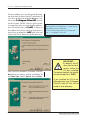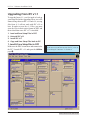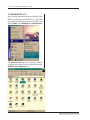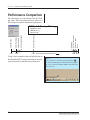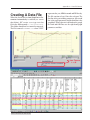
1
Browser-based interface is used to set parameters and display part data, providing a complete graphical environment for communicating with the DPC IV or DPC IV Plus ultrasonic system. Context-sensitive online help, electronic documentation and unlimited technical support. iPC manages a library of up to 100 user-definable setups on the host computer. Available COM port and a 9-pin RS-232 cable interface with the DPC IV. Full networking capability provides setup and part information from any DPC IV on your network. Software Installation Guide Dukane Part No. 403–545-02 Dukane Corporation • Ultrasonics Division • 2900 Dukane Drive • St. Charles, Illinois 60174 USA • TEL (630) 797-4900 • FAX (630) 797-4949 ISO 9001:2000 Dukane products are manufactured in ISO registered facilities www.dukcorp.com/us iPC™ v1.7 Software Installation Guide Copyright © 2001—2005 Dukane Corporation Ultrasonics Division 2900 Dukane Drive St. Charles, IL 60174 USA Notice of Rights: All rights reserved. No part of this manual including the interior design, cover design and icons may be reproduced, transmitted or utilized in any form or by any means, electronic, mechanical, photocopying, recording, or by any information storage and retrieval system, without written permission from Dukane Corporation. Notice of Liability: The information contained is this manual is distributed on an “As is” basis, without warranty. While every precaution has been taken in the preparation of this manual, Dukane Corporation shall not have any liability to any person or entity with respect to any liability, loss, or damaged caused or alleged to be caused directly or indirectly by the instructions contained in this manual, or by the hardware products described herein. Printed in the United States of America. PRINTED ON RECYCLED PAPER Dukane Part Number: 403–545–02 Dukane ultrasonic equipment is manufactured under one or more of the following U.S. Patents: 3,780,926 3,825,481 4,131,505 4,277,710 5,798,599 and 5,880,580. iPC and DPC are trademarks of Dukane Corporation Windows 95, Windows 98, Windows 2000, Windows ME, Windows NT, and Windows XP are trademarks of Microsoft Corporation. Internet Explorer is a trademark of Microsoft Corporation. Excel is a trademark of Microsoft Corporation. Java is a trademark of Sun Microsystems, Inc. Netscape Navigator is a trademark of Netscape Communications Corporation ii Dukane Manual Part No. 403-545-02 Table of Contents i PC Revision History Revision Number Revision History Date –00 iPC v1.3 Original release 28–Sept–2001 –01 DPC v3.2 and v3.3 Firmware Information 01–Nov–2001 –02 iPC Version1.7 Update DPC IV v3.6 Firmware compatibility DPC IV Plus v4.2 Firmware compatibility Windows XP Screenshots and Instructions Security Key (Dongle) no longer required Serial Port Setup Now Automatic New features in Version 1.7 New features in Version 1.6 New features in Version 1.5 New features in Version 1.4 Appendix A added to describe the data file format, parameter codes and graph data reconstruction. 24–Feb–2005 IE Configuration for Windows XP Service Pack 2 30–Mar–2005 Addendum 1 Dukane Corporation • Dukane Manual Part No. 403-545-02 • Ultrasonics Division iii iPC™ v1.7 Software Installation Guide This page intentionally left blank iv Dukane Manual Part No. 403-545-02 Table of Contents TABLE OF CONTENTS Section 1 – Unpacking the iPC™ ............................................. 1 Package Contents ................................................................................... 3 What’s New in v1.7? ............................................................................... 4 v1.7 Enhancements From v1.6 v1.6 Enhancements From v1.5 v1.5 Enhancements From v1.4 v1.4 Enhancements From v1.3 v1.3 Enhancements From v1.2 v1.2 Enhancements From v1.1 ...................................................................... 4 ...................................................................... 5 ...................................................................... 5 ...................................................................... 5 ...................................................................... 5 ...................................................................... 6 Installation Flowchart ............................................................................ 7 Section 2 – DPC Requirements................................................. 9 DPC Model ............................................................................................ 11 Firmware Version ................................................................................. 11 Section 3 – DPC Setup ............................................................ 13 Local/Remote ........................................................................................ 15 Format................................................................................................... 15 Baud Rate ............................................................................................. 15 Section 4 – PC Requirements ................................................. 17 Computer Requirements...................................................................... 19 Processor ....................................................................................................... 19 Memory ........................................................................................................ 19 Video Display ............................................................................................... 19 CD ROM Drive .............................................................................................. 21 Hard Disk Space ........................................................................................... 21 Communication Ports .................................................................................. 21 Software Requirements ....................................................................... 22 Windows™ ................................................................................................... 22 Internet Explorer™ ...................................................................................... 25 IE6 With Windows XP SP2 ........................................................................... 26 Section 5 – PC Setup ............................................................... 27 JAVA Virtual Machine .......................................................................... 29 Enable JAVA Console ........................................................................... 30 Serial Port Settings ............................................................................... 32 Section 6 – Connecting PC to DPC ......................................... 37 Serial Cable Connection ....................................................................... 39 DPC Network Connection .................................................................... 40 Dukane Manual Part No. 403-545-02 v iPC™ v1.7 Software Installation Guide Section 7 – iPC™ Installation ................................................. 41 Installing iPC v1.7 ................................................................................. 43 CD Documentation ....................................................................................... 43 Automatic Installation .................................................................................. 43 Manual Installation ....................................................................................... 49 Upgrading to iPC v1.7 .......................................................................... 49 Upgrading From iPC v1.3 or Later ............................................................... 49 Upgrading From iPC v1.2 .............................................................................. 50 Upgrading From iPC v1.1 .............................................................................. 52 Section 8 – DPC Firmware Upgrade ...................................... 59 DPC v3.60 Firmware ............................................................................. 61 DPC v3.20 Firmware ............................................................................. 61 DPC v3.3 – v3.5 Firmware..................................................................... 61 Possible Problems ................................................................................. 67 Section 9 – Starting the iPC ................................................... 69 DPC v3.40 DPC IV Launching iPC Software ....................................................................... 71 Performance Comparison .................................................................... 72 Status Bar .............................................................................................. 73 Section 10 – Help & Troubleshooting .................................... 75 ? Context–Sensitive Help ........................................................................ 77 Associating IE With iPC ........................................................................ 81 Section 11 – Contacting Dukane ........................................... 85 Ultrasonics Division .............................................................................. 87 Telephone Extensions .......................................................................... 87 eMail Addresses.................................................................................... 87 P, 13:46:14, 003, 01, 0, 4, 100, 24, 030, 0.250, 032, 0.10, 033, 0.2 250, 9, 0.500, 0.000, s, 4, 51000, 49000, Hz 57, 57, 57, 57, 88, 88, 88, 88, 156, 156, 156, 156, 158, 158, 158 158, 158, 158 ,158, 158, 158, 158, 158, 158, 158, 158, 158, 158, 158, 158 158, 158, 158 ,158, 158, 158, 158, 158, 158, 158, 158, 158, 158, 158, 158 158, 158, 158 ,158, 158, 158, 158, 158, 158, 158, 158, 158, 158, 158, 158 158, 158, 158 ,158, 158, 158, 158, 158, 158, 158, 158, 158, 158, 158, 158 158, 158, 158 ,158, 158, 158, 158, 158, 158, 158, 158, 158, 158, 158, 158 158, 158, 158 ,158, 158, 158, 158, 158, 158, 158, 158, 158, 158, 158, 158 158, 158, 158 ,158, 158, 158, 158, 158, 158, 158, 158, 158, 158, 158, 158 158, 158, 158 ,158, 158, 158, 158, 158, 158, 158, 158, 158, 158, 158, 158 158, 158, 158 ,158, 158, 158, 158, 158, 158, 158, 158, 158, 158, 158, 158 158, 158, 158 ,158, 158, 158, 158, 158, 158, 158, 158, 158, 158, 158, 158 158, 158, 158 ,158, 158, 158, 158, 158, 158, 158, 158, 158, 158, 158, 158 158, 158, 158 ,158, 158, 158, 158, 158, 158, 158, 158, 158, 158, 158, 158 158, 158, 158 ,158, 158, 158, 158, 158, 158, 158, 158, 158, 158, 158, 158 158, 158, 158 ,158, 158, 158, 158, 158, 158, 158, 158, 158, 158, 158, 158 158, 158, 158 ,158, 158, 158, 158, 158, 158, 158, 158, 158, 158, 158, 158 158, 158, 158 ,158, 158, 158, 158, 158, 158, 158, 158, 158, 158, 158, 158 Appendix A – Data File Format ............................................. 89 Creating A Data File ............................................................................. 91 Welding Parameter .............................................................................. 92 Graph Parameter .................................................................................. 93 Graph Data Values ............................................................................... 93 Index ....................................................................................... 97 vi Dukane Manual Part No. 403-545-02 Section 1 – Unpacking the iPC SECTION 1 Unpacking the iPC ™ • iPC Package Contents • What’s New in v1.7? • Installation Flowchart Package Contents ........................................... 3 What’s New in v1.7 ? ...................................... 4 v1.7 Enhancements From v1.6 v1.6 Enhancements From v1.5 v1.5 Enhancements From v1.4 v1.4 Enhancements From v1.3 v1.3 Enhancements From v1.2 v1.2 Enhancements From v1.1 ............................... 4 ............................... 5 ............................... 5 ............................... 5 ............................... 5 ............................... 6 Installation Flowchart ...................................... 7 Dukane Corporation • • Ultrasonics Division iPC™ v1.7 Software Installation Guide This page intentionally left blank 2 Dukane Manual Part No. 403–545–02 Section 1 – Unpacking the iPC Package Contents The iPC™ v1.7 software package (No. 437–00118) contains three items — 1. This Software Installation Guide (No. 403–545–02) 2. Serial Cable (No. 200–1126) 3. The iPC™ v1.7 CD-ROM (No. 437–00118) which contains: • iPC™ v1.7 Software Installer (Setup.exe) • What’s new in v1.7? (What new in v1.7x.doc) • Installation Guide ( i P C I n s t a l l a t i o n G u i d e . d o c ) • Final Release Notes (Final Release Notes for iPC1.7x.doc) These three items are pictured below. Dukane Manual Part No. 403–545–02 3 iPC™ v1.7 Software Installation Guide What’s New in v1.7? v1.7 Enhancements From v1.6 The hardware security key which plugged into the parallel port is no longer required. Just enter the serial number from the CD into the user information window (see page 45) when requested. i PC can now detect if the Sun Micro Systems Java Virtual Machine is active. Although the JVM from Microsoft is based on the JVM from Sun, iPC is not compatible with Sun’s JVM. Each time iPC starts, it scans the PC to see if the Sun Micro Systems JVM is active. If it is, the program will abort and provide an error message indicating that the Sun JVM must be disabled before continuing. 4 IMPORTANT – By default, the iPC saves files to the directory where the iPC was installed. The default location for installation and saved files is C:\iPC If you installed the iPC to another directory (e.g. C:\Program Files\iPC) then all files will be saved to that directory. Dukane Manual Part No. 403–545–02 Section 1 – Unpacking the iPC v1.6 Enhancements From v1.5 v1.4 Enhancements From v1.3 The Graph page has a new check box that allows the user to save part data and graph data for each weld cycle automatically to the computer hard drive. The feature is highlighted at the bottom of the sample page below. It is normally disabled, but checking the box will enable the feature. When Save Graph Data + Parameters Automatically is enabled, iPC creates a csv–type text data file in the folder named C:\iPC\Saved Data. This folder should not be renamed or removed. The file is named YYYYMMDD.csv where YYYY represents the year, MM the month and DD the day. See Appendix A for a detailed description of the file format. 1. Setup file names, as well as Graph and Parts data file names can now be entered by the user. The file paths can also be chosen. v1.5 Enhancements From v1.4 • 1. Within the Save pop up box for the Save Data and Save Graph Data features, the navigation process has been revised to remove the ‘.’ and ‘..’ respectively. 2. Within the Graph page, the Zoom feature has been revised to center the displayed graph after selecting zoom values. 3. Within the Graph page, the size of the graph area was optimized to produce a more accurate representation of the graph data. 4. Within the Graph page, the right hand graph navigation arrows have been revised to green to reflect that they are associated with the right hand graph data which is displayed in green. 5. Within the Process Setup page, the Afterburst feature has been revised to permit a minimum delay and duration value of zero. 6. Within the Process Setup page, the Scrub feature has been modified to comply with the DPC’s maximum value of 1.270 seconds for scrub time. 7. Serial port parameters on the host computer are now automatically setup. The setup instruction in Section 5 – Serial Port Settings are not needed for v1.5, v1.6 or v1.7. Dukane Manual Part No. 403–545–02 2. There are a new ZOOM and a SLIDER features in the Graph page. Please note the following known issues for version v1.4x • • • • • • • The four user parameter fields, JOB ID, HORN, BOOSTER, and FIXTURE must be 10 characters or less, ending with Enter key, and can not contain commas. Any lower case letters will be converted to upper case. When the iPC is started, the Operate page will not display any part data that is stored in the DPC. The iPC only displays part data that is generated while it is running. Date cannot be set from the iPC. Date Format cannot be set from the DPC. Setup files created from off line cannot be used when on line, and verse true. Cannot make any change from iPC when DPC is in cycle. Cannot make any change from DPC when iPC is in a change process. Part Sampling does not work. If there is a printer attached to the DPC’s parallel port it should be turned off during Group load. In the Graph page, the vertical Right Axis item ‘none’ has no equivalent in the DPC, consequently this value cannot be restored from a setup file. v1.3 Enhancements From v1.2 1. iPC now works on both local and networked remote DPCs. 2. Part data is saved as comma delimited (*.csv ) files which can be opened by EXCEL. The file is saved to the directory where the iPC was installed. Implicit Saving: The iPC will automatically save the displayed part data on the Operate page when it reaches 20,000 cycles. The file is named partMMM.xml where MMM is a number starting at 301 and increasing by 1 each time the file is automatically saved. 5 iPC™ v1.7 Software Installation Guide Explicit Saving: The iPC will save the displayed part data on the Operate page when the Save Parts Data button is clicked. The file is named partNNN.xml where NNN is a number between 1 and 100 chosen from the selection box on the Operate page. The iPC will clear the displayed part data in the Operate page, and begin to display the new cycle after saving. 3. iPC is now able to save DPC graphic data to a file. The data is saved as comma delimited (*.csv ) files which can be opened by EXCEL and redrawn as a graph based upon the saved data. The file is saved to the directory where the iPC was installed. The file is named graphJJJ.xml where JJJ is a number between 1 and 100 chosen from the selection box on the Graph page. 4. You can now view parameters in real–time from the Operate page. 5. Printer setup now available on Utilities page. Go to the Utilities page, select DPC and choose the setup number. To print, select View Setup then click the OK button. This will preview the output on the screen. Then either select Print from the Internet Explorer File menu, or click the close box in the left–hand quadrant to return to the Utilities page. 4. Part sampling does not work because the DPC currently does not support it. V1.3 Restrictions – 1. The four user parameter fields JOB ID, HORN, BOOSTER and FIXTURE must be 10 characters or less. These can be any characters including spaces except a comma. All lower case letters are converted to upper case. 2. You cannot make any change from the iPC while DPC is in cycle. You cannot make any change from the DPC while iPC is in a change process. 3. In the Graph page, the right vertical axis item None has no equivalent in the DPC. As a result this value cannot be restored from a setup file. 4. If you have a printer attached to the DPC’s parallel port, it should be turned off during Group load. v1.2 Enhancements From v1.1 1. Able to load the DPC setup to the iPC from the Process Control page. 2. Select the DPC setup and view the setup Job ID from the Process Control page. 3. View the current DPC setup Job ID from the Operate page. 4. Select the primary weld method and parameters from the Operate page. V1.3 Limitations – 1. Code currently does not work properly under Windows ME. 2. Using the minimum supported computer (200MHz Pentium) results in extremely slow performance due to shortcomings in the processor architecture. See Section 6 for a timing example. A recommended setup is a 500MHz Pentium III. 3. The iPC only displays part data generated while the iPC is running. When the iPC is started, it does not display any part data that was previously stored in the DPC. 6 Dukane Manual Part No. 403–545–02 Section 1 – Unpacking the iPC Start All Items Identified ? 1. Unpack iPC™ v1.7 NO Contact Dukane Service Department if any items missing. Contact carrier if items damaged. YES DPC 4 or 4 Plus & Firmware Correct ? YES 2. DPC Requirements NO Contact Dukane Service Department. v3.20 or earlier Firmware may require an internal hardware update. Configure DPC–IV Settings 3. Setup DPC PC Meets NO Requirements ? 4. PC Requirements Upgrade Windows™ and/or download latest versions of IE. Java VM on CD YES 5. Setup Computer Configure Serial Port & Internet Explr 6. Connect DPC to Computer Serial Cable and/or DPC 4 Network iPC NO Fresh Install ? YES 7. Install iPC™ 8. Firmware Update S32500000020030065FF16006663156 S325000000400300600002406000CE0 S325000000609D526207157F5200030 S32500000080256262049D516207157 S325000000A01560600442636061ACF S325000000C003A682480200820401F S325000000E07040010170400101039 S32500000100030764D0039E6214024 S3250000012015546000039B55C4024 S3250000014002405C10033E6080020 DPC NO v3.60 or Later ? YES i PC v1.7 Installation Flowchart v1.3 NO or Later ? YES 9. Start iPC™ DPC v3.40 Dukane Manual Part No. 403–545–02 DPC ™ IV v1.1 Upgrade Transfer Setup Files to DPC, Then Uninstall iPC v1.1 YES Uninstall v1.2 First DPC NO v3.30 or Later ? YES S32500000020030065FF16006663156 S325000000400300600002406000CE0 S325000000609D526207157F5200030 S32500000080256262049D516207157 S325000000A01560600442636061ACF S325000000C003A682480200820401F S325000000E07040010170400101039 S32500000100030764D0039E6214024 S3250000012015546000039B55C4024 S3250000014002405C10033E6080020 Launch iPC v1.7 Software v1.2 NO Upgrade ? Rewrite Flash Memory NO v3.20 ? YES Call Dukane Service Internal Service Upgrade 7 iPC™ v1.7 Software Installation Guide This page intentionally left blank 8 Dukane Manual Part No. 403–545–02 Section 2 – DPC Requirements SECTION 2 DPC Requirements • Model Number • Firmware Revision DPC Model Number ...................................... 11 DPC Firmware Version................................... 11 Dukane Corporation • Dukane Manual Part No. 403–545–02 • Ultrasonics Division 9 iPC™ v1.7 Software Installation Guide This page intentionally left blank 10 Dukane Manual Part No. 403–545–02 Section 2 – DPC Requirements DPC Requirements DPC Model Number The iPC™ software is designed to control a Dukane DPC IV or DPC IV Plus. The DPC Level 3 and Level 2 are not capable of being controlled by iPC software. A DPC Level 4 can be easily verified from the front panel layout shown in the illustrations below. The DPC™ IV logo is prominently displayed under the menu keys. DPC Firmware Version The DPC firmware revision must be Version 3.60 or later. When the DPC is initially powered up, it executes a self test, then briefly displays the firmware revision number. WELCOME Dukane DPC4 v3.60 (c) 2002 Dukane Corp. All Rights Reserved. Dukane Manual Part No. 403–545–02 CAUTION Do not install iPC v1.7 until the DPC firmware has been verified as being version 3.60 or later. 11 iPC™ v1.7 Software Installation Guide If you have a DPC IV with v3.60 or a DPC IV Plus with v4.20, you may continue with preparations for the iPC™ v1.7 installation or upgrade. DPC IVs with v3.30, v3.33, v3.40 or v3.50 will need to upgrade the firmware. Instructions for rewriting the Flash Memory to bring the DPC firmware to v3.60 are covered later in the v3.6 Firmware Update section starting on page 63. DPCs with versions 3.20 and earlier require a processor board exchange with a new PLD and Flash Memory. The service upgrade is handled through the Service Department (see Section 11 for contact information). Failure to upgrade the DPC internally and updating the DPC v3.20 firmware may result in a successful firmware update, but unpredictable operation or incorrect interpretation of the DPC weld parameters. 12 iPC™ Version Compatibality DPC IV v3.20 (Incompatiable) iPC v1.1 DPC IV v3.30/v3.33 iPC v1.2 iPC v1.3 DPC IV v3.40 or v3.50 iPC v1.4 DPC IV v3.50 iPC v1.5 iPC v1.6 iPC v1.7 DPC IV v3.60 iPC v1.7 DPC IV Plus v4.20 Dukane Manual Part No. 403–545–02 Section 3 – DPC Setup SECTION 3 DPC Setup • DPC Serial Port • DPC Node ID Local/Remote ................................................ 15 Format.......................................................... 15 Baud Rate ..................................................... 15 Dukane Corporation • Dukane Manual Part No. 403–545–02 • Ultrasonics Division 13 iPC™ v1.7 Software Installation Guide This page intentionally left blank 14 Dukane Manual Part No. 403–545–02 Section 3 – DPC Setup Serial Port Three separate options for the serial port must be configured. All three are accessed from the front panel of the DPC IV or DPC IV Plus. Local/Remote If a single DPC is connected to the PC the configuration is Local. If a network of two or more DPCs are connected to the PC, then the DPC connected to the computer is set to Local and the remaining DPCs must be set to Remote. The remaining DPCs that are set to Remote must also identify the Node ID of the DPC connected to the PC. Refer to the section on Naming Procedure in the DPC IV manual. Main Menu Hardware Setup Ports Serial Process Seup Hardware Setup Time and Date Ports Serial Destination Security User I/O Parallel Output Device Destination Local Remote Node ID Format Next the serial port output device must be configured. Set this to iPC format. Main Menu Hardware Setup Ports Serial Output Device Destination Output Format Falco Process Seup Hardware Setup Time and Date Ports Serial Output Device Computer Security User I/O Parallel Output Mode Printer iPC (Winter) * * Output Format — DPC firmware version 3.50 and later displays iPC. DPC firmware version 3.40 and earlier displays Winter. Baud Rate The final option to be set is the baud rate. This determines the communication speed between the DPC and the PC. Set the speed to 19,200 as indicated in the diagram below. The port access rate on the PC must match the DPC setting. We will set the PC serial port speed in Section 5. Main Menu Hardware Setup Ports Serial Baud Rate Process Seup Hardware Setup Time and Date Ports Serial Output Mode Baud Rate 9,600 19,200 Security User I/O Parallel Protocol 34,800 Dukane Manual Part No. 403–545–02 15 iPC™ v1.7 Software Installation Guide This page intentionally left blank 16 Dukane Manual Part No. 403–545–02 Section 4 – PC Requirements SECTION 4 PC Requirements • Processor • Memory • Windows™ • Internet Explorer Computer Requirements ............................... 19 Processor ............................................................. 19 Memory ...............................................................19 Video Display .......................................................19 CD–ROM Drive .....................................................21 Hard Disk Space ................................................... 21 Communication Ports........................................... 21 Software Requirements ................................. 22 Windows™ ..........................................................22 Internet Explorer™ ...............................................25 IE6 With Windows XP SP2 ....................................26 Dukane Corporation • Dukane Manual Part No. 403–545–02 • Ultrasonics Division 17 iPC™ v1.7 Software Installation Guide This page intentionally left blank 18 Dukane Manual Part No. 403–545–02 Section 4 – PC Requirements Computer Requirements Version 1.7 of the iPC™ software requires the following minimum computer hardware configuration. Processor A IBM–compatiable PC or laptop with a Pentium class (or better) CPU is required. The processor must have a clock speed of at least 200 MHz to operate. A faster processor with a more advanced architecture will provide improved performance. TIP – The minimum requirements are not the same as the suggested configuration (500MHz Pentium III). Just as we have a MDR of vitamins and calories, no one tries to live on 600 calories per day. Memory At least 32 MB of RAM are required. Less memory will result in an unacceptable performance penalty. 64 MB of memory or more will enhance the system response. Video Display A color display with at least 800 x 600 resolution and 256 colors (8-bit) is required (SVGA). Higher resolution and/or more colors also work well. To determine your settings, click on the Start menu, then select Control Panel as shown. Dukane Manual Part No. 403–545–02 19 iPC™ v1.7 Software Installation Guide In the Control Panel window, double-click the Display icon. A new popup window appears showing your current display properties. Click the Settings tab 20 Dukane Manual Part No. 403–545–02 Section 4 – PC Requirements to view your current settings. Use the slider in the lower left corner of the window to adjust the display to at least 800 x 600. The drop–down menu in the lower right indicates the current color palette. Select at least 256 colors (8–bit). Your system may be capable of higher resolution and/or more colors. You may increase these settings to your preference. When you are finished, click the OK button and then close the Control Panel window. CD-ROM Drive A CD-ROM drive is required to install the iPC™ software. Hard Disk Space The iPC software requires approximately 1.8MB of hard disk space for installation. If all the files from the CD (firmware updates, Java VM installer, etc.) are copied to the hard drive, then about 8.6 MB is required. Communication Ports Serial Port A serial port is required for the PC to communicate with the DPC™. The serial port has a DB-9 connectors and is also referred to as a COM port in the iPC software. See the figure to the right for an iullustration of the serial communication port. 1 2 3 4 5 6 7 8 9 COM – a contraction of communications, and it is used to describe the serial port on a PC. COM is generally used in conjunction with a number, as in COM1, COM2, COM3, or COM4 Parallel Port A parallel port is not required for the software. Earlier versions required a hardware security key to be installed on the parallel port. This has been eliminated in iPC v1.7. Dukane Manual Part No. 403–545–02 NOTE – iPC no longer requires the use of a hardware security key for operation. 21 iPC™ v1.7 Software Installation Guide Software Requirements Version 1.7 of the iPC™ software requires Windows™ and Internet Explorer to be installed. Windows™ The computer operating system must be Windows 98, Windows ME, Windows 2000, Windows NT or Windows XP. The iPC v1.7 is not supported under Windows 95. To determine which version of Windows you have, select My Computer in the Windows Start menu as shown below. 22 Dukane Manual Part No. 403–545–02 Section 4 – PC Requirements For Windows XP, select View System Information as shown in the screen shot directly below. For earlier versions of Windows, open Windows Explorer, right click on My Computer in the screen and select Properties. Dukane Manual Part No. 403–545–02 23 iPC™ v1.7 Software Installation Guide A new popup window will appear showing the version of Windows™ currently installed as shown . This window also shows the type of processor , and amount of memory installed. 24 Dukane Manual Part No. 403–545–02 Section 4 – PC Requirements Internet Explorer™ The iPC utilizes the Internet Explorer web browser for its graphical interface. You must have Internet Explorer (IE) version 5.00 or higher. After staring Internet Explorer (IE), select the Help drop–down menu on the right side of the tool bar. From the drop–down list, select About Internet Explorer. If you only see an icon bar across the top of the IE instead of a menu bar, then you are in Full–Page mode. Press the F11 key to toggle back to the standard menu bar. A new popup window will appear that displays the version number of the installed IE. Any version that is 5.00 or later will work. If you have an earlier version of IE, you can download the latest version of IE for free from Microsoft. It is not necessary to have the 128-bit cipher strength (used for on-line banking). The 40-bit cipher encoding will work just as well. CAUTION The iPC program will not work with the Netscape Navigator browser. If you have Netscape, you can leave it installed, but you will also need Internet Explorer v5, v5.1, v5.5 or v6. If your version of Internet Explorer is older than Version 5.00, an upgrade can be downloaded for free from Microsoft’s website. http://www.microsoft.com/ie/downloads/ search.aspx?displaylang=en —or— http://www.microsoft.com/windows/ie/ default.mspx Dukane Manual Part No. 403–545–02 25 iPC™ v1.7 Software Installation Guide IE6 With Windows XP SP2 If you are running Windows XP with the latest Service Pack 2 update, you will have to modify one setting in Internet Explorer 6. You can check if you have Service Pack 2 installed by selecting My Computer (see screen shot on page 24). 1. Start Internet Explorer 6, and from the Tools menu select Internet Options... 2. A new window named Internet Options... opens. Select the Advanced tab at the far right. 3. Under Security settings, confirm that the box labeled Allow active content to run in files on My Computer is checked as shown below. 2 3 4 4. Click the OK button at the bottom of the window. You can now close Internet Explorer. 26 Dukane Manual Part No. 403–545–02 Section 4 – PC Requirements SECTION 5 PC Configuration • JAVA Virtual Machine • Serial Port JAVA Virtual Machine ................................... 29 Enable JAVA Console .................................... 30 Serial Port Settings ........................................ 32 Dukane Corporation • Dukane Manual Part No. 403–545–02 • Ultrasonics Division 27 iPC™ v1.7 Software Installation Guide This page intentionally left blank 28 Dukane Manual Part No. 403–545–02 Section 5 – PC Configuration Java Virtual Machine In order to run the iPC software, Microsoft’s Virtual Machine for Java (JVM) 5.0 Release 5.0.0.3167 or higher must be installed and activated. The installed version of the JVM can also be identified from the Internet Explorer. After starting IE, select the View menu as shown. Then select Java Console from the list as shown below. Virtual Machine for JAVA — The Java Virtual Machine (JVM) is a simulated computer. It runs on a host computer but behaves as if it is a separate computer. The Java Virtual Machine works as a self-contained operating environment to run Java applets, with the advantage that Java applets can be run independently from the host operating system. The JVM is what makes Java portable. A vendor such as Microsoft writes a JVM for their operating system (e.g. Windows XP), and any Java program can run on that JVM. TIP — A shortcut to launch Windows Explorer is to hold down to Windows Key and press the E key. Windows Explorer will open to the root directory of My Computer which contains C:\iPC If Java Console is not present on the View drop– down list, then it has not been enabled in the Internet Explorer program. To enable the Java Console, follow the steps given on the next page, then return here to determine the version. The Windows key has the icon If the Java Console has been enabled, a new popup window will open as shown here. The version number is displayed at the top as shown at . If your version of the JVM is older than Release 5.0.0.3167, a free update is available on the iPC CD. 1. Using Windows Explorer, open the J a v a folder ( C : \ i P C \ J A V A V M ) VM 2. Double click on m s j a v x 8 6 . e x e and click the Yes button to install the Microsoft Java VM. 3. Click Yes to agree to the License Agreement. 4. After the installation is complete, click the Yes button to acknowledge installation. 5. Once the installation is complete, restart your computer for the changes to take effect. Dukane Manual Part No. 403–545–02 29 iPC™ v1.7 Software Installation Guide iPC can detect if the Sun Micro Systems Java Virtual Machine is active. Although the JVM from Microsoft is based on the JVM from Sun, iPC is not compatible with Sun’s JVM. The Sun JVM must be disabled. Microsoft’s JVM implements some additional features specific to the Windows™ OS. Enable Java Console If the Java Console does not show up in the drop– down list under the View menu, then the control console has not been enabled. To enable the Java Console feature of Internet Explorer, go to the Tools menu of IE and select Internet Options . A new popup window opens with 6 tabs across the top. Click the Advanced tab . 30 Dukane Manual Part No. 403–545–02 Section 5 – PC Configuration A list of options with check boxes appears. Scroll half way down until you get to the Microsoft VM section. Check the Java console enabled box . Java Logging — Leave this feature unchecked. It is used mainly for debugging using the Java console window. JIT Compiler — This button should be checked. The JIT (Just In Time) Compiler translates the bytecodes running in the JVM into the native binary code equivalent for the local computer and keeps this native code around as a cache for the next time the method is run. A system with JIT technology in place runs a lot faster. If the Sun JVM is listed, make sure its box is not checked. Now click on the OK button to close the window. Exit Internet Explorer and restart your computer. Now when you start IE again and check the View menu, the Java Console should now be listed. Dukane Manual Part No. 403–545–02 NOTE — You must restart Internet Explorer before the Java console will be enabled. Close all opened copies of Internet Explorer, and then start Internet Explorer again. 31 iPC™ v1.7 Software Installation Guide Serial Port Settings The serial port settings of your PC must be correctly configured to establish a communication link with the serial port of the DPC. Earlier versions of iPC required you to configure these settings. Starting with v1.5, iPC sets all the seral port parameters itself, so this section is not needed. However it is included for reference. IMPORTANT – Starting with version 1.5, iPC sets the serial port parameters itself. This section is included only for reference to earlier versions of iPC. The iPC data rate must match the DPC setting. To verify or configure the PC serial port, select the Control Panel from the Start menu (refer back to page 19). When the Control Panel window opens, double–click the System icon to open its properties window. This is the same window we opened previously (on page 20) to check the Video display properties 32 Dukane Manual Part No. 403–545–02 Section 5 – PC Configuration Select the Device Manager tab , and the panel changes to display the device properties. Click on the plus sign next to the Ports (COM & LPT) box to expand the selection. Highlight the COM port that you will use on your PC to connect to the DPC. Now click the Properties button at the bottom left and a new window will open. Dukane Manual Part No. 403–545–02 33 iPC™ v1.7 Software Installation Guide Select the Port Settings tab to display the properties of the selected COM port. Confirm that your settings match those displayed in the window shown here. If they do not match, use the drop–down lists to select the correct values. Click the OK button to close this window, then click OK to close the System Properties window. Finally close the Control Panel window. 34 Dukane Manual Part No. 403–545–02 Section 5 – PC Configuration If you are using Windows XP, Select the Hardware tab , and the panel displays the Device Manager and Hardware Profiles. Select the Device Manager button , and a new window appears listing the Ports. Double click on the Communications Port (COM1) . Dukane Manual Part No. 403–545–02 35 iPC™ v1.7 Software Installation Guide Select the Port Settings tab . Enter the values shown in the screen shot above. When you are finished, click the OK button. Then close the Device Manager, System Properties and Control Panel windows. 36 Dukane Manual Part No. 403–545–02 Section 5 – PC Configuration SECTION 6 Connect PC to DPC • Serial Cable • Network Configuration Serial Cable Connection ................................ 39 DPC Network Connection ............................. 40 Dukane Corporation • Dukane Manual Part No. 403–545–02 • Ultrasonics Division 37 iPC™ v1.7 Software Installation Guide This page intentionally left blank 38 Dukane Manual Part No. 403–545–02 Section 6 – Connect PC to DPC Serial Cable Connection In order for the DPC IV and the iPC to communicate, a serial cable must be connected between the DPC and the PC. You must use the same serial port (COM1 or COM2) that you setup on pages 36–38. Connect the serial cable (Dukane Part No. 200-1126) from the DPC serial port (J506) to the correct COM port on the computer. The serial ports are identified on the rear panels in the illustration below. J505 I WARNING POWER LINE MUST BE GROUNDED AT OUTLET O MMI DUKANE CORP ST. CHARLES, IL 60174 MADE IN USA J602 J507 J202 – WARNING! – POWER LINE MUST BE GROUNDED AT OUTLET. REMOVE ALL POWER BEFORE REMOVING COVER OR CONNECTING OR DISCONNECTING CABLES. J401 J504 J201 J506 J1 J503 Serial Cable DPC Serial Port #200–1126 Serial Port (COM1 & COM2) Video (on seperate card) Typical PC Serial Port Location Dukane Manual Part No. 403–545–02 39 iPC™ v1.7 Software Installation Guide DPC Network Connection HARDWARE SETUP > PORTS > SERIAL > DESTINATION > REMOTE > NODE # J505 I O MMI Network Termination Plug #597–477 J602 J507 J202 J506 DPC IV and DPC IV Plus Network Connections J504 J401 J201 J506 J1 J503 Network Cable #200–1141 Maximum of 7 DPC IVs per Network HARDWARE SETUP > PORTS > SERIAL > DESTINATION > REMOTE > NODE # J505 I MMI J506 O J602 J507 J202 J504 J401 J201 J506 J1 J503 Network Cable DPC Network Ports #200–1141 HARDWARE SETUP > PORTS > SERIAL > DESTINATION > LOCAL J505 I J506 O J602 J507 J202 MMI J504 J401 J201 J506 J1 J503 Network Termination Plug DPC Serial Port #597–477 Serial Cable #200–1126 Serial Port (COM1 or COM2) 40 Parallel Port (433-32 Software Key) Dukane Manual Part No. 403–545–02 Section 6 – Connect PC to DPC SECTION 7 iPC ™ Installation • Installing iPC v1.7 • Upgrading to iPC v1.7 Installing iPC v1.7 ......................................... 43 CD Documentation ..............................................43 Automatic Installation ..........................................43 Manual Installation ...............................................49 Upgrading to iPC v1.7 .................................. 49 Upgrading From v1.3 or Later ..............................49 Upgrading From v1.2 ...........................................50 Upgrading From v1.1 ...........................................52 Dukane Corporation • Dukane Manual Part No. 403–545–02 • Ultrasonics Division 41 iPC™ v1.7 Software Installation Guide This page intentionally left blank 42 Dukane Manual Part No. 403–545–02 Section 7 – iPC Installation Installing iPC v1.7 CD Documentation The iPC v1.7 CD-ROM contains three files which have a condensed version of the instructions in this manual. The files are readable using MicrosoftWORD. The first file, called iPC Installation Guide.doc, is a short, six–page configuration requirements document. The second file, Final Release Notes for IPC1.7.doc is an abbreviated installation guide. The thrid file, Whats New in v1.7.doc is a more detailed version of the data file format covered in Chapter 1. Automatic Installation If you have never installed IPC v1.7 or if you have removed it from the system and do not have a version earlier than v1.3 currently installed, then follow these steps. If you have a version of iPC v1.2 or earlier installed, then skip to the section on upgrading iPC. Dukane Manual Part No. 403–545–02 ALERT If the CD does not automatically begin installation, proceed to the next section – Manual Installation on page 49. 43 iPC™ v1.7 Software Installation Guide Quit any programs you have running. Place the CD-ROM containing the iPC v1.7 software into the CD drive of the computer. The installation program will begin automatically. An iPC splash screen appears which shows the current version, and the Setup window shows the progress of the installation. Next, the screen refreshes and a Welcome window appears reminding you to exit any other running programs if you haven’t done so already. Click the Next button when you are ready to proceed. Next the Software License Agreement appears. Click Yes if you agree to the terms in the license. 44 Dukane Manual Part No. 403–545–02 Section 7 – iPC Installation Next the Information window is displayed which provides the iPC version number and information about the release notes (see page 47 for file description). Click the Next button to proceed. The User Information window appears next. Enter your name, the company name and the serial number that appears on the case which the CD was shipped in. If you do multiple installations on different computers, use the same serial number. When you have finished entering the information, click the Next button to proceed. Dukane Manual Part No. 403–545–02 45 iPC™ v1.7 Software Installation Guide The next window gives you the option of changing the default location of the iPC installation. If you select another path using the Browse... button such as C:\Program Files\iPC, remember the location. The iPC will save all its parameter setup files in the root of its installation directory. The default value is C:\iPC as shown in the window below. If you select an alternate location, be sure to include the \ i P C path at the end to place the files in their own separate directory. Once you have decided on a location, click the Next button to continue with the installation. In the Setup Type, choose Typical and click Next. TIP — Do not confuse the forward slash / used for internet web address with the backslash \ All DOS and Windows paths use the backslash. e.g. C:\Program Files\iPC IMPORTANT – By default, the iPC saves files to the directory where the iPC was installed. The default location for installation and saved files is C:\iPC If you installed the iPC to another directory (e.g. C:\Program Files\iPC) then all files will be saved to that directory. 46 Dukane Manual Part No. 403–545–02 Section 7 – iPC Installation Next, decide if you want iPC to start automatically each time the computer is turned on. Click Yes or No and click Next. In the Select Program Folders window, accept the default values and click Next. Dukane Manual Part No. 403–545–02 47 iPC™ v1.7 Software Installation Guide The next window confirms the choices we have made regarding the iPC program file location . Click the Next button to begin installation of the iPC files. The screen refreshes and the files are copied to the computer hard disk. A progress bar indicates the status. Once the files have been copied, a Setup Complete window appears. Click the Finish button to complete the installation. The setup window automatically closes and returns you to the desktop. You can now remove the CD from its drive. If you have DPC IV firmware version 3.30, v3.33, v3.40 or v3.50, you will need 48 the CD again in order to upgrade the firmware. If you have DPC IV firmware v3.60 (or DPC IV Plus v4.20), you can put the CD back in its protective case and store it in a safe place. Dukane Manual Part No. 403–545–02 Section 7 – iPC Installation Manual Installation If the CD does not automatically begin the installation of the iPC, follow these steps which are also printed on the CD–ROM. See page 23 to orient yourself with the Start and Run menu. 1. Click on Start 2. Select Run... TIP — The CD drive is typically the D drive. If however your CD drive is E, F or G, use the appropriate letter in place of D to manually install the iPC. e.g. E:\install Also, do not confuse the back slash \ used for all DOS and Windows paths with the forward slash / used for internet web address. 3. Type D : \ i n s t a l l 4. Select OK Upgrading to iPC v1.7 NEW FEATURES — Version 1.7 features many improvements. 1. iPC now works on both local and remote DPCs. 2. Save part data to comma delimited (*.csv) files which can be opened by EXCEL. 3. Now able to save DPC graphic data to a file. 4. View real–time parameters from the Operate page. 5. Print setup now available on Utilities page. Upgrading From iPC v1.3 or Later To upgrade from iPC v1.3, v1.4, v1.5 or v1.6, you do not need to uninstall the older version of iPC. Follow the instructions at the beginning of this section for automatic or manual installation. Dukane Manual Part No. 403–545–02 49 iPC™ v1.7 Software Installation Guide Upgrading From iPC v1.2 To upgrade from v1.2, you need to first uninstall iPC v1.2. Left click on Start. Select Settings then Control Panel. The Control Panel opens in a separate window as shown in the figure below. Double click on the Add/Remove Programs icon. A new window titled Add/Remove Programs Properties will open as shown on the next page. 50 Dukane Manual Part No. 403–545–02 Section 7 – iPC Installation Scroll down until you locate iPC and select it from the list. Click the Add/Remove... button. Another window opens asking you to confirm deletion of the iPC program. Click the Yes button. When the iPC program has been deleted, Close the Add/Remove Programs Properties window and close the Control Panel window. Open Windows Explorer and rename the iPC folder to Old_iPC or something like that. This will retain any setup files you have until you are satisfied the upgrade has been completed. Now follow the instructions at the beginning of this section for installing iPC v1.7. When installation of iPC v1.7 is completed, copy the setup files from Old_iPC to the new iPC folder. Dukane Manual Part No. 403–545–02 NOTE — A shortcut to launch Windows Explorer is to hold down to Windows Key and press the E key. Windows Explorer will open to the root directory of My Computer which contains C:\iPC The Windows key has the icon 51 iPC™ v1.7 Software Installation Guide Upgrading From iPC v1.1 To upgrade from v1.1, you first need to back up your setup files before upgrading. There was a file format change between iPC v1.1 and v1.2, so setup files from v1.1 will not work with iPC v1.2 or later. In order to reuse the v1.1 files, you must store the files in their native format in DPC and then reload them once iPC v1.7 is installed. 1. 2. 3. 4. Load and Save Setup Files in DPC Uninstall iPC v1.1 Install iPC v1.7 Copy and Save Setup Files back to iPC. 1. Load & Save Setup Files in DPC Make sure the DPC is turned on and connected to the PC. Launch iPC v1.1 and open the Utilities page . NOTE — If you are unsure of how to start the iPC, refer to “Launching iPC Software” in Section 9. 52 Dukane Manual Part No. 403–545–02 Section 7 – iPC Installation On the Utilities page, select File and then select the Load box . This will open a new window for you to select the file to be loaded (see next page). Dukane Manual Part No. 403–545–02 53 iPC™ v1.7 Software Installation Guide The files should be located in the SavedData directory . Open the directory and select the first file and click OK in the directory window. When the window closes, click OK in the iPC window. This will retrieve the first file from computer hard disk and transfer it to the DPC memory. Repeat this procedure for each setup file that is not saved in the DPC. Remember the DPC can hold a maximum of 25 files. 54 Dukane Manual Part No. 403–545–02 Section 7 – iPC Installation The terminology of Load and Save can be confusing because it does not specify which device files are being saved from or to. File refers to computer hard disk operations. The iPC can store a maximum of 100 setup files. File > Save means to save to the hard disk. The settings currently in the iPC Process Control page are saved on the computer hard disk. File > Load means to read from the hard disk, load the files to the DPC memory and display them on the iPC Process Control page. DPC refers to operations in the DPC memory. Save DPC Setups to PC Hard Drive — 1. DPC > Load retrieves a setup file from the DPC and loads it in the iPC. 2. File > Save stores the setup file currently displayed in the iPC to the computer drive. Copy Setups From PC to DPC Memory — 1. File > Load retrieves a setup file from the computer drive and loads it in the iPC. 2. DPC > Save stores the setup file currently displayed in the iPC to the DPC with the specified setup number The DPC can saves a maximum of 25 files in its memory. DPC > Save refers to operations from one DPC setup to another DPC setup. The existing setup in the DPC is replaced by the settings currently in the iPC. The new settings overwrite the existing DPC settings. DPC > Load means to change from one DPC setup to another setup. This retrieves a setup file in the DPC and loads it into the iPC. The existing settings in the DPC are overwritten by the new settings. Setup is a file containing a complete set of pa- rameter values required to configure a DPC. Each file is written to the hard disk in XML format. Dukane Manual Part No. 403–545–02 XML — Extensible Markup Language is a method for putting structured data in a text file. XML is conceptually related to HTML, but XML is not itself a markup language. Rather it is a metalanguage, a language used to create other specialized languages. Like JAVA, XML is platform independent. You can examine an XML setup file by using a text editor such as NOTEPAD. 55 iPC™ v1.7 Software Installation Guide 2. Uninstall iPC v1.1 After you have transferred all your setup files to the DPC, you will need to uninstall iPC v1.1. The files are stored in nonvolatile memory in the DPC. Left click on Start. Select Settings then Control Panel. The Control Panel opens in a separate window as shown in the figure below. Double click on the Add/Remove Programs icon. 56 Dukane Manual Part No. 403–545–02 Section 7 – iPC Installation A new window titled Add/Remove Programs Properties will open as shown on below. Scroll down until you locate iPC and select it from the list. Click the Add/Remove... button. Another window opens asking you to confirm deletion of the iPC program. Click the Yes button. When the iPC program has been deleted, Close the Add/Remove Programs Properties window and close the Control Panel window. Open Windows Explorer and rename the iPC folder to Old_iPC or something like that. This will retain your old setup files. Even though the setup files are not directly readable by iPC v1.7, keep a copy of them until you are satisfied that the v1.7 upgrade has been satisfactorily completed. Dukane Manual Part No. 403–545–02 57 iPC™ v1.7 Software Installation Guide 3. Install iPC v1.7 Now follow the instructions at the beginning of this section for installing iPC v1.7, then return here to complete step 4. 4. Transfer Setup Files Back To PC To transfer your DPC setup files back to the computer and iPC, reverse the process of loading the files.. To transfer your setup files, first open the Utilities page . On the Utilities page, select File for each setup file you saved to the DPC. Select the Load box and a new window opens to displays a directory of files. Select a File then click the OK button in the directory window. Then click the OK button in the iPC window. Use the same file numbers to restore the files as you used to save them. You can use Windows Explorer to navigate to C : \ i P C (or the directory you choose to install iPC) to view the files. You can sort the files by type or by date modified to group them and verify the file names. 58 Dukane Manual Part No. 403–545–02 Section 7 – iPC Installation SECTION 8 DPC Firmware Upgrade • DPC Service Upgrade • Updating DPC Firmware S32500000020030065FF16006663156 S325000000400300600002406000CE0 S325000000609D526207157F5200030 S32500000080256262049D516207157 S325000000A01560600442636061ACF S325000000C003A682480200820401F S325000000E07040010170400101039 S32500000100030764D0039E6214024 S3250000012015546000039B55C4024 S3250000014002405C10033E6080020 DPC v3.60 Firmware ..................................... 61 DPC v3.20 Firmware ..................................... 61 DPC v3.30 – v3.50 Firmware ......................... 61 Possible Problems ......................................... 67 Dukane Corporation • Dukane Manual Part No. 403–545–02 • Ultrasonics Division 59 iPC™ v1.7 Software Installation Guide This page intentionally left blank 60 Dukane Manual Part No. 403–545–02 Section 8 – DPC Firmware Upgrade DPC v3.60 Firmware No update is needed for firmware revision v3.60 (DPC IV) or v4.20 (DPC IV Plus) to run iPC v1.7. DPC v3.20 Firmware For firmware versions 3.20 and earlier, an internal service upgrade may be required before the DPC firmware can be safely updated. The service upgrade is handled through the Service Department (see Section 11 for contact information). Failure to upgrade the DPC internally and updating the DPC v3.20 firmware may result in a successful firmware update, but unpredictable or total failure of stored DPC process setup files. DPC v3.3– v3.5 Firmware If your DPC IV has firmware revision v3.30, v3.33, v3.40 or v3.50, you may proceed to rewrite the Flash Memory in the DPC IV by using the software contained on the iPC v1.7 CD. You will first need to copy the required file from the CD to your computer hard disk. Do not try to use the DPC4 Plus software – dpcv4p20.txt. The DPC IV does not enough memory to hold the IV Plus program. Trying to use the DPC IV Plus software in a DPC IV will result in nonfunctional DPC IV ! 1. Locate the folder on the iPC v1.7 CD–ROM named DPC Firmware. Copy the folder from the CD (D:\ drive) to the iPC folder on your computer’s C:\ drive. 2. Now, open the DPC Firmware folder on the C:\ drive. There are three text files. We are only interested in verifying that there is one f ile named dpcv3p60.txt. To be CAUTION Do not attempt to update DPC v3.20 or earlier firmware without first contacting the Service Department. If you are instructed to return a DPC printed circuit board to Dukane, print out or write down all your DPC setup parameters before returning the board. WARNING Do not attempt to update the firmware on a DPC 4 Plus. They have the latest version. Do not try and turn a DPC 4 into a DPC 4 Plus. Attempting to rewrite the Flash Memory on a DPC 4 with the 4 Plus software will erase the entire DPC IV Flash Memory, leaving it in a coma! safe, delete the other two files before continuing. Dukane Manual Part No. 403–545–02 61 iPC™ v1.7 Software Installation Guide 3. To rewrite the DPC IV Flash memory, you will use a Windows utility called HyperTerminal. Click on the Start->All Programs button and navigate to the HyperTerminal directory. If a window appears asking if you want to make Hyperterminal your default Telenet program, click the Yes button. 4. A new window for the HyperTerminal directory will open. Double–click on the Hypertrm.exe application to open a new dialog window. 62 NOTE — Your HyperTerminal directory may be located in the Accessories folder instead of the Communications folder. If it is not installed, you can go back to your original Windows™ installation CD and perform a custom installation of just the HyperTerminal program. Dukane Manual Part No. 403–545–02 Section 8 – DPC Firmware Upgrade 5. Enter a name for the connection description, file select an icon of your choice and click OK. Choose any name you want. CAUTION Call the Service Department first to check if there have been any recent changes to this procedure. Schedule a DPC firmware update early in the week and early in the day. While every precaution has been taken to ensure the Flash Memory writing is trouble–free, Murphy’s Law will almost certainly apply if you wait until late Friday afternoon. 6. Select the Direct to COM1 (or COM2) connection and click OK again. DISCLAIMER — While iPC and Flash Memory updates are normally performed without incident, unforeseeable problems may sometimes occur and therefore should be performed during a period of inactivity. Dukane is not responsible for lost production, etc. due to failed upgrades. Dukane Manual Part No. 403–545–02 63 iPC™ v1.7 Software Installation Guide 7. Enter the same port settings as we used in Section 3. Click OK when you are finished. TIP — You can always double check your settings or change the icon by choosing File > Properties then click on the Configure button . 8. A terminal HyperTerminal window opens with the name of the connection description file in the window title bar. Press the enter key a few times. The DPC should echo back with a carat (i.e. the greater–than sign; the same as a DOS session prompt). If the DPC does not echo back, check the DPC port settings and the serial cable connection. 64 Dukane Manual Part No. 403–545–02 Section 8 – DPC Firmware Upgrade 9. We are now ready to update the DPC firmware. Click on the Transfer menu and select Send Text File... as shown. 10. By default, the window opens in the HyperTerminal directory. Click the triangle at the right of the Look In: menu bar. 11. Navigate up to the root C:\ directory (or wherever you installed the iPC) till you locate the iPC folder. Dukane Manual Part No. 403–545–02 65 iPC™ v1.7 Software Installation Guide 12. Now select the iPC folder and click open, then open the DPC Firmware folder. 13. Select the dpcv3p60.txt file and click the Open button. 14. Now your HyperTerminal window will begin displaying the status of the firmware update process. This can require up to 20 minutes to complete. At this point the DPC communication link is vulnerable. Do not turn off the DPC power or disconnect the serial data cable. Doing this may leave the DPC unable to communicate via its serial port. 15. When the update process is complete, the last line of the status message reads: Programming Successful – Restarting At this point you may exit the HyperTerminal program and proceed to launch iPC v1.7. 66 WARNING DO NOT disrupt the communication link to the DPC or turn the DPC power off during the firmware update process NOTE — DPC IV Firmware is stored in four Flash Memory chips. The DPC startup files are stored in a separate EEPROM chip. They are independent and retain their information when the power is turned off. Dukane Manual Part No. 403–545–02 Section 8 – DPC Firmware Upgrade Possible Problems Invalid Checksum Every line in a DPC program file has a checksum. A checksum is a byte used to ensure each line is sent without errors. If an Invalid Checksum message is displayed after the DPC File Received message, stop the file transfer and try again. To stop the file transfer, from the menu bar select Call > Disconnect or click on the Disconnect icon (fourth from left under the Call menu). WARNING DO NOT turn off the DPC AC power to stop the file transfer. Doing this may leave the DPC unable to communicate via its serial port. The program file contains blank lines at the beginning to clear the DPC buffer. It is possible to see an Invalid Checksum message at the start of the transfer as long as this happens before the DPC File Received message. Erase Failed One or more devices failed to erase. Replacement program Flash Memory devices are required from the Dukane Ultrasonics Service Department. Write Failure One or more devices could not be written to. Replacement program Flash Memory devices are required from the Dukane Ultrasonics Service Department. Dukane Manual Part No. 403–545–02 67 iPC™ v1.7 Software Installation Guide This page intentionally left blank 68 Dukane Manual Part No. 403–545–02 Section 8 – DPC Firmware Upgrade SECTION 9 Starting iPC ™ • Launching iPC • Performance Comparison DPC v3.40 DPC ™ IV Launching iPC™ Software ............................ 71 Performance Comparison ............................. 72 Status Bar ..................................................... 73 Dukane Corporation • Dukane Manual Part No. 403–545–02 • Ultrasonics Division 69 iPC™ v1.7 Software Installation Guide This page intentionally left blank 70 Dukane Manual Part No. 403–545–02 Section 9 – Starting the iPC Launching iPC Software A shortcut icon was placed on the Windows desktop during the iPC installation. Double click the iPC icon to launch the program. NOTE The iPC will not work with the Netscape Navigator browser. If Netscape launches instead of Explorer, follow the instructions under Associating IE5 With iPC Program in Section 10 to change the file association type. Internet Explorer launches and displays an iPC splash screen. A few seconds later, a small window titled Open Port appears in the center of the screen. If the DPC is not turned on, turn it on now and wait for it to complete its powerup self–check. Now select the COM port you previously configured (COM1 or COM2) and click Continue. NOTE — Select Off-Line if the DPC is not connected by the serial cable or needs to be turned off. If Com1 or Com2 is selected and the DPC is not turned on and/ or not connected to the PC via the serial cable, the iPC software will stop loading and will wait (forever) for a response from the DPC. Dukane Manual Part No. 403–545–02 Once the DPC is turned on, the iPC software will recognize the DPC connection, and finish loading. 71 iPC™ v1.7 Software Installation Guide Performance Comparison The chart below gives the timing of the iPC loading status. These measurements were taken on a PC configured with the minimum requirements. iPC™ v1.7 Startup Timing Amplutud P:255.010nnnnnnn,n Hardware page Done P:255.010nnnnnnn,n 0:05 P:255.0104000002,7 COM Port Window 0:00 Applet initializd Applet Started 200MHz Pentium 39MB Memory Windows 98 0:55 Time in minutes and seconds (m:ss) Using a faster computer shortens both the time to download the DPC settings and configure the program and results in much better performance. 2:00 2:10 NOTE — The status bar in the lower left–hand corner of the IE window gives an indication of the progress of the iPC startup and corresponds to the labels on the time lines. 72 Dukane Manual Part No. 403–545–02 Section 9 – Starting the iPC Status Bar If you do not see the Status Bar at the bottom of the window, enable it from the View menu (check mark showing) as shown below. Dukane Manual Part No. 403–545–02 73 iPC™ v1.7 Software Installation Guide This page intentionally left blank 74 Dukane Manual Part No. 403–545–02 Section 9 – Starting the iPC SECTION 10 Help & Troubleshooting ? Context–Sensitive Help ................................. 77 Associating IE With iPC Program ................... 81 Dukane Corporation • Dukane Manual Part No. 403–545–02 • Ultrasonics Division 75 iPC™ v1.7 Software Installation Guide This page intentionally left blank 76 Dukane Manual Part No. 403–545–02 Section 10 – Help & Troubleshooting Context–Sensitive Help iPC has a built–in help file to assist you with routine questions. To access the help system, select User’s Manual in the iPC menu selection box as shown below. Dukane Manual Part No. 403–545–02 77 iPC™ v1.7 Software Installation Guide The window will refresh and the User’s Manual splash screen appears. By default it opens with the Table of Contents displayed in the left panel. 78 Dukane Manual Part No. 403–545–02 Section 10 – Help & Troubleshooting To look up a specific topic, move the cursor over the topic. The cursor turns into a hand with a pointing finger. Click on the topic you want more information about. You can also view the topics in alphabetical order by clicking on the Index button. Dukane Manual Part No. 403–545–02 79 iPC™ v1.7 Software Installation Guide To return to the Process Control page, click the close box next to the Index button. if you click the close box in the upper right–hand corner, you will exit the iPC. 80 Dukane Manual Part No. 403–545–02 Section 10 – Help & Troubleshooting Associating IE With iPC Program If you also have Netscape Navigator installed, you may find that the iPC software launches Navigator instead of Internet Explorer. Even though the iPC can run under a variety of Windows versions, iPC is tailored specifically for the Internet Explorer browser. The method for setting which application is launched differs between different version of Windows. Since there isn’t one universal set of instructions for setting which program is launched when you open a file, the best way is to modify iPC. If iPC starts an internet browser other than Internet Explorer, close the program. In Windows XP, right click on the iPC icon and select Open With. Select the target as Internet Explorer. This method will not permanently change the iPC to open with Internet Explorer. It must be used each time you start iPC. To make a permanent change, select My Computer in the Windows Explorer screen. Select Folder Options from the View menu as shown in the screen shot on the next page. Dukane Manual Part No. 403–545–02 81 iPC™ v1.7 Software Installation Guide In the Folder Options window, select the File Types tab as shown. 82 Dukane Manual Part No. 403–545–02 Section 10 – Help & Troubleshooting Scroll down until HTML Document is shown. If IEXPLORE is not listed as the program to open the file, click the Edit... button to change the program. In the new window (shown at right), select Open and then Edit..., or just double–click on the Open action in the selection window to locate the target program. A new window opens as shown on the next page. Dukane Manual Part No. 403–545–02 83 iPC™ v1.7 Software Installation Guide Internet Explorer is usually located along a path something like: C:\Program Files \Internet Explorer\Iexplore.exe Use the Browse button to locate IE5 and then press the OK button to complete. Close any other open windows. Now double–click on the iPC icon and it should launch Internet Explorer. 84 Dukane Manual Part No. 403–545–02 Section 10 – Help & Troubleshooting SECTION 11 Contacting Dukane • Corporate Office • Extensions & eMails Local Support ............................................... 87 Ultrasonics Division ....................................... 87 Telephone Numbers ...................................... 87 eMail Addresses ............................................ 87 Our Website ................................................. 87 Dukane Corporation • Dukane Manual Part No. 403–545–02 • Ultrasonics Division 85 iPC™ v1.7 Software Installation Guide This page intentionally left blank 86 Dukane Manual Part No. 403–545–02 Section 11 – Contacting Dukane Contacting Dukane Identify Equipment When contacting Dukane, especially if calling about a service-related problem, be prepared to give the iPC version number and serial number. Local Support Your local Dukane representative has received factory training and can answer all of your questions regarding Dukane equipment. Ultrasonics Division Mailing Address: 2900 Dukane Drive Main Phone: Main Fax: Service & Parts Fax: Dukane Ultrasonics St. Charles, IL 60174 USA (630) 797–4900 (630) 797–4949 (630) 584–0796 Department Phone Numbers You can reach each department by dialing directly Application Support (630) 797–4930 For applications and/or process technology questions. Engineering (630) 797–4950 For engineering of standard and customized systems. Service & Parts (630) 762–4090 For equipment servicing or replacement parts. Department email Addresses Applications: .............. [email protected] Engineering: ............... [email protected] Service & Parts: ......... [email protected] Our Website Dukane Corporation is on the worldwide web at: http://www.dukcorp.com Navigate to the Ultrasonics site, or enter: http://www.dukcorp.com/us and then go to your area of interest. Dukane Manual Part No. 403–545–02 87 iPC™ v1.7 Software Installation Guide This page intentionally left blank 88 Dukane Manual Part No. 403–545–02 Appendix A – Data File Format APPENDIX A Data File Format P, 13:46:14, 003, 01, 0, 4, 100, 24, 030, 0.250, 032, 0.10, 033, 0.2 250, 9, 0.500, 0.000, s, 4, 51000, 49000, Hz 57, 57, 57, 57, 88, 88, 88, 88, 156, 156, 156, 156, 158, 158, 158 158, 158, 158 ,158, 158, 158, 158, 158, 158, 158, 158, 158, 158, 158, 158 158, 158, 158 ,158, 158, 158, 158, 158, 158, 158, 158, 158, 158, 158, 158 158, 158, 158 ,158, 158, 158, 158, 158, 158, 158, 158, 158, 158, 158, 158 158, 158, 158 ,158, 158, 158, 158, 158, 158, 158, 158, 158, 158, 158, 158 158, 158, 158 ,158, 158, 158, 158, 158, 158, 158, 158, 158, 158, 158, 158 158, 158, 158 ,158, 158, 158, 158, 158, 158, 158, 158, 158, 158, 158, 158 158, 158, 158 ,158, 158, 158, 158, 158, 158, 158, 158, 158, 158, 158, 158 158, 158, 158 ,158, 158, 158, 158, 158, 158, 158, 158, 158, 158, 158, 158 158, 158, 158 ,158, 158, 158, 158, 158, 158, 158, 158, 158, 158, 158, 158 158, 158, 158 ,158, 158, 158, 158, 158, 158, 158, 158, 158, 158, 158, 158 158, 158, 158 ,158, 158, 158, 158, 158, 158, 158, 158, 158, 158, 158, 158 158, 158, 158 ,158, 158, 158, 158, 158, 158, 158, 158, 158, 158, 158, 158 158, 158, 158 ,158, 158, 158, 158, 158, 158, 158, 158, 158, 158, 158, 158 158, 158, 158 ,158, 158, 158, 158, 158, 158, 158, 158, 158, 158, 158, 158 158, 158, 158 ,158, 158, 158, 158, 158, 158, 158, 158, 158, 158, 158, 158 158, 158, 158 ,158, 158, 158, 158, 158, 158, 158, 158, 158, 158, 158, 158 Creating A Data File ...................................... 91 Welding Parameter ....................................... 92 Graph Parameter .......................................... 93 Graph Data Values ........................................ 93 Dukane Corporation • Dukane Manual Part No. 403–545–02 • Ultrasonics Division 89 iPC™ v1.7 Software Installation Guide This page intentionally left blank 90 Dukane Manual Part No. 403–545–02 Appendix A – Data File Format Creating A Data File When the check box for Save Graph Data + Parameters Automatically is enabled (see screen shot below), iPC creates a csv–type text data file in the folder named C:\iPC\Saved Data. This folder should not be renamed or removed. The file is named YYYYMMDD.csv where YYYY Dukane Manual Part No. 403–545–02 represents the year, MM the month and DD the day. The file contains at least 3 lines for each part. The first line is the part welding parameters, the second line is the graph parameters and the third line is the graph data. If the right axis is defined on the graph, the forth and fifth lines are the right hand graph parameters and data. 91 iPC™ v1.7 Software Installation Guide Welding Parameters The first line of the welding parameter header starts with the letter P as is shown in column B in the screen shot . The remainding colums in the first row provide the welding parameter information as defined by: P,HH:MM:SS,XXX,SS,U,N,YZZ, VVVVVVVVVVV[,YZZ, VVVVVVVVVVV]…….<CR>[<LF>] Where: P The letter “P” is a marker for a new part HH:MM:SS Time of the day, in 24-hour format (i. e. 14:10:00 is 2:10:00 PM) XXX Three digit node number SS Two digit setup number V Units (0 = US, 1 = Metric) N Number of parameters And for each parameter: YZZ The parameter’s 3-digit code; includes: Status of the characteristic; status of the part if associated with part count (00): 1 = good, 2 = suspect low, 3 = suspect high, 4 = bad low, 5 = bad high; ZZ: the characteristic number (see table below) and VVVVVVVVVVV The parameter’s value. Welding Parameter Parts Counter Line Pressure Downstroke Time Downstroke Distance Downstroke Velocity Contact Pressure Trigger Delay Time Trigger Delay Distance Weld Time P1 Weld Distance P1 Weld Energy P1 Weld Power P1 Weld Time P2 Weld Distance P2 Weld Energy P2 Weld Power P2 Absolute Weld Distance Total Weld Time Total Weld Distance Total Weld Energy Hold Time Hold Distance Total Cycle Time Total Stroke 92 Code Number Units (US) Units (Metric) 00 01 10 11 12 13 20 21 30 31 32 33 40 41 42 43 50 51 52 53 60 61 70 71 psi sec in in/s psi sec in sec in j w sec in j w in sec In j sec in sec in kPa sec mm mm/s kPa sec mm sec mm j w sec mm j w mm sec mm j sec mm sec mm NOTE This information is also included on the CD. The file is a WORD™ document named — What's New in v1.7x.doc Also read the files — Final Release Notes for iPC1.7x.doc iPC Installation Guide.doc Dukane Manual Part No. 403–545–02 Appendix A – Data File Format Graph Parameters The second line of the data file defines the graph parameters for the left vertical and bottom horizontal axes. If a second graph is defined, the fourth line of the data file lists the parameters for the right vertical and bottom horizontal axes. The first value is a number that indicates the number of data points. The graph format string has the following format: PPP,H,AAAAAAAAA,BBBBBBBBB,CCCCCCC,V,DDDDDDDDD,EEEEEEEEE,FFFFFFF Where: PPP H AAAAAAAAA BBBBBBBBB CCCCCCC V DDDDDDDDD EEEEEEEEE FFFFFFF Number of Data Points (250 default) Horizontal Data Type Horizontal Axis Max Value Horizontal Axis Min Value Horizontal Units Name (text) Vertical Data Type Vertical Axis Max Value Vertical Axis Min Value Vertical Units Name (text) Graph Parameter Code Number Units (US) Units (Metric) 0 1 2 3 4 5 6 7 9 in in/s J W Hz lbs psi in Sec mm mm/s J W Hz N KPa mm Sec Distance Velocity Power Energy Frequency Force Pressure Amplitude Time Graph Data The third (and fifth if a second graph is present) line of the file are the data for the weld cycle graph. The data can be reconstructed into a graph using the graph parameters to scale the left vertical and bottom horizontal axes. The horizontal axis ranges from the minimum value to the maximum in equally spaced values (Hi ) determined by the formula: HG = (AAAAAAAAA – BBBBBBBBB)/PPP where AAAAAAAAA = Horiz Axis Max Value BBBBBBBBB = Horiz Axis Min Value PPP = Number of Data Points (250 by default) Dukane Manual Part No. 403–545–02 93 iPC™ v1.7 Software Installation Guide Each horizontal–axis data point has the value: Hi = (i x HG) + BBBBBBBBB where i = Data Point Number – 1 and HG = horizontal axis increment The vertical axis ranges from the minimum value to the maximum in equally spaced values (Vi ) determined by the formula: VG = (DDDDDDDDD – EEEEEEEEE)/250 where DDDDDDDDD = Vert Axis Max Value EEEEEEEEE = Vert Axis Min Value Each vertical–axis data point has the value: Vi = (i x VG) + EEEEEEEEE where i = Data Point Number – 1 and VG= vertical axis increment As an example, lets consider the following three lines from a data file: P,1 3:46:14,003,01,0,4,100,24,030,0.250,032,0.10,033,0.2 250,9,0.500,0.000,s,4,51000,49000,Hz 57,57,57,57,88,88,88,88,156,156,156,156,158,158,158,… Header string (1st line) P Time Node ID Setup number Units Num. Params Part Status Number of Parts Weld Time P1 (030) Weld Energy P1 (032) Weld Power P1 (033) Start of part marker 13:46:14 (1:46 pm) 003 01 0 (US) 4 100 (1=Good Part, 00=Parts Counter) 24 0.250 sec 0.10 Joule 0.2 Watt Graph Parameter string (2nd line) Number of Data Points 250 Horizontal Data Type 9 (Time) Horizontal Axis Max Value: 0.500 sec Horizontal Axis Min Value: 0.000 sec Horizontal Units Name: s (seconds) Vertical Data Type: 4 (Frequency) Vertical Axis Max Value: 51000 Vertical Axis Min Value: 49000 94 Dukane Manual Part No. 403–545–02 Appendix A – Data File Format To reconstruct the data, we need to know the offset, range and scale factors. The horizontal axis increment is just the (Max – Min)/250. HG = (0.5 sec – 0.0 sec)/250 = 0.002 second The vertical data must be scaled and given the correct offset. VG = (51000 Hz –49000 Hz)/250 = 8 Hz for the first data point), i = 0, so H0 = (i x HG) + 0 = = (0 x 0.002) + 0 = 0.000 sec V0 = (i x VG) + 0 = = (57 x 8) + 49000 =49456 Hz Vertical Units Name: Hz Data values (3rd line) The first fifteen points then look like: Point Number 1 2 3 4 5 6 7 8 9 10 11 12 13 14 15 i Raw Data Time (sec) Freq (Hz) 0 1 2 3 4 5 6 7 8 9 10 11 12 13 14 57 57 57 57 88 88 88 88 156 156 156 156 158 158 158 0.000 0.002 0.004 0.006 0.008 0.010 0.012 0.014 0.016 0.018 0.020 0.022 0.024 0.026 0.028 49456 49456 49456 49456 49704 49704 49704 49704 50248 50248 50248 50248 50264 50264 50264 Dukane Manual Part No. 403–545–02 95 iPC™ v1.7 Software Installation Guide This page intentionally left blank 96 Dukane Manual Part No. 403–545–02 Appendix A – Data File Format INDEX A Activate Java Console ................................................................................... 30 Add/Remove Programs ........................................................................... 56–57 Afterburst Feature (v1.5 Enhancement) ........................................................ 5 Associating IE With iPC Program ........................................................... 81–84 Automatic Installation, iPC ..................................................................... 43–48 B Baud Rate, DPC ............................................................................................. 15 C Cable, Serial ............................................................................................... 3, 39 Cable, DPC Network ..................................................................................... 40 CD, iPC ............................................................................................................. 3 CD–ROM Drive ............................................................................................... 21 COM Port (also see Serial Port, Computer) ..................................... 39, 63, 71 Computer Requirements ........................................................................ 19–21 Connection Speed, Computer ...................................................................... 34 Connection Speed, DPC ................................................................................ 15 Context–Sensitive Help ........................................................................... 77–80 Control Panel, Windows ......................................................................... 20, 32 CSV Files ..................................................................................................... 5, 91 D Data File Format...................................................................................... 92–95 Device Manager Tab/Button .................................................................. 33, 35 Disk Space Requirements ............................................................................. 21 DPC–4 ............................................................................................................. 11 DPC–4 Plus ..................................................................................................... 11 DPC Firmware Upgrade .......................................................................... 61–66 DPC Firmware Version .................................................................................. 12 DPC Model Number ...................................................................................... 11 DPC > Load .................................................................................................... 55 DPC > Save ..................................................................................................... 55 DPC Setup ...................................................................................................... 15 DPC Connection to PC .................................................................................. 39 DPC Network Connection ............................................................................. 40 DPC Requirements ........................................................................................ 11 Dukane Contacts ........................................................................................... 87 Dukane Website ............................................................................................ 87 E Enhancements in iPC v1.7 ............................................................................... 4 Erase Failed Error Message ........................................................................... 67 EXCEL Spreadsheet ................................................................................... 5, 91 Dukane Manual Part No. 403–545–02 97 iPC™ v1.7 Software Installation Guide F File > Load ..................................................................................................... 55 File > Save ...................................................................................................... 55 File Format, Data .................................................................................... 92–95 Final Release Notes ................................................................................... 3, 43 Firmware Upgrade, DPC 4 ...................................................................... 61–66 Flowchart, Installation .................................................................................... 7 Format, Output, DPC .................................................................................... 15 Full Page Mode, Intenet Explorer ................................................................ 25 G Graph Page, iPC ............................................................................................... 4 Graph Data, DPC ..................................................................................... 93–95 Graph Parameters, DPC .......................................................................... 93–95 H Hardware Setup Menu, DPC ........................................................................ 15 Help, Context–Sensitive .......................................................................... 77–80 HyperTerminal ......................................................................................... 62–66 I Installation Flowchart ..................................................................................... 7 Installation Manual, iPC ................................................................................. 3 Installing iPC ............................................................................................ 43–49 Internet Explorer ......................................................................................25-26 Invalid Checksum Error Message ................................................................. 67 iPC v1.2 Enhancements ................................................................................... 6 iPC v1.3 Enhancements ................................................................................... 5 iPC v1.4 Enhancements ................................................................................... 5 iPC v1.5 Enhancements ................................................................................... 5 iPC v1.6 Enhancements ................................................................................... 5 iPC v1.7 Enhancements ................................................................................... 4 iPC Version Compatibility ............................................................................. 12 J Java Console .................................................................................................. 30 Java Logging ................................................................................................. 31 Java Virtual Machine (JVM) .......................................................................... 29 JVM, Enable ................................................................................................... 31 JVM, Sun, Disable .......................................................................................... 31 JIT Compiler ................................................................................................... 32 L Launching iPC ................................................................................................ 71 Local/Remote Setting, DPC ........................................................................... 15 98 Dukane Manual Part No. 403–545–02 Index M Manual Installation, iPC ............................................................................... 49 Microsoft Java Machine .......................................................................... 30–31 Microsoft Website ......................................................................................... 25 Memory, Computer (RAM) ..................................................................... 19, 24 N Naming Procedure, DPC ............................................................................... 15 Netscape Navigator ................................................................................ 25, 71 Network Cable, DPC ..................................................................................... 40 Network Connection, DPC ............................................................................ 40 Network Termination Plug ........................................................................... 40 Node ID, DPC ................................................................................................. 15 O Open Port Window, iPC ................................................................................ 71 P Package Contents............................................................................................ 3 Parameter Fields, Data File ..................................................................... 92–95 Pentium Processor ................................................................................... 19, 72 Performance Comparison ............................................................................. 72 Printer Setup, iPC Utilities Page ..................................................................... 6 Process Control Page, iPC ....................................................................... 77, 81 Processor Board Exchange, DPC ................................................................... 61 R RAM ......................................................................... (see Memory, Computer) Requirements, Computer ....................................................................... 19–21 Requirements, DPC ....................................................................................... 15 S Save Graph Data, Enable ................................................................................ 4 Save Parts Data Button ................................................................................... 6 Saving, Explicit ................................................................................................ 6 Saving, Implicit ................................................................................................ 6 Scrub Feature( v1.5 Enhancement) ................................................................ 5 Serial Cable .......................................................................................... 3, 39–40 Serial Number, iPC ......................................................................................... 45 Serial Port, Computer ............................................................................. 25, 41 Serial Port, DPC ................................................................................. 19, 41–42 Serial Port Settings, Computer ......................................................... 36–38, 73 Setup Files, Reading ...................................................................................... 57 Setup Window ............................................................................................... 48 Software License Agreement ....................................................................... 46 Start Menu, Window .................................................................................... 26 Dukane Manual Part No. 403–545–02 99 iPC™ v1.7 Software Installation Guide Sun Java Machine................................................................................ 4, 30-31 SVGA Display ............................................................................................19-21 System Properties (Windows™) ............................................................. 24, 35 T Transfer Setup Files to DPC .............................................................. 52-55, 58 Troubleshooting ................................................................................ 67, 77–80 U Uninstall iPC ............................................................................................ 56–57 Upgrading from iPC v1.1 ........................................................................ 52–58 Upgrading from iPC v1.2 ........................................................................ 50–51 Upgrading from iPC v1.3 or Later ................................................................ 49 User Information Window ........................................................................... 45 V Video Display, Computer ........................................................................ 19-20 W Website, Dukane ........................................................................................... 87 Website, Microsoft ........................................................................................ 25 Welding Parameters ..................................................................................... 92 Windows™, Version Installed ................................................................ 22–24 Windows 95™ ............................................................................................... 22 Windows 98™ ............................................................................................... 22 Windows 2000™ ........................................................................................... 22 Windows ME™ .............................................................................................. 22 Windows NT™ ............................................................................................... 22 Windows XP™ ............................................................................................... 22 Windows XP™ Service Pack 2 ...................................................................... 26 Write Failure Error Message ......................................................................... 67 X XML File, Description ................................................................................... 55 Z Zoom Feature( v1.5 Enhancement)................................................................ 5 100 Dukane Manual Part No. 403–545–02 Dukane ISO ISO CERTIFICATION Dukane chose to become ISO 9001:2000 certified in order to demonstrate to our customers our continuing commitment to being a quality vendor. By passing its audit, Dukane can assure you that we have in place a well–defined and systematic approach to quality design, manufacturing, delivery and service. This certificate reinforces Dukane's status as a quality vendor of technology and products. To achieve ISO 9001:2000 certification, you must prove to one of the quality system registrar groups that you meet three requirements: 1. Leadership 2. Involvement 3. Quality in Line Organizations and Quality System Infrastructure. The ISO 9001:2000 standard establishes a minimum requirement for these requirements and starts transitioning the company from a traditional inspection–oriented quality system to one based on partnership for continuous improvement. This concept is key in that Dukane no longer focuses on inspection, but on individual processes. Dukane's quality management system is based on the following three objectives: 1. Customer oriented quality. The aim is to improve customer satisfaction. 2. Quality is determined by people. The aim is to improve the internal organization and cooperation between staff members. 3. Quality is a continuous improvement. The aim is to continuously improve the internal organization and the competitive position. ISO 9001:2000 CERTIFIED Dukane products are manufactured in ISO registered facilities DUKANE CORPORATION WHO ARE WE? We are plastic welding technologists. We are scientists. We are employees and businessmen. We are instructors. We are engineers. We are specialists in electronics and experts in plastic assembly. We are salesmen. We do basic research and we manufacture machines. We are problem solvers and we are technical advisors We Are Your Partners. 5 햲 햳 햴 햵 햶 햷 REGIONAL OFFICES Northeast Region Rocco Telese 14 Delmar Drive – Suite 6B Brookfield, CT 06084 (203) 740–0089 Central Region Jason Barton 4424 Aicholtz Road – Suite G Cincinnati, OH 45245 (513) 752–8803 3 Tooling Lab Engineering Lab Automotive Region Raymond LaFlamme 11235 Stark Road Livonia, MI 48150 (734) 513–4038 4 3 Automotive Appl. Lab § Main Serv.Cntr. 5 2 Tooling Lab § Western Serv.Cntr. Midwest Region Jerry Wibben 2900 Dukane Drive St. Charles, IL 60174 (630) 797–4921 Film & Fabric Appl. Lab Corporate Office and Training Center Regional Office Application Laboratory § Service Center Western Region & Alaska James Jackstein 162 East Manilla Drive Draper, UT 84020 (801) 523–6191 Mexico & Caribbean Nelson Romero 2900 Dukane Drive St. Charles, IL 60174 (630) 797–4915 1 Mexico Sales & Serv.Cntr. 6 6 § Mexico Service Center Alejandro (Alex) Juarez Dukane Corporation Vulcano No. 1618 Col. Nueva Linda Vista Guadalupe NL CP 67110 Mexico TEL 011–52–81–8364–9313 iPC ™ Software Installation Guide Part No. 403–545–02 40354502 $100.00 www.dukcorp.com/us Printed in the United States of America Dukane Corporation • Ultrasonics Division • 2900 Dukane Drive • St. Charles, Illinois 60174 USA • TEL (630) 797- 4900 • FAX (630) 797- 4949