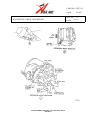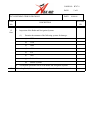
1
B767 LINE MAINTENANCE
FORMS MANUAL
REVISION HIGHLIGHTS
B767 LINE MAINTENANCE FORMS MANUAL
REVISION 82, DATED 12-06-10
B767-2A, B767-2B
Service Check Description and Signoff Record revised to incorporate QAR maintenance requirements, add
requirements of AD 2010-23-03, and delete references to 312AA, per MPRR 38615.
REVISION HIGHLIGHTS
B767 LINE MAINTENANCE FORMS MANUAL
REVISION 81, DATED 11-29-10
B767-90
Pages 4-6, added Figures 1, 2, and 3 regarding engine oil servicing, per MPRR 38632.
REVISION HIGHLIGHTS
B767 LINE MAINTENANCE FORMS MANUAL
REVISION 80, DATED 11-17-10
B767-14
Page 4, Item 1.A.(4) deleted “for JT9 engines, or 54-10-00 for CF6 engines”, per MPRR 38613.
Page 4, Item 1.A.(4)(a) deleted “for CF6 engines, or FIM 71A-05-00 for JT9 engines”, per MPRR 38613.
Deleted Item 4. “Disposition of Remains”, per MPRR 38613.
Page 4, revised Records Mail Code to “2061-R”, per MPRR 38613.
REVISION HIGHLIGHTS
B767 LINE MAINTENANCE FORMS MANUAL
REVISION 79, DATED 11-04-10
B767-90
Page 1, Note, added “or the B767-2A/B Service Check when scheduled”, per MPRR 38604.
Page 2, Job Description Engines, revised Item 4. and Item 5. to incorporate PW4000 requirements, per
MPRR 38604.
Page 2, Job Description Engines, Item 6. revised “If both engines require oil to be added and both filler caps
have been opened” to “If both engines require oil to be added and/or both filler caps have been opened”, per
MPRR 38604.
REVISION HIGHLIGHTS
B767 LINE MAINTENANCE FORMS MANUAL
REVISION 78, DATED 10-28-10
B767-1A, Daily Check Description
B767-1B, Daily Check Signoff Record
B767-2A, Service Check Description
B767-2B, Service Check Signoff Record
Cards revised to delete the PC configuration, and add the B767-300 BDSF with PW4000 engine
configuration, per MPRR 38606.
REVISION HIGHLIGHTS
B767 LINE MAINTENANCE FORMS MANUAL
REVISION 77, DATED 10-07-10
B767-5
Card “B767 JT9D PT7 Probe Cleaning” deleted from manual, per MPRR 38560.
REVISION HIGHLIGHTS
B767 LINE MAINTENANCE FORMS MANUAL
REVISION 76, DATED 07-15-10
B767-2A
Page 7, added new Item 7.B. “Check portable oxygen bottle (BCSF)”, sub-item 7.B.(1), and Note, per MPRR
38671.
B767-2B
Page 3, Item 7. deleted “Sheet 1 and Sheet 2”, per MPRR 38671.
REVISION HIGHLIGHTS
B767 LINE MAINTENANCE FORMS MANUAL
REVISION 75, DATED 06-17-10
B767-1A
Page 1, PC - Package Carrier, revised “RH upper corner” to “upper corners”, per MPRR 38732.
Page 1, PC2SF, revised “RH upper corner” to “external upper corners”, per MPRR 38732.
Page 1, Item 1.B. revised to read “Remove completed Engine Trend Monitoring Reports from the binder at
the operations hub. Aircraft that do not transit an operations hub, forward to Aircraft Records, ILN”, per
MPRR 38732.
Page 2, Item 3.A.(2) deleted “at ILN”, per MPRR 38732.
B767-1B
Page 1, PC - Package Carrier, revised “RH upper corner” to “upper corners”, per MPRR 38732.
Page 1, PC2SF, revised “RH upper corner” to “external upper corners”, per MPRR 38732.
B767-2A
Page 1, PC - Package Carrier, revised “RH upper corner” to “upper corners”, per MPRR 38732.
Page 1, PC2SF, revised “RH upper corner” to “external upper corners”, per MPRR 38732.
Page 1, revised title of section from “FLIGHT COMPARTMENT” to “ABBREVIATED SERVICE CHECK”
per MPRR 38732.
NOTE: Item 1. and sub-items are now “ABBREVIATED SERVICE CHECK”; Items 2. through 12. are now
“FLIGHT COMPARTMENT.”
Page 1, Item 1. revised, per MPRR 38732.
Page 1, Item 1.B. revised “Deferred Item placards” to “Deferred Items”, per mPRR 38732.
Page 4, added new Item 3. “Operationally Check the Takeoff Configuration Warning Alert (N315AA Only)”;
renumbered subsequent items, per MPRR 38732.
REVISION HIGHLIGHTS
B767 LINE MAINTENANCE FORMS MANUAL
Page 6, added new Item 6.B. “Remove completed Engine Trend Monitoring Reports from the binder at the
operations hub. Aircraft that do not transit an operations hub, forward to Aircraft Records, ILN”; renumbered
subsequent items, per MPRR 38732.
Page 14, added new Item 17.D. “Check that 1 ea. ash tray is installed in receptacle on exterior lavatory
compartment wall next to lavatory door (AD 74-08-09 R2) (SF and PC2SF)”, per MPRR 38732.
Page 17, added new Item 30.A. “Check that 1 ea. ash tray is installed in receptacle on exterior lavatory
compartment wall next to lavatory door (AD 74-08-09 R2) (PC)”; renumbered subsequent item, per MPRR
38732.
Page 17, Item 34.A. revised “Volumes 1, 2, 3, 4, and 5” to “all volumes”, per MPRR 38732.
Page 19, added new Item 39.B. “Check that 2 ea. fire extinguisher nozzles are unobstructed by tape or liner
panels along the upper corner on the left side wall of the forward and aft compartments (AD 08-13-04) (NA
N315AA)”, per MPRR 38732.
B767-2B
Page 1, Total Sign-Off Pages revised from “10” to “11.”
Page 1, PC - Package Carrier, revised “RH upper corner” to “upper corners”, per MPRR 38732.
Page 1, PC2SF, revised “RH upper corner” to “external upper corners”, per MPRR 38732.
Page 2, revised title of section from “FLIGHT COMPARTMENT” to “ABBREVIATED SERVICE CHECK”
per MPRR 38732.
NOTE: Item 1. and sub-items are now “ABBREVIATED SERVICE CHECK”; Items 2. through 12. are now
“FLIGHT COMPARTMENT.”
Page 2, Item 1. revised “document accomplishment of Service Check with a log book entry” to “document
accomplishment of Abbreviated Service Check or Service Check with a log book entry”, per MPRR 38732.
Page 3, added new Item 3. “Operationally check the Takeoff Configuration Warning Alert (N315AA Only)”;
renumbered subsequent items, per MPRR 38732.
REVISION HIGHLIGHTS
B767 LINE MAINTENANCE FORMS MANUAL
REVISION 74, DATED 06-11-10
B767-1A, B767-1B, B767-2A, B767-2B
Daily and Service Check forms revised to incorporate the BCSF configuration and delete JT9D requirements,
per MPRR 38726.
REVISION HIGHLIGHTS
B767 LINE MAINTENANCE FORMS MANUAL
REVISION 73, DATED 04-14-10
B767-90
Page 2, Job Description Engines, Item 6. added “If no oil was added enter zero (0)”, per MPRR 36880.
Page 2, Job Description APU, Item 1. added “Record oil added (quarts) in aircraft log book. If no oil was
added enter zero (0)”, per MPRR 36880.
Page 3, Job Description Logbook, Item 1. revised to read “Complete Airworthiness Release entry for ETOPS
PDSC Inspection”, per MPRR 36880.
Page 3, Check Completed section, added space for Employee Number, per MPRR 36880.
REVISION HIGHLIGHTS
B767 LINE MAINTENANCE FORMS MANUAL
REVISION 72, DATED 03-12-10
B767-1A
Page 8, Item 10.H. added “If no oil was added, enter zero (0)”, per MPRR 36882.
Page 10, Item 12.B.(1)(i) added “If no oil was added, enter zero (0)”, per MPRR 36882.
B767-1B
Page 5, Item 10. added “If no oil was added, enter zero (0)”, per MPRR 36882.
Page 6, Item 12. added “If no oil was added, enter zero (0)”, per MPRR 36882.
B767-2A
Page 11, added new Item 13. “Clean microwave oven (SF and PC2SF only)”; renumbered subsequent items,
per MPRR 31956.
Page 24, Item 56.H. added “If no oil was added, enter zero (0)”, per MPRR 36882.
Page 28, Item 59.H. added “If no oil was added, enter zero (0)”, per MPRR 36882.
Page 33, Item 62.B.(1)(i) added “If no oil was added, enter zero (0)”, per MPRR 36882.
Page 38, Item 65.B.(1)(i) added “If no oil was added, enter zero (0)”, per MPRR 36882.
Page 41, Item 68.C. added “If no oil was added, enter zero (0)”, per MPRR 36882.
B767-2B
Page 3, added new Item 13. “Clean microwave oven (SF and PC2SF Only)”; renumbered subsequent items,
per MPRR 31956.
Page 8, Item 56. added “If no oil was added, enter zero (0)”, per MPRR 36882.
Page 9, Item 59. added “If no oil was added, enter zero (0)”, per MPRR 36882.
REVISION HIGHLIGHTS
B767 LINE MAINTENANCE FORMS MANUAL
Page 10, Item 62. added “If no oil was added, enter zero (0)”, per MPRR 36882.
Page 11, Item 65. added “If no oil was added, enter zero (0)”, per MPRR 36882.
Page 12, Item 68. added “If no oil was added, enter zero (0)”, per MPRR 36882.
REVISION HIGHLIGHTS
B767 LINE MAINTENANCE FORMS MANUAL
REVISION 71, DATED 01-19-10
B767-2A
Page 9. Added the following Flight Compartment items, per MPRR 31933:
- Item 9.C.(4) “Items provided by Charter Operations:”
- Item 9.C.(4)(a) “ICAO Doc. 9481, Emergency Response Guidance for Aircraft Incidents Involving
Dangerous Goods (312, 740, 744, 745, 747 only).”
REVISION HIGHLIGHTS
B767 LINE MAINTENANCE FORMS MANUAL
REVISION 70, DATED 10-27-09
B767-1A
Page 8, added new Item 10.H. “Record OIL ADDED - QUARTS in aircraft log book”, per MPRR 31923.
Page 10, deleted Item 12.B.(1)(e)1 “Record quantities added in the Aircraft Log Page . . .”; renumbered
subsequent item, per MPRR 31923.
Page 10, deleted Item 12.B.(1)(h) “Write in the Aircraft Log Page the amount of oil added to the oil
tank . . .”; renumbered subsequent item, per MPRR 31923.
Page 10, added new Item 12.B.(1)(i) “Record OIL ADDED - QUARTS in aircraft log book”, per
MPRR 31923.
B767-1B
Page 5, Item 10. revised “Oil added in quarts: Eng. #1 ___ Eng. #2 ____” to “Record OIL ADDED QUARTS in aircraft log book”, per MPRR 31923.
Page 6, Item 12. revised “Oil added in quarts: Eng. #1 ___ Eng. #2 ____” to “Record OIL ADDED QUARTS in aircraft log book”, per MPRR 31923.
B767-2A
Page 13, revised Items 25.B.(6)(a), (b), and (c) regarding Weight and Balance Computer, per MPRR 31960.
Page 14, deleted Item 32. Note “N714AX only has four (4) volumes”, per MPRR 31923.
Page 23, added new Item 55.H. “Record OIL ADDED - QUARTS in aircraft log book”, per MPRR 31923.
Page 27, added new Item 58.H. “Record OIL ADDED - QUARTS in aircraft log book”, per MPRR 31923.
Page 31, deleted Item 61.B.(1)(e)1 “Record quantities added in the Aircraft Log Page . . .”; renumbered
subsequent item, per MPRR 31923.
Page 32, deleted Item 61.B.(1)(h) “Write in the Aircraft Log Page the amount of oil added to the oil
tank . . .”; renumbered subsequent item, per MPRR 31923.
Page 32, added new Item 61.B.(1)(i) “Record OIL ADDED - QUARTS in aircraft log book”, per
MPRR 31923.
REVISION HIGHLIGHTS
B767 LINE MAINTENANCE FORMS MANUAL
Page 36, deleted Item 64.B.(1)(e)1 “Record quantities added in the Aircraft Log Page . . .”; renumbered
subsequent item, per MPRR 31923.
Page 37, deleted Item 64.B.(1)(h) “Write in the Aircraft Log Page the amount of oil added to the oil
tank . . .”; renumbered subsequent item, per MPRR 31923.
Page 37, added new Item 64.B.(1)(i) “Record OIL ADDED - QUARTS in aircraft log book”, per
MPRR 31923.
Page 40, Item 67.A. deleted “Enter the amount added (in quarts) in the aircraft log book”, per MPRR 31923.
Page 40, added new Item 67.C. “Record OIL ADDED - QUARTS in aircraft log book”, per MPRR 31923.
B767-2B
Page 8, Item 55. revised “Oil added in quarts: Eng. #1 ___” to “Record OIL ADDED - QUARTS in aircraft
log book”, per MPRR 31923.
Page 8, Item 56. deleted “Oil added in quarts: Eng. #1 IDG ___”, per MPRR 31923.
Page 9, Item 58. revised “Oil added in quarts: Eng. #2 ___” to “Record OIL ADDED - QUARTS in aircraft
log book”, per MPRR 31923.
Page 9, Item 59. deleted “Oil added in quarts: Eng. #2 IDG ___”, per MPRR 31923.
Page 10, Item 61. revised “Oil added in quarts: Eng. #1 ___” to “Record OIL ADDED - QUARTS in aircraft
log book”, per MPRR 31923.
Page 10, Item 62. deleted “Oil added in quarts: Eng. #1 ___”, per MPRR 31923.
Page 11, Item 64. revised “Oil added in quarts: Eng. #2 ___” to “Record OIL ADDED - QUARTS in aircraft
log book”, per MPRR 31923.
Page 11, Igem 65. deleted “Oil added in quarts: Eng. #2 ___”, per MPRR 31923.
Page 12, Item 67. revised “Oil added in quarts: APU ___”, to “Record OIL ADDED - QUARTS in aircraft
log book”, per MPRR 31923.
REVISION HIGHLIGHTS
B767 LINE MAINTENANCE FORMS MANUAL
REVISION 69, DATED 09-23-09
B767-2A
Page 9, deleted Item 9.C.(1)(d) “Airport Analysis Book” (no longer carried onboard), per MPRR 36475.
REVISION HIGHLIGHTS
B767 LINE MAINTENANCE FORMS MANUAL
REVISION 68, DATED 09-15-09
B767-1A
Page 7, Item 10. deleted first Note “If an excessive amount of oil is used . . .”, per MPRR 36469.
Page 7, added new Item 10.D. regarding excessive oil use, and sub-items; renumbered subsequent items, per
MPRR 36469.
Page 10, Item 12.B.(1)(e)2 deleted “Maximum One Time Oil Addition”, “Limits For Oil Quantity”, per
MPRR 36469.
Page 10, Item 12.B.(1)(e)2a revised “Fax a note to Manager Powerplant Engineering” to “Contact
Maintenance Control”, per MPRR 36469.
Page 10, Item 12.B.(1)(e)2a revised “Engine Number” to “Engine Position”, per MPRR 36469.
B767-2A
Page 23, added new Item 55.D. regarding excessive oil use, and sub-items; renumbered subsequent items, per
MPRR 36469.
Page 27, added new Item 58.D. regarding excessive oil use, and sub-items; renumbered subsequent items, per
MPRR 36469.
Page 31, Item 61.B.(1)(e)2 deleted “Maximum One Time Oil Addition”, “Limits For Oil Quantity”, per
MPRR 36469.
Page 31, Item 61.B.(1)(e)2a revised “Fax a note to Manager Powerplant Engineering” to “Contact
Maintenance Control”, per MPRR 36469.
Page 31, Item 61.B.(1)(e)2a revised “Engine Number” to “Engine Position”, per MPRR 36469.
Page 36, Item 64.B.(1)(e)2 deleted “Maximum One Time Oil Addition”, “Limits For Oil Quantity”, per
MPRR 36469.
Page 36, Item 64.B.(1)(e)2a revised “Fax a note to Manager Powerplant Engineering” to “Contact
Maintenance Control”, per MPRR 36469.
Page 36, Item 64.B.(1)(e)2a revised “Engine Number” to “Engine Position”, per MPRR 36469.
REVISION HIGHLIGHTS
B767 LINE MAINTENANCE FORMS MANUAL
REVISION 67, DATED 08-12-09
B767-90
Page 3, Job Description Logbook, Item 1. deleted “ETOPS PDSC required and”, per MPRR 36459.
Page 3, Item ETOPS Pre-Departure Service Check Complete, revised “Forward all signoff sheets” to “Fax all
signoff sheets”, per MPRR 36459.
Page 3, Item ETOPS Pre-Departure Service Check Complete, added “Ensure ETOPS PDSC Inspection has
been entered in the Airworthiness Release block at the bottom of the log page”, per MPRR 36459.
Page 3, Item ETOPS Pre-Departure Service Check Complete, added “Attach this form to the white copy of
the log page”, per MPRR 36459.
REVISION HIGHLIGHTS
B767 LINE MAINTENANCE FORMS MANUAL
REVISION 66, DATED 07-13-09
B767-1A
Page 2, Item 2.A. added “PC”, per MPRR 36166.
Page 2, Item 4.A. deleted “and hydrostatic test/inspection due dates”, per MPRR 36166.
Page 2, deleted Item 4.A. Note “If there are less than ninety (90) days until the expiration date . . .”, per
MPRR 36166.
Page 2, Item 4.A.(2) added “other”, per MPRR 36166.
Page 3, Item 5.F. added “(PC only)”, per MPRR 36166.
B767-1B
Page 3, Item 2. added “PC”, per MPRR 36166.
B767-2A
Page 4, Item 4.B.(2) revised “PC Aircraft” to “PC and PC2SF Aircraft”, per MPRR 36166.
Page 5, Item 6.B. added “and PC2SF”, per MPRR 36166.
Page 5, Item 6.C.(2) added “and PC2SF”, per MPRR 36166.
Page 6, Item 6.E. added “and PC2SF”, per MPRR 36166.
Page 6, Item 6.F. added “and PC2SF”, per MPRR 36166.
Page 6, Item 6.I. added “and PC2SF”, per MPRR 36166.
Page 11, revised section title from “Supernumerary Compartment (SF Mod Only)” to “Supernumerary
Compartment (SF)/Crew Service Area (PC2SF)”, per MPRR 36166.
Page 11, Item 12. added “/crew service” and added “and “PC2SF”, per MPRR 36166.
Page 11, Item 14. added “/crew service”, per MPRR 36166.
Page 11, Item 14.D. revised “Life vest (4 ea.)” to “Life vest (4 ea. SF, 1 ea. PC2SF)”, per MPRR 36166.
REVISION HIGHLIGHTS
B767 LINE MAINTENANCE FORMS MANUAL
Page 11, Item 14.E.(1) deleted “located above supernumerary seats”, per MPRR 36166.
Page 11, Item 14.G. added “(if installed)”, per MPRR 36166.
Page 12, Item 23. added “and PC2SF”, per MPRR 36166.
Page 13, Item 26. added “(PC Only)”, per MPRR 36166.
Page 13, Item 26.A.(2) added “other”, per MPRR 36166.
Page 13, deleted Item 26.A.(3) “Installed on aft face of aft lavatory wall on SF aircraft”, per MPRR 36166.
Page 14, Item 30. added “and PC2SF”, per MPRR 36166.
Page 53, revised Figure 13, Sheet 1 of 2, Cockpit Equipment - PC and PC2SF Configured Aircraft, per
MPRR 36166.
B767-2B
Page 3, revised title from “Supernumerary Compartment (SF Mod Only)” to “Supernumerary Compartment
(SF)/Crew Service Area (PC2SF)”, per MPRR 36166.
Page 3, Item 12. added “/crew service” and added “and “PC2SF”, per MPRR 36166.
Page 3, Item 14. added “/crew service”, per MPRR 36166.
Page 4, Item 23. added “and PC2SF”, per MPRR 36166.
REVISION HIGHLIGHTS
B767 LINE MAINTENANCE FORMS MANUAL
REVISION 65, DATED 06-24-09
B767-2A
Page 11, Item 14.D. added “and demonstration life vest (1 ea.)”, per MPRR 36216.
Page 13, revised Item 25.B.(6)(a) regarding Weight and Balance Computer program version number, per
MPRR 36102.
Page 54, revised illustration “Flight Deck Emergency Equipment - SF Configured Aircraft”, Figure 13, Sheet
2 of 2, per MPRR 36216.
REVISION HIGHLIGHTS
B767 LINE MAINTENANCE FORMS MANUAL
REVISION 64, DATED 04-21-09
B767-2A
Page 25, No. 1 Engine and Pylon, CF6-80A Series, deleted Item 57. “Check engine master chip detector for
metal. (Ref. Figures 7 and 8)”; renumbered subsequent items, per MPRR 35591.
Page 29, No. 2 Engine and Pylon, CF6-80A Series, deleted Item 60. “Check engine master chip detector for
metal. (Ref. Figures 7 and 8)”; renumbered subsequent items, per MPRR 35591.
Page 47, deleted Figure 7, CF6-80A Series Engines - Magnetic Chip Detector Locations (page now “This
Figure Intentionally Left Blank”), per MPRR 35591.
Page 48, deleted Figure 8, CF6-80A Series Engines - MCD Data Retrieval (page now “This Figure
Intentionally Left Blank”), per MPRR 35591.
B767-2B
Page 8, No. 1 Engine and Pylon, CF6-80A Series, deleted Item 57. “Check No. 1 Engine Master Chip
Detector(s) (MCD) for metal” and Notes; renumbered subsequent items, per MPRR 35591.
Page 9, No. 2 Engine and Pylon, CF6-80A Series, deleted Item 60. “Check No. 2 engine Master Chip
Detector(s) (MCD) for metal” and Notes; renumbered subsequent items, per MPRR 35591.
REVISION HIGHLIGHTS
B767 LINE MAINTENANCE FORMS MANUAL
REVISION 63, DATED 04-21-09
B767-90
ETOPS Predeparture Check revised, per MPRR 35587.
REVISION HIGHLIGHTS
B767 LINE MAINTENANCE FORMS MANUAL
REVISION 62, DATED 03-31-09
B767-90
Moved “Mechanic’s Initials” column from left side of form to right side of form, per MPRR 35578.
Page 2, Job Description Engines, revised Item 4, and added new Items 5 and 6, per MPRR 35578.
Page 2, Job Description APU, revised Item 1, per MPRR 35578.
Page 2, Job Description Logbook, added new Item 3, per MPRR 35578.
REVISION HIGHLIGHTS
B767 LINE MAINTENANCE FORMS MANUAL
REVISION 61, DATED 03-09-09
B767-1A
Page 1, deleted Item 1.F. “Ensure ETOPS Reporting Form Binder is onboard (ETOPS aircraft only)”, per
MPRR 35521.
Page 1, deleted Item 1.G. “Ensure ETOPS APU Reporting Form Binder is onboard (ETOPS aircraft only)”,
per MPRR 35521.
Page 3, Item 5.M. added “door sills”; deleted “(ETOPS)”, per MPRR 35521.
Page 3, Item 5.N. deleted “(ETOPS)”, per MPRR 35521.
Page 7, Item 10. revised from “Service oil at No. 1 and No. 2 engines to maximum limits with turbo 2380 oil
(Ref. Figure 2) (ETOPS)”, to “Check the No. 1 and No. 2 engine oil levels and service with Turbo 2380 oil if
required (Ref. Figure 2)”, per MPRR 35521.
Page 7, Item 10.C. deleted “Fill the tank with oil until the oil overflows at the filler neck”; added “Add oil in
whole quart quantities only. When the floating ball reaches the top of the sight glass, continue to pour in any
remaining oil until the quart can is empty. Do not add any more oil”, per MPRR 35521.
Page 7, Item 10.C. Note revised to read “Make sure you add oil slowly and carefully. If you add oil into the
filler cap too quickly, the oil may flow out the fill port. The internal self-sealing valve limits the flow of oil to
1 quart (1 liter) every 40 seconds at 70oF (21oC)”, per MPRR 35521.
Page 7, added new Item 10.E. “Verify the ball is at the top of the sight glass”; renumbered subsequent item,
per MPRR 35521.
Page 8, Item 12. deleted “(ETOPS)”, per MPRR 35521.
Page 10, deleted Item 13. and sub-items regarding Auxiliary Power Unit, per MPRR 35521.
B767-1B
Page 1, General Description and Operation, added new Item “This check includes ETOPS tasks which
require Technicians to adhere to GMM 04.44 guidelines when performing maintenance on ETOPS aircraft”,
per MPRR 35521.
Page 2, deleted Item 1.F. “Ensure ETOPS Reporting Form Binder is onboard (ETOPS aircraft only)”, per
MPRR 35521.
REVISION HIGHLIGHTS
B767 LINE MAINTENANCE FORMS MANUAL
Page 2, deleted Item 1.G. “Ensure ETOPS APU Reporting Form Binder is onboard (ETOPS aircraft only)”,
per MPRR 35521.
Page 4, Item 5. deleted “(ETOPS)”, per MPRR 35521.
Page 5, Item 10. revised to read “Check the No. 1 and No. 2 engine oil levels and service with Turbo 2380
oil, if required (Ref. Figure 2)”, per MPRR 35521.
Page 6, Item 12. deleted “(ETOPS)”, per MPRR 35521.
Page 7, deleted Item 13. regarding Auxiliary Power Unit, per MPRR 35521.
B767-2A
Page 16, Item 36. added “door sills”; deleted “(ETOPS)”, per MPRR 35521.
Page 16, Item 37. deleted “(ETOPS)”, per MPRR 35521.
Page 16, Item 38. deleted “(ETOPS)”, per MPRR 35521.
Page 16, Item 39. deleted “(ETOPS)”, per MPRR 35521.
Page 18, Item 44.D. added “AOA, TAT”, per MPRR 35521.
Page 18, Item 44.L. deleted “(ETOPS)”, per MPRR 35521.
Page 22, Item 55. revised to read “Check the No. 1 engine oil level and service with Turbo 2380 oil, if
required (Ref. Figure 5)”, per MPRR 35521.
Page 22, Item 55. third Note revised to read “When servicing the oil tank, observe for odor of fuel at engine
oil tank fill port. If you find fuel in the oil system, you must do the troubleshooting procedure (FIM 71-05-00/
101, Fig. 129) and flush the oil system (AMM 79-11-00/301)”, per MPRR 35521.
Page 22, deleted Item 55.B. “Remove engine oil tank filler cap”; renumbered subsequent items, per MPRR
35521.
Page 22, Item 55.B. Note revised to read “A sight glass with a hollow float ball is installed below the fill port
scupper. The oil tank is fully serviced when the ball is at the top of the glass”, per MPRR 35521.
Page 22, Item 55.C. revised to read “If the oil level is below the top of the sight glass, remove engine oil tank
filler cap. Add oil in whole quart quantities only. When the floating ball reaches the top of the sight glass,
continue to pour in any remaining oil until the quart can is empty. Do not add any more oil”, per MPRR
REVISION HIGHLIGHTS
B767 LINE MAINTENANCE FORMS MANUAL
35521.
Page 23, Item 55.C. Note revised to read “Make sure you add oil slowly and carefully. If you add oil into the
filler cap too quickly, the oil may flow out the fill port. The internal self-sealing valve limits the flow of oil to
1 quart (1 liter) every 40 seconds at 70oF (21oC)”, per MPRR 35521.
Page 23, added new Item 55.E. “Verify the ball is at the top of the sight glass”; renumbered subsequent item,
per MPRR 35521.
Page 23, Item 56. deleted “(ETOPS)”, per MPRR 35521.
Page 27, revised Item 59. and sub-items regarding No. 2 engine oil level and servicing, per MPRR 35521.
Page 28, Item 60. deleted “(ETOPS)”, per MPRR 35521.
Page 32, Item 63. deleted “(ETOPS)”, per MPRR 35521.
Page 34, Item 64. deleted “(ETOPS)”, per MPRR 35521.
Page 37, Item 66. deleted “(ETOPS)”, per MPRR 35521.
Page 39, Item 67. deleted “(ETOPS)”, per MPRR 35521.
Page 42, Item 69. deleted “(ETOPS)”, per MPRR 35521.
B767-2B
Page 1, General Description and Operation, added Item “This check includes ETOPS tasks which require
Technicians to adhere to GMM 04.44 guidelines when performing maintenance on ETOPS aircraft”, per
MPRR 35521.
Page 6, Items 36., 37., 38., and 39. deleted “(ETOPS)”, per MPRR 35521.
Page 7, Item 44. deleted “(ETOPS)”, per MPRR 35521.
Page 8, Item 55. revised to read “Check the No. 1 engine oil level and service with Turbo 2380 oil, if required
(Ref. Fig. 5)”, per MPRR 35521.
Page 8, Item 56. deleted “(ETOPS)”, per MPRR 35521.
Page 9, Item 59. revised to read “Check the No. 2 engine oil level and service with Turbo 2380 oil, if required
(Ref. Fig. 5)”, per MPRR 35521.
REVISION HIGHLIGHTS
B767 LINE MAINTENANCE FORMS MANUAL
Page 9, Item 60. deleted “(ETOPS)”, per MPRR 35521.
Page 10, Items 63. and 64. deleted “(ETOPS)”, per MPRR 35521.
Page 11, Items 66. and 67. deleted “(ETOPS)”, per MPRR 35521.
Page 12, Item 69. deleted “(ETOPS)”, per MPRR 35521.
REVISION HIGHLIGHTS
B767 LINE MAINTENANCE FORMS MANUAL
REVISION 60, DATED 08-29-08
B767-1A
Page 1, added new Item 1.C. Note “M-1A entry required for all O2 bottle servicing. M-1A entry to include
O2 bottle pressure before and after servicing”, per MPRR 35134.
Page 2, revised Item 4. regarding portable oxygen bottles, per MPRR 33876.
B767-1B
Page 2, added new Item 1.C. Note “M-1A entry required for all O2 bottle servicing. M-1A entry to include
O2 bottle pressure before and after servicing”, per MPRR 35134.
Page 3, Item 4. deleted “2 ea.”, per MPRR 33876.
B767-2A
Page 1, added new Item 1.F. Note “M-1A entry required for all O2 bottle servicing. M-1A entry to include
O2 bottle pressure before and after servicing”, per MPRR 35134.
Page 4, Item 5.C. revised to read “Check spare bulb supply, and presence of the thrust reverser isolation valve
deactivation pins (2 ea. P/N B78001-3); replenish as necessary”, per MPRR 34311.
Page 5, added new Item 6.A. Note “M-1A entry required for all O2 bottle servicing. M-1A entry to include
O2 bottle pressure before and after servicing”, per MPRR 35134.
Page 10, deleted Item 12. “TCAS Self-Test” and sub-items; renumbered subsequent items, per MPRR 34267.
Page 13, revised Item 26. regarding portable oxygen bottles, per MPRR 33876.
Page 14, added Item 32.A. Note “714AX only has four (4) volumes”, per MPRR 34271.
Page 55, revised Figure 13, Sheet 1 of 2, “Cockpit Equipment - PC Configured Aircraft”, per MPRR 33876.
B767-2B
Page 2, deleted Item 12. “TCAS Self-Test” and sub-items; renumbered subsequent items, per MPRR 34267.
Page 4, Item 26. deleted “(2 ea. installed in galley and near weight and balance computer) (PC only)”, per
MPRR 33876.
REVISION HIGHLIGHTS
B767 LINE MAINTENANCE FORMS MANUAL
B767-3A
B767-3A, A-Check Description, deleted from B767 Line Maintenance Forms Manual (A-Checks are now in
PMI Job Cards), per MPRR 34281.
B767-3B
B767-3B, A-Check Signoff Record, deleted from B767 Line Maintenance Forms Manual (A-Checks are now
in PMI Job Cards), per MPRR 34281.
REVISION HIGHLIGHTS
B767 LINE MAINTENANCE FORMS MANUAL
REVISION 59, DATED 02-26-08
B767-1A
Page 2, Item 2. added “Reference AMM 25-20-01-6 for net damage, cuts, tears, stitching limits”, per MPRR
34372.
B767-2A
Page 13, Item 23.A. added “Reference AMM 25-20-01-6 for net damage, cuts, tears, stitching limits”, per
MPRR 34372.
Page 23, added new Item 54. “Check external power interrupt spare fuses on P34 panel (2 ea.)”; renumbered
subsequent items, per MPRR 34260.
B767-2B
Page 7, added new Item 54. “Check external power interrupt spare fuses on P34 panel (2 ea.)”; renumbered
subsequent items, per MPRR 34260.
REVISION HIGHLIGHTS
B767 LINE MAINTENANCE FORMS MANUAL
REVISION 58, DATED 01-22-08
B767-1A
Page 1, Item 1.G. revised “(all aircraft)” to “(ETOPS aircraft only)”, per MPRR 33856.
B767-1B
Page 2, Item 1.G. revised “(all aircraft)” to “(ETOPS aircraft only)”, per MPRR 33856.
B767-2A
Page 3, Item 4.A.(6)(a)1 added “and A/T Disc”, per MPRR 33683.
Page 6, Item 7. revised “(applicable for Saturday maintenance visits only)” to “(applicable for Saturday or
Sunday, once per week, maintenance visits only)”, per MPRR 31834.
Page 7, Item 8. revised “(applicable for Saturday maintenance visits only)” to “(applicable for Saturday or
Sunday, once per week, maintenance visits only)”, per MPRR 31834.
Page 9, Item B. revised “(all aircraft)” to “(ETOPS aircraft only)”, per MPRR 33856.
Page 14, Item 26.B. added “If the Maintenance Check fails, use 767 AMM 25-57-33-5, Config. 40 Check
Out Procedure to run Weight and Balance program. If successful, the error in “Maintenance Check” may be
ignored”, per MPRR 34102.
Page 14, added new Item 26.B.(4) “Check battery condition and note % of charge”, per MPRR 33883.
Page 14, added new Item 26.B.(6) Note “If the printer is inoperative, it is acceptable to use the “VIEW”
button in the Maintenance Check program instead of the “PRINT” button to verify the program version and
other error messages. Normal printer operation must then be verified with a test loadplan printout, or deferred
per B767 MEL 25-63-5”, per MPRR 33704.
Page 14, Item 26.B.(6)(a) revised from “Program version is 4.164 (2007.405) or later” to “Program version is
4.222 (2007.1011) or later”, per MPRR 34102.
Page 14, added new Item 26.B.(9) “After 10 minutes of operation, check battery condition for increase in %
of charge”; renumbered subsequent item, per MPRR 33883.
Page 14, added new Item 26.B.(9) Note “Batteries that will not charge above 50% should be replaced”, per
MPRR 33883.
REVISION HIGHLIGHTS
B767 LINE MAINTENANCE FORMS MANUAL
Page 18, Item 44. added “except 84227-XX configuration”, per MPRR 33084.
Page 18, Item 44. added Note “For easy identification, 84227-XX configurations have ball mats installed”,
per MPRR 33084.
Page 23, deleted Item 54. “Check center hydraulic system ADP (Air Driven Pump) oil level and delta “P”
pop-up indicator” and sub-items (moved to B767-3A as new Item 72.); renumbered subsequent items, per
MPRR 33695.
B767-2B
Page 2, Item 7. revised “(applicable for Saturday maintenance visits only)” to “(applicable for Saturday or
Sunday, once per week, maintenance visits only)”, per MPRR 31834.
Page 2, Item 8. revised “(applicable for Saturday maintenance visits only)” to “(applicable for Saturday or
Sunday, once per week, maintenance visits only)”, per MPRR 31834.
Page 6, Item 44. added “except 84227-XX configuration”, per MPRR 33084.
Page 7, deleted Item 54. “Check center hydraulic system ADP (Air Driven Pump) oil level and delta “P” popup indicator” (moved to B767-3A as new Item 72.); renumbered subsequent items, per MPRR 33695.
B767-3A
Revised, per MPRRs 33695, 33121, 33692, 31280, 33652, 33700, 33697, 33862, 33712, and 31848.
B767-3B
Revised, per MPRR 33084.
Also revised to correspond with changes per MPRRs 33695, 33700, 33697, 33862, and 33712.
CHAPTER: 00
SECTION: Index
PAGE:
REV. NO.: 82
DATE: 12-06-10
B767 LINE MAINTENANCE FORMS MANUAL
CARD/FORM
NUMBER
DESCRIPTION
1
PAGES
PAGE
RANGE IN
DIGITAL
FILE
DATE
B767-1A
B767 Daily Check - Description
1-14
37-50
10-28-10
B767-1B
B767 Daily Check - Sign-Off Record
1-4
51-54
10-28-10
B767-2A
B767 Service Check - Description
1-55
55-109
12-06-10
B767-2B
B767 Service Check - Sign-Off Record
1-12
110-121
12-06-10
B767-9
B767 Lightning Strike Checklist
1-6
122-127
10-06-06
B767-14
B767 Bird / Hail Strike Inspection
1-4
128-131
11-17-10
B767-50
B767 APU ECU Function Adjustment
Switches Settings (ECU Installed)
1-2
132-133
02-11-04
B767-51
B767 APU ECU Function Adjustment
Switches Settings (ECU Removed)
1-2
134-135
05-06-03
B767-60
B767 Daily EICAS Non-Normal Fault
Message Retrieval Form
1-2
136-137
10-24-03
B767-90
B767 ETOPS Predeparture Check
1-6
138-143
11-29-10
CARD NO.: B767-1A
PAGE:
B767 DAILY CHECK - DESCRIPTION
NOTE:
1 of 14
REV. NO.: 78
DATE: 10-28-10
The Daily Check is accomplished in accordance with the Description on this Form (B767-1A) and
documented on Sign-Off Form B767-1B.
Configuration Designations - Identifiable Features
PC2SF - B767-200 Package Carrier Converted to an IAI Special Freighter. Main Deck Cargo Door “Door Locked”
external view ports are functional. A protective impact doubler is installed on the external upper corners of the L1 Door
cutout. The supernumerary seat is in the cockpit.
SF - B767-200 IAI Special Freighter. Main Deck Cargo Door “Door Locked” external view ports are functional. The
supernumerary seat is between the cockpit and smoke barrier.
BCSF - B767-200 Boeing Converted Special Freighter. Main Deck Cargo Door “Door Locked” external view ports
cannot be used and are covered with “Do Not Remove” decals. Lavatory is in the cockpit.
BDSF - B767-300 IAI Special Freighter. Main Deck Cargo Door “Door Locked” external view ports are functional.
Airplane has a tail skid. Lavatory is in the cockpit.
FLIGHT COMPARTMENT
Utilize GSE as much as possible to decrease APU operation. Communicate with flight crew on
arrival for any requirements or servicing. Request APU be shut down if GSE equipment is
connected and supplying power to the aircraft. Enter all discrepancies and corrective actions in
Aircraft Log Book (M-1A). Record all non-airworthy and non-safety items that are found during
the check on the Non-Routine Work Sheet (M-17).
Check flight compartment items.
A.
Check Aircraft Logbook for pilot reports.
B.
Remove completed Engine Trend Monitoring Reports from the binder at the operations hub. Aircraft
that do not transit an operations hub, forward to Aircraft Records, ILN.
C.
Check 2 ea. crew oxygen bottle pressures - 1000 psi MINIMUM.
NOTE:
M-1A entry required for all O2 bottle servicing. M-1A entry to include O2 bottle pressure before
and after servicing.
D.
Inspect Logbook binder for serviceable condition.
E.
Inspect document holder sleeves for condition and security. If found unserviceable or in poor
condition, contact Maintenance for deferral I/A/W GMM Chapter 1, Section 07.04.
NOTE:
1.
CARD NO.: B767-1A
PAGE:
2 of 14
REV. NO.: 78
DATE: 10-28-10
B767 DAILY CHECK - DESCRIPTION
LAVATORY
2.
Check Lavatory:
A.
Check for toilet condition.
(1)
Replenish tissue as required.
(2)
If toilet requires servicing, service per MM 38-30-01. If unable to service, contact
Maintenance Control to have servicing performed and place toilet on Deferred Item List.
UPPER CARGO COMPARTMENT
3.
Check the cargo compartment for general condition.
CARD NO.: B767-1A
PAGE:
B767 DAILY CHECK - DESCRIPTION
3 of 14
REV. NO.: 78
DATE: 10-28-10
AIRCRAFT GENERAL
4.
5.
Perform a general visual inspection (walk-around check) of the aircraft fuselage, wings, and empennage
sections (as viewed from ground level).
A.
Perform a general visual inspection (walk-around check) of the aircraft to ensure that all access doors
are secured. Check fuselage, empennage L and R wings, wing tips, and flight control surfaces for
fluid leaks and damage. Correct any discrepancy found, and clean stained areas.
B.
Perform a general visual inspection (from ground level) for missing or damaged navigational/
communication antennas, and static ports, static probes, and angle of attack vanes for obvious
damage.
C.
Check wheel well areas for general condition and evidence of fluid leaks.
D.
Visually inspect wheels for broken, damaged, or missing tie bolts. Replace any wheel with broken or
missing tie bolts.
E.
Check NLG and MLG struts for evidence of leakage. Ref MM 12-15-01 for any corrective action.
(1)
Wipe the exposed chrome surface of the shock strut piston with a clean cloth dampened with
ROYCO “SSF” fluid (MIL-H-5606 or MIL-H-6083 oils are acceptable alternates) to remove
any accumulated grit or grime. Remove debris with a downward motion to prevent inserting
the debris into the shock strut.
F.
Inspect Main Deck Cargo Door within six (6) inches of cutout for dents, nicks, and general condition.
G.
Check the crew oxygen discharge indicator disc for presence.
H.
Check the fuselage in areas of drain masts and drains for fluid leakage.
I.
Check RAM air inlet/exhaust doors for obstructions.
J.
Check fueling station door is secured.
K.
Check the positive pressure relief valves for (FLAG) indication that valves have opened.
L.
Check fuselage exterior skin, doors, door sills, and door seals as viewed from the ground for
condition and obvious damage.
M.
Check tail skid indicator for evidence of tail strike (-300 only).
N.
Visually check lower cargo compartment linings to verify integrity of compartment sealings.
Check tires and wheels for wear, cuts, and obvious damage.
NOTE:
All wheels removed for low pressure should be returned to ABX - ILN. Please note the following
information on the parts tag: “Tire removed due to LOW PRESSURE”, and actual tire pressure
(gauge reading) when removed.
NOTE:
Interior grooves are those exclusive of the grooves in or adjacent to the shoulder areas.
A.
Replace tire when any portion of an interior tread groove is worn away completely around the visible
portion of the circumference, OR when the fabric reinforcing ply is exposed.
NOTE:
Excessive wear past the fabric reinforcing plies could make the tire non-re-treadable.
B.
When a tire is worn-to-limits and requires replacement, but circumstances do not permit, replacement
may be deferred, provided the following conditions are met:
(1)
No more than 5 additional landings are made.
(2)
No peeling or chunking of the tire exists, and no carcass plies are exposed.
(3)
Item is forwarded as a Deferred Item with an entry in the Aircraft Log Book to monitor
landings and tire for maximum wear limits stated in Items A and B above.
CARD NO.: B767-1A
PAGE:
B767 DAILY CHECK - DESCRIPTION
4 of 14
REV. NO.: 78
DATE: 10-28-10
AIRCRAFT GENERAL
(4)
Advise Maintenance Control of requirement to replace deferred tire within 5 landings.
Examine the tires for the presence of contaminants.
(1)
Keep the tires clean of contaminants such as oils, fuels, hydraulic fluids, aircraft cleaning
agents, and greases. Cover the tire if these or other potentially harmful chemicals may spill
or drip on the tire.
(2)
Wipe off the tire with a soapy solution if the tire becomes contaminated.
(3)
The tire should be removed from service as soon as practical if the surface of the tire appears
soft, spongy, or there are bulges present.
6.
Check tires for proper pressure using approved ABX tool.
WARNING:
SERVICE TIRES USING APPROVED ABX TOOL. DO NOT USE AN UNREGULATED,
HIGH PRESSURE NITROGEN SOURCE TO SERVICE TIRES. USE OF AN
UNREGULATED, HIGH PRESSURE NITROGEN SOURCE COULD LEAD TO
EXPLOSIVE TIRE FAILURE AND POSSIBLE INJURY.
C.
CAUTION:
DO NOT LEAVE TIRE UNATTENDED DURING SERVICING, OR OVER-INFLATION
AND EXPLOSION COULD OCCUR.
NOTE:
Never deflate a warm or hot tire to obtain desired pressure.
NOTE:
Required by AD 87-08-09. Service with dry nitrogen only. If nitrogen is not available for reinflation, refer to MM 12-15-03.
A.
When tire pressure is below minimum, re-inflate to desired pressure using approved ABX tool within
the following guidelines:
(1)
When a tire is re-inflated more than 10 PSI, an Aircraft Log Book entry is required.
(2)
If pressure is 10-20 PSI below the lower limit of the applicable inflation range, service tire to
the upper limit of the inflation range and make an entry into the Aircraft Log Book. If log
book indicates a previous history of under-inflation for 3 or more days, tire must be
replaced.
(3)
If pressure is more than 20 PSI below limits, the tire must be replaced prior to further flight.
(4)
Replace both tires on the same axle if the aircraft is taxied with tire deflated, more than 35
PSI below limits, or wheel bearing failure. Removal of the adjacent tire is not required if the
tire deflates while aircraft is parked or under tow.
(5)
Adjacent tire replacement may be deferred if circumstances do not permit, provided the
following conditions are met:
NOTE:
Tires with excessive heat will be too hot to comfortably leave your hand in the shoulder area.
(a)
No more than 5 additional landings are made.
(b)
Tire is visually inspected for signs of damage, excessive heat, bulges, leakage, or
other unusual conditions prior to each flight.
(c)
Tire pressure is checked and properly serviced.
(d)
Item is forwarded as a Deferred Item with an entry in the Aircraft Log Book to
monitor landings and tire condition per items (a) and (b) above.
(e)
Advise Maintenance Control of requirement to replace deferred tire within 5
landings.
CARD NO.: B767-1A
PAGE:
B767 DAILY CHECK - DESCRIPTION
5 of 14
REV. NO.: 78
DATE: 10-28-10
AIRCRAFT GENERAL
7.
Check brakes for wear, evidence of leakage, and damage.
CAUTION:
DO NOT LEAVE BRAKES SET FOR MORE THAN FIVE MINUTES WHEN HOT. DO
NOT SET BRAKES UNDER EXTREME CONDITIONS.
A.
Prepare for the inspection.
(1)
Ensure the downlocks are installed on the nose and main landing gear (AMM 32-00-20).
(2)
Ensure that chocks are installed on the wheels.
(3)
Release the parking brake.
B.
Procedure
CAUTION:
BE VERY CAREFUL WHEN YOU DO A CHECK OF THE BRAKES TO NOT SPILL
HYDRAULIC BRAKE FLUID ON THE BRAKE LININGS. IF YOU SPILL BRAKE FLUID ON
THE BRAKE LININGS, THE BRAKES WILL NOT OPERATE CORRECTLY.
(1)
Pressurize the right hydraulic system and reservoir (AMM 29-11-00/201).
(2)
Fully apply and release the left and right Captain’s or First Officer’s brake pedals five times.
(3)
With the brake pedals not applied, do a check of the brakes for fluid leaks at these locations:
(a)
Brake pistons.
(b)
Brake housing plugs.
(c)
Inlet and drain ports.
(d)
Bleed ports.
(e)
All hydraulic line connections.
(4)
If the total leakage per brake at the above locations is greater than one (1) drop per minute
with the brake pedals not applied, repair the leaks or replace the brake prior to dispatch.
(5)
Slowly apply the brake pedals to the stops.
(6)
While the brake pedals are applied, do a check for leaks at the same places on the brake that
you did in Step (3).
(7)
If the total leakage per brake at the above locations is greater than five (5) drops per minute
while the brakes are being applied, repair the leakage or replace the brake prior to dispatch.
(8)
Brakes with leaks below these limits must be rechecked prior to each flight, and should be
repaired or replaced at the next opportunity that manpower and material allow.
(9)
If it is suspected that a brake has been exposed to significant levels of contamination, the
brake should be removed, inspected, and cleaned in accordance with the brake supplier
component maintenance manual. Signs of contamination include a wet or oily appearance,
buildup of charred residue, or heavy smoking after landing.
(10)
Release the brakes and ensure that the pressure plate returns to the proper brake released
position.
C.
Do a check for missing brake wear indicator pins.
CAUTION:
DO NOT LEAVE BRAKES SET FOR MORE THAN FIVE MINUTES WHEN HOT. DO NOT
SET BRAKES UNDER EXTREME CONDITIONS.
(1)
Set parking brake.
NOTE:
Each brake has two brake wear indicator pins.
(a)
If the two wear pins are missing, you must replace the brake prior to the next flight.
(b)
If one wear pin is missing, the brake can stay in service if the remaining wear pin
operation is satisfactory.
CARD NO.: B767-1A
PAGE:
B767 DAILY CHECK - DESCRIPTION
6 of 14
REV. NO.: 78
DATE: 10-28-10
AIRCRAFT GENERAL
NOTE:
Required by AD 91-18-10. Aircraft cannot be dispatched if fwd or aft brake wear indicator pin is
below FLUSH with brakes parked and hydraulic system pressurized. Brake wear pin limits are
more restrictive than the AD. Limits on the brake wear indicator pins are 1/32” with brakes parked
(not flush) (Ref. Figure 1).
(c)
Measure fwd and aft brake wear indicator pins. Replace brake if end of fwd or aft
wear pins is 0.031 (1/32 inch) or less from housing sub-assembly (brakes parked
and hydraulic system pressurized).
(d)
Remove the pressure from the right hydraulic system if it is not necessary (AMM
29-11-00).
(e)
Release parking brake.
CARD NO.: B767-1A
PAGE:
B767 DAILY CHECK - DESCRIPTION
7 of 14
REV. NO.: 78
DATE: 10-28-10
ENGINES AND PYLONS
CF6-80A SERIES
8.
9.
Perform a general visual inspection (walk-around check) of the No. 1 and No. 2 engines. Check engine
cowling, engine inlet, fan rotor spinner, fan rotor blades, pylons, open blow-out doors, open latches, visible
turbine blades, and exhaust area for obvious damage and fluid leaks.
Check the No. 1 and No. 2 engine oil level using EICAS and service with Turbo 2380 oil if required (Ref.
Figure 2). An EICAS indication of 20 or more is full and oil servicing is not required.
NOTE:
When servicing the oil tank, observe for odor of fuel at engine oil tank fill port. If you find fuel in
the oil system, you must do the troubleshooting procedure (FIM 71-05-00/101, Fig. 129) and flush
the oil system (AMM 79-11-00/301).
A.
Open the engine oil servicing door on right fan cowl panel.
B.
Check oil level as indicated by the hollow ball in the sight glass within 30 minutes of shutdown.
WARNING:
LUBRICATING OILS CONTAIN ADDITIVES WHICH ARE READILY ABSORBED
THROUGH THE SKIN AND ARE CONSIDERED TOXIC. AVOID PROLONGED OR
CONTINUOUS CONTACT OF LUBRICATING OIL WITH SKIN.
CAUTION:
IF INADVERTENTLY SERVICED WITH DISSIMILAR FLUIDS SUCH AS MIL-L-6081
FLUSHING OIL OR HYDRAULIC FLUID, DO NOT OPERATE ENGINE UNTIL A
COMPREHENSIVE EVALUATION OF EFFECTS ON OIL SYSTEM AND ENGINE IS
PERFORMED AND CORRECTIVE ACTION IS COMPLETED.
NOTE:
A sight glass with a hollow float ball is installed below the fill port scupper. The oil tank is fully
serviced when the ball is at the top of the glass.
NOTE:
Use oil from freshly opened cans in order to assure that uncontaminated oil is used.
WARNING:
WAIT A MINIMUM OF 5 MINUTES AFTER ENGINE IS SHUT DOWN BEFORE
REMOVING FILLER CAP TO ALLOW TANK PRESSURE TO BLEED OFF. HOT OIL
GUSHING FROM TANK COULD CAUSE SEVERE BURNS IF FILLER NECK FLOAT
VALVE IS DISPLACED BEFORE PRESSURE DISSIPATES.
C.
If the oil level is below the top of the sight glass, remove engine oil tank filler cap. Add oil in whole
quart quantities only. When the floating ball reaches the top of the sight glass, continue to pour in any
remaining oil until the quart can is empty. Do not add any more oil.
NOTE:
Make sure you add oil slowly and carefully. If you add oil into the filler cap too quickly, the oil may
flow out the fill port. The internal self-sealing valve limits the flow of oil to 1 quart (1 liter) every
40 seconds at 70oF (21oC).
D.
If an excessive amount of oil is used (0.55 U.S. quarts per hour or more), contact Maintenance
Control (Ref. MM 71-00-00) indicating:
(1)
Aircraft Number.
(2)
Engine Position.
(3)
Qty per flight hour used.
(4)
Qty oil added.
CARD NO.: B767-1A
PAGE:
B767 DAILY CHECK - DESCRIPTION
REV. NO.: 78
DATE: 10-28-10
ENGINES AND PYLONS
CF6-80A SERIES
E.
F.
G.
H.
8 of 14
Install filler cap, and check for looseness and positive locking.
Verify the ball is at the top of the sight glass.
Close the engine oil servicing door on the right fan cowl panel.
Record OIL ADDED - QUARTS in aircraft log book. If no oil was added, enter zero (0).
CARD NO.: B767-1A
PAGE:
B767 DAILY CHECK - DESCRIPTION
9 of 14
REV. NO.: 78
DATE: 10-28-10
ENGINES AND PYLONS
PW4000 SERIES
10.
Perform a general visual inspection (walk-around check) of the No. 1 and No. 2 engines. Check engine
cowling, engine inlet, fan rotor spinner, fan rotor blades, fan cowls, pylons, open blow-out doors, open latches,
visible turbine blades, and exhaust area for obvious damage and fluid leaks.
11.
Service at No. 1 and No. 2 engines with 2380 engine oil (Ref. Figure 3).
A.
Engine Oil Check
(1)
To check the engine oil, wait a minimum of 15 minutes and a maximum of 2 hours after
initial engine shut down.
(2)
If the engine has been shut down for more than 2 hours, motor engine for 2 minutes (AMM
71-00-00/201) before checking the oil level.
(3)
Check the oil level indication using the EICAS. Full is: Left 24 + 3, Right 21 + 3.
(4)
If engine EICAS indicates Left 21, Right 19 or less, engine oil must be added.
(5)
If next flight segment is ETOPS, oil tank level must be visually checked.
B.
Engine Oil Servicing
(1)
Supply electrical power (Ref. 24-22-00).
WARNING:
DO THE THRUST REVERSER DEACTIVATION PROCEDURE TO PREVENT THE
OPERATION OF THE THRUST REVERSER. ACCIDENTAL OPERATION OF THE
THRUST REVERSER CAN CAUSE INJURY TO YOU OR DAMAGE TO EQUIPMENT.
(2)
Do the Thrust Reverser for Ground Maintenance (Ref. 78-31-00/201).
(3)
Open the access door to the oil tank of the left side of the core cowl panel.
(4)
Do the steps that follow to open the oil tank cap:
WARNING:
BEFORE YOU OPEN THE OIL TANK CAP, PERMIT A MINIMUM OF FIVE MINUTES
AFTER ENGINE SHUTDOWN TO LET THE PRESSURE IN THE OIL TANK BLEED OFF.
A FAST FLOW OF HOT OIL CAN OCCUR AND CAUSE INJURY TO YOU.
CAUTION:
DO NOT USE THE OIL TANK SIGHT GAGE TO DO A CHECK OF THE OIL LEVEL.
YOU MUST LOOK INSIDE THE OIL TANK TO CORRECTLY MEASURE THE OIL.
(a)
Lift the handle to the position vertical to the top of the oil tank cap.
(b)
Turn the handle counter-clockwise to the OPEN position.
(c)
Remove the oil tank cap from the filler neck.
(5)
Look inside the oil tank at the oil (Ref. Figure 4).
NOTE:
If you see “black oil” in the oil system, refer to AMM 72-00-00/601. Black oil can be an indication
of a serious problem, or it can be a condition that requires no maintenance action.
(6)
If you do not see oil (the oil is below the bottom of the “V”):
(a)
With a clean screwdriver, push open the valve of the filler neck.
(b)
With a strong light, look at the oil.
CAUTION:
DO NOT OVERFILL THE ENGINE OIL. TOO MUCH OIL IN THE ENGINE COULD RESULT
IN ENGINE DAMAGE.
(c)
Add oil in whole quart quantities only. When the oil level reaches the bottom of the
“V”, continue to pour in any remaining oil until the quart can is empty. Do not add
any more oil.
CARD NO.: B767-1A
PAGE:
B767 DAILY CHECK - DESCRIPTION
10 of 14
REV. NO.: 78
DATE: 10-28-10
ENGINES AND PYLONS
PW4000 SERIES
(7)
(8)
(9)
(10)
(11)
(12)
If an excessive amount of oil is used (0.5 U.S. quarts per hour or more), contact Maintenance
Control (Ref. MM 71-00-00) indicating:
(a)
Aircraft Number.
(b)
Engine Position.
(c)
Qty per flight hour used.
(d)
Qty oil added.
If you do see oil (the oil is above the bottom of the “V”)
(a)
Do not add engine oil.
Install the oil tank cap as follows:
(a)
Do a visual inspection of the oil tank cap packing to ensure it is free of cuts and
shows no evidence of deterioration.
(b)
Lubricate the packing of the oil tank cap with engine oil.
(c)
Turn the handle on the oil tank cap to the OPEN position, with the smooth side of
the handle away fro the recess.
(d)
Align the lugs of the oil tank cap with the slots in the filler neck.
(e)
Install the oil tank cap into the filler neck.
(f)
Lock the oil tank cap.
(g)
Apply pressure down on the oil tank cap.
(h)
Turn the handle to the CLOSE position (approximately 45 degrees).
(i)
Pull up on the handle to make sure that the installation of the oil tank cap is correct.
(j)
Put the handle in the recess to lock the oil tank cap.
(k)
Apply pressure to the outer rim of the oil tank cap at the opposite points to make
sure that the installation is correct.
Make sure that the oil tank cap does not move.
Close the access door to the oil tank on the left core cowl panel.
Make sure the EICAS oil indication is Left 24 + 3, Right 21 + 3
Record OIL ADDED - QUARTS in aircraft log book. If no oil was added, enter zero (0).
CARD NO.: B767-1A
PAGE:
B767 DAILY CHECK - DESCRIPTION
NOTE:
11 of 14
REV. NO.: 78
DATE: 10-28-10
Replace brake if end of fwd or aft wear indicator pins are 0.031 (1/32 inch) or less with brakes parked
and hydraulic system pressurized.
BRAKE INDICATOR PIN LIMIT
FIGURE 1
CARD NO.: B767-1A
PAGE:
B767 DAILY CHECK - DESCRIPTION
ENGINE OIL SERVICING
FIGURE 2
12 of 14
REV. NO.: 78
DATE: 10-28-10
CARD NO.: B767-1A
PAGE:
B767 DAILY CHECK - DESCRIPTION
PW 4000 ENGINE OIL SERVICING
FIGURE 3
13 of 14
REV. NO.: 78
DATE: 10-28-10
CARD NO.: B767-1A
PAGE:
B767 DAILY CHECK - DESCRIPTION
PW 4000 ENGINE OIL SERVICING
FIGURE 4
14 of 14
REV. NO.: 78
DATE: 10-28-10
CARD NO.: B767-1B
PAGE:
REV. NO.: 78
DATE: 10-28-10
B767 DAILY CHECK - SIGN-OFF RECORD
AIRCRAFT NO. STATION
LOG PAGE NO. WORK ORDER NO.
1 of 4
DATE
TOTAL SIGN-OFF
PAGES: 4
GENERAL DESCRIPTION AND OPERATION
NOTE:
The Sign-Off Section of the Daily Check (Form B767-1B) is a signature record and contains general
information only. The Description Section on Form B767-1A MUST be used to accomplish the Daily
Check.
Configuration Designations - Identifiable Features
PC2SF - B767-200 Package Carrier Converted to an IAI Special Freighter. Main Deck Cargo Door “Door Locked”
external view ports are functional. A protective impact doubler is installed on the external upper corners of the L1 Door
cutout. The supernumerary seat is in the cockpit.
SF - B767-200 IAI Special Freighter. Main Deck Cargo Door “Door Locked” external view ports are functional. The
supernumerary seat is between the cockpit and smoke barrier.
BCSF - B767-200 Boeing Converted Special Freighter. Main Deck Cargo Door “Door Locked” external view ports
cannot be used and are covered with “Do Not Remove” decals. Lavatory is in the cockpit.
BDSF - B767-300 IAI Special Freighter. Main Deck Cargo Door “Door Locked” external view ports are functional.
Airplane has a tail skid. Lavatory is in the cockpit.
•
•
•
•
•
•
•
Utilize GSE as much as possible to decrease APU operation.
Communicate with flight crew on arrival for any servicing or special requirements. Check aircraft Logbook for
pilot reports.
Enter all discrepancies and corrective actions in Aircraft Logbook (M-1A).
Record all non-airworthy and non-safety items that are found during the check on the Non-Routine Work Sheet
(M-17).
If any errors are identified with a Line Maintenance Check, submit a Maintenance Programs Revision Request
(MPRR) per GMM Chapter 1, Section 01.03, and forward to maintenance Programs.
Any material referenced in the text or tables of the Line Maintenance Checks may be substituted in accordance
with the Consumable Material Equivalents List located in Chapter 20, B767 Maintenance Manual. This bullet item
does not apply to AD related tasks.
This check includes ETOPS tasks which require Technicians to adhere to GMM 04.44 guidelines when performing
maintenance on ETOPS aircraft.
CERTIFICATION OF AIRWORTHINESS
All signoff pages of the check have been received, action taken where necessary, and initialed properly. Aircraft Logbook properly noted GMM Chapter 1, Section 04.03. Forward all sign-off sheets and attach M-17 forms to Aircraft
Records, ILN.
Daily Check Completed. _______________________________
A & P Technician (signature)
CARD NO.: B767-1B
PAGE:
B767 DAILY CHECK - SIGN-OFF RECORD
AIRCRAFT NO.
Mechanic’s
Initials
2 of 4
REV. NO.: 78
DATE: 10-28-10
DATE
Job Description
FLIGHT COMPARTMENT
1
Mechanic’s
Initials
2
Mechanic’s
Initials
3
Mechanic’s
Initials
4
5
6
1.
Check flight compartment items.
A.
Check Aircraft Logbook for pilot reports.
B.
Remove Engine Trend Monitoring Reports from binder sheets, at ILN or from
aircraft that are not returning to ILN, and forward to Aircraft Records, ILN.
C.
Check 2 ea. crew oxygen bottle pressures - 1000 psi MINIMUM.
NOTE:
M-1A entry required for all O2 bottle servicing. M-1A entry to include O2 bottle
pressure before and after servicing.
D.
Inspect Logbook binder for serviceable condition.
E.
Inspect document holder sleeves for condition and security. If found unserviceable
or in poor condition, contact Maintenance for deferral I/A/W GMM Chapter 1,
Section 07.04.
Job Description
LAVATORY
2.
Check lavatory.
Job Description
UPPER CARGO COMPARTMENT
3.
Check the cargo compartment for general condition.
Job Description
AIRCRAFT GENERAL
4.
Perform a general visual inspection (walk-around check) of the aircraft fuselage, wings, and
empennage sections (as viewed from ground level).
5.
Check tires and wheels for wear, cuts, and obvious damage.
6.
Check tires for proper pressure using approved ABX tool.
WARNING:
SERVICE TIRES USING APPROVED ABX TOOL. DO NOT USE AN
UNREGULATED, HIGH PRESSURE NITROGEN SOURCE TO SERVICE
TIRES. USE OF AN UNREGULATED, HIGH PRESSURE NITROGEN
SOURCE COULD LEAD TO EXPLOSIVE TIRE FAILURE AND
POSSIBLE INJURY.
NOTE:
Required by AD 87-08-09. Service with dry nitrogen only. If dry nitrogen is not
available for reinflation, refer to MM 12-15-03.
-200
COLD
WARM
HOT
NOSE TIRES
145-150 PSI
151-160 PSI
---------MAIN TIRES
185-190 PSI
191-200 PSI
201-205 PSI MIN
-300
COLD
WARM
HOT
NOSE TIRES
175-180 PSI
181-190 PSI
---------MAIN TIRES
195-200 PSI
201-210 PSI
211-215 PSI MIN
CARD NO.: B767-1B
PAGE:
B767 DAILY CHECK - SIGN-OFF RECORD
AIRCRAFT NO.
3 of 4
REV. NO.: 78
DATE: 10-28-10
DATE
Mechanic’s
Initials
Job Description
AIRCRAFT GENERAL
7
7.
8
8.
9
9.
Mechanic’s
Initials
Check brakes for wear, evidence of leakage, and damage.
A.
Replace brake if end of fwd or aft wear indicator pins are 0.031 (1/32 inch) or less
with brakes parked and hydraulic system pressurized (Ref. Fig. 1).
NOTE:
Required by AD 91-18-10. Under no circumstances may an aircraft be dispatched
with end of fwd or aft wear indicator pins below FLUSH with brakes parked.
BRAKE WEAR PIN LIMITS ARE MORE RESTRICTIVE THAN THE AD.
LIMITS ON THE BRAKE WEAR INDICATOR PINS ARE 1/32” WITH THE
BRAKES PARKED (NOT FLUSH) (REF. FIGURE 1).
Job Description
ENGINES & PYLONS
CF6-80A ENGINES ONLY
Perform a general visual inspection (walk-around check) of the No. 1 and No. 2 engines.
Check engine cowling, engine inlet, fan rotor spinner, fan rotor blades, pylons, open blowout
doors, open latches, visible turbine blades, and exhaust area for obvious damage and fluid
leaks.
Check the No. 1 and No. 2 engine oil levels using EICAS and service with Turbo 2380 oil, if
required (Ref. Figure 2). An EICAS indication of 20 or more is full and oil servicing is not
required.
Record OIL ADDED - QUARTS in aircraft log book. If no oil was added, enter
zero (0).
WARNING:
NOTE:
ON GE CF6-80A ENGINES, SERVICING SHOULD BE ACCOMPLISHED
WITHIN 30 MINUTES OF ENGINE SHUTDOWN. WAIT A MINIMUM OF
5 MINUTES AFTER ENGINE SHUTDOWN BEFORE REMOVING
FILLER CAP.
(CF6-80A Engines) Oil consumption is acceptable if consumption is not more
than 0.55 U.S. quarts per hour (ref. MM 71-00-00). If excessive amount of oil is
added, notify Maintenance Control.
CARD NO.: B767-1B
PAGE:
B767 DAILY CHECK - SIGN-OFF RECORD
AIRCRAFT NO.
4 of 4
REV. NO.: 78
DATE: 10-28-10
DATE
Mechanic’s
Initials
Job Description
ENGINES & PYLONS
PW 4000 ENGINES ONLY
10
10.
Perform a general visual inspection (walk-around check) of the No. 1 and No. 2 engines.
Check engine cowling, engine inlet, fan rotor spinner, fan rotor blades, pylons, open blowout doors, open latches, visible turbine blades, and exhaust area for obvious damage and
fluid leaks.
11
11.
Check the No. 1 and No. 2 engine oil levels using EICAS, and service with Turbo Oil 2380 if
required. An EICAS indication of Left 24 + 3, Right 21 + 3 is full, and oil servicing is not
required.
If next flight segment is ETOPS, oil tank level must be visually checked.
Record OIL ADDED - QUARTS in aircraft log book. If no oil was added, enter zero
(0).
WARNING:
NOTE:
NOTE:
NOTE:
WAIT A MINIMUM OF 5 MINUTES AFTER ENGINE SHUTDOWN BEFORE
REMOVING FILLER CAP.
Servicing should be accomplished between 15 minutes and 2 hours of engine
shutdown.
If engine has been shut down for more than 2 hours, dry motor engine for 2
minutes before checking the oil level.
(PW 4000 Engines) Engine oil consumption is acceptable if consumption is not
more than 0.5 U.S. quarts per hour (Ref. MM 71-00-00). If excessive amount of
oil is added, notify Maintenance Control.
CARD NO.: B767-2A
PAGE:
B767 SERVICE CHECK - DESCRIPTION
NOTE:
1 of 55
REV. NO.: 82
DATE: 12-06-10
The Service Check is accomplished in accordance with the Description on this Form (B767-2A) and
documented on Sign-Off Form B767-2B.
Configuration Designations - Identifiable Features
PC2SF - B767-200 Package Carrier Converted to an IAI Special Freighter. Main Deck Cargo Door “Door Locked”
external view ports are functional. A protective impact doubler is installed on the external upper corners of the L1 Door
cutout. The supernumerary seat is in the cockpit.
SF - B767-200 IAI Special Freighter. Main Deck Cargo Door “Door Locked” external view ports are functional. The
supernumerary seat is between the cockpit and smoke barrier.
BCSF - B767-200 Boeing Converted Special Freighter. Main Deck Cargo Door “Door Locked” external view ports
cannot be used and are covered with “Do Not Remove” decals. Lavatory is in the cockpit.
BDSF - B767-300 IAI Special Freighter. Main Deck Cargo Door “Door Locked” external view ports are functional.
Airplane has a tail skid. Lavatory is in the cockpit.
ABBREVIATED SERVICE CHECK
1.
If the aircraft has sat statically, the main engines have not been operated, and less than 72 hours have elapsed
since the last full Service Check, perform this step and N/A the remainder of Service Check. If the aircraft has
moved, the main engines have been operated, or 72 hours have elapsed since the last full Service Check,
accomplish remainder of Service Check. In either case, document accomplishment of Abbreviated Service
Check or Service Check with a log book entry.
NOTE:
External/APU power must be applied with the hydraulic and fuel systems pressurized. DO NOT
operate the main engines for this step. Operating the main engines prior to or during the reduced
check will require a full Service Check to be accomplished. Detailed instructions stated in the
Service/A Check Description must be referenced for the following items.
A.
Place “Maintenance In Work” placard in front of radar display.
B.
Review the aircraft log book and Deferred Items.
C.
Apply external/APU power to the aircraft and pressurize the hydraulic and fuel systems.
D.
Check battery voltage.
E.
Check general condition of cockpit and cabin areas.
F.
Check oxygen bottles for required pressure.
NOTE:
M-1A entry required for all O2 bottle servicing. M-1A entry to include O2 bottle pressure before
and after servicing.
G.
Check the cockpit fire extinguishers for required pressure.
H.
Ensure weight and balance computers are operable.
I.
Check the hydraulic brake pressure.
J.
From the ground, check for fluid leakage and general condition of the entire aircraft.
K.
Check MLG strut height and tire pressure.
CARD NO.: B767-2A
PAGE:
B767 SERVICE CHECK - DESCRIPTION
2 of 55
REV. NO.: 82
DATE: 12-06-10
ABBREVIATED SERVICE CHECK
L.
M.
N.
O.
P.
Q.
Check main hydraulic system reservoir quantity.
Check NLG strut height and tire pressure.
Check each engine fire extinguishing discharge light is not illuminated.
Sump fuel tanks checking for water and sediments.
Ensure all access doors, panels, and cowlings are closed and secured.
Check that the aircraft log book has been properly cleared, signed, and that the inspection has been
entered. Check that non-routine items generated are corrected.
R.
Remove external/APU power from the aircraft.
S.
Check APU/oil quantity if APU has been operated since the last service check.
T.
Stow “Maintenance In Work” placard in F/O’s seat back pocket.
NOTE:
Utilize GSE as much as possible to decrease APU operation. Communicate with flight crew on
arrival for any servicing or special requirements. Check aircraft Log Book for pilot reports. Enter
all discrepancies and corrective actions in Aircraft Log Book (M-1A). Record all non-airworthy
and non-safety items that are found during the check on the Non-Routine Work Sheet (M-17).
CARD NO.: B767-2A
PAGE:
B767 SERVICE CHECK - DESCRIPTION
3 of 55
REV. NO.: 82
DATE: 12-06-10
FLIGHT COMPARTMENT
2.
Perform an EICAS maintenance message read-out and record in A/C Logbook (Ref. Figures 1, 2, and 3).
NOTE:
Ensure all prerequisites are met in step A.
NOTE:
Figures 1, 2, and 3 contain additional information to aid the mechanic in troubleshooting.
NOTE:
If EICAS maintenance level messages are not recorded as soon as the aircraft is released to
maintenance, it is possible to set EICAS maintenance level messages in the course of other
maintenance performed on the aircraft. The technician should determine if messages are generated
by other maintenance, and not record them in the log book. Recording maintenance generated
messages could cause unnecessary follow-up work. If the validity of the message cannot be
determined, enter the information in the log book, and not if the message cleared after EICAS erase
procedure.
NOTE:
Required by CMR 31-41-00-2A at 100 HR intervals, accomplished at each Service Check.
A.
Accomplish a read-out of EICAS maintenance messages:
PREREQUISITES
Standby Power Selector ..................AUTO
Battery Switch.................................LATCHED ON
External/APU Power.......................ON
All Three IRUs................................ALIGNED WITH PRESENT POSITION
SAM Modules in MEC ...................CLEAR FAULT BALLS
Yaw Damper Modules in MEC.......CLEAR FAULT BALLS
Parking Brake..................................SET
(1)
On the EICAS maintenance panel (P-61), press the ECS/MSG Select switch. Maintenance
messages will be displayed in white lettering on the right side of the lower EICAS screen. If
the message “page 1” or “page 2” appears at the bottom of the message list, pressing the
ECS/MSG switch will cause additional messages to be displayed.
(2)
Record each of the messages as a separate item in the aircraft logbook. Consult the EICAS
Message Table (Ref. MM 31-41-00) for general conditions which generate each message.
Note which messages may have been generated as part of an Auto Event (ECS, HYD, ELEC
or APU) since these messages may have a "Snap Shot" of the respective system parameters
recorded.
(3)
Operationally check each item, or perform a BITE check as applicable, and correct any
discrepancies as necessary.
NOTE:
Any time the Inertial Reference Units are shut down, the L FLT CONT ELEC and R FLT CONT
ELEC maintenance messages will be generated and latched in Non-Volatile Memory. These
messages DO NOT indicate a malfunction unless they cannot be erased by the method outlined
below.
B.
When all discrepancies are cleared, the maintenance messages must be erased by the following
methods:
(1)
Messages recorded in Non-Volatile Memory (NVM) are recalled by pressing the ECS/MSG
switch to display all messages, then pressing the AUTO switch to isolate the NVM
messages. These messages may then be erased by pressing the ERASE switch for 5
seconds.
CARD NO.: B767-2A
PAGE:
B767 SERVICE CHECK - DESCRIPTION
4 of 55
REV. NO.: 82
DATE: 12-06-10
FLIGHT COMPARTMENT
(2)
3.
Messages which are latched in the memory of the various BITE boxes on the aircraft are also
displayed on the ECS/MSG page. Messages may only be erased by clearing the faults from
the individual system BITE box. For example, an EEC MONITOR message on the ECS/
MSG page may only be cleared by depressing the RESET switch on the EEC MONITOR
and clearing the stored data.
(3)
Some maintenance messages are generated when individual component malfunctions are
sensed. These messages are erased when normal system operation is restored.
(4)
The EICAS BITE message may be erased by first depressing the TEST switch on the
EICAS maintenance panel (P-61) and releasing it. This initiates the EICAS Self-Test, which
terminates after 5 seconds. After the test is complete and a TEST OK is annunciated,
depress the ERASE switch and release it. The message PRESS ERASE TO CLEAR
MEMORY will appear on the EICAS screen. Depress the ERASE switch a second time and
release it. The message MEMORY CLEARED will appear on the EICAS screen. Depress
the TEST switch on the EICAS Maintenance Panel and release it. The test pattern will
extinguish and the normal engine display will return.
NOTE:
Figures 1, 2, and 3 contain additional information to aid mechanic in troubleshooting.
C.
Record all EICAS maintenance messages in the aircraft logbook. Indicate the appropriate action
taken per paragraph A. (2) & (3).
NOTE:
If there are no EICAS maintenance messages, record in logbook that no messages were found.
Operationally Check the Takeoff Configuration Warning Alert (N315AA Only)
NOTE:
Required by CMR 31-51-00-5C. Interval should not exceed 72 elapsed clock hours.
A.
Procedure
(1)
Make sure the Parking Brake is set (AMM 32-44-00/101).
(2)
Make sure the P10 control stand Parking Brake Light is on.
(3)
Push the EICAS Test Switch on the P61 EICAS maintenance panel.
(4)
Verify the following:
(a)
The red CONFIG light on the instrument panel is on.
(b)
The WARNING lights on the glareshield come on.
(c)
The siren Aural Warning is on.
(d)
The red EICAS message “PARKING BRAKE” shows on the upper EICAS display.
NOTE:
These EICAS messages may or may not appear depending on
airplane configuration and should be ignored: (1) SPOILERS, (2)
FLAPS, (3) STABILIZER, (4) MAIN CARGO DOOR.
NOTE:
(5)
The red PARKING BRAKE message will show if you push the TEST
switch again in less than 6 seconds. After 6 seconds, only the yellow
PARKING BRAKE message will show.
Push and release the EICAS Self Test button to return the EICAS to normal operation.
NOTE:
(6)
The EICAS warning messages may not come on if you wait more than
approximately 10 seconds before you push the EICAS Test Switch. The MAIN
CARGO DOOR will extinguish immediately if it appears.
Do the EICAS maintenance message erase procedure as necessary (AMM 31-41-00/201).
CARD NO.: B767-2A
PAGE:
B767 SERVICE CHECK - DESCRIPTION
5 of 55
REV. NO.: 82
DATE: 12-06-10
FLIGHT COMPARTMENT
(7)
If any of the above conditions cannot be verified, troubleshoot and repair the Takeoff
Warning System, and do the Takeoff Configuration Warning Alert check again (AMM 3151-00/101).
4.
Check LT, CTR, and RT hydraulic fluid quantities using EICAS status display. If servicing is required, refer to
MM 12-12-01.
A.
Release parking brakes and pressurize systems for approximately one (1) minute.
B.
With pumps “OFF” quantity should read between 0.88 and 1.11 for left and right systems, and
between 0.93 and 1.07 for the center system.
NOTE:
RF (refill) message appears on EICAS when HYD QTY reading is 0.75 or below. If O/FULL
(overfull) appears, refer to MM 12-12-01 for servicing.
5.
Check operation and illumination of all flight compartment lights.
NOTE:
Ensure each indicator has two functional lamps. If not, re-lamp as necessary.
A.
Press MASTER DIM and TEST SWITCH to illuminate all flight compartment lights.
(1)
Supply electrical power (AMM 24-22-00/201).
(2)
Ensure the equipment cooling system is operating (AMM 21-58-00/501).
(3)
Ensure the flight data recorder system is operating (AMM 31-31-00/501).
NOTE:
On a bright day, put a cover on the windshield to make it easier to do this test.
(4)
At the overhead panel (P5), ensure the light override switch is in the OFF mode.
(5)
At the P5 panel, set the switch for the indicator lights to the bright mode.
(6)
Put the adjacent test switch to the ON mode.
(a)
Ensure all of the annunciators (lights and switches) connected to the master dim
and test system come on brightly.
1
Ensure the Alt Alert, A/P, A/P Disc, and A/T Disc annunciator lights are
on.
(7)
Set the switch for the indicator lights to the dim mode.
(a)
Ensure the annunciators (lights and switches) connected to the master dim and test
system become dim.
(8)
When the test is done, put the test switch in the OFF mode.
(9)
Set the switch for the indicator lights to the usual mode.
(10)
Put the aircraft back to its usual condition.
CAUTION:
DO NOT KEEP THE EMERGENCY LIGHTS ON FOR MORE THAN 1 MINUTE.
EXTENDED OPERATION WILL REDUCE THE CHARGE ON THE BATTERIES AND
MAY RESULT IN DAMAGE.
B.
Check flight compartment emergency lights.
(1)
Select emergency lights switch to ARMED. Verify UNARM light is extinguished and the
emergency lights did not illuminate (validates 28 VDC). Pin 2 power system (i.e., ground
service buss).
(2)
Turn emergency light switch to ON. Verify all emergency lights illuminate and UNARM
light is ON.
CARD NO.: B767-2A
PAGE:
B767 SERVICE CHECK - DESCRIPTION
6 of 55
REV. NO.: 82
DATE: 12-06-10
FLIGHT COMPARTMENT
6.
PC2SF Aircraft:
L388 - L1 Door (L/H Grd Illum)...................Exterior Light
L312 - L1 Threshold Exit Sign......................Interior Light
L313 - L1 Door Ovhd Light ..........................Interior Light
L9201 - L1 Door Exit Sign............................Interior Light
L950 - Cockpit Door Exit Sign......................Interior Light
SF and BDSF Aircraft:
L388 - L1 Door (L/H Grd Illum)...................Exterior Light
L312 - L1 Threshold Exit Sign......................Interior Light
L313 - L1 Door Ovhd Light ..........................Interior Light
L393 - R1 Door (R/H Grd Illum) ..................Exterior Light
L287 - R1 Threshold Exit Sign......................Interior Light
L288 - R1 Door Ovhd Light ..........................Interior Light
L950 - Cockpit Door Exit Sign......................Interior Light
BCSF Aircraft:
L1343 - L1 Door (L/H Grd Illum).................Exterior Light
L312 - L1 Door Threshold Exit Sign.............Interior Light
L313 - L1 Door Ovhd Light ..........................Interior Light
L1342 - Entryway Ovhd Light ......................Interior Light
L1270 - Cockpit Ovhd Light, LH ..................Interior Light
L1271 - Cockpit Ovhd Light, RH..................Interior Light
NOTE:
One minute maximum to prevent depleting emergency battery pack voltage.
(3)
Turn emergency light switch to OFF. Verify the interior and exterior emergency lights
extinguish and overhead panel UNARMED light is ON.
Perform a general visual inspection of flight compartment, including windows, for general condition,
cleanliness, and security.
A.
Check Aircraft Logbook for pilot reports.
B.
Remove completed Engine Trend Monitoring Reports from the binder at the operations hub. Aircraft
that do not transit an operations hub, forward to Aircraft Records, ILN.
C.
Visually check cockpit windows for cracks, crazing, and delamination (Ref. MM 56-11-00 for
limitations).
D.
Check spare bulb supply, and presence of the thrust reverser isolation valve deactivation pins
(2 ea. P/N B78001-3); replenish as necessary.
E.
Check for presence and condition of headsets (3 ea.).
F.
Clean cockpit windows.
G.
Clean flight compartment.
(1)
Trash.
(2)
Glareshield.
(3)
Ashtrays and cup holders.
(4)
Floor tracks.
(5)
Instrument panels.
H.
Saturday AM Service Check.
(1)
Ensure all trash and debris is removed.
(2)
Vacuum the entire cockpit.
CARD NO.: B767-2A
PAGE:
B767 SERVICE CHECK - DESCRIPTION
7 of 55
REV. NO.: 82
DATE: 12-06-10
FLIGHT COMPARTMENT
7.
(3)
Clean all cockpit windows, sun visors, and glareshield.
(4)
Clean/dust/vacuum all cockpit instruments and pedestal areas.
Check flight compartment items for presence, condition, and safeties (if required).
NOTE:
Unserviceable emergency equipment must be replaced before flight. Replace any equipment found
with a broken seal.
NOTE:
If there are any bottles with less than ninety (90) days until the expiration date, replace the bottle. If
there is not an adequate supply of bottles in stock and time remains on the bottle in question, make
a logbook entry with expiration date, place on Deferred Item, and notify Maintenance Control.
A.
Check 2 ea. Crew Oxygen Bottle Pressure - 1300 PSI MINIMUM.
NOTE:
M-1A entry required for all O2 bottle servicing. M-1A entry to include O2 bottle pressure before
and after servicing.
NOTE:
Crew oxygen bottles are located in the Main Equipment Center.
(1)
Compare Crew Oxygen cylinder pressure gauges with flight deck indication (should agree
within 50 PSI).
(2)
Check hydrostatic test/inspection due dates.
B.
Check portable oxygen bottle (BCSF and BDSF).
(1)
Check condition/security and hydrostatic test/inspection due dates.
Full 1850 (+/- 50) PSI; MIN 1400 PSI
NOTE:
If there are less than ninety (90) days until the expiration date, replace the bottle. If there is not an
adequate supply of bottles in stock and time remains on the bottle in question, make a logbook
entry with expiration date, place on Deferred Item, and notify Maintenance Control.
C.
Check portable (Halon) fire extinguisher(s) for presence and security (2 each for BCSF and BDSF,
and 1 each for SF and PC2SF).
(1)
Pressure gauge indication should be within green band.
(2)
Check and ensure seal is not broken.
(3)
Check hydrostatic test/inspection due dates.
D.
Check emergency descent device and escape ropes for presence, condition, and security.
(1)
There is 1 escape rope at each no. 2 window.
(2)
There is 1 ea. inertia reel assembly located above 3rd and 4th observer seats (PC and PC2SF
only).
E.
Check First Aid Kit.
(1)
Check condition and security; if seal is broken, inventory first aid kit contents and replace
any missing or damaged items.
(a)
Contents: Each first aid kit must contain the following:
CARD NO.: B767-2A
PAGE:
B767 SERVICE CHECK - DESCRIPTION
8 of 55
REV. NO.: 82
DATE: 12-06-10
FLIGHT COMPARTMENT
CONTENTS
QUANTITY
Adhesive bandage compress, 1 inch ............................................................. 16
Antiseptic swabs ........................................................................................... 20
Ammonia inhalants ....................................................................................... 10
Bandage compresses, 4 inch ......................................................................... 8
Triangular bandage compresses, 40 inch ...................................................... 5
Arm splint, non-inflammable........................................................................ 1
Leg splint, non-inflammable......................................................................... 1
Roller bandage, 4 inch .................................................................................. 4
Adhesive tape, 1 inch standard roll............................................................... 2
Bandage scissors ........................................................................................... 1
Protective latex gloves or equivalent, non-permeable gloves (pair)............. 1
(2)
Sealing of First Aid Kits:
(a)
After contents of the first aid kit have been inventoried and replenished, complete
an Emergency Sticker (M-38) (Ref. GMM Chapter 1, Section 07.07), and seal the
first aid kit.
(b)
Enter “N/A” in the “Inspection Due Date” due to no time requirements for this unit.
F.
Check oxygen masks (6 each for PC2SF, BCSF, and BDSF; 4 each for SF) for presence, condition
and security.
(1)
Make sure the oxygen masks are not damaged and are clean, protected, and stored properly.
NOTE:
Ensure oxygen mask and smoke goggles are manufactured by EROS. Do not intermix
manufactures.
G.
Check smoke goggles (6 each for PC2SF, BCSF, and BDSF; 4 each for SF) for presence, condition
and security.
(1)
Make sure the goggles are not damaged and are clean, protected, and stored properly.
H.
Check Fire Ax for presence and security.
I.
Check condition, security, and inspection due date of Protective Breathing Equipment (PBE)
Assembly. Ensure red Visual Service Indicator (VSI) is NOT protruding beyond face of mounting
box and tamper seal(s) are intact. Record hydrostatic due dates on form B767-2B.
NOTE:
Not all PBE’s have a blue/pink humidity indicator, but if installed near handle of pouch: blue color
indicates serviceable PBE, pink color indicates need for replacement within 36 hours of discovery.
Notify Maintenance Control if humidity indicator is pink but PBE is not replaced.
(1)
Check the new style PBE (with humidity indicators) as follows:
(a)
If red VSI protrudes beyond face of mounting box or green tamper seal(s) are
broken, place hand in box and feel pouch. DO NOT remove pouch from box. If
pouch is soft and spongy, replace PBE assembly within 36 hours. Notify
Maintenance Control and generate a Deferred Item to have unit replaced.
(a)
If pouch is firm to touch, replace green tamper seal(s) only using new padlock style
seals Model 1001; or notify Maintenance control and generate a Deferred Item to
replace tampered seal(s) or assembly at next station where parts are available.
(b)
If humidity indicator (located below barrier pouch handles) has changed in color
from blue to pink, unit must be replaced within 36 hours. Notify Maintenance
Control and generate a Deferred Item to have unit replaced.
J.
Check life vests (6 each for PC2SF, BCSF, and BDSF; 4 each for SF) for presence, condition and
security.
CARD NO.: B767-2A
PAGE:
B767 SERVICE CHECK - DESCRIPTION
9 of 55
REV. NO.: 82
DATE: 12-06-10
FLIGHT COMPARTMENT
NOTE:
8.
Replace Life Vests that are due inspection within the next 30 days or generate a Deferred Item so
Life Vests can be replaced before due date.
K.
ELT (BCSF).
L.
Check all crew and observer lap seatbelts for ease of length adjustment
M.
Check air sickness bags (5 ea.), located in First Officer’s seat back pocket.
Perform readout of the Maintenance Control Display Panel (MCDP) (applicable for Saturday or Sunday, once
per week, maintenance visits only).
A.
Energize the MCDP and do the self-test.
(1)
Close these circuit breakers on the overhead panel P11:
(a)
11C29, LANDING GEAR POSITION AIR/GND SYS 2 ALTN
(b)
11C30, LANDING GEAR POSITION AIR/GND SYS 1
(c)
11U9, MAINT CONT DSPL
(d)
11U15, AIR/GND SYS 1
(e)
11U24, LANDING GEAR POSITION AIR/GND SYS 2
(2)
Supply electrical power (AMM 24-22-00/201).
(3)
Put the MCDP ON/OFF switch to the ON position.
(a)
Ensure the FAIL light and the GRD TEST light come on for 5 seconds and then go
off.
(b)
Ensure the FLT FAULT light comes on and stays on.
(4)
To do a check for flight faults, go to the Flight Faults procedure. To do the ground tests, go
to the Ground Test procedure.
B.
Show the Last Flight Faults and record on form B767-30, MCDP Flight Fault Recording Report,
located in the B767 Blank Forms Manual.
NOTE:
Last Flight Faults shows the faults kept by the MCDP during the last time the MCDP
was automatically turned on by touchdown. If the Flight Faults Mode is engaged on the
ground, it causes the MCDP to show LAST FLT FAULT?. Push the YES/ADV button
to show a fault that was found during the last flight. Each time the YES/ADV switch is
pushed a different fault will show until all of the faults have been shown. The display
will then show ALL LAST FLT FAULTS DSPLY.
(1)
Push the NO/SKIP switch to go out of Last Flight Faults.
NOTE:
If no faults are found, the message that shows after the YES/ADV switch is
pushed will be NO LAST FLT FAULT.
C.
Show the Previous Flight Faults and record on form B767-30, MCDP Flight Fault Recording Report,
located in the B767 Blank Forms Manual.
NOTE:
When you go into Previous Flight Faults, the message PREV FLT FAULT? shows. The
MCDP will show faults from the flight before the last flight the same way as the Last
Flight Fault messages were shown. The same messages for all previous faults shown
and no previous faults are shown as applicable. The Previous Flight Faults gives
historical flight data. Faults from up to 99 flights are kept in the MCDP unless more
than 10 flight have had faults. Faults for a specified flight are kept together and given a
number (02 = two flights before, 05 = 5 flights before, etc.). Flight numbers are left off
if the flight had no faults.
(1)
To show Subsequent Previous Flight Faults push the YES/ADV switch.
CARD NO.: B767-2A
PAGE:
B767 SERVICE CHECK - DESCRIPTION
10 of 55
REV. NO.: 82
DATE: 12-06-10
FLIGHT COMPARTMENT
9.
Replace the Compact Flash (CF) data card in the QAR at the P-61 panel. Applicable to 219, 315, 744, and 747
at BRU, CVG, JFK, LGG, and MIA, Saturday or Sunday, once per week maintenance visits only.
A.
Obtain 1 each P/N SDCFX3-002G-A21 Compact Flash card from station stock.
B.
Locate microQAR reader installed in the Flight Recorder System Test Plug on the P-61 panel.
C.
Remove Compact Flash card from microQAR recorder and install card obtained from station stock.
D.
BRU and LGG stations with upload capability:
(1)
Upload data from removed Compact Flash card using Polaris Transfer program and card
reader installed on station computer. Ref. Polaris Transfer Program User Manual.
(2)
Return Compact Flash card to station stock after upload is completed.
E.
CVG, JFK, and MIA:
(1)
COMAT or overnight ship removed Compact Flash card to ABX Engineering, ILN/2061-R.
10.
Comply with APU Health Check and record on APU Health Check form, B767-40, located in the B767 Blank
Forms Manual (applicable for Saturday or Sunday, once per week, maintenance visits only).
A.
APU Control Unit - Self Test
(1)
Supply electrical power (AMM 24-22-00/201).
(a)
Ensure the following circuit breaker on the overhead circuit breaker panel, P11, is
closed:
1
11B35, APU ALTN CONT
(b)
Ensure the APU control switch on the P5 overhead panel is OFF, and attach a DONOT-OPERATE tag.
(c)
Ensure the APU RPM is less than 7%.
(d)
Put the TEST switch on the APU control unit in the LAMP position, and release the
switch.
1
Ensure all of the lights come on, column by column.
2
If all of the lights do not come on, replace the APU control unit.
WARNING:
DO NOT DO THE ECU BITE TEST AND MAINTENANCE ON THE IGNITION SYSTEM
AT THE SAME TIME. THE IGNITER LEAD ENERGIZES DURING THE SELF-TEST
AND CAN CAUSE AN INJURY.
(e)
Put the TEST switch to the SELF position and release the switch.
NOTE:
This will do a test of the software in the APU control unit and of the APU
hardware.
1
The WAIT light will come on during the test.
2
The TEST OK light will come on if the self-test does not find defective
units.
3
Make a record of the FAULTY LRU lights that come on.
NOTE:
The FAULTY LRU lights will come on one at a time for 4 seconds
(from the left to the right and from the top to the bottom of the control
unit).
4
If FAULTY LRU lights came on, correct the failure (FIM 49-11-00, Fig.
103).
B.
APU Control Unit - BITE Test
(1)
Put the RECORD SELECT switch to the LAST RUN/#1 position.
(a)
Put the FAULT switch to the LRU/UNIT position and release.
CARD NO.: B767-2A
PAGE:
B767 SERVICE CHECK - DESCRIPTION
11 of 55
REV. NO.: 82
DATE: 12-06-10
FLIGHT COMPARTMENT
NOTE:
11.
This does a check for the FAULTY LRUs that could have caused the last autoshutdown failure on the APU.
1
Make a record of the FAULTY LRU lights that come on.
NOTE:
If there are FAULTY LRUs, the lights will come on at the same time
for 4-6 seconds.
(b)
Put the FAULT switch to the REASON/DISPLAY position.
NOTE:
The APU shutdowns are put in the memory of the control unit. You can see the
reason for the last shutdown when the RECORD/FAULT SELECT switch is in
the LAST RUN position.
1
Make a record of the REASON/DISPLAY APU NOT OPERATING lights
that come on.
(c)
Correct the failures for the REASON/DISPLAY APU NOT OPERATING and the
FAULTY LRU lights that you recorded (FIM 49-11-00, Fig. 103).
(d)
Push the ERASE MEMORY switch to erase the failures from the memory of the
APU control unit.
C.
APU Start Operational Check
(1)
Record APU battery voltage prior to start.
(2)
Start APU and record battery voltage dip at starter engagement.
(3)
Record APU/BAT amperage indication during start.
(4)
Record APU start time (from battery voltage dip until “RUN” light illuminates).
(5)
Record idle EGT with bleed valve closed and generator off.
(6)
Generator on and bleed valve open. Record EGT and pneumatic pressure.
(7)
Operate both packs until stabilized; record EGT.
(8)
Both packs off and dry motor either engine, and record APU GT at max motor, pneumatic
pressure at max motor, and aircraft engine N2 RPM at max motor.
(9)
Terminate MES and monitor pneumatic pressure dip and recovery to normal pressure.
(10)
Shut down APU and check ECU for any faults including mini-flags.
Check that the following manuals, forms and certificates are onboard the aircraft and in serviceable condition:
A.
Ensure ETOPS Reporting Form Binder is onboard (ETOPS aircraft only).
B.
Ensure ETOPS APU Reporting Form Binder is onboard (ETOPS aircraft only).
C.
Replenish forms and manuals as applicable.
(1)
Items provided by ABX Flight Operations:
(a)
Two (2) Flight Crew Normal Checklists.
(b)
Two (2) Quick Reference Handbooks (Non-Normal Procedures).
(c)
Passenger Briefing Card.
(2)
Items provided by ABX Document Distribution:
(a)
One (1) spare Aircraft Log Book.
(b)
One (1) spare Engine Performance Report
(c)
Radio License.
(d)
B767 Fueling Manual.
(e)
Emergency Response Guidebook (Hazardous Materials).
(f)
Fault Reporting Manual (FRM).
CARD NO.: B767-2A
PAGE:
B767 SERVICE CHECK - DESCRIPTION
12 of 55
REV. NO.: 82
DATE: 12-06-10
FLIGHT COMPARTMENT
(g)
12.
13.
Minimum Equipment List, Configuration Deviation List (MEL/CDL), and NonEssential Furnishings (NEF).
NOTE: N315AA has a 315 Only MEL/CDL.
(h)
MEL Maintenance Practices.
(i)
WDM Supplement (BCSF).
(3)
Items Provided by ABX Maintenance:
(a)
Aircraft Airworthiness Certificate.
(b)
Aircraft Registration Certificate.
(c)
Flight crew circuit breaker collars (orange): Five (5) each in the aircraft log book.
(d)
10 ea. M-3, and 5 ea. M-3R Deferred Item Placards.
(e)
Maintenance In Use placard.
(4)
Items Provided by Charter Operations:
(a)
ICAO Doc. 9481, Emergency Response Guidance for Aircraft Incidents Involving
Dangerous Goods (219, 315, 740, 744, 745, 747 only).
(5)
Binder P/N Reference
(a)
Flight Log A07588-1
(b)
Engine Performance A07590-1
(c)
APU Reporting A08775-1
(d)
ETOPS Event A08775-501
D.
Check the tail number and registration number to ensure the Aircraft Registration and Airworthiness
Certificate reflect the same.
E.
Check contents of the Flight Crew Deferral Packet stowed in the pocket behind the Pilot seat.
(1)
Replace as necessary any missing items.
CONTENTS
QUANTITY
Tie wraps, yellow, resealable (cut to 4” length) 10 ea.
Labels, yellow, 3/4” diameter, P/N MR1212-12 3 sheets
Bag, Ziplock, approximately 5” x 8”
1 ea.
F.
Check standby magnetic compass card.
(1)
Check for presence and condition.
(2)
Check compass card is filled out properly and is legible.
Inspect aluminum tape on cargo compartment side of the cockpit door for condition and security
(N/A to BCSF and BDSF).
NOTE:
Aluminum tape is used as a surface to place the red cockpit security tag.
A.
If necessary, clean surface of tape with a mild cleaner. (Ref. Figure 12 Security Tag Locator, Cockpit
Door.) (Ref. AMM 11-35-02.)
Test engine, APU, cargo squibs on squib test control panel.
A.
Push the indicator lights on the SQUIB-TEST panel (P61) to do a test of the bulbs.
B.
Push the TEST 1 switch on the SQUIB TEST panel.
C.
Ensure all of the indicator lights on the panel come on (green).
NOTE:
L & R Emergency Escape Lights have been deactivated.
D.
Release the TEST 1 switch.
(1)
Ensure the indicator lights go off.
CARD NO.: B767-2A
PAGE:
B767 SERVICE CHECK - DESCRIPTION
13 of 55
REV. NO.: 82
DATE: 12-06-10
FLIGHT COMPARTMENT
E.
F.
14.
Push the TEST 2 switch on the SQUIB TEST panel.
APU Fire Bottles:
(1)
Airplanes with single APU Fire Bottle:
(a)
Ensure all of the indicator lights on the panel, but not the APU light, come on
(green).
(2)
Airplanes with dual APU Fire Bottles:
(a)
Ensure all of the indicator lights on the panel come on (green).
G.
Release the TEST 2 switch.
H.
Ensure the indicator lights go off.
Test the FUEL CONFIG Light and the LOW FUEL Message.
NOTE:
Required by AD 2010-23-03 at 100 hr intervals, accomplished at Service Check.
A.
Supply electrical power. Refer to 767 AMM 24-22-00 as an accepted procedure.
B.
Ensure the following six EICAS circuit breakers are closed:
CIRCUIT BREAKER NAME
PANEL
LOCATION
C4078 ............................... EICAS, L CMPTR ..........................P11-2............. J2
C4079 ............................... EICAS, R CMPTR ..........................P11-5............. J29
C4094 ............................... EICAS DISPLAY SELECT ............P11-5............. J32
C4189 ............................... EICAS DISPLAY SWITCHING ....P11-5............. J31
C4082 ............................... EICAS LOWER DISPLAY ............P11-5............. J30
C4081 ............................... EICAS UPPER DSPL .....................P11-2............. J3
C.
Do the test:
(1)
Push the CAUTION Cancel button on the P1-3, Captain Instrument Panel, Right, to reset
EICAS caution and advisory messages.
(2)
Put the FUEL QTY test switch in the FUEL QTY position and release [located on the
(M10398) P61 Panel].
(3)
Make sure the FUEL CONFIG light comes on (P5, Pilot’s Overhead Panel).
(4)
Make sure the LOW FUEL message shows (Upper EICAS Display).
NOTE:
If the test fails, contact Maintenance Control. Corrective action requires FAA approval before
further flight.
NOTE:
If the test fails, troubleshoot for wire faults, bent connector pins, or damaged equipment. Refer to
Fault Isolation Manual 767 FIM 28-41-00 as an accepted procedure, and to Wire Diagram Manual
767 WDM 28-41-13 for related wires.
CARD NO.: B767-2A
PAGE:
14 of 55
REV. NO.: 82
DATE: 12-06-10
B767 SERVICE CHECK - DESCRIPTION
LAVATORY
15.
Perform general visual inspection of lavatory.
A.
Check for toilet condition, cleanliness, and security.
(1)
Replenish tissue as required.
B.
Contact Maintenance Control if leaking conditions and/or contamination of surrounding areas are
noted.
C.
Lavatory Portable Oxygen Bottle
(1)
Check condition/security and hydrostatic test/inspection due dates.
FULL 1850 (+/-50) PSI; MIN. 1400 PSI
NOTE:
If there are any bottles with less than ninety (90) days until the expiration date, replace
the bottle. If there is not an adequate supply of bottles in stock and time remains on the
bottle in question, make a log book entry with expiration date, place on Deferred Item,
and notify Maintenance Control.
D.
Check that 1 ea. ash tray is installed in receptacle on exterior lavatory compartment wall next to
lavatory door (AD 74-08-09 R2).
CARD NO.: B767-2A
PAGE:
B767 SERVICE CHECK - DESCRIPTION
15 of 55
REV. NO.: 82
DATE: 12-06-10
SUPERNUMERARY COMPARTMENT (SF)/CREW SERVICE AREA (PC2SF, BCSF, and BDSF)
16.
Visually check supernumerary/crew service area ceiling and reading lights for cleanliness, condition, and
security of installation.
17.
Clean oven, if installed.
WARNING:
USE A DAMP CLOTH ONLY TO CLEAN OVEN. EXCESSIVE WATER MAY CAUSE SHORT
CIRCUIT.
A.
Daily
(1)
Using a damp cloth, wipe all areas of the oven including exterior, interior, and door. A mild
soap may be used if necessary to remove spills or splatters. Dry with a soft cloth. Care
should be taken in cleaning the touch control panel.
CAUTION:
DO NOT USE ANY TYPE OF ABRASIVE CLEANER. SCOURING PADS ARE ALSO
UNACCEPTABLE AS THEY MAY SCRATCH THE PRECOATED METAL AND PLASTIC.
THE ONLY ACCEPTABLE CLEANSER IS A CLOTH MOISTENED IN WATER, AND A MILD
SOAP.
18.
Portable oxygen bottle (1 ea. located near L1 door, SF and PC2SF).
A.
Check condition/security and hydrostatic test/inspection due dates.
FULL 1850 (+/-50) PSI; MIN. 1400 PSI
NOTE:
If there are any bottles with less than ninety (90) days until the expiration date, replace the bottle. If
there is not an adequate supply of bottles in stock and time remains on the bottle in question, make
a log book entry with expiration date, place on Deferred Item, and notify Maintenance Control.
19.
Check emergency equipment in supernumerary/crew service area (Ref. Figure 13, Sheet 2 of 2).
A.
ELT (SF and PC2SF if equipped).
B.
Halon fire extinguisher (1 ea.) for presence and security (SF, PC2SF, and BDSF).
(1)
Pressure gauge indication should be within green band.
(2)
Check and ensure seal is not broken.
(3)
Check hydrostatic test/inspection due dates. Record hydrostatic due dates on form B767-2B.
NOTE:
If there are less than ninety (90) days until the expiration date, replace the bottle. If there is not an
adequate supply of bottles in stock and time remains on the bottle in question, make a logbook
entry with expiration date, place on Deferred Item, and notify Maintenance Control.
C.
Life raft (2 ea.) (if installed).
D.
Life vest (4 ea. SF; 1 ea. PC and PC2SF) and demonstration life vest (1 ea.).
E.
Emergency descent device for presence, condition, and security.
(1)
There is 1 ea. inertia reel assembly.
(2)
Check 6 ea. inertia reel harnesses for presence, condition, and security.
F.
Portable oxygen bottle (1 ea.) (SF and PC2SF).
G.
Verify MEC safety barrier (1 ea.) is located on the upper galley shelf (SF and PC2SF).
CARD NO.: B767-2A
PAGE:
B767 SERVICE CHECK - DESCRIPTION
16 of 55
REV. NO.: 82
DATE: 12-06-10
UPPER CARGO COMPARTMENT
20.
21.
22.
23.
24.
25.
26.
27.
28.
29.
Check sidewall lining, ceiling panels, and lights for condition and security.
Clean and vacuum compartment.
Check cabin floor and seat tracks for cleanliness and condition; clean as required.
A.
Ensure floor is clean and free of debris.
B.
Ensure seat tracks are clean and free of debris.
C.
Check anti-slip tape for condition.
Check internal markings for condition/legibility.
Compartment lighting.
A.
On the forward attendant’s panel, P21, push the MN DK CARGO light switch and the CABIN
ENTRY light switch to the on position.
B.
Make sure all the cargo compartment lights come on.
Perform a general visual inspection of the cargo net for security (SF and PC2SF only).
Weight and Balance Computer
A.
Run the Maintenance Check program as follows, and check for sufficient amount of paper. If the
Maintenance Check fails, use 767 AMM 25-57-33-5, Config. 40 Check Out Procedure to run Weight
and Balance program. If successful, the error in “Maintenance Check” may be ignored.
(1)
On the printer box/cabinet, toggle the ON/OFF switch to ON.
(2)
Select the W&B-1 or W&B-2 position as applicable.
(3)
Press the red ON button on the WBC.
(4)
Check battery condition and note % of charge.
(5)
Click on the “Maintenance Check” icon.
(6)
Follow the on-screen instructions to print and verify the following:
NOTE:
If the printer is inoperative, it is acceptable to use the “VIEW” button in the Maintenance Check
program instead of the “PRINT” button to verify the program version and other error messages.
Normal printer operation must then be verified with a test loadplan printout, or deferred per B767
MEL 25-63-5.
(a)
Verify that weight and balance program is current (version 4.709 or later).
(b)
Check for spare paper P/N LD-R4KN5B for printer.
(c)
No other error messages will be shown.
(7)
Close the “Maintenance Check” program using the small “x” in the upper right corner.
(8)
Check the print for correct values and readability.
(9)
After 10 minutes of operation, check battery condition for increase in % of charge.
NOTE:
Batteries that will not charge above 50% should be replaced.
(10)
Turn off the WBC, and toggle the ON/OFF switch on the printer box/cabinet to the OFF
position.
Check that all access doors/panels are closed/secured.
Operate forward entry/service door(s) and latching mechanism. Ensure smooth operation without restriction
(L1 PC2SF, BCSF, and BDSF only; L1 and R1 SF only).
Wiring Diagram Manuals (PC2SF, and SF)
A.
Check that all volumes of the B767 Wiring Diagram Manual are present and in serviceable condition.
CARD NO.: B767-2A
PAGE:
B767 SERVICE CHECK - DESCRIPTION
UPPER CARGO COMPARTMENT
B.
Check manual storage bin for general condition.
17 of 55
REV. NO.: 82
DATE: 12-06-10
CARD NO.: B767-2A
PAGE:
B767 SERVICE CHECK - DESCRIPTION
18 of 55
REV. NO.: 82
DATE: 12-06-10
LOWER CARGO COMPARTMENT
30.
31.
32.
33.
34.
35.
36.
37.
Check cargo doors for operation, door stops, door sills, and seals for security and evidence of damage.
A.
Ensure all cargo compartment door stops are not broken or missing.
B.
Ensure all cargo door handles are faired when cargo door is closed.
C.
Check cargo door operation and cargo door proximity targets for damage.
Check cargo compartments for general condition and evidence of damage.
A.
Repair liners using AKRO Fireguard Repair Kit AF888 or by replacing the entire fiberglass panel.
NOTE:
All tears, holes, or damage penetrations through cargo compartment ceiling, sidewall, shrouds,
contour panels, and door liners must be repaired prior to further flight except as authorized in
specific aircraft Minimum Equipment List (MEL).
B.
Check that 2 ea. fire extinguisher nozzles are unobstructed by tape or liner panels along the upper
corner on the left side wall of the forward and aft compartments (AD 08-13-04) (NA N315AA).
Check condition and cleanliness of interior lining, thresholds, door barriers, restraining equipment/nets/
stanchions, and doors. Pay particular attention to holes in lining and sharp edges which could cause personal
injury or damage to baggage.
A.
Repair liners using AKRO Fireguard Repair Kit AF888 or by replacing the entire fiberglass panel.
Repair formed cargo liner panels and detail features using Kit AF400. The repair kits are located at
each ABX B767 outbase station.
NOTE:
Use oldest kits first (AF400 or AF888), as determined by expiration date at top of kit label.
Check that all blow-out panels are in place.
Check operation of cargo compartment lights. Replace bulbs as necessary.
Check that drain holes are unobstructed.
NOTE:
Drains are openings in the structure located in the lower fwd and aft corners of the door jambs.
Remove all foreign matter from cargo compartment door jambs.
Check fwd and aft cargo compartments cargo loading system for general condition and cleanliness.
CARD NO.: B767-2A
PAGE:
B767 SERVICE CHECK - DESCRIPTION
19 of 55
REV. NO.: 82
DATE: 12-06-10
AIRCRAFT GENERAL
38.
Perform a general visual inspection (walk-around check) of the aircraft fuselage, wings, and empennage
sections (viewed from ground level).
WARNING:
BEFORE MOVING FLAP/SLAT HANDLE, MAKE CERTAIN THAT AREAS AROUND
FLAPS AND SLATS ARE CLEAR OF PERSONNEL AND EQUIPMENT.
Accomplish a general visual inspection (walk-around check) with the flaps set at 20o or more,
spoilers up, slats extended, and L, C, and R hydraulic systems pressurized. Check external surfaces of
L and R wings including leading edges, slats, flaps, spoilers, ailerons, wing tips, and trailing edges for
damage, corrosion, fluid leaks, general condition, and security.
B.
Check wheel well for condition and fluid leaks.
C.
Check the crew oxygen discharge indicator disc for presence.
D.
Check AOA, TAT, pitot/static ports, antennas, and radome for condition.
E.
Check the fuselage in areas of drain masts and drains for fluid leakage.
F.
Check vertical and horizontal stabilizer assemblies, leading edges, skin, tips, elevator, rudder, tabs,
and fairings for general condition and security (as viewed from ground level).
G.
Check LT and RT wing-to-fuselage fillets upper and lower external surfaces for damage, corrosion,
fuel leaks, general condition, and security.
H.
Ensure that all access doors are secured.
I.
Check fueling station door is secured.
WARNING:
BEFORE MOVING FLAP/SLAT HANDLE, MAKE CERTAIN THAT AREAS AROUND
FLAPS AND SLATS ARE CLEAR OF PERSONNEL AND EQUIPMENT.
J.
Check the positive pressure relief valves for (FLAG) indication that valves have opened.
K.
Check RAM air inlet/exhaust doors for obstructions.
L.
Check fuselage exterior skin, doors, and door seals as viewed from the ground for condition and
obvious damage.
M.
Check tail skid indicator for evidence of tail strike and low pressure pop-out indicator is not extended
(Ref. Figure 14) (-300 only).
N.
Raise flaps and slats and remove hydraulic system pressure.
39.
Check operation and illumination of exterior lights.
WARNING:
DO NOT LOOK AT STROBE LIGHTS AND ANTI-COLLISION LIGHTS FOR A LONG
TIME. THESE LIGHTS CAN CAUSE INJURIES TO YOUR EYES.
A.
Check the following exterior lights and replace all bulbs not illuminated:
(1)
Fwd and aft position/navigation lights.
(2)
Strobe lights.
(3)
Anti-collision lights (upper/lower and wing/body).
(4)
Wing position lights.
(5)
Wing flood lights.
(6)
Landing and taxi lights.
(7)
Runway turnoff lights.
(8)
NLG and MLG wheel well lights and gear inspection lights.
A.
CARD NO.: B767-2A
PAGE:
B767 SERVICE CHECK - DESCRIPTION
20 of 55
REV. NO.: 82
DATE: 12-06-10
AIRCRAFT GENERAL
40.
Check all tires and wheels for wear, cuts, obvious damage, or broken tie bolts.
NOTE:
All wheels removed for low pressure should be returned to ABX Air Wheel and Tire Shop, ILN.
Please note the following information on the parts tag: “Tire removed due to LOW PRESSURE”
and actual tire pressure (gauge reading) when removed.
A.
Replace tire when any portion of an interior tread groove is worn away completely around the visible
portion of the circumference, OR
NOTE:
Interior grooves are those exclusive of the grooves in or adjacent to the shoulder areas.
B.
When the fabric reinforcing ply is exposed.
NOTE:
Excessive wear past the fabric reinforcing plies could make the tire non re-treadable.
C.
When a tire is worn-to-limits and requires replacement, but circumstances do not permit, replacement
may be deferred, provided the following conditions are met:
(1)
No more than 5 additional landings are made.
(2)
No peeling or chunking of the tire exists, and no carcass plies are exposed.
(3)
Item is forwarded to a Deferred Item with an entry in the Aircraft Log Book to monitor
landings and tire for maximum wear limits stated in Items A and B above.
(4)
Advise Maintenance Control of requirement to replace deferred tire within 5 landings.
D.
Examine the tires for the presence of contaminants.
(1)
Keep the tires clean of contaminants such as oils, fuels, hydraulic fluids, aircraft cleaning
agents, and greases. Cover the tire if these or other potentially harmful chemicals may spill
or drip on the tire.
(2)
Wipe off the tire with a soapy solution if the tire becomes contaminated.
(3)
The tire should be removed from service as soon as practical if the surface of the tire appears
soft, spongy, or there are bulges present.
E.
Visually inspect wheels for broken, damaged, or missing tie bolts. Replace any wheel with broken or
missing tie bolts.
41.
Check tires for proper pressure using approved ABX tool.
WARNING:
SERVICE TIRES USING APPROVED ABX TOOL. DO NOT USE AN UNREGULATED,
HIGH PRESSURE NITROGEN SOURCE TO SERVICE TIRES. USE OF AN
UNREGULATED, HIGH PRESSURE NITROGEN SOURCE COULD LEAD TO
EXPLOSIVE TIRE FAILURE AND POSSIBLE INJURY.
CAUTION:
DO NOT LEAVE TIRE UNATTENDED DURING SERVICING. OVER INFLATION AND
EXPLOSION COULD OCCUR.
NOTE:
Never deflate a warm or hot tire to obtain desired pressure.
NOTE:
Required by AD 87-08-09. Service with dry nitrogen only. If dry nitrogen is not available for reinflation, refer to MM 12-15-03.
A.
When tire pressure is below minimum, re-inflate to desired pressure using approved ABX tool within
the following guidelines:
(1)
When a tire is re-inflated more than 10 PSI, an Aircraft Log Book entry is required.
(2)
If pressure is 10-20 PSI below the lower limit of the applicable inflation range, service tire to
the upper limit of the inflation range and make an entry into the Aircraft Log Book. If log
book indicates a previous history of under inflation for 3 or more days, tire must be replaced.
(3)
If pressure is more than 20 PSI below limits, the tire must be replaced prior to further flight.
CARD NO.: B767-2A
PAGE:
B767 SERVICE CHECK - DESCRIPTION
21 of 55
REV. NO.: 82
DATE: 12-06-10
AIRCRAFT GENERAL
(4)
Replace both tires on the same axle if the aircraft is taxied with tire deflated, more than 35
PSI below limits, or wheel bearing failure. Removal of the adjacent tire is not required if the
tire deflates while aircraft is parked or under tow.
(5)
Adjacent tire replacement may be deferred if circumstances do not permit, provided the
following conditions are met:
NOTE:
Tires with excessive heat will be too hot to comfortably leave your hand in the shoulder area.
(a)
No more than 5 additional landings are made.
(b)
Tire is visually inspected for signs of damage, excessive heat, bulges, leakage, or
other unusual conditions prior to each flight.
(c)
Tire pressure is checked and properly serviced.
NOTE:
All wheels removed for low pressure should be returned to ABX Air Wheel and Tire Shop, ILN.
Please note the following information on the parts tag: “Tire removed due to LOW PRESSURE”
and actual tire pressure (gauge reading) when removed.
(d)
Item is forwarded as a Deferred Item with an entry in the Aircraft Log Book to
monitor landings and tire condition per items (a) and (b) above.
(e)
Advise Maintenance Control of requirement to replace deferred tire within 5
landings.
42.
Check brakes for wear, evidence of leakage, and damage.
A.
Prepare for the inspection.
(1)
Ensure the downlocks are installed on the nose and main landing gear (AMM 32-00-20).
(2)
Ensure that chocks are installed on the wheels.
(3)
Release the parking brake.
B.
Procedure
CAUTION:
BE VERY CAREFUL WHEN YOU DO A CHECK OF THE BRAKES TO NOT SPILL
HYDRAULIC BRAKE FLUID ON THE BRAKE LININGS. IF YOU SPILL BRAKE FLUID ON
THE BRAKE LININGS, THE BRAKES WILL NOT OPERATE CORRECTLY.
(1)
Pressurize the right hydraulic system and reservoir (AMM 29-11-00/201).
(2)
Fully apply and release the left and right Captain’s or First Officer’s brake pedals five times.
(3)
With the brake pedals not applied, do a check of the brakes for fluid leaks at these locations:
(a)
Brake pistons.
(b)
Brake housing plugs.
(c)
Inlet and drain ports.
(d)
Bleed ports.
(e)
All hydraulic line connections.
(4)
If the total leakage per brake at the above locations is greater than one (1) drop per minute
with the brake pedals not applied, repair the leaks or replace the brake prior to dispatch.
(5)
Slowly apply the brake pedals to the stops.
(6)
While the brake pedals are applied, do a check for leaks at the same places on the brake that
you did in Step (3).
(7)
If the total leakage per brake at the above locations is greater than five (5) drops per minute
while the brakes are being applied, repair the leakage or replace the brake prior to dispatch.
(8)
Brakes with leaks below these limits must be rechecked prior to each flight, and should be
repaired or replaced at the next opportunity that manpower and material allow.
CARD NO.: B767-2A
PAGE:
B767 SERVICE CHECK - DESCRIPTION
22 of 55
REV. NO.: 82
DATE: 12-06-10
AIRCRAFT GENERAL
(9)
If it is suspected that a brake has been exposed to significant levels of contamination, the
brake should be removed, inspected, and cleaned in accordance with the brake supplier
component maintenance manual. Signs of contamination include a wet or oily appearance,
buildup of charred residue, or heavy smoking after landing.
(10)
Release the brakes and ensure that the pressure plate returns to the proper brake released
position.
C.
Do a check for missing brake wear indicator pins (Diagram 661181).
CAUTION:
DO NOT LEAVE BRAKES SET FOR MORE THAN FIVE MINUTES WHEN HOT. DO NOT
SET BRAKES UNDER EXTREME CONDITIONS.
(1)
Set parking brake.
NOTE:
Each brake has two brake wear indicator pins.
(a)
If the two wear pins are missing, you must replace the brake prior to the next flight.
(b)
If one wear pin is missing, the brake can stay in service if the remaining wear pin
operation is satisfactory.
NOTE:
Required by AD 91-18-10. Aircraft cannot be dispatched if fwd or aft brake wear indicator pin is
below FLUSH with brakes parked and hydraulic system pressurized. Brake wear pin limits are
more restrictive than the AD. Limits on the brake wear indicator pins are 1/32” with brakes parked
(not flush) (Ref. Figure 4).
(c)
Measure fwd and aft brake wear indicator pins. Replace brake if end of fwd or aft
wear pins is 0.031 (1/32 inch) or less from housing sub-assembly (brakes parked
and hydraulic system pressurized).
(d)
Remove the pressure from the right hydraulic system if it is not necessary (AMM
29-11-00).
(e)
Release parking brake.
43.
Check NLG and MLG shock struts for evidence of leakage and general condition. Ref. MM 12-15-01 for any
corrective action.
44.
Wipe the exposed chrome surface of the shock strut piston with a clean cloth dampened with ROYCO “SSF”
fluid (MIL-H 5606 or MIL-H-6083 oils are acceptable alternatives) to remove any accumulated grit or grime.
Remove debris with a downward motion to prevent inserting the debris into the shock strut.
45.
Drain left and right wing center aux, main, and surge fuel tank sumps (after aircraft has been on ground 1 hour
or more).
A.
After aircraft has remained in static position for a minimum of one (1) hour, drain all fuel tank sumps.
If more than one (1) hour ground time is available, allow fuel to settle as long as schedule permits
prior to sumping.
NOTE:
Use appropriate sump bottle with drain probe attached.
NOTE:
Drain a minimum of two (2) quarts from each sump.
NOTE:
Check sump bottle after each draining for water and sediment. A clear sump sample can be all
water or all fuel. To distinguish, add a small quantity of water to bottle and observe reaction. If
sample is all water, no change will be observed. If sample is all fuel, the added water will settle to
the bottom of the bottle and form a visible interface with the fuel.
46.
Check external power interrupt spare fuses on P34 panel (2 ea.).
CARD NO.: B767-2A
PAGE:
B767 SERVICE CHECK - DESCRIPTION
23 of 55
REV. NO.: 82
DATE: 12-06-10
NO. 1 ENGINE AND PYLON
CF6-80A SERIES
47.
Perform a general visual inspection (walk-around check) of the No. 1 engine. Check engine cowling, engine
inlet, fan rotor spinner, fan rotor blades, pylons, open blow-out doors, open latches, visible turbine blades and
exhaust area for obvious damage and fluid leaks.
A.
Check engines for fluid leaks and obvious damage.
B.
Check inlet cowl lip assembly and inner/outer panels for security, condition, and damage.
C.
Check inlet cone, fan blades, and annulus fillers for security, condition, and damage.
D.
Check fan duct and cold stream duct, thrust reverser blocker doors and acoustic panels for security,
condition, and damage.
E.
Check core engine exhaust area including turbine blades for condition and damage.
F.
Check engine pylons for fluid leaks and obvious damage.
48.
Check the No. 1 engine oil level using EICAS and service with Turbo 2380 oil, if required (Ref. Figure 5). An
EICAS indication of 20 or more is full and oil servicing is not required.
NOTE:
It is not required to service the engine oil if Service Check is being performed on a CF6-80A
equipped aircraft that has sat statically and not operated either or both engines for the previous 72
hours since last Service Check.
NOTE:
Lubricating oil for the engine is replenished through the engine oil tank filler port. Servicing should
be accomplished within 30 minutes of engine shutdown for consistent results. If after 30 minutes,
operate the engines until the rpm is stable. (Ref. AMM 71-00-00/20).
NOTE:
When servicing the oil tank, observe for odor of fuel at engine oil tank fill port. If you find fuel in
the oil system, you must do the troubleshooting procedure (FIM 71-05-00/101, Fig. 129) and flush
the oil system (AMM 79-11-00/301).
A.
Open the engine oil servicing door on right fan cowl panel.
WARNING:
WAIT A MINIMUM OF 5 MINUTES AFTER ENGINE IS SHUT DOWN BEFORE
REMOVING FILLER CAP TO ALLOW TANK PRESSURE TO BLEED OFF. HOT OIL
GUSHING FROM TANK COULD CAUSE SEVERE BURNS IF FILLER NECK FLOAT
VALVE IS DISPLACED BEFORE PRESSURE DISSIPATES.
B.
Check oil level as indicated by the hollow float ball in the sight glass.
WARNING:
LUBRICATING OILS CONTAIN ADDITIVES WHICH ARE READILY ABSORBED
THROUGH THE SKIN AND ARE CONSIDERED TOXIC. AVOID PROLONGED OR
CONTINUOUS CONTACT OF LUBRICATING OIL WITH SKIN.
CAUTION:
IF INADVERTENTLY SERVICED WITH DISSIMILAR FLUIDS SUCH AS MIL-L-6081
FLUSHING OIL OR HYDRAULIC FLUID, DO NOT OPERATE ENGINE UNTIL A
COMPREHENSIVE EVALUATION OF EFFECTS ON OIL SYSTEM AND ENGINE IS
PERFORMED AND CORRECTIVE ACTION IS COMPLETED.
NOTE:
A sight glass with a hollow float ball is installed below the fill port scupper. The oil tank is fully
serviced when the ball is at the top of the glass.
NOTE:
Use oil from freshly opened cans in order to assure that uncontaminated oil is used.
C.
If the oil level is below the top of the sight glass, remove engine oil tank filler cap. Add oil in whole
quart quantities only. When the floating ball reaches the top of the sight glass, continue to pour in any
remaining oil until the quart can is empty. Do not add any more oil.
CARD NO.: B767-2A
PAGE:
B767 SERVICE CHECK - DESCRIPTION
24 of 55
REV. NO.: 82
DATE: 12-06-10
NO. 1 ENGINE AND PYLON
CF6-80A SERIES
NOTE:
Make sure you add oil slowly and carefully. If you add oil into the filler cap too quickly, the oil may
flow out the fill port. The internal self-sealing valve limits the flow of oil to 1 quart (1 liter) every
40 seconds at 70oF (21oC).
D.
If an excessive amount of oil is used (0.55 U.S. quarts per hour or more), contact Maintenance
Control (Ref. MM 71-00-00) indicating:
(1)
Aircraft Number.
(2)
Engine Position.
(3)
Qty per flight hour used.
(4)
Qty oil added.
E.
Install filler cap, and check for looseness and positive locking.
F.
Verify the ball is at the top of the sight glass.
G.
Close the engine oil servicing door on the right fan cowl panel.
H.
Record OIL ADDED - QUARTS in aircraft log book. If no oil was added, enter zero (0).
49.
Service engine IDG oil level and check filter pop-out indicator (IDGs use turbo 2380 oil).
CAUTION:
DO NOT SERVICE IDG IF IDG IS DISCONNECTED. A DISCONNECTED IDG MUST BE
REMOVED FROM THE AIRCRAFT WITHIN 50 FLIGHT HOURS.
NOTE:
Access through panels 417CL and 427CL on No. 1 & No. 2 engine core panels.
NOTE:
It is not required to service the IDG if Service Check is being performed on a CF6-80A equipped
aircraft that has sat statically and not operated either or both engines for the previous 72 hours since
last Service Check.
A.
Deactivate thrust reverser isolation valve for ground maintenance.
WARNING:
FAILURE TO DEACTIVATE THRUST REVERSER ISOLATION VALVE FOR GROUND
MAINTENANCE COULD RESULT IN INADVERTENT THRUST REVERSER
OPERATION WITH POSSIBLE INJURY TO PERSONNEL AND DAMAGE TO
EQUIPMENT.
B.
Check to see if the IDG is disconnected.
C.
Correct the DISCONNECT TRIP message if necessary (Ref. AMM 24-20-00).
D.
Service IDG as follows: (Ref. Fig. 6)
(1)
If IDG is being serviced due to oil loss during system maintenance, drain IDG case (M/M
12-13-03 IDG Oil Drain Procedure) and then continue servicing at step D.(3).
(2)
If IDG is being serviced for any other reason, continue servicing at step D.(3).
(3)
Remove dust cover from overflow drain coupling on IDG.
(4)
Put a container below the IDG to catch the oil which will flow from the IDG.
(5)
Place end of oil drain hose into a container to catch oil.
WARNING:
WHEN CONNECTING HOSE TO OVERFLOW DRAIN COUPLING, USE RAG AROUND
FITTING TO PREVENT SPLASH DUE TO PRESSURE BUILDUP IN IDG CASE. HOT OIL
CAN CAUSE INJURY TO PERSONNEL.
CARD NO.: B767-2A
PAGE:
B767 SERVICE CHECK - DESCRIPTION
25 of 55
REV. NO.: 82
DATE: 12-06-10
NO. 1 ENGINE AND PYLON
CF6-80A SERIES
CAUTION:
CHECK THAT IDG OIL DRAIN HOSE IS NOT SUBMERGED IN OIL IN CONTAINER, IS
NOT BENT OR KINKED SO AS TO INHIBIT DRAINAGE, AND IS LOWER THAN IDG AT
ALL POINTS. FREE DRAINAGE DEPENDS ON AIR GETTING BACK TO IDG CASE
THROUGH DRAIN HOSE. FAILURE TO OBTAIN PROPER DRAINAGE CAN RESULT IN
AN OVER FILLED CONDITION AND CAUSE DAMAGE TO IDG. USE THE CORRECT
ADAPTER TO RELEASE THE PRESSURE FROM THE IDG. AN INCORRECT ADAPTER
WILL NOT RELEASE THE PRESSURE IN THE IDG. THIS CAN CAUSE AN INCORRECT
OIL LEVEL IN THE IDG.
(6)
Connect oil drain hose to overflow drain coupling on IDG. Allow any oil draining through
oil drain hose to flow into container. Keep hose below the level of the IDG.
NOTE:
It is normal for some oil to drain when the hose is connected to the coupling.
(7)
Remove dust cover from pressure fill coupling.
(8)
Connect service cart oil-in hose to pressure fill coupling on IDG.
CAUTION:
WHEN SERVICING IDG, DO NOT MIX TYPES OR BRANDS OF OIL. MIXING OILS
COULD CAUSE DAMAGE TO IDG.
(9)
Pump oil from service cart into IDG.
CAUTION:
SOON AFTER STARTING TO PUMP OIL INTO IDG, OIL MAY FLOW FROM THE OIL
DRAIN HOSE. THIS DOES NOT INDICATE A FULL IDG. CONTINUE SERVICING
UNTIL A MINIMUM OF ONE QUART (ONE LITER) OF OIL HAS OVERFLOWED INTO
THE CONTAINER. THIS IS REQUIRED TO ASSURE THE IDG OVERFLOW DRAIN
COUPLING IS FULLY ATTACHED. FAILURE TO OBTAIN NEEDED DRAINAGE CAN
RESULT IN OVERFILLING AND CAUSE DAMAGE TO THE IDG.
(10)
Discontinue pumping oil into IDG when a minimum of one (1) quart (0.9463 liter) has
overflowed into container.
NOTE:
The one quart of oil overflow is in addition to any oil that may have drained when the hose was
connected to the overflow drain coupling.
(11)
Disconnect the oil-in hose from coupling on IDG.
(12)
Install dust cover on pressure fill coupling on IDG.
CAUTION:
DO NOT REMOVE OIL DRAIN HOSE FROM OVERFLOW DRAIN COUPLING UNTIL
DRAINAGE SUBSIDES TO A SLOW DRIPPING CONDITION. FAILURE TO DRAIN THE
IDG PROPERLY WILL RESULT IN AN OVERFILLED CONDITION AND CAUSE
DAMAGE TO THE IDG.
(13)
When oil flow from oil drain hose slows to drops, remove oil drain hose.
(14)
Install dust cover on overflow drain coupling on IDG.
E.
Check scavenge filter Differential Pressure Indicator (DPI).
NOTE:
MM 24-11-01 allows the DPI to be reset three times before IDG replacement. If “DPI RESET”
placard is not installed on the IDG, contact Maintenance Control to place reset on Deferred Item.
(1)
When an extended DPI is found on the IDG, do the following:
(a)
Mark the next sequential number on the “DPI RESET” placard located on the IDG
housing.
(b)
Record in the A/C Logbook the DPI reset number marked in step E.(1)(a).
(c)
Do a check for the following conditions.
CARD NO.: B767-2A
PAGE:
B767 SERVICE CHECK - DESCRIPTION
26 of 55
REV. NO.: 82
DATE: 12-06-10
NO. 1 ENGINE AND PYLON
CF6-80A SERIES
1
Check to see if there is contamination on the scavenge filter element, in
the filter, in the filter bowl or in the oil drained from the filter cavity.
NOTE:
Contamination is defined as bright metal deposits which can be defined as chunks or pieces caused
by breakage (in contrast to non-metallic flakes or slivers caused by normal wear). A moderate
number of scattered small metallic flakes (bronze or silver colored metal), or flakes of generator
insulation are normal products of wear during operation. Even a considerable number of nonmetallic items such as black epoxy chips, sleeving and other forms of generator insulation does not
always indicate damage to the IDG.
2
Check to see if the O-rings or the filter is damaged. This would allow
contaminated oil to bypass the filter and enter the external oil cooling
circuit.
(d)
If no contamination is found and no condition is observed that would allow oil to
bypass the filter, do the following:
NOTE:
When the filter DPI has activated for the fourth time, replace the IDG (Ref. AMM 24-11-01).
1
Verify there are no IDG related EICAS or BPCU BITE messages. If the
EICAS or BITE messages are present, take necessary corrective action. If
message was caused by the IDG, replace the IDG (Ref. AMM 24-11-01).
2
Reset the filter DPI.
(e)
If contamination is found, refer to AMM 24-11-02 for corrective action.
F.
Activate thrust reverser isolation valve (Ref. AMM 78-31-00).
CARD NO.: B767-2A
PAGE:
B767 SERVICE CHECK - DESCRIPTION
27 of 55
REV. NO.: 82
DATE: 12-06-10
NO. 2 ENGINE AND PYLON
CF6-80A SERIES
50.
Perform a general visual inspection (walk-around check) of the No. 2 engine. Check engine cowling, engine
inlet, fan rotor spinner, fan rotor blades, pylons, open blow-out doors, open latches, visible turbine blades and
exhaust area for obvious damage and fluid leaks.
A.
Check engines for fluid leaks and obvious damage.
B.
Check inlet cowl lip assembly and inner/outer panels for security, condition, and damage.
C.
Check inlet cone, fan blades, and annulus fillers for security, condition, and damage.
D.
Check fan duct and cold stream duct, thrust reverser blocker doors and acoustic panels for security,
condition, and damage.
E.
Check core engine exhaust area including turbine blades for condition and damage.
F.
Check engine pylons for fluid leaks and obvious damage.
51.
Check the No. 2 engine oil level using EICAS and service with Turbo 2380 oil, if required (Ref. Figure 5). An
EICAS indication of 20 or more is full and oil servicing is not required.
NOTE:
It is not required to service the engine oil if Service Check is being performed on a CF6-80A
equipped aircraft that has sat statically and not operated either or both engines for the previous 72
hours since last Service Check.
NOTE:
Lubricating oil for the engine is replenished through the engine oil tank filler port. Servicing should
be accomplished within 30 minutes of engine shutdown for consistent results. If after 30 minutes,
operate the engines until the rpm is stable. (Ref. AMM 71-00-00/20).
NOTE:
When servicing the oil tank, observe for odor of fuel at engine oil tank fill port. If you find fuel in
the oil system, you must do the troubleshooting procedure (FIM 71-05-00/101, Fig. 129) and flush
the oil system (AMM 79-11-00/301).
A.
Open the engine oil servicing door on right fan cowl panel.
WARNING:
WAIT A MINIMUM OF 5 MINUTES AFTER ENGINE IS SHUT DOWN BEFORE
REMOVING FILLER CAP TO ALLOW TANK PRESSURE TO BLEED OFF. HOT OIL
GUSHING FROM TANK COULD CAUSE SEVERE BURNS IF FILLER NECK FLOAT
VALVE IS DISPLACED BEFORE PRESSURE DISSIPATES.
B.
Check oil level as indicated by the hollow float ball in the sight glass.
WARNING:
LUBRICATING OILS CONTAIN ADDITIVES WHICH ARE READILY ABSORBED
THROUGH THE SKIN AND ARE CONSIDERED TOXIC. AVOID PROLONGED OR
CONTINUOUS CONTACT OF LUBRICATING OIL WITH SKIN.
CAUTION:
IF INADVERTENTLY SERVICED WITH DISSIMILAR FLUIDS SUCH AS MIL-L-6081
FLUSHING OIL OR HYDRAULIC FLUID, DO NOT OPERATE ENGINE UNTIL A
COMPREHENSIVE EVALUATION OF EFFECTS ON OIL SYSTEM AND ENGINE IS
PERFORMED AND CORRECTIVE ACTION IS COMPLETED.
NOTE:
A sight glass with a hollow float ball is installed below the fill port scupper. The oil tank is fully
serviced when the ball is at the top of the glass.
NOTE:
Use oil from freshly opened cans in order to assure that uncontaminated oil is used.
C.
If the oil level is below the top of the sight glass, remove engine oil tank filler cap. Add oil in whole
quart quantities only. When the floating ball reaches the top of the sight glass, continue to pour in any
remaining oil until the quart can is empty. Do not add any more oil.
CARD NO.: B767-2A
PAGE:
B767 SERVICE CHECK - DESCRIPTION
28 of 55
REV. NO.: 82
DATE: 12-06-10
NO. 2 ENGINE AND PYLON
CF6-80A SERIES
NOTE:
Make sure you add oil slowly and carefully. If you add oil into the filler cap too quickly, the oil may
flow out the fill port. The internal self-sealing valve limits the flow of oil to 1 quart (1 liter) every
40 seconds at 70oF (21oC).
D.
If an excessive amount of oil is used (0.55 U.S. quarts per hour or more), contact Maintenance
Control (Ref. MM 71-00-00) indicating:
(1)
Aircraft Number.
(2)
Engine Position.
(3)
Qty per flight hour used.
(4)
Qty oil added.
E.
Install filler cap, and check for looseness and positive locking.
F.
Verify the ball is at the top of the sight glass.
G.
Close the engine oil servicing door on the right fan cowl panel.
H.
Record OIL ADDED - QUARTS in aircraft log book. If no oil was added, enter zero (0).
52.
Service engine IDG oil level and check filter pop-out indicator (IDGs use turbo 2380 oil).
CAUTION:
DO NOT SERVICE IDG IF IDG IS DISCONNECTED. A DISCONNECTED IDG MUST BE
REMOVED FROM THE AIRCRAFT WITHIN 50 FLIGHT HOURS.
NOTE:
It is not required to service the IDG if Service Check is being performed on a CF6-80A equipped
aircraft that has sat statically and not operated either or both engines for the previous 72 hours since
last Service Check
NOTE:
Access through panels 417CL and 427CL on No. 2 engine core panels.
A.
Deactivate thrust reverser isolation valve for ground maintenance.
WARNING:
FAILURE TO DEACTIVATE THRUST REVERSER ISOLATION VALVE FOR GROUND
MAINTENANCE COULD RESULT IN INADVERTENT THRUST REVERSER
OPERATION WITH POSSIBLE INJURY TO PERSONNEL AND DAMAGE TO
EQUIPMENT.
B.
Check to see if the IDG is disconnected.
C.
Correct the DISCONNECT TRIP message if necessary (Ref. AMM 24-20-00).
D.
Service IDG as follows: (Ref. Fig. 6)
(1)
If IDG is being serviced due to oil loss during system maintenance, drain IDG case (M/M
12-13-03 IDG Oil Drain Procedure) and then continue servicing at step D.(3).
(2)
If IDG is being serviced for any other reason, continue servicing at step D.(3).
(3)
Remove dust cover from overflow drain coupling on IDG.
(4)
Put a container below the IDG to catch the oil which will flow from the IDG.
(5)
Place end of oil drain hose into a container to catch oil.
WARNING:
WHEN CONNECTING HOSE TO OVERFLOW DRAIN COUPLING, USE RAG AROUND
FITTING TO PREVENT SPLASH DUE TO PRESSURE BUILDUP IN IDG CASE. HOT OIL
CAN CAUSE INJURY TO PERSONNEL.
CARD NO.: B767-2A
PAGE:
B767 SERVICE CHECK - DESCRIPTION
29 of 55
REV. NO.: 82
DATE: 12-06-10
NO. 2 ENGINE AND PYLON
CF6-80A SERIES
CAUTION:
CHECK THAT IDG OIL DRAIN HOSE IS NOT SUBMERGED IN OIL IN CONTAINER, IS
NOT BENT OR KINKED SO AS TO INHIBIT DRAINAGE, AND IS LOWER THAN IDG AT
ALL POINTS. FREE DRAINAGE DEPENDS ON AIR GETTING BACK TO IDG CASE
THROUGH DRAIN HOSE. FAILURE TO OBTAIN PROPER DRAINAGE CAN RESULT IN
AN OVER FILLED CONDITION AND CAUSE DAMAGE TO IDG. USE THE CORRECT
ADAPTER TO RELEASE THE PRESSURE FROM THE IDG. AN INCORRECT ADAPTER
WILL NOT RELEASE THE PRESSURE IN THE IDG. THIS CAN CAUSE AN INCORRECT
OIL LEVEL IN THE IDG.
(6)
Connect oil drain hose to overflow drain coupling on IDG. Allow any oil draining through
oil drain hose to flow into container. Keep hose below the level of the IDG.
NOTE:
It is normal for some oil to drain when the hose is connected to the coupling.
(7)
Remove dust cover from pressure fill coupling.
(8)
Connect service cart oil-in hose to pressure fill coupling on IDG.
CAUTION:
WHEN SERVICING IDG, DO NOT MIX TYPES OR BRANDS OF OIL. MIXING OILS
COULD CAUSE DAMAGE TO IDG.
(9)
Pump oil from service cart into IDG.
CAUTION:
SOON AFTER STARTING TO PUMP OIL INTO IDG, OIL MAY FLOW FROM THE OIL
DRAIN HOSE. THIS DOES NOT INDICATE A FULL IDG. CONTINUE SERVICING
UNTIL A MINIMUM OF ONE QUART (ONE LITER) OF OIL HAS OVERFLOWED INTO
THE CONTAINER. THIS IS REQUIRED TO ASSURE THE IDG OVERFLOW DRAIN
COUPLING IS FULLY ATTACHED. FAILURE TO OBTAIN NEEDED DRAINAGE CAN
RESULT IN OVERFILLING AND CAUSE DAMAGE TO THE IDG.
(10)
Discontinue pumping oil into IDG when a minimum of one (1) quart (0.9463 liter) has
overflowed into container.
NOTE:
The one quart of oil overflow is in addition to any oil that may have drained when the hose was
connected to the overflow drain coupling.
(11)
Disconnect the oil-in hose from coupling on IDG.
(12)
Install dust cover on pressure fill coupling on IDG.
CAUTION:
DO NOT REMOVE OIL DRAIN HOSE FROM OVERFLOW DRAIN COUPLING UNTIL
DRAINAGE SUBSIDES TO A SLOW DRIPPING CONDITION. FAILURE TO DRAIN THE
IDG PROPERLY WILL RESULT IN AN OVERFILLED CONDITION AND CAUSE
DAMAGE TO THE IDG.
(13)
When oil flow from oil drain hose slows to drops, remove oil drain hose.
(14)
Install dust cover on overflow drain coupling on IDG.
E.
Check scavenge filter Differential Pressure Indicator (DPI).
NOTE:
MM 24-11-01 allows the DPI to be reset three times before IDG replacement. If “DPI RESET”
placard is not installed on the IDG, contact Maintenance Control to place reset on Deferred Item.
(1)
When an extended DPI is found on the IDG, do the following:
(a)
Mark the next sequential number on the “DPI RESET” placard located on the IDG
housing.
(b)
Record in the A/C Logbook the DPI reset number marked in step E.(1)(a).
(c)
Do a check for the following conditions.
CARD NO.: B767-2A
PAGE:
B767 SERVICE CHECK - DESCRIPTION
30 of 55
REV. NO.: 82
DATE: 12-06-10
NO. 2 ENGINE AND PYLON
CF6-80A SERIES
1
Check to see if there is contamination on the scavenge filter element, in
the filter, in the filter bowl or in the oil drained from the filter cavity.
NOTE:
Contamination is defined as bright metal deposits which can be defined as chunks or pieces caused
by breakage (in contrast to non-metallic flakes or slivers caused by normal wear). A moderate
number of scattered small metallic flakes (bronze or silver colored metal), or flakes of generator
insulation are normal products of wear during operation. Even a considerable number of nonmetallic items such as black epoxy chips, sleeving and other forms of generator insulation does not
always indicate damage to the IDG.
2
Check to see if the O-rings or the filter is damaged. This would allow
contaminated oil to bypass the filter and enter the external oil cooling
circuit.
(d)
If no contamination is found and no condition is observed that would allow oil to
bypass the filter, do the following:
NOTE:
When the filter DPI has activated for the fourth time, replace the IDG (Ref. AMM 24-11-01).
1
Verify there are no IDG related EICAS or BPCU BITE messages. If the
EICAS or BITE messages are present, take necessary corrective action. If
message was caused by the IDG, replace the IDG (Ref. AMM 24-11-01).
2
Reset the filter DPI.
(e)
If contamination is found, refer to AMM 24-11-02 for corrective action.
F.
Activate thrust reverser isolation valve (Ref. AMM 78-31-00).
CARD NO.: B767-2A
PAGE:
B767 SERVICE CHECK - DESCRIPTION
31 of 55
REV. NO.: 82
DATE: 12-06-10
NO. 1 ENGINE AND PYLON
PW 4000 SERIES
53.
Perform a general visual inspection (walk-around check) of the No. 1 engine. Check engine cowling, engine
inlet, fan rotor spinner, fan rotor blades, pylons, open blow-out doors, open latches, visible turbine blades and
exhaust area for obvious damage and fluid leaks.
A.
Check engines for fluid leaks and obvious damage.
B.
Check inlet cowl lip assembly and inner/outer panels for security, condition, and damage.
C.
Check inlet cone, fan blades, and fan case rub strips for security, condition, and damage.
D.
Check fan duct and cold stream duct, thrust reverser blocker doors and acoustic panels for security,
condition, and damage.
E.
Check core engine exhaust area including turbine blades for condition and damage.
F.
Check engine pylons for fluid leaks and obvious damage.
54.
Service oil at No. 1 engine with 2380 engine oil (Ref. Figure 7).
NOTE:
It is not required to service the engine oil if Service Check is being performed on a PW 4000
equipped aircraft that has sat statically and not operated either or both engines for the previous 72
hours since last Service Check.
A.
Engine Oil Check
(1)
To check the engine oil, wait a minimum of 15 minutes and a maximum of 2 hours after
initial engine shut down.
(2)
If the engine has been shut down for more than 2 hours, motor engine for 2 minutes (AMM
71-00-00/201) before checking the oil level.
(3)
Check the oil level indication using the EICAS. Full is: Left 24 + 3, Right 21 + 3.
(4)
If engine EICAS indicates Left 21, Right 19 or less, engine oil must be added.
(5)
If next flight segment is ETOPS, oil tank level must be visually checked.
B.
Engine Oil Servicing
(1)
Supply electrical power (Ref. 24-22-00).
WARNING:
DO THE THRUST REVERSER DEACTIVATION PROCEDURE TO PREVENT THE
OPERATION OF THE THRUST REVERSER. ACCIDENTAL OPERATION OF THE
THRUST REVERSER CAN CAUSE INJURY TO YOU OR DAMAGE TO EQUIPMENT.
(2)
Do the Thrust Reverser for Ground Maintenance (Ref. 78-31-00/201).
(3)
Open the access door to the oil tank of the left side of the core cowl panel.
(4)
Do the steps that follow to open the oil tank cap:
WARNING:
BEFORE YOU OPEN THE OIL TANK CAP, PERMIT A MINIMUM OF FIVE MINUTES
AFTER ENGINE SHUTDOWN TO LET THE PRESSURE IN THE OIL TANK BLEED OFF.
A FAST FLOW OF HOT OIL CAN OCCUR AND CAUSE INJURY TO YOU.
CAUTION:
DO NOT USE THE OIL TANK SIGHT GAGE TO DO A CHECK OF THE OIL LEVEL.
YOU MUST LOOK INSIDE THE OIL TANK TO CORRECTLY MEASURE THE OIL.
(a)
Lift the handle to the position vertical to the top of the oil tank cap.
(b)
Turn the handle counter-clockwise to the OPEN position.
(c)
Remove the oil tank cap from the filler neck.
(5)
Look inside the oil tank at the oil (Ref. Figure 8).
CARD NO.: B767-2A
PAGE:
B767 SERVICE CHECK - DESCRIPTION
32 of 55
REV. NO.: 82
DATE: 12-06-10
NO. 1 ENGINE AND PYLON
PW 4000 SERIES
NOTE:
If you see “black oil” in the oil system, refer to AMM 72-00-00/601. Black oil can be an indication
of a serious problem, or it can be a condition that requires no maintenance action.
(6)
If you do not see oil (the oil is below the bottom of the “V”):
(a)
With a clean screwdriver, push open the valve of the filler neck.
(b)
With a strong light, look at the oil.
CAUTION:
DO NOT OVERFILL THE ENGINE OIL. TOO MUCH OIL IN THE ENGINE COULD RESULT
IN ENGINE DAMAGE.
(c)
Add oil in whole quart quantities only. When the oil level reaches the bottom of the
“V”, continue to pour in any remaining oil until the quart can is empty. Do not add
any more oil.
(d)
Write down the quantity of oil added.
(7)
If you do see oil (the oil is above the bottom of the “V”)
(a)
Do not add engine oil.
(8)
Install the oil tank cap as follows:
(a)
Do a visual inspection of the oil tank cap packing to ensure it is free of cuts and
shows no evidence of deterioration.
(b)
Lubricate the packing of the oil tank cap with engine oil.
(c)
Turn the handle on the oil tank cap to the OPEN position, with the smooth side of
the handle away fro the recess.
(d)
Align the lugs of the oil tank cap with the slots in the filler neck.
(e)
Install the oil tank cap into the filler neck.
(f)
Lock the oil tank cap.
(g)
Apply pressure down on the oil tank cap.
(h)
Turn the handle to the CLOSE position (approximately 45 degrees).
(i)
Pull up on the handle to make sure that the installation of the oil tank cap is correct.
(j)
Put the handle in the recess to lock the oil tank cap.
(k)
Apply pressure to the outer rim of the oil tank cap at the opposite points to make
sure that the installation is correct.
Make sure that the oil tank cap does not move.
(9)
Close the access door to the oil tank on the left core cowl panel.
(10)
Make sure the EICAS oil indication is Left 24 + 3, Right 21 + 3
(11)
Record OIL ADDED - QUARTS in aircraft log book. If no oil was added, enter zero (0).
55.
Service engine IDG oil level and check filter pop-out indicator (IDGs use turbo 2380 oil).
CAUTION:
DO NOT SERVICE IDG IF IDG IS DISCONNECTED. A DISCONNECTED IDG MUST BE
REMOVED FROM THE AIRCRAFT WITHIN 50 FLIGHT HOURS.
NOTE:
It is not required to service the IDG if Service Check is being performed on a PW 4000 equipped
aircraft that has sat statically and not operated either or both engines for the previous 72 hours since
last Service Check
A.
Deactivate thrust reverser isolation valve for ground maintenance.
CARD NO.: B767-2A
PAGE:
B767 SERVICE CHECK - DESCRIPTION
33 of 55
REV. NO.: 82
DATE: 12-06-10
NO. 1 ENGINE AND PYLON
PW 4000 SERIES
WARNING:
FAILURE TO DEACTIVATE THRUST REVERSER ISOLATION VALVE FOR GROUND
MAINTENANCE COULD RESULT IN INADVERTENT THRUST REVERSER
OPERATION WITH POSSIBLE INJURY TO PERSONNEL AND DAMAGE TO
EQUIPMENT.
B.
Check to see if the IDG is disconnected.
C.
Correct the DISCONNECT TRIP message if necessary (Ref. AMM 24-20-00).
D.
Service IDG as follows: (Ref. Fig. 9)
(1)
If IDG is being serviced due to oil loss during system maintenance, drain IDG case (M/M
12-13-03 IDG Oil Drain Procedure) and then continue servicing at step D.(3).
(2)
If IDG is being serviced for any other reason, continue servicing at step D.(3).
(3)
Remove dust cover from overflow drain coupling on IDG.
(4)
Put a container below the IDG to catch the oil which will flow from the IDG.
(5)
Place end of oil drain hose into a container to catch oil.
WARNING:
WHEN CONNECTING HOSE TO OVERFLOW DRAIN COUPLING, USE RAG AROUND
FITTING TO PREVENT SPLASH DUE TO PRESSURE BUILDUP IN IDG CASE. HOT OIL
CAN CAUSE INJURY TO PERSONNEL.
CAUTION:
CHECK THAT IDG OIL DRAIN HOSE IS NOT SUBMERGED IN OIL IN CONTAINER, IS
NOT BENT OR KINKED SO AS TO INHIBIT DRAINAGE, AND IS LOWER THAN IDG AT
ALL POINTS. FREE DRAINAGE DEPENDS ON AIR GETTING BACK TO IDG CASE
THROUGH DRAIN HOSE. FAILURE TO OBTAIN PROPER DRAINAGE CAN RESULT IN
AN OVER FILLED CONDITION AND CAUSE DAMAGE TO IDG. USE THE CORRECT
ADAPTER TO RELEASE THE PRESSURE FROM THE IDG. AN INCORRECT ADAPTER
WILL NOT RELEASE THE PRESSURE IN THE IDG. THIS CAN CAUSE AN INCORRECT
OIL LEVEL IN THE IDG.
(6)
Connect oil drain hose to overflow drain coupling on IDG. Allow any oil draining through
oil drain hose to flow into container. Keep hose below the level of the IDG.
NOTE:
It is normal for some oil to drain when the hose is connected to the coupling.
(7)
Remove dust cover from pressure fill coupling.
(8)
Connect service cart oil-in hose to pressure fill coupling on IDG.
CAUTION:
WHEN SERVICING IDG, DO NOT MIX TYPES OR BRANDS OF OIL. MIXING OILS
COULD CAUSE DAMAGE TO IDG.
(9)
Pump oil from service cart into IDG.
CAUTION:
SOON AFTER STARTING TO PUMP OIL INTO IDG, OIL MAY FLOW FROM THE OIL
DRAIN HOSE. THIS DOES NOT INDICATE A FULL IDG. CONTINUE SERVICING
UNTIL A MINIMUM OF ONE QUART (ONE LITER) OF OIL HAS OVERFLOWED INTO
THE CONTAINER. THIS IS REQUIRED TO ASSURE THE IDG OVERFLOW DRAIN
COUPLING IS FULLY ATTACHED. FAILURE TO OBTAIN NEEDED DRAINAGE CAN
RESULT IN OVERFILLING AND CAUSE DAMAGE TO THE IDG.
(10)
Discontinue pumping oil into IDG when a minimum of one (1) quart (0.9463 liter) has
overflowed into container.
NOTE:
The one quart of oil overflow is in addition to any oil that may have drained when the hose was
connected to the overflow drain coupling.
(11)
Disconnect the oil-in hose from coupling on IDG.
CARD NO.: B767-2A
PAGE:
B767 SERVICE CHECK - DESCRIPTION
34 of 55
REV. NO.: 82
DATE: 12-06-10
NO. 1 ENGINE AND PYLON
PW 4000 SERIES
(12)
Install dust cover on pressure fill coupling on IDG.
DO NOT REMOVE OIL DRAIN HOSE FROM OVERFLOW DRAIN COUPLING UNTIL
DRAINAGE SUBSIDES TO A SLOW DRIPPING CONDITION. FAILURE TO DRAIN THE
IDG PROPERLY WILL RESULT IN AN OVERFILLED CONDITION AND CAUSE
DAMAGE TO THE IDG.
(13)
When oil flow from oil drain hose slows to a drop, wait two minutes, then remove oil drain
hose.
(14)
Install dust cover on overflow drain coupling on IDG.
E.
Check scavenge filter Differential Pressure Indicator (DPI) (Ref. Figure 10).
NOTE:
MM 24-11-01 allows the DPI to be reset three times before IDG replacement. If “DPI RESET”
placard is not installed on the IDG, contact Maintenance Control to place reset on Deferred Item.
(1)
When an extended DPI is found on the IDG, do the following:
(a)
Mark the next sequential number on the “DPI RESET” placard located on the IDG
housing.
(b)
Record in the A/C Logbook the DPI reset number marked in step E.(1)(a).
(c)
Do a check for the following conditions (AMM 24-11-02).
1
Check to see if there is contamination on the scavenge filter element, in
the filter, in the filter bowl or in the oil drained from the filter cavity.
NOTE:
Contamination is defined as bright metal deposits which can be defined as chunks or pieces caused
by breakage (in contrast to non-metallic flakes or slivers caused by normal wear). A moderate
number of scattered small metallic flakes (bronze or silver colored metal), or flakes of generator
insulation are normal products of wear during operation. Even a considerable number of nonmetallic items such as black epoxy chips, sleeving and other forms of generator insulation does not
always indicate damage to the IDG.
2
Check to see if the O-rings or the filter is damaged. This would allow
contaminated oil to bypass the filter and enter the external oil cooling
circuit.
(d)
If no contamination is found and no condition is observed that would allow oil to
bypass the filter, do the following:
NOTE:
When the filter DPI has activated for the fourth time, replace the IDG (Ref. AMM 24-11-01).
1
Verify there are no IDG related EICAS or BPCU BITE messages. If the
EICAS or BITE messages are present, take necessary corrective action. If
message was caused by the IDG, replace the IDG (Ref. AMM 24-11-01).
2
Reset the filter DPI.
(e)
If contamination is found, refer to AMM 24-11-02 for corrective action.
F.
Activate thrust reverser isolation valve (Ref. AMM 78-31-00).
CAUTION:
CARD NO.: B767-2A
PAGE:
B767 SERVICE CHECK - DESCRIPTION
35 of 55
REV. NO.: 82
DATE: 12-06-10
NO. 2 ENGINE AND PYLON
PW 4000 SERIES
56.
Perform a general visual inspection (walk-around check) of the No. 2 engine. Check engine cowling, engine
inlet, fan rotor spinner, fan rotor blades, pylons, open blow-out doors, open latches, visible turbine blades and
exhaust area for obvious damage and fluid leaks.
A.
Check engines for fluid leaks and obvious damage.
B.
Check inlet cowl lip assembly and inner/outer panels for security, condition, and damage.
C.
Check inlet cone, fan blades, and fan case rub strips for security, condition, and damage.
D.
Check fan duct and cold stream duct, thrust reverser blocker doors and acoustic panels for security,
condition, and damage.
E.
Check core engine exhaust area including turbine blades for condition and damage.
F.
Check engine pylons for fluid leaks and obvious damage.
57.
Service oil at No. 2 engine with 2380 engine oil (Ref. Figure 9).
NOTE:
It is not required to service the engine oil if Service Check is being performed on a PW 4000
equipped aircraft that has sat statically and not operated either or both engines for the previous 72
hours since last Service Check.
A.
Engine Oil Check
(1)
To check the engine oil, wait a minimum of 15 minutes and a maximum of 2 hours after
initial engine shut down.
(2)
If the engine has been shut down for more than 2 hours, motor engine for 2 minutes (AMM
71-00-00/201) before checking the oil level.
(3)
Check the oil level indication using the EICAS. Full is: Left 24 + 3, Right 21 + 3.
(4)
If engine EICAS indicates Left 21, Right 19 or less, engine oil must be added.
(5)
If next flight segment is ETOPS, oil tank level must be visually checked.
B.
Engine Oil Servicing
(1)
Supply electrical power (Ref. 24-22-00).
WARNING:
DO THE THRUST REVERSER DEACTIVATION PROCEDURE TO PREVENT THE
OPERATION OF THE THRUST REVERSER. ACCIDENTAL OPERATION OF THE
THRUST REVERSER CAN CAUSE INJURY TO YOU OR DAMAGE TO EQUIPMENT.
(2)
Do the Thrust Reverser for Ground Maintenance (Ref. 78-31-00/201).
(3)
Open the access door to the oil tank of the left side of the core cowl panel.
(4)
Do the steps that follow to open the oil tank cap:
WARNING:
BEFORE YOU OPEN THE OIL TANK CAP, PERMIT A MINIMUM OF FIVE MINUTES
AFTER ENGINE SHUTDOWN TO LET THE PRESSURE IN THE OIL TANK BLEED OFF.
A FAST FLOW OF HOT OIL CAN OCCUR AND CAUSE INJURY TO YOU.
CAUTION:
DO NOT USE THE OIL TANK SIGHT GAGE TO DO A CHECK OF THE OIL LEVEL.
YOU MUST LOOK INSIDE THE OIL TANK TO CORRECTLY MEASURE THE OIL.
(a)
Lift the handle to the position vertical to the top of the oil tank cap.
(b)
Turn the handle counter-clockwise to the OPEN position.
(c)
Remove the oil tank cap from the filler neck.
CARD NO.: B767-2A
PAGE:
B767 SERVICE CHECK - DESCRIPTION
36 of 55
REV. NO.: 82
DATE: 12-06-10
NO. 2 ENGINE AND PYLON
PW 4000 SERIES
(5)
Look inside the oil tank at the oil (Ref. Figure 8).
If you see “black oil” in the oil system, refer to AMM 72-00-00/601. Black oil can be an indication
of a serious problem, or it can be a condition that requires no maintenance action.
(6)
If you do not see oil (the oil is below the bottom of the “V”):
(a)
With a clean screwdriver, push open the valve of the filler neck.
(b)
With a strong light, look at the oil.
CAUTION:
DO NOT OVERFILL THE ENGINE OIL. TOO MUCH OIL IN THE ENGINE COULD RESULT
IN ENGINE DAMAGE.
(c)
Add oil in whole quart quantities only. When the oil level reaches the bottom of the
“V”, continue to pour in any remaining oil until the quart can is empty. Do not add
any more oil.
(d)
Write down the quantity of oil added.
(7)
If you do see oil (the oil is above the bottom of the “V”)
(a)
Do not add engine oil.
(8)
Install the oil tank cap as follows:
(a)
Do a visual inspection of the oil tank cap packing to ensure it is free of cuts and
shows no evidence of deterioration.
(b)
Lubricate the packing of the oil tank cap with engine oil.
(c)
Turn the handle on the oil tank cap to the OPEN position, with the smooth side of
the handle away fro the recess.
(d)
Align the lugs of the oil tank cap with the slots in the filler neck.
(e)
Install the oil tank cap into the filler neck.
(f)
Lock the oil tank cap.
(g)
Apply pressure down on the oil tank cap.
(h)
Turn the handle to the CLOSE position (approximately 45 degrees).
(i)
Pull up on the handle to make sure that the installation of the oil tank cap is correct.
(j)
Put the handle in the recess to lock the oil tank cap.
(k)
Apply pressure to the outer rim of the oil tank cap at the opposite points to make
sure that the installation is correct.
Make sure that the oil tank cap does not move.
(9)
Close the access door to the oil tank on the left core cowl panel.
(10)
Make sure the EICAS oil indication is Left 24 + 3, Right 21 + 3
(11)
Record OIL ADDED - QUARTS in aircraft log book. If no oil was added, enter zero (0).
58.
Service engine IDG oil level and check filter pop-out indicator (IDGs use turbo 2380 oil).
CAUTION:
DO NOT SERVICE IDG IF IDG IS DISCONNECTED. A DISCONNECTED IDG MUST BE
REMOVED FROM THE AIRCRAFT WITHIN 50 FLIGHT HOURS.
NOTE:
It is not required to service the IDG if Service Check is being performed on a PW 4000 equipped
aircraft that has sat statically and not operated either or both engines for the previous 72 hours since
last Service Check
A.
Deactivate thrust reverser isolation valve for ground maintenance.
NOTE:
CARD NO.: B767-2A
PAGE:
B767 SERVICE CHECK - DESCRIPTION
37 of 55
REV. NO.: 82
DATE: 12-06-10
NO. 2 ENGINE AND PYLON
PW 4000 SERIES
WARNING:
FAILURE TO DEACTIVATE THRUST REVERSER ISOLATION VALVE FOR GROUND
MAINTENANCE COULD RESULT IN INADVERTENT THRUST REVERSER
OPERATION WITH POSSIBLE INJURY TO PERSONNEL AND DAMAGE TO
EQUIPMENT.
B.
Check to see if the IDG is disconnected.
C.
Correct the DISCONNECT TRIP message if necessary (Ref. AMM 24-20-00).
D.
Service IDG as follows: (Ref. Fig. 9)
(1)
If IDG is being serviced due to oil loss during system maintenance, drain IDG case (M/M
12-13-03 IDG Oil Drain Procedure) and then continue servicing at step D.(3).
(2)
If IDG is being serviced for any other reason, continue servicing at step D.(3).
(3)
Remove dust cover from overflow drain coupling on IDG.
(4)
Put a container below the IDG to catch the oil which will flow from the IDG.
(5)
Place end of oil drain hose into a container to catch oil.
WARNING:
WHEN CONNECTING HOSE TO OVERFLOW DRAIN COUPLING, USE RAG AROUND
FITTING TO PREVENT SPLASH DUE TO PRESSURE BUILDUP IN IDG CASE. HOT OIL
CAN CAUSE INJURY TO PERSONNEL.
CAUTION:
CHECK THAT IDG OIL DRAIN HOSE IS NOT SUBMERGED IN OIL IN CONTAINER, IS
NOT BENT OR KINKED SO AS TO INHIBIT DRAINAGE, AND IS LOWER THAN IDG AT
ALL POINTS. FREE DRAINAGE DEPENDS ON AIR GETTING BACK TO IDG CASE
THROUGH DRAIN HOSE. FAILURE TO OBTAIN PROPER DRAINAGE CAN RESULT IN
AN OVER FILLED CONDITION AND CAUSE DAMAGE TO IDG. USE THE CORRECT
ADAPTER TO RELEASE THE PRESSURE FROM THE IDG. AN INCORRECT ADAPTER
WILL NOT RELEASE THE PRESSURE IN THE IDG. THIS CAN CAUSE AN INCORRECT
OIL LEVEL IN THE IDG.
(6)
Connect oil drain hose to overflow drain coupling on IDG. Allow any oil draining through
oil drain hose to flow into container. Keep hose below the level of the IDG.
NOTE:
It is normal for some oil to drain when the hose is connected to the coupling.
(7)
Remove dust cover from pressure fill coupling.
(8)
Connect service cart oil-in hose to pressure fill coupling on IDG.
CAUTION:
WHEN SERVICING IDG, DO NOT MIX TYPES OR BRANDS OF OIL. MIXING OILS
COULD CAUSE DAMAGE TO IDG.
(9)
Pump oil from service cart into IDG.
CAUTION:
SOON AFTER STARTING TO PUMP OIL INTO IDG, OIL MAY FLOW FROM THE OIL
DRAIN HOSE. THIS DOES NOT INDICATE A FULL IDG. CONTINUE SERVICING
UNTIL A MINIMUM OF ONE QUART (ONE LITER) OF OIL HAS OVERFLOWED INTO
THE CONTAINER. THIS IS REQUIRED TO ASSURE THE IDG OVERFLOW DRAIN
COUPLING IS FULLY ATTACHED. FAILURE TO OBTAIN NEEDED DRAINAGE CAN
RESULT IN OVERFILLING AND CAUSE DAMAGE TO THE IDG.
(10)
Discontinue pumping oil into IDG when a minimum of one (1) quart (0.9463 liter) has
overflowed into container.
NOTE:
The one quart of oil overflow is in addition to any oil that may have drained when the hose was
connected to the overflow drain coupling.
(11)
Disconnect the oil-in hose from coupling on IDG.
CARD NO.: B767-2A
PAGE:
B767 SERVICE CHECK - DESCRIPTION
38 of 55
REV. NO.: 82
DATE: 12-06-10
NO. 2 ENGINE AND PYLON
PW 4000 SERIES
(12)
Install dust cover on pressure fill coupling on IDG.
DO NOT REMOVE OIL DRAIN HOSE FROM OVERFLOW DRAIN COUPLING UNTIL
DRAINAGE SUBSIDES TO A SLOW DRIPPING CONDITION. FAILURE TO DRAIN THE
IDG PROPERLY WILL RESULT IN AN OVERFILLED CONDITION AND CAUSE
DAMAGE TO THE IDG.
(13)
When oil flow from oil drain hose slows to a drop, wait two minutes, then remove oil drain
hose.
(14)
Install dust cover on overflow drain coupling on IDG.
E.
Check scavenge filter Differential Pressure Indicator (DPI) (Ref. Figure 10).
NOTE:
MM 24-11-01 allows the DPI to be reset three times before IDG replacement. If “DPI RESET”
placard is not installed on the IDG, contact Maintenance Control to place reset on Deferred Item.
(1)
When an extended DPI is found on the IDG, do the following:
(a)
Mark the next sequential number on the “DPI RESET” placard located on the IDG
housing.
(b)
Record in the A/C Logbook the DPI reset number marked in step E.(1)(a).
(c)
Do a check for the following conditions (AMM 24-11-02).
1
Check to see if there is contamination on the scavenge filter element, in
the filter, in the filter bowl or in the oil drained from the filter cavity.
NOTE:
Contamination is defined as bright metal deposits which can be defined as chunks or pieces caused
by breakage (in contrast to non-metallic flakes or slivers caused by normal wear). A moderate
number of scattered small metallic flakes (bronze or silver colored metal), or flakes of generator
insulation are normal products of wear during operation. Even a considerable number of nonmetallic items such as black epoxy chips, sleeving and other forms of generator insulation does not
always indicate damage to the IDG.
2
Check to see if the O-rings or the filter is damaged. This would allow
contaminated oil to bypass the filter and enter the external oil cooling
circuit.
(d)
If no contamination is found and no condition is observed that would allow oil to
bypass the filter, do the following:
NOTE:
When the filter DPI has activated for the fourth time, replace the IDG (Ref. AMM 24-11-01).
1
Verify there are no IDG related EICAS or BPCU BITE messages. If the
EICAS or BITE messages are present, take necessary corrective action. If
message was caused by the IDG, replace the IDG (Ref. AMM 24-11-01).
2
Reset the filter DPI.
(e)
If contamination is found, refer to AMM 24-11-02 for corrective action.
F.
Activate thrust reverser isolation valve (Ref. AMM 78-31-00).
CAUTION:
CARD NO.: B767-2A
PAGE:
B767 SERVICE CHECK - DESCRIPTION
39 of 55
REV. NO.: 82
DATE: 12-06-10
AUXILIARY POWER UNIT
59.
60.
Perform a general visual inspection of the internal section of the APU compartment.
A.
Open APU access doors.
B.
Do a general visual inspection of the APU compartment and check for condition, security, and fluid
leaks.
Service auxiliary power unit (APU) oil to maximum limits with turbo 2380 oil.
A.
Service APU oil quantity to maximum limit with turbo 2380 oil.
WARNING:
DO NOT REMOVE THE OIL FILL CAP IF THE APU IS WARM AND THE OIL LEVEL IS
AT OR ABOVE THE FULL MARK. THE HOT OIL CAN CAUSE INJURY. ALLOW THE
APU TEMPERATURE TO DECREASE AS MUCH AS POSSIBLE BEFORE YOU FILL
THE OIL.
(1)
Remove oil fill cap.
WARNING:
PROLONGED CONTACT OF LUBRICATING OIL WITH THE SKIN CAN CAUSE
DERMATITIS. OIL WILL STAIN CLOTHING AND WILL SOFTEN PAINT.
CAUTION:
SOME OILS ARE NOT COMPATIBLE WHEN MIXED. UNLESS COMPATIBILITY IS
ASSURED, DO NOT MIX BRAND NAME OILS.
B.
C.
(2)
Slowly add oil until the oil flows into the scupper drain.
(3)
Install fill cap; ensure cap is secure.
Close APU access doors.
Record OIL ADDED - QUARTS in aircraft log book. If no oil was added, enter zero (0).
CARD NO.: B767-2A
PAGE:
B767 SERVICE CHECK - DESCRIPTION
EICAS MESSAGES
FIGURE 1
40 of 55
REV. NO.: 82
DATE: 12-06-10
CARD NO.: B767-2A
PAGE:
B767 SERVICE CHECK - DESCRIPTION
EICAS MESSAGES
FIGURE 2
41 of 55
REV. NO.: 82
DATE: 12-06-10
CARD NO.: B767-2A
PAGE:
B767 SERVICE CHECK - DESCRIPTION
EICAS MESSAGES
FIGURE 3
42 of 55
REV. NO.: 82
DATE: 12-06-10
CARD NO.: B767-2A
PAGE:
B767 SERVICE CHECK - DESCRIPTION
NOTE:
43 of 55
REV. NO.: 82
DATE: 12-06-10
Replace brake if either end of fwd or aft wear indicator pins is 0.031 (1/32 inch) or less from housing
sub-assembly with brakes parked and hydraulic system pressurized.
BRAKE WEAR LIMITS
FIGURE 4
CARD NO.: B767-2A
PAGE:
B767 SERVICE CHECK - DESCRIPTION
ENGINE OIL SERVICING
FIGURE 5
44 of 55
REV. NO.: 82
DATE: 12-06-10
CARD NO.: B767-2A
PAGE:
B767 SERVICE CHECK - DESCRIPTION
CF6-80A SERIES ENGINES - IDG OIL SERVICING
FIGURE 6
45 of 55
REV. NO.: 82
DATE: 12-06-10
CARD NO.: B767-2A
PAGE:
B767 SERVICE CHECK - DESCRIPTION
PW4000 ENGINE OIL SERVICING
FIGURE 7
46 of 55
REV. NO.: 82
DATE: 12-06-10
CARD NO.: B767-2A
PAGE:
B767 SERVICE CHECK - DESCRIPTION
PW4000 ENGINE OIL SERVICING
FIGURE 8
47 of 55
REV. NO.: 82
DATE: 12-06-10
CARD NO.: B767-2A
PAGE:
B767 SERVICE CHECK - DESCRIPTION
48 of 55
REV. NO.: 82
DATE: 12-06-10
PW4000 INTEGRATED DRIVE GENERATOR (IDG) OIL SERVICING
FIGURE 9
CARD NO.: B767-2A
PAGE:
B767 SERVICE CHECK - DESCRIPTION
PW4000 IDG SERVICING
FIGURE 10
49 of 55
REV. NO.: 82
DATE: 12-06-10
CARD NO.: B767-2A
PAGE:
B767 SERVICE CHECK - DESCRIPTION
APU BITE PROCEDURES
FIGURE 11
50 of 55
REV. NO.: 82
DATE: 12-06-10
CARD NO.: B767-2A
PAGE:
B767 SERVICE CHECK - DESCRIPTION
SECURITY TAG LOCATOR, COCKPIT DOOR
FIGURE 12
51 of 55
REV. NO.: 82
DATE: 12-06-10
CARD NO.: B767-2A
PAGE:
B767 SERVICE CHECK - DESCRIPTION
52 of 55
REV. NO.: 82
DATE: 12-06-10
COCKPIT EQUIPMENT - PC2SF CONFIGURED AIRCRAFT
FIGURE 13, SHEET 1 OF 3
CARD NO.: B767-2A
PAGE:
B767 SERVICE CHECK - DESCRIPTION
53 of 55
REV. NO.: 82
DATE: 12-06-10
FLIGHT DECK EMERGENCY EQUIPMENT - SF CONFIGURED AIRCRAFT
FIGURE 13, SHEET 2 OF 3
CARD NO.: B767-2A
PAGE:
B767 SERVICE CHECK - DESCRIPTION
54 of 55
REV. NO.: 82
DATE: 12-06-10
EMERGENCY EQUIPMENT - BCSF AND BDSF CONFIGURED AIRCRAFT
FIGURE 13, SHEET 3 OF 3
CARD NO.: B767-2A
PAGE:
B767 SERVICE CHECK - DESCRIPTION
TAIL SKID STRUT/ACTUATOR PRESSURIZATION
FIGURE 14
55 of 55
REV. NO.: 82
DATE: 12-06-10
CARD NO.: B767-2B
PAGE:
REV. NO.: 82
DATE: 12-06-10
B767 SERVICE CHECK - SIGN-OFF RECORD
AIRCRAFT NO. STATION
LOG PAGE NO. WORK ORDER NO.
1 of 12
DATE
TOTAL SIGN-OFF
PAGES: 12
GENERAL DESCRIPTION AND OPERATION
NOTE:
The Sign-Off Section of the Service Check (Form B767-2B) is a signature record and contains
general information only. The Description Section on Form B767-2A MUST be used to accomplish
the Service Check.
Configuration Designations - Identifiable Features
PC2SF - B767-200 Package Carrier Converted to an IAI Special Freighter. Main Deck Cargo Door “Door Locked”
external view ports are functional. A protective impact doubler is installed on the external upper corners of the L1 Door
cutout. The supernumerary seat is in the cockpit.
SF - B767-200 IAI Special Freighter. Main Deck Cargo Door “Door Locked” external view ports are functional. The
supernumerary seat is between the cockpit and smoke barrier.
BCSF - B767-200 Boeing Converted Special Freighter. Main Deck Cargo Door “Door Locked” external view ports
cannot be used and are covered with “Do Not Remove” decals. Lavatory is in the cockpit.
BDSF - B767-300 IAI Special Freighter. Main Deck Cargo Door “Door Locked” external view ports are functional.
Airplane has a tail skid. Lavatory is in the cockpit.
•
Remove the yellow “Maintenance in Work” placard from F/O’s seat back pocket and place in front of throttle
levers. Remove placard and re-stow after check is complete.
•
Utilize GSE as much as possible to decrease APU operation.
•
Communicate with flight crew on arrival for any servicing or special requirements. Check aircraft Log Book for
pilot reports.
•
Complete B767 Daily EICAS Non-Normal Fault Message Retrieval Form (B767-60).
•
Enter all discrepancies and corrective actions in Aircraft Log Book (M-1A).
•
Record all non-airworthy and non-safety items that are found during the check on the Non-Routine Work Sheet
(M-17).
•
If any errors are identified with a Line Maintenance Check, submit a Maintenance Programs Revision Request
(MPRR) per GMM Chap. 1, Section 01.03, and forward to Maintenance Programs.
•
Any material referenced in the text or tables of the Line Maintenance Checks may be substituted in accordance
with the Consumable Material Equivalents List located in Chapter 20, B767 Maintenance Manual. This bullet item
does not apply to AD related tasks.
•
This check includes ETOPS tasks which require Technicians to adhere to GMM 04.44 guidelines when performing
maintenance on ETOPS aircraft.
CERTIFICATION OF AIRWORTHINESS
All signoff pages of the check have been received, action taken where necessary, and initialed properly. Aircraft Logbook properly noted GMM Chapter 1, Section 04.03. Forward all sign-off sheets and attach M-17 forms to Aircraft
Records, ILN.
Service Check Completed. _______________________________
A & P Technician (signature)
CARD NO.: B767-2B
PAGE:
REV. NO.: 82
DATE: 12-06-10
B767 SERVICE CHECK - SIGN-OFF RECORD
AIRCRAFT NO.
Mechanic’s
Initials
STATION
LOG PAGE NO.
2 of 12
WORK ORDER NO.
DATE
Job Description
ABBREVIATED SERVICE CHECK
1
1.
NOTE:
Unserviceable emergency equipment must be replaced before flight.
If the aircraft has sat statically, the main engines have not been operated, and less than 72
hours have elapsed since the last full Service Check, perform the 72 hour reduced service
check and N/A the remainder of Service Check. If the aircraft has moved, the main engines
have been operated, or 72 hours have elapsed since the last full Service Check, N/A this step
and accomplish remainder of Service Check. In either case, document accomplishment of
Abbreviated Service Check or Full Service Check with a log book entry.
CARD NO.: B767-2B
PAGE:
REV. NO.: 82
DATE: 12-06-10
B767 SERVICE CHECK - SIGN-OFF RECORD
AIRCRAFT NO.
Mechanic’s
Initials
STATION
3 of 12
LOG PAGE NO.
WORK ORDER NO.
DATE
Job Description
FLIGHT COMPARTMENT
2
3
4
5
6
7
8
9.
10
11
12
13
14
NOTE:
Unserviceable emergency equipment must be replaced before flight.
2.
Perform an EICAS maintenance message read-out and record in Aircraft Logbook.
3.
Operationally check the Takeoff Configuration Warning Alert (N315AA Only).
4.
Check LT, CTR, and RT hydraulic fluid quantities using EICAS status display.
5.
Check operation and illumination of all flight compartment lights.
NOTE:
Ensure each indicator has 2 functional lamps. Re-lamp as necessary.
CAUTION:
DO NOT KEEP THE EMERGENCY LIGHTS ON FOR MORE THAN 1
MINUTE. EXTENDED OPERATION WILL REDUCE THE CHARGE ON
THE BATTERIES AND MAY RESULT IN DAMAGE.
6.
Perform a general visual inspection of flight compartment, including windows, for general
condition, cleanliness, and security.
7.
Check flight compartment items for presence, condition, and safeties (if required).
(Ref. Figure 13.)
8.
Perform readout of the Maintenance Control Display Panel (MCDP) (applicable for
Saturday or Sunday, once per week, maintenance visits only).
9.
Replace the Compact Flash (CF) data card in the QAR at the P-61 panel. Applicable to 219,
315, 744, and 747 at BRU, CVG, JFK, LGG, and MIA Saturday or Sunday, once per week
maintenance visits only.
10.
Perform APU Health Check (applicable for Saturday or Sunday, once per week, maintenance
visits only).
11.
Check that listed manuals, forms, and certificates are onboard the aircraft and in serviceable
condition.
12.
Inspect aluminum tape on cargo compartment side of the cockpit door for condition and
security. (Ref. Figure 12.) (Ref. AMM 11-35-02.) (N/A to BCSF and BDSF)
13.
Test engine, APU, cargo squibs on squib test control panel.
14.
Test the FUEL CONFIG Light and the LOW FUEL Message. Required by AD 2010-23-03.
Mechanic’s
Initials
15
Job Description
LAVATORY
15.
Perform general visual inspection of lavatory.
CARD NO.: B767-2B
PAGE:
B767 SERVICE CHECK - SIGN-OFF RECORD
AIRCRAFT NO.
Mechanic’s
Initials
16
4 of 12
REV. NO.: 82
DATE: 12-06-10
DATE
Job Description
SUPERNUMERARY COMPARTMENT (SF)/CREW SERVICE AREA (PC2SF AND BCSF)
16.
Visually check supernumerary/crew service area ceiling and reading lights for cleanliness,
condition, and security of installation (SF and PC2SF Only).
17
17.
Clean oven, if installed.
18
18.
Check portable oxygen bottles (SF and PC2SF Only).
19
19.
Check emergency equipment in supernumerary/crew service area (Ref. Figure 13).
CARD NO.: B767-2B
PAGE:
B767 SERVICE CHECK - SIGN-OFF RECORD
AIRCRAFT NO.
5 of 12
REV. NO.: 82
DATE: 12-06-10
DATE
Mechanic’s
Initials
Job Description
UPPER CARGO COMPARTMENT
NOTE:
20
20.
Unserviceable emergency equipment must be replaced before flight or placed on
deferral if allowable (Ref. MEL).
Check sidewall lining, ceiling panels, and lights.
21
21.
Clean and vacuum compartment.
22
22.
Check condition of floor, seat tracks, and anti-slip tape.
23
23.
Check internal markings for condition/legibility.
24
24.
Compartment lighting.
25
25.
Perform a general visual inspection of the cargo net for security (SF and PC2SF only).
26
26.
Weight and Balance Computer.
27
27.
Check that all access doors/panels are closed/secured.
28
28.
Operate forward (L1/R1) door and latching mechanism. Ensure smooth operation without
restriction.
29
29.
Check that all volumes of the B767 Wiring Diagram Manual are present and in serviceable
condition in manual storage bin. Check manual storage bin for general condition (PC,
PC2SF, and SF).
CARD NO.: B767-2B
PAGE:
B767 SERVICE CHECK - SIGN-OFF RECORD
AIRCRAFT NO.
6 of 12
REV. NO.: 82
DATE: 12-06-10
DATE
Mechanic’s
Initials
Job Description
LOWER CARGO COMPARTMENT
30
30.
Check cargo door for operation, door stops, and seals for security and evidence of damage.
31
31.
Check cargo compartments for general condition and evidence of damage.
NOTE:
All tears, holes, or damage penetrations through cargo compartment ceiling,
sidewall, shrouds, contour panels, and door liners must be repaired prior to
further flight except as authorized in specific aircraft Minimum Equipment List
(MEL).
32
32.
Check condition and cleanliness of interior lining, thresholds, door barriers, restraining
equipment/nets/stanchions, and doors.
33
33.
Check that all blow-out panels are in place.
34
34.
Check operation of cargo compartment lights. Replace bulbs as necessary.
35
35.
Check drain holes are unobstructed.
36
36.
Remove all foreign matter from cargo compartment door jambs.
37
37.
Check fwd and aft cargo compartments cargo loading system for general condition and
cleanliness.
CARD NO.: B767-2B
PAGE:
B767 SERVICE CHECK - SIGN-OFF RECORD
AIRCRAFT NO.
Mechanic’s
Initials
7 of 12
REV. NO.: 82
DATE: 12-06-10
DATE
Job Description
AIRCRAFT GENERAL
38
38.
Perform a general visual inspection (walk-around check) of the aircraft fuselage, wings, and
empennage sections (viewed from ground level).
39
39.
Check operation and illumination of exterior lights.
40
40.
Check all tires and wheels for wear, cuts, obvious damage, or broken tie bolts.
41
41.
43
Check tires for proper pressure using approved ABX tool.
NOTE:
Required by AD 87-08-09. Service with dry nitrogen only. If dry nitrogen is not
available for reinflation, refer to MM 12-15-03.
-200
COLD
WARM
HOT
NOSE TIRES
145-150 PSI
151-160 PSI
---------MAIN TIRES
185-190 PSI
191-200 PSI
201-205 PSI MIN
-300
COLD
WARM
HOT
NOSE TIRES
175-180 PSI
181-190 PSI
---------MAIN TIRES
195-200 PSI
201-210 PSI
211-215 PSI MIN
WARNING:
SERVICE TIRES USING APPROVED ABX TOOL. DO NOT USE AN
UNREGULATED, HIGH PRESSURE NITROGEN SOURCE TO SERVICE
TIRES. USE OF AN UNREGULATED, HIGH PRESSURE NITROGEN
SOURCE COULD LEAD TO EXPLOSIVE TIRE FAILURE AND
POSSIBLE INJURY.
42.
Check brakes for wear, evidence of leakage, and damage.
A.
Replace brake if end of fwd or aft wear indicator pins are 0.031 (1/32 inch) or less
with brakes parked and hydraulic system pressurized (Ref. Fig. 4).
NOTE:
Required by AD 91-18-10. Under no circumstances may an aircraft be dispatched
with end of fwd or aft wear indicator pins below FLUSH with brakes parked
(Ref. Figure 4). BRAKE WEAR PIN LIMITS ARE MORE RESTRICTIVE
THAN THE AD. LIMITS ON THE BRAKE WEAR INDICATOR PINS ARE
1/32” WITH THE BRAKES PARKED (NOT FLUSH) (REF. FIGURE 4).
43.
Check NLG & MLG shock struts for general condition.
44
44.
With a clean cloth, apply a film of ROYCO “SSF” fluid to the exposed chrome surface of the
shock strut pistons to remove any accumulated dirt or debris.
45
45.
46
46.
Drain left and right wing center aux, main, and surge fuel tank sumps (after aircraft has been
left on ground 1 hour or more).
Check external power interrupt spare fuses on P34 panel (2 ea.).
42
CARD NO.: B767-2B
PAGE:
B767 SERVICE CHECK - SIGN-OFF RECORD
AIRCRAFT NO.
8 of 12
REV. NO.: 82
DATE: 12-06-10
DATE
Mechanic’s
Initials
Job Description
NO. 1 ENGINE AND PYLON
CF6-80A SERIES
47
47.
48
48.
Perform a general visual inspection (walk-around check) of the No. 1 engine. Check engine
cowling, engine inlet, fan rotor spinner, fan rotor blades, pylons, open blow-out doors, open
latches, visible turbine blades, and exhaust area for obvious damage and fluid leaks.
Check the No. 1 engine oil level using EICAS and service with Turbo 2380 oil, if required
(Ref. Fig. 5). An EICAS indication of 20 or more is full and oil servicing is not required.
Record OIL ADDED - QUARTS in aircraft log book. If no oil was added, enter
zero (0).
WARNING:
49
ON GE CF6-80A ENGINES, SERVICING SHOULD BE ACCOMPLISHED
WITHIN 30 MINUTES OF ENGINE SHUTDOWN. WAIT A MINIMUM OF
5 MINUTES AFTER ENGINE SHUTDOWN BEFORE REMOVING
FILLER CAP.
NOTE:
If oil servicing does not occur within 30 minutes of shutdown, operate the
engines until the RPM is stable (Ref. AMM 71-00-00/20).
NOTE:
Engine oil consumption is acceptable if consumption is not more than 0.55 U.S.
quarts per hour (Ref. MM 71-00-00). If excessive amount of oil is added, notify
Maintenance Control.
49.
Check No. 1 engine IDG oil level and filter pop-out indicators.
CAUTION:
DO NOT SERVICE IDG IF IDG IS DISCONNECTED. REFER TO FIM 2420-00 FAULT ISOLATION AND CORRECT “DISCONNECT TRIP” BITE
MESSAGE.
CAUTION:
DO NOT REMOVE OIL DRAIN HOSE FROM OVERFLOW DRAIN
COUPLING UNTIL DRAINAGE SUBSIDES TO A SLOW DRIPPING
CONDITION. FAILURE TO DRAIN THE IDG PROPERLY WILL RESULT
IN AN OVERFILLED CONDITION AND CAUSE DAMAGE TO THE IDG.
CARD NO.: B767-2B
PAGE:
B767 SERVICE CHECK - SIGN-OFF RECORD
AIRCRAFT NO.
9 of 12
REV. NO.: 82
DATE: 12-06-10
DATE
Mechanic’s
Initials
Job Description
NO. 2 ENGINE AND PYLON
CF6-80A SERIES
50
50.
51
51.
Perform a general visual inspection (walk-around check) of the No. 2 engine. Check engine
cowling, engine inlet, fan rotor spinner, fan rotor blades, pylons, open blow-out doors, open
latches, visible turbine blades, and exhaust area for obvious damage and fluid leaks.
Check the No. 2 engine oil level using EICAS and service with Turbo 2380 oil, if required
(Ref. Fig. 5). An EICAS indication of 20 or more is full and oil servicing is not required.
Record OIL ADDED - QUARTS in aircraft log book. If no oil was added, enter
zero (0).
WARNING:
52
ON GE CF6-80A ENGINES, SERVICING SHOULD BE ACCOMPLISHED
WITHIN 30 MINUTES OF ENGINE SHUTDOWN. WAIT A MINIMUM OF
5 MINUTES AFTER ENGINE SHUTDOWN BEFORE REMOVING
FILLER CAP.
NOTE:
If oil servicing does not occur within 30 minutes of shutdown, operate the
engines until the RPM is stable (Ref. AMM 71-00-00/20).
NOTE:
Engine oil consumption is acceptable if consumption is not more than 0.55 U.S.
quarts per hour (Ref. MM 71-00-00). If excessive amount of oil is added, notify
Maintenance Control.
52.
Check No. 2 engine IDG oil level and filter pop-out indicators.
CAUTION:
DO NOT SERVICE IDG IF IDG IS DISCONNECTED. REFER TO FIM 2420-00 FAULT ISOLATION AND CORRECT “DISCONNECT TRIP” BITE
MESSAGE.
CAUTION:
DO NOT REMOVE OIL DRAIN HOSE FROM OVERFLOW DRAIN
COUPLING UNTIL DRAINAGE SUBSIDES TO A SLOW DRIPPING
CONDITION. FAILURE TO DRAIN THE IDG PROPERLY WILL RESULT
IN AN OVERFILLED CONDITION AND CAUSE DAMAGE TO THE IDG.
CARD NO.: B767-2B
PAGE:
B767 SERVICE CHECK - SIGN-OFF RECORD
AIRCRAFT NO.
10 of 12
REV. NO.: 82
DATE: 12-06-10
DATE
Mechanic’s
Initials
Job Description
NO. 1 ENGINE AND PYLON
PW4000 SERIES
53
53.
Perform a general visual inspection (walk-around check) of the No. 1 engine. Check engine
cowling, engine inlet, fan rotor spinner, fan rotor blades, pylons, open blow-out doors, open
latches, visible turbine blades, and exhaust area for obvious damage and fluid leaks.
54
54.
Service oil at No. 1 engine with 2380 engine oil.
Check the No. 1 and No. 2 engine oil levels using EICAS, and service with Turbo Oil 2380 if
required. An EICAS indication of Left 24 + 3, Right 21 + 3 is full, and oil servicing is not
required.
If next flight segment is ETOPS, oil tank level must be visually checked.
Record OIL ADDED - QUARTS in aircraft log book. If no oil was added, enter zero
(0).
WARNING:
NOTE:
NOTE:
NOTE:
55
WAIT A MINIMUM OF 5 MINUTES AFTER ENGINE SHUTDOWN BEFORE
REMOVING FILLER CAP.
Servicing should be accomplished between 15 minutes and 2 hours of engine
shutdown.
If engine has been shut down for more than 2 hours, dry motor engine for 2
minutes before checking the oil level.
(PW 4000 Engines) Engine oil consumption is acceptable if consumption is not
more than 0.5 U.S. quarts per hour (Ref. MM 71-00-00). If excessive amount of
oil is added, notify Maintenance Control.
55.
Check No. 1 engine IDG oil levels and filter pop-out indicators.
CAUTION:
DO NOT SERVICE IDG IF IDG IS DISCONNECTED. A DISCONNECTED IDG
MUST BE REMOVED FROM THE AIRCRAFT WITHIN 50 FLIGHT HOURS.
CAUTION:
DO NOT REMOVE OIL DRAIN HOSE FROM OVERFLOW DRAIN
COUPLING UNTIL DRAINAGE SUBSIDES TO A SLOW DRIPPING
CONDITION. FAILURE TO DRAIN THE IDG PROPERLY WILL RESULT IN
AN OVERFILLED CONDITION AND CAUSE DAMAGE TO THE IDG.
CARD NO.: B767-2B
PAGE:
B767 SERVICE CHECK - SIGN-OFF RECORD
AIRCRAFT NO.
Mechanic’s
Initials
56
56.
57
57.
11 of 12
REV. NO.: 82
DATE: 12-06-10
DATE
Job Description
NO. 2 ENGINE AND PYLON
PW4000 SERIES
Perform a general visual inspection (walk-around check) of the No. 2 engine. Check engine
cowling, engine inlet, fan rotor spinner, fan rotor blades, pylons, open blow-out doors, open
latches, visible turbine blades, and exhaust area for obvious damage and fluid leaks.
Service oil at No. 2 engine with 2380 engine oil.
Check the No. 1 and No. 2 engine oil levels using EICAS, and service with Turbo Oil 2380 if
required. An EICAS indication of Left 24 + 3, Right 21 + 3 is full, and oil servicing is not
required.
If next flight segment is ETOPS, oil tank level must be visually checked.
Record OIL ADDED - QUARTS in aircraft log book. If no oil was added, enter zero
(0).
WARNING:
NOTE:
NOTE:
NOTE:
58
WAIT A MINIMUM OF 5 MINUTES AFTER ENGINE SHUTDOWN BEFORE
REMOVING FILLER CAP.
Servicing should be accomplished between 15 minutes and 2 hours of engine
shutdown.
If engine has been shut down for more than 2 hours, dry motor engine for 2
minutes before checking the oil level.
(PW 4000 Engines) Engine oil consumption is acceptable if consumption is not
more than 0.5 U.S. quarts per hour (Ref. MM 71-00-00). If excessive amount of
oil is added, notify Maintenance Control.
58.
Check No. 2 engine IDG oil levels and filter pop-out indicators.
CAUTION:
DO NOT SERVICE IDG IF IDG IS DISCONNECTED. A DISCONNECTED IDG
MUST BE REMOVED FROM THE AIRCRAFT WITHIN 50 FLIGHT HOURS.
CAUTION:
DO NOT REMOVE OIL DRAIN HOSE FROM OVERFLOW DRAIN
COUPLING UNTIL DRAINAGE SUBSIDES TO A SLOW DRIPPING
CONDITION. FAILURE TO DRAIN THE IDG PROPERLY WILL RESULT IN
AN OVERFILLED CONDITION AND CAUSE DAMAGE TO THE IDG.
CARD NO.: B767-2B
PAGE:
B767 SERVICE CHECK - SIGN-OFF RECORD
AIRCRAFT NO.
Mechanic’s
Initials
12 of 12
REV. NO.: 82
DATE: 12-06-10
DATE
Job Description
AUXILIARY POWER UNIT (APU)
59
59.
Perform a general visual inspection of the APU compartment (internal).
60
60.
Service (APU) oil to maximum limits with turbo oil 2380.
Record OIL ADDED - QUARTS in aircraft log book. If no oil was added, enter
zero (0).
CARD NO.: B767-9
B767 LIGHTNING STRIKE CHECKLIST
Aircraft No.:
1.
Station:
Log Page No.:
PAGE:
1 of 6
DATE:
10-06-06
Work Order No.:
Date:
Complete the Lightning Strike Checklist in the following situations:
2.
A.
If the flight crew reports a lightning strike.
B.
If reports indicate that the aircraft may have experienced heavy static discharge while passing
through an electrical storm region.
C.
Evidence of lightning strike discovered by Maintenance personnel.
Check the listed items/areas for damage before aircraft is released for service.
NOTE:
Items that do not apply may be signed off as not applicable (N/A).
ITEM
NO.
1.
DESCRIPTION
Examine the Zone 1 (Figure 1) surface areas for signs of a lightning strike.
A.
Examine the internal and external surfaces of the nose radome. Look at the
honeycomb sandwich structure for burns, punctures, and pin holes.
(1)
Examine the internal/external radome. Look for pin holes, punctures,
and paint that has chipped, per M/M 05-51-19-2.
(2)
Examine the radome bonding straps. Ensure they are attached correctly
to the airframe.
(3)
Look at the condition of the lightning diverter strips. Repair or replace
them if they are damaged.
(4)
If the radome is damaged, examine the antenna and the waveguide for
damage.
B.
Examine the metallic structure for holes or pits. Look for burned or unusual
colored skin or rivets.
C.
Examine the external surfaces of the composite honeycomb sandwich
components. Look for discolored paint, burned, punctured, or delaminated
skin plies.
ACCOMP
BY
CARD NO.: B767-9
B767 LIGHTNING STRIKE CHECKLIST
ITEM
NO.
1.
Cont.
2 of 6
DATE:
10-06-06
DESCRIPTION
CAUTION:
D.
2.
PAGE:
MAKE SURE TO SEAL OR REPAIR ALL DAMAGE. FAILURE
TO SEAL OR REPAIR DAMAGE CAN CAUSE MORE
INTERNAL DAMAGE BECAUSE MOISTURE CAN GET IN.
Repair or seal the damaged areas.
Examine the Zone 2 (Figure 1) surface areas for signs of a lightning strike. Make
sure you look in the areas where one surface ends and the other surface starts.
A.
Examine the metallic structure for holes or pits. Look for burned or discolored
skin or rivets.
B.
Examine external surfaces of composite honeycomb sandwich components.
Look for discolored paint, burned, punctured, or delaminated skin plies.
CAUTION:
C.
MAKE SURE TO SEAL OR REPAIR ALL DAMAGE. FAILURE
TO SEAL OR REPAIR DAMAGE CAN CAUSE MORE
INTERNAL DAMAGE BECAUSE MOISTURE CAN GET IN.
Repair or seal the damaged areas.
3.
If an external light shows damage from a lightning strike, examine the internal wires
of the light fixture. Also look at those wires that go from the light to the circuit
breaker.
4.
Ensure the navigation lamps, rotary lights, and the landing lights operate.
5.
Do the following examinations of the flight controls:
6.
A.
If the rudder shows signs of a lightning strike, examine the surface hinges,
bearings, and bondings for signs of damage.
B.
If the elevators show signs of a lightning strike, examine the surface hinges,
bearings, and bondings for signs of damage.
C.
If the ailerons show signs of a lightning strike, examine the surface hinges,
bearings, and bondings for signs of damage.
Do an operational test of the rudder if there are signs of lightning strike damage (Ref.
27-21-00).
ACCOMP
BY
CARD NO.: B767-9
B767 LIGHTNING STRIKE CHECKLIST
ITEM
NO.
PAGE:
3 of 6
DATE:
10-06-06
DESCRIPTION
7.
Do an operational test of the elevator if there are signs of lightning strike damage
(Ref. 27-31-00).
8.
Do an operational test of the ailerons if there are signs of lightning strike damage
(Ref. 27-11-00).
9.
If the wingtips show signs of a lightning strike, examine the wingtips carefully. Also
look carefully at the fuel vent outlet for signs of damage.
10.
Examine the static dischargers.
11.
A.
Visually examine all dischargers to ensure they are there and installed correctly
on the mounting retainer. Also ensure they are not broken.
B.
Examine the dischargers for damage as shown by a burned and roughened
coating. Also look for pitted metal discharger retainers.
C.
Examine the dischargers for broken, bent, or blunted tungsten pins. Bent pins
must be made straight.
D.
Look for erosion of the discharger coating or peeling of the tip cup. The
leading edge erosion of the discharger must not extend back more than 1/3 of
the width of the discharger.
E.
Do a resistance test if a damaged static discharger is found (Ref. 23-61-01).
Aircraft Internal Examination
A.
If a lightning strike has caused a system malfunction, do a full examination of
the defective system. Use the applicable maintenance manual section for that
system.
B.
Do a check of the standby compass system only if the flight crew found a very
large compass deviation (AMM 34-23-00/201).
C.
Ensure that the fuel quantity system is accurate. If it is not, do a check of the
applicable tank units and compensator (AMM 28-41-00/501).
ACCOMP
BY
CARD NO.: B767-9
B767 LIGHTNING STRIKE CHECKLIST
ITEM
NO.
12.
PAGE:
4 of 6
DATE:
10-06-06
DESCRIPTION
Inspection and Operational Check of Radio and Navigation Systems
A.
General
(1)
The radio and navigation systems must have a full examination after
the aircraft was hit by lightning. The examination is also necessary
after heavy static discharger. The level of the inspections and operation
tests comes from flight crew information and the aircraft conditions
during and after the incident.
NOTE:
B.
It is not necessary to examine the coaxial cables and the
connectors if the radio system had no problems during and
after the incident and operational checks were done and no
problems were found.
Accomplish Operational Check of the following systems per the reference
provided:
(1)
VHF Communications System (Ref. 23-12-00/501)
(2)
Navigation - General (Ref. 34-00-00/201)
(3)
ILS Navigation System (Ref. 34-31-00/501)
(4)
Marker Beacon System (Ref. 34-32-00/501)
(5)
Radio Altimeter System (Ref. 34-33-00/501)
(6)
Weather Radar System (Ref. 34-43-00/501)
(7)
VOR System (Ref. 34-51-00/501)
(8)
ATC System (Ref. 34-53-00/501)
(9)
DME System (Ref. 34-55-00/501)
(10)
Automatic Direction Finder (ADF) System (Ref. 34-57-00/501)
(11)
Nose Radome (Ref. 53-12-01/201)
ACCOMP
BY
CARD NO.: B767-9
B767 LIGHTNING STRIKE CHECKLIST
ITEM
NO.
12.
Cont.
5 of 6
DATE:
10-06-06
DESCRIPTION
C.
Inspection of the Radio and Navigation Systems
(1)
D.
13.
PAGE:
Examine the antennas of the following systems for damage:
(a)
VHF
(b)
VOR
(c)
DME
(d)
ATC
(e)
ILS
(f)
ADF
(g)
Radio Altimeter
(h)
Marker Systems
Accomplish operational check of the Radio and Navigation Systems
Make a Log Book (M-1A) entry of any damage found and corrective action taken.
ACCOMP
BY
CARD NO.: B767-9
B767 LIGHTNING STRIKE CHECKLIST
Figure 1
PAGE:
6 of 6
DATE:
10-06-06
CARD NO.: B767-14
B767 BIRD / HAIL STRIKE INSPECTION
AIRCRAFT NO.
1.
STATION
LOG PAGE NO.
WORK ORDER NO.
PAGE:
1 of 4
DATE:
11-17-10
DATE
TOTAL SIGN-OFF
PAGES: 4
The examinations that follow are for a bird strike and a hail strike condition. Follow the procedures as
indicated below.
A.
Bird Strike
(1)
B.
Examine the external surfaces of the airplane structure in the general area of the bird
strike. (All engine intakes and surrounding area must be inspected following a bird
strike.) If external surfaces are damaged, the internal structure must be inspected. Also,
inspect the hydraulic, pneumatic, and other systems in the area of the bird strike for
damage. Items that do not apply may be signed off as not applicable (N/A).
Hail Strike
(1)
Complete Items 1 through 3, and N/A Step 4.
2.
Aircraft configuration should be the same as when bird/hail strike occurred, i.e., position of flaps,
slats, etc. This information should be obtained from the flight crew and annotated on the back of this
form. If flap position is unknown, examine trailing edge flaps and leading edge flaps and slats in fully
extended position.
3.
For allowable bird / hail damage and repair, refer to the Structural Repair Manual.
4.
Make a Log Book (M-1A) entry of any damage found and corrective action taken.
CARD NO.: B767-14
B767 BIRD / HAIL STRIKE INSPECTION
ITEM
NO.
1.
PAGE:
2 of 4
DATE:
11-17-10
DESCRIPTION
Bird / Hail Strike Conditional Inspection
A.
Bird / Hail Strike Conditional Inspection Procedure
WARNING:
DO THE DEACTIVATION PROCEDURE FOR THE
FLAP/SLAT ACTUATION SYSTEMS. INJURY TO A
PERSON OR DAMAGE TO EQUIPMENT CAN
OCCUR IF THE FLAPS/SLATS MOVE. FLAP/SLAT
ACTUATION SYSTEMS MUST NOT BE OPERATED
DURING THIS INSPECTION.FAILURE TO OBEY
CAN CAUSE INJURY TO PERSONS.
(1)
Do the deactivation procedure for the leading edge slat system
(Ref 27-81-00).
(2)
Do the deactivation procedure for the trailing edge flap system
(Ref 27-51-00).
(3)
Do the examinations that follow:
NOTE:
For hail damage to control surfaces, contact ABX Air
Planning, ILN, to issue appropriate Planning
Engineering Authorization(s).
NOTE:
When you examine the honeycomb panels, look at the
two sides for cracks, delaminations, soft spots, and core
damage.
(a)
Examine the internal and external areas of the radome. Look
for honeycomb damage and for soft spots.
(b)
Examine the forward-body nose section “eyebrow” area
above the windows and radome. Look for cracks, distortion,
delamination, misalignment, and displacement of the skins.
Also look for fasteners that have pulled out or are not there.
(c)
Examine the pilots’ windows for delamination, spalling, or
cracks. Also examine the adjacent structure for distortion,
cracks, and fasteners that have pulled out or are not there.
ACCOMP
BY
CARD NO.: B767-14
B767 BIRD / HAIL STRIKE INSPECTION
ITEM
NO.
1.
Cont.
PAGE:
3 of 4
DATE:
11-17-10
DESCRIPTION
Bird / Hail Strike Conditional Inspection, Cont.
(d)
Examine all wing horizontal surfaces, nacelle strut, and the
horizontal and vertical stabilizer leading edge fairing. Look
for displacement, distortion, fastener hole elongation or
tearout, and paint that has flaked. Also look for skin cracks,
and fasteners that have pulled out or are not there.
(e)
Examine the wing leading and trailing edge structure,
panels, and doors. Look for displacement, distortion, paint
that has flaked, cracks, and fasteners that have pulled out or
are not there. Also examine the two sides of the honeycomb
panels for cracks, delamination, soft spots, and core
damage.
(f)
Examine the leading edge slat mechanism and track fairing
links. Look for distortion, cracks, misalignment, or other
signs of distress.
(g)
Examine the trailing edge flap mechanism and track fairing
links. Look for distortion, cracks, misalignment, or other
signs of distress.
(h)
Examine the control surfaces. Look for binding, too much
play, misalignment, distortion, or displacement of skins.
Also look for fasteners that have pulled out or are missing.
(i)
Examine the strut panels, doors and structure for buckling,
cracks, and fasteners that have pulled out or are not there.
(j)
Examine wing tip fairings and navigation lights for
distortion, cracks, or other signs of damage.
ACCOMP
BY
CARD NO.: B767-14
B767 BIRD / HAIL STRIKE INSPECTION
ITEM
NO.
1.
PAGE:
4 of 4
DATE:
11-17-10
DESCRIPTION
Bird / Hail Strike Conditional Inspection, Cont.
Cont.
(k)
(4)
Examine the external fuselage structure (upper and lower).
1
If signs of hail damage to the external fuselage
structure are found, refer to SRM 51-10-04 for the
analysis and continued service of airplanes with onground hail damage.
2
Examine any remaining windows for cracks,
displacement, crazing, or other signs of damage.
3
Examine all antennas for distortion, cracks, or other
signs of damage.
(l)
Examine entry/service doors for displacement, distortion,
paint that has flaked, dents, cracks, and fasteners that have
pulled out or are not there, or other signs of distress.
(m)
Examine the nose landing gear doors and linkage. Look for
distortion, cracks, and other signs of distress.
(n)
Examine the main landing gear doors and linkage. Look for
distortion, cracks, and other signs of distress.
Examine the nose cowl and the engine for foreign object damage.
Reference SRM 54-10-00 for allowable damage limits.
(a)
If engine bird ingestion suspected, perform Engine Foreign
Object Damage Inspection in accordance with B767 FIM
71-05-00.
2.
Do the reactivation procedure for the leading edge slat system (AMM 27-81-00/
201).
3.
Do the reactivation procedure for the trailing edge flap system (AMM 27-51-00/
201).
RETURN COMPLETED FORM TO RECORDS, ILN, BUILDING 2061-R.
ACCOMP
BY
B767-50
Page 1 of 2
DATE: 02-11-04
B767 APU ECU FUNCTION ADJUSTMENT SWITCHES SETTINGS
(ECU TO BE INSTALLED ON THE AIRCRAFT)
This form provides instructions to change the ECS Switch settings on the B767 APU ECU from
the original factory settings to the revised Airborne Express settings. This form is to be accomplished when an ECU is installed on an aircraft.
INSTALLED ECU
NOTE:
1.
If time does not permit the switch setting adjustment, defer this Form B767-50 for
tracking IAW ABX GMM, Section 07.04 for tracking to be completed at the next convenient maintenance opportunity.
Record ECU S/N
____________________
Record ECU P/N
____________________
2.
Remove the ECS switch cover (5 captive screws) so that the function adjust switches S1
through S8 can be accessed. Reference Honeywell CMM 49-61-26, Figure 103, Sheet 2.
3.
Change the S3 Max Normal Switch setting from D to B.
4.
Change the S5 Max Cold Switch setting from E to B.
5.
Change the S8 Duct Press Switch setting from E to B.
6.
Ensure that all ECS Switches are set to the revised Airborne Express settings.
AIRBORNE EXPRESS SETTINGS
S1
Min
S2
MES
S3
Max
Norm
S4
Cool
Down
S5
Max
Cold
S6
EGT
Deg F
S7
ADP
S8
Duct
Press
A
E
B
C
B
D
E
B
7.
Reinstall the ECS switch cover.
8.
Make Log Book entry that Form B767-50 was completed to change the ECU ECS Switch
settings from the Factory settings to the revised Airborne Express settings.
B767-50
Page 2 of 2
DATE: 02-11-04
Test Set and ECU Controls
B767-51
Page 1 of 2
DATE: 05-06-03
B767 APU ECU FUNCTION ADJUSTMENT SWITCHES SETTINGS
(ECU REMOVED FROM THE AIRCRAFT)
This form provides instructions to change the ECS Switch settings on the B767 APU ECU from
the revised Airborne Express settings to the original factory settings. This form is to be accomplished when an ECU is removed from the aircraft.
REMOVED ECU
1.
Record ECU S/N
____________________
Record ECU P/N
____________________
2.
Remove the ECS switch cover (5 captive screws) so that the function adjust switches S1
through S8 can be accessed. Reference Honeywell CMM 49-61-26, Figure 103, Sheet 2.
3.
Change the S3 Max Normal Switch setting from B to D.
4.
Change the S5 Max Cold Switch setting from B to E.
5.
Change the S8 Duct Press Switch setting from B to E.
6.
Ensure that all ECS Switches are set to the factory settings.
FACTORY SETTINGS
S1
Min
S2
MES
S3
Max
Norm
S4
Cool
Down
S5
Max
Cold
S6
EGT
Deg F
S7
ADP
S8
Duct
Press
A
E
D
C
E
D
E
E
7.
Reinstall the ECS switch cover.
8.
Route this form with the PIL to Aircraft Records, ILN.
NOTE:
Repair Services, if the ECU switches were not set to the factory settings, contact Line
Maintenance to adjust the switches.
B767-51
Page 2 of 2
DATE: 05-06-03
Test Set and ECU Controls
CARD NO.: B767-90
PAGE:
B767 ETOPS PREDEPARTURE CHECK
1 of 6
DATE: 11-29-10
NOTE: This check B767-90 is accomplished prior to each scheduled ETOPS departure in addition to the B767-1A/B card
which is accomplished daily, or the B767-2A/B Service Check when scheduled.
AIRCRAFT NO.
STATION
LOG PAGE
Job Description
FUSELAGE/EMPENNAGE
1.
2.
3.
4.
5.
6.
7.
8.
9.
1.
2.
3.
Visually inspect the crew oxygen discharge indicator disc for presence.
Visually inspect the positive pressure relief valves for (flag) indication that valves
have opened.
Visually inspect the static ports, TAT and pitot static probes, and angle of attack
vanes for obvious damage.
Visually inspect the ram air inlet/exhaust doors and cabin pressure outflow valve
to ensure there are no obstructions.
Visually inspect, from ground level, for missing or damaged navigation/
communication antennas.
Visually inspect the fuselage in areas of drain masts and drains for fluid leakage.
Visually inspect lower cargo compartment liners and door seals for obvious
damage.
Visually inspect the visible portions of the vertical fin, and rudder and horizontal
stabilizer and elevators from ground level for obvious damage, evidence of fluid
leakage, and missing or damaged dischargers.
Visually inspect the nose and main landing gear tires and wheels for obvious
damage.
Job Description
WINGS
Visually inspect the lower wing surfaces and wing tips from ground level for
obvious damage and fuel leakage, and missing or damaged dischargers.
Visually inspect the visible portions of the left and right wing flight control
surfaces from ground level for obvious damage.
Visually inspect that the fueling station door is secured.
DATE
AMM
Mechanic’s
Initials
35-10-00
21-32-00
1
2
34-10-00
3
21-00-00
4
34-00-00
5
53-00-00
25-52-00
52-09-02
55-00-00
6
7
32-45-00
9
AMM
57-50-00
8
Mechanic’s
Initials
1
27-00-00
2
28-21-00
3
CARD NO.: B767-90
2 of 6
PAGE:
DATE: 11-29-10
B767 ETOPS PREDEPARTURE CHECK
Job Description
ENGINES
1.
2.
3.
4.
Visually inspect the engine cowling for obvious damage, open
blow out doors, open latches, and signs of fluid leakage.
Visually inspect the inlet cowl, fan rotor spinner, and fan rotor
blades for obvious damage.
Visually inspect the turbine exhaust sleeve, plug, and visible
turbine blades.
Check engine oil level for full. Ref. B767-1A Daily Check for
detailed procedures.
AMM
71-00-00
Mechanic’s
Initials
ENGINE #1
ENGINE #2
1
1
72-00-00
2
2
72-00-00
3
3
12-13-01
4
4
12-13-01
5
5
12-13-01
6
6
CF6-80A - Ball at the top of sight gage is full.
5.
PW4000 - Requires two separate ETOPS mechanics or
alternate flight crew procedure per GMM 04.44, Par 5. Oil
level must be at or above the “V” in the filler neck.
Check EICAS oil level indication.
CF6-80A - 20 or greater is full.
6.
PW4000 - Left 24 +/- 3 is full. Right 21 +/- 3 is full.
Document any oil added on M-1A. If no oil was added enter
zero (0). If both engines require oil to be added and/or both
filler caps have been opened, two separate ETOPS mechanics
must service engine oil.
Also see GMM 04.44 Par. 5 for alternate flight crew procedure.
Check here (_____) if alternate flight crew procedure is used.
1.
Job Description
APU
Check APU oil level for full via sight gage. Add oil as necessary to service to full.
Ensure EICAS “APU OIL QTY” message is not displayed. Record oil added
(quarts) in aircraft log book. If no oil was added enter zero (0).
AMM
12-13-04
Mechanic’s
Initials
1
CARD NO.: B767-90
PAGE:
B767 ETOPS PREDEPARTURE CHECK
1.
2.
3.
3 of 6
DATE: 11-29-10
Job Description
LOGBOOK
Complete Airworthiness Release entry for ETOPS PDSC Inspection.
Ensure “ETOPS Reporting Form” binder and “ETOPS APU Reporting Form” are
onboard the aircraft.
Contact Maintenance Control to confirm Aircraft ETOPS Significant Systems
status (Ref. GMM 04.44, Par 6.) and overall maintenance history. Ensure ETOPS
Status placard reflects any current downgraded conditions or need for verification
flight as determined by Maintenance Control.
Mechanic’s
Initials
XXXX
XXXX
1
2
XXXX
3
ETOPS PRE-DEPARTURE SERVICE CHECK COMPLETE
All signoff blocks of the check have been accomplished, action taken where necessary, and initialed properly. Fax all
signoff sheets to Maintenance Control, ILN.
Ensure ETOPS PDSC Inspection has been entered in the Airworthiness Release block at the bottom of the log page.
Check Completed: _______________________________________ ______________________________
ETOPS Authorized A&P Technician (Signature)
Employee Number
Attach this form to the white copy of the log page.
CARD NO.: B767-90
PAGE:
B767 ETOPS PREDEPARTURE CHECK
ENGINE OIL SERVICING
FIGURE 1
4 of 6
DATE: 11-29-10
CARD NO.: B767-90
PAGE:
B767 ETOPS PREDEPARTURE CHECK
PW 4000 ENGINE OIL SERVICING
FIGURE 2
5 of 6
DATE: 11-29-10
CARD NO.: B767-90
PAGE:
B767 ETOPS PREDEPARTURE CHECK
PW 4000 ENGINE OIL SERVICING
FIGURE 3
6 of 6
DATE: 11-29-10