1
MULTIFUNCTIONAL DIGITAL SYSTEMS
Scanning Guide
Software License Agreement
INSTALLING OR OTHERWISE USING THIS SOFTWARE PRODUCT CONSTITUTES YOUR ACCEPTANCE OF THE FOLLOWING TERMS AND CONDITIONS (UNLESS A SEPARATE LICENSE IS PROVIDED BY THE SUPPLIER OF APPLICABLE SOFTWARE IN WHICH CASE SUCH SEPARATE LICENSE
SHALL APPLY). IF YOU DO NOT ACCEPT THESE TERMS, YOU MAY NOT INSTALL OR USE THIS
SOFTWARE, AND YOU MUST PROMPTLY RETURN THE SOFTWARE TO THE LOCATION WHERE
YOU OBTAINED IT.
THE SOFTWARE INSTALLED ON THIS PRODUCT INCLUDES NUMEROUS INDIVIDUAL SOFTWARE
COMPONENTS, EACH HAVING ITS OWN APPLICABLE END USER LICENSE AGREEMENT (“EULA”).
INFORMATION RELATING TO THE EULAS MAY BE FOUND IN AN ELECTRONIC FILE INCLUDED ON
THE USER DOCUMENTATION CD-ROM INCLUDED HEREWITH; HOWEVER, ALL SOFTWARE AND
DOCUMENTATION DEVELOPED OR CREATED BY OR FOR TOSHIBA TEC CORPORATION (“TTEC”)
ARE PROPRIETARY PRODUCTS OF TTEC AND ARE PROTECTED BY COPYRIGHT LAWS, INTERNATIONAL TREATY PROVISIONS, AND OTHER APPLICABLE LAWS.
Grant of License
This is a legal agreement between you, the end-user (“You”), and TTEC and its suppliers. This software,
fonts (including their typefaces) and related documentation (“Software”) is licensed for use with the system
CPU on which it was installed (“System”) in accordance with the terms contained in this Agreement. This
Software is proprietary to TTEC and/or its suppliers.
TTEC and its suppliers disclaim responsibility for the installation and/or use of this Software, and for the
results obtained by using this Software. You may use one copy of the Software as installed on a single System, and may not copy the Software for any reason except as necessary to use the Software on a single
System. Any copies of the Software shall be subject to the conditions of this Agreement.
You may not, nor cause or permit any third party to, modify, adapt, merge, translate, reverse compile,
reverse assemble, or reverse engineer the Software. You may not use the Software, except in accordance
with this license. No title to the intellectual property in the Software is transferred to you and full ownership is
retained by TTEC or its suppliers. Source code of the Software is not licensed to you. You will be held legally
responsible for any copyright infringement, unauthorized transfer, reproduction or use of the Software or its
documentation.
Term
This license is effective until terminated by TTEC or upon your failure to comply with any term of this Agreement. Upon termination, you agree to destroy all copies of the Software and its documentation.
You may terminate this license at any time by destroying the Software and its documentation and all copies.
Disclaimer of Warranty
THIS SOFTWARE IS PROVIDED “AS IS” WITHOUT WARRANTY OF ANY KIND, EITHER EXPRESS OR
IMPLIED, INCLUDING, BUT NOT LIMITED TO, THE IMPLIED WARRANTIES OF MERCHANTABILITY,
FITNESS FOR A PARTICULAR PURPOSE, TITLE, AND NON-INFRINGEMENT. TTEC AND ITS SUPPLIERS DISCLAIM ANY WARRANTY RELATING TO THE QUALITY AND PERFORMANCE OF THE SOFTWARE. IF THE SOFTWARE PROVES DEFECTIVE, YOU (AND NOT TTEC OR ITS SUPPLIERS) SHALL
BE RESPONSIBLE FOR THE ENTIRE COST OF ALL NECESSARY SERVICING, REPAIR OR CORRECTION. TTEC AND ITS SUPPLIERS DO NOT WARRANT THAT THE FUNCTIONS CONTAINED IN THE
SOFTWARE WILL MEET YOUR REQUIREMENTS OR THAT THE OPERATION OF THE SOFTWARE
WILL BE UNINTERRUPTED OR ERROR FREE.
ALL INFORMATION CONTAINED HEREIN THAT IS PROVIDED BY TTEC AND ITS AFFILIATES PURSUANT TO A EULA IS PROVIDED “AS IS” WITHOUT WARRANTY OF ANY KIND, EITHER EXPRESS OR
IMPLIED.
2
Software License Agreement
Limitation of Liability
IN NO EVENT WILL TTEC OR ITS SUPPLIERS BE LIABLE TO YOU FOR ANY DAMAGES, WHETHER IN
CONTRACT, TORT, OR OTHERWISE (EXCEPT PERSONAL INJURY OR DEATH RESULTING FROM
NEGLIGENCE ON THE PART OF TTEC OR ITS SUPPLIERS), INCLUDING WITHOUT LIMITATION ANY
LOST PROFITS, LOST DATA, LOST SAVINGS OR OTHER INCIDENTAL, SPECIAL OR CONSEQUENTIAL DAMAGES ARISING OUT OF THE USE OR INABILITY TO USE THE SOFTWARE, EVEN IF TTEC
OR ITS SUPPLIERS HAVE BEEN ADVISED OF THE POSSIBILITY OF SUCH DAMAGES, NOR FOR
THIRD PARTY CLAIMS.
U.S. Government Restricted Rights
The Software is provided with RESTRICTED RIGHTS. Use, duplication or disclosure by the U.S. Government is subject to restrictions set forth in subdivision (b) (3) (ii) or (c) (i) (ii) of the Rights in Technical Data
and Computer Software Clause set forth in 252.227-7013, or 52.227-19 (c) (2) of the DOD FAR, as appropriate. Contractor/Manufacturer is TOSHIBA TEC Corporation, 6-78, Minami-cho, Mishima-shi, Shizuoka-ken,
411-8520, Japan.
General
You may not sublicense, lease, rent, assign or transfer this license or the Software. Any attempt to sublicense, lease, rent, assign or transfer any of the rights, duties or obligations hereunder is void. You agree that
you do not intend to, and will not ship, transmit (directly or indirectly) the Software, including any copies of
the Software, or any technical data contained in the Software or its media, or any direct product thereof, to
any country or destination prohibited by the United States Government. This license shall be governed by
the laws of Japan or, at the election of a Supplier of TTEC concerned with a dispute arising from or relating
to this Agreement, the laws of the Country designated from time to time by the relevant Supplier of TTEC. If
any provision or portion of this Agreement shall be found to be illegal, invalid or unenforceable, the remaining provisions or portions shall remain in full force and effect.
YOU ACKNOWLEDGE THAT YOU HAVE READ THIS LICENSE AGREEMENT AND THAT YOU UNDERSTAND ITS PROVISIONS. YOU AGREE TO BE BOUND BY ITS TERMS AND CONDITIONS. YOU FURTHER AGREE THAT THIS LICENSE AGREEMENT CONTAINS THE COMPLETE AND EXCLUSIVE
AGREEMENT BETWEEN YOU AND TTEC AND ITS SUPPLIERS AND SUPERSEDES ANY PROPOSAL
OR PRIOR AGREEMENT, ORAL OR WRITTEN, OR ANY OTHER COMMUNICATION RELATING TO THE
SUBJECT MATTER OF THIS LICENSE AGREEMENT.
TOSHIBA TEC Corporation, 6-78, Minami-cho, Mishima-shi, Shizuoka-ken, 411-8520, Japan.
Software License Agreement
3
4
Software License Agreement
Preface
Thank you for purchasing the TOSHIBA multifunctional digital system e-STUDIO165/205.
This Scanning Guide is a manual for the e-STUDIO165/205 when the following option is
installed:
y Network Printer Kit
y Scanner Upgrade Kit
y External Keyboard
This section also explains about functions available with the above options and the Fax Kit
(optional).
You can use this equipment as a network scanner when the Network Printer Kit (optional), the
Scanner Upgrade Kit (optional) and the External Keyboard (optional) are installed on this equipment. You can send the scanned images as attachment files of an Email, and also save them
into the shared folder of a client computer.
This Scanning Guide describes how to utilize the various scanning functions of this equipment
and how to install client software to enable the Scan to TWAIN function.
For the instruction on how to configure network servers or this equipment, see the following
manuals:
y Network Administration Guide for Printing Functions
y Network Administration Guide for Scanning Functions
y Setup Guide for Printing Functions
y Setup Guide for Scanning Functions
For general descriptions of your computer, application software and networks, see the manual
attached on each product.
Be sure to read this manual before using the e-STUDIO165/205 to fully understand and utilize
its scanning functions. Keep this manual handy and retain it for future reference.
Preface
5
Lineup of Our Manuals
These manuals are provided for the operation of the e-STUDIO165/205. Select and read the
manual best suited to your needs.
TOSHIBA multifunctional digital system e-STUDIO165/205
Operator’s Manual for Copying Functions
This manual describes the basic operations, mainly copying functions,
of this equipment. It also describes safety precautions to ensure correct and safe use of this equipment. Be sure to read this before you
use the equipment.
Network Printer Kit (optional, GA-1190)
Quick Start Guide for Printing Functions
This manual describes the operation of the equipment when the Network Printer Kit (optional) is installed on it. This also explains about the
accessories, conditions required for network systems, connecting
method of the network, general description of network settings and
troubleshooting.
Network Administration Guide for Printing Functions (PDF)
This manual is only for the equipment on which the Network Printer Kit
(optional) is installed. This provides you with setup procedures by the
type of platforms or networks you are utilizing, and also setup procedures for network servers to enable various network services.
Setup Guide for Printing Functions (PDF)
This manual is only for the equipment on which the Network Printer Kit
(optional) is installed. The manual consists of the following 2 parts:
Settings Using Control Panel:
This part describes the printer-related settings using the [PRINTER]
and [USER FUNCTIONS] buttons on the control panel of this equipment.
Settings Using TopAccess:
This part describes how to set up this equipment from your computer
through a network using a web-based utility TopAccess. This also
explains about functions to check the current status of this equipment.
Printing Guide (PDF)
This manual is only for the equipment on which the Network Printer Kit
(optional) is installed. This describes how to install client software for
printing data to your computer. This also describes how to print data
sent from your computer to this equipment.
6
Lineup of Our Manuals
Network Fax Guide (PDF)
This manual is only for the equipment on which the Fax Kit (optional),
the External Keyboard (optional) and the Network Printer Kit (optional)
are installed. This explains about the network Fax functions, which
enable Fax transmissions from a client computer through a network.
Scanner Upgrade Kit (optional, GA-1200)
Quick Start Guide for Scanning Functions (PDF)
This manual is for equipment on which the Network Printer Kit
(optional), the Scanner Upgrade Kit (optional) and the External Keyboard (optional) are installed. This also explains about the accessories,
general description of the scanner-related settings and troubleshooting.
MULTIFUNCTIONAL DIGITAL SYSTEMS
Network Administration
Guide for Scanning
Functions
Network Administration Guide for Scanning Functions (PDF)
This manual is for equipment on which the Network Printer Kit
(optional), the Scanner Upgrade Kit (optional) and the External Keyboard (optional) are installed. This provides you with the setup procedures of this equipment by the type of functions you are utilizing.
Setup Guide for Scanning Functions (PDF)
This manual is for equipment on which the Network Printer Kit
(optional), the Scanner Upgrade Kit (optional) and the External Keyboard (optional) are installed. The manual consists of the following 2
parts:
Settings Using Control Panel:
This part describes the scanner-related settings using the [USER
FUNCTIONS] button on the control panel of this equipment.
Settings Using TopAccess:
This part describes how to set up this equipment from your computer
through a network using the web-based utility TopAccess. This also
explains about functions to check the current status of this equipment.
Scanning Guide (PDF) (This manual)
This manual is for equipment on which the Network Printer Kit
(optional), the Scanner Upgrade Kit (optional) and the External Keyboard (optional) are installed. This describes how to install the TWAIN
driver or how to utilize various scanning functions.
Lineup of Our Manuals
7
To read manuals of PDF (Portable Document Format) files
Viewing and printing this operator‘s manual of PDF files require that you install Adobe Reader or
Adobe Acrobat Reader on your PC. If Adobe Reader or Adobe Acrobat Reader is not installed
on your PC, download and install it from the website of Adobe Systems Incorporated.
8
Lineup of Our Manuals
Before Reading This Manual
Signal in this manual
To ensure correct and safe use of this equipment, this operator's manual describes safety precautions according to the three levels shown below.
You should fully understand the meaning and importance of these items before reading this
manual.
Indicates information to which you should pay attention when operating the
equipment.
Other than the above, this manual also describes information that may be useful for the operation of this equipment with the following signal:
Describes handy information that is useful to know when operating the equipment.
Pages describing items related to what you are currently doing. See these
pages as required.
Trademarks
y
y
y
y
y
y
y
y
y
y
y
y
The official name of Windows 98 is Microsoft Windows 98 Operating System.
The official name of Windows Me is Microsoft Windows Me Operating System.
The official name of Windows 2000 is Microsoft Windows 2000 Operating System.
The official name of Windows XP is Microsoft Windows XP Operating System.
The official name of Windows Server 2003 is Microsoft Windows Server 2003 Operating
System.
Microsoft, Windows, Windows NT, and the brand names and product names of other
Microsoft products are trademarks of Microsoft Corporation in the US and other countries.
Apple, AppleTalk, Macintosh, Mac, TrueType, and LaserWriter are trademarks of Apple
Computer Inc. in the US and other countries.
Postscript is a trademark of Adobe Systems Incorporated.
Netscape is a trademark of Netscape Communications Corporation.
IBM, AT and AIX are trademarks of International Business Machines Corporation.
NOVELL, NetWare, and NDS are trademarks of Novell, Inc.
Other company names and product names in this manual are the trademarks of their respective companies.
©2006 TOSHIBA TEC CORPORATION All rights reserved
This manual is protected by copyright laws. No part of this manual shall be duplicated or reproduced without the permission of TOSHIBA TEC CORPORATION. TOSHIBA TEC CORPORATION shall not be liable in terms of granting patents for any use of information contained in this
manual by third parties.
Before Reading This Manual
9
Control Panel
Control panel
1
2
28
27
3 4 5
26
25
6
7
24
23
22
21
8
9
10
11
20
19
18
17
12
13 14
16 15
1. [ENERGY SAVER] button
Use this to let the equipment enter into the energy saving mode when the equipment is not
used. Pressing this button again releases the energy saving mode.
Also, the energy saving mode is released and the equipment returns to the normal mode in
following cases:
Receiving printing data
Performing RX printing of an InternetFax or Email
Receiving a Fax document (The optional Fax Kit is needed.)
2. [INTERRUPT] button
Use this to interrupt the copy job in process and perform another one (= interrupt copying).
*
This button is not used in the Scan mode.
3. [MIXED SIZE] button
Use this to copy originals whose sizes are different.
*
This button is not used in the Scan mode.
4. [USER FUNCTIONS] button
Use this to change the equipment's default settings.
5. [SETTINGS] button
Use this to confirm the copying functions currently set.
*
10
This button is not used in the Scan mode.
Control Panel
6. Selecting button A/B/C
Use them to select items or operation in each copy menu. Items or operation corresponding
to each button appears at the lower section of the LCD screen.For details, see the Operator's Manual for Copying Functions.
*
This button is not used in the Scan mode.
7. LCD screen
This screen displays the status of the equipment, operation procedure and various instructions for users (operation menu, operation status, time, telephone numbers, Fax numbers
and ID numbers) with letters and icons.
8. FAX communication lamp
This lamp blinks at the transmission and reception of Fax data.
The Fax Kit (optional, GD-1220) is required.
9. [FAX] button
Press this button to utilize the InternetFax functions.
The Fax Kit (optional, GD-1220) is required.
10. [SCAN] button
Press this button to utilize the scanning functions.
11. [PRINTER] button
Use this to stop the print job. For details, see the Setup Guide for Printing Functions.
*
This button is not used in the Scan mode.
12. [COPY] button
Press this button to utilize the copy functions.
*
This button is not used in the Scan mode.
13. Contrast adjustment volume
Use this to adjust the brightness level of the LCD screen.
14. [FUNCTION CLEAR] button
Use this button to clear all the menus such as "COMM. OPTION" to the default setting. It can
also be used to clear the error messages.
Automatic function clear:
This function works when a specified period of time has passed since the last Scan operation or the last entry of any button. This function returns all the function settings to default
without the need to press the [FUNCTION CLEAR] button. When the department management function is being used, the display returns to the department code input menu. When
this function is not being used, the display returns to the basic menu of the Copy function.
For details, see the Operator's Manual for Copying Functions.
15. [CLEAR/STOP] button
Use this to stop the direct TX Fax job which is being transmitted or clear error message in
the LCD screen.
16. [START] button
Use this to start transmitting and receiving a document manually or start a Scan operation.
Control Panel
11
17. Digital keys
Use these keys to enter the telephone and Fax numbers, ID numbers and password.
18. Alarm lamp
This lamp blinks when an error such as paper jams or running out of toner has occurred.
19. [DATA] lamp
This lamp blinks when print data are being sent or received through a network.
20. [CANCEL] button
Use this to cancel the current setting and return to the previous menu.
21. [ENTER] button
Use this to determine items or operation selected in each menu.
22.
/
/
/
(UP/DOWN/LEFT/RIGHT) buttons
Use them to select items you want to set in each menu. The selected item is highlighted.
23. Original mode button
Use this button to set the image quality of scanning according to that of an original. The lamp
corresponding to the selected original mode lights in green.
24. Density adjustment buttons
Use this button to adjust the density of scan image. The
(automatic copy density
mode) button lamp lights in green when the density is being automatically adjusted.
25. [DRAWER] button
Use this button to select a drawer or the bypass tray to be used as a paper source. The lamp
of the paper source currently selected is lit. The lamp blinks when the selected drawer or tray
is running out of paper.
*
This button is not used in the Scan mode.
26. [COPY] button
Use this button to select the size of paper to be used. The lamp of the paper size currently
selected blinks when this size of paper is not placed in the drawer or on the bypass tray.
*
This button is not used in the Scan mode.
27. [ORIGINAL] button
Use this button to specify the size of an original.
*
This button is not used in the Scan mode.
28. APS/AMS selecting button
Automatic paper selection (APS): The equipment detects the size of original and automatically selects the same size of copy paper.
Automatic magnification selection (AMS): Set the size of copy paper to be used in advance.
The equipment then detects the size of original and automatically selects the most suitable
reproduction ratio to the copy paper.
*
12
This button is not used in the Scan mode.
Control Panel
External keyboard (optional)
1
2 3 4 5
1. Flip Panel ( P.14 “Flip panel”)
2. [RESOLUTION] button
Use this key to change the scanning resolution.
3. [SPEED DIAL] button
Use to specify a destination by Abbreviated, Alphabet, or Group dialing telephone directories.
4. [REDIAL/PAUSE] button
Jobs (max. 100 telephone numbers), which are ready to be resent in the transmission memory appear on the message display panel. You can refax each by selecting a telephone number. Or, use this key to enter a pause between telephone digits when entering a remote Fax
number.
The Fax Kit (optional, GD-1220) is required.
*
This button is not used in the Scan mode.
5. [MONITOR] button
Used to enable the speaker monitor, for monitoring call progress during non-memory transmission.
The Fax Kit (optional, GD-1220) is required.
*
This button is not used in the Scan mode.
Control Panel
13
Flip panel
One touch keys 1 to 75
Use a key between 1 and 75 as a one touch key to specify a destination when sending an InternetFax/Email. If the template function is enabled, use a key between 66 and 75 to recall a template. ( P.88 “Entry with one touch key”)
1 - 50
51 - 75
Function keys
1. CHAIN DIAL COMM
Used to dial a remote party using Chain Dialing.
The Fax Kit (optional, GD-1220) is required.
*
This button is not used in the Scan mode.
2. CHARGE CODE
Allows entry of a charge code at the time of dialing or during Abbreviated Dial and One
Touch Dial programming.
The Fax Kit (optional, GD-1220) is required.
*
This button is not used in the Scan mode.
3. DELAYED COMM
Schedules a delayed communication job to be performed at a designated date and time.
The Fax Kit (optional, GD-1220) is required.
*
14
This button is not used in the Scan mode.
Control Panel
4. DIRECT TX
Allows transmission direct from the document glass or the document feeder without the use
of memory.
The Fax Kit (optional, GD-1220) is required.
*
This button is not used in the Scan mode.
5. LOW SPEED TX
Used to select a lower transmission speed to transmit a document when poor line conditions
are expected, such as when transmitting to an overseas location that can only accept low
speed data.
The Fax Kit (optional, GD-1220) is required.
*
This button is not used in the Scan mode.
6. ITU MAILBOX
Used for Mailbox Communications or Relay, Transmission with remote Faxes that support
the ITU-T functions.
The Fax Kit (optional, GD-1220) is required.
*
This button is not used in the Scan mode.
7. COVER SHEET
Used to attach a cover sheet to a document to be transmitted.
The Fax Kit (optional, GD-1220) is required.
*
This button is not used in the Scan mode.
8. PRIORITY TX
Sends pages set on the document glass or in the document feeder ahead of all previously
scheduled transmissions.
The Fax Kit (optional, GD-1220) is required.
*
This button is not used in the Scan mode.
9. MULTI
Used to create a manual grouping for multi-address transmission.
P.95 “Multi-address transmission”
10. RECOVERY TX
Recovers from memory and sends incomplete transmissions.
The Fax Kit (optional, GD-1220) is required.
*
This button is not used in the Scan mode.
11. SEND AFTER SCAN
Used to select whether the dialing starts while the equipment is scanning the documents or
after the equipment has scanned all documents to memory.
The Fax Kit (optional, GD-1220) is required.
*
This button is not used in the Scan mode.
12. POLLING
Designates polling communication.
The Fax Kit (optional, GD-1220) is required.
*
This button is not used in the Scan mode.
13. SUB ADDRESS COMM
Adds sub-address digits to the remote Fax number for routing or security.
The Fax Kit (optional, GD-1220) is required.
*
This button is not used in the Scan mode.
14. JOB STATUS
Used to confirm the status of the job or canceling a job.
The Fax Kit (optional, GD-1220) is required.
Control Panel
15
*
This button is not used in the Scan mode.
15. JOURNAL
Used to print a communication journal.
16. PREV. TX RPT
Displays and prints the result of latest 150 transmission jobs.
17. RESERVATION LIST
Prints a Job Reservation List.
The Fax Kit (optional, GD-1220) is required.
*
This button is not used in the Scan mode.
18. SECURE RX
Enables or disables Secure RX.
The Fax Kit (optional, GD-1220) is required.
*
This button is not used in the Scan mode.
19. CHECK E-MAIL
Used to confirm InternetFax (Email) reception.
The Fax Kit (optional, GD-1220) is required.
P.73 “Receiving InternetFax”
20. TX REPORT
Prints a transmission report for one job.
The Fax Kit (optional, GD-1220) is required.
21. TEL LIST ENTRY
Used to register Abbreviated, One Touch, Group Dialing numbers.
P.102 “Registering in Address Book”
22. TEL LIST PRINT
Prints desired telephone/Fax lists.
P.126 “Destination lists”
Keyboard
This keyboard is used to enter letters for terminal ID name. It is also used to enter Email address
when you use the Email function.
P.102 “Registering in Address Book”
16
Control Panel
CONTENTS
Software License Agreement ......................................................................2
Preface...........................................................................................................5
Lineup of Our Manuals ................................................................................6
To read manuals of PDF (Portable Document Format) files .....................8
Before Reading This Manual .......................................................................9
Signal in this manual .................................................................................9
Trademarks ...............................................................................................9
Control Panel ..............................................................................................10
Control panel ...........................................................................................10
External keyboard (optional)....................................................................13
Flip panel ................................................................................................. 14
Chapter 1
OVERVIEW
About Scanning Functions........................................................................22
Scan to Email ..........................................................................................22
Scan to File .............................................................................................22
Scan to TWAIN........................................................................................23
About Scan Speed ..................................................................................23
About Scanning Functions Requiring Fax...............................................24
InternetFax ..............................................................................................24
Onramp gateway .....................................................................................25
Offramp gateway .....................................................................................26
About the Scan Utilities CD-ROM............................................................26
Chapter 2
SCAN TO E-MAIL
Scan to Email ..............................................................................................28
Procedure for Scan to Email .....................................................................29
Chapter 3
SCAN TO FILE
Scan to File ................................................................................................. 34
Procedure for Scan to File.........................................................................35
Chapter 4
SCAN TO TWAIN
Scan to TWAIN............................................................................................40
Requirements for TWAIN driver ..............................................................40
Installing TWAIN Driver..............................................................................41
Uninstalling TWAIN Driver.........................................................................43
CONTENTS
17
Operating with Control Panel of This Equipment....................................45
Retrieving Images with TWAIN Driver ......................................................48
Using TWAIN Driver for the First Time .....................................................50
Connection by searching over network ...................................................50
Connection by setting up manually.......................................................... 53
How to Use the Main Window....................................................................55
Deleting Box documents.......................................................................... 56
Displaying the Box, Folder, Document and Page Properties ..................57
Adding a new device using network discovery ........................................61
Changing the target device for retrieving Box documents.......................61
Chapter 5
TEMPLATE
Template......................................................................................................64
Procedure for Operating Templates .........................................................65
Chapter 6
INTERNETFAX
About InternetFax....................................................................................... 68
Precaution for Internet Transmission....................................................... 69
Transmitting InternetFax ...........................................................................70
Receiving InternetFax ................................................................................73
Receiving automatically...........................................................................73
Receiving manually .................................................................................74
Chapter 7
ONRAMP GATEWAY
Onramp Gateway ........................................................................................76
Chapter 8
OFFRAMP GATEWAY
Offramp Gateway........................................................................................78
Chapter 9
SCANNING FUNCTIONS SETUPS
About Scanning Functions Settings.........................................................80
Changing resolution level ....................................................................... 80
Scanning 2-sided originals ......................................................................81
Rotating images....................................................................................... 81
Changing file format ................................................................................82
Changing destination to store files .......................................................... 82
18
CONTENTS
Chapter 10 SPECIFYING DESTINATIONS
About Specifying Procedure of Destinations .......................................... 86
Direct entry with digital keys and QWERTY Keyboard............................86
Entry with one touch key .........................................................................88
Entry with abbreviated number................................................................89
Alphabet search ......................................................................................90
Entry with group number .........................................................................91
Entry from sent history.............................................................................92
Entry from reception history.....................................................................93
Multi-address transmission......................................................................95
Confirming Destinations Specified...........................................................97
Confirming destinations specified............................................................97
Deleting destinations specified ...............................................................97
Modifying destinations specified..............................................................98
Chapter 11 REGISTERING IN ADDRESS BOOK
Registering in Address Book ..................................................................102
Entering Email addresses......................................................................102
Abbreviation number registration...........................................................104
One touch number registration ..............................................................108
Group number registration.....................................................................113
Confirming destinations specified..........................................................117
Chapter 12 TROUBLESHOOTING
TWAIN Driver Errors.................................................................................122
TWAIN driver error condition .................................................................122
Chapter 13 APPENDIX
Destination lists........................................................................................126
Alphabetical sort list...............................................................................127
Abbreviated tel number list ....................................................................128
Group number information list ...............................................................129
One touch number information list.........................................................130
Printing a communication journal ..........................................................131
TX Report ..................................................................................................134
Error code table ........................................................................................135
INDEX .......................................................................................................................................141
CONTENTS
19
20
CONTENTS
OVERVIEW
1.
This section describes the overview of the scanning functions.
About Scanning Functions ....................................................................................22
Scan to Email ....................................................................................................................................22
Scan to File .......................................................................................................................................22
Scan to TWAIN .................................................................................................................................23
About Scan Speed ............................................................................................................................23
About Scanning Functions Requiring Fax ...........................................................24
InternetFax ........................................................................................................................................24
Onramp gateway...............................................................................................................................25
Offramp gateway...............................................................................................................................26
About the Scan Utilities CD-ROM .....................................................................................................26
1 OVERVIEW
About Scanning Functions
This section describes the overview of the scanning functions.
Scan to Email
You can Email the scanned images to the previously specified addresses. In this function the
scanned images are converted to TIFF files or PDF files so that they can be attached to the
Email.
Scan
@
SMTP
LAN
Internet
SMTP Server
For the operation of Scan to Email, see P.27 “SCAN TO E-MAIL”.
Scan to File
You can save the scanned images as TIFF files or PDF files into client computers or FTP servers.
Scan
FTP Server
FTP
SMB
Folder of
Client Computer
For the operation of Scan to File, see P.33 “SCAN TO FILE”.
22
About Scanning Functions
Scan to TWAIN
You can retrieve the images scanned in this equipment to your computer using the
TWAIN-compliant application software. To utilize this function, the installation of the attached
TWAIN driver is required.
Scan
Windows 98
Windows Me
Windows NT4.0
Windows 2000
Windows XP
Windows Server 2003
TWAIN driver
Memory
Client Computer
For the operation of Scan to TWAIN, see P.39 “SCAN TO TWAIN”.
About Scan Speed
The scan speed varies depending on the resolution.
The following table describes the scan speed for each resolution.
Resolution
150 dpi
200 dpi
300 dpi
400 dpi
600 dpi
Scan Speed
20 page/minute
14 page/minute
About Scanning Functions
23
1 OVERVIEW
About Scanning Functions Requiring Fax
When the Fax Kit (optional) is installed, more advanced functions will be available.
To utilize these functions, the Fax Kit (optional) are required.
InternetFax
You can send or receive the scanned images as attachment of Emails by converting them into a
TIFF-FX (Profile S) format. This function reduces communication fees because it does not
require public switched telephone networks. In this function either an InternetFax machine or a
client computer can be the recipient.
y InternetFax machine -> InternetFax machine
Internet
Intranet
Mail Server
Mail Server
Email Transmission
LAN
y InternetFax machine -> Client computer
Internet
Intranet
Client Computer
Mail Server
Mail Server
Email Transmission
LAN
For the operation of the InternetFax, see P.67 “INTERNETFAX”.
24
About Scanning Functions Requiring Fax
Client Computer
Onramp gateway
You can send fax data from a G3 mode-compliant Fax machine through a relay mailbox of this
equipment using InternetFax to Email addresses registered in this relay mailbox.
To utilize this function, the setup of a relay mailbox is required.
Fax
transmission
to relay mailbox
@
G3 Fax
Mail Server
@
@
@
Mail Server
LAN
Internet
InternetFax equipment
@
@
Mail Server
Client Computer
For the operation of onramp gateway, see P.75 “ONRAMP GATEWAY”.
About Scanning Functions Requiring Fax
25
1 OVERVIEW
Offramp gateway
You can send InternetFax data received by this equipment to other Fax machines. This function
reduces communication fees when the terminal recipient is a non-InternetFax machine because
in this procedure the distance requiring public switched telephone networks is shorter.
InternetFax equipment
InternetFax equipment
Mail Server
@
InternetFax
@
@
LAN
Internet
@
Mail Server
Fax
transmission
@
Fax
transmission
@
Client Computer
Mail Server
(With sub-address)
G3 Fax
For the operation of offramp gateway, see P.77 “OFFRAMP GATEWAY”.
About the Scan Utilities CD-ROM
The contents of the Scan Utilities CD-ROM are as follows:
Client software installer
[Scan Utilities CD-ROM]: \setup.exe
The above is a setup program to install TWAIN driver on your computer.
TWAIN driver
[Scan Utilities CD-ROM]: \TWAIN\<language>
26
About Scanning Functions Requiring Fax
G3 Fax
SCAN TO E-MAIL
2.
This section explains how to send an Email with scanned images attached.
Scan to Email ..........................................................................................................28
Procedure for Scan to Email..................................................................................29
2 SCAN TO E-MAIL
Scan to Email
Scanned images can be attached to an Email and sent as a multi-page TIFF file or PDF file.
The image density and resolution can be changed when the images are scanned.
A file with a maximum of 30 MB can be sent. A file with a large amount of data can be sent by
having the data divided into several blocks. The files sent with the divided data will be merged
into one file when they are received.
An Email can be sent to a maximum of 375 addresses in one go.
y The network settings for sending Emails are required. For the network settings relating to
scanning, see the Setup Guide for Scanning Functions. For other network settings, see
the Setup Guide for Printing Functions.
y The name of the file to be attached, message fragmentation settings and contents of the
Email can be changed in TopAccess. See the Setup Guide for Scanning Functions for
details.
y When the Fax Kit (optional) has been installed, the result of Scan to Email can be confirmed
by Journal. See P.131 “Printing a communication journal”.
28
Scan to Email
Procedure for Scan to Email
1
Place the original(s).
For placing the originals, see the Operator's Manual for Copying Functions.
y Mixed sized originals cannot be used.
y A4, A3, B5, B4 and A4-R (LT, LD, LT-R, LG and ST-R) sized originals can be
scanned.
2
Press the [SCAN] button.
3
Select "SCAN TO E-MAIL"
using the
or
button and
then press the [ENTER] button.
The SCAN TO E-MAIL menu is
displayed.
4
Set the scanning condition by
pressing the
button and
press the [CANCEL] button.
Skip to Step 5 without pressing the
button if no scanning conditions need to
be changed.
SELECT
1.SCAN
2.SCAN
3.SCAN
SCAN MENU
TO E-MAIL
TO FILE
TO TWAIN
ENTER E-MAIL ADDRESS(192MAX):
2006-08-20 11:56
M: 100%
RESOLUTION:200dpi
COMM.OPTION
1.DUPLEX
2.ROTATION
3.FILE FORMAT
4.DESTINATION
:OFF
:OFF
:PDF
:REMOTE1
Procedure for Scan to Email
29
2 SCAN TO E-MAIL
y The settings available for Scan to Email and the default settings are as follows:
Items
Default
Settings selectable
RESOLUTION
Selected
150dpi
200dpi
300dpi
400dpi
600dpi
OFF
Selected
BOOK
TABLET
OFF
Selected
ON
PDF
Selected
DUPLEX*1
ROTATION
FILE FORMAT
Ref.
P.80 “Changing resolution
level”
P.81 “Scanning 2-sided originals”
P.81 “Rotating images”
P.82 “Changing file format”
Multi-page TIFF
*1 Available only when the Reversing Automatic Document Feeder (optional) is installed
y The image mode and density can be changed. See the Operator's Manual for
Copying Functions for details.
y If the [CANCEL] button is pressed, the screen returns to the SCAN TO E-MAIL menu.
5
Specify the address.
Specify the destinations.
ENTER E-MAIL ADDRESS(192MAX):
2006-08-20 11:56
M: 100%
RESOLUTION:200dpi
COMM.OPTION
y For the direct entry, see P.86 “Direct entry with digital keys and QWERTY Keyboard”.
y For the one-touch entry, see P.88 “Entry with one touch key”.
y For the abbreviated number entry, see P.89 “Entry with abbreviated number”.
y For the search letter entry, see P.90 “Alphabet search”.
y For the group number entry, see P.91 “Entry with group number”.
y For the entry from sent history, see P.92 “Entry from sent history”.
y For the entry from reception history, see P.93 “Entry from reception history”.
y For the multi-address transmission, see P.95 “Multi-address transmission”.
y Originals are scanned and stored if they are placed on the Automatic Document
Feeder (optional) or the Reversing Automatic Document Feeder (optional).
y If originals are placed on the original glass, perform the procedure from Step 6.
y When the equipment cannot detect
the original size, the original size
selecting screen appears. Select the
Select original size
1.LT
original size using the
or
but- 2.LD
3.LT-R
ton and then press the [ENTER] button.
30
Procedure for Scan to Email
y A/B series of the paper sizes are displayed depending on the original
size.
Select original size
1.A4
2.A3
3.B5
y Scanning of the originals will start.
Processing
JOB NUMBER
SCANNING PAGE
6
:029
:001
If there are more originals,
place the next one on the origi- SCAN NEXT ORIGINAL?
1.YES
nal glass. Select "YES" using
the
or
button and press 2.NO
the [ENTER] button.
Repeat Step 6 until all the originals are finished being scanned.
7
If there are no more originals,
select "NO" using the
or
button. Transmission of the
originals is started by pressing
the [ENTER] button.
ENTER E-MAIL ADDRESS(192MAX):
2006-08-20 11:56
M: 099%
RESOLUTION:200dpi
COMM.OPTION
If the data size of the scanned images exceeds 30 MB, "Memory overflow" appears on
the control panel and the scanning of the images stops. The data already scanned are
processed automatically. To start the scanning of the remaining images, press the
[FUNCTION CLEAR] button and then perform the operation again.
Procedure for Scan to Email
31
2 SCAN TO E-MAIL
32
Procedure for Scan to Email
SCAN TO FILE
3.
This section explains how to save scanned images as a PDF or TIFF file.
Scan to File..............................................................................................................34
Procedure for Scan to File .....................................................................................35
3 SCAN TO FILE
Scan to File
Scanned images can be stored in a computer or an FTP server as a PDF or TIFF file.
The image density and resolution can be changed when images are scanned.
Up to two locations can be registered for saving scanned images. Select one of the two locations registered when you are performing the Scan to File.
y To enable this function, you need to set the location where data are to be stored. For the settings of the location such as a computer or FTP server, see the Setup Guide for Scanning
Functions.
y The name of the file to be stored will be "DOCYYMMDD.pdf(tif)".
E.g.: DOC060820.pdf
If the same file name exists in the folder specified, a three-digit number will be added to the
end of the name in order.
E.g.: DOCYYMMDD-001.pdf(tif)
y When the Fax Kit (optional) has been installed, the result of Scan to File can be confirmed by
Journal. See P.131 “Printing a communication journal”.
y If you create a template for the Scan to File, you can save the images into a location other
than the two locations registered.
34
Scan to File
Procedure for Scan to File
1
Place the original(s).
For placing the originals, see the Operator's Manual for Copying Functions.
y Mixed-size originals cannot be used.
y A4, A3, B5, B4 and A4-R (LT, LD, LT-R, LG and ST-R) sized originals can be
scanned.
2
Press the [SCAN] button
3
Select "SCAN TO FILE" using
the
or
button and then
press the [ENTER] button.
SCAN TO FILE menu is displayed.
4
Set the scanning condition by
pressing the
button and
press the [CANCEL] button.
Skip to Step 5 without pressing the
button if no scanning conditions need to
be changed.
SELECT
1.SCAN
2.SCAN
3.SCAN
SCAN MENU
TO E-MAIL
TO FILE
TO TWAIN
TO FILE(REMOTE1)
2006-08-20 11:56
M: 100%
RESOLUTION:200dpi
COMM.OPTION
1.DUPLEX
2.ROTATION
3.FILE FORMAT
4.DESTINATION
:OFF
:OFF
:PDF
:REMOTE1
Procedure for Scan to File
35
3 SCAN TO FILE
y The settings available for Scan to File and the default settings are as follows:
Items
Default
RESOLUTION
Settings selectable
150dpi
Selected
Ref.
P.80 “Changing resolution
level”
200dpi
300dpi
400dpi
600dpi
Selected
DUPLEX*1
OFF
P.81 “Scanning 2-sided originals”
BOOK
TABLET
ROTATION
Selected
OFF
P.81 “Rotating images”
ON
FILE FORMAT
Selected
PDF
P.82 “Changing file format”
Multi-page TIFF
Single-page TIFF
DESTINATION*2
REMOTE 1
REMOTE 2
P.82 “Changing destination to
store files”
*1 Available only when the Reversing Automatic Document Feeder (optional) is installed.
*2 If only one location is set by the administrator, it will be the default setting.
y The image mode and density can be changed. See the Operator's Manual for
Copying Functions for details.
y If the [CANCEL] button is pressed, the screen returns to the SCAN TO FILE menu.
5
Press the [START] button.
y Originals are scanned and stored if they are placed on the Automatic Document
Feeder (optional) or the Reversing Automatic Document Feeder (optional).
y If originals are placed on the original glass, perform the procedure from Step 6.
y When the equipment cannot detect
the original size, the original size
selecting screen appears. Select the
Select original size
1.LT
original size using the
or
but- 2.LD
3.LT-R
ton and then press the [ENTER] button.
y A/B series of the paper sizes are displayed depending on the original
size.
y Scanning of the originals will start.
36
Procedure for Scan to File
Select original size
1.A4
2.A3
3.B5
6
If there are more originals,
place the next one on the origi- SCAN NEXT ORIGINAL?
1.YES
nal glass. Select "YES" using
the
or
button and press 2.NO
the [ENTER] button.
Repeat Step 6 until all the originals have finished being scanned.
7
If there are no more originals, select "NO" using the
or
button. The originals are stored by pressing the [ENTER] button.
If the data size of the scanned images exceeds 30 MB, "Memory overflow" appears on
the control panel and the scanning of the images stops. The data already scanned are
processed automatically. To start the scanning of the remaining images, press the
[FUNCTION CLEAR] button and then perform the operation again.
Procedure for Scan to File
37
3 SCAN TO FILE
38
Procedure for Scan to File
SCAN TO TWAIN
4.
This section describes how to retrieve images to your computer using TWAIN driver.
Scan to TWAIN ........................................................................................................40
Requirements for TWAIN driver ........................................................................................................40
Installing TWAIN Driver ..........................................................................................41
Uninstalling TWAIN Driver .....................................................................................43
Operating with Control Panel of This Equipment ................................................45
Retrieving Images with TWAIN Driver...................................................................48
Using TWAIN Driver for the First Time..................................................................50
Connection by searching over network .............................................................................................50
Connection by setting up manually ...................................................................................................53
4 SCAN TO TWAIN
Scan to TWAIN
You can retrieve the images stored in the memory of the equipment using the TWAIN-compliant
application software if the attached TWAIN driver is installed in the equipment.
The Scan to TWAIN operational procedure is as follows. The installation of a TWAIN driver is
required only once at the first stage. Perform steps 2 and 3 to retrieve images.
1. Install the TWAIN driver in the equipment.
2. Scan the image using the control panel of the equipment. (The scanned image file is stored
in the memory of the equipment.)
3. Retrieve the image stored in the memory of the equipment to a client computer using the
TWAIN-compliant application software.
y Some TWAIN-compliant applications do not operate with TWAIN driver. In that case, see the
manual or online help of the application.
y A TWAIN-compliant application is not attached on Windows NT 4.0, Windows XP and Windows Server 2003. Purchase it individually for these systems.
y Some applications do not support the TWAIN scanning of originals whose colors, sizes, or
resolution levels are not unified. When you scan this type of originals into these applications,
try to scan one page by one.
y The image quality of the scanned image may differ depending on applications you are using.
If you feel the image quality of the scanned image is not satisfactory, try other applications.
y When the Fax Kit (optional) has been installed, the result of Scan to TWAIN can be confirmed by Journal. See P.131 “Printing a communication journal”.
Requirements for TWAIN driver
TWAIN driver can be operated under the following environments:
y Display resolution: 1024 x 768 dots or more
y Display color: 16 bits (high color) or more
y CPU: Pentium 133 MHz (Pentium 266 MHz or higher is recommended)
y OS:
Windows 98 (Windows 98 Second Edition is recommended)
Windows Me
Windows NT 4.0 Service Pack 6a
Windows 2000 Service Pack 4
Windows XP Service Pack 1 / Service Pack 2
Windows Server 2003 Service Pack 1
y Required software:
TWAIN-compliant application (when TWAIN driver is used)
Microsoft Internet Explorer 5.5 Service Pack 2 or later
40
Scan to TWAIN
Installing TWAIN Driver
1
Insert the Scan Utilities CD-ROM into the CD-ROM drive of your
computer.
When the installer does not automatically start, open the CD-ROM from the Explorer and
double-click "Setup.exe" to start up the installer.
2
Select the language.
3
Click [Next].
The License Agreement dialog box appears.
4
Read the Agreement carefully and click [Yes] if you accept.
The Start Copying Files dialog box appears.
Installing TWAIN Driver
41
4 SCAN TO TWAIN
5
Review the settings and click [Next].
Copying starts. When the copying is completed, the InstallShield Wizard Complete dialog
box appears.
6
42
Click [Finish].
Installing TWAIN Driver
Uninstalling TWAIN Driver
This section describes how to uninstall only TWAIN driver.
Figures below are for Windows XP but the procedure to uninstall TWAIN driver from other versions of Windows is the same.
1
Open the "Control Panel" window and double-click "Add or
Remove Programs".
The Add or Remove Programs dialog box appears.
2
Select "TOSHIBA e-STUDIO205 SERIES" in the list and then click
[Change/Remove].
The InstallShield Wizard dialog box appears.
Uninstalling TWAIN Driver
43
4 SCAN TO TWAIN
3
Select "Modify" and click [Next].
4
Uncheck the box for the TOSHIBA e-STUDIO205 Series TWAIN
Driver and then click [Next].
5
Click [Yes].
6
Select "Yes, I want to restart my computer now" and then click
[Finish] to restart it.
Some files will be removed after restarting the computer.
44
Uninstalling TWAIN Driver
Operating with Control Panel of This Equipment
Before retrieving image files using TWAIN driver, these image files must be saved into the memory of this equipment using the control panel of this equipment.
1
Place the original(s).
For how to place originals, see the Operator's Manual for Copying Functions.
y Mixed-size originals are not available.
y Sizes available for scanning are A4, A3, B5, B4 and A4-R (LT, LD, LT-R, LG and
ST-R).
2
Press the [SCAN] button.
3
Select "SCAN TO TWAIN"
using the
or
button and
then press the [ENTER] button.
The TO TWAIN screen appears.
4
Select the scan modes using
the
button and press the
[CANCEL] button.
SELECT
1.SCAN
2.SCAN
3.SCAN
SCAN MENU
TO E-MAIL
TO FILE
TO TWAIN
TO TWAIN
2006-08-20 11:56
M: 100%
RESOLUTION:200dpi
COMM.OPTION
If you do not change any scan modes,
do not press the
5.
button. Go to step
1.DUPLEX
2.ROTATION
3.FILE FORMAT
4.DESTINATION
:OFF
:OFF
:PDF
:REMOTE1
Operating with Control Panel of This Equipment
45
4 SCAN TO TWAIN
y Changeable items and their default values in the Scan to TWAIN function are shown
below.
Items
Default
RESOLUTION
Settings selectable
150dpi
Selected
Ref.
P.80 “Changing resolution
level”
200dpi
300dpi
400dpi
600dpi
DUPLEX*1
Selected
OFF
P.81 “Scanning 2-sided originals”
BOOK
TABLET
ROTATION
Selected
OFF
P.81 “Rotating images”
ON
*1 This item is available only when the Reversing Automatic Document Feeder (optional) is
installed.
y The image mode and density can be changed. See the Operator's Manual for
Coping Functions for details.
y If the [CANCEL] button is pressed, the screen returns to the SCAN TO TWAIN menu.
5
Press the [START] button.
y When originals are placed on the Automatic Document Feeder (optional) or the
Reversing Automatic Document Feeder (optional), the originals are scanned first and
the scanned images are then saved.
y When an original is placed on the original glass, go to step 6.
y When the equipment cannot detect
the original size, the original size
selecting screen appears. Select the
Select original size
1.LT
2.LD
but- 3.LT-R
original size using the
or
ton and then press the [ENTER] button.
y A/B series of the paper sizes are displayed depending on the original
size.
y Scanning starts.
6
Place the next original on the
original glass if any. Select "1.
YES" using the
or
button and then press the
[ENTER] button.
Select original size
1.A4
2.A3
3.B5
SCAN NEXT ORIGINAL?
1.YES
2.NO
Repeat step 6 until all the originals are scanned.
46
Operating with Control Panel of This Equipment
7
If you do not scan the next original, select "2. NO" using the
button and then press the [ENTER] button. Saving starts.
or
If the data size of the scanned images exceeds 30 MB, "Memory overflow" appears on
the control panel and the scanning of the images stops. The data already scanned are
stored as an image file in a memory of the equipment automatically. To scan the remaining images, retrieve the image file and store it in a client computer, delete the image file
in the memory and then perform the operation again.
P.48 “Retrieving Images with TWAIN Driver”
Operating with Control Panel of This Equipment
47
4 SCAN TO TWAIN
Retrieving Images with TWAIN Driver
You can retrieve images saved in the memory of this equipment using a TWAIN-compliant application such as Imaging for Windows 98/Me/2000.
1
2
Start a TWAIN-compliant application.
3
Select "e-STUDIO TWAIN driver" and click [OK].
4
Select "Acquire image (or the same functional command)" from the
File menu.
Open the File menu and select "Select Device (or the same functional command)".
The TWAIN Driver for e-STUDIO dialog box appears.
If you use TWAIN driver to retrieve images for the first time, the TopAccess DocMon
Local Discovery dialog box appears. If it appears, search this equipment over a network
and set up the connection.
P.50 “Using TWAIN Driver for the First Time”
5
48
Select "Public Box" in a tree window.
Retrieving Images with TWAIN Driver
6
Select a file to retrieve, and then click [Acquire].
7
If you want to remove the files in the memory of this equipment
after scanning, click [YES]. If you retain them in the memory, click
[NO].
Click [CANCEL] to cancel scanning documents.
8
A dialog box indicating downloading status appears. When the
downloading is completed, the retrieved image files appear on the
screen of the TWAIN-compliant application.
Retrieving Images with TWAIN Driver
49
4 SCAN TO TWAIN
Using TWAIN Driver for the First Time
If you are using TWAIN driver for the first time to access this equipment, the TopAccess DocMon
Local Discovery dialog box appears. If it appears, set up the connection with this equipment in
this dialog box.
Set up the connection by either searching this equipment over a network or directly entering the
network address of this equipment.
Connection by searching over network
You can set up the connection by searching this equipment over a network.
1
Click [Start Discovery] in the TopAccessDocMon Local Discovery
dialog box.
All TWAIN-compliant devices on the network are searched.
50
Using TWAIN Driver for the First Time
2
When searching is completed, the searched devices are listed.
If many clients exist on the network, searching may take a long time. In this case, click
[Advanced...] in the Discovery Settings dialog box to change the search conditions.
Devices
Specify the device series to search.
Network - Enable IPX/SPX Search
This item is unselectable because TWAIN driver does not support IPX/SPX connection.
Network - Enable TCP/IP Search
Check this to search devices connected with a TCP/IP network. This method is available
only when a TCP/IP protocol is installed on your computer.
If this item is checked, further select how you search the desired devices on the TCP/IP
network.
Search local subnet
Check this to search devices on a local subnet.
Specify a range
Check this to narrow the search range for IP addresses. If this item is checked, key in IP
addresses in the From and To fields to specify the search range.
Using TWAIN Driver for the First Time
51
4 SCAN TO TWAIN
3
Select this equipment in the list and then click [OK].
Connect with this equipment. A window for TWAIN driver appears.
52
Using TWAIN Driver for the First Time
Connection by setting up manually
1
Click [Manual Selection] in the TopAccessDocMon Local Discovery
dialog box.
2
Enter the items below and click [OK].
IP address
Enter the IP address of this equipment.
IPX Address
This item is unselectable because TWAIN driver does not support IPX connection.
Name
Enter the device name of this equipment.
Location
Enter the installation location of this equipment.
3
Click [OK].
The entered device name is added to the list in the TopAccessDocMon Local Discovery
dialog box.
Using TWAIN Driver for the First Time
53
4 SCAN TO TWAIN
4
Select this equipment and then click [OK].
Connect with this equipment. A window for TWAIN driver appears.
54
Using TWAIN Driver for the First Time
How to Use the Main Window
When you access the TWAIN driver, the Main window for the TWAIN driver appears and lets you
perform various functions more than retrieving Box documents in the Main window.
1
2
3
4
8
5
6
7
1) Menu Bar
You can select various functions from the menu.
File menu:
- Acquire — Click this menu to download a document, or pages of a document, into an
application.
- Delete — Click this menu to delete selected pages or documents.
P.56 “Deleting Box documents”
- Properties — Click this menu to display the properties of a selected page or document.
P.57 “Displaying the Box, Folder, Document and Page Properties”
- Close — Click this menu to close the TWAIN driver Main window.
Edit menu:
- Select All — Click this menu to select all pages displayed in the Content window. This is
available only when you select a document in the Tree window.
- Shrink To Half *— Click this menu to change resolution of the e-Filing documents to
300x300 dpi that are originally stored in 600x600 dpi. This feature is only available for the
documents that are originally stored to the e-Filing by the Copy to e-Filing or Print to
e-Filing feature. When the check mark is displayed in this menu, all documents will be
retrieved in 300x300 dpi. You can cancel shrinking to half by clicking on this menu again.
*
This function is not available for this equipment.
View menu:
- List — Click this menu to display the List view in the Content window.
- Details — Click this menu to display the Details view in the Content window.
- Thumbnail Size — Click a desired thumbnail size from “Small”, “Medium”, and “Large”.
This menu is only available when you display the Thumbnail view.
- Arrange Icons — Click a desired arrangement for the view from “By Name”, “By Date”,
“By Type”, and “By Size”.
- Refresh — Click this menu to update the information in the Content window.
Box Select menu:
- Device Discovery — Click this menu to add a new connection to the equipment in a network and display the TopAccessDocMon Local Discovery dialog box.
P.61 “Adding a new device using network discovery”
How to Use the Main Window
55
4 SCAN TO TWAIN
- Select e-STUDIO — Click this menu to change the target device when retrieving Box
documents.
P.61 “Changing the target device for retrieving Box documents”
Help
- Help — Click this menu to display Online Help.
- About — Click this menu to display the version information.
2) Tool Bar
The tool bar displays icons for performing “Delete”, “Properties”, “List”, “Details”, “Thumbnail”, “Refresh”, “Device Discovery”, and “Select e-STUDIO”.
3) Tree window
This displays the boxes, folders, and documents in tree view. The contents of boxes, folders
and documents are displayed in the contents window when they are clicked and opened.
4) Contents windows
This displays the contents such as folders, documents, and pages of the object you select in
the tree window.
5) [Acquire]
Click this to import the selected document or pages into the TWAIN compliant application.
6) [Delete]
Click this to delete the selected documents or pages.
7) [Close]
Click this to exit the TWAIN driver.
8) Status Bar
This displays the communication status, number of pages or the document that you selected,
and the IP address of the equipment to be connected.
Deleting Box documents
You can delete a document or page(s) in a document from Box using the TWAIN driver Main
window.
Deleting documents from the Box
1
Select the document or page(s) to be deleted and click the [Delete].
The Confirm Deletion dialog box appears.
56
How to Use the Main Window
2
Click [Yes].
The selected document or page(s) is deleted.
If documents are not deleted manually, they remain in memory for 7 days and then
deleted automatically.
Folders cannot be deleted manually. Only when there is no file in the folder, it will be
deleted automatically in the following conditions:
y When 7 days have passed since the creation of the folder (After this first deletion, the
equipment checks every 7 days if there is any folder.)
y When the template for creating the folder is deleted
Displaying the Box, Folder, Document and Page Properties
The Box, Folder, Document, and Page Information dialog box can be displayed by selecting a
box, folder, document or page and click [Properties] in the [File] menu.
P.57 “Box properties”
P.58 “Folder properties”
P.59 “Document and Page properties”
P.60 “Page properties”
Box properties
In the Box Information dialog box, you can see the following information about the selected box.
y Contains — Number and type of contents in the box.
y Size — Total size of contents in the box.
y Preservation Period for Documents — The number of days to retain the document before
deleting it automatically. This function is not available for this equipment.
y EMail Address For Notification — Email address that the notification will be sent to. This
function is not available for this equipment.
y Status — “Ready” means a box is ready to edit or to be deleted. “Busy” means a box cannot
be modified or deleted.
y Created — Date the box was created.
y Modified — Date the box was previously modified.
y Protected — “Yes” means this box is protected by a password. This function is not available
for this equipment.
How to Use the Main Window
57
4 SCAN TO TWAIN
Folder properties
In the Folder Information dialog box, you can see the following information about the selected
folder.
A Folder can be created when performing Scan to TWAIN using a Template. To create folders,
see "TWAIN Setting" in the Setup Guide for Scanning Functions.
y Location — Path to the folder.
y Contains — Number of documents in the folder.
y Status — “Ready” means a folder is ready to edit or to be deleted. “Busy” means a folder
cannot be modified or deleted.
y Created — Date the folder was created.
y Modified — Date the folder was previously modified.
58
How to Use the Main Window
Document and Page properties
In the Document Information or Page Information dialog box, you can see the following information about the selected document.
Property tab
The Property tab is only displayed for the Document Information dialog box.
Format — How the document is saved.
Location — Path to the Box where the document is saved.
Size — Size of the document.
Total Pages — Number of pages in the document.
Status — “Ready” means a document is ready to download. “Busy” means a document cannot be downloaded or deleted.
y Created — Date and time a document is created.
y Modified — Date and time a document is previously modified.
y Accessed — Date and time a document is previously accessed.
y
y
y
y
y
How to Use the Main Window
59
4 SCAN TO TWAIN
Preview tab
The Preview tab displays the thumbnail of a selected page. When you are displaying the document properties, it displays the thumbnail of the first page of the document. The information in
the Preview tab of the Document Information dialog box and Page Information dialog box is the
same.
y
y
y
y
y
Format — How the document is saved.
Resolution — Resolution of the first page.
Image Size — Pixel size of the first page.
Paper Size — Paper size of the first page.
Size — Data size of the first page.
Page properties
y
y
y
y
y
60
Format — How the document is saved.
Resolution — Resolution of the page.
Image Size — Pixel size of the page.
Paper Size — Paper size of the page.
Size — Data size of the page.
How to Use the Main Window
Adding a new device using network discovery
You can add a new connection to other equipment by searching the equipment in your network.
This enables you to add several devices that you can connect using the TWAIN driver.
To add a new connection, click the [Box Select] menu and select [Device Discovery]. The
TopAccessDocMon Local Discovery dialog box appears and discovers the devices in your network to add a new connection. For further instruction on how to discover the devices using the
TopAccessDocMon Local Discovery dialog box, see the following section.
P.50 “Using TWAIN Driver for the First Time”
After you add other devices in the connection list, you can change the target equipment by
selecting the [Select e-STUDIO] command under the [Box Select] menu.
P.61 “Changing the target device for retrieving Box documents”
Changing the target device for retrieving Box documents
If you have added more than one device to connect, you can change the target device for
retrieving Box documents using the TWAIN driver.
Selecting the target device for retrieving Box documents
1
Click the [Box Select] menu and select [Select e-STUDIO].
The Select Device dialog box appears.
2
Select the name of the equipment that you want to connect to, and
click [OK].
The target device has been changed to the selected equipment.
How to Use the Main Window
61
4 SCAN TO TWAIN
62
How to Use the Main Window
TEMPLATE
5.
This section explains the template function. You can register the scanning settings, which are frequently
used, to a one touch key and recall the settings by pressing one button.
Template ..................................................................................................................64
Procedure for Operating Templates......................................................................65
5 TEMPLATE
Template
A template in which image density, resolution, rotation and file format are set to the scanning
functions can be registered to a one touch key.
You can perform desired scanning operation by placing an original on the original glass, Automatic Document Feeder or Reversing Automatic Document Feeder and pressing a one touch
key to which the template is registered.
y To enable the template function, you need to set the template setting in the equipment to
ON. See the Setup Guide for Scanning Functions for details.
y Templates can be created in TopAccess. (e.g.: Scan to Email in which the address is specified) See the Setup Guide for Scanning Functions for details.
y Up to 10 templates can be created and registered to one touch keys from 66 to 75.
y When the template function is set to ON, only 65 one touch keys from 1 to 65 can be registered for the address.
64
Template
Procedure for Operating Templates
1
Place the original(s).
For placing the originals, see the Operator's Manual for Copying Functions.
y Mixed-size originals cannot be used.
y A4, A3, B5, B4 and A4-R (LT, LD, LT-R, LG and ST-R) sized originals can be
scanned.
2
Press the [SCAN] button
3
Press the one touch key to which the template to be used is registered and press the [START] button.
P.14 “One touch keys 1 to 75”
y Templates can be registered to one touch keys from 66 (template 1) to 75 (template
10).
y Originals are scanned with the settings registered to a template if they are placed on
the Automatic Document Feeder (optional) or the Reversing Automatic Document
Feeder (optional).
y If originals are placed on the original glass, perform the procedure from Step 4.
y When the equipment cannot detect
the original size, the original size
selecting screen appears. Select the
Select original size
1.LT
2.LD
but- 3.LT-R
original size using the
or
ton and then press the [ENTER] button.
y A/B series of the paper sizes are displayed depending on the original
size.
Select original size
1.A4
2.A3
3.B5
Procedure for Operating Templates
65
5 TEMPLATE
y Scanning of the originals will start.
4
Processing
JOB NUMBER
SCANNING PAGE
:029
:001
If there are more originals,
place the next one on the origi- SCAN NEXT ORIGINAL?
1.YES
nal glass. Select "YES" using
the
or
button and press 2.NO
the [ENTER] button.
Repeat Step 4 until all the originals have finished being scanned.
5
66
If there are no more originals, select "NO" using the
button.
Procedure for Operating Templates
or
INTERNETFAX
6.
This section describes about how to transmit the InternetFax, and how to receive an InternetFax and Email
with an attached file.
About InternetFax ...................................................................................................68
Precaution for Internet Transmission ...................................................................69
Transmitting InternetFax ........................................................................................70
Receiving InternetFax.............................................................................................73
Receiving automatically ....................................................................................................................73
Receiving manually ...........................................................................................................................74
6 INTERNETFAX
About InternetFax
You can perform the InternetFax function that provides the ability to transmit a scanned original
as an Email, with an attached TIFF-FX (Profile S) file. Since an Internet line is used instead of
the public switched telephone networks, the communication cost can be reduced.
In this function, an Email address is specified in place of a phone number to transmit a scanned
original to the InternetFax equipment or the client computers.
When the InternetFax is received, it is automatically output like regular Fax.
This equipment can transmit a file of up to 5MB. In addition, you can split a large file into pieces
and send them separately. The InternetFax can be sent to up to 375 destinations at the same
time.
y The Fax Kit (optional) is needed for the InternetFax to function.
y It is necessary to configure the network settings for the Email transmission in order to use
the InternetFax functions. For the details about the scanning related network settings, see
the Setup Guide for Scanning Functions. For other network settings, see the Setup
Guide for Printing Functions.
y You can change the file fragmentation setting and text data of the InternetFax using
TopAccess. For details, see the Setup Guide for Scanning Functions.
y You can confirm the result of InternetFax by printing journals and other reports shown below.
For the details, see P.131 “Printing a communication journal”.
y In the tables below, the names of reports or lists displayed on the LCD screen are written
first, and their names on the actual reports or lists are written next in parentheses.
Communication Report
y MEMORY TX REPORT
(MEMORY TRANSMISSION REPORT)
y MULTI-ADD REPORT
(MULTI TRANSMISSION REPORT)
68
About InternetFax
Precaution for Internet Transmission
Transmissions using the InternetFax function are the same as Email transmissions. Various
functions to support data communications are available for the Internet communications. Also,
there are various Internet specific troubles.
Before you start to use the InternetFax function, it is recommended that you read this section
and understand the precautions for Internet transmission.
y The InternetFax sends a document to the Email server of Internet and it does not send via
the PSTN* alike regular facsimile transmissions. Therefore, the transmission is considered
to be completed when the document has been sent to the Email sever successfully.
y Internet transmission has low security. It is recommended that you use regular facsimile
transmission when a confidential document is sent.
y It may take a considerable amount of time for the recipient to receive the document because
of the line traffic in the Internet.
y If the document being transmitted has a large amount of data, it may not be successfully sent
due to the configuration of the Email server.
y If the InternetFax is sent to multiple recipients at the same time and the header page is set to
be printed on the recipient's devices, all recipient's addresses will be printed on the header
page. If you want to secure the recipient information, send the InternetFax separately to
each recipient rather than sending to multiple recipients at the same time.
*
PSTN (Public Switched Telephone Network) is a global telephone system enables to communicate
in worldwide using copper wires to transmit analog data.
Precaution for Internet Transmission
69
6 INTERNETFAX
Transmitting InternetFax
1
Place the original.
For how to place the originals, see the Operator's Manual for Copying Functions.
y Mixed originals cannot be transmitted.
y The original of A4, A3, B5, B4 and A4-R (LT, LD, LT-R, LG and ST-R) sizes can be
scanned.
2
Press the [FAX] button twice.
The InternetFax menu appears.
ENTER E-MAIL ADDRESS(192MAX):
2006-08-20 11:56
M: 100%
RESOLUTION:200dpi
COMM.OPTION
3
Press the
button to set the
scanning conditions and press
the [CANCEL] button.
1.DUPLEX SENDING :OFF
If you do not change the scanning
conditions, proceed to step 4 without
pressing the
button.
y The items that can be set with InternetFax and their default values are shown below.
Items
*1
DUPLEX SENDING
Default
Settings selectable
Selected
OFF
ON
*1 Enabled only when the Reversing Automatic Document Feeder is installed.
y The image mode and density can be changed. See the Operator's Manual for
Copying Functions for details.
70
Transmitting InternetFax
4
Specifying Destinations.
You can specify Email addresses for
InternetFax by following methods:
ENTER E-MAIL ADDRESS(192MAX):
2006-08-20 11:56
M: 100%
RESOLUTION:200dpi
COMM.OPTION
y For the direct entry, see P.86 “Direct entry with digital keys and QWERTY Keyboard”.
y For the one-touch entry, see P.88 “Entry with one touch key”.
y For the abbreviated number entry, see P.89 “Entry with abbreviated number”.
y For the search letter entry, see P.90 “Alphabet search”.
y For the group number entry, see P.91 “Entry with group number”.
y For the entry from sent history, see P.92 “Entry from sent history”.
y For the entry from reception history, see P.93 “Entry from reception history”.
y For the multi-address transmission, see P.95 “Multi-address transmission”.
y The destination with the Email address not registered cannot be specified.
y Only the group with the Email address being set can be specified.
y When the original is placed in the Automatic Document Feeder or Reversing Automatic Document Feeder, the equipment starts scanning and transmits it.
y If the original is placed on the original glass, perform the procedure from step 5.
y When the equipment cannot detect
the original size, the original size
selecting screen appears. Select the
Select original size
1.LT
original size using the
or
but- 2.LD
3.LT-R
ton and then press the [ENTER] button.
y A/B series of the paper sizes are displayed depending on the original
size.
Select original size
1.A4
2.A3
3.B5
y Scanning starts.
SCANNING TO MEMORY
JOB NUMBER
SCANNING PAGE
RESIDUAL MEMORY
:029
:001
:099%
Transmitting InternetFax
71
6 INTERNETFAX
5
If there are multiple originals,
place the next one on the origi- SCAN NEXT ORIGINAL?
nal glass, use the
or
but- 1.YES
2.NO
ton to select "YES", and then
press the [OK] button.
Repeat step 5 until all the originals are scanned.
6
When there is no other original
to be scanned, use the
or
button to select "NO", and
then press the [OK] button to
start the transmission.
ENTER E-MAIL ADDRESS(192MAX):
2006-08-20 11:56
M: 099%
RESOLUTION:200dpi
COMM.OPTION
If the data size of the scanned images exceeds 5 MB, "Memory overflow" appears on the
control panel and the scanning of the images stops. The data already scanned are processed automatically. To start the scanning of the remaining images, press the [FUNCTION CLEAR] button and then perform the operation again.
72
Transmitting InternetFax
Receiving InternetFax
The equipment accesses the Email server at specified intervals to check whether any InternetFax/Email has been delivered. If an InternetFax/Email has been delivered, the equipment will
automatically retrieve and print out the InternetFax/Email. The text data as well as attached files
can be printed. Also, the InternetFax with the header can be printed.
When the [CHECK E-MAIL] button in the InternetFax mode is pressed, the equipment manually
accesses the Email server to check whether any InternetFax/Email has been delivered. If an
InternetFax/Email has been delivered, the equipment receives and prints out the InternetFax/
Email.
When the large image file has been split and sent, the equipment will automatically restore the
multiple files into the original state and print out.
The InternetFax with a header can also be received.
Images in the TIFF Profile S, TIFF Profile F or TIFF Profile J format can be received and printed.
The resolution of the images must be either of 200 x 100, 150 x 150, 200 x 200, 200 x 400, 300
x 300 or 400 x 400 (dpi).
You can also set to forward the InternetFax/Email to another Email address when an error
occurs.
For details, see the Setup Guide for Scanning Functions.
An error occurs when an attached image file to be sent is larger than 6MB, or an image file
attached to a received Email is in a format that cannot be printed with the equipment. You can
set to print the report with the error message when an error occurs for Email printing. For details,
see the Setup Guide for Scanning Functions.
In case when the split Email has been received and the data size after the restoration exceeds
30 MB, an error occurs and the first page will be printed out as an error log.
If the above error occurs, the received data are automatically deleted. Ask the sender to perform
the transmission again with the size reduced.
Receiving automatically
The equipment can be set to check whether any InternetFax/Email has been delivered to the
Email server at specified intervals automatically. (Default setting: every 5 minutes)
For setting the intervals to access the server (polling rate), see the Setup Guide for Scanning
Functions.
To automatically receive the InternetFax from the Email server, it is necessary to make the
POP3 server settings. For details, see the Setup Guide for Scanning Functions.
Receiving InternetFax
73
6 INTERNETFAX
Receiving manually
Use this to manually access the Email server to check whether any InternetFax/Email has been
delivered.
1
Press the [FAX] button twice.
The InternetFax screen appears.
ENTER E-MAIL ADDRESS(192MAX):
2006-08-20 11:56
M: 100%
RESOLUTION:200dpi
COMM.OPTION
2
Press the [CHECK E-MAIL]
button.
"Searching…" appears on the screen.
3
When an InternetFax/Email is received, "Printing" appears on the
screen and the printing of the InternetFax/Email is started.
When no InternetFax/Email is received, "No e-mail exist" appears
on the screen for two seconds and the screen returns to the InternetFax screen.
Acceptable sizes of paper for InternetFax/Email RX printing are as follows: A3, A4, A5-R,
B4, B5 and Folio (LG, LD, LT, ST-R and COMP)
If the acceptable size of paper is not set in the drawer when the InternetFax/Email is
received, place paper of appropriate size on the bypass tray, and then print.
74
Receiving InternetFax
ONRAMP GATEWAY
7.
This section describes the onramp gateway.
Onramp Gateway ....................................................................................................76
7 ONRAMP GATEWAY
Onramp Gateway
This is a function to send received Fax data through a relay box in the equipment to an Email
address, which is registered in this relay box, as an InternetFax.
Fax
transmission
to relay mailbox
@
G3 Fax
Mail Server
@
@
@
Mail Server
LAN
Internet
InternetFax equipment
@
@
Mail Server
Client Computer
This function enables you to send an InternetFax from a machine, which does not support the
InternetFax function, to an address set in a machine which can receive only an InternetFax such
as a computer without the modem installed.
To use the onramp gateway, either of the following settings is required.
1. The relay box for the transfer is set in the equipment.
The Fax is received on the condition that the sub address of the relay box is added to the
Fax number of the equipment.
2. The InternetFax reception/transfer function is set in the equipment.
See the Operator's Manual for Facsimile Function and Setup Guide for Scanning Functions for details.
y The Fax Kit (optional) is required.
y InternetFax settings are required. See the Setup Guide for Scanning Functions for
details.
y You can confirm the result of Onramp Gateway transmission/reception by printing journals and other lists and reports shown below. For the details, see P.131 “Printing a
communication journal”.
Reception List
y LOCAL MAILBOX LIST
y REMOTE MAILBOX LIST
y RELAY RECEPTION LIST
(RELAY STATION
REPORT)
76
Onramp Gateway
Communication Report
y MEMORY TX REPORT
(MEMORY TRANSMISSION REPORT)
y MULTI-ADD REPORT
(MULTI TRANSMISSION REPORT)
y RELAY ORIGINATOR REPORT
(RELAY TX ORIG. TERMINAL REPORT)
y RELAY STATION REPORT
(RELAY SEND RELAY STATION REPORT)
y RELAY END REPORT
(RELAY TX END STATION REPORT)
OFFRAMP GATEWAY
8.
This section describes the offramp gateway.
Offramp Gateway ....................................................................................................78
8 OFFRAMP GATEWAY
Offramp Gateway
This is a function to send received InternetFax data to other Facsimiles as a Fax. The use of the
public switched telephone networks can be minimized by means of this function, if the machines
which receive the Fax do not support the InternetFax function.
InternetFax equipment
InternetFax equipment
Mail Server
@
InternetFax
@
@
LAN
Internet
@
Mail Server
Fax
transmission
@
Fax
transmission
@
Client Computer
Mail Server
(With sub-address)
G3 Fax
G3 Fax
y The Fax Kit (optional) is required.
y The network settings of the equipment are required. See the Network Administration
Guide for Scanning Functions and the Setup Guide for Scanning Functions for details.
y When the host name of the equipment is "host1.toshibatec-ifax.com" on the DNS server, the
address of the InternetFax to be sent needs to be in the following format.
[email protected]
*
XXXXXXXXXXX Telephone number to which a Fax is sent.
See the Operator's Manual for Facsimile Function.
y You can confirm the result of Offramp Gateway transmission/reception by printing journals
and other reports shown below. For the details, see P.131 “Printing a communication journal”.
Communication Report
y MEMORY-TX REPORT
(MEMORY TRANSMISSION REPORT)
y MULTI-ADD REPORT
(MULTI TRANSMISSION REPORT)
78
Offramp Gateway
SCANNING FUNCTIONS SETUPS
9.
This section describes how to change the various settings of the scanning functions.
About Scanning Functions Settings .....................................................................80
Changing resolution level..................................................................................................................80
Scanning 2-sided originals ................................................................................................................81
Rotating images ................................................................................................................................81
Changing file format ..........................................................................................................................82
Changing destination to store files ....................................................................................................82
9 SCANNING FUNCTIONS SETUPS
About Scanning Functions Settings
In the scanning functions, you can change each setting item such as resolution level.
When you have selected the desired scanning function, press a button for each item or the
button while "COMM. OPTION" appears on the screen.
Selectable items or their default settings may differ depending on the type of the scanning function you select. For the details, see the table below. After scanning is performed, the changed
setting value returns to the default one.
Item name
SCAN TO E-MAIL
SCAN TO FILE
SCAN TO TWAIN
(200 dpi)
(200 dpi)
(200 dpi)
(OFF)
(OFF)
(OFF)
RESOLUTION
DUPLEX
*1
ROTATION
(OFF)
(OFF)
(OFF)
FILE FORMAT
(PDF)
(PDF)
-
DESTINATION
-
*2
-
( ): Default settings
*1 Available only when the Reversing Automatic Document Feeder (optional) is installed
*2 A destination to store the files will be selected from either "REMOTE 1" or "REMOTE 2".
Changing resolution level
80
1
Press the [RESOLUTION] button.
2
Select the desired resolution
level using the
or
button
and then press the [ENTER]
button.
About Scanning Functions Settings
SELECT RESOLUTION
3.300dpi
4.400dpi
5.600dpi
Scanning 2-sided originals
1
Press the
2
Select "DUPLEX" using the
or
button and then press
the [ENTER] button.
3
Select "BOOK" or "TABLET"
using the
or
button and
then press the [ENTER] button.
button.
Items selectable appear.
ENTER E-MAIL ADDRESS(192MAX):
2006-08-20 11:56
M: 100%
RESOLUTION:200dpi
COMM.OPTION
1.DUPLEX
2.ROTATION
3.FILE FORMAT
4.DESTINATION
:OFF
:OFF
:PDF
:REMOTE1
DUPLEX
1.OFF
2.BOOK
3.TABLET
Rotating images
1
Press the
2
Select "ROTATION" using the
or
button and then press
the [ENTER] button.
3
Select "ON" or "OFF" using
the
or
button and then
press the [ENTER] button.
button.
When you select "ON", an image on the
original placed in the A4-R direction will
be rotated to the A4 direction.
ENTER E-MAIL ADDRESS(192MAX):
2006-08-20 11:56
M: 100%
RESOLUTION:200dpi
COMM.OPTION
1.DUPLEX
2.ROTATION
3.FILE FORMAT
4.DESTINATION
:OFF
:OFF
:PDF
:REMOTE1
ROTATION
OFF
A
1. A
ON
2.
A
A
Items selectable appear.
About Scanning Functions Settings
81
9 SCANNING FUNCTIONS SETUPS
Changing file format
1
Press the
2
Select "FILE FORMAT" using
the
or
button and then
press the [ENTER] button.
3
Select "PDF", "MULTI PAGE
TIFF" or "SINGLE PAGE TIFF"
using the
or
button and
then press the [ENTER] button.
button.
Items selectable appear.
ENTER E-MAIL ADDRESS(192MAX):
2006-08-20 11:56
M: 100%
RESOLUTION:200dpi
COMM.OPTION
1.DUPLEX
2.ROTATION
3.FILE FORMAT
4.DESTINATION
:OFF
:OFF
:PDF
:REMOTE1
FILE FORMAT
1.PDF
2.MULTI PAGE TIFF
3.SINGL PAGE TIFF
When "PDF" or “MULTI PAGE TIFF” is
selected, the scanned images will be
stored as a file with multiple pages.
When “SINGLE PAGE TIFF” is selected,
the scanned images will be stored as a
file with a page in the folder created
automatically.
Changing destination to store files
82
1
Press the
2
Select "DESTINATION" using
the
or
button and then
press the [ENTER] button.
button.
Items selectable appear.
About Scanning Functions Settings
TO FILE (REMOTE1)
2006-08-20 11:56
M: 100%
RESOLUTION:200dpi
COMM.OPTION
1.DUPLEX
2.ROTATION
3.FILE FORMAT
4.DESTINATION
:OFF
:OFF
:PDF
:REMOTE1
3
Select "REMOTE 1" or
"REMOTE 2" using the
or
button and then press the
[ENTER] button.
DESTINATION
1.REMOTE1
2.REMOTE2
For instructions for setting a folder to
store files in "REMOTE 1" or "REMOTE
2", see the Setup Guide for Scanning
Functions.
About Scanning Functions Settings
83
9 SCANNING FUNCTIONS SETUPS
84
About Scanning Functions Settings
10.
SPECIFYING DESTINATIONS
This section describes how to specify destinations in the Scan to Email and InternetFax functions.
About Specifying Procedure of Destinations.......................................................86
Direct entry with digital keys and QWERTY Keyboard .....................................................................86
Entry with one touch key ...................................................................................................................88
Entry with abbreviated number .........................................................................................................89
Alphabet search ................................................................................................................................90
Entry with group number ...................................................................................................................91
Multi-address transmission ...............................................................................................................95
Confirming Destinations Specified .......................................................................97
Confirming destinations specified .....................................................................................................97
Deleting destinations specified..........................................................................................................97
Modifying destinations specified .......................................................................................................98
10 SPECIFYING DESTINATIONS
About Specifying Procedure of Destinations
In the Scan to Email and InternetFax functions, you need to specify the desired destinations of
the data. Select the entry method best suited to your use for specifying.
y You can enter up to 192 letters.
y When you specify them with one touch keys, abbreviated numbers, or alphabet search or
group numbers, you need to previously register the information of destinations in the
address book of this equipment, because these methods require the address book function.
For registering the information in the address book, see P.102 “Registering in Address
Book”.
Direct entry with digital keys and QWERTY Keyboard
This method allows you to enter the Email addresses of destinations directly at the time of Email
or InternetFax transmission.
You can enter Email addresses by pressing buttons on the flip panel while "ENTER E-MAIL
ADDRESS (192MAX)" is displayed on the screen.
Turn both of the two tab pages of the flip panel on the External Keyboard (optional) to enter letters of the alphabet and symbols. Enter digits with the digital keys.
P.10 “Control panel”
P.16 “Keyboard”
If you press a button with a letter of the alphabet on it, a small letter is entered. If you press a
button with a letter of the alphabet on it while holding down the [SHIFT] button, a capital letter is
entered.
"q"
"Q"
Symbols are displayed in upper and lower cases. If you press a button with symbols on it, a
symbol displayed in the lower case is entered. If you press a button with symbols on it while
holding down the [SHIFT] button, a symbol displayed in the upper case is entered.
"~"
86
About Specifying Procedure of Destinations
"!"
1
Enter the Email address with
digital keys and QWERTY keyboard.
2
Press the [START] button.
[email protected]
2006-08-20 11:56
M: 100%
RESOLUTION:200dpi
When you want to enter more than one Email address, or when the multiple destinations
contains an Email address that has been entered directly, press the [MULTI] button, and
then enter an Email address.
P.95 “Multi-address transmission”
About Specifying Procedure of Destinations
87
10 SPECIFYING DESTINATIONS
Entry with one touch key
This method allows you to send an Email or an InternetFax by pressing only one key to Email
addresses previously registered on one touch keys from 1 to 75.
P.14 “One touch keys 1 to 75”
Press the desired one touch key while "ENTER E-MAIL ADDRESS (192MAX)" is displayed on
the screen.
ONE TOUCH NUMBER
ONE TOUCH:
01
L.A Office
The one touch key number and the name registered on this number are displayed for approx.
two seconds on the message LCD screen.
y You can specify only one destination.
y To specify the destination with a one touch key, the Email address of the destination and the
one touch key number must be previously registered in the address book. Select the desired
one touch key from 1 to 75. *1
*1 When the template function is enabled, select the desired one touch key from 1 to 65.
P.102 “Registering in Address Book”
y If the pressed one touch key has no destination registered, an alarm buzzer sounds and
"Number not listed" appears on the message LCD screen. In this case, the screen returns to
the one with "ENTER E-MAIL ADDRESS (192MAX)" after approx. two seconds. Then press
the correct one touch key on which the destination is registered.
ONE TOUCH NUMBER
ONE TOUCH:
15
Number not listed
y You can confirm destinations registered on the one touch keys by printing the ONE TOUCH
NUMBER INFORMATION list.
P.126 “Destination lists”
88
About Specifying Procedure of Destinations
Entry with abbreviated number
This method allows you to send an Email or an InternetFax by using a 3-digit abbreviated number to an Email address previously registered on the abbreviated number.
Specify the destination with the abbreviated number while "ENTER E-MAIL ADDRESS
(192MAX)" is displayed on the screen.
1
Press the [SPEED DIAL] button.
2
Select "1. ABB. NUMBER"
using the
or
button and
then press the [ENTER] button.
3
Key in the desired abbreviated
number and then press the
[ENTER] or [START] button.
The abbreviated number and the name
registered on this number are displayed
for approx. two seconds on the message
LCD screen.
TELEPHONE NUMBERS LIST
1.ABB. NUMBER
2.SEARCH NAME
3.GROUP NUMBER
TELEPHONE NUMBERS LIST
ABB. NUMBER (1-999):
007
Madrid Office
y You can specify only one destination.
y To specify the destination with an abbreviated number, the Email address of the destination and the abbreviated number must be previously registered in the address
book. Select the desired 3-digit abbreviated number from 1 to 999. Up to 300 abbreviated numbers can be registered.
P.102 “Registering in Address Book”
y If the abbreviated number keyed in has no destination registered, an alarm buzzer
sounds and "Number not listed" appears on the message LCD screen. In this case,
the screen returns to the abbreviated number entry screen after approx. two seconds.
Then key in the correct abbreviated number on which the destination is registered.
TELEPHONE NUMBERS LIST
ABB. NUMBER:
085
Number not listed
y You can confirm destinations registered on the abbreviated numbers by printing the
ABBREVIATED TEL NUMBER list.
P.126 “Destination lists”
About Specifying Procedure of Destinations
89
10 SPECIFYING DESTINATIONS
Alphabet search
This method allows you to send an Email or an InternetFax by searching the name of the destination.
Search and specify the destination while "ENTER E-MAIL ADDRESS (192MAX)" is displayed
on the screen.
1
Press the [SPEED DIAL] button.
2
Select "2. SEARCH NAME"
using the
or
button and
then press the [ENTER] button.
3
Enter the search letter of the
search name and then press
the [ENTER] button.
TELEPHONE NUMBERS LIST
1.ABB. NUMBER
2.SEARCH NAME
3.GROUP NUMBER
SEARCH NAME
ID NAME (MAX20):
I
4
Select the desired destination
using the
or
button and
then press the [ENTER] or
[START] button.
The abbreviated number and the name
registered on this number are displayed
for approx. two seconds on the message
LCD screen.
SEARCH NAME
Lisbon Office
London Office
L.A Office
SEARCH NAME
ABB. NUMBER:
Lisbon Office
90
About Specifying Procedure of Destinations
006
y You can specify only one destination.
y If no destinations with the entered search letter registered are found, an alarm buzzer
sounds and "Name not found" appears on the message LCD screen. In this case, the
screen returns to the search letter entry screen after approx. two seconds. Then enter
the correct search letter of the destination.
SEARCH NAME
p
Name not found
Entry with group number
This method allows you to send an Email or an InternetFax by specifying a group number in
which more than one destination is previously registered. Use this when you send the same
original to more than one destination.
Specify the destination by keying in its group number while "ENTER E-MAIL ADDRESS
(192MAX)" is displayed on the screen.
1
Press the [SPEED DIAL] button.
2
Select "3. GROUP NUMBER"
using the
or
button and
then press the [ENTER] button.
TELEPHONE NUMBERS LIST
1.ABB. NUMBER
2.SEARCH NAME
3.GROUP NUMBER
ABB. NUMBER
1.SEARCH NAME
2.SENT HISTORY
3.RECEPTION HISTORY
001
ONE TOUCH KEY
1.SEARCH NAME
2.SENT HISTORY
3.RECEPTION HISTORY
05
About Specifying Procedure of Destinations
91
Select “1. SEARCH NAME” if you are
registering the Email address into the
one touch key or abbreviated number.
10 SPECIFYING DESTINATIONS
3
Key in the group number and
then press the [ENTER] or
[START] button.
The group number and the name
registered on this number are displayed
for approx. two seconds on the message
LCD screen.
TELEPHONE NUMBERS LIST
GROUP NUMBER:
0001
U.S. Division
y When the Fax Kit (optional) has been installed, specify a group registered as "E-MAIL
ADDRESS" for the destination.
y You can specify only one group per transmission but up to 375 destinations can be
registered in one group.
P.102 “Registering in Address Book”
y If the group number keyed in is not registered, an alarm buzzer sounds and "Number
not listed" appears on the message LCD screen. In this case, the screen returns to
the group number entry screen after approx. two seconds. Then key in the correct
group number registered.
TELEPHONE NUMBERS LIST
GROUP NUMBER:
0088
Number not listed
y You can confirm destinations registered in each group by printing the GROUP NUMBER INFORMATION list.
P.126 “Destination lists”
Entry from sent history
This method allows you to select the desired destination from the list of destinations you have
ever sent from this equipment. Up to 20 destinations are displayed at once.
1
Press the [SPEED DIAL] button.
2
Select “4. SENT HISTORY”
using the
or
button and
then press the [ENTER] button.
The transmission history will be
displayed.
92
About Specifying Procedure of Destinations
TELEPHONE NUMBERS LIST
3.GROUP NUMBER
4.SENT HISTORY
5.RECEPTION HISTORY
Select “2. SENT HISTORY” if you are
registering the destination into the one
touch key or the abbreviated number.
3
Select the destination using
the
or
button and then
press the [ENTER] or [START]
button.
ABB. NUMBER
1.SEARCH NAME
2.SENT HISTORY
3.RECEPTION HISTORY
001
ONE TOUCH KEY
1.SEARCH NAME
2.SENT HISTORY
3.RECEPTION HISTORY
05
SENT HISTORY
If the transmission history includes no
Email or InternetFax destinations, an
alarm buzzer sounds and “Address not
found” appears on the message LCD
screen. In this case, the screen returns
to the TELEPHONE NUMBERS list
screen after approx. two seconds. Select
the destination in other methods.
Address not found
Entry from reception history
This method allows you to select the desired destination from the list of destinations you have
ever received at this equipment. Up to 20 destinations are displayed at once.
1
Press the [SPEED DIAL] button.
2
Select “5. RECEPTION HISTORY” using the
or
button and then press the
[ENTER] button.
The reception history will be displayed.
TELEPHONE NUMBERS LIST
3.GROUP NUMBER
4.SENT HISTORY
5.RECEPTION HISTORY
About Specifying Procedure of Destinations
93
10 SPECIFYING DESTINATIONS
3
ABB. NUMBER
1.SEARCH
NAME
Select “3. RECEPTION HISTORY” if you
2.SENT HISTORY
are registering the destination into the
one touch key or abbreviated number.
3.RECEPTION HISTORY
001
ONE TOUCH KEY
1.SEARCH NAME
2.SENT HISTORY
3.RECEPTION HISTORY
05
Select the destination using
the
or
button and then
press the [ENTER] or [START]
button.
RECEPTION HISTORY
[email protected]
[email protected]
[email protected]
RECEPTION HISTORY
If the reception history includes no Email
or InternetFax destinations, an alarm
buzzer sounds and “Address not found”
appears on the message LCD screen. In
this case, the screen returns to the
TELEPHONE NUMBERS LIST screen
after approx. two seconds. Select the
destination in other methods.
94
About Specifying Procedure of Destinations
Address not found
Multi-address transmission
This method allows you to send an Email or an InternetFax to more than one destination per
transmission. You can select any of one-touch entry, abbreviated number entry, search letter
entry or group number entry in combination, or enter the desired Email addresses directly. In this
method you can specify up to 375 destinations per transmission.
Specify the destinations while "ENTER E-MAIL ADDRESS (192MAX)" is displayed on the
screen.
Destinations to which only telephone numbers are registered cannot be specified.
1
Press the [MULTI] button.
The multi-address destination selecting
screen appears.
2
MULTI GROUP
000
ENTER E-MAIL ADDRESS OR,
PRESS SPEED DIAL OR
ONE TOUCH KEY
Specify the destinations.
y For the direct entry, see P.86 “Direct entry with digital keys and QWERTY Keyboard”.
y For the one-touch entry, see P.88 “Entry with one touch key”.
y For the abbreviated number entry, see P.89 “Entry with abbreviated number”.
y For the search letter entry, see P.90 “Alphabet search”.
y For the group number entry, see P.91 “Entry with group number”.
y For the entry from sent history, see P.92 “Entry from sent history”.
y For the entry from reception history, see P.93 “Entry from reception history”.
About Specifying Procedure of Destinations
95
10 SPECIFYING DESTINATIONS
3
When the destination has been
specified, the multi-address
destination confirmation
screen appears. To add more
destinations, select "NEXT
DESTINATION" using the
or
button and then press the
[ENTER] button.
MULTI GROUP
NEXT DESTINATION
REVIEW LIST
COMPLETE
001
y Repeat steps 2 and 3 to specify all destinations. When you finish specifying all destinations, go to step 4.
y To modify or delete the destination already specified, see P.117 “Confirming destinations specified”.
4
96
When you finish specifying all destinations, select "COMPLETE"
using the
or
button and then press the [ENTER] or [START]
button.
About Specifying Procedure of Destinations
Confirming Destinations Specified
Use this to confirm, delete and correct the specified destination for Multi-address Transmission
(Broadcasting). Select an item to be performed in the "MULTI GROUP" screen.
Confirming destinations specified
1
Select "REVIEW LIST" using
the
or
button in the
multi-address destination confirmation screen, and then
press the [ENTER] button.
2
All the destinations specified
appear. Confirm them one by
one using the
or
button.
Press the [CANCEL] button to return to
the multi-address destination
confirmation screen.
MULTI GROUP
NEXT DESTINATION
REVIEW LIST
COMPLETE
003
001. L.A Office
002. New York Office
003. Miami Office
DELETE
MODIFY
Deleting destinations specified
1
Select "REVIEW LIST" using
the
or
button in the
multi-address destination confirmation screen, and then
press the [ENTER] button.
MULTI GROUP
NEXT DESTINATION
REVIEW LIST
COMPLETE
2
All the destinations specified
appear. Select the destination
you want to delete using the
or
button, and then
press the
button.
001. L.A Office
002. New York Office
003. Miami Office
DELETE
MODIFY
3
Select "1. YES" using the
or
DELETE?
button and then press the
ONE TOUCH
[ENTER] button.
1.YES
To cancel the deletion, select "2. NO"
2.NO
and then press the [ENTER] button.
Confirming Destinations Specified
003
02
97
10 SPECIFYING DESTINATIONS
4
A screen for confirming the
deleted destination is displayed for approx. two seconds, and then the screen
returns to the multi-address
destination selecting screen.
MULTI GROUP
ONE TOUCH:
New York Office
Deleted
002
02
001. L.A Office
002. Miami Office
DELETE
MODIFY
To continue the deletion, repeat the procedure from step 2.
To finish the deletion, press the [CANCEL] button. The screen returns to the multiaddress destination confirmation screen.
Modifying destinations specified
1
Select "REVIEW LIST" using
the
or
button in the
multi-address destination confirmation screen, and then
press the [ENTER] button.
MULTI GROUP
NEXT DESTINATION
REVIEW LIST
COMPLETE
2
All the destinations specified
appear. Select the destination
you want to modify using the
or
button, and then
press the
button.
001. L.A Office
002. New York Office
003. Chicago Office
DELETE
MODIFY
3
A screen for confirming the
destination you want to modify
is displayed for approx. two
seconds, and then the multiaddress destination entry
screen appears.
If you specify a directly entered
destination, which has not been
registered in the one touch key/
abbreviated number, the confirmation
screen is not displayed, but the multiaddress destination entry screen
immediately appears.
98
Confirming Destinations Specified
MULTI GROUP
ONE TOUCH:
003
003
04
Chicago Office
MULTI GROUP
ABB. NUMBER (1-999):
003
4
Specify the destination.
5
To continue the modification, repeat the procedure from step 2.
y For the direct entry, see P.86 “Direct entry with digital keys and QWERTY Keyboard”.
y For the one-touch entry, see P.88 “Entry with one touch key”.
y For the abbreviated number entry, see P.89 “Entry with abbreviated number”.
y For the search letter entry, see P.90 “Alphabet search”.
y For the group number entry, see P.91 “Entry with group number”.
y For the entry from sent history, see P.92 “Entry from sent history”.
y For the entry from reception history, see P.93 “Entry from reception history”.
To finish the modification, press the [CANCEL] button. The screen returns to the multiaddress destination confirmation screen.
Confirming Destinations Specified
99
10 SPECIFYING DESTINATIONS
100
Confirming Destinations Specified
REGISTERING IN ADDRESS BOOK
11.
This section explains how to register an Email address in the address book from the control panel of the
equipment.
Registering in Address Book...............................................................................102
Entering Email addresses ...............................................................................................................102
Abbreviation number registration ....................................................................................................104
One touch number registration........................................................................................................108
Group number registration .............................................................................................................. 113
Confirming destinations specified ................................................................................................... 117
11 REGISTERING IN ADDRESS BOOK
Registering in Address Book
You can register an Email address in the address book either using the control panel of the
equipment or using TopAccess. This section describes how an ID name or an Email address is
registered in the address book from the control panel.
For registering it from TopAccess, see the Setup Guide for Scanning Functions.
Entering Email addresses
Turn both of the two tab pages of the flip panel on the External Keyboard (optional) to enter
Email addresses. Enter digits with the digital keys.
P.16 “Keyboard”
1. [SHIFT]
Use this to enter a capital letter of the alphabet or symbols in the upper case.
2. [BACKSPACE]
Use this to delete the letter immediately before the cursor.
3. [SPACE]
Use this to enter one space immediately before the cursor.
4. [INSERT]
Use this to insert the letter immediately before the cursor.
5. [DELETE]
Use this to delete the letter on which the cursor has stopped.
102
Registering in Address Book
If you press a button with a letter of the alphabet on it, a small letter is entered. If you press a
button with a letter of the alphabet on it while holding down the [SHIFT] button, a capital letter is
entered.
"q"
"Q"
Symbols are displayed in upper and lower cases. If you press a button with symbols on it, a
symbol displayed in the lower case is entered. If you press a button with symbols on it while
holding down the [SHIFT] button, a symbol displayed in the upper case is entered.
"~"
"!"
Registering in Address Book
103
11 REGISTERING IN ADDRESS BOOK
Abbreviation number registration
When you register a destination in the address book of this equipment, you must also register its
abbreviation number or one touch number. Up to 300 abbreviation numbers and up to 75 one
touch numbers can be registered in the address book, and both the abbreviation number and
the one touch number can be registered to one destination.
Select the desired (3-digit) abbreviation number from 1 to 999, and select the desired one touch
number from 1 to 75.
y Abbreviation numbers can also be registered from the TopAccess. For details, see the Setup
Guide for Scanning Functions.
y When the template function is enabled, select the desired one touch key from 1 to 65.
y You can confirm destinations registered on the abbreviated numbers by printing the
"ABBREVIATED TEL NUMBER LIST".
P.126 “Destination lists”
Registering abbreviation numbers
1
Press the [SCAN] button on the control panel to switch to the scan
mode. Select "SCAN TO E-MAIL" using the
or
button and
then press the [ENTER] button.
When the Fax Kit (optional) is installed, the registration is available in the following two
methods:
y Press the [FAX] button on the control panel once to switch to the Fax mode.
y Press the [FAX] button on the control panel twice to switch to the InternetFax mode.
2
Press the function button
on the flip panel.
The "TEL LIST ENTRY" screen appears.
TEL LIST ENTRY
1.ABB. NUMBERS
2.GROUP NUMBERS
3.ONE TOUCH NUMBERS
104
Registering in Address Book
3
Select "1. ABB. NUMBERS"
using the
or
button and
then press the [ENTER] button.
The abbreviation number registration
selecting screen appears.
4
Key in the abbreviation number (from 1 to 999) and then
press the [ENTER] button.
TEL LIST ENTRY
1.ABB. NUMBERS
2.GROUP NUMBERS
3.ONE TOUCH NUMBERS
ABB. NUMBER
ENTER ABB. NUMBER (1-999):
You can add "00" before the abbreviation
number.
1
ABB. NUMBER
If the abbreviation number keyed in is
already registered, "Already assigned" is
displayed for approx. two seconds. Then
the screen turns to the abbreviation
number modification screen.
Select the item using the
or
button and then press the [ENTER]
button.
001
L.A Office
Already assigned
ABB. NUMBER
1.DELETE
2.MODIFY
3.RETAIN
001
1. DELETE
Deletes all the information of the destination registered. Start the procedure from step
4.
2. MODIFY
Modifies the information of the destination registered. Start the procedure from step 5.
3. RETAIN
Retains the information of the destination registered. Start the procedure from step 4.
5
Select "2. NAME" using the
or
button and then press
the [ENTER] button.
The NAME entry screen appears.
6
Enter the name (up to 20 letters) of the destination using
the digital keys or the buttons
on the External Keyboard
(optional), and then press the
[ENTER] button.
ABB. NUMBER
1.COMPLETE
2.NAME
3.TEL NUMBER
ABB. NUMBER
ENTER ID NAME(MAX20):
001
001
Milan Office
See the Operator's Manual for
Facsimile Function.
Registering in Address Book
105
11 REGISTERING IN ADDRESS BOOK
7
Select "6. E-MAIL ADDRESS"
using the
or
button and
then press the [ENTER] button.
The Email address enter screen
appears.
8
Enter the Email address (up to
192 letters) of the destination
using the digital keys or the
buttons on the External Keyboard (optional), and then
press the [ENTER] button.
ABB. NUMBER
4.2nd TEL NUMBER
5.COMM. OPTIONS
6.E-MAIL ADDRESS
001
ABB. NUMBER
ENTER E-MAIL ADDRESS OR
PRESS SPEED DIAL KEY
001
You can also enter Email addresses by selecting from any of the alphabet search,
transmission history and reception history. Press the [SPEED DIAL] button and select
the desired method.
P.90 “Alphabet search”
P.92 “Entry from sent history”
P.93 “Entry from reception history”
P.102 “Entering Email addresses”
y If you do not print the TX REPORT (TRANSMISSION REPORT), go to step 15.
y The TX REPORT (TRANSMISSION REPORT) will be printed only when the InternetFaxes are sent. To send the InternetFaxes, the Fax Kit (optional) is required.
y "TEL NUMBER", "2nd TEL NIMBER" and "COMM. OPTIONS" can be registered
only when the Fax kit (optional) is installed. For details of each entry, see the
Operator's Manual for Facsimile Function.
106
9
Select “7. E-MAIL OPTION”
using the
or
button and
then press the [ENTER] button.
10
Select “2. ON” using the
or
button and then press the
[ENTER] button.
11
Select “2. TX REPORT” using
the
or
button and then
press the [ENTER] button.
Registering in Address Book
ABB. NUMBER
5.COMM. OPTIONS
6.E-MAIL ADDRESS
7.E-MAIL OPTION
E-MAIL OPTIONS
1.OFF
2.ON
E-MAIL OPTIONS
1.COMPLETE
2.TX REPORT
001
12
Select “2. ON” using the
or
button and then press the
[ENTER] button.
TX REPORT
1.OFF
2.ON
The setting for printing the first page image of the InternetFax document on TX report is
the same as that of “MEMORY TX REPORT” of the Fax functions. For details, see the
Operator's Manual for Facsimile Function.
13
Select “1. COMPLETE” using
the
or
button and then
press the [ENTER] button.
14
Select "1. COMPLETE" using
the
or
button and then
press the [ENTER] button.
Be sure to enter the destination name
and Email address. If you perform step
14 while they are not entered, an alarm
buzzer sounds and "No destination" is
displayed. In this case, the screen
returns to the abbreviation number registration screen after approx. two seconds.
Then repeat the procedure from step 4.
15
If you want to register this destination also on a one touch
number, press the desired one
touch key.
P.14 “One touch keys 1 to 75”
If you do not want to register this
destination on a one touch number,
press the [ENTER] button.
"Operation completed" is displayed for
approx. two seconds. Then the screen
returns to the abbreviation number
registration screen. If you want to
register another abbreviation number,
repeat the procedure from step 4 to 14.
E-MAIL OPTIONS
1.COMPLETE
2.TX REPORT
ABB. NUMBER
1.COMPLETE
2.NAME
3.TEL NUMBER
001
ABB. NUMBER
001
No destination
ABB. NUMBER
PRESS ONE TOUCH KEY
TO ENTER OR
[ENTER]:TO SKIP
ABB. NUMBER
001
001
Operation completed
ABB. NUMBER
ENTER ABB. NUMBER (1-999):
Registering in Address Book
107
11 REGISTERING IN ADDRESS BOOK
If the one touch number keyed in is
already registered, "Already assigned" is
displayed for approx. two seconds. Then
the screen turns to the one touch number modification screen.
Select the item using the
or
button and then press the [ENTER]
button.
ABB. NUMBER
ONE TOUCH:
NEW York Office
Already assigned
ONE TOUCH KEY
1.DELETE
2.RETAIN
001
02
001
1. DELETE
Deletes all the information of the destination registered. Start the procedure from step
15.
2. RETAIN
Retains the information of the destination registered. Start the procedure from step 15.
16
Press the [FUNCTION CLEAR] button on the control panel to return
to the basic screen.
One touch number registration
Up to 75 one touch numbers can be registered in the address book, and both the one touch
number and the abbreviation number can be registered to one destination.
Select the desired one touch number from 1 to 75, and select the desired (3-digit) abbreviation
number from 1 to 999.
y Abbreviation numbers can also be registered from the TopAccess. For details, see the Setup
Guide for Scanning Functions.
y When the template function is enabled, select the desired one touch key from 1 to 65.
y You can confirm destinations registered on the abbreviated numbers by printing the ONE
TOUCH NUMBER INFORMATION list.
P.126 “Destination lists”
108
Registering in Address Book
Registering one touch numbers
1
Press the [SCAN] button on the control panel to switch to the scan
mode. Select "SCAN TO E-MAIL" using the
or
button and
then press the [ENTER] button.
When the Fax Kit (optional) is installed, the registration is available in the following two
methods:
y Press the [FAX] button on the control panel once to switch to the Fax mode.
y Press the [FAX] button on the control panel twice to switch to the InternetFax mode.
2
Press the function button
on the flip panel.
The "TEL LIST ENTRY" screen appears.
TEL LIST ENTRY
1.ABB. NUMBERS
2.GROUP NUMBERS
3.ONE TOUCH NUMBERS
3
Select "3. ONE TOUCH NUMBERS" using the
or
button and then press the
[ENTER] button.
The one touch number registration
selecting screen appears.
4
Press the one touch key (from
1 to 75) to register.
If the one touch key pressed is already
registered, "Already assigned" is displayed for approx. two seconds. Then
the screen turns to the one touch number modification screen.
TEL LIST ENTRY
1.ABB. NUMBERS
2.GROUP NUMBERS
3.ONE TOUCH NUMBERS
ONE TOUCH KEY
PRESS ONE TOUCH KEY
ONE TOUCH KEY
ABB. NUMBER:
TOSHIBA
Already assigned
Registering in Address Book
01
012
109
11 REGISTERING IN ADDRESS BOOK
Select the item using the
or
button and then press the [ENTER]
button.
ONE TOUCH KEY
1.DELETE
2.MODIFY
3.RETAIN
1. DELETE
Deletes all the information of the destination registered and starts a new registration.
Start the procedure from step 4.
2. MODIFY
Modifies the information of the destination registered. Start the procedure from step 5.
3. RETAIN
Retains the information of the destination registered and the screen returns to the one
touch number registration screen. Start the procedure from step 4.
5
Select "2. NAME" using the
or
button and then press
the [ENTER] button.
The NAME entry screen appears.
6
Enter the name (up to 20 letters) of the destination using
the digital keys or the buttons
on the External Keyboard
(optional), and then press the
[ENTER] button.
ONE TOUCH KEY
1.COMPLETE
2.NAME
3.TEL NUMBER
ONE TOUCH KEY
ENTER ID NAME(MAX20):
001
05
LONDON OFFICE
See the Operator's Manual for
Facsimile Function.
7
Select "6. E-MAIL ADDRESS"
using the
or
button and
then press the [ENTER] button.
The E-mail address entry screen
appears.
8
Enter the Email address (up to
192 letters) of the destination
using the digital keys or the
buttons on the External Keyboard (optional), and then
press the [ENTER] button.
ONE TOUCH KEY
4.2nd TEL NUMBER
5.COMM. OPTIONS
6.E-MAIL ADDRESS
05
ONE TOUCH KEY
ENTER E-MAIL ADDRESS OR
PRESS SPEED DIAL KEY
05
You can also enter Email addresses by selecting from any of the alphabet search,
transmission history and reception history. Press the [SPEED DIAL] button and select
the desired method.
P.90 “Alphabet search”
P.92 “Entry from sent history”
P.93 “Entry from reception history”
P.102 “Entering Email addresses”
110
Registering in Address Book
y If you do not print the TX REPORT (TRANSMISSION REPORT), go to step 14.
y The TX REPORT (TRANSMISSION REPORT) will be printed only when the InternetFaxes
are sent. To send the InternetFaxes, the Fax Kit (optional) is required.
y Select other options or key in the phone number or the 2nd phone number as required. For
details of each entry, see the Operator's Manual for Facsimile Function.
9
Select “7. E-MAIL OPTION”
using the
or
button and
then press the [ENTER] button.
10
Select “2. ON” using the
or
button and then press the
[ENTER] button.
11
Select “2. TX REPORT” using
the
or
button and then
press the [ENTER] button.
12
Select “2. ON” using the
or
button and then press the
[ENTER] button.
ONE TOUCH KEY
5.COMM. OPTIONS
6.E-MAIL ADDRESS
7.E-MAIL OPTION
05
E-MAIL OPTIONS
1.OFF
2.ON
E-MAIL OPTIONS
1.COMPLETE
2.TX REPORT
TX REPORT
1.OFF
2.ON
The setting for printing the first page image of the InternetFax document on TX report is
the same as that of “MEMORY TX REPORT” of the Fax functions. For details, see the
Operator's Manual for Facsimile Function.
13
Select “1. COMPLETE” using
the
or
button and then
press the [ENTER] button.
E-MAIL OPTIONS
1.COMPLETE
2.TX REPORT
Registering in Address Book
111
11 REGISTERING IN ADDRESS BOOK
14
Select "1. COMPLETE" using
the
or
button and then
press the [ENTER] button.
"Operation completed" is displayed for
approx. two seconds. Then the screen
returns to the one touch number
selecting screen.
ONE TOUCH KEY
1.COMPLETE
2.NAME
3.TEL NUMBER
05
ONE TOUCH KEY
05
Operation completed
ONE TOUCH KEY
PRESS ONE TOUCH KEY
If you want to register another one touch number, repeat the procedure from step 4 to
13.
ONE TOUCH KEY
Be sure to enter the destination name
and Email address. If you perform step
14 while they are not entered, an alarm
buzzer sounds and "No destination" is
displayed. In this case, the screen
returns to the one touch number registration screen after approx. two seconds.
Then repeat the procedure from step 4.
15
112
05
No destination
Press the [FUNCTION CLEAR] button on the control panel to return
to the basic screen.
Registering in Address Book
Group number registration
If you frequently send an Email to the same multiple destinations, this method allows you to
send them in one go by previously registering these destinations into one group.
y A group to which you send an Email and a group to which you send a Fax should be created
individually.
y You can create up to 50 groups.
y You can register up to 375 destinations into one group.
y You can select the desired (4-digit) group number from 1 to 1999.
y You can register a group created to a one touch number.
y You can confirm destinations registered in each group by printing the GROUP NUMBER
INFORMATION list.
P.126 “Destination lists”
Registering group numbers
1
Press the [SCAN] button on the control panel to switch to the scan
mode. Select "SCAN TO E-MAIL" using the
or
button and
then press the [ENTER] button.
When the Fax Kit (optional) is installed, the registration is available in the following two
methods:
y Press the [FAX] button on the control panel once to switch to the Fax mode.
y Press the [FAX] button on the control panel twice to switch to the InternetFax mode.
2
Press the function button
on the flip panel.
The "TEL LIST ENTRY" screen appears.
TEL LIST ENTRY
1.ABB. NUMBERS
2.GROUP NUMBERS
3.ONE TOUCH NUMBERS
Registering in Address Book
113
11 REGISTERING IN ADDRESS BOOK
3
Select "2. GROUP NUMBERS"
using the
or
button and
then press the [ENTER] button.
The group type selecting screen
appears.
TEL LIST ENTRY
1.ABB. NUMBERS
2.GROUP NUMBERS
3.ONE TOUCH NUMBERS
When the Fax Kit has been installed, select "Enter e-Mail Address" to create a group.
4
Key in the group number (from
1 to 1999) and then press the
[ENTER] button.
GROUP NUMBER
ENTER GROUP NUMBER(1-1999)
You can add "000" before the group
number.
GROUP NUMBER
01
TOSHIBA
Already assigned
If the group number keyed in is already
registered, "Already assigned" is displayed for approx. two seconds. Then
the screen turns to the group number
modification screen.
GROUP NUMBER
1.DELETE
2.MODIFY
3.RETAIN
05
Select the item using the
or
button and then press the [ENTER] button.
1. DELETE
Deletes all the information of the destination registered. Start the procedure from step
4.
2. MODIFY
Modifies the information of the destination registered. Start the procedure from step 5.
3. RETAIN
Retains the information of the destination registered and the screen returns to the
group number registration selecting screen. Start the procedure from step 4.
5
Select "2. NAME" using the
or
button and then press
the [ENTER] button.
The NAME entry screen appears.
114
Registering in Address Book
GROUP NUMBER
1.COMPLETE
2.NAME
3.DESTINATIONS
6
Enter the name (up to 20 letters) of the destination using
the digital keys or the buttons
on the External Keyboard
(optional), and then press the
[ENTER] button.
GROUP NUMBER
ENTER ID NAME(MAX20):
0001
ABC GROUP
P.102 “Entering Email addresses”
7
Select "DESTINATION" using
the
or
button and then
press the [ENTER] button.
The DESTINATION entry screen
appears.
8
GROUP NUMBER
1.COMPLETE
2.NAME
3.DESTINATION
05
Specify the destination (abbreGROUP NUMBER
viation number or one touch
ENTER ABB. NUMBER
number) to register into this
OR ONE TOUCH KEY
group.
y Abbreviation number: Use the digital
keys to enter the abbreviation number and then press the [ENTER] button.
y One touch number: Press the one
touch key which includes the destination you want to register into this
group.
The name of the destination specified is displayed for approx. two seconds. Then the group registration
screen appears.
y If you try to register a destination
without an Email address, an alarm
buzzer sounds and "Number not
listed" is displayed for approx. two
seconds. Then the screen returns to
the DESTINATION entry screen.
y If the specified abbreviation number
or one touch number is already registered to other destination, an alarm
buzzer sounds and "Already
assigned" is displayed for approx.
two seconds. Then the screen
returns to the DESTINATION entry
screen.
GROUP NUMBER
ABB. NUMBER
0001
03
CHICAGO OFFICE
GROUP NUMBER
ABB. NUMBER:
01
005
Number not listed
GROUP NUMBER
ABB. NUMBER:
TOSHIBA
Already assigned
Registering in Address Book
01
001
115
11 REGISTERING IN ADDRESS BOOK
9
Select the item using the
or
button and then press the
[ENTER] button.
GROUP NUMBER
1.ADD NEXT NUMBER
2.REVIEW LIST
3.COMPLETE
0001
1. ADD NEXT NUMBER
Adds another destination into this group. Start the procedure from step 8.
2. REVIEW LIST
Modifies or deletes the information of the destination registered into this group and lets
you confirm that the registered information is correct. For the details, see P.117
“Confirming destinations specified”.
3. COMPLETE
Completes the registration. Start the procedure from step 10.
10
Select "1. COMPLETE" using
the
or
button and then
press the [ENTER] button.
11
Press the one touch key to
which the new destination is
registered.
If you do not register the new destination
to the one touch key, press the [ENTER]
button.
"Operation completed" is displayed for
approx. two seconds. Then the screen
returns to the group number registration
selecting screen.
GROUP NUMBER
1.COMPLETE
2.NAME
3.DESTINATIONS
0001
GROUP NUMBER
PRESS ONE TOUCH KEY
TO ENTER OR
[ENTER]:TO SKIP
0001
GROUP NUMBER
001
Operation completed
GROUP NUMBER
ENTER GROUP NUMBER(1-999):
If you want to register another group number, repeat the procedure from step 4 to 11.
If the one touch number pressed is
already registered, "Already assigned" is
displayed for approx. two seconds. Then
the screen turns to the one touch number deletion screen.
116
Registering in Address Book
GROUP NUMBER
ONE TOUCH:
TOSHIBA
Already assigned
01
001
Select the item using the
or
button and then press the [ENTER]
button.
ONE TOUCH KEY
1.DELETE
2.RETAIN
1. DELETE
Deletes all the information of the destination registered and starts a new registration.
Start the procedure from step 11.
2. RETAIN
Retains the information of the destination registered and the screen returns to the one
touch number registration screen. Start the procedure from step 11.
Confirming destinations specified
Use this to confirm, delete and correct the specified destination for Multi-address Transmission
(Broadcasting). Select an item to be performed in the "MULTI GROUP" screen
Confirming information registered
1
Select "2. REVIEW LIST" using
the
or
button and then
press the [ENTER] button.
2
Select the destination to confirm its information using the
or
button.
Press the [CANCEL] button on the
control panel. Start the procedure from
P.113 “Registering group numbers”
step 10.
GROUP NUMBER
1.ADD NEXT NUMBER
2.REVIEW LIST
3.COMPLETE
0001
002. L.A Office
003. New York Office
004. Miami Office
DELETE
MODIFY
Deleting destination registered
1
Select "2. REVIEW LIST" using
the
or
button and then
press the [ENTER] button.
GROUP NUMBER
1.ADD NEXT NUMBER
2.REVIEW LIST
3.COMPLETE
Registering in Address Book
0001
117
11 REGISTERING IN ADDRESS BOOK
2
Select the destination to be
deleted using the
or
but- 001.COLORADO OFFICE
ton and then press the
but- 002.CHICAGO OFFICE
003.L.A.OFFICE
ton.
DELETE
MODIFY
The information of the destination to be
deleted is displayed for approx. two
seconds.
0001
03
GROUP NUMBER
ABB. NUMBER
CHICAGO OFFICE
3
Select "1. YES" using the
or
button and then press the
[ENTER] button.
DELETE?
CHICAGO OFFICE
1.YES
2.NO
If you cancel the deletion, select "2. NO" and then press the [ENTER] button.
y If you modify the selected destination, start the procedure from "Modifying destination registered".
y If you neither delete nor modify the destination, press the [CANCEL] button on the
control panel and then start the procedure from P.113 “Registering group numbers” step 10.
Modifying destination registered
1
Select "2. REVIEW LIST" using
the
or
button and then
press the [ENTER] button.
2
Select the destination to be
modified using the
or
button and then press the
button.
GROUP NUMBER
1.ADD NEXT NUMBER
2.REVIEW LIST
3.COMPLETE
0001
001.COLORADO OFFICE
002.CHICAGO OFFICE
003.L.A.OFFICE
DELETE
MODIFY
002. L.A Office
003. New York Office
004. Miami Office
DELETE
MODIFY
118
Registering in Address Book
The information of the destination to be
modified is displayed for approx. two
seconds.
GROUP NUMBER
ABB. NUMBER:
001
001
Miami Office
3
Specify a new destination.
GROUP NUMBER
001
ENTER ABB. NUMBER(1-999):
50
If the selected destination was registered to a group using a one touch number, also use
the one touch number to register a new destination.
If the selected destination was registered to a group using an abbreviation number, also
use the abbreviation number to register a new destination and then press the [ENTER]
button.
The information of a new destination is
displayed for approx. two seconds.
002. L.A Office
003. New York Office
004. Detroit Office
DELETE
MODIFY
Press the [CANCEL] button on the control panel and then start the procedure from
P.113 “Registering group numbers” step 10.
Registering in Address Book
119
11 REGISTERING IN ADDRESS BOOK
120
Registering in Address Book
12.
TROUBLESHOOTING
This section describes the instructions on how to troubleshoot the scanning function.
TWAIN Driver Errors .............................................................................................122
TWAIN driver error condition...........................................................................................................122
12 TROUBLESHOOTING
TWAIN Driver Errors
This chapter describes the most common TWAIN driver errors and provides steps to resolve the
conditions. If the problem persists after you have followed all of the steps, make sure to note the
name of the application you were using, what you were trying to do, and any error messages
and then contact your service technician or service representative for further assistance.
Please refer to the README file for TWAIN driver about the problems that are not described
here.
TWAIN driver error condition
Refer to the corrective action for the following error conditions.
P.122 “Cannot find the device”
P.122 “Cannot connect to the device found by discovery”
P.123 “Cannot acquire document”
P.123 “Image corrupt when acquiring color mixed document”
P.123 “Cannot acquire multi page document”
Cannot find the device
Problem description:
Cannot find this equipment using the Local Discovery or Network Discovery feature.
Corrective action:
Confirm the following statements:
y The equipment and your computer is correctly connected to the TCP/IP network.
y The default gateway setting is correctly set up if the equipment is connected to a different
subnet.
The TWAIN Driver does not support the GL-1010 or GL-1020 controller. These devices cannot
be found by the Discovery function.
Cannot connect to the device found by discovery
Problem description:
The Local Discovery finds the device, but you cannot connect to it.
Corrective action:
1. Make sure Microsoft Internet Explorer 5.5 or later is installed.
2. Make sure the Proxy settings on the Microsoft Internet Explorer have been set correctly so
that it can connect to the device.
3. Make sure Microsoft Internet Explorer is not in the off-line mode. If it is in off-line mode,
change it to the on-line mode.
It also fails to connect to the device when too many computers connect to the device at the
same time. Please try again later.
122
TWAIN Driver Errors
Cannot acquire document
Problem description:
Cannot acquire a document using the TWAIN Driver.
Corrective action:
The TWAIN Driver is carefully tested with several TWAIN-compliant applications. However,
some applications need settings to acquire a document from the device, and applications that
have not been tested cannot connect to the device. See the readme file about the required settings in applications that have been tested. Also, you may be able to use an application that has
not been tested by enabling the TWAIN Driver’s Native UI, or changing the Data Transfer Mode.
For more details about TWAIN settings on your application, see the user manual for your application.
Image corrupt when acquiring color mixed document
Problem description:
Image will be corrupt when acquiring the document that contains both color pages and black and
white pages, using the TWAIN driver.
Corrective action:
Some applications do not support acquiring the color and black/white mixed document. In that
case, acquire the color pages and black and white pages separately.
Cannot acquire multi page document
Problem description:
Cannot acquire a multipage document from an application.
Corrective action:
Some applications do not support multi page scan from TWAIN I/F, or need to be configured to
acquire multi page documents. See the user documentation of an application that you use.
TWAIN Driver Errors
123
12 TROUBLESHOOTING
124
TWAIN Driver Errors
13.
APPENDIX
This section describes the destination lists.
Destination lists ....................................................................................................126
Alphabetical sort list ........................................................................................................................127
Abbreviated tel number list..............................................................................................................128
Group number information list.........................................................................................................129
One touch number information list ..................................................................................................130
Printing a communication journal.......................................................................131
TX Report...............................................................................................................134
Error code table ....................................................................................................135
13 APPENDIX
Destination lists
Destination lists allow you to confirm destinations registered in the address book in a printed list.
These are the ABBREVIATED TEL NUMBER LIST, the GROUP NUMBER INFORMATION LIST
and the ONE TOUCH NUMBER INFORMATION LIST. You can print out the three of them at
once. For details of each list, see the following pages:
P.127 “Alphabetical sort list”
P.128 “Abbreviated tel number list”
P.129 “Group number information list”
P.130 “One touch number information list”
1
Press the [SCAN] button on the control panel to switch to the scan
mode. Select "SCAN TO E-MAIL" using the
or
button and
then press the [ENTER] button.
When the Fax Kit (optional) is installed, the registration is available in the following two
methods:
y Press the [FAX] button on the control panel once to switch to the Fax mode.
y Press the [FAX] button on the control panel twice to switch to the InternetFax mode.
2
Press the function button
on the flip panel.
The destination lists selecting screen
appears.
3
Select a list to print out using
the
or
button and then
press the [ENTER] button.
TELEPHONE NUMBERS LIST
1.BY NAME
2.ABB. NUMBERS
3.GROUP NUMBERS
You can print them out as follows:
1. Only the ABBREVIATED TEL NUMBER LIST
2. Only the GROUP NUMBER INFORMATION LIST
3. Only the ONE TOUCH NUMBER INFORMATION LIST
4. All of the above
126
Destination lists
Alphabetical sort list
Issues a listing of names programmed to Abbreviated Dial Numbers, One Touch Keys, and
Group Numbers.
<Example>
PHONEBOOK
IN
ALPHABETICAL
ORDER
PAGE
TIME
TEL NUMBER
NAME
:
:
:
:
001
JAN-15-2003
11:48AM
12345678901234567890
ABCDEFGHIJKLMNOPQRSTUVWXYZABCDEFGHIJKLMN
NAME
LOCATION
FAX NUMBER/E-MAIL ADDRESS
~~~~~~~~~~~~~~~~~~~~~~~~~~~~~~~~~~~~~~~~~~~~~~~~~~~~~~~~~~~~~~~~~~~~~~~~~~~~~~~~~~~~~~~~~~~~~~~~~~~~~~~~~~~~~~~~~~~~~~~~
AAAdefghijklmnOpqrst
OT
01
12345678901234567890123456789012345678901234567890123456789012345678901234567890
123456789012345678901234567890123456789012345678901234567890
12345678901234567890123456789012345678901234567890123456789012345678901234567890
123456789012345678901234567890123456789012345678901234567890
SUB: 12345678901234567890
PWD: ********************
ABCDEFGHIJKLMNOPQRSTUVWXYZABCDEFGHIJKLMNOPQRSTUVWXYZABCDEFGHIJKLMNOPQRSTUVWXYZAB
ABCDEFGHIJKLMNOPQRSTUVWXYZABCDEFGHIJKLMNOPQRSTUVWXYZABCDEFGHIJKLMNOPQRSTUVWXYZAB
ABCDEFGHIJKLMNOPQRSTUVWXYZABCDEFGHIJKLMNOPQRSTUVWXYZABCDEFGHIJKLMNOPQRSTUVWXYZAB
ABCDEFGHIJKLMNOPQRSTUVWXYZABCDEFGHIJKLMNOPQRSTUVWXYZABCDEFGHIJKLMNOPQRSTUVWXYZAB
AABdefghijklmnOpqrst
ABB.
001
0559891014
0559891014
[email protected]
Beat kiyoshi
GROUP 0051
Brilliant green
OT
29
00181559761000
Bringer
OT
33
0120444444
Charles Baudelaire
ABB.
148
254126
Dancer.Fushimi
ABB.
006
0558762500
0558763500
Guitar store
GROUP 0001
JAMES GARFIELD
OT
07
123456789012345
[email protected]
Virginia
GROUP 0008
Zombi Fushimi
ABB.
003
2223242526
3536373839
SUB: 12345678901234567890
SEP: 12345678901234567890
PWD: ********************
ZZZZZZZZZ
ABB.
029
[email protected]
1
Number of pages
2
Time of output of the list or report
3
Fax/telephone number of this equipment (Max. 40 letters)
4
Your station’s ID name (Max. 40 letters)
5
Destination name
The station names of one touch/abbreviated dial numbers and the group names (sorted in
alphabetical order)
6
Type/Number (One touch number/Abbreviated dial number/Group)
7
Dial number data
The facsimile/telephone numbers registered in the one touch number or the abbreviated dial
number are indicated. The mark “ ” is added before the facsimile/telephone number when it is
a sub-address dial. If SUB/SEP/PWD is registered for the facsimile/telephone number, “SUB:
”, “SEP: ”, or “PWD: ” is added in the front of each line. (Each item has a max. of 20 digits.)
The letters of the registered password are indicated by “*”s. If a group is assigned to the one
touch number, the group number is indicated. E-mail address (indicated in a max. of 192 digits)
The E-mail mark “ ” is placed before the Email address.
Destination lists
127
13 APPENDIX
Abbreviated tel number list
Displays the name, phone number or Email address of each destination registered in each
abbreviation number in the address book of this equipment.
<Example>
ABBREVIATED
TEL
NUMBER
LIST
PAGE
TIME
TEL NUMBER
NAME
:
:
:
:
001
JAN-15-2003
11:48AM
12345678901234567890
ABCDEFGHIJKLMNOPQRSTUVWXYZABCDEFGHIJKLMN
ABB. NBR
NAME
TEL NUMBER/E-MAIL ADDRESS
TIME
MONI
BPS
REPORT
~~~~~~~~~~~~~~~~~~~~~~~~~~~~~~~~~~~~~~~~~~~~~~~~~~~~~~~~~~~~~~~~~~~~~~~~~~~~~~~~~~~~~~~~~~~~~~~~~~~~~~~~~~~
001
ABCDEFGHIJKLMNOPQRST
002
ON
48
12:34PM
1
Number of pages
2
Time of output of the list or report
3
Fax/telephone number of this equipment (Max. 40 letters)
ON
ON
4
Your station’s ID name (Max. 40 letters)
5
Abbreviated dial number (indicated in ascending order (001 to 999))
6
Station’s name (left-aligned and indicated in a max. of 20 digits)
7
Facsimile/telephone number (indicated in a max of 128 digits)
A sub-address dial is indicated on the next line. (The mark “ ” is added before the facsimile/telephone number.) If SUB/SEP/PWD is registered for the facsimile/telephone number, “SUB:”,
“SEP: ”, or “PWD: ” is added in the front of each line. (Each item has a max. of 20 digits.) The letters of the registered password are indicated by “*”. If a group is assigned to the one touch number, the group number is indicated.
The E-mail mark “ ” is placed before the Email address.
8
Designated time of transmission by the timer When there is not a specified time, it is not indicated. (The specified times for the line and Email are indicated.)
9
Line monitoring for each communication (indicated as a communication added function):
ON/OFF
When line monitoring is OFF, nothing is indicated.
10
Transmission speed
Transmission Speed
144000 bps
9600 bps
4800 bps
Not specified
11
128
11:45AM
GREENVILLE OFFICE
123456789012345678901234567890
1234567
3456789012345678901234567890
123456789012345678901234567890
123456789012345678901234567890
1234567
SUB: 12345678901234567890
SEP: 12345678901234567890
PWD: ********************
ABCDEFGHIJKLMNOPQRSTUVWXYZABCD
ABCDEFGHIJKLMNOPQRSTUVWXYZABCD
ABCDEFGHIJKLMNOPQRSTUVWXYZABCD
ABCDEFGHIJKLMNOPQRSTUVWXY
0559123456
Indication
144
96
48
Blank
Report (indicated as a communication added function): ON/OFF
The settings for the line and Email are indicated.
Destination lists
Group number information list
Displays the group names, and the abbreviation number or one touch number of each destination registered in each group in the address book of this equipment.
<Example>
GROUP
NUMBER
INFORMATION
PAGE
TIME
TEL NUMBER
NAME
:
:
:
:
001
JAN-15-2003
11:48AM
12345678901234567890
ABCDEFGHIJKLMNOPQRSTUVWXYZABCDEFGHIJKLMN
GROUP NUMBER
NAME
OT/ABB. NUMBER
~~~~~~~~~~~~~~~~~~~~~~~~~~~~~~~~~~~~~~~~~~~~~~~~~~~~~~~~~~~~~~~~~~~~~~~~~~~~~~~~~~~~~~~~~~~~~~~~~~~~~~~~~~~~
0001
ABCDEFGHIJKLMNOPQRST
1234
COMPANY_GROUP
OT
ABB.
OT
ABB.
001
002
003
004
111
112
113
114
011
011
012
012
013
121
122
122
ABCDEFGHIJKLMNOPQRST
AABBCCDD
EEFFGG
HHII
ABCDEFGHIJKLMNOPQRST
JJKKLLMM
NNOOPP
QQRR
SSTTUUVV
SSTTUUVV
WWXXYY
WWXXYY
ZZ
aabbccdd
eeffgg
eeffgg
1
Number of pages
2
Date and time of output of the list or report
3
Fax/telephone number of this equipment (Max. 40 letters)
4
Your station’s ID name (Max. 40 letters)
5
Group number (indicated in 4 digits in the ascending order)
6
Group name (indicated in max. 20 letters)
7
Type: One touch number/Abbreviated dial number
8
One touch number/Abbreviated dial number (indicated in ascending order)
9
Station’s name. The E-mail mark “
” is placed before the Email address.
Destination lists
129
13 APPENDIX
One touch number information list
Displays the abbreviation number or group number registered to each one touch number.
<Example>
ONE
TOUCH
NUMBER
INFORMATION
PAGE
TIME
TEL NUMBER
NAME
:
:
:
:
001
JAN-15-2003
11:48AM
12345678901234567890
ABCDEFGHIJKLMNOPQRSTUVWXYZABCDEFGHIJKLMN
OT NBR
NAME/FUNCTION
ABB./FAX NUMBER & E-MAIL
TIME
MONI
BPS
REPORT
~~~~~~~~~~~~~~~~~~~~~~~~~~~~~~~~~~~~~~~~~~~~~~~~~~~~~~~~~~~~~~~~~~~~~~~~~~~~~~~~~~~~~~~~~~~~~~~~~~~~~~~~~~~
01
ABCDEFGHIJKLMNOPQRST
02
Tokyo Office
130
123456789012345678901234567890
1234567
123456789012345678901234567890
123456789012345678901234567890
1234567
SUB: 12345678901234567890
SEP: 12345678901234567890
PWD: ********************
ABCDEFGHIJKLMNOPQRSTUVWXYZABCD
ABCDEFGHIJKLMNOPQRSTUVWXYZABCD
ABCDEFGHIJKLMNOPQRSTUVWXYZABCD
ABCDEFGHIJKLMNOPQRSTUVWXY
0759723288
11:45AM
Number of pages
2
Date and time of output of the list or report
48
12:34PM
1
ON
ON
ON
3
Fax/telephone number of this equipment (Max. 40 letters)
4
Your station’s ID name (Max. 40 letters)
5
One touch number
6
Station’s name/Type of registration
7
Abbreviated dial number/Group number/Facsimile telephone number
The mark “ ” is added before the facsimile/telephone number when it is a sub-address dial. If
SUB/SEP/PWD is registered for the facsimile/telephone number, “SUB: ”, “SEP: ”, or “PWD: ”
is added in the front of each line. (Each item has a max. of 20 digits.) The letters of the registered password are indicated by “*”s. If a group is assigned to the one touch number, the group
number is indicated.
The E-mail mark “ ” is placed before the Email address.
8
Designated time of transmission (indicated when there is a specified time) When there is no
specified time, it is not indicated. (The specified times for the line and E-mail are indicated.)
9
Line monitoring for each communication (indicated as a communication added function):
ON/OFF
When line monitoring is OFF, nothing is indicated.
10
Transmission speed
Transmission SpeedIndication
144000 bps
144
9600 bps
96
4800 bps
48
Not specified
Blank
11
Report (indicated as a communication added function): ON/OFF
The settings for the line and Email are indicated.
Destination lists
Printing a communication journal
The histories of the transmission and reception of the scanning functions or the InternetFax are
printed on the TX JOURNAL (TRANSMISSION JOURNAL) and the RX JOURNAL
(RECEPTION JOURNAL). Histories related to the scanning functions are printed only on the TX
JOURNAL.
To print them, press the [JOURNAL] button in any of the scan, Fax and InternetFax mode. For
the details, see the Operator’s Manual for Facsimile Function.
1
Press the [SCAN] button.
2
Select “1. SCAN TO E-MAIL”,
“2. SCAN TO FILE” or “3.
SCAN TO TWAIN” using the
or
button, and then press
the [ENTER] button.
3
Press the [JOURNAL] button.
4
Select the number of sheets
you want to print using the
or
button, and then press
the [ENTER] button.
SELECT
1.SCAN
2.SCAN
3.SCAN
SCAN MENU
TO E-MAIL
TO FILE
TO TWAIN
PRINT NUMBER
1.1-50 (1 PAGE)
2.1-100 (2 PAGES)
3.1-150 (3 PAGES)
Printing a communication journal
131
13 APPENDIX
TRANSMISSION
JOURNAL
PAGE
:
TIME
:
TEL NUMBER :
NAME
:
SCAN COUNT :
PRINT COUNT:
DRUM COUNT :
001
AUG-20-2006 10:24AM
0000000000
Sales Dept.
19 (00000013)
93 (0000005D)
51 (00000033)
NBR FILE NBR
DATE TIME
DURATION
PGS TO
DEPT NBR ACCOUNT
MODE
STATUS
~~~~~~~~~~~~~~~~~~~~~~~~~~~~~~~~~~~~~~~~~~~~~~~~~~~~~~~~~~~~~~~~~~~~~~~~~~~~~~~~~~~~~~~~~~~~~~~~~~~~~~~~~~~~~~~~~~
001
001
AUG-20 10:10AM
00/02
002 [email protected]
ML 12
SCAN
002
002
AUG-20 10:13AM
00/12
001 D0000001
TW B2
SCAN
004
005
AUG-20 10:16AM
03/52
005 CONTENTS Dept.
D 01
9999
EC 502 P
OK
005
006
AUG-20 10:24AM
00/05
011
1111111111
G3 111 SB
OK
007
008
AUG-20 10:30AM
00/41
001 Head office
EC 502 P
OK
008
009
AUG-20 11:05AM
03/47
001 D0000001
TW 42
SCAN
009
010
AUG-20 11:18AM
00/24
003 [email protected]
ML D2
SENT
010
011
AUG-20 02:20PM
10/57
002 [email protected]
ML B2
SENT
012
013
AUG-20 02:36PM
03/27
000 \\:bbbbbbbbbbbbbbbbbb
FL 42
NG
A4
132
1
Number of pages
2
Date and time of output of the list or report
3
Fax/telephone number of this equipment (Max. 40 letters)
4
Your station’s ID name (Max. 40 letters)
5
Scan count (indicates the number of scanned pages.)
6
Print count (indicates the number of printed pages.)
7
Drum count (indicates the number of pages that the drum was used for printing)
8
Serial No. (lists the transmissions in the order they took place. Indicated in 3 digits (001 to
999).)
9
File No. (assigned to the communication jobs and indicated in 3 digits)
10
Date and time when communication started
11
Length of each transmission: Minutes/Seconds (If it takes more than 1 hour, "59/59" is indicated.)
12
Number of pages (indicated in 3 digits (001 to 999). More than 1000 pages is indicated as
"999"
13
Remote station’s name and Fax/telephone number (When an abbreviated dial number or one
touch number is used, the remote station’s name is indicated.) The mark "?" indicates an alternate number or sub-address was used.
14
Department No. (indicates the department responsible for this transmission job; printed only
when the department control option is ON)
15
Account code (indicated in 4 digits when the account number option is ON and used.)
Printing a communication journal
16
The communication mode
Communication Mode Indication
G3
G3
ECM*
EX
ECM
EC
E-mail
ML
RDC communication HW, HR
Scan to File
FL
Scan to TWAIN
TW
17
Transmission speed (bps)/ Resolution (pels/mm)/ Encoding method
0: 2400
0: 8 x 3.85
0: MH
1: 4800
1: 8 x 7.7
1: MR
2: 7200
2: 8 x 15.4
2: MMR
3: 9600
4: 16 x 15.4
3: JBIG
4: 12000 8: 300 dpi
5: 14400 B: 600 dpi
6: V.34
D: 150 dpi
18
Special communication mode
P:
Polling Communication
SR, R: Relay Communication
SB:
ITU-T Mailbox Communication
S:
Sub Address Communication
I:
PC-FAX Communication
F:
Fax/InternetFax Relay Communication
O:
Offramp Gateway
19
Result: The result of the transmission is indicated.
OK
NG
SCAN Scanning Job
SENT InternetFax Transmission
20
If the transmission failed, an error code is indicated. When a transmission was completed normally, nothing is indicated.
*
Toshiba shortened protocol version of the original mode is used.
Printing a communication journal
133
13 APPENDIX
TX Report
It will be printed when the InternetFax is sent.
P.128 “Abbreviated tel number list”
P.108 “One touch number registration”
MEMORY
TRANSMISSION
REPORT
PAGE
: 001
TIME
: AUG-20-2006
10:00AM
TEL NUMBER : 12345678901234567890
NAME
: ABCDEFGHIJKLMNOPQRSTUVWXYZABCDEFGHIJKLMN
FILE NUMBER
:
004
DATE
:
AUG-20 10:21AM
TO
:
ABCDEFGHIJKLMNOPQRST
DOCUMENT PAGES
:
003
START TIME
:
AUG-20 10:00AM
END TIME
:
AUG-20 10:20AM
SEND PAGES
:
000
STATUS
:
OK
FILE NUMBER
:
004
***
SUCCESSFUL
TX
NOTICE
***
134
1
Number of pages
2
Date and time of output of the list or report
3
Fax/telephone number of this equipment (Max. 40 letters)
4
Your station’s ID name (Max. 40 letters)
5
File number of the memory transmission job (indicated in 3 digits (001 to 999))
6
Date and time when the memory transmission job was accepted.
7
Remote party’s name or facsimile/telephone number
8
Number of pages input in memory
9
Time when the transmission started
10
Time when the transmission was completed (When the recovery transmission option is ON,
"(RECOVERY TIME: FEB-25 12:48PM)" is added. The data can be resent until the time indicated after “Resend until:” When the transmission is completed normally or the recovery transmission option is OFF, this information is not added.)
11
Number of pages which were transmitted normally (indicated in 3 digits (001to 999); more than
1000 pages is printed as “999”.)
12
Result: (Result of communication: OK/NG)
13
The image data on page 1 is reduced and printed.
TX Report
Error code table
If an error occurs during communications, an error code is indicated in the transmission journal,
reception journal or memory transmission journal.
See the following table for the remedy.
Error Code
Cause
10
Paper Empty
Countermeasure
Replenish paper.
11
Paper Jam
Remove the jammed paper.
12
Document Jam
Remove the jammed document.
13
Cover Open
Firmly close all covers, then retry.
20
Power Failure
Confirm the Power Failure List.
E0
Error relating to memory
Please contact your service technician.
30
The [CLEAR/STOP] button was pressed
during the communication.
Retry the transmission or ask the remote
party to transmit the document again.
32
Page # Mismatch
Check the actual document count.
33
Password Mismatch
Confirm the remote party’s password, and
retry communications.
42
Memory Full
Make sure that there is sufficient memory
before making the call again.
50
53, B1
B0, B2 to B5,
D0 to D2, F0,
F1, 84
Line Busy
Send the document again.
Security Mismatch in Relay or Mail Box
transmission
Confirm the remote party’s security code,
password, and your setup.
Signal Error or Line Condition Error
Retry the communication. Frequent failures
may indicate a phone line problem. If possible, move the unit to another line and try
your communications again.
Error code table
135
13 APPENDIX
Transmission errors
136
Error Code
Cause
Countermeasure
60
An error occurred during image data processing.
61
An error occurred during text data processing.
Turn the power of this equipment OFF and
then back ON. If the error still occurs, contact your service technician or service representative.
62
Access to the network interface card
was denied.
63
A sequence error occurred on the USB
interface.
71
A time-out error occurred during communication with an SMTP server.
Check if the network cable is connected correctly and also the SMTP server is running
correctly.
Refer to the Setup Guide for Scanning
Functions and set the SMTP client correctly.
72
The destination machine responded that
the transmission was an error because
the host name of this equipment (device
name) was invalid.
Refer to the Setup Guide for Printing
Functions and set the host name of this
equipment correctly.
73
The Email address of this equipment
(“From Address”) is not assigned or
includes an invalid letter.
Refer to the Setup Guide for Scanning
Functions and set the Email address of this
equipment correctly.
74
The SMTP server address is not
assigned.
Refer to the Setup Guide for Scanning
Functions and assign the SMTP server
address correctly.
75
The IP address of this equipment is not
assigned.
Refer to the Setup Guide for Printing
Functions and assign the IP address of this
equipment correctly.
76
The size of data being sent is over the
maximum transmission size.
Refer to the Setup Guide for Scanning
Functions and set the value of “Maximum
Email / InternetFax Size” larger. Or reduce
the size of the data by reducing the number
of pages or such.
7C
For sending Emails:
The Email address of the destination is
invalid.
Refer to “Selecting destinations from
address book” in the Setup Guide for Scanning Functions or “Direct Entry with Digital
Keys” in the P.86 “About Specifying Procedure of Destinations” and enter the Email
address correctly.
For saving as files:
Invalid entry is found for any of the “Network Path”, “Server Name”, “Login User
Name” and “Password”.
Refer to “Configuring Save as file Settings”
in the Setup Guide for Scanning Functions and set a folder to which the data are
to be saved correctly.
7D
Data transmission failed due to insufficient memory space.
Wait until a job in process is completed, and
then ensure sufficient space in the memory.
If the error still occurs, turn the power of this
equipment OFF and then back ON.
A0
A system error is detected. If a template
is being used, it is incorrect.
Refer to the Setup Guide for Scanning
Functions and set the corresponding template correctly. If the error still occurs, turn
the power of this equipment OFF and then
back ON.
Error code table
Error Code
Cause
Countermeasure
A1
The address book data could not be
retrieved.
Turn the power of this equipment OFF and
then back ON. If the error still occurs, refer
to the Setup Guide for Scanning Functions or the Operator's Manual for Facsimile Function and set the address book
correctly.
A2
An SMTP authentication error occurred.
Refer to the Setup Guide for Scanning
Functions and set the SMTP client correctly. Or check if the SMTP server is running correctly.
A4
A file could not be saved in a certain
folder.
Check if the property of the folder is writable
or it has sufficient space.
A5
The protocol (FTP or SMB) for saving
files is invalid.
Refer to “Configuring Save as file Settings”
in the Setup Guide for Scanning Functions and set the protocol correctly.
A6
The data scanned with TWAIN driver
could not be saved for any of the following reasons:
y The memory space is insufficient.
y Any of the number of pages, documents or folders has reached the
maximum value for saving.
Reduce the size of the data by reducing the
number of pages or such. Or refer to the
P.56 “Deleting Box documents” and
delete unnecessary TWAIN data currently
saved to ensure sufficient space in the memory.
AF
A system error is detected.
Turn the power of this equipment OFF and
then back ON. If the error still occurs, contact your service technician or service representative.
Error code table
137
13 APPENDIX
Reception errors
Error code
138
Cause
Countermeasure
80
A sequence error occurred on the USB
interface.
Turn the power of this equipment OFF and
then back ON. If the error still occurs, contact your service technician or service representative.
90
The InternetFax or Email could not be
received properly for any of the following
reasons and thus it was forwarded to a designated address as an error:
y The data are corrupted.
y Any of the format, compression
method, resolution and paper size of
the data is not supported by this equipment.
Check the forwarded data. Or refer to the
P.73 “Receiving InternetFax” and check
the data specifications which this equipment
can receive. Then ask the sender to retry
the transmission in an acceptable format.
91
The InternetFax or Email could not be
received properly for any of the following
reasons:
y The data are corrupted.
y Any of the format, compression
method, resolution and paper size of
the data is not supported by this equipment.
Refer to the P.73 “Receiving InternetFax”
and check the data specifications which this
equipment can receive. Then ask the
sender to retry the transmission in an
acceptable format.
92
The InternetFax or Email could not be
received properly for any of the following
reasons and thus it was forwarded to a designated address as an error:
y The data are corrupted.
y Any of the format, attachment file format and letter set of the data is not supported by this equipment.
Check the forwarded data. Or refer to the
P.73 “Receiving InternetFax” and check
the data specifications which this equipment
can receive. Then ask the sender to retry
the transmission in an acceptable format.
93
The InternetFax or Email could not be
received properly for any of the following
reasons:
y The data are corrupted.
y Any of the format, attachment file format and letter set of the data is not supported by this equipment.
Refer to the P.73 “Receiving InternetFax”
and check the data specifications which this
equipment can receive. Then ask the
sender to retry the transmission in an
acceptable format.
94
The InternetFax or Email could not be
received properly due to the insufficient
memory space and thus it was forwarded to
a designated address as an error.
Check the forwarded data. Or wait until a
job in process is completed, and then
ensure sufficient space in the memory. Then
ask the sender to retry the transmission.
95
The InternetFax or Email could not be
received properly due to the insufficient
memory space.
Wait until a job in process is completed, and
then ensure sufficient space in the memory.
Then ask the sender to retry the transmission.
9A
In the offramp gateway function, the forwarding of the InternetFax or Email was
stopped by the offramp security setting
because the Fax number of the destination
was not registered in the address book.
Check the Fax number in the RECEPTION
JOURNAL, and then notify the sender that
the forwarding was stopped.
If necessary, refer to the Setup Guide for
Scanning Functions or the Operator's
Manual for Facsimile Function and register the Fax number into the address book.
Error code table
Error code
Cause
Countermeasure
9B
In the offramp gateway function, the forwarding of the InternetFax or Email was
stopped by the offramp security setting and
forwarded to a designated address as an
error because the Fax number of the destination was not registered in the address
book.
Check the Fax number in the RECEPTION
JOURNAL or on the forwarded data, and
then notify the sender that the forwarding
was stopped.
If necessary, refer to the Setup Guide for
Scanning Functions or the Operator's
Manual for Facsimile Function and register the Fax number into the address book.
9C
In the offramp gateway function, the forwarding of the InternetFax or Email was
stopped and forwarded to a designated
address as an error because the Fax number of the destination includes an invalid
letter or 41 or more destinations are specified.
Check the Fax number in the RECEPTION
JOURNAL or on the forwarded data, and
then correct it (if 41 or more destinations are
specified, set them within 40). Then ask the
sender to retry the transmission.
9D
In the offramp gateway function, the forwarding of the InternetFax or Email was
stopped because the Fax number the destination includes an invalid letter or 41 or
more destinations are specified.
Check the Fax number in the RECEPTION
JOURNAL, and then correct it (if 41 or more
destinations are specified, set them within
40).
9E
The divided InternetFax/Email could not be
received properly for any of the following
reasons:
y The reception was not completed within
the waiting period specified for receiving divided data.
y A setting for receiving divided data
turned disabled during the reception.
y The divided data were sent in a format
which this equipment does not support.
Refer to the Setup Guide for Scanning
Functions and set “Enable Partial Email”
correctly. Then ask the sender to retry the
transmission. If the divided data were sent
in a format which this equipment does not
support, contact your system administrator.
9F
Connection to a POP3 server failed.
Check if the network cable is connected correctly and also the POP3 server is running
correctly. Or refer to the Setup Guide for
Scanning Functions and set the POP3
correctly.
Error code table
139
13 APPENDIX
140
Error code table
INDEX
A
Abbreviated tel number list ......................... 128
Abbreviation number registration ................ 104
About ......................................................... 56
Acquire ...................................................... 55
Adding a new device ................................... 61
Alarm lamp ................................................. 12
Alphabet search .......................................... 90
APS/AMS selecting button ........................... 12
Arrange Icons ............................................. 55
B
Box Information .......................................... 57
Box Select .................................................. 61
Box Select menu ......................................... 55
Box, Folder, Document and Page Properties .. 57
C
CANCEL button .......................................... 12
CHAIN DIAL COMM .................................... 14
Changing file format .................................... 82
Changing folder to store files ........................ 82
Changing resolution level ............................. 80
Changing the target device .......................... 61
CHARGE CODE ......................................... 14
CHECK E-MAIL .......................................... 16
CLEAR/STOP button ................................... 11
Close ......................................................... 55
Confirming destinations specified ..........97, 117
Contents windows ....................................... 56
Contrast adjustment volume ......................... 11
Control panel .............................................. 10
COPY button ........................................11, 12
COVER SHEET .......................................... 15
D
DATA lamp ................................................ 12
DELAYED COMM ....................................... 14
Delete ........................................................ 55
Deleting Box documents .............................. 56
Density adjustment buttons .......................... 12
Destination lists ........................................ 126
Details ....................................................... 55
Device Discovery ..................................55, 61
Digital keys ................................................ 12
Direct entry with digital keys ......................... 86
DIRECT TX ................................................ 15
Document Information ................................. 59
DRAWER button ......................................... 12
E
Edit menu .................................................. 55
ENERGY SAVER button .............................. 10
ENTER button ............................................ 12
Entering Email addresses .......................... 102
Entry with abbreviated number ......................89
Entry with group number ..............................91
Entry with one touch key ..............................88
Error code table ........................................135
External keyboard .......................................13
F
FAX button .................................................11
FAX communication lamp .............................11
File menu ...................................................55
Flip panel ............................................ 13, 14
Folder Information .......................................58
FUNCTION CLEAR button ...........................11
Function keys .............................................14
G
Group number information list .....................129
Group number registration ..........................113
H
Help ...........................................................56
Help menu ..................................................56
I
Installing TWAIN driver ................................41
InternetFax .......................................... 24, 68
INTERRUPT button .....................................10
ITU MAILBOX .............................................15
J
JOB STATUS .............................................15
JOURNAL ..................................................16
K
Keyboard ....................................................16
L
LCD screen ................................................11
List ............................................................55
LOW SPEED TX .........................................15
M
Main ..........................................................55
Main window ...............................................55
Menu Bar ...................................................55
MIXED SIZE button .....................................10
MONITOR button ........................................13
MULTI ........................................................15
Multi-address transmission ...........................95
O
Offramp gateway .................................. 26, 78
One touch keys ...........................................14
One touch number information list ...............130
One touch number registration ....................108
Onramp gateway .................................. 25, 76
INDEX
141
Operating with control .................................. 45
ORIGINAL button ........................................ 12
Original mode button ................................... 12
P
Page Information ........................................ 59
POLLING ................................................... 15
Precaution for Internet Transmission ............. 69
PREV. TX RPT ........................................... 16
PRINTER button ......................................... 11
PRIORITY TX ............................................. 15
Properties ............................................55, 57
R
Receiving automatically ............................... 73
Receiving InternetFax .................................. 73
Receiving manually ..................................... 74
RECOVERY TX .......................................... 15
REDIAL/PAUSE button ................................ 13
Refresh ...................................................... 55
Registering in Address Book ...................... 102
Requirements for TWAIN driver .................... 40
RESERVATION LIST .................................. 16
RESOLUTION button .................................. 13
Retrieving images with TWAIN driver ............ 48
Rotating images .......................................... 81
S
SCAN button .............................................. 11
Scan to Email .......................................22, 28
Scan to File ..........................................22, 34
Scan to TWAIN .....................................23, 40
Scan Utilities CD-ROM ................................ 26
Scanning 2-sided originals ........................... 81
scanning functions ...................................... 22
scanning functions requiring fax .................... 24
scanning functions settings .......................... 80
SECURE RX .............................................. 16
Select All .................................................... 55
Select e-STUDIO ..................................56, 61
Selecting button A/B/C ................................ 11
SEND AFTER SCAN ................................... 15
SETTINGS button ....................................... 10
specifying procedure of destinations ............. 86
SPEED DIAL button .................................... 13
START button ............................................. 11
SUB ADDRESS COMM ............................... 15
T
TEL LIST ENTRY ....................................... 16
TEL LIST PRINT ......................................... 16
Template .................................................... 64
Thumbnail Size ........................................... 55
Tool Bar ..................................................... 56
TopAccessDocMon Local Discovery ............. 61
Transmitting InternetFax .............................. 70
142
INDEX
Tree window ...............................................56
TWAIN driver ..............................................26
TWAIN Driver Errors ..................................122
TX REPORT ...............................................16
U
Uninstalling TWAIN driver ............................43
UP/DOWN/LEFT/RIGHT buttons ...................12
USER FUNCTIONS button ...........................10
Using TWAIN driver for the first time ..............50
V
View menu .................................................55
GA-1200
OME060100A0
MULTIFUNCTIONAL DIGITAL SYSTEMS
Scanning Guide
2-17-2, HIGASHIGOTANDA, SHINAGAWA-KU, TOKYO, 141-8664, JAPAN
©2006 TOSHIBA TEC CORPORATION All rights reserved
R060520C0801-TTEC
Ver01 2006-09


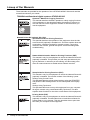

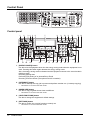
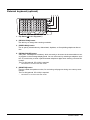
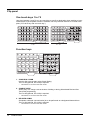


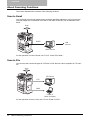
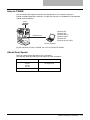

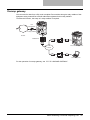

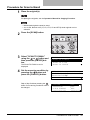
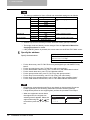
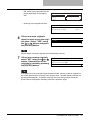


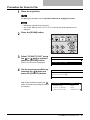
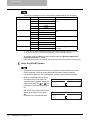


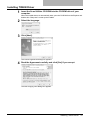
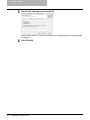
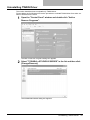
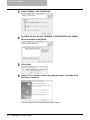
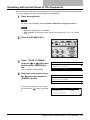
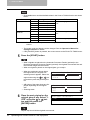

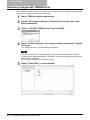
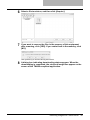
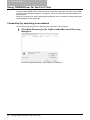
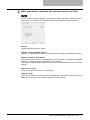
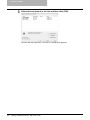
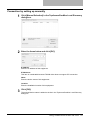
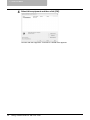
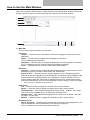
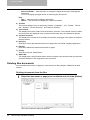
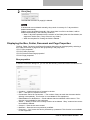
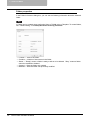
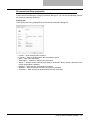
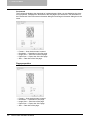
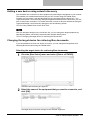


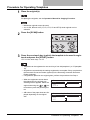


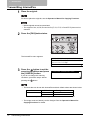

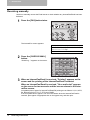

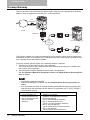

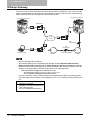

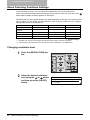
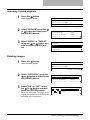
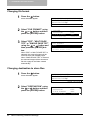


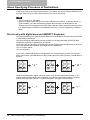

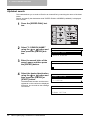
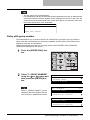
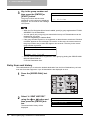
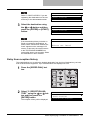
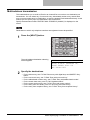
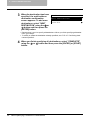


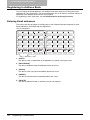
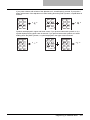
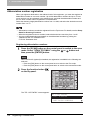
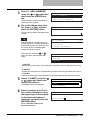
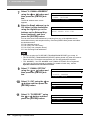
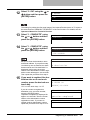

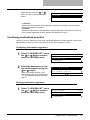
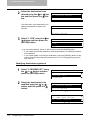
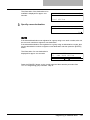


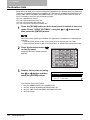
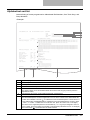
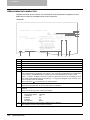

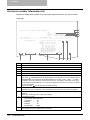
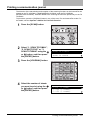
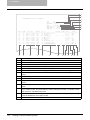
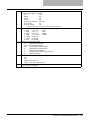
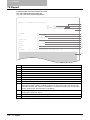
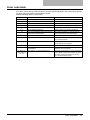
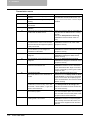
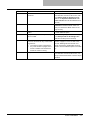
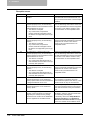
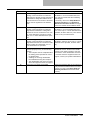

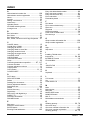
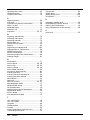


![4 Click [OK] - Toshiba America Business Solutions](http://vs1.manualzilla.com/store/data/005818130_1-6da0751aebf4d6c87686321c2c4e7e3a-150x150.png)