1
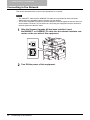
READ THIS BOOK
First
MULTIFUNCTIONAL DIGITAL SYSTEMS
Quick Start Guide for
Scanning Functions
GA-1201
Preface
Thank you for purchasing the Toshiba multifunctional digital system e-STUDIO165/205,
e-STUDIO167/207/237 or e-STUDIO182/212/242.
This Quick Start Guide for Scanning Functions is a manual for the e-STUDIO165/205,
e-STUDIO167/207/237 or e-STUDIO182/212/242 when the following option is installed:
y Network Printer Kit
y Scanner Upgrade Kit
y Fax Kit
y External Keyboard
This Quick Start Guide for Scanning Functions explains about the accessories, conditions
required for network systems, connecting procedures of a network, general description of network settings, default setting lists and troubleshooting.
Be sure to read this manual before using the e-STUDIO165/205, e-STUDIO167/207/237 or
e-STUDIO182/212/242 with the options shown above. Keep this manual handy and retain it for
future reference.
Preface
1
Software License Agreement
INSTALLING OR OTHERWISE USING THIS SOFTWARE PRODUCT CONSTITUTES YOUR
ACCEPTANCE OF THE FOLLOWING TERMS AND CONDITIONS (UNLESS A SEPARATE
LICENSE IS PROVIDED BY THE SUPPLIER OF APPLICABLE SOFTWARE IN WHICH CASE
SUCH SEPARATE LICENSE SHALL APPLY). IF YOU DO NOT ACCEPT THESE TERMS, YOU
MAY NOT INSTALL OR USE THIS SOFTWARE, AND YOU MUST PROMPTLY RETURN THE
SOFTWARE TO THE LOCATION WHERE YOU OBTAINED IT.
THE SOFTWARE INSTALLED ON THIS PRODUCT INCLUDES NUMEROUS INDIVIDUAL
SOFTWARE COMPONENTS, EACH HAVING ITS OWN APPLICABLE END USER LICENSE
AGREEMENT (“EULA”). INFORMATION RELATING TO THE EULAS MAY BE FOUND IN AN
ELECTRONIC FILE INCLUDED ON THE USER DOCUMENTATION CD-ROM INCLUDED
HEREWITH; HOWEVER, ALL SOFTWARE AND DOCUMENTATION DEVELOPED OR CREATED BY OR FOR TOSHIBA TEC CORPORATION (“TTEC”) ARE PROPRIETARY PRODUCTS OF TTEC AND ARE PROTECTED BY COPYRIGHT LAWS, INTERNATIONAL TREATY
PROVISIONS, AND OTHER APPLICABLE LAWS.
Grant of License
This is a legal agreement between you, the end-user (“You”), and TTEC and its suppliers. This
software, fonts (including their typefaces) and related documentation (“Software”) is licensed for
use with the system CPU on which it was installed (“System”) in accordance with the terms contained in this Agreement. This Software is proprietary to TTEC and/or its suppliers.
TTEC and its suppliers disclaim responsibility for the installation and/or use of this Software, and
for the results obtained by using this Software. You may use one copy of the Software as
installed on a single System, and may not copy the Software for any reason except as necessary to use the Software on a single System. Any copies of the Software shall be subject to the
conditions of this Agreement.
You may not, nor cause or permit any third party to, modify, adapt, merge, translate, reverse
compile, reverse assemble, or reverse engineer the Software. You may not use the Software,
except in accordance with this license. No title to the intellectual property in the Software is
transferred to you and full ownership is retained by TTEC or its suppliers. Source code of the
Software is not licensed to you. You will be held legally responsible for any copyright infringement, unauthorized transfer, reproduction or use of the Software or its documentation.
Term
This license is effective until terminated by TTEC or upon your failure to comply with any term of
this Agreement. Upon termination, you agree to destroy all copies of the Software and its documentation.
You may terminate this license at any time by destroying the Software and its documentation
and all copies.
2
Software License Agreement
Disclaimer of Warranty
THIS SOFTWARE IS PROVIDED “AS IS” WITHOUT WARRANTY OF ANY KIND, EITHER
EXPRESS OR IMPLIED, INCLUDING, BUT NOT LIMITED TO, THE IMPLIED WARRANTIES
OF MERCHANTABILITY, FITNESS FOR A PARTICULAR PURPOSE, TITLE, AND NONINFRINGEMENT. TTEC AND ITS SUPPLIERS DISCLAIM ANY WARRANTY RELATING TO
THE QUALITY AND PERFORMANCE OF THE SOFTWARE. IF THE SOFTWARE PROVES
DEFECTIVE, YOU (AND NOT TTEC OR ITS SUPPLIERS) SHALL BE RESPONSIBLE FOR
THE ENTIRE COST OF ALL NECESSARY SERVICING, REPAIR OR CORRECTION. TTEC
AND ITS SUPPLIERS DO NOT WARRANT THAT THE FUNCTIONS CONTAINED IN THE
SOFTWARE WILL MEET YOUR REQUIREMENTS OR THAT THE OPERATION OF THE
SOFTWARE WILL BE UNINTERRUPTED OR ERROR FREE.
ALL INFORMATION CONTAINED HEREIN THAT IS PROVIDED BY TTEC AND ITS AFFILIATES PURSUANT TO A EULA IS PROVIDED “AS IS” WITHOUT WARRANTY OF ANY KIND,
EITHER EXPRESS OR IMPLIED.
Limitation of Liability
IN NO EVENT WILL TTEC OR ITS SUPPLIERS BE LIABLE TO YOU FOR ANY DAMAGES,
WHETHER IN CONTRACT, TORT, OR OTHERWISE (EXCEPT PERSONAL INJURY OR
DEATH RESULTING FROM NEGLIGENCE ON THE PART OF TTEC OR ITS SUPPLIERS),
INCLUDING WITHOUT LIMITATION ANY LOST PROFITS, LOST DATA, LOST SAVINGS OR
OTHER INCIDENTAL, SPECIAL OR CONSEQUENTIAL DAMAGES ARISING OUT OF THE
USE OR INABILITY TO USE THE SOFTWARE, EVEN IF TTEC OR ITS SUPPLIERS HAVE
BEEN ADVISED OF THE POSSIBILITY OF SUCH DAMAGES, NOR FOR THIRD PARTY
CLAIMS.
U.S. Government Restricted Rights
The Software is provided with RESTRICTED RIGHTS. Use, duplication or disclosure by the
U.S. Government is subject to restrictions set forth in subdivision (b) (3) (ii) or (c) (i) (ii) of the
Rights in Technical Data and Computer Software Clause set forth in 252.227-7013, or 52.227-19
(c) (2) of the DOD FAR, as appropriate. Contractor/Manufacturer is TOSHIBA TEC Corporation,
2-17-2, Higashigotanda, Shinagawa-ku, Tokyo, 141-8664, Japan.
General
You may not sublicense, lease, rent, assign or transfer this license or the Software. Any attempt
to sublicense, lease, rent, assign or transfer any of the rights, duties or obligations hereunder is
void. You agree that you do not intend to, and will not ship, transmit (directly or indirectly) the
Software, including any copies of the Software, or any technical data contained in the Software
or its media, or any direct product thereof, to any country or destination prohibited by the United
States Government. This license shall be governed by the laws of Japan or, at the election of a
Supplier of TTEC concerned with a dispute arising from or relating to this Agreement, the laws of
the Country designated from time to time by the relevant Supplier of TTEC. If any provision or
portion of this Agreement shall be found to be illegal, invalid or unenforceable, the remaining
provisions or portions shall remain in full force and effect.
YOU ACKNOWLEDGE THAT YOU HAVE READ THIS LICENSE AGREEMENT AND THAT
YOU UNDERSTAND ITS PROVISIONS. YOU AGREE TO BE BOUND BY ITS TERMS AND
CONDITIONS. YOU FURTHER AGREE THAT THIS LICENSE AGREEMENT CONTAINS THE
COMPLETE AND EXCLUSIVE AGREEMENT BETWEEN YOU AND TTEC AND ITS SUPPLIERS AND SUPERSEDES ANY PROPOSAL OR PRIOR AGREEMENT, ORAL OR WRITTEN,
OR ANY OTHER COMMUNICATION RELATING TO THE SUBJECT MATTER OF THIS
LICENSE AGREEMENT.
TOSHIBA TEC Corporation, 2-17-2, Higashigotanda, Shinagawa-ku, Tokyo, 141-8664, Japan.
Software License Agreement
3
Before Reading This Manual
Lineup of our manuals
These manuals are provided for the operation of the e-STUDIO165/205, e-STUDIO167/207/237
or e-STUDIO182/212/242. Select and read the manual best suited to your needs. This manual is
the Quick Start Guide for Scanning Functions.
Basic functions
Operator’s Manual for Copying Functions (Booklet)
This manual describes the basic operations, mainly copying functions, of this equipment. It
also describes safety precautions to ensure correct and safe use of this equipment. Be sure to
read this before you use the equipment.
Facsimile functions
The Fax Kit GD-1221 (optional) is necessary for using the Fax functions.
Operator’s Manual for Facsimile Function (Booklet)
This manual describes how to use the Fax functions. Various functions both basic and
advanced regarding Fax transmission/reception are available.
Printing functions
The Network Printer Kit GA-1191 (optional) is necessary for using the printing functions.
Quick Start Guide for Printing Functions (Booklet)
This manual gives basic information regarding the printing functions, such as the GA-1191
accessories, necessary environmental conditions and outline of network connections as well
as troubleshooting. Be sure to read this before using the printing functions.
Network Administration Guide for Printing Functions (PDF file)
This manual describes the operation necessary for configuring a network and using the printing functions, such as connecting to a network and setting components.
Setup Guide for Printing Functions (PDF file)
This manual consists of the following two parts.
Control panel:
This part describes how to configure the printer-related settings using the
control panel of the equipment.
TopAccess:
This part describes how to use the co-packed utility “TopAccess”. The settings and management of the equipment can be done using a Web browser.
Printing Guide (PDF file)
This manual describes the operation necessary for printing data from a computer, such as the
installation of the client software and the use of the printer driver.
Network Fax Guide (PDF file)
This manual describes the operation necessary for sending a Fax from a computer via a network, such as the installation of the client software, use of the N/W-Fax driver and the copacked application software “AddressBook Viewer”.
4
Before Reading This Manual
Scanning functions
The Scanner Upgrade Kit GA-1201 (optional) is necessary for using the scanning functions.
Quick Start Guide for Scanning Functions (PDF file, This manual)
This manual gives the basic information regarding the scanning functions, such as the
GA-1201 accessories, necessary environmental conditions and outline of network connections as well as troubleshooting. Be sure to read this before using the scanning functions.
Network Administration Guide for Scanning Functions (PDF file)
This manual describes the operation necessary for configuring a network and using the scanning functions, such as connecting to a network and setting components.
Setup Guide for Scanning Functions (PDF file)
This manual consists of the following two parts.
Control panel:
This part describes how to configure the scanner-related settings using the
control panel of the equipment.
TopAccess:
This part describes how to use the co-packed utility “TopAccess”. The settings and management of the equipment can be done using a Web browser.
Scanning Guide (PDF file)
This manual describes the operation necessary for using the scanning functions, such as the
installation and the use of the TWAIN driver.
To read manuals in the PDF file format
The operator's manual in the PDF (Portable Document Format) can be displayed/printed using
Adobe Reader or Adobe Acrobat Reader. If neither is installed in your computer, download one
of them. This can be done via the website of Adobe Systems Incorporated.
Before Reading This Manual
5
How to read this manual
Symbols in this manual
In this manual, some important items are descried with the symbols shown below. Be sure to
read these items before using this equipment.
Indicates information to which you should pay attention when operating the
equipment.
Describes handy information that is useful to know when operating the equipment.
Pages describing items related to what you are currently doing. See these
pages as required.
Trademarks
y
y
y
y
y
y
y
y
y
y
y
y
y
y
The official name of Windows 2000 is Microsoft Windows 2000 Operating System.
The official name of Windows XP is Microsoft Windows XP Operating System.
The official name of Windows Vista is Microsoft Windows Vista Operating System.
The official name of Windows Server 2003 is Microsoft Windows Server 2003 Operating
System.
The official name of Windows Server 2008 is Microsoft Windows Server 2008 Operating
System.
Microsoft, Windows, Windows NT, and the brand names and product names of other
Microsoft products are trademarks of Microsoft Corporation in the US and other countries.
Apple, AppleTalk, Macintosh, Mac, Mac OS, Safari, and TrueType are trademarks of Apple
Inc. in the US and other countries.
PostScript is a trademark of Adobe Systems Incorporated.
Mozilla, Firefox and Firefox logo are trademarks or registered trademarks of Mozilla Foundation in the U.S. and other countries.
Netscape is a trademark of Netscape Communications Corporation.
IBM, AT and AIX are trademarks of International Business Machines Corporation.
NOVELL, NetWare, and NDS are trademarks of Novell, Inc.
TopAccess is a trademark of Toshiba Tec Corporation.
Other company names and product names in this manual are the trademarks of their respective companies.
©2009 TOSHIBA TEC CORPORATION All rights reserved
This manual is protected by copyright laws. No part of this manual shall be duplicated or reproduced without the permission of TOSHIBA TEC CORPORATION. TOSHIBA TEC CORPORATION shall not be liable in terms of granting patents for any use of information contained in this
manual by third parties.
6
Before Reading This Manual
Disclaimer notice
The following notice sets out the exclusions and limitations of liability of TOSHIBA TEC CORPORATION (including its employees, agents and sub-contractors) to any purchaser or user (‘User’)
of the e-STUDIO165/205 or e-STUDIO167/207/237, including its accessories, options and bundled software (‘Product’).
1. The exclusion and limitations of liability referred to in this notice shall be effective to the fullest extent permissible at law. For the avoidance of doubt, nothing in this notice shall be taken
to exclude or limit TOSHIBA TEC CORPORATION’s liability for death or personal injury
caused by TOSHIBA TEC CORPORATION’s negligence or TOSHIBA TEC CORPORATION’s fraudulent misrepresentation.
2. All warranties, conditions and other terms implied by law are, to the fullest extent permitted
by law, excluded and no such implied warranties are given or apply in relation to the Products.
3. TOSHIBA TEC CORPORATION shall not be liable for any loss, cost, expense, claim or damage whatsoever caused by any of the following:
- use or handling of the Product otherwise than in accordance with the manuals, including
but not limited to Operator’s Manual, User’s Guide, and/or incorrect or careless handling
or use of the Product;
- any cause which prevents the Product from operating or functioning correctly which
arises from or is attributable to either acts, omissions, events or accidents beyond the
reasonable control of TOSHIBA TEC CORPORATION including without limitation acts of
God, war, riot, civil commotion, malicious or deliberate damage, fire, flood, or storm, natural calamity, earthquakes, abnormal voltage or other disasters;
- additions, modifications, disassembly, transportation, or repairs by any person other than
service technicians authorized by TOSHIBA TEC CORPORATION; or
- use of paper, supplies or parts other than those recommended by TOSHIBA TEC
CORPORATION.
4. Subject to paragraph 1, TOSHIBA TEC CORPORATION shall not be liable to Customer for:
- loss of profits; loss of sales or turnover; loss of or damage to reputation; loss of production; loss of anticipated savings; loss of goodwill or business opportunities; loss of customers; loss of, or loss of use of, any software or data; loss under or in relation to any
contract; or
- any special, incidental, consequential or indirect loss or damage, costs, expenses, financial loss or claims for consequential compensation;
whatsoever and howsoever caused which arise out of or in connection with the Product or
the use or handling of the Product even if TOSHIBA TEC CORPORATION is advised of the
possibility of such damages.
TOSHIBA TEC CORPORATION shall not be liable for any loss, cost, expense, claim or damage caused by any inability to use (including, but not limited to failure, malfunction, hang-up,
virus infection or other problems) which arises from use of the Product with hardware, goods
or software which TOSHIBA TEC CORPORATION has not directly or indirectly supplied
Before Reading This Manual
7
Security precautions
In order to make correct use of this product’s security function, first read the following precautions carefully.
To Administrators
y If a physical security problem such as hardware removal or inappropriate disassembly
should occur at the installation site, take the appropriate physical security measures such as
checking who enters and leaves the site.
y When connecting this product with an outer network such as the Internet, only operate it in a
network environment protected by a firewall, etc. to prevent information from being leaked
due to incorrect settings or avoid illegal access by unauthorized users.
y To prevent the configuration settings from being changed illegally or similar, change the initial administrator password at the time of shipping before you use this product. Also, the
administrator password should be altered periodically.
y In order to make proper use of the network function, be sure to read the “Network Administration Guide”, set the given function and explain the instructions to general users as well.
y Always check if the network function is enabled in order to maintain the security. Should you
happen to come across any abnormality, contact your service technician immediately. See
the “Network Administration Guide” for the checking method.
8
Before Reading This Manual
CONTENTS
Preface...........................................................................................................1
Software License Agreement ......................................................................2
Before Reading This Manual .......................................................................4
Chapter 1
INTRODUCTION
Function Enhancement by Option Configurations .................................12
Items Included in Optional Kits.................................................................14
Scanner Upgrade Kit ...............................................................................14
About the CD-ROM .....................................................................................15
Scan Utilities CD-ROM ............................................................................15
Chapter 2
SYSTEM REQUIREMENTS
System Requirements................................................................................18
General requirements..............................................................................18
When the Network Printer Kit and Scanner Upgrade Kit are installed ....18
When the Network Printer Kit, Scanner Upgrade Kit
and Fax Kit are installed .......................................................................... 18
Chapter 3
CONNECTING TO THE NETWORK
Connecting to the Network........................................................................20
Chapter 4
SETUP
Overview of Connecting Configurations..................................................22
Connecting the equipment....................................................................... 22
Available functions under each connection ............................................. 23
About Setups ..............................................................................................24
Setup the network document processing system ....................................24
Setup Flow for TopAccess ........................................................................25
Chapter 5
APPENDIX
Default Setting List.....................................................................................28
Default settings for NETWORK SETTING...............................................28
Default settings for PRINT SERVICE SETTING .....................................29
Troubleshooting .........................................................................................30
Network setting checklists ....................................................................... 30
TopAccess error messages.....................................................................36
CONTENTS
9
10
CONTENTS
INTRODUCTION
1.
This chapter describes the details of option configurations.
Function Enhancement by Option Configurations..............................................12
About the CD-ROM .................................................................................................15
Scanner Upgrade Kit.........................................................................................................................14
About the CD-ROM .................................................................................................15
Scan Utilities CD-ROM......................................................................................................................15
1 INTRODUCTION
Function Enhancement by Option Configurations
This section provides you with the general descriptions of functions enabled with each option
(the Network Printer Kit, Scanner Upgrade Kit, Fax Kit and External Keyboard).
For details of the function of the Fax Kit (optional) and the External Keyboard (optional), see the
Operator’s Manual for Facsimile Functions.
To operate the Scanner Upgrade Kit, both the Network Printer Kit and External Keyboard are
necessary to be installed.
The general descriptions of the functions and the option configurations are shown below.
When the Network Printer Kit, the Scanner Upgrade Kit and the External
Keyboard are installed
y Network Printer Kit
Network printing is enabled. (USB printing is also enabled with the USB connector of this kit.)
In addition, you can set up or manage this equipment from the client computer using the copacked utility TopAccess.
y Scanner Upgrade Kit / External Keyboard
This kit enables you to store scanned image data into a folder on the network, or send them
by Email.
*
The External Keyboard (optional) is used for entering and registering the destinations of the Email.
External Keyboard
Equipment
(Copying functions)
USB
Network Printer Kit
Scanner Upgrade Kit
(
(Scanning functions) Network printing /
TopAccess)
LAN
To a computer
(USB printing)
To a network
(Network printing/
Scanning functions)
When the Network Printer Kit, the Scanner Upgrade Kit, the Fax Kit and the
External Keyboard are installed
y Network Printer Kit
Network printing is enabled. (USB printing is also enabled with the USB connector of this kit.)
In addition, you can set up or manage this equipment from the client computer using the copacked utility TopAccess.
y Scanner Upgrade Kit / External Keyboard
This kit enables you to store scanned image data into a folder on the network, or send them
by Email.
12
Function Enhancement by Option Configurations
y Fax Kit / External Keyboard
Transmission and reception of Fax data through public switched telephone networks are
enabled.
Also, the transmission/reception of the InternetFax and the onramp/offramp gateway functions are enabled. (These functions are available with the Scanner Upgrade Kit simultaneously installed.)
*
The External Keyboard (optional) is used for entering and registering the destinations of the Email
and Fax.
External Keyboard
Equipment
(Copying functions)
LINE
To the PSTN
(Fax transmission/reception)
Fax Kit
USB
Network Printer Kit
Scanner Upgrade Kit
(
(Scanning functions) Network printing /
TopAccess)
LAN
To a computer
(USB printing)
To a network
(Network printing/
Scanning functions)
Function Enhancement by Option Configurations
13
1 INTRODUCTION
Items Included in Optional Kits
This section explains about the accessories of the Scanner Upgrade Kit. Be sure that all the
accessories described in this section are attached.
In case any of them is lacking or damaged, contact your service representative.
Scanner Upgrade Kit
The Scanner Upgrade Kit includes the following accessories.
See the following page for the content of the CD-ROM:
P.15 “About the CD-ROM”
Scan Utilities CD-ROM
14
Items Included in Optional Kits
About the CD-ROM
This section explains about the CD-ROM attached to the Scanner Upgrade Kit.
Scan Utilities CD-ROM
The Scan Utilities CD-ROM includes the following manuals and client software:
Operator's Manuals (in PDF files)
y
y
y
y
Quick Start Guide for Scanning Functions
Network Administration Guide for Scanning Functions
Scanning Guide
Setup Guide for Scanning Functions
Client Software
y Windows Client Installer
y TWAIN Driver
y TopAccess Language Data
About the CD-ROM
15
SYSTEM REQUIREMENTS
2.
This chapter describes system requirements.
System Requirements ............................................................................................18
General requirements .......................................................................................................................18
When the Network Printer Kit and Scanner Upgrade Kit are installed ..............................................18
When the Network Printer Kit, Scanner Upgrade Kit and Fax Kit are installed.................................18
2 SYSTEM REQUIREMENTS
System Requirements
This section describes the environments required for respective options (Network Printer Kit,
Scanner Upgrade Kit and Fax Kit). The functions available for users vary depending on the
installed option and condition of use.
The copying functions of this equipment do not require any special environments. You can utilize
these functions when you turn the power of this equipment ON.
General requirements
This equipment requires the following cables to connect with your computers:
For Ethernet Connection: 10BASE-T/100BASE-TX STP cable with a Category 5
RJ-45 connector
When the Scanner Upgrade Kit has been installed, the scanning function cannot be used with a
computer connected to the equipment with a USB.
When the Network Printer Kit and Scanner Upgrade Kit are installed
This equipment requires the following environments for scanning functions as well as the printing functions:
Interface:
Ethernet
Network protocol:
TCP/IP, SMB, FTP, IPX/SPX
Network server:
Windows file server (for storing files using SMB)
FTP server (for storing files using FTP)
NetWare file server (for storing files using IPX/SPX)
SMTP server (for Email transmission)
When the Network Printer Kit, Scanner Upgrade Kit and Fax Kit are
installed
This equipment requires the following environments in order to enable the InternetFax functions
and onramp/offramp gateway functions, as well as the printing functions, network fax functions
and scanning functions:
Interface:
Ethernet
Network protocol:
TCP/IP, FTP
Network servers:
POP3 server (for InternetFax/Email reception)
SMTP server (for InternetFax/Email transmission)
18
System Requirements
CONNECTING TO THE NETWORK
3.
This chapter describes how to connect this equipment to a network.
Connecting to the Network ....................................................................................20
3 CONNECTING TO THE NETWORK
Connecting to the Network
This section describes how to connect this equipment to a network.
y The 10BASE-T cable and the 100BASE-TX cable are not included in the accessories.
Obtain the ones compatible with the network you are utilizing.
y The Scanner Upgrade Kit (optional) and the Network Printer Kit (optional) use the same network interface connector, so procedures for connecting this equipment and the network for
the both options are also the same.
20
1
After the Scanner Upgrade Kit has been installed, insert
the10BASE-T or 100BASE-TX cable into the network interface connector on the rear side of this equipment.
2
Turn ON the power of this equipment.
Connecting to the Network
SETUP
4.
This chapter describes how to configure the system when the Scanner Upgrade Kit installed.
Overview of Connecting Configurations ..............................................................22
Connecting the equipment ................................................................................................................22
Available functions under each connection.......................................................................................23
About Setups...........................................................................................................24
Setup the network document processing system..............................................................................24
Setup Flow for TopAccess .....................................................................................25
4 SETUP
Overview of Connecting Configurations
Connecting the equipment
When the Scanner Upgrade Kit is installed in this equipment, functions such as scanning and
Email transmission are enabled. When the Fax Kit is added as well as the Scanner Upgrade Kit,
functions such as InternetFax transmission are also enabled.
To enable these functions, an administrator has to configure the proper network settings with client computers, servers, and this equipment.
Possible configurations are shown below.
Windows 2000
Windows XP
Windows Vista
Windows Server 2003
Windows Server 2008
NetWare 6.0/6.5
UNIX
TCP/IP or IPX/SPX Local Area Network
AppleTalk or TCP/IP Local Area Network
Mac OS X
Internet
DNS Server
Email Server
y When you want to perform scanning from Windows 98/Windows Me/Windows NT using eSTUDIO165/205 or e-STUDIO167/207/237, contact your service technician or representative.
y When you want to perform scanning from Mac OS 8.6/9.x or Mac OS X 10.1/10.2 Classic
Mode using e-STUDIO165/205 or e-STUDIO167/207/237, contact your service technician or
representative.
22
Overview of Connecting Configurations
Available functions under each connection
Functions available vary depending on each connecting configuration. This section describes
the functions available for each connection.
Local area network connection over TCP/IP
The following functions are available when this equipment is connected to a local area network
over TCP/IP with which Windows computers, Macintosh computers or UNIX workstations are
connected:
TopAccess
y Managing and configuring this equipment by client computers using the TopAccess
Scanning functions
y Storing scanned image data in a file (Storing data in a specified folder on a network)
y Storing TWAIN data of scanned images (Storing data in the memory of equipment and
obtaining them only with a computer running with a Windows client operating system)
In Macintosh computers and UNIX workstations, the storing function of TWAIN data cannot be
used.
Local area network connection over IPX/SPX
The following features are available when this equipment is connected to a local area network
over IPX/SPX where NetWare file servers are connected.
Scanning function
y Storing scanned image data in a file (Storing data in a specified folder on a network)
Internet connection
The following functions are available when this equipment is connected to a network where this
equipment can access the Internet:
Scanning function
y Email transmission of scanned image data
InternetFax functions
y
y
y
y
Printing of TIFF files (TIFF-FX Profile S/F/J) attached to Emails
Transmission/reception of an InternetFax
Offramp gateway
Onramp gateway
The InternetFax functions are enabled only when the Fax Kit (optional) is installed.
Overview of Connecting Configurations
23
4 SETUP
About Setups
First of all, you must set up the management and the operation of this equipment as a network
scanner. Although this equipment can operate successfully in the default settings, the following
settings need to be changed for better performance:
Before using this equipment through a network, check the default settings of this equipment
according to the following reference:
Quick Start Guide for Printing Functions
Chapter 4 "SETUP FLOW"
"Default Setting Check"
Setup the network document processing system
This equipment is an MFP that enables you to have immediate use with the connection to a network you are utilizing.
Even in suitable conditions, however, you need to check if the functions of this equipment are
under an appropriate environment for the operation and if they are set enabled as described
below. Some functions may require additional settings depending on your environment.
The following table shows the references for easy setup flows to enable these document-processing systems:
Options
Network Printer Kit
Scanner Upgrade Kit
External Keyboard
Network Printer Kit
Scanner Upgrade Kit
External Keyboard
Fax Kit
(All features
described in the
“Setup contents” column are available in
this configuration.)
Network Printer Kit
Scanner Upgrade Kit
Setup contents
Storing files
*1
Descriptions
Setups for storing file
References
Network Administrator Guide for Scanning Functions
Email transmission
Setups for Email transmission
Storing TWAIN
TWAIN driver installation
Setups for storing TWAIN data
Scanning Guide
data*2
Email printing
Setups for Email printing
InternetFax
Setups for transmission/reception
of InternetFax
Network Administrator Guide for Scanning Functions
Onramp gateway
Setups for onramp gateway
function*3
Offramp gateway
Setups for offramp gateway
function*4
TopAccess
Setups for TopAccess environment related to scanning functions
P.25 “Setup Flow for
TopAccess”
*1 Storing files: This function allows you to store a scanned image to network folder set up previously.
*2 Storing TWAIN data: This function allows you to store the TWAIN data of a scanned image in the memory of the equipment, and then retrieve it only with a client Windows computer.
*3 Onramp gateway function: This function allows you to have the relay box in the equipment receive faxes
sent from G3 fax machines, convert them into Email, and then forward them to the Email addresses registered in the relay box as an InternetFax.
*4 Offramp gateway function: This function allows you to receive an InternetFax/Email, convert it back into
a fax message, and then forward it to another G3 fax machine.
When the terminating end is not compatible with the InternetFax, use this to shorten the fax transmission
distance over the public switched telephone networks, so that the communication cost will be reduced.
24
About Setups
Setup Flow for TopAccess
TopAccess, a web-based device management utility, enables a remote management of this
equipment for users or administrators from their computers. The following functions are available in TopAccess:
y Configuring and managing this equipment
y Managing the address book data
y Creating templates (This function is available only when the Scanner Upgrade Kit is
installed.)
Using TopAccess administrator’s functions, administrators can set up and maintain the equipment remotely.
To enable TopAccess, administrators should set up the network connection between this equipment and your computers over TCP/IP, and should enable the HTTP network services of this
equipment.
Setup Flow
Description/Reference
Connect this equipment
Connect this equipment to your network using a network cable.
Reference: Quick Start Guide for Scanning Functions (this
manual)
Chapter 3 “CONNECTING TO THE NETWORK”
P.20 “Connecting to the Network”
Set up the TCP/IP
Assign the IP address, Subnet mask, and Gateway address.
Reference: Setup Guide for Printing Functions
Chapter 5 "CONFIGURING NETWORKS (EQUIPMENT)"
"TCP/IP Configuration"
Set up the HTTP network service
Enable the HTTP Network Server.
Reference: Setup Guide for Printing Functions
Chapter 5 "CONFIGURING NETWORKS (EQUIPMENT)"
"HTTP Configuration"
Setup Flow for TopAccess
25
APPENDIX
5.
Default Setting List .................................................................................................28
Default settings for NETWORK SETTING ........................................................................................28
Default settings for PRINT SERVICE SETTING ...............................................................................29
Troubleshooting......................................................................................................30
Network setting checklists.................................................................................................................30
TopAccess error messages...............................................................................................................36
5 APPENDIX
Default Setting List
The Scanning-related default setting values of this equipment are shown below.
y The default setting values are the ones set at the factory when this equipment is shipped.
y You can see the current setting values by printing the "Configuration Page" from the operation panel of this equipment. See the following manual for how to print the "Configuration
Page".
Setup Guide for Scanning Functions
Chapter 4 "PRINTING LISTS (EQUIPMENT)"
To Print Lists
"Configuration Page"
Default settings for NETWORK SETTING
SMB SESSION
SMB SIGNING OF SMB CLIENT ............................... AUTO
SMTP CLIENT NETWORK SERVICE
ENABLE SMTP CLIENT ............................................. ENABLE
AUTHENTICATION..................................................... DISABLE
POP BEFORE SMTP.................................................. DISABLE
SMTP SERVER ADDRESS ........................................ Undefined
LOGIN NAME ............................................................. Undefined
PORT NUMBER.......................................................... 25
SMTP SERVER NETWORK SERVICE
ENABLE SMTP SERVER ........................................... ENABLEE
PORT NUMBER.......................................................... 25
ENABLE OFFRAMP GATEWAY ................................. DISABLE
ENABLE OFFRAMP SECURITY ................................ ENABLE
ENABLE OFFRAMP PRINT ....................................... ENABLE
E-MAIL ADDRESS...................................................... Undefined
POP3 NETWORK SERVICE
ENABLE POP3 CLIENT ............................................. ENABLE
POP3 SERVER ADDRESS ........................................ Undefined
TYPE POP3 LOGIN .................................................... AUTO
ACCOUNT NAME ....................................................... Undefined
SCAN RATE................................................................ 5
PORT NUMBER.......................................................... 110
FTP CLIENT NETWORK SERVICE
DEFAULT PORT NUMBER......................................... 21
28
Default Setting List
Default settings for PRINT SERVICE SETTING
E-MAIL PRINT
ENABLE PRINT HEADER .......................................... DISABLE
ENABLE PRINT MESSAGE BODY ............................ ENABLE
MAXIMUM E-MAIL BODY PRINT............................... 5
ENABLE PRINT E-MAIL ERROR ............................... ENABLE
ENABLE E-MAIL ERROR FORWARD ....................... DISABLE
E-MAIL ERROR TRANSFER ADDRESS ................... Undefined
ENABLE PARTIAL E-MAIL ......................................... ENABLE
PARTIAL WAIT TIME .................................................. 24
MDN REPLY ............................................................... DISABLE
Default Setting List
29
5 APPENDIX
Troubleshooting
This section picks up troubleshooting from other manuals and describes them collectively.
Network setting checklists
Check if the network setting is correct according to checklists, and then specify the cause of the
error and take an appropriate countermeasure. The checklists are introduced by functions. Look
for a function you are using and refer to the corresponding item in the list. Note that the checklists are extracts from the Network Administration Guide for Scanning Functions.
When this equipment cannot be detected over the network, check if the network cable is correctly connected, and then refer to the following manuals:
y Network Administration Guide for Printing Functions
Chapter 3 “TROUBLESHOOTING”
Equipment Detection and Printing Check
File storage
When an error has occurred in the file storage function, check the setting by referring to the list
below.
No
1
2
3
Check Item
Is the IP address of this
equipment correctly set?
Can you utilize the TopAccess?
Yes
No
Next Step
Ø
Ö
Refer to the Setup Guide for
Printing Functions and set the
TCP/IP correctly.
Next Step
Ø
Ö
Refer to the Setup Guide for
Printing Functions and set the
HTTP correctly.
Ö
Refer to “Setting up Save as file
Settings” in the Setup Guide for
Scanning Functions and set the
folder correctly.
According to the protocol selected
in this step, setting the related
items in the “Setup” - “Network”
menu may be required.
Ö
An error code is printed in the
Transmission/Reception Journal.
Refer to the “Error code list” in the
Network Administration Guide
for Scanning Functions.
Is a folder where the file is
stored set correctly?
Next Step
Ø
4
Can the file be stored?
End
30
Troubleshooting
Countermeasure
Email transmission
When an error has occurred in the Email transmission function, check the setting by referring to
the list below.
No
1
2
3
4
5
6
Check Item
Yes
No
Countermeasure
Next Step
Ø
Ö
Refer to an appropriate manual
and set the DNS server and
SMTP server correctly.
If necessary, refer to the “Setting
up DNS Server and Mail Server”
in the Network Administration
Guide for Scanning Functions.
Next Step
Ø
Ö
Refer to the Setup Guide for
Printing Functions and set the
TCP/IP correctly.
Next Step
Ø
Ö
Refer to the Setup Guide for
Printing Functions and set the
HTTP correctly.
Next Step
Ø
Ö
Refer to the Setup Guide for
Scanning Functions and set the
SMTP client correctly.
Ö
Refer to the Setup Guide for
Scanning Functions and perform a correct Email transmission setting.
Ö
An error code is printed in the
Transmission/Reception Journal.
Refer to the “Error code list” in the
Network Administration Guide
for Scanning Functions.
Are servers for sending
Emails correctly set?
Is the IP address of this
equipment correctly set?
Can you utilize the TopAccess?
Is the setting for SMTP
transmission of Emails
enabled?
Is the setting for sending
Emails enabled?
Next Step
Ø
Can you send Emails?
End
Troubleshooting
31
5 APPENDIX
Email printing
When an error has occurred in the Email printing function, check the setting by referring to the
list below.
No
1
2
3
4
5
6
Check Item
Yes
No
Countermeasure
Next Step
Ø
Ö
Refer to an appropriate manual
and set the POP3 server correctly.
If necessary, refer to the “Setting
up DNS Server and Mail Server”
in the Network Administration
Guide for Scanning Functions.
Next Step
Ø
Ö
Refer to the Setup Guide for
Printing Functions and set the
TCP/IP correctly.
Can you utilize the TopAccess?
Next Step
Ø
Ö
Refer to the Setup Guide for
Printing Functions and set the
HTTP correctly.
Is the setting for receiving
Emails enabled?
Next Step
Ø
Ö
Refer to the Setup Guide for
Scanning Functions and set the
POP3 correctly.
Next Step
Ø
Ö
Refer to the Setup Guide for
Scanning Functions and perform a correct Email print setting.
Ö
An error code is printed in the
Transmission/Reception Journal.
Refer to the “Error code list” in the
Network Administration Guide
for Scanning Functions.
Is a server for receiving
Emails correctly set?
Is the IP address of this
equipment correctly set?
Is a setting for printing
attachment files of the
received Email enabled?
Can you receive Emails and
print their attachment files?
End
32
Troubleshooting
InternetFax
When an error has occurred in the InternetFax function, check the setting by referring to the list
below.
No
Check Item
1
Are servers for sending or
receiving the Internet Faxes
set correctly?
2
3
4
5
6
Is the IP address of this
equipment correctly set?
Can you utilize the TopAccess?
Are settings for sending or
receiving Internet Faxes
enabled?
Is a setting for printing the
received InternetFax
enabled?
Can you send and receive
the InternetFaxes and print
the attachment files of the
received one?
Yes
No
Countermeasure
Next Step
Ø
Ö
Refer to an appropriate manual
and set the DNS server and mail
server correctly.
If necessary, refer to the “Setting
up DNS Server and Mail Server”
in the Network Administration
Guide for Scanning Functions.
Next Step
Ø
Ö
Refer to the Setup Guide for
Printing Functions and set the
TCP/IP correctly.
Next Step
Ø
Ö
Refer to the Setup Guide for
Printing Functions and set the
HTTP correctly.
Next Step
Ø
Ö
Refer to the Setup Guide for
Scanning Functions and perform the correct settings of an
SMTP client computer, a POP3
server and the Internet Fax.
Next Step
Ø
Ö
Refer to the Setup Guide for
Scanning Functions and perform a correct Email print setting.
Ö
An error code is printed in the
Transmission/Reception Journal.
Refer to the “Error code list” in the
Network Administration Guide
for Scanning Functions.
End
Troubleshooting
33
5 APPENDIX
Onramp gateway
When an error has occurred in the onramp gateway function, check the setting by referring to
the list below.
No
1
2
3
4
5
6
7
Check Item
Are servers for sending an
InternetFax/Email set correctly?
Is the IP address of this
equipment correctly set?
Can you utilize the TopAccess?
Is the setting for SMTP
transmission of an InternetFax/Email enabled?
Are settings for sending an
InternetFax/Email enabled?
Is a setting for the Fax functions enabled?
Yes
No
Countermeasure
Next Step
Ø
Ö
Refer to an appropriate manual
and set the DNS server and
SMTP server correctly.
If necessary, refer to the “Setting
up DNS Server and Mail Server”
in the Network Administration
Guide for Scanning Functions.
Next Step
Ø
Ö
Refer to the Setup Guide for
Printing Functions and set the
TCP/IP correctly.
Next Step
Ø
Ö
Refer to the Setup Guide for
Printing Functions and set the
HTTP correctly.
Next Step
Ø
Ö
Refer to the Setup Guide for
Scanning Functions and set the
SMTP client correctly.
Next Step
Ø
Ö
Refer to the Setup Guide for
Scanning Functions and perform a correct InternetFax setting.
Ö
Refer to the Setup Guide for
Printing Functions or the Operator's Manual for Facsimile
Function and perform a correct
Fax setting.
Ö
Refer to the Setup Guide for
Scanning Functions or the
Operator's Manual for Facsimile Function and set the mailboxes and the Email address of
the destination correctly.
Ö
An error code is printed in the
Transmission/Reception Journal.
Refer to the “Error code list” in the
Network Administration Guide
for Scanning Functions.
Next Step
Ø
Is a setting for the onramp
gateway functions enabled?
Next Step
Ø
8
34
Can you send a Fax document received from a G3
facsimile as an InternetFax/
Email?
Troubleshooting
End
Offramp gateway
When an error has occurred in the offramp gateway function, check the setting by referring to
the list below.
No
Check Item
1
Are servers for forwarding
an InternetFax/Email to this
equipment set correctly?
2
3
4
5
Is the IP address of this
equipment correctly set?
Can you utilize the TopAccess?
Are the settings for the DNS
session and DDNS session
enabled?
Yes
No
Countermeasure
Next Step
Ø
Ö
Refer to an appropriate manual
and set the DNS server and
SMTP server correctly.
If necessary, refer to the “Setting
up DNS Server and Mail Server”
in the Network Administration
Guide for Scanning Functions.
Next Step
Ø
Ö
Refer to the Setup Guide for
Printing Functions and set the
TCP/IP correctly.
Next Step
Ø
Ö
Refer to the Setup Guide for
Printing Functions and set the
HTTP correctly.
Ö
Refer to the Setup Guide for
Scanning Functions and set the
DNS session correctly. If the DNS
server supports dynamic DNS, a
setting for DDNS session is also
required.
Ö
Refer to the Setup Guide for
Scanning Functions and set the
SMTP server of this equipment
correctly.
If “OffRamp Security” is set
“Enable”, the Fax number of a
destination (to which the Fax is
forwarded) must be registered
into the address book of this
equipment.
Ö
Refer to the Setup Guide for
Printing Functions or the Operator's Manual for Facsimile
Function and perform a correct
Fax setting.
Ö
An error code is printed in the
Transmission/Reception Journal.
Refer to the “Error code list” in the
Network Administration Guide
for Scanning Functions.
Next Step
Ø
Is a setting for the offramp
gateway functions enabled?
Next Step
Ø
6
7
Is a setting for the Fax functions enabled?
Can you fax an InternetFax/
Email received from other
equipments to a G3 facsimile?
Next Step
Ø
End
Troubleshooting
35
5 APPENDIX
TopAccess error messages
The device status indicators (icons) and messages on the TopAccess screen notify you the status of errors occurred on this equipment. Refer to lists for the icons and messages and look for
items concerned. Note that the lists are extracts from the Setup Guide for Printing Functions.
TopAccess Device tab menu:
1
2
1) Device status indicators
The device status indicators (icons) are displayed here. For the details, see the following
page:
P.37 “Device status indicator list”
2) Alerts
The error messages are displayed here. For the details, see the following page:
P.38 “Error message list”
36
Troubleshooting
Device status indicator list
y Printer Error
The above printer error icon indicates:
- You need to remove paper from the receiving tray.
- Non-recommended toner is being used.
For information on how to resolve the error condition, see “Replacing Toner Cartridge” in
the Operator’s Manual for Copying Functions.
y Cover Open
The Cover Open error icon indicates that you need to close the cover.
y Toner Empty
The Toner Empty icon indicates the empty status of the toner cartridge. For information on
how to resolve the error condition, see “Replacing Toner Cartridge” in the Operator’s
Manual for Copying Functions.
y Paper Empty
The Paper Empty icon indicates that one of the drawers is opened. You must close the
opened drawer to resume printing or copying. This icon also indicates the empty status of
the drawer. This status does not immediately stop a print job or a copy job. If the automatic
paper selection (APS) function is enabled, the print or copy job may continue by selecting
paper of the same size in the other drawer. For information on how to resolve the error condition, see “When This Message Appears” in the Operator’s Manual for Copying Functions.
When paper has run out, you can cancel a print job in process from the control panel of this
equipment. See the following page for how to cancel a print job:
Setup Guide for Printing Functions
Chapter 3 "CANCELING PRINT JOBS AND PRINTING FONT LISTS (EQUIPMENT)"
"To Cancel Print Jobs"
y Paper Jam
The Paper Jam icon indicates that you must remove jammed paper from the equipment. For
information on how to resolve the error condition, see “Paper Jams” in the Operator’s
Manual for Copying Functions.
y Service calls
The Service Call error icon indicates that you must call for service. Contact your service
technician.
Troubleshooting
37
5 APPENDIX
Error message list
TopAccess Message
38
Corrective Action
Main Motor Error - Please Contact Service
Technician.
Contact your service representative.
Fuser Error - Please Contact Service Technician.
Contact your service representative.
Scanner Error - Please Contact Service
Technician.
Contact your service representative.
Toner Not Recognized - Please Check
Toner.
Check and adjust the toner cartridge.
Fatal Error - Please Contact Service Technician.
Contact your service representative.
Paper Jam in Automatic Duplexing Unit Please Clear Paper Path.
Remove jammed paper.
Paper Jam in Printer - Please Clear Paper
Path.
Remove jammed paper.
Paper Insertion Jam - Please Clear Paper
Path.
Remove jammed paper.
Front Cover Open - Please Close Cover.
Close the Front cover.
Paper Feeding Cover Open - Please Close
Cover.
Close the Paper Feeding cover.
Lower Side Cover Open - Please Close
Cover.
Close the Lower Side cover.
Transfer/Transport unit Cover Open - Please
Close Cover.
Close the Transfer/Transport unit cover.
Black Toner Empty - Please Refill.
Replace the toner. Refer to the Operator's
Manual for Copying Functions for instruction.
Black Toner Cartridge Depleted - Please
Install New Cartridge Before System is
Empty.
Prepare the toner cartridge.
Paper Empty in Drawer 1 - Please Add
Paper.
Set paper in the drawer 1.
Paper Empty in Drawer 2 - Please Add
Paper.
Set paper in the drawer 2.
Troubleshooting
TopAccess Message
Corrective Action
Paper Empty in Drawer 3 - Please Add
Paper.
Set paper in the drawer 3.
Paper Empty in Drawer 4 - Please Add
Paper.
Set paper in the drawer 4.
Troubleshooting
39
GA-1201
OME09008700
MULTIFUNCTIONAL DIGITAL SYSTEMS
Quick Start Guide for Scanning Functions
GA-1201
2-17-2, HIGASHIGOTANDA, SHINAGAWA-KU, TOKYO, 141-8664, JAPAN
2009 TOSHIBA TEC CORPORATION All rights reserved
R090820I1300-TTEC
2009-09