Download LPV3-USB-TX1 QSG.indd
Transcript
User Manual
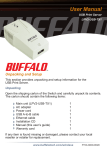
USB Print Server
LPV3-U2
Unpacking and Setup
This section provides unpacking and setup information for the
USB Print Server.
Unpacking
Open the shipping carton of the USB Printer Server and carefully unpack
its contents. The carton should contain the following items:
Main unit (LPV3-U2)
AC adapter
Power cord
USB A-to-B cable
Ethernet cable
Installation CD
Manual (this user’s guide)
Warranty card
1
1
1
1
1
1
1
1
If any item is found missing or damaged, please contact your local
reseller or retailer for replacement.
www.buffalotech.com/wireless
PY00-30052-DM20-01 1-01
Setup
The setup of the USB Print
Server is performed using
the following steps:
Connect the USB Print Server into
the included AC Adapter power cord,
and attach the power cord to a power outlet.
Connect the included standard patch cable from the USB Print Server
to a switch, hub, or router on your network.
Connect the included USB A-to-B cable to the USB Print Server and
the USB Printer. Visually inspect all connections and verify that they
are secured.
Software Installation - Windows Based PC’s
*Macintosh Procedure on Page 19*
This section describes how to properly install and use the USB Print
Server configuration software. Please follow the following steps to
properly install the software:
Insert the included CD into a CD-ROM Drive.
Run the setup.exe program found on the root of the CD. This can be
done by browsing to the CD or by going to the ‘Start Menu’, selecting
‘Run...’ , and typing x:\setup.exe (Where x is the drive letter of the
CD-ROM Drive), then press the ‘OK’ button.
The Install Shield Wizard for LPV3 Manager will open up.
Press the ‘Next’ button.
2
Press the ‘Browse’ button if there is a specific location the manager
should be installed to. Otherwise press the ‘Next’ button and accept
the default installation location.
The installation will continue and copy files to their necessary locations.
When the installation is complete, press the ‘Finish’ button.
Congratulations, the software has been successfully installed.
3
Using the Software
Launch the software by finding the icon in the Start Menu. Press
the ‘Start’ button, select ‘Programs’, select ‘BUFFALO’, select ‘LPV3
Manager’, and finally press the ‘LPV3 Manager’ icon.
The LPV3 Manager will launch and search for the USB Print Server on
the network.
The LPV3 Manager will display the USB Print Servers on the network.
4
Configure the USB Print Server by double-clicking on the
corresponding Print Server. This will open the USB Print Server’s
properties.
The name of the USB Print Server can be changed by entering a new
name in the ‘Server Name’ field. The Password and Port names can
also be changed if desired. Record the name and port for later use.
NOTE: The ‘Password’ option sets a password for the LPV3 Manager
and web-based administration tool.
5
To configure the protocol settings press the ‘Protocol Settings’ tab.
The protocol options are TCP/IP, AppleTalk, NetBEUI, and SNMP. To
configure a protocol, select it and press the ‘Properties’ button.
TCP/IP Settings:
Select the ‘Manual Setting’ option from the drop-down menu if
a specific IP address is desired. Otherwise leave the setting on
Automatic. With Automatic used, the device will obtain its IP from
a DHCP server. Record the IP address of the printer. When the
selection is made, press the ‘OK’ button.
NOTE: If DHCP is used, it is recommended to exit out of the program,
reconnect to the Print Server through the Manager and record the new
‘discovered’ IP address. The IP address will be greyed out like above.
6
NOTE: It is recommended to use IP based printing for newer
PC-only networks. If there are Macintoshes or older PC’s on the
network, then please configure the appropriate AppleTalk and
NetBEUI settings.
AppleTalk Settings:
If there are Macintosh computers on the network that wish to use the
printer, then enter a ‘Rendezvous Service Name’ in the field and press
the ‘OK’ button. This name is the friendly name Mac users will see
when installing their printer.
NetBEUI Settings:
If the printer is to be accessible via Network Neighborhood in Windows
98 and Windows ME, then enter the proper Work Group name for your
Work Group. Once the settings have been set, press the ‘OK’ button.
7
To view information about the USB Print Server, press the
‘Information’ tab. This tab will display the current information about
the USB Print Server.
To reset the device or to restore the factory default settings, press the
‘Reset’ tab.
Restart: Reboots the USB Print Server
Set to Factory Default: Restores the factory default settings.
Once all settings have been changed, press the ‘OK’ button.
NOTE: Future configuration can be done using your web browser.
Browse to http://xxx.xxx.xxx.xxx (where xxx.xxx.xxx.xxx is the configured
IP address of the Print Server.)
8
Installing the Printer
Windows 2000 & XP
*Macintosh Procedure on Page 19*
Open the ‘Printers and Faxes’ folder. To do so, open the ‘Control
Panel’ and then open the ‘Printers and Faxes’ folder. Double click on
the ‘Add Printer’ icon. This will open the ‘Add Printer Wizard’. Press
the ‘Next’ button.
Select ‘Local printer attached to this computer’. Also, uncheck the
‘Automatically detect and install my Plug and Play printer’ check box.
Press the ‘Next’ button when finished.
9
Select ‘Create a new port: Type of port:’. From the pull down list,
select ‘Standard TCP/IP Port’. Press the ‘Next’ button.
The ‘Add Standard TCP/IP Printer Port Wizard’ will open. Press the
‘Next’ button.
Enter the IP address of the USB Print Server into the field called
‘Printer Name or IP Address:’. The Port Name field will be filled
automatically once the IP address is entered.
Please enter the IP address recorded on Page 6. Once complete,
press the ‘Next’ button.
10
The ‘Additional Port Information Required’ window will appear. Select
‘Standard’ device type and select ‘Generic Network Card’ from the pull
down menu. Press the ‘Next’ button when finished.
A summary screen will appear. Press the ‘Finish’ button to continue
setting up your USB Network Printer.
The ‘Install Printer Software’ window will appear. Please select the
proper printer from the list below, or refer to the printer manufacturer’s
driver location. Once the proper printer driver has been selected,
press the ‘Next’ button.
NOTE: Press the ‘Have Disk’ button to install drivers from a CD-ROM
or Floppy disk.
11
The ‘Name Your Printer’ window will appear. Enter an appropriate
name or leave the default ‘Printer name’ if desired. Also, select if the
printer is to be the default printer or not. Press the ‘Next’ button when
complete.
The ‘Printer Sharing’ window will appear. Select ‘Do not share this
printer’ and click the ‘Next’ button.
The ‘Print Test Page’ window will appear. Select ‘Yes’ to print a test
page. Press the ‘Next’ button when finished.
The ‘Add Print Wizard’ is now complete. Press the ‘Finish’ button.
Congratulations, your USB Network Printer has been installed.
12
Windows 98 & ME
Open the ‘Printers’ folder. To do so, open the ‘Control Panel’ and then
open the ‘Printers’ folder. Double click on the ‘Add Printer’ icon. This
will open the ‘Add Printer Wizard’. Press the ‘Next’ button.
You will be prompted to select the type of printer to be installed. Select
‘Network printer’ and press the ‘Next’ button.
A prompt for the ‘Network path or queue name’ will appear. Press the
‘Browse’ button.
NOTE: You can enter the printer’s path if you wish. The format should
be \\PrintServer\PortName (where PrintServer and PortName are the
same as set on Page 5. Press the ‘Next’ button when finished.
13
The ‘Browse’ dialog window will appear. Browse for the appropriate
printer, select it, and press the ‘OK’ button.
NOTE: If an error is displayed while browsing for the printer, then there
is a network problem, or a problem with the ‘PortName’ set on
Page 5. To remedy the problem, reset the Print Server to factory
defaults by following the instructions on Page 8. Then restart the
configuration from Page 4. If you still have problems, contact our 24/7
customer support at 1-(866) 752-6210.
The ‘Driver Selection’ window will appear. Select the correct driver
from the supplied list, or press the ‘Have Disk’ button to select a driver
supplied by the printer manufacturer. Once the proper driver has been
selected, press the ‘Next’ button.
14
The ‘Printer Name’ window will appear. Enter an appropriate name for
the printer and press the ‘Finish’ button.
The USB Network Printer is now installed. A test print can verify that
the printer is installed correctly. Find the printer in the Printer’s folder,
right click on its icon and select ‘Properties’.
The ‘Printer Properties’ window will appear. Press the ‘Print Test
Page’ button to print a test page. If the test page prints, then your
printer is setup properly.
15
Internet Printing Protocol (IPP)
Internet Printing Protocol (IPP) allows a computer in a remote location
to print to an installed printer at a home or office over the internet.
Practical applications would include printing to a work printer from home,
printing to a work printer on a business trip, etc.
IPP requires a full time internet connection at the location where the
printer is installed.
Port 631 is the default port for IPP. The router on the network needs to
pass port 631 through to the local IP address of the USB Print Server.
Please see the documentation for the router to setup port forwarding
properly.
The ’Port’ name from Page 5 will be needed.
Please follow the following steps to properly setup IPP:
Windows 2000 & XP
Open the ‘Printers and Faxes’ folder. To do so, open the ‘Control
Panel’ and then open the ‘Printers and Faxes’ folder. Double click on
the ‘Add Printer’ icon. This will open the ‘Add Printer Wizard’. Click
the ‘Next’ button.
NOTE: Internet Printing Protocol (IPP) is NOT supported in Windows
98 or Windows ME due to a lack of TCP/IP printing support.
16
Select ‘A network printer, or a printer attached to another computer’.
Press the ‘Next’ button.
Select ‘Connect to a printer on the Internet or on a home or office
network:’. In the ‘URL’ field, enter:
http://IP_ADDRESS:631/PORTNAME (using the ‘Port’ name from
Page 5). Once complete, press the ‘Next’ button.
NOTE: The IP address inputted needs to be your external/Internet
IP address, NOT the internal IP address. Consult your router
documentation or ISP information to determine this IP address.
17
The ‘Install Printer Software’ window will appear. Please select the
proper printer from the list below, or refer to the printer manufacturer’s
driver location. Once the proper printer driver has been selected,
press the ‘Next’ button.
NOTE: Press the ‘Have Disk’ button to install drivers from a CD-ROM or
Floppy disk.
The ‘Default Printer’ window will appear. Select if the printer is to be
the default printer or not. Press the ‘Next’ button when complete.
The ‘Add Print Wizard’ is now complete. Press the ‘Finish’ button.
Congratulations, your IPP USB Network Printer has been installed.
The printer will now be available in your ‘Printers and Faxes’ folder.
You can print a test page by going to the printer’s properties and
pressing the ‘Print Test Page’ button.
18
Macintosh Setup
Print Server Configuration
It is recommended that you connect the print server directly to your
Apple computer using a cross over Ethernet Cable or connect the
Apple computer and the print server to a hub or switch, to perform
the initial configuration. The print server will attempt to obtain an IP
address from a DHCP server if one is available, otherwise the print
server will default to an IP address of 192.168.11.222. If a DHCP
server is available you will have to check the server’s logs to determine
which IP address the print server received.
Open the ‘System Preferences’ from the Apple menu and select
‘Network’. Set ‘Show’ to ‘Buit-in Ethernet’. Record the current
settings; they will be needed later. Set ‘Configure’ to ‘Manually’. Enter
198.168.11.223 into the ‘IP Address’ field. Enter 255.255.255.0 into
the ‘Subnet Mask’ field. Press the ‘Apply Now’ button when finished.
Open a Web Browser (Version 4.5 or later) and enter 192.168.11.222
into the ‘Address’ field. Press the Enter or Return key to continue.
The ‘Server Status’ page of the USB Print Server will open. Press the
‘Settings’ link to continue setting the Print Server up.
19
The Basic Settings menu will appear. Enter an acceptable Print
Server Name. This can be left as default if desired. The Web-based
Configuration system can be password protected by entering and
verifying a new password. Press the ‘Set’ button when configuration
is complete. A message will appear stating that the print server is
rebooting. You will be prompted to login using the new password.
Click on the ’Network Settings’ link. Enter a fixed IP address or set
the bullet to ‘Obtain an IP address automatically’. This will be the IP
address used for PC-Based printing and for configuration. Store the IP
address in a safe place in case you need to access the configuration
options again. Press the ‘Set’ button when configuration is complete. A
message will appear stating that the print server is rebooting.
20
Rendezvous is enabled by default so if you are using this service in
your network, the server will be discovered.
If used, enter AppleTalk info, otherwise leave in default condition.
After entering your settings, press the ‘Set’ button.
For further information please click on the ‘?’ icon next to the area in
question.
Restore the TCP/IP settings. Open your ‘System Preferences’ and
select ‘Network’. Set ‘Show’ to ‘Buit-in Ethernet’. Restore the
settings that were recorded previously. Use the ‘Using DHCP’ option
from the pull down menu if the IP address is to be automatically
assigned. Otherwise, enter the proper static IP address information.
Press the ‘Apply Now’ button when configuration is complete.
21
Installing the Printer on your Macintosh
Open the ‘System Preferences’ from the Apple menu and select ‘Print
& Fax’. The ‘Print & Fax’ window will appear. Press the ‘Set Up
Printers...’ button.
The ‘Printer List’ will appear. A dialog box may appear stating “You
have no printer available.” In this case press the ‘Add’ button.
Otherwise press the ‘Add’ button from the graphical menu.
A list of available printers will appear. In that list should appear the
Rendezvous name set on Page 7 or Page 21. Highlight the correct
printer.
22
Press the ‘Printer Model’ pull down menu and select the proper
hardware driver for the printer. The printer’s CD-ROM may be needed
to install the proper drivers if they’re not already supplied. In this case,
select the ‘Other...’ option and provide the location of the proper driver
file. Once the driver has been selected, press the ‘Add’ button.
Congratulations, the printer has been installed. The ‘Printer List’ will
now list the installed network printer. This window can be closed. You
can now print to that printer.
23
Technical Specifications
LAN Standards:
IEEE 802.3u 100BASE-TX; IEEE 802.3 10BASE-T
Transmission Types:
100Mbps/10 Mbps; 100BASE-TX 4B/5B, MLT-3;
10BASE-T Manchester Coding
Access Media:
CSMA/CD
Media Interface:
RJ-45
USB Standard:
USB1.1, USB2.0
USB Connector:
USB A Connector (1)
Network Protocols:
NetBEUI; TCP/IP; Apple Talk; SNMP
Electric Current:
5.0V
Power Consumption:
500mA
Dimensions:
3.7 x 1.1 x 2.6 in. (92 x 28 x 52 mm.)
Weight:
3.2 oz. (90 g.)
Operating Temperature:
0-40 C; 20-80% non-condensing
Technical Support
Buffalo Technology offers toll-free technical support 24 hours a day,
7 days a week for this product. Customers in the United States and
Canada can obtain technical support using the following information:
Web:
E-mail:
Telephone:
www.buffalotech.com
[email protected]
866-752-6210 (USA & Canada only)
FCC Warning
This device complies with part 15 of the FCC Rules. Operation is subject
to the following two conditions: (1) This device may not cause harmful
interference, and (2) this device must accept any interference received,
including interference that may cause undesired operation.
24


