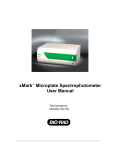
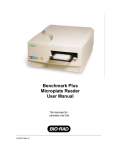
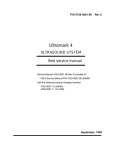
1
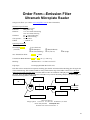
Ultramark™ Microplate Reader
User Manual
410-0164 Rev B
Ultramark Catalog Number 170-9500
Ultramark User Manual Catalog Number 170-9502
Bio-Rad Technical Services Department
Open Monday–Friday, 8:00 a.m. to 4:00 p.m., Pacific Standard Time.
Phone:
Fax:
E-mail:
(800) 424-6723, option 2, option 3
(510) 741-6576
(510) 741-5802
[email protected] (U.S.)
[email protected] (International)
Notice:
No part of this publication may be reproduced or transmitted in any form or by any means, electronic
or mechanical, including photocopy, recording, or any information storage or retrieval system,
without permission in writing from Bio-Rad.
Ultramark is a trademark of Bio-Rad Laboratories. The Bio-Rad logo is a registered trademark of
Bio-Rad Laboratories. All other trademarks and registered trademarks are of their respective
companies.
Warranty and Regulatory Notices
Warranty Statement
This warranty may vary outside of the continental United States. Contact your local Bio-Rad office for
the exact terms of your warranty.
Bio-Rad Laboratories warrants that the Ultramark system will be free from defeats in material and
workmanship, and will meet all performance specifications for the period of 1 year from the date of
shipment. This warranty covers all parts and labor.
In the event that the instrument must be returned to the factory for repair under warranty, the
instrument must be packed for return in the original packaging.
Bio-Rad shall not be liable for any incidental, special, or consequential loss, damage, or expense
directly or indirectly arising from the use of the Ultramark system. Bio-Rad makes no warranty
whatsoever in regards to products or parts furnished by third parties, such being subject to the
warranty of their respective manufacturers. Service under this warranty shall be requested by the
contacting your nearest Bio-Rad office.
This warranty does not extend to any instruments or parts thereof that have been subject to misuse,
neglect, or accident, or that have been modified by anyone other than Bio-Rad or that have been used
in violation of Bio-Rad instruction.
The foregoing obligations are in lieu of all other obligation and liabilities including negligence and all
warranties, of merchantability, fitness for a particular purpose or otherwise, expressed or implied in
fact or by law, and state Bio-Rad’s entire and exclusive remedy for any claims or damages in
connection with the furnishing of goods or parts, their design, suitability for use, installation, or
operation. Bio-Rad will in no event be liable for any special, incidental, or consequential damages
whatsoever, and Bio-Rad’s liability under no circumstances will exceed the contract price for the
goods for which liability is claimed.
Regulatory Notices
Important: This Bio-Rad instrument is designed and certified to meet EN55011, EN50082-1, and IEC
1010-1 requirements, which are internationally accepted electrical safety standards. Certified
products are safe to use when operated in accordance with the instruction manual. This instrument
should not be modified or altered in any way. Alteration will:
•
•
•
Void the manufacture’s warranty.
Void the regulatory certification.
Create a potential safety hazard.
Note: This equipment has been tested and found to comply with the limits for a Class A digital
device, pursuant to Part 15 of the FCC rules. These limits are designed to provide reasonable
protection against harmful interference when the equipment is operated in a commercial
environment. This equipment generates, uses, and can radiate radio frequency energy and, if not
installed and used in accordance with the instruction manual, may cause harmful interference to
radio communications. Operation of this equipment in a residential area is likely to cause harmful
interference in which case the user will be required to correct the interference at his/her own
expense.
iii
Table of Contents
1. General Information..................................................................................................1
1.1
1.2
Introduction........................................................................................................................ 1
Ultramark Specifications.................................................................................................... 1
2. Equipment Set-up and Installation..........................................................................3
2.1
2.2
2.3
2.4
Unpacking the Ultramark Microplate Reader .................................................................... 3
SCSI II Cable Connection ................................................................................................. 3
Power Connection ............................................................................................................. 3
Location of the Instrument................................................................................................. 4
3. Using the Ultramark..................................................................................................5
3.1
3.2
3.3
Loading a Plate.................................................................................................................. 5
Reading a Plate ................................................................................................................. 5
Incubator Controls ............................................................................................................. 5
4. Changing Filters in the Ultramark ...........................................................................7
5. Recovering from a Filter Error.................................................................................9
6. Recovering a Dropped Filter..................................................................................11
7. Disinfection Procedure ..........................................................................................13
8. Error Codes .............................................................................................................15
9. Product Information ...............................................................................................19
Order Form—Emission Filter .......................................................................................21
Disinfection Certificate .................................................................................................23
v
1. General Information
1.1
Introduction
The Ultramark microplate reader provides all the flexibility you need for virtually any absorbance
assay. You can use it to perform standard colormetric ELISA and kinetic readings for general cell
screening with 6, 12, 24, 96, 384, and 1536-well microplate formats. The Ultramark has a 10-magazine
filter holder with a working wavelength range of 260–750 nm and an incubation temperature range
up to 42 degrees Celsius. The optical design provides verifiable results up to 4.5 O.D. with an optical
resolution 500 microns.
1.2
Ultramark Specifications
Light Source
Xenon Flash Lamp
Spectral Range
250–750 nm
Filter Capacity
10-position magazine
Shaking
Yes
Incubation
Up to 42°C , programmable in 0.2° C increments
Power
100–240 V, 60/50 Hz, 22 Amps
Dimensions
20 cm (H) x 43 cm (W) x 51 cm (D)
Compatible Plates
Any microplate or suitable medium with dimensions 138 mm
(length) x 98 mm (width). Plate height cannot exceed 15 mm.
Resolution
500 microns
Linearity
Less than 0.5% CV from 0–4.0 O.D. at 405 nm
Precision
Less than 0.5% CV from 0–4.0 O.D. at 405 nm
Software Compatibility
A System 486 or higher, 32 Mb RAM, Windows 95 OS or higher
Read Times
96-well plate:
6 seconds single wavelength
24 seconds dual wavelength
384-well plate:
12 seconds single wavelength
32 seconds dual wavelength
1536-well plate: 34 seconds single wavelength
78 seconds dual wavelength
Compatible Plate types
Any format from 1 well to 1536 wells, up to a plate height of 15
mm.
Environmental Operating
Range
5–40 degrees C; max. relative humidity 80% non-condensing
1
2. Equipment Set-up and Installation
2.1
Unpacking the Ultramark Microplate Reader
Before opening the box, check for any outer damage. Document any damages, if present.
Place the box upright with the TOP label facing up and open the box. Remove the instrument from
the box in this position only.
Warning! Grasp the instrument firmly under the right and left sides before attempting to lift or carry
it.
Check the instrument for damaged or broken parts. Document any damages in detail.
Each Ultramark instrument includes the following accessories. Verify that they are present:
•
•
•
1 power cord.
1 plastic container with filter holder and 10 filters: 260 nm, 280 nm, 340 nm, 405 nm, 415 nm,
490 nm, 550 nm, 630 nm, 655 nm, and 750 nm.
1 user manual.
Verify that the serial number on the back of the instrument is the same as that on the outside of the
box.
Remove the side cover on the right side of the unit. Inside there are two docking brackets that need to
be removed by unscrewing 3 screws as shown on the unpacking sheet attached to the unit. After
removing the two docking brackets, install the Filter Magazine as described in the unpacking
instructions.
2.2
SCSI II Cable Connection
The SCSI II port is located on the back of the instrument. There are two connectors, which allows the
user to connect more than one SCSI instrument in a chain. If the Ultramark is the last instrument in
the chain, make sure that the termination switch (next to the SCSI connectors) is in the “ON” position.
If the Ultramark is an intermediate unit in the chain, make sure that the termination switch is in the
“OFF” position. If the Ultramark is the only unit connected to the SCSI cable, make sure that the
switch is in the “ON” position.
There is a small dial next to the SCSI connectors on the back of the unit. This dial selects the SCSI ID
number for the unit at boot-up. Be sure to select an ID number that is not being used by any other
SCSI device in the chain.
2.3
Power Connection
Before switching the power on for the first time, allow the Ultramark to warm to room temperature
for 6 hours after unpacking to prevent any condensation problems.
Plug the included power cord into the main power connector port. Make sure that the instrument is
connected to a grounded conductor of the main power outlet.
3
2.4
Location of the Instrument
The Ultramark microplate reader is a precise optical measuring instrument. The following conditions
must be met to ensure maximum sensitivity:
•
•
•
Place the instrument on a flat surface that is free of vibration.
Do not place the instrument in direct sunlight.
Make sure that the instrument is being operated in a dust-free environment.
Warning! Do not operate the instrument with the filter cover off. Always have the filter cover
attached to ensure proper data sampling and protect users from moving parts.
4
3. Using the Ultramark
The Ultramark is operated through the Protocol dialog boxes in Microplate Manager. See the
Microplate Manager User Guide for instructions on specifying the filter wavelengths (section 2.7)
and operating the Ultramark through the Protocol dialogs (Chapter 5).
3.1
Loading a Plate
To load a plate into the Ultramark, press the Open/Close button on the front of the instrument or
click on the Reader Door: Open button in the Protocol dialog box in Microplate Manager. The front
door of the reader will open and the plate loader will extend.
Place your microplate in the plate loader, pressing lightly to snap the plate into place. Press the
Open/Close button again to close the reader door, or click on the Reader Door: Close button in the
Protocol dialog in Microplate Manager.
The Ultramark will accept any plate with the dimensions 138 mm (length) x 98 mm (width).
Plate height cannot exceed 15 mm.
3.2
Reading a Plate
Plate readings are controlled entirely by Microplate Manager. See Chapter 5 of the Microplate
Manager User Guide for instructions.
To stop a plate reading that is in progress, press the Stop button on the front panel of the Ultramark
or click on the Stop button in the Microplate Manager Protocol dialog box.
3.3
Incubator Controls
The incubator in the Ultramark is controlled from within Microplate Manager. You can also start the
incubator by pressing the Incubator button on the front panel of the Ultramark.
Pressing the Incubator button once will begin warming up the incubator (message: “Ready. Temp =
__”). Pressing it again will begin cooling the incubator down to ambient room temperature (message:
“Cooling”). Pressing it again will turn the incubator off (message: “Ready. Incu. Off”).
Incubator Set Point
The incubator set point is set from within Microplate Manager. The last set point selected in
Microplate Manager is stored in memory inside the Ultramark, so if you start the Ultramark and start
the incubator without opening Microplate Manager, the incubator will begin warming up to the last
specified set point.
5
4. Changing Filters in the Ultramark
This section describes how to change a filter or filters in the Ultramark.
To enter filter removing mode, hold down the Open/Close button on the front panel while you turn
on the Ultramark. The message window will read “Filter Removing”? Press the Incubator button to
continue (the Stop button will exit filter removing mode). The message will read “Remove
Magazine.”
Remove the two thumbscrews on the right side of the Ultramark and remove the side cover.
Inside the side panel, remove the large thumbscrew (Screw 2) at the bottom of the Filter Magazine.
Screw 2
Pull the Filter Magazine forward off the pins and lift it out of the Filter Base.
Press any button on the front panel, and the filter arm will extend. Remove the filter from the arm,
and press any button on the front panel. The filter arm will retract. Now turn off the Ultramark.
When installing new filters in the Magazine, make sure that each filter is oriented in the Magazine
with the numbered side facing the rear of the Ultramark and the shiny side facing the front of the
Ultramark.
When installing filters, carefully note the wavelength of each filter you are inserting and the
number of the clip you are inserting it into. You will have to enter this information into
7
Microplate Manager (see the Microplate Manager User Guide, section 2.7). Incorrect
wavelength and clip information could result in damage to the Ultramark!
Incorrect
Correct
Make sure that all the filters sit securely and properly in the Magazine clips before reinstalling the
Magazine.
Reinsert the Filter Magazine into the base so that the pins in the base fit in the holes in the magazine.
Insert Screw 2 into the center hole in the Filter Magazine and tighten securely with a coin or
screwdriver.
The Filter Magazine must be securely fastened to the base to avoid serious problems.
Replace the side cover and fasten it with the thumbscrews. Restart the Ultramark.
Finally, be sure to enter the new filter information into Microplate Manager (see section 2.7 of the
Microplate Manager User Guide).
8
5. Recovering from a Filter Error
There are three filter error messages that can appear in the front panel of the Ultramark:
•
•
•
Filter Memory Error
Filter Set Error
Gain Mes-2 Error
To correct these errors:
1.
Press any button on the front panel of the Ultramark to enter the Filter Set mode.
2.
Remove the side panel and the Filter Magazine from the Ultramark (see instructions in
previous section).
3.
Note the number of the filter that is in the filter arm (i.e., the Magazine clip that does not have
a filter).
4.
To enter the number of the filter in the filter arm:
5.
Press the Open/Close button on the front panel to increase the filter number.
Press the Stop button to decrease the filter number.
When you reach the correct filter number, press the Incubator button to reset the filter status.
6.
Replace the Filter Magazine and the side panel.
9
6. Recovering a Dropped Filter
To recover a filter that has dropped inside the instrument, perform the following steps:
1.
Turn power off.
2.
Loosen thumbscrews on
side panel and remove
panel.
11
12
3.
Remove thumbscrew holding
filter magazine in place.
4.
Remove filter magazine.
5.
Reach inside instrument,
locate dropped filter, and
remove.
6.
Reinsert filter into clip in
magazine, replace the
magazine and side panel, and
turn the instrument back on.
7.
Specify in Microplate
Manager that the filter is in
the magazine, not the filter
arm.
7. Disinfection Procedure
All parts of this instrument that can come in contact with patient sera or positive samples must be
handled as hazardous items. Bio-Rad Laboratories recommends using gloves when performing
maintenance or working with the instrument.
It is very important that the instrument undergo thorough disinfection before performing
maintenance or before physical removal of the instrument from the laboratory. The
instrument must be disinfected before you send it back to Bio-Rad Laboratories for service.
For safety reasons, you must fill out a Disinfection Certificate and include it with the
instrument. Without the Disinfection Certificate, Bio-Rad Laboratories will not accept any
returned instruments.
Bio-Rad Laboratories recommends using a solution of 5% sodium hypochlorite solution (in water).
Authorized persons wearing one way gloves and protective clothes must perform the disinfection
procedure. The location must possess adequate ventilation.
When disinfecting, be sure to wear disposable gloves.
To disinfect the Ultramark, use the following procedure:
7.
Remove the instrument from the packaging.
8.
Remove the SCSI II cable and any accessories that were returned.
9.
Clean all the outside surface of the instrument carefully with a wad of cotton, which has been
soaked in the 5% sodium hypochlorite solution.
10.
Repeat the procedure for the disinfection on any accessories, which were also returned with
the instrument.
13
8. Error Codes
The following error codes appear in the message window of the Ultramark.
Error Message
Probable Cause
Recommended Solution
Memory(SRAM)
An empty battery.
Contact Bio-Rad.
ROM replaced.
Not a problem.
SRAM chip trouble.
Contact Bio-Rad.
Memory(DRAM)
DRAM chip trouble.
Contact Bio-Rad.
Plate Carrier
Dirty guide shaft, or something Confirm that there is nothing blocking
blocking the guide shaft.
the guide shaft, then clean the shaft
and put some grease on it.
X Axis
Y Axis
Filter Miss
Motor drive damaged.
Contact Bio-Rad.
Photo sensor damaged.
Contact Bio-Rad.
Dirty guide rail , or something
blocking the rail.
Confirm that there is nothing blocking
the guide rail, then clean the rail and
put grease on it.
Motor drive damaged.
Contact Bio-Rad.
Photo sensor damaged.
Contact Bio-Rad.
Dirty guide rail , or something
blocking the rail.
Confirm that there is nothing blocking
the guide rail, then clean the rail and
put grease on it.
Motor drive damaged.
Contact Bio-Rad.
Photo sensor damaged.
Contact Bio-Rad.
Incomplete installation of filters Install filters correctly into the
in the magazine.
magazine.
Photo sensor damaged.
Contact Bio-Rad.
Filter ph-s
Photo sensor damaged.
Contact Bio-Rad.
Incubator
Incubator electronics
damaged.
Contact Bio-Rad.
15
Error Message
Probable Cause
Recommended Solution
Xe flash
The Xenon Lamp did not flash. If this occurs only a few times a year,
it is no problem.
Hi-Voltage power supply
damaged.
Contact Bio-Rad.
Xenon Flash Lamp damaged.
Contact Bio-Rad.
Measuring electronics
damaged.
Contact Bio-Rad.
Analog offset voltage is too
high.
Contact Bio-Rad.
Selected filter is not installed.
Install filter.
Measuring electronics
damaged.
Contact Bio-Rad.
Xenon Flash Lamp damaged.
Contact Bio-Rad.
Measuring electronics
damaged.
Contact Bio-Rad.
Optical Block is out of the
starting point.
Contact Bio-Rad.
Lenses and Mirrors may be
dirty.
Contact Bio-Rad.
Measuring electronics
damaged.
Contact Bio-Rad.
Analog offset voltage is too
high.
Contact Bio-Rad.
Gain Ref-
Measuring electronics
damaged.
Contact Bio-Rad.
Gain Ref-3
Xenon Flash Lamp damaged.
Contact Bio-Rad.
Measuring electronics
damaged.
Contact Bio-Rad.
Lenses and Mirrors may be
dirty.
Contact Bio-Rad.
A/D Mes.
Malfunction of A/D converter.
Contact Bio-Rad.
A/D Incu
Malfunction of A/D converter.
Contact Bio-Rad.
EEPROM
EEPROM chip trouble.
Contact Bio-Rad.
Gain Mes-1
Gain Mes-2
Gain Mes-3
Gain Ref-1
16
Error Message
Probable Cause
Recommended Solution
SCSI ini.
SCSI chip trouble.
Contact Bio-Rad.
WCS R/W SCSI
SCSI chip trouble.
Contact Bio-Rad.
DPR R/W SCSI
SCSI chip damaged.
Contact Bio-Rad.
SCSI bus
Data communication problem
between the Ultramark and
your computer.
The Ultramark is not the source of the
problem. Check your computer.
Bus Rst SCSI
The termination switch may be Turn the SCSI termination switch on
off.
(located next to SCSI connector).
Another connected SCSI
device is powered off.
Turn the connected machine on, or
turn the termination switch on the
Ultramark on.
17
9. Product Information
170-9500
Ultramark Microplate Imaging System, 110/230 V, Includes 10 Filters (260, 280, 340, 405,
415, 490, 570, 630, 655, and 750 nm)
170-9501
Feeder/Stacker
170-9518
1536 Well Microplate, 25
170-9519
96 Well UV Transparent Microplate, 25
170-9520
SCSI II Card and Cable for PC
170-9521
MPM 5.0 PC Software
Filter Table
170-9504
260 nm Filter
170-9505
280 nm Filter
170-9506
340 nm Filter
170-9507
405 nm Filter
170-9508
415 nm Filter
170-9509
450 nm Filter
170-9510
490 nm Filter
170-9511
540 nm Filter
170-9512
550 nm Filter
170-9513
570 nm Filter
170-9514
595 nm Filter
170-9515
630 nm Filter
170-9516
655 nm Filter
170-9517
750 nm Filter
19
Order Form—Emission Filter
Ultramark Microplate Reader
Omega series filters (see website www.omegafilters.com for more information)
Mechanical Specifications
Laminated construction edges sealed.
Enclosure:
ABS plastic ring.
Diameter:
11.9 +0/-0.25mm without ring
14.0 +0/-0.25mm with ring
Thickness:
4.9 + 0.1mm without ring
4.9 + 0.1mm with ring
Clear aperture: 7.0+0.1/-0mm
TWFD:
< Lambda / 10
Optical Specifications
Wavelength _______
(>450 nm)
Type (Check one)
BP (Bandpass)
DF (Discrminating)
50% Transmission Point:
WB (Wideband)
CF (Cut-on)
EF (Edge)
_______ + 10mm
Transmission Band: Minimum _____ to _____ nm @ > 80% Avg.
Blocking:
Minimum O.D. > 5.0 from cut-on to UV
Edge slope:
Per Omega published data for EF series.
Each filter whose construction incorporates absorbing glass shall be oriented with the absorbing glass facing the rim
of the aluminum ring. This orientation shall be clearly marked on the edge of the holder with an arrow. The head
shall point toward the absorbing glass. The filter shall be used in an orientation with light going in the direction of
the arrow. Thus, the light shall first strike the side furthest away from the absorbing (and possibly fluorescing) glass
and autofluorescing shall be minimized.
Filter marking
Reflective side
7.0 +0/-0.25mm
dia.
4.9 + 0.1mm
Absorbing side
14.0 +0/-0.25mm dia.
FAX order form to:
Omega Optical 3 Grove St. P.O. Box 573 Brattleboro, VT 05301
Phone: 802/254-2690
FAX 802/254-3937
Bio-Rad order form 410-0170 Rev. A
21
Disinfection Certificate
This instrument and its inventory have: (1) never been in contact with any dangerous biological material, or (2) been
disinfected according to the instructions contained in the operating manual for this instrument.
Name (please print):
Firm name (please print):
Signature:
Date:
23
25