1
AMIGANET USER MANUAL
REV. 1.4 JAN. ’90
HYDRA SYSTEMS UK
1
Congratulations on your purchase of AMIGANET!
We naturally feel that you have made the right choice, not least
because AMIGANET subscribes to ETHERNET, a major World Standard
maintained by the IEEE Corp. What this means is that, with AMIGANET
Hardware, you have inter—Network connectivity with the leading
products in Networking, and that you will be able to track major
developments in Networking Software.
Thank-you for flying with HYDRA SYSTEMS.
ABOUT AMIGANET
AMIGANET is an ETHERNET Network System for the Commodore AMIGA
range of microcomputers and workstations. It was designed and is
manufactured in the UK, and continues HYDRA SYSTEMS’ involvement
since 1982 in the Networking of CBM products.
There are Networks currently available for the AMIGA of varying
architectures, speeds and abilities. AMIGANET uses the fastest
affordable technology; Ethernet, running at 10MBaud, operates from
4 to 1000 times faster than the other available Network protocols.
AMIGANET
is the only Ethernet system to offer Amiga-to-Amiga
(peer to peer) communication, and Amiga File Servers.
AMIGANET is, and we intend that it will always remain, the least
expensive high-end Network System option for the AMIGA.
AMIGANET — SYSTEM OVERVIEW
AMIGANET employs the widely used, Industry-Standard Ethernet
architecture, which now occupies a substantial position in the PC
Network world. AMIGANET is compatible with Ethernet Version 2, and is
fully compliant with IEEE Standards 802.3 Types A and B, which refer to
Ethernet and ‘Cheapernet’ respectively. Cheapernet employs the same
hardware and design standards as Ethernet, but has a built-in Net
Transceiver. It therefore requires no Computer—to-Net Transceiver
cable; Cheapernet can also use a much cheaper form of co-axial cable
(hence the name), resulting in dramatically reduced installation costs.
There are no compromises involved using Cheapernet, merely a reduction
of (the upper limits of) distance and numbers of attached computers.
An illustration of the savings using AMIGANET in Cheapernet Mode;
an Ethernet Transceiver, its connecting cable, and a short Ethernet
segment will cost about the same as the AMIGANET Board.
The AMIGANET design philosophy adopted at the outset was to enable
virtually instantaneous movement of Data of varying types between any
of the Amiga products. Image movement between Amigae naturally has a
high priority, and full Network File support is provided as one of a
number of Network services. In simple terms, the purpose of the Network
is to allow inter—computer communication, and Data and Resource
sharing; subject to Access permissions, any Computer on the Net can
access any other Screen, Storage Device or Printer on the Network as if
it were physically attached locally. The cost savings resulting from
centralised printing and Hard-Disc sharing can be substantial, and the
ability to share Files is fundamental to modern Database design.
2
AMIGANET USER MANUAL
Copyright 1989 HYDRA SYSTEMS
All rights reserved. No part of this work may be reproduced in any
form or by any means, or used to make a derivative work (such as a
translation, transformation, or adaptation) without permission in
writing from HYDRA SYSTEMS, Red Lane, Kenilworth, ENGLAND, CV8 1PB.
This Manual accompanies Revs. 1.1 and 2.0 of the Amiganet Local Area
Network product for the Commodore Amiga range of Microcomputers.
Amiga and AmigaDOS are trademarks of Commodore Business Machines, Inc.
3
TABLE of CONTENTS
Typographical Conventions.
Page Four
Hardware Overview.
Page Five
Section One:
Hardware Installation.
Page Six
Section Two:
Software Installation.
Page Eight
Section Three:/A
Using AMIGANET.
Page Eleven
/B
Starting AMIGANET.
Date and Time service.
Page Twelve
/C
Sharing files/resources.
Mountfiles.
Accessing remote Discs.
Page Thirteen
Page Fourteen
/D
Sharing Remote Printers.
Page Sixteen
/E
Who’s out there.
Chatline.
The TUBE.
Page Seventeen
Section Four:
Command Definitions.
Page Nineteen
Section Five:
General Guidelines.
Page
Section Six:
Current Revision Data.
Page
Section Seven:
Appendices.
Page
Section Eight:
Index.
Page
Page Eighteen
4
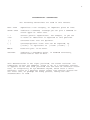
TYPOGRAPHICAL CONVENTIONS
The following conventions are used in this manuals
BOLD TYPE
emphasises a new category, or important piece of info.
UPPER CASE
indicates a command, although you can give a command in
either upper or lower case.
< >
<id>
enclose generic expectations: for example, if you see
it means an identifier is expected at this position.
[ ]
surround items that are optional.
{ }
surround optional items that can be repeated; eg.
{<item>} is equivalent to [<item> [<item>]...]
Note:
Read this part if no other.
CAUTION:
indicates a procedure which, if handled carelessly,
could lead to loss of data.
This documentation is not right-justified; the author resisted- the
temptation to have the computer ‘clean it up’ at a keystroke, because
it appears to him that such justified text can have an unnatural visual
feel, an irregularity of eye-movement-rhythm, which after a while
manifests itself as a physical effect rather like wearing glasses for
the first time, or perhaps the wrong glasses, making the text
uncomfortable to read..
5
HARDWARE OVERVIEW AND CAVEATS
AMIGANET Hardware is available in several forms, tailored mainly on
the basis of end-user cost. The fully—loaded version, preferable for
any serious work (such as File Service, or any centralised high
traffic service), has 64 Kbytes of buffer memory and a 16-bit data
path, assisted by a DMA sequencer with a 16 Mbyte address range.
The AMIGANET DMA process is able to move data directly to or from any
memory location in your AMIGA, for example directly into Video RAM.
For this version of the hardware, we have concentrated on technical
elegance and delivered horsepower, rather than build cost.
Notwithstanding, the maximum-spec. board has a sensible price; at the
same time we offer detuned versions for cost-sensitive applications.
To define the position of your AMIGANET Board in the hierarchy of
Networking hardware, for those of you who need to relate to horsepower,
Network cards usually boast 8 Kbytes of memory, an 8-bit data path, and
no onboard DMA ability. 16 Kbytes is described as an ‘Enhancement’.
The base—line AMIGANET board, a low cost Education special, has a
similar fit to Novell, Western Dig. and other mainstream LAN Cards.
A quicker version has 16 Kbytes, 16-bit paths, and DMA. All of the
variants are available enclosed, for attachment to A500 computers.
INSTALLATION CAVEAT
When installing Network Boards in A2000 computers, it is necessary to
check the Revision No. of one of the components on the Motherboard.
On a small series of A2000 boards, commonly referred to as ‘the four
layer version’, there is a DataBUS-buffer control PAL which prevents
DMA transfers between Expansion slots. This is U5, a 20L8 PAL which
can be found next to, and in-line with, the 3rd of 5 Expansion slots.
The PAL will cause problems if you have Expansion slot resident Memory
boards, not including the Co-Processor—slot-mounted 0.5 Mbyte board.
The Bad News Part No. is 380 715-1. The Good News is that the later
revision part, 380 715-2, is supplied with A2090X Hard Disc Controllers
so it is, in theory, in general circulation. The Bad News is that you
will not be able to make a copy of it. If you have the -1 part in your
A2000, proceed directly to your Amiga dealer; do not pass GO.
This is a known design oversight, and the part should be available as a
spare at around £5.00. Responsible dealers ought to be carrying a few
in stock; as a last resort contact HYDRA SYSTEMS. If you have PALASM,,
PLAN, or similar software, you can blast your own from the 380 715-2
listing in the AMIGA Tech. Ref. Manual.
IMPORTANT READ THIS IMPORTANT READ THIS IMPORTANT READ THIS IMPORTANT
**************************
BOARD POSITIONS
**************************
At the time of writing, User feedback indicates that the A2000
Expansion Bus continues to cause problems with Expansion Boards.
The bugs in Revs. 4.3, 6.0 and 6.1 motherboards have been adequately
documented elsewhere; You may qualify for CBM upgrade of these
revisions in cases of continuing difficulty. There are also specific
problems caused by Expansion products that do not adhere to the
published Expansion Bus specifications. For these reasons, it may be
necessary to ignore installation advice given later, and install ANET
Boards in any slot that will allow successful operation of the system.
6
SECTION ONE
INSTALLING THE HARDWARE
The Network hardware is available in two forms; one is a Printed
Circuit Board which fits into one of the Expansion slots of an Amiga
2000 or it’s derivatives, and the other is a moulded enclosure of the
same profile and colour as an Amiga 500 series computer.
If you are unable to identify which is which, get help now before you
break something.
There is only one Option choice to be made prior to fitting an AMIGANET
Board to your Systems: are you installing Ethernet or Cheapernet?
Find the (only) bank of Option Links on the Board, and ensure that
all six shorting links are resident on the correct bank of pins.
AMIGANET is shipped with Option links set for Cheapernet; this may save
you the Job of opening an A500 AMIGANET enclosure to inspect the Board.
If there are no Option links fitted, you don’t need them; you have been
supplied with a single-purpose rather than a dual-purpose Board (i.e.
Ethernet or Cheapernet).
AMIGANET 2000
To install the hardware in an Amiga 2000, you will need a special tool
called a screwdriver; remove the FOUR screws at the lower left and
right sides of the main enclosure, and ONE screw at the top middle of
the rear panel, taking care not to confuse this screw with adjacent,
similar, non-cover—retaining screws. Slide off the cover.
Once inside, fight the temptation to burrow around looking for the
68000. It really is there, it is big and funky looking, but you won’t
need to locate it for the purpose of this exercise.
HOW TO CHOOSE A SLOT: there is a Co-processor slot on the motherboard
right next to the disk drives which, even if unoccupied, you should
ignore. Choose a convenient empty slot from the block of FIVE identical
slots on the backplane, some of which may already be occupied by other
boards. AMIGANET can live in any one of these five slots, but it will
be happiest in the right-most slot, closest to the disk drives.
Curious owners (most Amigii) may check the last item in this section
for the Technical Explanation, and the Caveat on the preceding page.
Having chosen your slot, remove the rear blanking plate in-line with
that slot. Holding the Network Board in the mating position, incline it
down a couple of inches (50.8 mm.) at its rear, and push the Ethernet
socket(s) through the rear opening towards the outside world.
Then lower the Board into the guide rails in the 2000, levelling it as
it is lowered, until finally pressing it home with the palm of your
hand into the edge connector on the motherboard. You may require more
force than you imagined would be necessary, but it is impossible to put
the Board into the wrong type of slot. Now replace the backplate screw,
the A2000 cover, and its screws. If you lack confidence in yourself or
in our product, or if you are so enthusiastic that you can’t wait to
get wired to a Real Network, you can leave the cover till later.
Just don’t stand the Monitor on the plug-in Boards.
Now repeat the process with the other machine(s). (It is presumed that
you have other Network Sites - a Network of ONE is incredibly fast but
not very practical.)
7
SECTION ONE
AMIGANET 500
The installation procedure for an A500 Network Board is somewhat
simpler; just place the unit on the left of the A500 and wait for them
to mate. This normally takes place under conditions of darkness; if you
are in a hurry you can help the process along by pushing them gently
together, making sure that plug and edgeconn are aligned.
WIRES
When all the Network Boards are installed, either connect the computers
to each other with the supplied Cheapernet BNC cables, using the BNC
socket(s) protruding from the rear of each machine, or attach an
Ethernet Transceiver Drop Cable between each Board’s 15-pin D-type
connector and its respective MAU (Media Access Unit).
IF YOU USE CHEAPERNET YOU MUST PLUG IN A 50 OHM TERMINATOR AT EACH END
OF THE CABLE SYSTEM, TOTAL TWO PER SYSTEM. THIS IS NOT DISCRETIONARY.
(These terminators are supplied with your AMIGANET Boards.)
If the Network Board has two BNC sockets fitted; they are connected in
parallel and you may ‘daisy-chain’ the Sites by connecting one cable
’in’ and one cable ‘out’. If there is only one socket fitted, you must
use a BNC ‘T’ connector, which plugs onto the Network Board and which
provides two sockets for cable connection.
Even if there are two sockets on the Board, some discretion must
be used concerning the method of attachment; using ‘daisy chaining’,
there might be some disruption to Network activity if it is necessary
to remove or replace a Site on the Net, during the time that the two
cables are removed and re-joined. AMIGANET is tolerant of this kind of
interruption, but Application program timeouts could be triggered,
giving rise to possible program failure or breakout, or at the least
some form of halt to proceedings, with appropriate Screen warnings via
Requesters. If this is likely to be a regular event, or if the Network
Manager or responsible person cannot control the conditions and timing
of the operation, then it is essential to use ‘T’ connectors, which
allow the machine to be disconnected from the Network without breaking
the cable route even momentarily.
Why the right-most slot for my latest acquisition ?
This slot has the highest DMA Request priority, as defined by the DMA
arbitration circuitry within the AMIGA; this DMA Request, however, can
only be arbitrated while no DMA is active. AMIGANET’s DMA process
behaves responsibly towards other DMA devices (such as the Hard Disc
Controller) and will not hog the Bus to the exclusion of other
processes, but this might not be the case for other boards.
Ethernet runs at an instantaneous rate of around 1MByte/sec, and its
communications arrive unpredictably, so AMIGANET can reasonably expect
to be given the highest DMA priority. The HD Controller, for example,
can wait around for a few milliseconds with no difficulty.
In practice, within the AFS protocols there is a flow-control
mechanism which makes it impossible to overload an AMIGANET Site that
is denied convenient DMA access; however, this will lower throughput
capacity, and therefore operating speed. For other implementations of
Operating Systems using AMIGANET Boards, such as TCP/IP, flow control
may not be used, which makes the slot issue more sensitive.
An easy way to summarise these factors is this:
Put the AMIGANET Board in the slot nearest to the disk drives.
8
SECTION TWO
INSTALLING THE SOFTWARE
In order to use AMIGANET, you must first install the Network Driver and
Fileserver Software: the first step is to install the Driver programs
and their associated Data Files at every machine on your Network; the
second is to install the date and time services on some machines, and
File or other servers where appropriate.
The AMIGANET Software includes a number of Data and Code Files, which
must be installed in standard directories on your System disc.
The AMIGANET Installation disc contains a program that will copy the
relevant Files into these directories automatically.
The Installation process will create a new directory called SYS:ANET on
your System disc. If you need to have a different name for this
directory, install the System by hand and add an ASSIGN command to your
S:startup-sequence File, such as ASSIGN ANET: different-directory.
Most users will not need to do this.
CAUTION: If you are installing AMIGANET onto a floppy disc machine,
make sure that you have a backup of the original Workbench disc that
came with your Amiga, and of the environment that you normally use.
The actual INSTALL program you should use for a particular computer
depends on the number and type of disc drives attached to that machine.
To install the AMIGANET software, perform the following steps:
1.
Boot, the Amiga System using a COPY of Workbench, or a COPY
of your favourite Amiga working environment.
2.
Make sure that you have enough room on your System disc for the
AMIGANET Files to be installed. You will require at least. 320 disc
blocks (160 kilobytes) of space for the Rev. 1.4 Software as shipped.
The installation can be be tailored subsequently, by deletion of any
unnecessary services, and this will reduce the space requirement.
To check whether you have enough space on the disc, select the System
Boot-Disc Icon with a single—click of the mouse, and then choose the
’info’ option from the ‘Workbench’ menu. The box labeled ‘Number free’
details the number of free disc blocks. If this is less than 320, you
must delete some Files from your System disc. For instance, if you have
any drawers containing PC emulation related Files, and you don’t have a
PC card in your Amiga, then these items will be suitable for deletion.
3.
For Hard Disc Systems, insert the Installation disc in any floppy
drive, say DF1:. Dual-drive Systems should have the Installation
disc inserted in drive DF1:, leaving the System disc in drive DF0:.
Systems that only have one drive should have the Installation disc
inserted into that drive, but the user should be prepared to swap the
System and Installation discs around during the Installation process.
This is a particularly tedious process, and you might prefer to use the
RAM Disk to copy all the AMIGANET System Files to your SYS disc.
4.
Double click on the AMIGANET disc Icon. A Workbench window will
appear on the screen.
5.
For Hard and dual-drive Systems, locate the ‘Install’ Icon in the
new Workbench window and double-click on it. For single-drive
Systems, double-click on the ‘Install-Single’ Icon instead.
9
SECTION TWO
6.
The installation process will now start copying Files from the
AMIGANET disc to your System disc. You should expect the following
Files (plus other Files, depending on Rev. level) to be copied
from your Installation disc to directories on the System discs
DIRECTORY
FILE
DESCRIPTION
--------------------------------------------------------------------C:
STARTNET
Activates your computer on the Net.
REMOTEMOUNT
Used to access other computers’ disc
drives or other facilities.
TIME
Sets current date and time from the
Network.
CHAT
Allows you to ‘chat’ to other users.
WHO
Lists the Site addresses and names
of all. the users who are currently
active on the Network, and where you
can access services that you need.
DEVS:
amiganet.device
AMIGANET System File used to access
the Network hardware.
L:
AFS-server
AMIGANET System Files here:
AFS-handler
anet-dateserver
anet-services
anscreen-server
ANET:services
anscreen
AMIGANET Network service File
used by CHAT.
ANET:mountfiles
SPL
TUBE
Mountfile used to access remote
printers.
Example mountfile for accessing a
remote disc.
Mountfile for high-speed data tube.
LexLib
CommonLib
AnotherLib
AMIGANET library File.
AMIGANET library File.
AMIGANET library File.
RH0
ANET:blibs
When the process is complete, find the ANET Drawer in the Workbench
screen; you may need to clear and reload the window from the SYS disc
Icon. Position the ANET drawer to suit your taste. Now Snapshot.
You are now ready to test the System. Turn the pages to USING AMIGANET.
If you prefer the simple life, click 2 on ANET and STARTNET Icons.
If the installation has been performed correctly, the AMIGANET Logo and
Copyright message will appear for a moment. You are now on-line.
10
SECTION TWO
INSTALLING AND DISABLING SERVICES
Having completed the initial Software Installation, which installs all
of the available services by default, you should go on to verify the
installation of the date and time server. The purpose of this server is
to provide machines without battery backed up clocks with an automatic
date and time setting service. It also serves to synchronise all the
computers on the Network. This can be extremely important for certain
types of Database operation.
The date and time service should be left installed only on computers
with battery backed up clocks, such as an Amiga 2000, or A500 with
added RT Clock option. You should select a number of these machines to
provide the service, two to three should be sufficient. This means that
you should disable most of the ‘andate’ services on the Network.
Note that it must be guaranteed that at least one of these servers is
on-line first (for daily start-up), or permanently, if other machines
are to reliably access the date and time service.
Disabling Existing Services:
There is a task (program) that is responsible for handling requests
from the Network for the services provided by your machine.
To determine which services it can provide to other Network users,
this task checks the ANET/services directory for the list of services.
Disabling a service, therefore, is just a matter of deleting its
service File from the ANET/services directory. This can be done from
the CLI, or from the workbench by discarding the services’ Icon or by
moving the Icon into a spare drawer, i.e. out of the Services drawer.
To subsequently re-enable this service, you should copy its service
File back from the Installation disc’s ANET/services directory, or drag
the relevant Icon back out of the Trashcan into the Services window.
For instance, to prevent Network users from accessing a particular
Site’s discs and peripheral devices, you need to disable the machine’s
Fileservice. You do this by deleting the File ‘AFS’ from the Site’s
services directory. This also releases about 25k of memory.
To prevent users talking to you via the CHAT facility at your computer,
you should disable the screen service. The service File for CHAT is
called ‘anscreen’.
If a Site providing the date and time service has a problem with
its clock (for example, when its batteries are discharged), you
can disable the service by deleting the File ‘andate’.
NOTE:
if the Network is already active (STARTed) at the
Site in question, the service(s) disablement will
not be effective until the computer is re-booted.
11
SECTION THREE /A
USING AMIGANET
This chapter details the Operating Modes of the AMIGANET System.
In particular, it covers the following topics:
Starting up and running the Network.
Using the Network services.
Sharing Files via the Network.
Printing on the Network printers.
Talking to other users on the Network.
Listing current users of the Network.
INTRODUCTION TO AMIGANET O/S
The AMIGANET Operating System software provides a sophisticated
interface between the Network hardware and the AmigaOOS Operating
System. There are various elements of this interface, and it is
worth understanding some of the functions.
At the lowest level, the ‘amiganet.device’ provides a normal Amiga
device interface to the Network Board. This is a very low level
interface providing primary physical movement of Data in blocks.
The Data arriving via the Network at a particular computer consists
mainly of messages for different processes within the machine. These
must be carefully routed for use within the File System, and passed
onto the correct process. For this reason, user programs should never
read or write to the ‘amiganet.device’, but instead communicate with
the Network via the AMIGANET System libraries.
Any computer which is capable of providing a service to other computers
on the Network will be running a copy of the Network Services task.
This task is responsible for accepting service requests from Network
users. When a request appears that matches a service name given in the
ANET/services directory, the Net Services task starts up a new task
which will handle the service requested. Commonly used services remain
resident in memory (as long as the Amiga is powered) once they are
started for the first time, and the Net services task keeps track of
where these tasks are.
There are a number of services supplied as standard with AMIGANET.
Among these are the date and time service, the screen communications
service and the AMIGANET File System (AFS). These services, and the way
in which they are used, are described in later sections of this manual.
You may have other services installed on your Network such as a Print
Spooler, or TCP/IP support, which will have their own documentation.
AMIGANET has been designed to cope with problems such as disconnection
of the Network cabling. If this situation occurs, a window will pop-up
on your screen to announce this condition. You should examine the cable
and connectors (and possibly the users) to make sure that the Network
connections are all in order, and that there has been no break in, or
damage done, to the cable. When the problem has been resolved, Network
operations should continue from where they were interrupted.
12
SECTION THREE /B
STARTING AMIGANET
AMIGANET can be started in three different ways: from the Workbench,
from the CLI, or automatically, following a power—on or re-boot.
Starting the Network from the Workbench:
It is assumed that the Software is installed; to start using the
Network, double-click on the ANET Icon in the Workbench window, and
then on the STARTNET Icon when it appears. The AMIGANET Logo, Ethernet
address, and Copyright message will appear for a moment to confirm
and your Amiga will become active on the Network.
successful Ignition,
STARTNET mounts and initialises all the necessary devices, checks the
table of Users and their aliases, and activates the Network Board.
Starting the Network from the CLI:
You can start the Network from the CLI by using the command ‘startnet’.
Startnet will be confirmed by the previously described message, which
will remain on the screen until overwritten by CLI activity. This is
useful for those who miss the twelve digits of the Ethernet address at
Logo time, as you might need to use the address for mountlistings.
When using an address,, you may ignore leading zeros.
Starting the Network Automatically:
The Network can be activated automatically at your Site whenever
you turn the computer on, or re-boot it, if you include the command
’startnet’ in your S:startup-sequence File.
When you have started the Network using one of these three methods, and
have received the AMIGANET startup confirmation message, you may begin
to use the Network services described here:
Using the Date and Time Server:
AMIGANET operates a Network-wide Date and Time service which can be
accessed by any Amiga on the Network. Its main function is to set
automatically the time and date on machines that do not have Real-Time
clocks. It also ensures that your Site operations will be synchronised
with the other computers on the Network. To execute this function, you
issue a special CLI command, TIME, which is provided by the AMIGANET
software. This command will take additional arguments; see the Command
Definitions for a description of your options. Apart from resetting
your local clock, TIME will display the current Network Date and Time
on your screen. The format used for the display is the same as that
used by AmigaDOS: <weekday> DD-MMM-YY HH:MM:SS, so that half-past eight
in the evening on Saturday, September 10th looks like:
Saturday 10-Sep-88 20:30:00
This command can also be added to your S:startup-sequence File, so that
you do not need to type it each time you re—boot your computer.
NOTE that you must add this command after the STARTNET command.
Users should also note that computers with synchronised clocks will
complete Workbench activity with Remote Files more quickly.
(This effect is less significant when the Fast Filing System is used.)
13
SECTION THREE /C
Sharing Files and resources Via The Network:
Users on the Network can be allowed access to the disc drives of other
computers, as if the discs were connected to their own computer.
To access another Site’s disc drive, you must first ‘mount’ it on your
Amiga. This can be done from the Workbench or from the CLI; to mount a
disc, you must first modify a File in the ANET/mountfiles directory.
This File will define the Networked disc that you wish to access.
Mountfile Contents:
An example mountfile is provided, called ‘RH0’ (Remote Hard disc 0),
This was placed in the ANET/mountfiles directory during the Software
Installation process, and you should duplicate and modify this File to
create your own specific mountfile. The format of the File is similar
to an entry in the standard AmigaDOS mountlist, and is as follows:
Handler
Resident
StackSize
GlobVec
Priority
Startup
Startup
=
L:afs-handler
=
=
=
=
=
1000
0
5
serialnumber/AFS
SYS:
When you edit this example File to suit your own requirements for disc
access, you need only alter the last two ‘Startup’ lines.
DO NOT alter the lines above these two.
The first ‘Startup’ line refers to the Site at which you wish to make
disc accesses. For instance, if you wished to access an Amiga with an
ETHERNET address of ‘AE4742004C27’, the line would simply read:
Startup = “AE4742004C27/AFS”
NOTE the quotes.
The second part of the line, separated from the first by the slash,
refers to the service at that machine. Whenever you access another
Amiga, it will be cal led ‘ AFS’ , for AMIGANET File Service.
The second ‘Startup’ line refers to the device that you wish to access
at the Remote Site;
For instance,
to access the first hard disc, you would use
to access the System disc, you would use
to access the first floppy drive you would enter
‘DH0:’
‘SYS:’
‘DF0:’
and so on. To access the entire System disc of the Remote
machine AE4742004C27, you would use the following lines:
Startup = “AE4742004C27/AFS”
Startup = SYS:
Quotation marks are needed for
syntax when ser/no.s are used.
As the second ‘Startup’ line refers to AmigaDOS devices in general, you
may access a Remote machine’s parallel port via ‘PAR:’, or its serial
port via ‘SER:’. For example, the following lines would access the
serial port of Amiga AE47420004B8:
Startup = “AE47420004B8/AFS”
Startup = SER:
14
SECTION THREE /C
Accessing Remote Discs via the CLI:
You can create mountfiles via the CLI; however, if you don’t copy the
mountfile’s associated ‘.info’ File, you will not be able to access the
Remote File System from the Workbench. If you do copy the ‘.info’ File,
remember to set its default tool to ‘C:REMOTEMOUNT’, via the Workbench
’info’ command. You can alter the mountfile with any standard ASCII
editor that you may be familiar with, such as ED. Once you have edited
the File to your satisfaction, you can then use the CLI command
REMOTEMOUNT to mount the Remote disc on your System.
For instance, if the mountfile is called ‘sales’, you would issue the
command:
REMOTEMOUNT SALES:
It is not absolutely necessary to add a colon at the end of the name.
When the Remote disc has been mounted, you can access it in the same
fashion as a disc drive directly connected to your System. That is to
say, all the standard CLI commands, LIST, COPY, RENAME, CD, ASSIGN, and
so on, will operate correctly on it.
For instance, after using the command ‘REMOTEMOUNT JAY:’ where ‘JAY’ is
a mountfile in ANET/mountfiles, you can copy the File ‘MYFILE’ from
your current directory to ‘JAY:’ by typing ‘COPY MYFILE TO JAY:MYFILE’.
You may use a Remote directory as the default path to run programs from
by typing, for example, ASSIGN C: JAY:C. The CLI then looks in the
’C’ directory of ‘JAY:’ whenever you type a command; if it finds the
command there, it executes it.
Accessing Remote Discs via the Workbench:
If you intend to access Remote File Systems via the Workbench, the
following approach to creating new mountfiles can be used:
1.
Enter the ANET/mountfiles directory via the Workbench.
2.
Duplicate the File ‘RH0’ (or any other previously altered
mountfile). This is done via the standard Workbench mechanism
of selecting the File with a single-click of the mouse, and
choosing the ‘Duplicate’ option from the ‘Workbench’ menu.
3.
Rename this new duplicate File with the name that you wish
the Remote disc to be called. This can also be done by first
selecting the File, and then choosing the ‘Rename’ option
from the ‘Workbench’ menu. You should choose a name that is
fairly short (three to_ fifteen characters), as it will be
displayed as the label for a disc Icon on the Workbench
background. If you enter any spaces in the name, you will
need to place quotation marks around all references to this
Remote disc when using it from the CLI. Life will be made
easier if you use dashes ‘-’ for any required spacing effect.
Good examples might be:
RH1
JANET
RT-LIBRARY
ACCOUNTS
15
SECTION THREE /C
4.
Double-click on a CLI Icon. Run ED ANET:/MOUNTFILES/NEWNAME.
(Use CD to get to the ANET/MOUNTFILES directory if you don’t like
using the CLI. Check that you get there and can see your new File
with DIR. Load ED using the command ED YOUR-NEW-NAME. The case of
the text is not important.) See Introduction to the Amiga manual
Appendix B for ED commands
5.
Edit the last two ‘Startup’ lines in accordance with the
previous mountfiles description. When you have finished,
save the File and exit from ED with ESC SA, ESC Q.
7.
You should now check the new mountfile’s ‘default tool’.
To do this, select the mountfile Icon with a single-click,
then choose the ‘Info’ option on the ‘Workbench’ menu.
A (full screen) requester will then be displayed.
Locate the ‘Default Tool’ box, and verify that it contains
C:REMOTEMOUNT. If not, select the box with the mouse, delete its
existing contents, enter the legend ‘C:REMOTEMOUNT’, and press
the RETURN key. Finally, select the ‘Save’ box at the bottom left
of the requester; the new version will now be stored.
8.
If you have already started the Network, double-click on the
new mountfile Icon to mount the Remote disc. A new disc Icon
should now appear on the screen, with the same name as the
Filename that you gave the mountfile. If the operation fails,
a message will be displayed in the Workbench Title bar. This
can happen if the File ‘default tool’ was not set correctly.
9.
When the above process has been correctly executed, you will
be able to access the Remote disc as if it were physically
connected to your Amiga; that is, double-clicking on its Icon
on your screen will open a window onto its contents, and
double-clicking on its program Files will run those programs
in your Amiga. All the standard Workbench functions, such as
RENAME, DUPLICATE, and DELETE, are executable.
Accessing Remote Discs Automatically:
You may mount Remote discs automatically, rather than double-clicking
on the mountfile Icons, or using the REMOTEMOUNT command within the
CLI, by including the REMOTEMOUNT command in your S:startup-sequence.
For instance, if you always need to access the Remote disc referred to
by the mountfile PARTS-LIBRARY, you would add the following line to the
S:startup-sequence File:
REMOTEMOUNT PARTS-LIBRARY:
This line should be added after the STARTNET command in the File.
If the Remote File System cannot be located (the relevant Site may not
be currently active), the startup-sequence will abort. If you don’t
want this to happen every time the Remote File System is not available,
include the line ‘FAILAT 30’ in the S:startup-sequence File, just
before the line containing the REMOTEMOUNT command.
16
SECTION THREE /D
Printing Files on Remote Printers:
You can print Files from your Amiga on any Remote Amiga’s printer.
This is achieved by the standard method of sending the Files to the
Amiga printer device PRT: (either directly, or from word-processing
packages or other applications). Use the CMD command available with 1.3
Workbench to redirect the output from the PRTs AmigaDOS device to the
AMIGANET SPL: AmigaDOS device. This differs from the standard printer
device, which will send its output to either of the Serial and Parallel
AmigaDOS devices on the Amiga.
To specify which printer on the Network you wish to use, you must edit
the File ‘SPL’ (which will create the device SPLs when mounted).
This File is found in the ANET/mountfiles directory. To edit the File,
follow the instructions in previous sections on using the Remote File
System (you don’t need to copy RH0, just edit the File SPL).
In the same way that you might specify a Remote Disc, you must specify
the location of the printer on the first ‘Startup =’ line, and the
logical device that the printer is attached to on the second line.
For instance, if you wished to use the printer attached to the parallel
port of the machine known as AE4742005678, the two startup lines would
read:
startup = “AE4742005678/AFS”
startup = PAR:
Or, if the printer is attached to the serial port of Amiga
AE4742004D24, you would alter the two startup lines to:
startup = “AE4742004D24/AFS”
startup = SER:
NOTE that you should not use the PRT:
device for the 2nd startup line.
When you have altered this File, change its ‘default tool’ to
C:REMOTEMOUNT in the same way as described for the Remote File System.
Whenever you wish to start using the Remote printer, you now simply
double-click on the SPL File in ANET/mountfiles, and the Remote printer
will be available for use.
You may start a Print service with the CLI command ‘REMOTEMOUNT SPL:’
Rather than double-clicking on SPL, or typing ‘REMOTEMOUNT SPL:’ each
time you wish to use the Network printer, you could add the entry:
REMOTEMOUNT SPL:
to your S:startup-sequence File.
Again, you must place this entry after the line containing the STARTNET
command. Once you have added this line, your Amiga will automatically
send all printer output over the Network to the Remote printer.
Once SPL: has been mounted, all output to PRT: will print on the Remote
printer that you have specified in the mountfile. For instance, the
commands ‘TYPE report TO PRT:’ prints the contents of the File ‘report’
on the Remote printer. Alternatively, you can specify the SPL: device
directly, as in ‘TYPE report TO SPL:’ to achieve the same effect.
If you subsequently wish to add and use a local printer at your Amiga,
you should use CMD to un-direct PRT: output.
17
SECTION THREE /D, SECTION THREE /E
A simpler way of adding a local printer, but a less efficient one,
would be to alter the first startup line to include your own Site’s
Network serial number. The inefficiency here results from sending your
printer output around the AMIGANET Operating System and back to
yourself, rather than sending it directly to your local printer.
For instance, if your Network serial number is AE4742002C41, and the
printer is connected to the serial port on your Amiga, the startup
lines should read as follows:
startup = “AE4742002C41/AFS”
startup = SER:
SECTION THREE /E
Listing Other Users on the Network:
To obtain a list of other users currently using the Network, use the
CLI command WHO. This will provide information on the Ethernet Site
address and alias of each user currently active on the Network, and on
which services are being provided at each Site.
WHO allows you to examine a particular computer on the Network; you may
define the Site you wish to interrogate either by its Ethernet Address,
or by its operator’s alias. Refer to the Command Definitions for the
options and Syntax of WHO, and the following CHAT and TUBE.
Talking to Other Users on the Network:
AMIGANET provides a simple CLI command, CHAT, that allows you to send
messages from one Network Site to another. This command uses the screen
communications service of the target computer to display your messages.
CHAT will accept anything that you type and pass it directly to a
screen window at the defined Remote Site, until you enter a full-stop
(period) on a line by itself. Messages can be as long as you like.
To prevent possible abuse of the facility, the originating Ethernet
address appears in the window title bar.
For example: you wish to send a message to a user known as ‘alan’;
CHAT @alan
Please turn the printer on and enable spooler service.
About the TUBE:
This is a high-speed unidirectional interactive ‘pipe’ mechanism,
designed for the purpose of passing real-time data at a high rate
between AMIGANET sites. A site can open a TUBE to another site, which
will then start a task to handle TUBE input. A dialogue will need two
TUBEs, one originating at each site. Some degree of co-operation is
necessary between sites; it is necessary to ensure that the target
computer is on-line (verify with WHO) and that the TUBE is mounted at
that site. It could be mounted automatically from a requesting site
using the AMIGANET command REMOTERUN, but it is more likely that
computers using the TUBE will be operating in a controlled environment
as part of a co-operating process, and will be configured by the
application Software appropriately.
18
SECTION THREE /E
OPERATION of the TUBE:
The AmigaDOS device TUBE is a device that allows one program to send
information to another co-operating program. For a very simple example,
perform the following steps:
Start two CLI screens.
In one CLI, mount the handler by typing ‘remotemount tube’.
Enter ‘type <anyfile> tube:anyname’.
In the other CLI enter ‘type tube:anyname’.
This will have the same result as entering ‘type <anyfile>’ directly in
a CLI. In this example you will have passed information via the TUBE
between two processes within the same computer.
The next step is to create a mountfile entry, say, SAMPLE, in
anet:mountfiles, either directly or by modifying an existing mountfile.
The entry will be anet:mountfiles/sample, and will look like this:
handler =
resident
globvec =
stacksize
startup =
startup =
I:afs-handler
0
1000
=
“AE4742001008/afs”
tube:
(your Ethernet target address here.)
Ensure that the defined target site is on-line, that you have used the
correct address, and that TUBE has been ‘remotemounted” at that site.
At the Local site enter: ‘remotemount sample’.
Then enter
‘type <filename> sample:99’.
At the target site enter ‘type tube:99’.
You will see the content of ‘filename’ appear in the CLI of the target
computer, the data having been transferred via AMIGANET.
The TUBE is uni-directional, and you must not read and write to an
individual example. Open another TUBE in the other direction if you
wish to exchange data both ways, such as for handshaking or program
dialogue. Having remotemounted a TUBE referencing a particular site, it
will then be possible to pass multiple streams of data, each defined by
the suffix after the colon e.g. 99 or fred or potrzebie.
To achieve the same result with a C program we can use the following
code, assuming that TUBE and SAMPLE have been remotemounted:
At the local site:
FileHandle fh = Open(“SAMPLE:yourname”,mode_newfile);
Write(fh,mybuffer,mybufferlen);
...
...
NOTE:
You must use upper
Close(fh)
case Open, Close
Read, etc., NOT
At the target site:
Unix—style lower
FileHandle fh = Open(“TUBE:yourname”,mode_oldfile);
case commands.
Read(fh,mybuffer,mybufferlen);
...
...
Close(fh)
19
SECTION FOUR
COMMAND DEFINITIONS
This section details the exact syntax, scope, and options of AMIGANET
commands. Simple examples are given where appropriate, and the commands
are described in plain terms.
Command
WHO
Template
“ADDRESS,ALL”
Example 1:
who
Finds the current status of all the
sites in the file anet:addresses.
Example 2:
who @fred
Finds out if there is an alias fred
on the Net, and if so returns the
Ethernet address of fred.
Example 3:
who @fred all
As above plus returns all services
available at that site.
This command returns current status information about
computers/users on the Network and the services that
are available at those sites. The enquiry is made based on parameters
read from the local File anet:addresses. This File must therefore be
constructed at least once to contain all user addresses and aliases,
and be kept up to date. It could be maintained on a central disc and
down-loaded periodically, to ensure that all users have consistent
information. If the local copy is altered after STARTNET, for example
via a down—load, changes will not be valid until a re-boot.
Description
The information returned by WHO is in the following format:
[*/] <address> [alias1] [alias2] [alias3] ....
service ....
service ....
The * at the start of the line denotes that the site is on—line.
Command
CHAT
Template
“ADDRESS”
This argument is required.
Example 1:
chat @SALES
Talks to the computer operated by
the user with the alias SALES.
Example 2:
chat AE4742000023
Talk to site as number. No quotes.
This command instructs the service anscreen at the
target site, opening a small window at that site.
Text entered locally will be passed to this remote window until a
period (.) is entered on a line by itself, or CTRL \.
Description
20
SECTION FOUR
Command
TIME
Template
“ADDRESS”
This argument is optional.
Example 1:
time @SALES
Sets the time and date from the site
of a user with the alias SALES.
Example 2:
time AE4742000023
Sets the time and date from the site
numbered. No quotes necessary.
Example 3:
time
Gets the time and date from the
first computer detailed in the File
anet:addresses that is found to have
an active andate service.
This command sets the local site to the time and date
found as above. If no donor site is specified, the
will poll all sites in the anet:addresses File sequentially.
therefore execute faster if a donor is specified. If the donor
choice cannot be guaranteed to be on-line at all times, enter
andate serving sites at the beginning of the File.
Description
command
It will
of your
all the
Command
REMOTERUN
Template
“ADDRESS,SILENT,,,,,,,”
Example 1:
remoterun @Bilbo list
Example 2:
remoterun
The ADDRESS argument is reqd.,
SILENT is optional.
Causes LIST to be run in a
window at Bilbo’s computer.
AE4742000023 silent sys:demos/animations/robo
will cause the Robo Demo to be loaded on the computer
designated, but without bringing up a window.
This command is used typically to run a command at a
remote machine. It could be that the computer is
unattended temporarily, or it might perhaps be operating in a hazardous
environment, the operator preferring to action events from a distance.
Description
If the command is run normally, a window is opened on the target site
to take the output of the program. If the SILENT switch is used, the
output from the command is discarded.
If the command has more than seven arguments, they must all be enclosed
by quotes; i.e. remoterun @site “delete fl f2 f3 f4 f5 f6 f7 f8 f9”
21
SECTION FOUR
Command
REMOTEMOUNT
Template
“DEV”
Argument required.
Example:
remotemount RH0
Will cause the remote device
described by the File
anet:mountfiles/RH0 to be
mounted at the local site.
Description
The command attempts to mount a remote device according
to its definition in the directory anet:mountfiles.
The mountfile has the following form:
HANDLER <filename>
[RESIDENT]
[GLOBVEC n]
[STACKSIZE n]
[PRIORITY n]
STARTUP “string”
STARTUP “string”
The filename given after the keyword HANDLER
is the File that contains the handler code.
The keyword RESIDENT tells remotemount that
code is shareable. This means in the case of
the remote File handler AFS-handler that, ‘tho
you may have, for example, three remote File
handlers running, the actual code is only in
memory once. Warning: the RESIDENT keyword
only works on code that is pure. Most programs
are not pure.
The keyword GLOBVEC tells remotemount about how to run the program.
If n = 0 then we have our own global vector and we will be a BCPL prog.
If n =-1 then we are probably a C program and use a shared global vec.
The keyword STACKSIZE describes the size of the stack in bytes in which
the program runs.
The keyword PRIORITY describes what priority the handler is to run at.
The keyword STARTUP is followed by a string which is passed onto the
handler. You may specify more than one startup string. Remoterun
expects the argument following the keyword startup to be a string,
therefore, if the string starts with a number or contains spaces, it
must be enclosed in double quotes.
The only user—changeable entries are the startup keywords for the
remote filehandler AFS-handlerr which can be made by copying the
example File RH0 and editing as appropriate.
SECTION EIGHT
INDEX
Subject
Section
Page(s)
---------------------------------------------------------------Access, remote disc
THREE/C
13,14,15
Access, remote disc via Workbench
THREE/C
14
Access, remote disc via CLI
THREE/C
14
Access, remote printer
THREE/D
14,17,18
Access, remote screen
THREE/E
17
Aliases, Network
THREE/B
12
THREE/E
17
FOUR
19
AMIGANET Board Types
5
AMIGANET System File types
TWO
9
ANET Icon
TWO
9
THREE/B
12
Automatic Net Start
THREE/B
12
Bus Buffer PAL, Bug
BNC Connectors, Sockets
Cable breaks, interruptions
ONE
ONE
THREE/A
ONE
5
7
7
11
7
THREE/E
FOUR
THREE/B
ONE
17
19
12
7
TWO
THREE/B
FOUR
THREE/C
TWO
TWO
THREE
THREE/C
ONE
10
12
20
14,15,16
10
8
14
13,14,15
5,7
Enabling Services
Ethernet Address
TWO
THREE/B
THREE/C
THREE/D
THREE/E
FOUR
10
12
13
16
17,18
19,20
File Server, AFS
TWO
8
THREE/A/C 11,14
THREE/C
XX
Cabling, attachment
Cabling, distance, specifications
CHAT, screen dialogue service
CLI Net Start
Connectors, BNC
Connectors, sources
Date and Time Service
Default Tool, Mountfile
Disabling Services
Disk space, required by ANET
Disk access, shared
Disk access, mountfiles
DMA
File sharing via AMIGANET
Hardware
Hardware
Hardware
Hardware
Installation
Option settings
Overview
Problems, non AMIGANET
ONE
ONE
5,6,7
6
5
5
SECTION EIGHT
Subject
Section
Page(s)
---------------------------------------------------------------Install Program
ONE
8
Installation Caveat
5
Installation Hard
ONE
5,6,7
Installation, Slot choice
ONE
6,7
Installation Soft
TWO
8
Installation Options
ONE
6
Installing Services
TWO
10
Introduction to AMIGANET O/S
THREE/A
11
Listing Network Users
THREE/E
FOUR
17
19
Mountfiles
Mountfiles, creation and editing
Mounting remote devices automatically
Mounting remote devices with Icons
TWO
THREE/C
THREE/C
THREE/C
THREE/C
9
13,14,15,16
13,14,15,16
15
14,15
Network Drivers
TWO
8
Option Links
ONE
6
Printer sharing via AMIGANET
Printer, mountfiles, SPL
THREE/D
THREE/D
16
16
Remotemount command
THREE/C
14,15,16,18,21
Screen dialogue, CHAT
THREE/E
FOUR
TWO
THREE/B
THREE/C
TWO
ONE
THREE/B
THREE/B
THREE/B
17
19
10
12
13
8
6,7
12
12
12
1
Terminations, cable
TIME Command
Using AMIGANET
ONE
FOUR
THREE
7
20
11....
WHO, listing Network Users
THREE/E
FOUR
ONE
THREE/B
17
19
7
12
Services
Sharing Files via AMIGANET
Software Installation
Slots, choice
Starting the Network
Startup-sequence, Net Start
Startup-sequence, Netdate, time
System Overview
Wires and Plugs
Workbench Net Start
Amiga Hardware World
Everything about Amiga hardware...
~
http://amiga.resource.cx