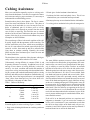
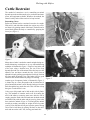
1
PRACTICAL TECHNIQUES
FOR DAIRY FARMERS
3rd Edition
TONY SEYKORA
ACKNOWLEDGEMENTS
Thanks must go to the colleagues that I have been privileged to work with at the University of Minnesota for their help in
completing this edition. I am grateful to Kim Reno for typing and proofreading and to my wife, Rel, for her help with the
photography. Finally, thanks to farmers that allowed us to get photographs of their cows for the various procedures.
PREFACE
In this book are outlined basic procedures that are often required of a dairy farmer. Included are common sense, practical
procedures learned from working with dairy animals, observing good “cowmen” and industry persons, and performing and
teaching these techniques to students. Hopefully, the written text and many illustrations will provide many useful hints and
technical information to dairy personnel as day-to-day tasks are performed.
Readers are cautioned not to perform any techniques that might cause injury to the animals or themselves unless they are
sure of the procedure. Consult with a veterinarian or other expert if in doubt. Mention of products in this book is not meant
as endorsement to the exclusion of other similar products that the author may or may not have been familiar with. Always
follow manufacturers label directions when using any product. An extra label use of any drug should be done under a veterinarian’s supervision.
While many procedures are timeless, practices and recommendations change with new technologies. Always consult with
your veterinarian or industry consultant for the latest information. Updates on procedures will be posted at the following
website: http://www.ansci.umn.edu/faculty/Seykora.htm. Readers are encouraged to contact me if they have useful information that they feel should be shared with others.
Dr. Tony Seykora
Professor, University of Minnesota
225B Haecker Hall
1364 Eckles Avenue
St. Paul, MN 55108-6118
612-624-3448
[email protected]
©Copyright 2000, 1993, 1987
i
TABLE OF CONTENTS
Calving Assistance...............................................................................................................................................................1
Resuscitating a Newborn Calf ...........................................................................................................................................4
Passing an Esophagus Tube ...............................................................................................................................................6
Identify Dairy Animals .......................................................................................................................................................8
Freeze Branding for Permanent Identification ..............................................................................................................10
Managing Hutches in the Winter ....................................................................................................................................12
Removing Dewclaws .........................................................................................................................................................14
Removing Extra Teats ......................................................................................................................................................16
Tail Docking.......................................................................................................................................................................18
Surgical Castration ...........................................................................................................................................................20
Bloodless Castration .........................................................................................................................................................22
Implanting Dairy Steers ...................................................................................................................................................24
Dehorning Calves and Older Animals ............................................................................................................................26
Caustic Stick or Paste................................................................................................................................................26
Tube Dehorning.........................................................................................................................................................26
Electric Dehorning ....................................................................................................................................................27
Barnes-type Dehorners, Clippers, Saws....................................................................................................................29
Anesthetic During Dehorning ...................................................................................................................................30
Taking an Animals Temperature .....................................................................................................................................31
Tips on Giving Injections .................................................................................................................................................32
Intramuscular.............................................................................................................................................................32
Subcutaneous.............................................................................................................................................................32
Intravenous ................................................................................................................................................................33
Minimizing Calf Scours....................................................................................................................................................35
Prevention..................................................................................................................................................................35
Treatment ..................................................................................................................................................................36
Treating Pinkeye ...............................................................................................................................................................38
Treating Ringworm...........................................................................................................................................................40
Lice and Mange Infestations............................................................................................................................................42
Choke..................................................................................................................................................................................44
Treating Abscesses.............................................................................................................................................................46
Proper Handling and Storeage of Injectables ................................................................................................................48
Tying Farm Knots .............................................................................................................................................................51
Overhand Knot ..........................................................................................................................................................51
Square Knot...............................................................................................................................................................51
Granny Knot..............................................................................................................................................................51
Reefer’s Knot ............................................................................................................................................................52
Surgeon’s Knot..........................................................................................................................................................52
Honda Knot ...............................................................................................................................................................52
Bowline Knot ............................................................................................................................................................52
Ring Knot..................................................................................................................................................................53
Double Sheet Bend Knot ..........................................................................................................................................53
Quick Release Knot ..................................................................................................................................................53
Double Half Hitch.....................................................................................................................................................53
ii
TABLE OF CONTENTS
Making a Rope Halter ......................................................................................................................................................54
Finishing the Rope Ends ....................................................................................................................................54
Making the Halter...............................................................................................................................................55
Finishing the Nose Piece (Alternative 1) ...........................................................................................................55
Finishing the Nose Piece (Alternative 2) ...........................................................................................................56
Training a Heifer for Show ..............................................................................................................................................57
Selection .............................................................................................................................................................57
Halter Breaking ..................................................................................................................................................57
Training to Lead .................................................................................................................................................57
Feeding ...............................................................................................................................................................59
Clipping and Grooming for Show ...................................................................................................................................60
Weeks Prior to Show Day ..................................................................................................................................60
Within a Few Days of Show Day.......................................................................................................................60
Showday .............................................................................................................................................................62
In the Show Ring...............................................................................................................................................................63
Cattle Restraint .................................................................................................................................................................66
Restraining Calves..............................................................................................................................................66
Casting an Animal ..............................................................................................................................................68
Raising the Feet ..................................................................................................................................................68
Nose Lead ...........................................................................................................................................................69
Headgates and Squeeze Chutes ..........................................................................................................................69
Tilt Tables ...........................................................................................................................................................69
Hoof-Trimming Chutes ......................................................................................................................................69
Working with First-Calf Heifers .....................................................................................................................................70
Handling Bulls...................................................................................................................................................................72
Recognizing Heat Signs in Heifers ..................................................................................................................................74
Using a Heat Detection Aid ..............................................................................................................................................76
Heat Synchronization .......................................................................................................................................................78
Synchromate-B ...................................................................................................................................................78
Prostaglandin ......................................................................................................................................................79
Prostaglandin plus MGA ....................................................................................................................................79
Ovsynch Program ...............................................................................................................................................79
Artificially Inseminating Cows ........................................................................................................................................80
Storing and Handling Frozen Semen..............................................................................................................................82
Trimming Hooves..............................................................................................................................................................84
Treating Sole Abscesses ....................................................................................................................................................86
Using Footbaths.................................................................................................................................................................88
Good Milking Management .............................................................................................................................................90
Clipping Cows ...................................................................................................................................................................92
Singeing Hair Off the Udder ..............................................................................................................................93
Milking Equipment Maintenance....................................................................................................................................94
Proper Use and Care of Inflations ..................................................................................................................................96
Detecting and Treating Mastitis ......................................................................................................................................98
Sampling Forages............................................................................................................................................................102
Subject Index...................................................................................................................................................................104
iii
Calves
Calving Assistance
Most cows and heifers normally require no calving assistance from the herdsman. To be able to recognize the abnormal occurrence and give proper assistance, it is necessary to
understand the normal birthing process.
2. Plastic glove for the herdsman’s hand and arm.
3. Lubricant for birth canal and plastic sleeve. This is best
obtained from your veterinarian and kept on hand.
4. Sanitary nylon rope or two obstetrical chains with handles.
Parturition takes place in three phases. The first is contraction of the uterus and dilation of the cervix. This phase of
labor may not be noticeable in a cow, but may be seen in a
heifer as abdominal pain 12-24 hours prior to calving.
Dilation of the cervix depends on pressure from the uterine
sacs of fluid, or water bag. This fluid also acts as a shock
absorber for the calf and a lubricant to the parts. Premature
rupture of this bag by an overanxious herdsman may cause
incomplete or slowed dilation.
5. A calving jack or mechanical calve puller for emergencies.
The second stage of labor is the actual expulsion of the calf.
It usually begins with the appearance of the water bag. The
calf has entered the pelvic area, which causes straining by
the cow. It is not unusual for animals (especially heifers) to
strain for a while, then stand up and move around before
lying down to continue straining. Normally, the second
phase may take from 30 minutes up to 3 hours for cows and
4-8 hours for heifers.
Figure 1
The third phase is the expulsion of the placenta, which generally occurs within 8 hours after the calf is born.
The most difficult question to answer is how long should
cows be allowed to strain before giving assistance. An examination of the cow can tell you a great deal and if done properly, is unlikely to cause any harm. First have an assistant
hold the tail to the side or tie it off to the side with a twine.
Wash the genital area with warm, soapy water. Put on a plastic sleeve and lubricate it. If a sleeve is not available, make
sure hands and arms are washed and covered with a lubricating material. If the calf is presented correctly with front
feet first and head in between, normal labor may last several
hours. If the birth canal appears dry, apply lubricant. As long
as the cow is straining and progress is being made, it may be
best not to assist. It is a common error to assist too soon with
too much force, causing danger to the cow and calf. On the
other hand, if the feet and nose are appearing at the lips of
the vulva and the cervix is well dilated then the cow should
not be left more than an hour before assistance is given. If the
nose is present and the tongue is extended and swollen, assistance should be started.
Unfortunately, calving difficulty is common (Table 1) and
frequently assistance is necessary. In addition to sex of calf
and age of cow, chance of calving difficulty is also influenced by sire used, condition and health and nutrition of
cow prior to calving. An interesting trial showed that heifers
left in a pasture and watched intermittently had less calving
difficulty and stillborn calves than those confined under regular watch. One of the largest influences is an unexplained
“farm” effect. Some farms pull very few calves while calving difficulty is the norm on other farms.
Table 1. Chance of Difficulty
Age of Cow
2
3
4+
Sex of Calf
Male
Female
Male
Female
Male
Female
Calving Difficulty
1 out of 3
1 out of 4
1 out of 5
1 out of 20
1 out of 10
1 out of 20
If the calf is in an abnormal position, use experience and
judgment to determine if you can correct the situation or
need to call a veterinarian. If your examination reveals that
the calf is too large relative to the birth canal, call your veterinarian. A successful Cesarean section can be performed if
head and front feet are still in the birth canal.
Essential supplies to assist at calving (Figure 1) include:
1. Soap or non-irritating disinfectant to wash the genital area
of the cow.
1
Calves
If the cow has been in labor for some time and progress is no
longer being made, it is time to assist. Don’t wait until the
cow is completely exhausted. Place the loop of the calving
rope or chains on the cannon bone and half hitch it between
the dewclaw and hoof (Figure 2). The half hitch will distribute the stress placed on the bones during the pull. It is best to
position the half hitch so the chains or rope pull from the bottom of the leg (dewclaw side). Before you begin to pull,
lubricate the vagina generously with the lubricant, especially between the top of the calf’s head and top of the vagina.
The most common way to apply lubricant is to take a handful and push it into the vagina at a moment when the cow
isn’t straining. Others have placed lubricant in a plastic glove
with the fingers cut off. Place the end of the glove behind the
calf’s skull and squeeze the lubricant into the vagina. A small
diameter plastic tube 5-6 inches in length placed on a large
syringe also works well and can be loaded ahead of time
ready for use.
Figure 3
If the shoulders are stuck in the birth canal and no progress
is being made, pull on the calf’s head by putting a rope or
chain behind the poll and through the mouth (Figure 4).
Applying a moderate amount of traction on the head will
help free it from the canal and reduce the dimensions of the
shoulder region.
Figure 4
Figure 2
As the calf’s shoulders emerge, take a minute to twist the
shoulders and head halfway around so that the hips go
through the birth canal sideways. The pelvic structure is
illustrated in Figure 5. It is taller at A than it is wide at B. B
is wider than C. By twisting the calf, the widest part of the
hips goes through at a wider part of the birth canal, which
should prevent hip lock. Alternatively, rather than twisting
the calf, it is suggested to pull downward on the calf as its
shoulders emerge. This will tend to raise the calf’s hips to
the top of the birth canal, which is wider than the bottom.
This technique isn’t as good for preventing hip lock as twisting the calf, but it is definitely easier for most people.
Front legs should be pulled alternately, so both shoulders
aren’t forced through the birth canal simultaneously (Figure
3). This requires two chains or ropes. Do not hook a single
chain to both legs. A steady continued pressure can be
applied with one person on each rope or chain. The pulling
force should be increased as the cow strains. If cervical dilation is not complete, moderate traction will encourage dilation without risk of tearing the uterus. A constant hard pull
may cause spasm of the uterine neck muscles, tearing of the
uterus and constriction of the umbilical cord, which is supplying oxygen to the calf. If the vulva is very tight, it may
be beneficial to manually dilate it. This can be done prior to
pulling the calf by inserting your arms, palms together, and
then pushing apart your elbows to apply pressure to the
vaginal walls with your forearms. As the calf is being
pulled, time can be taken to stretch the vulva with your
hands.
2
Calves
on the rear legs to help slip the hips through the canal.
Rotating the calf a quarter turn will take advantage of the
greatest diameter of the birth canal.
A mechanical puller should be kept on hand for emergencies. A puller that works off the back of the cow is preferable to a puller that is attached to a stationary object because
it allows movement with the cow, traction is in the proper
direction and it puts pressure on the lower part of the cow’s
pelvis changing the angle helping to open the birth canal.
Calf pullers must be used carefully. Excessive force can easily injure the cow and calf. It is generally recommended that
no more than about 400 lbs. of force be used which is about
the force that two strong people can exert if pulling on a
rope. Upwards of 2000 lbs. of force can be exerted with
some calf jacks. Don’t use excessive force as a substitute for
generous lubrication and time for complete dilation.
Whether it was a difficult birth or not, as soon as the calf is
delivered the cow should be offered all the lukewarm water
that she wants from a bucket or pan. A cow will usually
drink 8 to 12 gallons at this time and this will help avoid
post calving complications. If she doesn’t drink, insert a
gloved hand in the uterus to check for a twin calf.
Figure 5
If the hips do become locked in the pelvic area it is a lot
more difficult to twist the calf than prior to the hip lock. If
hip lock occurs, stop pulling and lubricate the pelvic area
and try pulling again. You can attempt to turn the calf by
placing the calf’s head through its front legs and pulling up
towards its body. Or you can attempt to turn the calf by
releasing tension on the front legs and pulling them back
toward the cow and clockwise. Repeat in the opposite direction if the calf isn’t released.
After the cow drinks water, allow the cow to lick off the calf.
The mothers licking stimulates the calf’s circulation and
gets them standing sooner. One study showed that calves
that were licked off by their mothers absorbed a greater percentage of antibodies from the colostrum. It is also believed
that the amniotic fluid from the calf has an analgesic effect
on the cow making her feel better after the painful birthing
process. This is beneficial even if the calf was born dead.
Another method that may work if there is ample room and
manpower is to roll the cow completely over onto her back
and to the other side. Make sure the calf begins breathing
normally as the umbilical cord is apt to be pinched closed.
After leaving her alone for a few minutes, again try assistance as the cow strains. Excessive force during “hip lock”
should be avoided as it can cause damage and paralysis to
the cow. It’s not unusual for a stubborn case to suddenly
release on its own as the hips manage to slip over the brim
of the pelvis.
In summary, don’t assist with calving until the cervix is
completely dilated - work with the cow. Cleanliness when
assisting is of utmost importance. Misdirected brute force
causes more harm than good. Call your veterinarian if you
are unsure of the position of the calf or the proper assistance
to give. Finally, it can be tiring staying up all night checking
cows. Studies have shown that if close up cows are given
their daily ration in one feeding, the majority will calve
starting about 12 hours later. Hence, by feeding them at 6:00
- 7:00 p.m., 80 - 85% of calvings will be in daylight hours.
If the first examination reveals that the calf is coming backwards (breech), the calf needs to be taken out quickly after
the hips enter the birth canal since the umbilical cord is apt
to be pinched, shutting off oxygen to the calf. Breech births
are more difficult than normal presentations and assistance
is generally warranted. Check that the tail is lying between
the hind legs. If not, reach in and pull it forward so that it
isn’t forced up into the roof of the birth canal. Lubricate the
birth canal and attach the chains properly. Alternate traction
3
Calves
Resuscitating a
Newborn Calf
5% carbon dioxide, while normal air contains much less.
Blowing carbon dioxide into the respiratory tract of the calf
will act as a stimulant to initiate breathing. When performing
this technique, your mouth should not touch the calf’s. When
working with weak or sick calves, one should always be
aware of the potential of human exposure to infectious diseases. Brucellosis, Campylobacteriosis, Leptospirosis,
Listeriosis, Salmonellosis, and Chlamydiosis are a few diseases that humans can catch from cattle under the right conditions. Most of the diseases have been isolated or at least
implicated in weak and stillborn calves.
National data collected from 1985 to 1996 for U.S. Holsteins
show that 7% of calves were delivered stillborn. Cows having their 2nd or 3rd calves had a 5.7% stillborn rate. First calf
heifers had a 11% stillborn rate. Calves born as the result of
a difficult calving were more apt to be stillborn. For 1st calf
heifers that had difficulty at calving, 27.7% of the calves
were stillborn. Assistance from the herdsperson at time of
delivery can save many of these calves.
As soon as a calf is born, its mouth and nostrils should be
cleared of mucus and afterbirth. Straighten out the calf’s
neck so that the airways are not obstructed. The calf’s situation needs to be quickly evaluated. If the calf’s eye looks
slightly deflated and has turned a blue, opaque color then the
calf has been dead for several hours. If the calf is soiled in
the rear with feces, the calf probably died during the birthing
process struggling to breath. Press your hand against the
chest between the front legs, if you can feel a heartbeat there
is a good chance you can save the calf.
The simplest method that may produce breathing is to take a
straw and insert it an inch or two into the calf’s nostril
(Figure 1). Move the straw in and out. Within 5-10 seconds,
the calf may shake its head, sneeze and start breathing. This
method is also recommended for healthy calves to help clear
the lungs.
Figure 2
A third method to try is to briefly hold the calf up by its hind
legs (Figure 3). Fluid may run from the calf’s mouth. Most
of this is coming from the calf’s stomach, not the lungs.
While the calf is suspended, have someone else pour cold
water onto the chest and head regions. This cold shock may
initiate breathing where the two previous methods failed.
Variations of this include having a pail of very cold water
handy and dumping it on the calf’s head as it is laying on the
ground. Another suggestion is to pour cold water into the ear.
Figure 1
If the straw method doesn’t work, give the calf what is
known as the “kiss of life.” Hold the mouth of the calf open,
with the calf’s tongue on the floor of the mouth (Figure 2).
Blow down the calf’s throat. Your breath contains about 4-
If the calf still is not breathing, it is time to try artificial respiration. There are many different methods used to force air into the
4
Calves
Figure 5
Figure 3
Many producers have found the use of a portable oxygen
tank to be much more convenient. A small oxygen bottle
with a regulator can be purchased from a welding supply
store with about 5 feet of hose. Attach 5 inches of a small
diameter rubber tube to the end of the hose. When a calf
needs help, the oxygen is turned on so that it feels like a gentle breeze when the tube is held next to the operators cheek.
The 5-inch tube is inserted into the calf’s nose for about 30
seconds to get calves breathing. Finally, respiratory and heart
stimulants are available from your veterinarian for use under
their supervision. Many people have claimed good success
when these have been injected.
calf’s lungs. Figure 4 illustrates applying intermittent pressure
on the calf’s rib cage with the calf lying on its side. Pressure can
be applied simultaneously to both sides of the rib cage if you
position the calf so it is lying on its chest. Applying pressure to
the rib cage forces air out of the lungs. Releasing the pressure
allows fresh air to enter the lungs. If an assistant is present, have
him blow down the calf’s throat at 15-20 second intervals.
Artificial respiration can be continued for 5-10 minutes.
If the heart is not beating, then the prognosis is not good.
Heart massage can be given by laying the calf on its side and
compressing the area of the chest between the front legs with
your hand approximately once per second. At the same time,
some sort of artificial respiration should be given by a second person.
The calf may be weak after normal breathing is established.
Make sure the calf gets colostrum via a tube feeder as soon
as possible. If the calf is chilled, supplemental heat is
extremely important. Regular freeze-dried coffee crystals
(not decaf) can be used to stimulate weak newborn calves.
Mix 1 teaspoon of crystals per 2 oz. (1 pint is 16 oz.) of
colostrum. Administer 1/2 -1 pint of the mix every hour with
a tube feeder until the calf responds.
Figure 4
Calves can also be revived by mouth-to-mouth resuscitation
using commercially available devices that protect the operator from germs that the calf may be harboring (Figure 5). As
you blow into the calf’s lungs, you should be able to see the
rib cage expand. If it appears that most of the air is going into
the stomach, pinch off the esophagus in the neck with your
fingers. This will force the air into the trachea.
Hopefully, a few of these ideas will allow you to resuscitate
the occasional calf that may need help.
5
Calves
Passing an
Esophagus Tube
tongue to the back of the tongue (Figure 4). Do this slowly.
You’ll notice that when the tube is over the back of the
tongue, the calf starts chewing and swallowing. Use this to
help get the tube down the esophagus, which is situated above
the trachea, which leads into the lungs. This procedure also
applies to passing a hose for bloat or passing a balling gun.
The esophageal feeder or oral calf feeder is an excellent aid
to force-feed colostrum to weak, newborn calves or electrolytes to weak, scouring calves. This is a relatively inexpensive piece of equipment that can save the life of a sick or
weak calf. It can be purchased fairly inexpensively so there is
no excuse for any dairy not to have one or two on hand. There
is always apprehension that the tube may be passed into the
calf’s lungs rather than into the esophagus. Fluid in the lungs
can lead to mechanical pneumonia or bronchitis. Chances of
this happening can be minimized if proper procedures are followed.
Proper restraint makes this task easier. Young calves can be
backed into a corner with control of the head, and held adequately. It is easier to pass the tube with the calf standing up.
However, if calves are too weak to stand, it can be done while
they are lying down.
The esophageal feeder should be thoroughly cleaned to prevent bacterial growth, especially after it has been used for
colostrum or milk. Note the ball end of the tube (Figure 1).
This helps prevent passing the tube into the calf’s lungs.
Figure 2
Figure 1
To open the calf’s mouth, you can apply pressure to the corner of the mouth (Figure 2), or grab over the bridge of the
nose, applying pressure to the upper palate or gums (Figure
3). Once the mouth is open, pass the tube alongside the
Figure 3
6
Calves
It is advisable to pass the tube almost the full length of the
stiffest part. Fluid will thus go into the lower esophagus.
After the tube is passed, unclip the tube to allow the liquid to
drain out of the bag. The bag can be held above the calf or
hung on a nail. It will take a couple of minutes to drain. The
liquid should be at body temperature to prevent temperature
shock to an already weakened calf.
Buying this tool is highly recommended to increase effectiveness in feeding colostrum to weak calves and delivering electrolytes to calves with scours. The probes are available in plastic and stainless steel models. Buy what you prefer. The stainless steel models cost more but are more durable and there is
no chance of the probe breaking while in use. The plastic models are more apt to become jagged and rough if allowed to be
chewed on by the calf and could potentially injure the esophagus. It is easy to smooth a jagged surface using fine sandpaper and this is a recommended maintenance procedure. Since
they are cheap, they should be replaced before they become
excessively worn. If you have a weak calf that needs forcefeeding and you don’t have an esophageal feeder, then you
will have to improvise. A clean pulsator hose may be just
about the right size for passing down a calf’s throat. It should
be passed about 16 to 18 inches. Put a funnel from the kitchen
on the top of the hose and you are ready to pour the liquid into
the calf’s stomach. This method will get the job done, but
isn’t nearly as safe or handy as using an esophageal feeder.
Figure 4
If the tube has been correctly passed, you should be able to
feel it in the esophagus (Figure 5). The ball on the end of the
tube can be felt quite easily.
Figure 5
7
Calves
with interchangeable broad and fine tips. Buy the ink specific for the company’s tags. The ink from one company
may not work well on another company’s tags because the
composition of the plastic may be different.
Identify Dairy Animals
Identification of individual animals should be standard procedure on all dairy farms. It is essential for breeding decisions, registration, merchandising, health and reproduction
records, and daily management decisions. The identification
systems used should provide reliability and visibility at a
reasonable price.
For animals with color patterns, a photograph or sketch provides a permanent means of identification (Figure 1). The
disadvantage of this method is that they are difficult to carry
around and use daily.
Figure 2
To tag an animal, restrain it and insert the tag into the applicator. Placement of the tag in the ear will depend on the
style of tag used.
Generally, tags should be placed in the middle of the ear
between the cartilage ribs, approximately one-half the distance from the base to the tip of the ear (Figure 3). The tagger pliers are calibrated to apply the tag without getting the
tag too tight. Avoid the temptation of manually squeezing
the button and tag together for a tighter fit after the pliers are
removed. This will result in restricted blood flow to the
wound and may result in the tag being sloughed off. Putting
the tags in before the calf is taken away from the dam will
prevent a mix-up later. Treat the wound with an antiseptic to
prevent an infection and repel insects. Disinfect the applicator between animals if there is any danger of transmitting
any blood-borne diseases. If there is a tendency for animals
in your herd to lose tags, you may wish to tag each ear.
Some dairymen have resorted to using smaller tags designed
for swine with good results.
Figure 1
Plastic ear tags are one of the most popular forms of identification. First, select the style of tag to be used. Larger tags
are easier to read from a distance and usually aren’t any
more apt to tear out or break off than smaller tags. You can
buy pre-stamped tags, or you can number your own (Figure
2). The advantage of numbering your own is that you may
also include birth date, sire, and dam on the front or back of
the tag. The numbering system chosen may tell you something about the calf. For example, 9309 is the ninth calf born
in 1993. You may wish to use different colored tags. For
example, grades may get red tags and purebreds yellow
tags.Each tag manufacturer makes a specific ink for their
tags. Some of these inks have a chemical base that allows
them to etch or melt into the polyurethane tags. These new
inks won’t fade like a typical “magic marker” would and are
worth the small additional cost. These ink pens may come
Tattooing gives a permanent means of identification,
although the animal usually has to be restrained to read the
tattoo. A suggested procedure includes:
1. Place the numbers in the tattoo pliers. If in doubt, check
the numbers on a piece of cardboard to make sure they
are in proper sequence.
2. Wipe the area to be tattooed with an alcohol- soaked cloth
or cotton ball. The tattoo is usually placed above the top
cartilage rib. The area between the two cartilage ribs is
8
Calves
Figure 5
Figure 3
generally reserved for a bangs vaccination tattoo, or may
be the side for ear tagging.
3. Using a disposable plastic glove, apply a very thin film of
paste ink to the ear. Ink paste is generally preferred to liquid ink.
4. Position the tattooing pliers in the ear and squeeze firmly
for 30 seconds (Figure 4).
Figure 6
around the rear leg when the heifer first enters the milking
string. It should be applied tight enough to remain on, but
loose enough so it doesn’t restrict blood flow. The major disadvantage to bands is that bands can get dirty which make
them difficult to read.
Figure 4
Two other popular means of identification include neck
chains and freeze branding. Neck chains are easy to apply
and are fairly visible. If put on calves, they need to be
adjusted as the calf grows. Freeze brands give permanent
identification and are easily read if of good quality.
Disadvantages are that occasionally a number will not come
out clear, and more time and labor are required to do freeze
branding than other means of identification.
5. Remove the pliers and rub the ink paste into the tattoo for
30 seconds.
6. Equipment should be disinfected between calves.
An aid in reading tattoos in dark ears is to shine a flashlight on
the back of the ear while reading it from the front (Figure 5).
Ankle bands have been gaining popularity for cows milked
in herringbone parlors (Figure 6). The band is applied
9
Calves
Freeze Branding for
Permanent Identification
Freeze branding is gaining popularity as a method of identification in dairy cattle. Freeze brands can’t be lost like an ear
tag or neck chain. They are easily read from a distance, can
be read in milking parlors (Figure 1), and do not damage the
hides as hot brands do.
Figure 2
After a site has been chosen, use a surgical blade on an electric hair clipper to clip against the lay of the hair to remove
as much hair as possible (Figure 3). To increase iron-to-skin
contact, pour 99% isopropyl alcohol over the shaved area
immediately before applying the irons (Figure 4). 99% isopropyl alcohol can be purchased through your veterinarian or
other supplier. Rubbing alcohol typically is only 70% alcohol. Use enough alcohol to saturate the skin.
Figure 1
The most common method of cooling the irons is with liquid
nitrogen. Pour 4-5 inches of the nitrogen from a storage tank
into an ice chest (Figure 2), using proper caution to avoid
splashing it into your face. The liquid nitrogen will boil as
the relatively warm irons are placed into the liquid. After 510 minutes, the irons will have cooled down to the temperature of liquid nitrogen (-197° C) and boiling will stop. The
irons are now ready for use. Most people prefer to wear
gloves when handling the cold irons.
Properly restrain the animal in a squeeze chute or with a tail
hold if the animal is haltered or in a stanchion. Remove the
iron from the liquid nitrogen and immediately apply it firmly
to the animal (Figure 5). Make sure that all portions of the
face of the brand are in contact with the hide. Lack of pressure or uneven pressure can result in poor brands. The animal may jump around for the first 10 seconds after which the
area becomes numb and the animal will usually calm down.
Each iron needs to be applied for 20 seconds with dark hair
and 2-2 1/2 minutes with white hair. (Brands on white hair
are marginal at best.) After the allotted contact time, the iron
needs to be returned to the liquid nitrogen until bubbling
stops before it is used for another brand.
Freeze branding works best when applied to dark hair. It
works by killing the pigmentation cells, so white hair
replaces the dark hair where the brands are applied. If
applied on white hair, the irons are held in contact with the
skin for a longer period of time to kill the hair follicles.
Branding on dark hair usually gives a much more satisfactory brand. The best areas to brand are on the rump, upper
thigh or over the loin, because these areas are firmer and
ensure better iron-to-skin contact. People with herringbone
milking parlors may wish to brand both sides of their cattle.
The most common cause of failure is from not applying the
iron for the proper length of time. Time yourself, don’t
guess! When the iron is pulled off, it should leave a frozen
10
Calves
imprint of the number, as in Figure 5. If not, you didn’t apply
the iron long enough or with enough pressure. After a few
minutes, the imprint will swell and welt up. Generally, after
a couple of weeks, the hair and outer layer of skin may
slough off leaving a bare spot. The dark hair is replaced with
white hair as the hair grows out. This may take 2 months.
The above procedures have given consistently good results on
Holsteins from 3 months to 10 years of age. There are alternative procedures and contact times that have worked well for
other people. These include different contact times than suggested here such as 5 seconds for 1 month old calves; 8 seconds for 2-3 months; 10 seconds for 4-8 months; 13 seconds
for 9-18 months; and 15 seconds for over 18 months.
Experiment to find the contact times that work best for you.
Beef cattle have thicker hides and require longer contact
times. Jerseys require less contact time.
Figure 3
Freeze Branding Irons come in sizes ranging from 2 to 6 inches. It is common to freeze brand 4-6 month old calves using
the 2-inch numbers. As the calves grow, the numbers will
expand. The 4-inch size is often used for cows. Size of brand
used is a matter of personal preference and is dependent somewhat on from what distance the brand needs to be read.
If liquid nitrogen is unavailable, alcohol and dry ice can be
used to cool the irons. Since this mixture is not as cold as liquid nitrogen, add 15 seconds to the length of time the irons
are applied.
The largest cost involved in freeze branding is purchasing the
irons. They range from $100-200 for a set. You may be able
to borrow irons from an A.I. representative. It takes about 5
quarts of liquid nitrogen to do 20-25 animals. Freeze branding is an excellent form of identification if done properly.
Figure 4
Figure 5
11
Calves
Managing Hutches
in the Winter
Cold, damp weather puts additional stress on the newborn
calf. Even under the most adverse weather conditions, a calf
hutch can still be the most desirable system under which to
raise a calf, if the calf has a dry, draft-free place to lie and an
adequate energy intake.
Place hutches so they face the south or southwest in winter.
This protects calves from the cold northwestern winds and
allows the sun to penetrate the hutch. Never locate hutches
near barn exhaust fans, as this will expose calves to
pathogens from the barn. It is important that hutches have a
thick bedding base, to allow for drainage and to insulate the
calf from the cold ground. Straw or chopped cornstalks make
excellent bedding because of their absorbent properties.
Placing the bedding on a 4 to 6-inch base of corncobs makes
an excellent bed.
Figure 1
It is generally recommended that hutches should be thoroughly cleaned and disinfected between calves. Many dairymen,
however, report good results with cleaning after every 2 calves
in winter. Use the system that works best for you.
After a calf is born, the navel should be dipped in iodine and
tied to prevent navel ill. Surveys have shown 10 to 15% of
untreated calves get navel infections which decrease performance. Allow the mother to lick off the calf. Feed the calf
colostrum within 30-45 minutes of birth while the calf is still
with the cow. The amount fed should be at least 5% of its
body weight (about 2 quarts.).
Most experts recommend that calves be placed in hutches as
soon as they have received their colostrum and been dried off
(Figure 1), even in cold weather. Others have had good
results with keeping the calf inside for a few days or until the
weather moderates. By moving the calf out immediately, it
will be exposed to fewer disease-causing organisms. A newborn calf will generally have more body fat than a calf 2-3
days old, so it adjusts easier to the cold weather. Don’t put a
calf already weak or chilled out into a hutch.
Figure 2
quarter feeding provides 4.3 lbs. When temperatures fall
below freezing for extended periods, calves will need additional energy to maintain body temperature and still have an
acceptable growth rate. Following are general guidelines: if
average daily temperatures are expected to be around 25º F,
increase milk intake by 1 pint or milk replacer powder by .1
lb. per day; at 15º F increase by 2 pints or .2 lbs. of powder;
at 5º F increase by 3 pints or .3 lbs. of powder by adding a
third feeding per day. Be consistent in feeding, don’t change
amount fed just because the weather moderates for a couple
of days.
During periods of extreme cold or blowing snow, it may be
advantageous to partially block the front of the hutch of the
newly arrived calves with 2 bales of straw (Figure 2) or other
barrier. The barrier need only remain for a day or two, and
under no circumstances should the opening be completely
blocked. The barrier will help block the wind and snow, and
keep the calf inside.
Generally, calves should be fed milk at the rate of 10% of
their bodyweight per day. This means that a 120 lb. calf gets
12 lbs. per day while a 80 lb. calf gets 8 lbs. per day. A two-
Make sure the milk is warmed to 105° F when fed. Cooler
milk will cause the calf to expend energy to warm it. Carry
12
Calves
the milk out to the calves in insulated containers, if necessary,
to keep it warm. Milk replacers, if used, should be high quality with 20% fat, 20% protein and less than .5% fiber.
Encourage calves to eat a grain mix as soon as possible.
Cold Stress (Hypothermia)
Symptoms:
Decreased body temperature (5-10º below normal).
Ears and legs cold.
Loss of vigor and appetite.
Shivering. Hair standing on end.
Stiffness. Stand with head down and feet together.
Lying down most of the time.
Sudden death of the calf.
Remedy:
Bring calf in out of cold.
Bring calf’s body temperature back to normal (101.5º).
a. immerse in warm water (105º) and/or
b. vigorously rub with dry, warm towels
c. provide warm, draft-free environment
(heat lamp or heat-pad)
Give two quarts of warm milk. Tube feed if the calf is
weak.
Prevention:
Provide calves adequate energy intake.
Provide dry, draft-free environment. Calves can become
cold stressed in wet, drafty barns as well as in hutches.
Observe calves frequently for alertness and general condition.
Because of long winter hair coats, it is difficult to tell the condition of calves visually. Make it a habit to run your hand over
the calf’s back each time it’s fed (Figure 3). If you note that a
calf is losing body condition, try to increase its energy intake.
Hutch calves that do become sick in winter should be moved
inside to a warm environment. It is difficult for a sick calf to
get well in a hutch at 0-20° below. If the calf is cold stressed,
remedial measures should begin at once (Figure 4).
If the hutch is 8 ft. deep and there are no openings or cracks in
the back, snow generally doesn’t penetrate more than a few
feet. Shovel the snow out promptly so the calf doesn’t track it
onto the dry bedding. If bedding becomes damp, add bedding.
A good test is to sit down where the calf lies. If your pants
become wet, add bedding.
Many people have had good success raising calves in domed
hutches (Figure 5) during cold weather. The calf doesn’t track
snow onto the bedding, and is protected from the wind. The
ventilator cap should be adjusted to provide enough ventilation
to prevent condensation inside the hutch.
Figure 4
A “calf jacket” is a good option for calves in the winter. These
are commercially available blankets that are put on the calves
Figure 5
when put out in the hutch and taken off when weather moderates or after the calf is weaned and eating well. Calves expend
less energy maintaining body weight and hence have increased
growth rates and are less stressed during cold winter months.
The jackets need to be cleaned between calves, straps kept
adjusted, and hutches still need adequate bedding.
Another management practice is to place the calf hutches
inside a shed during the harshest winter months. This offers
additional protection for the calf and makes calf chores a little
more pleasant.
Figure 3
Many of these recommendations will help raise healthy,
growthy calves under harsh winter conditions as well as under
moderate conditions.
13
Calves
Removing Dewclaws
Removal of the inside dewclaw is not widely practiced. Yet a
few dairymen and veterinarians feel that it will reduce
mechanical injury to the teat and udder. They have routinely
removed calves’ dewclaws for years. It is a relatively safe and
easy procedure, especially if it’s done at a young age. Figure
1 shows a cow with the inside dewclaw removed.
Figure 3
Take several precautions to lessen the chance of infection.
Make sure the shears are clean and sanitized prior to use. A
disinfectant spray or dressing should be applied to the wound
(Figure 4). A fly repellant spray should be used in the summer. Probably most important, make sure the calf is in a clean,
well-bedded pen.
Figure 1
As with most surgical procedures, it is best to remove the
dewclaws at a young age. Many farmers perform the procedure immediately after removing the calf from the cow. The
calf is much easier to control at this time so only one person
is needed for the job. Also, bleeding is minimal.
Restrain the calf by laying it on its side. Use an all-purpose,
heavy duty shears to cut off the dewclaw (Figure 2). If done
properly, there should be hair all the way around the removed
dewclaw (Figure 3). If not, make another snip with the shears.
If the dewclaw is not completely removed, it may grow abnormally and may cause more damage than a normal dewclaw.
Figure 4
If done at a young age, bleeding from the wound will be minimal. However, calves should be watched to make sure that
they don’t bleed excessively. On a very small percentage of
calves, it may be necessary to pack the wound with cotton
held in place by several wrappings of gauze (Figure 5).
Place tape over the gauze to finish the bandage or use vet wrap
over the cotton pack. Do not wrap the tape too tightly or you’ll
cut off circulation to the foot. Remove the bandages in 2-3 days.
Figure 2
14
Calves
Generally, only the inside dewclaws on the hind legs are
removed. Obviously, relative to udder injury, the inside dewclaws are the ones that cause the problems. However, some
dairymen remove both dewclaws on the hind legs for a more
pleasing appearance.
You can also use a Barnes dehorner to remove dewclaws. It
may be best to use it on older calves. Figure 6 shows the sanitized gouge dehorner positioned around the inside dewclaw.
It is important to get all around the dewclaw. To help avoid
cutting too deeply and possibly injuring the underlying tendons, place the gouge around the dewclaw and tighten enough
so that you can pull outward as the handles are quickly spread
to close the blades.
If you adopt this procedure, remove the dewclaws when
calves are young. Do it correctly under sanitary conditions. If
done incorrectly or if an infection results, any beneficial
aspects of dewclaw removal will be negated and the calf may
suffer. It is always a good idea to consult your veterinarian
before trying a new procedure.
Using the Barnes dehorner requires more skill than using the
shears. The older the calf, the more restraint required; and
more bleeding and trauma expected.
Removing dewclaws may reduce teat injury and bruises to the
udder if your herd has these problems. It is not known what
percentage of such injuries are caused by the dewclaw.
Removing dewclaws may significantly improve udder health
of some herds but have no benefits in others. Level of benefit
would be influenced by type of housing and depth of udders.
If in doubt, try removing the dewclaws of every other heifer
born. When these heifers freshen, monitor the difference in
incidence of teat injury, mastitis incidence and somatic cell
count between the two groups.
Figure 5
Figure 6
15
Calves
Removing Extra Teats
Dairy heifers often have extra teats (supernumerary) in
addition to the normal ones. Supernumerary teats present no
problem if removed when the calf is 1-2 months of age. If
left longer, an operation using anesthetics may be necessary.
If not removed, extra teats may interfere with teatcup placement, become an extra functioning milk gland, or become
infected. At any rate, extra teats detract from an udder’s general appearance.
Removing extra teats is a simple surgical procedure, but
must be done right for satisfactory results. In a well-lit area,
have someone hold the calf securely on its side with its hind
legs held apart. Normal teats are those which are properly
placed and usually a bit larger than the extra teats. One to
four extra teats may be present. The heifer in Figure 1 had
two extra teats behind the four normal teats. Extra teats may
also appear between the normal teats. If there’s doubt as to
which teats to remove, postpone the operation until there’s
more udder development or just leave them alone.
Figure 2
Grasp the teat between your thumb and forefinger. Even in
small calves, the nerve supply to their teats are well developed. Make sure the calf is well restrained before you proceed. Pull the teat outwards and take a generous bite with
the scissors (Figure 2).
The most common mistake is not removing enough of the
teat. Often, the teat is cut off level with surrounding skin or
even less is taken. This can leave a lump or scar which may
increase in size as the heifer grows. Taking a generous
amount of the skin surrounding the teat also ensures complete removal of the budding milk gland. A comparatively
large elliptical wound about the size of a dime should result
(Figure 3).
An alternate method of removing teats is to pull the teat
outward and clamp artery forceps on the udder above where
the cut will be made. Then, slide a scalpel along the forceps
and remove the teat, leaving the forceps attached to the skin
of the udder. When the forceps are removed, bleeding will
be minimal.
Figure 1
Dress the wound liberally with a tincture of iodine (Figure
4) or antibiotic ointment. The calf’s pen should be clean and
well-bedded to prevent infection.
Scissors or a scalpel may be used, but scissors are most preferred because there is less chance of cutting yourself or the
calf if the calf should move. Generally, the sharper the scissors
are, the easier the job can be accomplished, but scissors don’t
need to be razor sharp. Actually, slightly dull scissors tend to
crush the blood vessels as they cut. This minimizes bleeding,
although bleeding is not a big problem for this operation.
16
Calves
Figure 3
Figure 4
17
Calves
Tail Docking
The most common method of docking tails is the use of elastrator bands. In young calves the band is placed three finger
widths below the bottom of the vulva (Figure 2). In cows the
band is placed two hand widths below the vulva or at the top
of the rear udder attachment (Figure 3). Docking the tail too
short may result in an increase in vaginal infections as a cow
may stick her tail into the vulva. A tail that is left too long can
be a nasty weapon without a switch. The rubber band should
be placed between the vertebrae. The tail will fall off in two
to four weeks. Following are variations of this procedure:
Tail docking is becoming more widely accepted by farmers
in both freestall and stall barns (Figure 1). Reasons for
docking include added cleanliness of cows, ease of milker
attachment in parallel parlors, and reduced chance of the
farmer getting swatted in the face. Research results comparing cows with and without tails have yielded mixed results.
One study showed that heifers with docked tails on pasture
had more flies on their backs. Another study showed no
improvement in cleanliness or udder health for cows with
docked tails. Practical experience would indicate that in
many housing situations cows with docked tails will be significantly cleaner. There are no studies that say tail docking
has any effect on performance or production.
Figure 2
Figure 1
Some people object to the docking of tails for humane reasons. In fact, the practice of docking tails is banned in Great
Britain. Others see no difference between docking cattle
compared to docking the tails of pigs and sheep or the
dehorning of cattle.
Tail docking is a relatively simple procedure and there are
several different methods used. Producers dock tails at less
than a week of age, at time of dehorning, at first breeding,
or as freshened heifers enter the herd. Some producers only
dock the tails of “problem” cows. Docking seems to cause
very little or no stress on the animal.
Figure 3
1. Some people prefer to place two rubber bands on the tail.
2. One option is after the band is on for four or five days, is
to cut off the dying tail with a hoof trimmer or knife
immediately below the band.
18
Calves
3. Another option is to put the band on in the morning and
cut the tail off one vertebrae lower in the evening. The
rubber band is cut off three days later.
4. To facilitate the placement of the band, some people load
the bands onto a 1.25 to 1.75 inch PVC pipe. Slide the
pipe up the tail and then slide the band off the pipe into
the tail (Figure 4).
5. If tetanus is a concern, two tetanus vaccinations can be
given. The first is given two weeks before and the second
is given on the day the band is put on. This is not a concern on most farms.
Some people prefer not to use rubber bands. An option is to
clamp a “Burdizzo” a few fingers below the vulva on a calf
less than a week old (Figure 5). Cut the tail off with a sharp
knife or scalpel below the clamp. Remove the burdizzo 30
seconds later and bleeding should be minimal.
Figure 4
A veterinarian from Canada recommends the following procedure for removing tails from cows:
1. 18 mg. of xylazine with 6 ml. of saline is given epidurally in the tailhead to numb the tail.
2. The tail is washed at the place of incision with a chlorohexidine soap.
3. A scalpel is used to make a skin incision a little lower
than the joint.
4. A Mayo scissors or shears is used to sever the tail at the
joint.
Figure 5
This method should only be done by a veterinarian.
19
Bulls
Surgical Castration
Surgical castration guarantees that there will be no unwanted pregnancies when running “steers” and heifers
together. If properly performed, surgical castration causes less
pain in the long run than other methods. The pain involved
lasts for a brief period. With non-surgical techniques, the animal is uncomfortable for days. To minimize pain and stress,
calves should be castrated at 2-3 months of age.
One of the preferred methods of castration is to cut off the
lower one-third of the scrotum so the testicles can be
removed. Equipment required is a sharp scalpel and a pail of
warm water with an antiseptic. Sanitize hands and scalpel
after each calf. Change the solution if it becomes contaminated or after 10-15 calves.
On a young calf, a tail hold with the calf’s head in the feed
bunk is usually adequate restraint. A proper tail hold is in an
upward as much as a forward direction. This stretches the
tendons in the legs and reduces the chance for kicking. Do
older calves in a squeeze chute.
Once the calf is restrained, check both testicles to make sure
there are no abnormalities such as ruptures or undescended
testicles. A veterinarian should castrate any calf with a rupture.
Figure 1
If the examination reveals no abnormalities, grab the bottom
of the scrotum with your thumb and forefinger (Figure 1).
With the scalpel, cut off the lower one-third of the scrotum,
exposing the testicles (Figure 2). Take hold of a testicle. At
this point, do not let it slip back into the body as this will
increase the chance of infection. The testicle will be rounded on one side and relatively flat on the other. You will want
to cut through the membrane on the more rounded side of the
testicle. Take the scalpel and continue splitting the membrane covering the testicle (Figure 3) until you can pop out
the testicle. Separate the membrane from the testicle. The
membrane should remain connected to the bottom of the testicle. Next cut off the membrane above the testicle (Figure
4). By cutting away as much of the membrane as possible,
excessive swelling and inflammation will be prevented.
The testicle now is supported entirely by the spermatic cord.
Take hold of the testicle and extract it with a slow steady
pull. Stretching the cord in this way stretches and tears the
blood vessels which minimizes bleeding. Cut off any Figure 2
remaining cords or tissue hanging down with the scalpel.
Repeat the same procedure with the other testicle. After you
have completed removal of the second testicle, spray the
wound with an antiseptic.
The use of emasculators simplifies the procedure and is definitely recommended to help reduce bleeding when castrat-
20
Bulls
ing older calves (5-6 months). After cutting off the bottom
of the scrotum, grasp both testicles and pull down. Place the
emasculators as high up on the spermatic cord as possible
and cut. The crushing side of the emasculators should be
toward the body.
There are a few precautions to keep in mind. There is a
major blood vessel on the inside of the calf’s hind leg. Be
extremely careful not to accidentally cut this vessel, as
bleeding may be difficult to control. Provide a clean environment for the calves and observe animals for scrotal
infections. Infection may occur 1 to 2 weeks after castration
and should be treated by draining the wound and adminis- Figure 3
tering antibiotics.
There are other methods of surgical castration. The method
described here has worked successfully in keeping bleeding
and stress to a minimum.
Figure 4
21
Bulls
Bloodless Castration
Bloodless castration of calves is preferred by many dairy
people because it reduces the risk of open wound infection
and parasites. There are three major methods of bloodless
castration: the elastrator (bands) for small calves, banders
for larger bulls, and the Burdizzo® (emasculatome). There
are several steps you can take to assure a good job of castration by these methods.
Castration with the elastrator is accomplished by placing a
band around the scrotum above the testicles. This effectively stops the blood to the scrotum causing the scrotum and
testicles to slough off in 3-4 weeks. It is best to use this
method on calves prior to 2 weeks of age. In some European
countries the law dictates that calves are castrated prior to 1
week of age. To increase the success rate of this method:
1. Maintain the elasticity of the bands by storing them in a Figure 2
sealed container in the refrigerator.
A relatively new practice in the beef cattle industry is the
2. Restrain the calf either in a stall, or by laying it on its side. use of banders. Similar in principle to the elastrator, a heavy
rubber loop is tightened around the neck of the scrotum and
3. Place the rubber band on the elastrator (Figure 1).
secured with a metal clip. The scrotum shrivels and falls off
in two to three weeks. Bulls are banded when they start to
show signs of masculinity (between 700 and 800 lbs. in beef
bulls) and implanted with a growth promotant. Bulls up to
1200 lbs. have been successfully castrated with this method.
Proponents of banding claim increased rate of gain and
heavier carcasses because of the testosterone produced by
the testicles and stress to the animal is minimal. In very
large bulls there can be quite a strong odor from the decaying scrotal tissue four or five days after applying the bands
but the bulls continue to eat and grow.
Burdizzo® castration is usually done on calves weighing
200-600 lbs. The Burdizzo® comes in several different sizes.
Fit the size to the size of the calf. To tell if your Burdizzo®
is working properly, clamp it on a sheet of paper. It should
crease the paper without cutting it.
Figure 1
Good animal restraint helps minimize time required for the
procedure, stress on the calf and chance of injury to the person performing the task. Whether you use a chute or just
push the head through a feeder, a proper tail hold will
decrease the chance of injury from kicking. In Figure 3,
notice the hand is held on the base of the tail, pulling up and
forward.
Squeeze the elastrator handle to spread the bands while cupping your other hand over the band to protect your eyes
should the band break. Wearing safety glasses is an excellent practice. Make sure both testicles are in the scrotum
when the elastrator band is applied (Figure 2).
5. After the elastrator is removed, check to make sure both
testicles are below the band. If not, remove the band and
repeat the procedure.
Once the calf is restrained, palpate the testicles to make sure
both are present and normal (no scrotal hernias). Work the
testicles downward into the scrotum. Place your thumb and
forefinger around half of the scrotum at the center septum
(Note Figures 4 & 5). Move the spermatic cord to the outside edge of the scrotum. When you place the Burdizzo®
over the cord, be sure the Burdizzo® doesn’t cross over the
6. Calves with bands may be susceptible to tetanus.
Consider giving the calf a tetanus antitoxin shot at the
time of banding if there has been a problem with tetanus
on the farm.
22
Bulls
Figure 4
Figure 3
center septum. Crushing the center septum may interrupt the
blood supply to the scrotum and cause the bottom of the
scrotum to slough off.
Position the Burdizzo® as high as you can while still remaining on the scrotum. On younger calves, try to be at least 1
inch above the top of the testicle and on older calves, 2
inches above the top. Close the jaws of the Burdizzo®. Don’t
slam the jaws together! You should hear a popping sound
when the cord snaps.
While the jaws are still closed, take the testicle and pull
firmly downward and push forward to make sure the cord is
broken. Leave the jaws closed for at least 10 seconds. This
reduces swelling and stress on the calf. Lower the Burdizzo®
1/2 inch closer to the testicle and repeat the same procedure
(Figure 6). Double pinching gives you greater confidence
Figure 5
and assurance that the calf is castrated.
You might encounter two problems with this method. Several
days after Burdizzo® castration, you may observe calves that
are stiff legged and have very swollen scrotums. This causes
stress and reduces gains. Another problem with Burdizzo®
castration, especially for inexperienced or unskilled operators, is that the spermatic cord may not be completely severed
so calves remain bulls. Following the procedures described
above will help eliminate both problems.
Figure 6
23
Bulls
Implanting Dairy Steers
Feedlot operators have used growth promotant implants for
years to improve rate of gain and feed efficiency. An average of 10-15% improvement in rate of gain and approximately 7% improvement in feed efficiency is realized by
using implants. In addition, finished steers will have more
muscle and less fat. A disadvantage may be lower marbling
scores.
Optimal implant schedule is determined by diet, end slaughter weight and body type. Holstein steers that are on a high
energy diet and are slaughtered at approximately 400 days
should probably be implanted three times. The first implant
would be at 200-300 lbs. with a lower potency implant listed in Table 1. A moderate potency implant is used at 500600 lbs. A high potency implant is used 95 days prior to
expected marketing weight. If dairy steers are on less than a
80% concentrate diet or are not fleshing well, a high potency implant should not be used, as these cattle will not finish
well enough to grade.
Figure 1
Implanting is a relatively simple procedure, which can be
easily mastered following these steps:
Implant
Potency
Calf-oid
Lower
Implus-C
Lower
Ralgro
Lower
Synovex-C
Lower
1. Assemble the necessary equipment. Make sure the needle
on the implant gun is clean and sharp. Have a few
replacement needles on hand. Load the implants into the
gun properly to prevent crushing of the pellets. Make any
adjustments necessary so that the needle can be placed
parallel to the ear as the needle is inserted under the skin.
Have a disinfectant such as Nolvasan on hand at the right
dilution rate.
Compudose
Moderate
2. Restrain the steer.
Implus-S
Moderate
Steer-oid
Moderate
Synovex-S
Moderate
Finaplix-S + (Synovex or
Implus or Ralgro)
Higher
3. Sanitation is important to prevent a bacteria caused
abscess from developing at the implant site. If the ear is
clean and dry, the implant can be inserted. If the ear is wet
it should be brushed with a disinfectant solution before
implanting. If the ear is dirty, the dirt should be scraped
off with a butter knife before the disinfectant is applied.
Revalor-S
Higher
Table 1. Relative Ranking of Implant Potency for Steers
4. Pick up the implant gun with one hand and grasp the ear
with the other. Place the point of the needle at the implant
entrance site. This should be between the cartilage ridges
and away from major blood vessels. The needle should be
nearly parallel to the ear with the beveled side facing
away from the ear (Figure 2). Lift the skin slightly and
insert the needle under the skin. If you feel resistance, it
may be because the needle is at too steep an angle and
you are gouging the cartilage of the ear. It may help to
rotate the needle so that the point is up towards the skin.
If the needle is properly placed, it should slide relatively
easily under the skin and you should be able to see the
outline of the needle.
Good handling facilities make implanting quick and easy.
Properly designed corrals with a head gate is a necessity.
Larger steers may need an additional restraint such as a nose
lead. An experienced person can implant an animal quickly
with little animal stress or restraint.
The implantation site is under the skin in the middle 1/3 of
the back of the ear (Figure 1). If part of the ear has been lost
because of frostbite, the implant should be placed in the last
third of the ear.
24
Bulls
Figure 2
Figure 4
5. After the needle is fully inserted, withdraw the needle
about 1/2 inch and begin depressing the plunger as you
slowly withdraw the needle (Figure 3). Physically palpate
the implant site to determine that the pellets are deposited in a straight line with the last pellet 1/2 inch from the
opening that the needle made. The needle hole should be
closed by pressing down on the hole. Rather than pellets,
Compudose® is a silicone implant that is impregnated
with a growth promotant. Because of its larger size, it can
be a bit more difficult to get the needle properly positioned (Figure 4). But with a little experience, the successful implantation rate can be as high for Compudose®
as the other implants.
6. The needle should be cleaned between animals with a
diluted disinfectant. One ounce of chlorhexidine, the blue
disinfectant, per gallon of water works well. Alcohol does
not. The cleaned implanting needle can be dipped in an
approved, non-irritating antibiotic between animals as
added insurance. Keep replaced needles on hand in case
the needle in use becomes dull or damaged. Dull needles
can be resharpened on a whetstone. Make sure there are
no burrs on the inside of the needles.
7. If steers are re-implanted later, it is a good idea to use the
opposite ear. For example, implant all calves in the left
ear, next time use the right ear. If Finaplix and another
implant is used, put one implant in each ear.
Implanting is a relatively simple operation and can be mastered with a little experience. Errors that will decrease effectiveness include:
1. Depositing the implant into the cartilage will cause
absorption to be too slow.
2. Dirty needles can cause abscesses or infections, which
walls off the pellets and prevents absorption.
3. Severing a blood vessel in the ear may cause absorption
of the implant to be too quick.
4. Failure to withdraw the needle as the pellets are deposited may cause them to be crushed. Absorption will be too
quick and may cause the animal to act as a bull.
Figure 3
By getting steers on implants from 200 lbs. to market, you
can realize savings of about $40 per head or more. With
practice, implanting is easy and takes only a few seconds.
Follow manufacturer’s recommendations for proper implantation and withdrawal times.
25
Calves
Dehorning Calves and
Older Animals
Unfortunately, dehorning calves tends to be one of those
jobs that gets put off until animals are much older and larger than need be. Dehorning animals at an older age is more
dangerous, requires more labor, and greatly increases the
level of pain and stress on the animal. In fact, many
European countries have passed laws encouraging dehorning at a young age because it is more humane.
The preferred method of dehorning will depend somewhat
upon the size of the calf. When dehorning young calves, it
is only necessary to destroy or remove the keratin producing
cells of the horn bud. Left intact, these cells produce the
outer casing of the horn. Skull bone then grows to occupy
the center of the horn. Caustic chemical, tube dehorners, or
an electric dehorner can be used to prevent the horn from
developing. Tube and electric dehorners can generally be
used up to about four months of age. Barnes-type dehorners,
dehorning clippers and saws are used to remove horns from
more mature animals.
Figure 1
Tube dehorners come in a set of four different sizes (Figure
2). Select the correctly sized tube so that about 1/8 inch of
skin around the bud will be removed. Place the tube over the
bud (Figure 3). Twist with moderate pressure to cut through
the skin. When you are through the skin to the bone, slant
the dehorner at a 45 degree angle with the tube’s handle
toward the calf’s muzzle. Applying pressure and twisting,
scoop out the horn bud. Occasionally, the bud may still be
attached by a strip of skin. Have a sharp knife handy to cut
through this skin to complete the removal of the horn bud
(Figure 4).
Caustic Stick or Paste
Caustic stick or paste is best used on calves less than 2
weeks old. First clip the hair around the base of the horn bud
as close as possible. Next clip, scrape with a knife, or file off
the end of the horn button or rough tissue over the horn bud.
This allows the dehorning chemical to easily penetrate the
tissues that produce the horn. Apply a ring of petroleum
jelly or Vaseline around the base of the horn to prevent any
excess chemical from running into the eye or onto unprotected skin. The Vaseline ring is not necessary if the dehorning chemical is lacquer based.
Sprinkling astringent powder on the wound will help minimize bleeding. If calves are dehorned prior to 4 weeks of
age, there is usually very little bleeding and blood vessels
may not have to be pulled. However, it is a good practice to
check for exposed arteries and pull them to minimize blood
loss. When using the large tube dehorner on older calves,
the angle of cut is such that it can be difficult to locate and
pull the artery. In that case, it is better to use a gouge or
Apply the caustic stick or paste according to the directions
on the label. Cover an area about the size of a nickel (Figure
1). If housed in group pens, restrain calves for a few hours
to prevent them from rubbing the chemical off on each
other, which may cause burns or scars. A scab should form
in 6-8 hours. Excellent results have been obtained using this
method of dehorning, but for some dairymen, results have
been variable and disappointing.
Tube Dehorning
Using a dehorning tube on calves 1 to 4 weeks of age is one
of the easiest and safest ways of dehorning. Restrain the calf
in a head gate, or more simply lay it on its side on the
ground. If inexperienced, you may have difficulty locating
the horn bud on young calves. Clipping the hair over the bud
will make it more easily visible. With additional experience,
clipping the hair will not be necessary.
Figure 2
26
Calves
eliminates the worry of fly problems. Calves can be
dehorned from 1 week to 4 months of age with this method.
There are a couple of disadvantages to electric dehorning.
Smoke and odor during the procedure can be offensive.
Incomplete dehorning can result in horn tissue that regenerates into scurs.
Here are a few suggestions to help eliminate some of the
odor problems:
1. Use the electric dehorners in a well ventilated area.
2. Clip the hair around the horn buttons to help eliminate
smoke from burning hair.
3. Dehorn calves at a young age, and use the electric iron
appropriate for the size of horn buttons. Figure 5 shows two
common electric dehorners. The amount of smoke and odor
from the dehorner with the small tip is negligible compared
with using the larger tip and the wound is much smaller.
Figure 3
Figure 5
Proper dehorning will eliminate scur growth. If scur growth
occurs, the heat from the dehorner did not penetrate deep
enough to destroy the blood supply to the horn tissue. You
can avoid this by using the appearance of the horn button as
a guide for when the procedure is finished, rather than just
using a certain number of seconds as the stopping point.
Amount of time required will be influenced by temperature
of the dehorner, amount of force applied to the dehorner and
the fit of the dehorner tip over the horn button.
Figure 4
Barnes dehorner, which will expose the blood vessels for
easier removal. Observe calves for a few hours and if excessive bleeding is noted, pull the blood vessel.
A copper ring around the horn is generally used as an indicator that the dehorning is complete. However, if the dehorner is
applied without enough force, this copper ring can appear
without enough heat penetration to destroy the underlying
blood supply to the horn button and horn or scur growth will
occur. Some people prefer to apply the dehorner just a bit
longer until it penetrates through the skin to the skull. Note the
white ring inside the copper ring in Figure 6. In this case you
can be sure that there will not be horn regrowth.
Apply a fly repellent dressing if dehorning is done during
the fly season. Observe the calves for a few weeks and if a
maggot infestation is noted, clean the wound and apply a fly
repellent wound dressing.
Electric Dehorning
Electric dehorning of calves has gained popularity, particularly for use during the summer. Because it is bloodless, it
27
Calves
4. The dehorner has to be left on the button for approximately 5-20 seconds. The time will seem longer, because of the
combined unpleasantness of burning hair and a struggling
calf. If the horn button doesn’t show a good copper ring, or
separation between the hide and button, if that is desired,
apply the dehorners again for another 5-10 seconds. Keep
checking the button until a good copper ring surrounds the
button. Another indicator that dehorning may be complete
is when you hear a squeaking sound as the dehorner is
twisted. It is the sound of the dehorner tip rubbing against
the bone of the skull. Figure 8 shows where the dehorner
penetrated through the hide to the calf’s skull and the horn
button removed. This will not generally cause a problem.
The calf will not be unduly injured if the dehorner is inadvertently applied a little longer than necessary. The skull is
fairly thick in young calves at this location and underneath
is the sinus cavity space.
Following are pointers for effective dehorning:
1. Restrain the calf so its head is immobile. The calf’s head
can be pulled through a feedbunk or stanchion and the
head tied with halter or nose lead to the opposite side
being dehorned. Another method of restraint is to lie the
calf on its side and put your knee on the neck. Be careful
of the feet and legs with this method. It may be advisable
to have someone help hold the calf still.
Figure 6
2. Plug the electric dehorner in 10-15 minutes before
dehorning, so the iron can preheat. The iron is hot enough
as soon as it can char a piece of straw or paper.
3. With your free hand, grasp the ear of the calf on the side
to be dehorned. Place the dehorner around the button with
good pressure. Twist the dehorner clockwise and counter
clockwise slowly to help distribute the heat evenly
(Figure 7).
Figure 8
5. After dehorning, a scab will form in the area. Scab and
horn bud will fall off in 4-6 weeks. Even though this is a
bloodless form of dehorning, if the calf disturbs the scab,
a small amount of bleeding may occur which could
attract flies in the summer months. While this is seldom a
problem, calves should be observed and if a maggot
infestation is noted, the wound should be cleaned and a
fly repellent wound dressing applied.
6. Always use an iron free of charred material. Use a wire
brush or scraper to clean the dehorner top as you work.
Charred material acts as an insulator between the hot tip
and the horn button.
7. The younger that the calf is when electrically dehorned,
the less stress it is on the calf and the person performing
the operation. A dehorner with a small tip should be used
on the younger calves. The dehorner with the larger tip
should only be used on older calves whose horn buttons
are already too large for the smaller dehorners.
Figure 7
28
Calves
8. Use a heavier extension cord than the 18 gauge cords most
commonly sold to assure ample voltage at the dehorner. If
the cord is less than 50 feet long, a 16 gauge cord is recommended. If longer, go with 14 gauge. If too light or
excessively long cords are used, resulting voltage drop will
cause the dehorner’s heating elements to heat to a lower
temperature and may cause them to fail prematurely.
With more calves being raised in calf hutches without a convenient electricity source nearby, battery operated, butane
fueled or propane fueled dehorners are becoming increasingly popular (Figure 9). They are more expensive to purchase, but are very convenient and work well.
Figure 10
4. Spread the handles apart quickly with inward and downward pressure, twist, and lift up. A complete ring of hair
should be removed with the horn (Figure 11). If all the
horny tissue is not removed, a second or third cut may be
necessary to prevent scurs. Proper positioning of the
dehorners the first time will make this unnecessary.
Figure 9
Barnes-type Dehorners, Clippers, Saws
Barnes-type dehorners, clippers, and saws may be used on
cattle varying in age from 2 months to maturity. Use caution
when dehorning larger cattle. The exposed sinus cavity and
blood after dehorning attract flies during the fly season.
During cold weather, the exposed sinuses can lead to respiratory problems. Therefore, it is generally best not to dehorn
large animals during summer or winter months.
Barnes-type dehorners can be used on calves from 6 weeks
to 12 months of age.
Figure 11
1. Assemble equipment needed: Barnes dehorners, disinfectant to sanitize dehorners between calves, forceps or pliers, 5. Stop excessive bleeding by cauterizing or pulling the
roll of cotton and styptic powder (blood clotting powder).
exposed arteries. The major arteries will be located at the
bottom of the wound between the base of the ear and the
2. Restrain the animal properly. A chute with a head table is
eye. In older animals, an artery may also be fairly well
preferred. Haltering the calf and securing its head through
developed opposite the major ones at the top of the
a fenceline feeder is also an adequate method of restraint.
wound. Forceps, hemostats, needle-nosed or regular pli3. Place the Barnes dehorners over the horn or horn button.
ers can be used to pull arteries. Actually most people are
The knives of the dehorner should be placed so 1/4 inch
more efficient at pulling arteries using an ordinary set of
of skin is taken all the way around the horn button. Proper
slip joint pliers found on most farms because they have a
placement is critical in calves with larger horns because
wider gripping surface. The broken artery will retract into
of the oblong shape of the horn. Figure 10 shows placesoft tissue and bleeding should stop. Pulling arteries will
ment that will facilitate proper dehorning.
not cause internal bleeding (Figure 12).
29
Calves
Anesthetic During Dehorning
With increased concern for animal welfare, there is increased
interest in reducing pain to the calf. In fact, in some countries
calves must be given an anesthetic prior to being dehorned.
The nerve for the horn area extends from near the eye and
runs under a small ledge of the skull to the horn. Using a 1/2
to 1 inch needle, the anesthetic is injected under this ridge
(Figure 14). Anesthetic and dosage levels can be procured
from your veterinarian. The anesthetic works almost immediately if deposited on the nerve. However, you should wait
at least 5 minutes before dehorning. This is the time required
for the anesthetic to diffuse through the tissue to the nerve if
the injection was off by just a little. A vein and artery run
along side the nerve and if the anesthetic is inadvertently
injected directly into the blood stream it can cause the animal
to temporarily go down. This is usually not a problem, but it
is sometimes recommended to withdraw the plunger of the
syringe slightly before depositing the anesthetic. If blood
flows into the syringe the needle is in a blood vessel.
Reposition the needle before making the deposit.
Figure 12
The arteries can also be cauterized using a hot iron. A soldering tip directed at the bleeding source works well. Avoid
using a large electric dehorner for this purpose, as it will
result in more destruction of tissue than necessary and may
not penetrate deep enough to stop the bleeding.
A blood clotting powder can be applied if the sinus cavity is
not exposed. If it is, as in Figure 13, cover the sinus with a
thin layer of cotton after the main arteries have been pulled.
This will help facilitate clotting and prevent entry of foreign
matter into the sinus. The brain sinus should swell shut in 34 days. Calves should be observed periodically for 24 hours
to spot excessive bleeders. Calves that continue to bleed
need to be restrained and the artery cauterized or pulled.
Figure 14
An alternate protocol was recently reported by researchers to
minimize pain related behaviors in 4-8 week old calves
dehorned with an electric dehorner. Calves received a nonsteroidal, anti-inflammatory drug (ketoprofen) before
dehorning as well as 2 and 7 hours afterward. Calves received
a sedative (xylazine) and local anesthetic (lidocaine) a few
minutes before dehorning. Consult your veterinarian if you
wish to adapt these procedures for your farm.
Figure 13
As calves become older, the amount of bleeding, stress on
the calf, and labor requirements become greater. Cattle more
than 1 year of age may be too large for the Barnes dehorners.
They will have to be dehorned with a dehorning clipper or a
saw. Saws need to be used on mature animals, rather than
clippers, to prevent the possibility of cracking the bone that
forms the horn core. You want at least 1/4 inch of skin or ring
of hair all the way around the horn. Don’t start at too deep of
an angle when using a hand saw. Pull the arteries.
30
Health
Taking an Animals
Temperature
Following are normal ranges for temperature, heart and respiration rates for animals at rest:
One of the first signs of an infection is that an animal will
have an elevated temperature. For that reason, a temperature
should be taken for any animal that appears to be under the
weather. It has become a common practice on many dairies
to take daily temperatures for five days after calving.
Heart
Rate
Respiratory
Rate
101.4-104
130
56
1 month old
101.4-103.5
105
50
3 month old
101.4-103.5
99
40
6 month old
101-103.5
96
30
1 year old
99.5-103.5
80
18
99-103
80
14
Newborn
A bulb type thermometer or digital thermometer can be used
to take the temperature. A bulb thermometer needs to be
shaken down below 96º F before use. The thermometer or
probe should be lubricated prior to insertion. Most people
use their own saliva as a lubricant but Vaseline or other suitable lubricant can be used. A bulb thermometer should be
left in the rectum for 2-3 minutes. It is a good idea to have
a string attached to the hole in the top of the thermometer
(Figure 1). After the allotted time, remove the thermometer,
wipe it clean, and read the temperature.
Cows
Heart rates can be felt in the artery on the underside of the
tail, the artery inside the hind leg, the chest of a calf, or
heard with a stethoscope on the chest of a cow.
Figure 1
Digital thermometers have the advantage in that they are
much faster. The temperature can be read as soon as the
readout stops fluctuating (Figure 2).
Figure 2
Temperature
31
Health
Tips on Giving Injections
Intramuscular
The most common injection is intramuscular (IM).
Antibiotics, for example, are mostly given IM. The three
most desirable IM injection locations (Figure 2) are the
thigh, thick part of the neck muscle, or rump (flat region
between the hooks and pins).
A variety of injections of antibiotics, vitamins, hormones,
vaccines, or dewormers are given on dairy farms. Using
proper techniques will reduce frustration and improve performance of products being injected.
Keep several lengths and gauges of needles on hand. The
gauge number and needle diameter are inversely related. For
example, a 20-ga. needle is smaller than an 18-ga. needle. A
dairy should have 16, 18, and 20-ga. needles on hand ranging in length from 3/4 to 2 inches. Always use the smallest
needle available that will do the job to minimize tissue damage and leakage. Generally, for intramuscular injections use
a 16 or 18 gauge needle, 1 to 2 inches long. Subcutaneous
injections should be given with a 1/2 inch, 16 gauge needle.
A 16 gauge, 2 inch needle is used for IV injections.
Proportionately smaller needles can be used for calves.
Syringes and needles are best sterilized by boiling in water
for 10 minutes. At a minimum, syringes and needles should
be cleaned with soap and water, rinsed thoroughly with
water and allowed to air dry. Disposable syringes and needles are a cheap and viable option.
Figure 2
Most injectables need shaking before use. After shaking,
inject the same amount of air into the bottle as the amount
of liquid you wish to withdraw. This prevents a vacuum
from forming as the liquid is withdrawn (Figure 1). If the
liquid is thick, a 3/4 inch, 18 or 16-ga. needle will give a
faster fill. After filling, tap the barrel of the syringe to send
air bubbles to the top and expel the bubbles.
The rump is generally the easiest to inject, but has poor circulation causing slower absorption. For calves, use an 18-20
ga. needle, 1 inch long. Use a 16-18 ga., 1 1/2 inch needle
on older animals for quicker delivery of the product deep
into the muscle.
Once the injection site is chosen and the animal is properly
restrained, use these tricks to help place the needle IM.
Pinch or pull the skin a couple of inches from the intended
injection site (Figure 3) or firmly slap the area 2-3 times to
distract the animal. With a quick thrust, plant the needle
almost straight in. With the needle and syringe properly
placed, draw back the plunger (Figure 4). If blood appears
in the syringe, the needle may be in a blood vessel and it
should be withdrawn slightly before injection. If the solution goes directly into the blood, it may go to the brain and
temporarily affect motor function. Do not exceed much
more than 15 cc of fluid at one injection site in the adult animal. Smaller amounts should be used in the immature
calves, down to 5 cc in the small calf. More than this can
cause some muscle necrosis and stiffness. After a large dose
is injected, it is a good idea to massage the area to help disperse the drug.
Figure 1
Be sure to read the label for type of injection. An improper
injection can cause the solution to be less effective, increase
withdrawal times, or cause injury to the animal. In addition,
to lessen risk of infection, the injection site should be clean
and dry. Applying disinfectant (alcohol) to the injection site
is probably not worthwhile.
Subcutaneous
The subcutaneous (Sub-Q or SC) injection is made directly
under the skin for slower absorption. Vaccines are usually
given this route. A 1/2 inch, 16-gauge needle can be used if
a small dosage is given.
32
Health
Figure 3
Figure 5
Hold the needle parallel to the vein with the beveled opening
facing toward you as you push the needle through the skin
(Figure 6). After it is through the skin, hold the needle a little more perpendicular to the neck as you push it through the
wall of the vein. Once to the middle of the vein, lower the
needle back parallel to the vein, then insert it the rest of the
way being careful to keep it in the center of the vein.
Figure 4
Give subcutaneous injections in the neck near the shoulder,
where a large lymph node bed nearby will help in absorption. Figure 5 shows grabbing a fold of skin and thrusting
the needle into the open cavity left by the fold of skin.
Again, check for blood. If none, deposit the solution. The
maximum SC injection is 20-30 cc in the adult and down to
7-10 cc in a calf. Massage the area briefly to reduce
swelling.
Intravenous
When large volumes of solution are given (such as Calcium
Dextrose or CMPK for milk fever) an intravenous (IV)
injection is used where injection is made directly into the
jugular vein. The jugular veins carry blood from the head to
the heart and runs from the back of the jaw to the shoulder.
To make an intravenous injection the animal is generally
restrained by a noselead with its head tied to the side. To
assist with finding the vein, a rope or rubber tourniquet is
usually placed on the neck below the proposed injection
site. Finger or thumb pressure by you or an assistant against
the vein may be used instead of a tourniquet. With proper
pressure the vein becomes prominent, making insertion of
the needle easier.
Figure 6
Blood should flow from the inserted needle. If not, try
pulling the needle out slightly, rotate a quarter turn and push
back in. This procedure may get the beveled end more in the
center of the vein.
33
Health
Once the needle is properly positioned, the tourniquet or
hand pressure on the lower vein is removed. At this point the
blood can flow back to the heart and no or very little blood
will be squirting from the needle. If blood continues to
squirt from the needle at a high rate, it may be in the carotid
artery which flows from the heart to the brain rather than in
the jugular vein. Do not make injections into this artery. If
in doubt, remove the needle and begin the procedure over.
The carotid artery is deeper in the neck than the jugular vein
and it is unlikely that you will hit it but it has happened.
When attaching the rubber tube or syringe to the needle, let
a few drops of solution drip out to make sure that no air bubbles get into the vein. After attaching the tube or syringe,
release the tourniquet or thumb pressure. Allow the solution
to flow into the vein at a slow rate (use the manufacturer’s
rate of flow as a maximum). The rate of flow is determined
by how high the bottle is held if a tube is being used. It
should take 10-20 minutes to administer 300 ml.
Figure 7
If the flow rate is too fast, the animal may go into cardiac
arrest. At the first signs of shortness of breath, rapid pulse or
frothing from the mouth, discontinue the injection until the
animal returns to normal. Then resume the injection at a
slower flow rate.
If a second bottle is given, it should be administered at a
slower rate than the first. If possible, monitor the heart with
a stethoscope. If the heart beat becomes irregular, stop the IV
immediately. If milk fever is being treated, it is not unusual
for a cow to shake or shiver slightly or belch after treatment.
A low volume intravenous injection (<5 cc) can also be
given in the tail vein. This vein can also be used to draw
blood samples. Whether drawing a blood sample or giving
an injection, the underside of the tail should be first cleaned
with a disinfectant (Figure 7). The vein runs down the middle of the underside of the tail. You will want to insert the
needle at an angle in a valley between the bony projections
(Figure 8). After the needle is inserted into the vein, pull
back on the plunger. The syringe will readily fill with blood
if you are in the vein (Figure 9). If not, remove the needle
and try again. Because the vein lies just next to the bone,
you may contact the bone as you attempt to locate the vein.
Withdraw the needle slightly if this happens.
Figure 8
Always consult your veterinarian for specific drug and treatment information. Always read the labels before administering any solutions. Check dosage, route of administration,
and expiration dates. Keep drugs properly stored (most are
refrigerated) and out of sunlight. Mix different solutions or
give multiple injections only under the direction of a veterinarian. Many products are not compatible, and mixing them
decreases effectiveness of each.
Figure 9
34
Health
Minimizing Calf Scours
Calf scours is one of the most common diseases affecting
young calves. It can be caused by infectious organisms,
nutritional or environmental stresses. Most frequently, a
multiple of factors are involved. The amount of effort needed to control scours will vary from farm to farm. Infectious
causes of calf scours are presented in Figure 1.
Traditionally, E. coli, coronavirus and rotavirus have been
most commonly reported, but there has been an increase in
reported severe outbreaks of cryptosporidia caused scours.
As with most diseases, an ounce of prevention is worth a
pound of cure.
Infectious Cause of Scours
Bacterial Causes:
Enterotoxigenic
severe E. Coli (ETEC)
Salmonella
Viral Causes:
Coronavirus and
Rotavirus
BVD Virus
Protozoan Parasites:
Cryptosporidium
Coccidiosis
Figure 2
fed within 4-6 hours. Some herds have solved calf health
problems by feeding a full gallon of colostrum as soon as
possible after birth. The calves may drink the first 2
quarts, but need to be tubed the second 2 quarts. They are
not force fed if not hungry for the second feeding 12
hours later, but usually regain their appetites for the feeding 24 hours later. Good colostrum will have a thick consistency and colostrum from 4-5 year old cows will have
a 40% higher antibody content than that from 2 year olds.
Keep frozen colostrum on hand from an older cow for
those occasions when a cow may calve without adequate
colostrum. An excellent method of freezing colostrum is
to place 1 quart of colostrum in a 1-gallon zip-lock bag
laid flat in the freezer. If the freezer is -5º F or below the
colostrum should stay good for over a year. Colostrum
can be thawed in warm water (<120º F) or in a
microwave. The microwave should be set on low power
for short periods and the thawed liquid poured out after
each period to avoid overheating. Thawed colostrum
should be at body temperature (101º F) when fed.
Most common cause of
watery diarrhea with
dehydration
Not common but outbreaks
on individual farms can be
severe
Present in most herds. Often
compounded by bacterial
infections.
Causes persistent diarrhea.
Erosions on lips, tongue. IBR
May cause listlessness,
scours and death.
Usually show signs of severe
watery diarrhea, dehydration,
anorexia and depression
within 5 days up to 3 weeks
of age.
3. Calves should continue to receive colostrum for three
days. The antibodies continue to provide immunity in the
gut even though they are not absorbed intact into the
bloodstream.
Affects calves 3-4 weeks of
age or older. Blood in feces.
4. Milk replacers should contain less than .5% fiber and be
made from milk by-products such as whey, dried skim
milk and casein. It may be advantageous to stay on
colostrum or whole milk in problem herds.
Figure 1
Prevention
1. When weather permits, a clean grass lot is an ideal place
for calves to be born. If a pen is used, it should be cleaned
and disinfected between calvings (Figure 2).
5. Clean calf-feeding utensils the same as milking equipment by using a warm rinse, hot detergent, acid rinse and
allow to dry. Sanitize with 100 ppm chlorine before use.
2. Regardless of where the calf is born, a minimum of 2
quarts of colostrum should be fed within 30 minutes of
birth. Feed from a bottle that was hand milked from the
mother. Force-feed weak calves. Another 2 quarts can be
6. Maintaining a closed herd may prevent introducing “hot
bugs” to the dairy.
7. Isolate sick calves or feed and handle them last.
35
Health
Scours causes death in calves by dehydration, loss of electrolytes and/or lack of nutrient absorption. Treatment needs
to address these three areas while allowing the calves’
immune systems time to fight off the infectious agents causing the scours.
1. Continue feeding the calf the same amount of milk as
usual. It is beneficial to divide the daily milk intake into
3 or 4 feedings. If fed 4 times per day, a 90 lb. calf would
get 1 quart per feeding or 1 1/3 quarts if fed three times
per day.
2. Feed an equal amount of a commercially available electrolyte solution as milk for the first two days of treatment,
and then decrease the amount to 3 quarts on days 3 and 4
and 2 quarts on days 5 and 6. Less electrolytes may be fed
for a shorter duration for mild cases of scours or as the
severity of scours decreases.
Figure 3
8. Provide a clean, dry, well-ventilated calf raising environment. Calf hutches prevent the transmission of infectious
agents from calf to calf (Figure 3).
Do not mix the electrolyte solutions with the milk.
Electrolyte solutions may be either acidic or alkaline. If an
acidic solution is used, the solution can be fed 15 minutes
after the milk. Regarding alkaline solutions, optimally they
should be fed at least 4 hours prior to milk feeding. Alkaline
solutions raise the pH of the digestive tract for up to 4 hours,
which can interfere with milk protein digestion and result in
loose stools. If a commercial electrolyte solution is not
available, an alkaline solution can be mixed using ingredients in Figure 4.
9. Consistently feed the correct amount of milk to each calf.
A calf should receive 10 percent of its birth weight each
day. A 90-pound calf gets 9 pounds per day or 4.5 pounds
(2 quarts = 4.3 lbs.) in two equal feedings. A 70 lb. calf
would receive about 1 3/4 quarts. Inconsistent or overfeeding can cause scours. On the other hand, some farmers have solved scour calf problems by gang feeding them
twice as much milk with several nipples off one barrel.
10. If E. coli is the cause of a herd scours problem, vaccination of dry cows with a K-99 bearing E. coli bacterin
will give protection to calves through the colostrum.
Colostrum from the vaccinated cows should be fed for
at least 3 days and preferably longer.
3. If the calf does not voluntarily drink the milk or electrolyte solution, tube the calf with an esophageal feeder
Electrolyte Solution
Energy source:
50 cc 50% dextrose solution
(or 1/4 cup light Karo syrup)
(or 1/2 package pectin)
(do not use table sugar)
11. Vaccines against rotavirus-coronavirus are available.
The cow may be vaccinated prior to calving to provide
antibodies in the colostrum. If an oral vaccine is used on
newborn calves it must be given prior to the colostrum.
If scours from rota or corona viruses are still occurring,
colostral supplements (such as Lifeline or Gammulin)
may solve the problem by feeding 1 ounce per feeding
for the 1st few days and then dropping to one half ounce
per feeding until the danger of scours has past.
Electrolytes:
1/2 teaspoon low sodium (Lite®) salt
(use regular salt if not available)
1/2 tablespoon baking soda Add warm water to
make 2 quarts
Treatment
Calves should be checked twice daily for scours. The treatment course to take is influenced by past experiences in the
herd. Mild cases may not need treatment or may benefit
from administration of an electrolyte solution after milk
feeding. Signs of dehydration (sunken eyes, loss of skin
elasticity - skin does not spring back after pinching between
two fingers) and profuse diarrhea requires a more aggressive
treatment.
Figure 4
or stomach tube (Figure 5). A severely dehydrated calf
may need an intravenous administration of electrolytes.
4. Make sure fresh water is always available to the calf.
36
Health
5. Dehydrated calves often suffer from hypothermia.
Provide supplemental heat if needed.
6. There is disagreement regarding the benefits of antimicrobial drugs in treating calf scours.
a. Antimicrobials may help if the scours are caused by a
bacterial agent that is susceptible to the drug being
administered. Antibiotics do not kill viruses or protozoa.
b. If drugs are used for E. coli scours, they should be
given orally. Injections are preferred for scours caused
by Salmonella.
c. Misuse of drugs may cause or worsen scours.
d. Occasional loose feces is common in healthy calves.
The practice of giving a few “scour pills” to every calf
with loose feces perpetuates the idea that antibiotics are
needed. The calves would have recovered on their own.
Attention to detail and cleanliness will solve most scour
problems. Because of the wide range of causes, work with
your veterinarian to fine tune a prevention and treatment
program.
Figure 5
37
Health
Treating Pinkeye
As warm weather approaches, we see an increase in pinkeye
(Infectious Bovine Keratoconjunctivitis, or IBK). Bright sunlight, dust, wind, pollen and face flies irritate and increase the
eyes’ susceptibility to infection. Also, eartags placed to far out
on the ear, so when the calf flicks its ear the tag nicks the eye,
has been implicated in contributing to pinkeye. Pinkeye usually occurs in summer, but may occur any time during the year.
Clip pastures, control flies, minimize dust and provide shade
to help lessen chance of infection.
Even under the best management, outbreaks may occur.
Young animals are generally more susceptible than older
ones. Economic losses can be seen in decreased growth,
actual damage to the eye, a possible drop in milk production
and the cost of treating cattle.
Figure 2
Most pinkeye cases are caused by a bacterium called
Moraxella bovis, which invades the eye after irritation. The
bacteria produce a toxin, which erodes the eye coverings.
Initial symptoms are a watering eye, blinking of the eye, or
holding the eye closed (Figure 1). The animal may seek
shade and stand with the affected eye away from the sun. The
eye becomes red and swollen. As the disease progresses, a
whitish, opaque spot appears in the center of the eye (Figure
2). In acute cases, this opaque spot enlarges, ruptures and
results in blindness.
Start treatment as soon as pinkeye is diagnosed to minimize
economic loss and prevent unnecessary suffering for the animal. To treat the animal, secure the head and examine the eye
closely. With pinkeye there should be a white opaque spot in
the middle of the eye. If the eye irritation is caused instead
by a foreign object in the eye, the white opaque spot will be
to the side of the cornea. If that is the case, you may be able
to lift the eyelid and remove the foreign matter with a cotton
swab. If the foreign object is deeply embedded it might have
to be removed by a veterinarian using anesthetic and forceps
or scalpel. IBR (red nose) also may cause a red and painful
eye but usually both eyes are affected, there may not be a
white opaque spot present and the discharge is more of a
white, creamy pus rather than clear tears.
Many different antibodies and routes of administration have
been attempted as treatments for pinkeye. The pinkeye infection usually clears after treatment but it also clears in most
untreated animals, as the immune system will eventually
eliminate it. Recent studies comparing different treatments
conducted at the University of California at Davis yielded
the following results:
1. The most effective treatment for pinkeye that they investigated was injecting 20 mg/kg (about 5 ml/100 lb) body
weight of long acting oxytetracycline (LA-200) intramuscularly 2 to 3 days apart.
2. They found that the two injections of LA-200 plus feeding
2 gms daily of oxytetracycline for 10 days after the second
injection reduced the incidence of pinkeye for the entire
summer in herds with a high incidence of the disease.
Figure 1
3. Florfenicol (Nuflor) was injected intramuscularly at the
rate of 3 ml/100 body weight two days apart and compared to a one dose SQ injection of 6 ml/100 lb body
38
Health
In addition to antibiotics, topical atropine can be applied 1 to
3 times daily to relieve pain and corticosteroids may be
administered topically or injected into the underside of the
eyelid to decrease corneal scarring. Do not inject corticosteroids into pregnant animals because it can cause abortion.
weight. Both were effective in promoting faster healing
than untreated animals.
4. Injecting Procaine penicillin G just beneath the thin layer
of tissue on the surface of both eyeballs using a fine needle daily until healed was as effective in treating acute
cases as the intramuscular injection of LA-200. It was not
as effective in preventing recurrences or new cases of the
disease as the LA-200 injection. Because of the difficulty
of giving this type of injection, it does not seem like a feasible alternative to the LA-200 intramuscular injection.
Applying an eye patch after treatment is advisable to prevent
further irritation from sunlight, dust and wind, and prevent
transmission to other animals. They probably have no effect
on healing rate. Patches can be purchased or made from an old
pair of blue jeans. When applying the patch with a bead of
glue (example: Kamar adhesive), leave a 2 to 3-inch space
without glue at the bottom for drainage (Figure 4). The patch
should wear off in about 14 days and the eye should be healed.
If not, repeat the patch after consulting with your veterinarian.
5. Another treatment was to inject 1 ml procaine penicillin G
with a fine needle under the tissue of the inner eyelid and
depositing the liquid so a small “blip” appears under the
inner eyelid tissue. The same procedure was tried with a
mixture of 1 ml penicillin G and 1 ml dexamethasone.
With or without dexamethasone, the injection of penicillin
into the upper eyelid did not speed healing in these trials
(A protocol claimed to be successful on some dairies is to
inject a mixture of 3 ml procaine penicillin G and 3 ml
dexamethasone with half given in the upper eyelid and
half given in the lower eyelid).
6. Topical application of furazolidone spray daily for 3 days
promoted recovery but was not as effective as the intramuscular injections of antibiotics.
Topical ointments that may be effective in speeding recovery
include antibiotics such as oxytetracycline, gentamicin, terramycin and a neomycin-polymixin-B-bacitracin combination. These are generally applied 1 to 2 times a day up to several days. If convenient, applications up to 4 times per day
may be more effective. Dairy producers have substituted the
antibiotic preparation from a mastitis treatment tube if eye
ointment was unavailable. To apply eye ointment, hold the
tube almost parallel to the eye with your hand resting on the
animals face. Move the tube backward across the eye as you
make your deposit (Figure 3).
Figure 4
Other more exotic methods are being used to treat pinkeye.
Some veterinarians sew the third eyelid closed with dissolvable suture instead of using a patch, to protect the eye after
antibiotic therapy. Also, a contact lense with antibiotic on it,
which attaches itself to the eye and upper eyelid, has been
developed and shown to be quite effective. The contact dissolves after the antibiotic is worn out.
Several vaccines are available to help provide immunity
against the bacteria, which causes pinkeye. They vary in
effectiveness probably because there are many different
strains of Moraxella. New vaccines are under development.
Consult your veterinarian on vaccine use. Some cows can be
carriers of the bacteria and never show symptoms of the disease, allowing it to spread to other animals by flies or direct
animal-to-animal contact. Controlling flies by using insect
tags and good sanitation will help prevent bacteria spread.
Some research has shown a benefit from good vitamin A
nutrition in controlling pinkeye in confined cattle. Check your
feed, and supplement vitamin A if the requirement is not met.
Figure 3
39
Health
Treating Ringworm
without first removing the crusts will give disappointing
results, because the fungus is in the skin.
Ringworm is a disease that commonly appears during winter months in animals housed indoors. It is caused by a fungus, Trichophyton verrucosum, that forms grayish, crusty or
scabby ringlike lesions, hence the name ringworm.
Although cattle of all ages may be affected, the disease is
more prevalent in calves and yearlings. Although it causes
minimal discomfort to the animal, ringworm is an unsightly
disease that may lessen the value of affected animals, prevent them from being exhibited at shows and can be transmitted to humans.
Animals are exposed to the fungus by contact with infected
equipment or animals. Lice are also thought to spread the
disease. After exposure, the fungus grows down into the hair
follicles, causing the hair to break off or fall out. Grayish
plagues or crusts are seen 1 to 3 months after exposure
(Figure 1). Ringworm is usually found around the eyes,
ears, muzzle, and neck, but can also be located on other
areas. Left untreated, the animal develops an immunity to
the fungus and will eliminate it from their bodies, although
some infections may be quite persistent. The fungus is
killed by ultra-violet light and high doses of vitamin A seem
to help resistance and recovery. This explains why calves
are usually cured spontaneously when turned out on pasture
in the spring.
Figure 2
After the crust is removed, the most common remedy is to
apply a tincture of iodine. Ringworm lesions need to be
soaked thoroughly during each application (Figure 3).
Prevent the solution from getting into the animal’s eyes. The
iodine may need to be applied daily or every other day until
the ringworm is cured. Because ringworm is highly contagious to man, wear rubber gloves and scrub after working
with infected cattle.
Figure 1
Many different treatments are used effectively to treat ringworm. Just the lesions may be treated, the entire body
sprayed, or medication given systemically. Very few treatments have official FDA clearance for use on dairy heifers
so consult your veterinarian before initiation of treatment. If
there are just a few lesions to treat, first remove the crusts
with a stiff brush and a mild soap and water (Figure 2) or
use a metal currycomb. Slight bleeding commonly occurs.
Simply painting the lesions with iodine or other solutions
Figure 3
Other topical treatments that have proven effective are:
equal parts tincture of iodine and glycerin, copper sulfate,
20% solution of sodium caprylate, ordinary household
bleach, and even old tractor oil. Thiabendazole, although
best known as a wormer, is a potent antifungal agent and is
effective against ringworm when the paste is applied directly to the lesions. At the same time, a therapeutic deworming
40
Health
dose may be given orally. A similar product is
Dichlorophen, used at a concentration of 2% in ointment
form or in alcoholic solutions. Dichlorophen will generally
clear up ringworm after just a few dressings. Another antifungal agent, Captan, has been mixed with water to form a
thick paste and applied to the lesions although it is not
approved for use on food producing animals.
The fungus that causes ringworm is resilient and may survive up to 4 years in dry scales shed by the animal. Once the
fungus is in the environment, it’s difficult to prevent animals
from being exposed to it. Thorough cleaning and disinfection with chlorine (Chlorox bleach) of walls, ceiling, floors,
mangers and equipment may eliminate the fungus. A fungicide such as Captan may also be used.
If the infection is widespread over the body, the entire body
of the animal should be sprayed weekly using a high pressure sprayer to remove the crusts and apply the medication.
The body should be thoroughly soaked and all animals in
the group treated. Effective solutions are: Natamycin (an
antibiotic), 2 to 5 percent lime-sulfur solution, an iodophor
solution, .5 percent sodium hypochlorite (bleach) solution,
or 3 percent Captan solution.
Calves differ in susceptibility; some calves may have severe
lesions while others in the same pen show no signs of the
disease. Calves in poor condition are often the worst affected and maintaining a high standard of general health and
nutrition will help to reduce the effects of ringworm. A
Vitamin A injection or addition in the ration may improve
the integrity of the skin so to resist infection.
The incidence and severity of ringworm can be kept to a
minimum with good management. Treat infected animals.
Provide clean, well-ventilated and well-lit pens for calves.
Feed calves a properly balanced ration. Effective vaccines
are available in many countries but have not be approved in
the United States as of this publication. Unproven folk
remedies include hanging Holly in the heifer shed out of
reach of the calves and running billy goats with the calves.
Systemic treatments are also effective. Research studies
done many years ago showed an injection of 1 million I.U.’s
of Vitamin A followed by a second injection two weeks later
to be effective. More effective is 2 IV treatments one week
apart consisting of 30 gm of sodium iodide in 250 ml of
water. Oral administration of Griseofulrin is fast and effective but more expensive and not approved for food producing animals (Figure 4).
Figure 4
41
Health
Lice and Mange
Infestations
Lice and mange have been common cattle pests for centuries
in all parts of the world. Lice are more common than mange
and can be classified as either sucking or biting. Biting lice
feed on pieces of skin and hair particles, while the sucking
lice actually suck blood from the host. Lice cause the animal
to itch, which can lower feed consumption, efficiency,
increase nervousness and lower milk production. Sucking lice
may occasionally cause anemia and in extreme cases, death.
The three most common species of lice are:
• Long-nosed cattle louse (Linognathus vituli)
• blood sucking
• heads conical or pointed
• retractable mouth tube for sucking blood
• eggs are dark blue or blackish in color
• location: dewlap, shoulders, neck, rump, flanks,
topline, udder and under tail
Diagnosis is not difficult, but many times lice remain unnoticed until they have already caused financial loss. The first
indication may be cattle rubbing on feed bunks or fencelines
(Figure 1). Heavy infestations may cause bare patches of skin
to appear, as in Figure 2. If you part the hair and look closely in good light, you may confirm the diagnosis if you see lice
on the skin or their eggs, called nits, stuck on the hair.
• Little Blue Cattle Louse (Solenopotes capillatus)
• blood sucking
• stubby head, a smaller but fatter body
• retractable mouth tube for sucking blood
• eggs are pale yellowish that bend hair where
attached
• location: face, neck, around anus
• Cattle biting louse (Bovicola bovis)
• most common of lice species on cattle
• brown or reddish, broad heads with visible
mandibles for chewing
• very irritating for cattle
• eggs are pale, translucent
• location: neck, shoulders, back, rump, tail
• General:
• life cycles: 3-4 weeks
• live only on cattle
• wingless, 1 to 2 mm long
Knowing the life cycle of lice helps in planning a control
program. Cattle lice spend their entire life cycle as parasites
on cattle. The nits are attached to the hair and hatch in about
7-8 days. The lice go through 3 nymph stages and reach
adulthood in 15-21 days. They begin producing eggs 3 days
later. Adults may live as long as 9-10 weeks. Lice usually
die within hours if removed from the animal. Although they
may live in warm straw for a couple of days, lice are usually spread by animal-to-animal contact.
Figure 1
Most problems with lice infestations are seen during winter
and early spring. Longer hair coats are an ideal habitat.
Also, cows are more likely to be confined during this time,
unable to groom themselves and exposed to less sunlight.
Lice infestations can be controlled quite well with insecticides available on the market. If treatment is for the milking
herd, make sure the product is approved for lactating cows.
Figure 2
42
Health
Chorioptic mange extends from around the tailhead down
the inside of the hind legs to the belly. Sarcoptic mites prefer
areas around the eyes, face, neck and brisket. Psoroptic mites
generally prefer the topline. These are guidelines. Heavy
infestations may cause lice or mites to extend over the whole
body. Mites, depending on type, will live on the skin or burrow into the skin. Infested sites may have a crusted over
appearance. Mites are identified by taking a skin scraping
and checking for mites under a microscope.
Always follow label recommendations for proper dosages,
method of application and safety precautions. Generally,
insecticide applications need to be repeated 2 weeks after
the first treatment to kill recently hatched eggs, as insecticides do not affect the eggs. All animals within a group
should be treated at the same time to prevent re-infestation
of treated animals by untreated ones. If lice persists after 2
treatments, consult your veterinarian. He or she may recommend a more potent product.
If time permits, clip an 8 to 10-inch wide strip of hair down
the topline to expose lice to a harsher environment before
applying the insecticide (Figure 3). This should ensure more
satisfactory results.
/////
\\\\\
…..
Figure 3
indicates preferred infestation sites for biting lice
and Psoroptic mites.
indicates preferred sites for Sarcoptic mites.
indicates preferred sites for Chorioptic mites.
Figure 4
If lice have been a problem on your dairy, treat all cattle in
late fall.
Injectables that contain ivermectin or doramectin will control both lice and mites. Pour-ons that control both lice and
mange have the active ingredient of phosmet, permethrin,
moxidectin, doramectin, ivermectin, or eprinomectin.
Fenthion and famphur are effective against lice but not mites.
While an itching animal usually indicates lice, mange caused
by mites may be the problem if lice or nits are not identified.
Lice are usually found along the topline (Figure 4).
43
Health
Choke
Choke in cattle may be caused by cattle attempting to swallow a large, firm object such as an apple, potato, beet or
green ear of corn. It is more likely to occur if objects are
eaten from a raised trough or if an apple is eaten off a tree.
Animals are more likely to chew food into smaller pieces
before swallowing if eaten off the ground.
Bloat and salivation are two of the main symptoms of choke
in cattle. Bloat is caused because excess gas is trapped in the
rumen. Salivation or frothing at the mouth occurs because
the cow can’t swallow her saliva. The cow may stand with
its head and neck extended. She may shake her head or
move it up and down. Harsh coughing is frequent. If the
obstruction is not complete so that saliva can still pass down
and gas escape, the only symptoms may be the animal
standing by itself, head stretch outward and mouth slightly
open.
Figure 2
va will digest enough of it so that it will eventually slide
down into the rumen or you can try massaging it up again
after a few hours or even days. In the mean time, a trocar
and cannula or large gauge needle may have to be used to
puncture the rumen to alleviate any bloat that may occur. A
less appealing alternative is to reach in with your hand to
dislodge the object. Hold the nose with one hand and cup
your hand to extend it down the throat (Figure 3). Follow
the upward outline of the throat so that you are guided into
the esophagus rather than the windpipe (Figure 4). This
maneuver should really only be done with mouth gag or
block in the animal’s mouth so that you can’t be bitten. The
molar teeth can cut off or crush a finger quite easily. After
locating the object, grasp it between your thumb and fingers
and slowly pull it out. If the object cannot be grasped in
order to withdraw it, it might work to bend a ten-foot wire
in half forming a loop large enough to go over the obstruction. The loop is passed into the esophagus, over the
obstruction and then slowly withdrawn.
To further help with diagnosis, consider whether the cow
had access to objects that may have gotten lodged in her
throat. Next try to palpate the obstruction in the esophagus.
Figure 1 shows the most common location of an obstruction. Do not confuse the larynx (Adam’s apple) with an
obstruction. If the obstruction is felt, place your thumbs or
fingers in the jugular furrow below the object on both sides
of the neck. Gradually work the object upward by applying
steady pressure (Figure 2). The muscles of the esophagus
tend to contract and relax intermittently which should allow
you to move the object upward. When the object is brought
to the top of the throat, have another person reach into the
mouth to pull it out while still applying upward pressure on
the throat.
Figure 1
If massaging fails to dislodge the object, it may be best to
leave the animal to recover on its own. If it is a high starch
object, such a potato, beet or apple, the amylase in the sali-
Figure 3
44
Health
Only as an absolute last resort to save the life of an animal
should a stomach tube or hose be used to attempt to push the
object down the throat and into the rumen (Figure 5). Using
this procedure may damage the esophagus or other organs
or cause the object to get lodged further down the throat.
If drooling is the only symptom noted, rabies may be the
cause. Do not expose yourself to the rabies virus by needlessly putting your hand into the animal’s mouth. Frothing
or drooling at the mouth is the only symptom that rabies and
choke have in common. Bronchitis or throat infections may
cause symptoms somewhat similar to choke.
If bloat is extreme and the cow is in immediate danger of
dying or is unmanageable because of the discomfort, the
bloat may have to be taken care of first. Usually, the best
way to treat bloat is to pass a stomach tube into the rumen,
relieving the gas. Because the esophagus is obstructed, the
preferred method to relieve bloat when caused by choke is
to puncture the rumen with a 6-inch long 12 gauge needle.
This is preferred over using a bloat trocar or knife because
there is less chance of rumen fluid contaminating the
abdomen. Obviously, you have to use what you have on
hand at the time.
Figure 4
Choke can be prevented by keeping objects such as apples
and potatoes away from cows. Feedstuffs should be
chopped so that they are not the size or shape that might
cause choke.
Figure 5
45
Health
Hematomas occur when a blood vessel near the surface ruptures, usually because of an injury. The swelling is filled
with blood and it is usually best not to treat them as they
usually heal themselves. Opening up a hematoma may
cause excessive bleeding or initiate a bacterial infection.
Treating Abscesses
An abscess is a pus-filled swelling on an animal’s body
(Figure 1). It is usually caused by a bacterial infection.
Causes of abscesses include puncture wounds, giving injections with a contaminated needle or syringe, and open
wounds from routine operations such as castration. Once
bacteria gain entry, they multiply and pus forms. The body
tries to encase the infection to keep it from spreading.
Usually as the bacteria continued to multiply, a thin spot
will develop in the hide and eventually burst.
To determine the status of an abscess, puncture it with a
sterile needle on a syringe. Check to see if the point of the
needle is in the hallowed core. Draw some of the contents
into the syringe. If it contains pus it is an abscess and can be
opened (Figure 2). If it contains blood, it is a hematoma and
should be left alone. If it contains pus tinged with blood or
is not distinctly hollow, it may be an abscess that is not yet
“ripe.” Opening an abscess too soon may cause bacteria to
get into the blood and spread to other parts of the body or all
of the pus may not be removed and a new abscess may form
next to the old one. If in doubt, it is best to leave it alone or
consult your veterinarian.
Figure 1
Abscesses need to be differentiated from hernias and
hematomas. Hernias occur in the abdomen wall where there
is an opening in the muscle tissue allowing a loop of intestines to protrude through. The hole in the abdomen wall can
usually be felt by palpation. The most common location for
hernias is near the navel, many times caused by a navel
infection. Small hernias usually resolve themselves as the
calf grows since the hole in the body wall remains the same
size while the intestines increase in size until they no longer
fit through the wall. Larger hernias may need attention by a
veterinarian to surgically repair the abdomen wall or a metal
or plastic hernia clamp can be applied to the loose fold of
skin, holding the intestines in. The clamp is tightened every
few days. The clamp falls off along with the loose skin in
two weeks. With very large hernias the animal may need to
be culled.
Figure 2
Before opening the abscess, wash the area with a disinfectant. If the hair coat is long, the hair should be clipped first.
With a hooked or curved surgical blade, cut into the abscess
near the bottom to allow better drainage (Figure 3). Gently
squeeze the pus out of the abscess into a container. Because
the pus may contain huge numbers of infective bacteria it
should be disposed of properly.
After the initial incision, widen the cut by removing a triangular piece of hide near the bottom of the abscess to insure
good drainage (Figure 4). A wide opening will also insure
that the abscess heals from the inside without closing up on
itself. If the drainage site closes before the infection is
cured, the abscess may reoccur.
46
Health
The abscess should now be wiped out with a piece of gauze
soaked in disinfectant (Figure 5). Repeat the process a couple of times. An alternative is to irrigate the wound with
cold water from a garden house if the opening is large
enough. Finally, irrigate the wound with mild disinfectant
from a squeeze bottle. Irrigation can continue daily until
healed although this is usually not necessary. Leave the
wound opened, unbandaged for it to heal. If flies are a problem, use a wound dressing that includes a fly repellant. In
nonlactating animals, an intramuscular injection of a broad
spectrum antibiotic may help the wound heal and prevent
spread of the bacteria to other parts of the body.
Timely drainage of abscesses will promote faster healing
with minimum stress to the animal. The danger of the
abscess bursting inward and infecting other parts of the
body are lessened. In addition, the pus can be disposed of
rather than contaminating the housing area as it would if
allowed to burst and drain naturally.
Figure 3
Figure 4
Figure 5
47
Health
Proper Handling and
Storage of Injectables
Figure 1
A variety of injectable solutions, including drugs, vaccines,
hormones, and vitamin mixtures, contribute to better herd
health if used properly. Improper handling or use is costly
and dangerous.
(Figure 2). A drug for lactating cows will state so on the
label, along with a milk-withdrawal time. If not, it’s not
approved for lactating cows.
In general, specific drugs are effective against only a few
bacterial illnesses. Before treating sick animals, be sure to
make a proper diagnosis and choose the most suitable drug.
Do not use a “shotgun” approach.
Don’t use a combination of vaccines, drugs or antibiotics
unless instructed by your veterinarian. Many drugs or vaccines are not compatible. For example, live vaccines should
not be mixed with a killed vaccine, and drug and vaccine carriers may not mix. Figure 1 shows drugs that aren’t compatible because of different modes of action against the
disease organism. For example, tetracycline slows the metabolism of bacteria. Because penicillin works best against bacteria with high metabolism rates, it is less effective in the
presence of tetracycline. They should not be mixed.
Regulations require that drugs for lactating cows be stored
on a different shelf or compartment than drugs for non-lactating cows. Shelves or compartments in the storage area
must be clearly labeled “lactating” and “nonlactating”
Figure 2
48
Health
Drugs and vaccines must be properly stored (Figure 3)
because they can lose effectiveness if warmed or exposed to
sunlight. Figure 4 illustrates effects of different temperatures
on these products. At 32° F biologicals remain effective for
a long time. Biologicals freeze at a few degrees below water
and may become useless if frozen. Generally, 35-40° F is a
safe temperature range. Storage of solutions as shown in
Figure 5 occurs far too often. Buy your vaccines and antibiotics from a reputable source. Make sure they are kept at a
proper storage temperature until you receive them to insure
proper effectiveness.
Figure 5
Vaccines should not be mixed in the same syringe unless
instructed. Use separate injection sites on the animal if different vaccines are being injected to prevent their mixing in
the animal. A modified-live vaccine should be reconstituted
just prior to use, kept cold, out of sunlight and used within
two hours.
Advantages of modified live vaccines compared to killed
virus vaccines are : there is less chance of an adverse reaction to the injection, they give a faster and stronger immune
response, only one dose is required and they are less expensive. The advantages of a killed vaccine are that they are
more stable in storage, safer to use on pregnant animals, no
chance of reverting to virulent form, no mixing required and
less likely to cause immunosuppression.
Figure 3
Avoid administering vaccines when animals are stressed.
Do not vaccine within 24 hours of trucking. Avoid vaccinating on hot days. On warm days vaccinate early in the morning. Don’t vaccinate cows from 2 days before to 5 days after
calving. Poor nutrition and parasites will suppress the
immune response.
Figure 4
49
Health
Always check the expiration date on the bottle and try to use
the solution before that date (Figure 6). If stored properly,
antibiotics will generally still be good for a short time past
the expiration date. Consult your veterinarian if in doubt. If
vaccines go beyond their expiration dates, discarding them
is generally recommended.
When filling a syringe from a bottle, take care to avoid contaminating the remaining contents. Insert only clean needles
through the bottle’s rubber stopper. Once solution is
removed, it should not be put back. Discard any unused solution in the syringe rather than risk contaminating the bottle’s
contents. Even under the best conditions, the shelf lives of
partially used bottles of biologicals, especially live vaccines,
are usually reduced. For this reason, buy injectables in small
bottles that will be used quickly. Vaccinations should be set
up so that the whole bottle is used on the same day.
Syringes and needles are best sterilized by boiling in water
for 10 minutes (Figure 7). After boiling, allow them to dry
thoroughly before storage. Be careful to avoid contamination before use. Store them in the original sterilized containers or plastic sandwich bags (Figure 8). Inspect needles
and discard those that are bent or have burrs on the points.
If boiling the instruments is not convenient, use disposable
items or disinfect by filling the instrument with a 70% alcohol solution and squirting out the contents. Make sure all
alcohol is forced out. A small amount of alcohol left in the
syringe may decrease effectiveness of the biological and
cause irritation to animal tissue. It is best to rinse with water
a couple of times after using any disinfectant. After the
instruments are cleaned, be careful to avoid contamination
before use.
Figure 6
Finally, read the label and give proper doses based on the
animal’s weight. Too small a dose will probably be ineffective. Exceed label dosage recommendations only under
directions from your veterinarian. Excessive dosages can
injure or kill the patient and will increase withdrawal times.
Figure 7
Develop a complete vaccination program as part of a complete herd health program which includes sanitation, parasite and fly control, balanced rations and animal comfort.
Figure 8
50
Working with Heifers
Tying Farm Knots
A rope is one of the most common of tools used to restrain
animals. Unfortunately, most people never learn which knots
are most efficient to use in given situations. Practice tying the
knots presented here as you read through the descriptions.
First, let’s define the parts of the rope:
Square Knot
The square knot is simply two overhand knots tied one after
the other. The sequence must be correct. Remember: right
over left then left over right as you tie the overhand knots. Or
the opposite: left over right then right over left. The knot
should have a “square” appearance. The square knot is a
strong, small knot used to tie the ends of two ropes together.
When splicing two balls of twine together in a baler, a square
knot is used. Under tension, a square knot will tighten and
may be difficult to untie.
Overhand Knot
An overhand knot is the simplest of all knots. Generally, it is
not used by itself but is the first step in tying more complex
knots. It may be used by itself to keep the end of the rope
from unraveling or to provide a knob or hand hold in a rope.
Granny Knot
The granny knot is an undesirable knot that is illustrated here
so that you recognize it. It has no useful purpose. People mistakenly tie it when what they really want is a square knot. It
is two overhand knots like the square knot but is bigger and
not as strong. It is tied by going left or right and then left over
right again, or by beginning right over left and going right
over left with the second overhand knot.
51
Working with Heifers
Reefer’s Knot
Honda Knot
The reefer’s knot is just a square knot with a single bow in it
so that it can be untied. A common use might be to tie a gate
open or closed. Another closely related knot is the bow knot
which is used to tie shoe laces.
The honda knot is simply one overhand knot inserted into
another. Like the bowline knot, it will give a nonslip loop. It
is used to form the small loop for the end of a lariat to pass
through and because of its nonslip property may be used to
tie a rope around an animal’s neck.
Surgeon’s Knot
Bowline Knot
Another variation of the square knot is the surgeon’s knot.
This knot has the advantage of the first overhand knot holding while the second is being tied. When putting in the first
overhand knot, wrap 2 or 3 times instead of once. This provides additional friction between the rope, making it easier
to hold. The surgeon’s knot is used when the rope is under
tension as you are trying to tie it. It is used when retying a
bale, tying an overstuffed package or during suturing.
The bowline knot is the preferred knot when tying a rope
around any part of an animal’s body because it won’t slip
and tighten around the animal. Also, the knot is relatively
easy to untie. First, place a loop in the rope where the knot
is to be tied. The loop should be pointed toward the free end
and the working part should be to the back. Next, insert the
free end of the rope through the loop from the back. Go
around the working part of the rope and back through the
loop and tighten. To help you remember, there is a story that
goes along with the knot: “The rabbit jumps out of the hole,
runs around the front and down behind the tree and jumps
back in the hole.” With a little practice, it is a knot that can
be tied quickly.
52
Working with Heifers
Ring Knot
Quick Release Knot
The ring knot is used to fasten a ring to a rope or can be
quickly formed and dropped over or tied to a post. For a
drop over ring knot, make a bight in the rope, grasp the two
strands with one hand and pull the bight over your hand.
The resulting double loop can be dropped over a post.
The quick release knot is frequently used when tying a haltered animal to a post or fence. It can be released very
quickly should the need arise, although it may tighten up to
the point where the bow is hard to pull out. To prevent the
animal from releasing itself, insert the free end through the
bow after the knot is tied.
Double Sheet Bend Knot
Double Half Hitch
The double sheet bend knot is used to tie two ropes of
unequal size or stiffness together. If the ropes are similar,
the simpler square knot should be used. To tie, form a bight
in the larger or stiffer of the two ropes, then run the lighter
rope into the bight, wrap it around the heavier rope and then
string it between itself and the strands of the bight as illustrated.
The double half hitch is the preferred knot if a haltered animal’s head needs to be snugged up tight to a post such as for
dehorning or other operations. The double half hitch cannot
be released as quickly as a quick release knot, but is easier
to tie while keeping the rope tight and is a more secure knot.
It doesn’t tighten up on itself so is easy to untie.
53
Working with Heifers
Making a Rope Halter
Rope halters are needed occasionally on all dairy farms.
They are inexpensive to buy, but even so, it is worthwhile to
know how they are made because it may be inconvenient to
run to the farm supply store when one is needed. In addition,
if you know how they are made, it will be easier to repair or
adjust one if the need arises.
To make a halter, start with a three strand rope 12’ to 15’ in
length. A 3/8-inch rope is suitable for calves. Halters for
yearlings or cows are made from 7/16 or 1/2 inch rope.
Finishing the Rope Ends
The first step is to finish the ends of the rope to prevent them
from unraveling. Only one end needs to be finished if alternative 2 is used to finish the nose piece of the halter. Following
are several methods used to finish the end of a rope:
Hold the rope in one hand to prevent it from unraveling further. Take the upper most strand and bend it between the
other two, forming a bight. Wrap the next strand down
around the bight. Insert the last strand into the bight.
Carefully pull on each of the strands to tighten the crown
knot. It should be a very symmetrical knot.
1. The quickest, but not the best, way to finish a rope is to
put an overhand knot in the end of the rope. The figureeight knot as illustrated is actually a more secure knot.
Back splicing is now done to complete the crowning of the
rope. Hold the knot in one hand and twist the rope to loosen
the strands. Start with any strand and bend it over the strand
next to it and under the next strand, which should be itself. Do
the same with the other two strands. Bending them over one
strand down the rope and under themselves. Continue lacing
the strands over one and under one down the rope so that each
strand is tucked under 3 times. Trim the frayed ends.
2. Dipping 1-2” of the rope into an oil based paint or varnish
works well except for polypropylene rope. It should dry
for 24 hours before it is used.
3. The ends of nylon, dacron and polypropylene rope can be
heated to fuse the fibers together. If using a flame, hold
the end of the rope from the flame so that the rope heats
thoroughly instead of only the outer fibers. The fibers
should melt and stick together. Wear an old pair of heavy
leather gloves so that you can shape the hot end in case a
large knob or sharp edge results.
4. Metal wraps, hog rings, or heavy wire or wire staples bent
around the rope will prevent it from unraveling if done
properly. Be certain that there are no sharp edges when
you are finished.
5. You can “crown” the rope by using a crown knot and back
splicing. Start by unraveling about four inches of the rope.
54
Working with Heifers
Making the Halter
Finishing the Nose Piece (Alternative 1)
3. Grasp the nose piece near the end with one hand and 2-3
inches further down the rope with the other. Twist the rope
between your hands to open the strands, then push your
hands together. The strands should buckle and fold over,
forming three loops. Line up the loops and put a stick the
diameter of the rope through them to keep them in place.
1. Measure out 12” from the end of the rope for the nose
piece for a calf-sized halter. Twist the rope to open up the
strands. Insert the short rope under one strand, leaving a
loop twice the diameter of the rope.
2. To secure this loop, open up the strands of the nose piece
near the loop. Push the long end of the rope under the two
opened strands and pull it through until it is tight.
4. Put the long end of the rope through the loops one at a
time, starting with the loop furthest from the short end.
Remove the stick as you go. After that is complete, run
the long end of the rope through the eye loop to complete
your halter.
55
Working with Heifers
When putting the halter on an animal, the lead rope should
be on the left hand side of the animal’s head (Figure 1). The
part of the halter that tightens through the loop should be
under the animal’s chin. The length of the nose piece will
determine how high it rides on an animal’s face. A short
nose piece will cause the halter to ride lower on the nose and
will give you more control when leading the animal.
Finished nose pieces should be about 7” long for calves and
up to 14” long for cows.
Finishing the Nose Piece (Alternative 2)
3. With this method, the short end of the rope should not be
finished. Bend about five inches over the head piece as
shown. Unravel the end of the rope. Back splice the strands
into the nose piece as previously illustrated on page 55.
First take the center strand and insert it under the first
strand of the nose piece. Repeat with the second strand.
Keep the loop tight around the rope of the head piece.
Figure 1
4. Work around the rope, lacing the strands over one and
under one so that each strand is tucked at least three
times. Trim the frayed ends. After the splice is complete,
run the long end of the rope through the eye loop to complete the halter.
56
Working with Heifers
Training a
Heifer for Show
In order to have a heifer that can be shown to its best advantage on show day, schedule your work plan months in
advance. Considerations include the initial selection, breaking her to lead and proper feeding.
If the heifer fights the halter, a rope halter will put undue
pressure on the heifer’s jaw causing it to become swollen
and very sore. This can interfere with trying to teach her to
lead later. Do not tie her with a show halter. Try to calm the
heifer during this time by talking to her and petting her on
the side of the neck and shoulder. Do not pet a heifer on the
poll or forehead if you are trying to tame her as this is
looked at by her as an act of aggression and will agitate her.
Selection
Selection of the heifer is an important step. The heifer
should be stylish, well grown but dairy, straight over the
topline, and have good feet and legs. If you are unsure of
your ability to select animals with good conformation, ask a
person with experience to help, such as an extension agent,
4-H leader or dairy producer in your area with experience.
When selecting a heifer, know what the various age requirements for different classes are. Generally, older heifers have
an advantage over younger heifers within a class. Another
consideration should be the size of the heifer relative to the
size of the person who will be showing it. A young exhibitor
with little experience will be best off showing a young calf
rather than a yearling. Disposition of the heifer might also
be considered when selecting for these young exhibitors.
Finally, if there are a number of heifers in the calf pen at
home, it usually makes more economic sense to make your
selection there rather than going out to purchase a heifer.
Good A.I. sire selection and a sound calf rearing program
should ensure that there is an adequate number of good
calves to select from.
Figure 1
Make sure that the heifer has had all the proper vaccinations.
A suggested program would be to vaccinate for Brucella,
IBR, BVD, PI3, BRSV and a 5-way Lepto at 4 months of age.
An 8-way Clostridium and wart vaccine can be given one
week later. One to two months later, the booster injections for
IBR, BVD, PI3, BRSV and Lepto need to be given. After one
week, give the Clostridium and wart vaccine boosters.
Leaving the animal tied a couple of times for 1-2 hours is
generally enough to halter break a heifer. If you leave the
heifer tied for longer periods of time, make sure she has
access to feed and water and has a well bedded place to lie
down. The place and manner that the heifer is tied should be
such to minimize any chance of injury.
Training to Lead
When training heifers to lead, most people prefer to use a
rope halter. The halter goes on so that the part that tightens
up is under the jaw with the lead rope on the left (Figure 2).
Adjust the halter so that the nose band is low on the heifer’s
nose. This gives more control than if it is riding high on the
face. The first time a heifer is led out of the pen, an experienced person large enough to control the heifer should be at
the halter. Younger showpersons will have plenty of time to
gain experience later.
It is a good idea to observe the feet on the heifer when she
is selected to determine how much hoof trimming she might
need. Most heifers should have their feet trimmed at least
once before the show. An expert trimmer can do a lot to correct poor feet and improve the heifer’s stance.
Halter Breaking
The amount of time required to train a heifer to lead will
depend on her disposition and the techniques used. Starting
at least six weeks prior to the show, the first step is to halter
break your heifer. Put a halter on her and tie her in her pen
so she learns to respect the halter. It is best to use a stable halter that doesn’t tighten up under the heifer’s jaw (Figure1).
To get the heifer to walk, walk at her side. If necessary, have
someone walk behind her to give her a nudge or tail twist if
needed rather than tugging at the halter (Figure 3). Give her
57
Working with Heifers
a little slack in the lead rope and try to walk at the heifer’s
pace the first time out. You’ll have time to slow her down in
later sessions. Try to keep it a pleasant experience. If the
heifer stops, spend a few seconds talking to her and petting
her before resuming the walk. After 15-20 minutes, put the
heifer back in the pen. Training periods of longer than 20
minutes can be counter productive, especially if you or the
heifer begin to lose patience.
Figure 4
Rarely should it be necessary, nor is it productive, to discipline a heifer by striking her. Generally, hitting a heifer only
worsens her mood and confuses her. On rare occasions, traditional methods of training may not work and you might
opt to expedite the process by tying the heifer behind a
wagon hooked to a tractor. This method works but has a
potential for abuse. Use a strong halter and drive slowly.
Take every precaution to prevent injury to the heifer. Have
someone walk behind the heifer to nudge her along, making
sure that the heifer is walking and not sliding her feet. If you
are patient, the heifer should learn quickly that it is best to
trail along rather than fight the halter.
There are a couple of other techniques that people have used
to train heifers in a short time. One is to tie them with a stable halter by themselves in a pen without feed or water.
After twelve hours, set a bucket of water about three feet
away and behind the heifer. Untie her and turn her to the
bucket and let her drink. Put some feed back at the tie point,
turn her back and tie her for another twelve hours. Twelve
hours later, repeat the routine with the water 6 to 10 feet
away. Repeat the routine with the water further away. The
heifer will associate you and being lead with a positive
experience in a couple of days.
Another technique is to tie a heifer’s halter to a donkey’s
with about two feet between them and put them out to pasture. When the heifer gets jumpy, the donkey will stay still
until the heifer settles down. In 2 to 3 days the heifer will be
broke to lead.
Figure 3
After a heifer is responding well to the halter, switch to a
show halter in your practices. Teach her to walk slowly and
to place her legs correctly when stopped in preparation for
showday (Figure 5). Practice backing up with pressure just
at the halter. Let her get used to having other people around
as she is being led.
As much as possible, try to use positive rather than negative
reinforcement. Patience, kindness and firmness, along with
a little cow psychology, will most quickly train heifers.
Don’t drag a heifer as it is being done in Figure 4. Heifers won’t
cooperate if they associate being lead as a bad experience.
58
Working with Heifers
Feeding
Feeding programs for show heifers shouldn’t be much different than the regular heifer ration on a farm. Make use of
growth charts (Figure 6) to make sure heifers are growing at
the proper rate. If heifers are over conditioned, take off the
condition by reducing the energy in the diet well before the
fair. This is usually done by reducing the grain or excluding
ionophores (rumensin or bovatec) from the diet. If grain is
reduced, make sure the heifer is still getting an adequate
supply of protein in the diet by top dressing a protein supplement. You want her to lose condition without arresting
her growth rate.
Figure 5
Figure 6
59
Working with Heifers
Clipping and
Grooming for Show
Summer finds many dairy people working with a heifer or
cow in anticipation of bringing home a blue ribbon. Good
clipping and grooming will enhance those chances by making a short heifer appear longer, a thick heifer sharper, or a
plain heifer more stylish. Becoming an expert fitter takes
years of practice, patience, observations of others techniques, and some artistic ability.
The showbox of an experienced showperson is as wellequipped as a modern beauty salon (Figure 1). Equipment
and supplies include stiff and soft bristled brushes, tail comb,
ratting brush, soap, fly spray, hair spray, alcohol, spray bottle, talcum powder, hair oil, halters and hair clippers.
Figure 2
Figure 1
3 Weeks Prior to Show Day
Generally, clipping starts about 2-3 weeks prior to showday
for heifers with a body clip (Cows usually are not body
clipped unless their hair is excessively long or coarse.). A
body clip entails clipping all of the hair that won’t be clipped
close right before the show except for the topline as illustrated in Figure 2. Clip against the lay of the hair. Don’t clip the
hair off the top of the topline. On most heifers, you will want
to clip the underline at this time. On shallow bodied heifers,
clip the underline about a month earlier so that you get additional hair growth prior to the show which will give her more
depth. After the body is clipped, work the topline somewhat
as you would before the show. Brush the hair up and clip it
so that it comes to a point over the topline (Figure 3).
Figure 3
Within a Few Days of Show Day
Clip the entire head except for the eyebrows, eyelashes and
hair on the muzzle. Clip against the hair, getting as close as
possible. Clip the inside and outside of the ears. If the heifer
has a metal ear tag be careful to avoid it with the clippers as
nicking it can easily break the clipper blades. Animals are
generally sensitive to being clipped on the head region. Be
assertive, firm and patient. Try not to become agitated. A stanchion and nose lead may facilitate getting the hair clipped.
Clip the neck from the head to an imaginary line that runs
from the point of the shoulders to the top of the shoulder
blades (Figure 4). Do not clip past the shoulder blades.
Leave the hair on top of the withers and neck near the withers. This will be clipped as the topline is worked. Clip the
brisket. The front legs can be clipped from the toe up to the
An alternative to this early body clipping is to purchase a
plucking blade for your clipper. Because this blade is thicker, it leaves the hair about 1/2 inch long allowing you to
body clip a heifer right prior to show. A regular blade is still
used on the rest of the animal. Plucking blades are more
expensive than regular blades.
60
Working with Heifers
Figure 6
Figure 4
point of the elbow. This is especially useful to eliminate the
stained hair on the knees and near the feet.
Clip the hind legs on the inside and out, from the toe up to
the middle of the thigh. As you clip or work with animals,
stay close and in contact with them to lessen your chances
of being kicked. Figure 5 shows the correct position when
clipping the hind leg. In Figure 6 the person is not in contact with the heifer and in a good position to be kicked.
Figure 7
Figure 5
Begin clipping the tail about one good hand width above where
the switch starts. Clip against the hair (Figure 7). Blend as the
tail goes between the pins. Clip any long hair off the vulva. If
you are showing a cow, the entire udder and milk wells should
be fine clipped to show off the mammary veining.
You are trying to accomplish two objectives as you clip the
topline. Make the heifers topline appear level as viewed
from the side and sharp, especially over the withers, as
viewed from behind. First get the hair to stand up by brushing against the hair and applying a hair spray or a dry
Figure 8
antiperspirant containing aluminum chlorhydrate (Figure
8). Clean hair will stand up easier than dirty, oily hair. You
may wish to wash the topline before you proceed.
61
Working with Heifers
There are different techniques used for clipping the topline.
Figure 9 illustrates clipping against the hair with one finger
under the blade to prevent clipping too closely. Some prefer
clipping with the lay of the hair. Some clip with the clipper
turned over, resting the top of the clipper on the heifer to prevent nicks as in Figure 10. Whatever technique you choose,
go slowly. Clip a little on one side and then the other. Get the
hair brushed up. Continue the procedure until you’ve
achieved the desired effects. A common error is clipping too
close on high spots over the rump. This draws attention to the
defect rather than concealing it. The goal is to make your
heifer look as perfect as possible but still natural! Figures 11
and 12 show the same heifer before and after clipping.
Showday
Wash your heifer in time so that she will be dry well before
you are scheduled to take her into the ring. Soap and rinse
your heifer twice. Be careful not to get any water into the ear.
This may cause the ear to droop and heifer to hold her head
to the side as you are showing her. Use a soft, damp rag to
clean wax and dirt out of her ears. Clean the dew claws with
a stiff bristled brush. Clean the hooves with a wire brush.
Figure 10
After leaving the wash rack, brush the hair down with a softbristled brush. When dry, brush the hair up on the topline. Have
someone else hold a blow dryer as you brush and apply the hair
spray. After the hair is up, you may wish to take the clippers for
one last trim, making the topline as neat and sharp as possible.
Fluff up the switch with a brush and hold with hair spray.
Apply talcum powder to any stained or scuffed areas such as
the knees. A light coat dressing can be applied to add a sheen
to the hair. Just a little will do it. The wet look is out! One
technique used is to mix one-half to two-thirds oil (such as
mineral) with rubbing alcohol in a spray bottle. Lightly mist
this mixture on the animal’s coat. Apply fly spray to the legs,
if needed, and you’re ready to enter the show ring.
Exhibiting an animal can provide a welcome relief from the
routine work on a dairy. A proper job of clipping and
grooming can enhance chances of a blue ribbon and provide
a great deal of enjoyment and satisfaction.
Figure 11
Figure 12
Figure 9
62
Working with Heifers
In the Show Ring
Showmanship involves showing your animal to make her look
her best at all times. Once the grooming is done, your techniques
and demeanor in the show ring can often influence your final
placing and give you a great deal of self-satisfaction.
If your animal is roach backed you may wish to pinch down the
topline (Figure 2). If she’s weak over the top, poke her in the ribs
to bring the top up. If the animal has excess skin in the throat, pull
up on the throat with your free hand as you’re leading her around
the ring to make her look more clean cut and feminine (Figure 3).
Your appearance is part of showmanship. You want to look sharp,
clean and alert. Clean, neat clothes are a must. Most exhibitors
wear white clothing and this is preferred. White trousers with a
dark, solid colored shirt has gained acceptance at some shows.
Many judges prefer a heavier leather shoe or boot rather than a
tennis shoe. Your hair should be well groomed and wear a smile!
Try to be at ringside a few minutes before your class is to begin.
If you are there longer than that, your heifer may get tired and
impatient before the class begins. It probably doesn’t matter
whether you are the first or the last one in the ring, but be on time!
Hold the heifer with your hand right in the halter for maximum
control (Figure 1). Use whatever method is efficient and comfortable but also allows easy release of the halter if need be. Fold the
lead strap in 10 inch loops and hold it in a convenient manner with
either your right or left hand. Do not roll the lead strap in a coil,
wrap it around your hand or throw it over your shoulder.
Figure 2
Figure 1
Enter the ring in a clockwise direction. Walk backward when the
judge is observing your heifer, otherwise walk forward. Walk at
a pace to fit the situation, keeping a suitable distance between
you and the animal in front of you. In the ring, if the exhibitor in
front of you is having difficulty moving the animal, help by nudging the animal or gently twisting the tail.
Figure 3
63
Working with Heifers
If the animal won’t set up perfectly, settle for good enough. If you
are constantly fussing and maneuvering, you will frustrate the
animal. Never step on or handle the animal’s hind feet to get them
in position. Only place the front feet with the aid of your feet if
the judge isn’t looking. It is best to be able to set your animal up
just by pressure applied at the halter. Practice prior to the show
will usually allow you to accomplish this.
When the judge asks you to stop, set the animal up. The legs
should be squarely under the animal, with the heifer’s hind leg
nearest the judge back several inches. This will give the appearance of your heifer being longer. The head should be held high to
make the animal look taller and more alert but not too high to
make it look unnatural. In Figure 4 the heifer is set up correctly.
The same heifer in Figure 5 is set up with her legs set too wide
and head held too low. As the judge moves around to the opposite side of the heifer, move up one step to reposition the hind
legs. Once a cow has freshened, the proper position of the hind
legs is reversed with the leg nearest the judge forward. This
allows the judge to see the fore and rear udders at the same time.
Be prepared to answer questions that the judge might ask
relative to your animal. These include birth date and if or
when she might have been bred. Know a cow’s freshening
and due date. In an advanced showmanship class, judges
may ask questions about the sire, dam, service sire, production levels, rations, parts of the cow and other subjects to
test your dairy husbandry knowledge.
Be alert. Continue to glance back and forth between your
animal and the judge. Don’t stare at the judge. Be aware of
the signals asking you to move or stop. Don’t make the
judge ask you to do something twice.
Don’t over show! The ideal is to show your animal to its
best advantage as effortlessly as possible so as not to draw
attention to yourself. Over showing, as illustrated in Figure
6, will tire you and the animal and is distracting to the judge.
Figure 4
Figure 6
When the judge motions you into line, walk quickly into
position. Switch hands on the halter and walk forward
(Figure 7). Position your animal close enough to the one
next to you so that there isn’t room to position another animal above you. Make sure your animal is in line with the
others. Don’t let yourself or your animal fall asleep while
you are in line. Keep the animal’s legs positioned correctly.
If the judge walks by to the opposite side, remember to
reposition the legs.
Figure 5
64
Working with Heifers
Keep showing your animal while the reasons are being
given and as you lead from the ring. Listen to the judges reasons for his placings and try to learn from them. They may
help you in another year as you select your animal.
Sportsmanship and helping others is a big part of show ring
etiquette. If you notice other exhibitors that need pointers in
clipping or showing, privately offer your assistance. It can
be extremely rewarding to see someone come back another
year and do better because of assistance you’ve given.
There are bound to be disappointments and disagreements
with some of the placings. Judging is not an exact science
and two totally competent judges may place a class quite
differently. As with most of life, there is a bit of luck
involved. Be a humble winner as well as a gracious loser. Be
ready to congratulate the winners and give encouragement
to those that were further down the line.
Figure 7
Below is a showmanship scorecard developed by the
Purebred Dairy Cattle Association:
If the judge asks you to back your heifer out of line, back
her by pushing back on the halter or push your right hand
into the heifer’s shoulder (Figure 8). If she won’t back, lead
her forward, turn and travel back through the line or around
the end if you are near the end of the line. Regarding turning a heifer, it is usually recommended to turn right with the
heifer because she will be less likely to step on your toes. At
times, it is much more expedient to do a left turn and this is
permissable. Keep your feet away from the heifer’s hooves
as you bring her around.
Points
Appearance of Animal.................................................30
Cleanliness ..............................................................10
Grooming ................................................................10
Clipping.....................................................................5
Condition and Thriftiness .........................................5
Appearance of Exhibitor.............................................10
Showing Animal in the Ring.......................................60
Leading ...................................................................25
Posing......................................................................15
Show Animal to Best Advantage ............................10
Poise, Alertness, Attitude ........................................10
100
Figure 8
65
Working with Heifers
Cattle Restraint
The method of restraint to use in controlling an animal
depends upon the task that needs to be performed and manpower and equipment available. Whatever the method, the
animal’s safety and welfare needs to be kept in mind.
Restraining Calves
Before any animal can be restrained it needs to be caught.
With calves, and with older animals, the easiest way to control them is by gaining control of the head. The head can be
turned back against the body or controlled by grasping the
lower jaw (Figure 1).
Figure 2
Figure 1
Many times a halter is needed to control animals during castration, dehorning, vaccination, etc. A very efficient haltering
technique is illustrated in Figure 2. First tie a loop in the end
of the rope, using a bowline knot. The size of the loop
depends upon the size of the animal. Place the loop over the
animal’s ears and down around the face. Next, form an
adjustable loop by pulling rope under the fixed loop. Position
this loop under the animal’s jaw. This halter will give good
control of the animal without any danger of choking.
Figure 3
Another type of temporary halter is illustrated in Figure 3.
A lariate loop or a loose loop made with a bowline knot is
placed around the animal’s neck. Run the lead rope from the
back through the loop under the neck. This will form a loop
that goes over the heifer’s nose.
Calves up to 300 pounds can be laid on their side by flanking. This method of restraint works well for treating the
navel with iodine or removing extra teats. After the calf is
caught, grasp the flank with one hand, turn the head around
toward the body with the other and put your leg, bent at the
knee, under the animal (Figure 4). Lift and pull the animal
toward you so that you transfer its weight off of its feet onto
your leg. Now slide the calf off your leg to the ground. Young
calves can be held down by placing one knee on the calf’s
neck and one on the calf’s side, leaving your hands free.
Figure 4
66
Working with Heifers
Older calves or heifers from which you are removing extra
teats usually require two people to restrain it. One person
puts a knee on the calf’s neck and curls the front leg back.
The second person puts a foot right above the hock on the
bottom leg and grasps the top leg near the pastern, pulling it
up and back (Figure 5).
Figure 7
Figure 5
Another method of laying a calf down is with the use of a
halter. The head is pulled around as the lead rope goes
around the thigh and inside the hind leg. By pulling on the
rope the hind leg is brought forward (Figure 6). By pulling
on the rope and lifting under the neck, the calf can be slid
down your leg as before. The rope can be further used to
restrain the leg once the calf is down (Figure 7).
Figure 8
Figure 6
Head gates or ways to immobilize the head make operations
such as dehorning a lot easier but often are not available
when calves are in hutches. Figures 8 and 9 illustrate a
portable stall that was made relatively cheaply. The stall
folds up after use.
Figure 9
67
Working with Heifers
Raising the Feet
There are numerous methods for manually raising feet.
None of them are especially easy or enjoyable. A smaller
heifer or gentle cow may allow a person with a strong back
to raise a foot manually and rest her leg on your knee or
thigh. Pushing the animal’s weight onto the other leg will
make raising the foot easier. Using a nose lead or rope tightened around the flank may reduce struggling by diverting
the animal’s attention.
Casting an Animal
An animal can be cast when near total immobilization is
required. First, halter the animal and tie her to a secure
object using a quick release knot. Next, tie the end of a 35
ft. rope loosely around the animal’s neck using a bowline
knot. Put a half-hitch just in back of the shoulders and
another one over the loin and under the flanks (Figure 10).
Cast the animal by pulling on the rope from directly behind.
The tightening rope exerts pressure on the nerves and blood
vessels supplying the legs, causing the animal to lie down
(Figure 11). A constant steady pull needs to be maintained
on the end of the rope while the management technique is
being performed.
When using ropes, the animal should always be adequately
restrained to prevent injury. The front foot can be held up by
attaching a rope around the pasterns and bringing it up over
the back (Figure 12).
Figure 10
Figure 12
The rear leg can be hoisted up by placing a rope just above
the hock and having the rope attached over a beam. A slightly different method is to place a loop above the pasterns,
pass the rope over a beam, and then back around the leg
right above the hock (Figure 13). Don’t raise the leg any further than necessary and have the cow properly restrained to
avoid unnecessary risk of injury.
Figure 11
Animals should be cast only on well-bedded or grassy areas
to prevent unnecessary bruising or injury. Avoid casting animals that are heavy with calf. Also, don’t keep an animal
lying on its side for extended periods, as bloat or pneumonia may result.
Figure 13
68
Working with Heifers
Nose Lead
A nose lead can give added restraint when needed such as
for intervaneous injections and clipping the head of an
unruly animal. The nose lead can be rather severe and
should only be used when needed and then used properly.
narrower than the top to prevent the animal from laying
down. Workable inside widths at the floor are 6 inches for
500 lb. animals, 8 inches for 700 lb. animals and 12 inches
for larger animals.
Occasionally, cattle in a stall or headgate refuse to get up from
a lying position. Figure 15 illustrates a method of encouraging
animals to rise without causing undue excitement or injury.
Simply cup your hand over the animal’s nostrils. As the animal becomes short of breath, it will inevitably rise before there
is any danger of suffocation. Sometimes one may be smart
enough to breathe through its mouth. This is solved by holding the mouth closed with your other hand.
To put a nose lead in, stand at the side of the animal’s head.
Grasp the animal by the lip on the side of the mouth and pull
its head toward you (Figure 14). Insert the nose lead one
nostril at a time and squeeze it shut. Have a firm hold of the
nose lead as you release the animal’s head. The animal will
usually attempt to swing its head from side to side in an
attempt to shake off the nose lead. The rope from the nose
lead should be held or double wrapped around a pipe or post
and held rather than tied. Tying the rope could cause the animal to tear its nose, should the animal go down.
Figure 14
Headgates and Squeeze Chutes
A head gate, squeeze chute and cattle handling facilities can
make handling livestock much less stressful and efficient.
This generally translates into management techniques being
done in a more timely fashion and sick animals being treated more promptly.
Figure 15
Tilt Tables
Tilt tables have generally been preferred over any other
method of restraint for hoof trimming or inspection of the
foot. The general procedure is to strap the animal to the
table and slowly tilt the animal over. Allow the animal to
settle down just a bit before tying down its legs.
There are different types of headgates on the market.
Choose one that fits your cattle and the tasks that you will
be performing in it. A headgate with straight vertical neck
bars has much less chance of choking an animal but doesn’t
provide head control like curved bar stanchion headgates
will. This disadvantage of straight bars can be overcome by
quickly and simply slipping a halter on the animal once it is
in the headgate.
Hoof-Trimming Chutes
Hoof-trimming chutes in which animals remain upright with
belts under them for support have been greatly improved in
past years and are becoming the chute of choice. When using
older or homemade models for unruly animals, a few precautions should be taken. To prevent them from sticking their
legs where they don’t belong, the feet should be hobbled to
the bottom of the chute except when they are being worked
on. Provisions can be made so that rope can be used to raise
and hold the feet as explained earlier.
Proper design of a squeeze chute includes a tailgate, removable side panels on the bottom 24 inches of the chute and
removable bars above the side panels for easy access to the
animal. It is desirable to have a chute with adjustable bottom
widths so that when the animal is squeezed the bottom is
69
Working with Heifers
Working with
First-Calf Heifers
the halter on the heifer from behind as you are standing at the
side of the heifer. The heifer will usually move forward in the
stall and you should be able to tie her head to the side with
little resistance. Tie her head to the right for right side milking and to the left for left side milking. This will naturally
cause the heifer to stand to the other side of the stall in the
proper position for milking.
Dairymen work closely with cattle on a daily basis, and have
a lot of control in determining whether this association is a
pleasant one or one that causes discomfort for both. Cows
are generally docile, and respond best to gentle handling and
a soothing voice. Sometimes additional restraints are needed
to perform a task, but the importance of calmness, gentleness
and confidence on your part can’t be overemphasized.
In most situations it is advantageous for the heifers to
become accustomed to the milking routine and housing prior
to calving. In a milking parlor situation, the heifers can be
housed with the milking herd and walked through the parlor
a few times prior to being taken to the maternity area. In stall
barns, heifers should have a chance to get used to getting up
and down in the stalls at least two weeks prior to calving.
After freshening make sure that heifers are provided plenty
of clean bedding. This will help prevent slipping and bruising of legs or teats.
Some heifers may not let down their milk at the first milking.
If they are wild or extremely nervous, 1 cc of Heifer Calm
(rompen and oxytocin) will tame them and cause them to let
down their milk. Oxytocin by itself can be used if the heifer
isn’t wild. Doses are decreased the next milking and by the
third day the animals are milked normally. An older remedy
is to stimulate the lining of the vulva with your forearm. This
causes a cow to secrete her own oxytocin into the blood
stream.
Figure 1
Heifers may need to be restrained when they first enter the
milking string, to prevent them from kicking off the milking
unit or kicking the milker. If the milker is gentle and calm,
heifers generally return the favor. Usually, laying a hand on
the rump is enough to calm a heifer. However, a few may
need additional restraints, such as use of a Kow-Kant-Kick,
rope or tailhold. When applying a tailhold, push up more
than forward and use only as much force as needed (Figure
1). The Kow-Kant-Kick is applied in front of the hooks and
tightened (Figure 2). This exerts pressure in the stifle area,
discouraging any kicking.
Another restraint that acts in the same fashion is illustrated
in Figure 3. Place a rope over the front of the hooks and
around the front of the udder. Tighten the rope snugly and tie
with a quick-release knot. Remove the restraint after milking
is completed and the cow has been teat dipped. Don’t use
restraints unless needed, and then only as long as necessary.
Figure 2
You may wish to hobble a heifer or cow occasionally. This will
prevent kicking, and also prevent a cow from injuring herself
by sprawling on a slippery floor. To hobble a heifer,
A simple technique to restrict a two-year old’s movement in
a tie-stall is to tie her head to the side using a rope halter. Put
70
Working with Heifers
first take two short pieces of rope and tie the first length above
the dewclaws (Figure 4). In the same fashion, tie the other rope
on the opposite leg and then join the ropes in the middle with
a tight knot (Figure 5). Cut off long loose ends with a knife.
Figure 3
If the hobbles are tied to allow about 15-18 inches between the
legs, they won’t interfere with the heifer getting up and down
or walking, and can be left on for an extended period, if necessary. A soft cotton rope will be least abrasion on the animal’s
legs. Remove the hobbles promptly if the legs become sore
where the hobbles are attached. Cow hobbles can also be purchased for about $20.00. The nylon hobbles are easier to apply
than rope and are an excellent investment to use as a prevention aid to keep weak cows from doing the splits or over
extending her rear legs which can cause serious damage.
Figure 4
Figure 5
71
Bulls
Handling Bulls
Even with the many advantages of A.I., many dairies still keep
a herd bull for cleanup or for breeding heifers. Clearly, the
biggest disadvantage of keeping bulls is the danger they pose to
the dairy’s workers and visitors. Many people have been injured
by a “friendly” or “tame” bull. Never underestimate a bull’s
strength, and respect the possibility of sudden disposition
changes. A dairy bull should not be kept beyond 2 to 2 1/2 years
of age and sold prior to that if he shows aggressive behavior. A
research study found that bull calves raised in groups were less
likely to attack people than bull calves raised in individual pens.
The theory is that if bulls are raised with other cattle, they are
less likely to think of people as part of the herd and less likely
to feel the need to express dominance over a human.
be easier to first pierce the nose with a trochar and canula (such
as is used for bloat) or use a sharpened punch. The ring can then
be pushed through the preformed hole.
Once the ring is passed through the nose, close the ring and
replace the locking screw. It is a good idea to have someone
hold a pail or scoop under the ring in case the screw is dropped.
Or at least sweep the ground over which you are working prior
to beginning the procedure. Trying to find a small screw
dropped in a pile of silage is not a fun task.
With a file, take any rough edges off the joint or screw head to
avoid any additional tears to the nose. It usually takes about 2
weeks to completely heal the wound, so don’t use the nose ring
before this time.
Prospective herd sires should be halter-broke at a young age.
Before a year of age, a bull ring should be placed in the nose of
the bull. Figure 1 shows two sizes of self-piercing bull rings.
The smaller ring works well on young calves under 6 months
of age. Don’t put a large ring in young calves, because it may
interfere with eating. When the calf outgrows the small ring,
remove it and place a larger ring in the nose.
Observe the bull to make sure he continues to eat and that there
are no complications after being rung. Remove any items from
the pen that could catch the ring, such as projecting bolts or
spikes.
Figure 2
Figure 1
The procedure for putting in a ring is relatively simple. Properly
restrain the calf’s head in a head gate and halter. Clean and rinse
the ring in an antiseptic solution. Locate the ring in the soft tissue 1/2 inch back from the nostrils (Figure 2), just in front of
the cartilage of the nasal septum. You can easily feel the cartilage with your fingers. Piercing this may cause necrosis of tissue. Use a smooth, steady push to force the ring through the tissue (Figure 3). Wearing leather gloves will give you a better
grip on the ring and may prevent a gash on your hand from the
ring’s sharp edges. When ringing a bull for the first time, it may
Figure 3
72
Bulls
If bulls are kept for many years, such as in AI studs, and eat off
the concrete, the concrete will wear the ring causing it to eventually break or need to be replaced. An inch long piece of rubber hose placed on the ring at the time the bull is rung will
greatly extend the life of the ring.
Work with bulls at a young age if they are to be trained to lead.
It is important to keep the bull’s head up, and don’t step in front
of him. Never turn your back on a bull, and don’t handle or lead
mature bulls without assistance. One method of leading a bull
is with a heavy rope halter and a rope on the nose ring, with a
person on each side to protect each other. Better yet, Figure 4
shows the use of a staff hooked to the ring, which gives greater
control of the head with a heavy rope to the other side. If the
bull is extremely difficult to handle, people have used baling
wire or a transcom chain through the nose to help lead bulls in
the show ring. Remove the wire or chain after the bull is done
being shown.
Some dairymen hang a short chain on the nose ring (Figure 6),
which can help in catching the bull and may make him less
aggressive and less likely to charge. It also serves an excellent
contact point to prevent a bull from sticking his head over an
electric fence. A long chain can get caught on equipment, trees
and fencing. For this reason, don’t use a chain unless you
observe the bull frequently. It may be a good idea to cut through
the link that attaches through the ring. If the chain gets caught
on an object, it should spread and pull off preventing the ring
from ripping through the nose. The chain should be light
enough so it doesn’t put undue pressure on the nose.
Figure 4
Never tie a bull with just a rope on the bull ring. If he becomes
frightened, he may break the ring or tear it out of his nose. To
properly tie the bull for short periods of time, tie the rope halter to one side of a stall and the rope on the nose ring to the
other side with a little more slack (Figure 5). Be sure to tie the
ropes low enough so the bull can comfortably lie down and
stand up. If a bull does tear out his ring in which case the front
of the nose is tore out, the ring can be replaced vertically
instead of horizontally.
Figure 6
If it is necessary to have breeding bulls run with cows, workers
need to be taught to stay alert and to notice aggressive postures
by the bull. One aggressive posture prior to an attack is what is
called a broadside threat. The bull will stand sideways showing
off how big and powerful he is. The bull may back off if a person continues to face the bull, but if the person feels threatened,
it is usually best to slowly back away from the bull to safety.
Don’t turn and run.
Figure 5
73
Reproduction
Recognizing Heat
Signs in Heifers
Unless observation is continuous, which is impractical, many
mounts will be missed. Occasionally, heifers may stand to be
mounted briefly even though they are not in heat or may even
be pregnant. Therefore, to maximize breeding efficiency, take
into account the many secondary signs of heat. Secondary
signs vary in length and may start a day before standing heat
and continue for a day after standing heat.
Poor heat detection in heifers delays breeding, and frustrates
dairymen to the point where a bull is sometimes substituted for
the A.I. technician. It is the primary reason that a smaller percentage of heifers are bred A. I. compared to older cows, even
though heifers usually have a higher conception rate. Heat
detection efficiency can be improved considerably by observing heifers on a regular schedule and recognizing all the signs
of heat.
Heifers coming into heat and in heat are generally more
active. They may walk the fenceline or pace back and forth
across the barnyard (Figure 2). They may bellow considerably and urinate frequently. Animals that are in or near heat
may attempt to mount other heifers that may or may not be
in estrus and may also spend time butting heads with other
animals. A heifer that attempts to mount the front end of
another heifer is usually in heat.
Although the greatest amount of riding activity probably
occurs between midnight and 6:00 a.m., 15 minutes committed just to observation in the early morning and later afternoon
will catch most heifers exhibiting heat. Also be on the lookout
for signs of heat any time you are working around the cattle.
Standing to be mounted is the primary and surest sign of heat
and the most common indication of estrus used (Figure 1). On
the average, a heifer remains in standing heat for 14-16 hours,
and will ovulate 10 hours after the end of standing heat.
However, to be noted in standing heat, the heifer must be
mounted by another animal which doesn’t always occur or
doesn’t happen while the heifer is being observed.
Figure 2
Other behavior changes include the heifer testing other
heifers by resting her chin on their rumps or loins. The heifer
may nudge, lick or sniff the vulva of other heifers and then
wrinkle its nose and curl its upper lip, similar to a bull
(flehmen response). A clear, chrystalline mucus is secreted
by the vagina of a heifer in heat. The mucus may be seen
draining from the vulva, appear as strings of mucus on the
tail, or be smeared on the animal’s thigh (Figure 3). It will
glisten in sunlight and artificial light. In fact, checking the
rears of cows for this chrystalline mucus with a flashlight,
with the barn lights off, prior to the morning milking is a
good heat detection aid. It is sticky and should stretch for
more than 4 inches when touched by two objects and pulled
apart. Contrasted with nonestrus vaginal mucus secretions
which are much smaller in quantity, cloudy rather than
chrystalline and less sticky, this clear mucus discharge is a
good indicator of heat.
Figure 1
To maximize the amount of estrus behavior during the observation period, it is an excellent management practice to turn
the heifers into a dirt lot, away from feed bunks, for heat detection. Both the effects of movement and good footing will
increase activity. If a heifer is in heat, there may be several
mounts in the first few minutes in the new lot. After the observation period, put the heifers back in their regular lot. Try to
keep open heifers together, because there will be more estrus
activity if there is a bunch of cycling animals together. If there
are only a few open heifers left in a group, move them to a pen
of open heifers.
74
Reproduction
If a heifer has been ridden, the hair on her tailhead may
become ruffled or rubbed off (Figure 5). In muddy conditions, there may be mud on her rump and flanks. Even
though not directly seen in standing heat, these are telltale
signs that she was recently in heat and may conceive from an
insemination at this point.
Figure 3
Figure 5
There may be noticeable physical changes in some heifers.
The vulva may swell with a reddened lining. It will have a
puffy appearance, and instead of many fine wrinkles, it will
have fewer, deeper wrinkles (Figure 4). The secreted mucous
may mat the hair and give the lip of the vulva a wet appearance. The pelvis may rotate causing a slight depression in the
loin and an elevated tail or tailhead.
Approximately 90% of heifers will have a small bloody discharge 1 or 2 days after estrus. This may be noticed as a discharge from the vulva or as a string or smear of blood on the
tail or flank. This discharge is from the breaking of small
blood capillaries in the lining of the uterus caused by changing hormonal levels during and after estrus. It is not related
to whether the heifer conceived or not.
Usually, it’s too late to breed a heifer when you notice blood.
Record the heat on a heat expectancy chart so you can anticipate the next heat period. An alternative that may get her
bred earlier would be to wait 10 days, then inject her with
prostaglandin and breed her when she comes into heat or 80
hours after injection.
All of the rules relative to catching heifers in heat also apply
to cows. Cows may also have a decrease in milk production
while they are in heat.
Figure 4
75
Reproduction
Using a Heat
Detection Aid
Heat in cattle can be missed because of several factors even
when they are observed 2 or 3 times daily. Up to 25% of animals are in standing heat for less than 8 hours. In addition,
animals may be mounted only 5 or 6 times during their heat
period. For these reasons, heat detection aids can help detect
animals that stand to be mounted between observation times.
Using both heat detection patches and paint can be more
effective than using either by itself.
When using a heat detection patch, it is important to apply it
properly in the correct position. Generally, the patch should
be placed about a third of the way from the hooks toward the
pins (Figure 1). For animals with high tailheads, place the
patch further back toward the tail. Use good judgment in
determining the best position so it will come into best contact
with the mounting animal.
Figure 2
3. Don’t allow glue in the tube to freeze.
4. Write the animal’s ID number on the detector (Figure 3).
If a detector is lost, perhaps during mounting activity, it can
be rematched to the animal.
Figure 1
To prepare the site for the patch, first remove dirt and loose
hair with a currycomb. If the hair is extremely long, as under
winter conditions, you may clip it down to 1/2 inch in length.
Apply a gob of glue about the size of a quarter (Figure 2).
Use the spreader to spread the glue. Press firmly to assure
good penetration of the glue. Next, put a smaller gob of glue
on the back of the patch. Use the spreader to spread it out
evenly to all the edges. With the arrow pointing forward, press
the patch on the prepared area of the tailhead.
Figure 3
5. If a new detector is to be placed on an animal and the old
one is still firmly attached, cut off the plastic bubble and
cement the new detector over the old one.
6. Remove obstacles that cattle may rub against and falsely
trigger the detector.
Here are a few additional tips on applying detectors:
After the detector is in place, paint can be applied over the
midline of the rump from the hooks to back over the tailhead
(Figure 4). Use a stiff brush to apply the paint, making sure
that the paint penetrates down to the skin. Make a final backward stroke to produce a smooth strip of paint about 8 inches long and 2-3 inches wide. Both water soluble latex or oil-
1. Do not use too much glue. Detectors will not stay on as
well if an overly generous amount of glue is used.
2. Store detectors in a cool, dry place and use before expiration date.
76
Reproduction
based paints are suitable, or you may purchase a speciallydeveloped heat detection paint from your A.I. supplier.
All animals should be observed for visible signs of estrus
and triggered heat detection aids at least twice daily. If the
heat detector has been triggered or is missing and the paint
has been rubbed off (Figure 5), the animal was probably in
heat. Try to confirm this with other visible signs of heat or
behavior changes before breeding the animal. False positives do occasionally occur, but are less likely when heat
detectors and paint are used in combination. If the heat
detector is missing or triggered but the paint is not rubbed
off, it is questionable whether the animal was in heat.
Figure 4
The paint can aid in heat detection because it is rubbed off
when the animal is mounted. Different color paint can be
used, depending upon breeding status. For example, all animals that have not been bred can be painted yellow. Once
bred, their tailheads can be painted blue. At a glance, you
can see which animals have and have not been bred. After
animals are bred, you may wish to just use paint without
applying another detector.
Figure 5
An alternative or addition, is to use an implanted free-martin heifer or small, healthy cull cow to help find animals in
heat. Four implants of Synovex H are placed in each ear in
different locations. Eighty percent of heifers will respond in
1 to 2 weeks and stay active for 4 to 6 months.
Marking crayon can be used instead of paint. The crayon
may be more convenient to handle and apply. But under
humid conditions, it may require daily application, while
paint needs replacement only every 1-3 weeks.
77
Reproduction
Heat Synchronization
Heat synchronization can reduce time required for estrus and
help get heifers bred at younger ages as well as getting cows
rebred with fewer days open. Products and programs for synchronizing cattle are changing and new ones are under development. Synchromate-B for heifers has recently been taken off the
market at least temporarily in the United States leaving
prostaglandin injections given alone or with the feeding of MGA
as the one alternative for heifers. Prostaglandins alone or with
GnRH in an Ovsynch program are popular for dairy cows. Intravaginal devises for heifers are currently under development.
Synchromate-B
The equipment needed to use syncromate-B includes a
restraining chute, small table or work bench, disinfectant, shallow pan, small scrub brush, implant gun, small syringe with
one inch, 16-gauge hypodermic needles, slender forceps and
hair clippers (Figure 1).
Figure 2
Figure 3
Figure 1
neously). The outline of the implant should be visible through
the skin. The implant contains Norgestomet, which acts similar to progesterone.
Restrain the heifer. Limit movement of her head as much as
possible. Prepare the ear for implanting by clipping the hair on
the ear midway between the base and tip (Figure 2). Clipping
makes implanting easier and more sanitary. Scrub the area with
a brush and disinfectant.
An injection containing Norgestomet and estradiol valerate
(estrogen activity) is given at the same time as the implant.
These compounds are relatively safe, will not cause abortion
and work at any point in the estrus cycle. This injection is given
intramuscularly (IM) in the neck or in the thigh below the pins.
A sterile needle should be used for each animal to prevent
infection and contamination of the unused portion of the liquid
left in the bottle (Figure 4).
Affix a sterile needle to the implant gun. A sterile needle is
needed to avoid infection and prevent transfer of blood-borne
disease organisms from one heifer to another. Remove the
sheathed implant from the foil pack and load it into the implant
gun. Let the plunger rest against the implant and push the
implant 1/16 inch out of the sheath.
After 9 days, again restrain the heifer for implant removal.
Disinfect the back of the ear. With the tip of the disinfected forceps, open the original needle opening (which will now be partially healed) up to the implant (Figure 5). Once the opening is
reestablished, you may remove the implant by pushing on it
with your thumb nail.
With the beveled part of the needle away from the ear, insert
the needle just under the skin. Avoid hitting any major blood
vessels or puncturing the cartilage. Push the needle between
the skin and cartilage (Figure 3). With the needle in all the way,
push the plunger to eject the implant under the skin (subcuta78
Reproduction
Alternative 2: Inject all animals 11 days apart. Begin heat
detection after second injection and breed after caught in
heat. 96 hours after injection breed all animals not yet bred.
Alternative 3: Inject all animals and check for heat for 6
days - breed after caught in heat. Day 11 – re-inject all animals not yet bred and breed as in Alternative 2.
Expect conception rates to be the same as non-synchronized
animals if animals are bred when showing signs of heat.
Conception rates are generally lower if animals are timed
bred without estrus observed.
Prostaglandin plus MGA
MGA is not approved for lactating dairy cows but can be fed
to heifers to synchronize estrus. MGA is fed for 14 days at
the rate of 1/2 mg. per head per day. The MGA is then withdrawn from the feed and a prostaglandin injection is given
19 days later. All heifers are bred 72 hours after the
prostaglandin injection or as they come into estrus.
Figure 4
Timed insemination needs to be done 48-54 hours after the
implant is removed from the ear. Labor required for heat detection is eliminated. However, if a heifer is noticed in heat, it is
preferable to breed her 12 hours after heat is first exhibited.
Ovsynch Program
The ovsynch program for lactating dairy cows was introduced about five years ago and has been successfully used
on many dairy farms. It synchronizes ovulation more so
than estrus. In fact, many cows will not show signs of estrus
on the program. The basic program is 3 injections. Recent
studies have shown a good increase in conception rate using
5 injections. The basic program is to give a 2 cc injection of
GnRH on day 0, 5 cc injection of prostaglandin on day 7,
and a 2 cc injection of GnRH on day 9. The cows are bred
16 hours later. With the 5 injection programs 2 additional
injections of prostaglandins are given 26 and 12 days before
the first GnRH injection. Some people have been successful
reducing the GnRH dose from 2cc to 1 cc. If the reduced
dosage is used, the injection should be given deep in the
muscle with a 20 gauge 1 1/2 needle to prevent run back.
Another practice shown to increase conception rates is to
give BST at the same time as the first GnRH injection.
Figure 5
Prostaglandin
Prostaglandin (Lutalyse, Estrumate, Bovilene) injection
synchronizes estrus by causing the regression of the CL
(corpus luteum). There are many different ways
prostaglandins can be incorporated into breeding programs.
With any synchronization program, it is important to have a
follow up program after the animals are inseminated. An
example would be to chalk tailheads eighteen days after the
insemination and observe for estrus. Breed animals
observed in heat. All animals not returned to estrus should
be pregnancy checked between 38 and 45 days.
Alternative 1: Check heat for 5 days - breed animals
caught. Day 6 - inject remaining animals. Breed animals
after they come into heat. 96 hours after injection breed all
animals not yet bred.
Wholesale cost
Requires Implant
Causes Abortion
Works all Days of Heat Cycle
Ability to Synchronize Heats
Must Obtain Through Veterinarian
Approved for Lactating Cows
Synchromate-B
$6.00-$8.00
Yes
No
Yes
Excellent
No
No
Prostaglandin
$1.50-$2.00
No
Yes
Only Days 5-18
Good
Yes
Yes
79
Prost. + MGA
$3.00-6.00
No
Yes
Yes
Excellent
No
No
Ovsynch
$5.00-$9.00
No
Yes
Yes
Excellent
Yes
Yes
Reproduction
Artificially
Inseminating Cows
on the right and a pregnant tract on the left. The pregnancy
is in the left horn and is about 50 days along. If the horns do
not seem normal, it would be wise to have a veterinarian
check the cow on his next visit.
Proper and thorough initial training from professional personnel is required to learn how to artificially inseminate cattle. It’s important to review techniques periodically to avoid
adopting poor procedures that may lower conception rates.
Poor habits can be picked up over a period of time without
the inseminator being aware of the change in his routine.
If stored in a cold area, warm the insemination gun and
sheath prior to loading the semen into the gun. Once the
insemination gun is loaded, place it under your coveralls or
shirt (Figure 1) to prevent exposure to cold or sunlight, both
of which are detrimental to sperm survival. Post-thaw temperature fluctuations will damage sperm.
Figure 2
Figure 4
Figure 3
A disposable plastic glove-sleeve is used for cleanliness and
protection from disease. Lubricating the glove will make
entry into the rectum easier and reduce irritation to the cow.
Lubricants are available from A. I. suppliers, or a mild lubricant such as K.Y. Jelly or mineral oil may be used. Avoid
using detergents or soaps that may be irritating to the rectum
and harmful to sperm if contact is inadvertently made with
the semen.
With your free hand, thoroughly wipe the area around the
vulva with a paper towel before inserting the insemination
gun. By bringing the hand in the rectum toward the rear of
the rectum and exerting a slight backward and downward
pressure with the wrist, it is possible to open the vulva lips to
make insertion of the insemination gun easier and more sanitary. Usually, the gun will slide easily right up to the cervix.
After the hand is inserted into the rectum and fecal material
removed, locate the cervix. Gently feel the uterine horns to
determine if everything is normal and the cow is ready to
inseminate (Figure 2). Figure 3 shows a normal, open tract
To start the gun into the cervix, grip the end of the cervix
nearest you and manipulate it over the tip of the gun. If need
be, push the cervix forward to free the insemination gun
from folds in the vagina. After the gun tip starts into the
80
Reproduction
cervix, manipulate the cervix to ease passage of the instrument through the rings into the body of the uterus, where the
emerging gun can be felt. Never force the insemination tube.
Do not insert the gun beyond the body of the uterus, as the
uterine walls are fragile and can be damaged.
Feel the end of the cervix and insemination gun between
thumb (over top) and index finger (underneath). Pull the gun
back into the cervix about 1/4 inch for deposit position.
Figure 4 illustrates the proper placement of the gun for deposition of the semen in a cut-away view of the reproductive
tract. The tip of the insemination gun should be over the third
ring, so semen flows unrestrained into the body of the uterus.
Figure 5
After the insemination gun is withdrawn, check to make sure
all the semen was deposited and that there was no abnormal
discharges from the reproductive tract on the sheath. Reverse
strip your glove off your arm so that the used sheath and
manure is trapped inside. Dispose of properly.
Even if multiple cows are being inseminated at the same
time, a new disposable glove should be used on each cow.
This same recommendation is important when doing pregnancy checks or reproductive palpations. Using the same
glove on multiple cows greatly increases the danger of passing blood born diseases, such as leukosis, from cow to cow.
Figure 4
The procedures outlined here are for depositing semen into
the body of the uterus. Some people advocate horn breeding, but that procedure has not been as widely accepted.
Choice of procedure is one of personal preference as they
both have given acceptable results.
As you get ready to make the semen deposit, keep hold of
the cervix to make sure its relative position to the insemination gun does not change. Make sure your forefinger is not
blocking the flow of semen. Depress the metal plunger over
an 8 to 10-second period to deposit the semen (Figure 5).
Do not pull back on the gun or change the position of the tip
of the insemination gun as the deposit is being made.
Maximum conception rate will be realized if all the semen
is deposited in the proper position to assure sperm transportation into both uterine horns.
81
Reproduction
Storing and Handling
Frozen Semen
Frozen semen remains viable for years if properly stored
and handled. Improper handling can render it useless in a
few seconds. Therefore, it is important to use proper procedures to safeguard your investment.
Semen is stored at -320ºF in a cryogenic tank filled with liquid nitrogen. The semen is safe as long as there is liquid
nitrogen in the tank, but is ruined in a matter of minutes if the
tank runs dry. Semen tanks must be handled with care to prevent damage, which may break their vacuum seal. If the tank
must be moved, always pick it up by both handles and set it
down gently. The tank should be stored on wooden blocks
or a pallet rather than on concrete to prevent corrosion. To
check the nitrogen level, lower a measuring stick, which can
be obtained from you’re A.I. supplier, to the bottom of the
tank. After 10 seconds, remove the stick and wave it in the
air. The frost line on the stick indicates the nitrogen level
(Figure 1). Record the reading. Weekly checks will indicate
any abnormal nitrogen losses. The chart below will help to
determine the proper nitrogen level at each check. If you
notice rapid nitrogen loss, frosting or sweating, semen
should be moved into another tank immediately.
Figure 1
Ideal Nitrogen Levels in Your A.I. Tank
Weeks
Tank type,
after refill
4-week
8-week 16-week 20 to 24-week
- - - - -ideal nitrogen level in centimeters - - - - 1
23
2
18
23
3
10 to 13
4
3 to 5
10 to 13
23
6
18
23
8
3 to 5
18
12
10 to 13
18
16
3 to 5 18
10 to 13
24
3 to 5
Figure 2
Source: ABS Global, Inc. A.I. Manual, 1996
The most common semen package is the 1/2 cc. straw.
When removing semen, never raise the canister above the
frost line, which is about 2-3 inches from the top of the neck
tube (Figure 3). Semen can be damaged if exposed to temperatures above -112ºF, which is the temperature near the
frost line. Temperatures increase to 0ºF at 1 inch from the
top of the neck tube and 36-54ºF at the top of the neck tube,
depending on room temperature and level of nitrogen in the
tank. The damage to sperm from exposure to elevated temperatures is cumulative. Recrystallization of ice begins with
Keep a semen inventory record near the tank (Figure 2). The
inventory needs to identify semen, quantities left and proper
canister assignment. This record will help locate semen
quickly without unnecessarily exposing semen to warm temperatures while hunting for a specific straw. An inventory
also helps determine needed semen purchases. There is little
reason to have more than a 6 month semen supply. Semen
becomes genetically outdated as new and better bulls continuously become available. Discard genetically inferior semen.
82
Reproduction
Hold the removed straw on the sealed end as you remove it
from the tank. Otherwise, unequal thawing will result where
your fingers touch the straw. Shake the straw sharply to
remove the nitrogen from the cotton plug, and thaw according to semen supplier recommendations. General recommendations are to drop the straw immediately into warm
water (90-95ºF) after removal from the canister. Thaw the
semen for at least 40 seconds. This procedure will give satisfactory results with all 1/2 cc. straws.
exposures to temperatures above -112º’F, which will lower
semen quality even if exposure is for only a few seconds.
Don’t guess the water temperature. Use a thermometer.
Periodically, check the thermometer against another one to
make sure it is accurate. A thermos with a thermometer is
highly desired (Figure 5). These units can be purchased
from A.I. suppliers for $10-15. Electronic thaw devices are
also available. It is safest and highly recommended to thaw
semen one straw at a time, and get it into the cow as soon as
possible. However, satisfactory results have been obtained
by thawing up to 10-15 straws at once if proper procedures
are used. Straws should be stirred so that they don’t “freeze”
together during the thawing process. Waterbath temperature
needs to be maintained until the straw is removed.
Figure 3
To remove semen, raise the canister just high enough to
identify the sire by the top of the cane (Figure 4). Lower the
canister briefly to equalize the temperature, raise it again
and quickly remove the desired straw. If the straw is not
removed within 7 seconds, lower the canister back into the
tank for about 30 seconds to equalize the temperature of the
semen back to -320ºF. Then raise the canister again to
remove the straw.
Figure 5
Once a straw has been removed from a nitrogen unit, it must
be used or discarded. In 80ºF air, an individual straw warms
to -112ºF in only 3 seconds. Even though it still may appear
frozen, the straw should not be returned to the tank.
Hopefully a few of these hints will aid your A.I. breeding
program.
Figure 4
83
Foot Care
Trimming Hooves
Condition of the feet and legs on dairy cattle shouldn’t be
taken lightly. A cow with sore feet may realize losses in
milk production, diminished breeding efficiency and
decreased salvage value in the case of severe lameness. As
the number of cows in confinement increases, the need for
periodic hoof trimming is necessary for cows to reach their
full genetic potential.
Hoof trimming is very labor intensive, which is why many
times it is neglected. Before you can begin hoof trimming,
you must understand what the correct hoof shape is. Figure
1 shows a diagram of a correctly shaped hoof. Notice the
45º angle of the hoof to give the greatest amount of shock
absorption through the pastern yet provide plenty of heel
depth. Another way to get an idea of a correctly shaped heel
is to look at a young calf’s hoof (1-2 months old). Toes on
each hoof should be about equal length, with all four feet
approximately the same shape. The hind feet are likely to
get longer on the toes than the front feet, and may need trimming more often.
Figure 2
Figure 3
an electric sander), hoof nippers and gloves to protect your
hands. Be sure the hoof knives are sharp. This reduces the
force required to use them, making them much safer.
Hoof trimming should be supervised or taught by a veterinarian or professional hoof trimmer until you become
accomplished at the skill. When the cow is restrained properly, begin with the hoof knife. Figure 4 shows removal of
old hard sole towards the toes. You should remove very little tissue from the heels, but take more off as you pull
towards the toes. The goal is to get the length in proper proportion to the foot shape desired.
Figure 1
Trim the feet of cows that show excessive hoof growth or
signs of lameness. It is best to trim hooves when cows are in
the latter part of lactation so you don’t disturb milk production. One of the more popular methods of restraining a cow
is to use a tilt table (Figure 2). This allows for total restraint
of the cow, but does have the disadvantage of making it
more difficult to check for the correct foot angles.
Avoid cutting too deep. Generally, it is better to under trim
than over trim. If you see any pink tissue, stop before you
draw blood. There are exceptions to this, in the case of
abscesses or other foot problems.
After the sole is sufficiently pared down and no problem
area is spotted, use the nippers to shorten the toe and shape
the hoof (Figure 5). Cut from the underside of the hoof.
Assemble the proper equipment, shown in Figure 3. Use a
couple of hoof knives (search knives), a rasp (some prefer
84
Foot Care
Again, take small bites at a time so you don’t injure the foot.
The finished hoof should be slightly concave so most of the
weight is supported by the outer horny wall. The hoof should
set flat when placed on the ground. This can be checked
while the cow is still on the table by placing a small board on
the bottom of the hoof. A common mistake is to trim too
much from the toe, leaving a rounded bottom to the hoof.
Finish the hoof by rasping or sanding the rough areas so you
don’t leave an area for bacterial growth. Be careful so you
don’t get the foot hot if you use a disk sander. The excess
heat can cause internal damage and abnormal hoof growth.
Some trimmers coat the hooves with iodine when they’re
finished, to help dry the hoof and act as a bactericide.
Figure 4
Several other practices to compliment your hoof trimming are:
1. Keep cattle areas dry. Wet floors tend to keep the soles soft,
so they are subject to more mechanical injuries and foot rot.
2. Use a copper sulfate foot bath to help control foot rot.
3. Allow the cows plenty of room to exercise so they wear
feet down.
4. Don’t turn freshly trimmed cows out on rough, frozen
ground.
5. Use a well-balanced ration with an adequate amount of
fiber.
6. Seek out professional help if needed.
Hopefully, a few of these ideas may improve hoof care in
your herd.
Figure 5
85
Foot Care
Treating Sole Abscesses
spurts out of the abscess, leaving a hole in the foot. To provide adequate drainage, pare-out the wound area and dead
tissue, as shown in the heel abscess in Figure 2 and the toe
abscess in Figure 3.
Lameness caused by a sole abscess can occur in any herd.
Sole abscesses generally occur in the hind feet and most
often during the first half of lactation. More foot problems
are seen in the winter months because wet floors soften the
soles of feet, making them more susceptible to abscesses
and other injuries.
Sole abscesses are usually a result of a puncture wound
from a nail or sharp object. They are also caused by cows
walking on overgrown hooves. This causes bruising and
results in an abscess.
A sole abscess needs to be treated promptly to prevent the
spread of infection into the toe joint, causing permanent
injury. A novice should always seek the help of a professional hoof trimmer or veterinarian.
Lift the infected foot and wash it with a sanitizing solution
(Figure 1). This allows for better observation of the foot.
Usually a sole abscess won’t cause the foot to swell, but if
you tap on the bottom of the hoof with the handle of the
hoof knife, the cow exhibits pain.
Figure 2
Figure 3
After you provide adequate drainage, it is important to use
some type of topical antibiotic or sulfa drug to help promote
healing. Figure 4 shows the use of a mastitis infusion tube
to apply antibiotic directly into the wound to prevent infection. Be sure to consult your veterinarian on milk withholding when using antibiotics. Follow labels properly. Once the
antibiotic is applied, copper sulfate may also be used as a
wound dressing. It can prevent the open wound from
becoming a foot rot problem.
Figure 1
The next step is to remove excessive tissue from the bottom
of the sole as you would for regular hoof trimming.
Remember to remove more from the toe than the heel. Once
the sole is pared down, try to find a spot where a black mark
or line shows through the cleaned off sole. This black mark
is usually from dirt that got into the puncture wound, or
where some puss was released, leaving an opening that was
contaminated by dirt and manure. Dig out the sole of the
foot, following the black line to the abscess. Pus usually
After applying the wound dressing, pack the affected claw
with cotton and wrap it to help protect the wound (Figure 5).
Reusable urethane boots are also available for this purpose.
The wrapping will wear off in a couple of weeks on its own.
86
Foot Care
If the claw has had an extreme amount of tissue removed, it
may be advisable to glue a wooden block to the bottom of
the unaffected hoof. This will keep weight off the injured
claw and prevent further mechanical injury.
An important role of the dairy herdsperson is to decrease the
incidence of sole abscesses through good management.
Develop a regular hoof trimming program. It’s best to trim
cows’ feet toward the end of lactation or as they are being
dried off. Keep cows on well balanced diets with adequate
amounts of fiber. High concentrate diets tend to lead to more
foot problems. Also select cows for better feet and legs.
Prevention and early diagnosis are keys to eliminating sole
abscess problems.
Figure 4
Figure 5
87
Foot Care
Using Footbaths
Foot rot and heel erosion are two common foot ailments of
cattle leading to lameness and decreased production. Both
are caused by a bacterial infection. Hairy heel warts are also
a common cause of lameness. All three can be prevented or
reduced with proper sanitation and judicial use of a footbath. They are often misdiagnosed. Foot rot is also referred
to as foul-in-the-foot. Common names for heel erosion are
stable rot or stall rot. Other names for hairy heel warts
include interdigital dermatitis and strawberry heel.
Cows with foot rot suddenly become noticeably lame.
Generally, only one foot is affected. It usually begins with a
bacterial infection between the toes that, left untreated, can
spread into the points of the foot and cause permanent damage. The foot swells most noticeably in the pastern area
(Figure 1). If you stand behind the cow, you can see the
swelling forcing the claws apart. The cow may run a temperature with a drop in milk production. There is a characteristic foul smell from between the toes. After foot rot is
diagnosed, administer antibiotics or sulfonamides, following proper dosage and withdrawal times. Wash the area
between the toes with a mild disinfectant, and remove any
loose, decaying tissue. Trim diseased hoof tissue.
Figure 2
Typically, hairy heel warts are first seen on the heel bulbs of
the hind feet. They occur less frequently on the front feet.
They can also occur in the interdigital area toward the front
of the foot. The warts may have projections resembling
hairs. The lesions can become ulcerated, with erosion of the
area between the skin and hoof.
Proper use of footbaths can greatly reduce infectious foot
problems in cattle. Footbaths can be purchased commercially or constructed inexpensively with exterior plywood as the
base and 2x6’s for the sides. A bead of silicone caulk or
sealant between the 2x6’s and the plywood prior to assembly will help seal the joints. The footbath solution will act as
a preservative for the wood.
The bath should be at least 8 ft. long and wide enough so
cows can’t walk around it. Generally, the footbath is placed
in the exit lane of the milking parlor so cows walk through
it twice a day (Figure 3). In stall barns, the bath may be
located outside the exit door so cows walk through it as they
exit and enter.
Copper sulfate and zinc sulfate are two compounds shown
to be effective against foot problems when placed in a foot
bath at 5%. To calculate the gallon capacity of the footbath,
multiply length x width x depth x 7.46. There are 7.46 gallons in a cubic foot. One gallon weighs 8 lbs. For a 5% copper sulfate footbath, add 4 lb. copper sulfate per 10 gallons
of water (Figure 4). Tetracycline and Oxytetracycline at .1%
or Lincomycin at .01% have shown to be effective against
hairy heel warts.
Figure 1
Heel erosion occurs in different stages with varying symptoms. Initial symptom is a wet, clear or gray-colored inflammation on the skin between the claws. The initial stages
generally do not cause lameness, fever or noticeable production drop. Antibiotics generally have no effect. In the
next stage of infection, the bacteria can infect the heel of the
hoof, causing heel erosion (Figure 2). This can lead to
degeneration of the hoof, abnormal hoof growth, sole
abscesses and permanent hoof damage. Heel erosion is most
prevalent in confinement.
Once the problems have been reduced, cutting the concentration to 21/2% should be sufficient. The footbath should be
emptied and replenished if it becomes diluted with waste.
This might be multiple times per day on large herds or
weekly in small herds. One practice is to replenish the bath
88
Foot Care
Other considerations include:
• The footbath should be deep enough to submerge the foot
past the hairline.
• If introducing a footbath to cows for the first time, just fill
with clear water for a day until cows get used to stepping
through it.
• To lessen contamination of the footbath, a clear water footbath can be placed prior to the chemical bath to cleanse the
cow’s hoofs. Suspect cow’s feet can be sprayed off in the
parlor so that they have better contact with the chemical in
the footbath.
• Place footbaths in places where they are easy to clean and
maintain.
• If multiple groups of animals work through a bath, replenish the footbath so that each group gets the fresh solution
in rotation.
Figure 3
• Solutions that are mixed too strongly can harm the skin on
a cow’s foot or may splash up on a cow’s teats. Do not use
concentrations greater than 5%.
and allow cows to walk through it for 4 days, then dump it
and leave it empty for 3 days. On the eighth day, replenish
and repeat the cycle. Another option might be to use copper
sulfate for 5 days and Lincomycin for 2 days. You may have
to experiment to find the program best for your situation.
• If the skin on the cow’s feet becomes irritated, discontinue
the footbath for 2 weeks. If the condition persists, consult
your veterinarian.
• Try to provide cows with a fairly clean, dry environment
after they walk through the bath. A footbath will have little effect if the cows walk from it into 6 inches of muck.
• When a footbath is emptied, the solution should not cause
contamination problems if it is added to the barn manure
waste.
• Some dairy farms have found success preventing hairy
heel warts with a copper sulfate and lime paste. It is recommended to mix 5 lbs. of copper sulfate in 25 gallons of
water in the footbath. After it dissolves, mix 25 lbs. of
hydrated lime in with a hoe to form a paste.
A footbath will not solve lameness problems if there are
other weak points in management. The ration needs to be
balanced, especially assuring adequate fiber level. Hooves
need to be properly trimmed. Improper trimming can cause
more harm than good by putting uneven stresses on the
hoof. Cows’ feet should be kept as dry as possible. Giving
cows daily access to a drylot or pasture can alleviate foot
problems.
Figure 4
89
Producing Quality Milk
Good Milking
Management
parlors, the stream of milk may be directed onto a black
patch on the floor and later washed away. Strip cups must
be used in stall barns (Figure 2). Make sure it is kept
clean, as a dirty cup is a perfect haven for bacteria. The
disadvantages of fore-stripping include increased labor
and a possibility of the development of tendonitis in some
workers.
Proper milking procedure efficiently uses labor and maintains udder health while obtaining the available milk. The
old rule of prepping a cow for at least 20-30 seconds and
applying the teat cups within 1 minute after initiating prepping are still good goals. However, variation from these
guidelines to accommodate different milking systems can
occur without decreasing milking effectiveness in modern
high producing cows as long as the routine is fairly consistent. Regardless of the routine used, it is important to be
consistent in an orderly and calm fashion.
The first step in good milking management is to provide an
environment for the cows so that their udders and teats
remain relatively clean at all times. Stalls and walkways
need to be maintained. Udder hair should be clipped or
singed on a routine basis. If cows are kept clean, water can
be eliminated from the cow prep routine.
The following cow prep routine was developed at the
University of Minnesota and was shown to reduce bacteria
counts and reduce milking machine on time compared to
more traditional methods:
Figure 2
1. Teats are pre-dipped or pre-dip spray is used (Figure 1).
Three vertical motions up and down the teat and a couple
of motions across the teat end are made with the milker’s
hand. This removes dirt, gets teat dip into the crevices of
the teat and stimulates milk letdown. For sanitation reasons, it is preferable for the milker to wear plastic gloves.
3. Re-dip or spray the teat. Allow at least 30 seconds of contact time before Step 4.
4. Wipe off the teat dip with a single-service towel - paper
or cloth (Figure 3). Attach the milking unit and position
the claw to prevent liner slip.
Figure 1
Figure 3
2. Two streams of foremilk are removed from each quarter.
This step aids in detection of clinical mastitis, flushes
bacteria from the teat canal, further promotes milk letdown, increases milk output and speeds milking time. In
The above steps represent an ideal situation and the more
religiously they are followed the better the results would be
expected. Variations, within reason, can be adopted and still
90
Producing Quality Milk
Completeness of milking can be determined by hand-stripping a random ten cows into a bucket. If the strip averages
more than 1 lb. per cow, incomplete milking is occurring.
Typically, strip yields should be less than .5 lb. per cow.
Incomplete milking can be caused by many different problems. Common causes are: improper vacuum levels, poor
type or condition of liners, clusters that are too light or hang
unevenly, poor oxytocin stimulation and partial closure of
short milk tube due to claw inlet size too large compared to
tube size.
have acceptable results depending upon the circumstances
in the herd. However, just pre-dipping grossly dirty teats
and then just wiping them off prior to machine attachment
is not acceptable. Nor is the use of a common rag or sponge
to wash cows, or attaching units to wet or dirty teats.
If automatic detachers are not used, remove the machine
when milk flow has stopped, as determined by watching
milk flow in the transparent claw or appearance and feel of
the udder. Do not pinch the milk tube to detect milk flow.
The constriction can force mastitis organisms into the teat.
Remove the machine by shutting off the vacuum and then
catch the claw as it falls.
Within minutes of machine removal, dip the teats to cover at
least the bottom 50% of the teat in an approved teat dip
preparation (Figure 5). The solution must be clean to be
effective. Discard teat dip contaminated with manure or
urine, and rinse the cup before dipping the next cow.
Discard any teat dip remaining in the cup at the end of milking and wash the applicator regularly.
Machine stripping, where pressure is applied to the claw in
a downward direction and the udder massaged, should not
be necessary (Figure 4). Today’s narrow bore liners and
improved liner design minimize teat cup crawl and generally eliminate the need to strip. Use machine stripping only on
cows that have problems due to injury, udder shape, mastitis or edema. Routine machine stripping increases labor and
milking time without significantly increasing milk yield.
Figure 5
Finally, be as calm and quiet as possible around the cows,
especially during milking. When cows are excited or treated
roughly, adrenalin from the adrenal gland will suppress the
effects of oxytocin and good milk letdown is not achieved.
Figure 4
The following table gives guidelines as to how long the
milking unit should be on the cow:
Production
(lbs/day)
Average Milking Time
(minutes/milking)
2x
3x
50
6.5
5.6
75
8.0
6.5
100
9.4
7.5
If milking times are longer than this, the entire milking procedure should be evaluated to determine the cause.
91
Producing Quality Milk
Clipping Cows
Clipping excessive hair from cows in late fall and winter
serves several purposes. Clipped cows stay cleaner, which
reduces prep time. Bulk tank bacteria count and sediment
are reduced by up to 50%. Mastitis infection may be
decreased because of reduced exposure to pathogens.
Clipping is also a good lice control measure.
Equipment needed for clipping a cow includes the clippers,
one or two sets of spare blades, a screwdriver for clipper
adjustment, diesel fuel or similar lubricant, curry comb and
brush (Figure 1). You may need a halter or other restraining
device as well.
Figure 3
If clipping a number of cows, it’s best to get a routine down.
For example:
• Approach the cow from the side so she sees you, and begin
clipping the tail.
• Cut off the switch to within 4 inches of the tailbone, or 1
ft. from the floor. Clip the tail starting a few inches above
the switch and continue up over the tailhead.
• Clip the udder against the hair. Use your free hand to pull
the folds out of the skin (Figure 4).
Figure 1
The area that needs to be clipped varies with individual
cows and the environment they’re in. Minimal clipping
should include the cow’s udder (Figure 2), along with the
legs and thigh from the hock up to about 12 inches from the
tailhead. In most cases it is worthwhile to clip a larger area,
if time allows, as illustrated in Figure 3.
Figure 4
• Clip the legs and thighs and continue up over the rump.
The belly should be clipped from the milkwells back.
• Four strokes down the topline to the poll will help prevent lice.
Long-haired springers brought into a warm barn from an
outside lot will adjust to the temperature change faster if
given a complete body clip.
Calves will also benefit from a small trim job. Clip the tail
from the switch to the tailhead, and clip a small patch under
Figure 2
92
Producing Quality Milk
8. Don’t store clippers in the barn or other damp area. Clean
and oil clippers before storage. Store in a dry, dust-free
area with the motor resting higher than the head to prevent oil from seeping back into the motor.
the tail (Figure 5). This will prevent manure from accumulating on the tail, which can restrict blood flow. If not
removed, these manure balls can result in loss of the tail.
Singeing Hair Off the Udder
A fast, easy way to get the hair off of the udder is to singe it
off using a modified propane torch. The air vents need to be
blocked and a flange can be placed on the nozzle to broaden the flame (Figure 6). The flame should be orange not
blue when lit.
Figure 5
Figure 6
Clippers and blades are relatively expensive, but proper care
and maintenance will insure a long life:
A wand type torch can be constructed from 36” of heavy duty
brake line, some fuel line tubing, hose barbs, and a ball type
gas shut-off valve. These materials can be found in hardware
and auto stores. Squeeze one end of the brakeline closed and
drill 6-8 1/16” holes about 1/2" apart starting at the crimped
end. The other end is attached to the gas shut off valve which
is attached to the rubber tubing running to a modified torch
attachment screwed onto a 14 oz propane bottle. The bottle
can then be hung from your belt. The brakeline can be bent to
the most convenient shape to singe the udder. Make sure all
connections are leak free. Larger herds may wish to use a
BBQ sized propane tank rather than the small propane bottle.
1. Keep blades sharp. Dull blades irritate the cow, overload
the clipper motor and make clipping an unpleasant task.
2. Clean extremely dirty cows before clipping. Plowing through
packed manure will dull blades. Sharpen dull blades.
3. Submerse the clipper head into diesel fuel while running,
to lubricate the blades and flush out dirt and hair. Do this
periodically as you’re clipping the cow. The clipper
should not run hot. Submersing the clipper head is preferable over using a spray lube.
The hair is removed around the teats and udder floor by circling the flame around the bottom of the udder. It may take
several passes depending on the density of the hair. Keep the
hot nozzle away from the teats and keep the flame moving.
Keep your hand or stick with a pad on near the udder to rub
out the flames if the hair catches on fire. Because some cows
may object to this procedure, for added safety and efficiency,
it is best to have someone restrain the cow with a tail hold. The
area should be ventilated but a draft will blow out the flame.
4. Wipe the hair off the motor screen as you clip.
5. Turn down the tension screw just enough to get the blades
to cut. Too much tension will wear blades and overheat the
motor. The tension screw might tighten as you clip. Check
it periodically to make sure it isn’t tighter than need be.
6. If the clipper blades are bumped against a hard surface,
teeth can break. Discard and replace blades rather than try
to get additional use from them.
The biggest advantage of singeing is the speed. A hundred
cows can be done in less than an hour. With this efficiency,
herds can be done every 2-3 months. If cows are done often
the job is easier as there will be less flame-ups. This job
should be assigned to a competent, well trained individual
as there has been reported cases of cows’ teats being severely burnt from improper use of this procedure.
7. Maintain the clippers routinely, depending on amount of
use. Oil the bearings through the holes in the case. The
bearings are wick-fed. Do not remove the wicks.
Periodically, add a small amount of grease to the gears
inside of the clipper head as needed. Dry gears will make
a rattling or clanking sound.
93
Producing Quality Milk
Milking Equipment
Maintenance
Even the best milking equipment needs routine maintenance.
The system should be serviced at least once every 6 months by
a competent service technician. In addition, the operator needs
to make routine inspections to avoid costly repairs of equipment or injuries to mammary tissue.
During each milking, check the vacuum gauge to ensure that
proper vacuum is being maintained (Figure 1). The vacuum is
usually set at 12-13 inches of mercury for low pipelines, 1415 inches for high lines. Vacuum level should not fluctuate
more than 1/2 inch during milking. Excessive fluctuation indicates problems with the regulator or other inadequacies. Keep
the gauge clean, and check it for accuracy each time the system is serviced. Gauges lose their accuracy after several years
due to corrosion and need to be replaced. Do not adjust vacuum levels without first checking the accuracy of the gauge!
Figure 2
Service the pump as directed by the service manual. Check
oil level or usage, belt tension and alignment every 2 weeks
(Figure 3). Always use a vacuum pump oil recommended by
the manufacturer. Using a substitute oil may void the pump
warranty or cause it to fail. Turn pump by hand to detect
unusual drag, loose pulleys or rough bearings.
Figure 1
Figure 3
Clean the vacuum controller or regulator at least monthly, or
according to manufacturer’s directions. Figure 2 shows a
weighted style regulator that has been poorly maintained.
Frequency of cleaning is determined by how much dust and
grime the regulator is exposed to. One way to check if a regulator is sticky or faulty is to open a milk inlet halfway. Vacuum
should hold within 1/2 inch of the original level. Next, open it
all the way and then close it. As the vacuum level returns to
normal, it should not go past the set position. Newer
diaphragm controllers are superior in maintaining a stable
vacuum than the older, weighted style regulators. Old style
regulators need to be replaced.
A pulsation rate between 50-60 is generally recommended.
This may vary slightly with manufacturers. Pulsators need
to be cleaned and serviced regularly to ensure proper functioning (Figure 4). A pulsator that sounds sluggish or unusual should be fixed or replaced immediately. A spare pulsator
kept on hand for emergencies is cheap insurance.
A couple of quick, easy procedures can determine if there is
adequate vacuum capacity in the system. Set up the milking
system as during milking. In a 4-unit system, admit air by
turning over 1 unit - similar to what would happen if a unit
94
Producing Quality Milk
Figure 5
Parlor with looped line, units per slope*
line size
2-inch
2.5-inch
3-inch
4-inch
Figure 4
fell off during milking. The vacuum level should remain
within 1/2 inch of mercury. Rather than turning over a unit,
an alternate test is to open a milk inlet for 5 seconds and
then close it. The vacuum in the line will drop but should
recover in 3 seconds or less. An extended recovery time may
be caused by problems with the pump or regulator, undersized lines or leaks in the system. To detect a leak, hold plastic wrap over the suspected area. If a leak is present, the
plastic will be sucked to the hole.
0.5
2
4
6
21
Slope (percent)
0.8
1.0
1.25
3
3
4
5
6
7
9
10
13
28
32
35
1.5
4
8
16
38
2.0
5
10
24
43
Clean air vents in the claws when they become obscured
during milking. If vented inflations are used, the air vent in
the claw should be plugged. Vented equipment should move
milk away from the cow faster, but also requires more air
flow. Make sure that there is adequate vacuum reserve
before changing to vented equipment.
Milk lines must be of adequate size, slope and design. The
following table provides guidelines to prevent flooding.
These guidelines are also influenced by how fast units are
attached and milk flow per cow. A pipeline’s effective size
is reduced if there are restrictions anywhere along it. Many
times, restrictions are found at the receiver jar (Figure 5)
because of improper design. In this illustration, the black
plug cuts the effective size of the pipeline in half and should
be replaced with a more efficient design.
Inspect hoses and tubes regularly for obvious wear, cracks,
kinking, distortion or swelling. This is especially important
for the pulsation hose and short milk tube. Replace hoses on
a regular basis before they start causing problems.
Conscientious attention to machine maintenance will help
achieve maximum milking efficiency. The operator needs to
be aware of the importance of regular inspection, follow
manufacturer’s recommendations and consult with an expert
if any problems arise.
95
Producing Quality Milk
Proper Use and Care of
Inflations
uation may depend upon milking system design, vacuum
level, udder conformation and personal preferences. Because
of their design differences, there are inflation differences in
milking speed, completeness of milkout, amount of liner
slips, and fall-offs. If the rest of the milking system checks
out and any of these problems persist, changing inflation
types may help. However, changing inflation type will not
compensate for deficiencies in the overall system and will
seldom cure a mastitis problem.
Inflations, or teat cup liners, relieve vacuum to the teat and
massage the teat as they collapse during the pulsation cycle.
Teat-end irritation and high somatic cell counts can result
from inflations that are worn, misused or not properly selected for the milking system. In addition, six fold differences in
strip yield, eight-fold differences in the incidence of teatcup
slips, and 33% differences in milking times between liner
types have been reported.
There are many different types of liners on the market.
Narrow bore liners are less prone to damage teat and udder
tissue, and are preferred over inflations with more than 7/8
inch inside diameter (Figure 1). The internal diameter of a
liner is usually measured 3 inches below the top. Ideally, liners should have an internal diameter about 1-2 mm less than
the average diameter of the teats after milk letdown.
Probably the biggest abuse of liners is that they are used too
long. Follow the manufacturer’s recommendations.
Generally, rubber inflations can be used for 600 cow milkings, synthetic rubber for 1,200 cow milkings, and silicon
inflations for about 5,000 cow milkings. For example, a 60cow herd is milked with 4 units. Each unit milks 15 cows per
milking, or 30 per day. If natural rubber inflations are used,
you would expect to change them every 20 days. Synthetic
rubber would be changed every 40 days in this example.
Examine liners regularly and discard any that show signs of
roughness or wear. Change all 4 inflations on a unit at the
same time, because mixing new and old inflations can lead
to uneven milk-out.
Liners should be Liners should be checked daily to make
sure they are not twisted in the shell. Many liners have markings to insure proper alignment (Figure 2). A twisted liner
may cause incomplete milking and may increase dropoff
problems.
Figure 1
Liners should be long enough to collapse below the teat. If
the liners are unable to collapse because there is not enough
liner past the teat end, the teat end is exposed to constant vacuum and will be damaged. The minimum lengths of the liner
barrel should be: 5.1” for liners up to .8 inch diameter; 5.3”
for liners .82” to .88”; and 5.5” for liners over .90” to .94”.
Liners are basically of two designs: molded or multiple
piece. There are advantages and disadvantages for each. The
advantage of a molded inflation is reduced labor required for
cleaning and changing the inflations. Multiple piece design
allows an air vent above the short milk tube, which may help
prevent teat cup flooding. Liners may be made from natural
rubber, synthetic rubber, a combination of the two, or silicon.
Figure 2
Water should not get between the liner and the shell. This
may result in slow, incomplete milking. It is recommended
to check for water between shell and liner before each milking. Just one teaspoon of water can cause the inflation to
malfunction.
There is no “best” inflation. In fact, most suppliers handle a
variety of liners. The inflation that works best in a given sit96
Producing Quality Milk
2. Store liners away from electric motors and sunlight.
Ozone from the electric motors can cause the rubber to
crack. Sunlight shortens the liner’s life.
To avoid a buildup of organic materials such as milk fat, protein and sugar, never allow milk to dry in the liners.
Immediately rinse liners with cool water after milking, then
wash and rinse again. Natural rubber liners tend to be more
porous, and absorb milk solids more easily. To extend their
usefulness, boil them in a lye solution for 1 hour weekly and
soak overnight (Figure 3). It may pay to have 2 sets if stretch
liners are used. By alternating your sets every 7-10 days - one
set in use and the other soaking in solution - you can lengthen the useful life of the liners and help maintain flexibility.
3. Some manufacturers recommend that inflations be taken
out of the shell for manual cleaning or at least removed
once a week to allow the rubber to relax. Inflations should
be pushed out rather than pulled. Twist the milk tube
clockwise, then push to remove the inflation correctly.
4. Ointments and teat dips may cause deterioration, so
check liners often. You may need to change ointments or
teat dips if fast deterioration is noted.
5. Liner life varies with how they are stored, used, and
cleaned. Adjust the manufacturers suggested replacement
rate accordingly. If there is a significant change in milkability when liners are replaced, the liners were used too long.
6. When switching from a stiff to a more pliable liner, such
as silicon, milking time may increase. This happens
because the more pliable liners may close sooner and
open later during the pulsation cycle. If milking speed
remains greatly decreased after a 2-week adjustment
period, then the pulsation ratio of the unit may need to be
changed to achieve the same milking speed as with the
stiffer liners. Softer, more pliable liners generally are preferred for good udder health.
Figure 3
You need to do everything possible to promote good udder
health and produce a quality product. Proper selection, care
and use of inflations is important in reducing teat irritation
and somatic cell counts.
Other considerations:
1. Make sure the liner fits the shell. When collapsed, the liners should still move freely within the shell. The inflation’s diameter when flattened should not exceed the
diameter of the shell as noted in Figure 4. The mouthpiece should not be distorted by a shell diameter that is
too big, but the shell needs to be large enough to hold the
mouthpiece firmly to avoid twisting.
Figure 4
97
Producing Quality Milk
Detecting and
Treating Mastitis
A total mastitis control program is needed to minimize mastitis. However, even in the best managed herds, mastitis
flare-ups occur occasionally. Timely diagnosis of clinical
and subclinical mastitis and proper treatment are key elements in the fight against this disease.
Observe and palpate the udder to detect clinical mastitis.
Quarters that become hot or swollen are suspect, and examination of the milk may confirm a clinical mastitis flare-up
(Figure 1). Flakes, clots or garget can be seen in the milk
from clinical quarters. Treat these cows promptly.
Figure 2
Culturing a milk sample to identify the microorganism
involved will help prescribe the correct treatment (see page
101). It is extremely important to maintain sanitary conditions to obtain a useful sample. Wash your hands before
sampling. Be careful not to contaminate the container or its
cap. To obtain the sample, wash and dry the udder and teats
as you would if prepping the cow for milking. Remove three
streams of milk from each teat. Soak a clean cotton ball in
70 percent rubbing alcohol and swab off the teat end. If multiple quarters are being sampled, start with the far teat so
that you don’t contaminate a clean teat with your arm. Hold
the tube at a 45 degree angle and squirt the milk sideways
into the container. Then fill the container provided by your
veterinarian (Figure 3). Refrigerate samples immediately at
34-40ºF and culture within 24 hours, or freeze until delivery
to the lab.
Figure 1
For every clinical case, there are 15-40 subclinical cases in
a herd. Although milk from subclinical mastitis appears normal, yield is reduced significantly. In addition, most clinical
mastitis develops from subclinical cases, and subclinically
infected cows serve as bacteria reservoirs to infect other
cows. Subclinical infections can be detected by an elevated
somatic cell count.
Somatic Cell Count should be monitored through the DHIA
SCC option. In addition, the California Mastitis Test (CMT)
is a fast, efficient screening test for individual quarters. Mix
1 or 2 streams of milk from each quarter with an equivalent
amount of reagent in the 4-compartment CMT paddle
(Figure 2). The reagent causes the membranes of the somatic cells to rupture and a gel to form. The more gel, the higher the cell count.
Generally, it is not effective to treat cows with elevated
counts unless they show symptoms of clinical mastitis.
However, knowing the cell counts of individual cows will
help monitor incidence of mastitis, important in a mastitis
control program.
Figure 3
98
Producing Quality Milk
When infusing a cow with an antibiotic, make sure you follow
these simple rules. Dip the teats with a teat dip. Allow 30-60
seconds contact time then dry with a clean towel. Swab the teat
end with cotton saturated in alcohol, or use the pad provided
with the antibiotic product. Be careful not to contaminate the
cannual of the syringe as you insert it into the teat canal (Figure
4). The cannula should only be inserted about 1/8 inch or just
deep enough to deliver the antibiotic into the teat. Depress the
plunger slowly and remove the syringe. Massage the quarter to
distribute the antibiotic, and re-dip the teats.
Figure 5
Even if a cow is treated in only 1 quarter, milk from all 4 quarters must be discarded for the length of time prescribed on the
label. If antibiotic milk is fed to calves, they must be withheld
from market until the antibiotic clears their tissues. This also
applies to calves fed colostrum from dry treated cows.
Figure 4
Use only single-dose syringes and products designed for udder
infusion. The few cents saved by using multiple dose containers or homemade mixtures is not worth the risk of introducing
pathogens into the udder.
Wishing to avoid antibiotic use and residue problems, alternative methods to treat clinic mastitis have been sought. For mild
cases of mastitis, giving an injection of oxytocin during milking and milking frequently during the day may allow many
cows to cure themselves. Work with your veterinarian to
develop a treatment plan and recording scheme for your dairy.
An example plan is given on page 100.
Make it standard practice to mark the cow and record the treatment. Marking methods include paint stick, marker, paint
spray on the rear leg, or a leg band (Figure 5). Don’t take a
chance. Mark the cow on both sides in parlors where they can
be milked from the left or right. Develop a system that works
and is understood by everyone milking, so contaminated milk
does not enter the bulk tank.
Good management is essential to diagnose and properly treat
mastitis, and prevent antibiotic residues in human food products. Good records and communication with your veterinarian
are also essential in a total mastitis control program. Finally,
clinical mastitis can be reduced significantly in the future by
wise selection of A. I. sires today. Bulls with low PTA’s for
SCS have daughters with significantly lower incidences of
mastitis.
99
Farm:_________________________________________
Date: _______________________________________
Veterinarian: ___________________________________
Guidelines for Clinical Mastitis Treatment
Severity
Symptoms
Type of infection
General treatment plan
Mild
Abnormal milk
1-3 cc oxytocin, milkout
Moderate
Abnormal milk
Swollen quarters
1-3 cc oxytocin, milkout 1st
episode, then Rx IMM
If 2 or more episodes,
chronic, antibiotics are
often ineffective
Severe
Temp > 102º
Abnormal milk
Swollen quarters
Severely ill, depressed,
off-feed and dehydrated
1-3 cc oxytocin, milkout
Antipyretics (Aspirin,
Banamine, etc.) and antiinflammatory.
Antibiotic IMM and/or
systemic IV. Fluids as needed
Specific drugs/doses
Withholding
Drug used
Dose
Milk (hrs)
Meat (days)
Appropriate test
Further Instructions
(1)
______________________________________________________________________________________
(2)
______________________________________________________________________________________
(3)
______________________________________________________________________________________
100
Organisms That Cause Mastitis
Bacteria
Source
Persistence
Subclinical*
Treatment
Control
Measures**
infected udders
chronic
eradicated by
antibiotics
antibiotic treatment
infected udders,
contaminated bedding,
teat sores
chronic
not recommended
segregate or cull
infected cows, check
milking equipment
environment
self-limiting,
occasionally chronic
treatment not
recommended
improve barn, lot,
and stall sanitation,
check milking
equipment, avoid
liner slips
Staph epidermitis
common on skin
sporadic and
self-limiting
do not treat
not necessary because
of low pathogenicity
E. coli (coliform)
environment,
cow feces,
contaminated water
cow dies or
infection eliminated
seldom subclinical,
no treatment
for subclinical
barn and lot sanitation,
especially during
hot-humid weather,
avoid liner slips,
avoid letting cows
lay in contaminated
area after milking
Klebsiella (coliform)
environment-often
in sawdust bedding
variable
chronics difficult
to treat
keep sawdust
fresh and dry if
used (same as
for E. coli)
contaminated
antibiotics or syringe
used to infuse udder
self-limiting
no treatment
use sterile
equipment for
intramammary
therapy, avoid
homemade mixtures
infected udders
becomes chronic
no treatment
culture cows,
segregate or cull
infected cow
Strep. ag.
Staph aureus
Environment. strep.
(Strep uberus, Strep
dysgalactia, Strep
bovis)
Yeast
Mycoplasma
*Clinical cases should be treated according to treatment criteria for individual farms.
**Teat dipping after milking and dry treatment are recommended for all herds. Organisms may be spread from infected to
uninfected quarters by contaminated milking units or milker’s hands. Damaged teat-ends greatly increases cow’s
susceptibility.
101
Feeding
Sampling Forages
Dairy rations are generally balanced nutritionally by adding
concentrates to complement nutrients supplied by forage.
The surest way of accurately determining nutrient content of
forage is through a well-planned feed analysis program.
Frequent and proper sampling is important.
The analysis of feed is only as good as the sample. When
sampling hay, keep the different fields and cuttings separate.
Using a bale corer is essential for a good hay sample (Figure
1). The best sample is obtained if the corer is put in at an
angle in the end of the bale. Hay corers are available from
many farm supply outlets. They can be manually turned into
the bale or mounted on an electric drill.
Figure 2
Figure 1
Sample a minimum of 12-15 bales from the same lot. Pick
bales randomly for the best estimation of hay quality. Don’t
hand pick the best appearing bales for sampling!
Mix the 12-15 cores together to get a composite sample.
Testing labs generally need about 1 lb. (1-2 quarts) of material to run the analysis. Avoid grabbing a majority of stems
or fines for the composite sample.
By mixing the cores on the top of a table and then pushing
a portion into a bag, an adequate sample should be obtained
(Figure 2).
Figure 3 shows a labeled plastic bag with a paper label
inside for identification. Labels should include your name,
address, sample number, forage mixture, stage of maturity
and date harvested. Store in the freezer if the sample will not
be sent to the lab right away.
Sample haylage and silage as the silo is being filled. In a
pail, collect 4-5 handfuls from the first load and from every
Figure 3
second or third load after that from each field. Again, get a
good composite sample in a 1 to 2-quart airtight plastic bag
and put the container in the freezer to prevent spoilage. Send
the sample to the lab early in the week, so the analysis is run
before the weekend. The label should indicate that the sample was taken prior to fermentation.
By sampling feed as it’s going into the silo, you can get
results from the lab and balance the ration before the feed is
fed. When fields or feed changes, mark the spot in the silo
by throwing a few small pieces of black or colored plastic
into the blower. Figure 4 shows the plastic in corn silage
coming out of the silo.
If forage is ensiled too dry, heat damage may occur. The
sweet-smelling, dark brown material is very palatable to
cows, but much of the protein may be indigestible. This feed
needs to be tested for available crude protein, and rations
adjusted accordingly. Test corn silage for crude protein after
102
Feeding
A simple method is to weigh 100 gm. of material on a plate
or dish that is microwave oven-safe. Make sure you deduct
the weight of the plate. Arrange the material on the plate
with a hole in the center. Place the material into the center
of the oven for 6 minutes for haylage or silage, 2 minutes for
hay. Mix haylage and silage samples every 2 minutes to
ensure uniform drying. Remove from the oven and reweigh.
Place in the oven for another 2 minutes and reweigh. If the
weight changed little from the previous weighing, the sample is dry. If charring occurs, the sample is overcooked, so
use the previous weight to calculate moisture content.
If you started with an initial weight of 100 gm. and the dry
weight is 40 gm., then the percent dry matter is 40% and
percent moisture is 60%. Besides helping to balance the
ration, this method of determining moisture content can also
help determine when hay is dry enough to bale or of proper
moisture to ensile.
Figure 4
fermentation if urea or anyhdrous ammonia is added at
ensiling. Indicate on the label the additive used.
The moisture content of a sample will be included on the lab
report. However, it can fluctuate quite a bit in different
depths of the silo, and should be retested and rations adjusted accordingly. Figure 5 shows the equipment needed to test
for moisture content: a small scale and microwave oven.
The microwave method usually can be completed in 10 to
15 minutes but can take up to 30 to 45 minutes for highmoisture feeds. Electronic moisture testers are available that
require about 4 minutes per sample. A Koster Tester
requires 15 to 40 minutes, but the operator does not have to
be present while the test is run.
Quick test of moisture in the field: Keep a roll of paper towels in the tractor. After chopping a small amount, put a pool
ball-size ball in a towel and squeeze. If there is lots of free liquid it is too wet. If there is just a few stains it is too dry. The
amount of staining will depend on the crop, how hard you
squeeze, and fineness of chop. By comparing the amount of
staining to moisture content determined by a different
method, you can “calibrate” this test for your conditions.
Figure 5
103
Subject Index
A
Abscesses..................................................................................46
A.I.............................................................................................80
Anesthetic .................................................................................30
Ankle Bands ...............................................................................9
Antibiotic Infusion ...................................................................99
Antibiotic Mixtures ..................................................................48
B
Banders (Castration).................................................................22
Barnes Dehorners .....................................................................29
Breech Birth ...............................................................................3
Bull Ring ..................................................................................72
Burdizzo ...................................................................................22
C
Calf Jacket ................................................................................13
Calving .......................................................................................1
Casting......................................................................................68
Castration..................................................................................20
Caustic Paste.............................................................................26
Choke........................................................................................44
Clipping For Show ...................................................................60
Clipping Udders .......................................................................92
CMT .........................................................................................98
Colostrum .................................................................................35
Cow Clippers ............................................................................96
D
Dehorning .................................................................................26
Dehydration ..............................................................................36
Dewclaws..................................................................................14
E
Eartag..........................................................................................8
E.coli Bacterin ..........................................................................36
Elastrator...................................................................................22
Electric Dehorning ...................................................................27
Electrolytes ...............................................................................36
Emasculator ..............................................................................23
Esophagus Tube..........................................................................6
Estrus ........................................................................................74
Estrus Detector .........................................................................78
Extra Teats ................................................................................16
F
Flanking....................................................................................66
Forage Sampling.....................................................................102
Foot Baths.................................................................................88
Foot Rot ....................................................................................88
Freezer Brands..........................................................................10
Frozen Semen ...........................................................................82
H
Hairy Heel Warts ......................................................................88
Heat...........................................................................................74
Heat Synchronization ...............................................................78
Heel Erosion .............................................................................88
Hoof Shape ...............................................................................84
Hutches .....................................................................................13
Hypothermia .............................................................................13
I
Identification...............................................................................8
Implants ....................................................................................24
Inflations...................................................................................96
Injections ..................................................................................32
K
Knots.........................................................................................51
L
Lice ...........................................................................................42
Liners........................................................................................96
M
Mange .......................................................................................43
Mastitis .....................................................................................98
Organisms............................................................................101
Treatment ......................................................................98, 100
Milking Equipment...................................................................94
Milking Management ...............................................................90
Milk Lines ................................................................................95
Mites .........................................................................................43
Moisture Testing (Forage) ......................................................103
N
Nits ...........................................................................................42
Nose Ring .................................................................................72
O
Oral Calf Feeder .........................................................................6
P
Pelvic Structure ..........................................................................3
Pinkeye .....................................................................................38
Prostaglandin ............................................................................79
Pulsator .....................................................................................94
R
Resuscitation...............................................................................4
Ringworm .................................................................................40
Rope Halter...............................................................................54
S
Scours .......................................................................................35
Semen Tank ..............................................................................82
Showmanship............................................................................63
Singeing Udders .......................................................................93
Stillborn ......................................................................................4
Supernumerary Teats ................................................................16
Syncro-Mates-B........................................................................78
Syringes ....................................................................................49
T
Tail Docking .............................................................................18
Tail Vein....................................................................................34
Tattooing.....................................................................................8
Teat Dipping .............................................................................90
Temperature Chart ....................................................................31
Thawing Semen ........................................................................83
Training Calves For Show........................................................57
Trimming Hoofs .......................................................................84
Tube Dehorner..........................................................................26
V
Vaccines....................................................................................48
Vacuum
Controller ..............................................................................94
Gauge ....................................................................................94
Pump .....................................................................................94
104