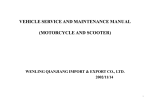
1
Service Manual
ICC 1 S D
1.142-...
5.905-432
03.01
Foreword
ICC 1 S D
Foreword
Good servicing requires extensive and relevant training as well as comprehensible reference documents.
We therefore regularly offer all service technician both basic and advanced training courses
for the full range of our products.
In addition we produce service handbooks for the major equipment which can be used
initially as instructional material and later as sources of reference.
Furthermore we regularly distribute service information bulletins that provide details about
further developments to the products.
The copying and duplicating the text and the illustrations, as well as passing them on to a
third parties, requires the express approval of:
ALFRED KÄRCHER GmbH & Co.
INTERNATIONAL SERVICE TRAINING
P.O. Box 160
D-71349 Winnenden
http://www.karcher.de
2
ICC 1 S D
Table of Contents
Table of Contents
Unit Functions ................................................................................... 5 - 24
Technical Features .................................................................................................... 5
Equipment Features .......................................................................................... 6 - 15
Front view ............................................................................................................................ 6
Side brush view .................................................................................................................... 7
Rear view ............................................................................................................................. 8
Raised debris container view ................................................................................................ 9
Control elements ............................................................................................................... . 10
Combination instrument ..................................................................................................... 11
Front fuse box ..................................................................................................................... 12
Control console, open view ................................................................................................ 13
Side console, open view ..................................................................................................... 14
Engine compartment, view from left ................................................................................... 15
Engine compartment, view from right ................................................................................. 16
Engine compartment, view toward rear .............................................................................. 17
Fuel tank ............................................................................................................................ 18
Heater ................................................................................................................................ 19
Engine compartment, view from rear .................................................................................. 20
Function Groups ..............................................................................................22 - 24
Sweeping and vacuum system ........................................................................................... 22
Water system ..................................................................................................................... 23
Basic Settings and Service Procedures......................................... 25 - 55
Engine ...............................................................................................................25 - 32
Fuel .................................................................................................................................... 25
Cooling ............................................................................................................................... 26
Speed adjustment .............................................................................................................. 28
Engine shut-off solenoid valve ........................................................................................... 29
Air cleaner .......................................................................................................................... 30
Engine oil ........................................................................................................................... 31
Drive pump belt .................................................................................................................. 32
Sweeping Mechanism ......................................................................................33 - 37
Sweeping pattern ............................................................................................................... 33
Spray nozzles ..................................................................................................................... 34
Vacuum intake .................................................................................................................... 35
Warning buzzer, debris container ....................................................................................... 36
Debris container ................................................................................................................. 37
Running Gear ...................................................................................................38 - 44
Grease fittings .................................................................................................................... 38
Brake .................................................................................................................................. 39
Wheel change / Steering wheel .......................................................................................... 41
Toe-in adjustment ............................................................................................................... 42
Shock absorber .................................................................................................................. 43
Towing and transporting ..................................................................................................... 44
3
Table of Contents
ICC 1 S D
Hydraulic System ............................................................................................. 45 - 52
Hydraulic fluid ..................................................................................................................... 45
Hydraulic fluid filter ............................................................................................................. 46
Emergency pump (option) .................................................................................................. 47
Drive pedal ......................................................................................................................... 48
Checking working pressures .............................................................................................. 49
Pressure relief valve ........................................................................................................... 51
Pumps ............................................................................................................................... 52
Impeller fan ....................................................................................................... 53 - 55
Changing impeller fan ........................................................................................................ 53
Adjusting magnetic brake ................................................................................................... 55
Troubleshooting ..................................................................................... 56
Circuit Diagram....................................................................................... 58
Circuit Diagram – Search List .............................................................. 64
Hydraulic Block Diagram ...................................................................... 66
Hydraulic Line Diagram ......................................................................... 68
Specifications ......................................................................................... 70
Fuses ....................................................................................................... 70
Special Tools .......................................................................................... 71
Assembly Torque Ratings .................................................................... 71
4
ICC 1 S D
Unit Functions
Technical Features
The ICC 1 S D is a high-performance sweeping
machine designed for professional use in industrial service and municipal fleet applications.
Steering
The unit may be licensed for road traffic.
Hydraulic system
Depending on the country of operation, singleunit approval by the responsible Highway Traffic
Authority may be required.
–
Rear wheels, individually powered by
hydraulic motors.
–
2 side brushes, individually powered by
hydraulic motors, and raised by hydraulic
cylinders.
–
Drive power
Hydraulic steering on front wheels
–
3-cyl. Kubota D722 water-cooled diesel
engine (similar to KMR 1700 D).
–
Debris container, raised by two hydraulic
cylinders.
–
Forward and reverse, variable speed
control with two separate foot pedals.
–
Electrical cooling fan for hydraulic fluid
and engine cooling.
Brake
–
Foot brake serves as operating brake,
acting on both front wheels via brake
cables. Parking brake can be set via
separate brake lever.
–
Braking action on rear wheels only via
hydraulic system.
Sweeping system
–
2 inward rotating side brushes
–
Sweeping roller not required
Vacuum system
–
Sweeping debris is shredded by impeller
fan, picked up by vacuum stream, and
conveyed into debris container.
–
Impeller fan, driven via magnetic clutch
and V-belt with magnetic brake.
Water system
–
Water tank with filter and water pump
–
Water jets on side brushes and in air
channel to reduce dusting, and for
lubricating air channel.
5
Unit Functions
ICC 1 S D
Equipment Features – Front view
1
11
2
10
9
3
4
8
6
7
6
5
1
Cover, debris container
2
Debris container
10
Head lamps
3
Dual-circuit radiator
(hydraulic fluid / engine coolant)
11
Air exhaust, debris container
4
Operator seat
5
Support caster, vacuum intake
6
Side brush, LH
7
Bumper
8
Turn signals
9
Side brush, RH
ICC 1 S D
Unit Functions
Equipment Features – Sidebrush view
1
Pressurized gas spring, side brush
2
Stop screw, side brush bottom position
3
Adjusting screws, side brush sweeping
pattern
4
Hydraulic motor, LF side brush
5
LH side brush
6
RH side brush
7
Bumper
7
Unit Functions
ICC 1 S D
Equipment Features – Rear view
1
7
2
3
6
5
1
Safety beacon
2
Filler neck, fuel tank
3
RH side brush
4
Side cover panel
5
Rear cover panel
6
Water tank
7
Filler neck, water tank
8
4
ICC 1 S D
Unit Functions
Equipment Features – Raised debris container view
1
2
3
4
8
7
6
5
1
Debris container
2
Air exhaust
3
Debris container cover
4
Water tank
5
Rear cover panel
6
Removable grille, dual-circuit radiator
(hydraulic fluid / engine coolant)
7
LH side brush
8
Vacuum channel
9
Unit Functions
ICC 1 S D
Equipment Features – Control elements
1
2
3
4 5
6 7 8 9 10
KÄRCHER
KÄRCHER
0
11
12
13
14
15
16
17
18
23
22
1
Switch, four-way flashers (S12)
2
Combination instrument (P1)
3
Steering wheel
4
Ignition switch (S1)
5
Combination switch (S13)
6
Switch (S16), working spotlights
(option)
7
Switch, windshield wiper (S6)
8
Switch, cabin heater fan (S7)
9
Switch, windshield defroster fan (S15)
21 20
19
14
Lever, Raise / Lower side brush and
vacuum inlet (with brush speed control)
15
Lever, Open / Close coarse debris flap
16
Switch, impeller fan (S9)
17
Switch, water pump (S8)
18
Operating hours counter, impeller fan
(option) (P2)
19
Manual throttle, engine speed control
20
Metering valve, side brush water volume
21
Metering valve, vacuum channel water
volume
10
Switch, safety beacon (S14)
22
Pedal, parking brake / operating brake
11
Drive pedal, reverse
23
12
Drive pedal, forward
Changeover button, parking brake /
operating brake
13
Lever, Raise / Lower debris container
10
ICC 1 S D
Unit Functions
Equipment Features – Combination instrument
Indicator lights and displays
1
Debris container raised
2
Pre-glow cycle activated
3
Excessive engine coolant temperature
4
Spare
5
Low charging current warning
6
Low engine oil pressure warning
7
Blocked air cleaner warning
8
Headlamps ON
9
Turn signal ON
10
Operating hours counter
11
Fuel level indicator
11
Unit Functions
ICC 1 S D
Equipment Features – Fuse box
Fuses
Relays
F1
Ignition switch
K1
Ignition switch
F2
Four-way flashers
K2
Fan, cabin heater
F3
Impeller fan brake
K3
Water pump
F4
Magnetic clutch
K4
Safety beacon
F5
Water pump
K5
Turn signals
F6
Fan, cabin heater
K6
Windshield wiper
F7
Windshield wiper
K7
Fan, windshield defroster
F8
Turn signals / horn
K8
Headlamps
F9
Headlamps
M5
Fan, windshield defroster
X1
Plug connector
F10 Position lamps, RH
F11 Position lamps, LH
F12 Engine stop solenoid
F13 Safety beacon
F14 Fan, windshield defroster
F15 Stop lights
F16 Headlamps
12
Note:
The fuse box is located below the instrument
panel.
ICC 1 S D
Unit Functions
Equipment Features – Control console, open view
D2
Control module, engine shut-off solenoid
S14 Switch, safety beacon
S15 Switch, windshield defroster fan
S7
Switch, cabin heater fan
S6
Switch, windshield wiper
S16 Switch, working spotlights (option)
S13 Combination switch
S1
Ignition switch
13
Unit Functions
ICC 1 S D
Equipment Features – Side console, open view
1
Mounting thread for lever, Raise / Lower
debris container
10
Manual throttle
2
Mounting thread for lever, Raise / Lower
side brush and vacuum intake
11
Control module, impeller fan brake (D3)
3
Pressure relief valve
12
Switch, debris container warning buzzer
(S18)
4
Bowden cable, coarse debris flap
13
Hydraulic line, Raise debris container
5
Hydraulic line, Lower debris container
14
Hydraulic line, Sweeping operating
6
Hydraulic line, Lower brushes,
Sweeping
15
Hydraulic line to hydraulic fluid tank
7
Hydraulic fluid inlet
8
Hydraulic line, Raise brushes
14
9
Hydraulic line, Lower brushes
ICC 1 S D
Unit Functions
Equipment Features – Engine compartment, view from left
1
Magnetic clutch, vacuum impeller fan
8
Fuel filter
2
Filler neck, engine oil
9
Engine
3
Glow plug
10
Tension roller, V-belt
4
Injector nozzle
11
V-belt
5
Injection pump
12
Magnetic brake, vacuum impeller fan
6
Oil dip stick
7
Air intake hose
15
Unit Functions
Equipment Features – Engine compartment, view from right
1
Oil dip stick
2
Coolant radiator electric fan
3
Adjustment screw, V-belt tension
4
Magnetic brake, vacuum impeller fan
5
Exhaust manifold
6
Starter
7
Oil filler neck
8
Alternator
16
ICC 1 S D
ICC 1 S D
Unit Functions
Equipment Features – Engine compartment, view toward rear
1
RH limit switch, debris container (S10)
2
LH limit switch, debris container (S11)
3
Air cleaner
4
Engine cover
5
LH stop screw, debris container
6
RH stop screw, debris container
17
Unit Functions
ICC 1 S D
Equipment Features – Fuel tank
2
1
3
1
Fuel level sensor
2
Fuel filler neck
3
Fuel tank
18
ICC 1 S D
Unit Functions
Equipment Features – Heater
1
Hot water supply hose
2
Heat exchanger
3
Warm water return hose
4
Heater fan shroud
19
Unit Functions
Equipment Features – Engine compartment, view from rear
20
ICC 1 S D
ICC 1 S D
Unit Functions
Equipment Features – Engine compartment, view from rear
1
Relay, radiator fan (K9)
2
Control module, pre-glow (D1)
3
Fuse, radiator fan (F18)
4
Fuse, glow plugs (F17)
5
Splash water guard
6
Hydraulic line, to hydraulic motor,
RR wheel
7
Battery
8
Hydraulic line, to steering valve
9
Hydraulic line, to side brushes / debris
container control block
10
Water pump
11
Hose, to water pump inlet
12
Hydraulic pumps, side brushes / debris
container, steering
13
Hydraulic line, to hydraulic fluid tank
14
Hydraulic line, to hydraulic motor,
RR wheel
15
Hydraulic line, from bypass valve
16
Bypass valve, with changeover lever,
free-wheel
17
Water filter
18
Water shut-off valve
19
Hydraulic line, to bypass valve
20
Hydraulic line, to hydraulic motor,
LR wheel
21
Hydraulic pump, driving operation
22
Hydraulic line, to hydraulic motor,
LR wheel
Note:
When removing the battery, start by
disconnecting the negative terminal (-), and
then remove the positive terminal (+).
21
Unit Functions
ICC 1 S D
Function Groups – Sweeping & Vacuum system
1
Grille plate, deflection plate
10
Vacuum duct
2
Air exhaust
11
Support casters
3
Chain curtain
12
Vacuum inlet
4
Deflection plate
13
Side brush
5
Cover
14
Spray nozzles
6
Debris container
7
Fresh water tank
8
Engine
9
Impeller fan
22
ICC 1 S D
Unit Functions
Function Groups – Water system
1
Water tank
2
Shut-off valve
3
Water filter
4
Water pump
5
Non-return valve *
6
Metering valve, vacuum channel
7
Spray nozzle, vacuum channel
8
Spray nozzle (2x), side brushes
9
10
Metering valve, side brushes
Tank fill level indicator in operator cab
* Effective with serial no. 10200, solenoid valve
was replaced by non-return valve.
23
Unit Functions
Function Groups – Water system
1
Shut-off valve
2
Water filter
3
Water pump
4
Solenoid valve, water pump
24
ICC 1 S D
ICC 1 S D
Basic Settings and Service Procedures
Engine – Fuel
Cleaning fuel filter
–
Close fuel shut-off valve (1) by turning
counter-clockwise one-quarter turn.
–
Loosen and unscrew knurled retaining ring
(2), and remove fuel filter bowl (3) complete
with contents.
–
Replace fuel filter insert (3).
Cleaning fuel system
Bleeding air from fuel system
–
Loosen air bleeding screw (4) approx. 2 turns.
–
Start engine, and allow to run until exiting fuel
no longer contains air bubbles.
–
Tighten air bleeding screw (4) while engine is
running.
Bleeding air from fuel system
1
Fuel shut-off valve
2
Knurled retaining ring
3
Fuel filter bowl
4
Air bleeding screw
25
Basic Settings and Service Procedures
ICC 1 S D
Engine – Cooling
Checking / topping up engine coolant
Prior to checking coolant level, allow engine to
cool. The proportion of antifreeze in the engine
coolant must not exceed 50 percent.
–
Raise the debris container.
–
Check coolant level in expansion tank.
–
With engine cold, top up engine coolant to the
"min" mark in expansion tank.
Checking engine coolant level in expansion tank
Checking cooling system for leaks
The radiator is a combination of two cooling
circuits, one for hydraulic fluid, the other for engine
coolant. The fan transports the cooling air from
the outside into the engine compartment, passing
it through the dual-circuit radiator. Check all
radiator hoses, connections and the radiator itself
for leaks.
Checking cooling fan functions
The fan must start as soon as the ignition key
is turned to position "1".
Checking cooling fan motor
–
Check electrical connections and fuses,
and replace as required.
–
Measure voltage applied to electric motor.
–
If required, replace connecting cable / relay
/ electric motor.
When replacing the fan, it must be noted that the
cable inlet connection on the electric motor points
downward.
26
ICC 1 S D
Basic Settings and Service Procedures
Engine – Cooling
Checking engine coolant temperature
switch
Checking engine coolant temperature switch
1
Plug-in connector
2
Engine coolant temperature switch (S3)
–
Start engine.
–
If the "Engine Coolant Temperature" indicator
light on the combination instrument illuminates
also when the engine is cold, the connecting
cable must be checked for a short-circuit
against vehicle ground.
–
With engine running, bridge the connector
(1) to vehicle ground (indicator lamp must
illuminate and buzzer must sound).
–
Replace temperature switch (2) as required.
Note:
A radiator that is blocked by dirt and debris
will cause overtemperature of engine
coolant and hydraulic fluid. Therefore, when
the indicator lamp illuminates, the first step
to be taken should be to investigate the
radiator for free air passage.
When the indicator lamp lights up, the engine
will not be shut off.
27
Basic Settings and Service Procedures
ICC 1 S D
Engine – Speed adjustments
Adjusting idle speed
Note:
Engine speed may be checked with the use
of a stroboscope, digital tachometer or
vibration tachometer (refer to Special Tools).
–
Push manual throttle lever on right-hand side
panel all the way in.
–
Adjust Bowden cable (8) in such a way that
throttle lever (5) contacts adjusting screw
(3). Make necessary corrections on clamp
bolt (6) or adjusting nut (7) as required.
–
Refer to Specifications for idle speed settings.
Adjusting idle speed
Adjusting operating speed
Checking engine speed with vibration tachometer
–
Accelerate engine until operating speed has
been reached.
–
Hold tachometer in close contact with valve
cover or engine block.
–
Turn rotating plate of vibration tachometer
until resonance spring attains maximum
deflection.
–
Read engine speed on tachometer.
–
Adjust Bowden cable (8) in such a way that
throttle lever (5) touches adjusting screw (4).
Make necessary corrections on clamp bolt
(6) or adjusting nut (7) as required.
–
Refer to Specifications for operating speed
settings.
1
Lever, engine shut-off solenoid
2
Stop screw, engine shut-off solenoid
Note:
3
Adjusting screw, idle speed
4
Adjusting screw, operating speed
5
Throttle lever
6
Clamp bolt, Bowden cable
The adjusting screws (3 and 4) are preset
and sealed at the factory. They must not be
adjusted. Breaking the seal will void
manufacturer's warranty and operating
license.
7
Adjusting nut, Bowden cable
8
Bowden cable
9
Solenoid valve, engine shut-off
28
ICC 1 S D
Basic Settings and Service Procedures
Engine – Engine shut-off solenoid valve
Engine shut-off solenoid valve
As soon as the ignition switch (S1) is set to
position "0" with the engine running, the engine
shut-off control responds, and the solenoid valve
(1) attracts. This shuts off the fuel supply inlet,
causing the engine to stop. After about 15
seconds, solenoid valve switches off again, and
opens fuel supply inlet.
1
Solenoid valve, engine shut-off
2
Lever, engine stop
Engine shut-off solenoid valve
In the event that the solenoid valve (1) fails to
shut off the fuel supply when the ignition key is
set to position "0", the solenoid valve can also be
actuated manually.
Shut off engine:
–
Move engine shut-off lever in direction of
arrow until it stops, and hold until engine
comes to a standstill.
Caution!
Stay clear of rotating components!
Manual actuation of engine shut-off solenoid valve
Checking engine shut-off solenoid valve
–
Check fuse F 12.
–
Set ignition switch to "0" position.
–
Measure magnetic field on solenoid valve no
later than 5 seconds after setting ignition key
to "0" position.
–
If a switching voltage is present, and the
solenoid valve does not attract, it must be
replaced.
–
If no switching voltage is present, connecting
cables and D2 engine shut-off control module
must be checked and replaced as required.
Checking magnetic field
29
Basic Settings and Service Procedures
ICC 1 S D
Engine – Air cleaner
Checking / replacing air cleaner
When the "Air Cleaner Warning" indicator light in
the combination instrument illuminates, the air
cleaner must be cleaned or its cartridge replaced.
Checking air cleaner
1
Air cleaner housing
2
Warning switch/reset button
3
Filter cartridge
4
Clamp
5
Air cleaner cover
30
–
Detach air cleaner cover (5), and clean
together with air cleaner housing (1), do not
wash.
–
Loosen clamp (4).
–
Clean or replace filter cartridge (3).
–
Press in warning switch button (2) to reset.
ICC 1 S D
Basic Settings and Service Procedures
Engine – Engine oil
Checking engine oil level
–
After shutting off engine, allow at least five
minutes to pass before checking oil level.
–
Oil level must be between "MIN" and "MAX"
marks on oil dip stick (arrow).
–
If oil level is found to be below "MIN" mark,
top up with engine oil immediately.
–
Do not overfill engine oil to above "MAX"
mark! Refer to Specifications for type of
engine oil required.
Checking engine oil level
Changing oil filter
–
Drain engine oil.
–
Remove oil filter (2) using cartridge wrench.
–
Clean sealing surface at filter base.
–
Apply thin film of engine oil to rubber seal of
new filter cartridge.
–
Start new filter cartridge on threaded base,
and turn until hand-tight.
Checking oil pressure switch
–
Start engine. Oil pressure indicator lamp must
extinguish.
–
If indicator lamp fails to extinguish, check /
top up engine oil first.
–
Check for switching voltage on terminal of
connecting cable.
–
If a voltage is present, oil pressure switch
must be replaced.
–
If no voltage is present, connecting cable
must be checked for possible short-circuit
against vehicle ground.
Changing oil filter / Checking oil pressure switch
1
Oil pressure switch
2
Oil filter
Note:
When the indicator lamp lights up, the engine
will not be shut off.
31
Basic Settings and Service Procedures
ICC 1 S D
Engine – Drive Pump belt
Changing drive pump belt
–
Loosen and remove six mounting bolts (1).
–
Pull pumps (2) far enough toward the rear to
separate coupling sleeve (3) from engine drive
shaft (gap wide enough to allow drive belt to
be passed through).
–
Loosen belt tensioning roller.
–
Replace drive pump belt (4).
–
Re-adjust belt tention roller.
Engine mounted pumps
Alternator V-belt
32
1
Mounting screws (6x)
2
Pumps
3
Coupling sleeve
4
Belt, drive pump
5
V-belt, alternator
ICC 1 S D
Basic Settings and Service Procedures
Sweeping Mechanism – Sweeping pattern
Adjusting sweeping pattern
–
Check tire pressure (see Specifications).
–
Loosen clamp bolts (1).
–
Adjust lateral inclination of side brush (2)
–
Tighten clamp bolts (1).
1
Clamp bolts (2x)
2
Side brush
3
Stop screw
4
Lock nut
Adjusting sweeping pattern
–
Loosen lock nut (4).
–
Turn stop screw (3) to adjust side brush
contact pressure on ground.
–
Tighten lock nut (4).
Adjusting brush contact pressure
Checking sweeping pattern
The sweeping pattern should be formed like a
moon-shaped sickle (approx. 120° to 150°).
–
Raise side brushes.
–
Drive sweeping machine onto flat and level
ground that is evenly covered with dust.
–
Lower side brushes, and allow to run for a
few seconds.
–
Raise side brushes, back up machine.
–
Check sweeping pattern.
q
Direction of travel
Checking sweeping pattern
33
Basic Settings and Service Procedures
ICC 1 S D
Sweeping Mechanism – Spray nozzles
Cleaning spray nozzles on side brush
Spray nozzles on side brush
1
Union nut
2
Spray nozzle
34
–
Loosen union nut (1), and remove nozzle.
–
Blow out spray nozzle with pressurized air
from front (2). Replace as required.
–
Install spray nozzle (2), and tighten union nut
(1).
ICC 1 S D
Basic Settings and Service Procedures
Sweeping Mechanism – Vacuum intake
1
Coarse dirt flap
Adjusting vacuum intake
2
Sealing lip
–
Lower vacuum intake.
3
Caster adjusting clamp bolt (4x)
–
Loosen clamp bolts (3) on both sides.
4
Adjusting screw
–
Loosen lock nuts (5) on both sides.
5
Lock nut
–
6
Support caster, vacuum intake
7
Adjusting guide rods (2x)
Using adjustment screws (4), adjust vacuum
intake in such a way that the front sealing lip
(2) at the coarse dirt flap (1) has about 0 to 1
mm ground clearance.
–
Using guide rods (7), adjust sealing lip (2) to
provide about 10 to 18 mm ground clearance
at rear.
–
After each adjustment, again check the other
measurements.
35
Basic Settings and Service Procedures
ICC 1 S D
Sweeping Mechanism – Warning buzzer, debris container
Adjusting warning buzzer switch
–
Pull knobs off control levers (2, 3).
–
Remove panel mounting screws (4).
–
Detach Bowden cable at injection pump (see
page 28).
–
Lift cover panel (5).
–
Unscrew union nut (7).
–
Detach Bowden cable (8).
Opening side console
1
Lever, coarse dirt flap
2
Lever, side brushes and vacuum intake
3
Lever, debris container
4
Panel mounting screws (4x)
5
Cover panel
6
Manual throttle
7
Union nut
8
Bowden cable
9
Switch, warning buzzer (S18)
Bowden cable, detached
–
Set lever (3) to "Neutral" position.
–
Turn switch clockwise until (9) switching
noise is heard.
–
Turn switch (9) counter-clockwise one-half
turn.
Note:
Due to confined working space, removal or
rotation of hydraulic hoses on control block
may be required.
Adjusting warning buzzer switch
36
ICC 1 S D
Basic Settings and Service Procedures
Sweeping Mechanism – Debris container
1
Debris container
Removing debris container
2
Container swivel bolt (2x)
–
3
Lifting cylinder retaining bolt (2x)
Raise debris container until level, and shut
off engine.
4
LH side panel
–
Attach rope slings to crane hook and debris
container as shown.
5
LH lifting cylinder
–
Carefully raise crane hook until rope is taut.
–
Remove retaining bolts (3) on LH and RH
lifting cylinders.
–
Remove both container swivel bolts (2) on
LH and RH side panels.
–
Using suitable tools, push LH and RH side
panels outward, and raise crane hook to lift
off debris container.
37
Basic Settings and Service Procedures
ICC 1 S D
Running Gear – Grease fittings
Lubricating steering knuckles
–
Lubricate grease fittings on both steering
knuckles (arrow) on front axle with 3-5 shots
from grease gun.
Lubricating steering knuckle
Lubricating axle mounting
–
Lubricate grease fittings (arrow) on front axle
mounting with 3-5 shots from grease gun.
Lubricating front axle mounting
Lubricating side brush suspension
–
Lubricating side brush suspension
38
Lubricate grease fittings (arrow) on side brush
suspension with 3-5 shots from grease gun.
ICC 1 S D
Basic Settings and Service Procedures
Running Gear – Brake
1
Adjusting screw
2
Drum brake
3
Brake lever
4
Lock nut
Adjusting brakes
Note:
Parking barke and operating brake act on
both front wheels via brake cables (drum
brake). Braking action on rear wheels is by
hydraulics only.
The Bowden brake cables are adjusted by means
of the adjusting screw (1).
–
Loosen lock nut (4).
–
Turn adjusting screw (1) to adjust brake.
When the front wheel is raised with a floor jack,
it must turn freely without chafing of brake linings
on brake drum.
39
Basic Settings and Service Procedures
ICC 1 S D
Running Gear – Brake (view from below)
1
Floor panel
Replacing stop light switch
2
Actuating spring, stop light switch
–
Remove actuating spring from eyelet (2).
3
Protective cap, stop light switch (S 19)
–
4
Bowden cable, to LH drum brake
Pull off protective cap (3) from stop light
switch.
5
Bowden cable, to RH drum brake
–
Remove electrical cable.
6
Bowden cable, for setting parking brake
–
Replace stop light switch.
40
ICC 1 S D
Basic Settings and Service Procedures
Running Gear – Wheel change / Steering wheel
Changing rear wheel
–
Secure unit to prevent rolling, and loosen
wheel bolts.
–
Insert round steel bar (20 mm dia.) into rear
jacking eye.
–
Place hydraulic jack under protruding round
bar, and jack up unit.
–
Support unit with block.
–
Change wheel, tighten wheel nuts, then torque
to finish (refer to Specifications for torque
rating).
Note:
Jacking eye at rear
Round steel bar must be cradled in jack
head notch.
Changing front wheel
–
Secure unit to prevent rolling, and loosen
wheel bolts.
–
Place hydraulic jack under front axle near
wheel to be changed, and jack up unit.
–
Support unit with block.
–
Change wheel, tighten wheel nuts, then
torque to finish (refer to Specifications for
torque rating).
Front axle jacking point
Removing steering wheel
–
Pull center cap off steering wheel (1).
–
Remove center nut from steering shaft.
–
Install suitable pulling tool using tapped holes
(2).
–
Pull off steering wheel.
1
Steering wheel
2
Tapped holes (2x)
Removing steering wheel
41
Basic Settings and Service Procedures
ICC 1 S D
Running Gear – Toe-in adjustment
Adjusting toe-in
–
Set steering wheel for straight-ahead travel.
–
Hook measuring tape into one of the tire tread
grooves.
–
Pass measuring tape under unit and across
to opposite wheel.
–
Read mesaurement "x" on tread groove
corresponding to opposite wheel.
Hooking measuring tape into tread groove
Measuring front wheel toe-in
With toe-in properly adjusted, dimension "x" at
the front of tyres is 5 mm smaller than the
dimension at rear of tyres.
q
Direction of travel
Correct front wheel toe-in adjustment
42
ICC 1 S D
Basic Settings and Service Procedures
Running Gear – Shock absorber
1
Upper mounting bolt
Replacing shock absorber
2
Loading ramp
–
3
Lower mounting bolt
Move unit with one wheel onto loading ramp
(2) of approx. 150 mm height.
4
Shock absorber
–
Turn steering wheel to the left or right.
–
Remove upper shock absorber mounting bolt
(1).
–
Remove lower shock absorber mounting bolt
(3).
–
Take out shock absorber (4).
Note:
New shock absorber must be manually
extended to proper length before installation.
43
Basic Settings and Service Procedures
Running Gear – Towing and transport
Important:
The unit may be towed only with bypass
valve open. Towing with closed bypass valve
will damage hydraulic drive components.
Towing speed must not exceed walking
speed, and towed distance must be less
than 250 m. Otherwise, hydraulic motors
on rear wheels may be damaged.
–
Attach tow rope to towing eye (arrow).
–
Winch unit onto transport vehicle, and secure
to tie-down points.
44
ICC 1 S D
ICC 1 S D
Basic Settings and Service Procedures
Hydraulic System – Hydraulic fluid
Note:
When carrying out procedures on the
hydraulic system, care must be taken to
maintain extreme cleanliness throughout.
Even minor contaminations may cause
component damage or complete system
failure.
Checking hydraulic fluid level
The inspection glass for checking the level in the
hydraulic fluid tank is located in the front left wheel
well.
Inspection glass, hydraulic fluid tank
Topping up hydraulic fluid
The filler neck is located beneath the operator
seat.
Note:
When installing the threaded cover, ensure
that it can be turned easily. Otherwise, thread
damage through cross-threading may result.
Install cover only hand-tight.
Filler neck, hydraulic fluid
1
Dip stick
2
Pressure gauge, return pressure
3
Cover
45
Basic Settings and Service Procedures
ICC 1 S D
Hydraulic System – Hydraulic fluid filter
Replacing hydraulic fluid filter
Replacement of the hydraulic fluid filter is required
when indication of pressure gauge is in red range.
1
Note:
Engine must be shut off before the filter can
be changed.
2
3
Hydraulic fluid filter
1
Filter element
2
Protective tube
3
Filler neck
46
–
Tilt up operator seat.
–
Unscrew filler neck cover.
–
Remove filter element (1) with protective tube
(2) by pulling both out of filler neck (3).
–
Insert new filter element (1) in protective tube
(2).
–
Install protective tube (2) with filter element
(1) in filler neck (3).
–
Replace cover, start thread clockwise, and
turn until hand-tight.
ICC 1 S D
Basic Settings and Service Procedures
Hydraulic System – Emergency pump (option)
1
Lever, emergency pump
2
Lever, Raise / Lower debris container
Raise / Lower debris container
To carry out repairs, the emergency pump (1)
can be used to raise the debris container without
the need to start the engine.
–
To raise debris container, set the "Debris
Container" lever (2) on the side console to
"Raise" position, hold lever, and actuate
emergency pump lever (1) in a pumping
motion until debris container has been raised
to desired height.
–
To lower debris container, set the "Debris
Container" lever (2) on the side console to
"Lower" position, hold lever, and actuate
emergency pump lever (1) in a pumping
motion until debris container has been
lowered to desired position.
47
Basic Settings and Service Procedures
ICC 1 S D
Hydraulic System – Drive pedal
Setting NEUTRAL on hydraulic drive pump
If the unit creeps forward or backward without
drive pedals being actuated, setting the NEUTRAL
position on the hydraulic drive pump will be
required.
–
Loosen lock nut on cam bolt.
–
Turn cam bolt (arrow) until unit no longer
creeps.
–
Tighten lock nut on cam bolt.
Setting NEUTRAL position on hydraulic pump
Adjusting drive pedal inclination
When in rest position, the "Forward" drive pedal
must be positioned in parallel with the "Reverse"
drive pedal. The drive pedal position can be
adjusted at each linkage pivot point.
5
4
1
2
Pedal linkage
1
Lever
2
Fork (adjuster)
3
Pedal linkage
4
Threaded rod
5
Lock nut
6
Reverse drive switch
48
–
Detach fork (2) from lever (1).
–
Loosen lock nut (5).
–
Turn fork (2) on the threaded rod (4) in pedal
linkage (3) clockwise or counter-clockwise
as required.
–
Reattach fork (2) to lever (1).
3
Note:
When making adjustments, ensure that
pedal linkage travels freely and without
chafing.
ICC 1 S D
Basic Settings and Service Procedures
Hydraulic System – Checking working pressures
1
Connecting union on testing setup
Checking drive hydraulic pressure
2
T-joint
–
Secure unit by setting parking brake.
3
Connecting union on bypass line
–
4
Bypass line
Unscrew connecting union (3) from T-joint
(2).
5
Connecting union on bypass valve
–
Loosen connecting union (5) from bypass
valve (6). Swivel bypass line (4) sideways.
6
Bypass valve
–
7
Testing set (special tool)
Close bypass line (4) with blind plug to
prevent admission of contaminants.
8
Hydraulic drive pump
–
Screw connecting union (1) of testing set (7)
onto T-joint (2), and tighten.
–
Start engine, and run at full throttle.
–
Fully depress "Forward" drive pedal.
–
With all hydraulic components working
properly, a pressure of 150 to 180 bar must
be indicated on testing gauge.
–
After conclusion of pressure test, remove
testing set, and return all hydraulic connectors to their previous positions. Ensure that
connections are tight.
Note:
A pressure reading below 100 bar indicates
a defective drive pump or drive motor.
49
Basic Settings and Service Procedures
ICC 1 S D
Hydraulic System – Checking working pressures (continued)
2
1
3
150
100
S
200
50
Bar
250
4
5
1
Pressure-side connection
2
T-joint
3
Pressure line to control block, side
console
4
Testing set (special tool)
5
Hydraulic pump, side brushes and
debris container
50
Checking hydraulic pressure for side brushes
and debris container
–
Unscrew pressure line to control block (3)
from pressure-side connection (1).
–
Install T-joint (2) between pressure-side
connection (1) and pressure line (3).
–
Install testing set (4) on T-joint (2).
–
Start engine, and run at full throttle.
–
Raise side brush cylinders until they rest
against the stops.
–
With side brushes engaged and rotating, a
pressure of 60 to 80 bar must be indicated on
testing gauge.
–
For adjustment of pressure relief valve, refer
to page 51.
ICC 1 S D
Basic Settings and Service Procedures
Hydraulic System – Pressure relief valve
Adjusting pressure relief valve
The pressure relief valve is used to adjust the
working pressure for functions such as "Raise /
Lower Debris Container" and raising / lowering
side brushes and vacuum intake.
–
Remove mounting screws (2x), see arrows
–
Tilt up seat.
–
Remove mounting screws (2x), see arrows.
–
Lift side console approx. 30 mm until pressure
relief valve can be seen.
Side console, view from right
Note:
As a prerequisite, the unit must have been
prepared as described on page 50.
Side console, view from left, seat tilted forward
–
Loosen lock nut (1).
–
Using Allen wrench (3), adjust pressure by
turning screw (2).
–
Turning clockwise increases pressure.
–
Turning counter-clockwise reduces
pressure.
For nominal value, refer to Specifications.
Side console raised, adjusting pressure relief valve
1
Lock nut
2
Adjusting screw
3
Allen wrench, 5 mm size
4
Side console, raised
51
Basic Settings and Service Procedures
ICC 1 S D
Hydraulic System – Pumps
Removing hydraulic pumps
The hydraulic pumps powering the working
hydraulics and steering are mounted beneath the
battery (3) as an extension of the engine drive
shaft.
–
Drain hydraulic fluid into clean container.
–
Remove all hydraulic lines from pumps (2).
–
Remove a total of six mounting bolts (1).
–
Pull pumps off toward the rear.
Removing hydraulic pumps
Installing hydraulic pumps
–
Install pumps, complete with connecting
sleeve (4), engine drive shaft.
–
Install, then tighten, a total of six mounting
bolts (1).
–
Connect all hydraulic lines.
Note:
When mounting bolts have been thightened,
connecting sleeve (4) must still have free axial
travel.
Installing hydraulic pumps
1
Mounting bolts
2
Hydraulic pumps
3
Battery
4
Connecting sleeve, engine/hydraulic pump
5
Alternator
52
Binding connecting sleeves may cause
damage to hydraulic pump bearings and to
engine.
ICC 1 S D
Basic Settings and Service Procedures
Impeller fan
1
Vacuum hose
Changing impeller fan
2
Hose clamp
–
3
Front axle carrier
Raise front of unit approx. 200 mm or drive
on inclined ramp.
4
Front wheel
–
Raise debris container to highest position and
secure.
5
Mounting bolts
–
6
Strut (frame support)
Loosen and remove bolts (5) on strut (6)
attached to front axle carrier (3).
7
Fuel tank
–
Remove heater assembly, and place toward
rear with heater hoses still attached.
–
Remove seat.
–
Tilt up seat panel (90° angle), and detach
pressurized gas spring.
–
Loosen hose clamp (2) on vacuum hose (1),
and pull off vacuum hose toward the front.
–
Remove mounting screws from impeller fan
front panel, leaving suction channel in place.
53
Basic Settings and Service Procedures
ICC 1 S D
Impeller fan (continued)
1
2
1
Retaining bolt
Changing impeller fan (continued)
2
Impeller fan
–
Deflect steering all the way to the left.
–
Remove hydraulic lines from steering
cylinder.
–
Detach accelerator cable at side panel (see
page 36).
–
Slide out impeller fan front panel sideways
between fuel tank and axle.
–
Remove center bolt and washer (1) from
impeller fan (2).
–
Pull off impeller fan (2) toward the front.
–
Grease impeller shaft.
–
Install new impeller fan on shaft. Install
retaining bolt and washer (1), and tighten.
–
Assemble all components in reverse order
of disassembly.
–
Ensure proper seating of seal between
vacuum channel and debris container.
54
ICC 1 S D
Basic Settings and Service Procedures
Impeller fan
1
Air gap
Adjusting magnetic brake
2
Brake lining
3
Shim (7.343-026)
4
Bolt
5
Magnet coil
To ensure proper functioning of the magnetic
brake, the air gap (1) between brake lining (2)
and drive plate must be adjusted.
An adjustment will be required only if the
magnetic brake has been replaced.
–
Using the feeler gauge, check air gap (1)
once around the entire circumference.
–
To adjust air gap, add a sufficient number of
shims (3) under the bolts (4) until an even
air gap of 0.3 ± 0.1 mm has been achieved.
55
Troubleshooting
ICC 1 S D
Troubleshooting
Problem
Remedy
Starter fails to turn engine
–
–
–
–
–
–
–
Check / replace fuse F1
Check ground connection between engine and chassis
Check battery G1 (voltage, electrolyte level & density)
Check / replace ignition switch S1
Check voltage at starter relay
Check voltage at starter terminals
Check / replace starter
Starter turns engine but engine
does not start
–
–
–
–
–
–
–
–
–
Check battery voltage
Check fuel level, top up as required
Check / replace fuel filter
Check / replace air cleaner element
Check / replace fuse F12
Check / replace fuse F1
Check / replace glow plug control module D1
Check / replace engine shutoff solenoid valve Y1
Check starter drive gear
Battery Charge
indicator lamp illuminates
– Check cable connections on alternator
– Check alternator
– Check / adjust V-belt tension
Multifunctional display – Excessive
engine coolant temperature
–
–
–
–
Oil Pressure
indicator lamp illuminates
– Check / top up engine oil level
– Check / replace oil pressure switch S2, connections
and lamps
Defective vehicle lighting
– Check / replace fuses, connectors, lamps
Warning beacon without function
– Check plug connectors
– Check / replace fuse F13
– Check / replace lamp
Windshield wiper without function
– Check / replace fuse F7
– Check / replace relay K6
– Check / replace wiper motor M4
Windshield wiper fails to return
to parking position
– Replace wiper motor M4
Stop light without function
– Check / replace fuse F15
– Check / replace stop light switch S19
Engine runs but machine fails to
move
–
–
–
–
–
56
Check engine coolant level, top up as required
Check / adjust V-belt tension (alternator,water pump)
Check radiator for leaks and clogging
Check / replace cooling fan motor
Release parking brake
Close bypass valve
Check brake pedal return
Check throttle linkage
Check / adjust pressure on drive hydraulics
ICC 1 S D
Troubleshooting
Troubleshooting
Problem
Remedy
Engine cannot be shut off
– Check engine shutoff control module D2
– Check / replace ignition switch S1
– Check / replace engine shutoff solenoid valve Y1
No fuel tank level indication
– Check / replace fuel level sensor B1
Brushes fail to rotate or rotate too
slowly
– Check pressure in working hydraulic circuit
– Adjust pressure relief valve
Blower without function
– Check / replace switches S10 / S11 on debris
container
– Check / replace relay K1
– Check / replace fuse F4
– Check / adjust V-belt
– Check magnetic clutch
Vacuum intake cannot be lowered /
raised
–
–
–
–
Check linkage for obstruction or blockage
Check / replace valve on control block
Check pressure in working hydraulic circuit
Adjust pressure relief valve
Debris container cannot be raised
–
–
–
–
Check / replace valve on control block
Check pressure in working hydraulic circuit
Switch off side brushes
Adjust pressure relief valve
Debris container cannot be lowered
– Check / replace valve on control block
– Switch off side brushes
Engine emits black smoke
– Check / replace air cleaner element
– Check fuel return lines
Machine fails to develop sufficient –
suction
–
–
–
–
–
–
Check / clean chain curtain in debris container
Check vacuum intake
Check impeller fan
Check / adjust / replace sealing lips on vacuum intake
Check vacuum intake condition / remove blockage
Check / replace seal in vacuum channel
Check / adjust / replace seals on debris container
Clogged suction tube
– Check / adjust water feed volume
– Check / clean / replace spray nozzles at vacuum intake
No water at spray nozzles
– Check / top up water tank
– Check / clean water filter
– Check / replace water pump M2
– Check position of water shutoff valve
– Check / replace solenoid valve Y3
Water pump without function
– Check / replace fuse F5
– Check / replace relay K3
– Check / replace water pump M2
57
25qmm
sw
-G1
12V
44Ah
16qmm
rt
30
-G2
1
D+
G
-M6
P1/1.7
.3
-K9
M
87
30
-K9
87
86
85
30
30
.2
-M1
50
M
-S1
0
I
II
0,1
30
-R1
15/54
-F1
-R2
-D1
-X1
C
-R3
6qmm
rt
50
50
6qmm
rt
30A
-F17
87
30
85
T
L
2
1
86
1qmm
sw
-P1
P1/1.2
-R4
1K
7
3
12
-V1
-V2
8
6
8
1
-S2
P
-X1
5
8
-X1
4
-S3
-S4
P
6
15
10
-X1
11
7
2
-V3
-B1
-S17
E3/3.7
S5/2.1
K5/3.3
9
5
9
-X1
5
6
30A
4
7
-F18
3
X3
X3
-X1
Q
-S18
4
2
10
-H5
-D2
4
1
-Y1
-X1
3
2
11
-F12
X2
X1
26
25qmm
rt
31
-
+
58
31
1
87
87a
-K6
-S6
86
85
2
1
30
5
12
.12
87a
-M4
53b
.12
-K6
31
M
53
30
53a
87
13
B-/2.1
-F7
B+/2.1
15/2.1
Circuit Diagram
ICC 1 S D
Circuit diagram 0.088-215, page 1
Installed location
Pos
Designation
Installed location
B1
Level sensor
Fuel tank
S1
Ignition switch
Cab control console
D1
Module, preglow
Rear fuse box
S2
Oil pressure switch
Engine compartment
D2
Module, engine shutoff
Control console
S3
F1
Fuse, ignition switch
Front fuse box
S4
F7
Fuse, windshield wiper
Front fuse box
S17
Temperature switch,
Engine compartment
engine coolant
Vacuum switch, air
Air cleaner housing
cleaner
Switch, reversing buzzer Throttle linkage / rear panel
F12
Fuse, engine shutoff
Front fuse box
S18
Inside control console cover
F17
Fuse, glow plugs
Rear fuse box
F18
Fuse, radiator fan
Rear fuse box
G1
Battery
Rear cover panel
X1
Plug connector
G2
Alternator
Engine compartment
X3
H5
Warning buzzer
Behind LH rear body panel
K6
Relay, windshield wiper
Front fuse box
Plug connector, fuel level Fuel tank
sensor
Solenoid valve, engine
Engine compartment
shutoff
K9
Relay, radiator blower
Front fuse box
M1
Starter
Engine compartment
M4
Windshield wiper motor
Cab
M6
Motor, radiator fan
Engine compartment
P1
Combination instrument
Instrument panel
Switch, warning buzzer,
Raise/Lower debris
container
V1 - V3 Diodes
Y1
R4
Resistor
Engine compartment
Fuse box, rear
Control console
59
Circuit Diagram
R1-R3 Glow plugs
On connecting wire of unit
ICC 1 S D
Designation
Circuit diagram 0.088-215, page 1
Pos
Circuit Diagram
Circuit diagram 0.088-215, page 2
60
ICC 1 S D
Installed location
D3
Control, impeller fan brake
Side console
S5
Switch, folding seat
Cab, under seat
E7
LH working spotlight
Cab
S7
Switch, heater fan
Control console
E8
RH working spotlight
Cab
S8
Switch, water pump
Control console
F3
Fuse, impeller fan brake
Front fuse box
S9
Switch, magnetic clutch
Side console
F4
Fuse, magnetic clutch
Front fuse box
S10
F5
Fuse, water pump
Front fuse box
S11
F6
Fuse, heater fan
Front fuse box
LH limit switch, debris
container
RH limit switch, debris
container
Water tank, raise debris
container
Water tank, raise debris
container
F13
Fuse, warning beacon
Front fuse box
S14
Switch, warning beacon
Control console
F14
Fuse, windshield defroster
Front fuse box
S15
Control console
H6
Warning beacon
Cab roof
Switch, windshield
defroster
Switch, working spotlights
K1
Relay, ignition switch
Front fuse box
K2
Relay, heater fan
Front fuse box
X1
Plug connector
Control console
K3
Relay, water pump
Front fuse box
X2
Plug connector
Side console
K4
Relay, warning beacon
Front fuse box
Y2
K7
Relay, windshield defroster
Front fuse box
Y3
Engine compartment
Magnetic clutch, impeller
fan
Solenoid valve, water pump Rear cover panel
K8
Relay, working spotlights
Front fuse box
Y4
Impeller fan brake
M2
Water pump
Rear panel, below battery
M3
Heater fan, cab
LH cab rear wall
M5
Fan, windshield defroster
Cab
S16
V4 - V6 Diodes
Control console
ICC 1 S D
Designation
Designation
Circuit diagram 0.088-215, page 2
Installed location
Pos
Pos
On connecting wire of unit
Engine compartment
Circuit Diagram
61
10A
-F2
7,5A
-F8
-S12
-K5
49
30
K5/1.9
31
ZUBEH™R
ACCESSOIRE
15
49
L
49a
R
49a
4
LIGHT
HORN
LIGHT
-H1
-X1
L
O
R
5
-H2
-X1
-X1
-H3
-X1
-H4
2
9
3
6
6
18
3
20
31
19
2
E3/1.9
5
21
1
-E3
-S13
7
-E4
-X1
-F11
-E5
-X1
8
-E6
-F10
16
62
1
-E1
-F9
9
4
-E2
7
-B2
-X1
8
10
17
B+/2.13
K1/2.13
-S19
11
-H8
7,5A
-F15
-H9
12
13
Circuit Diagram
ICC 1 S D
Circuit diagram 0.088-215, page 3
15
Installed Location
Pos
Designation
Installed location
Horn
Front bumper
K5
Relay, turn signals
Front fuse box
E1
Headlamp, L
Windshield
S12
Switch, four-way flashers
Instrument panel
E2
Headlamp, R
Windshield
S13
Combination switch
Instrument panel
E3
Position light, LF
Front bumper
S19
Switch, stop lights
Brake pedal assy.
E4
Position light, LR
Windshield
Plug connector
Fuse box, right side
E5
Position light, RF
Front bumper
E6
Position light, RR
Windshield
F2
Fuse, four-way flashers
Front fuse box
F8
Fuse, horn
Front fuse box
F9
Fuse, headlamps
Front fuse box
F10
Fuse, position lights, L
Front fuse box
F11
Fuse, position lights, R
Front fuse box
F15
Fuse, stop light
Front fuse box
H1
Turn signal, LF
Front bumper
H2
Turn signal, RR
Water tank
H3
Turn signal, LF
Front bumper
H4
Turn signal, RR
Water tank
H8
Stop light, L
Water tank
H9
Stop light, R
Water tank
X1
63
Circuit Diagram
B2
ICC 1 S D
Designation
Circuit diagram 0.088-215, page 3
Pos
Installed location
C/D
Pos
Designation
Installed location
C/D
Fuel tank
1
F14 Fuse, windshield defroster
Front fuse box
2
B2 Horn
Front bumper
3
F15 Fuse, stop lights
Front fuse box
3
D1 Control module, preglow
Rear fuse box
1
F16 Fuse, headlamps
Front fuse box
2
D2 Control module, engine shutoff
Control console
1
F17 Fuse, glow plugs
Rear fuse box
1
D3 Control module, impeller fan brake
Side console
2
F18 Fuse, radiator fan
Rear fuse box
1
E1 Headlamp, L
Windshield
3
G1 Battery
Rear cover panel
1
E2 Headlamp, R
Windshield
3
G2 Alternator
Engine compartment
1
E3 Position light, LF
Front bumper
3
E4 Position light, LR
Water tank
3
H1 Turn signal, LF
Front bumper
3
E5 Position light, RF
Front bumper
3
H2 Turn signal, LR
Water tank
3
E6 Position light, RR
Water tank
3
H3 Turn signal, RR
Water tank
3
E7 Working spotlight, L (option)
Cab
2
H4 Turn signal, RF
Front bumper
3
E8 Working spotlight, R (option)
Cab
2
Rear cover panel
1
F1 Fuse, ignition switch
Front fuse box
1
F2 Fuse, four-way flashers
Front fuse box
3
H5 Warning buzzer, reversing,
debris container
H6 Warning beacon
Cab
2
F3 Fuse, impeller fan brake
Front fuse box
2
H8 Stop light, L
Water tank
3
F4 Fuse, magnetic clutch
Front fuse box
2
H9 Stop light, R
Water tank
3
F5 Fuse, water pump
Front fuse box
2
K1 Relay, ignition switch
Front fuse box
2
F6 Fuse, heater fan
Front fuse box
2
K2 Relay, heater fan
Front fuse box
2
F7 Fuse, windshield wiper
Front fuse box
1
K3 Relay, water pump
Front fuse box
2
F8 Fuse, turn signals / horn
Front fuse box
3
K4 Relay, warning beacon
Front fuse box
2
F9 Fuse, headlamps
Front fuse box
3
K5 Relay, turn signals
Front fuse box
3
F10 Fuse, position lights, R
Front fuse box
3
K6 Relay, windshield wiper
Front fuse box
1
F11 Fuse, position lights, L
Front fuse box
3
K7 Relay, windshield defroster
Front fuse box
2
F12 Fuse, engine shutoff
Front fuse box
1
K8 Relay, headlamps
Front fuse box
2
F13 Fuse, warning beacon
Front fuse box
2
K9 Relay, radiator fan
Rear fuse box
1
ICC 1 S D
B1 Level sensor, fuel
Circuit Diagram
Designation
Circuit Diagram – Search List
64
Pos
Installed location C/D
Pos
Designation
Installed location
C/D
M1 Starter
Engine compart.
1
P1 Combination instrument
Instrument panel
1
M2 Water pump
Engine compart.
2
V1 Diode
On connecting wire
1
M3 Heater fan, cab
Cab rear wall
2
V2 Diode
On connecting wire
1
M4 Windshield wiper
Cab
1
V3 Diode
On connecting wire
1
M5 Fan, windshield defroster
Cab
2
V4 Diode
On connecting wire
2
M6 Radiator fan
Engine compart.
1
V5 Diode
On connecting wire
2
Glow plugs
Engine compart.
1
V6 Diode
On connecting wire
2
R4
Resistor
Fuse box
1
X1 Plug connector
Fuse box, right side
1-3
S1 Ignition switch
Instument panel
1
X2
Plug connector
Side console
2
S2
Oil pressure switch
Engint compart.
1
X3
Plug connector
Fuel tank
1
S3
Temperature switch, engine coolant
Engine compart.
1
Y1
Solenoid valve, engine shutoff
Engine compartment
1
S4
Vacuum switch, air cleaner
Air cleaner
1
Y2
Magnetic clutch,impeller fan
Engine compartment
2
S5
Switch, folding seat
Cab, under seat
2
Y3
Solenoid valve, water pump
Engine compartment
2
S6
Switch, windshield wiper
Control console
1
Y4
Impeller fan brake
Engine compartment
2
S7
Switch, heater fan
Control console
2
S8
Switch, water pump
Side console
2
S9
Switch, magnet. clutch, impeller fan
Side console
2
S10 Switch, debris container, LH
Engine compart.
2
S11 Switch, debris container, RH
Engine compart.
2
S12 Switch, four-way flashers
Instument panel
3
S13 Combination switch
Instument panel
3
S14 Switch, warning beacon
Control console
2
S15 Switch, windshield defroster fan
Control console
2
S16 Switch, working spotlight (option)
Control console
2
S17 Switch, warning buzzer, reversing
Engine compart.
1
65
S18 Switch, warning buzzer, debris contain. Side console
1
S19 Switch, stop lights
3
Brake pedal
Circuit Diagram
R
ICC 1 S D
Designation
Circuit Diagram – Search List
Pos
Hydraulic Block Diagram
Hydraulic block diagram 0.088-258
66
ICC 1 S D
ICC 1 S D
Hydraulic Block Diagram
Hydraulic block diagram 0.088-258
1
Hydraulic fluid tank
2
Hydraulic fluid filter, return line
3
Oil cooler
4
Combustion engine
5
Assembly, drive components
5.1
Precharge valve
5.2
Precharge pump
5.3
Hydraulic pump, drive
5.4
Non-return valve
5.5
Control valve, low acceleration
6
Bypass valve
7
Hydraulic motor, R & L drives
8
Hydraulic pump, steering
9
Valve block, steering
10
Steering valve
11
Steering cylinder
12
Hydraulic pump, side brushes / debris
container
13
Control block
13.1 Pressure relief valve
13.2 Proportional valve for pos. 16 and 17
13.3 Control valve, debris container
14
Pipe-break safety valve
15
Hydraulic cylinder, debris container
16
Hydraulic motors, side brushes
17
Hydraulic cylinder, side brushes /
vacuum intake
18
Throttle valve
19
Emergency hand pump (option)
67
Hydraulic Line Diagram
Hydraulic line diagram 2.706-010
68
ICC 1 S D
ICC 1 S D
Hydraulic Line Diagram
Hydraulic line diagram 2.706-010
1
Hydraulic motor, LH side brush
2
Steering valve
3
Hydraulic motor, RH side brush
4
Hydraulic cylinder, steering
5
Valve block, steering
6
Control block, side console
7
Hydraulic pump, steering
8
Hydraulic pump, side brushes and
debris container
9
Hydraulic cylinder, debris container
10
Hydraulic motor, RH drive motor
11
Hydraulic pump, drive components
12
Hydraulikzylinder, side brushes and
vacuum intake
13
Bypass valve
14
Hydraulic cylinder, debris container
15
Hydraulic motor, LH drive motor
16
Hydraulic fluid tank
17
Emergency pump (option)
18
Hydraulic oil cooler
69
Specifications
ICC 1 S D
Specifications
Diesel engine................................................................................... Type
Operating speed ............................................................................... RPM
Idle speed ......................................................................................... RPM
Oil type, diesel engine ..................................................................... Type
Oil capacity, diesel engine ....................................................................... l
Sound noise level ........................................................................... dB(A)
Battery, voltage ...................................................................................... V
Battery low-maintance, capacity ......................................................... Ah
Driving speed, forward max. ............................................................ km/h
Driving speed, reverse max. ............................................................ km/h
Width of sweeping path, total ............................................................ m m
Side brushes, max. speed ................................................................ RPM
Ground clearance, w/ side brushes raised .......................................... mm
Ground clearance, w/ vacuum intake lowered .................................... mm
Ground clearance, w/ vacuum intake raised ....................................... mm
Debris container, raised height .......................................................... mm
Hydraulic fluid type ..................................................................................
Hydraulic fluid capacity, total .................................................................. l
Hydraulic pressure, drive system ...................................................... bar
Hydraulic pressure, side brushes at operating speed ........................ bar
Pressure relief valve (side brushes, debris container) ....................... bar
Tyre size, front ........................................................................................
Tyre size, rear .........................................................................................
Tyre pressure, front / rear .................................................................. bar
KUBOTA D722
2650 – 2800
800 – 900
10 W 40
3.8
78
12
44
14 – 16
4–6
1400
160 – 180
30
15– 20
150
1350
HV 46
35
150-180
60 - 80
160
145 / 80 R 10
165 / 65 R 13
2.9 / 2.9
Fuses
F1
F2
F3
F4
F5
F6
F7
F8
F9
F10
F11
F12
F13
F14
F15
F16
F17
F18
70
Ignition switch ............................................................................... 5
Four-way flashers .......................................................................10
Impeller fan brake ..........................................................................5
Magnetic clutch .............................................................................5
Water pump ................................................................................15
Heater fan .................................................................................. 7.5
Windshield wiper ........................................................................7.5
Turn signals / horn .....................................................................7.5
Headlamps .................................................................................7.5
Position lamps, R ..........................................................................5
Position lamps, L ..........................................................................5
Engine shutoff .............................................................................15
Warning beacon ..........................................................................10
Windshield defroster fan .............................................................20
Stop lights .................................................................................. 7.5
Headlamps .................................................................................7.5
Glow plugs ..................................................................................30
Radiator fan ................................................................................30
A
A
A
A
A
A
A
A
A
A
A
A
A
A
A
A
A
A
Specifications
ICC 1 S D
Special tools
Testing equipment ................................................................................... 2.639-387
Tachometer ............................................................................................. 6.491-361
Magnetic field tester ................................................................................ 6.803-003
Assembly torque ratings
Rear wheels ............................................................................................ 100 Nm
Front wheels............................................................................................
90 Nm
71