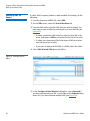
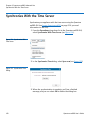
1
User’s Guide Quantum vmPRO 6-67535-05 Rev B Quantum vmPRO User’s Guide, 6-67535-05 Rev B, August 2014, Product of USA. Quantum Corporation provides this publication “as is” without warranty of any kind, either express or implied, including but not limited to the implied warranties of merchantability or fitness for a particular purpose. Quantum Corporation may revise this publication from time to time without notice. COPYRIGHT STATEMENT © 2014 Quantum Corporation. All rights reserved. Your right to copy this manual is limited by copyright law. Making copies or adaptations without prior written authorization of Quantum Corporation is prohibited by law and constitutes a punishable violation of the law. TRADEMARK STATEMENT Quantum, the Quantum Logo, Backup. Recovery. Archive. It's What We Do., Be Certain, Be Quantum Certain, DLT, the DLT Logo, DLTSage, DLTtape, the DLTtape Logo, DXi, DXi Accent, Dynamic Powerdown, FastSense, FlexLink, GoProtect, GoVault, iLayer, Lattus, MediaShield, Optyon, Pocket-sized., Wellarmored., Preserving the World's Most Important Data. Yours., Q-Cloud, Quantum Certain, Quantum Certainty, Quantum vmPRO, Scalar, SDLT, SiteCare, SmartVerify, StorageCare, StorNext, Super DLTtape, SuperLoader, and Vision are either registered trademarks or trademarks of Quantum Corporation and its affiliates in the United States and/or other countries. All other trademarks are the property of their respective owners. Products mentioned herein are for identification purposes only and may be registered trademarks or trademarks of their respective companies. All other brand names or trademarks are the property of their respective owners. Quantum specifications are subject to change. ii Quantum vmPRO User’s Guide Contents Preface Chapter 1 xvii Quantum vmPRO Overview 1 Quantum vmPRO. . . . . . . . . . . . . . . . . . . . . . . . . . . . . . . . . . . . . . . . . . 1 vmPRO Highlights . . . . . . . . . . . . . . . . . . . . . . . . . . . . . . . . . . . 2 Quantum vmPRO Requirements . . . . . . . . . . . . . . . . . . . . . . . . . . . . . . 2 Notes . . . . . . . . . . . . . . . . . . . . . . . . . . . . . . . . . . . . . . . . . . . . 3 Quantum vmPRO Capacity License Calculations . . . . . . . . . . . . . . . . . . 4 Quantum vmPRO and Quantum Vision . . . . . . . . . . . . . . . . . . . . . . . . . 6 Quantum vmPRO GUI . . . . . . . . . . . . . . . . . . . . . . . . . . . . . . . . . . . . . . 6 Home . . . . . . . . . . . . . . . . . . . . . . . . . . . . . . . . . . . . . . . . . . . . 7 VMs . . . . . . . . . . . . . . . . . . . . . . . . . . . . . . . . . . . . . . . . . . . . . 8 Alerts . . . . . . . . . . . . . . . . . . . . . . . . . . . . . . . . . . . . . . . . . . . 11 Tasks . . . . . . . . . . . . . . . . . . . . . . . . . . . . . . . . . . . . . . . . . . . . 12 SmartMotion Backup . . . . . . . . . . . . . . . . . . . . . . . . . . . . . . . 16 Configure . . . . . . . . . . . . . . . . . . . . . . . . . . . . . . . . . . . . . . . . 17 Operations . . . . . . . . . . . . . . . . . . . . . . . . . . . . . . . . . . . . . . . 20 Help . . . . . . . . . . . . . . . . . . . . . . . . . . . . . . . . . . . . . . . . . . . . 22 Refresh . . . . . . . . . . . . . . . . . . . . . . . . . . . . . . . . . . . . . . . . . . 23 Quantum vmPRO User’s Guide iii Contents Chapter 2 Getting Started With Quantum vmPRO 25 Access Quantum vmPRO . . . . . . . . . . . . . . . . . . . . . . . . . . . . . . . . . . . 25 Accessing the Quantum vmPRO GUI . . . . . . . . . . . . . . . . . . . . 26 Accessing the Console Setup Wizard . . . . . . . . . . . . . . . . . . . 26 Accessing the Console Command Line . . . . . . . . . . . . . . . . . . 29 Set Up and Configure Quantum vmPRO . . . . . . . . . . . . . . . . . . . . . . . 30 Network Settings . . . . . . . . . . . . . . . . . . . . . . . . . . . . . . . . . . 31 Configure Quantum vmPRO . . . . . . . . . . . . . . . . . . . . . . . . . . 32 View Your Virtual Machines . . . . . . . . . . . . . . . . . . . . . . . . . . 38 Access Your Virtual Machines . . . . . . . . . . . . . . . . . . . . . . . . . . . . . . . 39 SmartMotion NAS Target Protocol Selection. . . . . . . . . . . . . . 39 CIFS. . . . . . . . . . . . . . . . . . . . . . . . . . . . . . . . . . . . . . . . . . . . . 40 NFS . . . . . . . . . . . . . . . . . . . . . . . . . . . . . . . . . . . . . . . . . . . . . 40 Modify Your Configuration . . . . . . . . . . . . . . . . . . . . . . . . . . . . . . . . . 40 Configuration Wizard Reminders . . . . . . . . . . . . . . . . . . . . . . 41 Accessing the Servers . . . . . . . . . . . . . . . . . . . . . . . . . . . . . . . 42 Add an ESX Server . . . . . . . . . . . . . . . . . . . . . . . . . . . . . . . . . 45 Add an ESX Server When There is an Existing vCenter Server . 47 Add a vCenter Server . . . . . . . . . . . . . . . . . . . . . . . . . . . . . . . 51 Edit a ESX Server. . . . . . . . . . . . . . . . . . . . . . . . . . . . . . . . . . . 55 Edit a vCenter Server. . . . . . . . . . . . . . . . . . . . . . . . . . . . . . . . 57 Delete ESX Servers . . . . . . . . . . . . . . . . . . . . . . . . . . . . . . . . . 58 Delete a vCenter Server . . . . . . . . . . . . . . . . . . . . . . . . . . . . . . 59 Manage Users . . . . . . . . . . . . . . . . . . . . . . . . . . . . . . . . . . . . . 61 Emails, Reports, Alerts, and Autosupport . . . . . . . . . . . . . . . . 62 Time and NTP . . . . . . . . . . . . . . . . . . . . . . . . . . . . . . . . . . . . . 65 Updating Quantum vmPRO Software . . . . . . . . . . . . . . . . . . . . . . . . . 67 Check for Software Updates . . . . . . . . . . . . . . . . . . . . . . . . . . 67 Configure When to Receive Software Update Notices. . . . . . . 68 Install Software Updates . . . . . . . . . . . . . . . . . . . . . . . . . . . . . 69 Chapter 3 Back Up and Store Data With Quantum vmPRO 71 Back Up and Store Data. . . . . . . . . . . . . . . . . . . . . . . . . . . . . . . . . . . . 71 Using Your Current Backup and Recovery Solution . . . . . . . . . 72 Using Folders to Facilitate Multiple Backup Policies . . . . . . . . 72 Using SmartMotion Backup . . . . . . . . . . . . . . . . . . . . . . . . . . 72 Running a SmartMotion Backup . . . . . . . . . . . . . . . . . . . . . . . 74 Using Additional Storage . . . . . . . . . . . . . . . . . . . . . . . . . . . . 76 iv Quantum vmPRO User’s Guide Contents Using Backup Policies . . . . . . . . . . . . . . . . . . . . . . . . . . . . . . . 79 Selecting VMs for Export. . . . . . . . . . . . . . . . . . . . . . . . . . . . . 90 Chapter 4 Recover Data With Quantum vmPRO 93 Recover Data . . . . . . . . . . . . . . . . . . . . . . . . . . . . . . . . . . . . . . . . . . . . 93 vmPRO Recover Virtual Machines Wizard . . . . . . . . . . . . . . . . 94 Recover VMs Backed up using SmartMotion. . . . . . . . . . . . . . 94 Manually Recover a VM Backed up using a Third-Party Application . . . . . . . . . . . . . . . . . . . . . . . . . . . . . . . . . . . . . . 130 Recovering Individual Files . . . . . . . . . . . . . . . . . . . . . . . . . . 131 Chapter 5 Using Groups and Folders With Quantum vmPRO 135 Set Up and Manage Groups . . . . . . . . . . . . . . . . . . . . . . . . . . . . . . . 135 Set Up Groups . . . . . . . . . . . . . . . . . . . . . . . . . . . . . . . . . . . 137 Manage Groups . . . . . . . . . . . . . . . . . . . . . . . . . . . . . . . . . . 139 Increase Backup Throughput . . . . . . . . . . . . . . . . . . . . . . . . 140 Update Group Members When the Master’s IP Address/ Hostname Changes . . . . . . . . . . . . . . . . . . . . . . . . . . . . . . . . 141 Import the Configuration Settings for Groups . . . . . . . . . . . 142 Create and Manage Folders. . . . . . . . . . . . . . . . . . . . . . . . . . . . . . . . 145 Create Folders . . . . . . . . . . . . . . . . . . . . . . . . . . . . . . . . . . . . 146 Move VMs to New Folders . . . . . . . . . . . . . . . . . . . . . . . . . . 147 Edit or Delete a Folder . . . . . . . . . . . . . . . . . . . . . . . . . . . . . 148 Chapter 6 Quantum vmPRO Advanced Use 149 Quantum VSS Writer . . . . . . . . . . . . . . . . . . . . . . . . . . . . . . . . . . . . . 149 Requirements for Active Directory Backup and Recover Support 150 Manual Installation of the Quantum VSS Writer . . . . . . . . . . 150 Enable Quiesce for VMs . . . . . . . . . . . . . . . . . . . . . . . . . . . . 151 VMware Tools Out of Date . . . . . . . . . . . . . . . . . . . . . . . . . . 154 Uninstall the VSS Writer . . . . . . . . . . . . . . . . . . . . . . . . . . . . 154 VSS Resources . . . . . . . . . . . . . . . . . . . . . . . . . . . . . . . . . . . . 155 Embed the Quantum vmPRO GUI in vSphere Client. . . . . . . . . . . . . . 155 Register the vCenter Plugin . . . . . . . . . . . . . . . . . . . . . . . . . . 156 Use the vCenter Plugin Once It Has Been Registered . . . . . . . 157 Quantum vmPRO User’s Guide v Contents Quantum vmPRO Support for External Monitoring . . . . . . . . . . . . . . 158 SNMP Support . . . . . . . . . . . . . . . . . . . . . . . . . . . . . . . . . . . 158 Nagios Support . . . . . . . . . . . . . . . . . . . . . . . . . . . . . . . . . . . 159 Synchronize With the Time Server . . . . . . . . . . . . . . . . . . . . . . . . . . . 160 vSphere Changed Block Tracking (CBT) Support . . . . . . . . . . . . . . . . 161 CBT Considerations . . . . . . . . . . . . . . . . . . . . . . . . . . . . . . . . 161 Enable CBT for VMs . . . . . . . . . . . . . . . . . . . . . . . . . . . . . . . 162 Schedule Your Changed Block Tracking Resets . . . . . . . . . . . 164 Configure Advanced Settings . . . . . . . . . . . . . . . . . . . . . . . . . . . . . . 166 Enable the file system integrity check during backup . . . . . . 166 Enable HotAdd Transport . . . . . . . . . . . . . . . . . . . . . . . . . . . 167 Skip reading of page file and swap partitions during backup168 Allow a SmartMotion to run even if the same policy is already running. . . . . . . . . . . . . . . . . . . . . . . . . . . . . . . . . . . . . . . . . 169 Disallow backups when there is not enough datastore space for snapshot . . . . . . . . . . . . . . . . . . . . . . . . . . . . . . . . . . . . . . . . 169 Appendix A Console Commands and vmPRO Procedures 171 Console Commands. . . . . . . . . . . . . . . . . . . . . . . . . . . . . . . . . . . . . . 171 autosupport . . . . . . . . . . . . . . . . . . . . . . . . . . . . . . . . . . . . . 173 cbt . . . . . . . . . . . . . . . . . . . . . . . . . . . . . . . . . . . . . . . . . . . . 173 config . . . . . . . . . . . . . . . . . . . . . . . . . . . . . . . . . . . . . . . . . . 173 filesys . . . . . . . . . . . . . . . . . . . . . . . . . . . . . . . . . . . . . . . . . . 174 group . . . . . . . . . . . . . . . . . . . . . . . . . . . . . . . . . . . . . . . . . . 174 help . . . . . . . . . . . . . . . . . . . . . . . . . . . . . . . . . . . . . . . . . . . 175 import. . . . . . . . . . . . . . . . . . . . . . . . . . . . . . . . . . . . . . . . . . 176 log . . . . . . . . . . . . . . . . . . . . . . . . . . . . . . . . . . . . . . . . . . . . 177 nagios . . . . . . . . . . . . . . . . . . . . . . . . . . . . . . . . . . . . . . . . . . 177 net . . . . . . . . . . . . . . . . . . . . . . . . . . . . . . . . . . . . . . . . . . . . 177 ntp . . . . . . . . . . . . . . . . . . . . . . . . . . . . . . . . . . . . . . . . . . . . 179 nw . . . . . . . . . . . . . . . . . . . . . . . . . . . . . . . . . . . . . . . . . . . . 180 smartmotion . . . . . . . . . . . . . . . . . . . . . . . . . . . . . . . . . . . . . 181 snmp. . . . . . . . . . . . . . . . . . . . . . . . . . . . . . . . . . . . . . . . . . . 182 ssh . . . . . . . . . . . . . . . . . . . . . . . . . . . . . . . . . . . . . . . . . . . . 182 system . . . . . . . . . . . . . . . . . . . . . . . . . . . . . . . . . . . . . . . . . 183 tsm . . . . . . . . . . . . . . . . . . . . . . . . . . . . . . . . . . . . . . . . . . . . 184 vss. . . . . . . . . . . . . . . . . . . . . . . . . . . . . . . . . . . . . . . . . . . . . 185 Procedures. . . . . . . . . . . . . . . . . . . . . . . . . . . . . . . . . . . . . . . . . . . . . 186 Proxy Support for Software Updates. . . . . . . . . . . . . . . . . . . 186 vi Quantum vmPRO User’s Guide Contents Install Software Updates Offline . . . . . . . . . . . . . . . . . . . . . . 186 Quantum vmPRO User’s Guide vii Contents viii Quantum vmPRO User’s Guide Figures Quantum vmPRO User’s Guide Figure 1 Total Size of VMs . . . . . . . . . . . . . . . . . . . . . . . . . . . . . . . . 5 Figure 2 Capacity Exceeded Warning . . . . . . . . . . . . . . . . . . . . . . . . 5 Figure 3 Home tab View. . . . . . . . . . . . . . . . . . . . . . . . . . . . . . . . . . 8 Figure 4 Virtual Machines tab. . . . . . . . . . . . . . . . . . . . . . . . . . . . . 10 Figure 5 Folders tab . . . . . . . . . . . . . . . . . . . . . . . . . . . . . . . . . . . . 10 Figure 6 Resources tab . . . . . . . . . . . . . . . . . . . . . . . . . . . . . . . . . . 11 Figure 7 Alerts tab . . . . . . . . . . . . . . . . . . . . . . . . . . . . . . . . . . . . . 12 Figure 8 Backup tab - VMs . . . . . . . . . . . . . . . . . . . . . . . . . . . . . . . 13 Figure 9 Backup tab - Folders . . . . . . . . . . . . . . . . . . . . . . . . . . . . . 14 Figure 10 Backup tab - Nodes . . . . . . . . . . . . . . . . . . . . . . . . . . . . . 14 Figure 11 Backup tab - Errors . . . . . . . . . . . . . . . . . . . . . . . . . . . . . . 15 Figure 12 Recovery tab . . . . . . . . . . . . . . . . . . . . . . . . . . . . . . . . . . . 15 Figure 13 History tab . . . . . . . . . . . . . . . . . . . . . . . . . . . . . . . . . . . . 16 Figure 14 SmartMotion Backup drop-down list . . . . . . . . . . . . . . . . 17 Figure 15 Configure drop-down list . . . . . . . . . . . . . . . . . . . . . . . . . 20 Figure 16 Operations drop-down list . . . . . . . . . . . . . . . . . . . . . . . . 22 Figure 17 Help drop-down list . . . . . . . . . . . . . . . . . . . . . . . . . . . . . 23 Figure 18 Quantum vmPRO GUI . . . . . . . . . . . . . . . . . . . . . . . . . . . . 26 ix Figures x Figure 19 Select Your Appliance . . . . . . . . . . . . . . . . . . . . . . . . . . . . 27 Figure 20 Select the Console tab . . . . . . . . . . . . . . . . . . . . . . . . . . . 27 Figure 21 The Console Welcome Screen . . . . . . . . . . . . . . . . . . . . . . 28 Figure 22 Console Login Prompt . . . . . . . . . . . . . . . . . . . . . . . . . . . 28 Figure 23 Console Setup Wizard: Changing Settings . . . . . . . . . . . . 29 Figure 24 Entering Networking Information. . . . . . . . . . . . . . . . . . . 32 Figure 25 Configuration Wizard Welcome Screen . . . . . . . . . . . . . . 33 Figure 26 Support Site Credentials . . . . . . . . . . . . . . . . . . . . . . . . . . 34 Figure 27 Current Licenses . . . . . . . . . . . . . . . . . . . . . . . . . . . . . . . . 35 Figure 28 Viewing Virtual Machines . . . . . . . . . . . . . . . . . . . . . . . . . 38 Figure 29 Mapping a Network Drive. . . . . . . . . . . . . . . . . . . . . . . . . 40 Figure 30 Configuration Wizard: Exiting the Wizard. . . . . . . . . . . . . 41 Figure 31 Discover Now . . . . . . . . . . . . . . . . . . . . . . . . . . . . . . . . . . 42 Figure 32 Discovery Started . . . . . . . . . . . . . . . . . . . . . . . . . . . . . . . 42 Figure 33 Accessing the Configuration Wizard. . . . . . . . . . . . . . . . . 43 Figure 34 Configuration Wizard: Welcome. . . . . . . . . . . . . . . . . . . . 43 Figure 35 Configuration Wizard: ESX Servers List . . . . . . . . . . . . . . . 44 Figure 36 Configuration Wizard: Servers (vCenter) . . . . . . . . . . . . . . 44 Figure 37 Configuration Wizard: Select Server Type . . . . . . . . . . . . . 45 Figure 38 Configuration Wizard: Add Server . . . . . . . . . . . . . . . . . . 46 Figure 39 Configuration Wizard: Configure Server . . . . . . . . . . . . . . 46 Figure 40 Configuration Wizard: Configure Server Verification . . . . 47 Figure 41 Configuration Wizard: No vCenter is Configured . . . . . . . 48 Figure 42 Configuration Wizard: Select Server Type . . . . . . . . . . . . . 48 Figure 43 Configuration Wizard: Add Server . . . . . . . . . . . . . . . . . . 49 Figure 44 Configuration Wizard: Configure Server . . . . . . . . . . . . . . 50 Figure 45 Configuration Wizard: Configure Server Verification . . . . 50 Figure 46 Configuration Wizard: No vCenter is Configured . . . . . . . 51 Figure 47 Configuration Wizard: Servers List . . . . . . . . . . . . . . . . . . 52 Quantum vmPRO User’s Guide Figures Quantum vmPRO User’s Guide Figure 48 Configuration Wizard: Select Server Type . . . . . . . . . . . . . 53 Figure 49 Configuration Wizard: Configure Server . . . . . . . . . . . . . . 53 Figure 50 Configuration Wizard: Selecting Items to Export . . . . . . . 54 Figure 51 Configuration Wizard: Configure Server Verification . . . . 55 Figure 52 Configuration Wizard: Configure Server . . . . . . . . . . . . . . 56 Figure 53 Configuration Wizard: Configure Server Verification . . . . 56 Figure 54 Configuration Wizard: Configure Server . . . . . . . . . . . . . . 57 Figure 55 Configuration Wizard: Configure Server Verification . . . . 58 Figure 56 Configuration Wizard: Deleting a Server. . . . . . . . . . . . . . 59 Figure 57 Configuration Wizard: No vCenter is Configured . . . . . . . 60 Figure 58 Accessing User Management . . . . . . . . . . . . . . . . . . . . . . 61 Figure 59 Configure User List . . . . . . . . . . . . . . . . . . . . . . . . . . . . . . 62 Figure 60 Configure User . . . . . . . . . . . . . . . . . . . . . . . . . . . . . . . . . 62 Figure 61 Configure Email . . . . . . . . . . . . . . . . . . . . . . . . . . . . . . . . 64 Figure 62 Configure Reports and Alerts . . . . . . . . . . . . . . . . . . . . . . 65 Figure 63 Configuration Wizard: Time & NTP . . . . . . . . . . . . . . . . . . 66 Figure 64 Software Updates Bar. . . . . . . . . . . . . . . . . . . . . . . . . . . . 67 Figure 65 Accessing Software Updates. . . . . . . . . . . . . . . . . . . . . . . 68 Figure 66 Configure Software Updates . . . . . . . . . . . . . . . . . . . . . . 68 Figure 67 Selecting the SmartMotion Backup Options . . . . . . . . . . . 74 Figure 68 Selecting the Backup Policy . . . . . . . . . . . . . . . . . . . . . . . 75 Figure 69 Backup Progress . . . . . . . . . . . . . . . . . . . . . . . . . . . . . . . . 75 Figure 70 Viewing Backed up VMs . . . . . . . . . . . . . . . . . . . . . . . . . . 76 Figure 71 Available Storage . . . . . . . . . . . . . . . . . . . . . . . . . . . . . . . 77 Figure 72 Configure Storage . . . . . . . . . . . . . . . . . . . . . . . . . . . . . . 78 Figure 73 One DXi Configured for Additional Storage . . . . . . . . . . . 79 Figure 74 More than one DXi Configured for Additional Storage. . . 79 Figure 75 Available Backup Policies . . . . . . . . . . . . . . . . . . . . . . . . . 80 Figure 76 Configure SmartMotion Backup Policy - Add . . . . . . . . . . 81 xi Figures Figure 77 Configure Folder Assignments . . . . . . . . . . . . . . . . . . . . . 83 Figure 78 Retention - Daily . . . . . . . . . . . . . . . . . . . . . . . . . . . . . . . . 86 Figure 79 Retention - Weekly . . . . . . . . . . . . . . . . . . . . . . . . . . . . . . 87 Figure 80 Retention - Monthly . . . . . . . . . . . . . . . . . . . . . . . . . . . . . 87 Figure 81 Retention - Annual . . . . . . . . . . . . . . . . . . . . . . . . . . . . . . 88 Figure 82 Configure SmartMotion Backup Policy - Modify . . . . . . . . 89 Figure 83 Selecting VMs to Export . . . . . . . . . . . . . . . . . . . . . . . . . . 90 Figure 84 Configure Virtual Machine . . . . . . . . . . . . . . . . . . . . . . . . 91 Figure 85 Accessing the Recovery Wizard. . . . . . . . . . . . . . . . . . . . . 94 Figure 86 Recover Virtual Machines Wizard . . . . . . . . . . . . . . . . . . . 94 Figure 87 Select Recover from . . . . . . . . . . . . . . . . . . . . . . . . . . . . . 95 Figure 88 Select Directory-storage view . . . . . . . . . . . . . . . . . . . . . . 96 Figure 89 Select Directory-folder view . . . . . . . . . . . . . . . . . . . . . . . 96 Figure 90 Select Directory-VMs view . . . . . . . . . . . . . . . . . . . . . . . . 97 Figure 91 Recover Virtual Machines Wizard Recovery Type . . . . . . . 97 Figure 92 Select Target Virtual Machine . . . . . . . . . . . . . . . . . . . . . . 99 Figure 93 Starting a Recovery for a VM . . . . . . . . . . . . . . . . . . . . . 100 Figure 94 Select Recovery Policy . . . . . . . . . . . . . . . . . . . . . . . . . . . 101 Figure 95 Recovery Confirmation . . . . . . . . . . . . . . . . . . . . . . . . . . 101 Figure 96 Recovery Started. . . . . . . . . . . . . . . . . . . . . . . . . . . . . . . 102 Figure 97 Recovery of VMs . . . . . . . . . . . . . . . . . . . . . . . . . . . . . . . 102 Figure 98 iSCSI Write Area Settings . . . . . . . . . . . . . . . . . . . . . . . . 104 Figure 99 Microsoft Exchange 2013 Exchange Admin Center. . . . . 105 Figure 100 Select Members 2013 . . . . . . . . . . . . . . . . . . . . . . . . . . . 106 Figure 101 Role Group 2013 . . . . . . . . . . . . . . . . . . . . . . . . . . . . . . 107 Figure 102 Microsoft Exchange 2010 Exchange Admin Center. . . . . 108 Figure 103 Select Members 2010 . . . . . . . . . . . . . . . . . . . . . . . . . . . 109 Figure 104 Organization Management Properties 2010 . . . . . . . . . . 110 Figure 105 Select Exchange Database . . . . . . . . . . . . . . . . . . . . . . . 111 xii Quantum vmPRO User’s Guide Figures Figure 106 Browse to Edb File . . . . . . . . . . . . . . . . . . . . . . . . . . . . . 112 Figure 107 Enter VMware Credentials . . . . . . . . . . . . . . . . . . . . . . . 112 Figure 108 Enter Exchange Server Credentials . . . . . . . . . . . . . . . . . 113 Figure 109 Recovery Database Status . . . . . . . . . . . . . . . . . . . . . . . . 114 Figure 110 Select Mailbox to Recover. . . . . . . . . . . . . . . . . . . . . . . . 114 Figure 111 Access the Tasks Tab for Recovery Progress . . . . . . . . . . 115 Figure 112 Tasks Tab Restore Progress . . . . . . . . . . . . . . . . . . . . . . . 116 Figure 113 Restore Progress Status . . . . . . . . . . . . . . . . . . . . . . . . . 116 Figure 114 Mailbox Successfully Restored . . . . . . . . . . . . . . . . . . . . 116 Figure 115 Database Cleanup. . . . . . . . . . . . . . . . . . . . . . . . . . . . . . 117 Figure 116 Obtain the Recovery Database Name . . . . . . . . . . . . . . . 118 Figure 117 Dismount the Recovery Database . . . . . . . . . . . . . . . . . . 118 Figure 118 Remove the Recovery Database . . . . . . . . . . . . . . . . . . . 118 Figure 119 Disk Management . . . . . . . . . . . . . . . . . . . . . . . . . . . . . 119 Figure 120 Volumes Mounted by vmPRO . . . . . . . . . . . . . . . . . . . . . 119 Figure 121 Take Volumes Offline . . . . . . . . . . . . . . . . . . . . . . . . . . . 120 Figure 122 Disconnect vmPRO Targets . . . . . . . . . . . . . . . . . . . . . . . 121 Figure 123 Remove the vmPRO Portal . . . . . . . . . . . . . . . . . . . . . . . 122 Figure 124 iSCSI Targets . . . . . . . . . . . . . . . . . . . . . . . . . . . . . . . . . . 122 Figure 125 Delete the iSCSI Target . . . . . . . . . . . . . . . . . . . . . . . . . . 123 Figure 126 Enable Disks for iSCSI Export . . . . . . . . . . . . . . . . . . . . . 124 Figure 127 iSCSI Targets Disks’ Information . . . . . . . . . . . . . . . . . . . 125 Figure 128 Discover vmPRO . . . . . . . . . . . . . . . . . . . . . . . . . . . . . . . 125 Figure 129 Discover Target vmPRO. . . . . . . . . . . . . . . . . . . . . . . . . . 126 Figure 130 Connect to target vmPRO . . . . . . . . . . . . . . . . . . . . . . . . 127 Figure 131 Connect to Target Advanced Options . . . . . . . . . . . . . . . 127 Figure 132 Advanced Setting for Target vmPRO. . . . . . . . . . . . . . . . 128 Figure 133 iSCSI Disk Connected . . . . . . . . . . . . . . . . . . . . . . . . . . . 129 Figure 134 Recovering an Individual File . . . . . . . . . . . . . . . . . . . . . 133 Quantum vmPRO User’s Guide xiii Figures Figure 135 Group Membership . . . . . . . . . . . . . . . . . . . . . . . . . . . . 137 Figure 136 Creating a New Group . . . . . . . . . . . . . . . . . . . . . . . . . . 138 Figure 137 Joining an Existing Group . . . . . . . . . . . . . . . . . . . . . . . . 139 Figure 138 Lists of Nodes . . . . . . . . . . . . . . . . . . . . . . . . . . . . . . . . . 140 Figure 139 Adding a Node Column . . . . . . . . . . . . . . . . . . . . . . . . . 140 Figure 140 Selecting a Node. . . . . . . . . . . . . . . . . . . . . . . . . . . . . . . 141 Figure 141 Operations drop-down list . . . . . . . . . . . . . . . . . . . . . . . 143 Figure 142 Remove the Old Nodes . . . . . . . . . . . . . . . . . . . . . . . . . . 144 Figure 143 Folders tab . . . . . . . . . . . . . . . . . . . . . . . . . . . . . . . . . . . 146 Figure 144 Configure Folder. . . . . . . . . . . . . . . . . . . . . . . . . . . . . . . 146 Figure 145 Selecting VMs to Move . . . . . . . . . . . . . . . . . . . . . . . . . . 147 Figure 146 Configure Virtual Machine . . . . . . . . . . . . . . . . . . . . . . . 148 Figure 147 Selecting VMs to Enable For Quiesce . . . . . . . . . . . . . . . 151 Figure 148 Configure Virtual Machine . . . . . . . . . . . . . . . . . . . . . . . 152 Figure 149 Enable Quiesce . . . . . . . . . . . . . . . . . . . . . . . . . . . . . . . . 153 Figure 150 VMs List (Quiesce Enabled) . . . . . . . . . . . . . . . . . . . . . . . 153 Figure 151 Regedit Uninstall . . . . . . . . . . . . . . . . . . . . . . . . . . . . . . 155 Figure 152 Configuration Wizard: vCenter Plugin . . . . . . . . . . . . . . 156 Figure 153 Register vCenter Plugin. . . . . . . . . . . . . . . . . . . . . . . . . . 157 Figure 154 Synchronize With Time Server. . . . . . . . . . . . . . . . . . . . . 160 Figure 155 Synchronize Time Dialog. . . . . . . . . . . . . . . . . . . . . . . . . 160 Figure 156 Selecting VMs to Enable For CBT . . . . . . . . . . . . . . . . . . 163 Figure 157 Configure Virtual Machine . . . . . . . . . . . . . . . . . . . . . . . 163 Figure 158 VMs List (CBT Enabled) . . . . . . . . . . . . . . . . . . . . . . . . . . 164 Figure 159 Scheduling CBT Resets . . . . . . . . . . . . . . . . . . . . . . . . . . 165 Figure 160 Configure Advanced Settings . . . . . . . . . . . . . . . . . . . . . 166 Figure 161 Configuring Proxy Settings . . . . . . . . . . . . . . . . . . . . . . . 186 xiv Quantum vmPRO User’s Guide Tables Quantum vmPRO User’s Guide Table 1 SmartMotion Task Information. . . . . . . . . . . . . . . . . . . . . 13 Table 2 SNMP MIBs . . . . . . . . . . . . . . . . . . . . . . . . . . . . . . . . . . . 158 Table 3 Nagios Commands . . . . . . . . . . . . . . . . . . . . . . . . . . . . . 159 Table 4 Nagios Console Commands . . . . . . . . . . . . . . . . . . . . . . 159 Table 5 vSphere HotAdd Licensing . . . . . . . . . . . . . . . . . . . . . . . 168 xv Tables xvi Quantum vmPRO User’s Guide Preface This manual introduces the Quantum vmPRO and discusses its configuration and operation. Audience This manual is written for Quantum vmPRO operators and administrators. It is assumed that this audience has at least a basic understanding regarding the use and function of the following products and applications: • VMware • UNIX® • backup and recovery systems Document Organization Following is a brief description of chapter contents. • Chapter 1, Quantum vmPRO Overview provides an overview of all the functions and features that can be accessed from the vmPRO GUI. • Chapter 2, Getting Started With Quantum vmPRO provides information about accessing and configuring Quantum vmPRO. • Chapter 3, Back Up and Store Data With Quantum vmPRO provides information about using the vmPRO tools and features that allow you to back up and store your data. Quantum vmPRO User’s Guide xvii Preface • Chapter 4, Recover Data With Quantum vmPRO provides information about using the vmPRO tools and features that allow you to recover your data. • Chapter 5, Using Groups and Folders With Quantum vmPRO provides information about how to create, set up, and manage groups and folders for more efficient and faster backups. • Chapter 6, Quantum vmPRO Advanced Use provides information about advanced features of Quantum vmPRO. • Appendix A, Console Commands and vmPRO Procedures provides a list of Quantum vmPRO console commands and usage information. Notational Conventions This manual uses the following conventions: Convention Example User input is shown in bold font. cd /tmp/VISION/ Computer output and command line examples are shown in monospace font. Sample output User input variables are enclosed in angle brackets. http://<ip_address> For UNIX and Linux commands, the command prompt is implied. ./setup-linux.bin is the same as # ./setup-linux.bin File and directory names, menu commands, button names, and window names are shown in bold font. /tmp/VISION/ Menu names separated by arrows indicate a sequence of menus to be navigated. Configuration > Licensing The following formats indicate important information: xviii Quantum vmPRO User’s Guide Preface Note: Note emphasizes important information related to the main topic. Caution: Caution indicates potential hazards to equipment or data. WARNING: Warning indicates potential hazards to personal safety. Related Documents The following Quantum documents are also available for Quantum vmPRO: Document No. Quantum vmPRO User’s Guide Document Title Document Description 6-67534 Quantum vmPRO Release Notes Compatibility and support information about the latest release of Quantum vmPRO. 6-66527 Quantum Vision User’s Guide Describes the Quantum Vision web-based user interface, management, configuration, and operation. 6-67612 Quantum DXi V-Series User’s Guide Describes Quantum’s DXi V-Series appliances (DXi V1000 and DXi V4000) Webbased user interface, operations, and configuration. xix Preface Document No. 6-67081 Document Title Quantum DXi-Series Command Line Interface (CLI) Guide Document Description Describes the CLI commands for DXi V-Series Software. For the most up to date information on Quantum vmPRO, see: http://www.quantum.com/ServiceandSupport/Index.aspx Contacts For information about contacting Quantum, including Quantum office locations, go to: http://www.quantum.com/aboutus/contactus/index.aspx Comments To provide comments or feedback about this document, or about other Quantum technical publications, send e-mail to: [email protected] Getting More Information or Help StorageCare™, Quantum’s comprehensive service approach, leverages advanced data access and diagnostics technologies with crossenvironment, multi-vendor expertise to resolve backup issues faster and at lower cost. Accelerate service issue resolution with these exclusive Quantum StorageCare services: • Service and Support Website - Register products, license software, browse Quantum Learning courses, check backup software and operating system support, locate manuals, FAQs, firmware downloads, product updates and more in one convenient location: http://www.quantum.com/ServiceandSupport/Index.aspx xx Quantum vmPRO User’s Guide Preface Note: For Standard Edition users, documentation, community support, and other resources are available through Forum V (http://www.quantum.com/forumv, Quantum's online support forum for virtualization products.) • eSupport - Submit online service requests, update contact information, add attachments, and receive status updates via email. Online Service accounts are free from Quantum. That account can also be used to access Quantum’s Knowledge Base, a comprehensive repository of product support information. Sign up today at: http://www.quantum.com/osr • StorageCare Guardian - Securely links Quantum hardware and the diagnostic data from the surrounding storage ecosystem to Quantum's Global Services Team for faster, more precise root cause diagnosis. StorageCare Guardian is simple to set up through the internet and provides secure, two-way communications with Quantum’s Secure Service Center. More StorageCare Guardian information can be found at: http://www.quantum.com/ServiceandSupport/Services/ GuardianInformation/Index.aspx For further assistance or if training is desired, contact the Quantum Customer Support Center: United States Toll Free: 1-800-284-5101 Toll: +1-720-249-5700 Europe, the Middle East, and Africa (EMEA) Toll Free: +800-7826-8888 Asia and Pacific (APAC) Toll Free: +800-7826-8887 Toll: +49-6131-3241-1164 Toll: +603-7953-3010 For worldwide support: http://www.quantum.com/ServiceandSupport/Index.aspx Quantum vmPRO User’s Guide xxi Preface Worldwide End-User Product Warranty For more information on the Quantum Worldwide End-User Standard Limited Product Warranty: http://www.quantum.com/serviceandsupport/warrantyinformation/ index.aspx xxii Quantum vmPRO User’s Guide Chapter 1 Quantum vmPRO Overview This chapter introduces the Quantum vmPRO and describes the Quantum vmPRO’s requirements, interface with Quantum Vision, and presents an overview of the vmPRO’s Graphical User Interface (GUI). • Quantum vmPRO • Quantum vmPRO Requirements • Quantum vmPRO Capacity License Calculations • Quantum vmPRO and Quantum Vision • Quantum vmPRO GUI Quantum vmPRO The Quantum vmPRO is a light-weight, agentless backup application that protects data in its native format. vmPRO is a virtual appliance that consists of a Linux virtual server running vmPRO software; vmPRO is deployed into a compatible customer-provided VMware vSphere ESX or ESXi environment. At the heart of your vmPRO is SmartMotion™. SmartMotion™ provides the backup services by initiating a scheduled push of specified vmdk files to any specified NAS mount point. The mount point can be resident on plain NAS storage or on a deduplication system such as the Quantum DXi. In addition SmartView™ can present the ESX environment as a Quantum vmPRO User’s Guide 1 Chapter 1: Quantum vmPRO Overview Quantum vmPRO Requirements virtual NAS file system (an NFS or CIFS share). This provides a simple integration point for third-party applications. In the background, progressive optimization, which includes leaving out whitespace, deleting any unused blocks, and organizing the data stream for efficiency, is performed on the vmdk files whenever a read on the virtual file system is initiated. vmPRO Highlights The Quantum vmPRO provides the following functions and capabilities: • Provides native format access to backed up data (CIFS or NFS), as well as provides restores with drag and drop functionality. • Runs on a self-contained VM appliance with no extra agents or dedicated servers. • Provides image-level backup and restore capabilities, as well as direct file-level restore capabilities thru SmartView™. • Auto-discovers VMs for better protection in dynamic environments. • Recovers archived data without proprietary backup applications from any medium (disk, tape and cloud). • Uses vStorage API to access all VMs – running or idle – from one location (Compatible with Change-Block Tracking). • Supports full manageability within a vCenter console. • Supports vSphere 4.X and vSphere 5.X environments. • Provides VSS support for Windows Shadow Services. • Reduces host, network, and storage resources by up to 75% with patented Progressive Optimization. Quantum vmPRO Requirements The following are the system requirements for the Quantum vmPRO appliance: • One or more VMware ESX or ESXi servers, versions 4.0 update 2 or later (Only paid versions of VMware ESX or ESXi servers should be 2 Quantum vmPRO User’s Guide Chapter 1: Quantum vmPRO Overview Quantum vmPRO Requirements used. Free versions have various API limitations that prohibit vmPRO from functioning as designed.); or a VMware vCenter server, version 4.0 update 2 or later. • 12 GB of free disk space. • At least 1280 MB of free RAM. • Gigabit NIC port for data movement on the Quantum vmPRO host server. • Internet Explorer and Firefox with Adobe Flash 9 or Flash 10 plugin. Notes The following section presents helpful information that will assist you when setting up and configuring your vmPRO backup solution. • If you plan to use more than one vmPRO as part of your backup solution, the vmPROs should be set up in a group configuration. • If multiple VLANS are present, the Quantum vmPRO network should be configured on the VLAN that has access to the ESX or vCenter server(s) to be protected. This VLAN must be accessible by the backup software client that connects to the Quantum vmPRO network. • In environments with DHCP, the Quantum vmPRO appliance automatically acquires a network address. However, Quantum recommends configuring a static IP address during configuration. • On Windows Backup Servers, the Quantum vmPRO appliance can join an Active Directory domain, and any authenticated user can be used for CIFS backup. When there is not an Active Directory integration, a local user with the same user context as the Quantum vmPRO admin user (sysadmin/sysadmin) is needed for CIFS backups. • In environments with numerous ESX or ESXi servers and many virtual machines, multiple Quantum vmPRO appliances may be deployed on more than one ESX or ESXi servers to increase overall performance and throughput. • Do not clone a vmPRO. Cloned appliances are not supported. Quantum vmPRO User’s Guide 3 Chapter 1: Quantum vmPRO Overview Quantum vmPRO Capacity License Calculations Quantum vmPRO Capacity License Calculations The vmPRO appliance uses a Capacity License that is enforced based upon the total allocated capacity of all virtual machines exported (see Selecting VMs for Export on page 90) to a vmPRO instance (a single vmPRO appliance). If you exceed the capacity license, you will receive error messages, but your backups will still function and you can still restore data. Note: Customers who purchase a Quantum vmPRO 4000 product receive a target-based license for their vmPRO environment. This license has no capacity limit or calculation, but is limited to using just a single share as a target in backup policies. VMware provides the vmPRO appliance the information it needs to determine the maximum allocated size of each virtual machine (VM) that has been selected for export. Even though the VM may be using only a percent of its maximum capacity, the vmPRO uses the maximum capacity value for its calculations. For example: a VM has a maximum allocation of 250 GB but is actually using only 115 GB. The vmPRO uses 250 GB for its capacity license calculations. Since an exported VM’s maximum allocated size counts toward your capacity license, we advise that you do not export a VM until you want to include it in your backup. It is a good practice to keep a record of the disk space allocated to each VM when you create them in VMware. This record gives you a good estimation of the capacity that you need. vmPRO 3.1 and later have a Size column that can be displayed on the VMs tab. The Size column displays the size of each VM. Use this information to determine how much capacity you will need (see Figure 4). You can also use your operating system to determine your capacity requirements. When you have selected (for export) all the VMs you plan to backup, do the following: 1 Using Windows Explorer (assuming Windows), browse to the \\<vmpro-host-ipaddress>\export share. 2 Select all the VMs you are backing up. 4 Quantum vmPRO User’s Guide Chapter 1: Quantum vmPRO Overview Quantum vmPRO Capacity License Calculations 3 Right-click on the selected VMs, and select Properties. 4 The Properties dialog box displays a total Size calculation for the selected VMs. That number is the size of the capacity license that you need (see Figure 1). In this case, you can see that you would need approximately 2.8 TB of disk space. Note: The target DXi, the actual disk space used by the VM, and the use of thin provisioning have no impact on the size calculation. Figure 1 Total Size of VMs Should you exceed your capacity, the vmPRO GUI will display a warning banner (see Figure 2). The backup still continues; however, you will continue to receive error messages. At this point, you should contact your Quantum sales representative to purchase a capacity license, and then add the capacity license to your vmPRO (see Licenses on page 33). Figure 2 Capacity Exceeded Warning If you have configured your vmPRO to support Upload a report to Quantum support site every day (see Emails, Reports, Alerts, and Quantum vmPRO User’s Guide 5 Chapter 1: Quantum vmPRO Overview Quantum vmPRO and Quantum Vision Autosupport on page 62), Quantum can actually tell you what capacity you are currently using. Quantum vmPRO and Quantum Vision Quantum Vision provides various interactive status, history, and device reports using at-a-glance status reports and automatically generated alerts to provide an overview of all systems. Quantum Vision also provides trend analysis and real-time data capture that help users make decisions concerning capacity planning, troubleshooting, replication operations, and performance tuning. Vision will accesses the vmPRO API to gather alert and backup information to fulfill its status and reporting requirements. Quantum vmPRO GUI The following is an overview of the functions and options you can access from the Quantum vmPRO GUI. The overview contains the following sections: • Home • VMs • Alerts • Tasks • SmartMotion Backup • Configure • Operations • Help • Refresh 6 Quantum vmPRO User’s Guide Chapter 1: Quantum vmPRO Overview Quantum vmPRO GUI Home The Home tab displays a general status view of the appliance. The following information is presented (see Figure 3): Active Alerts This panel displays all the alerts that the appliance has received within the past 24 hours. The most recent alert is displayed. To view all the alerts for your vmPRO appliance, click the See all alerts link. Last 24 Hrs SmartRead This panel displays the amount of data that has been moved (backed up) within the past 24 hours. Hold the cursor over a line or bar on the chart to see details about the underlying data. Last 24 Hrs I/O Reduction This panel displays the amount of data reduction achieved within the past 24 hours. Hold the cursor over a line or bar on the chart to see details about the underlying data. Summary This pane displays the number of Servers and VMs (Virtual Machines) that the appliance is managing. If DXis are configured for additional storage, this pane displays information regarding those DXis (see Access a DXi for Additional Storage on page 78). If there are DXis configured for additional storage, the DXi Target link will open the native management interface for the DXi. If more than one DXi is available for extra storage, the X Configured DXi link (where X is the number of DXis that have been added for storage) displays the Available Storage dialog box (see Figure 71 on page 77). For VMs, the number of VMs that are Exported and the number that need attention are displayed. The Needs Attention link opens the Resources display (same as that accessed from the VMs tab) allowing you to get more information regarding the VMs that need attention. Network Throughput This pane displays the speed at which the current session is processing. You can select to view the throughput as Combined (both data received and transmitted), Receive (data sent to the vmPRO, such as a recovery), or Transmit (data sent from the vmPRO, Quantum vmPRO User’s Guide 7 Chapter 1: Quantum vmPRO Overview Quantum vmPRO GUI such as a backup). To view the network throughput, select the appropriate tab or link (Once a tab is selected, the other two choices will have links in the bottom right area of the Network Throughput pane.) You can also select Stop or Start to control when the throughput is displayed. Figure 3 Home tab View VMs The VMs tab displays status information about the virtual machines that are resident on the appliance. The following information is presented: Virtual Machines The Virtual Machines tab (see Figure 4) displays the following information for each VM: Name, Datastore, Server, Node, Exported, Size, VSS, LogTr (log truncation), and CBT. The information displayed can be modified to your preferences by selecting the columns to display from the Select Columns dropdown list. The screen’s lower pane displays a summary of the selected VM's main attributes. 8 Quantum vmPRO User’s Guide Chapter 1: Quantum vmPRO Overview Quantum vmPRO GUI You can filter the list of displayed VMs my using the Search option, and you can clear any search criteria by selecting clear. You can modify the VMs’ settings by selecting the VMs and then selecting Edit Selected VMs to display the Configure Virtual Machine dialog box. Use the Configure Virtual Machine dialog box to modify the VMs’ configuration settings: Node, Folder, Exported, Change Block Tracking Enabled, and VSS Configuration settings (for Microsoft Windows-based VMS only). On the Configure Virtual Machine dialog box you can also access VSS information, and the VM’s quiesce and log truncation settings by selecting Configure VSS Settings (see Enable Quiesce for VMs on page 151). Select or clear Automatically export new VMs for the Virtual Machines. By default, when you deploy a new appliance, the Auto-Export feature is enabled. This setting automatically enables SmartView and SmartMotion capabilities for any new VM discovered in the vCenter inventory. This feature is convenient for un-attended backups of remote, isolated, or fully automated vSphere environments, and it is good for scheduled backups on systems where VMs are moving from server to server frequently. With this feature enabled, the vmPRO appliance recognizes when VMware moves VMs. Keep in mind that automatic does not mean set-and-forget. Each VM that is protected consumes space on the target storage device. As the population of VMs grows, so does the storage requirement. To monitor storage requirements, set the threshold at which you receive alerts regarding your capacity (see Licenses on page 33. Please note the following when using the Auto-Export feature: • Use Auto-Export with caution since excessive addition of VMs to a backup job may cause it to run longer than anticipated. • Be mindful of the capacity and utilization of the target storage when using Auto-Export – too many new VMs may overburden the target. • Use caution when enabling Auto-Export in large environments. • Account for any new VMs that may become Auto-Exported due to a vMotion/DRS operation relocating them onto a vSphere host being managed by vmPRO, and then plan for available capacity in your backup target. Quantum vmPRO User’s Guide 9 Chapter 1: Quantum vmPRO Overview Quantum vmPRO GUI Figure 4 Virtual Machines tab Search Folders The Folders tab (see Figure 5) allows you to add, back up, edit (configure), or delete a folder. For each folder, the Folder Name, Number of VMs, Total Size of Exported VMs, Transport Method CBT Reset, and Actions (edit, backup, delete) are displayed. For more information regarding the use of folders, see Create and Manage Folders on page 145 Figure 5 Folders tab 10 Quantum vmPRO User’s Guide Chapter 1: Quantum vmPRO Overview Quantum vmPRO GUI Resources The Resources tab (see Figure 6) displays a list of Servers and a list of Nodes. You can add ESX servers (vCenter servers must be added through the Congfig Wizard), edit servers (change a server’s Label and the authentication Username and password), or delete servers from the Configure Serve List dialog box. For nodes, you can edit a node’s Label, send an email notification, or delete a node from the Configure Node List dialog box. The Total Size of Exported VMs for the nodes is also displayed. Figure 6 Resources tab Alerts The Alerts tab (see Figure 7) displays a list of current alerts and an Alert History list. For both lists, the following information is presented for each alert: Time, Severity, Node, and Message. You can clear alerts that are displayed in the current alerts list by selecting the red X in the list’s last column. For the Alert History list, the Cleared Time and Cleared By columns can be displayed for each alert. The information displayed in the Alert History list can be modified to your preferences by selecting the columns to display from the Select Columns drop-down list. Quantum vmPRO User’s Guide 11 Chapter 1: Quantum vmPRO Overview Quantum vmPRO GUI Figure 7 Alerts tab Tasks The Tasks tab displays information about the following topics: Backup The Backup tab (see Figure 8) displays Recent SmartMotion Backup activity and allows you to View Policies, start a backup by selecting Start Backup, or stop a backup by selecting Abort Backup. For each SmartMotion task, tabs display the following information: 12 Quantum vmPRO User’s Guide Chapter 1: Quantum vmPRO Overview Quantum vmPRO GUI Table 1 SmartMotion Task Information VMs • • • • • • • • • VM Name Status Error Copy type File Size Savings Elapsed Time Start Time End Time Folders Nodes • Folder • Num VMs (number of virtual machines) • Status • Num Errors (number of errors) • Node • Num VMs • Status Errorsa • VM Name • Error Message a.This tab displays only when there are errors. View Policies allows you to Create a new policy, Set default policy, edit an existing policy, or delete a policy from the Available Backup Policy dialog box. For more information regarding these tasks, see Using Backup Policies on page 79. Figure 8 Backup tab - VMs Quantum vmPRO User’s Guide 13 Chapter 1: Quantum vmPRO Overview Quantum vmPRO GUI Figure 9 Backup tab - Folders Figure 10 Backup tab - Nodes 14 Quantum vmPRO User’s Guide Chapter 1: Quantum vmPRO Overview Quantum vmPRO GUI Figure 11 Backup tab - Errors VM Recovery The Recovery tab (see Figure 12) allows you to start a Recover VMs task. For each recovered VM, its Name, Status, Start Time, Elapsed Time, and Progress are displayed. Once a recovery is in process, the Recover VMs option will change to Abort Recovery. Figure 12 Recovery tab Quantum vmPRO User’s Guide 15 Chapter 1: Quantum vmPRO Overview Quantum vmPRO GUI History The History tab (see Figure 13) displays the Time, Command, Node, Object, and Status associated with each task. Figure 13 History tab SmartMotion Backup The SmartMotion Backup drop-down list (see Figure 14) allows you to perform the following functions: Backup Select Backup to begin a SmartMotion backup session by selecting the backup policy in the Run SmartMotion Backup dialog box. You can also edit the policy before starting the backup. Recover Select Recover to open the Recover Virtual Machine Wizard to recover VMs. You can recover all VMs, select VMs based on various filtering options, or manually choose the VMs that you want to recover. In addition, you can recover mailboxes on an exchange server. iSCSI Targets Select iSCSI Targets to view backed up virtual disks that you have exported as iSCSI targets. These iSCSI target disks can then be accessed by using the Microsoft iSCSI Initiator and then mounted as iSCSI disks on remote hosts. The Microsoft iSCSI Initiator allows you to connect a Windows host to an external iSCSI device using an Ethernet connection. This allows you to use your existing network infrastructure to enable block16 Quantum vmPRO User’s Guide Chapter 1: Quantum vmPRO Overview Quantum vmPRO GUI based Storage Area Networks without the need for additional hardware. Backup Policies Select Backup Policies to Create a new policy, Set default policy, edit an existing policy, edit the folder assignments for the policy, or delete a policy from the Available Backup Policy dialog box. For more information about creating and using backup policies, see Using Backup Policies on page 79 Storage Select Storage to add, edit (configure), or delete storage from the Available Storage dialog box. To add or edit storage, you will enter or modify the Hostname, Nickname, Device, Protocol, Share, Subfolder, Mount options, (for CIFS protocol) CIFS User, CIFS and Password. Figure 14 SmartMotion Backup drop-down list For more information regarding the use of SmartMotion, see Using SmartMotion Backup on page 72. Configure The Configure drop-down list (see Figure 15) allows you to configure or access the following components: Servers Select Servers to add a server to the appliance, modify an existing server’s configuration, or delete a server from the appliance. You can enter or modify the server’s Hostname (add), Label, Username, and Password in the Configure Server dialog box. You can use either a single vCenter server or one or more standalone ESX hosts, but not both simultaneously. Also, if you are adding a Quantum vmPRO User’s Guide 17 Chapter 1: Quantum vmPRO Overview Quantum vmPRO GUI vCenter server, we recommend using the Configuration Wizard (see Servers on page 35). Since vCenter servers can be very large, the Configuration Wizard gives you the opportunity to designate a subset of the vCenter to be exported by the appliance. CIFS Select CIFS to configure all vmPRO CIFS shares, whichs allows you to configure your vmPRO appliance to use the CIFS protocol for your backups. You can select or clear the Enable CIFS access option. If you have chosen to enable CIFS access, select an Authentication Method, enter the Workgroup name, add Users, and select or clear the Enable Quantum Support share option in the Configure CIFS dialog box. NFS Select NFS to configure a NFS share, which allows you to configure your vmPRO to use the NFS protocol for your backups.You can select or clear the Enable NFS Access option. If you have chosen to enable NFS access, select Add NFS Export to select the Export path, enter the Host Specification, and enter any Options (comma separated list, such as: ro,insecure,anonid=500,no_root_squash) in the Add NFS Export dialog box. For existing NFS shares, you can edit their NFS export information or delete the share from the Client Access Control section of the Configure NFS dialog box. iSCSI Select iSCSI to configure the storage area and maximum target size of the write area for a backup exposed as an iSCSI target. Email Select Email to set your From Address for all email sent by the appliance. You will also enter the SMTP Server (see Email on page 37) information in the Configure Email dialog box. Reports & Alerts Select Reports & Alerts to create a Recipients list of email addresses to receive reports and alert emails. You can also select or clear the CC: Quantum Support Team option, select or clear the Email a report every day option, select or clear the Include CSV 18 Quantum vmPRO User’s Guide Chapter 1: Quantum vmPRO Overview Quantum vmPRO GUI attachment on SmartMotion reports option, select or clear the Upload a report to Quantum support site every day option, and select the email Format. In addition, you can view or send the report by selecting the View Report Now or Send Report Now options in the Configure Reports & Alerts dialog box. Advanced Settings Select Advanced Settings to enable or disable the following features: For more information regarding these features, see Configure Advanced Settings on page 166. • Enable the file system integrity check during backup. • Enable HotAdd Transport for all folders by default. (Please read Enable HotAdd Transport on page 167 before enabling this feature.) • Skip reading of page file and swap partitions during backup. • Allow a SmartMotion to run even if the same policy is already running. • Disallow backups when there is not enough datastore space for snapshot Users Select Users to add users. You can enter the User name, Password, and select users access privileges in the Configure User List dialog box. Downloads Select Downloads to download reports and existing support bundles by browsing to https://<ip-address>/api/download. You can clear or select Enable downloadable files from the Quantum vmPRO, clear or select Require HTTP authentication, and edit the wget command to allow downloadable files from the appliance in the Configure Downloads dialog box. Software Updates Select Software Updates to schedule and check for vmPRO software updates. Select Check now to check for software updates. You can also select to automatically check for software updates Quantum vmPRO User’s Guide 19 Chapter 1: Quantum vmPRO Overview Quantum vmPRO GUI daily or weekly in the Configure Software Updates dialog box. A list of currently available updates is also displayed. Config Wizard Select Config Wizard to access the Quantum vmPRO Configuration Wizard. The Quantum vmPRO Configuration Wizard initiates wizards that guide you through the configuration steps for Licenses, Servers, File Sharing, Storage, Backup Policies Email, Reports & Alerts, Time & NTP, and vCenter Plugin. Figure 15 Configure drop-down list Operations The Operations drop-down list (see Figure 16) allows you to perform or access the following functions: Discover Now Select Discover Now to find (discover) all the virtual machines that are candidates for export (can be backed up). View Report Select View Report to display the following information: Report time, Report Reason, vmPRO URL, Admin Email, Version, System Uptime, Controller UUID, Current Alerts, Alerts from Log, Licenses, (Group Member, if the vmPRO is a member of a group) Configured 20 Quantum vmPRO User’s Guide Chapter 1: Quantum vmPRO Overview Quantum vmPRO GUI Servers, Virtual Machines, SmartMotion, Alert History, Command History, Performance History, VM Statistics, vmPRO Appliance Status, and Log files. A report is created for each SmartMotion backup policy. Synchronize With Time Server Select Synchronize With Time Server to synchronize system time with the time servers. Gather Support Logs Select Gather Support Logs to create and upload support packages to assist Quantum technical support. Export vmPRO Configuration Select Export vmPRO Configuration to save a copy of your current configuration. Note: The vmPRO allows you to back up (save off-site) a copy of the vmPRO’s current XML configuration file (see Create a new Backup Policy, Step 2 on page 81). The contents of this file allows you to restore your vmPRO’s configuration in the event of a disaster recovery scenario. Import vmPRO Configuration Select Import vmPRO Configuration to import a saved configuration. Note: Importing is only supported by vmPRO appliances with factory default settings. Change My Password Select Change My Password to change your current password. This function changes the password for both the vmPRO GUI and the vmPRO’s Console Command Line (VMware vSphere) interface. Logout Select Logout to end your current vmPRO session. Quantum vmPRO User’s Guide 21 Chapter 1: Quantum vmPRO Overview Quantum vmPRO GUI Figure 16 Operations dropdown list Help The Help drop-down list (see Figure 17) allows you to access the following vmPRO help facilities: Online Help Select Online Help to access vmPRO help information, such as Release Notes, User’s Guide, Technical Notes, and Knowledge Base articles. About Select About to display the Privacy Statement, and to View Additional GUI Copyright Information, vmPRO version, Flash runtime, Quantum copyright, and Quantum patent information. Licensing Select Licensing to display the Licensing status for this Quantum vmPRO appliance. This information includes the following license information: Total licensed capacity, (amount) Currently in use, Expires (expiration date), Days remaining (number of days to expiration date). End User License Select End User License to read and accept the Quantum vmPRO End User License Agreement. 22 Quantum vmPRO User’s Guide Chapter 1: Quantum vmPRO Overview Quantum vmPRO GUI vmPro System Select vmPro System to display individual Log Files; Network, Disk, CPU, and Memory information; and GUI Errors. Figure 17 Help drop-down list Refresh Quantum vmPRO User’s Guide The Refresh facility allows you to refresh the current information that is being displayed by the appliance. 23 Chapter 1: Quantum vmPRO Overview Quantum vmPRO GUI 24 Quantum vmPRO User’s Guide Chapter 2 Getting Started With Quantum vmPRO This chapter helps you to get started with Quantum vmPRO and contains the following sections: • Access Quantum vmPRO • Set Up and Configure Quantum vmPRO • Access Your Virtual Machines • Modify Your Configuration • Updating Quantum vmPRO Software Access Quantum vmPRO Once you have installed Quantum vmPRO, you will have the following three means of accessing the Quantum vmPRO appliance and its configuration: Note: The Quantum vmPRO Configuration Wizard Welcome on page 32 displays the first time you log on to the vmPRO GUI. Each wizard leads you step-by-step through the configuration process. • Accessing the Quantum vmPRO GUI Quantum vmPRO User’s Guide 25 Chapter 2: Getting Started With Quantum vmPRO Access Quantum vmPRO • Accessing the Console Setup Wizard • Accessing the Console Command Line Accessing the Quantum vmPRO GUI The primary means of interacting with Quantum vmPRO is through its GUI (see Figure 18). Access the GUI by entering the IP address of the Quantum vmPRO appliance in the address field of your Web browser and logging in with your Quantum vmPRO appliance’s username and password. The default username/password for your appliance is sysadmin/ sysadmin. You can change the password by selecting Change Password from the Operations drop-down list in the GUI. Figure 18 Quantum vmPRO GUI Accessing the Console Setup Wizard 26 Network settings are controlled via the console Setup wizard. To access the Setup wizard: Quantum vmPRO User’s Guide Chapter 2: Getting Started With Quantum vmPRO Access Quantum vmPRO 1 Log in to your VMware vSphere Client. 2 After the vSphere client opens, if necessary, select Home, and then Inventory. 3 Select your appliance in the VMware vSphere Client’s left panel (see Figure 19). Figure 19 Select Your Appliance 4 Select the Console tab in the VMware vSphere Client’s right panel (see Figure 20 ). Figure 20 Select the Console tab You will see a screen displaying your Quantum vmPRO version and the IP address for your appliance (see Figure 21). Quantum vmPRO User’s Guide 27 Chapter 2: Getting Started With Quantum vmPRO Access Quantum vmPRO Figure 21 The Console Welcome Screen Version Number IP Address 5 Click anywhere inside the console screen, and then press <Enter>. 6 You will be prompted to log into your Quantum vmPRO appliance (see Figure 22). The default username and password are sysadmin/ sysadmin. (See Accessing the Quantum vmPRO GUI on page 26 for information on changing your appliance's password.) After entering the default username and password, press <Enter>. The Console Setup Wizard displays (see Figure 24). Figure 22 Console Login Prompt 28 Quantum vmPRO User’s Guide Chapter 2: Getting Started With Quantum vmPRO Access Quantum vmPRO Using the Console Setup Wizard • To free the cursor from the console screen, press <crtl+alt>. • To navigate the selections, use the Up/Down arrow keys. The current setting appears in the right column, along with an explanation of that setting. • To go to a screen that allows you to change the setting, press <Enter> on a setting. • To change settings preceded by square brackets ([ ]), use the arrow keys to move the cursor to the selection. • To activate an input area, press the spacebar. An X or * inside the brackets ([X] or [*]) indicates that the item is selected (see Figure 23). • To save the setting, press <Enter>. Note: Keyboard command reminders appear at the bottom of each screen in the Setup console. Figure 23 Console Setup Wizard: Changing Settings Accessing the Console Command Line Occasionally you may need to use a Quantum vmPRO function via the console command line, which is accessed from your VMware vSphere client. 1 Follow steps 1through 4 of as shown in Accessing the Console Setup Wizard. Quantum vmPRO User’s Guide 29 Chapter 2: Getting Started With Quantum vmPRO Set Up and Configure Quantum vmPRO 2 Click anywhere inside the console screen, and then press <1> to dismiss the console wizard. (If you are logged in, press <Esc> until you have logged out and are back at the starting screen.) 3 Log in with your appliance’s username and password and you will go to the console command line. Type help, and then press <Enter> to see a list of command line commands, or refer to the console commands list (see Console Commands and vmPRO Procedures on page 171). To return to the Setup wizard, type exit, and then press <Enter>. Set Up and Configure Quantum vmPRO You can have Quantum vmPRO up and running in just a few minutes. 1 If you have not yet installed your Quantum vmPRO, refer to the online Quantum vmPRO Download and Installation Guide to do so now. Note: You will need a valid e-mail address and password to access the vmPRO Download and Installation Guide. For Standard Edition users, documentation, community support, and other resources are available through Forum V (http://www.quantum.com/forumv, Quantum's online support forum for virtualization products.) 2 Refer to Network Settings on page 31 and Configure Quantum vmPRO on page 32 to finish setting up Quantum vmPRO. Note: For Tivoli Storage Manager, after you install your Quantum vmPRO appliance, we recommend installing the TSM Linux agent in Quantum vmPRO. For more information, refer to the following online support article: Installing and using the TSM Client on a Quantum vmPRO virtual appliance 30 Quantum vmPRO User’s Guide Chapter 2: Getting Started With Quantum vmPRO Set Up and Configure Quantum vmPRO Network Settings To set network settings for your Quantum vmPRO appliance: 1 Log in to access the console Setup wizard (see Accessing the Console Setup Wizard). 2 Follow the conventions presented in Using the Console Setup Wizard to use the Setup wizard and enter your networking information (see Figure 24). You can set or modify the following network setting: • Hostname Set the virtual appliance name. • Search Domains Add up to 6 domains. • Network Set the method (DHCP or Manual) by which the IP addresses are assigned or change them if necessary. • Network Reset Manually reset the network. • DNS Server Set the method (Automatic or Manual) by which the DNS servers are set or change them if necessary. • Proxy Setting Change the Proxy setting and require authentication if necessary. • Group Membership For an explanation of Group Membership, see Create and Manage Folders on page 145. If you have multiple Quantum vmPRO appliances, you can group them so that you can manage several appliances from one master. You can create groups during initial setup, or you can return to the Setup console to manage groups later. • System Shutdown Manually shutdown the system. Quantum vmPRO User’s Guide 31 Chapter 2: Getting Started With Quantum vmPRO Set Up and Configure Quantum vmPRO Figure 24 Entering Networking Information If you have dismissed the Setup console and are at the command line, you can return to the Setup console by typing exit at the command line. You may have to log in to return to the console. Configure Quantum vmPRO To configure your Quantum vmPRO appliance: 1 In a browser, enter the IP address for the Quantum vmPRO appliance. This brings you to the Quantum vmPRO GUI interface. 2 Log in. (Default username/password: sysadmin/sysadmin.) 3 Follow the Configuration Wizard (see Figure 25) to configure Licenses, Servers, File Sharing, Storage, Backup Policies, Email, Reports & Alerts, Time & NTP, and vCenter Plugin. Note: You can return to the Configuration Wizard later by selecting it from the Configure drop-down list in the Quantum vmPRO GUI. 32 Quantum vmPRO User’s Guide Chapter 2: Getting Started With Quantum vmPRO Set Up and Configure Quantum vmPRO Figure 25 Configuration Wizard Welcome Screen Licenses Enter your registered Quantum support email address and password to retrieve your licenses (see Figure 26), and then click Next. Quantum vmPRO User’s Guide 33 Chapter 2: Getting Started With Quantum vmPRO Set Up and Configure Quantum vmPRO Figure 26 Support Site Credentials Your current licenses will be listed (see Figure 27). If you think you have licenses that are not listed, select Update Licenses from Support Site. Under Configure Capacity Warning Threshold, you can enter the percentage of capacity at which you want vmPRO to issue an alert. Select Next to install your licenses and set your capacity warning threshold. If you are a Standard Edition customer, you will retrieve the Standard Edition license from the Web site where you received your initial contact email. You can then copy and paste the license key into the GUI and use the Add License Manually option to add/update your license. Standard Edition customers will not need to enter an email or password to add or update a license. Note: If necessary, you can use the Add License Manually option to install a new license or if Update Licenses from Support Site fails to retrieve the license. 34 Quantum vmPRO User’s Guide Chapter 2: Getting Started With Quantum vmPRO Set Up and Configure Quantum vmPRO Figure 27 Current Licenses Servers 1 Choose whether to configure a vCenter or ESX server, and then select Next. When configuring the appliance, you have the option of specifying either a single vCenter server hostname for VM discovery, OR one or more standalone ESX hosts, but not both simultaneously. If you have the option of using a vCenter server, it is recommended that you use this option, for ease of use and reduced management overhead by auto discovering all ESX hosts. 2 If you are adding an ESX server, select Add Server. 3 Under Configure Server: • Enter the Hostname for the ESX server or vCenter. This will be a fully qualified name or IP address. • Add a Label for your information. • If you need to change the default server port values (Data Port: 902, and Mgmt Port: 443) click Open Advanced Configuration, enter the port values, and then click OK. Quantum vmPRO User’s Guide 35 Chapter 2: Getting Started With Quantum vmPRO Set Up and Configure Quantum vmPRO 4 Under Authentication: • Enter your Username and Password. • Select Test Login to verify the connection to the ESX server or vCenter. 5 When the login information is correct, select Save. • If you added an ESX server, you can add another ESX server or select Next until you reach the File Sharing section. • If you added a vCenter, you are given the opportunity to designate a subset of the vCenter to be exported by the appliance. Check the servers/folders to be exported and select Next. If there are no errors, select Next to reach the File Sharing section. File Sharing 1 Be sure that both NFS and CIFS are enabled if you want to use both, or clear the check box for the protocol you will not use. 2 Both NFS and CIFS offer further configuration options on subsequent screens. 3 If you need to set up Active Directory authentication for CIFS, you can do so after you finish the initial installation and setup of your appliance. For more information, refer to the online support article: Active Directory Authentication Support in Quantum vmPRO Storage You can add and configure network storage. You will need to input or select the Hostname, Nickname, Device, Protocol (NFS or CIFS), Share, Sub-folder, and Mount options. If you will be using a CIFS share for added storage, you can also enter its user and password information. For more information about adding and configuring storage, see Using Additional Storage on page 76. Backup Policies Displays a list of the current backup policies and allows you to create a new backup policy, modify an existing backup policy, designate an existing backup policy as the default backup policy, or delete a backup 36 Quantum vmPRO User’s Guide Chapter 2: Getting Started With Quantum vmPRO Set Up and Configure Quantum vmPRO policy. For more information about creating and using backup policies, see Using Backup Policies on page 79. Email In ‘From’ Address, enter the email address that should be used in the From field on all email sent by the Quantum vmPRO appliance. Enter the hostname or IP address of your SMTP Server, the Port number, select or clear Use TLS, select or clear Use SMTPAUTH (if you chose to use SMTPAUTH, enter your login details). Select Send Test Email to verify that you entered the information correctly. For more information, see Emails, Reports, Alerts, and Autosupport on page 62. Reports and Alerts Enter recipients for email messages containing reports and alerts. Select or clear the CC: Quantum Support Team option, select or clear the Email a report every day option, select or clear the Include CSV attachment on SmartMotion reports option, and select the email Format. For more information, see Emails, Reports, Alerts, and Autosupport on page 62. Time and NTP To set the time: Note: Use of an NTP server is highly recommended. Unpredictable errors can occur if the system date and time are not consistent within the VMware environment. 1 Select your time zone. The time zone of the Quantum vmPRO appliance and the vCenter or ESX server(s) must match. 2 Choose whether to Enable NTP. If you chose to enable NTP, select the appropriate NTP Host. If necessary, you can edit the NTP server or delete an NTP server. 3 If you want to use your own NTP server, select Add NTP Server. Quantum vmPRO User’s Guide 37 Chapter 2: Getting Started With Quantum vmPRO Set Up and Configure Quantum vmPRO vCenter Plugin The Quantum vmPRO GUI can be embedded directly into vSphere Client when it is connected to a vCenter Server. See the section Embed the Quantum vmPRO GUI in vSphere Client on page 155 for complete information. Summary Screen Be sure to select Save, Next (to review your changes), and Finish at this screen to save your changes. View Your Virtual Machines When you have completed configuring your vmPRO, you can see the virtual machines in the configured server(s). On the vmPRO GUI, select the VMs tab. On the VMs screen, select the Virtual Machines tab. Your configured server will appear on the Virtual Machines tab as a folder which you can open to see the VMs (see Figure 28). Figure 28 Viewing Virtual Machines 38 Quantum vmPRO User’s Guide Chapter 2: Getting Started With Quantum vmPRO Access Your Virtual Machines Access Your Virtual Machines Both CIFS and NFS see the Quantum vmPRO appliance as a single file system as long as you have enabled CIFS and/or NFS in order to make /export available. If you need to enable or configure CIFS or NFS, go to the Configure drop-down list in the Quantum vmPRO GUI. SmartMotion NAS Target Protocol Selection Depending on the makeup of the VMs populating your vSphere environment, their applications, and the data within them, you may choose between the CIFS and NFS protocols for sending backup data, based on which is a best fit. For example, if you would like the SmartMotion backup files on the DXi or other NAS to be directly available to Windows systems, you may prefer to use the CIFS protocol. When UNIX/Linux/vSphere host integration is a priority, you may determine NFS to be more appropriate. Additionally, depending on the contents of the data inside the VM disks, you may observe substantially different performance characteristics during backup and recovery between the two protocols. Since no two vSphere environments are entirely alike, you should conduct a test backup and recovery with at least 40 GB worth of data over each protocol to observe the throughput and job completion time characteristics. This will allow you to choose the protocol best suited to your operations. Protocol Considerations Some protocol considerations to keep in mind include: • The NFS protocol type is supported as a Datastore type by vSphere. • VMware vSphere ESX hosts can mount a SmartMotion NAS backup target to allow for direct recovery of the backup images when using the NFS protocol to send backup data. • The appliance supports using a sparse writing approach when sending backup images. Sparse writing reduces the I/O overhead and time required for a backup job. Quantum vmPRO User’s Guide 39 Chapter 2: Getting Started With Quantum vmPRO Modify Your Configuration • For Linux users accessing the vmPRO /export share, we strongly recommend the use of the NFS protocol. If Linux users must use the CIFS protocol, the directio mount option must be specified in the mount command on the Linux machine that is mounting the vmPRO /export share using the CIFS protocol, for example: # mount.cifs -o ..,directio <share> <mount point> CIFS On a Windows server, you can map \\<vmPRO-Host_IP>\export as a network drive. To do so, go to Start > My Computer. From the Tools menu in the My Computer window, select Map Network Drive. You can then access all of your ESX servers and virtual machines through the mapped network drive (see Figure 29). You can even use drag and drop to copy a running virtual machine. Figure 29 Mapping a Network Drive NFS On a UNIX server, you can create a mount point on the server, and then NFS mount <vmPRO-Host>:/export on the server’s mount point. Modify Your Configuration You can modify your Quantum vmPRO appliance's setup at any time. Networking settings are managed via the console Setup wizard, and most other configuration is managed via the Quantum vmPRO GUI. See Access Quantum vmPRO on page 25 if you need reminders for accessing the Setup wizard or the Quantum vmPRO GUI. 40 Quantum vmPRO User’s Guide Chapter 2: Getting Started With Quantum vmPRO Modify Your Configuration This section contains instructions for common modifications you might need to make. Configuration Wizard Reminders Any time you make configuration changes using the wizard, you must exit the wizard using the Summary option to save your updates. Saving Your Configuration Changes To save your configuration change, do the following: 1 From the Configuration Wizard, select Summary. You will see a summary of all your changes (see Figure 30). Figure 30 Configuration Wizard: Exiting the Wizard 2 Select Save. 3 Select Next. 4 On the final screen, select Finish. Discovering Newly Added Servers Before your Quantum vmPRO appliance can see the new servers that you have added, they must be Discovered. This discovery process usually Quantum vmPRO User’s Guide 41 Chapter 2: Getting Started With Quantum vmPRO Modify Your Configuration takes place automatically; however, there are times when you might want to run a discovery manually, possibly as troubleshooting tool. To discover newly added servers, do the following: From the Operations drop-down list, select Discover Now (see Figure 31). Figure 31 Discover Now The Discovery Started alert box displays (see Figure 32). Figure 32 Discovery Started Accessing the Servers You will use the Servers section of the Configuration Wizard to add, edit, or delete servers configured for your Quantum vmPRO appliance. 1 From the Configure drop-down list in the Quantum vmPRO GUI, select Config Wizard (see Figure 33). 42 Quantum vmPRO User’s Guide Chapter 2: Getting Started With Quantum vmPRO Modify Your Configuration Figure 33 Accessing the Configuration Wizard 2 From the Configuration Wizard welcome screen, select Servers (see Figure 34). Figure 34 Configuration Wizard: Welcome If you currently have an ESX server or servers configured, the Servers list will open (see Figure 35). Quantum vmPRO User’s Guide 43 Chapter 2: Getting Started With Quantum vmPRO Modify Your Configuration Figure 35 Configuration Wizard: ESX Servers List If you currently have a vCenter configured, the vCenter server screen will open (see Figure 36). Figure 36 Configuration Wizard: Servers (vCenter) 44 Quantum vmPRO User’s Guide Chapter 2: Getting Started With Quantum vmPRO Modify Your Configuration Add an ESX Server To add an ESX Server, do the following: 1 Open the Servers section of the Configuration Wizard as described in Accessing the Servers on page 42. 2 At the Servers list, select Add Server. 3 Select ESX Server (multiple ESX servers may be managed) (see Figure 37). If you currently have an ESX server or servers configured, you will not see this screen, proceed to Step 6. Figure 37 Configuration Wizard: Select Server Type 4 Select Next. 5 At the Servers list, select Add Server (see Figure 38). Quantum vmPRO User’s Guide 45 Chapter 2: Getting Started With Quantum vmPRO Modify Your Configuration Figure 38 Configuration Wizard: Add Server 6 Fill in the Configure Server form (see Figure 39). If you need to change the default port settings (Data Port: 902, Mgmt Port 443), click Open Advanced Configuration, enter the port values, and then click OK. Figure 39 Configuration Wizard: Configure Server 46 Quantum vmPRO User’s Guide Chapter 2: Getting Started With Quantum vmPRO Modify Your Configuration 7 Select Save. 8 Select Next. 9 You will see a verification of your new configuration (see Figure 40). Figure 40 Configuration Wizard: Configure Server Verification 10 From the Configuration Wizard, select Summary to go to the summary screen and make your changes permanent. 11 Select Save, then Next, then Finish. Add an ESX Server When There is an Existing vCenter Server A Quantum vmPRO appliance cannot be configured with both an ESX server and a vCenter at the same time. You will have to delete the vCenter and then add the ESX server. 1 Open the Servers section of the Configuration Wizard as described in Accessing the Servers on page 42. 2 At the vCenter server screen, select Delete vCenter. You will see the message No vCenter is configured (see Figure 41). Quantum vmPRO User’s Guide 47 Chapter 2: Getting Started With Quantum vmPRO Modify Your Configuration Figure 41 Configuration Wizard: No vCenter is Configured 3 From the No vCenter is configured screen, select Back. 4 Select ESX Server (see Figure 42). Figure 42 Configuration Wizard: Select Server Type 5 Select Next. 48 Quantum vmPRO User’s Guide Chapter 2: Getting Started With Quantum vmPRO Modify Your Configuration 6 At the Servers list, select Add Server (see Figure 43). Figure 43 Configuration Wizard: Add Server 7 Fill in the Configure Server form (see Figure 44). If you need to change the default port settings (Data Port: 902, Mgmt Port 443), click Open Advanced Configuration, enter the port values, and then click OK. Quantum vmPRO User’s Guide 49 Chapter 2: Getting Started With Quantum vmPRO Modify Your Configuration Figure 44 Configuration Wizard: Configure Server 8 Select Save and you will see your server added to the list. 9 Select Next and you will see a verification of your new configuration. (see Figure 45). Figure 45 Configuration Wizard: Configure Server Verification 50 Quantum vmPRO User’s Guide Chapter 2: Getting Started With Quantum vmPRO Modify Your Configuration 10 From the Configuration Wizard, select Summary to go to the summary screen and make your changes permanent. 11 Select Save, then Next, then Finish. Add a vCenter Server A Quantum vmPRO appliance only supports one vCenter server at a time. You must delete all existing servers (ESXs and vCenter) and then add the new vCenter server. 1 Open the Servers section of the Configuration Wizard as described in Accessing the Servers on page 42. 2 If no servers are configured, proceed to Step 3. If there are any existing servers, delete them. • To delete a vCenter: a At the vCenter server screen, select Delete vCenter. You will see the message, No vCenter is configured (see Figure 46). b Select Add vCenter. Figure 46 Configuration Wizard: No vCenter is Configured • To delete ESX servers: Quantum vmPRO User’s Guide 51 Chapter 2: Getting Started With Quantum vmPRO Modify Your Configuration a Select the red X icon in the Actions column of the Servers list. The server will be removed from the list (see Figure 47). Figure 47 Configuration Wizard: Servers List b Select Back. 3 Select vCenter Server, and then select Next (see Figure 48). 52 Quantum vmPRO User’s Guide Chapter 2: Getting Started With Quantum vmPRO Modify Your Configuration Figure 48 Configuration Wizard: Select Server Type 4 Fill in the Configure Server form (see Figure 49). If you need to change the default port settings (Data Port: 902, Mgmt Port 443), click Open Advanced Configuration, enter the port values, and then click OK. Figure 49 Configuration Wizard: Configure Server Quantum vmPRO User’s Guide 53 Chapter 2: Getting Started With Quantum vmPRO Modify Your Configuration 5 Select Save. 6 Select whether to export your entire vCenter or a subset. If you select the subset option, you will need to select the items to export (see Figure 50). Figure 50 Configuration Wizard: Selecting Items to Export 7 Select Next, and you will see a verification of your new configuration (see Figure 51). 54 Quantum vmPRO User’s Guide Chapter 2: Getting Started With Quantum vmPRO Modify Your Configuration Figure 51 Configuration Wizard: Configure Server Verification 8 From the Configuration Wizard, select Summary to go to the summary screen and make your changes permanent. 9 Select Save, then Next, then Finish. Edit a ESX Server To edit an ESX Server, do the following: 1 Open the Servers section of the Configuration Wizard as described in Accessing the Servers on page 42. 2 Select the pencil icon in the Actions column of the Servers list. 3 Edit the Configure Server form (see Figure 52). If you need to change the default port settings (Data Port: 902, Mgmt Port 443), click Open Advanced Configuration, enter the port values, and then click OK. Quantum vmPRO User’s Guide 55 Chapter 2: Getting Started With Quantum vmPRO Modify Your Configuration Figure 52 Configuration Wizard: Configure Server 4 Select Save. 5 Select Next. 6 You will see a verification of your new configuration (see Figure 53). Figure 53 Configuration Wizard: Configure Server Verification 56 Quantum vmPRO User’s Guide Chapter 2: Getting Started With Quantum vmPRO Modify Your Configuration 7 From the Configuration Wizard, select Summary to go to the summary screen and make your changes permanent. 8 Select Save, then Next, then Finish. Edit a vCenter Server To edit a vCenter, do the following: 1 Open the Servers section of the Configuration Wizard as described in Accessing the Servers on page 42. 2 Select Edit vCenter. 3 Edit the Configure Server form (see Figure 54). If you need to change the default port settings (Data Port: 902, Mgmt Port 443), click Open Advanced Configuration, enter the port values, and then click OK. Figure 54 Configuration Wizard: Configure Server 4 Select Save. 5 Make changes if needed to your Export selections. 6 Select Next. 7 You will see a verification of your new configuration (see Figure 55). Quantum vmPRO User’s Guide 57 Chapter 2: Getting Started With Quantum vmPRO Modify Your Configuration Figure 55 Configuration Wizard: Configure Server Verification 8 From the Configuration Wizard, select Summary to go to the summary screen and make your changes permanent. 9 Select Save, then Next, then Finish. Delete ESX Servers To delete one or more ESX servers, do the following: 1 Open the Servers section of the Configuration Wizard as described in Accessing the Servers on page 42. 2 Select the red X icon in the Actions column of the Servers list. The server will be removed from the list. 3 If one or more ESX servers remain, you can save the new configuration by selecting Summary, and then selecting Save, then Next, and then Finish. OR If you deleted the only configured server, you need to add a new server. • Add a new ESX server: a Select Add Server. 58 Quantum vmPRO User’s Guide Chapter 2: Getting Started With Quantum vmPRO Modify Your Configuration b Follow the wizard; see complete instructions to Add an ESX Server on page 45. • Add a new vCenter server: a Select Back at the bottom of the Servers screen. b Select vCenter. c Select Next. d Select Add Server and add a new server as described in the section Add a vCenter Server on page 51. Delete a vCenter Server To delete a vCenter Server, do the following: 1 Open the Servers section of the Configuration Wizard as described in Accessing the Servers on page 42. 2 Select Delete vCenter (see Figure 56). Figure 56 Configuration Wizard: Deleting a Server You will see the message No vCenter is configured (see Figure 57). Quantum vmPRO User’s Guide 59 Chapter 2: Getting Started With Quantum vmPRO Modify Your Configuration Figure 57 Configuration Wizard: No vCenter is Configured 3 You must now configure a new server. • Configure a new vCenter server: a From the No vCenter is configured screen, select Add vCenter. b Add a new server as described in the section Add a vCenter Server on page 51. • Configure an ESX server: a From the No vCenter is configured screen, select Back. b Select ESX server and select Next c Select Add Server and configure a new ESX server as described in the section Add an ESX Server on page 45. 60 Quantum vmPRO User’s Guide Chapter 2: Getting Started With Quantum vmPRO Modify Your Configuration Manage Users Quantum vmPRO has two levels of user privilege: Admin and User. Admin users have full privileges, while those with User privileges are more limited to basic operations, and cannot make configuration changes. Create and manage users from the Quantum vmPRO GUI. See Access Quantum vmPRO on page 25 for information on accessing the GUI. 1 From the Configure drop-down list in the Quantum vmPRO GUI, select Users (see Figure 58). Figure 58 Accessing User Management 2 To add a new user, select Add User; or, to modify or delete an existing user, select that user's Edit (pencil) or Delete (X) icon in the Actions column (see Figure 59). Note: You cannot delete user sysadmin, and you cannot change a username. Quantum vmPRO User’s Guide 61 Chapter 2: Getting Started With Quantum vmPRO Modify Your Configuration Figure 59 Configure User List 3 If you are editing or adding a user, fill in the Configure User dialog box, and then click Save (see Figure 60). Figure 60 Configure User Emails, Reports, Alerts, and Autosupport 62 Quantum vmPRO’s reports and alerts not only keep you informed; they also enable autosupport from the Quantum team, and enable you to view statistical analysis of your appliance’s performance when you log into the Quantum support site. Quantum vmPRO User’s Guide Chapter 2: Getting Started With Quantum vmPRO Modify Your Configuration To get these benefits, configure your appliance to email daily reports and alerts to you and copy the Quantum support team, and also to upload a daily report to the Quantum support site. 1 Make sure that your firewall allows access to support.Quantum.com on port 443. 2 Log into the Quantum vmPRO GUI; see Access Quantum vmPRO on page 25. 3 Check your email settings by selecting Email from the Configure drop-down list (see Figure 58). • The ‘From’ Address field must contain the email address to be used for all email sent from the Quantum vmPRO appliance, and the Host and Port fields must contain correct information for your SMTP server (see Figure 61). • Select or clear Use TLS. • Select or clear Use SMTPAUTH (SMTP Auth is not required.) If you have selected Use SMTPAUTH, enter the Username and Password. • Select or clear Log Debug Messages. • If you select Send Test Email Now, you should receive a test email at the email address in the ‘From’ Address field. • Select OK to save your changes. Quantum vmPRO User’s Guide 63 Chapter 2: Getting Started With Quantum vmPRO Modify Your Configuration Figure 61 Configure Email 4 To configure reporting, select Reports & Alerts from the Configure drop-down list (see Figure 58). • Enter Recipients for email messages containing reports and alerts. • Select or clear CC: Quantum Support Team. • Select or clear Email a report every day. • Select or clear Include CSV attachment on SmartMotion reports. • Select or clear Upload a report to Quantum support site every day. Note: Standard Edition customers can upload reports; however, they cannot access the support site. If you want to take full advantage of this feature, you must either purchase additional capacity or purchase a service contract. For more information, contact http:// www.quantum.com. • 64 Select the email Format: HTML or plain text. Quantum vmPRO User’s Guide Chapter 2: Getting Started With Quantum vmPRO Modify Your Configuration • Select View Report Now to see the report. For more information on the contents of the report, see View Report on page 20. • Select Send Report Now to test your configuration. Within a few minutes, you should see your report on the support site at support.Quantum.com (check the Appliances tab of your My Appliances page). • Select OK to save your changes (see Figure 62). Figure 62 Configure Reports and Alerts Time and NTP Quantum vmPRO can use NTP servers to control the internal clock. Note: Use of an NTP server is highly recommended. Unpredictable errors can occur if the system date and time are not consistent within the VMware environment. The time zone of the Quantum vmPRO Appliance must match the time zone of the vCenter or ESX server(s). In a vCenter environment all hosts (including the vmPRO appliance), the vCenter server, and all ESX or ESXi hosts managed by the vCenter server must have their system time synchronized to the same NTP servers. Quantum vmPRO User’s Guide 65 Chapter 2: Getting Started With Quantum vmPRO Modify Your Configuration Note: Where time service is not available, all hosts must have their time manually set to the same time. 1 Log into the Quantum vmPRO GUI; see Access Quantum vmPRO on page 25. 2 From the Select Configure drop-down list, select Config Wizard to open the Quantum vmPRO Configuration Wizard (see Figure 58). 3 Select Time & NTP (see Figure 63). Figure 63 Configuration Wizard: Time & NTP 4 Make your additions and changes to your Time Zone and NTP settings. 5 Select Summary (or select Next until you get to the summary screen). 6 Select Save, then Next, then Finish to make your changes permanent. 66 Quantum vmPRO User’s Guide Chapter 2: Getting Started With Quantum vmPRO Updating Quantum vmPRO Software Updating Quantum vmPRO Software This section describes how you can check for software updates, configure when you are notified about available software updates, and how to install the updates. • Check for Software Updates • Configure When to Receive Software Update Notices • Install Software Updates Check for Software Updates If you are using the check for updates automatically option, a Software updates bar appears in the GUI just above the main tab when updates are available (see Figure 64). Figure 64 Software Updates Bar To manually check for Quantum vmPRO updates, do the following: 1 From the Configure drop-down list in the Quantum vmPRO GUI, select Software updates (see Figure 65). The Configure Software Updates dialog box displays. 2 To manually check for software updates, on the Configure Software Updates dialog box, select Check now (see Figure 66). Quantum vmPRO User’s Guide 67 Chapter 2: Getting Started With Quantum vmPRO Updating Quantum vmPRO Software Figure 65 Accessing Software Updates Figure 66 Configure Software Updates Configure When to Receive Software Update Notices To configure when you receive notifications regarding software updates, do the following: 1 From the Configure drop-down list in the Quantum vmPRO GUI, select Software updates (see Figure 65). The Configure Software Updates dialog box displays. 2 To receive automatic notification for software updates, select Check for updates, and then select daily or weekly. 3 Select OK. 68 Quantum vmPRO User’s Guide Chapter 2: Getting Started With Quantum vmPRO Updating Quantum vmPRO Software Install Software Updates To install the available software updates, do the following: 1 From the Configure drop-down list in the Quantum vmPRO GUI, select Software updates (see Figure 65). The Configure Software Updates dialog box displays. 2 On the Configure Software Updates dialog box, select Install Offline Updates (see Figure 66) 3 When the updates have been installed, select OK. Quantum vmPRO User’s Guide 69 Chapter 2: Getting Started With Quantum vmPRO Updating Quantum vmPRO Software 70 Quantum vmPRO User’s Guide Chapter 3 Back Up and Store Data With Quantum vmPRO This chapter describes the use of the vmPRO tools and features that allow you to back up and store your data. Back Up and Store Data For more detailed and specific information regarding vSphere ESX host datastore and storage considerations, see the vSphere ESX Host Notes and Best Practices section of the Quantum vmPRO Best Practices Guide. Caution: DXi V-Series appliances (such as DXi V1000 or DXi V4000) should not be backed up by the vmPRO. When a DXi VSeries appliance is managed by a vmPRO appliance, the DXi V-Series appliance should be disabled from being exported on the vmPRO. If you want to backup your DXi V-Series appliance, it should be replicated to another DXi appliance. Quantum vmPRO User’s Guide 71 Chapter 3: Back Up and Store Data With Quantum vmPRO Back Up and Store Data Note: If your backup target is powered down or in a disconnected state, your vmPRO GUI will time-out. If you see messages or behavior to this effect, check the status of your backup target, and then proceed when the backup target it functioning normally. Using Your Current Backup and Recovery Solution With Quantum vmPRO, you can use your current backup and recovery solution. If you need assistance, consult the product-specific technical notes on the Quantum Support site. Refer to the online support article: Quantum vmPRO and Your Backup Solution Using Folders to Facilitate Multiple Backup Policies You can set up folders within your Quantum vmPRO file system to facilitate multiple backup policies on a single appliance; see Create and Manage Folders on page 145. You may want to use folders in conjunction with the group management feature for better load balancing; see Set Up and Manage Groups on page 135. Using SmartMotion Backup Quantum’s SmartMotion Backup feature allows the Quantum vmPRO appliance to push data from /export to external storage on a scheduled basis and recover it easily. Each vmPRO appliance can have multiple backup policies and each policy will have its own schedule; however, a specific policy can be run only once per day. Also, if you are executing backup policies in a group configuration, only two individual backup policies can run at a time on the master and on each node. Note: Using vmPRO’s Advance Settings, you can configure your vmPRO to disallow backups when there is not enough datastore space for the snapshot (see Disallow backups when there is not enough datastore space for snapshot on page 169). At a minimum, a SmartMotion backup will include the following: 72 Quantum vmPRO User’s Guide Chapter 3: Back Up and Store Data With Quantum vmPRO Back Up and Store Data Add Servers To add, edit, or delete servers, see Accessing the Servers on page 42. Discover the VMs A discovery is usually done automatically. To manually discover your VMS, see Discover Now on page 20. Select the VMs to be exported For ESX servers, go to the VMs tab and select the VMs you want to export. For more information, see Selecting VMs for Export on page 90. For a vCenter, you can use the same method as describe for the ESX servers, or you can access the Configuration Wizard for servers. Using the wizard, you can edit the vCenter’s export configuration and select the entire vCenter (not recommended), or select the appropriate subsets. This information will be reflected in the backup policy for the vCenter. For more information, see Add a vCenter Server on page 51. At this point, you might consider the following: • The use of folders to tailor your selection of VMs based on whatever backup goal you want to accomplish, such as a backup based on VM types or geographic locations, see Create and Manage Folders on page 145. • The use of Change Block Tracking (for greater efficiency) see vSphere Changed Block Tracking (CBT) Support on page 161). Note: Setting, or re-setting, the CBT schedule sets the time at which the next full backup will occur. • For Windows based VMs, the use and configuration of Volume Shadow Copy Services (VSS), see Quantum VSS Writer on page 149. Set up storage To add, delete, and edit storage, see Using Additional Storage on page 76. Create a backup policy A backup policy can include the following: • Assigning folders. Quantum vmPRO User’s Guide 73 Chapter 3: Back Up and Store Data With Quantum vmPRO Back Up and Store Data • Assigning storage. • Setting up the backup's schedule. • Setting up the backup's retention period. For the options associated with backup policies, see Using Backup Policies on page 79. Run SmartMotion. Running a SmartMotion Backup To begin a SmartMotion backup session do the following: 1 Select Backup from the SmartMotion Backup drop-down list (see Figure 67). Figure 67 Selecting the SmartMotion Backup Options 2 From the Run SmartMotion Backup dialog box (see Figure 68), select the appropriate backup policy, and select Run. If necessary, you can edit the policy before starting the backup. This will be necessary if you have not selected a storage location for your backup policy or you have not configured your folder so that it is assigned to the appropriate backup policy; see Step 3 on page 82 of Create a new Backup Policy. You can view the progress for your backup by selecting the Backup tab on the Task screen (see Figure 69). The Recent SmartMotion Backup pane of the Backup screen displays a listing of Running backups and a listing of the policies that have been implemented (under Policy History). 74 Quantum vmPRO User’s Guide Chapter 3: Back Up and Store Data With Quantum vmPRO Back Up and Store Data Figure 68 Selecting the Backup Policy When the SmartMotion backup has completed, you can view the list of VMs, Folders, Nodes, and Errors (displays only when errors are detected). 1 From the vmPRO GUI, select the Tasks tab. 2 From the Tasks screen, select the Backup tab. 3 From the Backup screen, make the appropriate selection: VMs, Folders, or Nodes (see Figure 70). Figure 69 Backup Progress Quantum vmPRO User’s Guide 75 Chapter 3: Back Up and Store Data With Quantum vmPRO Back Up and Store Data Figure 70 Viewing Backed up VMs To stop a SmartMotion backup, do the following: 1 From the vmPRO GUI, select the Tasks tab. 2 From the Tasks screen, select the Backup tab. 3 Select the backup that you want to stop. 4 Select Abort Backup. Using Additional Storage In order to perform SmartMotion backups, you will need to add, edit (configure), and delete storage locations. 1 From the SmartMotion Backup drop-down list, select Storage (see Figure 67). The Available Storage dialog box displays. 2 From the Available Storage dialog box (see Figure 71), you can add new storage, edit the configuration of existing storage, or delete existing storage. • To edit the configuration settings of existing storage, select the entry, and then select the pencil icon. • To add new storage, select Add Storage. 76 Quantum vmPRO User’s Guide Chapter 3: Back Up and Store Data With Quantum vmPRO Back Up and Store Data • To delete a storage location, select the entry, and then select the red X. Figure 71 Available Storage Edit storage settings Add new storage 3 From Configure Storage dialog box, enter or modify the following settings (see Figure 72): • Hostname (or IP address) Take care when entering your hostname. Some devices will allow you to enter a name for a nonexistent device. If this happens, simply edit the entry and correct the error. • Nickname • Device • Protocol • Share • Sub-folder • Mount options • CIFS User (Protocol > CIFS) • CIFS Password (Protocol > CIFS) • Fastcopy user (Device >Data Domain) with Show SSH Key Fastcopy requires an SSH key to be copied to the Data Domain appliance. Quantum vmPRO User’s Guide 77 Chapter 3: Back Up and Store Data With Quantum vmPRO Back Up and Store Data Figure 72 Configure Storage 4 Select OK. Access a DXi for Additional Storage DXis provide a backup solution that integrates deduplication and replication to connect backup and disaster recovery protection across distributed environments. Before you can access a DXi for additional storage, it must be configured with either CIFS or NFS shares that your vmPRO can access. To accomplish this task, see any Quantum DXi User’s Guide, or contact the system administrator for the DXi. When the shares on the DXi have be successfully added, you will see how many DXis are available under the text heading, DXi Target: in the Summary pane on the vmPRO’s Home page. If only one DXi is available, you will see DXi Target: hostname (see Figure 73), where hostname is the value entered in the Hostname text box when the DXi was added for additional storage and is a link to the native management interface for the DXi. If more than one DXi has been added, you will see DXi Targets: X Configured DXi (see Figure 74), where X is the number of DXis that have been added for storage and is a link that displays the Available Storage dialog box. When the CIFS or NFS shares have been configured on the DXi, you can then use the Add Storage function on the Available Storage dialog box to add the DXi as a source for additional storage. To designate a DXi for additional storage, select Quantum DXi as the Device in Step 3 of Using Additional Storage. Note: If you are using the CIFS Protocol, be sure to enter the CIFS User name and CIFS Password exactly as enter in the DXi’s NAS configuration settings. 78 Quantum vmPRO User’s Guide Chapter 3: Back Up and Store Data With Quantum vmPRO Back Up and Store Data Figure 73 One DXi Configured for Additional Storage Figure 74 More than one DXi Configured for Additional Storage Using Backup Policies Before creating a backup policy, there are several items you can consider before actually creating the policy, such as determining a backup schedule and retention period, creating folders and assigning the appropriate VMs to those folders, and deciding if you want to manage multiple vmPROs using the group option. Also, keep in mind that while VMs can belong to only one folder, that folder can be backed up by more than one policy, which in turn allows it to have multiple schedules. Backup policies are unique to (all policy parameters controlled by) the vmPRO that created them regardless of storage. For example, if two vmPROs use the same storage, the backups created by vmPRO A will run and be retained by the backup policies' schedule and retention parameters set by vmPRO A. No backup policies set by vmPRO B will affect those of vmPRO A and vice versa. The Available Backup Policies dialog box allows you add, edit (configure), designate a backup policy to be the default backup policy, and delete backup policies. Quantum vmPRO User’s Guide 79 Chapter 3: Back Up and Store Data With Quantum vmPRO Back Up and Store Data To access the Available Backup Policies dialog box (see Figure 75), select Backup Policies from the SmartMotion Backup drop-down list (optionally, select Tasks > Backup > View Policies) (see Figure 67). Use the Available Backup Policies dialog box to perform the following tasks: • Create a new Backup Policy • Modify an Existing Backup Policy • Designate a Backup Policy as the Default Backup Policy • Delete a Backup Policy Note: Creating multiple backup policies provides the ability to have multiple backup schedules, backup to multiple targets, and supports multiple retention (date at which backups are deleted) policies. Figure 75 Available Backup Policies Edit a backup policy Delete a backup policy Designate a default backup policy Create a new backup policy Create a new Backup Policy To create a new backup policy, you will be configuring the following: • SmartMotion Policy • Assign Folders and Storage • Schedule Backups and Retention 80 Quantum vmPRO User’s Guide Chapter 3: Back Up and Store Data With Quantum vmPRO Back Up and Store Data 1 From the Available Backup Policies dialog box, select Create a new policy. The Configure SmartMotion Backup Policy dialog box displays (see Figure 76). Figure 76 Configure SmartMotion Backup Policy Add 2 Under SmartMotion Policy, enter or modify the following settings: • Name • Copy Mode - select multiple copies or one copy The one copy mode saves just one version of a VM, while the multiple copies saves more than one. The latter allows for retention to be applied across the multiple versions. • Select or clear Email Backup Report • Select or clear Backup vmPRO Configuration This option allows you to backup (save off-site) an encrypted copy of the vmPRO's current configuration file. The file contains all the configuration data that is needed to restore the appliance onto a new or re-installed appliance. Quantum vmPRO User’s Guide 81 Chapter 3: Back Up and Store Data With Quantum vmPRO Back Up and Store Data This configuration file is named db-package.tar.bz2.enc, and it is written to the base directory of the target storage for that particular backup. Its base directory follows the SmartMotion directory hierarchy convention of <Storage Subfolder>\<YYYY_MM>\<YYYY_MM_DD_HHMMSS>. This file will then be used by the configuration import function: Operations > Import vmPRO Configuration to complete the recovery. When importing the vmPRO configuration, you will be asked to browse your computer for the configuration package, so the computer running the vmPRO GUI must have access to the configuration file. 3 Under Assigned Folder and Storage, perform the following tasks: a Select the storage destination from the Storage drop-down list. If necessary, select Create new Storage from the Storage dropdown list or select Edit Storage to modify the storage configuration; see Using Additional Storage on page 76. b Select Configure Folders. The Configure Folder Assignments dialog box displays (see Figure 77). If necessary, select Create Folder to create a new folder; see Step 4 on page 146 of Create and Manage Folders. To access the Changed Block Tracking Schedule option for the backup policy, see Schedule Your Changed Block Tracking Resets on page 164. i To assign a folder to the backup policy, perform the following: a Select the folder in the Available folders (not assigned to this policy) list. b Select Move Up. ii To remove a folder from the backup policy, perform the following: a Select the folder in the Folders assigned to this policy list. b Select Move Down. c When you have completed configuring your folder and storage assignments, select OK. 82 Quantum vmPRO User’s Guide Chapter 3: Back Up and Store Data With Quantum vmPRO Back Up and Store Data Figure 77 Configure Folder Assignments 4 Under Scheduled Backups and Retention, select Configure, the Configure Backup Schedules and Retention dialog box displays (see Figure 78). Any combination of time intervals can be enabled, that is to say you can configure backup and retention parameters for Weekly, Monthly, and Annual time intervals. The actual backup activity is performed based on the smallest/shortest time interval (The longer time interval backups would not take place because they would be covered by the shorter interval.) All retention periods are honored. Ex: Daily backups are run, and both the daily and weekly retention policies are applied. Assume the daily retention is set for 8 days, and the weekly retention is set for 5 weeks with Sundays selected as the Retain VM from value. Daily backups would run and the two retention policies would cause backups to be deleted after 8 days, except for 5 weeks of Sunday backups. Quantum vmPRO User’s Guide 83 Chapter 3: Back Up and Store Data With Quantum vmPRO Back Up and Store Data Note: When a manual SmartMotion policy backup is run, it is treated like a daily backup for retention purposes. For example: A manual backup performed on a day when the daily backup option is disabled and the day does not fall into a weekly, monthly, or yearly schedule, the backup is saved as a daily backup. a Set the time at which you want the backup to start. Select Automatically start scheduled SmartMotion backup at, and then select the hours and minutes from the Time drop-down lists. b Select the tab of the time interval for which you want to schedule the backup to run: Daily, Weekly, Monthly, or Annual. c Select the Enable the <time interval> backup schedule option. This selection activates your retention options. Each interval has its own set of parameters. Note: Setting any retention period to zero, “0”, will keep the backups indefinitely. • Daily — runs the backup each day (see Figure 78) Retain VMs for X days — Enter the number of days that you want to keep the backup. • Weekly — runs the backup on a weekly basis based on the selected mode (see Figure 79) Basic Mode > Retain VMs from — Select a day of the week to run your backup. Advanced Mode > Retain VMs from the following days: Select which days of the week to run the backup. Retain VMs for X weeks — Enter the number of weeks that you want to keep the backup. • Monthly — runs the backup on a monthly basis (see Figure 80) Retain VMs from — Select the appropriate time period to run the backup and begin its retention period: Specific day (and the select the day from 1st of the month through 84 Quantum vmPRO User’s Guide Chapter 3: Back Up and Store Data With Quantum vmPRO Back Up and Store Data XX last of the month), The first backup for the month, or The last backup of the month. Retain VMs for X months — Enter the number of months that you want to keep the backup. • Annual — runs the backup on an annual basis (see Figure 81) Retain VMs from — Select the appropriate time period to run the backup and begin its retention period: Specific date (and select the specific month and day), The first backup of the year, or The last backup of the year. Retain VMs for X years — Enter the number of years that you want to keep the backup. d When you have completed configuring your backup schedule and retention period, select OK. * The following might help you determine a retention policy: Determining how many backups to keep and for how long, is based on a number of factors. The number of backups that can be retained is highly dependent on the characteristics of the target NAS storage device. The rate of storage utilization is dependent on a number of factors such as deduplication and the rate of unique block creation in the VMs that are being backed up. In general, it is best to start with a lower number of backups retained until the capacity growth rate can be observed, for example between 7 to 14 days. Use the following to help you determine your retention policy: • Deduplication-Enabled Target - DXi and other deduplicating NAS targets will generally achieve 10:1 to 20:1 reduction in aggregate backup volume, enabling greater retention periods than with comparably sized non-deduplicating storage devices. Full and Differential/CBT backups will have approximately the same storage utilization impact on targets that perform deduplication. • Non-Deduplicating Target - Non-deduplicating NAS targets will consume disk more rapidly. Here full and Differential/CBT backups will have different impacts, with the CBTs generally being approximately 15% to 30% the size of a full backup depending on your environment. Quantum vmPRO User’s Guide 85 Chapter 3: Back Up and Store Data With Quantum vmPRO Back Up and Store Data • Regardless of the type of storage target in use, the biggest factor affecting the rate of storage utilization is the rate at which unique data blocks are generated by the VM that are being backed up. 5 When all configuration items have been addressed, select OK. Figure 78 Retention - Daily 86 Quantum vmPRO User’s Guide Chapter 3: Back Up and Store Data With Quantum vmPRO Back Up and Store Data Figure 79 Retention - Weekly Figure 80 Retention - Monthly Quantum vmPRO User’s Guide 87 Chapter 3: Back Up and Store Data With Quantum vmPRO Back Up and Store Data Figure 81 Retention - Annual Modify an Existing Backup Policy To modify an existing backup policy, make the appropriate changes to the configuration settings that you used to create the backup policy. 1 From the Available Backup Policies dialog box, select the pencil icon. The Configure SmartMotion Backup Policy dialog box displays (see Figure 82). The only difference between the Configure SmartMotion Backup Policy dialog box to modify a backup policy and to create a backup policy is a table that shows VM folder assignments for the existing backup policy. Refer to the procedure to create a new backup policy where necessary. Note: If the Copy Mode for your backup policy is set to one copy, the Retention Policy option will not be active. A Copy Mode of one copy does not require any retention policy because there is only one backup copy; therefore, there is nothing for a policy to remove. Select multiple copies if you want to create a retention policy. 2 When you have made all your modifications, select OK. 88 Quantum vmPRO User’s Guide Chapter 3: Back Up and Store Data With Quantum vmPRO Back Up and Store Data Figure 82 Configure SmartMotion Backup Policy Modify Designate a Backup Policy as the Default Backup Policy To designate a backup policy to be your default backup policy, perform the following tasks: 1 From the Available Backup Policies dialog box, select the policy that you want to use as your default policy. 2 Select Set default policy. 3 Select OK. Delete a Backup Policy To delete a backup policy, perform the following tasks: 1 From the Available Backup Policies dialog box, select the policy that you want to delete. 2 Select the red X. 3 Select OK. Quantum vmPRO User’s Guide 89 Chapter 3: Back Up and Store Data With Quantum vmPRO Back Up and Store Data Selecting VMs for Export To select VMs for export (enable or make available for backup), do the following: 1 From the Quantum vmPRO GUI, select VMs. 2 On the VMs screen, select the Virtual Machines tab. 3 From the VMs table, select the VMs that you want to export. You may need to open a folder (by selecting it) to access the VMs (see Figure 83). • To select consecutive VMs in the list, select the first VM in the series, hold down <Shift> and select the last VM in the series. • To select non-consecutive VMs, hold down <Ctrl> and select each VM you want to select. • If you want to backup all the VMs in a folder, select the folder. 4 Select Edit Selected VMs above the VM list. Figure 83 Selecting VMs to Export 5 In the Configure Virtual Machine dialog box, select Exported if you have selected only one VM, or select Yes on the Exported dropdown list if you have selected multiple VMs (see Figure 84). 90 Quantum vmPRO User’s Guide Chapter 3: Back Up and Store Data With Quantum vmPRO Back Up and Store Data Figure 84 Configure Virtual Machine 6 Select Save. Quantum vmPRO User’s Guide 91 Chapter 3: Back Up and Store Data With Quantum vmPRO Back Up and Store Data 92 Quantum vmPRO User’s Guide Chapter 4 Recover Data With Quantum vmPRO This chapter describes the use of the vmPRO tools and features that allow you to recover your data. Recover Data Before starting a recovery, verify that you have enough free space on target datastores. The appliance will not warn you that there is not enough space available before executing a batch operation. Note: After recovering a VSS enabled VM with Active Directory installed, the VM will be automatically rebooted twice during the VSS restore process. These reboots can take several minutes. During this time, you should not attempt to use the VM. For the fastest access to file level recovery, configure the Mount options setting on the appliance to point directly to the location of the SmartMotion backups; (see Step 3 on page 77 of Using Additional Storage). This setting is preserved through reboots of the appliance and provides file level access to the backups at the \\<vmPROHost_IP>\recover\files CIFS share. Quantum vmPRO User’s Guide 93 Chapter 4: Recover Data With Quantum vmPRO Recover Data vmPRO Recover Virtual Machines Wizard Using the vmPRO Recover Virtual Machines Wizard, you can recover VMs backed up by SmartMotion or manually recover a VM backed up using a third-party application. To access the vmPRO Recover Virtual Machines Wizard, select Recover from the SmartMotion Backup drop-down list (see Figure 85). The Recover Virtual Machines Wizard dialog box displays, (see Figure 86). Figure 85 Accessing the Recovery Wizard Recover VMs Backed up using SmartMotion 1 Access the Recover Virtual Machines Wizard dialog box. 2 From the Recover Virtual Machines Wizard, use the wizard’s options to select the VMs you want to recover (see Figure 86). Figure 86 Recover Virtual Machines Wizard a Use the filter option to refine the list of VMs to recover. 94 Quantum vmPRO User’s Guide Chapter 4: Recover Data With Quantum vmPRO Recover Data i Enter any part of the VM’s name in Filter VM Name. ii Make the appropriate selection from the Backup in last XX days drop-down list. iii Select Update filter to display the VMs. b Select the VMs you want to recover. Note: At anytime you can select Select none to clear all previous selections. i To select all VMs, select Select all to recover all VMs. ii To select specific VMs, select the check boxes next to the VMs you want to recover. iii For each VM you select, select the appropriate entry from the VM’s Recover from drop-down list (see Figure 87). Figure 87 Select Recover from c (optional) At this point, most SmartMotion users will proceed to Step 3 on page 97. You can use the Manually Choose a VM option to recover a VM backed up using SmartMotion; however, it is mainly intended for recovering VMs that have been backed up using a third-party backup applications. i Quantum vmPRO User’s Guide Select Manually Choose a VM. The Select Directory (storage view) dialog box displays. 95 Chapter 4: Recover Data With Quantum vmPRO Recover Data ii Double click the appropriate storage (Figure 88), the Select Directory (folder view) dialog box displays. Figure 88 Select Directorystorage view iii Double click the appropriate folder (see Figure 89), the Select Directory (VMs view) dialog box displays. If there are more levels of folders, continue to drill down until you reach the VMs. Figure 89 Select Directoryfolder view 96 Quantum vmPRO User’s Guide Chapter 4: Recover Data With Quantum vmPRO Recover Data iv Select the VM you want to recover (see Figure 90), and then select OK. Figure 90 Select Directory-VMs view 3 When you have selected all the VMs (and their appropriate Recover from entry), select Next. The Recover Virtual Machines Wizard dialog box displays (see Figure 91). Figure 91 Recover Virtual Machines Wizard Recovery Type 4 Quantum vmPRO User’s Guide On the Recover Virtual Machines Wizard, select the type of recovery that you want to initiate: 97 Chapter 4: Recover Data With Quantum vmPRO Recover Data • VM Recovery—This option allows you to recover the VMs as new VMs to an ESX or vCenter. • Exchange Recovery on page 103—This option allows you to recover mailboxes on an Exchange server. • iSCSI Export on page 123—This option allows you to export the virtual disk as an iSCSI target and access it as a locally mounted disk. Note: Only one VM at a time can be recovered when using this option. Click Next. VM Recovery 1 If you have selected more than one VM to recover, the Recover Virtual Machines Wizard (Select a policy for recovering your virtual machines.) dialog box displays. Proceed to step Step 3. 2 If you have selected only one VM to recover, the Recover Virtual Machines Wizard (Select the target virtual machine configuration) dialog box displays (see Figure 92). a On the Recover Virtual Machines Wizard (Select the target virtual machine configuration) dialog box, make the appropriate selections. • Select rename for the Action on conflict option to avoid any interruptions during the restore due to VM name conflicts on the datastore. The rename option will register the VM with the VM name and append the next one-up number enclosed in parenthesize. Example: <VM_name> (1), if <VM_name> (1) exists, it will be named <VM_name> (2), etc. The rename option also renames the directory in which you are importing the VM using the same convention. • Select Add the VM to vSphere/ESX inventory after restore? to automatically add the VM to the vSphere client. • If the VM came from a vCenter or ESX server on the vmPRO, selecting Register with the configuration from the 98 Quantum vmPRO User’s Guide Chapter 4: Recover Data With Quantum vmPRO Recover Data backup? will return the VM to the same location from which it was backed up. • If the VM did not come from a vCenter or ESX server, or you want to restore it to a different location on the server, clear Register with the configuration from the backup?. This will let you choose where the VM will be registered. • Under Virtual Disk Configuration: Use the above datastore and directory - allows you to recover using the selections that you have just made on Recover Virtual Machines Wizard. Use the original configuration - allows you to recover with the same configuration that exists for the VM at the time of the backup. Change each virtual disk's configuration - allows you to customize each disk's name, target location, and provision type. b Select Next. The Recover Virtual Machines Wizard (Verify the configuration of the VM to be restored) dialog box displays (see Figure 93). Proceed to Step 4. Figure 92 Select Target Virtual Machine Quantum vmPRO User’s Guide 99 Chapter 4: Recover Data With Quantum vmPRO Recover Data Figure 93 Starting a Recovery for a VM 3 On the Recover Virtual Machines Wizard (see Figure 94),select the policy that you want to use to recover the VMs, and then select Next. The Recover Virtual Machines Wizard confirmation dialog box displays (see Figure 95). • If you select Attempt to add the VMs to vSphere/ESX inventory after restore (using the original configuration)?, keep in mind that when recovering multiple VMs, there is no rename option; therefore, the VMs must be removed before they can be recovered. • If you choose to Set a policy, use the Recover Virtual Machines Wizard (Configure policy mappings) dialog box to configure you policy. 100 Quantum vmPRO User’s Guide Chapter 4: Recover Data With Quantum vmPRO Recover Data Figure 94 Select Recovery Policy 4 On the Recover Virtual Machines Wizard confirmation dialog box (either Figure 93 or Figure 95), select Start. The Recovery Started alert box displays (see Figure 96). Figure 95 Recovery Confirmation Quantum vmPRO User’s Guide 101 Chapter 4: Recover Data With Quantum vmPRO Recover Data View the progress of a recovery. Figure 96 Recovery Started To view the progress of the recovery or to see the list of VMs that were recovered, do the following: 1 From the vmPRO GUI, select the Tasks tab. 2 From the Tasks screen, select the Recovery tab (see Figure 97). Note: If you need to stop the recovery, select Abort recovery Figure 97 Recovery of VMs Manually Register an Imported VM In the event of errors that prevent VMs from being registered or if you did not select Add the VM to vSphere/ESX inventory after restore?, you will need to manually register an imported VM. To manually register an imported VM, do the following: 1 Using a vSphere client, log in to the server (ESX or vCenter) where the VM resides. select the server tree in the left panel, and then select the Summary tab. 2 Right click the Storage location of the recovered VM and select Browse Datastore. 3 Find the VM directory (newly created recovery process) and open it. 102 Quantum vmPRO User’s Guide Chapter 4: Recover Data With Quantum vmPRO Recover Data 4 Right click the .vmx file and select Add to Inventory. 5 Select the location where you want to put the VM. The VM will automatically be Discovered. The VM will only be automatically exported if you have Automatically export new VMs enabled. Exchange Recovery Before beginning an Exchange Recovery, make sure the following prerequisites are met: • Exchange Recovery uses the Exchange Management Shell and requires a working/functional Exchange Management Shell to successfully execute an Exchange mailbox recovery. • The Windows Management Framework 3.0 must be installed when using Exchange servers running Windows 2008R2 and Exchange 2010. • The Exchange Recovery feature supports only a single network interface configuration. Using the VMware tools, the vmPRO specifies the IP address for eth0 as the iSCSI portal. This is the only network path by which the vmPRO can access the Exchange server. • You must configure your iSCSI Write Area settings. For each iSCSI target, there is a file created on the iSCSI write area storage. When data is written to the iSCSI disk, that data is stored in the write area, which is an area separate from the area used for the backed-up data. The configuration for the iSCSI Write Area specifies the amount of space per iSCSI target that can be used. To configure your iSCSI Write Area settings, do the following: 1 From the Configure drop-down list, select iSCSI. 2 On the Configure iSCSI dialog box, do the following: (see Figure 98): • Select the Storage for iSCSI Write Area. • Enter the Maximum size per target. 3 Click OK. Quantum vmPRO User’s Guide 103 Chapter 4: Recover Data With Quantum vmPRO Recover Data Figure 98 iSCSI Write Area Settings • The best results are seen when the backup has been completed with the Quantum VSS agent enabled (see Select the VMs to be exported on page 73). If you are using the Quantum VSS agent, you must use version 1.3 or higher (see Quantum VSS Writer on page 149). • You will need a mailbox on the target Exchange server (server in which you will recover your mailbox). Make sure that mailbox has enough space to hold the recovered mailbox; otherwise, the recovery will fail. • If you are using a Quantum VSS agent to perform the backup of mailboxes on an Exchange server, you need to add the Exchange server to the Organization Management domain group within Microsoft Exchange. This addition of the Exchange server to the domain group enables the Quantum VSS agent to capture the mailbox database information during a backup.Otherwise, during recovery of the Exchange server’s mailboxes, vmPRO is unable to list the mailbox databases located on the backed-up Exchange server. You can still proceed with the Exchange Recovery; however, you must do so by manually browsing to the Exchange server’s database .edb file and corresponding transaction log directory. To add an Exchange server to the Organization Management domain group for Microsoft Exchange 2013: 1 Open the Microsoft Exchange 2013 Exchange admin center page in a local browser (https://<Exchange Server IP Address>/ ecp/default.aspx). See Figure 99. 2 Select the Permissions tab, and then select the admin roles tab. 3 Double-click Organization Management to display the Role Group window. 104 Quantum vmPRO User’s Guide Chapter 4: Recover Data With Quantum vmPRO Recover Data 4 In the Members list, click the plus icon to display the Select Members window (see Figure 100). 5 In the displayed list, select Exchange Servers and click add to add the name to the Organization Management domain group. 6 Click ok to return to the Role Group window, with Exchange Servers displayed in the Members list (see Figure 101). 7 Click Save to exit the window and save changes. Figure 99 Microsoft Exchange 2013 Exchange Admin Center Quantum vmPRO User’s Guide 105 Chapter 4: Recover Data With Quantum vmPRO Recover Data Figure 100 Select Members 2013 106 Quantum vmPRO User’s Guide Chapter 4: Recover Data With Quantum vmPRO Recover Data Figure 101 Role Group 2013 To add an Exchange server to the Organization Management domain group for Microsoft Exchange 2010: 1 Open the Microsoft Exchange 2010 Exchange Server page in a local browser (https://<Exchange Server IP Address>/ecp/). See Figure 102. 2 Select the Roles and Auditing tab, and then select the Administrator Roles tab. 3 Double-click Organization Management to display the Role Group window. 4 In the Members list, click the plus icon to display the Select Members window (see Figure 103). 5 In the displayed list, select Exchange Servers and click Add to add the name to the Organization Management domain group. 6 Click OK to return to the Role Group window, with Exchange Servers displayed in the Members list (see Figure 104). Quantum vmPRO User’s Guide 107 Chapter 4: Recover Data With Quantum vmPRO Recover Data 7 Click Save to exit the window and save changes. Figure 102 Microsoft Exchange 2010 Exchange Admin Center 108 Quantum vmPRO User’s Guide Chapter 4: Recover Data With Quantum vmPRO Recover Data Figure 103 Select Members 2010 Quantum vmPRO User’s Guide 109 Chapter 4: Recover Data With Quantum vmPRO Recover Data Figure 104 Organization Management Properties 2010 To run an Exchange Recovery: 1 If you are using VSS, in the Exchange Recovery Wizard, select the Exchange database that contains the mailbox you want to recover (see Figure 105). Click Next. The the Exchange Recovery Wizard vCenter/ESX server information dialog box displays (see Figure 107). Proceed to Step 4 on page 113. 110 Quantum vmPRO User’s Guide Chapter 4: Recover Data With Quantum vmPRO Recover Data Figure 105 Select Exchange Database 2 If you are not using VSS, use the Exchange Recovery Wizard to browse to your Edb file location (see Figure 106). Note: When you complete a backup without VSS enabled, you will see a Database Listing Unavailable dialog box warning, just click OK, and then browse to the files. Quantum vmPRO User’s Guide 111 Chapter 4: Recover Data With Quantum vmPRO Recover Data Figure 106 Browse to Edb File 3 When you have selected your Edb file and Log dir, click Next. The the Exchange Recovery Wizard vCenter/ESX server information dialog box displays (see Figure 107). Figure 107 Enter VMware Credentials 112 Quantum vmPRO User’s Guide Chapter 4: Recover Data With Quantum vmPRO Recover Data 4 In the Exchange Recovery Wizard vCenter/ESX server information dialog box, enter your VMware login credentials: Hostname, VMware User, and VMware Password. Click Next. The Exchange Recovery Wizard Target Exchange Server dialog box displays (see Figure 108). Figure 108 Enter Exchange Server Credentials 5 In the Exchange Recovery Wizard Target Exchange Server dialog box, enter your Exchange Server’s credentials: VM Name, IP address, Windows Username, and Windows Password. Note: Because Exchange Recovery requires administrator access to the guest Exchange server VM, you must provide Windows credentials with administrator privileges. Click Next. The Recovery Database Setup Status dialog box displays (see Figure 109). When the recovery database setup has completed, control returns to the Exchange Recovery Wizard Target Exchange Server dialog box (see Figure 110). Quantum vmPRO User’s Guide 113 Chapter 4: Recover Data With Quantum vmPRO Recover Data Figure 109 Recovery Database Status Figure 110 Select Mailbox to Recover 6 In the Exchange Recovery Wizard Target Exchange Server dialog box: a Select the mailbox you want to recover. (You can only restore one mailbox at a time.) b Select or clear Keep this window open to do additional recoveries from this database as appropriate. 114 Quantum vmPRO User’s Guide Chapter 4: Recover Data With Quantum vmPRO Recover Data c Select the Target Mailbox Option: Recover to the mailbox with the same name on this server or Recover to an existing mailbox (enter the mailbox name if you select this option). d Select or enter the Recovery Options. • Conflict Resolution Option: This parameter specifies the action for the Microsoft Exchange Mailbox Replication service (MRS) to take if there are multiple matching messages in the target, Select from: Keep Source, Keep Latest, Keep All. • (Optional) Target Root Folder: This parameter specifies the top-level folder in which to restore data. If not specified, folders are restored to the top of the folder structure in the target mailbox. Content is merged under existing folders, and new folders are created if they do not already exist in the target folder structure. e Click Start. Note: If you abort a mailbox recovery, you will still see mailboxes being moved into the recovery target mailbox for a period time; this is due to a time delay that exists between the abort command and when Exchange server suspends the restore. 7 If Keep this window open to do additional recoveries from this database was not selected, you can view the mailbox recovery progress by accessing the vmPRO GUI Tasks tab (see Figure 111 and Figure 112). Figure 111 Access the Tasks Tab for Recovery Progress Quantum vmPRO User’s Guide 115 Chapter 4: Recover Data With Quantum vmPRO Recover Data Figure 112 Tasks Tab Restore Progress When the restore has completed, vmPRO will also have finished its automatic Exchange database cleanup process. 8 If Keep this window open to do additional recoveries from this database was selected, the Mailbox Restore Progress status displays (see Figure 113). Figure 113 Restore Progress Status When the mailbox restore has completed, Mailbox Successfully Recovered dialog box displays, Click OK (see Figure 114). Figure 114 Mailbox Successfully Restored a Continue restoring mailboxes as needed. b To exit the Exchange server mailbox restore function: • Clear Keep this window open to do additional recoveries from this database before starting the last mailbox recovery. 116 Quantum vmPRO User’s Guide Chapter 4: Recover Data With Quantum vmPRO Recover Data • Click Cancel to have vmPRO begin its Exchange database cleanup process and report its status (see Figure 115). Figure 115 Database Cleanup Manual Exchange Server Cleanup During an Exchange Recovery, iSCSI disks and the recovery Exchange database are configured on your Exchange server. The cleanup of this configuration is initiated when you exit the Recovery Wizard by clicking any of the back, cancel, or X buttons on the Recovery Wizard window. If you close the vmPRO GUI without exiting the Recovery Wizard or the browser crashes, the configuration changes made to your Exchange server will not be automatically cleaned up by vmPRO. If this happens, you must do a manual cleanup. Note: When the option Keep this window open to do additional recoveries is not enabled, the vmPRO will perform the cleanup automatically. To perform a manual Exchange server cleanup, do the following: 1 From the Exchange Management Shell, use the Get-MailboxDatabase | Select-Object Name command to obtain the recovery database name. The database name starts with vmPRO-Recovery (see Figure 116). Quantum vmPRO User’s Guide 117 Chapter 4: Recover Data With Quantum vmPRO Recover Data Figure 116 Obtain the Recovery Database Name 2 Use the Dismount-Database <database name> command to dismount the database (see Figure 117) Figure 117 Dismount the Recovery Database 3 Use the Remove-MailboxDatabase -identity <database name> command to remove the database (see Figure 118) Figure 118 Remove the Recovery Database 4 Unmount all vmPRO mounted volumes. a Open the Computer Management facility and access the Storage > Disk Management option (see Figure 119). 118 Quantum vmPRO User’s Guide Chapter 4: Recover Data With Quantum vmPRO Recover Data Figure 119 Disk Management vmPRO will have added one or more disks. More than one disk is added when the edb and the transaction logs are on different disks. When the edb and the transaction logs are on different partitions on the same disk, there will be two mounted volumes on that disk. b To see if a volume was mounted by vmPRO, right click the volume and select Change Drive Letter and Paths. For vmPRO mounted volumes, you will see QuanutmExcRecv (see Figure 120). Click Remove to unmount the volume. Figure 120 Volumes Mounted by vmPRO 5 Take the volumes Offline. For each volume you removed/unmounted in the previous step, take it Offline. To take a Quantum vmPRO User’s Guide 119 Chapter 4: Recover Data With Quantum vmPRO Recover Data volume Offline, right click the disk and select Offline (see Figure 121). Figure 121 Take Volumes Offline To complete the manual cleanup procedure, access your iSCSI Initiator. 1 Disconnect all vmPRO targets. In Targets tab of the iSCSI Initiator Properties dialog box, select the vmPRO target, and then click Disconnect (see Figure 122). 120 Quantum vmPRO User’s Guide Chapter 4: Recover Data With Quantum vmPRO Recover Data Figure 122 Disconnect vmPRO Targets 2 Remove the vmPRO portal. In Discovery tab of the iSCSI Initiator Properties dialog box, select the vmPRO Target Portal, and then click Remove (see Figure 123). Quantum vmPRO User’s Guide 121 Chapter 4: Recover Data With Quantum vmPRO Recover Data Figure 123 Remove the vmPRO Portal 3 Delete the iSCSI target from your vmPRO: Note: Before starting this step, make sure that all the vmPRO targets have been disconnected (see Step 1). a On the SmartMotion Backup drop-down list, select iSCSI Targets (see Figure 124). Figure 124 iSCSI Targets b On the iSCSI Targets dialog box, click delete (the red X) (see Figure 125). 122 Quantum vmPRO User’s Guide Chapter 4: Recover Data With Quantum vmPRO Recover Data Figure 125 Delete the iSCSI Target iSCSI Export This feature allows you to export/recover your backed up data as disk images (not as file systems as is the case with CIFS and NFS). After backing up disk images, you can export these disk images using vmPRO through iSCSI. You can then access the exported disk images from both virtual or physical machines. When exporting disk images using vmPRO through iSCSI, the disk images would be mounted by a Windows system, and the files within that disk are accessible on that system. Keep in mind that you can only view recovered Windows-based VMs when using the iSCSI Export feature. Before using this feature, you must address the following prerequisites: • You must create a vmPRO user (see Manage Users on page 61); this can also be do from the Enable Disks for iSCSI Export dialog box. You cannot use the default sysadmin user. For authentication and security purposes the Window iSCSI Initiator requires a unique user and a 12- to 16-character password. • You must configure your iSCSI Write Area settings (see iSCSI Write Area page page 103). For each iSCSI target there is a file created on the iSCSI write area storage. • You must have access to the Microsoft iSCSI Initiator, which if installed on your Windows system will usually be in your Administrative Tools folder. If the iSCSI Initiator is not installed on your system, you can download it at http://www.microsoft.com/en-us/download/details.aspx?id=18986 When you select iSCSI Export, the Enable Disks for iSCSI Export dialog box displays (see Figure 126). Quantum vmPRO User’s Guide 123 Chapter 4: Recover Data With Quantum vmPRO Recover Data Figure 126 Enable Disks for iSCSI Export 1 Select the disks that you want to export. 2 Enter the iSCSI Initiator IP Address IP. This is the address of the PC on which you have the iSCSI initiator installed. 3 Select (create if necessary) the iSCSI User. 4 Enter the 12- to 16-character Password of the iSCSI user. 5 Click Export Selected Disks. Control will return to the Enable Disks for iSCSI Export dialog box. The already exported disks cannot be selected and the input fields are not active. 6 (optional) Click Manage All iSCSI Targets. The iSCSI Targets dialog box displays (see Figure 127). The iSCSI Targets dialog box now contains the following information about the disk you have selected for export: Disk, iSCSI Target, Authorized User, Authorized Initiator. The iSCSI Target dialog box Action option will allow you to delete the disk (cancel the recovery). Click OK. 7 Click OK to start the recovery. 124 Quantum vmPRO User’s Guide Chapter 4: Recover Data With Quantum vmPRO Recover Data Figure 127 iSCSI Targets Disks’ Information To complete the recovery of the iSCSI VMDKs, access your iSCSI Initiator. 1 Discover the vmPRO. a Select the Discovery tab, and then click Discover Portal (see Figure 128). The Discover Target Portal dialog box displays. Figure 128 Discover vmPRO Quantum vmPRO User’s Guide 125 Chapter 4: Recover Data With Quantum vmPRO Recover Data b On the Discover Target Portal dialog box (see Figure 129), enter the IP address of DNS name of your vmPRO, and then click OK. Figure 129 Discover Target vmPRO c Select the Targets tab. Your vmPRO will be listed in the Discovered targets pane (see Figure 130). 2 Connect, log on, and mount the target. a Select your vmPRO, and then click Connect for the To connect using advanced options, select a target and the click Connect option (see Figure 130). The Connect To Target dialog box displays. 126 Quantum vmPRO User’s Guide Chapter 4: Recover Data With Quantum vmPRO Recover Data Figure 130 Connect to target vmPRO b On the Connect To Target dialog box, click Advanced (see Figure 131). The Advanced Settings dialog box displays. Figure 131 Connect to Target Advanced Options c On the Advanced Settings dialog box, do the following (see Figure 132): • Select Enable CHAP log on. • For Name: enter the vmPRO user name you enter when you created the vmPRO iSCSI user (see iSCSI Export on page 123). Quantum vmPRO User’s Guide 127 Chapter 4: Recover Data With Quantum vmPRO Recover Data • For Target secret: enter the vmPRO user password you enter when you created the vmPRO iSCSI user (see iSCSI Export on page 123). • Click OK on the Advanced Settings dialog box. • Click OK on the Connect to Target dialog box. An AutoPlay dialog box for your local disk displays (see Figure 133). You can access the file on this VMDK as you would any other files on your Windows system. Note: Do not close the iSCSI Initiator after connecting to the target. If you close the iSCSI Initiator, the AutoPlay dialog box will not display, and you will be unable to access the files on the VMDKs without repeating the discovery and connection process. Figure 132 Advanced Setting for Target vmPRO 128 Quantum vmPRO User’s Guide Chapter 4: Recover Data With Quantum vmPRO Recover Data Figure 133 iSCSI Disk Connected iSCSI Configuration Notes The following should be kept in mind when using the iSCSI Targets feature: • The target is exported to only a specific initiator IP; others initiators cannot discover the target. • You cannot delete a target when the initiator is connected. • You cannot delete the vmPRO user when the initiator is connected. • You cannot delete the vmPRO user when the iSCSI user is bound/ configured to iSCSI target. • You cannot change the vmPRO user’s password when the iSCSI user is bound/configured to the iSCSI target or when the iSCSI user is in use. • When exported, an iSCSI target will consume some of the system resources. You should remove unused iSCSI targets. The controller keeps track of how long a target is exported and generates a warning alert when the target has been exposed for more than 24 hours. • When the vmPRO is rebooted: • The iSCSI mount/connection is lost and all the previous writes are lost. • Previously exported targets are not available. • You must re-create the iSCSI targets. Quantum vmPRO User’s Guide 129 Chapter 4: Recover Data With Quantum vmPRO Recover Data Manually Recover a VM Backed up using a Third-Party Application Before you can manually recover a VM that was backed up using a third-party backup application, you must perform the following steps that will allow your vmPRO to access the VM: 1 Restore the VM using your third-party application. (If the location where the VM has been recovered can be accessed by your vmPRO, this location can be your staging area.) 2 If the location where your third-party application has located the restored VM is not accessible to your vmPRO, create a staging area on a host other than your vmPRO. This area can be on any NAS device that is accessible to both the system where the third-party backup software is installed and your vmPRO appliance. 3 In the location where your third-party application restored the VM, you will see a directory with the same name as the VM that you want to recover. Make sure that directory and all of its contents are in the staging area. Note: The following files should be in that directory: <VM name>-flat.vmdk - This is the full base disk image. <VM name>-pancbt.vmdk - Needed if using Changed Block Tracking. This is the file containing the changed blocks since the last reset <VM name>-flat.vmdk file was written. You should have one <VM name>-pancbt.vmdk file per flat file; you need only the latest <VM name>-pancbt.vmdk file for each flat file. <VM name>-.vmx - This is the VM’s configuration file. 4 Add the staging area to the vmPRO as additional storage (see Using Additional Storage on page 76). This will allow the Recover Virtual Machines Wizard to access all the directories in the staging area. 5 Access the Recover Virtual Machines Wizard dialog box. Note: The filter options are currently not available for the manual recovery option. 6 Proceed to Step c on page 95 of Recover VMs Backed up using SmartMotion. 130 Quantum vmPRO User’s Guide Chapter 4: Recover Data With Quantum vmPRO Recover Data Note: After performing a manual recovery, you must return to your staging area and delete the files. The vmPRO will not remove any of the files. Recovering Individual Files Individual files in backed-up virtual machines are available without running the recovery process. File-level recovery allows you to use the vmPRO appliance to access the files within the virtual disks that are backed up. Using Windows Explorer (not a browser) on your local computer, enter the UNC path \\<vmPRO-Host_IP>\recover\files, and then drill down the directory structure to the file (see Figure 134). Note: File-level recovery for dynamic volumes that span multiple disks is currently not supported. The vmPRO SmartView feature supports the following file system types: • EXT2, EXT3, and EXT4 • NTFS • FAT The vmPRO SmartView feature supports the following partition types: • MBR (Master Boot Record) partitions. • GPT (GUID Partition Table) partitions. The vmPRO SmartView feature also works with supported file systems that are embedded in LVM2 volumes that do not span multiple virtual disks. Limitations The vmPRO SmartView feature has limited support for Windows dynamic disks. For Windows 2003, only a simple Windows dynamic disks with a single partition is supported. If there are multiple partitions on a Windows 2003 dynamic disk, file-level access will only be available for the first partition. The vmPRO SmartView feature does not support the following: • Windows dynamic disks that span multiple drives • Windows dynamic disks that are striped Quantum vmPRO User’s Guide 131 Chapter 4: Recover Data With Quantum vmPRO Recover Data • Windows dynamic disks that use RAID • Windows 2008 dynamic disks file level access • volumes that span multiple virtual disks • Solaris UFS file systems • file systems on raw (un-partitioned disks) • physical/logical LVM partitions that have been created on raw (unpartitioned) disks • any file system types that are not explicitly listed as supported Note: When a third-party backup application is in use, you must use the third-party backup application to recover the entire virtual machine to a network share and then mount that share onto vmPRO using the vmPRO Recover Wizard; see Manually Recover a VM Backed up using a Third-Party Application on page 130 of Recover Data. (When using SmartMotion, only the target backup storage needs to be mounted using the vmPRO Recover Wizard.) In general, the drill-down process will proceed as follows: Note: The same procedure applies for NFS, just NFS mount to /recover. 1 CIFS mount the vmPRO /recover share. 2 cd to the files directory. Verify that you are in the /recover/files directory. 3 There is a directory for each configured target storage. cd to your backup data. When you cd into a VM directory it will contain a .volume directory for each disk. 4 cd into the .volume directory. There you will see directories named 0, 1, 2,... etc. for each partition on the disk. You can cd into each numbered directory to access the files for the respective partition. Note: The partitions will be automatically mounted; however, there could be a short delay during the automatic mount process. 132 Quantum vmPRO User’s Guide Chapter 4: Recover Data With Quantum vmPRO Recover Data Under /recover/files, the hierarchy is: storage-target yyyy-mm (month of backup) yyyy-mm-dd-tttt (date and time of backup) folder-name (such as ESX server) VM-name disk-name partition-number (such as 0, 1, …) files-and-directories Figure 134 Recovering an Individual File Quantum vmPRO User’s Guide 133 Chapter 4: Recover Data With Quantum vmPRO Recover Data 134 Quantum vmPRO User’s Guide Chapter 5 Using Groups and Folders With Quantum vmPRO This chapter describes how to create, set up, and manage groups and folders for more efficient and faster backups. Set Up and Manage Groups If a single appliance does not provide enough throughput to complete backups in the desired window, additional appliances may be deployed in the environment. Note: If you plan to use more than one vmPRO as part of your backup solution, the vmPROs should be set up in a group configuration. Keep in mind that the nodes in a Master/Slave relationship can only export one vCenter server. If two stand alone nodes are joined together the appliance in a Master role will supersede the export priority of the slaves roles. Group Mode streamlines the management of multiple appliances. When configuring Group Mode, one appliance is selected as the master. You then configure and manage all the other appliances from the master appliance. Quantum vmPRO User’s Guide 135 Chapter 5: Using Groups and Folders With Quantum vmPRO Set Up and Manage Groups You can distribute backups across other vmPRO nodes using a single capacity based license. Once installed, the single license is shared by the group and the capacity of the entire group is managed by the one capacity license. Note: The capacity license will be shared with all exported capacity from all nodes counting against the license. To take advantage of Group Mode Licensing, you must install multiple vmPRO appliances, designate one as the Master, and then add the other vmPRO appliances as nodes of the Master. To accomplish this, do the following: 1 Install a vmPRO (the one you want to use as the Master). 2 Install the capacity license that you have purchased. Follow the instructions presented by the Licenses Wizard (see Configure Quantum vmPRO on page 32. 3 Configure the vmPRO as the Master; see Create the Group’s Master on page 137. 4 Install all the vmPRO appliances that you want to be nodes (appliances managed by this Master). 5 Configure each node (add it to the group managed by this master); see Add Quantum vmPRO Appliances to a Group on page 138. Use the following to help you set up your groups: • Before deploying multiple appliances in Group Mode, confirm each appliance has network connectivity and DNS resolution. Use the net ping command from the appliance's console command line to verify that each appliance can ping the other appliances that will be part of the group (ping by name if using DNS). Perform this test before creating the group, to ensure proper functioning of the group deployment. • DNS resolution failures or IP routing issues in the group deployment may cause backup jobs to fail for VMs assigned to the misconfigured nodes. • Verify that all group members/nodes have been upgraded to the same release version of the appliance, for example 3.1. • Create your folders on the master appliance. They will appear on all nodes. 136 Quantum vmPRO User’s Guide Chapter 5: Using Groups and Folders With Quantum vmPRO Set Up and Manage Groups Note: If you need to migrate your VMs to another ESX server, and you do not want the VMs to be assigned to the master node, you must manually assign the VMs to the preferred node (see Increase Backup Throughput on page 140). Set Up Groups To set up groups, configure a Quantum vmPRO appliance as the group's master, and then add appliances to the group. Groups are created using the console Setup wizard. See Access Quantum vmPRO on page 25 for information on accessing and using the console Setup wizard. Create the Group’s Master 1 Log into to the console Setup wizard for the Quantum vmPRO appliance that will be your group’s master. 2 Select Group Membership (see Figure 135). Figure 135 Group Membership 3 Press <Enter> to go to the Change Group Membership screen. (If an appliance is already configured as a master appliance, you will not be able to go to the Change screen, because no changes can be Quantum vmPRO User’s Guide 137 Chapter 5: Using Groups and Folders With Quantum vmPRO Set Up and Manage Groups made to a master’s group membership until all its members have been removed.) 4 On the Change Group Membership screen, select Create a new group (use the arrow keys to move the cursor to Create and then press the spacebar) (see Figure 136). Figure 136 Creating a New Group 5 Press <Enter> to save the change, and the group will be created with the current Quantum vmPRO appliance as the master. You can now add other Quantum vmPRO appliances to the group. Add Quantum vmPRO Appliances to a Group 1 Log into the console Setup wizard for a Quantum appliance you want to make a member of a group. 2 Select Group Membership and press <Enter> to go to the Change Group Membership screen. 3 At the Change Group Membership screen, select Join a preexisting group. 4 Enter the IP address or resolvable hostname for the Quantum vmPRO appliance that is the master of the group in which you want to place the current appliance. 5 Enter the sysadmin password for the master appliance (see Figure 137). 138 Quantum vmPRO User’s Guide Chapter 5: Using Groups and Folders With Quantum vmPRO Set Up and Manage Groups Figure 137 Joining an Existing Group 6 Press <Enter> to save the changes, and the Quantum vmPRO appliance will join the specified group. Remove a Quantum vmPRO Appliance From a Group Note: When an appliance is removed from a group, the link between the backup policy and the storage no longer exists. For any node appliances which have left a group, you must re-create the backup policy. Also, if the appliance will be used as a standalone appliance, it will need a valid license. 1 Log into the Setup console for the Quantum vmPRO appliance to be removed from the group. 2 Select Group Membership. 3 From the Change Group Membership screen, select Leave group. 4 Save the changes. Note: You cannot remove a master appliance from a group unless all other appliances have already been removed from the group. Manage Groups Quantum vmPRO User’s Guide Once you have created a master and added appliances to it, you must configure and manage all group members from the master appliance. If you go to the GUI for a group member that is not a master, you will see a warning reminding you to go to the group’s master appliance to manage all appliances in the group. The warning includes a Go to master button that will take you to the GUI for the master appliance. Quantum does not support configuring a node appliance independently of its master. 139 Chapter 5: Using Groups and Folders With Quantum vmPRO Set Up and Manage Groups You can see the list of nodes on the Resources screen of the master appliance’s VMs tab. (see Figure 138). Figure 138 Lists of Nodes On the VMs table, accessed by selecting VMs on the vmPRO GUI and then selecting the Virtual Machines tab, you can add a Node column so that you can see which node each VM is associated with. Open the Select Columns drop-down list and check Node (see Figure 139). Figure 139 Adding a Node Column Increase Backup Throughput Increasing the number of nodes and correctly selecting VMs to be backed up by each node can increase overall backup throughput. To select or change the node to which VMs are assigned, do the following: 1 From the Quantum vmPRO GUI, select VMs. 2 At the VMs screen, select the Virtual Machines tab. 3 From the VMs table, select one or more VMs whose node you want to select or change. You may need to open a folder (by selecting it) to access the VMs. 140 Quantum vmPRO User’s Guide Chapter 5: Using Groups and Folders With Quantum vmPRO Set Up and Manage Groups • To select consecutive VMs in the list, select the first VM in the series, hold down <Shift> and select the last VM in the series. • To select non-consecutive VMs, hold down <Ctrl> and select each VM you need to select. • If you need to select all the VMs in a folder, select the folder. 4 Select Edit Selected VMs above the VM list. 5 In the Configure Virtual Machine dialog box, select the appropriate node from the Node drop-down list (see Figure 140). 6 Select Save. Figure 140 Selecting a Node Update Group Members When the Master’s IP Address/ Hostname Changes If a master appliance’s hostname or IP address changes (in other words, the command net set hostname was run on the master), the appliances in the group must be updated and restarted. Both operations are performed from the Quantum vmPRO command line. See Access Quantum vmPRO on page 25 for information on accessing the Quantum vmPRO appliance's command line. 1 Update the group member appliance to the master appliance’s new IP address/hostname using this command: group update master <master> The group update master command assumes that the master is the same appliance but with a new IP address. The command Quantum vmPRO User’s Guide 141 Chapter 5: Using Groups and Folders With Quantum vmPRO Set Up and Manage Groups should not be used in any other circumstance. After you run net set hostname on a master appliance, you will see a reminder to run group update master on the appliances in the group. 2 Restart the Quantum vmPRO appliance using this command: system reboot Import the Configuration Settings for Groups This procedure will allow you to transfer the configuration settings of all the members of a vmPRO group (master and all nodes) to new appliances and have the new group function as the original did. Note: Only the configuration settings of the previous/old group's master vmPRO appliance needs to be saved. 1 Save the previous/old master appliance's configuration settings: From the previous/old master appliance's vmPRO GUI, select Export vmPRO Configuration from the Operations drop-down list (see Figure 141). Note: Remember the file name and its location when you download it. 2 Import the master configuration package to the new factory default appliance: From the new appliance's vmPRO GUI, select Import vmPRO Configuration from the Operations drop-down list (see Figure 141). Use the Browse button to locate and select the file you downloaded in the previous step. This appliance will be the new master. Note: The importing of a saved/exported configuration package of a master appliance will automatically create a new master appliance. 142 Quantum vmPRO User’s Guide Chapter 5: Using Groups and Folders With Quantum vmPRO Set Up and Manage Groups Figure 141 Operations dropdown list 3 For each node that needs to be recovered, deploy a new appliance. Follow the procedure as presented in the online Quantum vmPRO Download and Installation Guide to deploy each new appliance. Note: You will need a valid e-mail address and password to access the vmPRO Download and Installation Guide. 4 For each node, access its console Setup wizard and join the group; see Add Quantum vmPRO Appliances to a Group on page 138. 5 Manually reassign the VMs from the old nodes to the new nodes: a From the master appliance's vmPRO GUI, select VMs. b At the VMs screen, select the Virtual Machines tab (see Figure 145). c From the VMs table, select the VMs that are to be reassign. You can also type node:<node_name> in the search field to help you find the VMs. You may need to open a folder (by selecting it) to access the VMs. • To select consecutive VMs in the list, select the first VM in the series, hold down <Shift> and select the last VM in the series. • To select non-consecutive VMs, hold down <Ctrl> and select each VM you need to select. • If you need to reassign all the VMs in a folder, select the folder. Quantum vmPRO User’s Guide 143 Chapter 5: Using Groups and Folders With Quantum vmPRO Set Up and Manage Groups d Select Edit Selected VMs. e On the Configure Virtual Machine dialog box, select the appropriate node from the Node drop-down list, and then select Save (see Figure 140). 6 Remove the old nodes: a From the master appliance's vmPRO GUI, select VMs. b At the VMs screen, select the Resources tab. c Under the Nodes pane, select Configure. d On the Configure Nodes List dialog box, select the (red) X for each node that you want to remove (see Figure 142). (This will avoid the confusion of having orphaned nodes.) Figure 142 Remove the Old Nodes 7 Reboot all nodes using the VMware vSphere console or from the each appliance's command console using the command system reboot. 144 Quantum vmPRO User’s Guide Chapter 5: Using Groups and Folders With Quantum vmPRO Create and Manage Folders Create and Manage Folders Folders are a powerful construct within the appliance. They enable you not only to organize your VMs visually, but also to manage multiple Differential CBT backup rotation schedules, and the distribution of backup jobs across multiple appliance nodes. The CBT feature enables differential backups which significantly reduce the amount of data read from the hypervisor and written to the target storage; thus, reducing backup times. By default, the appliance organizes your VMs in folders named for their respective vSphere ESX hosts. These folders are separate from your existing folder structures inside vSphere, and they are used in the appliance to allow you to refine and optimize the backup loads across your appliances. If you add a vCenter server, your VMs will all appear in a single initial folder with the name of that vCenter server. Alternately if you add one or more ESX servers, your VMs appear in folders corresponding to the ESX host on which they reside. You can create additional folders to visually organize your VMs and to manage multiple backup policies which will facilitate higher throughput. If you are using Group Mode, folders that you create on the master appliance will appear on all node appliances. Use the following to help you set up your folders: • Add folders and divide your VMs among them to enable multiple backup rotation policies. • Define folders that reflect your organization’s needs. For example, name folders and group VMs according to backup schedules or classes of VMs such as Production, QA, and Development. • Stagger full backups across different weeks to shorten long full backup windows. • Assign folders and VMs to be managed by the different appliance nodes in a group to distribute the backup load. • VMs can belong to only one folder; however, a folder can be backed up by more than one policy, which in turn allows it to have multiple schedules. Quantum vmPRO User’s Guide 145 Chapter 5: Using Groups and Folders With Quantum vmPRO Create and Manage Folders Create Folders To create a folder, do the following: 1 From the Quantum vmPRO GUI, select VMs. See Access Quantum vmPRO on page 25 for information on accessing the GUI. 2 At the VMs screen, select the Folders tab (see Figure 139). Figure 143 Folders tab 3 On the Folders screen, select Add Folder. 4 In the Configure Folder dialog box, enter a name for the folder (see Figure 144). Figure 144 Configure Folder 5 If you are using Changed Blocked Tracking on the VMs, you can change the CBT reset schedule for the folder if you wish. Keep in mind that setting, or re-setting, the CBT schedule sets the time at which the next full backup will occur. See vSphere Changed Block Tracking (CBT) Support on page 161 for more information. 146 Quantum vmPRO User’s Guide Chapter 5: Using Groups and Folders With Quantum vmPRO Create and Manage Folders 6 Select your Transport Method: global default, HotAdd with fall back to NBD, or NBD only. Note: If you want to use HotAdd as your Transport Method, please read the warning notice. 7 Select Save, and you will see the new folder appear in the list on the Folders tab. 8 Add as many folders as you need. Move VMs to New Folders To move VMs to a new folder, do the following: 1 From the Quantum vmPRO GUI, select VMs. 2 At the VMs screen, select the Virtual Machines tab. 3 From the VMs table, select one or more VMs to move into a new folder. You may need to open a folder (by selecting it) to access the VMs. • To select consecutive VMs in the list, select the first VM in the series, hold down <Shift> and select the last VM in the series. • To select non-consecutive VMs, hold down <Ctrl> and select each VM you need to select. • If you need to move all the VMs in a folder to the same new folder, simply select the folder icon. 4 Select Edit Selected VMs above the VM list (see Figure 145). Figure 145 Selecting VMs to Move Quantum vmPRO User’s Guide 147 Chapter 5: Using Groups and Folders With Quantum vmPRO Create and Manage Folders 5 In the Configure Virtual Machine dialog box, select the folder to move the VM or VMs to (see Figure 146). Figure 146 Configure Virtual Machine 6 Select Save. You will return to the Virtual Machines tab, where you will see the VMs listed in their new folders. Edit or Delete a Folder To edit a folder, select VMs on the Quantum vmPRO GUI, and then select the Folders tab. In the Actions column, select the folder’s Edit folder (pencil) icon. Make the appropriate changes, and then select Save. To delete a folder, select VMs on the Quantum vmPRO GUI, and then select the Folders tab. In the Actions column, select the folder’s Delete folder icon (red X). Note: A folder must be empty before it can be deleted. If the folder contains any VMs, you must move all the VMs from that folder to another folder. 148 Quantum vmPRO User’s Guide Chapter 6 Quantum vmPRO Advanced Use This chapter describes advanced features of Quantum vmPRO and contains the following sections: • Quantum VSS Writer • Embed the Quantum vmPRO GUI in vSphere Client • Quantum vmPRO Support for External Monitoring • Synchronize With the Time Server • vSphere Changed Block Tracking (CBT) Support • Configure Advanced Settings Quantum VSS Writer The VSS Writer prepares Windows for a VMware snapshot and automates a non-authoritative restore of Windows Domain Controller when the virtual machine is restored. When restoring a Windows Active Directory Domain Controller from a snapshot image, Quantum automatically boots the VM in the restore mode and performs the necessary steps to prevent a “USN rollback” so that directory replication will work correctly. Quantum vmPRO User’s Guide 149 Chapter 6: Quantum vmPRO Advanced Use Quantum VSS Writer Quantum vmPRO supports application-consistent quiescing of Windows 2003 32bit/64bit, Windows 2008 32bit/64bit, Windows 2008 R2, and Windows 2012. Quantum’s VSS Writer supports automating nonauthoritative recovery of Active Directory, Exchange 2007, Exchange 2010, Windows Server 2012, SQL Server 2008, and SQL Server 2012 from the snapshot. Note: Before beginning a VSS backup, ensure that the VM has enough free disk space. VSS backups will fail when the VM is low on free disk space. For more information, see http:// technet.microsoft.com/en-us/library/cc708051(v=ws.10).aspx. Note: VSS requires VMware Tools to be up to date. Requirements for Active Directory Backup and Recover Support • Windows Server 2003 and above • VMware tools (latest build preferred) • The Quantum VSS Writer • Enabled Quiesce on VMs Manual Installation of the Quantum VSS Writer The installation takes place from the Windows system upon which you are installing the VSS writer. The Quantum VSS Writer must be installed on each system that is to have this advanced level of support. The manual installation method allows you to install the VSS writer without exposing the Window’s username and password, which are required when using the automatic method as shown in Figure 149. To install the Quantum VSS agent, do the following: 1 Download the appropriate version of QuantumVSS.exe from \\<vmPRO IP>\quantum-support\vss. In this share you will see two folders, 2003 and 2008 and higher. In the 2003 folder you will find the QuantumVSS.exe that supports Windows 2003. In the 2008 and higher folder there are two sub folders, 32bit and 64bit, each has a QuantumVSS.exe that supports Windows 2008 32 or 64 bit servers respectively. 150 Quantum vmPRO User’s Guide Chapter 6: Quantum vmPRO Advanced Use Quantum VSS Writer 2 Install the correct Quantum VSS on the Windows VM by double clicking the QuantumVSS.exe file and following the instructions. Enable Quiesce for VMs For file system consistency, you must first enable quiesce. See Access Quantum vmPRO on page 25 if you need information on accessing the vmPRO GUI. 1 From the Quantum vmPRO GUI, select VMs. 2 From the VMs screen, select the Virtual Machines tab. 3 In the VM table on the Virtual Machines tab, select the VM or VMs for which you need to enable Quiesce (see Figure 147). • To select consecutive VMs in the list, select the first VM in the series, hold down <Shift> and select the last VM in the series. • To select non-consecutive VMs, hold down <Ctrl> and select each VM you need to select. • You can select a folder to edit all the VMs in that folder. By default, all your VMs are in a single folder, named for their vCenter or ESX server, but you can create more folders and move VMs into them to facilitate VM management (see Create and Manage Folders on page 145). Figure 147 Selecting VMs to Enable For Quiesce 4 Select Edit Selected VMs. 5 In the Configure Virtual Machine dialog box, check Configure VSS Settings (see Figure 148). The Configure VSS Login dialog box displays. Quantum vmPRO User’s Guide 151 Chapter 6: Quantum vmPRO Advanced Use Quantum VSS Writer Figure 148 Configure Virtual Machine 6 From the Configure VSS Login dialog box, select Quiesce Enabled (requires VMware tools) if you have selected one VM to quiesce; select Yes in the Quiesce Enabled drop-down list if you have selected multiple VMs to quiesce (see Figure 149). If necessary, Log truncation can be enabled at this time by selecting Log Truncation Enabled and providing the login credential for the VM. Log Truncation allows the vmPRO to trigger transaction log truncation after a backup completes. Failure to handle the truncation of the log files can cause a system disk or partition to become full, which will lead to application downtime. If Log Truncation is enabled for VMs that are being backed up by SmartMotion, the log truncation will occur automatically when SmartMotion completes successfully. If the VM is being copied from /export manually or through a third party backup tool, you will need to manually trigger the log truncation when the backup completes. You can do this using the button labeled Complete Backup (VSS) on the Virtual Machines tab of the GUI, or by using the console commands (see vss on page 185). Note: The Complete Backup (VSS) button will not display unless there are VMs with log truncation enabled that have been backed up recently. It can take up to an hour after the backup starts for the button to display. 7 You can automatically install or upgrade the VSS writer by entering the Window’s username and password and then clicking Install or upgrade Quantum VSS agent (optional). 152 Quantum vmPRO User’s Guide Chapter 6: Quantum vmPRO Advanced Use Quantum VSS Writer Figure 149 Enable Quiesce 8 Select Save. If you configure a large number of VMs, the process may take some time. 9 When the process is finished, you can view your changes in the VMs table (see Figure 150). • The VSS column on the Virtual Machines tab shows whether Quiesce is enabled for each VM. • If you do not see a VSS column, you can select the Select Columns drop-down list to add the column. • When you select a single VM, you will see further details about that VM at the bottom of the table. Figure 150 VMs List (Quiesce Enabled) Quantum vmPRO User’s Guide 153 Chapter 6: Quantum vmPRO Advanced Use Quantum VSS Writer VMware Tools Out of Date VSS requires VMware tools to be up to date. If VSS (quiesce) is enabled on a VM and its VMware Tools is out of date, the issue will be reported in the Quantum vmPRO GUI. • On the Virtual Machines tab of the Home page, the VM’s YES in the VSS column will be red. • If you mouse over a VM that has a red YES, you will see an error message. • You will also receive alert messages if VMware Tools is out of date for any VM’s. If cleared, the alert message will reappear every 15 minutes until you update VMware Tools and perform a discover, or disable VSS (Quiesce) for the VMs. Uninstall the VSS Writer Use the Windows Control Panel Add/Remove Programs to uninstall the VSS Writer. If you encounter an error using the Windows’ Add/Remove Programs to uninstall the VSS Writer, do the following: 1 On the Windows VM, open the Registry Editor by selecting Run from the Windows’ start button. 2 In the Run dialog box, enter regedit, and then click OK. 3 Navigate to the following key: HKEY_LOCAL_MACHINE\Software\Microsoft\Windows\CurrentVer sion\Uninstall\{13C110B5-F313-4bc5-B700-D7B4B6A70A49} 4 Change the value of UninstallString to the following, including the quotes (see Figure 151): "C:\Program Files\VMware\VMware Tools\backupScripts.d\QuantumVSS.exe" uninstall 154 Quantum vmPRO User’s Guide Chapter 6: Quantum vmPRO Advanced Use Embed the Quantum vmPRO GUI in vSphere Client Figure 151 Regedit Uninstall Note: If the Program Files directory is not located at C:\Program Files, you will need to replace that portion with the actual location. 5 Return to Add/Remove Programs and attempt the uninstall again. VSS Resources Information about what VMware tools can (and cannot) do with VSS: • Working with Microsoft Volume Shadow Copy Information about Active directory recover: • How to detect and recover from a USN rollback in Windows Server 2003 • Active Directory Backup and Restore Embed the Quantum vmPRO GUI in vSphere Client The Quantum vmPRO GUI can be embedded directly into vSphere Client when it is connected to a vCenter Server. To use this feature, a Quantum plugin must be registered with the vCenter server. Quantum vmPRO User’s Guide 155 Chapter 6: Quantum vmPRO Advanced Use Embed the Quantum vmPRO GUI in vSphere Client Note: The vCenter plugin works with all versions of the native vSphere client, but currently there is no plugin for the vSphere Web client. Register the vCenter Plugin Register the plugin from the Quantum vmPRO GUI (see Access Quantum vmPRO on page 25). 1 From the Configure drop-down list, select Config Wizard. 2 From the Configuration Wizard welcome screen, select vCenter Plugin (see Figure 152). Figure 152 Configuration Wizard: vCenter Plugin 3 Select Register plugin. 4 In the Register vCenter Plugin form, enter the IP address or resolvable hostname of your vCenter server. Note: If you need to register your vCenter plugin using an alternate port, enter the IP address and port number using the following format: <IP_address:port_number>. 5 Enter the administrative username and password (see Figure 153). 156 Quantum vmPRO User’s Guide Chapter 6: Quantum vmPRO Advanced Use Embed the Quantum vmPRO GUI in vSphere Client Figure 153 Register vCenter Plugin 6 Select OK and the plugin will be registered with the vCenter server. 7 From the Configuration Wizard, select Summary to go to the summary screen. 8 Select Save, then Next, then Finish to make your changes permanent. You can return to the Configuration Wizard if you need to remove the plugin from the vCenter server. Use the vCenter Plugin Once It Has Been Registered To use the vCenter plugin, do the following: 1 Restart your vCenter server. 2 Log into your vSphere client. 3 Select a datacenter or datacenter folder from the Inventory view. 4 Select the new tab labeled Quantum vmPRO <IP address>, and the Quantum vmPRO GUI will load in the tab. (A window may appear asking whether you want to trust the security certificate; select Yes.) You can then log into the GUI as usual. Note: If the Quantum vmPRO GUI does not load, make sure Adobe Flash Player is installed on the system running the vSphere Client. Quantum vmPRO User’s Guide 157 Chapter 6: Quantum vmPRO Advanced Use Quantum vmPRO Support for External Monitoring Quantum vmPRO Support for External Monitoring Quantum vmPRO supports external read-only monitoring using SNMP Version 2c. Quantum vmPRO supports MIB-II. Quantum vmPRO also supports Nagios remote plugin execution using the NRPE add-on. This allows you to monitor aspects of the Quantum vmPRO appliance using an external Nagios application. SNMP Support Quantum vmPRO supports external read-only monitoring using SNMP Version 2c. Quantum vmPRO supports MIB-II. SNMP allows access to any object in the system branch of the tree. SNMP, which is not enabled by default, can be configured from the command line of the Quantum vmPRO appliance. For a list of vmPRO supported SNMP commands, see snmp on page 182. For more information regarding various system statistics, you can read following MIBs: Table 2 SNMP MIBs 158 MIB Description .1.3.6.1.4.1.2021.4 Memory .1.3.6.1.4.1.2021.9 Disks (/, /var, and /var/cores only) .1.3.6.1.4.1.2021.10 Load .1.3.6.1.4.1.2021.11 CPU .1.3.6.1.2.1.1 System info such as uptime .1.3.6.1.2.1.2.0.0.0.2 Interfaces (eth0 only) .1.3.6.1.2.1.4 Networking Quantum vmPRO User’s Guide Chapter 6: Quantum vmPRO Advanced Use Quantum vmPRO Support for External Monitoring Nagios Support Quantum vmPRO supports Nagios remote plugin execution using the NRPE add-on. This allows you to monitor aspects of the Quantum vmPRO appliance using an external Nagios application. Monitoring commands are executed from the external Nagios application using the check_nrpe plugin with arguments to specify the host address and command: check_nrpe -H <Quantum vmPRO appliance address> -c <command> Table 3 lists the supported commands. Table 3 Nagios Commands Command Description check_disk Check the disk space on the appliance file system check_load Check the system load average over the last 1, 5 and 15 minutes check_snmp Check the status of snmp on the appliance Table 4 lists commands that are used from the Quantum vmPRO console command line (see Access Quantum vmPRO on page 25 for information on accessing the command line): Table 4 Nagios Console Commands Command Description nagios disable Disable Nagios on the appliance nagios enable Enable Nagios on the appliance nagios status Check status of Nagios For more information about Nagios, see: www.nagios.org Quantum vmPRO User’s Guide 159 Chapter 6: Quantum vmPRO Advanced Use Synchronize With the Time Server Synchronize With the Time Server Synchronize your appliance with the time server using the Quantum vmPRO GUI (see Access Quantum vmPRO on page 25 if you need information on the GUI). 1 From the Operations drop-down list in the Quantum vmPRO GUI, select Synchronize With Time Server (see Figure 154). Figure 154 Synchronize With Time Server 2 In the Synchronize Time dialog, select Sync now (see Figure 155). Figure 155 Synchronize Time Dialog 3 When the synchronization is complete, you'll see a finished message, and you can select OK to dismiss the dialog box. 160 Quantum vmPRO User’s Guide Chapter 6: Quantum vmPRO Advanced Use vSphere Changed Block Tracking (CBT) Support vSphere Changed Block Tracking (CBT) Support The appliance's SmartRead and SmartMotion capabilities can leverage VMware's Changed Block Tracking (CBT) feature to identify the virtual disk blocks that have changed, allowing backup and storage processes to avoid unnecessary reads. CBT allows the vmPRO to backup VMs at a differential level; thus, reducing network I/O and allowing backups to finish faster because only the changes to the virtual machine's disk(s) are backed up.This provides the basis for the appliance's differential backup capability. The CBT feature in VMware ESX versions 4.0 update 2 and later has been integrated with Quantum vmPRO. When the CBT feature is enabled for a VM, the Quantum vmPRO appliance will create a pancbt file for each base disk (-flat.vmdk file) in the /export file system. The pancbt files contain the changed blocks for their corresponding base disk. The differential CBT backup files (designated with the –pancbt.vmdk suffix) are not complete .vmdk disk images. These differential CBT backup files require recovery through the appliance before they can be used. The base disk’s mod time will be the start of the reset time, while the pancbt files will have newer mod times. (See the section, Schedule Your Changed Block Tracking Resets on page 164, for the default reset schedule and instructions for selecting a different schedule.) Note: Only paid versions of VMware ESX or ESXi servers should be used. Free versions have various API limitations that prohibit vmPRO from functioning as designed. CBT Considerations When using CBT, keep the following in mind: • VMs must be at virtual hardware version 7 or above for CBT. • The ESX server must be version 4.0 update 2 or above. • Assumes differential backups. • If you are using ESX 4.1, reverting a snapshot resets CBT for that VM. You must then remove all snapshots from the appliance and run the console command cbt reset <hypervisor> <VM>. Quantum vmPRO User’s Guide 161 Chapter 6: Quantum vmPRO Advanced Use vSphere Changed Block Tracking (CBT) Support • Moving a VM with Storage vMotion disables CBT. Standard vMotion (i.e., when the vmdk stays in the same physical place and only the ESX host changes) does not disable CBT. • Using vMotion on VMs for load balancing during a backup can cause the backup to fail to complete. To avoid this issue, vMotion will be disabled on the VMs prior to the start of the backup process on vmPRO 3.0.1 and newer. This feature is supported by vCenter Server version 5. For vCenter 4.x, the administrator should configure the VMs so that vMotion will not run during the backup. • Multiple appliances cannot manage the same VM when the CBT feature is used on the VM. • Do not schedule CBT resets to occur at the same time as backups. It is recommended that CBT resets be scheduled hours before the start of your backup window to allow enough time for the reset on all CBT-enabled VMs to complete before your backups start. Note: The backup after a CBT reset is a full backup. • Activating or deactivating the CBT feature will trigger the immediate creation and removal of an ESX snapshot for each VM activated, this is required by the VMware API. Note: The removal and creation of a snapshot for each VM can be a time consuming process when activating or deactivating the CBT feature on multiple VMs. • Differential CBT backup files are designated with the -pancbt.vmdk suffix. Unlike a Full backup, these files are not complete. VMware expects .vmdk files to be complete images, thus CBT-based backups require recovery through the vmPRO Recovery Wizard before being usable to ESX. Enable CBT for VMs Enable CBT for VMs from the Quantum vmPRO GUI (see Access Quantum vmPRO on page 25 if you need information on the GUI). 1 From the Quantum vmPRO GUI, select VMs. 2 Select the Virtual Machines tab. 3 In the table on the Virtual Machines tab, select the VM or VMs for which you need to enable CBT (see Figure 156). 162 Quantum vmPRO User’s Guide Chapter 6: Quantum vmPRO Advanced Use vSphere Changed Block Tracking (CBT) Support • To select consecutive VMs in the list, select the first VM in the series, hold down <Shift> and select the last VM in the series. • To select non-consecutive VMs, hold down <Ctrl> and select each VM you need to select. • To set the CBT setting for all VMs in a folder, select the folder. Figure 156 Selecting VMs to Enable For CBT 4 Select Edit Selected VMs. 5 In the Configure Virtual Machine dialog box, check Changed Block Tracking Enabled, or, if you are configuring a folder or a group of VMs, select Yes from the CBT Enabled drop-down list (see Figure 157). Figure 157 Configure Virtual Machine 6 Select Save. Quantum vmPRO User’s Guide 163 Chapter 6: Quantum vmPRO Advanced Use vSphere Changed Block Tracking (CBT) Support 7 Once your changes are completed, view them in the CBT column on the Virtual Machines tab (see Figure 158). • If you do not have a CBT column, you can add it from the Select Columns drop-down list. • You can view more details for a particular VM by selecting the VM from the list on the Virtual Machines tab and looking at the detailed view below the table. Figure 158 VMs List (CBT Enabled) Schedule Your Changed Block Tracking Resets By default, the last modified time for each CBT-enabled VM’s base disk is reset to the current time each Sunday at 03:30. You can modify this schedule in the configuration of the folder containing the VMs. Keep in mind that setting, or re-setting, the CBT schedule sets the time at which the next full backup will occur. To do so, go to the Quantum vmPRO GUI and select VMs. Then select the Folders tab. Select the pencil icon for the folder whose CBT reset schedule you need to change, select the time and frequency for your resets, and select Save (see Figure 159). Note: See Create and Manage Folders on page 145 for more details about creating and managing folders. 164 Quantum vmPRO User’s Guide Chapter 6: Quantum vmPRO Advanced Use vSphere Changed Block Tracking (CBT) Support Note: Do not start your resets at the same time as your backups. We recommend scheduling your resets a few hours before your backups to ensure that all CBT-enabled VMs have been reset before backups begin. Figure 159 Scheduling CBT Resets For a one-time, immediate reset of the last modified time for the base disk, use the following console command: cbt reset [all | <hypervisor> <vm name> | folder <folder> The last modified time will be reset to the current time. Quantum vmPRO User’s Guide 165 Chapter 6: Quantum vmPRO Advanced Use Configure Advanced Settings Configure Advanced Settings This section provides information regarding the advanced settings for the Quantum vmPRO. These options are found on the Configure Advanced Settings dialog box (see Figure 160). From the vmPRO GUI, select Configure > Advanced Settings. • Enable the file system integrity check during backup • Enable HotAdd Transport (Use caution when enabling this feature.) • Skip reading of page file and swap partitions during backup • Allow a SmartMotion to run even if the same policy is already running • Disallow backups when there is not enough datastore space for snapshot Figure 160 Configure Advanced Settings Enable the file system integrity check during backup 166 Clear or select the Enable the file system integrity check during backup option in the Configure Advanced Settings dialog box. This option allows the vmPRO to execute a file systems integrity check on the VM’s disks before performing a backup of that VM. This ensures that the SmartRead optimization can be used during backup. Otherwise it cannot, and an alert will be issued about possible problems at recover time. Quantum vmPRO User’s Guide Chapter 6: Quantum vmPRO Advanced Use Configure Advanced Settings Enable HotAdd Transport Clear or select the Enable HotAdd Transport option in the Configure Advanced Settings dialog box. Caution: If the vmPRO appliance has HotAdd disks attached, DO NOT delete the vmPRO appliance from the server; this will result in the attached disks being deleted from the datastore. Because of the potential for data loss, the default configuration of the vmPRO enables the NBD transport mode — not the HotAdd transport mode. vmPRO now supports vSphere’s HotAdd and HotAdd transport features. HotAdd allows you to add and remove SCSI virtual hard disks while your vmPRO is running. SCSI HotAdd is a good way to get virtual disk data from guest virtual machines directly to the ESX/ESXi host on which they are running. HotAdd improves performance and provides a non-networked-based method of transferring data from the source VM to vmPRO for backup purposes. Using HotAdd Mode When a hypervisor is under moderate to heavy system load, Quantum tests have shown significant performance improvement for backup throughput when the HotAdd transport mode was used. Before enabling the HotAdd transport mode, keep in mind that the HotAdd transport mode can access only the following VMs: • Target VMs that are on the same ESX server as the vmPRO appliance. • Target VMs that are managed by the same vCenter as the vmPRO, and sharing the same storage. In this case, the vmPRO must be managing the vCenter and not managing the ESX server directly. The vmPRO must also have access to the shared storage used by the target VM. If neither of the above conditions is met, the transport method will automatically revert to NBD. Verify HotAdd Mode in Use Enabling HotAdd only requests the HotAdd transport mode. It does not guarantee it will be used. You should verify that the HotAdd transport mode is in use. Quantum vmPRO User’s Guide 167 Chapter 6: Quantum vmPRO Advanced Use Configure Advanced Settings To verify that the HotAdd mode is in use, do any of the following: • From your vmPRO GUI, select Help > vmPRO System. Select the Log Files tab. Select datastore_fs. Look for the message Obtained (and using) Transport Mode: hotadd. • In your vSphere client, right click your vmPRO VM and select Edit > Settings. Select the Hardware tab and verify that a new virtual disk is added to the vmPRO each time a new disk is copied. Limitation with Mismatched Block Size HotAdd cannot be used if the VMFS block size of the datastore containing the virtual machine folder for the target (source of the backup) virtual machine does not match the VMFS block size of the datastore containing the proxy (The vmPRO appliance. The vmPRO is standing in as a proxy for the original VM that owns the disk.) virtual machine. For example, if you back up virtual disk on a datastore with 1MB blocks, the proxy must also be on a datastore with 1MB blocks. To use the HotAdd feature, you must meet your version of vSphere’s HotAdd licensing requirement (see Table 5). Table 5 vSphere HotAdd Licensing If your vSphere version is 5.1 is always available. 5.0 is enabled only for vSphere editions Enterprise and higher, which have HotAdd licensing enabled. 4.1 requires no special licensing. 4.0 update 2 Skip reading of page file and swap partitions during backup 168 then the SCSI HotAdd feature requires an Advanced or higher license: Advanced, Enterprise, or Enterprise Plus. Clear or select the Skip reading of page file and swap partitions during backup option in the Configure Advanced Settings dialog box. Quantum vmPRO User’s Guide Chapter 6: Quantum vmPRO Advanced Use Configure Advanced Settings This option improves upon the overall disk IO savings of SmartRead by implementing a mechanism to skip (avoid) reading blocks associated with temporary, transitional files of virtual machines. Examples of such files include virtual memory paging files and temporary files created during software installation. It reduces the backup window since these files are not being backed up. These temporary files are not required for a full system restore; hence, it is safe to skip them during a backup. Allow a SmartMotion to run even if the same policy is already running Clear or select Allow a SmartMotion to run even if the same policy is already running option in the Configure Advanced Settings dialog box. Disallow backups when there is not enough datastore space for snapshot Clear or select Disallow backups when there is not enough datastore space for snapshot to have vmPRO display an alert and stop the backup when the datastore is at 80% (default, configurable) of its total accessible capacity. Quantum vmPRO User’s Guide 169 This option will allow you to starting another scheduled backup of the same policy. This is not the preferred method for running backups and is not enabled by default. This option will (when enabled) allow you to start another backup immediately after a long running (more than 24 hours) backup has completed. Chapter 6: Quantum vmPRO Advanced Use Configure Advanced Settings 170 Quantum vmPRO User’s Guide Appendix A Console Commands and vmPRO Procedures The Appendix contains the following content: • Console Commands • Procedures Console Commands Most Quantum configuration and administration is performed via the Quantum vmPRO GUI or the Quantum vmPRO console wizard. A limited number of functions are available from the appliance's console command line. The preferred way to access the command line is by selecting the appliance in your vSphere client, selecting the Console tab, and exiting the console Setup wizard. See Access Quantum vmPRO on page 25 for more details. At the command line, entering help lists all commands, and entering the first element of a command lists all commands that start with that element, such as ssh or system. For example: quantum:bsmith> ssh Showing commands that start with 'ssh': ssh disable Quantum vmPRO User’s Guide 171 Appendix A: Console Commands and vmPRO Procedures Console Commands ssh enable ssh status Note that all network commands reflect the network related to the Quantum vmPRO virtual machine. The commands are: • autosupport • cbt • config • filesys • group • help • import • log • nagios • net • ntp • nw • smartmotion • snmp • ssh • system • tsm • vss 172 Quantum vmPRO User’s Guide Appendix A: Console Commands and vmPRO Procedures Console Commands autosupport The autosupport commands gather log files and sends the package to the email address given in the command if SMTP mail is set up using the Email selection from the Quantum vmPRO GUI Configure drop-down list. autosupport send logs [<email-address>] Email support package. autosupport upload logs [nocreate] Upload support package to support site. Nocreate flag will not try to create a support package first. autosupport upload report autosupport set daily-upload-packages on|off This command turns on or turns off the automatic uploading of support bundles when a core file is generated. This command does not change any of the Configure Report & Alerts settings. cbt The Changed Block Tracking (cbt) command is: cbt reset [all] | [<hypervisor> <vm name> | folder <folder>] Resets to the last modified time for the base disk to the current time. You can reset all VMs on the appliance, or specify an individual VM. config Configuration parameters should be modified using the Quantum vmPRO GUI. config set date MM/DD/YYYY HH:MM[:SS] Set the system date and time. config set time zone <timezone> Quantum vmPRO uses standard time zone names, such as US/Pacific, Asia/Tokyo, and Europe/Paris. A complete list of time zones is available on the Quantum Support site. Quantum vmPRO User’s Guide 173 Appendix A: Console Commands and vmPRO Procedures Console Commands config create https-certificate Create a new HTTPS SSL certificate. Note: If you have the vmPRO GUI open in a browser, you will need to refresh the browser. filesys The filesys commands are: filesys find <search-term> | vmx | vmdk List known files and directories. With the vmx command argument, list every .vmx file. With the vmdk argument, list every .vmdk file. A name argument can be a part of a file or directory name. For example: filesys find quantum /export/192.168.1.110/quantum-4/ /export/192.168.1.110/quantum-4/quantum-4.vmx /export/192.168.1.110/quantum-4/quantum-4.vmdk /export/192.168.1.110/quantum-4/quantum-4-flat.vmdk filesys list [<export-path>] With no command argument, list everything mounted under the Quantum vmPRO /export directory. With an export path, list only what is mounted in that path. For example: filesys list /export/192.168.201.10 group The group commands are: group status View the Quantum vmPRO appliance's current group membership. 174 Quantum vmPRO User’s Guide Appendix A: Console Commands and vmPRO Procedures Console Commands group create master Make the appliance the master of a group that other appliances can join. group join <master> Add the appliance to the group with master <master>. group leave Remove the appliance from its current group. (If the appliance is a master, it can only be removed from the group if the group has no other members.) group update master <master> Updates the appliance to its master's new ip address/hostname. Assumes that the master is the same appliance. This command should be run on group members only after net set hostname is run on a master. help With a command argument, help lists the options for the command: quantum:bsmith> help ssh Showing commands that start with 'ssh': ssh disable ssh enable ssh status With no arguments, help lists a summary of top level commands: The following commands are available: autosupport cbt config filesys group import Quantum vmPRO User’s Guide 175 Appendix A: Console Commands and vmPRO Procedures Console Commands log nagios net ntp nw smartmotion snmp ssh system tsm vss import The import commands are used during single step recovery from /import. import mkdir <directory-name> Create a directory under /import. import rmdir <directory-name> Removes the directory from /import. import edit <cfg-file> Edit the cfg file found in a directory; e.g., /import/my_directory/ vmname.cfg. import show errors <directory-name> List all error (.err) files in /import and the errors within them. import list Show a list of all files/directories inside /import. 176 Quantum vmPRO User’s Guide Appendix A: Console Commands and vmPRO Procedures Console Commands log The log commands are: log list Display a list of all Quantum vmPRO logs. log search <phrase> Search all log files for a character string. The string is handled as plain text, using no regular expressions or pattern matching. If the string contains one or more spaces, enclose the string in quotes. Use Ctrl/C to exit. log view <log-file> Display the contents of a named log. Use the log list command to find log names. Use Ctrl/C to exit. log watch <log-file> Display the most recent entries (a few lines) of a named log and update the display whenever a new message is added to the log. Use Ctrl/C to exit. nagios For more information, see Nagios Support on page 159. nagios disable Disable Nagios on the appliance. nagios enable Enable Nagios on the appliance. nagios status Check the status of Nagios. net The net commands are: net hosts add <ipaddr> <host-list> Add one or more hosts. Quantum vmPRO User’s Guide 177 Appendix A: Console Commands and vmPRO Procedures Console Commands net hosts del <ipaddr> Delete a host. net hosts reset Deletes all hosts. net hosts show Displays a host. net nslookup <hostname | ipaddr> Checks for DNS-to-IP or IP-to-DNS mapping. Used for debugging network problems. net ping <host> Confirm a connection between Quantum vmPRO and a host. net reset Reset network service. net set hostname <hostname> Set a hostname or IP address for the Quantum vmPRO appliance. net show config [all] Display the current network driver settings for the Quantum vmPRO Ethernet interface. net show dhcp Displays DHCP details. net show hostname Displays the current hostname used by Quantum vmPRO. net show routes Displays all entries in the IP routing table. net show status Display network statistics, including live connections. 178 Quantum vmPRO User’s Guide Appendix A: Console Commands and vmPRO Procedures Console Commands net tcpdump start [<tcpdump argument> ...] Begins a tcpdump that will write its output to a file similar to “tcpdump.2010-09-20.09-54.log.” Only one tcpdump can be running at a time. Any valid arguments for the tcpdump command can be used; for example: net tcpdump start -c 100 executes tcpdump -c 100 net tcpdump stop Stops a running tcpdump and prints the file that was being written to. There is an 8 MB total size limit on the tcpdump output files. Older tcpdump log files are deleted to make room for new ones as a tcpdump is running. If a single tcpdump file reaches 8 MB in size, the tcpdump will stop automatically. ntp Quantum vmPRO can use NTP servers for controlling the internal clock. The ntp commands are: ntp add <server> Add a time server to the list. ntp del <server> Remove a time server from the list. ntp disable Stop the use of the NTP service. ntp enable Start the NTP service. ntp reset Read through the list of time servers and recognize changes. ntp show Display the list of time servers. Quantum vmPRO User’s Guide 179 Appendix A: Console Commands and vmPRO Procedures Console Commands ntp sync Synchronize the appliance with the time server nw The networker (nw) commands are: nw install Runs TSM install script provided by pancetera-integ-networker RPM. Customer must install this RPM first. nw uninstall Uninstall networker. nw edit servers file Edit networker server file. nw set nsrports <number of ports> Set number of networker's nsr ports. The port starts from 7937 nw show nsrports Shows networker's nsr ports setting. nw enable Starts networker agent if it is not already running. nw disable Stops networker agent if it is running. nw restart Restarts networker agent. nw status Shows service networker status and netstat -nlp | grep nsrexecd. 180 Quantum vmPRO User’s Guide Appendix A: Console Commands and vmPRO Procedures Console Commands nw save <save arguments> Saves files, including directories or entire file systems, to the networker server. nw mminfo <mminfo arguments> Reports information about NetWorker media and save sets. The mminfo command can produce several different reports depending on the flags specified. nw recover <recover arguments> Browses the saved file index and recovers selected files from the networker system. smartmotion The smartmotion commands are: smartmotion abort [<policy name>] Abort a backup. smartmotion backup [<policy name>] Start a backup. smartmotion set [policy <policy name>] [schedule {never | daily <hr>:<mn>}] [email {enabled|disabled}] Set smartmotion policy parameters. smartmotion show policy [<policy name>] Show SmartMotion Policy. smartmotion status [<policy name>] Show backup status. smartmotion sync Start a backup of the default policy. Quantum vmPRO User’s Guide 181 Appendix A: Console Commands and vmPRO Procedures Console Commands snmp For more information, see SNMP Support on page 158. snmp disable Turn off SNMP. snmp enable Turn on SNMP. snmp reset rocommunity Reset the read-only community string to public. snmp set rocommunity <community string> Set the read-only community string to an argument. snmp status Show whether SNMP is enabled and print the current read-only community string. ssh The ssh commands are: ssh disable Disables the SSH service. Attempted logins through SSH fail. ssh enable Enables the SSH service, allowing SSH logins to the Quantum vmPRO appliance. ssh status Displays whether or not SSH is enabled and running, the process ID number, and active SSH sessions. 182 Quantum vmPRO User’s Guide Appendix A: Console Commands and vmPRO Procedures Console Commands system The system commands are: system reboot Reboot the Quantum vmPRO virtual machine. system restart services [all] Restart services. system status [all] Show various service statuses. system show date Display the current day of the week, month and date, and time, including time zone. system show license Shows various information regarding the licenses that you have installed on your appliance. For example: quantum:vmPR5152> system show license SmartView License information: Expires: in 66 days Licensed sockets: 20 system show uptime Display the time since the last Quantum vmPRO reboot. system show version [detail|all] Display the version numbers of the Quantum components. The all option gives version numbers for all open source packages used by Quantum vmPRO. Updates to the open source packages are included in standard Quantum vmPRO updates. system shutdown Shuts down the Quantum vmPRO virtual machine. Quantum vmPRO User’s Guide 183 Appendix A: Console Commands and vmPRO Procedures Console Commands system upgrade [local] system upgrade - checks for Quantum vmPRO updates and then automatically downloads and installs any updates found. No interaction is required. The process uses port 443 and goes to updates.Quantum.com. If you are behind a firewall, you may have to change your port settings as appropriate. Updates are usually a couple of megabytes in size and use signed, private key/public key encryption to verify and authenticate the update. The command does not update an open GUI. To see any GUI changes that were part of the upgrade, close the browser (or browser tab containing the GUI) and start a new instance of the GUI. local - allows you to manually perform a system upgrade. The upgrade files must be copied to the upgrade directory, and then you can run the system upgrade local command to manually upgrade your vmPRO (see Install Software Updates Offline on page 186). tsm The tsm commands are: tsm install Runs TSM install script provided by Quantum RPM. Customer must install the RPM first. tsm edit dsmsys Edit TSM dsm.sys file. tsm edit dsmopt Edit TSM dsm.opt file. tsm dsmc Run TSM dsmc command. tsm enable Enables the installed tsm client service. tsm disable Disables the installed tsm client service. 184 Quantum vmPRO User’s Guide Appendix A: Console Commands and vmPRO Procedures Console Commands tsm status View TSM status. tsm restart Restarts the installed tsm client service. vss The vss commands are: vss query Get a list of all VMs waiting for VSS backup complete. vss backup complete [query | all | <vm uuid>] - used to perform log truncation on VMs that have completed a backup query - check for VMs that are waiting for log truncation, returns a numbered list of VMs, if there are any VMs the user will be prompted to enter a number from the list, runs log truncation for the designated entry all - runs log truncation on all VMs listed vm uuid - runs log truncation on only the VM with the designated uuid vss backup fail [query | all | <vm uuid>] - similar to vss backup complete, except that the log truncation is not run, VMs are taken out of waiting for log truncation state query - check for VMs that are waiting for log truncation, returns a numbered list of VMs, if there are any VMs the user will be prompted to enter a number from the list, removes the designated entry for waiting all - removes all VMs from waiting vm uuid - removes only the VM with the designated uuid from waiting Quantum vmPRO User’s Guide 185 Appendix A: Console Commands and vmPRO Procedures Procedures Procedures This section presents the following vmPRO procedures: • Proxy Support for Software Updates • Install Software Updates Offline Proxy Support for Software Updates If you need proxy support to access the Internet, you can configure proxy support in your Quantum vmPRO appliance. Currently proxy support can be configured for upgrades only. 1 Log in to access the console Setup wizard (see Accessing the Console Setup Wizard on page 26). 2 Select Proxy Setting. 3 Enter and save your information (see Figure 161). Figure 161 Configuring Proxy Settings Install Software Updates Offline If your Quantum vmPRO appliance does not have Internet access, you can perform an offline upgrade. Requirements • You will need read and write access to \\<vmpro-host>\quantumupgrade on the appliance. Currently \quantum-upgrade is exported with CIFS only. 186 Quantum vmPRO User’s Guide Appendix A: Console Commands and vmPRO Procedures Procedures • You will need to download the appropriate zip file containing the upgrade RPMs. • If you have a 2.x appliance, the zip file can be downloaded from: http://mosaic.quantum.com/downloads/QuantumvmPROUpgrade-2.X.zip • If you are upgrading from a 3.0.x appliance, download the two zip files from: https://mosaic.quantum.com/downloads/QuantumvmPROUpgrade-from30x-1-of-2.zip https://mosaic.quantum.com/downloads/QuantumvmPROUpgrade-from30x-2-of-2.zip • If you are upgrading from a 3.1.x appliance to 3.2, download the following zip file: https://mosaic.quantum.com/downloads/QuantumvmPROUpgrade.zip • The upgrade zip file will contain one or more of these Quantum vmPRO upgrade RPMs: -unite, -base, and -tools. The zip file may also contain third party RPMs. Procedure for a 2.x or 3.1.x appliance: 1 Extract the RPM files from the zip file and place them in the appliance’s \quantum-upgrade folder. 2 At the command line, run the following command: system upgrade local 3 You will be asked for confirmation before the upgrade starts. Once you confirm, simply wait for the upgrade to finish. Procedure for a 3.0.x appliance 1 Extract the RPM files from the 1-of-2 zip file and place them in the appliance's \quantum-upgrade folder. 2 At the command line, run the following command: system upgrade local 3 You will be asked for confirmation before the upgrade starts. Once you confirm, simply wait for the upgrade to finish. 4 Extract the RPM files from the 2-of-2 zip file and place them in the appliance's \quantum-upgrade folder. Quantum vmPRO User’s Guide 187 Appendix A: Console Commands and vmPRO Procedures Procedures 5 At the command line, run the following command: system upgrade local 6 You will be asked for confirmation before the upgrade starts. Once you confirm, simply wait for the upgrade to finish. To see any GUI changes that were part of the upgrade, you must start a new instance of the GUI. 188 Quantum vmPRO User’s Guide