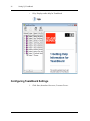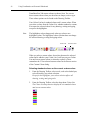
1
TeamBoard
User Guide for Windows
This guide is for use with TeamBoard software for Windows.
Revised May 21, 2008.
Developed for Egan TeamBoard Inc. by Front Runner Publishing Solutions Inc.
(www.front–runner.com).
TeamBoard is a registered trademark of Egan TeamBoard Inc.
Windows, Microsoft Word, Excel, and PowerPoint, are registered trademarks of
Microsoft Corporation.
All other products or companies mentioned are trademarks or service marks of
their respective owners.
© 1999-2008 Egan TeamBoard Inc.
All Rights Reserved
Welcome to TeamBoard
This guide is designed to assist you with installing and using the
TeamBoard for Windows. For more information, please contact us at
1-800-263-2387 or 1-905-851-2826, or email us at
[email protected].
This guide is a subset of the complete online help. The online help
system may be accessed by selecting the HELP menu in any
TeamBoard application.
This document contains:
•
A table of contents and alphabetical index in order to locate
topics and information quickly and easily.
•
Friendly definitions of common computer and
TeamBoard-related terms. For more information refer to
“Glossary” on page 109.
•
Information about the different button functions for various
applications. For more information refer to “Using the ActionBar
Buttons” on page 82.
We welcome feedback about TeamBoard products and tools. Please
feel free to forward any comments or suggestions to us at:
Egan TeamBoard Inc.
300 Hanlan Road
Woodbridge, Ontario
Canada L4L 3P6
Phone us at 1-800-263-2387 or 1-905-851-2826. Fax us at
1-905-851-3426. Visit online at www.teamboard.com or email us at
[email protected].
Happy TeamBoarding!
Table of Contents
i
Table of Contents
Chapter 1
Getting Help Information for TeamBoard 1
Types of Help Available . . . . . . . . . . . . . . . . . . . . . . . . . . . . . 1
Accessing Online Help . . . . . . . . . . . . . . . . . . . . . . . . . . . . . . 1
Contacting TeamBoard Technical Support. . . . . . . . . . . . . . . 2
Chapter 2
Setting Up TeamBoard 5
Installing TeamBoard . . . . . . . . . . . . . . . . . . . . . . . . . . . . . . . 5
Calibrating TeamBoard. . . . . . . . . . . . . . . . . . . . . . . . . . . . . 15
Changing Modes. . . . . . . . . . . . . . . . . . . . . . . . . . . . . . . . . . 22
Disabling or Enabling TeamBoard . . . . . . . . . . . . . . . . . . . . 24
TeamBoard Settings . . . . . . . . . . . . . . . . . . . . . . . . . . . . . . . 24
Chapter 3
Presenting, Training, and Communicating with
TeamBoard 33
Presenting PowerPoint Slide Shows with
TeamBoardUnderstanding TeamBoard’s Capabilities and
Features . . . . . . . . . . . . . . . . . . . . . . . . . . . . . . . . . . . . . . . . 33
Chapter 4
Using TeamBoard as an Electronic
Whiteboard 44
Using Draw without a Projector . . . . . . . . . . . . . . . . . . . . . .
About Using Draw without a Projector . . . . . . . . . . . . . . . . .
Drawing and Writing on the TeamBoard. . . . . . . . . . . . . . . .
Erasing Drawings and Writing . . . . . . . . . . . . . . . . . . . . . . .
Using Draw with a Projector . . . . . . . . . . . . . . . . . . . . . . . . .
Drawing and Writing with the Drawing Toolbar. . . . . . . . . . .
Editing Content with the Drawing Toolbar . . . . . . . . . . . . . .
Working with Multiple Pages. . . . . . . . . . . . . . . . . . . . . . . . .
Using the Page Sorter . . . . . . . . . . . . . . . . . . . . . . . . . . . . .
Using the Spotlight . . . . . . . . . . . . . . . . . . . . . . . . . . . . . . . .
Using Hide/Reveal . . . . . . . . . . . . . . . . . . . . . . . . . . . . . . . .
Importing Files and Scanned Images into Draw . . . . . . . . . .
Using ClipArt. . . . . . . . . . . . . . . . . . . . . . . . . . . . . . . . . . . . .
Exporting a Page or Entire Workbook . . . . . . . . . . . . . . . . .
Printing Your Work . . . . . . . . . . . . . . . . . . . . . . . . . . . . . . . .
Saving Your Work. . . . . . . . . . . . . . . . . . . . . . . . . . . . . . . . .
Chapter 5
44
45
46
47
48
53
62
65
67
70
71
71
74
74
76
76
Using TeamBoard as a Touchscreen 80
About Using TeamBoard as a Touchscreen. . . . . . . . . . . . . 80
ii
Table of Contents
Activating the Touchscreen . . . . . . . . . . . . . . . . . . . . . . . . . . 81
Using the ActionBar Buttons . . . . . . . . . . . . . . . . . . . . . . . . . 82
Entering Text and Numbers with the Virtual Keyboard . . . . . 83
Clicking with the Virtual Mouse . . . . . . . . . . . . . . . . . . . . . . . 86
Chapter 6
Using TeamBoard To Annotate 89
About Annotate . . . . . . . . . . . . . . . . . . . . . . . . . . . . . . . . . . . 89
Launching Annotate. . . . . . . . . . . . . . . . . . . . . . . . . . . . . . . . 90
Using Annotate . . . . . . . . . . . . . . . . . . . . . . . . . . . . . . . . . . . 91
Using TeamBoard Draw with Annotate . . . . . . . . . . . . . . . . . 92
Using AutoLaunch with Annotate . . . . . . . . . . . . . . . . . . . . . 92
Chapter 7
Presenting PowerPoint Slide Shows with
TeamBoard 95
Using PowerPoint with TeamBoard . . . . . . . . . . . . . . . . . . . . 95
PowerPoint with TeamBoard Draw . . . . . . . . . . . . . . . . . . . . 99
Build Effects and Transitions . . . . . . . . . . . . . . . . . . . . . . . . 101
Using Package for CD in PowerPoint . . . . . . . . . . . . . . . . . 101
Chapter 8
Adding a New Application to TeamBoard 105
Adding a New Application . . . . . . . . . . . . . . . . . . . . . . . . . . 105
Macros. . . . . . . . . . . . . . . . . . . . . . . . . . . . . . . . . . . . . . . . . 106
Adding and Editing Macros . . . . . . . . . . . . . . . . . . . . . . . . . 107
Chapter 9
Glossary 109
Index 113
Getting Help Information for TeamBoard
1
1
Getting Help Information for
TeamBoard
This section explains how to get help information for TeamBoard.
The information is divided into the following topics:
•
Types of Help Available
•
Accessing Online Help
•
Contacting TeamBoard Technical Support
Types of Help Available
This section explains the different types of help available for
TeamBoard.
•
The Quick Start Guide is a card containing quick reference
information. The card can be found on the left side of the
TeamBoard.
•
Your TeamBoard comes with a printed User Guide. This guide is
a subset the online help.
•
The online help system can be accessed by selecting HELP in any
TeamBoard application.
Accessing Online Help
This section explains how to access online Help.
TeamBoard has extensive online Help available so that users can
search for answers to their questions. Online help can be accessed by
selecting one of the following:
•
the Help button on the TeamBoard Dashboard
•
the HELP TOPICS item on the Help menu in TeamBoard Draw
2
Getting Help Information for TeamBoard
•
the HELP option in the SYSTEM TRAY menu, accessed from the
TeamBoard System Tray icon
Contacting TeamBoard Technical Support
This section explains how to contact TeamBoard’s Technical Support.
The following list is designed to help you through some common
troubleshooting questions. Before contacting TeamBoard Technical
Support, ensure that you go through these questions.
Have you done the following?
•
Looked up your question in the User Guide?
•
Looked up your question in the TeamBoard online help?
•
Checked that all cable connections are secure? For more
information refer to “Installing TeamBoard” on page 5.
Getting Help Information for TeamBoard
3
•
(For a Serial TeamBoard) Checked that you have an available
COM port?
•
Installed TeamBoard software without any error messages?
•
Checked that TeamBoard is “enabled” in the software?
•
(For a Serial TeamBoard) Checked that the green light is on at the
back of the Power Adapter?
•
Performed Whiteboard Calibration, ActionBar Calibration, and
Interactive Calibration?
•
Reviewed the Frequently Asked Questions (FAQ)
If you are still having problems, please contact TeamBoard Technical
Support at the following:
Tel: 1-800-263-2387 or 1-905-851-2826
Monday to Friday, 8:00 AM to 8:00 PM (ET)
Fax: 1-905-851-7991
Email: [email protected]
Website: www.teamboard.com
Egan TeamBoard Inc.
300 Hanlan Road
Woodbridge, ON
Canada L4L 3P6
4
Getting Help Information for TeamBoard
Setting Up TeamBoard
2
5
Setting Up TeamBoard
This section explains how to set up your TeamBoard. After installing
TeamBoard, you need to calibrate it to correctly associate the
TeamBoard drawing surface with your computer environment. To use
the TeamBoard, you also need to set the mode to Whiteboard or
Interactive, depending on the TeamBoard features you would like to
access. The information is divided into the following topics:
•
Installing TeamBoard
•
Calibrating TeamBoard
•
Changing Modes
•
Disabling or Enabling TeamBoard
•
TeamBoard Settings
Installing TeamBoard
This section explains how to install TeamBoard. The information is
divided into the following topics:
Note
•
Required Hardware, Software, and Items
•
Setting up Hardware for a USB TeamBoard
•
Setting Up Hardware for a Serial TeamBoard
•
Setting Up the Data Projector
•
Before Installing TeamBoard Software
•
Installing TeamBoard Software
Review the parts list in to make sure you received all the required
hardware, software, and other items with your TeamBoard shipment
before proceeding with installation. For more information refer to
“Required Hardware, Software, and Items” on page 6. Your
TeamBoard is set up with either a USB or Serial port connection to
your computer. If you are unsure of the type of TeamBoard you have,
please contact TeamBoard Technical Support.
6
Setting Up TeamBoard
Required Hardware, Software, and Items
This section provides two lists of parts that are included with your
TeamBoard: one for the USB TeamBoard, the other for the Serial
TeamBoard. Review the appropriate list to ensure that all required
hardware and software is included.
Setting Up TeamBoard
USB TeamBoard Parts List
TeamBoard Parts
Do you have it?
The TeamBoard
RJ-45 Cable
USB Adapter
6 dry-erase markers and 1 stylus
Egan Cloth
TeamBoard Quick Start Guide (card)
TeamBoard ReadMe Notice
Serial TeamBoard Parts List
TeamBoard Parts
Do you have it?
The TeamBoard
TeamBoard Serial Adapter
TeamBoard Power Adapter
Local voltage Power Cord
RJ-45 data cable
6 dry-erase markers and 1 stylus
Egan Cloth
TeamBoard Quick Start Guide (card)
TeamBoard ReadMe Notice
Note
Separate instructions for installing the TeamBoard
(Track/Wall Mount/Mobile/Cabinet) are included in the TeamBoard
box. To obtain another copy of the instructions, please contact your
dealer or TeamBoard Technical Support.
7
8
Setting Up TeamBoard
Setting up Hardware for a USB TeamBoard
This section explains how to connect your USB TeamBoard, your
computer and your projector. If you have a Serial TeamBoard, refer to
“Setting Up Hardware for a Serial TeamBoard” on page 10 for more
information. Figure A on page 9 is a visual guide to the following
steps.
Important
Unless you have a Windows Vista operating system, ensure that you
have connected the RJ-45 Cable and the USB Adapter correctly prior
to installing the TeamBoard software. Otherwise, the TeamBoard will
not be recognized by your computer.
Important
The RJ45 cable must be shielded with the ends grounded. The
maximum length is 25 feet; if a longer distance is required, please
contact Technical Support.
Important
For Windows Vista, install the software before making the following
connections.
1.
Attach the USB Adapter to an available USB port on your
computer.
Setting Up TeamBoard
2.
9
Attach one end of the RJ-45 Cable to the TeamBoard Controller
at the back of the TeamBoard (bottom-right corner) and the other
end to the USB Adapter.
Your computer detects the TeamBoard.
TeamBoard
in
Interactive Mode
Computer
15 Pin
VGA Port
USB Port
Data Projector
TeamBoard
RJ45 Jack
(back of TeamBoard)
USB Adapter
VGA Monitor
Cable
Figure A:
RJ-45 Cable
Setup for USB TeamBoard, Data Projector and
Computer
10
Setting Up TeamBoard
Your computer detects a new USB device being connected.
Setting Up Hardware for a Serial TeamBoard
This section explains how to connect your Serial TeamBoard, your
computer, and your projector. If you have a USB TeamBoard, refer to
“Setting up Hardware for a USB TeamBoard” on page 8 for more
information.
Figure B on page 11 is a visual guide to the following steps.
1.
Attach one end of the RJ-45 data cable to the TeamBoard
Controller at the back of the TeamBoard (bottom-right corner)
and the other end to the TeamBoard Serial Adapter.
2.
Attach the Serial Adapter to an available 9-pin Serial port at the
back of the computer.
Tighten the screws to ensure a firm connection.
3.
Attach the mini-plug end of the Power Adapter to the TeamBoard
Serial Adapter.
4.
Attach one end of the local Power Cord to the Power Adapter and
the other end into the power outlet.
Setting Up TeamBoard
5.
11
Be sure that all cables are secured to the walls and floor to avoid
tripping over them.
TeamBoard
in
Interactive Mode
Computer
15 Pin
VGA Port
9 Pin
Serial Port
Data Projector
Power Outlet
Power Cord
Serial Adapter
RJ-45 Jack
(back of TeamBoard)
Power Adapter
VGA Monitor
Cable
Figure B:
RJ-45 Cable
Setup for Serial TeamBoard, Data Projector, and
Computer
Setting Up the Data Projector
This section explains how to correctly set up your Data Projector to
work most effectively with your TeamBoard.
1.
Set up the Data Projector on an appropriate support surface,
approximately 10 feet from the TeamBoard.
2.
Connect one end of the VGA Monitor Cable to the Data Projector
and the other end to the 15-pin VGA port on the back of the
computer.
3.
Connect the Data Projector’s Power Cord into the power outlet.
4.
Turn on the Data Projector.
5.
Aim the projected image so that it fills the TeamBoard surface,
leaving a 1” (one inch) border from the frame.
12
Setting Up TeamBoard
6.
Align the projected image so it is as square to the border as
possible to avoid keystoning.
For additional information, see Figure A on page 9.
Before Installing TeamBoard Software
Important
Please read the ReadMe Notice for important and up to date
information about the TeamBoard software.
This section explains how to check if your computer has the
minimum requirements needed to use TeamBoard. It also explains the
considerations to bear in mind prior to installing and configuring your
TeamBoard.
Questions to consider include:
•
Does your
Computer Meet
the Minimum
Performance
Requirements?
Does your Computer Meet the Minimum Performance
Requirements?
The following table lists the minimum requirements of a computer
used to connect the TeamBoard.
Windows
2000
Windows XP Windows Vista
MAC OSX
10.4
RAM
64 MB
512 MB
1 GB
512 MB
Hard Drive
Free Space
50 MB
200 MB
150 MB
150 MB
Pentium 150
Pentium 3
Pentium 4
G3 at 500
MHz or better
CPU
Linux
(coming soon)
Installing TeamBoard Software
This section explains how to install the software required for
TeamBoard to interact with your Data Projector and your computer.
Setting Up TeamBoard
13
If using the USB Adapter, ensure that you have connected it correctly
prior to installing the TeamBoard software (except if you have a
Windows Vista operating system). Otherwise, the TeamBoard will not
be recognized by your computer. For a USB TeamBoard, refer to
“Setting up Hardware for a USB TeamBoard” on page 8 for more
information. For a Serial Cable refer to “Setting Up Hardware for a
Serial TeamBoard” on page 10 for more information.
Important
For Windows Vista, install the software before making the
connections to the TeamBoard.
Before installing, please take the time to read the ReadMe Notice. It
contains important information about the software. Also, check our
website for the latest software and technical information at
www.teamboard.com.
Remember to register to be automatically informed of updates. This
entitles you to free software upgrades. This can be done online at
www.teamboard.com.
You can also register automatically during the software installation.
For more information refer to “Installing TeamBoard Software” on
page 12.
TeamBoard software is designed to run on Windows XP and Vista
operating systems. The TeamBoard software is provided on a
CD-ROM, which is included with each TeamBoard product. You can
also download the software from the TeamBoard website at
www.teamboard.com/tech.
Important
If you do not already have the following software installed, install it
before continuing:
•
Adobe Flash Player version 9,0,115,0 (to import .swf files)
•
QuickTime’s latest version (to import all movie files except .swf)
14
Setting Up TeamBoard
Exit all other applications before proceeding with installing
TeamBoard software.
1.
Insert the TeamBoard software CD-ROM into your computer’s
CD-ROM drive.
The Welcome dialog box displays.
2.
Select the supported controller you want.
If you are not sure which controller you have, check the label on
the controller. If you are installing TeamBoard for the first time,
you probably have an H-series controller.
3.
Click Install.
TeamBoard installs.
You can register your software immediately by clicking Register
and connecting to the TeamBoard website.
Setting Up TeamBoard
4.
Important
15
Click Finish.
The software for TeamBoard has been installed successfully.
You should now complete Whiteboard and ActionBar calibration. For
more information refer to “Calibrating TeamBoard” on page 15.
Calibrating TeamBoard
This section explains how and when to calibrate the TeamBoard. The
information is divided into the following topics:
•
About Calibrating TeamBoard
•
Whiteboard Calibration
•
ActionBar Calibration
•
Interactive Calibration
About Calibrating TeamBoard
This section describes calibration and when to perform it. Calibration
is required in order to correctly associate the TeamBoard drawing
surface with your computer environment.
After installing the TeamBoard software, perform Whiteboard and
ActionBar calibrations. You don’t need to perform these calibrations
again. Interactive calibration, however, should be performed each
time the projector is moved or the TeamBoard is moved, since the size
and location of the image can vary.
16
Setting Up TeamBoard
Whiteboard Calibration
This section explains how to perform Whiteboard Calibration for the
TeamBoard. Ensure that your projector is off for Whiteboard
Calibration.
1.
Double-click the TeamBoard System Tray Icon.
The TeamBoard Dashboard displays.
2.
Select the Calibrate button.
The Calibration dialog box displays.
3.
Select the Whiteboard radio button.
Setting Up TeamBoard
4.
17
Click OK.
The Calibration screen displays.
If your projector is on, DO NOT touch the projected arrow tips or
circles. Touch the top-left corner and the bottom-right corner of
the drawing surface.
Tip
5.
From the TeamBoard, firmly press the top-left corner of the
TeamBoard drawing surface.
If sound is enabled on your computer, you hear a “ping” and the
next screen displays.
6.
Press the bottom-right corner of the TeamBoard drawing surface.
The Whiteboard calibration is complete.
Alternatively, you can calibrate using the System Tray menu.
18
Setting Up TeamBoard
ActionBar Calibration
This section explains how to perform ActionBar Calibration for the
TeamBoard. Ensure that your projector is off for ActionBar
Calibration.
1.
Double-click the TeamBoard System Tray Icon.
The TeamBoard Dashboard displays.
2.
Select the Calibrate button.
The Calibration dialog box displays.
3.
Select the ActionBar radio button.
Setting Up TeamBoard
4.
19
Click OK.
The Calibration screen displays.
During ActionBar calibration, DO NOT touch the projected
arrow tips or circles. Touch the top-left corner and the top-right
corner of the ActionBar.
Tip
5.
From the TeamBoard, firmly press the top-left corner of the
TeamBoard ActionBar.
If sound is enabled on your computer, you hear a “ping” and the
next screen displays.
6.
Press the top-right corner of the TeamBoard ActionBar.
The ActionBar calibration is complete.
Alternatively, you can calibrate using the System Tray menu.
Interactive Calibration
This section explains how to perform Interactive Calibration for the
TeamBoard.
Important
Before you perform Interactive calibration for the first time you must
perform Whiteboard and ActionBar calibrations. In addition, a
20
Setting Up TeamBoard
projector must be on and directed at the TeamBoard to perform
Interactive Calibration.
1.
Double-click the TeamBoard System Tray Icon.
The TeamBoard Dashboard displays.
2.
Select the Interactive mode.
3.
Select the Calibrate button.
The Calibration dialog box displays.
Setting Up TeamBoard
4.
Select the Interactive radio button.
5.
Click OK.
The Calibration screen displays.
6.
Touch nine points of the projected image as indicated.
21
Ensure that point where the lines cross is touched precisely to ensure
the TeamBoard is accurately calibrated. As each point is touched, a
green check mark displays.
Tip
Alternatively, you can calibrate using the System Tray menu.
22
Setting Up TeamBoard
Changing Modes
This section explains how to switch between the Interactive Mode and
Whiteboard Mode in TeamBoard. These modes allow you to use
TeamBoard in very different ways. The information is divided into the
following topics:
•
Overview of Modes
•
Selecting Modes
Once the TeamBoard has been calibrated, you can switch modes
simply by selecting the appropriate mode on the TeamBoard
Dashboard.
Overview of Modes
This section gives an overview of the two modes that are available in
TeamBoard use: Whiteboard and Interactive. Change between modes
as required in order to best use TeamBoard depending on your
specific needs.
The information is divided into the following topics:
Whiteboard
Mode
•
Whiteboard Mode
•
Interactive Mode
TeamBoard used in Whiteboard mode allows you to use TeamBoard
without a projector.
In Whiteboard mode TeamBoard may be used in a manner similar to
that of a regular whiteboard. Using a dry–erase marker the
TeamBoard can be written on and cleared of content. All drawings
created in Whiteboard mode are saved to your computer. For more
information refer to “Using TeamBoard as an Electronic Whiteboard”
on page 44.
Interactive Mode
TeamBoard used in Interactive mode allows you to use TeamBoard
with a projector.
In Interactive mode TeamBoard may be used in several ways. These
include as an interactive whiteboard, as an interactive touchscreen or
Setting Up TeamBoard
23
to annotate applications and presentations projected onto the
TeamBoard.
Use the TeamBoard as an interactive whiteboard in Interactive Mode
by drawing on the TeamBoard using your finger or the stylus. For
more information refer to “Using TeamBoard as an Electronic
Whiteboard” on page 44.
In addition, TeamBoard can be used as an interactive touchscreen. For
more information refer to “Using TeamBoard as a Touchscreen” on
page 80.
Finally, TeamBoard can be used to annotate content when used in
Interactive mode. For more information refer to “Using TeamBoard
To Annotate” on page 89.
Selecting Modes
1.
Double-click the TeamBoard System Tray Icon.
The TeamBoard Dashboard displays.
2.
Select the desired Mode, Whiteboard or Interactive, from the
Dashboard.
Tip
Alternatively, you can switch modes using the System Tray menu.
24
Setting Up TeamBoard
Disabling or Enabling TeamBoard
This section explains how to disable or enable TeamBoard.
If you need to disable TeamBoard, for example to make the COM port
available to another device, or need to enable the TeamBoard, for
example resetting the COM port after removing another device, then
use the following procedure.
Important
1.
Select the TeamBoard System Tray icon.
2.
Select or deselect ENABLED.
In order to use TeamBoard, it must be enabled.
TeamBoard Settings
There are tools available to help the TeamBoard Technical Support
group and its dealers configure and troubleshoot the TeamBoard
software. In the Windows Control Panel, you can find a TeamBoard
icon that is used to access the TeamBoard Properties dialog box.
Setting Up TeamBoard
25
Most of the tabs in this dialog box are for advanced users and
troubleshooting situations. However, you might use the following:
•
Hardware: Manages your hardware devices.
•
Click Mode: Modifies how the Interactive Mode identifies tap
and double tap values. For more information refer to
“Configuring Single, Right, and Double Click” on page 28.
•
Properties: Modifies the way the TeamBoard is configured. For
more information refer to “Configuring TeamBoard Settings” on
page 26.
•
Calibration: Modifies calibration settings. For more information
refer to “Changing the Calibration Settings” on page 29.
•
Status: Displays settings for troubleshooting and allows you to
use the Dump Settings feature to send information to TeamBoard
Support. For more information refer to “Working with
TeamBoard Status” on page 30.
•
About: Displays driver, copyright and license information. For
more information refer to “TeamBoard About Dialog” on
page 32.
26
Setting Up TeamBoard
•
Help: Displays online help for TeamBoard.
Configuring TeamBoard Settings
1.
Click Start, then select SETTINGS, CONTROL PANEL.
Setting Up TeamBoard
2.
Double-click the TeamBoard icon.
The TeamBoard Properties dialog box displays.
3.
Click Properties.
27
28
Setting Up TeamBoard
4.
Change options as required. For detailed information, click Help.
5.
Click Close when done.
Configuring Single, Right, and Double Click
This section explains how to configure the single, right, and double
click settings for the TeamBoard.
1.
Click Start, then select SETTINGS, CONTROL PANEL.
2.
Double-click the TeamBoard icon.
The TeamBoard Properties dialog box displays.
3.
Click Click Mode.
Setting Up TeamBoard
4.
Test the click settings and change the system mouse settings, if
required.
For more detailed information, click Help.
5.
Click Close when done.
29
Changing the Calibration Settings
This section explains how to change the calibration settings.
The calibrations for the two modes of operating TeamBoard,
Whiteboard and Interactive, have been preconfigured. However, the
calibration settings can be modified for each.
1.
Click Start, then select SETTINGS, CONTROL PANEL.
2.
Double-click the TeamBoard icon.
The TeamBoard Properties dialog box displays.
3.
Click the Calibration tab.
30
Setting Up TeamBoard
4.
Select Interactive or Whiteboard from the Calibration Modes
drop-down list.
5.
For detailed information about each field, click Help.
6.
Click Close when done.
Working with TeamBoard Status
This section explains how to work with the TeamBoard Status.
You should only work with TeamBoard Status in a troubleshooting
situation. If you are experiencing technical problems, try following
Setting Up TeamBoard
these steps to reset TeamBoard. If following these steps does not
solve the problem, contact TeamBoard Technical Support.
1.
Click Start, then select SETTINGS, CONTROL PANEL.
2.
Double-click the TeamBoard icon.
The TeamBoard Properties dialog box displays.
3.
Click the Status tab.
4.
The status should be enabled.
Click Help for more detailed information.
5.
If you cannot successfully troubleshoot, click Dump settings to
save your settings information to a file that you can send to
TeamBoard.
6.
Click Close when done.
31
32
Setting Up TeamBoard
TeamBoard About Dialog
This section explains how to use the TeamBoard About dialog.
1.
Click Start, then select SETTINGS, CONTROL PANEL.
2.
Double-click the TeamBoard icon.
The TeamBoard Properties dialog box displays.
3.
Click About.
Version and build information displays.
4.
Click View Licence.
The TeamBoard licensing agreement displays
5.
Click Support Information for details on how to contact
TeamBoard Support.
6.
Click Close when done.
Presenting, Training, and Communicating with TeamBoard
3
33
Presenting, Training, and
Communicating with
TeamBoard
This section explains how to present, train, and communicate using
TeamBoard. The information is divided into the following topics:
•
Presenting PowerPoint Slide Shows with
TeamBoardUnderstanding TeamBoard’s Capabilities and
Features
•
Using TeamBoard as an Electronic Whiteboard
•
Using TeamBoard as a Touchscreen
•
Using TeamBoard To Annotate
Understanding
TeamBoard’s Capabilities and Features
Presenting PowerPoint Slide Shows with TeamBoard
This section provides an overview of TeamBoard’s capabilities and an
overview of the functions of various features. The TeamBoard Suite
of software contains several tools and features to assist and simplify
the use of the TeamBoard. These tools and features are explained in
more detail in later chapters. The information is divided into the
following topics:
•
Understanding TeamBoard’s Capabilities
•
Understanding TeamBoard’s Features
Understanding TeamBoard’s Capabilities
This section provides an overview of TeamBoard’s capabilities.
TeamBoard is an advanced presentation, training, and communication
tool, effective for use with both immediate and remote audiences. The
TeamBoard can be mounted on a wall or on a stand.
34
Presenting, Training, and Communicating with TeamBoard
As an electronic whiteboard, TeamBoard enables your computer to
capture whatever you write and draw on it. Partnered with a Data
Projector, TeamBoard acts as an interactive touchscreen. Its dynamic,
interactive capabilities allow you to train, teach, and make
presentations without ever having to return to your computer.
Use the TeamBoard Draw application to capture all notes and
drawings created on the TeamBoard. TeamBoard Draw offers a sharp
image with “ink-like” lines as a result of its high resolution controller
and advanced line-smoothing features.
The TeamBoard can also be used without a projector, in Whiteboard
mode. Whiteboard mode is used for capturing notes and drawings into
the computer. Users also have a variety of pen widths and colours to
choose from. Anything you write and draw on the TeamBoard is
automatically captured by TeamBoard Draw. This content can be
printed, saved, stored as multiple pages and more.
TeamBoard’s surface is an interactive touchscreen with the use of
your Data Projector. This interactive touchscreen transforms your
fingertip into a mouse, allowing you to touch icons and display
changes while maintaining your audience’s attention on you and the
TeamBoard at the same time.
You can use TeamBoard to present PowerPoint slide shows, to
annotate during presentations and to smoothly and successfully
conduct Video and Data conferences. Communicating with
TeamBoard is easy. Participants are able to connect to your computer,
view your TeamBoard from anywhere a network is available and
actively participate in presentations. TeamBoard is designed to
interface with T.120 data conference applications, but can also be
used with more traditional video conference equipment (e.g.
PolyCom, Tandberg, VTel). Your remote viewers see everything you
do, since all of your TeamBoard actions appear on their remote
monitors and television screens.
Understanding TeamBoard’s Features
This section explains the functions of TeamBoard’s various features.
The information is divided into the following topics:
•
TeamBoard System Tray Icon
•
System Tray menu
Presenting, Training, and Communicating with TeamBoard
TeamBoard
System Tray Icon
•
TeamBoard Dashboard
•
ActionBar
•
Draw
•
Annotate
•
AutoLaunch
•
Virtual Keyboard
•
Virtual Mouse
•
Online Help
35
This section explains how to use the TeamBoard System Tray Icon.
The TeamBoard System Tray Icon resides in the system tray next to
the clock on the taskbar. Use the TeamBoard System Tray Icon to
quickly access the TeamBoard Dashboard and other commonly used
features.
TeamBoard System
Tray Icon
System Tray
menu
•
Double-click the TeamBoard System Tray Icon to open the
TeamBoard Dashboard.
•
Single-click the TeamBoard System Tray Icon to access the
SYSTEM TRAY menu, consisting of commonly used TeamBoard
features.
This section explains the purpose of the System Tray menu and the
options available in it.
The System Tray menu is a tool that is used to access features of the
TeamBoard in a manner similar to that of the TeamBoard Dashboard.
36
Presenting, Training, and Communicating with TeamBoard
When the System Tray menu is clicked a pop-up displays that can be
used to quickly access a variety of commands.
Dashboard
Selecting Dashboard launches the TeamBoard Dashboard. For more
information refer to “TeamBoard Dashboard” on page 38.
Enabled
When selected (marked with a check) the TeamBoard is active and
data from the TeamBoard is sent to your computer. If deselected
(marked with an x) the TeamBoard is inactive and data is not
transferred. Toggle the Enabled setting to make the TeamBoard active
or inactive as required.
For example, if cleaning the TeamBoard you may wish to temporarily
deselect Enabled to prevent contact due to cleaning from sending data
to your computer.
Mode
Mode has shortcuts to switch between the Interactive Mode and
Whiteboard Mode in TeamBoard. For more information refer to
“Changing Modes” on page 22.
Presenting, Training, and Communicating with TeamBoard
37
Calibrate
Calibrate has shortcuts to Calibration which is required in order to
correctly associate the TeamBoard drawing surface with your
computer environment. For more information refer to “Calibrating
TeamBoard” on page 15.
Draw
Clicking Draw launches an application for capturing notes and
drawings created on the TeamBoard. For more information refer to
“Draw” on page 38.
Annotate
Annotation is designed to gives users the ability to “mark up”
applications and presentations projected on to the TeamBoard. For
more information refer to “Annotate” on page 40.
Virtual Keyboard
Virtual Keyboard is an application that mimics a standard keyboard
allowing you to type text and numbers into your applications right at
the board. For more information refer to “Virtual Keyboard” on
page 41.
Virtual Mouse
Virtual Mouse can be used to change a tap on the TeamBoard to be
interpreted as a right mouse click. You can also quickly access the
right mouse options by holding your finger down on the board for 3
seconds. For more information refer to “Clicking with the Virtual
Mouse” on page 86.
Help
Selecting Help launches the TeamBoard Help. For more information
refer to “Online Help” on page 41.
About
Displays information about the TeamBoard software such as the
current TeamBoard Suite of tools, the driver version, the copyright
dates and so on.
38
Presenting, Training, and Communicating with TeamBoard
TeamBoard
Dashboard
This section explains the purpose of the TeamBoard Dashboard.
ActionBar
This section explains the purpose of the TeamBoard ActionBar.
The TeamBoard Dashboard is a command console that is used to
quickly access TeamBoard features and applications.
The ActionBar is a series of buttons that display along the bottom of
the TeamBoard. To invoke an action, press the related button.
The toolbar in TeamBoard Draw is similar to the TeamBoard
ActionBar. This allows users the flexibility and functionality to work
directly in Draw at their computer.
For more information refer to “Using the ActionBar Buttons” on
page 82.
Draw
This section explains the purpose of the TeamBoard Draw
application.
Draw is the application for capturing notes and drawings created on
the TeamBoard and saving them to a file, printing them, emailing the
content and more. Its design is similar to that of the actual
TeamBoard, including a toolbar that is similar to the TeamBoard
ActionBar. For more information refer to “Using TeamBoard as an
Electronic Whiteboard” on page 44.
Drawing Toolbar
This section explains the purpose of the Drawing Toolbar.
TeamBoard Draw has a wide range of features to enhance your
TeamBoard presentations. Located at the top of the Draw window is
Presenting, Training, and Communicating with TeamBoard
39
the Drawing Toolbar, which offers a variety of drawing and writing
tools. These tools include 300 custom colours, a dashed pen, a
highlighter, and tools for drawing shapes, as well as typing text. For
more information refer to “Drawing and Writing on the TeamBoard”
on page 46.
Editing features are also available on the Drawing Toolbar. These
features include the ability to cut and paste content, (both within
Draw and to and from other applications), erase content, move
content around on the page after it has been created, and undo and
redo past actions within Draw.
For more information refer to “Using Draw with a Projector” on
page 48.
Use Draw in Whiteboard or Interactive Mode to create multiple pages
of notes in a workbook and save them to a file. For more information
refer to “Using TeamBoard as an Electronic Whiteboard” on page 44.
40
Presenting, Training, and Communicating with TeamBoard
Annotate
This section explains the purpose of the TeamBoard Annotate feature.
Annotate is designed to be used in Interactive Mode. It gives users the
ability to mark up applications and presentations projected on to the
TeamBoard. For example, you can draw a circle around an important
point or underline items. For more information refer to “Using
TeamBoard To Annotate” on page 89.
Annotate works like a stand alone application, but is actually a feature
of Draw.
Minimize Toolbar
When you minimize TeamBoard Draw or TeamBoard Annotate, the
Minimize Toolbar displays. This lets you access some frequently used
features quickly, without having to maximize TeamBoard again.
Collapse/Expand Area Annotate Virtual Keyboard
Application List
Full Screen Annotate Return to Draw
Virtual Mouse
When you have a related application running in TeamBoard, the
Minimize Toolbar extends with the macro icons you have configured.
If you want to customize your macros, refer to “Adding and Editing
Macros” on page 107 for more information.
Macros for an application
AutoLaunch
This section explains the purpose of the TeamBoard AutoLaunch
feature.
AutoLaunch makes it easy for you to jump into using your
TeamBoard quickly. TeamBoard automatically launches Draw in
Whiteboard Mode or Annotate in Interactive Mode.
If using AutoLaunch in Whiteboard Mode, refer to “Using
AutoLaunch in Whiteboard Mode” on page 48 for more information.
If using AutoLaunch with Annotate in Interactive Mode, refer to
“Using AutoLaunch with Annotate” on page 92 for more information.
Presenting, Training, and Communicating with TeamBoard
Virtual Keyboard
41
This section explains the purpose of the TeamBoard Virtual Keyboard
application.
The Virtual Keyboard is an application that mimics a standard
keyboard. There are two views to choose from. You can use it to type
text and numbers into your applications right at the board. For more
information refer to “Entering Text and Numbers with the Virtual
Keyboard” on page 83.
Virtual Mouse
This section explains the purpose of the TeamBoard Virtual Mouse
application.
While in Interactive Mode, a tap on the TeamBoard is interpreted as a
left mouse click. Pressing or touching the TeamBoard for 3 seconds
activates the right mouse click. For more information refer to
“Clicking with the Virtual Mouse” on page 86.
Online Help
This section explains how to access the online Help system that is
included with your TeamBoard.
TeamBoard software has extensive Online Help available by
selecting:
•
the Help button on the TeamBoard Dashboard
•
the HELP menu in TeamBoard Draw
42
Presenting, Training, and Communicating with TeamBoard
•
the HELP option in the System Tray menu accessed from the
TeamBoard System Tray Icon.
For more information refer to “Getting Help Information for
TeamBoard” on page 1.
Presenting, Training, and Communicating with TeamBoard
43
44
4
Using TeamBoard as an Electronic Whiteboard
Using TeamBoard as an
Electronic Whiteboard
This section explains how to use TeamBoard as an electronic
whiteboard, using the TeamBoard Draw application. The information
is divided into the following topics:
•
Using Draw without a Projector
•
Using Draw with a Projector
•
Drawing and Writing with the Drawing Toolbar
•
Editing Content with the Drawing Toolbar
•
Working with Multiple Pages
•
Using the Page Sorter
•
Using the Spotlight
•
Using Hide/Reveal
•
Importing Files and Scanned Images into Draw
•
Using ClipArt
•
Exporting a Page or Entire Workbook
•
Printing Your Work
•
Saving Your Work
Using Draw without a Projector
This section explains how to use TeamBoard as an electronic
whiteboard without a projector, using TeamBoard’s ActionBar in the
TeamBoard Draw application. The information is divided into the
following topics:
•
About Using Draw without a Projector
•
Drawing and Writing on the TeamBoard
•
Inserting a New Page
•
Erasing Drawings and Writing
•
Changing Pen Widths
Using TeamBoard as an Electronic Whiteboard
45
About Using Draw without a Projector
This section explains how to use TeamBoard Draw without a
projector.
With TeamBoard Draw, you can write and draw on the TeamBoard
with dry–erase markers1 and capture all of your work onto your
computer.
To work in TeamBoard Draw without a projector, use
TeamBoard’s Whiteboard Mode. You must switch to Whiteboard
Mode first before launching TeamBoard Draw. For more information
refer to “Changing Modes” on page 22.
While in Whiteboard Mode, you can write and draw, erase, print,
create new pages and copy pages from the TeamBoard. From your
computer, you can use your monitor and mouse to access further
TeamBoard Draw features, such as saving, rearranging pages,
deleting pages, adding to pages and emailing pages.
TeamBoard Draw’s user-friendly interface emulates that of the actual
TeamBoard, including a toolbar that is similar to the TeamBoard
ActionBar. For more information refer to “Using the ActionBar
Buttons” on page 82.
TeamBoard Draw offers a sharp image with “ink-like” lines as a result
of its high resolution controller and advanced line smoothing features.
Users also have a variety of pen widths to choose from. All notes and
drawings are automatically backed up by the AutoSave feature at
configurable intervals.
1.
Expo 2 Low Odor Dry Erase Markers contain an alcohol based ink. They do
not clean well from TeamBoard or other whiteboard surfaces.
46
Using TeamBoard as an Electronic Whiteboard
Drawing and Writing on the TeamBoard
This section explains how to write and draw on the TeamBoard
without a projector. You use TeamBoard Draw in WhiteBoard Mode
to capture all of your work to your computer.
Tip
Ensure that your computer monitor is turned on when you work with
TeamBoard Draw in WhiteBoard Mode. This allows you to see
content displayed on screen. Since you can see the content on screen,
you can ensure that the content you see on the TeamBoard is the same
as the content on your computer.
1.
Ensure that your computer is turned on, and that your Data
Projector is turned off.
For more information refer to “Installing TeamBoard” on
page 5.
2.
If it has not yet been done, calibrate both the Whiteboard and
ActionBar.
For more information refer to “Calibrating TeamBoard” on
page 15.
3.
Switch into Whiteboard Mode.
For more information refer to “Changing Modes” on page 22.
4.
Launch TeamBoard Draw by touching the TeamBoard.
TeamBoard Draw launches and can be viewed on your monitor.
For more information refer to “Draw” on page 38.
5.
Press a pen button on the TeamBoard’s ActionBar in the colour
you want to use.
6.
Using an Egan dry–erase marker of the same colour, write and
draw on the TeamBoard.
Your computer monitor displays your work in the colour you have
chosen.
7.
To write and draw using another colour, repeat step 5 and step 6.
Using TeamBoard as an Electronic Whiteboard
8.
Tip
47
Use TeamBoard Draw’s features as needed for Erasing Drawings
and Writing, Saving Your Work, Printing Your Work and so on.
You can also use the AutoLaunch feature for drawing and writing on
the TeamBoard. For more information refer to “Using AutoLaunch in
Whiteboard Mode” on page 48.
Erasing Drawings and Writing
This section explains how to erase drawings and writing when using
TeamBoard Draw in Whiteboard Mode without a projector.
To erase drawings and writing from both the TeamBoard and
TeamBoard Draw on your monitor, you have two options. Use the
Small Eraser to wipe off small parts of a drawing such as letters or
numbers. Use the Large Eraser to wipe off large areas.
Using the Small Eraser
1.
Select the Small Erase button on the Drawing Toolbar.
2.
Erase content on the TeamBoard with the corner of a Egan Cloth
or with your finger.
The area is erased from both the TeamBoard and the image on
your monitor.
Using the Large Eraser
1.
Select the Large Eraser button on the Drawing Toolbar.
2.
Erase content on the TeamBoard with an Egan Cloth.
The area is erased from both the TeamBoard and the image on
your monitor.
48
Using TeamBoard as an Electronic Whiteboard
Changing Pen Widths
This section explains how to modify the width of the digital pen lines
that TeamBoard Draw displays on your monitor. There are eight pen
width values.
1.
Looking at your computer monitor, use your mouse to select PEN
WIDTH from the top menu bar of the TeamBoard Draw screen.
2.
From the PEN WIDTH drop-down menu, select the pen width you
need.
The selection remains until you select a new pen width.
Using AutoLaunch in Whiteboard Mode
This section explains how to use the AutoLaunch feature when using
Whiteboard Mode.
AutoLaunch makes it easy for you to jump into using your
TeamBoard quickly. TeamBoard automatically launches Draw to
capture any notes written on, or erased from, the whiteboard.
With the TeamBoard software in Whiteboard Mode, start drawing and
writing on the TeamBoard with a dry-erase marker. Draw launches
automatically and captures your notes and drawings.
Using Draw with a Projector
This section explains how to use TeamBoard as an electronic
whiteboard with a projector, using TeamBoard’s ActionBar in the
TeamBoard Draw application. The information is divided into the
following topics:
•
About Using Draw with a Projector
•
Drawing and Writing on the TeamBoard
•
Inserting a New Page
•
Erasing Drawings and Writing
•
Changing Pen Widths
Using TeamBoard as an Electronic Whiteboard
49
About Using Draw with a Projector
This section explains how to use TeamBoard Draw with a projector.
With TeamBoard Draw, you can write and draw on the TeamBoard
and capture all of your work onto your computer.
To work in TeamBoard Draw with a projector, use TeamBoard’s
Interactive Mode. Change mode to interactive before launching
TeamBoard Draw. For more information refer to “Changing Modes”
on page 22.
In Interactive Mode, you can access TeamBoard Draw features by
either touching the TeamBoard or by using your computer’s keyboard
and mouse. Examples of TeamBoard Draw features include printing,
saving, navigating through pages, rearranging pages, deleting pages,
adding to existing pages, emailing pages and working with images.
TeamBoard Draw’s user-friendly interface emulates that of the actual
TeamBoard, including a toolbar that is similar to the TeamBoard
ActionBar.
TeamBoard Draw offers a sharp image with “ink-like” lines as a result
of its high resolution controller and advanced line smoothing features.
Users also have a variety of pen widths to choose from. You can also
use Draw’s virtual ActionBar, which is not active by default, to access
pen options and erase options.
In addition to the TeamBoard ActionBar and Draw’s virtual
ActionBar, Draw features the Drawing Toolbar, which is located at
the top of the Draw window. The Drawing Toolbar offers a wide
range of drawing and writing tools such as a variety of custom
colours, a dashed pen, a highlighter, and tools for drawing shapes and
typing text. For more information refer to “Drawing and Writing with
the Drawing Toolbar” on page 53.
Editing features are also available on the Drawing Toolbar. The
features include the ability to cut and paste content, erase content,
50
Using TeamBoard as an Electronic Whiteboard
move content around on the page after it has been created, and undo
and redo past actions. For more information refer to “Editing Content
with the Drawing Toolbar” on page 62.
Drawing and Writing on the TeamBoard
This section explains how to write and draw on the TeamBoard when
used with a projector. You use TeamBoard Draw in Interactive Mode
to capture all of your work to your computer.
Note
Additionally, you can select a variety of pen tools and colours on the
Drawing Toolbar. For more information refer to “Drawing and
Writing with the Drawing Toolbar” on page 53.
1.
Turn on your computer and projector.
For more information refer to “Installing TeamBoard” on
page 5.
2.
If necessary, perform an Interactive Calibration on your
TeamBoard.
For more information refer to “Calibrating TeamBoard” on
page 15.
3.
Switch into Interactive Mode.
For more information refer to “Changing Modes” on page 22.
4.
Launch TeamBoard Draw from the TeamBoard Dashboard.
TeamBoard Draw launches and is projected on the TeamBoard. It
can also be viewed on your monitor.
5.
Press a pen button on the TeamBoard’s ActionBar in the colour
you want to use.
For more information refer to “ActionBar” on page 38.
6.
Using the TeamBoard Stylus or your finger draw on the
TeamBoard.
Your monitor and the projected image display your work in the
colour you have chosen.
Using TeamBoard as an Electronic Whiteboard
51
7.
To write and draw using another colour, repeat step 5 and step 6.
8.
Use TeamBoard Draw’s features as needed for Erasing Drawings
and Writing, Saving Your Work, Printing Your Work and so on.
Erasing Drawings and Writing
This section explains how to erase drawings and writing when using
TeamBoard Draw in Interactive Mode with a projector.
To erase drawings and writing from the TeamBoard, you have two
options. Use the Small Eraser to erase small parts of a drawing such
as letters or numbers. Use the Large Eraser to erase objects.
Using the Small Eraser
1.
Select the Small Eraser button on the TeamBoard ActionBar or
on the Drawing Toolbar.
2.
Erase content on the TeamBoard with your TeamBoard Stylus or
with your finger.
The area is erased from Draw.
Using the Large Eraser
1.
Select the Large Eraser button on the TeamBoard ActionBar or
on the Drawing Toolbar.
2.
Erase objects on the TeamBoard with your TeamBoard Stylus or
with your finger.
The selected objects are erased from Draw.
Changing Pen Widths
This section explains how to modify the width of the digital pen when
using TeamBoard Draw.
52
Using TeamBoard as an Electronic Whiteboard
The eight pen width values can be found at the top menu bar.
1.
To choose a pen width, click on the pen width arrow and select a
size from the drop-down list.
Viewing Full Screen
This section explains how to view the work area in Interactive Mode
as a full screen page when using TeamBoard Draw.
Note
In Full Screen view the title bar, menu bar, page sorter and toolbars
are hidden.
1.
Important
Select VIEW, FULL SCREEN or press the Full Screen button.
To return to the standard view, select the Go to Draw button on the
toolbar.
Undoing Changes
There are an unlimited number of actions that you can undo. To redo
actions that have been undone, use the Redo feature. These editing
tools can be found on the Drawing Toolbar.
•
To undo an action, select the Undo button.
•
To redo an action, select the Redo button.
Using TeamBoard as an Electronic Whiteboard
53
Drawing and Writing with the Drawing
Toolbar
This section explains how to draw and write using the Drawing
Toolbar located at the top of the Draw window. In order to have
access to the Drawing Toolbar, a projector is needed.
The information is divided into the following topics:
•
Using the Drawing Toolbar
•
Using Pens
•
Selecting Colours
•
Drawing Shapes
•
Entering Text
Using the Drawing Toolbar
This section explains how to use Draw’s drawing and writing tools
using the Drawing Toolbar.
The Drawing Toolbar features a wide range of drawing and writing
tools. These features include 300 custom colours, a dashed pen, a
highlighter and tools for drawing shapes and typing text.
Using Pens
This section explains how to draw solid lines, dashed lines and
highlight, both in standard colours and custom colours. These pen
options can be found on the Drawing Toolbar.
Pen Options
Dashed line
Solid line
1.
Pen Width
Highlighter
Custom
Colour List
Blackboard
Select the Pen Options icon from the Drawing Toolbar.
The Drawing Toolbar displays the pen options. Draw remembers
the last selected pen type, pen widths and colours.
54
Using TeamBoard as an Electronic Whiteboard
2.
Select the desired pen type.
• To draw a solid line, select Solid line.
• To draw a dashed line, select Dashed line.
• To draw a transparent line overtop of other content, select
Highlighter.
3.
Select the desired pen width.
• To choose a pen width, click on the pen width arrow and
select a size from the drop-down list.
Draw remembers the last selected line pen width and highlighter
pen width within a Draw session.
4.
Select the desired pen colour.
• To use a standard colour, or the current custom pen colour,
select a pen colour from the Colour List.
• To use a new custom colour, select Custom Colour from the
Drawing Toolbar. For more information refer to “Selecting
Colours” on page 55.
5.
Using the Stylus or your finger, draw and write onto the
TeamBoard.
Editing Content Using Right Click
You can format objects and text by right clicking on them.
1.
Select the object by double-clicking.
Using TeamBoard as an Electronic Whiteboard
2.
Right click (or hold your finger on the TeamBoard) for colour
and transparency options.
•
•
•
•
•
•
•
•
Note
55
Bring to font: Brings the current object in front of every
other object.
Send to back: Sends the current object to the back of every
other object.
Bring forward: Brings the current object forward one layer.
Send backward: Sends the current object back one layer.
Line colour: Displays the colour palette so you can change
the colour of the object’s lines.
Fill colour: Displays the colour palette so you can change the
colour of the inside of the object.
Change colour: Displays the colour palette so you can
change the colour of the object.
Transparency: Lets you adjust the transparency of the object.
Depending on the object selected, the right-click options may differ.
Selecting Colours
This section explains how to select standard colours and custom
colours from your Drawing Toolbar.
56
Using TeamBoard as an Electronic Whiteboard
TeamBoard has 300 custom colours to choose from. You can use
these custom colours when you draw lines or shapes, write or type.
These colour options can be found on the Drawing Toolbar.
Your Colour List has 6 standard colours and 1 custom colour. When
you select a colour from the Colour List, whether standard or custom,
it becomes the selected colour for any drawing, writing and typing,
except for the highlighter.
Note
The highlighter colour changes only when you select a new
highlighter colour. The highlighter colour selection does not change
the selected drawing, writing and typing colour.
Colour List
Custom Colour
When you select a custom colour, that colour becomes the selected
colour and is added to your Colour List. It will stay on your Colour
List until a new custom colour is selected to replace it. Draw
remembers the 35 last selected custom colours in the Recent section
of the Custom Colour dialog.
Selecting standard colours or the current custom colour
1.
From the Drawing Toolbar, select a tool, such as the dashed pen,
to be affected by your colour selection.
Except for the highlighter, your colour selection affects all
drawing, writing and typing tools.
2.
From the Drawing Toolbar, select the drop-down Colour List.
The Colour List drops down to display the six standard colours
and current custom colour.
Using TeamBoard as an Electronic Whiteboard
3.
57
Select the colour you want to become the current colour.
Selecting a new custom colour
1.
From the Drawing Toolbar, select a tool, such as the dashed pen,
to be affected by your colour selection.
Except for the highlighter, your colour selection affects all
drawing, writing and typing tools.
2.
Select the Custom Colour icon.
Draw displays the Custom Colour dialog.
3.
Click the colour you want to use.
• To select any new custom colour, click on the colour of your
choice from the large colour grid.
• To select a custom colour that was previously selected in
your Draw session, click on the colour from the small Recent
grid.
4.
Click OK.
The custom colour you chose is now your current colour.
58
Using TeamBoard as an Electronic Whiteboard
Drawing Shapes
This section explains how to draw straight lines, circles, rectangles
and triangles, both in standard colours and custom colours. These
options can all be found on the Drawing Toolbar.
Shape Options
Circle Filled Circle
Rectangle
Reveal/Hide
Filled Triangle
Line
Custom Colour
Pen Width
Arrow
Bi-Directional
Triangle Filled Rectangle
Arrow
Colour List
1.
Select the Shape Options icon on the Drawing Toolbar.
The Drawing Toolbar displays the shape options. Draw
remembers the last selected shape, pen width and colour.
2.
Select the desired shape.
• To draw an outlined circle, select Circle.
• To draw an outlined rectangle, select Rectangle.
• To draw an outlined triangle, select Triangle.
• To draw a filled circle, select Filled Circle.
• To draw a filled rectangle, select Filled Rectangle.
• To draw a filled triangle, select Filled Triangle.
• To draw a straight line, select Line, Arrow or Bi-Directional
arrow.
3.
Select the desired pen width.
• To choose a pen width, click on the pen width arrow and
select a size from the drop-down list.
4.
Select the desired colour.
• To use a standard colour, or the last selected custom pen
colour, select a pen colour from the Colour List.
• To use a new custom colour, select Custom Colour on the
Drawing Toolbar.
For more information refer to “Selecting Colours” on page 55.
Using TeamBoard as an Electronic Whiteboard
59
5.
Using the Stylus, your finger, or a dry erase marker, touch the
TeamBoard and drag along it until you have created the shape
you need.
6.
Release by taking the Stylus, your finger, or a dry erase marker
off the TeamBoard.
Draw inserts the shape you created.
7.
(Optional) Select the object by double-clicking and then right
click (or hold your finger on the TeamBoard) for colour and
transparency options.
• Bring to font: Brings the current object in front of every
other object.
60
Using TeamBoard as an Electronic Whiteboard
•
•
•
•
•
Note
Send to back: Sends the current object to the back of every
other object.
Bring forward: Brings the current object forward one layer.
Send backward: Sends the current object back one layer.
Change colour: Displays the colour palette so you can
change the colour of the object.
Transparency: Lets you adjust the transparency of the object.
Depending on the object selected, the right-click options may differ.
Entering Text
This section explains how to type and format text right into Draw. The
text options can be found on the Drawing Toolbar.
Text Options
Font
Font Size
Italic
Custom Colour
Virtual Keyboard
Bold
Underline
Colour List
The keyboard button located on the Drawing Toolbar, next to the
Colour List, launches the virtual keyboard. You can use the virtual
keyboard at the TeamBoard to type text, as well as numbers into your
applications. For more information refer to “About TeamBoard’s
Virtual Keyboard” on page 84.
Note
You can also copy text from other applications and paste it into Draw.
For more information refer to “Copying, Cutting, and Pasting
Content” on page 64.
1.
Select the Text Options icon on the Drawing Toolbar.
The Drawing Toolbar displays the shape options. Draw
remembers the last selected font family, font size, style, and
colour.
2.
Select the desired font family from the Font drop-down list.
3.
Select the desired text size from the Font Size drop-down list.
4.
Select the desired Bold, Italic and Underline style selections.
• To select a style, tap its button once.
Using TeamBoard as an Electronic Whiteboard
•
Note
Important
61
To deselect a style, tap its button once.
5.
Select the desired colour.
• To use a standard colour, or the last selected custom pen
colour, select a pen colour from the Colour List.
• To use a new custom colour, select Custom Colour on the
Drawing Toolbar.
For more information refer to “Selecting Colours” on page 55.
6.
Touch the TeamBoard to get an insertion point.
7.
Enter text.
• To use your computer’s keyboard, simply start typing.
• To use TeamBoard’s virtual keyboard, select Virtual Keyboard from your TeamBoard Dashboard. Press Enter to continue onto the next line.
For more information refer to “About TeamBoard’s Virtual
Keyboard” on page 84.
8.
Make adjustments to your text as needed.
9.
(Optional) Select the object by double-clicking and then right
click (or hold your finger on the TeamBoard) for colour and
transparency options.
• Bring to font: Brings the current text in front of every other
object.
• Send to back: Sends the current text to the back of every
other object.
• Bring forward: Brings the current text forward one layer.
• Send backward: Sends the current text back one layer.
• Change colour: Displays the colour palette so you can
change the colour of the object.
• Transparency: Lets you adjust the transparency of the object.
Depending on the object selected, the right-click options may differ.
Once you touch another point on your TeamBoard, you are not able to
edit or reformat or delete text.
62
Using TeamBoard as an Electronic Whiteboard
Editing Content with the Drawing Toolbar
This section explains how to edit content using the Drawing Toolbar
located at the top of the Draw window. In order to have access to the
Drawing Toolbar, a projector is needed. The information is divided
into the following topics:
•
Using the Drawing Toolbar
•
Erasing Content
•
Moving Content
•
Copying, Cutting, and Pasting Content
Using the Drawing Toolbar
This section explains how to use Draw’s editing tools using the
Drawing Toolbar.
The Drawing Toolbar features a wide range of editing tools. These
features include the ability to cut, copy and paste content, both within
Draw and to and from other applications, erase drawing and writing,
move content around within a Draw page after it has been created,
and undo and redo past actions.
Erasing Content
This section explains how to erase objects using the Small Eraser, the
Large Eraser and the Multi Eraser. The eraser options can be found on
the Drawing Toolbar.
Eraser Options
Small Eraser
Large Eraser
Multi–Erase
1.
Select the Eraser Options icon from the Drawing Toolbar.
The Drawing Toolbar displays the eraser options. Select the
desired eraser type.
• To erase small sections of content, select Small Eraser.
Using TeamBoard as an Electronic Whiteboard
•
•
2.
63
To erase whole objects, select Large Eraser.
To erase multiple objects at the same time, select Multi
Erase.
Erase content on the TeamBoard with the corner of an Egan
Cloth, your TeamBoard Stylus or with your finger.
• Small Eraser: Touch the areas you want to erase.
• Large Eraser: Tap the object you want to erase.
• Multi Eraser: Select a large area around the objects you wish
to erase, then drag your stylus or your finger along that area
until the objects are fully encompassed.
Moving Content
This section explains how to move Draw content within a Draw page
after it has been created. Each pen line, shape and text line is a
moveable object. The move options can be found on the Drawing
Toolbar.
Move Options
Multi-Move
Extended Object-Move
Object-Move
Embed a control
To move Draw objects to a different Draw page or another software
application, use the new Copy, Cut, and Paste tools. For more
information refer to “Copying, Cutting, and Pasting Content” on
page 64.
1.
Select the Move Options icon from the Drawing Toolbar.
The Drawing Toolbar displays the move options.
2.
Select the desired move option.
• To move multiple objects at the same time, select
Multi-Move.
• To move a single object, select Object-Move.
• To rotate a single object, select Extended Object-Move.
• To create a hyperlink to another page, file, or URL, select
Embed a control.
64
Using TeamBoard as an Electronic Whiteboard
3.
Using the Stylus or your finger, select and move objects as
needed.
• Multi-Move tool: Select a large area around the objects you
wish to move, then drag your stylus or your finger along that
area until the objects are fully encompassed.
Objects that are only partially encompassed are not selected for
the move. If you miss selecting some objects, simply reselect a
larger area.
• Object-Move tool: Touch the object and drag it to where you
want it released.
Copying, Cutting, and Pasting Content
This section explains how to cut, copy and paste content, both within
Draw and to and from other software applications. These clipboard
options can be found on the Drawing Toolbar.
Clipboard Options
Object-Copy
Multi-Copy
Object-Cut
Multi-Cut
Paste
Copying and Cutting
Use the Cut options to remove Draw objects from their current
positions and place them onto the clipboard, so that they can be pasted
to another Draw page or software application. Use the Copy options
to do the same, while leaving the original objects in their current
positions.
Note
To remove Draw objects from their current positions, and place them
elsewhere within the same Draw page, use the Move options. For
more information refer to “Moving Content” on page 63.
1.
Select the Clipboard Options icon from the Drawing Toolbar.
The Drawing Toolbar displays the clipboard options.
2.
Select the desired copy or cut option.
• To copy multiple objects at the same time, select
Multi-Copy.
• To copy a single object, select Copy.
Using TeamBoard as an Electronic Whiteboard
•
•
65
To cut multiple objects at the same time, select Multi-Cut.
To cut a single object, select Cut.
3.
Using the Stylus or your finger, select objects as needed.
• Multi-Copy or Multi-Cut Tools: Select a large area around
the objects you wish to copy or cut, then drag your stylus or
your finger along that area until the objects are fully encompassed.
Objects that are only partially encompassed are not selected for
the move. If you miss selecting some objects, simply reselect a
larger area.
• Object-Copy or Object-Cut tools: Tap the object once.
4.
Paste as needed.
For more information refer to “Pasting” on page 65.
Pasting
To paste, you must have copied or cut objects from either Draw or
other applications onto your clipboard. For more information refer to
“Copying and Cutting” on page 64.
1.
Display the Draw page you want to paste onto.
2.
Select the Clipboard Options icon from the Drawing Toolbar.
The Drawing Toolbar displays the clipboard options.
3.
Select Paste.
Draw pastes the objects from the clipboard onto your current
Draw page.
4.
Move the pasted objects as needed.
For more information refer to “Moving Content” on page 63.
Working with Multiple Pages
This section explains how to work with multiple pages captured in a
single TeamBoard Draw file. The information is divided into the
following topics:
•
Creating a New, Blank Page
66
Using TeamBoard as an Electronic Whiteboard
•
Creating a Copy of a Page
•
Deleting a Page
•
Navigating in the Draw Workbook
Creating a New, Blank Page
This section explains how to insert a new, blank page when working
with TeamBoard Draw.
The Insert Page button on the TeamBoard ActionBar is a quick way
to get a new, blank page to work with.
1.
Select Insert Page on the TeamBoard ActionBar or on the
ActionBar Toolbar.
A new, blank page is inserted. All drawings on the previous page
are saved.
Important
After inserting a blank page in Whiteboard Mode the drawing and
writing on the TeamBoard remains. The eraser is automatically
selected so that you can use the Egan Cloth on the TeamBoard. Before
drawing and writing on the new page you must select a pen colour.
Creating a Copy of a Page
This section explains how to duplicate an existing page using
TeamBoard Draw.
TeamBoard allows you to copy the current page and create a new,
identical page following it.
1.
Select Copy Page on the TeamBoard ActionBar or on the
ActionBar Toolbar.
A new, duplicate page is inserted.
Using TeamBoard as an Electronic Whiteboard
67
Deleting a Page
This section explains how to delete an unwanted page when using
TeamBoard Draw.
Important
This action cannot be undone.
1.
Select a page to delete.
2.
Use the Page Sorter Toolbar, or, using the keyboard, press Delete .
Navigating in the Draw Workbook
This section explains how to navigate between pages using
TeamBoard Draw.
Select the appropriate navigation button on the TeamBoard ActionBar
or the ActionBar Toolbar, to move from one page to another in a
Draw workbook.
Beginning (First page)
Back one page
Forward one page
End (Last page)
Using the Page Sorter
This section explains how to use the page sorter in TeamBoard Draw.
The information is divided into the following topics:
•
Closing the Page Sorter
68
Using TeamBoard as an Electronic Whiteboard
•
Opening the Page Sorter
•
Sorting Pages
•
Viewing Pages
Closing the Page Sorter
1.
Note
To close the Page Sorter select VIEW, PAGE SORTER (so the bullet
disappears).
If you close Page Sorter it remains closed the next time you launch
Draw. If you move the Page Sorter, it remains in the last location the
next time you launch Draw.
Opening the Page Sorter
1.
Select VIEW, PAGE SORTER.
The Page Sorter displays in the last location it was placed (by
default, this is the right side of the current page).
Sorting Pages
This section explains how to sort the order of pages when using
TeamBoard Draw.
Drag and Drop
1.
To rearrange pages, drag and drop the thumbnail pages in the
Page Sorter.
Buttons or
Keyboard
1.
Select a page to move.
2.
Select the Move Up or Move Down button on the TeamBoard
ActionBar or use the Page Sorter Toolbar, or, using the keyboard,
press the Up Arrow or Down Arrow key.
1.
To view a page, select it in the Page Sorter.
The page displays in the Draw window.
Viewing Pages
Page Sorter
Using TeamBoard as an Electronic Whiteboard
Keyboard
1.
69
Press the Up Arrow or the Down Arrow keyboard key.
The page displays in the Draw window.
Inserting a New Page
1.
In the Page Sorter, click the gray bar located directly below the
page.
The bar turns red.
2.
Click the Insert New Page icon.
A new page displays in the Page Sorter.
Note
Alternatively, you can select the Insert New Page icon from the
ActionBar.
70
Using TeamBoard as an Electronic Whiteboard
Using the Spotlight
The spotlight tool lets you shine a spotlight on an area of the
TeamBoard to help direct your audience’s attention.
1.
Select the Reveal/Hide Options icon from the Drawing Toolbar.
The Spotlight toolbar displays.
2.
Select the Spotlight tool.
The Spotlight turns on.
3.
Resize the spotlight if needed by dragging the edges larger or
smaller.
4.
Touch the board anywhere you want the spotlight to move to or
drag it.
The spotlight moves to wherever you touch.
5.
To exit from the spotlight, double-click anywhere.
Using TeamBoard as an Electronic Whiteboard
71
Using Hide/Reveal
The hide/reveal tool lets you show or hide any part of the screen you
want. Use it to temporarily hide an item you are not ready to show
yet.
1.
From the Drawing Toolbar, select the Reveal/Hide tool.
The Hide/Reveal hides your page contents.
2.
Resize the hide screen by dragging the edges.
3.
Double click it to cover your entire page again.
4.
To exit, de-select Reveal/Hide in the TeamBoard Draw
ActionBar.
Importing Files and Scanned Images into
Draw
This section explains how to import images from image files (BMP,
PNG, and JPG), scanners, and cameras into the background of your
TeamBoard Draw files. The information is divided into the following
sections:
•
Importing an Image from a Graphic File
•
Importing an Image from a Scanner or Camera
•
Deleting an Imported Background Image
•
Importing a Movie
72
Using TeamBoard as an Electronic Whiteboard
Importing an Image from a Graphic File
This section explains how to import an image from a graphic file into
the background of Draw.
Note
1.
In Draw, display the page you want to import into.
2.
Select FILE > IMPORT > FILE.
The Open dialog box displays.
3.
From the Files of type drop-down list, select the type of graphic
file you want to import.
4.
Browse to find the graphic file you want to import.
5.
Double-click the graphic file you want to import.
Draw imports the image into the background of your current
Draw page.
If the Scaling feature is enabled the imported image will be resized to
fill the Draw window. If you wish to maintain the image’s original
size then disable Scaling before or after importing the image.
Importing an Image from a Scanner or Camera
This section explains how to import an image from a scanner or
camera into the background of Draw.
1.
In Draw, display the page you want to import into.
2.
To import from another scanner or camera, select File > Import >
Canner/Camera > Select a Scanner/Camera. Select the scanner or
camera you want to import from.
3.
To import from the last selected scanner of camera in you Draw
session, select FILE > IMPORT > SCANNER/CAMERA > ACQUIRE.
4.
Follow the on-screen instructions to get an image from your
camera or scanner.
Draw imports the image into the background of your current
Draw page.
Using TeamBoard as an Electronic Whiteboard
73
Deleting an Imported Background Image
This section explains how to delete a background image that was
imported or captured during annotating from a page when using
TeamBoard Draw.
1.
In Draw, display the page with the background image you want to
remove.
2.
Select EDIT, CLEAR BACKGROUND.
The background Image is removed from your current Draw page.
Importing a Movie
You can import a movie into TeamBoard Draw. Once the movie is
imported, you can play or pause, rewind, or fast forward the movie.
You can also move the movie window around by dragging and
dropping.
The standard right-click options are also available to movies in Draw.
Import a file with one of the following extensions:
Note
•
.swf
•
.avi
•
.mov
•
.3gp
•
.mpg
•
.mpeg
You must have Adobe Flash (for .swf files) or QuickTime installed to
view movies.
•
Windows XP: You must reboot your computer after installing
QuickTime.
•
Windows Vista: You must turn off USER ACCOUNT CONTROL
(UAC) and then reboot the system after installing QuickTime.
1.
In Draw, display the page where you want to add a movie.
2.
Select FILE > IMPORT > MOVIE.
74
Using TeamBoard as an Electronic Whiteboard
3.
Tip
Browse to the movie file and click Open.
Draw imports the movie into the Draw page.
You can also import a movie into ClipArt.
Using ClipArt
This section explains how to use the ClipArt gallery to import images
and movies (including your own) into TeamBoard Draw.
1.
In TeamBoard Draw, select the ClipArt Viewer.
The ClipArt Gallery displays on the right.
2.
Navigate through the image collections to find the graphic or
movie you want.
• Click Add a category > Import to add your own graphic or
movie to the ClipArt gallery.
If you import your own graphic or movie, you must import it into
a category.
• (Optional) Click Add a category to add or remove a category.
3.
Once you have the graphic or movie you want in the gallery, drag
and drop it into your page as many times as you need it.
4.
Resize it if needed by double clicking the image and then
clicking and dragging any of the image corners.
5.
Use the right-click options to customize the colour and
transparency.
Exporting a Page or Entire Workbook
This section explains how to create PDF, HTML and image files (JPG,
BMP and PNG), from TeamBoard Draw and Annotation files. You
Using TeamBoard as an Electronic Whiteboard
75
can create a file from your current page or export your whole
workbook.
Creating a PDF or Image File from your Current Page
This section explains how to create a PDF or image file from your
current page.
1.
From within Draw, display the Draw page from which you want
to export.
2.
Select FILE > EXPORT > PAGE.
3.
Draw displays the Export dialog box.
4.
Browse to select the location in which to save your new file.
5.
Enter the name you want to give to your new file.
6.
From the Export type drop-down list, select the format you want
to create.
7.
Click Save.
Your file is created and placed into your chosen location
Creating a PDF, HTML or Image File From Your Current
Workbook
This section explains how to export your current workbook.
1.
From within Draw, display the Draw workbook from which you
want to export.
2.
Select FILE > EXPORT > WORKBOOK.
Draw displays the Save As dialog box.
3.
Browse to select the location in which to save your document.
4.
From the Save as type drop-down list, select the format you want
to create.
5.
Enter the name you want to give to your new document.
76
Using TeamBoard as an Electronic Whiteboard
6.
Note
Click Save.
Your files are created and placed into your chosen location.
When you export an entire workbook to PDF, you create a single PDF
document with multiple pages. Exporting a workbook to a JPG, BMP
or PNG image format results in a folder containing multiple image
files—one per workbook page.
Printing Your Work
This section explains how to print a single page or all pages using
TeamBoard Draw.
1.
Tip
Select Print on the TeamBoard ActionBar or, in TeamBoard
Draw, use the ActionBar Toolbar, or, using the menu, select FILE,
PRINT.
There is a Print Options tab in the TOOLS menu. From the TOOLS
menu, select OPTIONS, then the Prints Options tab. Three options
display: Print Page Numbers, Print Page Dates and Print File Name.
Print Page Numbers displays the page number in the bottom left
corner of the printed page. Print Page Dates displays the print date in
the bottom right corner of the printed page. Print File Name displays
the name of the file in the bottom, center of the printed page.
Additionally, you can select the Print Prints ALL Pages option. This
prints the entire file at once when Print is selected.
Saving Your Work
This section explains how to save a workbook of pages when using
TeamBoard Draw.
1.
Select FILE > SAVE AS.
The Save As dialog box displays.
Using TeamBoard as an Electronic Whiteboard
2.
Name the file under File name.
3.
Click Save.
Using Auto Save
Use the Auto-Save feature to automatically save the current
workbook at a specified time interval. By default, this feature is
disabled. Use the following procedure to enable Auto-Save and
specify the interval.
1.
Select TOOL > OPTIONS.
2.
Click the Auto-Save tab.
77
78
Using TeamBoard as an Electronic Whiteboard
3.
Enter the desired time interval in the Auto-Save Interval (mins) text
box.
4.
Click OK when done.
Using TeamBoard as an Electronic Whiteboard
79
80
5
Using TeamBoard as a Touchscreen
Using TeamBoard as a
Touchscreen
This section explains how to use TeamBoard as a touchscreen, using
TeamBoard’s Interactive Mode. The information is divided into the
following topics:
•
About Using TeamBoard as a Touchscreen
•
Activating the Touchscreen
•
Using the ActionBar Buttons
•
Entering Text and Numbers with the Virtual Keyboard
•
Clicking with the Virtual Mouse
About Using TeamBoard as a Touchscreen
This section explains how to use TeamBoard as a touchscreen.
TeamBoard's large drawing surface becomes an effective
touch-sensitive surface with the use of your Data Projector. Your
fingertip acts as a mouse; you can touch an icon projected onto the
TeamBoard and your audience instantly sees the computer react to the
touch, and display the change on the TeamBoard.
Presentations with TeamBoard are highly effective. A valuable tool
for instructing and presenting, use the TeamBoard ActionBar to
control your slide presentations all the while maintaining the
audience’s focus on you and TeamBoard. TeamBoard also allows you
to annotate during your presentation by drawing on top of
applications and presentations projected on to the TeamBoard.
Use the Virtual Keyboard to type information into applications,
without leaving the TeamBoard.
To use TeamBoard as a touchscreen, a Data Projector must be
connected to the computer and aimed onto the TeamBoard. As the
projected image can vary in size and location, calibration is needed to
align the touchscreen.
Using TeamBoard as a Touchscreen
81
Once Interactive Calibration has been performed, the user can touch
the TeamBoard with a finger or the stylus in order to operate
applications. Applications may also be annotated in Interactive Mode.
Activating the Touchscreen
This section explains how to activate TeamBoard’s touchscreen.
1.
If necessary, perform Interactive Calibration on your TeamBoard.
For more information refer to “Calibrating TeamBoard” on
page 15.
2.
Switch into Interactive Mode.
For more information refer to “Changing Modes” on page 22.
3.
Use TeamBoard in the following ways:
• Select options on the TeamBoard by pressing on the screen
with your finger or the Stylus.
This is similar to selecting what you see on your monitor
using a mouse.
• Press the ActionBar buttons on the TeamBoard to perform
the buttons’ functions.
For more information refer to “Using the ActionBar Buttons” on page 82.
• Enter Text and Numbers with the Virtual Keyboard.
For more information refer to “Entering Text and Numbers
with the Virtual Keyboard” on page 83.
• Using your finger, you can click, double-click or use a secondary mouse button to click on content.
This is similar to using a 2-button mouse. For more information refer to “Clicking with the Virtual Mouse” on page 86.
• Using your finger, you can touch and hold your touch on the
screen to right-click. For more information refer to “Clicking
with the Virtual Mouse” on page 86.
82
Using TeamBoard as a Touchscreen
Using the ActionBar Buttons
This section explains the functions of the ActionBar Buttons.
Applications
Button
Description
Draw
Paint
Eraser Functions
Small Eraser
Large Eraser
Erase with
your finger or
the corner of
the dry-erase
brush to erase
a small area.
Selects the
medium erase.
Erase with the
dry–erase
brush to clear a
larger area.
Selects a
rectangle-shap
ed tool that
whites out
what you
select on the
TeamBoard.
Drag from the
top-left corner
to the
bottom-right
corner of the
area that you
want to erase
Pen Functions
Pen Colours (6)
Selects a pen colour.
Using TeamBoard as a Touchscreen
83
Applications
Button
Description
Draw
Paint
Document Management Functions
Insert Page
Inserts a new,
blank page.
Copy Page
Inserts a new
duplicate of
the page.
Print Page
Prints the
current page or
workbook.
Not available
Prints the
current page.
Navigation Functions
Beginning of
Document
First page in
the workbook.
Back Page
Back one page
in the
workbook.
Not available.
Forward Page
End of
Document
Forward one
page in the
workbook.
Last page in
the workbook.
Entering Text and Numbers with the Virtual
Keyboard
This section explains how to use the Virtual Keyboard to enter text
and numbers on the TeamBoard. The information is divided into the
following topics:
•
About TeamBoard’s Virtual Keyboard
•
Launching and Using the TeamBoard Virtual Keyboard
•
Using the Caps Lock Key
84
Using TeamBoard as a Touchscreen
•
Using the Sticky Keys
•
Using the Number Keypad
About TeamBoard’s Virtual Keyboard
The TeamBoard software includes a program called Virtual
Keyboard. You can use it at the TeamBoard to type text and numbers
into your applications. For example, use it to enter text, numbers, and
formulas into a spreadsheet application.
When you type using the TeamBoard Virtual Keyboard, the typing
displays in the application you have currently selected.
Launching and Using the TeamBoard Virtual Keyboard
Tip
Using the Virtual
Keyboard
1.
Double-click the TeamBoard System Tray Icon to display the
TeamBoard Dashboard
2.
Click Virtual Keyboard on the TeamBoard Dashboard.
Alternatively, you can launch the Virtual Keyboard using the System
Tray menu.
1.
Switch to the application in which you want to type.
Using TeamBoard as a Touchscreen
2.
85
Select the characters you want to enter.
What you type will instantly appear in your application.
Using the Caps Lock Key
1.
Select lock to view the upper case and shift key characters.
This view remains until the lock button is selected again.
Using the Sticky Keys
A sticky key allows users to perform keyboard combinations, such as
Ctrl+c, to copy. To use a sticky key, such as Ctrl, select it and release.
Then select the combination key, such as c, and release. There are
three sticky keys: Shift, Ctrl and Alt.
Shift key
Ctrl key
Alt key
86
Using TeamBoard as a Touchscreen
Using the Number Keypad
On the Virtual Keyboard, use the Number Keypad to enter numbers
into spreadsheets and databases.
1.
Select nlk to view and use the arrow keys on the Number Keypad.
Clicking with the Virtual Mouse
This section explains how to use the Virtual Mouse. The information
is divided into the following topics:
•
About Clicking with the Virtual Mouse
•
Launching and Using the TeamBoard Virtual Mouse
Using TeamBoard as a Touchscreen
87
About Clicking with the Virtual Mouse
While in Interactive Mode, a tap on the TeamBoard is interpreted as a
left mouse click. Holding down a finger on the TeamBoard is
interpreted as a right click.
The TeamBoard Virtual Mouse can be used to change a tap on the
TeamBoard to be interpreted as a right mouse click instead.
Launching and Using the TeamBoard Virtual Mouse
Tip
Using the Virtual
Mouse
1.
Single-click the TeamBoard System Tray Icon to display the
TeamBoard settings
2.
Select Virtual Mouse.
The Virtual Mouse displays.
Alternatively, you can launch the Virtual Mouse using the System
Tray menu.
1.
Tap anywhere on the Virtual Mouse to enable the right mouse
button.
Tapping the Virtual Mouse will only change the very next tap to
act as a right click.
Enable a right click faster by holding your finger down on the
TeamBoard.
2.
Click the Close button when done.
88
Using TeamBoard as a Touchscreen
Using TeamBoard To Annotate
6
89
Using TeamBoard To
Annotate
This section explains how to use TeamBoard to Annotate on screen.
The information is divided into the following topics:
•
About Annotate
•
Launching Annotate
•
Using Annotate
•
Using TeamBoard Draw with Annotate
•
Using AutoLaunch with Annotate
About Annotate
This section explains the purpose of Annotate.
Annotate is designed to be used in Interactive Mode. It gives users the
ability to “mark up” applications and presentations projected on to the
TeamBoard. For example, you can draw a circle around an important
point or underline items.
When you use Annotate, all of the drawing, writing and editing
features of Draw are available to you. Furthermore, once your
Annotate file is brought into Draw, the saving and importing features
are also available.
Some applications, such as Microsoft Paint, already have drawing
tools available. For those that don’t, launch Annotate and, using your
finger or the stylus, begin drawing on top of a snapshot of your
screen.
Tip
If there are no pre-configured applications open, such as Paint, take
advantage of AutoLaunch. For more information refer to “Using
AutoLaunch with Annotate” on page 92.
If there are preconfigured applications open (Paint or Excel), follow
the steps below to launch Annotate. If you do not have these
90
Using TeamBoard To Annotate
applications running, follow the steps for AutoLaunch and Annotate
in the next section.
Launching Annotate
This section explains how to launch Annotate.
1.
Double-click the TeamBoard System Tray Icon.
The TeamBoard Dashboard displays.
Annotate
2.
Click Annotate on the TeamBoard Dashboard.
The AccessBar displays.
Full Screen Annotate
Return to Draw
Area Annotate
Tip
Alternatively, you can launch Annotate from the System Tray menu.
Using TeamBoard To Annotate
91
Using Annotate
This section explains how to use Annotate.
Capturing Screens for Use with Annotate
This section explains how to capture screens for annotating.
1.
Launch Annotate.
2.
Display the screen you want to annotate.
Work with your computer and any applications as required until
you are ready to capture the screen image for use with Annotate.
3.
Select the Full Screen Annotate button on the AccessBar.
Alternatively, you can select the Area Annotate button to create a
range that is captured for use with Annotate.
Full Screen Annotate
Return to Draw
Area Annotate
Wait a moment as an image of your screen is captured into Draw.
Once in Annotate, the Drawing Toolbar displays.
4.
Using your finger or the TeamBoard stylus, begin marking up
your snapshot on the TeamBoard.
All of the drawing and editing features of Draw are available on
the floating Drawing Toolbar.
5.
When finished annotating, select the Return to Desktop button on
the Drawing Toolbar.
Annotations are saved in TeamBoard Draw and you are returned
to the application that was active when the annotation began.
6.
Repeat step 2 to step 5 to continue to annotate.
92
Using TeamBoard To Annotate
7.
When you are finished with Annotate, select the Return to Draw
button on the Drawing Toolbar.
This allows you to use TeamBoard Draw to save, print or
otherwise work with annotated content. For more information
refer to “Using TeamBoard Draw with Annotate” on page 92.
Using TeamBoard Draw with Annotate
This section explains how to use TeamBoard Draw with Annotate.
The information in this section is divided into the following topics:
•
Working with Draw
•
Returning to Annotate
Working with Draw
Once in Draw, you can use all the features of TeamBoard Draw with
your annotations. This means you can save, print, and email your
annotations or otherwise manipulate them. For more information refer
to “Using TeamBoard as an Electronic Whiteboard” on page 44.
Returning to Annotate
Once you are finished reviewing the captured annotations, you can
reactivate annotation.
•
To reactivate Annotate, select Annotate on the Standard Toolbar.
Using AutoLaunch with Annotate
This section explains how to use AutoLaunch to launch Annotate.
Using TeamBoard To Annotate
93
If there are no pre-configured applications running (Paint, Excel), the
easiest way to launch Annotate is to just press a pen colour button on
the ActionBar. Annotate is AutoLaunched and the image of your
screen is captured.
Note
Annotate is only used when TeamBoard is in Interactive mode. For
more information refer to “Changing Modes” on page 22.
1.
Display the screen you want to annotate.
Work with your computer and any applications as required until
you are ready to capture the screen image for use with Annotate.
2.
Press an ActionBar colour button.
Wait a moment while Annotate is AutoLaunched.
3.
Using your finger or the TeamBoard stylus, begin marking up
your snapshot on the TeamBoard.
4.
When finished annotating, select the Insert page button on the
TeamBoard ActionBar.
This captures the annotations to a page in TeamBoard Draw. You
are returned to the application that was active when the
annotation began.
5.
Repeat steps 1 to 4 to continue to annotate.
94
Using TeamBoard To Annotate
Presenting PowerPoint Slide Shows with TeamBoard
7
95
Presenting PowerPoint Slide
Shows with TeamBoard
This section explains how to present PowerPoint slide shows with
TeamBoard.
This section contains the following information:
•
Using PowerPoint with TeamBoard
•
PowerPoint with TeamBoard Draw
•
Build Effects and Transitions
•
Using Package for CD in PowerPoint
Using PowerPoint with TeamBoard
This section explains how to use PowerPoint with TeamBoard.
Note
The functionality that TeamBoard enables with PowerPoint makes it
an ideal tool for meetings, conferences, group discussions, planning
sessions and more. The TeamBoard is a single solution to multiple
user events and allows simple integration with a host of software
tools.
Launch PowerPoint from TeamBoard Draw
The TeamBoard ActionBar is programmed with macros that are
preconfigured to work with the PowerPoint Slide Show view.
1.
From TeamBoard Draw, minimize the window.
The AccessBar displays.
96
Presenting PowerPoint Slide Shows with TeamBoard
2.
From the applications list, select the PowerPoint version you
want to launch.
The AccessBar extends to provide additional functionality
specific to PowerPoint.
Black Screen
Start/Stop Presentation
Erase All
Arrow
Black and Red Pen Tool Small Eraser
Slide Navigator
Presenting PowerPoint Slide Shows with TeamBoard
97
3.
Work in PowerPoint as required.
4.
Once a PowerPoint slide show is running, use the AccessBar to
do the following:
•
•
•
•
•
Use Start/Stop Presentation to launch or stop the slide
show.
Use the Pen Colour buttons to highlight and draw on slides
in various colours. When a pen colour is selected the PowerPoint drawing tools are activated and allow you to draw on
the slide.
Use the Eraser to erase all content on the slide.
Use the Small Eraser to erase selective items.
Use the Black Screen to black-out the screen. When the
screen is blank, you can use the AccessBar buttons to select
pen colours for drawing and writing on the black-out. Press
98
Presenting PowerPoint Slide Shows with TeamBoard
the Black Screen button a second time to return to the slideshow.
The Black Screen feature allows you to black out the screen
during a presentation so that you can stand in front of the
projector without having the light in your eyes.
•
•
Use the Slide Navigator to go back wards and forwards
through the slides.
Use the Arrow to display a pointer.
Black Screen
Start/Stop Presentation
Erase All
Arrow
Black and Red Pen Tool Small Eraser
Slide Navigator
Presenting PowerPoint Slide Shows with TeamBoard
5.
Note
99
Tap on the TeamBoard to navigate forward.
If you want to save your drawings, use the TeamBoard Annotation
application. Manually launch Annotation and then work with your
slides. For more information refer to “Using Annotate” on page 91.
PowerPoint with TeamBoard Draw
You can use the annotation feature to capture selected objects or the
full screen during a PowerPoint presentation.
1.
Launch Annotation from the system tray icon.
2.
Launch PowerPoint from the AccessBar.
100
Presenting PowerPoint Slide Shows with TeamBoard
3.
When you want to start annotating the PowerPoint presentation,
select one of the two capture options.
Captures the whole screen.
Captures what you select with your mouse or by
dragging your finger.
The screen or object displays with the Drawing Toolbar.
4.
Annotate the screen or object using the tools on the Drawing
Toolbar.
5.
To return to Draw, click Return to Draw.
To return to your PowerPoint presentation, click Return to
Desktop.
If you selected Return to Draw, the annotated screen displays in
TeamBoard Draw.
If you selected Return to Desktop, your PowerPoint presentation
continues.
Presenting PowerPoint Slide Shows with TeamBoard
6.
101
(Optional) Save your annotations.
Build Effects and Transitions
PowerPoint allows “build effects” and “transitions” between slides.
Build effects add special effects to the display of content in a slide.
This may include, for example, bulleted lists flying in from the right,
or text changing from one colour to another as new topics appear and
so on. Transitions allow you to add effects between slides. This may
include, for example, effects such as shutters between slides or slides
being replaced by dissolving and so on. The TeamBoard is the ideal
tool to take advantage of these effects for presentations in which the
focus is on the materials and the presenter.
Using Package for CD in PowerPoint
The Package for CD feature of PowerPoint allows you to run a slide
show on other computers. The Package for CD Wizard packs all files
and fonts used in a presentation into one file. When you intend to run
your show on a computer that doesn't have Microsoft PowerPoint
installed, you should include the PowerPoint Viewer. You can include
linked files as part of your package, and if you use TrueType fonts,
you can include them as well. If you make changes to your
presentation after you use the Package for CD Wizard, just run the
wizard again to update the package.
After you pack the presentation, you can unpack the presentation to
run it on other computers.
1.
To launch the Package for CD Wizard select FILE > PACKAGE
CD.
If the Package for CD option is not available, select FILE and
wait three or four seconds for the full menu to appear.
FOR
102
Presenting PowerPoint Slide Shows with TeamBoard
Alternatively, click the chevrons at the bottom of the menu to
expand the full menu.
Microsoft PowerPoint 2003:
Presenting PowerPoint Slide Shows with TeamBoard
Microsoft PowerPoint 2007:
2.
Note
Follow the steps of the wizard to create the show.
This format is ideal if a show is not to be altered by the presenter.
However, the slide show may still be annotated or drawn on.
103
104
Presenting PowerPoint Slide Shows with TeamBoard
Adding a New Application to TeamBoard
8
105
Adding a New Application
to TeamBoard
This section explains how to add a new application to TeamBoard. It
also explains how to add and modify macros for that application.
This section contains the following information:
•
Adding a New Application
•
Macros
•
Adding and Editing Macros
Adding a New Application
By default, two versions of Microsoft PowerPoint and Easiteach are
linked to TeamBoard. You can add any software that you have access
to.
1.
From TeamBoard Draw, select TOOLS > OPTIONS.
The Options settings display.
2.
Select Application Control.
106
Adding a New Application to TeamBoard
3.
Select Add.
4.
Fill in the application details.
• File path: Browse to the .exe file for the application you
want to add.
• Display name: Type a display name to identify the application in the TeamBoard list.
• Icon: Click the icon and select an icon from the options displayed.
5.
Click OK.
Your new application is added to the list.
Macros
Once you are running another application on TeamBoard, you can
simplify your controls greatly by adding macros to TeamBoard. The
Adding a New Application to TeamBoard
107
macro is displayed as an icon that you can tap or click instead of using
the application’s keyboard shortcuts.
For example, in Microsoft Word, CTRL + P prints the document. You
can create an icon to tap that does the same thing.
Adding and Editing Macros
.For any software that is connected to TeamBoard, you can add
macros that work with the application’s keyboard shortcuts, which
can make working with that application faster.
The new icons for the macros are displayed in the minimize toolbar;
refer to “Minimize Toolbar” on page 40 for more information.
1.
From TeamBoard Draw, select TOOLS > OPTIONS.
The Options settings display.
2.
Select Application Control.
3.
Select the application you want to add, modify, or delete macros
for.
4.
Click Edit.
108
Adding a New Application to TeamBoard
5.
Click the icon symbol to display the Icon Viewer and then double
click or browse to the icon you want to use for your macro.
6.
Specify the actions the macro stands for.
For example, CTRL + A selects all text in Microsoft Word. See
your application’s documentation for a list of their keyboard
shortcuts.
Click the mouse button to add a right mouse click to the macro
instructions.
7.
Click Add to add a new macro or Replace to replace an existing
macro with the new one.
Glossary
9
109
Glossary
ActionBar
Annotation
ANSI Lumens
Application Sharing
AutoLaunch
AutoSave
Bitmap
COM port
Conferencing
Controller
Cut, Copy and Paste
options
The ActionBar is a series of buttons that appear along the bottom of
the TeamBoard. Press a button to invoke the related action. There is a
toolbar in TeamBoard Draw that is similar to the TeamBoard
ActionBar.
Annotation is used to write and draw on top of snap shots of the
screen projected in Interactive Mode.
ANSI Lumens is a measure of the brightness of a Data Projector.
Application Sharing involves running an application on a local system
and allowing remote users to see and control the application. Any
application that can be executed can be shared.
AutoLaunch is used to launch Annotation by pressing a pen colour
button on the ActionBar.
AutoSave is an automatic back up of a TeamBoard Draw file. The file
name is a date and time stamp.
Bitmap is a common graphic file format (bmp).
See Serial port.
See Data conferencing.
The Controller is the TeamBoard hardware that converts a touch on
the TeamBoard to an (X,Y) coordinate on the computer screen.
H-series is the current controller. A-series and F-series are older
controllers.
The Cut, Copy and Paste options can be selected from the Drawing
Toolbar. Use the Cut options to remove Draw objects from their
current positions and place them onto the clipboard, so that they can
be pasted to another Draw page or software application. Use the Copy
options to do the same, while leaving the original objects in their
current positions.
110
Glossary
Dashboard
The Dashboard is the command center that is used to quickly access
TeamBoard features and applications.
Draw
Draw is a whiteboard application used to capture notes and drawings
made on the TeamBoard.
Drawing Toolbar
The Drawing Toolbar is a series of buttons that appear at the top of the
TeamBoard Draw window. Using a stylus or your finger, select a
button to invoke the related action.
Full Screen View
Full Screen View allows you to view the work area in Interactive
Mode as a full screen page when using TeamBoard Draw.
Interactive Mode
The Interactive Mode allows you to use the TeamBoard, in
conjunction with a projector, as an interactive touchscreen. Use your
finger or a stylus to work with the applications projected on to the
TeamBoard.
jpeg
Jpeg is a common graphic file format.
Keystoning
Keystoning occurs when your projected image displays skewed or is
not rectangular.
LAN
LAN (Local Area Network) is any physical computer network that
operates at high speed (10 Mbps or more) over short distances,
usually within the same building or same floor of a building. A LAN
connected to another remote LAN is part of a wide area network
(WAN).
Macro
A macro is an automated procedure that contains all the keyboard and
mouse actions required to perform a specific event. Create macros
using easily using TeamBoard Draw; refer to “Adding and Editing
Macros” on page 107 for more information.
MHz
Microsoft Paint
Microsoft
PowerPoint
MHz is the clock speed of the computer.
Microsoft Paint is an application for drawing.
Microsoft PowerPoint is a software application for presentations.
TeamBoard has a default, pre-configured macro for use with this
application.
Glossary
111
Move Option
Each pen line, shape and text line created in Draw is a moveable
object. You can move multi-objects or single objects by selecting the
move options on the Drawing Toolbar.
Page Sorter
The Page Sorter is used to sort the order of multiple pages captured in
a single TeamBoard Draw file.
png
RAM
Resolution (screen)
SVGA
Serial Adapter
Serial port
Serial TeamBoard
Stylus
Png is a graphic file format.
RAM (Random Access Memory) allows your computer stores
information in its RAM temporarily.
Resolution (screen) is the size of the display of information on your
computer screen, which is measured in pixels. 800 x 600 pixels
(SVGA) or 1024 x 768 pixels (XGA) are the most common desktop
resolutions. As the resolution gets higher, the image becomes sharper.
SVGA is a display resolution of 800 x 600 pixels.
The TeamBoard Serial Adapter is the device that connects the
TeamBoard to the computer through the Serial port.
A Serial port is a connection on the computer for devices such as a
modem or a TeamBoard.
A Serial TeamBoard connects to your computer using your
computer’s Serial port and a Serial Adapter.
Stylus is a drawing device for electronic applications. The TeamBoard
Stylus is a plastic, teflon-coated tipped marker that can be used to
touch or draw on the TeamBoard in Interactive Mode.
System Tray Icon
The TeamBoard System Tray Icon resides in the system tray next to
the clock on the taskbar. Use it to quickly access the TeamBoard
Dashboard and other commonly used features.
tmb
Tmb is the TeamBoard Draw file extension indicating a TeamBoard
Draw file.
Touchscreen
An interactive surface that allows actions on a physical surface, such
as the TeamBoard, to be translated to a format recognized by a
computer.
112
Glossary
URL
A URL (Uniform Resource Locator) is the standard way to give the
address of any resource on the Internet. For example:
http://www.teamboard.com
telnet://well.sf.ca.us
news:news.newusers.questions
The most common way to use a URL is to type it into the address bar
of a browser program, such as Microsoft Internet Explorer.
USB
USB (Universal Serial Bus) is an external peripheral interface
standard for communication, through a cable, between a computer
and external peripherals such as the TeamBoard. It is intended to
replace existing serial ports and parallel ports.
USB Cable
USB TeamBoard
VGA
Virtual Keyboard
Virtual Mouse
Whiteboard Mode
XGA
A USB (Universal Serial Bus) Cable can be used to connect a USB
TeamBoard to your computer’s USB port, allowing them to
communicate with each other.
A USB (Universal Serial Bus) TeamBoard connects to your computer
using your computer’s USB port and a USB Cable.
VGA is a display resolution of 640 x 480 pixels.
The Virtual Keyboard is an application that emulates a standard
keyboard for use in Interactive Mode. Use it to type text and numbers
into applications projected on to TeamBoard.
The Virtual Mouse is used to change a tap on the TeamBoard to a
right mouse click in Interactive Mode.
Whiteboard Mode allows you to draw on the TeamBoard with a
dry-erase marker, and have your notes and drawings captured to your
computer.
XGA is a display resolution of 1024 x 768 pixels.
113
Index
A
accessing help, 1
ActionBar, 38
calibrating, 18
Annotate, 40
annotate, 91
annotating, 89
Annotation and PowerPoint, 99, 106
annotations
modifying, 92
reviewing, 92
saving, 92
application
add a new, 105
autolaunch, 40
autolaunch and annotation, 92
autolaunch in whiteboard mode, 48
changing pen width, 48, 51
changing the calibration settings, 29
clearing a background image, 73
clip art
remove category, 74
clip art gallery, 74
closing the page sorter, 68
configuring double click, 28
configuring TeamBoard settings, 24
contact TeamBoard Support, 32
copying a page, 66
D
background image, 73
dashboard, 38
data projector
setup, 11
deleting a page, 67
double click configuration, 28
Draw, 38
dump settings, 31
C
E
calibrating
ActionBar, 18
first time, 15
whiteboard, 16
calibration settings, 29
caps lock key, 85
changing modes
using the TeamBoard
dashboard, 23
erasing drawings, 47, 51
B
F
full screen, 52
G
graphics
importing, 72
114
H
number keypad, 86
hardware installation, 8, 10
help
accessing, 1
O
I
importing a graphic file, 72
inserting a new page, 66
installing
hardware for TeamBoard, 8, 10
TeamBoard software, 12
L
large eraser, 47, 51
launching
annotate, 90
TeamBoard virtual keyboard, 84
TeamBoard virtual mouse, 87
M
macros
about, 107
add, delete, modify, 107
using, 40
modes
changing, 23
movie
importing, 73
movies
supported formats, 73
N
navigating in the draw workbook, 67
new page, 66
Online Help, 41
online help
accessing, 1
opening the page sorter, 68
P
page sorter, 68
opening, 68
pages
sorting in a workbook, 68
pen width, 48, 51
PowerPoint and Annotation, 99, 106
printing, 76
R
required hardware, software and
items, 6
reviewing, modifying or saving
annotations, 92
right-click, 81
S
saving a workbook, 76
setting up the data projector, 11
small eraser, 47, 51
sorting pages in a workbook, 68
sticky keys, 85
system tray icon, 35
115
T
TeamBoard dashboard, 38
TeamBoard Draw, 38, 49
TeamBoard status, 30
TeamBoard support
how to contact, 32
TeamBoard system tray icon, 35
toolbar
minimize, 40
troubleshoot
using dump settings, 31
typing with the virtual keyboard, 83
U
using package for CD in
PowerPoint, 101
V
viewing
annotations using go to draw, 92
full screen, 52
pages, 68
virtual keyboard, 41, 83
virtual mouse, 41, 86
W
whiteboard mode, 44
whiteboard mode and autolaunch, 48
workbook
saving, 76