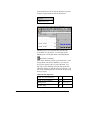
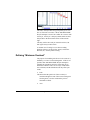
1
Version 5.0
AMS REALTIME Projects
Advanced User Guide
Copyright © Advanced Management Solutions, Inc.
1992 - 1997
all rights reserved.
Issue 1 - AMS REALTIME Projects Advanced User Guide
i
Contents
CHAPTER 1- INTRODUCTION........................................................... 1
Introduction to this Chapter .............................................................................................. 1
Introduction to the AMS REALTIME Projects Advanced User Guide ........................... 2
Purpose of the Guide ........................................................................................................ 2
The Route Map - What’s Where....................................................................................... 3
The Advanced User Guide Route Map.............................................................................. 5
The Structure of each Chapter.......................................................................................... 5
Some Conventions ........................................................................................................... 5
Configuration Switches ...................................................................................................... 7
Where To Go From Here................................................................................................... 7
CHAPTER 2- PROJECT LIBRARIAN.................................................. 9
Introduction to this Chapter .............................................................................................. 9
The Librarian Mode ........................................................................................................ 11
Viewing Files................................................................................................................. 11
Setting Up Tabs ............................................................................................................. 15
Path History ................................................................................................................... 16
Manipulating Files......................................................................................................... 17
Previewing a Schedule ................................................................................................... 17
Opening Schedules......................................................................................................... 20
Password Protection......................................................................................................... 20
Issue 1 - AMS REALTIME Projects Advanced User Guide
iii
Project Passwords .......................................................................................................... 20
Using a Projects Server Database.................................................................................... 22
Server Security............................................................................................................... 23
Configuring the Server................................................................................................... 25
Starting the Server ......................................................................................................... 25
Server Messages ............................................................................................................ 25
Organizing Project Schedules ........................................................................................ 30
Users ............................................................................................................................. 31
Groups........................................................................................................................... 34
Creating Access Control Lists (ACLs) ........................................................................... 35
Copying ACLs to Other Folders..................................................................................... 36
Copying Local Projects into an Internal Database........................................................... 36
Using an ODBC Data Source........................................................................................... 37
Saving Projects to a Database......................................................................................... 37
Configuring an ODBC Data Source ............................................................................... 38
Examining Database Tables........................................................................................... 39
A Sample ODBC Setup.................................................................................................... 40
A Step-by-Step Guide to ODBC ..................................................................................... 40
ODBC Structure ............................................................................................................ 40
Resources Used in this Example..................................................................................... 41
Naming a Data Source ................................................................................................... 42
Project Data Repositories ................................................................................................ 44
Creating a Map.............................................................................................................. 44
Using a Template Map................................................................................................... 45
Attaching to a Data Repository ...................................................................................... 45
Accessing the Repository from Schedule Mode .............................................................. 45
Developing Common Project Standards.......................................................................... 47
The Untitled Schedule.................................................................................................... 47
Software Configuration.................................................................................................. 47
Standard Calendars........................................................................................................ 48
Extension Fields ............................................................................................................ 49
Extension Field Types.................................................................................................... 49
Defining Pick Fields ...................................................................................................... 50
Resources....................................................................................................................... 51
Elements of Cost and Rate Tables .................................................................................. 52
Process Management Features ........................................................................................ 52
iv
Issue 1 - AMS REALTIME Projects Advanced User Guide
Attaching Documents to Objects .................................................................................... 52
Command ...................................................................................................................... 57
Batch Commands........................................................................................................... 59
CHAPTER 3 - THE WORK BREAKDOWN STRUCTURE ................ 65
Introduction to this Chapter ............................................................................................ 65
Related Topics.................................................................................................................. 66
Structures ......................................................................................................................... 66
Establishing a WBS for your Project .............................................................................. 67
WBS Fields.................................................................................................................... 67
Selecting the Structure in the Schedule .......................................................................... 68
Displaying and Amending WBS Information.................................................................. 70
Expand and Collapse ..................................................................................................... 70
Other Structure Tools..................................................................................................... 71
Displaying Separate Branches of the WBS ..................................................................... 72
Displaying Selected Levels of the WBS .......................................................................... 73
Switching Off the Filters ................................................................................................ 74
Hiding the Indentation ................................................................................................... 74
Why you Might Need Other Structures .......................................................................... 74
Combining Structures .................................................................................................... 76
Using a Structure to Summarize Information ................................................................. 76
CHAPTER 4 - VIEWS......................................................................... 78
Introduction to this Chapter ............................................................................................ 78
Using Views ...................................................................................................................... 79
Defining Your Own Views ............................................................................................... 81
Saving Your Matching Criteria to a View ...................................................................... 81
User-Defined Colors and Patterns................................................................................... 84
Issue 1 - AMS REALTIME Projects Advanced User Guide
v
Defining Colors in Windows.......................................................................................... 84
Defining Colors in UNIX............................................................................................... 87
Defining Patterns........................................................................................................... 88
Formatting the Descriptive Output for Activities ........................................................... 91
CHAPTER 5 - ADVANCED LOGIC ....................................................93
Introduction to this Chapter............................................................................................ 93
Related Topics.................................................................................................................. 94
The Network Table.......................................................................................................... 94
Network Calculations ...................................................................................................... 95
Calculating from the Start or End of the Project............................................................. 95
Float .............................................................................................................................. 95
How Target Dates Affect Constraint Calculations .......................................................... 96
The Effect of Progress on the Network ........................................................................... 99
Real Time ...................................................................................................................... 99
Posting Progress Out of the Network Order...................................................................100
Displaying the Path To An Activity................................................................................101
Using the Logic to Create and Amend a Schedule.........................................................103
Creating an Activity......................................................................................................104
Linking Existing Activities ...........................................................................................105
Linking to Off-Screen Activities ...................................................................................106
Changing a Link...........................................................................................................106
Deleting an Activity......................................................................................................107
Moving Activities Around the Network.........................................................................107
Changing the Display of the Logic .................................................................................108
Sorting the Activities in Logic ......................................................................................108
Changing the Way the Activity Boxes are Drawn..........................................................111
Changing the Way the Logic Links are Drawn .............................................................115
Time-Phasing the Network .............................................................................................117
vi
Issue 1 - AMS REALTIME Projects Advanced User Guide
Using the Analyze Mode to Check the Logic ................................................................ 118
Adding Constraints in the Analyzer Mode ................................................................... 121
Changing Constraints in the Analyzer Mode................................................................ 121
Analyzing your Network .............................................................................................. 123
Publishing Network Information ................................................................................... 125
CHAPTER 6 - ADVANCED RESOURCES ...................................... 127
Introduction to this Chapter .......................................................................................... 127
Related Topics................................................................................................................ 129
The Resource Tables...................................................................................................... 130
The Resource Table...................................................................................................... 130
The Pool Table............................................................................................................. 131
The Requirements Table .............................................................................................. 131
The Summaries Table .................................................................................................. 132
The Pool Exts Table..................................................................................................... 133
The Extension Fields Table.......................................................................................... 134
The Requirement Extension Tables .............................................................................. 134
The Usage Table .......................................................................................................... 136
Resource Group Summarization.................................................................................... 143
Cost Centers ................................................................................................................... 145
Using Cost Centers ...................................................................................................... 146
Resource Calendars ....................................................................................................... 148
Displaying Extensions in the Schedule View ................................................................. 149
The Resource Window Menus ....................................................................................... 150
The View Menu ........................................................................................................... 151
The Plane Menu........................................................................................................... 155
The Filter and Sort Menu............................................................................................. 156
The Units Menu ........................................................................................................... 159
The Resource Analyzer.................................................................................................. 159
Setting up the Resource Analyzer................................................................................. 160
Using the Analyzer Mode............................................................................................. 160
Issue 1 - AMS REALTIME Projects Advanced User Guide
vii
The Resource Leveler .....................................................................................................161
Using the Resource Leveler with Default Settings .........................................................163
Changing the Defaults ..................................................................................................163
Options for Leveling Resources......................................................................................164
Establishing the Permitted Delay ..................................................................................164
Prioritizing Activities....................................................................................................164
Defining “Minimum Overload” ....................................................................................168
Watching the Leveling Process .....................................................................................169
Leveling Manually........................................................................................................170
Printing Resource Information.......................................................................................170
Where To Go From Here ...............................................................................................170
CHAPTER 7 - COSTS ......................................................................171
Introduction to this Chapter...........................................................................................171
Summary of the Cost Processes in AMS REALTIME Projects.....................................173
Basic Cost Information ...................................................................................................175
Cost versus Value .........................................................................................................175
Cost Bins ......................................................................................................................176
Budgeted Cost of Work Scheduled (BCWS) ..................................................................177
Budgeted Cost of Work Performed (BCWP)..................................................................177
Actual Cost of Work Performed (ACWP)......................................................................178
Estimate To Complete (ETC)........................................................................................178
Methods of Calculating the Basic Information ..............................................................179
Calculating BCWS........................................................................................................180
Calculating BCWP........................................................................................................181
Calculating ACWP .......................................................................................................184
Calculating ETC...........................................................................................................185
Other Cost and Performance Indicators........................................................................185
Indicators Using Earned Value .....................................................................................186
Indicators Not Using Earned Value...............................................................................188
Establishing Time Periods for Cost Calculations...........................................................190
Cost Bins ......................................................................................................................190
viii
Issue 1 - AMS REALTIME Projects Advanced User Guide
Manually Entering Cost Information ............................................................................ 194
Calculating Costs from Resource Usage........................................................................ 196
Cost Elements................................................................................................................. 198
Defining Elements of Cost ........................................................................................... 200
Methods for Cost Breakdowns...................................................................................... 200
Cost Breakdowns by Resource Type ............................................................................. 202
Cost Breakdowns by Cost Center.................................................................................. 204
Cost Breakdowns by Cost Center and Resource Type ................................................... 206
Rate Tables..................................................................................................................... 211
Accessing Rate Tables.................................................................................................. 212
Defining Element of Cost Formulas............................................................................... 212
Element of Cost Exceptions ........................................................................................... 214
Summarizing Elements of Cost...................................................................................... 215
Apportioned Costs.......................................................................................................... 216
Earned Value Tracking and Reporting......................................................................... 217
Posting Progress........................................................................................................... 219
Posting Actual Expenditures ........................................................................................ 220
Evaluating the Results.................................................................................................. 220
Summarizing Cost Information ..................................................................................... 221
Summarizing the Project with Elements of Cost........................................................... 227
Printing Earned Value Reports..................................................................................... 228
Resource Cost Spreadsheet............................................................................................ 229
The Resource Usage Table............................................................................................. 230
The Cost Table ............................................................................................................... 231
Where to Go From Here................................................................................................ 232
CHAPTER 8 - MULTIPLE PROJECTS............................................ 233
Issue 1 - AMS REALTIME Projects Advanced User Guide
ix
Introduction to this Chapter...........................................................................................233
Related Topics.................................................................................................................235
Rolling Up All the Information in a File ........................................................................235
Organization.................................................................................................................236
Breaking Down Summary Information into Categories .................................................237
Resources......................................................................................................................241
Progress........................................................................................................................242
Current File ..................................................................................................................244
Other Options ...............................................................................................................244
Merging Schedules..........................................................................................................245
Merge-Link Schedules....................................................................................................246
Getting Information from Other Schedules ...................................................................248
Getting Other Schedule Information .............................................................................248
Getting Standard Activities and Sequences ...................................................................249
Sharing Information Between Projects ..........................................................................251
SubProjects .....................................................................................................................251
Using Subprojects .........................................................................................................253
SubProject Communication...........................................................................................255
Configuration Switches related to the use of SubProjects...............................................257
Considerations for Consistency with Multi-Project Techniques .....................................258
Inter-Project Constraints................................................................................................259
Cross-Locking .................................................................................................................260
Limits in Multi-Project Processing.................................................................................260
Maximum Overall Project Size .....................................................................................260
Maximum Overall Number of Resources.......................................................................261
Alignment of Extension Fields......................................................................................261
Sharing Calendars, Resource & Resource Pools............................................................262
CHAPTER 9 - DATA EXCHANGE ...................................................265
x
Issue 1 - AMS REALTIME Projects Advanced User Guide
Introduction to this Chapter .......................................................................................... 265
AMS REALTIME Projects Data Exchange Options ..................................................... 266
Related Topics................................................................................................................ 267
Some Definitions of Terms............................................................................................. 267
Dataset......................................................................................................................... 268
File Format .................................................................................................................. 268
Records and Fields ....................................................................................................... 269
Field Lengths ............................................................................................................... 269
Field Delimiters ........................................................................................................... 270
Text Fields................................................................................................................... 270
End of Line Markers .................................................................................................... 270
Date Formats ............................................................................................................... 271
Telling the Difference Between File Formats................................................................ 271
Examples: .................................................................................................................... 272
Using Cut and Paste ....................................................................................................... 272
Exchanging Information with other Schedules ............................................................. 273
Load and Dump from Tables........................................................................................ 273
Load and Dump from Calendars .................................................................................. 274
Using Translators to Transfer Data .............................................................................. 275
Before You Start .......................................................................................................... 276
Defining the transfer "map". ........................................................................................ 277
Testing Your Map........................................................................................................ 277
Summary of Importing and Exporting.......................................................................... 277
Generic Translators....................................................................................................... 278
The Generic Translator Map ........................................................................................ 284
Other Project Management Software Translators ....................................................... 310
ODBC (Open Database Connectivity)........................................................................... 311
Resource Transactions ................................................................................................... 311
How to Deal with Possible Errors on Transactions ....................................................... 314
CHAPTER 10 - INDEX ..................................................................... 317
Issue 1 - AMS REALTIME Projects Advanced User Guide
xi
xii
Issue 1 - AMS REALTIME Projects Advanced User Guide
Chapter 1 - Introduction
Introduction to this Chapter
In this chapter, you will be introduced to the AMS
REALTIME Projects v5.0 Advanced User Guide.
It will introduce you to the Guide as a whole, and also to
the Route Map that you will be following as you
familiarize yourself with AMS REALTIME Projects.
This will provide a general indication of where you
might find any topic that you are particularly interested
in.
You should also refer to the contents and index of the
manual for more detailed reference to topics of interest.
Elsewhere on your AMS REALTIME Projects CD-ROM
you will find material relating to Advanced Management
Solutions, the authors of the software, and an overview of
the product and its benefits to your organization.
Issue 1 - AMS REALTIME Projects Advanced User Guide
1
Introduction to the AMS REALTIME Projects
Advanced User Guide
Purpose of the Guide
This manual has been designed as an introduction to the
new user of AMS REALTIME Projects, as well as a ‘first
call’for help on specific topics for the more experienced
user.
The Advanced User Guide is a ‘follow-on’book from the
AMS REALTIME Projects Basic User Guide. It is
therefore assumed that you are already familiar with the
contents of that guide and are now ready for some more
sophisticated methods of project management. The
Advanced User Guide includes information on those
subjects that are not essential to the use of AMS
REALTIME Projects, but that will help you get the most
out of the facilities on offer in terms of:
• Managing the ‘library’of projects that you have
planned in AMS REALTIME Projects
• Putting together the fine detail for all aspects of a
project plan
• Scheduling work to make best use of the resources
available, including financial resources
• Viewing and printing information in a clear and
informative manner
• Coordinating work, resources and costs over a range
of projects at the same time
• Transferring project information between application
systems
Depending on the procedures you use on your projects,
you may not need to read every chapter.
2
Issue 1 - AMS REALTIME Projects Advanced User Guide
The Route Map - What’s Where
On the opposite page, you will see the Route Map for this
guide. It shows how the chapters in this guide are linked
with each other, and with chapters in the Basic User
Guide.
If you are a new user of AMS REALTIME Projects, it is
recommended that you read the chapters in the order
shown in the route map. This will ensure that you have
all the information you need before you need it, and that
right from the start you are following some standard
procedures for managing your projects.
The Route Map will help keep you 'signposted', so that
you know where you are now, and where else you may
like to 'visit' after reading the current chapter.
Chapter 2 outlines some of the techniques for managing
your project files and sharing standard information
between them, together with discussions on file security.
Chapter 3 discusses the use of structures within AMS
REALTIME Projects, as a method of organizing and
summarizing project data within categories.
Chapter 4 gives you information on creating and editing
your own views within AMS REALTIME Projects,
allowing you to impose your organization’s standards
and procedures onto users of AMS REALTIME Projects,
and giving you a wide scope in terms of tailoring the
format of the screen and your reports.
Chapter 5 provides more detail on the use of AMS
REALTIME Projects’s network facilities, including the
exact calculations that are performed, and the affect of
various forms of tracking.
Chapter 6 discusses the advanced methods available for
manipulating resources, and adjusting work to take into
account resourcing issues on your project.
Issue 1 - AMS REALTIME Projects Advanced User Guide
3
BASIC USER GUIDE
ADVANCED USER GUIDE
BASIC USER GUIDE
1
INTRODUCTION
2
PROJECT LIBRARIAN
2
PROJECT MANAGEMENT
3
WBS
4
VIEWS
5
ACTIVITIES
6
NETWORKING
5
ADVANCED LOGIC
7
RESOURCES
ADVANCED RESOURCES
6
7
COSTS
8
MULTIPLE PROJECTS
9
DESIGNING A PROJECT
TRACKING PROCESS
9
DATA EXCHANGE
4
Issue 1 - AMS REALTIME Projects Advanced User Guide
The Advanced User Guide Route Map
Chapter 7 gives full information on the use of AMS
REALTIME Projects to plan, monitor and control the
expenditure on the project, and some advanced
techniques in reporting cost variances and using them to
re-forecast the plan.
Chapter 8 discusses the application of all of these
techniques to multiple projects, and in particular the
sharing of information across those projects, and the
production of summary information.
Chapter 9 outlines the different ways in which you can
transfer information into and out of AMS REALTIME
Projects, in order to integrate it with other corporate
application systems, or with other planning tools.
The Structure of each Chapter
Each chapter in this Guide is structured in a similar way.
The Introduction to each chapter will point out the
highlights of what is covered in that chapter. It will also
point out what is not covered, in the form of pointers to
Related Topics that you may also want to read about.
At the end of each chapter, as appropriate, you will then
find a ‘Where To Go From Here’section, which will tell
you what your next topic should be, depending on how
you are using AMS REALTIME Projects.
With all this navigational advice, you should be able to
find your way around the guide very easily; but if you do
get lost, there is always the Contents and Index to refer
to!
Some Conventions
Throughout this manual you will find references to
different terminology and different aspects of the
software. In order to make these references clearer, and
Issue 1 - AMS REALTIME Projects Advanced User Guide
5
to enable you to make full use of the guide, you should be
aware of the conventions used.
Keyboard Terminology
Functions performed on the keyboard are shown in bold
type throughout this guide. For example, if you are being
instructed to select an item from the Edit menu using the
keyboard it will appear like this:
To insert an activity using the Edit menu, hold down the
Alt key, and press E. Highlight the Insert option and
press Enter.
When a keyboard instruction appears in bold type, the
keystrokes need to be entered exactly as they appear in
this book.
Filename Terminology
Specific filenames are listed in italics. For example, if
you are being instructed to save changes which will apply
to all schedules, you will be instructed to save the
changes in the untitled.arp file.
Menu Terminology
References to menu names and items available on the
menus appear in bold type. For example, you will see
references to the Edit menu, or you may be instructed to
select the Insert option from the Edit menu.
Icon Terminology
The names of the toolbar icons are underlined. For
example, to see which view you are currently using, you
will be referred to the View icon.
Configuration Switches
Configuration switches (see below) are displayed in
upper case. For example, setting the switch
FORMBUILDER to Y enables the Autoform capability.
6
Issue 1 - AMS REALTIME Projects Advanced User Guide
Notes
Helpful hints, shortcuts and
additional information which
can shorten your learning
curve will be displayed in
italics in the left column of
the page.
Additional information which can add to your knowledge
about AMS REALTIME Projects, but which may
interrupt the flow of the explanatory text is inserted
using one of two methods, as illustrated here.
NOTE: Other important information that needs to be
highlighted will be shown as a note outlined like this.
Configuration Switches
Throughout this guide you will find references to various
Configuration Switches. This refers to settings in a file
called rtp16.ini or rtp32.ini which controls some of the
defaults for your use of AMS REALTIME Projects.
Details of all the switches are contained in a file called
configs.doc which is provided on the installation CDROM with the application software. You should refer to
this document for full information.
To make changes to any of these settings in Windows 95
or NT you should use the File menu, select the Options
item. On other platforms a standard text editor can be
used.
Where To Go From Here
As outlined in the chapter by chapter introduction to this
manual, you should now read the following chapters:
• If you are interested in structuring your project
information to provide clarification you should read
Chapter 3, The Work Breakdown Structure. If you
are also interested in structures which will help you
summarize project information, you should read
Chapter 3, or proceed to Chapter 6, Advanced
Issue 1 - AMS REALTIME Projects Advanced User Guide
7
Resources, Chapter 7, Costs, or Chapter 8, Multiple
Projects.
• If you are interested in setting up views for your own
use or throughout your organization, you should read
Chapter 4, Views.
• If you are interested in finding out more about using
AMS REALTIME Projects's networking facilities,
you should read Chapter 5, Advanced Logic.
• If you are interested in finding out more about AMS
REALTIME Projects's resource facilities, you should
read Chapter 6, Advanced Resources.
• If you are intending to use your schedules to enter,
calculate, store and summarize cost information, you
should read Chapter 7, Costs.
• If you want to store project information in different
files to allow more widespread access while still
permitting the consolidation of project information,
you should read Chapter 8, Multiple Projects.
• Finally, if you are interested in transferring data
between projects, or between different applications,
you should read Chapter 9, Data Exchange.
8
Issue 1 - AMS REALTIME Projects Advanced User Guide
Chapter 2 - Project
Librarian
Introduction to this Chapter
AMS REALTIME Librarian provides a powerful new
interface that unifies access to project data. The
Librarian provides innovative, new tools for project
access, project data storage, maintenance and schedule
organization. Several methods are now available for
central project data storage, such as common network
storage, a proprietary AMS REALTIME database with
user access controls, and ODBC access to standard
databases, such as Oracle and Microsoft Access.
AMS REALTIME Projects now lets you store your
schedule data in three distinct ways. First, you can store
your schedules in native schedule files, as previous
versions have allowed. These files can be stored on local
drives and/or network drives, allowing multiple project
access and rollups through the many options described in
Chapter 8 of the Advanced User Guide, Multiple
Projects.
Issue 1 - AMS REALTIME Projects Advanced User Guide
9
By logging in to AMS REALTIME Projects through the
AMS REALTIME Server, related schedules can also be
stored in a virtual Library file. From inside the
Librarian, you will see your independent schedules, just
as you did with the old schedule storage method. From a
disk storage perspective, all related schedules are stored
in a single library file. This method provides central
calendar and resource data storage that applies to all
schedules in the project, as well as security regarding
data access.
The third method is to use a database repository, such as
Oracle, Microsoft Access or any other database that
supports ODBC (using Projects version 5.0) or SQL
(using Projects version 5.1). This method allows for
open central storage of all project data, allowing for
direct loads and saves to the repository.
You can use Project Librarian to organize your schedule
files, and even other files containing any data related to
your project. For example, you may wish to keep
spreadsheet files containing project data with your
schedules. You can establish different “shortcut tabs” to
locations where project data is stored, which speeds up
the access to file lists.
This chapter assumes that you are familiar with the way
in which files are organized on your platform, and with
the concept of hierarchies of files. For more information
on this topic, you should refer to the appropriate
documentation for your system.
The examples used in the discussion on Project Librarian
relate to the Windows platform, but have the same basic
functionality as on other platforms .
In this chapter, we will discuss the use of Project
Librarian itself. We will also cover some related topics
which enable you to set up and control links with other
parts of your system, such as attaching documents from
other applications to activities, launching outside
applications from within AMS REALTIME Projects, and
issuing commands that will enable AMS REALTIME
Projects to be run from outside.
10
Issue 1 - AMS REALTIME Projects Advanced User Guide
The Librarian Mode
You application may be configured to start in Librarian
mode. To return or move to AMS REALTIME
Librarian, use the Mode menu and select the Librarian
item.
You will see a screen which resembles the Windows
Explorer, listing high-level directories on the left and the
lower-level directories and/or files on the right.
However, Librarian differs from the standard Explorer by
providing some additional facilities; in particular:
• The ability to set up “Tabs,” each providing a
different view into areas of the schedule file system.
• The ability to change from one ODBC server to
another, or from an ODBC to a local server and vice
versa.
• The ability to view and edit schedule activities for a
schedule selected from the list.
• The ability to change the current schedule by
clicking on another one to open it.
• The ability to drag and drop schedules to other tabs
to reorganize project schedules, or copy schedules
into a file system which is internal to AMS
REALTIME Projects.
Viewing Files
One of the primary uses of AMS REALTIME Librarian
is to display lists of files in various parts of the system,
viewing them from within AMS REALTIME Projects.
Issue 1 - AMS REALTIME Projects Advanced User Guide
11
AMS REALTIME Librarian
As stated earlier, on the left-hand side of the screen you
will see a list of the drives, folders, data sources and
repositories that AMS REALTIME Projects has detected
on your system. At the very highest level, this will be a
folder for each disk on the system, such as drive A: (the
floppy disk drive) and drive C: (the hard disk drive).
On the right hand side, you will see the files or folders at
the next level down. The top option is a symbol allowing
you to go up a level. In the figure above, for example,
you can see the files and folders contained on the hard
disc drive. You can see that it is this drive (C:) as this is
the name on the “tab” on the left. If you were seeing the
files on the A: drive, the screen would look something
like that shown below.
You can tell that a folder contains lower-level folders if it
is tagged with a plus (‘+’) sign. If you click on the plus
sign to the left of a folder name, it will open a display of
all folders underneath the current folder. The plus sign
will change to a minus sign, indicating that all folders
underneath are displayed. Clicking on the minus sign
will revert the display so that the folders underneath are
not shown, and change the indicator back to a plus sign.
12
Issue 1 - AMS REALTIME Projects Advanced User Guide
This allows you to view any level of granularity, as well
as view combinations of file structures.
Librarian Folders and Tabs
As with the Windows Explorer, clicking on a folder
name in either listing will open that folder (and its icon
will change to show an opened folder), and list its
contents on the right-hand side.
Changing the Information Layout
Panel Layout Icons
The panel is an area of the Librarian screen that provides
a view of the selected file. You can switch the panel on
and position it using one of the Panel icons. The pink
area on the each panel icon indicates where the panel
area will be positioned on your screen. The File Viewer
icon is on by default. Clicking on a filename will display
the text, binary data or the first few activities of a project
schedule.
Column Icons
Issue 1 - AMS REALTIME Projects Advanced User Guide
13
The display on the right-hand side can be changed by
adding or deleting columns. For example, if you have
opened a folder which contains more folders and files
than can be listed on a single on-screen column, you will
be able to scroll. To fit the display into the screen better,
you may want to add columns, until all the files fit.
One Column Displayed
Four Columns Displayed
14
Issue 1 - AMS REALTIME Projects Advanced User Guide
• To add a column, click the Add Column icon.
• To remove a column, click the Remove Column
icon.
File Extension Subsets
If you want to see the file extensions that are present in
the current folder, you can use the View Extension
button. This enables you to limit the display to only files
that match a particular extension, or to see files with any
extension by selection the * item on the pop-up list . For
example, clicking the .arp option will display only those
files with a .arp extension, i.e. only the AMS
REALTIME Projects files.
Setting Up Tabs
Tab Icons
Librarian starts out with one tab that shows the current
directory, but you can also add and define your own tabs.
For example, you may want to set up a tab which will
immediately list all the files in the RTP subdirectory,
without having to navigate through the path each time to
find the right files.
• Double-click the folders you want to examine, until
you have the location you want.
• Click the New Tab icon, which will set up a tab
for the relevant path.
• If the Auto Update Tab button is depressed, as
you create new tabs and navigate, the current tab is
automatically updated to follow the current path.
• If Auto Update Tab is off, you should be in the
desired location before creating a new tab.
Issue 1 - AMS REALTIME Projects Advanced User Guide
15
• To remove a tab, click on it, and then click the
Delete Current Tab icon.
Path History
If you have not set up a tab for a particular view, but wish
to return to it you can return to a previous display by
using the Path History… icon. This will list the last set
of paths from which you have selected schedules. Select
the path you want and it will appear in the display
window next to the icon.
You can also enter a complete schedule name or wildcard
file specification directly into this window. Entering a
wildcard file specification will limit the files in the
window to only those that match the specification.
Entering a valid schedule name will open that project
schedule.
The Wildcard icon can be used to quickly select
any wildcard extension that currently exists in the folder.
Librarian Tabs with an *.arp Wildcard Specification
16
Issue 1 - AMS REALTIME Projects Advanced User Guide
Manipulating Files
Using Project Librarian, you can create new folders (or
directories), rename or delete files, or move them from
one folder to another. This feature allows you to manage
your project files within AMS REALTIME Projects, so
you can be absolutely sure you are deleting, saving or
moving the correct schedules.
File Management Icons
To create a new folder, select the folder which is to
“own” the new folder. Click the New Directory icon.
By default, the new folder will be called newdir, but a
dialog box prompts you to accept this or change it.
Creating a New Directory
To rename or delete a folder or file, select the appropriate
item and click the Rename or Delete icon. Rename
will show you the full pathname for the file as it is
currently named, and prompts you to enter the new
filename. Delete will prompt you to confirm that you
want to delete the selected item(s) or cancel the
operation.
Previewing a Schedule
Project Librarian provides you with the facility to
preview some of the contents of a schedule file without
Issue 1 - AMS REALTIME Projects Advanced User Guide
17
having to open it. This gives you a further indication,
together with the schedule name, as to whether you have
selected the correct project file.
The activity information is displayed in a Panel area,
which by default is switched off. You can switch the
panel on and position it using any of the Panel icons that
match the desired layout.
The diagrams below indicate the effects of the different
panel positions.
18
Issue 1 - AMS REALTIME Projects Advanced User Guide
Sample Panel Layouts
The panel will show the information listed below, and in
the order shown below:
• The full path name of the schedule file
• The number of activities in the schedule
Issue 1 - AMS REALTIME Projects Advanced User Guide
19
• The Heading (as defined in the Page Layout
dialog)
• A list of the first several activities, showing their ID
and Description separated by a colon (:)
Opening Schedules
AMS REALTIME Librarian allows you to open a
schedule directly by clicking on it. Librarian will close
the currently-open schedule, if necessary, prompting you
to save any changes. Thus, having found a schedule file
and examined the list of its activities, you may decide
that it is the file you want to work with, and wish to open
it.
Select the appropriate schedule file, usually with an
extension of .sch or .arp, and click the Open icon. You
will be returned to Schedule mode with the schedule you
have just opened.
Password Protection
Project Passwords
It is possible to put a password on a AMS REALTIME
Projects schedule file, so that anyone attempting to open
the schedule will be prompted for the password. To
enable this functionality, set the configuration switch
ASKPASS to Y in the configuration file and restart the
program. If you do not intend to use passwords at all,
set the flag to N to avoid being asked for a password
when you save the file.
Adding a Password
To add a password, save the schedule using the Save
As… item under the File menu. You will be asked
whether you want to protect that file with a password.
The Password Protect dialog box is displayed.
20
Issue 1 - AMS REALTIME Projects Advanced User Guide
Changing a Password
To change the password, use Save As… under the File
menu and enter the original schedule name. This option
is only available using Save As; if you simply Save the
project, you will not be prompted for a password or be
able to change the level of protection on a file.
Password Protection Prompt
Click No if you do not want to protect the file. If you
click Yes, you will be presented with the Password
dialog. This same dialog as is presented when you
attempt to open a schedule with a password on it. Enter
the password. If the password contains text, enter it
through the keyboard. If you are using numbers, they
can be entered using the keyboard, or clicking on the
numbers in the dialog.
Click OK.
If you are setting a password, you will be asked to
confirm the password by reentering it. This will
eliminate project access problems if the password is mistyped. If the two passwords do not match exactly, the
password is not set.
Enter the password exactly as you entered it the first
time. If you enter a password in the confirm dialog box
which differs from your first entry, you will be warned
and asked to begin all over again with a new password.
Passwords are internally encrypted, and are not
accessible from anywhere within AMS REALTIME
Projects. If you lose or forget a password, your schedule
Issue 1 - AMS REALTIME Projects Advanced User Guide
21
can be sent electronically to your AMS distributor to have
the password cleared.
Baseline locking passwords can also be set on
a schedule, which allows anyone with access to open and
status the schedule, but requires a password to add or
delete activities, re-baseline, change cost calculation
modes, or perform other functions that might have a
negative impact on an approved and baselined schedule.
Baseline locked schedules also use an encrypted “nolookup” password for maximum security. If you have
forgotten a password, the schedule can be sent
electronically to your AMS distributor to have the
password cleared.
Because of this possibility, we recommend using a single
password for all project schedules that you need to lock
or protect. Passwords should be something that is easy
for you to remember, but not easy for others to guess.
Using a Projects Server Database
If the AMS REALTIME Projects Server is present on
your system, project data can be stored in the AMS
internal project file storage system. This “virtual” file
system is a proprietary database that is internal to AMS
REALTIME. It can store related project schedules in a
database style format, but without external access to the
data for other programs. This can be used for
management systems that do not have an external
database with security controls, but need to keep one or
more schedules in the project secure.
You can think of this internal file system as similar to a
normal file directory system, but it is one that only AMS
REALTIME Librarian can see and interpret. When the
internal file system is examined from the perspective of
your operating system, only a single binary file is actually
present for each database. However, AMS REALTIME
Librarian will interpret the contents of a database file as
22
Issue 1 - AMS REALTIME Projects Advanced User Guide
containing all of the project schedule information and
security structure that has been deposited therein.
User logins must be defined for each user that accesses
this type of management system. Users can have a
unique set of access rights, or can be assigned group
access rights. When a user logs in through the server,
the user’s defined access rights determine what
directories or schedules he can List, Read, Write,
Create, Delete, Rename or Execute. Supervisor rights
can also be granted, which allows full access and control
to make security changes.
Server Security
In order to run any AMS REALTIME software in a nondemonstration mode, a control file must be present in the
same directory as the software. This control file is
created when you enter the security key provided with
each software program. Control files have the same base
filename as the executable program, but end in a .ctl
extension. For example, the executable file rtp32.exe
has a control file called rtp32.ctl. If this control file is
removed, the software will run in a demonstration mode
until the security key is correctly reentered.
In addition, the server software must have an encrypted
security license file which is provided by AMS. This file
contains the server name, serial number, network
protocol, the location of the server (either the IP address
(or domain name) and port number for TCPIP, or the
server name for IPX and NetBIOS) and the number of
concurrent users. Server license files have the same base
filename as the executable program, but end in a .lic
extension. For example, the executable file rtps32.exe
has a control file called rtps32.lic.
The client software must have an encrypted server
control file, which is also provided by AMS. This file
contains the name of the server, the network protocol
which will be used, and the location of the server (either
the IP address and port number for TCPIP, or the server
name for IPX and NetBIOS). The server control file uses
Issue 1 - AMS REALTIME Projects Advanced User Guide
23
the base filename of the executable with the file
extension .srv, and must be stored in the same directory
as the client (Projects) software.
Provide this information to AMS to obtain a security
license file for the server software and the a server
control file for the client software. The server control file
directs AMS REALTIME Projects to the name, address
and network protocol used for the server, and is
encrypted to match with the information provided for the
server’s security license file.
Client / Server Security Control Files
24
Issue 1 - AMS REALTIME Projects Advanced User Guide
Configuring the Server
The server configuration file determines where the
virtual files will be stored, and where the access control
database will be stored. There are two switches that must
be set in the server configuration, which is named using
the same base filename as the executable with .ini or
.cfg appended as the extension.
AXISDB="secure.axi"
The file name entered will be where User Login IDs,
Password, and Access Control Levels will be stored. No
specific file name is required, but the .axi extension
should be used.
FILESYSTEM="*.vfs"
This is the extension used when AMS REALTIME
creates an internal “virtual” file system. It is
recommended that the .vfs extension be used.
In order to login to AMS REALTIME through the server
and access the secure project data, each user’s client
software must have a software control file which points to
where the AMS REALTIME server is located.
Starting the Server
After the server configuration file has been set, start the
server program on the network location specified in the
license control file. The server must be accessible by all
AMS REALTIME users.
If the user access database (such as secure.axi in the
sample configuration above) has not yet been created
when the server is first executed, a database is created
that contains a single user login ID SUPER, that has
supervisory access. This login ID has no password.
Server Messages
There are several possible error messages that may
appear in the Server window if all essential server
Issue 1 - AMS REALTIME Projects Advanced User Guide
25
functions are not successfully initiated. The following
table provides a list of fatal error codes and a description
of what they mean:
26
RTPKEYREQUIRED
The AMS REALTIME
Projects Server will not run
in demonstration mode
without a control key. This
software must be purchased
to be used.
RTPLICERROR
There was an error loading
the server’s security license
file. Check to make sure
that the file is present.
RTPAXISERROR
There was an error loading
the AMS REALTIME
Projects internal security
file, where User Login IDs,
Passwords, and Group
Access Rights).
RTPVFSLOADERROR
There was an error loading
the AMS REALTIME
Projects internal database.
RTPVFSLOGINERROR
There was an error logging
in to the AMS REALTIME
Projects internal database.
RTPMAKEDIRERROR
There was an error creating
a directory or folder from
the AMS REALTIME
Librarian.
RTPADVERTISEFAIL
ED
Srvman encountered an
error advertising network
protocols.
RTPROCFAILED
Binding or advertising of
network protocols has
failed. Check the network
configuration.
Issue 1 - AMS REALTIME Projects Advanced User Guide
RTPSTARTFAILED
AMS REALTIME Server
startup failed.
Some warning messages simply provide information
about the current status of the server. While some
warning messages are a status indicator, all messages
should be carefully monitored to ensure a successful
server startup. If unexpected warning messages appear,
this may indicate a potential problem that should be
resolved before continuing. The following table provides
a list of warning message codes and a description of what
they mean:
RTPLOADEDAXIS
The AMS REALTIME
Projects internal security file
containing User Login IDs,
Passwords, and Group
Access Rights has been
loaded from [filename].
RTPAXISNOTFOUND
The AMS REALTIME
Projects internal security file
[filename] was not found, so
a new one will be created.
RTPAXISCREATED
The AMS REALTIME
Projects internal security file
[filename] has been created.
RTPSUPERUSERMSG
No User Login IDs or Group
Access Rights have been
defined, so a default superuser has been created with
the Login ID super (no
password).
RTPVFSEMPTY
The AMS REALTIME
Projects internal database
directory structure is empty,
so the default directory
structure will be created.
Issue 1 - AMS REALTIME Projects Advanced User Guide
27
Other messages are part of a normal server startup, and
also provide information about the server. The following
table provides a list of normal message codes and a
description of what they mean:
RTPLICENSELOADEDMSG
This message
displays after a
successfully loaded
security license file.
It provides the server
name and the number
of licensed users
(e.g., Loaded License
for Realtime, 175
users).
RTPPROTOCOLMSG
This message
displays after a
network protocol is
successfully loaded
and advertised. It
displays the protocol
and the address of
the server (e.g.,
Protocol UDP,
Address
89.1.2.3:8007).
RTPSTARTOK
This message
displays after a the
server is up and
running and ready
for client access. It
displays the message:
Ready for Clients.
Additional detailed error messages can come out if the
AMS REALTIME internal database failed to initialize,
or if the ROC SrvMan failed to initialize, or if there was
28
Issue 1 - AMS REALTIME Projects Advanced User Guide
an error creating a sub-directory to place the internal
database files. There might be one or more sources of
these errors, but the most common problems relate to
general memory, disk space, disk access privileges,
network failure or general corruption problems.
The following messages may result from a non-error
condition:
Licenser Error
There was an error interpreting
the license information.
Alloc Failed
Memory allocation failed; out of
memory.
Too Many
Concurrent Users
More than the licensed number of
users are attempting to access the
software.
Invalid Password
The password entered by the user
was incorrect.
Bad Token
An invalid token string was
received.
The following messages result from a network condition
or low-level function error:
Roc Error
A Remote Object Call library function
terminated with an error.
Alloc Failed
Memory allocation failed; out of
memory.
Duplicate Login
A user can only be logged in from one
location.
Not Found
Function was not found.
Invalid Version
The version of the software is invalid
for this database structure.
Access Denied
Access has been denied to the
software and/or database.
Issue 1 - AMS REALTIME Projects Advanced User Guide
29
Open Failed
The database could not be opened.
Send Failed
Network send transmission failed.
Receive Failed
Network receive transmission failed.
NAK Received
No Acknowledgment received from
the Server.
Roc Reentry
Remote Object Call reentry.
No Response
No Response received from the
Server.
Server Down
The Server is not running or has
crashed.
Standard network protocol errors for the current protocol
in use may also be returned if problems occur.
Organizing Project Schedules
You can create directories, move, copy and delete files
from within AMS REALTIME Librarian. These
functions are essential to good maintenance of project
disk storage, but are rarely found directly within most
native applications.
When using an AMS REALTIME internal database,
these functions also apply to the internal project storage
structure. Directories underneath the virtual file system
can contain schedules which are not only organized by
project, but by access rights as well. User access rights
can be assigned directly to a location where project
schedules are be stored.
Local and Network File Storage
AMS REALTIME Librarian can access projects that are
stored on a computer’s local drives, as well as shared
network drives. Unless network file sharing has been
turned on for a specific computer, project schedules
stored on a local drive will not be accessible by others.
30
Issue 1 - AMS REALTIME Projects Advanced User Guide
However, often a project schedule is only a small part of
the whole, such as a subproject or a component of a
merge-link project. In this case, storing the schedule on
a common network drive will allow others to access the
file, either directly or through one of the many AMS
REALTIME Projects of a multiple project functions, such
as File Rollup, Merge or Merge-Link.
Tabs should be created and maintained for any drive
where project information will be stored. This will
provide instant access to project data. In addition, the
currently selected tab will become the default directory
used within Projects.
Internal Project Database Storage
If the AMS REALTIME Server has created an internal
database structure for secure project data storage, a tab
can be created for each storage folder within the
proprietary database. Select the computer icon and
choose the name of the internal file system. Define a
new tab for each folder in the database structure.
To move local schedules into a folder within the project
database, simply select one or more project files from a
local or network drive tab. Drag and drop the selected
files onto the project database tab. Then click on the
project database tab to verify that the projects have been
copied.
Different default group rights can be assigned to different
folders within a projects database. By creating different
folders based on project access requirements and then
applying the appropriate group access rights (Access
Control Lists), data can be shared with those who need
access, but also protected from unauthorized change or
access. More information can be found in the section on
Access Control Lists.
Users
If you are logged in as a user with Supervisory access
(e.g., Super), the Librarian mode will contain additional
Issue 1 - AMS REALTIME Projects Advanced User Guide
31
icons. To use these functions, select the Panel Bottom or
Panel Zoom mode to open the User and Group screen
area.
ACL Editor (Access Control Lists)
User/ Group Editor
Each AMS REALTIME Projects user must have a User
Login and Password to access Projects through the
server. If a user hits the Cancel button, he may bypass
the Server and run AMS REALTIME projects locally,
provided that his software is configured to allow local
access. Some software is configure to enforce program
access through the server. Local users can not access any
project data from an internal database; they can only
access schedules stored on a local or network drive or
ODBC repository. This enforces data access control.
Adding New Users
To add a new User Login, click on the Edit User IDs
and Groups icon (ensure that the panel area of the
screen is visible). The lower right section of the screen
contains a list of all users that can access AMS
REALTIME Projects. If no users have been defined, only
the default use Super will be present. Each AMS
REALTIME Projects user must have a unique User Login
ID. The database also maintains each user’s name and
password.
Click on the New Users icon and enter a User Login ID. .
Each user must have their own unique Login ID and
Password to maintain project ownership and access
control. The Login ID is what will appear in the list of
users.
Then enter the user’s name and a password. A
confirmation dialog will request that the password be reentered for verification. Non-matching confirmations
will repeat the password cycle. Blank passwords can be
32
Issue 1 - AMS REALTIME Projects Advanced User Guide
temporarily used, but are not secure and should be
avoided.
Removing Users from the Database
To delete a user, simply click to select the User ID you
wish to remove. Then click on the Delete User icon.
You will receive a verification prompt with options to
Delete or Cancel the operation. Choose Delete to
remove the User ID from the list.
Changing a User Password
Important Note: When first logging in as the Super user,
remember to set a new password to protect the integrity
of the database.
Passwords are non-lookup, even to a System
Administrator. This means that the passwords can not
been seen and are internally encrypted. If a password is
lost, the System Administrator (or any Super user) can
enter a new password without knowing the old one. This
can be done by clicking on the Edit User IDs and
Groups icon and then selecting a panel view so that the
lower portion of the screen is visible. To change a
password, select a User ID from the list and click on the
Change Password icon. The new password can be
entered, followed by a confirmation dialog to ensure that
what was typed was actually correct. If the new password
does not exactly match the confirmation password, the
password prompts will repeat.
Users with less than Super user access also have a
Change Password icon in Librarian mode that is followed
by their Login ID. If a User clicks on the Change
Password icon, a dialog will appear that prompts for the
current password. If this is successfully entered, a dialog
will appear, allowing a new password and a confirmation
password to be entered. If the new password does not
exactly match the confirmation password, the password
prompts will repeat.
Issue 1 - AMS REALTIME Projects Advanced User Guide
33
Groups
Groups are used to define a set of users for the purpose of
assigning access rights to certain folders and/or projects.
A user can belong to multiple groups. Groups are
generally defined to match a project hierarchy, including
creation of new projects, deletion of old projects, data
modification, etc. Users are then assigned to the
appropriate groups.
Creating a Group
Click on the New Group icon to create Group Names.
A Group is a set of users that have common project
access requirements. Enter a unique Group ID, followed
by a descriptive name for the group. The Group ID will
appear in the list of Groups displayed on the left side of
the panel.
Removing a Group
Click on the Delete Group icon to remove a Group
from the list. It is the responsibility of the System
Administrator to ensure that a Group is not in used in an
Access Control List (ACL) before it is deleted.
Assigning Users to Groups
To add one or more users into a common Group, first
click on a Group name to select it. The center portion of
the panel will show all User IDs currently assigned to
that Group. Then select a User name, and click on the
Add User to Group icon. Continue to add all
appropriate users into the correct Group. Users can
belong to more than one Group, but care should be taken
not to overlap conflicting access rights.
If a specific User from the list is selected, the center
panel will contain a list of the Groups that the user
belongs to. If a Group is selected, the center panel will
contain the list of Users currently assigned to that Group.
Two icons appear at the top of the center panel. These
allow you to modify the contents of the group. If you
34
Issue 1 - AMS REALTIME Projects Advanced User Guide
wish to add en entire Group into a higher level Group,
select the higher level group from the left panel area.
Then click on the Add Group to Group icon. A
popup will appear that contains the current list of Group
IDs. Choosing a Group from the popup will cause it to
appear in the Group list, and all users within the Group
will also be assigned to the higher level Group.
Creating Access Control Lists (ACLs)
Once Groups have been created to combine users with
similar project access requirements, Access Control Lists
can be created for specific directories or folders. To
create ACLs, select the ACL Editor button from the
Librarian mode. Choose the Panel Bottom layout so that
the database directory structure and ACL information are
simultaneously visible.
First, choose the directory or folder on the projects
database that the ACL will apply to. Then click on the
Add ACL button in the panel area. Choose either
[Group] or User from the popup (Group IDs are
displayed in brackets to differentiate them from User
IDs). If you selected Group, enter the Group ID that will
be assigned specific access rights. If you selected User,
enter the User ID that will be assigned specific access
rights.
A popup will appear that allows you to specify specific
privileges to projects in the current folder. A plus sign
indicates that the privilege is assigned, and a minus sign
indicates that it is denied. Choose the appropriate
combination of privileges from the table below, and then
choose OK to save the ACL.
List
Controls if the folder or filename appears in
the user’s database directory structure.
Read
Controls if the user can open projects in the
database folder as Read Only (changes are
disallowed).
Issue 1 - AMS REALTIME Projects Advanced User Guide
35
Write
Controls if the user can open projects in the
database folder as Read / Write (changes are
allowed)..
Creat
e
Controls if the user can create new projects
in this database folder.
Delet
e
Controls if the user can delete projects in
this database folder.
Rena
me
Controls if the user can rename projects in
this database folder.
Execu
te
Controls if the user can execute programs in
this database folder.
Super
visor
Controls if the user has supervisor privileges
(nothing is disallowed) to projects in this
database folder.
Copying ACLs to Other Folders
Once one or more ACLs have been created for a database
folder, they can be copied and applied to other database
folders. To copy an ACL, select it and click on the
Copy ACLs icon located at the top of the panel area.
Then choose the new database folder from the directory
structure. Selecting the Paste ACLs icon will copy all
of the previous ACLs to the new database folder. The
new ACLs can be modified, deleted or added to, as
necessary.
Copying Local Projects into an Internal Database
Once a database folder system has been designed with the
appropriate users, Groups and ACLs, it is time to move
any existing projects schedules into the Projects database.
While you are still attached to the Projects server, create
tabs for each of the database folders where project data
will be stored. Then create a tab that accesses the local
or network drive where existing projects reside. To
access local drives, click on the Change Server icon and
select Local from the popup list.
36
Issue 1 - AMS REALTIME Projects Advanced User Guide
Select the projects you wish to move. Shift click will
select a contiguous range of projects, and control click
will select non-contiguous projects or files. Drag and
drop them onto the database folder tab. ACLs can be
copied or modified to individual projects.
Using an ODBC Data Source
Saving Projects to a Database
In its simplest form, AMS REALTIME Projects
incorporates standard Save To… and Get From…
options under the File Librarian sub-menu in Project
mode. These commands use SQL,ODBC and
(Oracle(TM)) OCI commands to share data with central
databases such as Oracle(TM), SQL Server, Access,
FoxPro and most other common ODBC or SQL
compliant systems. This means that AMS REALTIME
Projects data can be more easily integrated with other
database applications.
AMS REALTIME Projects offers a method of mapping
the interface between itself and a database through the
rtp.map file, so that you have control over the data you
share between the systems. You can create other map
files and modify them to your requirements, making a
standard data transfer operation that is both simple and
consistent with your requirements.
The Repository feature allows you to create and use
Shared Project Components. This means that you can
open specific components of a project which are common
to all projects, such as Calendar tables, Resource tables,
and so on.
The AMS Librarian also plays an important roll in the
management and control of data between AMS
REALTIME Projects and other Database and Project
Management systems. The AMS Librarian is a
combination file and database management integrator. It
offers some unique functions which allow you to preview
Issue 1 - AMS REALTIME Projects Advanced User Guide
37
the contents of files or database tables, just as you can
when using the Windows Explorer. Once you have
located the project data you require, double-click on the
project. If you clicked on a project in Oracle(TM), an
MPX or MPP file from Microsoft Project, or a native
REALTIME Projects file, the project data will load into
AMS REALTIME Projects.
Configuring an ODBC Data Source
In most cases, ODBC drivers are installed during the
database application's installation. However, if you are
not seeing the database as a named potential data source
in the ODBC setup dialog, it may be because the ODBC
drivers were not selected during the original was
installation. Check with your database vendor if you
have this problem, or try to re-install the application with
the full ODBC drivers selected.
ODBC drivers are typically written to you local Windows
System directory during installation. This makes them
available to you as a client for connectivity to databases,
either those maintained locally on your machine, or to
databases stored on a common network drive. Microsoft
Access is a good example of this. A network version
allows multiple users to connect to a database out on the
server, from local client applications. As long as the
client machine has the correct ODBC driver files in their
Windows System directory, they can connect to that
database with any compliant application.
The following picture shows AMS REALTIME Projects
connected to a remote Microsoft Access database, using
the AMS REALTIME Librarian to browse the tables
within.
38
Issue 1 - AMS REALTIME Projects Advanced User Guide
Viewing Tables in an ODBC Repository
The data shown was loaded to the Access database
directly from AMS REALTIME Projects using the
Database Repository option in the File menu. Selecting
the Database Save… option caused the system to:
1. Prompt for a project name ( or display the name if
already defined )
2. Prompt for a .map file ( explained later in this
section )
3. Prompt for a Data Source name
4. Save the project data to the database.
At this point, if the tables required by AMS REALTIME
Projects do not exist in the database, the system asks if
you would like to create them. In this example, 'Yes to
All' was selected and the tables were created
automatically based on the .map file. Once the tables
were created, the project data was written to the database.
Examining Database Tables
AMS REALTIME Librarian has a unique way of
exploring and opening databases and files. It works like
any normal browser, with the addition of being able to
previewing the contents of files and database tables. The
Issue 1 - AMS REALTIME Projects Advanced User Guide
39
preview lets you determine what is stored in the file
before double-clicking to open a project. You can even
open Microsoft Project .mpx, .mpp and .mpt files
directly from AMS REALTIME Librarian.
Once a data source has been selected, a list of the
database tables found in the data source will be provided
in the right side of the Librarian window. Selecting a
table from the list will provide a view of the current data
in the lower panel area (using any layout where the Panel
area is visible).
You can choose the data source for your repository and
view the database tables from a series of tabs in the lower
portion of the screen.
To view the data contained in a table, click on the tab for
that table to bring it to the front. Data tables will scroll if
all fields do not fit on the screen.
A Sample ODBC Setup
A Step-by-Step Guide to ODBC
16-bit ODBC systems are not
upward-compatible with 32bit systems. Be sure to check
that you are not trying to
connect to a 32-bit database
from a 16-bit client.
Typically you will not see 32bit Data Sources from 16-bit
clients.
The next part of this guide is based on setting up a
connection to a Microsoft Access 7.0 'network resident'
database from a Windows 95 operating system with
Microsoft Office 97 installed. The Office 97 component
alters the appearance of the ODBC setup dialogs from the
Windows 95 setup. However, the general rules are the
same for most ODBC connection setups in Windows 95
and Windows 3.x.
ODBC Structure
The following is a diagram of the basic structure of an
ODBC setup. It shows the path which all ODBC
applications must take to link to a specific data source.
40
Issue 1 - AMS REALTIME Projects Advanced User Guide
Application (32-bit)
|
ODBC Driver Manager
(ODBC32.dll)
|
ODBC Desktop Database Driver
(ODBCJT32.dll, MSJET35.dll, 32-bit Driver ISAM)
|
database
Resources Used in this Example
In creating this example, the following resources were
available to the system. Check the availability of these
in your system before proceeding with this example.
1. A local copy of Microsoft Access 7.0 installed on the
client machine (optional). This ensures that the
correct ODBC drivers are present in the Windows
Systems directory. You can install these drivers
separately if you do not have the MS Access
application residing on your computer by obtaining
the drivers from Microsoft.
2. A Microsoft Access database file called
AccProj.mdb residing on a network server disk
drive (note: the database does not have to be
predefined, but is in this sample).
3. A copy of the ODBC32.DLL driver file loaded in the
Windows System directory.
Issue 1 - AMS REALTIME Projects Advanced User Guide
41
Naming a Data Source
To name the data source for our connection, open the
Windows Control Panel and choose the 32bit ODBC icon
( this is simply named ODBC in Windows 3.x).
The ODBC Setup Program
You should now be looking at the following dialog box,
offering you a choice of available ODBC compliant data
sources. From the 'User DSN' tab, select MS Access 7.0
Database and then click on the Add… button.
42
Issue 1 - AMS REALTIME Projects Advanced User Guide
ODBC Administrator
From the following dialog select the Microsoft Access
Database(*.mdb) list option and click on finish.
Choosing an ODBC Driver
You will now be asked to specify a Data Source name for
that database and a description of what the database is.
In this example we called the data source
AccessProjectData.
Issue 1 - AMS REALTIME Projects Advanced User Guide
43
Now click on the Select button in the Database group
frame to specify the database you wish to Access. In this
example, the database was loaded on the network for
central access by other ODBC systems.
S:\Common\… \MSAccess\AccProj.mdb
Naming an ODBC Data Source
Click the OK button to complete the procedure. You
now have a named data source to which AMS
REALTIME Projects can connect and store project data.
Project Data Repositories
Creating a Map
This map is used to define all the fields that are needed
internally by AMS REALTIME Projects. It is
recommended that all of these fields be maintained in a
repository database to ensure data integrity when a
project is recalled.
To create a default map, click on the database icon and
choose Write RTP Default Map from the popup menu.
44
Issue 1 - AMS REALTIME Projects Advanced User Guide
You will be prompted to enter a filename for the map
(e.g. rtp.map). This default map will automatically
contain all data tables and field names used in AMS
REALTIME Projects, including your own extension
fields, and customized information.
Using a Template Map
A template map can be created to match up data fields to
an existing repository. More than one template map can
be maintained. This can be used to prevent loading of
some information for some users, to control which fields
are used to update Projects when an external program has
modified some fields in the database, or to simply have
control over field name mapping. Template maps can be
edited using any text editor.
Attaching to a Data Repository
You can choose an ODBC data source from any that have
been defined. If Connect to Repository is selected
from the database icon in Librarian mode, a list of all
data sources will be displayed so that one can be selected.
Once a data repository has been defined, it can be
automatically reconnected at startup by using a Projects
Repository Definition (*.pdf) file. This file is
automatically created, and specifies the data source
name, keeping an internal password to the data source.
Choosing Disconnect from Repository from the
same menu will sever the connection to the repository.
Accessing the Repository from Schedule Mode
There are two options under the File menu in Schedule
mode that provide direct access to a repository. The first
is the Librarian menu item, which has several other
options underneath. The Librarian menu provides direct
functional access to project data that is stored in the
repository.
Issue 1 - AMS REALTIME Projects Advanced User Guide
45
Browse
Browse allows you to view the database tables directly,
allowing a preview of the data contained in the
repository. Often this is useful when you are trying to
locate a particular project, or verify where data is stored
if it is mapped into an alternate field. Browse simply
opens up the data tables directly, offering a nondestructive view of the database contents.
Open From
Open From will move to the familiar Librarian mode, but
with a slight difference. The upper left corner of the
screen contains a prompt to Open Schedule File.
Icons will appear that provide options to accept (OK),
Cancel or choose a Repository. A file selector dialog
underneath allows direct entry of a schedule name, or
selection from a history list.
[figure of schedule file options]
Save To
The Save To option allows you to save a project to a
repository.
Using Multiple-Projects Functions with a Repository
If you wish to utilize multiple project techniques on
projects that are stored in a repository, select MergeFrom, Merge-Link From, Get From, or Rollup
From under the File Librarian menu in Schedule
mode.
46
Issue 1 - AMS REALTIME Projects Advanced User Guide
Developing Common Project Standards
The Untitled Schedule
When a new schedule is created, the untitled.arp file is
used as a default template to create the new schedule.
This template can be customized to contain standard
calendars, user-defined extension fields, revisions,
program and document links, views and many other
project attributes.
It is very important, especially when data will be shared
or consolidated across multiple projects, to maintain
consistency within each project. To create a standard
project that is used for new projects, you can make all
changes to an empty project and save it as untitled.arp
in the directory where AMS REALTIME Projects is
stored. Each time a new schedule is created, anything
that has been saved in the untitled.arp file will
automatically be included in the new schedule.
Software Configuration
While many configuration settings simply control userpreferences and have discrete and minor impact on the
schedule, there are several configuration settings that
have a direct major impact on network and resource
calculations and scheduling results.
AMS REALTIME uses a specific search path to read in
all configuration files in series and apply the switch
settings therein. The search order is:
1
AMS REALTIME Projects looks for a
configuration file with a .1st extension instead of
.ini or .cfg (e.g., rtp32.1st ) in the same
directory as the executable program. This can be
made a read-only or hidden file to protect the
contents, and should contain only switches that
must be enforced for your system to function
correctly.
Issue 1 - AMS REALTIME Projects Advanced User Guide
47
2
If a schedule is passed into AMS REALTIME
Projects as a parameter, that directory or folder is
searched for another configuration file. This
might contain switches that are used for only
specific schedules.
3
The Windows System directory, the Macintosh
System folder, or the Unix $HOME directory is
searched next. This can be used to store userpreference configuration switches, such as
BASELINECOLOR and BASELINEPATTERN,
even when the software is being executed from a
common network source.
4
The last place searched is the directory where the
software executable is stored. This configuration
file is the default configuration that comes with
the software when it is first installed. Any other
configuration file used must be created or
modified from this basic template.
Once a switch has been set, it can not be changed, even if
it encounters a different setting an a later configuration
file. If multiple configuration files are used, they should
contain only partial lists of configuration files, or the
subsequent files encountered will not be able to change
any of the configuration settings.
Standard Calendars
There are several methods that can be used to define a
standard set of calendars. First of all, since almost all of
the calculations within AMS REALTIME use one or
more working calendars, it is essential that they are
consistent.
Defining and storing a standard company calendar in the
untitled.arp is the simplest way to ensure that calendars
are consistent. However, changes can still be made to a
calendar in a project after it has been created. If global
changes have to be made, they will have to be made to all
projects, generally using an automated method such as
48
Issue 1 - AMS REALTIME Projects Advanced User Guide
the generic translator or calendar load and dump
methods.
If a Calendar template is used, the calendar is defined
and maintained from a single Shared Project Component,
and each time a project is opened that references that
common calendar, the current calendar data is reloaded.
This provides a simple mechanism for maintaining
calendar information from a single source. Calendars
can also be stored in database tables and accessed
through ODBC. Common Resources and Resource Pools
can also be shared with this method.
Extension Fields
Extension fields are additional fields that are added to the
standard data fields that AMS REALTIME uses.
Although a few of these fields may be used by AMS
REALTIME when specific product features are used, up
to a total of 100 extension fields exist each of the
following datasets: Activity, Schedule, Resource and
Requirements.
Multiple project operations can use these extensions to
perform operations or consolidations, so it is important
that they are identically defined. Fields from multiple
schedules are merged by position, not by name. To leave
some fields open for individual use, simply create a
placeholder field, such as Reserved or Available. If
features that use extension fields will be used, such as
Subprojects, Attach Documents, and Command Links,
these fields can also be created and stored in the
untitled.arp for placeholding purposes.
Extension Field Types
If you define extension fields using the menus in the
Schedule mode, you can simply define a label, or name,
for the field, and then enter values. AMS REALTIME
Projects will not make any checks on those values, which
therefore could be anything you wish. See Chapter 3,
Issue 1 - AMS REALTIME Projects Advanced User Guide
49
Getting Started, in the Basic User Guide, for more
information on the use of fields and tables.
However, if you use the Ext Fields table to define your
extension fields, you will be able to define a Field
Typefor Activity extensions. This determines the type of
data you can enter into that field, which will be checked
by AMS REALTIME Projects.
The allowed field types are listed in the table below.
Type
Allowed Values
Alpha
Any alphanumeric character, i.e. any
character available on the keyboard, up
to 255 characters in length
Uppercase
Any uppercase character. If you enter
characters in lower case, AMS
REALTIME Projects will convert them
to upper case.
Date
Any date in a valid date format.
Number
Any integer or decimal number. You
can enter any of the decimal digits (0-9)
or a decimal point. A number can range
from -2147483647 to 2147483647.
Logical
Y or N
Used to flag a record, possibly for
selection or sorting purposes.
WBS
Any valid value for a structure. See
Chapter 3, WBS, for more information.
Pick
Any pre-defined value from a userdefined selection of choices. See below.
Defining Pick Fields
Defining a field as being a Pick field means that you
want to define a list of values which any other user can
enter; any other entry will not be possible. For example,
you may want to define a list of valid sites for entry in the
Site extension field.
50
Issue 1 - AMS REALTIME Projects Advanced User Guide
When you define a field as a Pick field, the entry in the
Ext Fields table will read Pick =. You can now enter
the list. Click on the Type cell and a pop-up menu will
appear.
Selecting Add allows you to add an allowed value to the
end of the list.
Enter the valid value and click OK.
Continue to add fields until your list is complete.
Use the Insert Before … option to add a value
anywhere other than the end of the list. You will be
presented with a list of the existing values. Select the
value in the current list, before which the new value will
be entered.
The Delete and Change options also prompt you for
the appropriate value with the pop-up list. Change will
also prompt you for the new value.
The Change Type… option allows you to change the
type of the field altogether.
Resources
Resource names can be stored directly in an untitled.arp
or a Shared Project Component schedule. This saves
typing in the same resources in each schedule if they are
the same set used for different projects. However, this
method does not really “share” a common set of
resources, but merely is a shortcut for entering the same
data.
To actually share a set of resources across one or more
schedules, first define all of the resources in a schedule.
When you load this schedule as a resource template from
another schedule, the resource template will be loaded
each time the schedule is loaded. Resource usage from
all schedules that use the resource template will also be
stored within the resource template. This means that
resources will be available on a “first-come, first-served”
basis. Resource pool availability can also be stored and
Issue 1 - AMS REALTIME Projects Advanced User Guide
51
loaded as a Shared Project Component, or loaded from
common ODBC tables.
If resources are loaded into an AMS REALTIME
Resources database, this can also act as a central shared
resource pool, since all resources from all projects are
stored in a common area. Resource workload smoothing,
assignments for new activities, or generic to specific
work assignments can all be sent back to Projects from
the Resources database.
Elements of Cost and Rate Tables
If Elements of Cost are used and data is shared, the
definition of the Elements of Cost, including formulas,
hierarchy and rate tales, must be identical in order to
produce consistent results.
Process Management Features
Attaching Documents to Objects
It is sometimes very useful to be able to provide
quantities of additional information about activities. For
example, you may want to be able to provide team
members with a “Scope of Work” for the activity, listing
lower-level tasks that comprise work on the activity.
You could define an Alphanumeric Extension Field and
enter details there, but it is likely that this method will
not provide you with enough space for the full scope.
An alternative would be to write the scope document
using a word processor and then attach it to the activity.
Similarly, you may want to provide a detailed cost
breakdown in spreadsheet format, or a design drawing
for the work.
52
Issue 1 - AMS REALTIME Projects Advanced User Guide
When a document is attached to an activity, AMS
REALTIME Projects will store its filename and full
pathname in an extension field that has been defined for
a specific application. When an activity is selected,
clicking on the Attach Documents icon will make
AMS REALTIME Projects launch the application in
which the document was created and load the document
so that you can access it.
Using attached documents covers three areas:
• Set up a document type for each application (Word,
Excel, Draw, etc.) you will be using in this way.
• Attach the document.
• Access the document.
Document Types
Before you set up the types of documents you want to be
able to attached to activities, you will need to know two
pieces of information about the applications you will be
using:
• The name and location of the program file for the
application. This will usually be a file with an
extension of .exe, but you should check in the
appropriate documentation to ensure this is the case.
• The name and location of any document you want to
use as the template, or model, for the documents you
will be creating in future.
A template is used to provide the default layout for any
new document you create using this application. For
example, you may want to set up a template which
contains the company logo and any other information
which is standard to inter-company memos. Every time
you create a new word processed document to attach to
an activity, it will already contain this standard
information, and you only need to enter the new text.
Configuring documents is achieved in one of two ways,
depending on whether you already have any documents
set up or not.
Issue 1 - AMS REALTIME Projects Advanced User Guide
53
If you have not configured any document types you will
be prompted to do so when you click the Attach
Documents icon. You will need to select an
application and an empty template document, so that
AMS REALTIME Projects knows the layout of the
document to be attached, and you will be prompted to do
so. Click OK to the information dialogs, and use the
File Selector dialog in the normal way to select the
appropriate application file, and then the blank template
document.
If you have already configured document types, clicking
the icon displays a Configure… option on a pop-up
menu, together with a list of currently configured
documents. Selecting this option will take you through
the same steps as above.
Each time you configure a document type, AMS
REALTIME Projects creates an Extension Field for
the Schedule. The label of the extension is set to the
name of the executable program, and the field itself will
contain the default file extension and template document
name.
Therefore, an alternative method of setting up a
document type is to create your own Schedule Extension
Field label and values.
The table below shows two example of such fields,
enabling you to attached documents created in the
Windows Notepad application or in Microsoft Excel.
Schedule
Extension Label
Schedule Extension
Value
c:\win31\notepad.exe
*.TXT,c:\win31\template.txt
C:\excel\excel.exe
*.XLS,c:\excel\forms\xyzrep.xls
Attaching and Creating Documents
Once you have configured the document types, the
application names (as you defined it) will appear in the
pop-up menu displayed when you click the Attach
54
Issue 1 - AMS REALTIME Projects Advanced User Guide
Documents icon. With an activity selected, click the
icon, and then pick the document type.
A dialog will appear, allowing you to create a new
document or find an existing document to attach.
If you select Create, AMS REALTIME Projects will
launch the appropriate application and prompt you for
the filename for the document. By default, the name of
the file is set to the first eight characters of the Activity
ID, followed by the extension you defined as the default.
You can overwrite this if you wish.
An empty document is displayed, using the layout
determined by the template you specified.
Enter the data you want, and then exit from the
application. You will usually be prompted to save the
changes. You will exit the application and return to
AMS REALTIME Projects.
If you select Find, AMS REALTIME Projects displays
the Open dialog, where you can select the file you want
to attach to the selected activity. When you click OK, the
application will be launched with the selected document
displayed, where it can be edited or merely reviewed.
When a document has been attached to an activity, the
filename of the document will be stored in the extension
field for that document type. It will be preceded by a
“special character”, depending on the platform on which
you are using AMS REALTIME Projects. This helps to
eliminate problems which might occur when schedule are
used across different platforms and the application
program is unavailable.
If AMS REALTIME Projects is running on the Windows
platform, the document type name is preceded by a @
character, e.g. @Notepad, @Word.
If AMS REALTIME Projects is running on a UNIX
platform, the document type name is preceded by a #
character, e.g. #EDIT.
Issue 1 - AMS REALTIME Projects Advanced User Guide
55
If AMS REALTIME Projects is running on the
Macintosh platform, the document type name is preceded
by an & character, e.g. &QUED.
The extension field can be displayed in any of the activity
field areas, the Split Screen Table, the Info Line, or
any of the tables in Table mode. The path and filename
of the attached document can also be edited to change the
document which will be opened by the launched
application.
Examples of the fields and their values are shown below:
Activity ID
@Excel
@Notepad
AA-5700
c:\excel\AA5700.xls
C:\spwin\note5700.txt
AB-5702
AB-5706
C:\spwin\note5702.txt
c:\excel\AB5706.xls
AB-5710
c:\spwin\note5710.txt
As additional document types are configured, AMS
REALTIME Projects will label the next available activity
extension field with the identifying platform character
and the document type name. As each activity
attachment is created or opened, the filename will be
stored in the associated application type field.
To disconnect an attached document, clear the filename
from the appropriate extension field. AMS REALTIME
Projects will not delete files from the system; only the
connection is broken.
Accessing Attached Documents
To access an attached document, simply select an
activity, click on the Attach Documents icon and then
select the document type to be opened from the pop-up
menu. If the activity has an attached document, AMS
REALTIME Projects will launch the appropriate
application and open the attached document for viewing
and editing.
The Attach Documents icon also provides a Print option
from the pop-up on Windows and Macintosh platforms.
56
Issue 1 - AMS REALTIME Projects Advanced User Guide
Selecting Print will print the document from inside the
launched application. If more than one document is
attached, a pop-up list of all document types will appear
so the correct document can be selected and printed.
Documents cannot be incorporated directly into the
published schedule output, but they can be referenced by
publishing the extension field for the document type.
This will provide a reference for each application
document name which is attached to an activity.
Launched applications are opened as another task in a
multi-tasking window environment. If the mouse is
clicked outside the document application window, the
AMS REALTIME Projects window will come up to the
front, but the application session will still be active.
Exiting from the launched application will return to the
AMS REALTIME Projects session, or possibly another
active window.
Command
You can execute other applications and programs from
within AMS REALTIME Projects. You can do this
using the External Command facility. This facility works
in a very similar way to launching another application to
attach a document, but using Command means that the
application does not have to be related to an individual
activity. For example, you may want to launch the
Windows Explorer application to find a file.
However, you can pass information from an activity if
you wish to retrieve specific information from the other
application, perhaps a spreadsheet which has activity
calculations in it.
This can only be done on Windows or UNIX platforms;
Macintosh does not support the passing of command line
parameters.
Using Command means that you have to define your own
External Commands button using extension fields.
Ensure you are in Tables mode.
Issue 1 - AMS REALTIME Projects Advanced User Guide
57
Open the Ext Labels Table.
Enter the name of the command in the Sch Ext Labels
column, preceded by a command specifier for your
platform., see below This ensures that the name of the
command is listed on the Command icon tool.
Platform
Command Specifier Character
Windows
%
(percent)
Macintosh
^
(caret)
UNIX
!
(exclamation point)
In the Sch Ext Value enter the actual command string
that executes the other application or program, exactly as
you would enter it in the Run command of the Windows
Program Manager.
Examples of how you might use Sch Ext labels and Sch
Ext Values are shown below:
Sch Ext Labels
Sch Ext Values
%Clock
clock
%Notepad
notepad
%My External Program
C:\bc\userapp % datafile
If one or more activity fields are to be passed to the
application as a parameter, enter their names, preceded
by a percent sign, at the end of the command. You must
then ensure that the appropriate activities are selected
when you use the Command facility, or blanks will be
passed.
The entire command line can not exceed 127 characters
on Windows platforms, or 255 characters on UNIX
platforms.
58
Issue 1 - AMS REALTIME Projects Advanced User Guide
When configuring commands on UNIX platforms,
remember to specify extern and the trailing ‘&’where
appropriate
Batch Commands
In your use of AMS REALTIME Projects there will
almost certainly be tasks that you have to carry out on a
regular basis, following the same procedures each time.
After several repetitions this can become rather tiresome,
so AMS REALTIME Projects allows you to create text
files containing a list of commands used to automate
these repetitive tasks. By using these command files you
can lessen your work load while AMS REALTIME
Projects runs unsupervised.
Using Batch Commands
Using the batch command facilities requires two text
files: a command file storing the list of commands to be
performed and a diagnostic file to hold any error
messages that may occur. When running a batch file
from the command line, the command file should be used
as the standard input, and the diagnostic file as the
standard output. Batch commands can be executed from
the system prompt on Windows and UNIX platforms or
launched internally from the AMS REALTIME Projects
Execute command on all platforms. The methods to do
this differ from platform to platform, but an example for
UNIX and Windows is shown below.
UNIX
sp <batch.cmd > batch.lst &
Windows
schedule @batch.cmd !batch.log
If you also want to open a specific schedule upon startup,
the schedule name should precede the batch command
information, as shown:
schedule projecta.sch @batch.cmd
!batch.log.
Below are two examples of command files:
Issue 1 - AMS REALTIME Projects Advanced User Guide
59
PRODA.CMD
OPEN C:\D10\PROD.SCH
USEVIEW GROUPA
PUBLISH
OPENFMT C:\D10\PRODA.FMT
PRINT
SCHEDULE
QUIT Y
This file contains commands which will open a schedule
file called prod.sch, switch to a pre-defined view called
GroupA, change to Publish mode, open the proda
format file, print it out, return to Schedule mode and
quit.
EXPORT.CMD
OPEN FINAL.SCH
EXPORT OD.MAP OD.ACT
NEW Y
OPEN BCX.SCH
EXPORT OD.MAP BCX.ACT
QUIT Y
This file contains commands which will open a schedule
file called final.sch, export the activities using a specified
map, then open a file called bcx.sch (having saved
changes to the previous file), and export its activities
before quitting AMS REALTIME Projects.
Available Commands
Below is a list of the batch commands available in AMS
REALTIME Projects, together with their equivalent
menu commands, and a description.
SCHEDULE
Mode/Schedule
60
Issue 1 - AMS REALTIME Projects Advanced User Guide
This command switches into Schedule mode, where
most commands are executed. If AMS REALTIME
Projects has been switched into some other mode by a
previous command (e.g. Publish), this command returns
to the Schedule mode.
NEW Q|N|Y
File/New
This clears the current schedule and opens an empty
untitled schedule. You must also use one of the
parameters listed below, to tell AMS REALTIME
Projects how to act based on the status of the currentlyopened file.
Q
Query for save if the file has changed.
N
If the file has changed, do not open a new schedule.
Y
Open a new schedule regardless of file state.
OPEN filename
fileselection
File/Open
This opens an existing schedule file. Open does not
proceed if the currently opened file has changed and is
unsaved. Instead, it issues an error message saying use
the New command.
USEVIEW viewname
View/viewname (on View button)
This command selects a stored view from the current list
of pre-defined views. If views are to be selected from
batch files in this way, you should ensure that standard
names are used across all schedules.
IMPORT mapfilename datafilename
File/Translate/Generic/Import
This starts the Generic Translator Import process using a
named mapfile and datafile. This is equivalent to the
Translate Generic command, covered below, which is
preferred. IMPORT is included for compatibility with
intermediate versions.
EXPORT mapfilename datafilename
File/Translate/Generic/Export
Issue 1 - AMS REALTIME Projects Advanced User Guide
61
This starts the Generic Translator Export process using a
named mapfile and datafile. The Translate Generic
command is preferred (see IMPORT above).
TRANSLATE ARTEMIS options
File/Translate/Artemis
This command launches the Artemis Translator. The
options provided below control the translation process.
-sA|S|N
Translate All Activities (A), Selected
Activities (S), or Exclude Selected
Activities (N). Specify only one of
these choices.
-tAMTIR
Translate one or more of these types of
output: Activities (A), Milestones (M),
Titles (T), Interfaces (I), or Resources
(R).
-a6|7|9
Use Artemis 6000, 7000, or 9000
formats.
-dfilename.def
Use filename.def as the definition file.
-mfilename.map
Use filename.map as the Artemis map
file.
-iinput.txt
This specifies a Read operation using
input.txt as the Artemis input file.
-ooutput.txt
This specifies a Write operation using
output.txt as the Artemis output file.
The -i or -o switch is required for Artemis translation,
and all the other switches are optional, depending on
your translation requirements. Full path names are
recommended for all filenames. For example:
TRANSLATE ARTEMIS -sA -tAMT -a6 dart.def -mart.map -oart.txt
uses the Artemis translator to translate all activities,
together with milestones and titles, outputting them in
Artemis 6000 format to a file called art.txt. The
definition file art.def and the map file art.map should be
used.
TRANSLATE GENERIC options
Translate/Generic
62
Issue 1 - AMS REALTIME Projects Advanced User Guide
This command starts the Generic translator for Import or
Export. The following options set the Generic translation
options.
-i mapfile datafile
This starts the Generic translate Import
process with mapfile as the map file and
datafile as the base input file. Using
complete pathnames is recommended.
-o mapfile
datafile
This starts the Generic translate Export
process with mapfile as the map file and
datafile as the base output file. Using
complete pathnames is recommended.
FORCEPUBLISH
This command forces AMS REALTIME Projects to go
directly to Publish mode on startup, bypassing other
modes and preventing any changes. This lets some
people read but not change your schedules.
There is also a configuration flag called
FORCEPUBLISH which, if set to Y, provides the same
“view only” environment without using batch commands.
PUBLISH
Mode/Publish
This command switches to the Publish mode. If no
form is set and the configuration file is set to Autoform,
the program creates a form mimicking the schedule
screen layout. If a format file has been loaded, AMS
REALTIME Projects uses that form. The PUBLISH
command must precede a PRINT command.
OPENFMT filename
filename
File/Open
Only available in Publish mode, this command opens
the specified format file (*.fmt). This sets up stored
report formatting and loads the associated form file.
PRINT
File/Print
This command prints the all pages of the current
Publish view of the schedule on the currently selected
Issue 1 - AMS REALTIME Projects Advanced User Guide
63
printing device. It is only accessible while in Publish
mode.
SAVE
File/Save
This saves the current schedule file. A previously saved
schedule must be loaded to use this command.
SAVEAS filename
As...
File/Save
This saves the current schedule file as filename. The
SAVEAS command does not prompt you with overwrite
warnings if the file already exists, so use it cautiously.
QUIT Q|N|Y
File/Quit
This command exits AMS REALTIME Projects. One of
the parameters described below is required.
64
Q
If the file has changed, query for the user to save it.
N
If the file has changed, do not quit.
Y
Quit regardless of file state.
Issue 1 - AMS REALTIME Projects Advanced User Guide
Chapter 3 - The Work
Breakdown Structure
Introduction to this Chapter
Although an overall project
summary can be created with
a Project Rollup, which
provides a summary of the
entire schedule, if you want
multiple summarization levels
you should use a Structure.
The AMS REALTIME Projects Basic User Guide
included information on how to use Title activities to
summarize information from the activities below it (see
Chapter 5, Activities). This method of summarization,
though, is limited in that only one level of detail can be
summarized. In other words, you cannot have Title
activities summarized into other Title activities.
A hierarchy that could be summarized in this way is
represented in the figure below.
By using a more sophisticated hierarchical structure to
categorize and group activities, you can establish
Issue 1 - AMS REALTIME Projects Advanced User Guide
65
information at various levels of detail. This allows those
people who need low levels of detail to manage activities
at a low level; those people who prefer an overview with
no detail can manage activities at the higher levels.
AMS REALTIME Projects also provides additional
summarization facilities. Some are covered in other
chapters (see Related Topics below). This chapter
concentrates on the use of breakdown structures,
specifically the Work Breakdown Structure, to
summarize to different levels of detail, and within
different categories.
Related Topics
If you are thinking of using structures to reflect a Cost
Breakdown Structure, you should refer to Chapter 7,
Costs, for information on alternative methods of
summarizing cost and resource information. You should
refer to information on Cost Elements, Groups, and Cost
Centers.
Structures
The Work Breakdown Structure helps organize the
project into a hierarchy, categorizing tasks by the type of
work that they cover, and it allows you to summarize. In
addition, you could use other structures to organize work
according to different classifications, such as the
department responsible. The use of other structures is
covered in the section Why you Might Need Other
Structures, towards the end of this chapter.
PROJECT
PLANNING
INITIAL INTERVIEWS
DEPT A
DEPT B
INVESTIGATION
ANALYSIS
REQUIREMENTS
DRAFT REPORT
CONSULTATION
DESIGN
BUILD
REVISIIONS
TEST
SIGN-OFF
DEPT C
In AMS REALTIME Projects, the activities are assigned
a position in one of two ways:
66
Issue 1 - AMS REALTIME Projects Advanced User Guide
• the activity is numbered by entering a WBS code
following the system illustrated in the figure on page
3-2
or
• the lower-level activities are indented under a higherlevel summary activity using the structure tools (this
is also illustrated in the figure on page 3-2).
Whichever method is used to establish the structure,
AMS REALTIME Projects will make sure that activity
information is amended to reflect the structure being
used. For example, if you establish the hierarchy by
numbering activities, AMS REALTIME Projects will
reflect the different levels by indenting tasks as
appropriate. Conversely, if you indent tasks, you can get
AMS REALTIME Projects to generate WBS codes for
them.
Establishing a WBS for your Project
WBS Fields
Before you start to set up the Work Breakdown Structure,
or any other structure, you will need to decide which field
you are going to use to store the WBS information. You
can use any extension field, provided that it is set up with
a data type of WBS.
To define the fields for use with structures, click on the
WBS command tool and select the New… . Then enter a
name for your structure in the resultant dialog.
Issue 1 - AMS REALTIME Projects Advanced User Guide
67
Selecting the Structure in the Schedule
The Structure button in the icon toolbar controls the
organization of the activities in your schedule. Clicking
on this button opens a pop-up menu with the various
options described below.
Alternatively, you can use the Project menu to select the
Structure option, which has the sub-options below:
The Structure option
Use this option to select an activity extension field to be
the current structure that organizes the activities. Only
fields with a type of WBS are displayed. The menu item
reports the currently selected field, or No Structure if a
structure is not currently active. When AMS
REALTIME Projects applies a structure to a set of
activities, it indents the Activity IDs and Descriptions in
the Split Screen Table according to the activity’s
structural position.
68
Issue 1 - AMS REALTIME Projects Advanced User Guide
Once a new structure is activated, the Indent, Outdent
and Under options are the basic tools that can be used to
define and make changes to the structure.
The Indent Option
This command is useful for rearranging activities to a
lower structure level, directly changing the WBS values.
First select a row number (not an activity), then choose
this option to move the activity on that row to a lower
level in the structure. Note that it is not recommended
that you keep more than one activity on a physical line
when using WBS structures. Although both activities on
a selected line will be given an independent WBS code,
you will only be able to see the code for the leftmost
activity in the Split Screen Table, which can be
confusing. If you select this option without highlighting
any rows, the entire structure indents one level. Other
activities may also acquire new WBS values to
accommodate your changes.
Issue 1 - AMS REALTIME Projects Advanced User Guide
69
The Outdent option
This command moves activities higher in the structure,
removing indentations in the Activity ID and
Description fields. If you select this option without
highlighting any rows, the entire schedule moves back
one level. Other activities may acquire new WBS values
to accommodate your changes.
The Under option
This option is similar to Indent, but means that you
must select multiple rows, since the first highlighted row
acts as a top level for the other rows. Thus, if you
highlight three activities and select this option, the first
activity does not change, and the other two are placed
one level underneath it in the organizational structure.
Displaying and Amending WBS Information
Expand and Collapse
Notice that as your structure is define, each summary
level activity row number contains a small box with a
plus or minus sign inside, illustrated in the figure above.
70
Issue 1 - AMS REALTIME Projects Advanced User Guide
This is the Expand and Collapse box, and it indicates
a summary level activity.
Clicking on the Expand and Collapse box will open
or close all of the detail activities underneath. A plus in
the box indicates that there is more detail than is shown,
and the summary activity is collapsed. A minus in the
box indicates that all of the detail underneath is currently
shown. Clicking on the Expand and Collapse box of
a sub-level summary will open or close the detail for just
the tasks within that structure leg. A closed level has a
'+' sign in the expand and collapse box. A single click in
an expand and collapse box with a '+' sign in it, will
cause the detail on the next level below to appear. A
double click will cause the details on all levels to appear.
Each summary activity should be a Title type, so that a
Project Rollup will use the active structure to summarize
the lowest level (or work package level) tasks. You can
use Shift-click to select all summary level tasks and
change them into Title types with the Activity Type icon,
if they aren’t Title Summary tasks already.
Other Structure Tools
The other options on the Structure pop-up menu provide
tools for working with allow you to determine how the
Structure is to be displayed.
The Copy Structure option
Use this tool to copy the WBS values from the field
currently being used into another field, or to itself,
renumbering as it does so (This feature is useful if you
have inserted and indented a number of activities at
various points in your schedule). You can also redefine
the starting number (so 1.3.4 could become 5.3.4 or
2.3.3.4) during this process. AMS REALTIME Projects
immediately applies the newly created structure. The old
structure will still exist, but will no longer be the active
structure.
Issue 1 - AMS REALTIME Projects Advanced User Guide
71
Producing a Compact Structure
The Compact option removes any unnecessary levels of
indentation, in effect tightening the outline. Thus, if
activity 2.1 summarizes the activities 2.1.1.1 and 2.1.1.2,
selecting this option renumbers the two lower-level
activities to 2.1.1 and 2.1.2.
Compressing the Structure
The Compress option changes all the selected activities
to the level of the first highlighted activity. If you use
this option without selecting any activities, you can in
effect clear the previous structure and start from scratch.
Renumbering Activities
The Renumber Activities option recalculates the WBS
values according to the indentations in the Activity ID
and Description fields. This is useful for removing
gaps in the structure. For example, the series of WBS
codes 1.2, 1.2.1, 1.2.2, 1.4, 1.5 would be changed to 1.2,
1.2.1, 1.2.2, 1.3, 1.4. If you select some activities before
using this feature, the first activity’s number determines
the values of the following activities.
Displaying Separate Branches of the WBS
Sometimes you may want to hide some activities by
filtering them out of the schedule. The Filter Branch
option only shows one branch of the WBS structure,
which you select with a dialog box. Thus, selecting 4
displays activities 4.1 and 4.2 but not 5.1. You can also
control how many additional levels of activity detail
AMS REALTIME Projects displays. For example, if 3 is
entered as the branch to filter, and 1 sub-level were
entered, 3.1, 3.2, 3.3 would be displayed, but 3 is not,
and any lower detail (if we had a 3.1.1, 3.1.2, etc. )would
not be shown.
72
Issue 1 - AMS REALTIME Projects Advanced User Guide
Displaying Selected Levels of the WBS
Use the Filter Level option to display only the activities
at or above a specified level, removing the detail
activities. Selecting 2 displays 4 and 4.3, but not 4.3.1.
Issue 1 - AMS REALTIME Projects Advanced User Guide
73
Switching Off the Filters
The Filter Off command removes the filters and displays
all the activities. The current structure will still remain
active.
Hiding the Indentation
Select the Hide Indentation option to hide the
indentations in the Activity ID and Description fields
without actually removing the structure. That is, the
WBS codes are left unchanged.
Note that there is a configuration option, INDENTID,
which determines whether both the ID and Activity
Description are indented, or only the Activity
Description. Set the option to N to indent only the
Activity Descriptions.
Why you Might Need Other Structures
In the examples above, it has been assumed that you are
using the Structure facility to set up activities according
to their position in a Work Breakdown Structure. This
method means that activities are grouped according to
the type of work they refer to. In our examples, whether
the activity is to do with Planning work, or Traveling or
Administration.
74
Issue 1 - AMS REALTIME Projects Advanced User Guide
You might want to arrange your tasks according to some
other categorization to create a different form of
breakdown structure. Common alternative breakdowns
are:
• Organization Breakdown Structure (OBS)
Breaks the project down into those activities to be carried
out by different areas of the organization.
XYZ COMPANY
DIVISION 1
DEPARTMENT A
DIVISION 2
DEPARTMENT B
TEAM A
TEAM B
DIVISION 3
DEPARTMENT C
DEPARTMENT D
TEAM C
• Cost Breakdown Structure (CBS)
Breaks the project down into activities according to the
types of cost they incur, for example, Capital
expenditure divided into its different types or Labor
divided into different types of Labor costs.
COMPANY A
DIVISION 1
DEPARTMENT A
DIVISION 2
DEPARTMENT B
TEAM A
TEAM B
DIVISION 3
DEPARTMENT C
DEPARTMENT D
TEAM C
You should note, however, that AMS REALTIME
Projects does have several methods by which costs
can be summarized according to different resource
types or cost centers, and these might provide more
sophisticated facilities than you could achieve using
a CBS to summarize them. See Chapter 7, Costs, for
full information on cost summarization.
• Product Breakdown Structure or Process Breakdown
Structure
Issue 1 - AMS REALTIME Projects Advanced User Guide
75
Used primarily in engineering or manufacturing projects,
this type of breakdown classifies activities according
to which process they are part of or which product is
to be the end result of the activity.
The work is broken down into components, rather than
phases as in the earlier examples of the WBS.
Combining Structures
To generate multiple perspectives on the same schedule,
you can build multiple structures, using a separate
activity extension field for each one. You can have any
number of structures, providing that you have the right
number of WBS type extension fields available.
Using a Structure to Summarize
Information
The Structure facility can also incorporate Title lines or
activities, which maintain their structure during project
and file rollups. The ability to automatically summarize
several levels of detail activities is the greatest asset of
integrating structures into your schedule. You will only
need to keep the low-level activities updated, since AMS
REALTIME Projects updates the summary bars for you.
Each Title activity will collect the summary information
from all the underlying levels.
In order for the rollup to work, you must ensure that you
have a valid set of structure codes set up and that the
higher-level activities have been defined as Titles. (Use
the Activity Type tool or the Activity, Format,
Activity Type menu option.)
If you are maintaining multiple structures, you will
probably need to define a separate set of title bars for
each structure.
Because of the various methods of obtaining rollup
information, it is possible that you can get conflicting
76
Issue 1 - AMS REALTIME Projects Advanced User Guide
information. For example, you may have altered the
WBS structure but not the other rollup summaries. It is
therefore recommended that you maintain complete
control of how they take place by using a specific
Project Rollup command instead of allowing Autoroll
to recalculate summaries every time a change takes place.
There is a configuration setting which permits the rollup
to take place through the WBS or other structures. You
should ensure that the EROLLWBS flag is set to Y.
If you want the summaries to reflect the WBS structure
correctly in a published report, you should remember to
select Show Summaries from the Schedule Flags
(under the Format menu, Formatting option) dialog in
the Vision mode.
If you are using resource summarization, the resource
usage will also summarize to multiple WBS levels,
including both the real resource usage and the summary
level resource usage.
Issue 1 - AMS REALTIME Projects Advanced User Guide
77
Chapter 4 - Views
Introduction to this Chapter
Throughout the other chapters of this manual and the
Basic User Guide, information has been provided about
various methods of changing the way that your schedule
is displayed on screen. For example, you can change the
scope of the calendar timeline, which also changes the
scale of the activity bars, change which information is
displayed in the Split Screen Table, switch resource
information on and off, and sort and select information in
tables using the Sort and Matching features.
In this chapter, we shall look at how you can store all
these different combinations of output as named Views,
which can then be reapplied at any time. This facility
will allow you to have different layouts set up for
reporting to different areas of the project, or to highlight
particular aspects of the project at different times. For
example, you could have a View which focuses on the
critical path for use during planning, but once work is
under way, you might want to apply a different view
which homes in on those activities which are running
late.
Different people working on the schedule may require
different layouts. For example, you might want to see the
78
Issue 1 - AMS REALTIME Projects Advanced User Guide
whole schedule in order of criticality; a colleague may
prefer to see only those activities which Fred is working
on, in date order.
By saving your specific layouts as a View, you will not
need to make the formatting and layout changes every
time; you need only select that View in order to see
exactly what you want, how you want.
A View is made up of the following:
In Table mode:
• The Sort and Match criteria
• The field selections
In Schedule mode:
• The Layout (arrangement and sizing of screen areas)
• Whether the Resource and/or Network modes are
activated
• Selected Resource and Requirement extension fields
• The activity field selections in the Split Screen Table
• The Network formatting options - Show Flow,
Show Float and Critical
Using Views
Views are set up using the View tool. When you click
the icon, a pop-up menu appears, as illustrated below:
The View tool.
Issue 1 - AMS REALTIME Projects Advanced User Guide
79
The first five items are options available for creating and
amending View information, and are covered in the next
section.
At the bottom of the menu is a list of the views already
defined, including a Default view which will always be
present whether you have any user-defined views or not.
The Default view is the one you will be familiar with
from first using AMS REALTIME Projects. It shows the
Schedule mode, with no Split Screen Table, and using
default layouts for the bars, description placement and so
on. The Resource and Network mode are not active.
If you make any changes to this view without saving it as
a named View, then the new layout will be saved as the
new default view.
When you save a schedule, AMS REALTIME Projects
saves the information about the currently-selected view,
and that will be the view used when you next open the
schedule.
This can lead to some confusion when several people are
involved in maintaining or accessing the same schedule.
It could be, for example, that you have a view which
filters out any non-critical activities. If you save the
schedule with that view applied, then the next person to
open the schedule will only see the critical activities
displayed, and may be misled into thinking that those are
the only activities in the schedule.
In a similar way, the line numbers applied to activities
may only be temporary, due to a Match or Sort being
applied. This can lead to any new activities being moved
back to the end of the schedule as soon as the Match or
Sort criteria are removed or reapplied.
There are two ways in which you can overcome this
potential confusion:
• As soon as they open a schedule, every user should
check the View menu to see which view is applied
• Every time they save a schedule, every user should
make sure that the Default view is first applied
80
Issue 1 - AMS REALTIME Projects Advanced User Guide
Defining Your Own Views
To create a new view, first make sure that the schedule is
displayed exactly as you want. Then click on the View
tool and choose New. Enter a name for the view in the
dialog box. Names can be of any length, but the shorter
they are the more views you can store. You are limited to
a total of about one thousand characters for the sum of all
view names in a schedule.
A new view becomes the current view, and is shown in
Underlined Bold text on the View menu. If you want to
make changes to the current view, make the appropriate
amendments to your on-screen layout and then click the
Update option from the View menu. On the other
hand, if you don’t like the changes you have made, use
the Reapply option to return to the View as previously
defined and stored.
The Rename option allows you to change the name of
any view. The view you rename does not have to be the
current view. A pop-up menu will prompt you to select
the view to be renamed, and then a dialog box allows you
to enter the new name.
Similarly, the Delete option prompts you for the name of
the View to be deleted.
Saving Your Matching Criteria to a View
Whenever you create a new view of your data using the
Matching feature in the schedule split table view, you can
save your criteria into a named view. For example, if you
frequently need to see all the activities which have started
but not yet completed, you may wish to save a view
named 'Incomplete'. This would save you having to keep
entering the matching criteria each time you wanted that
information.
In the example below you can see how a matching
criteria has been saved into a view. In this case you can
Issue 1 - AMS REALTIME Projects Advanced User Guide
81
see the formula asks for any activity which has a percent
complete of greater than 0% but less than 100%.
Progress
<100.0 ANS >0.0
Matching criteria are inserted at the top of the split
screen table on a special line. To insert this special
Matching line, use the Split Table Commands Button.
Split Table Commands
Click on this button to produce a pop-down menu. From
the pop-down menu choose Matching. You will see a
new row line appear at the very top of the table. You
then type in your matching criteria on this special line,
within the column you wish the criteria to opperate. You
can use the following operators or formula in any activity
field you require.
Valid Selection Operators
Equal To (Case insensitive)
82
=
Equal To (case sensitive)
EQ
==
Not Equal To
NE
! or != or <>
Greater Than
GT
>
Issue 1 - AMS REALTIME Projects Advanced User Guide
Greater then or Equal To
GE
>=
Less Than
LT
<
Less Than or Equal To
LE
<=
You can also use more than one operator within a
column by separating each one with an 'AND' , 'OR' or
'XOR' separator.
Both True
AND
;
&
Either Ture
OR
;
|
Only one True
XOR
;
^
Valid Wildcards * and ?
Also you can use several operators spread out over
different columns to create multiple match criteria. You
can even create further special lines below the top line to
define further operators. Operators placed one below the
other in ther same column are treated as 'OR' operators.
For example,
Act ID
Description
=*Des*
=*Draw*
AA-00
Activity Description 1
etc.
This is equivalent to saying "Show me any activities
which have the letters 'Des' OR 'Draw' in their
description."
Create and save a view for your matching criteria.
You can temporarily deselect a Matching criteria in any
view by returning to the Split Table Commands button
and clicking on the Matching menu item to deselect it.
Issue 1 - AMS REALTIME Projects Advanced User Guide
83
To permanently remove a Matching criteria click on the
Clear Matching option.
Matching options are also available in the Table Mode of
AMS REALTIME Projects.
User-Defined Colors and Patterns
Information on setting Colors and Patterns for the
activity bars and other areas of the Schedule face is
included in the Basic User Guide. As a quick recap:
• Select the activity or activities you want to change
The Activity Color tool.
• Click the Activity Color or Activity Pattern tool on
the icon toolbar
The Activity Pattern
tool.
• Select the Color or Pattern you want to use
You will see from the Color and Pattern palettes that
there is a wide range of colors and patterns available to
you. However, you may wish to define your own. For
example, you may want to match a company color
exactly, or to provide fine distinctions in shading or
pattern.
You should note that you cannot change the colors in the
Macintosh environment. The sections below show how
you can set up user-defined colors in Windows and in
UNIX.
Defining Colors in Windows
To define your own colors you will need to know the Red
Green Blue (RGB) value for the color. (All colors are
formed from some combination of these primary colors,
and the RGB value specifies a numeric measurement of
each.)
In the Windows environment, you can obtain the number
from the Color Palette in the Windows Control
84
Issue 1 - AMS REALTIME Projects Advanced User Guide
Panel, or from any application which allows the
definition of custom colors.
From the Control Panel, select Display (the Monitor
icon).
Select the Appearance tab and in the Desktop Item,
select Color. If you are using Windows 95, you must
also click on the Other… button.
Issue 1 - AMS REALTIME Projects Advanced User Guide
85
Move the crosshairs cursor around until it is on the color
you want to use in AMS REALTIME Projects. Now
follow these steps:
• Write down the values for the Red Green and Blue
items.
• Convert each value from decimal (base 10) as it is
given, into hexadecimal (base 16). (An example of
this conversion is shown below.)
• String the hexadecimal numbers together in the
order Blue Green Red (i.e. the reverse of the order in
the Color Palette).
• Now use this string in the Configuration file to
change the color to be used.
The entry is of the form:
COLOR#=HHHHHH
where:
86
Issue 1 - AMS REALTIME Projects Advanced User Guide
#
represents the number of the color in
the AMS REALTIME Projects palette
(numbered 0-15 from the upper left to
the bottom right)
and
HHHHHH
represents the hexadecimal string (the
three numbers concatenated together in
BGR order).
For example, the color you want might have the Red
Green Blue values of 95, 61, and 78. These are
converted to hexadecimal as shown in the table below:
Color
Decimal
Equivalent
Color Value
Hex Value
Red
95
5F
Green
61
3D
Blue
78
4E
This gives you the hexadecimal string 4E3D5F to enter.
If you wanted this color to be Color 6, in place of the
standard Yellow in the AMS REALTIME Projects
palette, you should add the line:
COLOR6=4E3D5F
to the rtp.ini file.
You should not alter Black, White, Red, Light Gray or
Dark Gray, as they have special meaning within AMS
REALTIME Projects. This means that you should not
change color numbers 0, 1, 2, 8 or 9.
Defining Colors in UNIX
In the UNIX environment, you can enter the X Windows
name for the color in the configuration file against the
color you wish to change. For example:
Issue 1 - AMS REALTIME Projects Advanced User Guide
87
COLOR6=Pale Yellow
Defining Patterns
The patterns can be modified in a similar way, by
creating a binary representation of the pattern. However,
the first eight patterns (gray scale through solid) can not
be altered. Also, modifications must be made
sequentially beginning with Pat9, which is the first
pattern that can be modified. The figure 1 represents a
dark area, and 0 light.
For example, the following pattern shows a thick
diagonally striped pattern (the figure 1s form a diagonal
stripe from upper right to lower left of the 8x8 grid. Note
that all patterns will be tiled to fill in the pattern area of
an activity.
88
Issue 1 - AMS REALTIME Projects Advanced User Guide
11100001
11000011
10000111
00001111
00011110
00111100
01111000
11110000
Each line can be seen as two separate binary numbers,
each consisting of four figures:
1110 0001
1100 0011
1000 0111
0000 1111
0001 1110
0011 1100
0111 1000
1111 0000
(If you half-close your eyes you can see the pattern
appearing.)
Each of these four binary digits can be translated into its
hexadecimal equivalent, as follows:
Issue 1 - AMS REALTIME Projects Advanced User Guide
89
Binary
Hex
0000
0
0001
1
0010
2
0011
3
0100
4
0101
5
0110
6
0111
7
1000
8
1001
9
1010
A
1011
B
1100
C
1101
D
1110
E
1111
F
Using these translations, the pattern above becomes:
90
Binary Bit Map
Hex Code
1110 0001
E1
1100 0011
C3
10000111
87
00001111
0F
00011110
1E
00111100
3C
Issue 1 - AMS REALTIME Projects Advanced User Guide
01111000
78
11110000
0F
Thus, the entry in the rtp.ini file becomes:
PAT9=E1C3870F1E3C78F0
Formatting the Descriptive Output for
Activities
By default, the Activity Description is output next to the
activity bars, start and complete milestones and Title
activities.
It is possible to define the exact output you want to
appear. For example, as well as the Description, you
may want to see the Duration as well as (or instead of)
the Description. It is also possible to specify different
output for different types of activity, and to distinguish
between the output in the Schedule and Vision modes.
You will need to define a descriptive string using the
DESCFMT Configuration switch. It takes the form:
DESCFMT [SCH|PUB] [A|S|C|T] = [fields][literals]
where:
SCH or PUB
indicates whether this format applies to
Schedule or Publish mode.
A,S,C or T
indicate the type of activity (activity,
start milestone, complete milestone or
title, respectively).
These combinations provide you with up to eight string
combinations.
Any of the activity information fields, including
extensions, can be used in combination with literals.
Activity fields should have all spaces removed and be
preceded by a percent sign.
Issue 1 - AMS REALTIME Projects Advanced User Guide
91
If you want to use this facility
across all your projects you
should therefore ensure that
everybody uses the same
extension field labels.
Extension fields are referenced using %X1, %X2, %X3,
etc. If extension fields are standard across all schedules
which use the configuration file, specific extension field
names may be used, provided that they only contain the
characters A-Z and 0-9.
Below are some examples of how you might want to use
this facility:
DESCFMTSCH=%Actid:%Description(%Tfloat)
Outputs start milestones in the Schedule mode, labeled
with their Activity ID, a colon, their Description, and
their Total Float in parentheses
e.g.
C126:Contract AW (14)
DESCFMTPUBT=%Description WBS %X1
Outputs Titles in the Vision mode, labeled with their
Description, the text string 'WBS' (if you wanted the field
value you should precede the field name with a percent
sign), and the contents of the first activity extension
fields, which should therefore hold the WBS code.
e.g.
Design Phase WBS 1.2.1
DESCFMTSCHA=%X1-%SS
Outputs activities in the Schedule face, labeled with the
contents of the first activity extension field, a dash and
the Schedule Status field
e.g.
92
A Smith-Ahead
Issue 1 - AMS REALTIME Projects Advanced User Guide
Chapter 5 - Advanced
Logic
Introduction to this Chapter
The information needed to get ‘up and running’with the
network is contained in Chapter 6, The Network, in the
Basic User Guide. This chapter provides some further
information on the way in which AMS REALTIME
Projects processes network information, in particular the
specific information it calculates when networks are used
and the effect on those calculations of entering progress
information.
This chapter also contains full information on two modes
of operating in AMS REALTIME Projects which allow
you to concentrate on the logic aspects of the plan, rather
than on the activity information. These two modes are
the Logic mode and the Analyze mode, and between
them provide powerful tools for use with the networking
aspects of putting a plan together.
Issue 1 - AMS REALTIME Projects Advanced User Guide
93
Related Topics
Chapter 6, The Network, in the Basic User Guide
contains some introductory information about the use of
the AMS REALTIME Projects' networking facilities.
Also see Chapter 8, Publishing, in the Basic User Guide
for information on producing printed output from the
Network, Logic and Analyze modes.
The Network Table
The Network table is a list of all the network constraints
in your schedule. This view can be useful in
understanding the sequence of activities caused by the
network constraints, and removing or modifying any
incorrect logic. The first four columns describe the two
activities involved in the interface. They hold the
Activity ID and Description of the required and
supported activities. As a general rule, the activities in
the required column must be completed before the
activities in the supported column.
This table also has fields for the type of constraint (FS,
SS, FF, SF, %), the gap, the output value, the input
value, and the leeway. Since it would be redundant to
copy part of this table, any copying you do automatically
copies into the Clipboard table. The Clipboard table
allows you to make modifications to the copied network
constraints to make them unique before pasting back to
the Network table. AMS REALTIME Projects will not
allow you to have duplicate constraints by default.
94
Issue 1 - AMS REALTIME Projects Advanced User Guide
Network Calculations
Calculating from the Start or End of the Project
Usually you will want AMS REALTIME Projects to
calculate activity positions based on the first activity’s
Start Date. From that date, the activities are calculated
in their logical order, with the dates of a Required
activity determining the Supported activity. The
Complete Date of the last activity in the logical network
becomes the Complete Date for the whole project. To
have the project calculated in this way, make sure that
Forward is selected on the Network menu (it will be
checked). This method of network calculation is the
default, and draws activities at their earliest position, i.e.
from their Early Start (E Start) to their Early Complete
(E Comp).
However, it will sometimes be necessary to set a
Complete Date for the whole project and have AMS
REALTIME Projects calculate the dates backwards from
this, eventually determining the overall project Start
Date. For example, you may have a delivery date which
has already been agreed with the client, and you need to
know when to start the project to meet this date. To
calculate the project in this way, select Backward on the
Network menu. Activities will be drawn at their latest
positions, i.e. from their Late Start (L Start) to Late
Complete (L Comp).
Float
Float is an activity’s ability to slip without interfering
with the rest of the schedule. There are two types of float:
Free Float and Total Float. Total Float is the amount of
time an activity can slip before it impacts the project
deadline (defined by the latest date in the schedule). Free
Float is the amount of time an activity can slip before it
impacts anything in the project; for example a slip in one
activity can affect the start date of another activity, even
Issue 1 - AMS REALTIME Projects Advanced User Guide
95
if it does not affect the Project Complete Date. For more
discussion of Float and how it is calculated, see Chapter
2 of the AMS REALTIME Projects Basic User Guide.
To view the float graphically, select Show Float from
the Network menu.
If the network is calculated in Forward mode, a line to
the right of the activity represents the Float, if there is
any. If the network is being calculated in Backward
mode, the Float line will display to the left. Negative
float is also displayed in the opposite direction to the
current mode.
A thick line represents the Free Float for that activity,
and a thin line represents the Total Float. In the figure
below, Activity G has Free Float of 1 week and Total
Float of 9 weeks. Activity H has Free Float of 9 weeks.
No other activities have Free Float.
To see the float numerically, add the appropriate float
field to the Activity Table or the Split Screen Table.
How Target Dates Affect Constraint Calculations
If you are not using network constraints, targets serve
little purpose other than to guide your manual schedule
updates. With constraints, however, targets let you
override AMS REALTIME Projects’s default calculations
of dates for activities. Targets can fix activities at certain
dates regardless of constraints.
For example, the logic you have used might mean that
AMS REALTIME Projects has calculated the Early Start
96
Issue 1 - AMS REALTIME Projects Advanced User Guide
of an activity as 30 May 1997, and the Early Complete as
2 June.
If you set 30 May as the Soft Start Target, the start date
will show in bold. Altering preceding, required,
activities may move the activity, as illustrated in the
figures below.
If preceding activities are brought forward, Activity H
does not move. It cannot start any earlier than the Soft
Start Target of 30 May.
Issue 1 - AMS REALTIME Projects Advanced User Guide
97
If you use a Hard Target, if the preceding activities are
delayed Activity H is also delayed, and the slippage is
indicated by the Target diamond, and the dotted line
extending between it and the new position of the activity
bar. (In this example, the Critical Path has also been
recalculated.)
Contrast this with the effect of No Target, where Activity
H will simply be delayed by the network constraints but
the change will not show up on the schedule.
In a similar way, a Soft Complete Target operates as a
‘Complete No Later Than’constraint. In our example
above, setting a Soft Complete Target of 2 June have the
effect of showing slippage if preceding activities were to
be amended.
The figure above shows how a Soft Complete Target is
indicated with the date in bold. The figure below shows
the effect of a delay in a preceding activity.
98
Issue 1 - AMS REALTIME Projects Advanced User Guide
The figure below shows the effect of a preceding activity
being brought forward.
The major advantage, therefore, of using target dates is to
illustrate slippages clearly rather than simply
rescheduling the activities with no indication as to the
reasons or the overall effect on the network.
The Effect of Progress on the Network
As your project progresses, many of your activities will
vary from the plan, starting earlier than scheduled or,
more usually, slipping behind schedule. As you enter
Actual dates, the network automatically recalculates the
activity positions to save you time and prevent mistakes.
Real Time
By default, when you move an activity (for example,
moving it to the right to indicate a delay), any
Issue 1 - AMS REALTIME Projects Advanced User Guide
99
calculations take place only after you have ‘dropped’the
activity in its new position. You can see the effects
instantly by selecting Real Time from the Network
menu. In this mode, as you move one activity, it and all
the others which will be affected by the move are
recalculated instantly and displayed moving on the
screen. This means that you can view the changes to
your entire schedule as you move or slip an activity. In
Real Time mode, as you move one activity, all the other
activities are shown as simple outlines.
Through its real-time calculations, AMS REALTIME
Projects shows you how your schedule will be affected by
a change before you make a decision about placing the
activity.
Posting Progress Out of the Network Order
Just as activities will not always take place on exactly the
dates planned, sometimes the ‘real life’issues on the
project mean that the activities do not take place in the
order you planned. There are various ways in which you
can get AMS REALTIME Projects to take these ‘out of
sequence updates’into account when it recalculates the
dates of any downstream activities. You should make
sure that the setting in your configuration file is correct
for the type of calculation you wish to allow, and that the
configuration file is applied as a standard across all
projects.
This configuration switch is named OUTOFSEQ and can
have values of 0, 1, 2 or 3. The effects of each setting are
discussed below.
OUTOFSEQ = 0 means that progress information on
activities will override the network constraints. That is,
the Actual Dates have the effect of fixing the activity at
that position, and it will not be changed in line with the
logic if a change in a preceding activity occurs. Any
other activities are recalculated purely according to the
network constraints, and are not moved to Time Now.
This option is the default.
100
Issue 1 - AMS REALTIME Projects Advanced User Guide
OUTOFSEQ = 1 means that activities with progress
posted in the future (ahead of the Now date) will be
calculated based on their Remaining Duration rather than
their full Duration. This option has no effect on the
activities which are behind schedule.
OUTOFSEQ = 2 has the same effect as option ‘1’for
activities with progress posted in the future, but
uncompleted activities in the past (behind the Now date)
will be readjusted so that the remaining portion of the
Duration starts on the Now date. In other words,
activities running late will be moved as if you had used
the Readjust to Now option on the Activity menu. This
option thus reschedules all unfinished work to take place
now or in the future, rather than showing as scheduled in
the past.
OUTOFSEQ =3 means that all activities with progress
will take priority over the network logic and not be
repositioned. For activities that have not been
progressed, the first non-progressed activity in the
network logic will be Readjusted to Now. Remaining
non-progressed activities will follow the network logic
and are repositioned if necessary. Once they have been
progressed their position is fixed. Work that is in
progress may be re-estimated so that the remaining
duration begins at Now, if an adjustment is desired.
However, all unstarted work will be done in the future
and in accordance with the planned constraints. This
means that positions might be repositioned before you
enter progress and you will then have to readjust them
with Actual dates.
Displaying the Path To An Activity
Sometimes you will want to focus on a particular path
through the network, particularly when you are
evaluating why an activity has had its dates recalculated,
or to check what activities are determining its dates. If
the critical path is highlighted, then it is reasonably easy
to follow the logic through for that path. However, it can
Issue 1 - AMS REALTIME Projects Advanced User Guide
101
be harder to identify the path to a non-critical activity,
particularly if the network is reasonably complex or
contains a lot of activities.
Selecting The Path To from the Network menu will
hide all the activities except those leading up to the
currently-selected activity. This option will display the
path leading to the current activity, with all the activities
which are Required by it, and all the activities in turn
required by them.
When used in conjunction with the Critical flag, The
Path To only displays the critical path to the selected
activity rather than all possible paths to it. You should
note that this is not necessarily the critical path for the
whole project. (Imagine that the network has temporarily
been amended to make the current activity the end of a
‘sub-project’; combining these options will show the
critical path for that ‘sub-project’). Make sure that the
Critical flag is set before selecting The Path To. This
can also be stored in a View (see Chapter 4, Views).
To display the full schedule, simply uncheck The Path
To. If several people are using the schedule, it can cause
some confusion if you save the project with only The
Path To displayed. The next person to use the schedule
might not realize that there are some other activities
which are not being displayed.
102
Issue 1 - AMS REALTIME Projects Advanced User Guide
Using the Logic to Create and Amend a
Schedule
So far, we have been looking at applying logic to
activities in the Network mode. As you have seen, this
produces a display using the time-phased Schedule face,
but includes information on the links between activities.
The Logic AMS REALTIME Projects provides similar
information about the logic relationships, but in a view
where activity bars have no correlation to activity
duration, and thus allows you to concentrate purely on
the activities and their logic order. You may think of this
type of view as a Network, or PERT Chart. As in the
Schedule mode, The Path To option permits you to
check in detail the logic for each activity. In Logic
mode, this option is on the Format menu.
An example of the logic AMS REALTIME Projects is
shown below.
As well as allowing you to enter, check and amend logic
relationships, this AMS REALTIME Projects can be used
for reporting purposes where people need to be made
aware of the logic. For example, they may need a clear
indication of how work on one activity may affect
downstream activities.
The Logic AMS REALTIME Projects provides an
alternative method of creating a schedule. It can be very
useful, for example, in those projects where you want to
concentrate on the logic, rather than timescales at the
start of the planning phase. This might be required
where the project contains work that is very new to your
organization and where you therefore want to think
clearly about the various steps involved.
Issue 1 - AMS REALTIME Projects Advanced User Guide
103
To change from the Schedule AMS REALTIME Projects
to the Logic AMS REALTIME Projects, select Logic
from the Mode menu.
The Format menu offers slightly different options in the
Logic AMS REALTIME Projects, as explained in the
section on Changing the Display of the Logic AMS
REALTIME Projects below. However, the Zoom option
does operate in much the same way as on the Schedule
AMS REALTIME Projects.
Creating an Activity
To create a new activity, unconnected to any others,
position the cursor where you want the activity to be
displayed and double-click. A new Activity box is
created. An activity you create in Logic mode becomes
an Activity Type regardless of the default in schedule
mode, and default start is equal to Time Now and the
default Duration is 1. You can change the Type using
the information line at the top for a selected activity, but
only Milestones have a Duration of 0. Titles have no
dates or span defined until Project Rollup.
104
Issue 1 - AMS REALTIME Projects Advanced User Guide
To change any of this information, double-click on the
box and the Activity Information dialog box will appear,
and can be amended in the normal way.
After the first activity is created, you can then create
further activities which are connected logically to it. To
create an activity which logically succeeds the first
activity, i.e. which requires the first activity, move the
mouse cursor over the right-hand side of the box until it
changes to a cross-hair (+). Click, and then drag the
mouse towards where you want to create the succeeding
activity. A link line will be drawn, illustrating the
relationship to be created. When you double-click the
mouse button, a new activity will appear at that position.
The relationship is assumed to be a Finish-to-Start, and
the dates of the succeeding activity are calculated
accordingly. However, those dates will recalculate when
the correct activity spans are entered later.
To create an activity which logically precedes another,
i.e. which is required by another activity, move the
mouse to the left-hand side of the existing activity, and
click and drag backwards from there. Double-click to
create a new activity at the end of the constraint. Again,
the relationship is a FS type and the dates are calculated
accordingly.
In either case, if you wish to abandon the operation part
way through without creating a new activity, simply click
in the background area of the Logic AMS REALTIME
Projects.
Linking Existing Activities
Where two activities already exist, they can be connected
by adding a new relationship. In this case, click on the
left or right side of the first activity.
Issue 1 - AMS REALTIME Projects Advanced User Guide
105
When you move the mouse, a line extends from the first
activity. Move to the second activity and click on the left
or right. Click on the left to indicate that the link is to
the start of the activity (0%); click on the right to indicate
that the link is to the finish of the activity (100%). The
dates are recalculated as appropriate.
Again, to abandon the operation, click in the background
area.
Linking to Off-Screen Activities
Once you have got some way through creating a schedule
in this way, it becomes harder to see both activities to be
linked on the same screen. In this case, you can access a
pop-up list of all other activities to which linking is
allowed.
Make sure that one activity is displayed on the screen.
Double-click on the left or right of the activity box, and
then select one of the activities from the pop-up list
which appears. The default link is Finish-to-Start.
Changing a Link
The logic links can be edited in the Logic AMS
REALTIME Projects by selecting them with the mouse
and double-clicking to access the Edit Relationship
dialog. The method of selections depends on the Line
Type being used to draw the link (see the section below,
Changing the Way the Links are Drawn). If you are
using the Direct Line Type, double-click on the line. If
you are using the Elbow Line Type, double-click on the
‘elbow’. If you are using the Routed Line Type, you have
to turn Interfaces on and click on the constraint type to
access the Edit Relationship dialog.
106
Issue 1 - AMS REALTIME Projects Advanced User Guide
Deleting an Activity
To delete an activity, select it by clicking in the middle of
the box and then press the Backspace key. The activity
and all its constraints are deleted.
Moving Activities Around the Network
Move a single activity by dragging it. Ensure that you
‘pick up’the activity by positioning the mouse first in the
center of the activity box before depressing the button.
You will know when the mouse is in the correct position,
as the cursor changes to a hand.
As with the Schedule mode, groups of activities can be
selected by drawing a box around the relevant activity
boxes. Position the mouse anywhere in the background,
and drag to create the box. Any activities within the box
are now selected. Move the mouse over the group until it
changes into a hand and then drag the whole group to its
new location.
The position of each activity is stored with the project in
the Row(1), Col(1), Row(2) and Col(2) activity fields.
Row(1) and Col(1) hold the activity position of the large
box layout, and Row(2) and Col(2) hold the activity
Issue 1 - AMS REALTIME Projects Advanced User Guide
107
position of the small box layout. You can store more
logic layouts by defining extension fields and then
copying the row column position data back and forth
using the Fill Right function in the Activity table.
Changing the Display of the Logic
There are a variety of ways in which you can change the
way in which the Logic AMS REALTIME Projects is
presented. These are covered below, where we first
discuss changing the way the schedule is ordered,
followed by the way the activity boxes are displayed and
then the way the logic links are displayed. In the next
section you will see how to add some time-phasing to the
Logic in AMS REALTIME Projects.
Sorting the Activities in Logic
In Logic mode there are two types of sorting that you can
carry out. They are:
• Horizontal Sorting
The two horizontal sort options provided are Logical
and Critical. Selected activities are sorted left-toright across the screen, either using the network
logic as a sort order, or the critical path as a sort
order for placement.
• Water Fall Sorting
• The four waterfall sort options are all
combinations of top-to-bottom and left-to-right.
Selected activities are arranged in the order selected.
108
Issue 1 - AMS REALTIME Projects Advanced User Guide
The sort options are accessed on the Format menu in
Logic mode. The currently-selected type of sort is
included in the menu. In the example below, Horizontal
sorting is being used and is checked on the menu.
Horizontal is the default sort type.
If you uncheck Horizontal Sorting, then Water Fall
Sorting will be displayed and checked; the two menu
items toggle. If no activities are selected, the actual sort
options are not accessible. Activities must be selected
before a sort can be performed.
The general routine for sorting is:
• Select the activities to be sorted
• Use the Format menu to select either Water Fall
or Horizontal as the sort type to be used
• Use the Format menu to select the Sort option and
select the sort to be applied from the pop-up menu
Horizontal Sorting
The two types of Horizontal sorting available are Logic
and Critical.
• Logic
A Logic sort arranges activities so that the logic flow
moves from left to right. That is, supported
activities are placed to the right of required
activities, with different paths through the network
being placed on different lines on the chart.
• Critical
The Critical Path is placed across the center
(vertically) of the chart, with non-critical paths being
placed above and below it.
Issue 1 - AMS REALTIME Projects Advanced User Guide
109
Water Fall Sorting
There are four types of Water Fall sorting available,
which are:
• Sort Down Right
• Sort Down Left
110
Issue 1 - AMS REALTIME Projects Advanced User Guide
• Sort Up Right
• Sort Up Left
Changing the Way the Activity Boxes are Drawn
In the examples above, the activity boxes have been
drawn in a very small format, known as Hollow, with
their Descriptions (if any) displayed with them. This is
the default box type. Using this type of drawing, very
many activities can be drawn on the screen, or printed
out on a single page.
Issue 1 - AMS REALTIME Projects Advanced User Guide
111
The Hollow box type, however, can sometimes be
difficult to read where there are very many activities, and
provides very little information about each activity. This
section describes how you can change the type of box to
make them clearer, or to include more data.
Select the Box Type that you want from the Format
menu. The box type is applied to all activities, regardless
of which are selected.
The different types of box are listed below.
• Hollow
• Pattern
A box the same size as Hollow, but filled with the
pattern and color defined for the activities in the
Schedule mode. To change the pattern, therefore,
you will need to return to the Schedule mode or use
the Information Bar to enter color and pattern
numbers.
112
Issue 1 - AMS REALTIME Projects Advanced User Guide
• Custom
A larger box, divided into different areas to include
more activity information. The default box layout is
illustrated below, followed by information on how to
customize this information to suit your needs (see
below).
Displaying and Repositioning the Description
The Description field can be switched on or off using the
Format menu Description option. The option will be
checked if it is On.
If the box type is Hollow or Pattern, the Activity
Description will be drawn outside the box. On the
Format menu, select Description Location to choose
a new location for the description. The location is
relative to the activity box and may be: Above Right,
Below Right, Above Left or Below Left.
Customizing the Box Layout
If the box type is Custom, you can change the fields that
are displayed in the box. Up to 18 activity fields can be
displayed in the custom box. The font, size and style of
each field can be independently selected.
From the Format menu, select Custom Box Setup.
The current box layout will be displayed.
Issue 1 - AMS REALTIME Projects Advanced User Guide
113
To change a field, click on it and then use the buttons at
the bottom of the box to change the Font, Size or Style,
and select from the pop-up menus. Click Remove to
remove the selected field from the display.
To add a new field to the selected box position, click on
the Field button and select from the pop-up menu of
available activity fields.
Changing the Frame
There are two ways in which you can change the frame of
the activity box: you can change the type of line that is
used, and the color in which it is drawn.
Select the activities you want and on the Format menu,
select Frame Type to choose between plain, shadow,
thick, double, dotted or dashed lines.
Select Frame Color to choose the color of the frame.
114
Issue 1 - AMS REALTIME Projects Advanced User Guide
Changing the Way the Logic Links are
Drawn
By default, the lines showing the logic links are drawn
using straight lines. Depending on the position of
activities relative to their predecessors or successors, this
may result in lines being drawn diagonally. In some
organizations, this opposes the standards used for
drawing networks, and you might need to change the
conventions used in AMS REALTIME Projects. On the
Format menu in the Logic AMS REALTIME Projects,
there is an option for Line Type, which offers the choice
of:
• Elbow
The line makes one bend on its connection between two
activities
• Direct
The connector is drawn as a straight line between two
activities
• Routed
The connector makes bends to avoid the potential
placement of any other activities
Issue 1 - AMS REALTIME Projects Advanced User Guide
115
As well as the type of line, you can also change the way
in which the links are labeled. If you check the
Interface option on the Format menu, you can then
choose the Type. A pop-up list is displayed indicating
(with a + or -) which labeling methods are being used.
The Type will draw the type of link (FS, SS, FF, SF or
percentage) on the line.
No FS indicates that the type will only be drawn where
the type is not Finish-to-Start (FS).
The Gap will add the amount of Gap (if any), preceded
by a plus sign. For example:
SS+5
The Lee will add the amount of Leeway (if any),
preceded by a slash sign. For example:
FS/5
Leeway indicates the amount of slack or float on the
interface, as opposed to Float on an activity.
116
Issue 1 - AMS REALTIME Projects Advanced User Guide
Time-Phasing the Network
Although, strictly speaking, the Logic AMS REALTIME
Projects is not concerned with detailed time information,
it can sometimes be useful to get a general indication in
that view as to when an activity is taking place relative to
others.
The various Time-Phased options on the Format
menu allow you to position activities against a timescale
in different ways.
Note that the activity boxes will not indicate the duration
of the activity. Only the Schedule AMS REALTIME
Projects will timescale the activity bars.
Switch Time-Phasing on and off by selecting the TimePhased option on the Format menu. A checkmark
next to the menu option will indicate that it is on.
The options under Time-Phased will allow you to now
specify further details on how the activities are to be
positioned.
The first option is Compressed or Linear. A Linear
spread sorts the activity boxes from left-to-right
depending on their start date and positions them in
columns relative to those dates. This might mean that
two activities, starting a week apart are drawn quite a
long way from each other, with blank space in between.
This layout gives a good indication of relative time spans,
but takes up a lot of room across the screen.
A Compressed spread removes the blank spaces between
activities representing times when no activities are
starting. This layout uses up much less space, but only
indicates roughly where activities start relative to each
other.
Issue 1 - AMS REALTIME Projects Advanced User Guide
117
The next option is Stacked or Spread, indicating how
activities in the same time frame are to be drawn relative
to each other. The drawing here depends on the setting
for the final option, Date Bin, but let us assume that this
is set to Week, so that each column on the screen
represents one week. If several activities all start in the
same week they can be drawn Stacked, with one on top of
the other regardless of when in that week they start.
Alternatively, they can be drawn Spread, where their
relative start dates within the week are taken into account
when positioning the activities.
The Calendar option allows you to specify which
calendar is used to label the time scale. A pop-up list
shows which calendars are defined. A calendar must be
selected in order to see the labels for Time-Phased bins.
The Date Bin option allows you select the length of time
each column represents. It can be None, Hour, Day,
Week, or Month. For example, selecting Week means
that all activities that are scheduled to start in the same
week will be drawn in the same column. The way in
which they are drawn depends whether you are using
Stacked or Spread as the Time-Phased option. Selecting
None will cause all activities with the same start date to
be drawn in the same column; if an activity has a
different start date it will be drawn in a column of its
own. No times are shown at the top of the screen.
Using the Analyze Mode to Check the Logic
You have already seen how to check network logic using
a variety of tools, such as The Path To, or selecting
specific activities. AMS REALTIME Projects’s Analyze
mode enables the logic to be checked in great detail. The
118
Issue 1 - AMS REALTIME Projects Advanced User Guide
Analyze mode highlights exactly how activities are
affected by their logic constraints.
An activity must first be selected, and then you can enter
the Analyze mode by selecting Analyze from the Mode
menu.
A timescaled diagram is drawn, with the calendar at the
top of the screen. Note that the Activity Information bar
also provides access to activity fields for the selected
activity, and also allows you to edit this information.
The activity that was selected is now drawn in the center
of the screen, and is slightly larger than the other
activities. Any activities which are required by the
current activity are drawn above it and to the left;
activities which are supported by the current activity are
drawn below it and to the right. The activities are sorted
vertically according to their level of criticality or
importance to the current activity. Those which are most
critical are drawn closest to the current activity, so that
those furthest from it are those which are least critical.
The amount of Float is indicated by a dashed line to the
right of the activity bar. The thick dashed line represents
the Free Float, the thin dashed line the Total Float.
Issue 1 - AMS REALTIME Projects Advanced User Guide
119
The constraints are drawn with their Type, and any Lag
or Leeway. If the line is drawn dark, it indicates that
there are other constraints in or out of the linked activity;
if the line is drawn light it indicates that the only
constraint in or out of that activity is to the current
activity. In the example in the figure above, the only
interface from Activity E is the one into Activity G, the
current activity. On the other hand, there are more
interfaces into Activity H than that from Activity G. If
you were to select an activity linked to the current
activity with a dotted line, it will be drawn larger to
indicate it is the current activity, but the screen does not
change in any other way.
If you change the selection to an activity linked to the
current activity with a dark line, in our example Activity
A, the screen will be redrawn to show all the other
interfaces connected to that activity.
120
Issue 1 - AMS REALTIME Projects Advanced User Guide
The Analyzer AMS REALTIME Projects shows the
entire path on which the current activity lies, together
with a great deal of valuable information, including the
calendar, which is not drawn in the standard Logic mode.
The Analyzer AMS REALTIME Projects can now be
used to walk through and check the logic constraints or
to make changes to it.
Adding Constraints in the Analyzer Mode
Adding Interfaces is easy in the Analyzer mode. First
you will need to decide whether you are adding a
Required constraint or a Supports constraint. To add a
Required constraint, double-click near the top of the
screen, but below the calendar. To add a Supports
constraint, double-click near the bottom of the screen.
In both cases, a pop-up menu will appear, listing all the
activities which can be linked to the current activity with
their Activity ID and/or Description. Select the activity
you want by clicking on it. You can find the activity you
want by scrolling up and down the list or entering
enough characters to identify the activity by its ID and
Description.
Changing Constraints in the Analyzer Mode
Before you can make any changes to a constraint, you
will need to select it. Do this by clicking on the end of
the constraint which is furthest away from the current
activity. A marching dashed line indicates the interface
is selected. You can now change the Input, Output or
Gap parameters, or delete the constraint. Every change
Issue 1 - AMS REALTIME Projects Advanced User Guide
121
you make is instantly reflected in the network being
recalculated and redrawn to reflect the changes.
Free and Total Float figures are recalculated each time
you make a change. To better see the critical path, turn
the Critical flag on the Network menu is switched on;
it will be checked if it is on. If this flag is set, critical
activities will be drawn in bold in the Analyzer mode to
indicate more clearly the effect of your changes.
To change the Input value, make sure the constraint is
selected and then drag the line at the input point (i.e.
where it enters the current activity) and drag it.
Dragging to the right (i.e. later on the current activity)
increases the percentage, dragging to the left decreases
the percentage. The percentages are displayed on screen
to help you move the constraint to the correct position.
To change the Output value drag the other end of the
constraint. For example, if you select an activity where
the original constraint is a Finish-to-Start type, and you
click on the end of the constraint and drag it all the way
to the right, you will change the constraint to a Finish-toFinish type. Dragging a constraint only part way will
product a percentage constraint.
Changing the Input and Output values together can be
used to change the type of the constraint. For example,
changing from 100@0 to 0@0 changes the constraint
from a Finish-to-Start to a Start-to-Start.
To change the Gap value, drag the constraint from its
mid-point. Drag to the right for positive gap, or to the
left for negative gap. Again, AMS REALTIME Projects
122
Issue 1 - AMS REALTIME Projects Advanced User Guide
displays the current gap to help you move the mouse to
the right position before letting go.
To delete the constraint, press the Backspace key while
the constraint is selected.
Analyzing your Network
You have already seen how the positioning of the
activities allows you to understand more clearly how an
activity’s dates have been calculated. The Required
activity most critical to the current activity will be drawn
immediately above it, and it is this activity which
determines the start date of the current activity. In the
example below, Activity D is more critical to Activity I
than is Activity H, and is therefore drawn closer to it. (It
also has less float than Activity H, another indicator that
you will find useful.)
You could then focus on that required activity (in this
case Activity D), and examine it to see which other
activities have in turn determined its position on the
timescale. In this example, Activity C is the activity
which determines the start of Activity D. Stepping back
through the activities in this way allows you to check the
critical path analysis to ensure you understand how it has
calculated the network dates.
You may find that you need to alternate between the
Analyze mode and the Schedule mode so that you can
move between the low-level detail and the ‘big picture’,
but with some practice you will find a method that works
for you.
Issue 1 - AMS REALTIME Projects Advanced User Guide
123
In addition to being able to analyze the network visually,
there is a very powerful tool available in AMS
REALTIME Projects’s Analyze AMS REALTIME
Projects to enable you to check the logic numerically.
This is the Network Analyzer dialog box and allows you
to ‘walk through’the network, checking its logic and
changing it where necessary. The fact that you are using
a numeric representation makes this method particularly
useful for finding where numbers originate in the
network. For example, you might be trying to find out
exactly why an activity has 4 days of total float, and this
method enables you to look for the where the figure 4
originates.
To access the dialog box, double-click on the activity you
are interested in.
The current activity is shown in the center section of the
dialog box. At the top of the box are the Required
activities, at the bottom are the Supported activities. The
number of activities in each category is indicated in the
banner at the top of the section. The Prev and Next
buttons allows you to step through the activities if there is
more than one in each Required or Supported section.
124
Issue 1 - AMS REALTIME Projects Advanced User Guide
To move through the network by changing the current
activity, use the Prev, Next, Bwd or Fwd buttons in the
center section. Bwd and Fwd allow you to step through
to the activities currently displayed in the Required and
Supported sections respectively. In the figure above,
clicking Fwd in the Required section would move you to
Activity G. Prev and Next step you through the schedule
activity by activity, not necessarily via the interfaces but
in the order in which the activities appear in Schedule
mode.
The constraint information shows the Type, Output and
Input Percentages, Gap and Leeway, which is the amount
of float on the constraint itself.
The activity information shows the Activity ID,
Description, Total Float (TF) and Free Float (FF).
Changing the Constraints using the Analyzer Dialog Box
Once you have found the appropriate activity in the
Predecessor or Successor section, you can delete the
interface to it by clicking the Delete button. The dialog
box is updated after the network has been recalculated.
You can amend the constraint information by changing
the Type (which cycles round the types FS, SS, FF, FS
and %), the Output and Input Percentages, or the Lag. If
you change either of the percentages, the Type
automatically changes to %. The Leeway cannot be
changed, as it is a calculated field.
When you have made all the changes you want, click
Update to recalculate the network and update the dialog
box.
To exit, click Done.
Publishing Network Information
To print information showing the logical connections
between activities, you can either:
Issue 1 - AMS REALTIME Projects Advanced User Guide
125
• Amend the Schedule mode to include any settings
you wish, such as Show Float, Show Flow, etc. and
then move to Vision mode
• In Vision mode, insert the MetaFrame called Logic.
This will allow you to insert a rectangle containing
the network in Logic mode as shown in the figure
below.
126
Issue 1 - AMS REALTIME Projects Advanced User Guide
Chapter 6 - Advanced
Resources
Introduction to this Chapter
Chapter 7, Resources, in the Basic User Guide, outlined
the basic use of resources within AMS REALTIME
Projects.
This chapter is intended to provide further, much more
detailed information about how you can manage
resources, providing greater insight into the complexities
of the project and solutions to various issues concerning
your use of resources. There are three primary types of
information in this chapter:
• How resource data is stored, and how it can be
manipulated
• How to view resource information on screen
• How to manipulate activities and resources to
achieve the most workable plan for the project.
The first few sections provide information about the
resource data that is stored in AMS REALTIME Projects.
Issue 1 - AMS REALTIME Projects Advanced User Guide
127
As with activity information, this is stored in tables.
With resources, there are many more tables available,
and each is covered in turn. Again, as with activity
information, it is possible to define your own data
requirements in the form of extension fields, and to then
store values in those fields.
The use of these extension fields will depend on your
specific requirements from a project planning and
management application. However, there are some
powerful facilities within AMS REALTIME Projects
which enable you to make use of specific extensions to
provide detailed views into the resources and how they
are organized. This assumes that you are using
extensions to allocate resources to a Group, and then
provides facilities to produce summary information
according to these groupings. Another option enables
you to further break down resource allocations - to Cost
Centers (grouped or not).
These different “dimensions” on the resource data are
illustrated below, and are covered in detail in the sections
Resource Group Summarization and Cost Centers, below.
This figure shows the relationship between the Group (in
this case Department), Resource and Activity. The figure
below shows how a further dimension is added by the use
of Cost Centers (in this case representing Areas).
128
Issue 1 - AMS REALTIME Projects Advanced User Guide
In addition, the Resource Calendars section outlines the
way in which resources can be associated with specific
working calendars.
The two sections Displaying Extensions in the Schedule
View and The Resource Window Menus cover the large
number of ways in which resource information can be
viewed in AMS REALTIME Projects. This ranges from
simply viewing resource extensions in the Schedule mode
(as well as in Table mode), to the sophisticated range of
spreadsheet and graphic displays available in Resource
mode.
The final sections of the chapter deal with Resource
Leveling. In the Basic User Guide you saw how to make
changes to the activities and their resource assignments
to get a better match between resources requirements and
the availability in the pool. In this chapter, we will
explore the automatic functions which AMS REALTIME
Projects makes available, and the effect each may have
on the final schedule.
Related Topics
For the basic information on the use of resources, see
Chapter 7, Resources, in the Basic User Guide.
Issue 1 - AMS REALTIME Projects Advanced User Guide
129
For information on the use of Cost Elements to
summarize resource cost information, see Chapter 7,
Costs.
Resource information can be imported from other
schedules. For information see Chapter 9, Data
Exchange.
The Resource Tables
There are various Resource tables available in AMS
REALTIME Projects, providing a full range of facilities
for storing any data you require about the different
resources and their use within your project.
To access the tables, ensure that the Resources mode is
selected, and then use the Mode menu to select Tables.
Once in Table mode, the Table menu lists all the
Resource tables available. They are indented below the
Resource Table. These all store more specific resource
information. The section below provide details on the
contents of these tables.
The Resource Table
The Resource Table holds the general resource
information that you can also find on the Resource
Information dialog, seen in Chapter 7, Resources, in the
Basic User Guide. From this table you can access values
such as the resource ID, Description, Unit (of measure),
Cost Per Unit, Increment and whether the resource is
renewable or depletable (Ren/Dep).
When you click in the Unit and Ren/Dep fields, a pop-up
list shows the valid values. The Calendar field can be
added to the table’s default columns.
Each row in the table represents a different resource.
130
Issue 1 - AMS REALTIME Projects Advanced User Guide
The Pool Table
The Pool Table shows the positive pool levels, or
quantity, for each resource. The table displays the a
Start, Complete (Comp), and Amount (Amt) fields. The
Amt field lists the resource quantity, and the other two
fields define the start and ending time of the quantity
available. If the pool level is to be applied over an
infinite time, one or both of the date fields can be left
blank.
Since a resource’s pool can vary over time, this table lets
you define multiple availability spans for each resource,
with each time span represented by a different record in
the table.
See the section on the Pool Exts Table for information on
the additional information you could store in this table.
The Requirements Table
The Requirements Table displays all the information
associated with each resource assigned to an activity. By
default, it shows fields for the Act Desc, Res Desc, Start
Offset (how long after the beginning of the relevant
activity the resource usage starts), Complete Offset (how
long before the end of the relevant activity the resource
usage ends), Amount and Type (which may be Level,
Total or Effort). Where appropriate, AMS REALTIME
Projects displays a pop-up pick list of valid values.
Additional fields which can be displayed include the Act
ID, Res ID, Cost Center, Duration, Start Date, Comp
Date, Max. LOE, Min. LOE, and Spread.
As with the Pool Table, this table lets you use multiple
lines to represent usage variations.
Issue 1 - AMS REALTIME Projects Advanced User Guide
131
See the section on the Requirements Extension Table, for
information on the additional user-defined fields that can
store data directly related to the records in this table.
The Summaries Table
This table displays resources against time. The
Summaries Table can contain many different types of
data, depending on which information is currently
displayed in the spreadsheet in the Resource Window in
Schedule mode. If you have Conflict selected, no
information is displayed.
Each row in the table represents one resource. Dates are
shown across the top of the table, with the timescale
matching that currently in use in Schedule mode.
Columns will match the current gridline selection in the
resource window, which also matches the calendar
settings. For example, if weekly gridlines are set in the
resource window with Planned Usage showing, the
Summaries table will show the planned usage by week
for each resource. This table can be dumped to a tab,
comma or space delimited text file for use with a
spreadsheet or other document.
The figure below shows the Summaries table with the
Usage plane selected.
For a full explanation of the data in this table, see the
section on The Spreadsheet Menu, below..
132
Issue 1 - AMS REALTIME Projects Advanced User Guide
The Pool Exts Table
The first pool extension field
is assumed to be a "group
code", which can be used to
group multiple resources
together under one heading.
If you intend to use this
feature, you must remember
to use the first pool extension
field. If you do not plan on
using this feature, you can
assign anything to the first
field. For more information
on resource grouping, see the
section on Resource Group
Summarization, below.
Some resources defined in the Resource Pool Extensions
have pre-defined uses associated with them. See the
section, The Resource Pool Table, above. It is
sometimes useful to assign user-defined extension fields
to each of these resources to track such items as the
supplying organization, skill level, or any other data.
The Resource Pool Extension table is used to display
and assign values to any extension fields which may
have been defined for the resources. Extension labels
are assigned in the Extension Label table, which is
discussed in the next section. If you do not have any
pool extension fields defined, this table only displays
the resource names.
During the rollup process you can use these extension
fields for consolidating resource information. If you are
doing a File Rollup of one or more schedules, any
resource extension can be used to consolidate resource
usage. When you start a File Rollup, you can specify
which field to use. You may want to use the extension
fields, for example, to accommodate different
consolidations, such as by Skill, by Department, by Site,
and so on.
When carrying out a project rollup, the first resource
extension field can be user for summarization (See
resource group summarization.)
The extension fields can also be viewed in the Schedule
view. See the section Displaying Extensions in the
Schedule View, below.
Issue 1 - AMS REALTIME Projects Advanced User Guide
133
The Extension Fields Table
The Ext Fields table shows all the different types of
extensions that can be defined, including any extension
definitions that you have already made, in one table.
As outlined in Chapter 5, Activities, in the Basic User
Guide, activity extensions can be set up for activities or
the whole schedule using the Project menu, and values
entered using the Activity menu, or table. For
resources, this table is the only place where you can
define the extension fields you want to use.
The first two columns show the labels for Activity
Extension Fields and their data types. The next two
columns show the Schedule Extension Fields and their
values.
The last columns are where you can define the labels for
the Resource Pool Extensions (covered in the previous
section), and the Requirement Extensions (covered in the
next section).
The Requirement Extension Tables
As well as using resource pool extension fields to add
information about each individual resource, you may
want to add information of your own to the requirements
you have assigned to each activity. You may want, for
example, to track the resource by assigning work order
numbers, or purchase order numbers, or the name of the
authorizing manager.
Since the requirement can be “seen” from the viewpoint
of either activity or of the resource, the requirement
extension field values cannot be displayed in a single
table. AMS REALTIME Projects uses two sets of tables
to display them, as described below.
134
Issue 1 - AMS REALTIME Projects Advanced User Guide
Extensions by Resource
The Req Exts/Act Table provides several tables, one table
for each activity, with each record representing one
resource. The first column uses the activity description
as a heading, the cells below contain the resource names.
The other columns are the requirement extension fields.
If you do not have any fields defined, the only column is
the resource names.
Extensions by Activity
The Req Exts/Res Table also has many “sub-tables”, but
this view provides one table for each resource. The
resource name is listed at the top of the first column, with
the different activities listed below. Any requirement
extension fields you have defined make up the rest of the
columns. If you do not have any fields defined, the only
column is the activity names.
Issue 1 - AMS REALTIME Projects Advanced User Guide
135
On either of these tables, you can use the Next... and
Prev... items in the Edit menu to move from resource to
resource, or activity to activity, displaying the different
tables. You can also use the Pick... option to select a
new resource or activity, whichever is the primary
selection. Selecting this item opens a pop-up menu
listing all the activities or resources in the schedule
The Usage Table
The Resource Usage table is one of the more advanced
features of AMS REALTIME Projects. It can be used
both for viewing and modifying resource usage and cost
information. The description that follows requires a
working knowledge of many different functions of AMS
REALTIME Projects, including resource and cost data.
For more information, see the rest of this chapter and
Chapter 7, Costs.
136
Issue 1 - AMS REALTIME Projects Advanced User Guide
The Default Display
The Usage Table displays how much of a resource is
being used by a particular activity at any given time. By
default, each table represents one activity. The activity
name appears in the upper-left corner of the spreadsheet
as the first column heading. You can switch to a
different activity using the Next... and Prev... items in
the Edit menu. You can also use the Pick... option to
select a new activity. Selecting this item opens a pop-up
menu listing all the activities in the schedule.
The first column lists the resources used by the displayed
activity. By looking across the spreadsheet you can see
the resource usage divided into cost bins.
Dimensions in the Table
Under the default settings, this table ignores Cost Centers
and Data Types (the Planned, Actual and Baseline
planes). If they were displayed, they would appear
indented underneath each resource name, and the
resource row would contain the total values for all the
cost centers.
The top of the screen always displays the time axis, but
you can configure the display of the other axes.
Issue 1 - AMS REALTIME Projects Advanced User Guide
137
The five dimensions are listed below:
Time
Time is broken down into periods, such as days,
weeks, and months, along the horizontal axis of
the spreadsheet. The current gridline settings
in the resource window control the size of
these periods. The Project Start and Complete
dates control the scope of the table.
Apart from changing the timescale, this axis
remains unchangeable.
Activities
Each activity in the schedule represents one
entry along a second axis in the table. By
default you can view one activity at a time, i.e.
each activity is shown on its own “page” of the
Usage table.
Resources
Resources constitute another axis of the
spreadsheet. Combined with Time and
Activities, you can see when each activity is
using a particular resource.
Cost
Centers
The utilization of a resource by an activity can
be spread out over one or more cost centers.
These cost centers represent yet another
possible axis of the spreadsheet.
Type
Finally, the four-dimensional spreadsheet
described above is replicated three times
through another axis, which allows the tracking
of information for Planned, Actual, and
Baseline values. This allows comparisons that
are essential for performing cost variance
analysis and calculating BCWS, BCWP, and
ACWP as described in Chapter 7, Costs.
(Planned,
Actual,
Baseline)
Changing the Display of the Different Dimensions
To change the Usage Table’s display of different axes,
use the Edit menu to select Set Order... This opens the
Usage Table Options dialog box, which controls which
axes are shown and how they are arranged.
138
Issue 1 - AMS REALTIME Projects Advanced User Guide
Each dimension, except Time, is listed along the top of
this dialog box, with checkboxes controlling their
inclusion in the table. The Time axis can only be
changed by changing the size of the gridlines, which can
be done by resizing the calendar timeline or by selecting
specific gridlines using the pop-up under the Calendar
tool..
Checking a dimension adds it to the table, while
unchecking a dimension removes it from the table.
Underneath each dimension name are four numbered
radio buttons. These represent the order in which they
will be displayed. One table is created for each element
of the dimension numbered “1”. In the example dialog
box above, this means that there will be one table for
each Activity.
As with Activities in the default display, the name of the
current element acts as the first column heading. The
left side of the table holds the elements in the dimension
numbered “2.” Resources appear this way with the
default settings. The dimensions numbered “3” and “4”
are also shown along the left side of the spreadsheet, but
they are indented under each element in the second
dimension. See the figure on page 6-11 for a spreadsheet
with time, activities, resources, and cost centers.
The effect of changing the order is shown in the figure
below, which shows the dialog box settings and the
resulting display.
Issue 1 - AMS REALTIME Projects Advanced User Guide
139
Because you can specify the order of these dimensions,
this mechanism allows you to look at the fivedimensional spreadsheet from any angle or perspective.
This is a powerful way of looking at a resource problem
from the perspective of activities, resources, cost centers,
or data types.
If you include the Type dimension in your table, you can
control which data types the table displays using the
three check boxes, labeled Planned, Actuals, and
Baseline, located beneath the Type checkbox. Unlike the
other dimension elements, the planned, actual, and
baseline planes do not add up to a summary value.
Every usage value falls into one of the three cost planes,
so the table must still use one of the three data types even
if the Type dimension is disabled. The type used is the
first type that is checked, even if the Type category is
disabled. By default, all three are checked, and Planned
resource usage is shown.
140
Issue 1 - AMS REALTIME Projects Advanced User Guide
For more information on these cost planes, see the
section on The Resource Window Menus, below.
Changing Other Aspects of the Display
The other check boxes in the Usage Table Options dialog
control other aspects of the display. The first box, titled
Paged, controls the manner in which the 1st dimension is
organized. When checked, this box splits the first
dimension axis into multiple tables, or pages. For
example, if Cost Center is the first dimension, this would
give you a new page for each new Cost Center. With
extremely large schedules, working with a Paged Usage
table may be necessary to conserve memory.
Unchecking it causes the first dimension to occupy the
left column, with the 2nd, 3rd, and 4th dimensions are
indented underneath appropriately. This box defaults to
checked.
The Totals across check box, when selected, adds a new
column to your table between the first column and the
dates. Each row in the table sums into this field, labeled
TOTALS. The box is unchecked by default.
By default, when you have enough dimensions to require
indentation along the left column, only the lowest-level
dimension contains values. The other rows merely act as
visual separators to improve clarity.
The other rows can, however, hold the totals of the rows
below them. The Totals down check box controls
whether the intermediate dimensions have blank lines or
total values. When this box is checked, each summary
row holds the total of its component rows. For example,
using the default dimension order, Cost Centers total into
Issue 1 - AMS REALTIME Projects Advanced User Guide
141
Resource rows, and Resources total into Activity rows. If
Type is a dimension in your table, this check box cannot
be used, since different types cannot be added together.
By default, this box is unchecked.
The figure below shows the effect of checking both Totals
boxes.
Checking the By cost box shows the cost of the resource
usage rather than the resource usage itself. Dollar signs
appear before the values when this box is checked to
remind you that you are viewing dollar amounts. When
this box is unchecked, the numbers in the table are in the
units of the resource. The box defaults to unchecked.
Note that the costs shown in the Usage table will only
apply if you have defined a flat cost per unit in the
resource definition. Costs derived from elements,
calculations or rate tables must be viewed in the Costs
table.
142
Issue 1 - AMS REALTIME Projects Advanced User Guide
Use the configuration option INTLMONEYSIGN to
change the default from dollar signs to any other
currency sign.
The Condense box can be used to create smaller
spreadsheets containing only rows that contain resource
values. In other words, lines with all zero values are
excluded. This box defaults to unchecked.
Resource Group Summarization
Just as rolling up a project provides a summary view of
the activities in the project, you may also want to present
resource information in a summarized form. For
example, senior management may not be interested in
individuals and their usage, but will be interested in
seeing how efficiently we are using our total Engineering
resource.
AMS REALTIME Projects allows you to summarize
resource usage information during a Project Rollup. The
planned resource and actual usages are summarized by
the contents of the first pool extension into the matching
summary resource.
Resource usage can be summarized into multiple levels.
For example, the planned usage of Bob and Joe may both
summarize into an Engineering summary resource, and
the Engineering, Programming, and Technician
summary resources may also summarize into another
summary resource called Technical Manpower.
Issue 1 - AMS REALTIME Projects Advanced User Guide
143
These configuration switches affect resource
summarization: Ensure that EROLLMAPRQS=Y to
summarize resource usage, and EROLLMAPARQS=Y
to include Actual resource usage as well.
To summarize resource information:
• In Table mode, select the Ext Labels Table
• Create a Resource Pool extension field label called
Group (or any other name) in the first Pool
Extension field.
• Create summary resources and specific resources in
the Resource table. In the Resource Extensions (Res
Exts) table, enter the summary resource name that
the usage should be summed into under the Group
column.
Tech and Adim. group should be blank
• If a resource specifies a summary resource for
resource summarization, all usage will also be
summed up into the summary resource, showing that
usage against the summary title activity. If a
summary resource is assigned to a task, that amount
will also be maintained in the total. AMS
REALTIME Projects internally differentiates
between “real” resource usage and usage that comes
from a summary. However, if you assign summary
resources directly, it will produce confusing results,
so it is not a recommended practice.
NOTE: Summary resources are no longer identified by
having the contents of their Group match their Resource
Description, since multiple levels of summarization are
144
Issue 1 - AMS REALTIME Projects Advanced User Guide
now supported. They are simply identified by having
another resource specify them as a summary.
• If there is no Title in the schedule, insert a Title
activity before the first line to collect the schedule
summary. (Alternatively insure that you have title
bars defined at each summary level of your WBS.)
• Create resource requirements by selecting an activity
and clicking on the box to the left of each required
resource description. Do this until you have all
necessary requirements.
A File Rollup will also
consolidate on the Pool
extension to create a grouped
histogram in conjunction with
Project Rollups.
• Select Project Rollup from the Project menu.
Choose the usage view in the resource window. The
summary resource will contain the total resource
requirement for its type. Selecting the Summary
Resource name will create a histogram view of the
summary resource. If the summary resource does
not contain the expected summary, check the setting
for the configuration switches as shown in the note
above.
Cost Centers
You have already seen how resources can be grouped
together, using the Group field, to provide summarized
information. In a similar way, you can assign resources
to Cost Centers. This provides the ability to take a
different “cut” across the resource information, adding a
third dimension to the resource assignment as well as an
additional way in which usage can be summarized.
Different activities’use of the same resource may be
charged to different cost centers. For example, an
engineer’s time may be charged differently for different
tasks; maybe to different Areas of the company,
Issue 1 - AMS REALTIME Projects Advanced User Guide
145
depending on where the “contract” for his or her time
originates.
Alternatively, one activity’s use of a resource may be
spread over more than one cost center. For example, an
engineer carrying out routine maintenance may be
charged as an overhead to all Areas of the company.
After assigning the resource to a Group, a Cost Center
and to an Activity, we can then see the costs for that
resource as part of the costs for the Group as a whole, as
part of a total cost within a Cost Center, or as part of the
activity’s costs.
If you do not use the Cost Center capability, all the
resource assignments will be associated with the first cost
center.
Using Cost Centers
Open up the list of Cost Centers by dragging the size box
to the left of the resource size box.
Once the Cost Center area is displayed, you can use it in
the say way as you have already seen for the resource
146
Issue 1 - AMS REALTIME Projects Advanced User Guide
label area, by scrolling through the list and carrying out
any of the following operations:
• First, select the activity to which the resource will be
assigned.
• If you need to create or modify a Cost Center,
double-click on the Cost Center label to access the
dialog box. If you are creating a new cost center, use
the first blank line in the table.
Once a Resource and Cost
Center have been selected,
you can make any type of
resource assignment and still
break down the resource
usage by Cost Center.
• Click on the Cost Center label to select that Cost
Center. This will highlight the resource box for any
resources already associated with it.
• Click on a Resource label to select a resource.
• Click on the Cost Center button (to the left of the
label) or the Resource button (to the left of the
resource) while a resource is selected to assign or
remove the resource. If the Cost Center button is
currently clear, then the resource is not assigned;
black indicates that it is assigned.
• Repeat for each cost center to be charged against for
this activity’s use of resources.
Issue 1 - AMS REALTIME Projects Advanced User Guide
147
Resource Calendars
The definition of working calendars is covered in detail
in Chapter 4, Calendars, of the Basic User Guide. In that
chapter we discussed the use of calendars to schedule the
work that has to take place to complete activity. This
type of calendar assignment, however, assumes that the
resource is available whenever work is due to take place.
This may not be the case. For example, we may have
planned for work to take place Monday through Friday
every week throughout the project, and initially, activities
have been scheduled against this calendar. When we
come to assign a specific resource, we may find that is
available for different hours, maybe because we are using
outside contractors to work on the activity and they work
from Monday through Thursday.
To take this situation into account, AMS REALTIME
Projects allows you to assign resources to different
calendars, and will then take the working time for the
resource into account when scheduling work.
You must ensure that the following Configuration
Options are set as you want them:
148
1.
(Default) all resource usage is calculated against the
default calendar (the first in the list) regardless of
the activity calendar, which is used for network and
date calculations.
2.
RZRESCALUSAGE=Y makes the resource usage
calculate from the resource’s calendar.
3.
REQCAL=Y and/or POOLCAL=Y makes the
resource usage calculate from the specific activity
calendar, but the resource availability calculate from
the resource calendar.
Issue 1 - AMS REALTIME Projects Advanced User Guide
To assign a resource to a calendar, first make sure that
you have set up the appropriate calendar. Then doubleclick the resource button. Select the calendar you require
from the pop-up list.
You must take care when mixing activities on one
calendar with resources on different calendars. For the
purposes of calculating when an activity is being worked
on, and therefore when the requirements are taken out of
the pool, the activity calendar is used. The resource
calendar is used to indicate when a resource may be
available for leveling.
Displaying Extensions in the Schedule View
When you have defined resource extensions, they can
also be viewed in Schedule mode, as a “pullout” table in
the Resources window.
This facility is controlled by a setting in the
Configuration file; you should ensure that RZXTAB=Y.
To see the extension fields, drag the pullout box, which is
shown to the upper right of the Resource Description
column. Once they are displayed, the extension fields
can be resized, edited, or hidden in exactly the same way
as the other tables can be manipulated (see Chapter 3,
Getting Started, in the Basic User Guide).
In this example the Group field (a Resource Pool
extension field) is displayed.
If no activity is selected, the Resource Pool Extensions
are shown. If an activity is selected, the display shows
the Requirement Extensions for that resource and
activity.
Issue 1 - AMS REALTIME Projects Advanced User Guide
149
The fields in this table can be individually edited, but the
Edit Copy and Paste functions in the Schedule mode
are limited to the selected activities, and do not operate
on any of the table cells.
The display of Resource Pool extensions is particularly
useful when using resource summarization or skill level
codes, since they can be shown adjacent to the resource
names. See the section on Resource Group
Summarization, above, for more information on this
topic.
The Resource Window Menus
When no requirements are selected, menus at the top of
the Resource Window control what information is
displayed.
The four menus are listed below, and discussed in more
detail in the rest of this section:
• The View menu (currently showing conflict)
Selects the view to determine the resource information
you want displayed.
• The Plane menu (currently showing planned)
Selects the resource data you want displayed: Planned,
Actual or Baseline.
• The Filter and Sort menu
Allows for various combinations of resource filters and
resource sort options. This menu also provides
access to the Resource Analyser mode options.
• The Units menu ( currently showing none.)
Selects the units in which you want the resource data
displayed.
150
Issue 1 - AMS REALTIME Projects Advanced User Guide
The View Menu
Clicking on the View menu, you can see a list of the
various resource views available. Except for Conflict,
the menu items all employ a spreadsheet view to display
information. This is a table dividing the resources into
date bins according to the current calendar grid lines. If
these grid lines are too close together, no numbers are
displayed. You must have some gridlines in the schedule
window to get a spreadsheet table in the resource
window.
The numbers in these tables are expressed in the units
specified by the Unit menu (see the section on The Unit
Menu, below).
Conflict
The Conflict view shows an overall picture of resource
usage and availability throughout the schedule using
color-coded bars. All usage in the schedule is
summarized onto one line for each resource. Blue
indicates that there is some resource availability, white
indicates that the resource is wholly committed, and red
indicates over-commitment for the resource.
With no activities selected, you can click on any colored
area and get a pop-up of the activities to which the
resource is assigned. This helps to determine the source
of conflicts, which is the first step toward resolution.
Usage
The Usage option displays the total amount of each
resource being used at any given time. This view does
not tell you which activities are using the resources or
how the usage is distributed among the activities, but
provides a summary for the resource.
Issue 1 - AMS REALTIME Projects Advanced User Guide
151
The example in the figure shows the total number of
person-weeks required by all the activities for each week
of the project.
Usage+
The Usage+ option shows the cumulative resource
usage by activities over time. This option is useful for
recording total-to-date values.
The example above shows the same overall usage of
resources by activities as the example for Usage above,
but this time the figures have been cumulated.
Usage Min/Max
The Usage Min/Max option displays the number of
resources, rather than total number of resource units,
used in the time period. If the usage varies within the
current bin, the minimum and maximum values are
displayed, separated by a slash (/). Change the timeline
scale to see smaller periods to gain better resolution.
Usage %
The Usage % option displays the percentage of a
resource that is in use at any given time. For renewable
resources, this number is merely the percentage within
any time period. For depletable resources, the number
represents the percentage of the resource that has been
used in all time periods up to the current time. If more
152
Issue 1 - AMS REALTIME Projects Advanced User Guide
than the available resource is required, the percentage is
greater than 100 and appears in red.
Cost
The Cost option displays the cost for each resource in
each time period. This spreadsheet therefore shows the
Usage figure multiplied by the resource’s Cost Per Unit
(from the Resource Information dialog or Pool Table).
Note that this will only provide costs calculated by a flat
rate per unit directly from resource usage. If you have
used rate tables or elements of cost, use the Costs table
for this information.
Cost+
The Cost+ option shows the cumulative total amount a
resource has cost you up to a given point in time. It is
the Usage+ figure multiplied by the resources’Cost Per
Unit.
Available
The Available option tells you how much of a resource
is still available at any given time, after the activity
requirements have been deducted from the pool. In terms
of the spreadsheets, it is the difference between Usage
and Pool for each time period.
This option is useful for finding when you may have
resources still available in order to reposition conflicting
Issue 1 - AMS REALTIME Projects Advanced User Guide
153
activities. If a resource is over-committed, the value is
negative and is displayed in red.
This spreadsheet is similar to the conflict analyzer, but
this time gives a numeric representation of your
schedule’s resource allocation, rather than the graphical
view in Conflict mode.
Avail Min/Max
The Avail Min/Max option displays the number of
resources available, rather than total unit availability for
the time period. If the availability varies within the time
period, the minimum and maximum values are displayed,
separated by a slash (/).
Pool
The Pool option displays how much of each resource
exists in the pool at any given time. This is how much of
a resource is available before any activities use it, shown
as a total number of units for each time period.
In the example above, the units for the resource (set in
the Resource Information dialog) are Weeks. The time
period determined by the gridlines in the Timeline is
weeks. Therefore the values in the spreadsheet indicate
the number of person-weeks available per week.
154
Issue 1 - AMS REALTIME Projects Advanced User Guide
Pool Min/Max
The Pool Min/Max option displays the number of units
of resource available in each time period. For example, if
you have one Engineer available throughout the project,
the figure 1 will appear in this spreadsheet for each time
period, indicating one person available every day. This
compares with the figure 5 in the Pool spreadsheet,
indicating 5 person-days available within the weekly bin.
The Pool figure will vary with the duration of the time
period; the Pool Level will remain the same if the
availability is the same.
If the pool availability varies within the time period, the
minimum and maximum values are displayed, separated
by a slash (/).
The Plane Menu
As with so much else in the display of resources, the
Resource Window display can be thought of as threedimensional, with resource usage as one dimension
(vertical), time as the second dimension (horizontal), and
three distinct planes— Planned, Actual, and
Baseline— as the third dimension (depth). These
planes all hold independent usage values, but not
different pool values.
The default plane is Planned. Use the Planes menu to
switch to a different plane.
Issue 1 - AMS REALTIME Projects Advanced User Guide
155
Planned Values
Most of your resource work takes place in the Planned
plane. The resulting views represents planned resource
usage and costs for each activity.
Actual Values
The Actual plane shows figures representing how much
of a resource was really used for each activity, or possibly
how much the resource really cost. You will most likely
use this plane for entering actual resource usage (such as
hours or days) periodically once the project begins,
although this information can also be loaded from other
sources..
Baseline Values
The Baseline plane only holds values if you have
previously baselined your project. You cannot make any
changes to the Baseline plane directly; it is therefore a
“read only” view, but is useful for holding a copy of your
resource data while you experiment with changing the
planned values during “what-if analysis”. This data can
only be altered by re-baselining specific activities or the
entire schedule with different resource data.
The Filter and Sort Menu
This menu is used for filtering out the resource
information that you do not need to see. In a very large
project, or a project which uses a large number of
resources, the sheer volume of information can make the
Spreadsheets difficult to read. You will, therefore, want
to select only the information that concerns you at
present. A plus sign next to any of these options
indicates that it is active, while a minus sign indicates
that it is off.
The various menu options are discussed below.
156
Issue 1 - AMS REALTIME Projects Advanced User Guide
Lock
This locks the currently displayed resource options. If
you select just the resources used for a specific activity,
then Lock, and move to a new activity with no resource
assignments, the resource set is still selected, allowing
you to keep them on display for applying the same
resource set to a new task.
No Filter
This turns off any other selected options, and therefore
returns the spreadsheet to showing full information for
all resources and all activities.
Time Window
This option means that the Resource Window only
displays the resources (down the left-hand column) that
are being displayed in the current time window. Any
resources used before or after this time are not displayed.
Activity Selection
This option displays only those resources required by the
activities currently selected.
Issue 1 - AMS REALTIME Projects Advanced User Guide
157
In Use
This option displays only those resources being used in
the current schedule. Any resources not yet assigned to
any activities will not be displayed.
In Conflict
This option displays only those resources that are in
conflict. If the resource is not overloaded it will not be
displayed.
No Sort
The three options below this are used to specify the order
in which resources should be sorted. This option will
turn off any option already set and display the resources
in the order in which they were created.
By Group
Sorts the resources down the window in the order
determined by the first Resource Pool Extension field.
By default, this field is used to indicate the Group to
which this resource belongs.
By Name
Sorts the resources down the window in the order
determined by the Resource Name..
By Conflict
Sorts the resources in the order of most conflict to least
conflict. This allows you to deal with the biggest
problems first when analyzing resource overloads.
Analyzer
Turns on the Resource Analyzer mode. This displays a
color-coded list of the resources assigned to the selected
activity underneath the bar. Options exist for resource
categories, swapping out resources or adding resources.
158
Issue 1 - AMS REALTIME Projects Advanced User Guide
See the section on The Resource Analyzer, below, for full
information on this option.
Comments
If Comments is turned on when the Resource Analyzer is
in use, AMS REALTIME Projects will show any
populated Requirements Extension fields next to the
resource name under the activity bar in parenthesis. A
Comment field is generally used to provide information
about why a particular resource is working on that
activity.
The Units Menu
This menu allows you to determine the units in which
the resource values shown in the spreadsheet are
expressed. If None is selected, the spreadsheet uses the
defined unit for the resource, as defined in the Resource
Information dialog. Select Days, Hours, Minutes,
Weeks, or Months to show the appropriate units for
display. For example, select Weeks to show the values
expressed as person-weeks per time period..
The Resource Analyzer
The Resource Analyzer facility in AMS REALTIME
Projects provides increased visibility and control over the
resource usage on an activity. It displays beneath a
selected activity a pop-up list of the resources used on
that activity. This list can be used to view or make
changes to the current resource allocation by adding,
deleting and substituting resources.
The resource list in the Resource Windows are color
coded to indicate which resources are available, not
available and overcommitted. This greatly assists you in
analyzing the current allocations and in taking corrective
action. Colors are:Available = Blue
Issue 1 - AMS REALTIME Projects Advanced User Guide
159
Conflict = Red
Unavailable = Green
Resources can be grouped by skill type or group category,
as discussed above in the context of resource
summarization (see the section on Resource Group
Summarization). This allows the initial project planning
to be done on a generalized basis, and then each generic
resource to be substituted by a specific individual
resource. The Resource Analyzer can also be configured
to display only selected group categories, which provides
an instant focus on where resource assignment is critical.
You may wish to use this method before you attempt to
level the resources (see the section on The Resource
Leveler, below).
Setting up the Resource Analyzer
Make sure the following switches are set in the .ini file.
RZANALYZER=Y ( This allows the use of the resource
analyzer mode.
RZXTAB=Y ( This allows use of the resource pullout
table)
1STRESCAT=n This indicates the group or category
labels for resource analyzer display. These groups will
be defined starting in the first project extension following
the nth one. If you wanted to use the tenth project
extension onwards to define your groups, you should set
the ini switch 1STRESCAT=9.
Using the Analyzer Mode
To use the Analyzer mode, turn on the Resource
Analyzer (using the Filter menu in the Resource
Window to click on Analyzer). The option will be
checked when it is selected.
160
Issue 1 - AMS REALTIME Projects Advanced User Guide
Selecting an activity or activities in the schedule will
produce a pop-up display under the activity bar. The
resources displayed will be of the first group type listed.
Selecting a different group will change the display to
show the resources in the selected group.
To display all resource categories with a schedule
extension value of Y, use the left mouse button to select
All. To display all resource categories regardless of
specified type (Y or N), use the right mouse button to
select All.
To see a pop-up menu of all unassigned resources in the
currently selected group, click on a resource from the
pop-up.
To replace that resource with one from the list, use the
left mouse button to click on a new resource.
To add a resource from the list, use the right mouse
button to click on a new resource.
On Macintosh platforms, use Alt-click instead of the
right mouse button to add resources. Clicking the mouse
normally will replace resources.
The Resource Leveler
In Chapter 7, Resources, in the Basic User Guide, we
looked at the situation where resource requirements were
greater than the resource availability and how manually
adjusting the assignment and activity dates might
improve the situation.
Sometimes, however, it is difficult to reschedule activities
in this way; complex resource assignments will mean
that changing one resource or activity may have
repercussions in other places in the schedule.
AMS REALTIME Projects has a facility for
automatically carrying out this resource scheduling, or
resource leveling as it is also known. This involves a
series of calculations so that the activity is positioned for
Issue 1 - AMS REALTIME Projects Advanced User Guide
161
optimal resource usage, within a set of parameters which
you can adjust.
In order to calculate this optimal position, AMS
REALTIME Projects positions each activity, following
the network order, or another order that you specify.
Once an activity has been positioned, its resource
assignment is subtracted from the resource availability.
The next activity in order is then positioned to take best
advantage of the remaining resources. This process is
repeated until all activities have been placed.
When AMS REALTIME Projects is trying to position an
activity, there are limits on the rescheduling that it can
attempt. Usually, the limits are as follows:
• The activity must be placed within the constraints of
the network order.
• The activity cannot be placed where it is scheduled
to start any earlier than its early start or finish later
than its late finish, unless a float window is
specified.
• The leveler will follow the network in the current
top-down order, so priorities can be established by
sorting on one or more activity extension fields.
By default, AMS REALTIME Projects will attempt to
position the activity at the earliest point within this date
range so that it is not causing a resource conflict. If this
is not possible, it will be positioned at the earliest date at
which it is in minimum overload.
You can also schedule activities in reverse, from a fixed
project end date, so that they are positioned as late as
possible. This is achieved using the Backward option
on the Network menu, see Chapter 5, Networking, in
the Basic User Guide. If you are using these options, the
Resource Leveler will position activities as late as
possible within the allowed date range.
As you saw in the Basic User Guide, any changes to an
activity’s position will be undone if the network logic is
used to recalculate the dates and override the manual
repositioning you have carried out. For the same reason,
162
Issue 1 - AMS REALTIME Projects Advanced User Guide
the changes made during automatic leveling are “fixed”.
After leveling, the activity is kept at its new position
using an internal target date.
Using the Resource Leveler with Default Settings
The Resource Leveler
tool.
To access the Resource Leveler and its options, click the
Resource Leveler tool.
To use all the default settings, simply select Resource
Level from the pop-up menu of options. If any activities
are selected, the Leveler will display a dialog asking
whether to Level All or only the Selected activities. Once
you have clicked your choice, the leveling takes place and
activities are repositioned as appropriate.
To remove the effects of leveling, select the activities and
choose Remove Leveling. The internal target dates
are removed and the network recalculated so that
activities are repositioned at their original, unleveled
positions.
Changing the Defaults
It may be that the Resource Leveler manages to
reschedule your activities using the defaults and removes
all conflicts. However, it may be that you will need to
change some of those defaults in order to get the best
solution for your project.
Before using the Resource Leveler, you will need to
establish what you are trying to achieve. As discussed in
Chapter 2, Project Management, in the Basic User Guide,
you need to decide whether you are trying to:
• Meet the original end date, making best use of
resource but accepting that some may remain in
overload
• Complete the project within the resource availability
limits, even if this means a delay to the end date of
the project
Issue 1 - AMS REALTIME Projects Advanced User Guide
163
• Achieve some sort of compromise between these two
extremes by manually removing conflict or, in AMS
REALTIME Projects, to try changing some of the
options
The other options on the Resource Leveler menu are used
to adjust the defaults and provide you with a solution
tailored to your project’s priorities.
Options for Leveling Resources
Establishing the Permitted Delay
In order to specify whether activities, and possibly the
project itself, can be delayed, you should use the Float +
option. By default this is set to 0, indicating that
activities may only be delayed by the amount of their
float, and therefore, that critical activities cannot be
moved at all.
Increasing this setting means that activities can be
delayed beyond their float, by the specified number of
days. If this results in critical activities being delayed,
then the overall end date of the project will be delayed.
If you delay the project by enough, it should be possible
to schedule activities to make best use of resources. It
may be, however, that it is impossible to remove
overloads altogether. For example, if you only have 2
Engineers available and one activity alone requires 3
Engineers, then no amount of rescheduling will solve the
problem. You will have to consider other solutions, such
as reassigning resources or adding more Engineers. You
should take care that you are not delaying the project
unnecessarily in a fruitless search for zero overloads!
Prioritizing Activities
As outlined above, the order of activities is used to
determine which activities are positioned first, and
164
Issue 1 - AMS REALTIME Projects Advanced User Guide
therefore, which are given the “first refusal” on the use of
resources.
AMS REALTIME Projects uses as its default the
industry-standard sort order of TF+DUR+ES (Total Float
+ Duration + Early Start). This means that activities
with the least float are positioned first; if activities have
the same float, i.e. all the critical activities, then the
shortest are positioned first. All other things being
equal, the activities due to start first are positioned first.
There are two ways in which you can change this order:
• Use Set Priority to use the currently-applied sort
order, such as an ascending sort on a user-defined
priority code.
To specify the sort order, select a column in the Split
Screen Table, and use the Table tool to select one of
the Sort options from the pop-up menu.
Alternatively, use the Sort option on the Format
menu in Table mode.
Make sure that you have set the priority before you use
the Set Priority option. Also ensure that you have used
By Priority as the Sort option (see below).
• Use the last option on the Resource Leveling menu
to select the priority to be used.
• The By Priority option uses the sort order you
set using Set Priority.
• The TF+DUR+ES(<) option uses the default
order as discussed above.
• The By Date (C) +Priority option uses the
current calculated Early Start to prioritize
activities and then, if any have the same start,
uses the priority field.
• The By Date (O) + Priority option uses the
original Early Start, before any leveling took
place, to prioritize activities.
Issue 1 - AMS REALTIME Projects Advanced User Guide
165
The Effect of the Sort Order on Leveling
In most circumstances, the fact that network logic
overrides any other consideration means that you may not
see much difference between the effects of different sort
orders. However, you should take care, as this is not
always the case, and changing the sort order could have a
quite significant effect on the schedule dates and the
positioning of each activity.
Take the example as shown in the figure below.
There are three 5-day activities (Activities A, B and C)
taking place on Site B, and running concurrently with
one 15-day activity (Activity D) on Site A. When all
these activities are complete, the final activity (Activity
E) can take place on Site C. As you can see from the
figure, all activities are critical.
Using the default sort order (TF+SPAN+ES), the result
of leveling would be as shown in the figure below:
166
Issue 1 - AMS REALTIME Projects Advanced User Guide
Activity D has been delayed. Although its float (TF) and
early start date (ES) are the same as Activity A, its
Duration is greater, and so it must be schedule after A.
AMS REALTIME Projects attempts to position Activity
D immediately after Activity A, where it is now in
conflict with Activity B. Again, the float and early start
are the same, but the span of D is greater than that of B,
so again D is delayed. The same process is repeated with
Activity C. Finally, Activity D can be positioned after C;
Activity E has to be delayed because the network logic
states that D must finish before E can start.
Now consider the example of the same project where we
have decided that Site A should have greater priority
than Site B when it comes to using scarce resources. The
Sort order is changed to reflect this:
Note that this placement was achieved by sorting on
Description within Site.
When we have used Set Priority with this Sort, and used
By Priority to Resource Level, the results are rather
different:
Issue 1 - AMS REALTIME Projects Advanced User Guide
167
This time, Activity D has been given priority (as it is on
Site A, first in the sort order). When AMS REALTIME
Projects attempts to resolve the conflict for resources with
Activity A, Activity A is delayed, and the other activities
delayed due to the downstream effects of the network
logic.
This may well be the result you wanted to achieve, but
then again it may not have been!
A common use of sorting is to sort into ascending
duration sequence, set the priority, unsort, and use the
BY Date (O) + Priority when leveling.
Defining “Minimum Overload”
The purpose of scheduling activities to level resources is,
ultimately, to remove overloads altogether. If this is not
possible, then AMS REALTIME Projects attempts to
schedule the appropriate activities so that they are in
minimum overload. There are two ways in which this
can be defined, and the definition used may affect your
results.
• Peak
This means that the peak level of the overload, or
maximum height in terms of the resource histogram
showing units, is used to calculate the point of
minimum overload.
• Area
168
Issue 1 - AMS REALTIME Projects Advanced User Guide
This means that the total area of the overload, i.e.
the total resource overload in resource units, is used
to calculate the point of minimum overload.
For example, you may have a situation as shown in the
figure below, where the overload reaches a peak of 2
units of labor. Using the Overload: Peak option, if AMS
REALTIME Projects could reduce this to 1 unit then this
would be accepted as a minimum overload, even though
the total area of the overload remains the same.
Similarly, if you use the Overload: Area option, the AMS
REALTIME Projects may be able to reduce the area of
the overload, even if the peak usage remains the same.
The different results will have come from rescheduling
different activities, so you will need to ensure that you are
getting the results you want.
Watching the Leveling Process
Normally, AMS REALTIME Projects will carry out all
the leveling calculations and then redraw the schedule.
If you wish, you can watch the leveling process by
forcing AMS REALTIME Projects to redraw each bar as
it is placed. Use the Animation option to achieve this.
Some computers are now too fast to see the drawing
process, even if this option is used. If you can’t see this,
you are lucky!
Issue 1 - AMS REALTIME Projects Advanced User Guide
169
Leveling Manually
The Manual option allows you to fine-tune the leveled
schedule by manually repositioning activities. You
should be careful when using this mode as the internal
target dates are updated when the activities are moved
and this will override the network positioning.
The Resource Level icon changes to a shovel when you
are using manual mode.
Printing Resource Information
When you are producing resource information it is useful
to be able to output it on project reports. You should
refer to Chapter 8, Publishing, in the Basic User Guide,
for full information on the reporting facilities within
AMS REALTIME Projects.
There are several MetaFrames which are useful for
outputting resource information. They are:
MetaFrame
Description
Resource
Outputs the current contents of the
Resource Window and plane.
Resource
Summary
Outputs the current contents of the
Resource Window and plane.
ResID
Outputs the Resource IDs in a tabular
format
ResName
Outputs the Resource Names in a
tabular format.
Where To Go From Here
Chapter 7, Costs, contains further information about the
use of resources to calculate project costs. Chapter 8,
Publishing, in the Basic User Guide, contains further
information on producing resource-based costs.
170
Issue 1 - AMS REALTIME Projects Advanced User Guide
Chapter 7 - Costs
Introduction to this Chapter
In the past, it was sometimes sufficient to plan and track
a project in terms of time, and optionally in terms of
resources. Today, costs play an increasingly important
part in the measuring of project performance.
Organizations have seen the (sometimes complex) links
and balances between the timing of activities, the use of
resources, and the costs accrued to the project.
Because costs, resources, and progress are all closely tied
together in earned value tracking, AMS REALTIME
Projects you should already be familiar with the
following chapters in the AMS REALTIME Projects
documentation:
Basic User Guide
Chapter 5
Activities
Chapter 6
Networking
Chapter 7
Resources
Chapter 9
Designing a Project Tracking Process
Advanced User Guide (this guide)
Chapter 6
Advanced Resources
Issue 1 - AMS REALTIME Projects Advanced User Guide
171
These complex interactions are brought together in the
series of techniques known collectively as Earned Value
Methods. The exact application of these methods, and
the decision as to which you will use to calculate cost
data and progress are determined by the nature of your
project and your reporting techniques. Chapter 9,
Designing a Tracking Process, in the Basic User Guide,
outlines some of the aspects of the project you should
consider when deciding on the methods you will use.
A full understanding of the different cost values is
fundamental to using these features. These and the
calculation methods are covered in detail, giving you
perspective on how the different cost terms actually apply
to your project. It is assumed that you are already
familiar with these techniques, but this chapter reviews
their details as it applies to using earned value tracking
in AMS REALTIME Projects.
The source of cost data can vary from project to project in
AMS REALTIME Projects. In general, the information
can be calculated from planned and actual resource
usage, or it can be entered manually. At its very
simplest, the cost of an activity can be estimated by a
member of the project team, and the cost entered into
AMS REALTIME Projects. Alternately, you could
assign resources to an activity and let AMS REALTIME
Projects use the unit cost of the resource to calculate the
costs. For example, a four-day activity using a resource
full time which costs $100.00 per day would result in a
cost of $400.00.
Once calculated, these costs can then be viewed in a
variety of ways. For example:
• The $400 is part of the activity cost
• The $400 contributes to the overall cost of using the
resource throughout the project
• The $400 is part of costs accrued for the time period
in which the activity takes place; that is, if you are
accounting for costs on a weekly basis, the $400
would be part of the costs for the relevant week, if
172
Issue 1 - AMS REALTIME Projects Advanced User Guide
you are using a monthly basis, the $400 is totaled
into the relevant month
• The $400 is part of the costs of whichever Group the
resource belongs to; similarly it is included as part of
the costs billed to a particular Cost Center if this
facility is being used.
In this chapter, the first section provides a step-by-step
guide to the costing process; the next few sections then
review all aspects of the different types of cost
information that are available to, and within, AMS
REALTIME Projects.
This is followed by an outline of manually entering cost
information, and of the basics of calculating costs from
resource assignments.
The next few sections cover the different “angles” from
which cost information can be viewed: by activity, by
resource, by group and by cost center, together with an
introduction to the idea of Elements of Cost.
Summary of the Cost Processes in AMS
REALTIME Projects
The flexibility of earned value tracking in AMS
REALTIME Projects can provide many different
approaches to a problem. Too much flexibility, however,
can become a problem if you do not establish a
disciplined approach to the planning and progress stages.
Consistency will provide a comprehensible schedule that
is easy to follow as the project progresses.
The following outline can be used as a checklist for how
to set up, track, and report resources, costs, and earned
value. Your methods may vary in detail, but the basic
process will be similar.
1.
Establish your reporting periods. If you will use
these periods in several schedules, then set up the
Cost Bins in the untitled.arp file so all new projects
will inherit the same periods.
Issue 1 - AMS REALTIME Projects Advanced User Guide
173
2.
If you intend to use accounting periods to match
those in other accounting systems in your
organization, create the costbins.arp file with
milestones marking each period boundary. Make
sure that the costbins.arp establishes period
boundaries well into the future to support long-range
planning. Undefined cost bins will produce
unexpected results.
See the section on Establishing Time Periods for Cost
Calculations, later in this chapter, for information on
setting up cost bins.
174
3.
Decide which cost information you will enter
manually and which you will calculate from the
resources. Set the BCWS, BCWP, ACWP, and ETC
calculation methods using the Elements of Cost
button on the Icon Toolbar. (See the section below
on Methods of Calculating the Basic Information.)
4.
Plan the activities using either calendar dates,
constraints, or a combination of both. (See Chapter
5, Activities, in the Basic User Guide.)
5.
Either enter costs manually, or assign resources so
that costs can be calculated from resource usage (see
the sections below on Manually Entering Cost
Information and Calculating Costs from Resource
Usage later in this chapter, and Chapter 7,
Resources, in the Basic User Guide).
6.
Enter a unit cost for each resource, or set up Rate
Tables to enter more complex resource costs. (See
the section on Rate Tables, later in this chapter.)
7.
If required, set up Resource Groups and/or Cost
Centers so that costs can be easily summarized (see
Chapter 6, Advanced Resources).
8.
Alternately, if your requirements for summarizing
and apportioning costs are more complex, set up
Cost Elements (see the Cost Elements sections later
in this chapter).
9.
Baseline the schedule to freeze the plan and provide
something with which to compare any future
Issue 1 - AMS REALTIME Projects Advanced User Guide
changes. (See Chapter 9, Tracking Progress on the
Project, in the Basic User Guide.)
10. Move the Time Now Line to the end of the current
reporting period.
11. Post technical progress against all tasks currently
underway.
12. Post expenditures against these tasks using either
actual resource amounts or the ACWP field in the
Costs dialog box or Costs table.
See the section on Earned Value Tracking and Reporting
later in this chapter, and Chapter 9, Tracking
Progress on the Project, in the Basic User Guide, for
information on progressing activities.)
13. Rollup, analyze, correct, and generate reports. (See
the sections on Summarizing Costs Information and
Printing Earned Value Reports later in this chapter.)
14. Re-plan when necessary and repeat steps 10 through
13 for the next cost period.
Basic Cost Information
There are some fundamental terms that you need to
understand before reading much further. They were
explained in detail in Chapter 9, Designing a Project
Tracking Process, in the Basic User Guide, and are
reviewed below.
Cost versus Value
The cost calculations in AMS REALTIME Projects are
concerned with measuring two different aspects of a
project: cost and value. The cost of an activity is how
much you pay for that activity. The value (or worth) of
an activity is used to measure the progress you have made
in terms of its value to you, i.e. what you can get back
from that activity. In most cases this will be a direct
value: you will be able to bill a client for the value of
Issue 1 - AMS REALTIME Projects Advanced User Guide
175
work performed. In other cases, the relationship is not
quite that clear: it is simply an estimate of the value of
the work you have achieved so far, maybe in terms of its
contribution to the overall value of the project as a whole.
We make these judgments all the time in making
purchase decisions. We all know when we are being
expected to pay too much for something (the cost is
greater than the value), or when we are getting a bargain
(the cost is less than the value). A clear understanding of
this distinction and how it relates to the different cost
terms in the project context is vital for properly using
earned value tracking. This difference between cost and
value is highlighted in a couple of examples below:
We are building a wall which we expect to use 500 bricks
and take 10 hours of effort to complete. At the end of the
work, we have agreed with the client that we can bill
them $100. Therefore the value to us of completing the
wall is $100. When we have finished the wall, and sent
in our invoice for $100.00 we discover that the bricks and
labor actually ended up costing us $120.00. There is a
large difference (20%) between the value and the cost.
We could also make some assumptions about the value
after partial completion, e.g. after half the work is done
and 250 bricks have been laid, the putative value is $50,
and so on. We can then use these values to compare the
value of what we have done with the cost of doing it.
After the end of the first week we can see how much
progress we have made, estimate its value and then
compare that with the actual costs. If we have done half
the activity in terms of bricks laid, we have said that we
have a value of $50. But if it has cost us only $40 to
achieve that, then we have a value which exceeds the cost
- a profit!
Cost Bins
This term refers to the time periods into which the
project is divided. For example, setting your Cost Bins to
Month means that you are going to be calculating
estimated and actual cost information on a monthly basis
176
Issue 1 - AMS REALTIME Projects Advanced User Guide
throughout the project. See the section on Establishing
Time Periods for Cost Calculations, later in this chapter,
for details of establishing Cost Bins.
Budgeted Cost of Work Scheduled (BCWS)
This represents the expected cost for a specific time
period or Cost Bin. It can either be derived from the
resources or entered directly. It primarily represents how
much expenditure (either of money or effort) is necessary
to complete the activity. In essence, it is the value of the
activity within the time period.
Remember that this value may not represent the cost of
the entire activity. If the activity spans different cost
bins, the BCWS figure represents the budgeted cost for
each cost bin.
It can be compared to the value of the progress achieved
in order to calculate progress variances.
If you are calculating this value from resources, it is
simply the sum of the resource costs. The cost of each
resource is the product of the cost per unit and the
amount used.
See the section below on Calculating BCWS, for
information on the methods of calculating BCWS.
Budgeted Cost of Work Performed (BCWP)
The BCWP measures how much progress has been
accomplished. It is the value of the work that has been
accomplished so far. It does not take into account how
much the resources actually cost, but how they were
originally valued. Comparing this number to the BCWS
tells you if your project is behind or ahead of schedule.
In AMS REALTIME Projects, the BCWP is calculated in
many different ways, usually involving the different ways
in which progress can be measured. See the section on
Calculating BCWP later in this chapter for details.
Issue 1 - AMS REALTIME Projects Advanced User Guide
177
As with the BCWS, this value is broken into date bins
and does not often represent the total progress, but only
the progress in the current date bin.
Actual Cost of Work Performed (ACWP)
This value measures the project expenditure. It reports
how much it cost to attain the current progress, rather
than how much it was worth. By comparing this value to
the BCWP, you see whether you are over or under
budget.
The ACWP is calculated by AMS REALTIME Projects
from the actual amount of the resource which was used,
or you can enter the cost figure manually.
See the section Calculating ACWP, below, for
information on the methods of calculating ACWP.
Estimate To Complete (ETC)
This value measures the cost required to complete an
unfinished activity. It predicts cost changes that may
occur based on how closely the activity has followed the
budget so far. It does not tell how much progress still
needs to be made, but estimates how expensive that
progress is likely to be. It is the difference between the
total BCWS and the predicted total ACWP.
See the section on Calculating ETC, below, for
information on the methods of calculating ETC.
These four terms allow powerful calculations and
summarizations to help track costs and progress in terms
of monetary units. The figure below graphically
describes their relationship to each other.
178
Issue 1 - AMS REALTIME Projects Advanced User Guide
Earned Value Data Elements
Time Now
Estimate to
Complete (ETC)
Actual Cost of Work
Performed (ACWP)
Budgeted Cost of Work
Scheduled (BCWS)
Budgeted Cost of Work
Performed (BCWP)
time
Methods of Calculating the Basic
Information
You can configure the data sources for BCWS, BCWP,
ACWP, and ETC. There are only a few choices for
BCWS, ACWP, and ETC, but AMS REALTIME
Projects allows nine different methods for calculating
BCWP. This is because BCWP is essentially a measure
of progress, and different organizations view progress in
different ways.
For example, one common setup is to calculate BCWS
from resources and enter ACWP manually, since many
expenses cannot be predicted and do not derive easily
from resources. Basing ACWP merely on resources
might ignore these other factors.
Issue 1 - AMS REALTIME Projects Advanced User Guide
179
The Elements of Cost tool.
To select the manner by which AMS REALTIME
Projects calculates your cost values, use the Cost
Elements Commands tool on the Icon Toolbar. Pressing
this button displays a pop-up menu used to set the
calculation methods for all four fundamental cost values.
Notice that the current method is displayed after the cost
data name (e.g. BCWS: Resource).
If you open this menu when an activity is selected, you
can change the calculation method for just that activity.
If you open the menu when no activities are selected, you
can edit the default settings that are given to all new
activities. These calculation methods are covered in the
Basic User Guide in Chapter 9, Tracking Progress on the
Project, and are recapped here.
Calculating BCWS
There are three choices for calculating BCWS. These are
• Default
• Manual
• Resource
Manually calculating resources lets you enter numeric
values directly into the Costs dialog box. For
information on using this method, see the section on
Manually Entering Cost Information below.
If you choose to derive your BCWS values from
Resources, the cost per unit of each resource is multiplied
by that resource’s planned usage. These values appear in
the Costs dialog box, but in this calculation mode you
cannot edit them.
180
Issue 1 - AMS REALTIME Projects Advanced User Guide
Because Default can be
ambiguous, and because the
schedule default may be
changed if the schedule is
unlocked, it is highly
recommended that the
desired method be
specifically set.
Selecting Default for a particular activity causes that
activity to inherit the default calculation method.
Changing the default method for the schedule
automatically changes any activities that are set to
Default. When you select Default for the schedule’s
default method, that method is set to the value specificed
in the configuration file.
To change the value in the configuration file, set the
BCWSDEFAULT flag to 1 for Manual or 2 for
Resource.
Calculating BCWP
AMS REALTIME Projects offers nine different
calculation methods for BCWP. In general, BCWP
values can be manually entered in the Costs dialog box
(see the section Using the Costs Dialog, below) or can be
calculated from a combination of the BCWS and progress
bar. The different options are listed below.
Default
Because Default can be
ambiguous, and because the
schedule default may be
changed if the schedule is
unlocked, it is highly
recommended that the
desired method be
specifically set.
This is not a type of BCWP calculation, but works like
the Default option for BCWS. For an activity, it causes
that activity to follow the schedule default. If selected as
the schedule default, it sets the default to the value in the
configuration file.
To change the default in the Configuration File, use the
BCWPDEFAULT flag. Enter a number from 1 to 9,
depending on the desired calculation method as listed
below.
Issue 1 - AMS REALTIME Projects Advanced User Guide
181
Manual
1
This is the simplest method of controlling BCWP. When
this option is selected, cost data is entered directly
through the Costs dialog box. There is no connection
between BCWP and the progress bar, so that if you wish,
you can use the progress bar to indicate something other
than work progress, such as time spent on the activity.
Level of Effort
2
If your technical progress is defined purely in terms of
how much time has been spent on an activity, as happens
occasionally in project scheduling, you can choose this
option to automatically update progress and BCWP as
you move the Now Line.
An example of an activity where this is an appropriate
measure is Technical Support. It is difficult to measure
the “quantity” of technical support provided, other than
the amount of time that has passed, i.e. if we are half way
through the project, we must be half-way through
providing support for that project.
Any activities which use Level of Effort BCWP
calculations automatically have their progress line
adjusted to the Now Line. AMS REALTIME Projects
then looks at where the Now line is in terms of the
percentage of the activity bar it covers, and sets the
BCWP equal to that percentage of the BCWS.
This option is best used with EXACTNOWBIN set to Y.
Mathematically, this option calculates BCWP as:
BCWP(cur) = % Progress(cur) * BCWS(cur)
Manual, drive progress 3
Like the Manual option, this calculation method allows
you to enter BCWP data through the Costs dialog.
However, this option also automatically adjusts the
progress bar to represent technical progress as BCWP
182
Issue 1 - AMS REALTIME Projects Advanced User Guide
information is entered. When this option is selected, you
cannot change the progress bar by dragging it.
BCWS, 100/0
4
Sometimes you may want to consider an activity to have
earned all its value as soon as it begins. For example,
you could be using BCWP to represent monetary
allocations from the budget. Under this method, an
activity will receive its money at its start date. As soon
as an activity has any progress greater than zero, the
BCWP equals 100% of the total BCWS.
BCWS, linear percent
5
Selecting this option causes BCWP to be calculated from
the position of the progress bar. The value equals the
percent progress multiplied by the total BCWS. This
means that any fluctuations in BCWS over time are not
transferred to the BCWP, but a flat percentage based on
the progress is used. (See also BCWS, weighted,
below)
Mathematically, this option calculates the BCWP as:
BCWP = (% Progress(total) * BCWS(total)) – BCWP(prev. total)
BCWS, 50/50
6
This option is similar to BCWS, 100/0, but rather than
being assigned all the value at the beginning, the BCWP
earns 50% of the total BCWS when progress is initially
posted and the remaining 50% when the activity is
completed.
BCWS, 0/100
7
If you wish to ensure that no value is assigned to an
activity until it is complete, use this option. When the
activity finishes, the BCWP is set to 100% of the total
BCWS.
Issue 1 - AMS REALTIME Projects Advanced User Guide
183
BCWS, weighted
8
With this option, the progress bar determines the BCWP.
It is much like BCWS, linear percent, but rather than
being calculated from the total BCWS, the BCWP is
calculated only from the BCWS of the current cost bin.
This means that BCWS fluctuations between cost bins
are transferred to the BCWP.
Mathematically, this option calculates the BCWP as:
BCWP = % Progress(cur) * BCWS(cur)
Resource, weighted
9
This option also measures BCWP according to the
progress bar. Instead of depending on BCWS, it depends
on planned resource costs. Thus, it can follow resource
fluctuations even within cost bins. BCWP equals the
sum of all the planned resource costs during the period
over which progress was posted.
Mathematically, this option calculates the BCWP as:
last
resource Progress
To
Σ ∫(usage ) * (cost/unit ) dt
BCWP = r = first
r
r
start of
resource cost bin
Calculating ACWP
Because Default can be
ambiguous, and because the
schedule default may be
changed if the schedule is
unlocked, it is highly
recommended that the
desired methods be
specifically set.
Like the BCWS, the ACWP can be calculated from
resources or typed into the Costs dialog box. The
Manual option lets the selected activity accept data
through the Costs dialog. The Resource option causes
the activity to calculate ACWP data from the resource
usage on the Actual plane. Whenever you set an activity
to Default, it follows the schedule default value.
Once again, you can set defaults by not selecting an
activity. Selecting Default sets the schedule default to
that indicated in the configuration file.
184
Issue 1 - AMS REALTIME Projects Advanced User Guide
In the Configuration file, set the flag ACWPDEFAULT
controls this value, with 1 as Manual and 2 as
Resource.
Calculating ETC
Because Default can be
ambiguous, and because the
schedule default may be
changed if the schedule is
unlocked, it is highly
recommended that the
desired method be
specifically set.
ETC has one more calculation method than BCWS and
ACWP. The Manual option allows ETC to be directly
entered into the Costs dialog box. If the Resource
option is selected, the remaining resource usage (from
the Progress To point forward) determines the ETC. If
the BCWS-BCWP option is set, the ETC simply equals
the remaining planned expenses rather than a prediction
of those expenses. This option should be used if one of
the alternate BCWP methods is used to produce
consistent results. The Default option causes an activity
to follow the schedule default or the schedule default to
follow the configuration file.
In the Configuration file, set the flag ETCDEFAULT to
1 for Manual, 2 for Resource, or 3 for BCWSBCWP.
Other Cost and Performance Indicators
From the four basic cost terms, AMS REALTIME
Projects calculates many other useful values.
Understanding what these values represent saves you
time in analyzing your project costs, and help in
interpreting your schedule’s budget. These terms can be
related to an activity, cost bin, or the entire project. The
first group of indicators makes use of the calculated
Earned Value indicators; the second group does not.
Issue 1 - AMS REALTIME Projects Advanced User Guide
185
Indicators Using Earned Value
Schedule Variance (SV)
This is how far off schedule your project has slipped. It
is the difference between the work actually performed
and the work that was scheduled to have been performed,
i.e. the difference between BCWS and BCWP.
Mathematically, Schedule Variance is:
SV = BCWP(cum to date) – BCWS(cum to date)
A negative value indicates that the project is behind
schedule, a positive value that it is ahead of schedule.
Cost Variance (CV)
This value represents how close to budget your project is.
It is the difference between the actual cost of the work
performed and the value of the work performed.
Mathematically, Cost Variance is:
CV = BCWP(cum to date)– ACWP(cum to date)
A negative value means you have over-spent, while a
positive value means you have under-spent.
Budget at Complete (BAC)
This is the total BCWS for the activity, cost bin, or
project. It represents the total budgeted cost of
completing that item, for example the total cost of an
activity across all cost bins.
Mathematically, Budget at Complete is:
BAC = BCWS(total)
Estimate at Complete (EAC)
This is the projected actual cost for the activity, cost bin,
or project. Effectively, it uses the ACWP to date and the
estimate for the remaining work to provide an estimate of
what the total ACWP will be at the end of the item.
186
Issue 1 - AMS REALTIME Projects Advanced User Guide
Mathematically, Estimate at Complete is:
EAC = ACWP(cum to date) + ETC(to date)
Variance at Complete (VAC)
This value represents how far the activity, cost bin, or
project is likely to be off-budget when completed. Since
the BAC represents the budgeted total cost and the EAC
represents the estimated total cost, the VAC is the
difference between these two figures..
Mathematically, the Variance at Complete is:
VAC = BAC – EAC
A negative number indicates an over-budget activity and
a positive number indicates an under-budget activity.
Schedule Performance Index (SPI)
The Schedule Performance Index uses a percentage
rather than an absolute value to represent how closely
your project is following the schedule. While the
Schedule Variance gives a dollar amount to describe this
concept, the Schedule Performance Index is the ratio of
the actual work to the scheduled work.
Mathematically, the Schedule Performance Index is:
SPI = BCWP(cum to date) / BCWS(cum to date)
A number greater than one indicates that the work is
ahead of schedule, and a number less than one indicates
that the work is behind schedule.
Cost Performance Index (CPI)
Like the SPI, the Cost Performance Index conveys an
idea with a ratio rather than an absolute value. The CPI
measures how closely your project is following the budget
by dividing the value of the current progress by its cost.
Mathematically, the Cost Performance Index is:
CPI = BCWP(cum to date) / ACWP(cum to date)
Issue 1 - AMS REALTIME Projects Advanced User Guide
187
A number greater than one means the activity, cost bin,
or project is under budget. A number less than one means
the work is over budget.
Earned Value Data Elements
Estimate at
Complete (EAC)
Time Now
ETC
Cost Variance (CV)
(BCWP - ACWP)
ACWP
BCWS
Variance at
Complete (VAC)
Budget at
Complete (BAC)
Schedule Variance (SV)
(BCWP - BCWS)
BCWP
time
Indicators Not Using Earned Value
Schedule Status (SS)
This value indicates in words whether the activity, cost
bin, or project is Ahead, Behind, or On schedule. One of
these three words appears in the Schedule Status field in
the Costs dialog box, indicating the actual schedule status
against the plan.
Cost Status (CS)
This value indicates in words whether the activity, cost
bin, or project is Over, Under, or On budget. One of
these three words appears in the Cost Status field in the
Costs dialog box, indicating the actual cost status against
the plan.
188
Issue 1 - AMS REALTIME Projects Advanced User Guide
Plan-Spending Variance (PSV)
Plan-Spending Variance is how much it should have cost
to complete the work up to Time Now versus how much
it actually cost. This is the difference between the
planned cost and actual cost with no regard to Earned
Value. It is useful when technical progress is either
difficult to measure of when it is assumed to be on
schedule, such as pure level-of-effort tasks.
Mathematically, Plan-Spending Variance is:
PSV = BCWS(cum to date) – ACWP(cum to date)
Time Variance (TV)
Time Variance simply measures how far ahead or behind
schedule you are, based on the original plan and the
current progress to a task. In the Earned Value
calculations this is expressed as a numeric figure
indicating a difference in value, in TV it is expressed as a
time difference.
Mathematically, Time Variance is:
TV = Progress To – Time Now
The default calculation for Time Variance is derived
from costs. By setting the configuration switch
TVPROGRESS to Y, the Time Variance will calculate as
the difference between an activity’s Progress To date and
the Time Now date. This uses the Progress compared to
Time Now rather than derived costs.
Total Performance Index (TPI)
The Total Performance Index— also called Percent
Spent— is the measure of work accomplished to date
versus the total budgeted work for the activity. It is
expressed as a percentage, rather than a variance.
Mathematically, Total Performance Index is:
TPI = BCWP(cum to date) / BAC
Figure x-x depicts these three quantities as related to
BCWS, BCWP, ACWP, and Time Now.
Issue 1 - AMS REALTIME Projects Advanced User Guide
189
Earned Value Data Elements
Time Now
ETC
PSV
ACWP
BCWS
TPI (denominator)
TV
BCWP
TPI (numerator)
time
Establishing Time Periods for Cost
Calculations
Cost Bins
To use costs in your schedule, you must have a defined
time span in which costs accumulate. This is called a
cost bin. A cost bin breaks your project into small
segments of time so you can measure costs over brief
periods. The period length should be small enough to
ensure frequent updates, but large enough to provide
useful aggregates. If the periods are too long, you won’t
see the problems before they become serious and difficult
to fix; if too small you may not acquire information fast
enough, forcing calculations on incomplete data. For
large, long-term projects you might choose cost bins of a
month; for small, departmental projects you might prefer
to see your cost data in weekly cost bins.
In AMS REALTIME Projects you can have cost bins of
months, days, weeks, quarters, or years. You can also set
up your own, specially-defined cost bins. For more
190
Issue 1 - AMS REALTIME Projects Advanced User Guide
information on these custom periods, see User-Defined
Cost Bins, below.
Establishing the Cost Bins
To select a cost bin, go to the Project Attributes dialog
box by selecting Project Attributes... from the Project
menu. Then click Advanced.
On the bottom of the dialog box are two buttons. The
right button controls the Cost Bins, displaying the
currently selected bin size. By clicking on the button you
can change to a different cost bin. The available cost
bins are Month, Week, Quarter, Year, Day, and
Specific for the user-defined bins.
If you set the cost bin to Week, you must also decide
which day begins a new week. Use the Week Starts
button to select the desired day of the week.
User-Defined Cost Bins
It may be that you need your project accounting to use
cost bins that match those in use in other accounting
systems. This would allow, for example, the collection of
actual costs from an invoice processing system. In most
accounting systems, the “monthly” accounting period is
not necessarily an exact month, and AMS REALTIME
Issue 1 - AMS REALTIME Projects Advanced User Guide
191
Projects, therefore, permits you to set up cost bins with
periods of any length.
You can establish your own definition of cost bins and
their sizes by creating a special form of schedule and
entering a series of start milestones, each of which
defines the start of an accounting period, or cost bin.
The schedule must be called costbins.arp, and it should
be located on the normal search path, so that AMS
REALTIME Projects can find it on start up, and can pick
up the cost bin information.
It is recommended that you set up cost bins well into the
future to accommodate long range planning and prevent
frequent changes to this schedule. You may need to
check with your finance department to get the definitions
for several years ahead.
If you are using user-defined Cost Bins, it is almost
certain that all projects within your organization will
need to adhere to the same definitions, so that project
summarization of costs into time periods is consistent
across the organization. The costbins.arp schedule
therefore needs to be made available to all schedules in
AMS REALTIME Projects.
Once costs have been calculated you should not change
your cost bin definitions, as it will produce invalid
results.
Once you have defined the cost bins in costbins.arp, and
restarted AMS REALTIME Projects, you must then
ensure that in the Project Attributes dialog, you have
selected Specific as the Cost Bin.
Some Tips On Using Cost Bins
The position of the Time Now Line determines in which
cost bin your cost data accumulates. This is very
important to maintaining accurate cost data. If you post
progress when the Now line is in the wrong location, that
“earned” progress falls into the wrong cost bin.
192
Issue 1 - AMS REALTIME Projects Advanced User Guide
By default, data is not necessarily placed in the same cost
bin as the Time Now Line. A brief delay exists so you
have time to gather the cost data. For example, it might
take you a few days after the end of a month to gather the
cost information for that month; it is unlikely you could
have the data ready before the month finished.
By default, the window for entering data into a cost bin is
shifted right by half the cost bin length. For example, if
you are using Cost Bins of Months, you have a further
half a month in which to enter the data before the current
bin moves into the next month.. Thus, to enter data into
a particular cost bin, the Now Line must be in the latter
half of that cost bin or the first half of the next cost bin,
which is normally the time period in which you would
collect and enter status anyhow.
To maintain control over the current bin, the Now line
can be moved specifically to the end of each cost period,
rather than follow the system date.
When following an earned value process, it is
recommended that the NOWLOCKS configuration
switch be set to Y. This setting causes the Now line to be
moved only within the granularity of cost bin boundaries.
If the Now line is moved backward to another cost bin, a
dialog will ask the user to verify, since that action will
change the current cost bin.
To change the window for entering data to correlate
exactly with the cost bins, set EXACTNOWBIN to Y in
the configuration file.
Once you begin entering data you must not change the
cost bin size. This is because the old data is already
calculated and spread over a specific period. By
changing the size, you affect the time span that AMS
REALTIME Projects assumes for the old, existing cost
data, which is not recalculated. Thus, if you change the
cost bins from weeks to months, the old weekly data is all
viewed as monthly data instead, giving you figures of
approximately one-fourth the expected value.
Issue 1 - AMS REALTIME Projects Advanced User Guide
193
Manually Entering Cost Information
As mentioned in the introduction to this Chapter, the
simplest way of dealing with costs in AMS REALTIME
Projects is to enter them manually. However, it is also
the method which provides you with the least flexibility
in terms of amending cost data automatically, seeing the
financial impact of schedule changes, or producing
sophisticated cost information for reporting purposes.
Entering costs manually means that you are using cost
information which is completely separate from the
resource usage. This may be useful, for example, if you
are not charged for your use of resources; maybe because
they are all internal and classed as a general company
overhead. However, you might know the total estimates
for capital purchases, and may find it easier simply to
enter these amounts.
However, you should take great care when mixing these
types of manually entered costs and resource costs. If you
are using resource costs at all, you will probably find it
easier to track where costs originate by setting up a
different resource type for materials and having their
costs calculated for you by AMS REALTIME Projects.
If you enter cost information manually, then you will
need to remember to keep it updated.
The Elements of Cost tool.
194
To be able to enter costs manually, you must ensure that
you have used Manual as the calculation method for the
appropriate cost items. For example, if you want to enter
planned costs (BCWS) manually, then you should use the
Cost Elements Commands tool to select BCWS and then
choose Manual. Alternately, you may want planned and
earned value figures to be calculated, but to enter actual
costs (ACWP) manually. In this case, select ACWP
under Cost Elements and choose Manual for that
item.
Issue 1 - AMS REALTIME Projects Advanced User Guide
The Activity Costs tool.
As an alternative, you can
use the Activity Costs icon
tool, or double-click the
activity while holding down
the Alt key
To enter costs for an activity, select the activity and use
the Activity menu and select the Costs item. . This
opens the Costs dialog box, where costs can be entered
for each time period if a Manual mode is set. See the
sub-section below for information on the use of this
dialog.
The Costs dialog is very useful for entering or viewing
information on a single activity. If you want to access
cost information for a range of activities, you may find it
easier to use the Costs Table (see the section on The Cost
Table for information on the table).
Using the Costs Dialog
The time periods across the top of the form are
determined by the Cost Bins you have set up (see the
section on Establishing Time Periods for Cost
Calculations, above) and the span of the activity. If an
activity spans more than one Cost Bin, the current Cost
Bin (according to the Now date) is shown enclosed in
angle brackets (<>).
For each Cost Bin, you can enter the four basic cost
fields: BCWS, BCWP, ACWP and ETC. The fields for
which you have chosen the Manual calculation method
will be shown in white. If they are grayed out, you will
not be able to enter information manually and will need
to change the calculation method as discussed earlier. In
Issue 1 - AMS REALTIME Projects Advanced User Guide
195
the figure above, you can enter data for the first three
values, but ETC will be calculated.
Use the mouse or Tab key to position the cursor and type
in the relevant information. The Cumulative column
updates as you complete each field. To clear the entire
form and start again, click on the Clear button. (Note
that costs calculated from resources will be recalculated if
cleared.) Alternately, use Cancel to erase the changes
and revert to the original data.
The figures at the bottom of the form show the calculated
values discussed at the beginning of this chapter. This
means that the Costs dialog provides an enormous
amount of detailed information and insight into the exact
status of the Activity.
To show the information for other activities use the
Previous and Next buttons.
Calculating Costs from Resource Usage
Manually entering cost information is very
straightforward. However, it is not very realistic. On
most projects, we want the cost information to be
calculated and, most importantly, recalculated as our use
of resources varies.
As you saw in Chapter 7, Resources, in the Basic User
Guide, each resource can have a cost associated with it.
The simplest way to establish this is by using the
Resource Information dialog and entering the Units and
the Cost Per Unit. For example, an Engineer may be
charged by the day and at a rate of $100 per day. The
dialog box would look like this:
196
Issue 1 - AMS REALTIME Projects Advanced User Guide
When the resource is assigned to an activity, the required
number of units of the resource is calculated. For the
Engineer resource used in the example above, assigning
one unit of this resource to a five-day activity will result
in a total requirement for the activity of 5 units of
Engineer. This is then multiplied by the unit cost, thus
giving a total planned cost of $500 for this resource on
this activity. If we now change the assignment, say to
two Engineers, the cost will be automatically
recalculated, in this case to $1,000.00.
The Costs dialog will display the costs as they are
calculated for each activity.
The Resources Window in the Schedule mode will
display overall resource cost information. Use the
Spreadsheet menu in the Resource Window to change
the display to Cost or Cost +.
Issue 1 - AMS REALTIME Projects Advanced User Guide
197
The figure above illustrates the cost of two grades of
Engineer being used on the "Build" activity. The
Resource Window Costs Spreadsheet shows the costs
split out, the Costs Dialog shows the costs totaled for the
activity, i.e. In the June cost bin, the cost of 1008
represents 240 for Engineers Grade 1 plus 768 for
Engineers Grade 2.
The examples above are very simplistic. As you have
already seen with regard to resources (see Chapter 6,
Advanced Resources) and the introduction to this
chapter, it is from the complex grouping of resource and
cost information that gives the real insight into a project.
In the following sections, you will see how using
Elements of Cost, Resource Groups and Cost Centers
provides you with some extremely powerful tools to plan
and control you project costs.
Cost Elements
In most project management systems, the lowest unit for
which costs are collected is the resource assigned to an
activity. In AMS REALTIME Projects, this can be
broken down further to provide some very detailed
198
Issue 1 - AMS REALTIME Projects Advanced User Guide
information about elements that go to make up those
basic costs.
For example, the cost of using an Engineer on an activity
may not be simply their hourly rate. We may also need
to factor in additional costs, such as their expenses,
overhead costs and so on. Using Elements of Cost, it is
possible to see the time-phased costs (planned, baselined
and actual), variances (SV, CV, etc.) and indexes (CPI,
SPI, etc.) broken out by each cost element. Cost elements
are characterized by their resource type or cost center,
such as labor, materials, expenses, account, etc.
In a similar way, different resource/activity costs could be
grouped together into Elements of Cost.
Resource Groups and Cost Centers group resource
information together and produce summarized resource
information, which can be converted by a simple
calculation to summarized cost information. Cost
Elements, on the other hand, cut across this structure and
allow for a cost organization to be super-imposed, an
Issue 1 - AMS REALTIME Projects Advanced User Guide
199
organization which may or may not map directly to
individual resources.
Defining Elements of Cost
If an activity is selected, the
pop-up menu options change,
limiting the cost options to
just Table… . which
accesses the Costs Table
(with Element of Cost
breakdowns) for that activity.
(See the section on The Costs
Table, below, for information
on the Costs Table.) Once
Elements of Cost have been
defined, it will also display a
list of their names, allowing
you to access a table by
Element of Cost for all
activities.
Elements of Cost are defined using the Elements of Cost
icon. You can define new Elements of Cost at any time.
If no activities are selected, then the pop-up menu looks
like the diagram below:
Methods for Cost Breakdowns
If you are entering costs manually or loading them from
another system, you can structure Elements of Cost any
way you like. But if you are generating costs from
resource usage, there are three basic methods used to
collect resource usage and breakdown resultant costs.
These three methods are outlined here and covered in
more detail in the following sections.
The first method categorizes each resource as a specific
type. A Resource Extension field called Element must be
defined. This Element field must be populated with the
type of resource, such as Labor, Materials, Expenses, etc.
Then an Element of Cost is defined which matches the
name of each Element type, i.e., Labor, Materials,
Expenses, etc. This Element of Cost will automatically
collect resource usage by the category stored in Element,
200
Issue 1 - AMS REALTIME Projects Advanced User Guide
and this can be used to calculate other Elements of Cost
using Rate Tables and other cost formulas.
The second method is used when resource usage is
assigned using Cost Centers. This does not collect
resource usage by a resource category, but by the cost
center to which the resource assignment is made.
Elements of Cost are defined which provide a descriptive
name for the Cost Center, i.e., East Division, West
Division, Overseas Division, etc. Since Cost Centers
normally use accounting codes, the Element and Cost
Center fields are used to map the descriptive name of the
Cost Element to the accounting code, as shown in the
sample below:
Element
Cost Center
East Division
400-2968-01
West Division
400-8577-03
Overseas Division
500-7445-07
These Elements of Cost will automatically collect
resource usage by the assigned Cost Center, and can be
used to calculate other Elements of Cost using Rate
Tables and other cost formulas.
The third method is a combination of the other two
methods. This allows a breakdown of costs by each
unique combination of cost center and resource type.
The Elements of Cost are defined to match the name of
each Cost Center and Resource Element combination.
These Elements of Cost will automatically collect
resource usage for each combination, and these can be
used to calculate other Elements of Cost using Rate
Tables and other cost formulas.
Issue 1 - AMS REALTIME Projects Advanced User Guide
201
Cost Breakdowns by Resource Type
Creating Resource Element Types
First, we need to define a resource extension field to hold
the resource cost type. In Table mode, select the Ext
Fields table. Under the Res Exts column, add an
extension field called Element. See Chapter 6, Advanced
Resources, for full information on the resource tables.
The next step is to enter the type of each resource into the
Element field. In Table mode, select the Pool Exts table.
If the Elements extension is not visible, click in the white
space to the right of the columns and select Elements
from the picklist. Enter the resource Element type for
each resource, e.g., Labor, Equipment, Direct Costs.
Creating Elements of Cost
Now that the resources have been categorized, we must
create an Element of Cost to contain the resource usage
breakdowns. From Schedule mode, select Elements
from the Elements of Cost pop-up menu.
The first Element of Cost name should be a name which
reflects a total element, into which all other cost
breakdowns will be summarized. This is because when
more than one Cost Element is defined, the first one is
always displayed when accessing basic Activity Costs.
Subtotal Elements of Cost can also be defined.
202
Issue 1 - AMS REALTIME Projects Advanced User Guide
Use the single column to enter the names of each
Element, ensuring that each Element name exactly
matches the contents of a Resource Extension field
Element. As you fill in each row, a new row appears.
Enabling Element of Cost Calculations
From Table mode (or using the Elements of Cost pop-up
in Schedule mode), select Element Fields. This table
allows definition of Extension fields for Elements of
Cost. The first column is labeled Field, and allows you to
define the names of the Element of Cost extension fields.
The remaining columns will be filled with the names of
the currently-defined Elements of Cost. Once the
Elements and Element Fields have been defined, these
two tables will both allow entry of summarization and
formula criteria, merely switching the row and column
labels.
There are two standard Fields that should be defined for
this method of cost breakdown: Summary and Formula.
These are fixed name fields that AMS REALTIME
Projects uses to locate the summary order and calculation
formulas. Any other fields you wish to define can also be
added to contain additional information about each
Element of Cost.
The figure below shows the Costs Elements table after
the element fields have been defined.
The costs for each resource will now be summarized into
the appropriate Element of Cost.
Issue 1 - AMS REALTIME Projects Advanced User Guide
203
NOTE: If each Resource Cost per Unit has been defined
as 1, this Element of Cost will contain resource usage
broken down by Element type. To further calculate a cost
breakdown by Element of Cost, you can define additional
Elements of Cost that calculate from other Elements,
Rate Tables, and/or apportionment formulas.
For information on defining a summary order, refer to
the section on Summarizing Elements of Cost. For
information on defining formulas to calculate Elements
of Cost, refer to the section on Defining Element of Cost
Formulas.
Cost Breakdowns by Cost Center
Creating Cost Centers
Cost Centers must be defined for selection when a
resource assignment is made. Cost Centers can be
descriptive names or accounting codes, because they can
mapped to a specific Element of Cost name. If Cost
Centers have not been defined, pull out the button to the
left of the Resource name heading in the Resource
window in Schedule mode. This will expose the Cost
Centers. Double-click on the first line in the table to
enter a Cost Center name. Continue this process until all
Cost Centers have been defined.
204
Issue 1 - AMS REALTIME Projects Advanced User Guide
When assigning resource usage, select the name of the
cost center to which the usage will be assigned. For
complete information on using Cost Centers, refer to
Chapter 6, Advanced Resources.
Creating Elements of Cost
Now that the Cost Centers have been created, we must
create an Element of Cost to contain each Cost Center
breakdown. From Schedule mode, select Elements
from the Elements of Cost pop-up menu.
The first Element of Cost name should be a name which
reflects a total element, into which all other Cost Center
breakdowns will be summarized. This is because when
more than one Cost Element is defined, the first one is
always displayed when accessing basic Activity Costs.
Subtotal Elements of Cost can also be defined.
Use the single column to enter a names for each Element
of Cost. The names do not have to match in the case,
because we will correlate each Cost Center to an Element
of Cost. As you fill in each row, a new row appears.
Enabling Element of Cost Calculations
From Table mode (or using the Elements of Cost popup menu in Schedule mode), select Element Fields.
This table allows definition of Extension fields for
Elements of Cost. The first column is labeled Field, and
allows you to define the names of the Element of Cost
extension fields. The remaining columns will be filled
with the names of the currently-defined Elements of
Cost. Once the Elements and Element Fields have been
defined, both of these tables will both allow entry of
summarization and formula criteria, merely switching
the row and column labels.
There are three standard Fields that should be defined for
this method: Cost Center, Summary and Formula. The
Cost Center field is used to enter the exact name of the
Cost Center from Schedule mode that correlates to each
Issue 1 - AMS REALTIME Projects Advanced User Guide
205
Element of Cost you have defined. There must be a oneto-one correspondence between each.
Since Cost Centers normally use accounting codes, the
Element and Cost Center fields are used to map the
descriptive name of the Cost Element to the accounting
code, as shown in the sample below:
A Resource extension field
named Element can not be
present to use this method. If
this field is present, it is
assumed that method three is
being used.
Element
Cost Center (from
Schedule Mode)
Labor
400-2968-01
Equipment
400-8577-03
Direct Costs
500-7445-07
The other two fields, Summary and Formula, are fixed
name fields that AMS REALTIME Projects uses to
locate the summary order and calculation formulas. Any
other fields you wish to define can also be added to
contain additional information about each Element of
Cost.
For information on defining a summary order, refer to
the section on Summarizing Elements of Cost. For
information on defining formulas to calculate Elements
of Cost, refer to the section on Defining Element of Cost
Formulas.
Cost Breakdowns by Cost Center and Resource Type
The third method combines the capability of the first two,
providing a unique Element of Cost breakdown for each
unique combination of Resource Element type and Cost
Center.
206
Issue 1 - AMS REALTIME Projects Advanced User Guide
Creating Resource Element Types
First, we need to define a resource extension field to hold
the resource cost type. In Table mode, select the Ext
Fields table. Under the Res Exts column, add an
extension field called Element.
The next step is to enter the type of each resource into the
Element field. In Table mode, select the Res Exts table.
If the Elements extension is not visible, click in the white
space to the right of the columns and select Elements
from the picklist. Enter the resource Element type for
each resource, e.g., Labor, Materials, Overhead. You may
wish to use an abbreviation or code, since this text will
become the second part of the Element of Cost name.
Creating Cost Centers
Cost Centers must be defined for selection when a
resource assignment is made. Cost Centers can be
descriptive names or accounting codes, because they can
mapped to a specific Element of Cost name. If Cost
Centers have not been defined, pull out the button to the
left of the Resource name heading in the Resource
window in Schedule mode. This will expose the Cost
Centers. Double-click on the first line in the table to
enter a Cost Center name. Continue this process until all
Cost Centers have been defined.
Issue 1 - AMS REALTIME Projects Advanced User Guide
207
When assigning resource usage, select the name of the
cost center to which the usage will be assigned. For
complete information on using Cost Centers, refer to
Chapter 6, Advanced Resources.
Creating Elements of Cost
Now that the resources have been categorized and the
Cost Centers have been defined, we must create an
Element of Cost for each unique combination of Cost
Center and Resource Element type. From Schedule
mode, select Elements from the Elements of Cost
pop-up menu.
The first Element of Cost name should be a name which
reflects a total element, into which all other cost
breakdowns will be summarized. This is because when
more than one Cost Element is defined, the first one is
always displayed when accessing basic Activity Costs.
Subtotal Elements of Cost can also be defined.
Use the single column to enter the names of each Cost
Center Element, ensuring that each Element name
exactly matches the contents of both fields concatenated.
As you fill in each row, a new row appears.
For example, if these Cost Centers and Element types are
defined:
208
Issue 1 - AMS REALTIME Projects Advanced User Guide
Cost Centers
Unique Elements
EAST
-L
WEST
-M
-O
-T
it would result in the following Elements of Cost:
EAST-L
EAST-M
EAST-O
EAST-T
WEST-L
WEST-M
WEST-O
WEST-T
Enabling Element of Cost Calculations
From Table mode (or using the Elements of Cost popup in Schedule mode), select Element Fields. This
table allows definition of Extension fields for Elements of
Cost. The first column is labeled Field, and allows you to
define the names of the Element of Cost extension fields.
The remaining columns will be filled with the names of
the currently-defined Elements of Cost. Once the
Elements and Element Fields have been defined, these
two tables will both allow entry of summarization and
formula criteria, merely switching the row and column
labels.
There are two standard Fields that should be defined for
this method of cost breakdown: Summary and Formula.
These are fixed name fields that AMS REALTIME
Issue 1 - AMS REALTIME Projects Advanced User Guide
209
Projects uses to locate the summary order and calculation
formulas. Any other fields you wish to define can also be
added to contain additional information about each
Element of Cost.
Entering a value into the Element column will assign
each resource to the appropriate Element.
The figure below shows the Pool Exts table after the
fields have been defined.
The costs for each resource will now be summarized into
the appropriate Element of Cost.
NOTE: If each Resource Cost per Unit has been defined
as 1, this Element of Cost will contain resource usage
broken down by Element type. To further calculate a cost
breakdown by Element of Cost, you can define additional
Elements of Cost that calculate from other Elements,
Rate Tables, and/or apportionment formulas.
For information on defining a summary order, refer to
the section on Summarizing Elements of Cost. For
information on defining formulas to calculate Elements
of Cost, refer to the section on Defining Element of Cost
Formulas.
NOTE: If you are using Elements of Cost to summarize
information from multiple projects, then it is very
important that the definitions are identical in all the
relevant projects, including the file where a File Rollup is
stored.
210
Issue 1 - AMS REALTIME Projects Advanced User Guide
Rate Tables
You have already seen how entering a Rate (Cost Per
Unit) in the Resource Information dialog enables AMS
REALTIME Projects to calculate total resource costs by
multiplying that rate by the number of units being used.
This method of using rates, although very easy to use,
does have some limitations in terms of flexibility. This is
overcome by the use of Rate Tables. The major
advantages are:
• As with the Unit Rate, you can convert usage
numbers into financial (currency) amounts.
• You can vary the rates over time, for example, to
take into account inflationary trends to increase
rates. Since resources do not generally have a fixed
cost over long periods of time (i.e. inflation raises
the costs of manpower, material, etc.) it is useful to
be able to define rates that fluctuate over time.
• You can use equations to calculate rates, perhaps
using one set of rates as the basis for another; for
example basing a Senior Engineer’s rate on that of a
Junior Engineer, with an uplift amount.
• You can specify a resource’s specific cost per unit,
and also keep a history of rates as they change over
time..
An example of a simple Rate Table is shown below:
Issue 1 - AMS REALTIME Projects Advanced User Guide
211
Accessing Rate Tables
The Elements of Cost
tool.
The rate tables are accessed through the Elements of
Cost icon. Make sure no activities are selected, click
the Elements of Cost icon and select the Rate Tables
option from the pop-up menu. You will be presented
with another pop-up menu with the following options:
Add
Create a new Rate Table
Delete
Delete an existing Rate Table
Rename
Rename an existing Rate Table
Edit
Edit an existing Rate Table
When you Add a table, you are prompted to enter a
name. When you click OK, the table is drawn and you
can enter the time periods and rates. As with other date
ranges in AMS REALTIME Projects, leaving either
From or To blank implies a rate which is not limited to a
particular time scale.
The other options will show a pop-up list of Rate Table
names so that you can choose which one to amend.
No validation checks are
made when these tables are
being entered or modified. It
is your responsibility to order
the dates to avoid overlaps or
gaps in time, as well as to
verify that the rates are
correct
Any changes to the Rate Table entries will cause the
costs to be automatically recalculated. However, if you
have already baselined, only the current planned costs
will update, not the baselined costs. Activities can be
selectively re-baselined to update BCWS.
You should also ensure that rates are synchronized with
the cost bin boundaries you are using. Rates can only
change at the end of a cost bin. If this is not the case,
you will get unexpected results.
Defining Element of Cost Formulas
Equations in the Cost Extension field called Formula can
be used to populate other Elements of Cost. Equations
212
Issue 1 - AMS REALTIME Projects Advanced User Guide
can refer to other defined Elements of Cost, rate tables or
constants.
To use the Rate Tables to convert units to equivalent
money costs, you must build additional Elements of Cost
and then use the rate tables in an equation defined within
a cost extension field called Formula. This equation can
refer to other Elements of Cost, rate tables or constants.
Valid examples of these equations are as follows:
Engineering * ERates
Security * 2 * SRates
Engineering * ERates + Production * PRates
Production * 0.5 *( ERates + Production * 0.5 * PRates)
For example, assume that you have established a rate
table for Engineering called ERates and another for
Production called PRates. Also assume that you have
classified all your resources by either Engineering or
Production through the use of the Element resource
extension field, and that you have planned your resources
in terms of units of an hour. The Elements of Cost and
associated extension fields could be defined as they are in
the following example:
Element
Formula
Total Cost
ECost + PCost +
Material
Summary
Engineering
Production
Material
ECost
Engineering*ERate
Manpower
PCost
Production*Prate
Manpower
Manpower
In this case, Total Cost is a summary of the engineering
and production costs, and the material resource costs.
We will assume that resources with an Element
containing Engineering or Production are defined using a
Issue 1 - AMS REALTIME Projects Advanced User Guide
213
Cost per Unit of 1. This means that we will be collecting
resource usage, i.e., manpower, in the Engineering and
Production elements.
In our sample, resources categorized by an Element
containing Material will each have a specific Cost per
Unit defined. This means that what we are collecting in
the Material Element of Cost is already a cost figure.
ECost and PCost are then calculated from the
Engineering and Production cost planes by applying the
appropriate rate tables. Finally, Manpower is calculated
as the sum of the ECost and PCost planes, providing a
total manpower cost in terms of money.
Clearly, there is a substantial amount of flexibility
provided with Element of Cost techniques. Careful
consideration and planning must occur prior to
implementing Elements of Cost within your current
scheduling environment.
Element of Cost Exceptions
We have already described the basic cost elements
BCWS, BCWP, ACWP and ETC. We have also
described how an activity can have some cost fields
calculated from resources, and others manually entered.
For example, BCWS, BCWP and ETC are generally
calculated from resource usage, but often, ACWP is
already a cost figure that is imported from other sources,
so it can be set to Manual for cost data entry, rather than
calculation.
Individual elements of cost can also make exceptions for
specific cost fields within the formula. For example, if a
Manpower summary is calculated from several other
Elements of Cost, which are in turn calculated from
resource usage, rate tables and other factors, all of the
cost fields (BCWS, BCWP, ACWP and ETC) will also
summarize.
But suppose that we have an actual manpower cost from
our accounting system that is not broken down by the
214
Issue 1 - AMS REALTIME Projects Advanced User Guide
lower levels where we are collecting our other resource
data? We will want to enter the ACWP manually at the
Manpower Element of Cost, even though it is a summary.
To accomplish this, we can add an exception to the end
of the formula, specifying the cost fields which will not
be calculated. Exceptions are indicated by an
exclamation point and a code specifying the cost field:
Cost Field
Code
BCWS
S
BCWP
P
ACWP
A
ETC
E
For example, the formula below does not calculate
ACWP or ETC for the Manpower Element of Cost, but
will allow manual entry:
Element
Formula
Manpower
Production + Engineering + Design !AE
Summarizing Elements of Cost
The field which was defined in Element Fields called
Summary is used to define collection mechanism. For
example, if Manpower is an Element of Cost that will
contain a summary of all Engineering and Production
hours, it could be defined as:
Element
Summary
Manpower
Engineering
Manpower
Production
Manpower
Issue 1 - AMS REALTIME Projects Advanced User Guide
215
In this case, the Manpower element will contain the sum
of the Engineering and Production elements.
NOTE: Formulas are calculated before Summary
Elements of Cost. If you use an Element of Cost in an
equation that is populated by the Summary order, the
contents will not necessarily be correct. If you must use a
Summary Element of Cost in an equation, then define the
summary using the Formula field, e.g. ECost + PCost +
Material.
Apportioned Costs
Equations in the Cost Extension field called Formula can
be used to generate apportioned costs. Apportioned costs
are costs which can be calculated from other Elements of
Costs assigned to the current activity. You can apportion
costs to different Cost Elements, for example, taking a
percentage of a resource’s costs and allocating it as an
Overhead element. Or, you can generate a quality
assurance cost to a production task by generating a QA
Element of Cost equal to a percentage of the Production
costs.
To do this, create an Element of Cost called QA and put
the following equation into the Formula Cost Extension
field for that cost plane:
Production * 0.17
This would have the effect of calculating QA costs as
17% of the Production costs.
This equation could include more than one term,
allowing QA to be a function of both Engineering and
Production costs (e.g. Engineering * 0.22 +_ Production
* 0.1).
Note: It is important that spaces are put around all
minus signs (subtraction operators) used in equations.
AMS REALTIME Projects looks for spaces to
differentiate between a minus sign and an Element of
216
Issue 1 - AMS REALTIME Projects Advanced User Guide
Cost which has been created from appended fields (e.g.
ERates - PRates as a cost calculation, as opposed to EngrLabor).
Earned Value Tracking and Reporting
Progress can be looked at in two different ways: as a
simple passage of time or as actual work done. When
viewed as actual work done, it is called technical
progress. There are four values associated with progress,
regardless of its guise: Duration, Completed Duration,
Remaining Duration, and Percent Progress. Depending
on the method used to perform progress calculations,
these values may or may not be dependent on each other.
AMS REALTIME Projects has three ways of performing
progress calculations. To select the progress calculation
for an activity, select that activity and choose Progress:
from the Elements of Cost pop-up menu. From this
menu you can choose Duration, Technical, or
Baseline.
You can set the schedule default for progress calculations
by opening the Elements of Cost menu and choosing a
progress calculation mode without selecting an activity.
Any new activities you create inherit the default value.
This information is also available in the Activity field
Progress Mode.
Duration
The default progress calculation method is Duration.
When this is selected, changing any of the values causes
the other three to recalculate. Progress is closely tied to
time, rather than work, since the Remaining Duration is
strictly a measurement of time. Whatever the BCWP
calculation method used, it will basically ignore whether
progress is technical or time-related, but simply use the
Progress value as the measure of work performed. If you
perform a Readjust to Now operation in this mode, the
progress fills the space up to the Now Line and the
activity stretches to maintain the old Remaining
Issue 1 - AMS REALTIME Projects Advanced User Guide
217
Duration. This increases the Percent Progress,
Completed Duration, and Duration. It also affects
BCWP and ETC calculations.
Technical
Using Technical progress calculations separates Percent
Progress from the other three values. This frees Percent
Progress to represent technical progress (work
performed) while the other values represent how much
time has been spent on the activity. When an activity
uses this calculation mode, a downward pointing triangle
appears above the progress bar. This triangle represents
the Completed Duration, while the progress bar
represents the Percent Progress. When you perform a
Readjust to Now, the triangle shifts to the Time Now
Line and the Duration increases to accommodate the old
Remaining Duration. The Percent Progress remains
constant, although the progress bar shifts to represent the
same percentage in the new space. The BCWP and ETC
are recalculated.
If you would have the triangle represent progress and the
bar represent time, set the PROGALWAYSBAR flag to
N. There are two other configuration switches,
TECHPROGTO and TECHPROGTONOW, that control
what the Progress To field and the Progress to Now
function will update: Progress, Remaining Duration or
Both. D is the default (Remaining Duration) for both
switches.
Baseline
Baseline calculations also create a triangle above the
progress bar, but it does not separate Percent Progress
from the other progress values. The triangle is upright to
distinguish the activity from those in Technical mode.
This triangle cannot be controlled directly, but moves as
a result of moving the progress bar. Usually it follows
the progress bar, but when you select Readjust to Now or
slip the activity, the triangle shifts to the Time Now Line
218
Issue 1 - AMS REALTIME Projects Advanced User Guide
and progress is calculated based on the baselined
Duration and the new Remaining Duration. If the
activity was not baselined, progress is based on the old
Duration and the new Remaining Duration. BCWP and
ETC are also altered in this mode.
Once you physically begin to work on your project, you
need to continually update your schedule to track costs
and progress. Whether you plan to enter data through
the Costs dialog box or calculate it from resources, you
must make periodic changes to represent the work that is
actually being done.
Posting Progress
In addition to entering cost data, you must also update
progress throughout your project. Progress, actual hours
and resource plan updates can be automatically loaded
from AMS REALTIME Resources, or you can use any of
the manual methods described below to status the project.
First, position the Now Line so any progress you enter
will be recorded in the proper cost bin. To enter data
into a given cost bin, the Now Line should be at the end
of that cost bin. There is considerable latitude for
placement of the Now line; it must be in the second half
of that cost bin or the first half of the next cost bin. If
you would rather always enter data into the cost bin
where the Now Line is located, set the EXACTNOWBIN
flag to Y in the configuration file.
After you have properly positioned the Now Line, you
can post progress for the project activities by dragging
the progress bar to the desired position. Posting progress
tells AMS REALTIME Projects how much work was
accomplished toward each activity. This may be actual
work or just the passage of time. With the progress
information, BCWP can be calculated for the current cost
bin.
There are several other methods for posting progress. A
percent progress field, Progress, can be entered in any
Activity table. If you are using Duration or Baseline
Issue 1 - AMS REALTIME Projects Advanced User Guide
219
Progress modes, the Progress To field can be updated, or
the Progress to Now function can be used for selected
activities. This provides a shortcut for posting progress
to the Now line, but take care to make the appropriate
adjustments to make the Progress values accurate. A
rosy schedule may look good, but it misses the mark of
real management.
If you reported too much progress the last period and this
period you make an adjustment by reducing the progress
reported, the BCWP may actually be negative for the
current period to indicate the adjustment. The best way
to make corrections is to move the progress line and edit
the incorrect field.
Posting Actual Expenditures
After the progress has been entered, you can enter the
actual expenditures for each task. This can be done
resource by resource, using the Actual plane. If you have
a Manual mode set for ACWP for a Cost or Element of
Cost, Actuals can be entered in the Costs dialog for each
activity, or all at once in the Costs table.
Entering ACWP data through the Costs dialog box is
simpler than calculating it from resources, and it can
accommodate the non-resource based costs that often
arise when working on an activity without using
Elements of Cost. Remember that if you want to enter
cost information into the Costs dialog box or table, you
must have the ACWP calculation method set to Manual.
For more information, see the section on Methods of
Calculating the Basic Information earlier in this chapter.
Evaluating the Results
After the progress and cost information have been
entered for each activity, you should evaluate the results
on screen. This process should not be overlooked, since
there are frequently reporting errors and simple keyboard
entry mistakes. A quick evaluation can be done by
220
Issue 1 - AMS REALTIME Projects Advanced User Guide
performing a Project Rollup and then entering the Costs
dialog box for the project summary activity.
Cost Variance (CV), Schedule Variance (SV), Cost
Performance Index (CPI), Schedule Performance Index
(SPI), Cost Status (CS) and Schedule Status (SS) provide
an overall look at the project. You can look at any of the
summary bars within the schedule, as well as the detailed
activities.
Look for places where you are behind schedule or over
budget. These represent the problem areas. Validate that
the progress and expenditure information you entered for
these activities is correct, as errors here cause incorrect
results in the summary bars.
If you prefer, you can use the Costs table to see more than
one activity at a time, helping you see trends. However,
the table does not show all the variances, indexes, and
status information that the Costs dialog box includes.
Summarizing Cost Information
When you perform a Project Rollup, the progress from all
the detail activities is used to calculate the progress for
the summary activity. There are five different methods of
calculating the summary activity’s progress. Use the
RUPRGBCWP flag in the configuration file to select
which of the methods listed below you want to use. The
table below shows the values for the flag and describes
the effect of using it.
For example, if you set RUPRGBCWB=2 you will be
indicating that you want to use the Weighted BCWP
method.
Each method is illustrated with the rolled up schedule
and the Costs dialog for the project (the summary bar).
Issue 1 - AMS REALTIME Projects Advanced User Guide
221
0
Weighted Duration
This option focuses on the period before the Time Now
Line. It sets the progress to a percentage equal to the ratio
of the total progress to the total completed span. This
option is useful for determining how closely you are
following the project schedule. It calculates progress based
on how much work should have been done before Now
compared to how much actually was performed.
This option is the default.
222
Issue 1 - AMS REALTIME Projects Advanced User Guide
1
Linear BCWP
This option sets the summary progress equal to total
BCWP divided by the total BCWS. The progress bar
represents the percentage of technical progress, but it does
not accurately display whether your project is ahead or
behind schedule. It just gives a flat picture of the cost of
the work accomplished as compared to the whole amount.
Issue 1 - AMS REALTIME Projects Advanced User Guide
223
2
Weighted BCWP
With this option, the progress within the completed
span equals the total BCWP divided by only the
BCWS up to the Now line. Like Weighted Duration,
this option is useful for determining how on task a
project is rather than the percentage of work
completed. It calculates progress just as Weighted
Duration, but instead uses costs rather than time for
the comparison.
224
Issue 1 - AMS REALTIME Projects Advanced User Guide
3
Linear Duration
This option sets progress equal to the total progress
divided by the total activity spans. It is an effective
indicator of what percentage of the total work has
been completed, but if you have more work at one end
of the project it can deceptively make you appear
ahead or behind schedule. This gives a flat picture of
the time spent, as compared to the entire project span.
Issue 1 - AMS REALTIME Projects Advanced User Guide
225
5
Modified Linear Duration
This option sets progress equal to the difference
between the total BCWP and the cumulative BCWS
divided by the difference between the total BCWS
and the cumulative BCWS.
Except for Modified Linear Duration, these options are
the result of varying two factors: whether to base
calculations on costs or dates, and whether to divide by
the total value as a flat rate, or also evaluate where the
values are in relation to the Now line..
When using cost information, the numerator (the number
to be divided) is always the BWCP and the denominator
(the number it is to be divided by) is always the BCWS.
Otherwise, the numerator is the progress and the
denominator is the span.
226
Issue 1 - AMS REALTIME Projects Advanced User Guide
The choice of dividing by the total value or the
cumulative value depends on what you want the summary
progress bar to represent. A Linear selection divides by
the total value, so the progress bar represents an exact
percentage of the work completed so far. Since the work
may not be evenly distributed, however, the progress bar
can deceptively imply a project that is behind or ahead of
schedule. See the figure below for an example of how
this can occur. A Weighted selection eliminates the
problem of a specious progress bar, but it no longer
represents a flat percentage of the total work.
Summarizing the Project with Elements of Cost
In order to summarize cost information according to the
Element of Cost to which it is assigned, you will need to
set up planes that represent totals and subtotals for each
activity. These totals and subtotals can be created from
Summary definitions, Formula equations, or
combinations of each.
These planes will then be displayed in the Cost dialog
and Cost Table, rather than the normal information
which is the total costs for the activities.
A Project Rollup of activities will create and update
summary bars, either into Title activities or into an
overall Project Summary activity. Each of these activities
will have it’s own set of all the Elements of Cost you
have defined. This will give you the power to see not
only a complete breakdown of activity costs, but a
complete breakdown of costs for groups of activities or
for the entire project.
Issue 1 - AMS REALTIME Projects Advanced User Guide
227
The cost dialog which appears when the Cost icon is
selected is always the first Element of Cost. To access
the cost dialog for an Element of Cost, first select the
activity and then select the Elements of Cost icon. Then
choose the specific Element of Cost name from the popup menu.
Printing Earned Value Reports
The final step in earned value tracking is printing the
various reports to fully understand the current status.
You will most likely want to print a summary report and
several detailed reports. This is accomplished through
Vision Mode using various cost related MetaFrames and
MetaStrings. For an explanation of MetaFrames, see
Chapter 8, Publish, in the Basic User Guide.
Some of the more useful MetaFrames for this purpose
are:
%BCWS,
%BCWP,
%ACWP, ...
(any cost field)
These MetaFrames display the
associated fields for each activity of
the schedule. Time-phased cost fields
show just the current cost bin (except
ETC, which shows the next) If a
physical line has more than one
activity, only the earlier activity’s
information is shown.
%COSTS,
%TOTALS
These are used across the bottom of a
chart to show the costs or cumulative
costs time-wise from left to right.
The formatting dialog within Vision
mode controls which cost values are
shown.
%VARIANCE
This is a graphic MetaFrame that
displays the cumulative cost variance
analysis chart as an X-Y chart, where
the X axis is time and the Y axis is
cumulative cost.
This MetaFrame must be used in
conjunction with either the
%SCHEDULE or %CALENDAR
228
Issue 1 - AMS REALTIME Projects Advanced User Guide
MetaFrame so it can get the time
frame information it requires. It is
usually placed underneath one of
these MetaFrames, although you may
also overlay it on top of a
%SCHEDULE MetaFrame.
%LVAXIS
This assigns left axis labels if the
%VARIANCE MetaFrame is used.
%RZSUM
Although not strictly cost related, the
%RZSUM MetaFrame can be used to
acquire resource information broken
across periods, which is useful for
comparison with the cost information.
%fld[Element of Cost]
Any cost field can be modified to
show that field for a specific Element
of Cost by attaching the Element of
Cost name in square brackets after
the fieldname.
There are some sample reports and schedules distributed
with the software which will give you ideas on
structuring cost and Earned Value reports. Thumbnails
can be viewed in AMS REALTIME Vision by clicking
on the Cost reports button. Please refer to the chapter on
Publishing with Vision for more information.. Please
spend some time reviewing the cost reporting capabilities
which are provided, since they will help you understand
the reporting process.
Resource Cost Spreadsheet
This is covered in detail in Chapter 6, Advanced
Resources. To see resource cost information in the
Resource Window in Schedule mode, use the
Spreadhsheet menu in the Resource Window and
select Cost or Cost+.
Issue 1 - AMS REALTIME Projects Advanced User Guide
229
The Resource Usage Table
This table was covered in detail in Chapter 6, Advanced
Resources.
Remember that to see cost information, you should use
the Edit menu in Table mode, select Set Order and
check the By cost box, as shown in the figure below.
The resulting table is shown in the figure below.
In this case we have also checked the Totals Across
box. You may need to lock the first two columns and
scroll through the timescale to find the information you
want.
230
Issue 1 - AMS REALTIME Projects Advanced User Guide
The Cost Table
This table shows cost information by activity. Select the
cost table from Table mode, using the Table menu to
select the Costs item.
The first two columns identify the Activity by ID and
Description. This is followed by a column for each cost
field, (i.e. BCWS, BCWP, ACWP and ETC), a total and
then each of the defined cost bins for the project span.
The cost bin size should not be altered after the earned
value tracking process has begun.
Issue 1 - AMS REALTIME Projects Advanced User Guide
231
Be careful that you are not changing the cost bins purely
for aesthetic reasons. The cost bin definition is central to
the accounting time periods and should not be changed
once data has been entered.
If you wish to show costs for different time periods use
the Resource Window Costs Spreadsheet and alter the
Timeline scale and grid.
The table can then be manipulated exactly as covered in
Chapter 3, Getting Started, in the Basic User Guide.
Dollar signs indicate that you are seeing costs and not
usage information.
Change your money sign using the INTLMONEYSIGN
switch in the configuration file,
Where to Go From Here
For full information on printing cost reports, refer to
Chapter 8, Publishing, in the Basic User Guide.
For information about the entry, manipulation, and use of
resource information, see Chapter 7, Resources, in the
Basic User Guide, or Chapter 6, Advanced Resources, in
this manual.
232
Issue 1 - AMS REALTIME Projects Advanced User Guide
Chapter 8 - Multiple
Projects
Introduction to this Chapter
In many organizations, there are several different people
who will be involved in managing a project. An overall
project manager, for example, might want to maintain an
overview of the whole schedule, while team leaders or
other people may manage at a lower level, supervising
groups of related activities.
This “stratification” of the management may relate, for
example, to the use of the WBS.
To make this type of management easier, you may want
to break the project into separate schedule files,
containing only the information relevant to each person
involved in the process.
Issue 1 - AMS REALTIME Projects Advanced User Guide
233
PROJECT
PLANNING
INITIAL INVESTIGATION
DEPARTMENT A
DEPARTMENT B
INVESTIGATION
ANALYSIS
REQUIREMENTS
DRATF REPORT
CONSULTATION
DESIGN
BUILD
REVISIONS
TEST
SIGN-OFF
DEPARTMANT C
AMS REALTIME Projects provides some different
methods of doing this. These are covered in this chapter.
In summary, the different methods are:
• Rolling up a schedule into a separate file. This
allows you to rollup in different ways for different
people, but only provides a “snapshot” of the data at
the time you rolled up. This is a one-way process
that is typically used to provide summaries to upper
management..
This is a different operation from a Project Rollup, which
rolls the information up but stores the results in the
same schedule file.
• Using a Master project with a series of Subprojects.
This allows data to be consolidated for a high-level
view in the Master schedule, while other managers
can control their own sections of the project in the
subproject. Changes made at the lower levels can be
automatically passed up to the higher level Master
project; changes to the Master project can be passed
down to the lower-level subprojects. You can
change these defaults if you wish. Subprojects can
continue for an indefinite number of detail levels.
As well as establishing projects at different levels, you
may want to combine information from different
schedules. The methods for doing this, also covered in
this chapter are:
• Getting information from other projects, and placing
it in this project
• Merging one or more projects into a new schedule
• Merge-linking one or more projects into a Merge
Link schedule, which provides the capacity for inter-
234
Issue 1 - AMS REALTIME Projects Advanced User Guide
project network constraints and shared resource
leveling.
• Sharing calendars, Resources and Resource pools.
Related Topics
Chapter 3, The Work Breakdown Structure, contains
information on the use of the Structures facility to roll up
information from different levels. You should also refer
to chapters 6, Advanced Resources. and 7, Costs, for
information on summarizing resource and cost
information.
Rolling Up All the Information in a File
A summary file can contain information from multiple
detail files, which in turn may be derived from other
detail files.
Alternatively, you can use the
Project Rollup tool to initiate
the rollup.
To create a file to hold the summary information, first
select New from the File menu. Then choose MultiProject… and then Rollup... from the File menu,
opening a dialog box to set options for the function. See
the section on Organization below for a figure showing
this dialog box.
Issue 1 - AMS REALTIME Projects Advanced User Guide
235
File rollups, as they are more powerful than simple
project rollups, have many options, described in the subsections below, to control how activities, resources, and
cost centers group into summary bars.
Once you have configured the rollup, click OK and then
select the files from which the summary file will extract
information. Multiple files can be selected by entering a
standard wildcard file specification, such as *.arp,
CP*.sch, or CPX??.arp. To make a mass selection of
schedules that don’t have a common naming convention,
use the Librarian to move them into a temporary
directory first (see Chapter 2, Librarian, for full details).
The figure below shows how the sample project for this
manual might be rolled up.
Organization
When AMS REALTIME Projects collects data for the
summary bars, it must know how to group the detail
236
Issue 1 - AMS REALTIME Projects Advanced User Guide
activities. The different options for this procedure, listed
below, are divided into two categories on the left side of
the Rollup Options dialog box. The left side of the
dialog controls how summaries will be collected, while
the right side controls what information comes into the
rollup, and other options. Whenever one of these
categories is selected using the radio buttons, the choices
that comprise it can be selected.
Breaking Down Summary Information into Categories
When you choose the Breakdown by: radio button,
AMS REALTIME Projects lets you group the detail
activities by Schedule, Resource, or Cost Center.
You can also select more than one of these options to
create a summary bar for each unique combination of the
selected’elements. These options are described below:
Issue 1 - AMS REALTIME Projects Advanced User Guide
237
Schedule
This only produces one summary bar for
the whole schedule, much like the
schedule summary bar from a project
rollup. If you want to rollup several
different schedule files into one overview
file, this is a useful option to use. The
summary bar is named after the detail
schedule’s filename, or by the Project
Heading, if one exists, and can also
acquire resource usage or costs.
Resource
This produces a separate bar for each
resource in the detail schedule, naming
each bar after the resource. Each summary
bar acquires all the usage values for its
resource.
Cost Center
This produces a separate bar for each cost
center in the detail schedule, naming each
bar after the associated cost center. Each
summary bar acquires all the usage values
for its cost center.
Collect by Field
If you group activities by their fields, you must choose
which field to use and how to use the information in that
field. The first set of radio buttons controls the field
which categorizes activities, and the second set controls
how AMS REALTIME Projects uses the information in
that field. The figure below shows these options in more
detail.
238
Issue 1 - AMS REALTIME Projects Advanced User Guide
The various fields available for guiding a rollup are listed
below. If using a type of extension field, you must also
use the pop-up menu below the radio buttons to specify
the exact field to use. If you have standard fields defined
in your untitled.arp or a matching template schedule,
those field names will be provided in the extension popup. If you do not have extensions defined, AMS
REALTIME Projects will provide an extension field
framework by number. In either case, AMS REALTIME
Projects compares the extension row number, not the
name, of the field when making the comparison. Thus,
you do not have to redefine the activity extension fields
in the summary file, but if you do, make sure they are in
the same order as those in the detail files.
Activity ID
This groups activities with the same values
in the Activity ID field, naming each
summary activity after the shared values.
Since this is already a specific field, you
don’t need to use the pop-up menu below.
Activity Ext
This uses a user-defined activity extension
field to group activities, often a WBS or
Group field. The summary bars are named
Issue 1 - AMS REALTIME Projects Advanced User Guide
239
after the values in the field.
Requirement
Ext
This creates summary bars based on a
requirement extension field. Since each
activity may have more than one value per
field, the activities may contribute to more
than one summary bar. If this is the case,
resource usage is attributed to the summary
bar with the matching extension field value.
The summary bars are named after the values
in the field.
Res Ext
This creates summary bars based on a
resource extension field, naming the
summary bars after the values in the field.
Once you select a field, you must also tell AMS
REALTIME Projects how to interpret the values in that
field. The next set of radio buttons controls this aspect of
file rollups.
240
Match Whole
Field
This creates a separate summary bar for each
unique field value, grouping any activities
that share the same value.
Match
Template IDs
For greater control over the contents of each
summary bar, you can create rollup
templates, which are predefined summary
activities with special wildcard Descriptions
or IDs that control which detail activities
they comprise. Create these activities in the
blank summary schedule, and in their
Description field, enter a matching string
with wildcard characters, e.g., AA*, AB*,
etc. Every activity with a comparable value
in the selected field contributes to the
summary bar, redefining its start and
complete dates and resource requirements.
For example, if you want to divide the
schedule into those activities with A as their
second letter and those with B as their
second letter, create two summary activities,
one called ?A* and the other called ?B*.
Notice that some activities might be left out
using this technique, although a summary bar
with a description of * provides a full
overview. When using template IDs, you
must select Accumulate or Preserve
Issue 1 - AMS REALTIME Projects Advanced User Guide
Layout, described below, or the summary
activities are erased before the rollup uses
them.
Match Only the
First
This uses the first n characters in a field,
rather than the entire field value, to create
categories. With this option you must enter a
number in the space below to specify how
many opening characters to match.
Match Only the
Last
This uses the last n characters in a field,
rather than the entire field value, to create
categories. With this option you must enter a
number in the space below to specify how
many ending characters to match.
Match WBS to
Level
If you use a WBS field to group activities, the
above options are inadequate to properly
organize the schedule. Instead, use this
selection and in the space below enter a
number representing at what WBS level you
want to create summary bars. Thus, if you
specify 2, all the activities sharing the first
two WBS values are summarized together.
Key into ID
Normally when AMS REALTIME Projects groups
activities into summary bars, it places the common
characteristic in the summary bars’Description field.
Check the Key into ID box to place this piece of
information in the Activity ID field instead.
This box also controls the location of the matching
strings when using Match Template IDs. When
unchecked, you must enter the matching strings into the
Description field of the summary activities. When
checked, use the Activity ID field instead.
Resources
The top right area of the Rollup Options dialog box
controls resource and cost calculations. You can choose
which resources to include and how to incorporate them
into the file rollup.
Issue 1 - AMS REALTIME Projects Advanced User Guide
241
All Resources
This option includes all the resources,
essentially copying them from the detail
schedule to the summary schedule. Costs
will be recalculated from the summarized
resource usage based on the cost
calculation modes, resource cost per unit,
and Elements of Cost defined in the rollup
file. .
No Resources
(Costs Only)
Select this option to rollup cost
information without including all the
resource usage data.
Note: To preserve costs as they are, make
sure to set the cost calculation modes to
Manual before rolling up project data.
One Resource
To rollup only a single resource, select this
option and use the pop-up menu below to
select which resource to use. AMS
REALTIME Projects ignores all other
resource information.
Collect by
Resl Ext
Just as a rollup groups activities into
summary bars, so it can also use a resource
extension field to group detail resources in
summary resources. Use the pop-up menu
below to select which resourcel extension
to use. Each unique value in this field
creates a separate resource bar comprising
the detail resources with that value. The
summary resources are named after the
associated field value. This is useful for
rolling up resources by Group or Location.
Progress
The file rollup options for summarizing progress are
identical to those in project rollups, with one addition for
Minimum and Maximum Progress To dates. Select one
of the options described below to control how the
summary bars calculate progress. For consistent results,
you should choose the Progress type that matches the
242
Issue 1 - AMS REALTIME Projects Advanced User Guide
RUPRGBCWP configuration setting, which determines
how progress is calculated in Project Rollups.
Min/Max Dates
This option actually displays two
progress bars for each summary
activity. The first is black and
represents the position of minimum
progress. The second, an extension
of the first, is gray and represents
the position of maximum progress.
Linear Duration
This option sets progress equal to
the total progress divided by the
activity spans. It is an effective
indicator of what percentage of the
total work has been completed, but
if you have more work at one end of
the project it can deceptively make
you appear ahead or behind
schedule.
Weighted Duration
This option focuses on the period
before the Time Now Line, or the
work that should have been
completed. It sets the progress to a
percentage equal to the ratio of the
total progress to the total completed
span. This option is useful for
determining how closely you are
following the project schedule.
Linear BCWP
This option sets the summary
progress equal to the total BCWP
divided by the total BCWS. The
progress bar represents the flat
percentage of technical progress, but
it doesn’t accurately display whether
your project is ahead or behind
schedule.
Weighted BCWP
With this option, the progress within
the complete span equals the total
BCWP divided by only the BCWS
up to Time Now. Like Weighted
Duration, this option is useful for
determining how “on schedule” a
project plan is rather than the
percentage of completed work, but it
Issue 1 - AMS REALTIME Projects Advanced User Guide
243
is based on costs.
Current File
This set of options controls how to treat the currently
opened file. A different option exists for each situation
you are likely to be in.
Clear
Select this option to close the file and open
a new one for the file rollup. A dialog box
asks if you want to save the file before
closing it. This is likely to be your choice
for new file rollups.
Accumulate
This option does not erase any information
in the current rollup file, but accumulates
the new data (spans and other information)
into the current summary bar. This is
useful if you are rolling up several
schedules into one.
Preserve
layout
This option maintains the position of the old
summary bar, but replaces anything by the
same name with the new summary data.
This lets you preserve the schedule layout
while re-generating the actual information.
Other Options
Finally, there are three other options that control facets of
the file rollup.
Conserve Memory
If AMS REALTIME Projects warns you that you lack the
necessary memory to rollup a schedule, use this option.
Do not use Conserve Memory unless necessary, since
it slows down the processing of the rollup.
244
Issue 1 - AMS REALTIME Projects Advanced User Guide
Only Activities w/reqs.
Often, the intent of a rollup is to judge the periods when
different resources are required. However, if some
activities in a group do not use a resource, the summary
bar could extend farther than the time of resource usage.
Select this option to incorporate only those activities that
use resources.
Rollup Baseline
Select this option to transfer baseline data to the
summary schedule. Unless you use this option, AMS
REALTIME Projects will ignore the detail activity
baseline information when generating summary bars.
Merging Schedules
There may be times when you want to combine two
schedules. If so, open one of the schedules, then merge
in the second using the Merge item on the File menu.
When you have completed both steps, you have the two
schedules merged together on the screen, one following
the other. Merge is used for project communication
across horizontal levels, i.e., that contain the same level
of detail.
You can also merge one or more schedules into a blank
schedule to create a multiple project report that will have
no impact or links to the original schedules. This is an
effective technique for managing what-if analysis.
If you had a line selected when choosing this option, the
Merge inserts the schedule immediately before the line
that is selected. AMS REALTIME Projects inserts just
enough lines to hold the schedule you are merging, and
then puts it into the inserted space.
Issue 1 - AMS REALTIME Projects Advanced User Guide
245
You can use this technique to break a large schedule into
small discrete portions, each of which may be controlled
by different groups of users. Then, periodically, combine
these pieces into a larger overall schedule to get a big
picture of the entire project, with its current progress and
enough detail to make decisions and changes, if needed.
This type of project management gives maximum control
and responsibility to the groups actually performing the
work. In this case it provides the detail’s from the lower
levels. This makes schedule updating and progressing
easier and more reliable. It also makes it possible to have
progress updating happen more often, allowing the
project manager to have closer control than with
traditional centralized updating schemes.
A procedural hint when using this method is to create a
title line at the insertion point, before merging the files,
to ensure maximum separation and identification.
Merge-Link Schedules
A Merge-Link schedule is comprised of one or more
schedules, as is a Merged schedule. Merge-Link is used
for project communication across horizontal levels, i.e.,
that contain the same level of detail. However, a MergeLink schedule has several other important attributes.
The most significant difference is that a Merge-Link
schedule maintains a link back to each original
component schedule. Once a merge-link schedule has
been created, only the pointers to each component
schedule are stored in the merge-link schedule. Each
time the merge-link schedule is re-opened, each
component schedule is loaded, keeping the merge-link
schedule up-to-date.
246
Issue 1 - AMS REALTIME Projects Advanced User Guide
Likewise, when a merge-link schedule is saved, the
current information is written back to each individual
component schedule. The changes to component
schedules can come from many sources. Updates to
activities, resource assignments or resource leveling, or
network constraints between different schedules can all
impact the overall project.
If resource assignments are made in the Merge-Link
schedule from an overall resource pool, only the
resources assigned to the relevant activities will be
written back to each component schedule.
If network constraints are created in a Merge-Link
schedule between activities from different component
schedules, the network calculation will be made when the
Merge-Link schedule is opened. When the save occurs, a
“dummy” activity will also be written back to the
component schedule with a network constraint. This
identifies a predecessor or successor activity from another
project.
Dummy activities bring along all of their extension
fields, so if a standard set of activity extensions are used,
considerable information can be obtained about the
activity.
A dummy activity can not be deleted or modified, since it
really represents an activity from another project that
impacts something in the component schedule. If the
network constraint is deleted from the Merge-Link
schedule, the dummy activity will also be removed when
the Merge-Link schedule is saved.
Dummy activities can be filtered out with the matching
process. T Flags is an activity field that contains several
activity type flags. The fifth character in this series
identifies a dummy activity. If it is an upper case ‘D’,
the activity is flagged as a dummy from another
Issue 1 - AMS REALTIME Projects Advanced User Guide
247
schedule; if it is a lower case ‘d’, it is a regular activity in
the current schedule. To see only the “real” activities for
reports or other purposes, use the split screen table to
create a matching filter that under the T Flags activity
field that uses the case-sensitive filter:
For example, to select the regular activities from the
current schedule (and filter out the merged activities)
enter the following characters into the TFlags column for
matching:
== ????d??
Getting Information from Other Schedules
Schedules contain many pieces of useful data. Data
values for Import/Export maps and Extension Labels and
Values are useful across many projects. The Get option
allows you to get some of this information from another
schedule, so that you do not have to re-enter it each time
you build a new schedule. If you want to extract a single
activity or sequence of activities from another schedule
(which might be a library of standard operations), you
can also use this function.
Getting Other Schedule Information
If you want to get the Schedule Extension Fields,
Schedule Extension Values, Activity Extension Fields,
Activities, or Calendars from another schedule and load
it into the current schedule, select the Get item from the
File menu, Multi-Project… item.
A dialog box will appear, as shown below, which allows
you to pick the information you are interested in loading.
Select all those you are interested in and then click the
Get it button.
248
Issue 1 - AMS REALTIME Projects Advanced User Guide
You will be presented with the File Selector dialog to
select a schedule. Select the schedule you want to extract
from and click on OK. The information will be loaded
from the selected schedule into the schedule you
currently have open.
Getting Standard Activities and Sequences
For many organizations, new projects are not unique in
all their aspects. They may be very similar to previouslyplanned projects, or contain sequences of activities which
are common to all projects. For example, any software
development project will need to include a series of
activities to do with testing; these activities will be
essentially the same from project to project, although
some information, such as that to do with their timing,
will differ.
Where this is the case, and where these activities or
sequences can easily be pre-defined, the Get option
speeds the generation of a new schedule, and provides
consistency across schedules by allowing you to build and
maintain libraries of template schedules that contain
activities and activity sequences.
If you create template schedules with only activities
defined, getting activities from the template will produce
Issue 1 - AMS REALTIME Projects Advanced User Guide
249
a pop-up of each of the activities. You can continue to
select activities until you click outside of the pop-up to
indicate that you are finished.
If you create a template schedule with activities grouped
by title, only the title activities will be displayed in the
pop-up. Selecting a title will load all of the detail
activities, but not the title. You can continue to select sets
of activities by title until you click outside of the popup to
indicate that you are finished.
To create a new schedule from a template schedule, first
select the Activities option on the Get dialog in a new
schedule. AMS REALTIME Projects will first prompt
you for the name of the schedule from which to load the
Activities. Once selected, AMS REALTIME Projects
will read through the schedule and produce a pick-list of
activities (ID and Description), or a pick-list of Titles (if
you have Titles defined in the schedule you have selected
to get the information from).
If you select a single activity, that activity bar and all of
its associated resources and costs will be copied from the
library schedule and loaded into the current schedule. If
you select a Title name, then all the detail activities
underneath(and their resources and costs) associated with
that Title will be copied from the template schedule and
loaded into the current schedule.
Additionally, file merge can be used to merge incomplete
standard template schedules.
250
Issue 1 - AMS REALTIME Projects Advanced User Guide
Sharing Information Between Projects
By breaking down schedules into small pieces based on
responsibility and ownership, you can create a distributed
project so that each person who is responsible for the
work can also be responsible for maintaining the
schedule. More than one merge-link schedule can be
created to bring pieces of the project together in the
correct way.
For example, a merge-link schedule might be created to
pull all of the Engineering Department schedules
together and look at them as a whole. Resources can be
analyzed for conflict and other considerations, and any
appropriate changes can be written back to the
component schedules. Another merge-link schedule
might look at several component schedules from a
Product perspective. Schedules that span many
departments can be pulled together so that interproject
constraints are calculated, showing the impact on a
delivery date even when many organizations are
contributing.
The one essential element of sharing data is that the
extension fields, calendars, cost bins and parameters,
resource usage options and other user-defined project
attributes are consistent. This will allow you to compare
like data and achieve meaningful results, rather than
comparing apples to oranges.
SubProjects
When projects are very large or involve many different
departments, independent planning is often required for
certain project components. When this occurs, it is often
desirable to have a master schedule which contains highlevel information. This can take the form of one or more
activities, any of which may represent the summation of
another entire, detailed project. Each of these projects
can be independently planned, scheduled and tracked in a
Issue 1 - AMS REALTIME Projects Advanced User Guide
251
separate schedule. AMS REALTIME Projects allows
this process to be used through Subprojects.
Subprojects allow different levels of a project plan to
communicate and exchange schedule and resource
utilization information. These links can be established
between an activity in a higher level schedule, or master
schedule, and a summary activity in a detail level
schedule, or subproject. The activity in the master
schedule and the corresponding activity in the detail level
schedule must have the same Activity ID. Subproject
links are used for project communication between
vertical levels.
The master schedule does not necessarily have a one-barper-schedule connection to each subproject schedule, as
is the situation with a basic File Rollup. A task in the
master project is connected, or linked, to an activity in
the subproject. Usually, this is a Title activity, as it
summarizes the detail level from the subproject and
communicates it back to the master schedule. Each
activity can have one subproject link, but each link does
not have to connect to a different schedule file. Activities
in the master schedule can connect to different summary
activities within the same physical schedule, within a
different schedule or a combination of both. In addition,
a subproject may be connected to more than one master
schedule.
252
Issue 1 - AMS REALTIME Projects Advanced User Guide
Once a subproject connection has been made, AMS
REALTIME Projects creates an activity extension field
called SubProject in the first unused activity extension
field, which holds the pathname of the linked schedule
file. It is the filename stored in this field in combination
with the Activity ID match which defines the link. Note:
A SubProject field can be created and stored in the
untitled.arp to control exactly which activity extension
field is used.
When the detail level schedule undergoes an project
rollup, each Title activity will contain a summary bar
which encapsulates the dates and resource requirements
from the activities below. This summary information
from the detailed schedule can then be pulled up into the
master schedule via the subproject link. Subproject links
do not necessarily have to connect with summary
activities. One-to-one connections can also be defined.
For example, a link between milestones in the master and
identical milestones in the detail level schedules will
cause the linked milestones to shift in the master
schedule when updated with current data from the
subproject. This is extremely useful for showing critical
milestone slips without displaying all of the detail of the
subproject schedule. If these subproject milestones are
tied to other activities in the master schedule using
network constraints, the overall effect of a subproject slip
will be reflected appropriately throughout the project.
Using Subprojects
Alternatively, you can
use the SubProject
Commands tool.
To create a subproject link, select an activity and use the
File menu, Multi-Projects option and then the SubProject… option. The Subprojects menu is displayed.
Issue 1 - AMS REALTIME Projects Advanced User Guide
253
If the detail level schedule does not already exist, the
subproject connection is established in the master
schedule by selecting Create SubProject. You will be
prompted for a filename, and then AMS REALTIME
Projects will create that schedule file containing a Title
activity (or activities) with the same Activity ID and
dates as those in the master schedule. A Title activity is
the default, since normally detail level is summarized
and sent to the master schedule, but the activity types can
also be changed in the subproject schedule.
Select the linked activity and then select Go Down from
the SubProjects menu. This will close the master file
and open the Subproject file. Before the new file is
opened, you will be prompted to save changes to the
master. If the master file is not saved, a new file will
have been created, but the link will have been lost. The
link can be recreated by attaching to an existing
subproject file, which will be discussed later.
The detail activities can then be created in the subproject
schedule and adjusted to attempt at “best fit” within the
guidelines of the master plan. If multiple Title activities
have been created, lines should be inserted between the
title activities to make room for the detail activities.
Performing a Project Rollup in the subproject will
summarize the new detail plan into each Title bar. These
new plan summaries can be compared to the original
master plan by selecting the Dates from Above
revision plane (using the Multiple Revisions icon) and
comparing that revision to the current plan dates.
If the detail level schedule currently exists, the subproject
connection can be established in the master schedule by
selecting the Attach to SubProject command. If the
Activity ID of the selected activity is found in the detail
254
Issue 1 - AMS REALTIME Projects Advanced User Guide
level schedule, the subproject link will connect to the
existing activity. If the Activity ID is not found, a Title
activity is created with that Activity ID.
To clear the connecting subproject link, select the activity
and choose Detach from SubProject from the
SubProjects menu. The contents of the SubProject
extension field will clear to show that the subproject link
has been severed.
SubProject Communication
Once the links have been established, the current master
plan can be communicated to the subproject levels by
selecting Update SubProjects from the SubProject
menu. Update SubProjects iterates through all the
attached subproject schedules at the next lower level of
detail, and modifies the Dates From Above revision with
the dates and planned resource requirements of the
linked activities in the master project. This
communicates the current plan (either new or revised
information) down to the subprojects for comparison with
the schedule summary at the detail level..
In each of the subproject files, Project Rollup is used to
update the Title summary from the detailed activities in
the subproject schedule. The Dates From Above revised
set can then be viewed to compare the current low-level
plan with the plan sent down from above. To access the
information passed down from the master project, select
Dates From Above from the Revision Commands tool
icon. The revised dates will be displayed in the same
format as baseline dates. The schedule at the detail level
can then use this information to determine what changes
should be made to the detail schedule to conform to the
higher level requirements.
When the detailed schedule activities have been adjusted
for a “best fit” to the master plan, this new summary
information can be pulled up into the master schedule via
the subproject link. To examine the current plan in
relation to the current summary data from each detailed
subproject schedule, select Get Revised From
Issue 1 - AMS REALTIME Projects Advanced User Guide
255
SubProjects. This will bring the subproject
information up into the Dates From Below revision of the
master schedule.
To compare this new information with the current master
plan, select the revision labeled Dates From Below. The
baseline shadow boxes will display the current plan from
the subproject. Using Get Revised from
SubProjects allows examination of the changes before
they are accepted into the current master plan. To
examine the resource requirements from the subproject
link (either above or below), select the appropriate
revision and then select the baseline resource plane.
If comparison of the plan from below indicates that the
master plan should be altered, the activity can be
adjusted, the subprojects can be updated, and the cycle
can continue until a workable plan has been achieved.
This process permits information exchange between
project levels. Any schedule can be baselined prior to
subproject updates, as well as at additional critical
progress points into baseline revisions along the way for
comparison data. Any of these baselined stages can then
be measured against the current plan. Since the revised
information is stored in a baseline revision plane,
Perform Function/Baseline Into Planned can be
used to copy revision dates for just the selected activities
into the current planned plane.
Get Current from SubProjects will accept the
current summary of each detailed subproject schedule as
the current plan in the master. This replaces the last
master plan with the current response plan from below,
and causes the dates to become hard targets. Hard
Targets allow the dates from the subproject to supersede
any network logic which might alter those dates by
shifting the activities. This is a simple method of
accepting the changes from all the detail levels and
incorporating them into the master schedule.
Go Down will close the current schedule and open the
subproject schedule for the selected activity. If unsaved
changes have occurred in the current schedule, you will
256
Issue 1 - AMS REALTIME Projects Advanced User Guide
be prompted to save or disregard those changes before
opening the subproject schedule.
If multiple levels of subproject detail are used, it is
important that the process of updating begin at the lowest
level and move upward, until the highest level is
complete
Configuration Switches related to the use of SubProjects
The SUBPROJFULL configuration switch controls some
aspects of the subproject resource mapping. If
SUBPROJFULL=Y, then all resource information is
copied down in to the newly-created subproject. This
includes the pool information, resource pool extensions,
and even resources that are not yet explicitly used. If
SUBPROJFULL=N, then only the resources which have
actual requirements are moved down into each
subproject. Pool levels are not copied to the subproject if
this switch is set to N. In both cases, only the utilized
resources are moved in either direction once the
subproject has been created. It should be noted that
SUBPROJFULL does not send resource information into
newly attached subprojects, only newly created
subprojects.
Generic resource summaries lend themselves particularly
well to the subproject vertical communication process.
The generic resources can be defined in the master
schedule, where the general resource requirements can be
determined. These general resource requirement
amounts can be communicated down to the subproject
schedule, where specific resources can be assigned and
summarized into the generic resource. The generic
summary resource will then contain both the current plan
summary requirements in conjunction with the Dates
From Above baseline revision requirements. To
summarize resources with Project Rollup, set
EROLLMAPRQS=Y n the schedule configuration file.
The first resource pool extension is used to hold the
resource summary type, and should be named in the Ext
Fields Table. Each resource is given a first pool extension
Issue 1 - AMS REALTIME Projects Advanced User Guide
257
value that is identical to that of its summary resource.
When a Project Rollup occurs, the resource utilizations
will be summarized by type into each summary resource.
By selecting a summary resource, a histogram or usage
table for that summary can be obtained.
There must be a Title present in the schedule for f the
Project Rollup mechanism to function and collect the
resource summaries.
Considerations for Consistency with Multi-Project
Techniques
If multi-project techniques are to produce meaningful
results, it is very important that adequate consideration is
given to setting up standards for consistent calendar
definitions, extension definitions, and other shared
information. All of this standard information can be
controlled through the configuration file (schedule.ini or
schedule.cfg) and the untitled.arp file, which is the
default template for new schedules. It is very important
that these standards be communicated and understood by
everyone who will create and access any individual
component schedules.
For almost all multi-project techniques, unique Activity
IDs across schedules are extremely important. If Activity
IDs have not been created, Merge-Link will create a
unique Activity ID using the system date and time with
an encryption formula. These IDs will be written back to
the component schedule when the Merge-Link schedule
is saved. If activities with non-unique Activity IDs are
brought together through Merge-Link, AMS
REALTIME Projects will distinguish to those activities
by using an internal reference to the path and filename of
the source schedule. To minimize inconsistency and
maximize multi-project capability, it is highly
recommended that a unique Activity ID coding system be
developed and implemented across all projects.
258
Issue 1 - AMS REALTIME Projects Advanced User Guide
Subprojects require that a matching Activity ID is located
both in the master and the subproject schedule to
establish the link. Usually, each activity actually
represents the same task in both schedulers, but on a
different level of detail. If Activity IDs are blank, or if a
duplicate ID is found, the link will be made with the first
matching ID, which may not be correct. It is highly
recommended that some type of standard nomenclature
coding system be created and used. If this practice is
followed, all activities which might be linked across
projects will have unique Activity IDs.
Inter-Project Constraints
After you have used the Merge-Link option to combine
project schedules you can proceed to define the interproject constraints using the network tools as described
in Chapter 6, Networking, in the Basic User Guide. This
process is no different from that of defining constraints
within a project.
When you save the multi-project schedule after updates,
each independent schedule will contain dummy activities
which are reflections of activities in the schedules that
are either required or supported by activities in this
schedule. These dummy activities will carry the color,
pattern, and description of the activities that they
represent, but will be visually distinct: the symbol is
changed to an upward-pointing triangle connected to a
downward-pointing triangle with an underline. The
figure below shows a sample schedule and its interschedule constraints using dummy activities.
These dummy activities carry Hard Target dates which
represent the results of the last full multi-project
calculations. Therefore, any slips caused to a
downstream activity in another project will show as
Issue 1 - AMS REALTIME Projects Advanced User Guide
259
diamond slips against the target dates, indicating that
you should generate another full multi-project calculation
to get an idea of the full impact. To generate the full
calculation simply open the multi-project schedule file
and save it again.
Cross-Locking
If a project schedule is open and someone else tries to
open the same project, the second person will get a ReadOnly copy in an untitled.arp schedule. However,
different platforms use different techniques to lock an
open file. To accommodate users from multiple
platforms accessing the same schedule file, the
CROSSLOCKING switch can be set to Y. This creates a
dummy file with the .OWN extension. AMS REALTIME
Projects will check for the presence of and .OWN file
before allowing access to the schedule. As soon as the
original schedule is closed, the .OWN file is deleted. If
you are using AMS REALTIME from more than one
platform and sharing schedules from a common network
drive, this switch should be set to Y. Please note that if
your system terminates abnormally, AMS REALTIME
Projects will not be able to delete the .OWN file, and the
file must be removed manually.
Limits in Multi-Project Processing
There are several limitations which must be considered
when using the multi-project feature. These are not
serious, but should be considered when planning to
utilize this capability. A little pre-planning will ensure
that you do not have problems alter on.
Maximum Overall Project Size
A project’s activity capacity cannot exceed the maximum
number of activities that can be defined for any one
project. This number is dependent on memory size as
260
Issue 1 - AMS REALTIME Projects Advanced User Guide
well as the memory management scheme that was
provided with your version of AMS REALTIME
Projects. Generally speaking, with a 4-8 megabyte RAM
computer you will be able to process up to 4,000 tasks.
For each additional 4 megabytes of memory, this can be
increased by about 11,000.
In general, projects of this size should be broken into
subprojects or component schedules to keep management
effective. When you are looking at the relationships and
status of 50 activities, it is a manageable process. But if
you are looking at the relationships and status of several
thousand activities, you are bound to miss problems due
to the scope of what you are attempting to simultaneously
manage. The multiple-project techniques available
provide many options for combining and summarizing
data without all of the overhead of everything in a single
schedule. If you feel that you need to go beyond this
limit within a single schedule, please contact your
distributor or AMS.
Maximum Overall Number of Resources
The total number of resources must not exceed the
maximum number of resources allowed in any one
project which is 2000 resources.
NOTE: Several of the maximum size parameters have
been expanded or eliminated in Version 5.0, and are now
based strictly upon available memory.
Alignment of Extension Fields
When projects are merged together under a multi-project
process, there is no attempt to map extension fields by
field name or type. Extension field number one from one
schedule is mapped onto extension field one in the multiproject as is extension field number one from any other
schedule. This means that if, for example, extension
field one in one project was “Department”, while the
same field in another project was “Responsibility” then
Issue 1 - AMS REALTIME Projects Advanced User Guide
261
these two dissimilar fields would be mixed up when the
two were combined in the multi-project.
These limitations can be easily overcome by planning
ahead. For example, make sure that all your projects are
created with the same calendars, extension field layouts
and resource definitions. This can be done by defining
an untiled.arp that already contains your standard
starting point. Then every schedule that is built will
conform to this standard, and will therefore automatically
integrate without encountering these limitations.
Sharing Calendars, Resource & Resource
Pools
You can select and save Calendars, Resources and
Resource Pools from a central schedule file. This allows
common resources to be included across many projects
from a central point. As a resource is committed to a
new project, the availability of that resource is reduced in
the central file. So further project managers who select
from the pool can see who is available for their planned
activities, and who is not.
The above figure shows the Shared Project Components
button and the pop-down list which it invokes. Each
option on the list will link you to a file which contains
262
Issue 1 - AMS REALTIME Projects Advanced User Guide
the type of item you need. For example if you selected
Resources: you will be offered a file open dialog. From
here you can select the file that is acting as your central
file. This central file will contain Resources and/or
Calendars which can be imported to your new schedule.
A dynamic link is established between the two files and
any Resource commitments you make in the schedule file
will be saved to the central file.
The procedure for setting this up is quite straightforward
and is described in the following section.
• Create a Schedule file and enter all the
resources, resource availability's and
calendars you require to be available across
all projects.
• Save the file, preferably on a central server
with an appropriate name. For example
resource.avf
• Now open a new schedule using the New
option under the File menu.
Shared Project Components
• Go to the
button, and from the pop-down menu, select
Resource.
• From the resulting file open dialog, select
the location of your resource.avf file, select
it and click OK. The resources in the file
will be loaded into your new schedule.
• Now go back to the Shared Project
Components button and choose Pool. This
will import the availability of the resources
in the central resource.avf file. You will see
the Pool load into the Resource area at the
bottom of the screen.
• Create your activities and make your
resource assignments.
Issue 1 - AMS REALTIME Projects Advanced User Guide
263
• Save the new schedule file. At this point
the central file's resource pool will be
updated.
• Open the central file and you will see a
single activity bar representing all the
activities in your new schedule. In the
resource area you will see that your resource
assignments are reflected in the central
pool.
264
Issue 1 - AMS REALTIME Projects Advanced User Guide
Chapter 9 - Data
Exchange
Introduction to this Chapter
In the earlier chapters of this Guide, and throughout the
Basic User Guide, we have been concerned with creating,
viewing and amending information within AMS
REALTIME Projects schedules. In the previous chapter,
Multiple Projects, we broadened this out slightly to look
at data as it relates to several schedules, used together.
In this chapter, we shall look at the whole range of
facilities within AMS REALTIME Projects which will
enable you to share data, not only between schedules, but
between the AMS REALTIME Projects application and
almost any other application.
For example, you can take AMS REALTIME Projects
data and read it directly into other project management
systems that support the import of information, complete
with all the complex resource requirements and network
constraints between activities. Conversely, you might
want to take information about activities, constraints,
resources, costs, and so on, from another project
management system and read it into AMS REALTIME
Projects for more sophisticated analysis and reporting.
Issue 1 - AMS REALTIME Projects Advanced User Guide
265
The exchange of data may not only be concerned with
project-specific information. You may want, for
example, to take your project cost data and pass it on to
another spreadsheet or database application, where it can
be incorporated with other cost information from across
the organization. For example, you may want to
integrate project costing with departmental accounting
systems for a company-wide picture of expenditure
against budget.
In AMS REALTIME Projects, there are many methods
available for this type of data exchange. They are listed
here, and then each is covered in detail in the other
sections of this chapter. The list is ordered, roughly, in
terms of ease of use and complexity, where the options
that are easiest to use usually offer the least in the way of
functionality. The wider the range of functionality, the
more you will need to know about database layout and
manipulation. To help with this, the first section of the
chapter provides some quick definitions of the terms in
use throughout the rest of the chapter.
You will need to decide exactly what you are trying to
achieve before deciding on the best method for you.
AMS REALTIME Projects Data Exchange Options
• Using Cut and Paste facilities to move data between
applications
• Exchanging data from a single table in ASCII text
format using the Load and Dump facilities. You can
also Load and Dump Calendar information.
This option is useful for a one-time only passing of data
to or from another schedule or application
• Using Translators to transfer data
The Translators can be specific to another project
management or database system, such as the
translators for Microsoft Project or FoxPro.
Alternately, you can use the Generic Translator
capabilities to design your own “map” of the way in
266
Issue 1 - AMS REALTIME Projects Advanced User Guide
which the project data you choose is to be
transferred.
This option is useful where you want to transfer project
data from one or more tables, and will want to be
doing the same data transfer on a fairly regular basis.
• Using ODBC facilities provided by your operating
system
ODBC is an abbreviation for Open Database
Connectivity, and permits one application to access
data from directly within another application as its
source..
This is probably the one of the most far-reaching forms
of exchanging data, but does depend on your
computer system being set up correctly, and having
the right ODBC software options installed to work
properly.
Finally in this chapter, there is a section on a one-way
transfer of resource information into AMS REALTIME
Projects, using the facilities related to Resource
Transactions. For example, you may be using a
mainframe timesheet system to capture information about
actual hours and costs within projects. This information
can be transferred using a specific text format into AMS
REALTIME Projects automatically, without the need to
re-key the data, with all the opportunities for mistakes
that that entails.
Related Topics
You should refer to Chapter 2, Project Librarian, for
further information on the sharing of information
between projects.
Some Definitions of Terms
Before passing on to the exact methods for exchanging
data with AMS REALTIME Projects, it is probably worth
Issue 1 - AMS REALTIME Projects Advanced User Guide
267
defining some terms which will be used throughout the
discussions later in this chapter.
Dataset
AMS REALTIME Projects stores its data internally in a
series of tables which are known as datasets. These can
be thought of as similar to the tables that you can view on
the screen, but actually hold the internal database field
names as they are defined for the system.
File Format
For the most part, AMS REALTIME Projects shares
information by taking its own internal data and
converting it to an external file, which can then be read
into another schedule or another application altogether.
(The exception to this is ODBC, see the section on
ODBC (Open Database Connectivity) below). When you
want to share information from another application, the
process is reversed: that application will need to output
its data to a file, which can then be brought into AMS
REALTIME Projects.
The files used to do this are generally in a fixed ASCII
text format; that is, the files contain text and a range of
other characters (numbers, symbols, spaces, paragraph
markers and so on), which you could view on the screen
and read. This type of format contrasts strongly with
native binary formats, which are coded in such a way that
only other computer applications can read them.
Within this general type of text file, however, there are
various different formats used and they are discussed in
the sub-sections below. It is important that you
understand the format of the file that AMS REALTIME
Projects needs to create for it to be read successfully into
another application; in the same way it is important that
you understand the format of files being brought into
AMS REALTIME Projects.
AMS REALTIME Projects can work with almost any
type of text file, and several different types of application
268
Issue 1 - AMS REALTIME Projects Advanced User Guide
native binary files, giving you enormous flexibility in the
systems and applications that can be linked into your
project management system.
Records and Fields
The data used by AMS REALTIME Projects is divided
into records, each containing information concerning one
individual item. For example, an Activity Record relates
to just one activity; a Resource record to just one
resource, and so on.
In the exchange files, these records usually form one line,
or occasionally one section, within the file.
Each record (or line) is further divided into fields, each
of which contains one item of information about the
record. For example, in an Activity Record you would
expect to see a Field for the ID, a Field for the
Description, and so on.
Field Lengths
Data files can store their fields in one of two ways:
Fixed-length fields
In this case, the same field will be in the same position,
and taking up the same amount of space in every record
in the file. You could picture this in terms of columns of
data across the line. For example, the Description
column (field) may be in the first “column” of the record,
and the column one is 20 characters wide (in columns 1 20).
Variable-length fields
In this type of file, the fields are different in different
records, and are delimited by a particular character, such
as a comma. In this case, the Description may still be at
the beginning of the line, but is a different length for
each record, depending on the number of characters we
have used in each Activity Description.
Issue 1 - AMS REALTIME Projects Advanced User Guide
269
Field Delimiters
Where there are several fields on the same line, which is
nearly always the case, they will need to be separated
from each other. This is less likely with fixed-length
fields, as the position of the data on the line tells us what
field it belongs to. With variable-length fields, though,
we need to know, for example, where the Description
ends and the ID begins.
The most common types of delimiter are:
• Spaces
• Commas
• Tabs
but a delimiter can be any character that is not used
within the text fields themselves.
Text Fields
Frequently, text is treated specially in a data record and
can be displayed differently, usually by enclosing the text
within other symbols. If text is enclosed, it is usually
within:
• Single quotes (‘)
• Double quotes (“)
End of Line Markers
The end of the line can be signified differently, too. The
choices are
• CR for carriage return only (Macintosh)
• CR/LF for carriage return then line feed (Windows).
It may be difficult to know how the records are
terminated since a carriage return and line feed are not
printable characters. It is sometimes necessary to get a
hexadecimal dump of the file to be sure. A carriage
return is hex “0D” and a line feed is hex “0A”. Check
270
Issue 1 - AMS REALTIME Projects Advanced User Guide
with your system administrator, or with your
organization’s help desk if you need to know how to do
this.
Date Formats
Different applications, and sometimes different types of
file systems, use different date formats. The following
formats are available for use when importing or
exporting data into or out of AMS REALTIME Projects.
Format
Example
YYMMDD
980323
DDMONYY
23MAR98
DDMONYYYY
23MAR1998
MMDDYY
03/23/98
You should note that a wider range of formats is
available if you are using the Generic Translator (see the
sections on Generic Translators later in this chapter).
Telling the Difference Between File Formats
If the file has only a specific number of spaces for some
of its information, and this is the same for every data
record, then it can be assumed that the field type is fixed.
If, however, the data field length varies from record to
record then you can assume that the fields are variablelength.
Take, for example, the Activity Description (or in some
systems, title). If the length is fixed, then there will be a
lot of spaces at the end of a short description. If there
aren’t, it could mean that the data structure is variable
length. See the section Examples, below.
Another clue is the field delimiter. If nothing separates
fields, and data looks like it is run together, then there is
a good chance it is in fixed format. Otherwise, look for
some kind of separator and start counting columns
Issue 1 - AMS REALTIME Projects Advanced User Guide
271
between the same two fields in different data records to
see if they are the same (fixed) or different (variable).
Examples:
A file using fixed-length fields may contain a record
which looks something like this:
A123 Get Project Go-Ahead
25APR98
25APR98
A file using variable-length fields may contain a record
which looks something like this:
A123,“Get Project Go-Ahead”,25APR98,25APR98
Using Cut and Paste
Probably the simplest way of transferring AMS
REALTIME Projects data from one schedule to another,
or from one application to another is to use Cut and
Paste.
These facilities can be used to transfer data in tabular
format. However, they are rather limited, as data can
only be transferred to systems which use tables in a
similar way, and which use similar fields. It also means
that the other application must have the capability of
pasting data from the Clipboard.
• Access the table you want to use, either from the
Table mode, or using the Split Screen Table.
• Make sure the columns are in the correct order
across the table
• Make sure the data is in the correct order down the
screen
• Select the cells that you want to transfer by dragging
with the mouse from a cell at one corner to the cell
diagonally opposite
• Use the Edit menu, Cut or Copy options to copy
the data to the Clipboard. (Cut removes the data
from AMS REALTIME Projects after copying it.)
272
Issue 1 - AMS REALTIME Projects Advanced User Guide
• In the other schedule or application, position the
cursor or select the area where you want the data to
be inserted.
• Use the Edit menu (or its equivalent in the other
application) and select the Paste item to “drop” the
data into its new location
Exchanging Information with other
Schedules
Chapter 8, Multiple Projects, contains full information on
these facilities, but for completeness we enclose a
summary here. The two types of data that can be
“exported and imported” to other AMS REALTIME
Projects schedules are Tables and Calendars. The
processes for carrying out this exchange are outlines in
the next two sub-sections.
Load and Dump from Tables
On some projects, it is useful to be able to export data
from AMS REALTIME Projects to applications where
the data can be manipulated in other ways. For example,
you may want to export cost information to a spreadsheet
where it can be integrated into the rest of the
organization’s accounting information.
This Dump/Load facility can be used to export data from
a AMS REALTIME Projects table to an ASCII file, or to
import data to a AMS REALTIME Projects table from an
ASCII file. Once the fields are in the original order, the
ASCII file could be read back in to another AMS
REALTIME Projects schedule, or alternatively could be
imported to a spreadsheet or database application.
The use of this facility to share data with another AMS
REALTIME Projects schedule is covered in more detail
in Chapter 8, Multiple Project Processing. The processes
are summarized below, assuming that you want to use the
table data in another application altogether.
Issue 1 - AMS REALTIME Projects Advanced User Guide
273
To export table data:
• Change to Table mode
• Select the table you want from the Table menu.
• Manipulate the Table view so that its data format is
correct for use in the other application.
• Use the Dump item from the File menu.
• In the File Selection dialog, specify the name of the
file to dump to, and the type of file delimiter to use
(spaces, tabs, or commas).
• Click OK.
To import table data from an ASCII file:
• Change to Table mode
• Select the table you want from the Table menu.
• Manipulate the view so that the columns are in the
same order as the data in the file you are about to
import.
• Select Load from the File menu.
• In the dialog, select the type of file delimiter (spaces,
tabs, or commas).
• Select the name of the file to be loaded.
There are flags in the Configuration File for specifying
whether the Load/Dump process should include the field
column heading on the first line. This is necessary since
sometimes you need the headings, and sometimes you
don’t. The flags are TBLHDRSIN and TBLHDRSOUT.
Load and Dump from Calendars
This facility can be used to save the current calendar into
an ASCII file, or load a calendar in from an ASCII file.
It can be used to move specific calendars between
schedules, or to load only specific calendars into a new
schedule.
274
Issue 1 - AMS REALTIME Projects Advanced User Guide
• Change to Calendar mode
• Use the Load or Dump option on the File menu, or
use the Load or Dump icon tools.
• In the dialog box, use the file selector to select the
.cal file to be loaded or dumped to.
• Click OK.
Using Translators to Transfer Data
AMS REALTIME Projects can interacts with other
programs by importing or exporting data. These
facilities allow you to take activity information from
other programs and incorporate it into the schedule. You
can also take schedule information (all or selected parts)
generated in AMS REALTIME Projects and use it in
other programs.
When importing a file, the information read from the file
will be merged into the current schedule at the bottom of
the file. When exporting a file, the information will be
placed into the file activity by activity in the same order
as it appears in the schedule, top to bottom, left to right.
AMS REALTIME Projects provides some translators
specific to other project management applications.
Alternatively, you can use Generic Translators to define
your own import and export specification. See the
sections below on Generic Translators and Other Project
Management Software Translators, respectively.
You can import or export more than just the activity
information (resources, constraints, etc.). If you are only
going to use this process one time, you may want to use
the Table Dump or Load commands. If you are
transferring from one schedule to another in AMS
REALTIME Projects, then the Merge or Rollup items
in the File menu are more appropriate; see Chapter 8,
Multiple Projects, for more information.
The Import or Export process is essentially in four parts.
Issue 1 - AMS REALTIME Projects Advanced User Guide
275
• Before starting
Understanding the file and data formats
• Telling AMS REALTIME Projects about the data
and formats to use
Using the Generic Translators to define a “map” of
how the AMS REALTIME Projects data relates to
the data in the other application, particularly in
terms of where it is located in the transfer file.
Alternatively, using one of the application-specific
translators. See the sections below on Generic
Translators and Other Project Management Software
Translators, respectively.
• Carrying out the transfer of data
• Checking that the transfer has taken place correction
Each of these processes is covered in the sub-sections
below.
Before You Start
Before using the import and export facilities within AMS
REALTIME Projects, you must know how the other
application itself imports or exports its data
You will need to know what data the other application
uses, and in what format You must also understand the
mechanics of how the other system itself imports or
exports the data.
Ideally, you should get a copy of the Manual or User
Guide for the other application. Details of the
application’s export and import procedures are usually
found in the Utilities section. If this is not possible, you
should at least get a copy of a file that the application
generates, or will accept, and print it out using
identifiable sample material. This can be used as
reference material. Attention should be paid to where the
information for each activity appears, and how it is
delimited (spaces between values, or commas, etc.).
276
Issue 1 - AMS REALTIME Projects Advanced User Guide
After fully examining the other system's import/export
file structure, you are ready to set up the “map” of how to
exchange data with AMS REALTIME Projects.
Defining the transfer "map".
This part of the process is covered in detail in the section
below on Generic Translators. If you are using another
software application for which AMS REALTIME
Projects provides a translator, see the section on Other
Project Management Software Translators later in this
chapter.
Testing Your Map
To test your map, create and save a small test schedule.
Then select the Export item on the File menu and
proceed through the File Selection dialog box. Then exit
AMS REALTIME Projects and, with either a word
processing program or a text editor, inspect the file and
see if it conforms to what the other system is expecting.
If this checks out, you have a good chance of success.
Other areas of contention that could still make it fail are
misinterpretation of file structure, or line termination
characters.
Summary of Importing and Exporting
To summarize, the Import/Export procedure is as
follows:
• Identify the other system and locate the files utilities
information in its manual.
• Read carefully about what that system expects to
receive, or send, as far as data structure, location,
field delimiters, data types, record delimiters are
concerned.
• Select the Import/Export Map item on the
Format menu and make the correct choices based
Issue 1 - AMS REALTIME Projects Advanced User Guide
277
on your understanding of the other system’s
requirements.
• Test your map by using a small network (and select
either the Import or Export item on the File menu.
Go through the file selection and select the flat file.
It is recommended that you try exporting first, since
if something goes wrong you will have the results in
a file that you can look at and see what went wrong.
NOTE: Never use a large file for testing.
• Compare the output of the export in an editor with
the other system’s requirements and if it looks OK
then proceed with that systems importing function
on a test case, or import the file from the other
system into AMS REALTIME Projects.
• If you still have problems, compare the other
system’s output with the export file created by AMS
REALTIME Projects. Resolve the differences and
repeat the tests.
• When you are satisfied that the process works, move
data in both directions importing and exporting in
both systems. Then take a larger schedule and
repeat the process.
Generic Translators
As has been discussed in earlier sections of this chapter,
there are other methods of moving data in and out of
AMS REALTIME Projects. Each of these methods has
limitations when you begin to use them beyond the
purposes for which they were intended.
278
Issue 1 - AMS REALTIME Projects Advanced User Guide
For this reason, a generic translator is provided with
AMS REALTIME Projects, which will allow you to
program the data formats you require for data exchange
between AMS REALTIME Projects and virtually any
other system that is capable of exchanging data through
an ASCII file or set of files.
The generic translator is invoked through the Translate
item found under the File menu in Schedule mode. If
the translator is installed, you will find an item in the
translator pop-up list labeled Generic.
The generic translator requires you to build a map file
that describes what data elements you want to work with,
dataset by dataset. This map is a normal text file and can
be built and edited with any suitable editor or word
processor. The only requirement is that it is saved as text
only with line breaks. It should be saved with an
extension of .map.
The map contains one section for each dataset that you
want to read or write. The dataset name is given in the
second column in capital letters.
Content
Dataset Name
Description
Activity
ACTIVITY
This dataset contains all
the activity-related data.
The fields which relate
one-to-one with activities
are all found in this
dataset. This includes
such fields as: ID,
Description, Duration,
Target dates, Actual
dates, Calculated dates,
% Progress, Remaining
Duration, and other
activity fields, including
user-defined extensions.
Extension
EXTENSIONS
This dataset contains the
activity extension fields
which have been added
Issue 1 - AMS REALTIME Projects Advanced User Guide
279
to the standard activity
fields.
This is an alternative
method of accessing only
the extension fields as
they are also available
using the activity dataset.
Network
280
NETWORK
This dataset contains a
list of the constraints
between activities. The
network records contain
such fields as Required
Activity ID, Supported
Activity ID, Constraint
Type (FS,FF<SF<SS or
%), Constraint Delay
(Gap), Output and Input
percent and calculated
constraint Leeway
(Slack).
Issue 1 - AMS REALTIME Projects Advanced User Guide
Resource
RESOURCE
This dataset contains
information on each of the
resources that are found in
the resource pool. The fields
found in this dataset include:
Resource ID, Resource
Description, Unit of Measure
(Days, Hours or Minutes),
Cost per Unit, Resource
Type (Depletable or
Renewable) and smallest
allocation unit (Increment).
User-defined Resource
Extension fields can also be
included by name.
Resource
Pool
POOL
This dataset contains the
initial availability pool for
the resources found within
this project. The fields
found here include: Resource
ID, Resource Name, Period
Starting (date and time),
Period Ending (date and
time, and Amount available
during the period
Issue 1 - AMS REALTIME Projects Advanced User Guide
281
Resource
Requirements
REQUIREMENTS
This dataset contains
records that describe
the resource
requirements for each
activity. There is one
record for each
unique requirement
for each activity.
The resource
requirements dataset
contains fields such
as: Activity ID,
Resource ID, Start of
required period, End
of required period,
and Amount required
Requirement
Extensions
REQEXTS
This dataset contains
records that describe
the usage of a
resource by an
activity with userdefined fields. It is
considered an
extension dataset to
the requirements
fields contained
above.
Costs
COSTS
This dataset contains
time-phased data for
each activity that
defines the current
cost profiles over
time. The fields
contained in this
dataset include:
Activity ID and
associated BCWS,
BCWP, ACWP and
ETC.
If you are using
manual cost modes,
these fields can only
be exported. An
282
Issue 1 - AMS REALTIME Projects Advanced User Guide
attempt to import
these fields will
result in the fields
being recalculated
from resource usage.
Extension
Fields
EXTINFO
This provides access
to all user-defined
dataset extension
fields, including
Activity extension
data typing, and
Schedule values.
Pick Lists
PICKLISTS
Picklist data options
can be set here,
either by position
number or position
value. If the Pick
field name is already
present, this will
supply or update the
values.
Calendars
CALENDAR
This dataset provides
all calendar
information,
including calendar
name, holidays,
overdays, and work
cycles.
The map is used during a read (import) or write (export)
operation to coordinate which fields are to be translated
and what format is to be used when translating.
The map contains, among other things, a file extension
which is to be used to locate (on read, or generate on
write) an appropriate ASCII file associated with each of
the datasets that described within the map. One or more
datasets can be included in the map. During import, this
allows AMS REALTIME Projects to read each dataset,
one at a time, and interpret each dataset according to the
description given in the map. Similarly, during an
export operation AMS REALTIME Projects will generate
a file for each dataset described in the map, where each
dataset has a different format, as specified.
Issue 1 - AMS REALTIME Projects Advanced User Guide
283
Regardless of how many datasets may be involved, AMS
REALTIME Projects moves the data between the AMS
REALTIME Projects schedule file and the ASCII files in
accordance with the map file you choose and the
filename you specify.
The figure below shows an overview of the Map,
Schedule and Data files and how they work together
during an import operation. Export reverses this process,
and can use the same map, or a different map, depending
on the desired results.
The Generic Translator Map
The map file serves as a description for which dataset
and which fields you wish to translate. It is an ASCII file
that, as stated above, must contain one section for each
dataset you wish to import or export. Each section
begins with a set of control parameters that describe
various options for that dataset. This includes such items
as field separator character, text field delimiters, file
extension name for each dataset and so forth.
A sample of a generic map is shown below, followed by a
complete list of options and definitions. The letters in
bold represent keywords that must appear as shown. The
284
Issue 1 - AMS REALTIME Projects Advanced User Guide
letters in uppercase indicate the variables that must be
specified for your schedule.
Define DATASET Record
Options
Field: DELIMITER
Ext: FILE.EXT
Quote: QCHAR
Skip: SKIP#LINES
Datefmt: SAMPLEDATE
End Options
Fields
A = SPFIELD
…
…
F = SPFIELD
End Fields
Template
A….B C…. D…. E…………. F..
End Template
End DATASET Record
(Although the lines are indented in the example above to
make it easier to read, you do not have to indent your
file.)
A description of each of the sections and their associated
options is included below.
The Dataset Section
This section identifies which AMS REALTIME Projects
dataset is being addressed by the current section. The
DATASET variable should be entered as one of the
following:
Activity
Issue 1 - AMS REALTIME Projects Advanced User Guide
285
Extensions
Network
Requirements
Resource
Pool
Reqexts
Costs
Rates
Calendar
Holidays
Overdays
The Option Section
This section provides a means of controlling various file
and formatting options for this dataset. The section
begins with the Options line, which is followed by one or
more options. The section is ended with an End of
Options line.
The table below shows the basic options.
286
Issue 1 - AMS REALTIME Projects Advanced User Guide
DELIMITER
The decimal ASCII representation of the
field separator character enclosed in angle
brackets (<>), or just the character itself.
For example, a comma could be represented
as either “,” or <44>, while a space would
be represented as <32> and a tab as <9>.
Use <0> for fixed format records.
FILE.EXT
The default extension for this dataset. A
single map file can have definitions for all of
the datasets. This option lets you specify the
file extension to be used for each. The
extension is usually specified as “*.EXT”
where EXT is the three-digit operating
system extension for the file.
When reading or writing a data file, AMS
REALTIME Projects will append this
extension to the end of the file name
specified to determine the full file name to
be read or created.
The following are easily identified extension
names for each dataset:
*.ACT Activity dataset
*.NET Network Constraint
dataset
*.REQ Resource Requirements
dataset
*.RES Resource Information
dataset
*.RPL
Resource Pool dataset
*.CST Activity Cost dataset
As an option, the entire text file name can be
specified here, such as ACT.TXT, and
NET.TXT. This allows the entire name of
the text file to be specified, rather than
differentiating by the file extension alone.
FILEEXISTS
If exporting and the file already exists, you
can specify Overwrite or Append or Cancel.
If this option is included in the map, the File
Exists alert dialog will be disabled. This is
useful if the map will be used for batch
processing.
Issue 1 - AMS REALTIME Projects Advanced User Guide
287
288
FILEBREAK
A text string that will be used to delimit
datasets when the output for all datasets goes
into a single file. The string can be text,
<FF> (for the form feed character), or any
other single decimal ASCII character (put the
ASCII number in angle brackets: <32>). This
only needs to be specified in the first dataset
in the map; all the other datasets will
automatically use the same Filebreak string.
QCHAR
The decimal ASCII representation of the
quote character you want to use, enclosed in
angle brackets (<>), or just the character
itself. This is generally specified as either a
single quote (‘) or a double quote (“).
Issue 1 - AMS REALTIME Projects Advanced User Guide
PARENS
SKIP#LINES
This option specifies how dates with
parenthesis (expected) are output. Specifies
how any dates with parenthesis are handled.
N - No change, dates with parenthesis are
exported in parenthesis.
D - Dates with parenthesis aren't exported.
P - Dates with parenthesis are exported
with the parenthesis removed.
This specifies how many lines to ignore
when reading the input field. This can be
used to ignore header lines on text file
import, or to skip over header lines or add
blank lines before the data on export.
TITLECNT
This specifies the number of title lines to be
placed at the beginning of the dataset. The
title strings follow below. The SKIPCNT
must be set to at least the number of title
lines.
TITLE
The specified number of title strings as they
should appear at the head of the dataset.
Title strings do not need quotes. The title
strings can be automatically created with
these special fields:
%SPFIELDS% - List Schedule Publisher
map fields in template order.
%SPALIAS% - List the alias identifiers
in template order.
These special fields can be all or part of a
title string, and will be replaced by the
actual field or alias list on export.
MODE
This controls the way the Generic translator
handles the data when importing. Only the
first character needs to be specified (A, R,
U or P).
Append Add data to the end of the
schedule.
Replace Replaces all the fields in
the
activity record with the
information
provided. Any
fields not specified in the
map will be cleared.
Activity ID is used to
locate
the record to be replaced.
Issue 1 - AMS REALTIME Projects Advanced User Guide
289
Update Update the activity record with
the information provided. Only fields
which are specified in the
map
will be updated. Activity ID is used to
locate the record to be
updated. Activity IDs
which are not found are
appended.
Preserve Same as Update, but
blank
fields in the text file
will not
overwrite existing
data in the
schedule on
import.
NOTE: The Mode options function using
the Act ID as the key field in the Activity
dataset and using the ResID as the key field
in the Resource dataset. Mode: Replace can
also be used in the Resource Pool dataset to
remove the existing Availability Pool record
and replace it with the new availability
record.
SAMPLEDATE
This parameter is needed for output only. It
allows you to specify which date format you
want AMS REALTIME Projects to use
when writing dates. Simply specify any
valid date using the format you want.
The allowable formats are:
DDMONYY
MM/DD/YY
YYMMDD
DD-MON-YYYY
DD-MON-YY
YYYYMMDD
DD/MM/YY if INTALTDATE=Y in the
configuration file
290
REVISION
The Revision name to import or export.
PLANE
Source or destination of the requirements:
P[lanned], A[ctual] or B[aseline] (This
option only applies to the Requirements
dataset).
PROJECTDATES
[Y[es]|N[o]] Prompt for Project Start,
Issue 1 - AMS REALTIME Projects Advanced User Guide
Project Complete and Time Now
LINELENGTH
The maximum line length output before it
continues on the next line.
CONTINUATION
A list of comma delimited strings that are
used to mark this line as being a
continuation line. The first string will be
used for the primary string. The second
string will be used for all continuation
lines. If no primary string is wanted just
leave that string blank. For example,
CONTINUATION : "","C " will make
all continuation lines start with the letter C
followed by a space.
VIEW
To set a pre-defined View before exporting,
add the name of a standard View to the
Options section of the map. This will apply
the specified View before exporting the
dataset. The View will only remain set for
the current dataset, and will be cleared until
it is specifically reset in another dataset
definition. This can be used to filter the
data based on Activity field match criteria
which is stored in the View. For example,
if a View holds a match criteria for
activities with Prog < 100, and the View is
set in the Requirements dataset definition,
only the requirements for incomplete tasks
will be exported.
MATCH
The conditions of a filter using
MATCHFIELD operator EXPRESSION,
where MATCHFIELD is the activity field,
operator is any compare operator that can
be used with match (filtering) options, and
EXPRESSION is the match condition. Any
list of conditions with whitespace between
them after a Match option indicates AND
logic (all conditions must be met). If
several Match options are present in
succession, OR logic is indicated (only one
of the conditions must be met). AND / OR
can also be specified in the match
condition, just as you can when you enter
match criteria in the Table. For example:
Match: %Start >01jan95
Issue 1 - AMS REALTIME Projects Advanced User Guide
291
%Description == PROD*
will select all activity records that start after
01 January 1995 and start with PROD (case
sensitive). If dataset other than the Activity
dataset is being exported, only the subset of
records that applies to the selected activities
will be exported.
SORT
The field sort order, where the last activity
field name has the highest priority sort
order. If the field name is preceded with a
blank or plus sign, the sort is ascending; if
the field name is preceded with a minus
sign, the sort is descending. For example:
Sort: %ActID - %Progress + %Start
will produce a sort by (highest priority)
ascending Start date, (second priority)
descending Progress, and then Activity IDs
in ascending order.
SPECIAL
K[eepdates] = [Y|N]
Modifies the way SP handles dates & span
on import. Yes means keep the
start/complete date the same and recompute the span on import. No means
allow the span to control the start/complete
dates on import. If this is not specified, the
default method of computing the
start/complete/span is used.
M[apcharset] = [W|D]
When using extended characters (European
languages) the character set should be
defined. Windows and DOS character sets
are different. If the map file was built in a
Windows program (that uses the Windows
character set), set M=W. DOS is the
default.
F[ilecharset] = [W|D]
When using extended characters (European
languages) the character set should be
defined. Windows and DOS character sets
are different. If the data files are coming
from (or going to) a Windows program (that
uses the Windows character set), set F=W.
DOS is the default.
292
Issue 1 - AMS REALTIME Projects Advanced User Guide
SPECIAL: Q[uicknet]
Use Quicknet date format and rightjustified gaps.
SPECIAL: G[renada]
Put out both Start and Complete dates for
Milestone types.
The Fields Section
The Fields Section identifies all the AMS REALTIME
Projects fields that are to be imported or exported. Each
field is associated with an alias which is used for
positioning in the Template section. The alias is an
arbitrary identifier of 1 to 3 characters in length.
It contains a list of equivalents, the left-hand side is an
alias and the right-hand side is the AMS REALTIME
Projects field name associated with the alias.
For example, if you wanted to import an ID, Description,
and Duration, the Field Section would look like this:
Fields
A = ID
B = Description
C = Duration
End Fields
The Template Section
The Template Section describes what the order of the
fields for each record in the dataset. Using the aliases
defined in the fields section, the actual field order and
position are defined by example, using the alias.
Using the example above, suppose the fields are to be in
order of ID, then Duration, and finally Description,
delimited with a comma.
The Template Section might look like this:
Template
A,C,B
Issue 1 - AMS REALTIME Projects Advanced User Guide
293
End Template
A fixed column file in the template shows the spacing for
each field by allowing its size to be indicated with
periods (.). Using the example above, a fixed field
(column) file template might look like this:
Template
A…….. C…… B……………………………
End Template
If you need to process two or more datasets as part of the
translation process, list the Field and Template Sections
for each dataset. AMS REALTIME Projects will process
these datasets in the same order it finds them in the map.
The following map file is an example of a multiple
dataset map:
Define ACTIVITY Record
Options
Field: ,
Quote: “
Skip: 0
Ext: *.ACT
DateFmt: 911201
End Options
Fields
A = ID
B = DESC
C = TSTART
D = TCOMP
End Fields
Template
A,B,C,D
294
Issue 1 - AMS REALTIME Projects Advanced User Guide
End Template
End ACTIVITY Record
Define RESOURCE Record
Options
Field: ,
Quote: “
Skip: 0
Ext: *.RES
End Options
Fields
A=RESDESC
B=RESCAL
C=RESCOST
D=RESUNIT
E=RESINC
End Fields
Template
A,B,C,D,E
End Template
End RESOURCE Record
Using the map detailed above, the following data records
may be used to import and generate a new schedule:
PROJ.ACT
AB123,”Project Start”,15AUG98,15AUG98
AB234,”Prelim. Design”,15AUG98,30SEP98
and so on
PROJ.RES “PROJ ENGR”,CC40,50.75,HRS,.25
“TECH”,CC42,35.25,HRS,.25
Issue 1 - AMS REALTIME Projects Advanced User Guide
295
and so on.
In this example, the file name precedes each of the data
file examples. It is assumed that all these datasets have
been created and stored under the same project name (as
the base filename) with the appropriate extension before
the translate is initiated.
In this example, a comma-separated value format was
chosen. You can use fixed-length records or any other
combination allowed by the map.
There are some restrictions on the order of the dataset
within the map. For example, you must load the
activities before the network constraints and you must
load the resource information before you load the
resource requirements. If in doubt be sure the activity
dataset is loaded first, immediately followed by the
resource dataset, and only then followed by any other
datasets.
The Filter Section
The FILTER section allows you to change data based on
a filter criteria. Wildcards (e.g., ‘*’and ‘?’) can be used
for alphabetic fields. If you use a filter to change data,
the field you are using to filter data must be present in
the FIELDS section. You can change only one data field
per line, but you can have multiple comparisons of the
same criteria to change more than one item.
There are four symbols that can be used for a filter
condition:
=
value must be equal - case insensitive
compare
==
value must be equal - case sensitive compare
<
value must be less
>
value must be greater
For example, consider the following filter:
296
Issue 1 - AMS REALTIME Projects Advanced User Guide
Filter
ID = "A*"
COLOR = 2
ID = "A*"
PATTERN = 1
ID = "Test"
COLOR = 3
ID = "Test"
PATTERN = 2
ID = " "
SKIP
End Filter
This filter takes every Activity ID that starts with the
character A and sets the COLOR to 2 and the PATTERN
to 1, and any Activity ID that is "Test" and sets the
COLOR to 3 and the PATTERN to 2. Act IDs that are
blank are not written out to the text file.
List of Data Fields
The following list of data fields provides a quick
reference to the list of data fields currently available
within the Generic Translator, listed by dataset. You
should check the Generic.doc file, issued with the AMS
REALTIME Projects software, for any changes to this
list. The list will continue to grow as new releases are
made and new fields are added to the AMS REALTIME
Projects database.
Issue 1 - AMS REALTIME Projects Advanced User Guide
297
All Datasets
IGNORE
This is a special field that can be used any number
of times within the field list. It is used to ignore
data in an input stream. Simply assign this field
name to the data and it will not be loaded into
AMS REALTIME Projects.
Activity Dataset (ACTIVITY)
This dataset describes the activities in the schedule.
ID
Activity Identifier
(up to 255 characters unless limited)
DESC
Activity Description
(up to 255 characters)
LINE
Activity line number
(numeric)
COLOR
Activity color
This is simply the color number as displayed in the
color menu, beginning with zero (0) and numbered
from top to bottom. There are 16 colors.
PATTERN
Activity pattern
This is the pattern number as displayed in the
pattern menu, beginning with 0 (zero) and
numbered from top to bottom., then left to right.
There are 40 possible pattern.
SYMBOL
Activity symbol number
The number is a complex number made up of the
starting symbol, then connector, and the ending
symbol, as below:
SYM = ((Startsym * 32) + Connector * 32) +
Endsym
FLAGS
Activity Flag
Many different activity flags can be imported or
exported using this single field. The flags vary
from date formats, to appearance falgs and other
status markers.
This field is a complex combination of the various
attribute-fields, where each portion is given a
298
Issue 1 - AMS REALTIME Projects Advanced User Guide
binary weighting and then the various portions are
added together to arrive at a single decimal
number.
Although this field does allow for the control of
many aspects of any activity, its use is reserved for
those conversant with the binary numbering
system. Furthermore, these flags are subject to
change without notice so they should be used only
when necessary.
The sub-fields and their weightings are given
below:
Single Bit Flags:
Progress on
1
Dates on
2
Description on
4
Pattern on
256
Activity Complete 512
Time Enables
1024
On the calendar
4096
Date Formats:
dd
0 * 32 = 0
ddmon
1 * 32 = 32
ddmonyy
2 * 32 = 64
ddday
3 * 32 = 96
mmdd
4 * 32 = 128
mmddyy 5 * 32 = 512
hhmm
6 * 32 = 192
day
7 * 32 = 124
Description Justification:
Auto
0*8=0
Left
1*8=8
Right
2 * 8 = 16
Center
3 * 8 = 24
Target Type:
None
0
Soft Start
8192
Issue 1 - AMS REALTIME Projects Advanced User Guide
299
Soft Complete
2048
Hard Target
10240
Miscellaneous Flags:
Global Alert Flag 16384
To calculate how a certain flag should be set, pick
the options from this list and add the number in the
table to arrive at the decimal value to specify as
follows:
Example Options:
Progress on
1
Dates on
2
Description on
4
Date Fmt:dd
0
Justification: Auto 0
Target: None
0
_
Flag =
7
BSTART
Activity Baseline Start Date
BCOMP
Activity Baseline Complete Date
TSTART
Activity Target Start Date
If only a Target Start is loaded, it is assumed to be
a Soft Start (start no earlier than).
TCOMP
Activity Target Complete Date.
If only a Target Complete is loaded, it is assumed
to be a Soft complete (complete no later than). If
both a start and complete are given, it is assumed
to be a Hard target (start and complete).
SPAN
This is the specified Duration of the activity.
If it is omitted it will be calculated from target
Start and Target Complete.
REMSP
Remaining Duration
This is used to calculate progress and represents
the unshaded portion of the activity bar.
PROG
Percent Progress.
This is used to specify what percentage of the
activity has been performed. It is a number
300
Issue 1 - AMS REALTIME Projects Advanced User Guide
between 0- and 100 and can carry one decimal
point.
ASTART
Actual Start
This specifies the actual start date for an activity
which has started.
ACOMP
Actual Complete
This specifies the actual complete date for an
activity which is 100% complete.
Issue 1 - AMS REALTIME Projects Advanced User Guide
301
CALENDAR
Activity Calendar
This specifies the name of the calendar
against which the activity is to be carried out.
Any other Name
Any other field name is either an activity field
not listed here, or assumed to be an Activity
Extension record. On input, if the field
doesn’t exist, a new extension field will be
created using the name. On output, the
Extension Labels will be searched to find a
match. An error will be generated while
reading the map if a matching extension field
cannot be found and the Export will be
terminated.
Resource dataset (RESOURCE)
This dataset describes the resources in terms of the list of
resources, unit of measurement and cost per unit of the
resource.
RESID
ID of the resource.
RESDESC
Full description of the resource.
RESFLAGS
Resource flags, indicating such items as
depleteable vs. Renewable. See above.
RESUNIT
Unit of Measure
(Day, Hours, Minutes, Weeks, Months)
302
RESCOST
Cost Per Unit.
RESINC
Smallest increment of assignment and
availability.
Issue 1 - AMS REALTIME Projects Advanced User Guide
Any Other Name
Any other field name is assumed to be a
Pool Extension record. On input, if the
field doesn’t exist, a new extension field
will be created using this name. On
output, the Extension Labels will be
searched to find a match. An error will
be generated while reading the map if a
matching extension field cannot be
found, and the Export will be terminated.
Network Dataset (NETWORK)
This datset describes the network constraints between the
activities.
REQID
ID of the predecessor (required) activity.
SUPID
ID of the successor (supported) activity.
TYPE
Constraint type (FS,FF,SF,SS, or %).
IN
Input percent into successor activity.
OUT
Output percent from predecessor activity.
LAG
Lag time between output and input.
GAP
A synonym for LAG.
Resource Requirements dataset (RESOURCE)
This dataset describes the resource requirements for each
activity. There may be more than one resource
requirement per activity. There may also be more than
one requirement record for an activity for the same
resource. This allows a complex profile of resource
requirements to be described, as a series of varying levels
of usage for the same resource over time.
Issue 1 - AMS REALTIME Projects Advanced User Guide
303
RQACTID
ID of the activity used for all types of
resource requirements.
RQTYPE
Requirement type (Level, Total, Effort).
ACCT
Cost Center number, if cost centers are being
used, used for Level type requirements.
RQRESID
ID of the required resource for Level type
requirements.
RQRESDESC
Description of the required resource for
Level type requirements.
RQSTART
Point within the activity where the
requirement begins for Level type
requirements.
RQCOMP
Point within the activity where the
requirement ends for Level type
requirements.
RQAMOUNT
Amount of resource required for Level type
requirements.
RQTRESID
Resource ID for Total type requirements.
RQTRESDESC
Resource description for Total type
requirements.
RQTACCT
Cost Center for Total type requirements.
RQTAMOUNT
Total Amount for Total type requirements.
RQERESID
Resource ID for Effort type requirements.
RQERESDESC
Resource Description for Effort type
requirements.
RQEACCT
Cost Center for Effort type requirements.
RQESTART
Start for Effort type requirements.
RQESPREAD
Spread for Effort type requirements.
RQEMAXLOAD
Maximum Load for Effort type requirements.
RQEMINLOAD
Minimum Load for Effort type requirements.
RQEAMOUNT
Amount for Effort type requirements.
RQDURATION
Duration for Effort type requirements.
Resource Pool dataset (POOL)
304
Issue 1 - AMS REALTIME Projects Advanced User Guide
This dataset describes the resource pool in terms of
resource availability over time. There may be more than
one record per resource. This allows a complex resource
profile to be developed by varying the pool amount over
time.
PLRESID
Resource ID.
PLRESDESC
Resource Description.
PLSTART
Start point for this availability (date).
PLCOMP
End point for this availability (date).
PLAMOUNT
Amount available between start and
complete dates.
Requirement Extension dataset (REQEXTS)
This dataset describes the extensions that have been
defined, if any, for each resource. This allows additional
information to be logged, such as Work Order Number,
Resource Priority, and so on.
RQXACT
Activity ID of the activity using the
resource.
RQXRESID
Resource ID of the resource being used.
RQXRESDESC
Resource Description of the resource
being used.
Any Other Name
Any other field name is assumed to be an
extension field name. On input, if the
field doesn’t exist a new extension field
will be created using this name. On
output, the Extension Labels will be
searched to find a match. An error will
be generated while reading the amp if
matching extension field cannot be
found, and the Export will be terminated.
Activity Extension dataset (EXTENSION)
This dataset describes any Activity Extension Fields that
have been defined to store information that is additional
to that available in the Activity dataset.
EXTACTID
Activity ID.
EXTENSION
Field name
Name must follow the EXTACTID
Issue 1 - AMS REALTIME Projects Advanced User Guide
305
The Costs dataset (COSTS)
This dataset describes the costs associated with each
activity.
306
CSTACTID
Activity ID.
CSTBCWS
BCWS for this period.
CSTBCWP
BCWP for this period.
CSTACWP
ACWP for this period.
CSTBINSTART
Beginning date of the period.
CSTBINCOMP
Ending date of the period.
CSTETC
ETC for this period.
CSTPLANE
Element of Cost name.
Issue 1 - AMS REALTIME Projects Advanced User Guide
Project dataset (PROJECT)
This dataset describes the basic project information.
PRJSTART
Project Start Date
PRJCOMP
Project Complete Date
PRJNOW
Project Time Now Date
PRJTITLE
Project Title (Heading)
PRJSUBTITLE
Project SubTitle (SubHeading)
PRJCOSTBIN
Project Cost Bin
PRJWEEKSTART
Project Week Start
PRJSPANFMT
Project Duration Format
PRJGENMPU
Project Generic Time Minutes per
Unit
PRJGENBASE
Project Generic Calendar Base
Date
Extension Fields dataset (EXTINFO)
This dataset contains extension definitions for Activity,
Schedule, Resources and Requirements. It also stores
Activity extension data types and Schedule Extension
Values.
EXTINFN
Field # (0-99)
EXTINFAL
Activity Extension Label
EXTINFAT
Activity Extension Type
EXTINFSL
Schedule Extension Label
EXTINFSV
Schedule Extension Value
EXTINFPL
Pool Extension Label
EXTINFRL
Requirements Extension Label
Issue 1 - AMS REALTIME Projects Advanced User Guide
307
Pick Lists dataset (PICKLISTS)
This dataset contains picklist definitions for Activity
extensions that are defined as a picklist type. It stores the
order and values that are contained in each pick field, as
well as the position and name of the field itself.
PICKN
Activity Extension # (0-99)
PICKLABEL
Activity Extension Label
PICKINDEX
Choice #
PICKCHOICE
Choice (string)
NOTE: On Import, if PICKN is in the map,
PICKLABEL (if present) replaces the Activity Extension
Label. If PICKN is not in the map, PICKLABEL is used
to look it up. Either PICKN or PICKLABEL (or both)
must be in the map.
Rates dataset (RATES)
This dataset contains Rate tables used in Elements of
Cost.
308
RATENAME
Rate Table Name
RATEFROM
Start of Rate Range
RATETO
End of Rate Range
RATE
Rate Value
Issue 1 - AMS REALTIME Projects Advanced User Guide
Calendar dataset (CALENDAR)
This dataset contains Calendar definitions for that are
stored in the project, which can be applied to Activities
and/or Resources.
CALNAME
Calendar Name
CALNUM
Calendar Number
CALBASE
Calendar Base Date
CALCYCLE
Calendar Workday Cycle
CALSHIFTSTART
Calendar Shift Start Time
CALSHIFTEND
Calendar Shift Stop Time
Holiday dataset (HOLIDAYS)
This dataset contains Holiday definitions for that are
defined for a particular calendar. Holidays are days that
are normally worked, but are off for this day.
HOLCAL
Calendar Name with the Holiday
HOLIDAY
Holiday Date
Overday dataset (OVERDAYS)
This dataset contains Overday definitions for that are
defined for a particular calendar. Overdays are days that
are normally off, but are worked for this day.
OVERCAL
Calendar Name with the Overday
OVERDAY
Overday Date
NOTE: If you change update existing calendars by
importing a calendar with the translator, the dates will be
preserved. If you want to keep the spans instead, you
have to specifically reload the spans (using Generic with
Issue 1 - AMS REALTIME Projects Advanced User Guide
309
the Activity dataset, Copy/Paste in Table mode, or
some other method) after you have changed the calendar.
Other Project Management Software
Translators
AMS REALTIME Projects has been designed to
accommodate many different types of translators. These
can be installed separately. You need to follow the
documentation provided with each translator in order to
know the various options related to that translator.
Translators are invoked from the Translate … item in
the File menu within Schedule mode.
When you select this item, you will see a pop-up list of
the translators installed on your system, where you can
select the one you wish to use. When you click on your
selection from the list, you will be prompted as to
whether you wish to read data into AMS REALTIME
Projects or write data out to another application. Then
you will be prompted with a translator-specific dialog,
when options need to be specified, followed by the File
Selector dialog so you can pick the file name to be read
or written.
Please refer to the specific information supplied with the
on-line documentation for each translator to find further
details, specifically of the options that need to be selected
in the dialog.
This can be found in the Help sub-directory under the
directory where you installed AMS REALTIME Projects.
The file will have a name similar to that of the other
project management system, with an extension of .doc.
For example, Art.doc is the documentation for the
Artemis translator.
310
Issue 1 - AMS REALTIME Projects Advanced User Guide
ODBC (Open Database Connectivity)
ODBC is a facility available throughout a range of
modern applications, which enables one application to
access the data in another application. This facility does
away with the need for an intermediate translation file.
For example, in AMS REALTIME Projects you could
access data currently stored in a Microsoft Excel
spreadsheet, and use it to calculate data in the schedule.
You may want, for example, to pick up rates information
from the spreadsheet and use it to calculate your resource
costs. Any changes made to the data from within AMS
REALTIME Projects will be passed back to Excel
automatically.
In a similar fashion, you could access AMS REALTIME
Projects information while working in Microsoft Access,
and use the relevant resource usage information to feed
into an organization-wide cost application. Again, any
changes made in Access will be passed back to AMS
REALTIME Projects automatically.
In order to use ODBC with AMS REALTIME Projects,
you will need to ensure that the correct drivers and driver
manager have been installed.
Resource Transactions
This facility in AMS REALTIME Projects provides a
powerful capability upon which to build an automated
collection system for actual resource information. With
some forethought, you can assure that manpower and
other costs associated with the performance of the
schedule work is tracked by building an interface
between the actual cost collection system (timecards,
general ledger, etc.) and AMS REALTIME Projects.
This provides a powerful capability to integrate cost and
schedule. You can incorporate AMS REALTIME
Projects into a project cost control system by simply
collecting transactions with an external system
Issue 1 - AMS REALTIME Projects Advanced User Guide
311
(Timecard, General Ledger, etc.) in a simple text format
and feeding them to AMS REALTIME Projects through
the transaction mechanism.
(An alternative option, if you have resource information
outside AMS REALTIME Projects and would like to
import that information, use the Load command under
the File menu. This loads the information from a flat
file, assuming that the format of the file matches the
format of the data on the screen as set up by the Ordering
dialog box. See the section on Exchanging Information
with other Schedules, earlier in this chapter.)
The concept of a resource transaction is best understood
if you consider the information in the monthly updates to
the actual resource expenditures. In this case, you don’t
really want to re-load all the resource information
(including Description, Cost Per Unit, and so on). You
just want to update the current spreadsheet by adding in
the actual usage and/or actual cost solely for this month,
and only for those activities that were in progress.
To load a transaction into the proper cell, you need to
know the Activity, the Resource, the Cost Center, the
period ending date, and the amount of the transaction.
The format of a transaction file is simple. It is one line
per transaction, with each line specifying the Activity,
Resource, Cost Center, Transaction Date and Amount.
These fields can be separated by spaces, tabs or commas.
An example using commas is shown below:
A123,Quality Engineer,WesternRegion,15AUG98,31.8
This record would accumulate 31.8 Quality Engineering
hours to activity A123 and charge it to the Western
Region cost center for the period containing August 15,
1998.
Transaction Overrides
Although the default is to add the transaction amount to
the actuals, a set of overrides can be attached to the
312
Issue 1 - AMS REALTIME Projects Advanced User Guide
amount that control where and how it gets added to the
database. The overrides are:
• Type Overrides:
P
Apply this transaction to the Planned
spreadsheet
A
Apply this transaction to the Actual spreadsheet
B
Apply this transaction to the Baseline spreadsheet
• Operator Overrides:
+
Add this transaction to the current value in the
cell
-
Subtract this value from the current value in the
cell
=
Set the value in the current cell to this amount
You can combine one type override with one operator
override by placing the operator before the amount and
the type after the amount. Here are some examples:
A123,Quality Engineer, Western Region,15AUG98,-475P
A123,Quality Engineer, Western Region,15AUG98,+67P
A123,Quality Engineer, Western Region,15AUG98,=752B
The first example subtracts 475 from the planned usage
for the specified period, while the second add 67 to the
plan, and the third sets the baseline to 752.
The placement of the type and operator is flexible. You
can place them together on either side of the amount, or
place one on each side.
NOTE: The values seen in the Usage tables will be
minutes, hours, or days, depending on which unit you
selected when you defined the resource. See Chapter 7,
Resources, in the Basic User Guide for more details of
how to set the unit.
Issue 1 - AMS REALTIME Projects Advanced User Guide
313
How to Deal with Possible Errors on Transactions
There are several problems that may arise while
processing transactions for actual expenditures. These
include such things as:
Activity not found
Resource not found
Cost Center not found
Dates specified are outside the scheduled dates for the
activity
There are five configuration switches that can be set in
the configuration file that to tell AMS REALTIME
Projects what to do with the information when these
exceptions occur. They are:
XACTLOG = Y/N
Enabling this switch causes
AMS REALTIME Projects to
query for a log file name when
the first exception is
encountered. Specifying a file
name will cause that
exception, and any which
might follow, to be logged to
the specified file.
The log file will contain the
input record from the
transaction file followed by a
semi-colon(;) and a reason
code for the failure or
exception.
When the load is complete you
can look at the exceptions in
the file and make any
appropriate changes and rerun just the exceptions by
loading the file.
314
Issue 1 - AMS REALTIME Projects Advanced User Guide
XACTADDACT = Y/N
Enabling this switch will
cause AMS REALTIME
Projects to create an activity if
a reference is made in the
input file to an activity which
does not exist in the schedule.
The resulting activity will be
generated in the time period
specified in the record and will
have a Description that is the
same as the ID.
You should review the
schedule and attach
appropriate descriptions as
well as reasonable dates to
these newly-generated
activities. They represent
actual work which took place
but which was unplanned.
XACTSPANACT = Y/N Enabling this switch causes
activities to be expanded using
diamond slips when the data
to be loaded is outside the
planned dates. If the dates are
earlier than the planned dates,
the entire activity will be
slipped to the left. If the dates
are later than the planned
dates, a late complete slip will
be generated.
Issue 1 - AMS REALTIME Projects Advanced User Guide
315
XACTADDRES = Y/N
Enabling this switch will
cause resources which are
referenced by the transaction
to be added to the resource list.
The cost, unit, increment, and
type will be copied from the
first resource in the list. You
should review these resources
and update the appropriate
information (units, cost per
unit, etc.) after the
transactions are loaded where
necessary.
XACTADDCC = Y/N
Enabling this switch will
cause cost centers which are
referenced by the transaction
to be added to the cost center
list. You should review these
cost centers after the
transactions are loaded.
You can enable or disable any of these switches.
Depending on your choice some exceptions will be
overcome by taking appropriate steps. If all of the
exceptions switches are off, you will be given a warning
about each exception and the corresponding transaction
will be ignored. If only the logging switch is enabled, the
transaction that caused the exception will be added to the
log file. Then each case can be reviewed and appropriate
action can be taken manually. The log file can then be
reprocessed as normal input.
Any error encountered during the process for which the
corresponding switch is not set will cause processing to
stop.
316
Issue 1 - AMS REALTIME Projects Advanced User Guide
Chapter 10 - Index
- Index
A
Access Control Lists, 2-27
access rights, 2-27
Activity Boxes, 5-15–5-16, 5-19, 5-25
Activity Selection, 6-31
Actual Cost of Work Performed, 7-8
Actual Values, 6-30
Adding Constraints, 5-29
Advanced Logic, 1-8–5-1, 1-8–5-1
Advanced Resources, 1-8–7-1, 7-4, 7-28, 7-32, 7-34, 7-38, 7-59, 7-62–8-3
AMS REALTIME Server, 2-14
configuration, 2-17
security license file, 2-16
Analyzer, 6-32–6-34, 6-32–6-34
Analyzer Dialog Box, 5-32–5-33
Analyzer Mode, 5-29–6-34
Analyzing your Network, 5-31
Apportioned Costs, 7-46
Avail Min/Max, 6-28
B
Baseline calculations, 7-48
baseline locking, 2-14
Issue 1 - AMS REALTIME Projects Advanced User Guide
317
Baseline Values, 6-12, 6-30
Basic Cost Information, 7-5
BCWS, 0/100, 7-13
BCWS, 100/0, 7-13
BCWS, 50/50, 7-13
BCWS, linear percent, 7-13
BCWS, weighted, 7-13
Budgeted Cost of Work Performed, 7-7
By Conflict, 6-32
By Group, 6-32–7-3, 8-10
By Name, 6-32–9-17
bypassing the server, 2-24
C
Calculating, 5-3, 6-12, 6-23–7-10, 7-14, 7-26, 7-46, 7-50
Calculating ACWP, 7-8, 7-14
Calculating BCWP, 7-7–7-11
Calculating BCWS, 7-7, 7-10
Calculating Costs, 7-3–7-4, 7-26
Calculating Costs from Resource Usage, 7-4, 7-26
Calculating ETC, 7-8, 7-15
Categories, 1-3–3-57, 6-32–8-5, 8-9
Changing a Link, 5-14
changing columns, 2-6
Changing Constraints, 5-29
Changing the Display of the Logic, 5-12, 5-16
Collect by Field, 8-6
Combining Structures, 3-67
Complete, 4-14–6-5, 4-14–6-5, 6-12, 6-22, 6-37, 6-40–7-8, 7-13, 7-16–7-18, 7-26, 7-34, 7-38, 7-57–88, 8-11, 8-25–9-1, 9-20, 9-26–9-28, 9-35
Compressing the Structure, 3-63
Configuration Switches, 1-6, 6-18–6-19, 6-18–6-19, 7-48–8-25, 7-48–8-25, 9-50
Constraint Calculations, 5-4
copying ACLs to other database folders, 2-28
copying existing projects to an internal database, 2-28
Cost and Performance Indicators, 7-15
Cost Bins, 6-11–7-3, 7-6, 7-14, 7-16, 7-20–7-22, 7-25, 7-61–8-19
Cost Centers, 3-57, 6-11–6-15, 6-11–6-15, 6-19–7-4, 7-28–7-31, 7-34, 7-37–8-4, 9-40, 9-52
Cost Elements, 3-57–7-4, 7-10, 7-24, 7-28, 7-44–7-46
Cost Information, 8-10–9-2, 6-10–7-6, 7-10, 7-23–7-28, 7-50, 7-56, 7-59–8-3, 8-10–9-2, 9-9
Cost Performance Index, 7-17, 7-51
Cost Processes, 7-3
Cost Status, 7-18, 7-51
creating a new folder, 2-9
creating Groups, 2-26
318
Issue 1 - AMS REALTIME Projects Advanced User Guide
creating Login IDs and Passwords, 2-24
Cross-Locking, 8-28
Customizing the Box, 5-21
Cut and Paste, 9-2, 9-8
D
Data Exchange, 1-8–9-2, 9-15
Dataset, 9-4, 9-15–9-34, 9-38–9-45
Date Formats, 9-7, 9-34
default directory, 2-23
Defining Colors in UNIX, 4-10
Defining Colors in Windows, 4-7
Defining Elements of Cost, 7-30
Defining Patterns, 4-11
deleting a folder, 2-9
Deleting an Activity, 5-15
directory structures, 2-4
Displaying and Repositioning the Description, 5-21
Displaying Extensions in the Schedule View, 6-3, 6-8, 6-23
E
End of Line Markers, 9-6
Establishing the Cost Bins, 7-21
Establishing the Permitted Delay, 6-38
Establishing Time, 7-4, 7-7, 7-20, 7-25
Estimate at Complete, 7-16
Estimate To Complete, 7-8
Expand and Collapse, 3-62
Extensions by Activity, 6-9
Extensions by Resource, 6-9
F
Field Delimiters, 9-6, 9-14, 9-20
file extensions, 2-7
Filename Terminology, 1-6
Formatting, 3-68–4-2, 3-68–4-2, 4-14, 7-58–9-22, 7-58–9-22
G
Generic Translators, 9-7, 9-11–9-14
Issue 1 - AMS REALTIME Projects Advanced User Guide
319
H
Hiding the Indentation, 3-65
Horizontal Sorting, 5-16
I
Icon Terminology, 1-6
Importing and Exporting, 9-13–9-14
In Conflict, 6-28, 6-32, 6-41
In Use, 6-6, 6-26, 6-32–9-2
Inter-Project Constraints, 8-27
Introduction, 1-1, 1-5–7-3, 1-5–7-3, 7-24, 7-28–9-1, 7-28–9-1
K
Keyboard Terminology, 1-6
L
Level of Effort, 7-12
Leveling Manually, 6-44
Leveling Process, 6-43
Leveling Resources, 6-38
Librarian
panel layouts, 2-5, 2-10
tabs, 2-7
Linking Existing Activities, 5-13
Linking to Off-Screen Activities, 5-14
Load and Dump, 9-2, 9-9–9-11
M
Manual, drive progress, 7-12
Matching Criteria, 4-4–4-6, 4-4–4-6
Menu Terminology, 1-6
Merge-Link, 8-14–8-15, 8-19, 8-27
Merging Schedules, 8-13
Methods for Cost Breakdowns, 7-30
Minimum Overload, 6-36, 6-42
Moving Activities, 5-15
Multi-Project Processing, 8-29
Multi-Project Techniques, 8-26
320
Issue 1 - AMS REALTIME Projects Advanced User Guide
N
Network Calculations, 5-3
Network Order, 5-8, 6-36
Network Table, 5-2
No Filter, 6-31
No Sort, 6-32
O
opening a schedule, 2-12
Other Structure Tools, 3-62
P
passwords, 2-14
changing or removing, 2-13
lost password recovery, 2-14
setting, 2-12
Path History, 2-8
Plan-Spending Variance, 7-18–7-19
Pool Min/Max, 6-29
Posting Progress, 5-8, 7-49
previewing a schedule, 2-9
Printing, 1-2, 6-44–7-5, 7-58, 7-62
Printing Resource Information, 6-44
Prioritizing Activities, 6-38
Producing a Compact Structure, 3-63
Progress on the Network, 5-7
Progress Options, 4-5–5-1, 5-7–7-15, 7-17–7-19, 7-22, 7-47–7-50, 7-52–8-13, 8-24–9-15, 9-28, 9-34–
9-36, 9-48
Project Rollup, 3-56, 3-62, 5-12–6-8, 7-51–8-3, 8-6, 8-21
project storage
internal database, 2-22
internal server database, 2-14
repository, 2-32
shared disk, 2-22
Publishing Network Information, 5-33
Purpose of the Guide, 1-2
R
Rate Tables, 6-16, 6-27–7-4, 7-30–7-33, 7-40–9-44
renaming a folder, 2-9
Renumbering Activities, 3-63
Reporting, 1-5–4-1, 5-11, 6-44–7-5, 7-24, 7-47, 7-50, 7-59–9-2
Issue 1 - AMS REALTIME Projects Advanced User Guide
321
Resource Calendars, 6-3, 6-22
Resource Group Summarization, 6-2, 6-7, 6-17, 6-24, 6-34
Resource Leveler, 6-34–6-38
Resource Type, 7-24, 7-29, 7-31, 7-36–9-17
Resource Usage, 3-68–6-7, 6-10–6-11, 6-14, 6-16–6-17, 6-21–6-22, 6-25–6-30, 6-33–7-2, 7-4, 7-14, 724–7-26, 7-30–7-34, 7-38, 7-40, 7-44, 7-60–8-12, 8-19–9-18, 9-47
Resource, weighted, 7-14
Resources, 1-2, 1-8–6-16, 6-17–6-35, 6-38, 6-41–6-42, 6-44–7-10, 7-14, 7-24–7-30, 7-32, 7-34, 7-38,
7-41, 7-43, 7-49–7-50, 7-59, 7-62–8-4, 8-9–8-12, 8-15, 8-18, 8-25, 8-29–9-1, 9-11, 9-17, 9-38, 9-43,
9-45, 9-49, 9-52
Rolling Up, 6-17–8-3, 8-10–8-12
Rollup Baseline, 8-13
S
Schedule Information, 8-16–9-11
schedule organization, 2-1
Schedule Performance Index, 7-17, 7-51
Schedule Status, 4-15, 7-18, 7-51
Schedule Variance, 7-15–7-16, 7-51
security controls, 2-14
access rights, 2-15
supervisory access, 2-17
Setting up the Resource Analyzer, 6-34
Sharing, 1-3, 8-9, 8-19, 8-28–9-3
Sharing Information Between Projects, 8-19
Sorting the Activities, 5-16
Split Table Commands, 4-5–4-7, 4-5–4-7, 4-5–4-7
Standard Activities, 8-17
Structure of each Chapter, 1-5
Structure Tools, 3-58, 3-62
Structures, 1-3, 1-7–3-60, 1-7–3-60, 1-7–3-60, 3-66–8-3, 3-66–8-3, 3-66–8-3
SubProjects, 8-2, 8-19–8-27, 8-29
Summarize Information, 3-56, 3-67, 7-40
Summary Information, 1-5, 3-67–8-5, 8-21, 8-24
Switching Off the Filters, 3-65
T
tabs
auto update, 2-7
creating, 2-7
deleting, 2-8
Target Dates, 5-4, 5-7, 6-37, 6-44–9-15, 6-44–9-15
Technical Progress, 6-17–7-5, 7-12, 7-18, 7-47–7-48, 7-53–8-11
Template, 8-7–8-8, 8-17–8-19, 8-26–9-21, 9-25, 9-29–9-31
322
Issue 1 - AMS REALTIME Projects Advanced User Guide
The Copy Structure option, 3-62
The Extension Fields Table, 6-8
The Filter and Sort Menu, 6-24, 6-30
The Indent Option, 3-60
The Outdent option, 3-61
the Path To, 5-9–5-11, 5-9–5-11, 5-26
The Plane Menu, 6-24, 6-29
The Pool Exts Table, 6-5–6-7, 7-32, 7-40
The Pool Table, 6-5–6-6
The Requirement Extension Tables, 6-8
The Requirements Table, 6-5
The Resource Analyzer, 6-32–6-34
The Resource Tables, 6-4, 7-32
The Resource Window Menus, 6-3, 6-15, 6-24
The Route Map, 1-1–1-3, 1-1–1-3
The Structure option, 3-59
The Summaries Table, 6-6
The Under option, 3-61
The Units Menu, 6-24, 6-33
The Usage Table, 6-10, 6-12, 6-15–6-16
The View Menu, 4-3–4-4
Time Variance, 7-19
Time Window, 6-31
Time-Phasing the Network, 5-25
Tips On Using Cost Bins, 7-22
Total Performance Index, 7-19
Transactions, 9-3, 9-47, 9-50, 9-52
Translators, 9-2, 9-7, 9-11–9-14, 9-46
U
Usage Min/Max, 6-26
Using Cost Centers, 6-20, 7-31, 7-34, 7-38
Using Views, 4-2
V
Variance at Complete, 7-16
viewing projects, 2-3
W
Water Fall Sorting, 5-16–5-18
WBS Fields, 3-59
Work Breakdown Structure, 1-7–3-59, 1-7–3-59, 3-66–8-3, 3-66–8-3
Issue 1 - AMS REALTIME Projects Advanced User Guide
323
324
Issue 1 - AMS REALTIME Projects Advanced User Guide