1
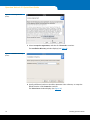
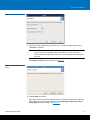
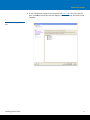
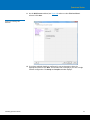
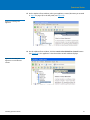
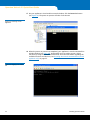
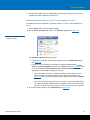
Quantum Vision Contents Quantum Vision Requirements ............... 2 Server Requirements ........................... 3 Server Port Requirements.................... 3 Browser Requirements ........................ 4 Quantum Vision 4.3.2 Quick Start Guide Supported Storage Devices ................. 4 Installing Quantum Vision....................... 5 Windows Installation .......................... 6 Linux Installation ................................. 9 Virtual Appliance Installation............ 12 Updating Quantum Vision .................... 23 Updating the Virtual Appliance ........ 24 Updating the Standard Installer Version of Vision ............................... 28 Quantum Vision Setup .......................... 30 This quick start guide provides basic installation and configuration instructions for Quantum Vision. For more information, see the Quantum Vision User’s Guide. About Quantum Vision Logging On to Vision ........................ 30 Discovering Devices........................... 31 Accessing the Console Command Line (virtual appliance only) ..................... 33 Taking Next Steps .............................. 36 Quantum® Vision™ provides powerful monitoring, reporting, and analysis tools for all of the Quantum storage devices in your backup environment. You can view the status and track the performance of multiple DXi™ disk backup systems, vmPRO 4000, vmPRO and DXi V-Series virtual devices, Scalar LTFS devices, and Scalar® libraries using a single flexible interface. Quantum Vision gives you the following capabilities: • Identify and initiate software updates for one or more vmPRO appliances from Vision. • Receive notification of and initiate a Vision software update using the Vision GUI (virtual appliance only). • Provide a per customer charge back report based on individual shares, partitions, or OST LSU system usage in both print and e-mail versions. The report includes data size ingested, size of unique data ingested, and compressed size of unique data ingested. • Monitor the status and health of up to 300 DXi, Scalar, Scalar LTFS, and vmPRO devices. • Visualize data on-demand to track capacity usage, analyze performance, and identify trends. • Access a Topology display to view the devices and their relationships. • Automatically generate reports and graphs, and send them to multiple recipients. www.quantum.com Quantum Vision 4.3.2 Quick Start Guide • Access the native management interface of any monitored Quantum device. • View and compare DXi Advanced Reporting graphs for one or more DXi disk backup systems. • Generate a Capacity Upgrade Estimate for DXi devices, this is an estimate regarding when your RAID may need to be expanded. • Monitor the usage and health of media in Scalar libraries (including Extended Data Life Management (EDLM) status), change media location, and delete media. About Quantum Vision 4.3.2 Quantum® Vision™ 4.3.2 provides significant performance improvements and several bugs fixes, which provide functionality and stability enhancements. Notational Conventions The following formats indicate important information: Note: Notes emphasize important information related to the main topic. Caution: Cautions indicate potential situations in which data can be lost or situations in which the software might not function as designed. Quantum Vision Requirements This section describes the following hardware and software requirements for Quantum Vision: • Server Requirements on page 3 • Server Port Requirements on page 3 • Browser Requirements on page 4 • Supported Storage Devices on page 4 2 Quantum Vision Requirements Quantum Vision Server Requirements Table 1 Vision Server System Requirements The Quantum Vision software runs on the Vision server. Before installing the Quantum Vision software, make sure the Vision server meets the requirements in Table 1. Server Component System Requirement Processor Intel or AMD server class processor 2 CPUs for up to 50 devices 4 CPUs for more than 50 devices Memory 4 GB for monitoring up to 50 devices 8 GB for monitoring more than 50 devices Available Disk Space 200 GB for monitoring up to 50 devices 400 GB for monitoring more than 50 devices Operating System One of the following operating systems: • Windows Server 2003 32-bit • Windows Server 2003 R2 64-bit • Windows Server 2008 32-bit • Windows Server 2008 R2 64-bit • Red Hat Enterprise Linux 5 32-bit • Red Hat Enterprise Linux 5 64-bit Virtual Appliance • Server system with at least an i7 quad-core Intel processor (or AMD equivalent) 2 virtual CPUs for up to 50 devices 4 virtual CPUs for more than 50 devices • At least one IP address available for use by the Vision appliance • One or more ESX4, ESXi4, or ESXi5 servers • Same memory requirements as that of a physical server installation Additional Software (Windows only) Microsoft NET Framework 2.0 or higher Note: Quantum Vision supports installation and operation on a virtual machine (VM) if all other system requirements are met. Server Port Requirements For correct operation of Quantum Vision, the following firewall ports must be open on the Vision server: • Port 80 - Web server (http) • Port 443 - Web server (https) • Port 162 - SNMP Quantum Vision Requirements 3 Quantum Vision 4.3.2 Quick Start Guide To enable monitoring of storage devices, the following firewall ports on the Vision server must allow outgoing traffic: • Port 80 - Web server (http) • Port 443 - Web server (https) • Port 22 - SSH Note: Ports 80 and 443 are the default web server ports. If you specified different web server ports when installing the Quantum Vision software, open those ports in the firewall instead. For more information about specifying the web server ports during installation, see Installing Quantum Vision on page 5. Browser Requirements Quantum Vision 4 is designed to run in any modern Web browser that supports the Adobe Flash Player plug-in. Web browser software is not included with Quantum Vision. You must obtain and install it separately. You must install the correct version of the Adobe Flash Player plug-in for your operating system and browser. Quantum Vision 4.3.2 requires Adobe Flash Player version 11.1 or higher. To download and install Flash Player, go to: http://www.adobe.com Caution: Quantum Vision does not support the 64-bit version of the Flash Player plug-in on Linux. Instead, use the 32-bit Flash Player plug-in and a 32-bit browser. Supported Storage Devices To discover and monitor a DXi disk backup system, Scalar tape library, Scalar LTFS, or vmPRO appliance in Quantum Vision, it must be a supported device. Quantum Vision supports the following Quantum storage devices: • DXi8500 disk backup system • DXi7500 disk backup system • DXi6802 disk backup system • DXi6701 and DXi6702 disk backup systems • DXi6700 disk backup system • DXi6500 disk backup family • DXi5500 disk backup system • DXi4701 disk backup system • Dxi4600 disk backup system • DXi4500 disk backup system • DXi3500 disk backup system • DXi2500-D disk backup system • DXi V-Series (DXi V1000 and DXi V4000) virtual backup systems 4 Quantum Vision Requirements Quantum Vision • Scalar i6000 library • Scalar i2000 library • Scalar i500 library • Scalar i80 library • Scalar i40 library • Scalar LTFS • vmPRO 4000 (software/hardware backup solution) • vmPRO virtual backup system Installing Quantum Vision If Quantum Vision 3 is installed on the Vision server, you should uninstall it before you install any version of Quantum Vision 4. Caution: Installing Vision 4 does not upgrade an existing Vision 3 installation. It is possible to run both Quantum Vision 3 and Quantum Vision 4 simultaneously on the Vision server. However, this is not the recommended configuration. For more information about moving from Vision 3 to Vision 4, see the Appendix “Vision Deployment Options” in the Quantum Vision User’s Guide. To install the Quantum Vision software, follow the procedure for the operating system running on the Vision server: • Windows Installation on page 6 • Linux Installation on page 9 To update an existing installation of Quantum Vision 4 to the latest version, see Updating the Standard Installer Version of Vision on page 28. Note: Before installing Quantum Vision, make sure the operating system on the Vision server is accessible on the network. For best results, Quantum recommends configuring the Vision server with a static IP address. Vision 4.3.2 is also available as a VMware appliance in a format that installs within a vSphere infrastructure. To install Vision as a virtual appliance, see Virtual Appliance Installation on page 12 Note: There is no technical advantage for Vision to be installed on a VM or physical server. Vision may be installed on either a physical server or as a virtual machine (by OVF or other means) to allow you to comply with your IT standards and policies. Installing Quantum Vision 5 Quantum Vision 4.3.2 Quick Start Guide Windows Installation To install the Quantum Vision software on a server running a Windows operating system: 1 Download the Vision installer file: vision-4.3.2-windows-installer.exe. If you do not have Internet access and have copied Vision to a removable media, insert the media into the appropriate drive of the Vision server. 2 Browse to the location of the Quantum Vision installer file: vision-4.3.2-windowsinstaller.exe. Double-click the file to begin installation. The Quantum Vision Setup Wizard displays (see Figure 1). Figure 1 Quantum Vision Setup Wizard (Windows) 3 Click Next to continue. The License Agreement window displays (see Figure 2). Figure 2 License Agreement (Windows) 4 Select I accept the agreement, and then click Next to continue. 6 Installing Quantum Vision Quantum Vision The Installation Directory window displays (see Figure 3). Figure 3 Installation Directory (Windows) 5 Specify a different location to install the Quantum Vision software, or accept the default location. Click Next to continue. The Vision Ports window displays (see Figure 4). Figure 4 Vision Ports (Windows) 6 Specify the ports that Quantum Vision will use, or accept the default port values. Click Next to continue. Note: On Windows or Linux installed Vision servers, you can change your network ports using Vision’s Security feature; however, be sure to check your existing firewall configuration and make sure the appropriate firewall ports are open. The Ready to Install window displays (see Figure 5). Installing Quantum Vision 7 Quantum Vision 4.3.2 Quick Start Guide Figure 5 Ready to Install (Windows) 7 Click Next to continue. Wait while the setup wizard installs the software, initializes the database, and starts Vision. When the setup wizard is finished, the Completing the Quantum Vision Setup Wizard window displays (see Figure 6). Figure 6 Completing the Quantum Vision Setup Wizard (Windows) 8 (Optional) Select the check box to launch Quantum Vision after closing the setup wizard. 9 Click Finish to close the setup wizard. 10 Remove the Quantum Vision Installers and Documentation CD from the CD-ROM drive, as needed. Continue with Quantum Vision Setup on page 30. 8 Installing Quantum Vision Quantum Vision Linux Installation To install the Quantum Vision software on a server running a Linux operating system: 1 Use one of the following options to install Quantum Vision: a If you do not have Internet access and have copied Vision to a removable media, insert the media into the appropriate drive of the Vision server. In a terminal window, execute the following commands as root: umount /media/<device> mkdir /tmp/VISION mount /dev/<device> /tmp/VISION/ cd /tmp/VISION/ ./setup-linux.bin b If you have downloaded the Vision Linux Installer: vision-4.3.2-linux-installer.run. In a terminal window, execute the following commands as root: chmod +x /root/Desktop/vision-4.3.2-linux-installer.run If you are in a desktop environment, double-click the installer file. If you are in a command line environment, type ./vision-4.3.2-linux-installer.run, and then press <Enter>. The Quantum Vision Setup Wizard displays (see Figure 7). Figure 7 Quantum Vision Setup Wizard (Linux) 2 Click Forward to continue. The License Agreement window displays (see Figure 8). Installing Quantum Vision 9 Quantum Vision 4.3.2 Quick Start Guide Figure 8 License Agreement (Linux) 3 Select I accept the agreement, and then click Forward to continue. The Installation Directory window displays (see Figure 9). Figure 9 Installation Directory (Linux) 4 Specify a different location to install the Quantum Vision software, or accept the default location. Click Forward to continue. The Vision Ports window displays (see Figure 10). 10 Installing Quantum Vision Quantum Vision Figure 10 Vision Ports (Linux) 5 Specify the ports the Quantum Vision will use, or accept the default port values. Click Next to continue. Note: On Windows or Linux installed Vision servers, you can change your network ports using Vision’s Security feature; however, be sure to check your existing firewall configuration and make sure the appropriate firewall ports are open. The Ready to Install window displays (see Figure 11). Figure 11 Ready to Install (Linux) 6 Click Forward to continue. Wait while the setup wizard installs the software, initializes the database, and starts Vision. When the setup wizard is finished, the Completing the Quantum Vision Setup Wizard window displays (see Figure 12). Installing Quantum Vision 11 Quantum Vision 4.3.2 Quick Start Guide Figure 12 Completing the Quantum Vision Setup Wizard (Linux) 7 (Optional) Select the check box to launch Quantum Vision after closing the setup wizard. 8 Click Finish to close the setup wizard. 9 If you are installing Vision using a removable media: a In a terminal window, execute the following commands as root: cd / umount /tmp/VISION/ b Remove the media from the drive. 10 Continue with Quantum Vision Setup on page 30. Virtual Appliance Installation To install Quantum Vision 4.3.2 as a virtual appliance: Note: If you have downloaded a Quantum Vision OVA file from the Quantum.com Web site, simply use it as you would an OVF file. The following example represents a typical OVF deployment. The actual sequence of windows that you will see will depend on your system’s configuration. With a basic knowledge of your system, the selections that you will need to make, such as hosts, clusters, resource pools, multiple storage destinations, networks, etc. should be intuitive. This example does attempt to depict where those windows will be displayed. 1 Download the Quantum Vision OVA or OVF file. If you do not have Internet access and have copied Vision to a removable media, insert the media into the appropriate drive of the Vision server. 2 Start a vSphere Client. 12 Installing Quantum Vision Quantum Vision 3 On the vSphere Client window (see Figure 13), select Deploy OVF Template from the File menu. The Source window displays. Figure 13 Deploying an OVF Template 4 On the Source window do the following (see Figure 14): a Select Browse, browse and locate the QuantumVision.ovf file. b Choose the file QuantumVision.ovf. c Click Next. The OVF Template Details window displays. Figure 14 Selecting the Quantum Vision OVF File Installing Quantum Vision 13 Quantum Vision 4.3.2 Quick Start Guide 5 On the OVF Template Details window (see Figure 15), make note of any information you feel you may need. Click Next. The End User License Agreement window displays. Figure 15 Viewing the OVF Template Details 14 Installing Quantum Vision Quantum Vision 6 On the End User License Agreement window (see Figure 16), click Accept; and then click Next to continue. The Name and Location window displays. Figure 16 Accepting the End User License Agreement Installing Quantum Vision 15 Quantum Vision 4.3.2 Quick Start Guide 7 On the Name and Location window (see Figure 17), enter a name for the new appliance; if necessary, select an Inventory Location. Click Next. Figure 17 Specifying the Appliance Name and Location 8 If your configuration has multiple hosts or clusters, select your host or cluster. Click Next. This window will not display if (as does this deployment) you have only one host or a single cluster. 16 Installing Quantum Vision Quantum Vision 9 If your configuration supports resource pools (see Figure 18), select your resource pool. Click Next. This window will not display if you are not using the resource pool capability. Figure 18 Selecting a Resource Pool Installing Quantum Vision 17 Quantum Vision 4.3.2 Quick Start Guide 10 If you have multiple storage destinations (see Figure 19), select your storage destination. Click Next. This window will not display if you have only one storage device. Figure 19 Selecting a Storage Destination 18 Installing Quantum Vision Quantum Vision 11 On the Disk Format window (see Figure 20) make sure that Thin Provision is selected. Click Next. Figure 20 Selecting Thin Provision 12 If you have multiple vSwitches configured in your environment, select the appropriate network. Click Next. This window will not display if you have a single vSwitch configuration. The Ready to Complete window displays. Installing Quantum Vision 19 Quantum Vision 4.3.2 Quick Start Guide 13 On the Ready to Complete window (see Figure 21), check the settings, if they are correct, click Finish. Figure 21 Completing the Deployment Task 14 The deployment process will take a few minutes.When the Vision appliance has been deployed, the Deployment Completed Successfully dialog box displays (see Figure 22). Click Close. Figure 22 Deployment Completed Successfully 20 Installing Quantum Vision Quantum Vision 15 On the vSphere Client window, select your appliance’s name (the name you entered in Step 7 on page 16) in the left panel (see Figure 23). Figure 23 Selecting Your Appliance 16 On the vSphere Client window, click the Launch Virtual Machine Console button (see Figure 24). Your appliance’s virtual machine console window displays. Figure 24 Launching the Appliance’s Virtual Machine Console Installing Quantum Vision 21 Quantum Vision 4.3.2 Quick Start Guide 17 On your appliance’s virtual machine console window, click the Power On button (see Figure 25). The power on process will take a few minutes. Figure 25 Powering On the Appliance 18 When the power on process has completed, your appliance’s console command line window displays (see Figure 26). Occasionally you may need to access a Vision functions by using the console command line. For more information regarding the available functions and their use, see Accessing the Console Command Line (virtual appliance only) on page 33. Figure 26 Logging in to Vision 4.2 22 Installing Quantum Vision Quantum Vision 19 When the IP address has been picked up by the system, you can find the IP address by clicking the vSphere Client Summary tab and then locating the IP Address in the right panel (seeFigure 27). Figure 27 Locating Your Appliance’s IP Address For enhanced stability, it is recommended that you replace your DHCP assigned IP address with a static IP address (Accessing the Console Command Line (virtual appliance only) on page 33). Note: For a Vision appliance, if you need to change your network ports, log on to the Vision Console Command Line (see Accessing the Console Command Line (virtual appliance only) on page 33), and run the net ports command.The net ports command opens the firewall and updates the ports. Continue with Quantum Vision Setup on page 30. Updating Quantum Vision This sections presents procedures for updating the Quantum Vision Appliance and the Quantum Vision server that was installed using the standard installer. • Updating the Virtual Appliance • Updating Quantum Vision 4.2.0 virtual appliance to 4.3.2 • Updating Quantum Vision 4.2.1 virtual appliance to 4.3.2 • Updating Quantum Vision 4.3 or 4.3.1 virtual appliance to 4.3.2 • Updating the Standard Installer Version of Vision Updating Quantum Vision 23 Quantum Vision 4.3.2 Quick Start Guide Updating the Virtual Appliance As a precautionary measure, Quantum recommends that you use your vSphere client or other ESXi management client to take a snapshot of your Vision virtual appliance before beginning any update. On the Vision window, the Software Update dialog box allows you to update your Vision virtual appliance*. It also allows you to choose whether you want your appliance to automatically check for updates and notify you when updates are available. Note: The Software Update feature supports only the Vision virtual appliance (installations from an OVF). The Software Update feature will not update Vision when it has been installed using the standard installer. * If you have set your appliance to automatically check for software updates and updates are available, a notification banner displays to the right of the toolbar (see Figure 32). Updating Quantum Vision 4.2.0 virtual appliance to 4.3.2 To update an existing installation of Quantum Vision 4.2.0 virtual appliance to 4.3.2: 1 Download the following PostgreSQL 8.4 RPM files (3) and the Vision-install RPM from the Quantum Web Site at http://www.quantum.com/vision. Once you have accessed the Web site, click the Upgrade link (see Figure 28). Note: The Vision and PostgresSQL version numbers will change when the software is updated. You should use the most recent versions. • postgresql-libs-8.4.13-1.el6_3.x86_64.rpm • postgresql-8.4.13-1.el6_3.x86_64.rpm • postgresql-server-8.4.13-1.el6_3.x86_64.rpm • vision-install-4.3.2-2575.x86_64.rpm Figure 28 Quantum Vision Upgrade Link 2 Place the RPMs on a server that is on your network and can be accessed from the appliance by either SCP/SSH or HTTP. If you have an HTTP server, you can put the RPMs anywhere within the Web server's directory structure; be sure to remember the URL; for example, 24 Updating Quantum Vision Quantum Vision http://<server>/directory/path/vision-install-4.3.22575.x86_64.rpm. For this example, you would use the http command in Step 4. If you will not be using an HTTP server, place the RPMs anywhere on the server; be sure to remember the location; for example, /tmp/vision/updates/vision-install4.3.2-2575.x86_64.rpm For this example, you would use the scp command in Step 4. 3 Log in to the appliance as the sysadmin user. • If you are on a Linux/Unix/Mac system, use SSH or a comparable application. • If you are on a Windows system, use PuTTY or a comparable application. • If you have a VMware vSphere client, use the appliance's VM console. Note: For more information on the use of the appliance's VM console, see Accessing the Console Command Line (virtual appliance only) on page 33. 4 Based on how you will transfer the RPM files from the server to your appliance, run the appropriate upgrade command to upgrade the Vision RPM. Note: The RPMs must be installed one at a time and in the following order: 1 postgresql-libs-8.4.13-1.el6_3.x86_64.rpm 2 postgresql-8.4.13-1.el6_3.x86_64.rpm 3 postgresql-server-8.4.13-1.el6_3.x86_64.rpm • If you plan to use SCP, use the scp option of the upgrade command. At the appliance’s admin command line prompt, type system upgrade scp, and then press <Enter>. • If you plan to use HTTP, use the http option of the upgrade command. At the appliance’s admin command line prompt, type system upgrade http, and then press <Enter>. 5 Respond appropriately to the prompts presented by the upgrade command. The upgrade command retrieves and installs the RPM onto the appliance. After the RPM is installed, you will see a message notifying you that the Vision service is being restarted. When the Vision service has restarted, the admin application will display its prompt. At this point, PostgreSQL is installed, but it is not configured and the service has not been started. Installing the Vision update rpm will initiate these processes. 6 Based on how you will transfer the RPM files from the server to your appliance, run the appropriate upgrade command to upgrade the Vision RPM (see Step 4). 7 Exit the admin application by typing exit at the prompt. At this point your Vision appliance has been updated to version 4.3.2. Updating Quantum Vision 25 Quantum Vision 4.3.2 Quick Start Guide Updating Quantum Vision 4.2.1 virtual appliance to 4.3.2 To update an existing installation of Quantum Vision 4.2.1 virtual appliance to 4.3.2: 1 Download the Vision-install RPM (vision-install-4.3.2-2575.x86_64.rpm) from the Quantum Web Site at http://www.quantum.com/vision. Once you have accessed the Web site, click the Upgrade link (see Figure 28). Note: The Vision version number will change when the software is updated. You should use the most recent version. 2 Place the RPM on a server that is on your network and can be accessed from the appliance by either SCP/SSH or HTTP. If you have an HTTP server, you can put the RPMs anywhere within the Web server's directory structure; be sure to remember the URL; for example, http://<server>/directory/path/vision-install-4.3.22575.x86_64.rpm. For this example, you would use the http command in Step 4. If you will not be using an HTTP server, place the RPMs anywhere on the server; be sure to remember the location; for example, /tmp/vision/updates/vision-install4.3.2-2575.x86_64.rpm For this example, you would use the scp command in Step 4. 3 Log in to the appliance as the sysadmin user. • If you are on a Linux/Unix/Mac system, use SSH or a comparable application. • If you are on a Windows system, use PuTTY or a comparable application. • If you have a VMware vSphere client, use the appliance's VM console. Note: For more information on the use of the appliance's VM console, see Accessing the Console Command Line (virtual appliance only) on page 33. 4 Based on how you will transfer the RPM file from the server to your appliance, run the appropriate upgrade command to upgrade the Vision RPM. • If you plan to use SCP, use the scp option of the upgrade command. At the appliance’s admin command line prompt, type system upgrade scp, and then press <Enter>. • If you plan to use HTTP, use the http option of the upgrade command. At the appliance’s admin command line prompt, type system upgrade http, and then press <Enter>. 5 Respond appropriately to the prompts presented by the upgrade command. The upgrade command retrieves and installs the RPM onto the appliance. After the RPM is installed, you will see a message notifying you that the Vision service is being restarted. When the Vision service has restarted, the admin application will display its prompt. 6 The system should indicate that updates are available. Run the system upgrade command. At the appliance’s admin command line prompt, type system upgrade, and then press <Enter>. 26 Updating Quantum Vision Quantum Vision 7 Exit the admin application by typing exit at the prompt. At this point your Vision appliance has been updated to version 4.3.2. Updating Quantum Vision 4.3 or 4.3.1 virtual appliance to 4.3.2 To update an existing installation of Quantum Vision 4.3 or 4.3.1 virtual appliance to 4.3.2: 1 Log on Vision and access the Vision window. 2 On the Vision Configuration menu, click Software Update (see Figure 29). Figure 29 Configuration Menu > Software Update The Software Update dialog box displays: • If updates are available, the dialog box displays with an Update Now button (see Figure 30). • If updates are not available, the dialog box displays a Vision server should check for software updates check box and an OK button (see Figure 31). Clear or select the Vision server should check for software updates check box, as appropriate, and click OK to apply your settings. • If you select this check box, a notification banner, which tells you that a software update is available, displays to the right of the toolbar (see Figure 32). You can also install the software updates by clicking the Update Now link. • If you clear this check box, your Vision server does not automatically check for updates or display available software updates on the notification banner. Clear this check box to control when your Vision server checks for updates. 3 To install software updates, click Update Now (see Figure 30). Updating Quantum Vision 27 Quantum Vision 4.3.2 Quick Start Guide Figure 30 CSoftware Update Figure 31 Software Update Configuration Figure 32 Software Update Notification Updating the Standard Installer Version of Vision 28 To update an existing installation (standard installer version) of Quantum Vision 4 to the latest version: 1 Download the Vision updater from the Quantum Web site at http://www.quantum.com/vision. Once you have accessed the Web site, click the Upgrade link (see Figure 33). Updating Quantum Vision Quantum Vision Figure 33 Vision Upgrade Link Make sure you download the correct updater for the operating system running on the Vision server (Windows or Linux). Note: If the Vision server is unable to access the Internet, download the updater on another computer, and then copy it to the Vision server using a USB flash drive or other removable storage. 2 On the Vision server, stop the Vision service: • In Windows, use the Services control panel to stop the Quantum Vision service. • In Linux, at a terminal prompt, type service vision stop and press <Enter>. 3 On the Vision server, run the Vision updater. • For Windows, double-click the updater file you downloaded. • For Linux, open a terminal window and change to the directory where you downloaded the updater file. Then execute the following command as root: ./<vision_updater_filename> where <vision_updater_filename> is the name of the Vision updater file. 4 Click OK. The Quantum Vision Setup Wizard displays. 5 Click Next or Forward to continue. The License Agreement window displays. 6 Select I accept the agreement, and then click Next or Forward to continue. The Installation Directory window displays. 7 If you installed Quantum Vision 4 in a directory other than the default location, specify the location to install the Quantum Vision software. Otherwise, accept the default location. Click Next or Forward to continue. • In Windows (32-bit), the default location is: \Program Files\Quantum Vision\ • In Windows (64-bit), the default location is: \Program Files (x86)\Quantum Vision\ • In Linux, the default location is: /opt/quantum-vision/ Updating Quantum Vision 29 Quantum Vision 4.3.2 Quick Start Guide The Ready to Install window displays. 8 Click Next or Forward to continue. Wait while the setup wizard updates the software. When the setup wizard is finished, the Completing the Quantum Vision Setup Wizard window displays. 9 Click Finish to close the setup wizard. The Quantum Vision software is updated to the latest version. Note: After the setup wizard is complete, Quantum Vision must update and convert the database for optimum performance. The update process can take up to two hours for large configurations. The Quantum Vision Webbased interface will not be available during the update process. The interface will become available after the update is completed. 10 Close your browser and open it again before accessing Quantum Vision. This clears the browser cache. Quantum Vision Setup After installation is complete, you must set up Quantum Vision to begin monitoring storage devices. To set up Quantum Vision, perform the following tasks: • Logging On to Vision • Discovering Devices • Accessing the Console Command Line (virtual appliance only) • Taking Next Steps Logging On to Vision Before you can begin setting up Quantum Vision, you must log on to the Web-based user interface. To log on to Quantum Vision: 1 Launch a supported Web browser on a workstation that has network access to the Vision server. 2 In the browser address box, type the IP address of the Vision server, and then press <Enter>. The Login window displays (see Figure 34). If the Login window does not display, verify that the IP address is correct and that the network path to the Vision server is valid. Also verify that you are using a supported Web browser and that the correct version of Adobe Flash Player is installed. 30 Quantum Vision Setup Quantum Vision Figure 34 Login Window 3 Enter the default username and password: • Username - admin • Password - password 4 Click Login. After a successful login, the Vision window displays (see Figure 35). Continue Vision configuration with Discovering Devices. If you are unable to log on, verify that your username and password are correct, then try again. Figure 35 The Vision Window Discovering Devices Quantum Vision Setup After you log on to Quantum Vision for the first time, a message appears stating that no Quantum devices were found (see Figure 36). 31 Quantum Vision 4.3.2 Quick Start Guide Figure 36 After First Login A device is a system, such as a Scalar tape library or DXi disk backup system, that is monitored by Quantum Vision. Before you can use Quantum Vision to monitor a device, you must first discover the device. To discover devices: 1 On the message box that displays after you first log on to Quantum Vision, click Yes. The Device Management dialog box displays. Note: If you do not see the message box, on the Management menu, click Device Management. 2 Click Add. The Discover New Device dialog box displays (see Figure 37). Figure 37 Discover New Device Dialog Box 3 Enter information about the device: • Device Name - Enter a name to identify the device. This name displays on all status and report consoles. • Device Address - Enter the IP address or hostname of the device. The IP address can be in IPv4 or IPv6 format. If entering a hostname, the Vision server must be running a name service that will resolve the hostname to an IP address. • Device Username - Enter the username to use when logging on to the device. 32 Quantum Vision Setup Quantum Vision Note: The username must have administrator rights on the device. • Device Password - Enter the password for the device username. • Gather Enabled - Select the check box to enable gathering of status and configuration data from the device. Clear the check box to disable gathering of status and configuration data. Note: The Select Device Groups list is empty because you have not yet added any user groups. You can associate devices with user groups in a later procedure in this guide. 4 Click Discover. 5 Click OK. The device is added to the Device Management dialog box. 6 (Optional) Repeat this procedure to add additional devices. Note: A temporary license is included with Quantum Vision. This temporary license allows you to monitor up to three devices. If you want to add more than three devices, you must first enter a permanent license key to authorize the total number of devices you want to monitor. 7 Click the close button (x) to close the Device Management dialog box. Note: It may take a few minutes for information for the new device to display on the Status console. Accessing the Console Command Line (virtual appliance only) A limited number of functions are available from your appliance's console command line. To access the command line, select your appliance in the vSphere client and then select the Console tab (see Figure 38). The console window displays. Figure 38 Console Tab Quantum Vision Setup 33 Quantum Vision 4.3.2 Quick Start Guide Log on with your appliance’s username and password and you will go to the console command line (see Figure 39). If this is your first time to access the console command line, log on with the default username and password: sysadmin/QuantumVision. Figure 39 Console Login The following will help you access and use the various commands: • To see the list of commands, type help and press <Enter>. • To log off the console command line, type exit and press <Enter>. • To free the cursor from the console, press <crtl+alt>: To return to the console command line, click anywhere inside the console command line window. • To get help about a specific command, type help <command> and press <Enter>. • To execute a command, type <command> <subcommand> <option> and press <Enter>. Example: to perform a system password reset, type system password reset, and then press <Enter>. The following commands are available: • admin • net • system • exit admin The admin command allows the user to change or reset the system password. admin password [reset] - This command prompts the user to change the system password. The reset option resets the system password to the default password. admin timezone - This command allows the user to change the system timezone setting. Upon entering this command, the user can select from three choices: 1. US timezones, 2. non-US timezones, and 3 cancel. Upon entering the desired selection, a list from which the user can select the appropriate timezone displays. When the timezone selection has been entered, control returns to the command line. 34 Quantum Vision Setup Quantum Vision admin backup - This command prompts the user for the server name, the username and password, and the location in which the database will be archived (on the server). admin restore - This command prompts the user for the server name, the username and password, and the location in which the database is archived. The command then copies the archive from the server to the appliance, extracts it, and then restarts the Vision server. net The net commands allow the user to choose how IP addresses are assigned and to set the http ports. net config [dhcp|static] - The dhcp option allows the user to have DHCP assign IP addresses. The static option allows the user to manually assign the IP address, NetMask, and Gateway IP addresses. net ports - This command allows the user to set the http and https ports. net dns - This command allows the user to set IP addresses for DNS servers for the appliance. Enter the DNS server IP address, one at a time, in priority order. Press <enter> without an IP address when finished. system The system commands allow the user to reboot or shutdown the system, restart the service, or upgrade the appliance. system reboot - This command allows the user to reboot the system. system restart service - This command allows the user to restart the service. system shutdown - This command allows the user to shutdown the system. system upgrade - This command allows the user to upgrade the Vision appliance from the Quantum repository. With the repository-based upgrade, the system upgrade command takes care of locating and downloading the upgrade rpm. Note: If you are currently running Vision 4.2 or 4.2.1, you will not have access to the Quantum repository. You will need to use either system upgrade http or system upgrade scp to perform your upgrade to 4.3.2. When you are running Vision 4.3 or newer, you will then have access to the Quantum repository. system upgrade [scp|http] - This command allows the user to upgrade the version of Vision running on the appliance. exit The exit commands allow the user to exit and log off from the console command line application. Quantum Vision Setup 35 Quantum Vision 4.3.2 Quick Start Guide Taking Next Steps To learn more about using Quantum Vision, see the Quantum Vision User’s Guide on the Quantum Vision Installers and Documentation CD, or see the online help. (To display the online help, click the Help button on the upper right of the Vision window.) See the Quantum Vision User’s Guide or the online help to learn more about these and other topics: • Viewing Installed Licenses or Adding a New Licenses • Adding Users and Groups • Setting Up Alerts • Configuring E-mail Settings • Viewing Device Status • Running Reports • Viewing Analytics Viewing Installed Licenses or Adding a New Licenses The temporary license installed with Quantum Vision authorizes you to monitor up to 3 devices for up to 60 days. To monitor more devices, or to use Quantum Vision for more than 60 days, you must add a permanent license. (See Chapter 4 “Vision Configuration” in the Quantum Vision User’s Guide.) Adding Users and Groups Quantum Vision can use users and groups to manage device access. A group is a named collection of users. When you discover a device, you can assign one or more groups to the device. Only users who belong to the assigned groups can access the device. (See Chapter 3 “Vision Management” in the Quantum Vision User’s Guide.) Setting Up Alerts Alerts are notifications that Quantum Vision sends regarding the status of a device. Alert rules define the conditions when the alert is generated and specify the recipients of the alert. With alerts, Quantum Vision can automatically notify users and administrators by e-mail about important changes in device status. Quantum Vision can also send an email in response to SNMP traps generated by devices. (See Chapter 3 “Vision Management” in the Quantum Vision User’s Guide.) Configuring E-mail Settings Use the Vision Email Configuration dialog box to configure settings for the outgoing e-mail server. Quantum Vision uses this server to send e-mail notifications and reports. Quantum Vision cannot send notifications and reports until you configure an outgoing e-mail server. (See Chapter 4 “Vision Configuration” in the Quantum Vision User’s Guide.) 36 Quantum Vision Setup Quantum Vision Viewing Device Status The Status console displays all monitored Quantum devices. Use the Status console to view the overall health of all DXi and Scalar devices or to get detailed status information for a single device. You can also view and acknowledge alert notifications for devices. (See Chapter 5 “Vision Status” in the Quantum Vision User’s Guide.) Running Reports Reports present capacity, performance, and configuration information for devices and media. A report can include information for a specified time period or provide a snapshot of the device at the time the report is run. You can run reports from the Reports console at any time. Also, Quantum Vision can generate reports on a recurring basis and send them to a list of recipients. (See Chapter 6 “Vision Reporting” in the Quantum Vision User’s Guide.) Viewing Analytics The Analytics console allows you to quickly visualize and compare key statistics for DXi and Scalar devices. Use the interactive reports to see, at a glance, if exceptional conditions exist for any monitored devices. Each report displays information about core device functionality, such as replication status on DXi disk backup systems or tape alerts on Scalar libraries. (See Chapter 7 “Vision Analytics” in the Quantum Vision User’s Guide.) *6-66528-12 A* 37 For assistance, contact the Quantum Customer Support Center: USA: 1-800-284-5101 (toll free) or +1-720-249-5700 EMEA: +800-7826-8888 (toll free) or +49-6131-3241-1164 APAC: +800-7826-8887 (toll free) or +603-7953-3010 Worldwide: http://www.quantum.com/ServiceandSupport ©2014 Quantum Corporation. All rights reserved. Quantum and the Quantum logo are registered trademarks of Quantum Corporation and its affliates in the United States and/or other countries. All other trademarks are the property of their respective owners. Protected by Pending and Issued U.S. and Foreign Patents, including U.S. Patent No. 5,990,810. 6-66528-13 Rev B, October 2014 About Quantum Quantum is a proven global expert in Data Protection and Big Data management, providing specialized storage solutions for physical, virtual and cloud environments. From small businesses to major enterprises, more than 50,000 customers trust Quantum to help maximize the value of their data by protecting and preserving it over its entire lifecycle. With Quantum, customers can Be Certain they’re able to adapt in a changing world—keeping more data longer, bridging from today to tomorrow, and reducing costs. See how at www.quantum.com/BeCertain. Quantum Vision 4.3.2 Quick Start Guide 38 Quantum Vision Setup