1
Sun™Trunking 1.3 Installation and
User’s Guide
Sun Microsystems, Inc.
www.sun.com
Part No. 817-3374-10
July 2003, Revision A
Submit comments about this document at: http://www.sun.com/hwdocs/feedback
Copyright 2003 Sun Microsystems, Inc., 4150 Network Circle, Santa Clara, California 95054, U.S.A. All rights reserved.
Sun Microsystems, Inc. has intellectual property rights relating to technology that is described in this document. In particular, and without
limitation, these intellectual property rights may include one or more of the U.S. patents listed at http://www.sun.com/patents and one or
more additional patents or pending patent applications in the U.S. and in other countries.
This document and the product to which it pertains are distributed under licenses restricting their use, copying, distribution, and
decompilation. No part of the product or of this document may be reproduced in any form by any means without prior written authorization of
Sun and its licensors, if any.
Third-party software, including font technology, is copyrighted and licensed from Sun suppliers.
Parts of the product may be derived from Berkeley BSD systems, licensed from the University of California. UNIX is a registered trademark in
the U.S. and in other countries, exclusively licensed through X/Open Company, Ltd.
Sun, Sun Microsystems, the Sun logo, AnswerBook2, docs.sun.com, Sun Gigabit Ethernet, Sun Quad FastEthernet, Sun GigaSwift Ethernet, Sun
Trunking, SunVTS, and Solaris are trademarks or registered trademarks of Sun Microsystems, Inc. in the U.S. and in other countries.
All SPARC trademarks are used under license and are trademarks or registered trademarks of SPARC International, Inc. in the U.S. and in other
countries. Products bearing SPARC trademarks are based upon an architecture developed by Sun Microsystems, Inc. The OPEN LOOK and
Sun™ Graphical User Interface was developed by Sun Microsystems, Inc. for its users and licensees. Sun acknowledges the pioneering efforts
of Xerox in researching and developing the concept of visual or graphical user interfaces for the computer industry. Sun holds a non-exclusive
license from Xerox to the Xerox Graphical User Interface, which license also covers Sun’s licensees who implement OPEN LOOK GUIs and
otherwise comply with Sun’s written license agreements.
U.S. Government Rights—Commercial use. Government users are subject to the Sun Microsystems, Inc. standard license agreement and
applicable provisions of the FAR and its supplements.
DOCUMENTATION IS PROVIDED "AS IS" AND ALL EXPRESS OR IMPLIED CONDITIONS, REPRESENTATIONS AND WARRANTIES,
INCLUDING ANY IMPLIED WARRANTY OF MERCHANTABILITY, FITNESS FOR A PARTICULAR PURPOSE OR NON-INFRINGEMENT,
ARE DISCLAIMED, EXCEPT TO THE EXTENT THAT SUCH DISCLAIMERS ARE HELD TO BE LEGALLY INVALID.
Copyright 2003 Sun Microsystems, Inc., 4150 Network Circle, Santa Clara, Californie 95054, Etats-Unis. Tous droits réservés.
Sun Microsystems, Inc. a les droits de propriété intellectuels relatants à la technologie qui est décrit dans ce document. En particulier, et sans la
limitation, ces droits de propriété intellectuels peuvent inclure un ou plus des brevets américains énumérés à http://www.sun.com/patents et
un ou les brevets plus supplémentaires ou les applications de brevet en attente dans les Etats-Unis et dans les autres pays.
Ce produit ou document est protégé par un copyright et distribué avec des licences qui en restreignent l’utilisation, la copie, la distribution, et la
décompilation. Aucune partie de ce produit ou document ne peut être reproduite sous aucune forme, par quelque moyen que ce soit, sans
l’autorisation préalable et écrite de Sun et de ses bailleurs de licence, s’il y ena.
Le logiciel détenu par des tiers, et qui comprend la technologie relative aux polices de caractères, est protégé par un copyright et licencié par des
fournisseurs de Sun.
Des parties de ce produit pourront être dérivées des systèmes Berkeley BSD licenciés par l’Université de Californie. UNIX est une marque
déposée aux Etats-Unis et dans d’autres pays et licenciée exclusivement par X/Open Company, Ltd.
Sun, Sun Microsystems, le logo Sun, AnswerBook2, docs.sun.com, Sun Gigabit Ethernet, Sun Quad FastEthernet, Sun GigaSwift Ethernet, Sun
Trunking, SunVTS,et Solaris sont des marques de fabrique ou des marques déposées de Sun Microsystems, Inc. aux Etats-Unis et dans d’autres
pays.
Toutes les marques SPARC sont utilisées sous licence et sont des marques de fabrique ou des marques déposées de SPARC International, Inc.
aux Etats-Unis et dans d’autres pays. Les produits protant les marques SPARC sont basés sur une architecture développée par Sun
Microsystems, Inc.
L’interface d’utilisation graphique OPEN LOOK et Sun™ a été développée par Sun Microsystems, Inc. pour ses utilisateurs et licenciés. Sun
reconnaît les efforts de pionniers de Xerox pour la recherche et le développement du concept des interfaces d’utilisation visuelle ou graphique
pour l’industrie de l’informatique. Sun détient une license non exclusive de Xerox sur l’interface d’utilisation graphique Xerox, cette licence
couvrant également les licenciées de Sun qui mettent en place l’interface d ’utilisation graphique OPEN LOOK et qui en outre se conforment aux
licences écrites de Sun.
LA DOCUMENTATION EST FOURNIE "EN L’ÉTAT" ET TOUTES AUTRES CONDITIONS, DECLARATIONS ET GARANTIES EXPRESSES
OU TACITES SONT FORMELLEMENT EXCLUES, DANS LA MESURE AUTORISEE PAR LA LOI APPLICABLE, Y COMPRIS NOTAMMENT
TOUTE GARANTIE IMPLICITE RELATIVE A LA QUALITE MARCHANDE, A L’APTITUDE A UNE UTILISATION PARTICULIERE OU A
L’ABSENCE DE CONTREFAÇON.
Please
Recycle
Contents
Preface
1.
vii
Overview of Sun Trunking 1.3 Software
What is Sun Trunking?
1
Hardware and Software Requirements
CPU Requirements
Key Features
2
2
2
What is New in This Release?
2.
1
3
Installing Sun Trunking 1.3 Software
5
Preparing for the Software Installation
5
Verifying Required Driver Software
▼
5
To Verify that the Software is Installed
Installing the Sun Trunking 1.3 Software
3.
5
6
▼
To Install the Sun Trunking 1.3 Software Packages
▼
To Verify that Sun Trunking 1.3 Packages Are Installed
▼
To Remove the the Sun Trunking 1.3 Packages
Configuring the Sun Trunking 1.3 Software
Preparing for Trunking Configuration
Checking for Link Mode
6
10
11
13
13
13
iii
Booting from the Network
14
Determining Instance Numbers
▼
14
To Resolve the Problem of Plumbed Interfaces
Accessing Trunk Members
16
Maximum Number of Links for Each Adapter
local-mac-address? Property
17
19
Using Trunking Auto-configuration Setup at Boot Time
▼
To Edit the nettr.sh File
▼
To Configure the Host Files
▼
To Activate the Networks Without Rebooting
▼
To Reboot and Activate the Trunked Networks
20
23
Verifying the Autoconfiguration Setup
Disabling the Sun Trunking Interface
26
27
Configuring Trunking with the nettr Utility
Command Syntax
28
Enabling Sun Trunking Interface
29
Disabling the Sun Trunking Interface
31
Trunking Policies
▼
31
31
To Use the Hashing Feature
Interoperability
IP Multipathing
34
Dynamic Reconfiguration
VLAN
33
33
IEEE 802.3ad Link Aggregation
34
35
SunVTS Diagnostic Software
Performance Tuning
iv
28
Verifying the Sun Trunking Interfaces
Load Balancing Methods
15
36
Sun Trunking 1.3 Installation and User’s Guide • July 2003
35
34
28
25
25
20
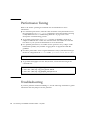
Troubleshooting
36
Using the stats Option
37
Using the snoop Command
Using the conf Option
Error Messages
User Hints
Getting Help
A.
37
38
38
40
40
Installing the Software Packages Manually
Installing the Driver Software
41
41
▼
To Install the Gigabit Ethernet Software for Solaris 7
▼
To Install the GigaSwift Ethernet Software or Dual Fast Ethernet Software
for Solaris 7 or Solaris 8 42
Verifying and Installing Driver Patches
▼
To Install the Patches
44
45
Installing the Trunking Software
▼
42
45
To Install the Trunking Packages
46
Contents
v
vi
Sun Trunking 1.3 Installation and User’s Guide • July 2003
Preface
The SunTrunking 1.3 Installation and User’s Guide describes how to install and
configure the Sun Trunking™ 1.3 software. These instructions are designed for an
experienced system administrator with networking knowledge.
How This Book Is Organized
This manual describes how to install and configure the Sun Trunking 1.3 software on
the supported adapters.
Chapter 1 provides an overview of Sun Trunking 1.3 software, an overview of the
Sun Trunking 1.3 software, including the hardware and software requirements for
using this product.
Chapter 2 describes how to prepare for and install the Sun Trunking 1.3 software
packages using the automated installation script.
Chapter 3 describes how to edit and create the Sun Trunking 1.3 configuration files.
Appendix A describes how to install the Sun Trunking 1.3 software and the driver
software manually.
Using UNIX Commands
This document might not contain information on basic UNIX® commands and
procedures such as shutting down the system, booting the system, and configuring
devices. See the following for this information:
vii
■
Software documentation that you received with your system
■
Solaris™ operating environment documentation, which is at
http://docs.sun.com
Typographic Conventions
Typeface1
Meaning
Examples
AaBbCc123
The names of commands, files,
and directories; on-screen
computer output
Edit your.login file.
Use ls -a to list all files.
% You have mail.
AaBbCc123
What you type, when contrasted
with on-screen computer output
% su
Password:
AaBbCc123
Book titles, new words or terms,
words to be emphasized.
Replace command-line variables
with real names or values.
Read Chapter 6 in the User’s Guide.
These are called class options.
You must be superuser to do this.
To delete a file, type rm filename.
1 The settings on your browser might differ from these settings.
Shell Prompts
Shell
Prompt
C shell
machine-name%
C shell superuser
machine-name#
Bourne shell and Korn shell
$
Bourne shell and Korn shell superuser
#
.
viii Sun Trunking 1.3 Installation and User’s Guide • July 2003
Related Documentation
TABLE P-1
Related Documentation
Application
Title
Part Number
Install
Sun Quad FastEthernet SBus Adapter Installation and User’s
Guide
805-0732-10
Install
Sun Quad FastEthernet SBus Adapter Release Notes
805-1444-13
Install
Sun Quad FastEthernet PCI Adapter Installation and User’s Guide
805-1797-10
Install
Sun Quad FastEthernet PCI Adapter Release Notes
805-2901-11
Install
Sun GigabitEthernet/S 2.0 Adapter Installation and User’s Guide
805-2784-10
Install
Sun GigabitEthernet/S 2.0 Adapter Release Notes
805-5937-10
Install
Sun GigabitEthernet/P 2.0 Adapter Installation and User’s Guide
805-2785-13
Install
Sun GigabitEthernet/P 2.0 Adapter Release Notes
805-5938-13
Install
Sun GigabitEthernet SBus Adapter 1.1 User’s Guide
805-1797-10
Install
Sun GigabitEthernet SBus Adapter 1.1 Product Notes
805-3950-10
Install
Sun GigabitEthernet PCI Adapter 1.1 User’s Guide
805-2901-11
Install
Sun GigabitEthernet PCI Adapter 1.1 Product Notes
805-3952-11
Install
Sun GigaSwift Ethernet PCI Adapter Installation and User’s Guide
816-1702-11
Install
Sun GigaSwift Ethernet PCI Adapter Product Notes
816-1703-10
Accessing Sun Documentation
You can view, print, or purchase a broad selection of Sun documentation, including
localized versions, at:
http://www.sun.com/products-n-solutions/hardware/docs/
Preface
ix
Contacting Sun Technical Support
If you have technical questions about this product that are not answered in this
document, go to:
http://www.sun.com/service/contacting
Sun Welcomes Your Comments
Sun is interested in improving its documentation and welcomes your comments and
suggestions. You can submit your comments by going to:
http://www.sun.com/hwdocs/feedback
Please include the title and part number of your document with your feedback:
Sun Trunking 1.3 Installation and User’s Guide, part number 817-3374-10
x
Sun Trunking 1.3 Installation and User’s Guide • July 2003
CHAPTER
1
Overview of Sun Trunking 1.3
Software
This chapter provides an overview of the Sun Trunking 1.3 software, including the
hardware and software requirements for using this product. This chapter includes
the following sections:
■
■
■
■
“What is Sun Trunking?” on page 1
“Hardware and Software Requirements” on page 2
“Key Features” on page 2
“What is New in This Release?” on page 3
What is Sun Trunking?
Sun Trunking 1.3 software provides the ability to aggregate multiple links between a
pair of devices so that they work in parallel as if they were a single link. Once
aggregated, these point-to-point links operate as a single highly available “fat pipe”
providing increased network bandwidth as well as high availability. For a given link
level connection, trunking enables you to add bandwidth up to the maximum
number of network interface links supported.
Sun Trunking 1.3 provides trunking support for the following network interface
cards:
■
■
■
■
Sun
Sun
Sun
Sun
Quad FastEthernet adapter
GigabitEthernet adapter
GigaSwift Ethernet adapter
Dual FastEthernet and Dual SCSI/P adapter
Sun Trunking 1.3 provides support for these adapters for Solaris 7, 8, and 9
operating environment. Refer to the product documentation for both your adapter
and your version of Solaris.
1
Hardware and Software Requirements
Before installing the Sun Trunking 1.3 software, make sure your system meets the
following hardware and software requirements:
Hardware and Software
Requirements
Hardware
Sun Ultra 60, Sun Ultra Enterprise 3x00, 4x00, 5x00, 6x00, E250,
E450, Sun Enterprise 10000, 12000, 15000 Sun Fire™ 4800, Netra
T3, T4, Sun Blade™ 100, 150, 1500, 2500 Netra™ T4.
Network Interface
Cards and drivers
Sun Quad FastEthernet adapter (qfe driver), Sun
GigabitEthernet adapter (ge driver), Sun GigaSwift
Ethernet adapter (ce driver), Sun Dual FastEthernet and
Dual SCSI/P adapter (ce driver)
OpenBoot PROM
Revision 3.x
Software
Solaris 7, 8, or 9 operating environment
You can use any trunking-capable switch with the Sun Trunking 1.3 software.
However, the switch must first be statically configured for trunking. (Refer to your
switch manual.)
CPU Requirements
Multiple trunks can be configured per server. However the total number of links
aggregated depends on the server capability. As a general guideline you need a
minimum of 1.25 MHz of CPU speed for every 1 Mbps of NIC bandwidth capability.
For optimum performance, use 2 MHz of CPU speed for every 1 Mbps of NIC
bandwidth capability. Any number of aggregations is supported within this
guideline.
Key Features
Sun Trunking 1.3 software implements the following key features:
■
■
2
Scalable, high density bandwidth
Automatic link-level failover
Sun Trunking 1.3 Installation and User’s Guide • July 2003
■
■
■
Load balancing based on policy: MAC address, Round Robin, IP Destination
Address, or IP Source Address/IP Destination Address.
Command line interface (CLI) backward compatibility with Sun Trunking 1.2.1
Provides the ability to aggregate ports for the following drivers:
■
ce, ge—a maximum of four ports can be aggregated
■
qfe—a maximum of 16 ports can be aggregated
What is New in This Release?
■
■
■
New underlying software architecture for Sun GigaSwift Ethernet adapter (ce)
support (ge and qfe remain the same)
Solaris 7, 8, 9 support
Same nettr(1M) interface:
conf option enhanced
debug option deprecated
Four ge interfaces are supported (Trunking 1.2.1 supported only two interfaces.)
Automatic installation and removal of Trunking 1.3 software
■
■
■
■
Chapter 1
Overview of Sun Trunking 1.3 Software
3
4
Sun Trunking 1.3 Installation and User’s Guide • July 2003
CHAPTER
2
Installing Sun Trunking 1.3 Software
This chapter describes how to prepare for and install the Sun Trunking 1.3 software
packages using the automated installation script. This chapter includes the following
sections:
■
■
“Preparing for the Software Installation” on page 5
“Installing the Sun Trunking 1.3 Software” on page 6
Preparing for the Software Installation
Before installing the Sun Trunking 1.3 software, you should have already installed
one or more of the following adapters:
■
■
■
■
Sun
Sun
Sun
Sun
Quad FastEthernet adapter
GigabitEthernet adapter
GigaSwift Ethernet adapter
Dual FastEthernet and Dual SCSI/P adapter
Refer to your product documentation for installation instructions.
Verifying Required Driver Software
You cannot activate the Sun Trunking 1.3 software until the driver software is
installed.
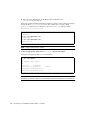
▼ To Verify that the Software is Installed
1. Verify the presence of the driver software:
5
■
If your system is booted using the 32-bit kernel:
# pkginfo -l package
Where package = SUNWqfed, SUNWged, or SUNWced
■
If system is booted using the 64-bit kernel:
# pkginfo -l package
Where package = SUNWqfedx, SUNWgedx, or SUNWcedx
SUNWqfed, SUNWqfedx (for QuadFast Ethernet)
SUNWged, SUNWgedx (for Gigabit Ethernet)
SUNWced, SUNWcedx (for GigaSwift Ethernet and Dual FastEthernet and Dual
SCSI/P)
If the command responds with packaging information, the packages are installed. If
the packages are not installed, refer to your product documentation.
Installing the Sun Trunking 1.3 Software
Sun Trunking 1.3 provides an automated installation script. In most cases, you can
use the following procedure and execute the installation script. If you have any
problems, see Appendix A for manual installation procedures.
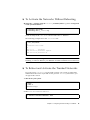
▼
To Install the Sun Trunking 1.3 Software
Packages
1. At the system console, become superuser (root).
6
Sun Trunking 1.3 Installation and User’s Guide • July 2003
2. Change to the directory where the install script resides:
# cd media_path
Where:
media_path = /cdrom/cdrom0, if you are installing from the Trunking 1.3 CDROM
or
unzipped Trunking_1_3_path/Trunking_1_3, if you are installing from a
download file.
3. Execute the install script:
# ./install
The install script verifies that the Trunking software is current or needs to be
removed before installation can begin, installs the Trunking software packages,
verifies the current driver software and patch if necessary. Nothing will be installed
until you are prompted to continue.
Sun Trunking 1.3 Utility Installation.
Copyright 2002 Sun Microsystems, Inc.
Use is subject to license terms.
All rights reserved.
*** Checking for existing Sun Trunking 1.3 Utility packages...
*** Checking for supporting Ethernet drivers and patches...
This script is about to take the following actions:
- Remove pre-existing Sun Trunking 1.3 Utility software
Press return to continue, or ’Q’ followed by a return to quit:
Chapter 2
Installing Sun Trunking 1.3 Software
7
4. Press Return to continue the installation:
*** Removing pre-existing Sun Trunking 1.3 Utility packages...
Removal of <SUNWtrku> was successful.
Removal of <SUNWtrkm> was successful.
*** Done.
Old packages have been removed, please re-execute install script
A log of this Install can be found at:
/var/tmp/Trunking.install.2003.06.27
Note – If a previous version of Trunking software is found and removed, you must
execute the install script again.
5. Execute the install script again:
# ./install
You will see messages similar to the following:
CODE EXAMPLE 2-1
Output from Sun Trunking Installation Script
*** Sun Trunking 1.3 Utility install script starting.
*** The current directory is </cdrom/cdrom0>.
*** This system is running Solaris 9.
Sun Trunking 1.3 Utility Installation.
Copyright 2002 Sun Microsystems, Inc.
Use is subject to license terms.
All rights reserved.
*** Checking for existing Sun Trunking 1.3 Utility packages...
*** Making sure that exist under Solaris_9/Trunking/Packages...
*** Checking if Sun Trunking 1.3 Utility packages are already
installed...
*** Checking for multiple instances of the Sun Trunking 1.3 Utility
software...
*** Checking for supporting Ethernet drivers and patches...
*** Checking if Sun GigaSwift Ethernet packages are already
installed...
8
Sun Trunking 1.3 Installation and User’s Guide • July 2003
CODE EXAMPLE 2-1
Output from Sun Trunking Installation Script (Continued)
*** Checking Sun GigaSwfit Ethernet patches are already
installed...
*** Checking if Sun GigaSwift Ethernet packages are already
installed...
*** Checking Sun Vlan Ethernet Utility patch is already
installed...
*** Checking if Sun Gigabit Ethernet packages are already
installed...
*** Checking Sun Gigabit Ethernet patches are already installed...
*** Checking if Sun Quadfast Ethernet packages are already
installed...
*** Checking Sun Quadfast Ethernet patches are already
installed...
This script is about to take the following actions:
- Install Sun Trunking 1.3 Utility packages.
- Install GigaSwift Ethernet: 112817-10 required patch(es).
Press return to continue, or ’Q’ followed by a return to quit:
*** Installing patch 112817-10 for Solaris 9...
Checking installed patches...
Verifying sufficient filesystem capacity (dry run method)...
Installing patch packages...
Patch number 112817-10 has been successfully installed.
See /var/sadm/patch/112817-10/log for details
Patch packages installed:
SUNWcea
SUNWceax
SUNWced
SUNWcedu
SUNWcedx
*** Installing Sun Trunking 1.3 Utility packages...
Copyright 2003 Sun Microsystems, Inc. All rights reserved.
Use is subject to license terms.
==========================================================
Please modify /etc/opt/SUNWconn/bin/nettr.sh to set up trunking
configuration.
Please create /etc/hostname.qfeN entries for QFE trunk heads.
Please create /etc/hostname.geN entries for GEM trunk heads.
Please create /etc/hostname.ceN entries for CE trunk heads.
Reboot your system.
Chapter 2
Installing Sun Trunking 1.3 Software
9
CODE EXAMPLE 2-1
Output from Sun Trunking Installation Script (Continued)
===============================================
Copyright 2003 Sun Microsystems, Inc. All rights reserved.
Use is subject to license terms.
*** Done.
A log of this Install can be found at:
/var/tmp/Trunking.install.2003.07.10
▼
To Verify that Sun Trunking 1.3 Packages Are
Installed
1. Verify the presence of the driver:
# pkginfo -l package
Where package = SUNWtrku, SUNWtrkm
If the command responds with packaging information, the packages are installed. If
the packages are not installed, refer to Appendix A.
10
Sun Trunking 1.3 Installation and User’s Guide • July 2003
▼
To Remove the the Sun Trunking 1.3 Packages
● As superuser, change to the directory where the trunking packages reside and
remove them:
# ./remove
Note, this script DOES NOT remove Network Ethernet Driver patches.
This should not be necessary.
Trunking 1.3 package removal script, please select an option:
1) Remove Sun Trunking 1.3 Software
2) Quit
Select an option: 1
application SUNWtrku
Sun Trunking Utility for Solaris 9
system
SUNWtrkm
Sun Trunking Man Pages
About to take the following actions:
- Remove Sun Trunking 1.3 Sofware
Press ’q’ followed by the return key to quit, or press any other
key followed by
the return key to continue:
*** Removing packages...
Removal of <SUNWtrku> was successful.
Removal of <SUNWtrkm> was successful.
*** Done. A log of this removal can be found at:
/var/tmp/Trunking.remove.2003.06.27
Chapter 2
Installing Sun Trunking 1.3 Software
11
12
Sun Trunking 1.3 Installation and User’s Guide • July 2003
CHAPTER
3
Configuring the Sun Trunking 1.3
Software
This chapter describes how to edit and create the Sun Trunking 1.3 configuration
files. This chapter includes the following sections:
■
■
■
■
■
“Preparing for Trunking Configuration” on page 13
“Configuring Trunking with the nettr Utility” on page 28
“Load Balancing Methods” on page 31
“Interoperability” on page 33
“Troubleshooting” on page 36
Preparing for Trunking Configuration
Before rebooting your system, you must edit and create configuration files to define
how you will link the Ethernet network interfaces. To configure these files, you need
to know the following for each Ethernet adapter:
■
■
■
The device instance numbers of each Ethernet network interface.
The device instance number for the trunk head.
The trunking policy you want to use: MAC, Round Robin, IP Destination, or IP
Source/IP Destination. (See “Trunking Policies” on page 31.)
Checking for Link Mode
Always check to be sure the link mode is set to run full-duplex.
13
Use the kstats (See the kstats manual page: kstats(1M)) or the ndd command
to verify link mode. If the information returned indicates that your trunking device
is not running at full-duplex, refer your networking device product documentation
for information on setting the link mode.
Booting from the Network
Once you have installed the trunking software and connected the Ethernet interfaces
to a switch that is configured for trunking, you cannot use that interface to boot from
the network.
Determining Instance Numbers
Each Ethernet adapter has a network interface. You will need to know the device
instance numbers for each network interface before you can configure the Sun
Trunking software files.
You can find the instance numbers by searching the /etc/path_to_inst file.
Both files contain the physical name, the instance number, and driver name for each
device on the system. By searching this file, you can find the instance numbers that
will be used with the Sun Trunking 1.3 software.
Note – The following examples are for a GigaSwift Ethernet adapter. If you are
using a different adapter, the output will be similar. For user input, replace ce with
qfe for the Quad FastEthernet adapter or ge for the Gigabit Ethernet adapter. The
Dual FastEthernet and Dual SCSI adapter uses the ce driver.
Using the grep command, search the path_to_inst file for all of the devices on
your system:
# grep ce /etc/path_to_inst
"/pci@1f,4000/network@2" 0 "ce"
"/pci@1f,4000/network@4" 1 "ce"
14
Sun Trunking 1.3 Installation and User’s Guide • July 2003
In the example above, instances 0 and 1 are GigaSwift Ethernet adapters. Your
information will be similar if you are using a different adapter. TABLE 3-1 lists the
network interface number, physical name, and instance number for each GigaSwift
Ethernet instance on this example system.
TABLE 3-1
Example GigaSwift Ethernet Instance Numbers
Network Interface
Number
Device Name
Instance Number
0
/pci@1f,4000/network@2
0
1
/pci@1f,4000/network@4
1
You will need to know the instance numbers of the GigaSwift Ethernet network
interfaces in order to configure the Sun Trunking software.
Note – You cannot trunk an interface that is already plumbed. To display a list of all
plumbed interfaces, execute ifconfig -a command.
▼ To Resolve the Problem of Plumbed Interfaces
1. Before trunking ensure that the links are available:
proboscis# ifconfig -a
lo0: flags=1000849<UP,LOOPBACK,RUNNING,MULTICAST,IPv4> mtu 8232
index 1
inet 127.0.0.1 netmask ff000000
eri0: flags=1000843<UP,BROADCAST,RUNNING,MULTICAST,IPv4> mtu 1500
index 2
inet 10.4.127.55 netmask ffffff00 broadcast 10.4.127.255
ether 0:3:ba:b:43:7b
ce0: flags=1000843<UP,BROADCAST,RUNNING,MULTICAST,IPv4> mtu 1500
index 942
inet 199.99.10.10 netmask ffffff00 broadcast 199.99.10.255
ether 8:0:20:bc:d6:fa
The output from the ifconfig -a command in the previous example shows that
ce0 is already plumbed, and therefore, cannot be aggregated.
Chapter 3
Configuring the Sun Trunking 1.3 Software
15
2. Unplumb the the interface as follows:
proboscis# ifconfig ce0 unplumb
proboscis# ifconfig -a
lo0: flags=1000849<UP,LOOPBACK,RUNNING,MULTICAST,IPv4> mtu 8232
index 1
inet 127.0.0.1 netmask ff000000
eri0: flags=1000843<UP,BROADCAST,RUNNING,MULTICAST,IPv4> mtu 1500
index 2
inet 10.4.127.55 netmask ffffff00 broadcast 10.4.127.255
ether 0:3:ba:b:43:7b
3. Setup the trunk and plumb the interface:
proboscis# nettr -setup 0 device=ce members=0,1,2,3 policy=2
ce trunk members:
ce0 (head)
ce1
ce2
ce3
proboscis# ifconfig ce0 plumb 199.99.10.10 up
Accessing Trunk Members
Trunk members can be accessed only through the trunk head. Since trunking
appears to the system as a single “fat pipe,” the trunk head is the single access point.
Other links in an aggregation are not plumbed beneath TCP/IP and are not visible.
Networking commands such as ifconfig(1M) and netstat(1M) work only on
the head instance.
For qfe and ge, you cannot do a DLPI attach on a non-head member. The following
error message was returned for a snoop command for a non-head member:
# snoop -d ge1
dlattachreq: DL_ERROR_ACK:
16
Sun Trunking 1.3 Installation and User’s Guide • July 2003
dl_errno 8 unix_errno 0
In this example, ge1 is a member of a trunk. The trunk head for that trunk is ge0. To
use the snoop command, for example, in such a case, the following would be the
correct usage:
# snoop -d ge0
Using device /dev/ge (promiscuous mode)
? -> (multicast) ETHER Type=0C34
? -> (multicast) ETHER Type=0C34
? -> (multicast) ETHER Type=0C34
? -> (multicast) ETHER Type=0C34
(Unknown),
(Unknown),
(Unknown),
(Unknown),
size
size
size
size
=
=
=
=
52
52
52
52
bytes
bytes
bytes
bytes
Note – If you are using the ce driver, you can run snoop command on all trunk
member instances.
Maximum Number of Links for Each Adapter
TABLE 3-2 shows a matrix of supported drivers and the maximum number of
supported links for each:
TABLE 3-2
Matrix of Supported Drivers and Number of Links
Driver
Supported Links
qfe
16 links
ge
4 links
ce
4 links
The two network interfaces of the GigaSwift Ethernet (ce) adapter can be linked as
follows.
Chapter 3
Configuring the Sun Trunking 1.3 Software
17
CE
Adapter
CE
Adapter
Two network
ports linked into
one trunk.
FIGURE 3-1
E
t
h
e
r
n
e
t
S
w
i
t
c
h
GigaSwift Ethernet Trunking Network Configuration Example
The two network ports of the GigabitEthernet (ge) adapter can be linked as follows.
GE
Adapter
GE
Adapter
Two network
ports linked into
one trunk.
FIGURE 3-2
E
t
h
e
r
n
e
t
S
w
i
t
c
h
GigabitEthernet Trunking Network Configuration Example
The four network ports of the Quad FastEthernet (qfe) adapter can be linked in a
number of ways, depending on the needs of your network. All four of the network
ports can be linked into one trunk, or two network ports can be linked into one
trunk. FIGURE 3-3 shows four different common linking possibilities.
18
Sun Trunking 1.3 Installation and User’s Guide • July 2003
QFE
Adapter
All four network ports
linked into one
trunk
QFE
Adapter
E
t
h
e
r
n
e
t
Four network ports
linked into two
separate trunks
S
w
i
t
c
h
S
w
i
t
c
h
QFE
Adapter
Two network ports
linked into a
trunk, with the two
other network ports
used as separate
network prots
FIGURE 3-3
E
t
h
e
r
n
e
t
QFE
Adapter
E
t
h
e
r
n
e
t
QFE
Adapter
All eight network
ports linked into
two trunks.
S
w
i
t
c
h
E
t
h
e
r
n
e
t
S
w
i
t
c
h
Quad FastEthernet Trunking Network Configuration Examples
The configuration of the Sun Trunking 1.3 software files depends on how you want
to organize the Ethernet network. You must also configure the Ethernet switch
software to be symmetrical with how you configured the Sun Trunking 1.3 software.
Refer to your Ethernet switch documentation for the switch configuration
instructions.
local-mac-address? Property
Each Ethernet adapter has been assigned a unique Media Access Control (MAC)
address, which represents the 48-bit Ethernet address for that network interface.
Each host system also provides a single global MAC address. For historical reasons,
Chapter 3
Configuring the Sun Trunking 1.3 Software
19
the default MAC address for each interface is that of the single global host MAC
address rather than the MAC address of each individual Ethernet adapter. This must
be modified for trunking.The OpenBoot firmware has a settable local-macaddress property.
The mac-address property of the network device specifies the network address
(system-wide or local-mac-address?) used for booting the system. To start using
the MAC addresses assigned to the network interface of the Ethernet adapter, set the
NVRAM configuration variable local-mac-address? to true.
ok setenv local-mac-address? true
Client machines with multiple interfaces that communicate with the trunked
machine should also set local-mac-address? to true.
Using Trunking Auto-configuration Setup at Boot
Time
After locating the instance numbers of the Ethernet network interfaces, and deciding
how you want to organize your network, you can begin to configure the Sun
Trunking 1.3 software.
▼
To Edit the nettr.sh File
This section describes the minimum set of instructions to configure trunking. For
more details, see “Configuring Trunking with the nettr Utility” on page 28.
The main configuration file of the Sun Trunking 1.3 software is the
/etc/opt/SUNWconn/bin/nettr.sh file. You will define each trunk by adding
commands to this file. Before you edit the nettr.sh file, you need to know how
many Ethernet network interfaces you want to link into a trunk, the first instance
number of each trunk (also called the “trunk head”), and the trunking policy you
want to use.
● Using a text editor, add commands to the nettr.sh file to define your trunking
network.
20
Sun Trunking 1.3 Installation and User’s Guide • July 2003
In the nettr.sh file, add the following nettr command to configure a trunk.The
format of this command is:
nettr -setup head-instance device=<qfe | ce | ge>
members=<instance,instance,.,.>
[ policy=<number> ]
In the command above, the head instance along with the device name is the trunk
identification. The device represents the adapter type (qfe for a Quad FastEthernet
adapter or ce for GigaSwift Ethernet adapter, or ge for Gigabit Ethernet). The
member option is used to select members of a trunk. The policy option can either
be the default value of 1 for MAC or 2 for round robin, 3 for IP Destination, or 4 for
IP Source/IP Destination.
Note – The examples below use the instance numbers found in TABLE 3-1 on page 15.
The instance numbers on your system will be different. See “Determining Instance
Numbers” on page 14 for more information.
■
If you want to use the MAC trunking policy and 2 links for a trunk, you need to
add the following line to the nettr.sh file:
nettr -setup 0 device=ce members=0,1 policy=1
■
Check the output that results from executing the nettr -conf command after
executing nettr -setup commands.
It will be similar to the following:
# nettr -conf
Name
Head
ce0
ce1
ce0
ce0
Policy DEV Type
1
■
pci
pci
Original-Mac-Addr
8:0:20:8f:be:24
8:0:20:8f:ce:15
Speed
1000
1000
Duplex
Link
Full
Full
Up
Up
For two trunks, containing two network interfaces each using the MAC policy,
you would add these two lines:
nettr -setup 0 device=ce members=0,1 policy=1
nettr -setup 0 device=ce members=2,3 policy=1
Chapter 3
Configuring the Sun Trunking 1.3 Software
21
Note – The command syntax of Sun Trunking 1.3 is is fully compatible with
Trunking 1.2.1. Existing nettr.sh files do not need any modifications.
■
To verify whether you have set up the trunking configuration file correctly, run
the nettr -run command. You should see information similar to the
following:
# nettr -run
Configuring Sun Trunking devices
ce trunk members:
ce0 (head)
ce1
ce trunk members:
ce2 (head)
ce3
■
# nettr -conf
Name
Head
22
Execute the nettr -conf command to check the configuration.
Policy DEV Type
Original-Mac-Addr
Speed
Duplex
Link
ce0
ce1
ce0
ce0
1
pci
pci
8:0:20:8f:be:24
8:0:20:8f:ce:15
1000
1000
Full
Full
Up
Up
ce2
ce3
ce0
ce0
1
pci
pci
8:0:20:8f:d2:11
8:0:20:8f:ac:19
1000
1000
Full
Full
Up
Up
Sun Trunking 1.3 Installation and User’s Guide • July 2003
▼
To Configure the Host Files
Before you can use these trunked Ethernet network interfaces, you must create an
/etc/hostname.driver# file.
Where driver = ce for GigaSwift Ethernet, ge for Gigabit Ethernet, or qfe for Quad
FastEthernet
# = instance number
Then add an entry in the /etc/hosts file for each trunk.
1. For each trunk, create a /etc/hostname.ce# file, where # corresponds to the
instance number used as the trunk head.
For example, if you had two trunks using two network interfaces each, you would
have to create two files containing the host name of the trunk as seen by network.
The extensions of these files would have to correspond with the trunk head interface
numbers of the trunks.
TABLE 3-3
Example hostname.ce# Files
Filename
Trunk Head Instance Number
GigaSwift Ethernet Adapter
Network Interfaces Used in the
Trunk1
/etc/hostname.ce0
0
0, 1
/etc/hostname.ce2
2
2, 3
1
■
■
See FIGURE 3-1 on page 18 for more information.
The /etc/hostname.ce# file must contain an appropriate host name for the
trunk.
The host name should be different from any other host name of any other
interface, for example: /etc/hostname.ce0 and /etc/hostname.ce2 cannot
share the same host name.
Chapter 3
Configuring the Sun Trunking 1.3 Software
23
■
The host name should have an IP address that is entered in the
/etc/hosts file (see Step 2).
Using the example trunk head instance numbers in TABLE 3-3, the following example
shows the three /etc/hostname.device# files required for a system called
proboscis, which has an onboard hme device (proboscis), and two trunks
(proboscis-11, proboscis-12).
# cat /etc/hostname.hme0
proboscis
# cat /etc/hostname.ce0
proboscis-11
# cat /etc/hostname.ce2
proboscis-12
Note – Only trunk heads are visible.
2. Create an appropriate entry in the /etc/hosts file for each trunk.
Using the example from Step 1, you would have:
# cat /etc/hosts
#
# Internet host table
#
127.0.0.1
localhost
129.144.10.57 proboscis
129.144.11.83 proboscis-11
129.144.12.41 proboscis-12
loghost
Note – Make sure you configure the switch software to be symmetrical with the Sun
Trunking 1.3 software. Refer to your Ethernet switch documentation for instructions.
24
Sun Trunking 1.3 Installation and User’s Guide • July 2003
▼
To Activate the Networks Without Rebooting
● Setup the ce adapter using the ifconfig command, where ip_address corresponds
to the system IP address.
# ifconfig ce0 plumb
# ifconfig ce0 ip_address up
Create an entry in the /etc/hosts file for each active ce interface.
The following example shows the /etc/hosts file.
# cat /etc/hosts
#
# Internet host table
#
127.0.0.1
localhost
129.144.10.57 proboscis loghost
129.144.11.83 proboscis-11
Note – Make sure you configure the switch software to be symmetrical with the Sun
Trunking 1.3 software. Refer to your Ethernet switch documentation for instructions.
▼
To Reboot and Activate the Trunked Networks
If you do not use ifconfig, you will need to reboot your system to make these
trunked networks active. If you did use the previous ifconfig instructions, you
can ignore this section.
1. Shut down your system.
# sync
# init 0
Shutdown messages.
2. Set local-mac-address? to true.
ok setenv local-mac-address? true
Chapter 3
Configuring the Sun Trunking 1.3 Software
25
3. Perform a reconfiguration boot.
ok boot -r
Verifying the Autoconfiguration Setup
You can verify trunking networks using the ifconfig and the nettr commands.
Use the ifconfig -a command to print out the addressing information for each
interface on the system.
# /usr/sbin/ifconfig -a
lo0: flags=849<UP,LOOPBACK,RUNNING,MULTICAST> mtu 8232
inet 127.0.0.1 netmask ff000000
hme0: flags=863<UP,BROADCAST,NOTRAILERS,RUNNING,MULTICAST> mtu 1500
inet 129.144.131.27 netmask ffffff00 broadcast
129.144.131.255
ether 8:0:20:8f:bf:79
ce0: flags=863<UP,BROADCAST,NOTRAILERS,RUNNING,MULTICAST> mtu 1500
inet 199.100.2.10 netmask ffffff00 broadcast 199.100.2.255
ether 8:0:20:8d:2f:ff
Even though a trunk may be composed of two linked GigaSwift Ethernet network
interfaces, the ifconfig -a command will only print out the addressing
information for the trunk head interfaces (ce0 in the example above).
For a more complete listing of the ce devices, use the nettr -conf command. This
command prints out a list of the trunked ce instances on the system.
# /etc/opt/SUNWconn/bin/nettr -conf
Name
Head
Policy DEV Type
Original-Mac-Addr
ce0
ce1
ce0
ce0
1
pci
pci
8:0:20:8f:be:24
8:0:20:8f:ce:15
Speed
1000
1000
Duplex
Link
Full
Full
Up
Up
In the example above, the ce0 interface is the trunk head for a two network interface
trunk, composed of the ce0, and ce1 interfaces. The nettr -conf command will
also show the policy of each trunk on the system, as well as listing the original MAC
address of each interface.
26
Sun Trunking 1.3 Installation and User’s Guide • July 2003
Use the nettr -stat trunkhead device=device command to monitor the network
statistics of each interface on the system.
Where:
trunkhead is the trunk head interface number of the trunk you want to monitor
device is qfe, ge, or ce
# /etc/opt/SUNWconn/bin/nettr -stats 0 device=ce
Mar 30 15:26:58 2003
Name
Ipkts
ce0
ce1
66518099
66527490
Ierrs
0
0
Opkts
Oerrs
67498218
67498218
0
0
Collis
0
0
Crc
0
0
%Ipkts %Opkts
50.00
50.00
50.00
50.00
This command will list each interface and the network performance statistics, of the
specified trunk. See “Configuring Trunking with the nettr Utility” on page 28 for
more information.
You can also monitor the network statistics of a trunk at regular intervals. The full
usage of the command is nettr -stats trunkhead device=[ce|ge|qfe] interval=sec,
with sec being the number of seconds between monitoring the trunk’s interfaces. In
the example below, the trunk is monitored once every second.
# /etc/opt/SUNWconn/bin/nettr -stats 0 device=ce interval=1
Mar 30 15:26:58 2003
Name
Ipkts
ce0
ce1
66518099
66527490
Ierrs
0
0
Opkts
Oerrs
67498218
67498218
0
0
Collis
0
0
Crc
0
0
%Ipkts %Opkts
50.00
50.00
50.00
50.00
You can also use the netstat(1M)or kstat(1M) command to monitor the network
statistics. Refer to the netstat(1M) and kstat(1M) man pages for more
information.
Disabling the Sun Trunking Interface
To permanently disable the trunking interface, comment out the nettr command in
the /etc/opt/SUNWconn/bin/nettr.sh file. You will need to reconfigure the
/etc/hostname.ce# and /etc/hosts files if you want to use the Ethernet
network interfaces separately. Refer to the product documentation for more
information.
Chapter 3
Configuring the Sun Trunking 1.3 Software
27
Configuring Trunking with the nettr
Utility
The nettr(1M) utility can be used to configure trunking. nettr(1M)can be used
to:
■
■
■
■
set up a trunk
release a trunk
display a trunk configuration
display statistics fo trunked interfaces
Command Syntax
Following is the command syntax for nettr.
nettr -setup head-instance device=<qfe | ge | ce>
members=<instance,instance,.,.> [ policy=<number> ]
nettr -stats head-instance device=<qfe | ge | ce>
[ interval=<time> ] [ type=<number> ]
nettr -release head-instance device=<qfe | ge | ce>
nettr -conf
nettr -run
nettr -policy
nettr -hash head-instance device=<qfe | ge | ce>
{[ mac=<dest_mac_address> ] [ ip=<dest_ip_address> ]
[ ip=<source_ip_address/dest_ip_address> ]}
Enabling Sun Trunking Interface
The format of this command is:
nettr -setup head-instance device=<qfe | ge | ce>
members=<instance,instance,.,.> [ policy=<number> ]
In the command above, the head instance is the instance number of the first linked
network interface of the trunk. The device represents the adapter type (qfe for a
Quad FastEthernet adapter or ge for GigabitEthernet adapter). The member option
is used to select members of a trunk. The policy option can either be the default
28
Sun Trunking 1.3 Installation and User’s Guide • July 2003
value of 1 for MAC or 2 for round robin, 3 for IP Destination, or 4 for IP Source/IP
Destination. If you wanted to use the MAC trunking policy and 2 links for a trunk,
execute the following line:
nettr -setup 0 device=ge members=0,1 policy=1
Verifying the Sun Trunking Interfaces
You can verify trunking networks using the ifconfig and the nettr commands.
Use the ifconfig -a command to print out the addressing information for each
interface on the system.
# /usr/sbin/ifconfig -a
lo0: flags=849<UP,LOOPBACK,RUNNING,MULTICAST> mtu 8232
inet 127.0.0.1 netmask ff000000
hme0: flags=863<UP,BROADCAST,NOTRAILERS,RUNNING,MULTICAST> mtu 1500
inet 129.144.131.27 netmask ffffff00 broadcast
129.144.131.255
ether 8:0:20:8f:bf:79
ce0: flags=863<UP,BROADCAST,NOTRAILERS,RUNNING,MULTICAST> mtu 1500
inet 199.100.2.10 netmask ffffff00 broadcast 199.100.2.255
ether 8:0:20:8d:2f:ff
Even though a trunk may be composed of two linked GigaSwift Ethernet network
interfaces, the ifconfig -a command will only print out the addressing
information for the trunk head interfaces (ce0 in the example above).
Use the nettr -conf command to print out a list of trunked ce instances on the
system.
# /etc/opt/SUNWconn/bin/nettr -conf
Name
Head
Policy DEV Type
Original-Mac-Addr
ce0
ce1
ce0
ce0
1
pci
pci
8:0:20:8f:be:24
8:0:20:8f:be:24
Speed
1000
1000
Duplex
Link
Full
Full
Up
Up
In the example above, the ce0 interface is the trunk head for a two network interface
trunk, composed of the ce0, and ce1 interfaces. The nettr -conf command will
also show the policy of each trunk on the system, as well as listing the original MAC
address of each interface.
Chapter 3
Configuring the Sun Trunking 1.3 Software
29
Use the nettr -stat trunkhead device=device command to monitor the network
statistics of each interface on the system.
Where:
trunkhead is the trunk head interface number of the trunk you want to monitor
device is qfe, ge, or ce
# /etc/opt/SUNWconn/bin/nettr -stats 0 device=ce
Mar 30 15:26:58 2003
Name
Ipkts
ce0
ce1
66518099
66527490
Ierrs
0
0
Opkts
Oerrs
67498218
67498218
Collis
0
0
0
0
Crc
0
0
%Ipkts %Opkts
50.00
50.00
50.00
50.00
This command will list each interface and the network performance statistics,
summarized in TABLE 3-4, of the specified trunk.
TABLE 3-4
30
Output of the nettr -stats Command
Network Statistic
Definition
Ipkts
The number of Ethernet packets inputted into the interface.
Ierrs
The number of errors that occurred while inputting these Ethernet
packages.
Opkts
The number of Ethernet packets outputted through the interface.
Oerrs
The number of errors that occurred while outputting these Ethernet
packages.
Collis
The number of collisions detected on the interface.
Crc
The number of cyclic redundancy check (CRC) errors detected on
the interface.
%Ipkts
The percent of Ethernet packets input to the interface.
%Opkts
The percent of Ethernet packets output through the interface.
Sun Trunking 1.3 Installation and User’s Guide • July 2003
You can also monitor the network statistics of a trunk at regular intervals. The full
usage of the command is nettr -stats trunkhead device=[ce|ge|qfe] interval=sec,
with sec being the number of seconds between monitoring the trunk’s interfaces. In
the example below, the trunk is monitored once every second.
# /etc/opt/SUNWconn/bin/nettr -stats 0 device=ce interval=1
Mar 30 15:26:58 2003
Name
Ipkts
ce0
ce1
66518099
66527490
Ierrs
0
0
Opkts
Oerrs
67498218
67498218
Collis
0
0
0
0
Crc
0
0
%Ipkts %Opkts
50.00
50.00
50.00
50.00
You can also use the netstat(1M)or kstat(1M) command to monitor the network
statistics. Refer to the netstat(1M) and kstat(1M) man pages for more
information.
Disabling the Sun Trunking Interface
If you need to disable a trunk, use the nettr -release trunkhead command, with
trunkhead being the trunk head interface number of the trunk you want to disable.
# /etc/opt/SUNWconn/bin/nettr -release 0 device=ce
nettr automatically unplumbs IPv4 and IPv6 stacks. If any other application (such
as VLAN) are plumbed, remember to manually unplumb the application.
Load Balancing Methods
Trunking Policies
The four supported trunking policies used in the Sun Trunking 1.3 software are
MAC, Round Robin, IP Destination, and IP Source+Destination. With these policies,
if a link fails, the traffic failsover to the next available link. The policies are defined
below.
Chapter 3
Configuring the Sun Trunking 1.3 Software
31
MAC
■
■
■
■
Is the default policy used by the Sun Trunking 1.3 software. MAC is the preferred
policy to use with switches. Most trunking-capable switches require using the
MAC-hashing policy, but check your switch documentation.
Uses the last three bits of the MAC address of both the source and destination.
For two ports, the MAC address of the source and destination are first XORed:
Result = 00, 01, which selects the port.
Favors a large population of clients. For example, this ensures that 50 percent of
the client connections will go through one of two ports in a two-port trunk.
Is required by most trunking-capable switches.
Note – Do not use MAC-hashing for connecting two servers back to back.
Round Robin
■
Round Robin is the preferred policy with a Back to Back connection, used
between the output of a transmitting device, and the input of an associated
receiving device.
■
Uses each network interface of the trunk in turn, as a method of distributing
packets over the assigned number of trunking interfaces.
May have an impact on performance since the temporal ordering of packets is not
observed.
■
IP Destination Address
■
Uses the four bytes of the IP Destination address to determine the transmission
path.
■
If a trunking interface host has one IP source address, and it is necessary to
communicate to multiple IP clients connected to the same router, then the IP
Destination Address policy is the preferred policy to use.
IP Source Address/IP Destination Address
■
■
Connects the source server to the destination, based on where the connection
originated or terminated.
Uses the four bytes of the source and destination IP addresses to determine the
transmission path.
The primary use of the IP Source/IP Destination Address policy occurs where
you use the IP virtual address feature to give multiple IP addresses to a single
physical interface. For example, you might have a cluster of servers providing
network services, in which each service is associated with a virtual IP address
32
Sun Trunking 1.3 Installation and User’s Guide • July 2003
over a given interface. If a service associated with an interface fails, the virtual
IP address migrates to a physical interface on a different machine in the cluster.
In such an arrangement, the IP Source Address/IP Destination Address policy
gives you a greater chance of using more, different links within the trunk than
would the IP Destination Address policy.
The -hash option to the nettr (1M) command enables you to determine over
which link a given packet will travel. The following section describes hashing
in greater detail.
Note – Sun Trunking 1.3, like any server trunking software, load balances the
outgoing traffic, not the incoming packets. Trunking 1.3 software relies on the link
partner (switch or server) to load balance the incoming packets.
▼
To Use the Hashing Feature
Note – Trunking interfaces must be set up prior to using hashing features. If, for
example, on one trunk, the link to transmit is 0, with the following hash command
input, the policy IP Source and Destination Address would read as follows:
# /etc/opt/SUNWconn/bin/nettr -hash 0 device=ce ip=
199.100.1.29/199.100.1.3
Name Head Policy Source Address
ce0
ce0
4
199.100.1.29
Dest Address
199.100.1.3
Link to Transmit
0
The -hash option to the nettr (1M) command enables you to determine over which
link a given packet will travel. For example, if you use the Destination IP Address
policy, you can supply an IP address to a nettr -hash command to determine
over which link a packet with the specified IP address will travel.
Interoperability
Sun Trunking 1.3 operates as a virtual network adapter that is visible to the system
through the head instance. Applications will transparently work as though on a
single link, yet will experience the benefits of increased bandwidth and automatic
Chapter 3
Configuring the Sun Trunking 1.3 Software
33
failover. On applications that deal with a physical NIC, such as DR, you must simply
unaggregate prior to performing those functions, then reaggregate when you are
finished.
IEEE 802.3ad Link Aggregation
Sun Trunking 1.3 works in the static mode with 802.3ad switches. For a link to be
part of an aggregation it has to be running at full-duplex and at the same speed. The
endpoints of the links must be terminated at the same switch or system.
Note – Sun Trunking 1.3 does not support the LACP and Marker protocols.
IP Multipathing
IP Multipathing (IPMP) works transparently with Sun Trunking 1.3. Configure two
aggregations (two trunk-heads) and group these two aggregations into one IPMP
group.
Note – IPMP failover may not happen if one of the links in an aggregation fails
because Sun Trunking 1.3 software will failover to the next available link in the
aggregation.
Dynamic Reconfiguration
Dynamic Reconfiguration (DR) works transparently with Sun Trunking 1.3. Here is
how it works:
34
■
Unconfigure the aggregation, using nettr -release.
■
Unconfigure the Ethernet adapter, using cfgadm.
■
Change the Ethernet adapter.
■
Configure the Ethernet adapter, using cfgadm.
■
Reconfigure the aggregation, using nettr -setup.
Sun Trunking 1.3 Installation and User’s Guide • July 2003
VLAN
Sun Trunking 1.3 works transparently with 802.1q and is available only on the
GigaSwift Ethernet adapter. For more information on configuring VLANs, refer to
“Configuring VLANs,” in the Sun GigaSwift Ethernet Adapter Installation and User’s
Guide, part number 816-1702-11.
When configuring VLANs on an aggregatation(trunk), make sure that the link
partner (or switch) has VLAN enabled on all its ports belonging this aggregation.
SunVTS Diagnostic Software
The SunVTS software executes multiple diagnostic hardware tests and is used to
verify the configuration and functionality of most hardware controllers and devices.
Since trunking aggregates many network adapters behind a single head instance,
these tests may not provide the information intended. Unaggregate all trunking
interfaces to be tested before running SunVTS.
If you still want to use the SunVTS nettest option on an aggregated link, use the
Round Robin policy option and then use the nettr -stats option to ensure that
test traffic is flowing over all interfaces in the aggregation.
Note – To use the nettest diagnostic, you must have the SunVTS software
installed on your system. Refer to the Solaris Sun Hardware Platform Guide, which was
shipped with the Solaris Supplement CD, for instructions on how to install the
SunVTS software.
Caution – Do not run the SunVTS netlbtest when links are aggregated. This test
will not make sense on aggregated links because the packets are distributed to
multiple links based on the load balancing policy.
Chapter 3
Configuring the Sun Trunking 1.3 Software
35
Performance Tuning
Refer to the Solaris operating environment user documentation for more
information.
■
For maximum performance, network traffic should be evenly distributed across
the aggregation. Use nettr -stats command to ensure that packets are being
evenly distributed. See “Load Balancing Methods” on page 31 for a full
description of load balancing policies.
■
To get better performance from ge or ce running at 1000Mbps, install each
adapter in different PCI or Sbus slot. Note that some slots utilize the same PCI
bus. Refer to your system documentation for more information.
■
For optimum performance, use 2 MHz of CPU speed for every 1 Mbps of NIC
bandwidth capability. Any number of aggregations is supported within this
guideline.
■
For better performance from a GigaSwift Ethernet card (ce) add the following to
the driver configuration file ce.conf under /platform/sun4u/kernel/drv:
interrupts=1;
■
To get better throughput over the TCP/IP stack, execute the following at the
command line:
# ndd -set /dev/tcp tcp_xmit_hiwat 65536
# ndd -set /dev/tcp tcp_recv_hiwat 65536
# ndd -set /dev/tcp tcp_maxpsz_multiplier 10
Troubleshooting
If you have problems with Sun Trunking 1.3, use the following commands to gather
information that may help resolve the problems.
36
Sun Trunking 1.3 Installation and User’s Guide • July 2003
Using the stats Option
Use the nettr -stats command to check whether network packets are showing in
each trunk instance. In the following example, 1 represents the trunk head instance
being monitored.
# /etc/opt/SUNWconn/bin/nettr -stats 0 device=ce
Mar 30 15:26:58 2003
Name
ce0
ce1
Ipkts
66518099
66527490
Ierrs
0
0
Opkts
Oerrs
67498218
67498218
0
0
Collis
0
0
Crc
0
0
%Ipkts
50.00
50.00
%Opkts
50.00
50.00
If you use MAC policy, you may not see packets on certain interfaces, as shown in
the example. This occurs because two or more clients may have MAC addresses with
the last two bits identical. See “Trunking Policies” on page 31 for more information.
Using the snoop Command
Use the snoop -d command to capture and inspect network packets. This
command enables you to troubleshoot network problems at the packet level,
allowing examination of the contents of a packet. The following shows example
output for ce0.
# snoop -d ce0
Using device /dev/ce (promiscuous mode)
199.100.1.10 -> 199.100.1.11 TCP D=5100 S=59412
Seq=391268307 Len=1460 Win=8760
199.100.1.10 -> 199.100.1.11 TCP D=5100 S=59412
Seq=391269767 Len=1460 Win=8760
199.100.1.10 -> 199.100.1.11 TCP D=5100 S=59412
Seq=391271227 Len=1460 Win=8760
Ack=2577009842
Ack=2577009842
Ack=2577009842
In this example, if there were packets meant for hostname hs4-net11, but none
showed in the output from the snoop command, you would know a problem
existed. In that case, you would check your host file, network connect, or your
ethernet switch setup. Refer to the snoop(1M) man page for more information.
Chapter 3
Configuring the Sun Trunking 1.3 Software
37
Using the conf Option
Use the nettr -conf command to verify your trunking configuration.
# nettr -conf
Name
Head
ce0
ce1
ce0
ce0
Policy DEV Type
2
pci
pci
Original-Mac-Addr
8:0:20:8f:be:24
8:0:20:8f:be:24
Speed
1000
1000
Duplex
Link
Full
Full
Up
Up
Make sure the ethernet switch software and the Sun Trunking 1.3 software are
configured symmetrically. For example, both Sun Trunking and the switch should be
configured with the same number of links per trunk.
Once you have configured Sun Trunking 1.3 software, be sure to re-configure your
switch to match the trunking configuration.
Error Messages
See your console for error messages when configuring a Sun GigaSwift Ethernet
adapter or a Sun Dual FastEthernet and Dual SCSI/P adapter for trunking. It is best
to aggregate and unaggreate links on the console because error messages from the
console and nettr are displayed inline.
Note – If you are configuring a Sun Gigabit Ethernet adapter or a Sun Quad
FastEthernet adapter, error messages are returned by nettr, but may not appear in
the console.
■
If you try to configure a trunk that has already been configured, you will see the
following error message from nettr:
# ./nettr -setup 0 device=ce members=0,1,2
./nettr: ioctl failed: Invalid argument
A message similar to the following appears in the console stating that the
aggregation already exists:
Jul 8 15:36:55 proboscis trslm: NOTICE: trunk(0): Aggregation
exists.
38
Sun Trunking 1.3 Installation and User’s Guide • July 2003
■
If you try to configure a trunk member that is part of another aggregation, you
will see the following message from nettr:
# ./nettr -setup 4 device=ce members=0,4
./nettr: ioctl failed: Invalid argument
A message similar to the following appears in the console stating that the
aggregation already exists:
Jul 8 15:38:18 proboscis trslm: NOTICE: trunk link (ce0): device
instance in use on aggregation 0
■
If you try to configure a non-existent member as part of an aggregation, nettr
will fail as follows:
# ./nettr -setup 7 device=ce members=7,8
./nettr: ioctl failed: I/O error
A message similar to the following appears in the console stating that the
aggregation already exists:
trslm: NOTICE: trunk link (ce7): DL_ERROR_ACK for DL_ATTACH_REQ(11),
errno 8, unix 0
■
If the policy is set out of range, you will see an error message and trunk will be
setup with default policy=1(MACSD).
proboscis# nettr -setup 1 device=ce members=0,1,2,3 policy=7
Jul 10 17:40:04 trunk5-127 laggr: trunk(1) laggr_ioc: Policy 7 not
within supported range(1 - 4), Using default Policy 1
■
If you plumb trunk member, you will see following message. The following
example shows, an attempt to plumb ce2, which is already aggregated and is a
trunk member. Plumbing is allowed only on the trunk-head.
proboscis# ifconfig ce2 plumb
ifconfig: Jul 10 17:57:59 trunk5-127 ce: NOTICE: Illegal BIND to
trunk mbr
SIOCSLIFNAME for ip: ce2: no such interface
Chapter 3
Configuring the Sun Trunking 1.3 Software
39
User Hints
■
Aggregate and unaggregate from the console because error messages from the
console and nettr are displayed inline.
■
After aggregating the links, be sure that the head instance is plumbed using
ifconfig.
■
Remember that only IPv4 and IPv6 are unplumbed during nettr -release
operation. You must unplumb all other VLANs and appplications running on the
head instance manually.
■
netlbtest in SunVTS fails when the links are aggregated. If you want to run
netlbtest on an interface, unconfigure trunking on that interface.
Getting Help
If you cannot resolve the problems and you have a SunService contract, send the
information gathered from these commands to your SunService representative. You
must have the following information ready:
■
Product name and release number (Sun Trunking 1.3)
■
Model number of your machine
■
Solaris release number
Use the showrev command to display your operating system release:
% showrev
Hostname: proboscis-11
Hostid: 8081d6ca
Release: 5.9
Kernel architecture: sun4u
Application architecture: sparc
Hardware provider: Sun_Microsystems
40
Sun Trunking 1.3 Installation and User’s Guide • July 2003
APPENDIX
A
Installing the Software Packages
Manually
This appendix describes how to install the Sun Trunking 1.3 software and the driver
software manually. This appendix includes the following sections:
■
“Installing the Driver Software” on page 41
Installing the Driver Software
You can install the packages from the Solaris release media for the installed version
of the Solaris operating environment. However, if you are using the Solaris 7 or
Solaris 8 operating environment with Gigabit Ethernet, GiagaSwift Ethernet, or Dual
FastEthernet and Dual SCSI/P adapters, install the packages from the Trunking 1.3
CD-ROM. The packages on the Trunking 1.3 CD-ROM contain a pre-applied patch,
so you will not need to install the required Solaris 7 or Solaris 8 patch for the driver
after you install the driver packages from the Trunking 1.3 CD-ROM.
41
▼
To Install the Gigabit Ethernet Software for
Solaris 7
1. As superuser (root), change to the following directory:
# cd media_path/Solaris_7/GigabitEthernet/Packages
Where:
media_path = /cdrom/cdrom0, if you are installing from the Trunking 1.3 CDROM
or
unzipped Trunking_1_3_path/Trunking_1_3, if you are installing from a
download file.
2. Install the packages as follows:
# pkgadd -d . SUNWged SUNWgedm SUNWgedu
Answer y for package installation questions.
▼
To Install the GigaSwift Ethernet Software or
Dual Fast Ethernet Software for Solaris 7 or
Solaris 8
1. As super-user (root), change directories as follows:
# cd media_path/Solaris_x/GigaSwiftEthernet/Packages
Where x = 7 for Solaris 7, 8 for Solaris 8
Where:
media_path = /cdrom/cdrom0, if you are installing from the Trunking 1.3 CDROM
or
unzipped Trunking_1_3_path/Trunking_1_3, if you are installing from a
download file.
2. Install the packages:
42
Sun Trunking 1.3 Installation and User’s Guide • July 2003
■
For Solaris 7:
# pkgadd -d . SUNWced.u SUNWcedu SUNWcedx
■
For Solaris 8:
# pkgadd -d . SUNWced.u SUNWcedu SUNWcedx SUNWvld SUNWvldu SUNWvldx
Answer y for package installation questions.
Appendix A
Installing the Software Packages Manually
43
Verifying and Installing Driver Patches
Ensure that the latest patches are installed on your system.
● Use the showrev command to see if the latest patches are currently installed.
# showrev -p | grep patch-id
If the following patches (or more recent versions) are present, proceed with the Sun
Trunking 1.3 software installation. If the patch version is less than indicated below,
install the patches as described in the next section.
The patches are installed in the various product directories. The following patch
versions (or higher) are required to support Trunking 1.3:
■
GigaSwift Ethernet Driver
■
■
■
■
■
■
Solaris 7
Solaris 8
Solaris 9
106765-11
108813-15
113361-06
Quad FastEthernet Driver
■
■
■
44
112327-12
111883-18 or 112119-02 if optional VLAN utility is installed.
112817-10 or 114600-02 if optional VLAN utility is installed
Gigabit Ethernet Driver
■
■
Solaris 7
Solaris 8
Solaris 9
Solaris 7
Solaris 8
Solaris 9
107743-14
108806-15
112764-06
Sun Trunking 1.3 Installation and User’s Guide • July 2003
▼
To Install the Patches
1. Change to the directory of the desired patch area:
# cd media_path/Solaris_x/network_product/Patches
Where:
media_path = /cdrom/cdrom0, if you are installing from the Trunking 1.3 CDROM
or
unzipped Trunking_1_3_path/Trunking_1_3, if you are installing from a
download file.
x = Solaris Version: 7, 8, or 9
network_product = GigaSwiftEthernet, GigabitEthernet, or QuadFast Ethernet
Install the required patch:
# patchadd patch_id
Where patch_id = See “Verifying and Installing Driver Patches” on page 44 for the
patch list.
Installing the Trunking Software
Once the desired network Ethernet drivers are installed and updated, the Trunking
packages can be installed.
Appendix A
Installing the Software Packages Manually
45
▼
To Install the Trunking Packages
1. Change to the directory of the Trunking packages:
# cd media_path/Solaris_x//Trunking/Packages
Where:
media_path = /cdrom/cdrom0, if you are installing from the Trunking 1.3 CDROM
or
unzipped Trunking_1_3_path/Trunking_1_3, if you are installing from a
download file.
x = Solaris Version: 7, 8, or 9
2. Install the packages:
# pkgadd -d . SUNWtrku SUNWtrkm
Answer y for package installation questions.
46
Sun Trunking 1.3 Installation and User’s Guide • July 2003