1
SpeedTouch™620
Wireless Business DSL Routers
Inte
rnet
ISDN
DSL
N
-in
W LA
Plug
er
Pow
Ethe
rnet
Operator’s Guide
SpeedTouch™
620
Operator’s Guide
Copyright
Copyright ©1999-2006 THOMSON. All rights reserved.
Distribution and copying of this document, use and communication of its contents is not permitted without written authorization
from THOMSON. The content of this document is furnished for informational use only, may be subject to change without notice,
and should not be construed as a commitment by THOMSON. THOMSON assumes no responsibility or liability for any errors or
inaccuracies that may appear in this document.
Thomson Telecom Belgium
Prins Boudewijnlaan, 47
B-2650 Edegem
Belgium
www.speedtouch.com
Trademarks
The following trademarks are used in this document:
SpeedTouch™ is a trademark of THOMSON.
UPnP™ is a certification mark of the UPnP™ Implementers Corporation.
Apple® and Mac OS® are registered trademarks of Apple Computer, Incorporated, registered in the United States and
other countries.
UNIX® is a registered trademark of UNIX System Laboratories, Incorporated.
Netscape® and Netscape Navigator® are registered trademarks of Netscape Communications Corporation.
Bluetooth® word mark and logos are owned by the Bluetooth SIG, Inc.
Ethernet™ is a trademark of Xerox Corporation.
Wi-Fi® and the Wi-Fi logo are registered trademarks of the Wi-Fi Alliance. "Wi-Fi CERTIFIED", "Wi-Fi ZONE", "Wi-Fi Alliance", their respective logos and "Wi-Fi Protected Access" are trademarks of the Wi-Fi Alliance.
Microsoft®, MS-DOS®, Windows® and Windows NT® are either registered trademarks or trademarks of Microsoft Corporation in the United States and/or other countries.
Adobe®, the Adobe logo, Acrobat and Acrobat Reader are trademarks or registered trademarks of Adobe Systems, Incorporated, registered in the United States and/or other countries.
Other brands and product names may be trademarks or registered trademarks of their respective holders.
Document Information
Status: v1.0 (January 2006)
Reference: E-DOC-CTC-20051017-0155
Short Title: Operator’s Guide ST620 R5.4
Contents
Contents
E-DOC-CTC-20051017-0155 v1.0
1
Introduction ................................................................... 3
2
SpeedTouch™ Command Line Interface .................... 5
2.1
About the CLI Interface.................................................................. 5
2.2
CLI Access via Telnet or Serial Console......................................... 6
2.3
Basic Navigation ............................................................................ 7
2.4
Command Line Interface Commands ........................................... 10
2.5
Menu-driven CLI Navigation......................................................... 13
3
SpeedTouch™ System Software .............................. 15
3.1
About the System Software......................................................... 15
3.2
System Software Management via FTP ....................................... 16
3.2.1
Backup System Software via FTP................................................................................. 17
3.2.2
Upgrade or Restore System Software via FTP............................................................ 19
3.2.3
Manual System Software Management via BOOTP/TFTP server.............................. 23
4
SpeedTouch™ Configuration Management............. 25
4.1
Configuration Management via the SpeedTouch™ Web Interface26
4.2
Configuration Management via Telnet......................................... 30
4.3
The :Config CLI Command Group ................................................ 31
4.3.1
Back up Configurations via FTP.................................................................................... 33
4.3.2
Store Configurations via FTP ........................................................................................ 35
i
Contents
ii
4.4
SpeedTouch™ Service Templates ................................................ 40
4.5
SpeedTouch™ System Languages Management .......................... 41
5
SpeedTouch™ Software Modules............................. 45
5.1
Software Activation Key Management ........................................ 46
6
SpeedTouch™ System Services................................ 49
6.1
SpeedTouch™ Dynamic DNS ....................................................... 50
6.2
The SpeedTouch™ SNTP Client ................................................... 56
6.3
Website Filtering .......................................................................... 60
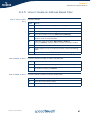
6.3.1
The Website Filtering Configuration Pages ................................................................. 62
6.3.2
How to Verify the Filtering Configuration.................................................................... 63
6.3.3
How to Activate a Web Filtering License ..................................................................... 65
6.3.4
Configuring the Actions for Uncategorised Sites ....................................................... 66
6.3.5
How to Create an Address Based Filter ....................................................................... 67
6.3.6
How to Create a Content Based Filter .......................................................................... 68
6.3.7
How to Create a Content Level ..................................................................................... 69
6.4
Intrusion Detection and Protection ............................................. 71
6.5
Remote Assistance....................................................................... 72
7
The SpeedTouch™ File System................................. 75
E-DOC-CTC-20051017-0155 v1.0
Contents
E-DOC-CTC-20051017-0155 v1.0
8
SpeedTouch™ Remote Access .................................. 79
8.1
Remote Web Interface Access ..................................................... 81
8.2
Secure Remote Web Interface Access ......................................... 84
8.3
Remote Telnet Access.................................................................. 88
8.4
Remote SSH Access ..................................................................... 91
8.5
Remote FTP Access...................................................................... 97
8.6
Remote SFTP Access ................................................................. 100
8.7
LAN Based Auto-Configuration (LAC) Support (TR-064) ............ 106
8.8
CPE WAN Management Protocol (CWMP) Support (TR-069)...... 108
9
The Integrated SpeedTouch™ ISDN Modem ......... 113
9.1
About the ISDN Modem ............................................................. 114
9.2
How to Configure the ISDN Modem........................................... 116
9.3
ISDN Backup .............................................................................. 117
9.3.1
How to Configure the ISDN Dial-In Connection ........................................................ 118
9.3.2
How to Configure the PPP Connection ...................................................................... 121
9.4
ISDN Callback ............................................................................ 124
9.4.1
How to Configure the ISDN Dial-In Connection ........................................................ 125
9.4.2
How to Configure the PPP Connection ...................................................................... 128
9.5
ISDN Remote CAPI..................................................................... 131
iii
Contents
iv
10
SpeedTouch™ Monitoring ...................................... 133
10.1
An Introduction to SNMP........................................................... 134
10.1.1
Basic Concepts ............................................................................................................. 135
10.1.2
MIBs Explained. ........................................................................................................... 136
10.2
SNMP configuration................................................................... 139
10.2.1
How to Allow Access to the SNMP Agent ................................................................. 140
10.2.2
How to View the SNMP Configuration....................................................................... 141
10.2.3
How to View the System Contact, Name and Location............................................ 142
10.2.4
How to Configure SNMPv1 ......................................................................................... 143
10.2.5
How to Configure the System contact, Name and Location .................................... 145
10.2.6
How to Force the Source IP Address.......................................................................... 146
10.2.7
How to Configure the SNMP Target........................................................................... 147
10.2.8
How to Read SNMP Parameters via the CLI .............................................................. 149
10.2.9
How to Allow Remote SNMP...................................................................................... 151
10.2.10
How to Add an SNMP User......................................................................................... 152
10.2.11
How to Restrict SNMP Access .................................................................................... 157
10.2.12
How to Configure the Traps........................................................................................ 158
10.3
The SpeedTouch™ Syslog .......................................................... 160
10.3.1
The SpeedTouch™ Syslog Daemon .......................................................................... 161
10.3.2
Syslog via the Web Interface ...................................................................................... 164
10.3.3
Syslog via the CLI ........................................................................................................ 166
10.3.4
Remote Syslog Notification ........................................................................................ 167
10.4
SpeedTouch™ Identification on AWS ........................................ 169
11
SpeedTouch™ Advanced Diagnostics .................... 171
11.1
The Office Network Web Page ................................................... 172
11.2
The Diagnostic Web Page .......................................................... 175
E-DOC-CTC-20051017-0155 v1.0
Contents
11.3
Command Line Interface Diagnostics ........................................ 179
11.3.1
About CLI Diagnostics ................................................................................................. 180
11.3.2
Lower Layer Diagnostics ............................................................................................. 181
11.3.3
Router Services Diagnostics ....................................................................................... 184
11.3.4
Routing Diagnostics..................................................................................................... 186
11.3.5
Ethernet Diagnostics.................................................................................................... 189
11.3.6
Management Diagnostics ........................................................................................... 191
12
SLA Monitoring. ........................................................ 193
13
Resetting the SpeedTouch™ ................................... 203
E-DOC-CTC-20051017-0155 v1.0
v
Contents
vi
E-DOC-CTC-20051017-0155 v1.0
About this Operator’s Guide
About this Operator’s Guide
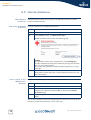
Used Symbols
A note provides additional information about a topic.
A tip provides an alternative method or shortcut to perform an action.
!
Terminology
Typographical
Conventions
A caution warns you about potential problems or specific precautions that
need to be taken.
Generally, the SpeedTouch™620 will be referred to as SpeedTouch™ in this
Operator’s Guide.
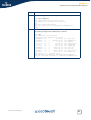
When we display interactive input and output we’ll show our typed input in a
bold font and the computer output like this.
Comments are added in italics.
Example:
=>language list
CODE LANGUAGE VERSION FILENAME
en* english 4.2.0.1 <system>
Documentation and
software updates
Only one language is available
THOMSON continuously develops new solutions, but is also committed to improve
its existing products.
For more information on THOMSON's latest technological innovations, documents
and software releases, visit us at:
www.speedtouch.com
E-DOC-CTC-20051017-0155 v1.0
1
About this Operator’s Guide
2
E-DOC-CTC-20051017-0155 v1.0
Chapter 1
Introduction
1 Introduction
Overview
Being a key component of your business network, a good operation of the
SpeedTouch™ is essential to gain maximum performance of your DSL connectivity.
Continuous management and diagnosis of the SpeedTouch™ should be performed
to ensure a faultless operation of the SpeedTouch™, 24hours a day, 7 days a week.
As such the SpeedTouch™ can be perfectly embedded in high quality networks.
Applicability
Contents
This Operator’s Guide applies to the SpeedTouch™620 Wireless Business DSL
Router.
This Operator’s guide consists of 2 major parts:
E-DOC-CTC-20051017-0155 v1.0
Configuration:
How to manage the SpeedTouch™ system configuration.
The SpeedTouch™ Command Line Interface.
How to manage the SpeedTouch™ system software.
How to activate software modules with activation keys.
How to configure the SpeedTouch™ system services.
The SpeedTouch™ file system.
How to access the SpeedTouch™ remotely.
How to use the integrated ISDN Modem of SpeedTouch™.
Monitoring and debugging:
How to monitor the SpeedTouch™.
How to identify the SpeedTouch™ with AWS.
The SpeedTouch™ Advanced Diagnostics.
SLA Monitoring.
How to reset the SpeedTouch™ to defaults.
3
Chapter 1
Introduction
4
E-DOC-CTC-20051017-0155 v1.0
Chapter 2
SpeedTouch™ Command Line Interface
2 SpeedTouch™ Command Line Interface
2.1 About the CLI Interface
CLI access
CLI web page access
requirements
CLI Telnet access
requirements
You can access the Command Line Interface via:
The SpeedTouch™ CLI Web Interface
A Telnet session
The serial Console interface.
To access the CLI via the SpeedTouch™ Web Interface, you need:
A TCP/IP connection between the computer and the SpeedTouch™.
A web browser on your computer. The web browser should be at least
Microsoft's Internet Explorer 4.0, Netscape's Communicator 4.06, or
equivalent. The web browser must support Java Script.
To access the CLI via an IP Telnet session, you need:
A TCP/IP connection between the computer and the SpeedTouch™.
A Telnet application on the computer.
All popular, recent Operating Systems feature a built-in telnet application.
CLI serial access
requirements
To access the CLI via the serial Console port, you need:
A cable.
A terminal application that you can use to connect to other devices.
Example: Hilgraeve’s Hyperterminal application delivered with MS Windows
OSs.
E-DOC-CTC-20051017-0155 v1.0
The following application’s Port settings:
9600 bits per second
8 data bits
No parity
One stop bit
No Flow control
ANSI terminal emulation
5
Chapter 2
SpeedTouch™ Command Line Interface
2.2 CLI Access via Telnet or Serial Console
Access via a Telnet
session or serial
console
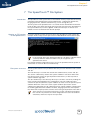
As soon a session to the CLI is opened, a banner pops up, followed by the CLI
prompt:
----------------------------------------------------------------------______ SpeedTouch 620
___/_____/\
/
/\ 5.4.0.10
_____/__
/ \
_/
/\_____/___ \ Copyright (c) 1999-2005, THOMSON
//
/ \
/\ \
_______//_______/
\
/ _\/______
/
/ \
\
/
/ /
/\
__/
/
\
\ /
/ /
/ _\__
/ /
/
\_______\/
/ /
/ /
/\
/_/______/___________________/ /________/ /___/ \
\ \
\
___________
\ \
\ \
\ /
\_\
\ /
/\
\ \
\ \___\/
\
\/
/ \
\ \
\ /
\_____/
/
\
\ \________\/
/__________/
\
\ /
\
_____ \
/_____\/
\ /
/\ \
/___\/
/____/ \ \ /
\
\ /___\/
\____\/
-----------------------------------------------------------------------
If the SpeedTouch™ is protected by a system password, authentication will be
required before access is granted to the CLI.
6
E-DOC-CTC-20051017-0155 v1.0
Chapter 2
SpeedTouch™ Command Line Interface
2.3 Basic Navigation
Command group
navigation
From the top level, you can change to a command group by executing the name of
the desired command group (for example type the name of the command group
and press ENTER).
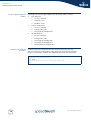
To obtain a list of all available command groups, use the help command from the
top level:
=>:help
Following commands are available :
help
menu
?
exit
..
saveall
ping
traceroute
telnet
:
:
:
:
:
:
:
:
:
Displays this help information
Displays menu
Displays this help information
Exits this shell.
Exits group selection.
Saves current configuration.
Send ICMP ECHO_REQUEST packets.
Send ICMP/UDP packets to trace the ip path.
Open a telnet connection to a server.
Following command groups are available :
firewall
dhcp
expr
adsl
env
language
ppp
sla
syslog
wireless
service
dns
ids
atm
hostmgr
mbus
pptp
snmp
system
autopvc
dsd
igmp
capi
interface
memm
rcapi
sntp
tunnel
connection
dyndns
ip
config
ipqos
mlp
router
software
upnp
cwmp
eth
isdn
debug
label
nat
script
ssh
user
The exact list of available command groups depends on the type of
SpeedTouch™, the number and kind of activated software modules and on
the current version of the SpeedTouch™ System software.
To return to top level, or to go up one level (in case of nested command groups),
type two dots and press ENTER.
E-DOC-CTC-20051017-0155 v1.0
7
Chapter 2
SpeedTouch™ Command Line Interface
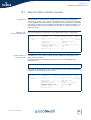
Help
You can use help or ? from any level to list all available commands and command
groups for that level. Below an example is provided of executing help from the
firewall command group selection:
=>:firewall help
Following commands are available :
config
list
flush
: Display/Modify firewall configuration.
: Display firewall configuration.
: Flush firewall configuration.
Following command groups are available :
chain
debug
level
rule
Executing :help firewall from top level gives the same result.
Entering help followed by a specific command, for example :help firewall
list (starting from top level) or help list (entered from within the firewall
command group selection) results in a description of the syntax for the command:
=>:help firewall list
Display firewall configuration.
Syntax : list [format = <{pretty|cli}>]
Parameters :
[format = <{pretty|cli}>]
The format of the firewall list.
Executing :help all from top level will generate the complete listing of all
available CLI commands (including syntax description). If entered from within a CLI
command group, the listing of all available CLI commands from that CLI command
group (including syntax description) are shown.
Command completion
The CLI features command completion, which means that when starting to type a
command it can be completed by pressing TAB.
For the completion to be successful, the part already typed has to be unique.
Completion works for the command groups, for the commands and the options, but
not for values.
For example, typing the letter l at the firewall command group selection, followed
by pressing TAB results in the full command being completed. Entering firewall
l from top level and pressing TAB gives the same result: the command is
completed to firewall list.
Going to the beginning
or end of a line
Breaking off commands
8
You can move the cursor to the beginning of the command line by pressing
"CTRL+A"; to move the cursor to the end of the Command Line press "CTRL+E".
You can break off a command by pressing "CTRL+G". This can be useful in a
situation where a user wants to abort the command. This can be useful to break off
commands for which the user does not know the value of a required command
parameter.
E-DOC-CTC-20051017-0155 v1.0
Chapter 2
SpeedTouch™ Command Line Interface
History of Commands
The CLI allows you to re-use commands you have used before during a CLI session.
To scroll through the previously used CLI commands use UP ARROW and DOWN
ARROW.
To execute a re-used command, press ENTER.
E-DOC-CTC-20051017-0155 v1.0
9
Chapter 2
SpeedTouch™ Command Line Interface
2.4 Command Line Interface Commands
Executing Commands
from the Top Level
All CLI commands are commands that operate on, or configure, the SpeedTouch™
settings.
You can use these commands from top level, preceded by the name of the
command group from which the command should be executed (for example
firewall list).
=>:firewall list
Config
======
State
Keep
TcpChecks
TcpWindow
UdpChecks
IcmpChecks
LogDefault
LogThreshold
:
:
:
:
:
:
:
:
disabled
disabled
none
65536
disabled
disabled
disabled
enabled
Modules
=======
Module
State
Text
Hooks
----------------------------------------------------------------------fire
enabled Firewall Administration Module sink, forward,
source
host_service
enabled Firewall Host Service Module
forward
level
enabled Firewall Level Module
forward
system_service
enabled Firewall System Service Module
sink
=>
10
E-DOC-CTC-20051017-0155 v1.0
Chapter 2
SpeedTouch™ Command Line Interface
Executing Commands
from the Command
Group
You can also enter the commands from the command group itself, using the
reduced form of the command (for example list at the firewall command group
selection):
=>firewall
[firewall]=>list
Config
======
State
Keep
TcpChecks
TcpWindow
UdpChecks
IcmpChecks
LogDefault
LogThreshold
:
:
:
:
:
:
:
:
disabled
disabled
none
65536
disabled
disabled
disabled
enabled
Modules
=======
Module
State
Text
Hooks
----------------------------------------------------------------------fire
enabled Firewall Administration Module
sink, for
ward, source
host_service
enabled Firewall Host Service Module
forward
level
enabled Firewall Level Module
forward
system_service
enabled Firewall System Service Module
sink
“!” in a command means NOT, for example the [!] parameter in the firewall rule
create command [srcintf [!]= <string>] parameter.
Executing Commands
from Anywhere
It is possible to enter a command from anywhere within the CLI, provided the
command is preceded by a colon (:) and the full command path, e.g.:
[firewall]=>:ip rtlist
Using Partial Command
Statements
Instead of typing a complete command with all of its required and optional
parameters and pressing ENTER, you can also enter the command itself, without
specifying any parameter. If all parameters are optional, the command is executed
immediately, assuming default values for all parameters. In case the CLI command
features required parameters, you are prompted to complete the command with the
required (and the optional, if present) parameters. For optional parameters you can
simply press ENTER without giving a value (to assume default value). In case the
parameter provides preset values, you can scroll through these via the UP and
DOWN arrow keys. For example, the addroute parameter below has two preset
values enabled and disabled:
=>:ip ipadd
intf = lan1
addr = 10.1.5.31
[netmask] = 8
[pointopoint] =
[addroute] = enabled
:ip ipadd intf=lan1 addr=10.1.5.31/8 addroute=enabled
E-DOC-CTC-20051017-0155 v1.0
11
Chapter 2
SpeedTouch™ Command Line Interface
Saving the configuration
After configuring the SpeedTouch™ via the CLI, it is advised to save your
configuration.
You can save the complete SpeedTouch™ configuration to persistent memory by
executing the saveall command.
The saveall command can be entered from any CLI prompt.
12
E-DOC-CTC-20051017-0155 v1.0
Chapter 2
SpeedTouch™ Command Line Interface
2.5 Menu-driven CLI Navigation
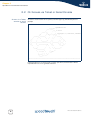
Introduction
Entering the CLI menu
To improve the user-friendliness of the SpeedTouch™ CLI, the CLI features a menudriven interface.
To enter the menu-driven interface, simply enter the command menu from the CLI
prompt:
The semi-graphical CLI offers you an attractive and easy-to-use configuration
environment for the CLI.
You can browse through the CLI command groups via the arrow keys. Pressing
ENTER executes your selection, i.e. for entering a CLI command group. From each
level you can select .. and press ENTER to go up one level.
Use TAB to change from the command menu to the control menu (the lower bar of
the menu) and vice versa.
Executing commands
To setup a CLI command, simply press ENTER on its name. You can configure and
overview its various parameters at once. In case the parameter provides preset
values, scroll through the available values via the UP and DOWN arrow keys. If you
are satisfied with all parameter values, use TAB to select <OK> and press ENTER to
execute the command:
Saving the configuration after configuring the SpeedTouch™ via the CLI, it is
advised to save your configuration.
Save the complete SpeedTouch™ configuration to persistent memory by executing
saveall after exiting the menu-driven CLI via <Cancel> from root menu.
E-DOC-CTC-20051017-0155 v1.0
13
Chapter 2
SpeedTouch™ Command Line Interface
14
E-DOC-CTC-20051017-0155 v1.0
Chapter 3
SpeedTouch™ System Software
3 SpeedTouch™ System Software
3.1 About the System Software
Upgrade system
software
System software
packages and security
For new system software packages, you can visit the SpeedTouch™ support pages
at: http://www.speedtouch.com
All SpeedTouch™ system software packages are:
Digitally signed and encrypted:
Packages that may have become corrupted, or have been altered in any way,
will not be accepted by the SpeedTouch™.
Specific per product.
This way, the SpeedTouch™, or its service can never be corrupted or lost.
E-DOC-CTC-20051017-0155 v1.0
15
Chapter 3
SpeedTouch™ System Software
3.2 System Software Management via FTP
FTP access
For more information on the SpeedTouch™ file system and how to access
it via FTP, see “7 The SpeedTouch™ File System” on page 75.
SpeedTouch™ system
software locations
The SpeedTouch™ file system consists of two subdirectories: ‘/active’ and ‘/ dl’.
In the ‘/active’ subdirectory the currently running system software (the active
software version) is stored. The ‘/dl’ subdirectory stores the dormant system
software (the passive software version).
There are SpeedTouch™ devices where only the ‘/dl’ directory exist (single
directory file system).
In case no SpeedTouch™ system software upgrade was performed before, both
active and passive software will be the same.
Full read/write access is only granted in the ‘/dl’ subdirectory.
Overview
This section covers the following topics:
Topic
16
See Page
“3.2.1 Backup System Software via FTP”
17
“3.2.2 Upgrade or Restore System Software via FTP”
19
“3.2.3 Manual System Software Management via BOOTP/
TFTP server”
23
E-DOC-CTC-20051017-0155 v1.0
Chapter 3
SpeedTouch™ System Software
3.2.1 Backup System Software via FTP
Introduction
Backup procedure
For backup reasons, you can transfer system software files from both
SpeedTouch™’s ‘/active’ and ‘/dl’ subdirectories to your local disk.
To transfer system software files from the SpeedTouch™ to your local disk as
backup, proceed as follows:
Step
Action
1
Open an FTP session to the SpeedTouch™. At the user name prompt,
enter a user name and at the password prompt, if applicable, the
Password (see “The Multi Level Access Policy Configuration Guide” for
more information):
C:\>ftp <SpeedTouch™ IP address>
Connected to <SpeedTouch™ IP address>.
220 Inactivity timer = 120 seconds. Use 'site idle <secs>' to
change.
User (<SpeedTouch™ IP address>:(none)): JohnDoe
331 SpeedTouch (00-90-D0-01-02-03) User 'JohnDoe' OK. Password
required.
Password:#####
230 OK
ftp>
2
Enter binary file transfer mode. Optionally you can enable hashing:
ftp> bin
200 TYPE is now 8-bit binary
ftp> hash
Hash mark printing On ftp: (2048 bytes/hash mark).
ftp>
3
Change to the SpeedTouch™ subdirectory from which you want to get
the system software file from. In the example below the ‘/dl’
subdirectory is chosen where the currently running - and usually most
recent - system software file is stored:
ftp>cd dl
250 Changed to /dl
ftp>
E-DOC-CTC-20051017-0155 v1.0
17
Chapter 3
SpeedTouch™ System Software
Step
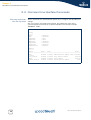
4
Action
To identify the system software file name, use the quote site
software version command:
ftp> quote site software version
200- Flash image : 5.4.0.10.0
200- Active SW
: ZZUIAA5.40A (5.4.0.a.0)
200- Passive SW : ZZUIAA5.40A (5.4.0.a.0)
200200 CLI command "software version" executed
You can also check for the system software file by making a listing of the
subdirectory’s contents:
ftp> dir
200 Connected to 192.168.1.60 port 1312
150 Opening data connection for /bin/ls
-rwxrwxrwx
1 0
0
3601488 Jun 29 1971 ZZUIAA5.40A
-rwxrwxrwx
1 0
0
20 Jun 29 1971 start.cmd
-r--r--r-1 0
0
9 Jun 29 1971 seed.dat
-r--r--r-1 0
0
790 Jun 29 1971 sslcert.pem
-r--r--r-1 0
0
963 Jun 29 1971 sslkey.pem
-r--r--r-1 0
0
692 Jun 29 1971 sshdsa.pem
-rwxrwxrwx
1 0
0
93013 Jun 29 1971 user.ini
226 Options: -l : 7 matches total
ftp: 466 bytes received in 0,00Seconds 466000,00Kbytes/sec.
5
Get the system software file:
ftp> get ZZUIAA5.40A
200 Connected to 192.168.1.60 port 1315
150 Opening data connection for ZZUIAA5.40A (3601488)
226 File transfer complete
ftp: 3601488 bytes received in 5,92Seconds 608,46Kbytes/sec.
ftp>
As a result the system software file will be stored on the location from where you
started the FTP session.
18
E-DOC-CTC-20051017-0155 v1.0
Chapter 3
SpeedTouch™ System Software
3.2.2 Upgrade or Restore System Software via FTP
Upgrade/Restore
procedure
E-DOC-CTC-20051017-0155 v1.0
The procedure to upgrade or restore the SpeedTouch™ system software consists of
three main steps:
Step
Action
1
Transfer system software to the SpeedTouch™
2
Mark system software file as Passive Software Version
3
Activate the upgrade/ restored system software
19
Chapter 3
SpeedTouch™ System Software
Transfer system
software to the
SpeedTouch™
To transfer a system software file stored on your local disk to the SpeedTouch™,
proceed as follows:
Step
Action
1
Open an FTP session to the SpeedTouch™. At the user name prompt,
enter a user name. At the password prompt, if applicable, enter the
SpeedTouch™ system password (see “The SpeedTouch™ Multi Level
Password Configuration Guide”):
C:\>ftp <SpeedTouch™ IP address>
Connected to <SpeedTouch™ IP address>.
220 Inactivity timer = 120 seconds. Use 'site idle <secs>' to
change.
User (<SpeedTouch™ IP address>:(none)): JohnDoe
331 SpeedTouch (00-90-D0-01-02-03) User 'JohnDoe' OK. Password
required.
Password:#####
230 OK
2
Enter binary file transfer mode. Optionally you can enable hashing:
ftp> bin
200 TYPE is now 8-bit binary
ftp> hash
Hash mark printing On ftp: (2048 bytes/hash mark).
3
Change to the SpeedTouch™ ‘/dl’ subdirectory:
ftp>cd dl
250 Changed to /dl
4
Use the quote site software version command to check
whether a passive system software version is stored in the ‘/dl’
subdirectory :
ftp> quote site software version
200- Flash image : 5.4.0.10.0
200- Active SW
: ZZUIAA5.40A (5.4.0.a.0)
200- Passive SW : ZZUIAA5.40A (5.4.0.a.0)
200200 CLI command "software version" executed
5
In case a passive software version is found, use the quote site
software deletepassive command to delete it:
ftp> quote site software deletepassive
200- Flash image : 5.4.0.10.0
200- Active SW
: ZZUIAA5.40A (5.4.0.a.0)
200- Passive SW : --200200 CLI command "software deletepassive" executed
20
E-DOC-CTC-20051017-0155 v1.0
Chapter 3
SpeedTouch™ System Software
Step
Action
6
Put the upgrade system software to the SpeedTouch™ ‘/dl’ subdirectory:
ftp> put ZZUIAA5.411
200 Connected to 192.168.1.254 port 3638
150 Opening data connection for ZZUIAA5.411
226-Filesystem data garbage collection in progress. This may
take
a while ...
226 File written successfully
ftp: 2314257 bytes sent in 5.05Seconds 464.90Kbytes/sec.
As a result the system software file is stored on the ‘/dl’ subdirectory of the
SpeedTouch™. In addition, the SpeedTouch™ will automatically clean its file
system.
E-DOC-CTC-20051017-0155 v1.0
21
Chapter 3
SpeedTouch™ System Software
Mark system software
file as Passive Software
Version
You must identify the system software you transferred to the SpeedTouch™ ‘/dl’
subdirectory as passive software version to allow the SpeedTouch™ to mark the file
as system software.
Proceeding from the same FTP session you opened to transfer the file, use the
quote site software setpassive file=<file name> command, where
<file name> represents the name of the system software file you transferred via the
previous procedure:
ftp> quote site software setpassive file=ZZUIAA5.411
200- Flash image : 5.4.0.10.0
200- Active SW
: ZZUIAA5.40A (5.4.0.a.0)
200- Passive SW : ZZUIAA5.411 (5.4.0.a.0)
200200 CLI command "software version" executed
ftp>
Activate the upgrade/
restored system
software
To activate the upgrade or restored system software, the same mechanism as used
via the Web Interface is valid: the system software files are switched.
Proceeding from the same FTP session you opened in the previous procedures, use
the quote site software switch command to restart the SpeedTouch™ and
activate the newly uploaded upgrade system software:
ftp> quote site software switch
200Connection closed by remote host.
ftp>
During restart, the SpeedTouch™ will switch the passive and active system
software files and mark the newly uploaded system software as active software
version.
Due to the restart of the SpeedTouch™ any open FTP or Telnet session will be
closed.
22
E-DOC-CTC-20051017-0155 v1.0
Chapter 3
SpeedTouch™ System Software
3.2.3 Manual System Software Management via
BOOTP/TFTP server
System software
management
The SpeedTouch™ system software can also be updated based on BOOTP, a
standard mechanism used for booting diskless stations.
The SpeedTouch™ Upgrade Wizard is based on a BOOTP/TFTP server. For
more information on how to upgrade the SpeedTouch™ using its Upgrade
wizard, please see the User’s Guide.
The SpeedTouch™ is able to be placed in BOOTP mode, allowing a BOOTP/TFTP
server to manage the SpeedTouch™ file system, allowing the SpeedTouch™ to
fetch the upgrade files from the BOOTP/TFTP server.
Important note
It is recommended only to use the procedure described below in case you are
familiar with the use of a BOOTP/TFTP server, and the mechanisms on which
BOOTP is based.
Upgrading the system software via the procedure described below will reset the
SpeedTouch™ to its factory default settings. Therefore, prior to performing an
upgrade of the system software it is recommended to back up the SpeedTouch™
configuration.
Before you start
You need a third party BOOTP/TFTP server installed on the computer from which
you want to perform the SpeedTouch™ system software upgrade.
Make sure that your computer is connected to the SpeedTouch™ via Ethernet. In
case of a SpeedTouch™ with USB connectivity, please disconnect the USB
interface, if used, to avoid communication errors during the system software
upgrade.
!
It is not possible to upgrade your SpeedTouch™ via a wireless connection!
You will need the SpeedTouch™ Medium Access Control (MAC) address of your
SpeedTouch™ device.
Make sure a valid SpeedTouch™ system software image file is available on your
local disk.
E-DOC-CTC-20051017-0155 v1.0
23
Chapter 3
SpeedTouch™ System Software
Procedure
To upgrade/restore the SpeedTouch™ system software:
Step
Action
1
Make sure that your SpeedTouch™ is powered off and that a BOOTP/
TFTP server is readily installed on the computer from which you intend
to perform the system software upgrade
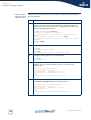
2
Configure the BOOTP/TFTP server to use the SpeedTouch™ system
software image file in its reply to BOOTP requests from the
SpeedTouch™ you want to upgrade.
3
To identify the BOOTP requests from the SpeedTouch™, you will need to
specify its MAC address and define an IP range for basic communication
between the BOOTP/TFTP server and the SpeedTouch™.
4
Set the SpeedTouch™ in BOOTP by executing the :software upgrade CLI
command:
=>:software upgrade
The SpeedTouch™ is in BOOTP mode when the power LED is solid
orange.
5
The BOOTP/TFTP server will reply to the BOOTP requests and will
perform the required operations to allow the system software to be
fetched by the SpeedTouch™ via TFTP.
6
After checking whether the received system software is valid for the
device, the SpeedTouch™ will start in normal operational mode to
complete the upgrade.
This step can take some time to complete.
The upgrade process can be followed via a serial console!
24
E-DOC-CTC-20051017-0155 v1.0
Chapter 4
SpeedTouch™ Configuration Management
4 SpeedTouch™ Configuration Management
Saving the
configuration
Whenever the configuration of the SpeedTouch™ has been altered in any way, with
the intention to keep this configuration, you should save it.
Whenever you alter the configuration of the SpeedTouch™ via the basic
Web Interface, all changes are saved automatically.
You can save the configuration manually in two ways:
Click Save All in the Topics menu of the SpeedTouch™ Expert Mode Web
Interface
Enter saveall from the CLI prompt.
Result:
The system creates a user.ini text file on the SpeedTouch™ ‘/dl’ subdirectory. This
file contains all CLI commands needed to reproduce the configuration present at the
moment it was saved.
Backing up
configurations
Storing and restoring
multiple configurations
E-DOC-CTC-20051017-0155 v1.0
You can make backup files of the SpeedTouch™ configuration for later use.
Backing up saved SpeedTouch™ configurations can be done via the SpeedTouch™
Web Interface or via FTP.
The SpeedTouch™ file system allows you to store multiple configuration files. Via
the CLI you are able to apply one of these whenever needed, without the need of
uploading a configuration file each time you want to switch to a new configuration.
25
Chapter 4
SpeedTouch™ Configuration Management
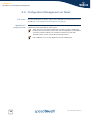
4.1 Configuration Management via the
SpeedTouch™ Web Interface
Basic and expert mode
Backing up
configurations via the
basic Web Interface
26
The SpeedTouch™ features two ways of managing its configuration via the Web
Interface:
Via the basic Web Interface
Via the expert Web Interface
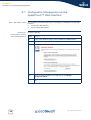
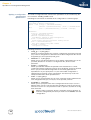
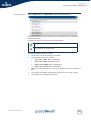
Proceed as follows:
Step
Action
1
Open a web browser and go to the SpeedTouch™ Web Interface.
2
Go to Home > SpeedTouch > Configuration.
3
Click Save or Restore Configuration:
4
To back up the SpeedTouch™ configuration, click Backup
Configuration Now.
5
Click Save and select a location on your local disk to store the user.ini
file.
E-DOC-CTC-20051017-0155 v1.0
Chapter 4
SpeedTouch™ Configuration Management
Restoring
configurations via the
basic Web Interface
E-DOC-CTC-20051017-0155 v1.0
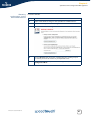
Proceed as follows:
Step
Action
1
Open a web browser and go to the SpeedTouch™ Web Interface.
2
Go to Home > SpeedTouch > Configuration.
3
Click Save or Restore Configuration:
4
Click on Browse and choose the configuration file, residing on your
local disk, you want to restore on your SpeedTouch™.
5
To restore the selected SpeedTouch™ configuration, click Restore
Configuration Now.
27
Chapter 4
SpeedTouch™ Configuration Management
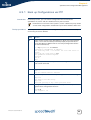
Backing up saved
configurations via the
expert Web Interface
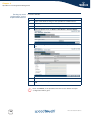
Proceed as follows:
Step
Action
1
Open a web browser and go to the SpeedTouch™ Web Interface.
2
Go to expert mode.
3
Click Save All to save the current configuration.
4
Open the Update page via Home > SpeedTouch > System Update:
5
Click the Configuration Files tab and select the file you want to back
up:
6
Click Backup.
7
Select a location on your local disk to store the user.ini file and click
OK.
!
28
Don’t click Delete, or the SpeedTouch™ will reset to defaults and your
configuration will be gone.
E-DOC-CTC-20051017-0155 v1.0
Chapter 4
SpeedTouch™ Configuration Management
Restoring a
configuration via the
expert pages
Proceed as follows:
Step
Action
1
Open a web browser and go to the SpeedTouch™ Web Interface.
2
Go to expert mode.
3
Open the Upgrade page via Home > SpeedTouch > System Update:
4
Click Browse to locate the configuration file on your local disk you
intend to restore. Select the file and click OK.
5
Click Upload to transfer the configuration file to the SpeedTouch™.
Be aware that by uploading a new configuration also the IP configuration of
the SpeedTouch™ may have been changed. In that case the information
logging as described above procedure will not be shown. To save the new
configuration, you must browse to the SpeedTouch™ Web Interface using
its new IP address, and click Save All.
E-DOC-CTC-20051017-0155 v1.0
29
Chapter 4
SpeedTouch™ Configuration Management
4.2 Configuration Management via Telnet
FTP access
SpeedTouch™
configuration files
For more information on the file system of the SpeedTouch™ and how to access it
via FTP, see “7 The SpeedTouch™ File System” on page 75.
The SpeedTouch™’s last saved configuration is stored in the SpeedTouch™ ‘/dl’
subdirectory of the SpeedTouch™ file system.
There may be a user.ini file present in the system’s ‘/active’ subdirectory.
However, this user.ini only contains the saved configuration created before
your latest software switch-over, and hence may be not up-to-date.
Therefore never use this user.ini file for backup reasons.
Full read/write access is only granted in the ‘/dl’ subdirectory.
30
E-DOC-CTC-20051017-0155 v1.0
Chapter 4
SpeedTouch™ Configuration Management
4.3 The :Config CLI Command Group
Introduction
The config CLI command group allows the management of SpeedTouch™
configurations.
Following CLI commands are available in the config CLI command group:
=>:help config
Following commands are available :
save
load
delete
flush
list
dump
:
:
:
:
:
:
Store current configuration to backup file
Load saved or default configuration.
Delete a user configuration file.
Flush the loaded configuration.
Show the current configuration set
Show the saved configuration file
=>
:config CLI commands
Below the CLI commands available for SpeedTouch™ configurations are shortly
described. For more information, see the “SpeedTouch™ CLI Reference Guide”.
:config save
Allows to save the current configuration of the SpeedTouch™ to a user.ini file
in the ‘/dl’ subdirectory
:config backup filename = <user configuration filename>
Allows to save the current configuration of the SpeedTouch™ to a
configuration file in the ‘/dl’ subdirectory. You are able to choose a filename of
your own choice for the backup file.
:config dump
Allows to view a dump of the stored user.ini file.
E-DOC-CTC-20051017-0155 v1.0
31
Chapter 4
SpeedTouch™ Configuration Management
Applying a configuration
stored on the
SpeedTouch™
To activate a configuration file, stored on the SpeedTouch™ ‘/dl’ subdirectory, the
CLI command :config load is used.
Following CLI commands are available in the config load CLI command group:
=>:help config load
Load saved or default configuration.
Syntax : load [load_ip = <{disabled|enabled}>]
[defaults <{disabled|enabled}>] [flush = <{enabled|disabl
ed}>]
[echo = <{disabled|enabled}>] [filename = <string>]
Parameters :
[load_ip = <{disabled|enabled}>]
Load IP settings or not.
[defaults <{disabled|enabled}>]
Load default instead of saved configuration.
[flush = <{enabled|disabled}>]
Flush current configuration before loading new one.
[echo = <{disabled|enabled}>]
Echo each command string when loaded.
[filename = <string>]
Configuration filename.
Following parameters are available:
load_ip = <{no|yes}>
Allows you to define whether the current IP configuration should be preserved
(no), or the IP configuration as defined in the loaded configuration file should
be applied (yes). If not specified, load_ip=no.
defaults = <{no|yes}>
Allows you to reset the SpeedTouch™ to its default configuration (yes). If not
specified, defaults=no. To restore a configuration file, do not use this
parameter.
flush = <{yes|no}>
Allows you to define whether the SpeedTouch™ should flush its current
configuration before loading the new one (yes). By default, and if not specified
flush = yes, the new loaded configuration is exclusively applied to the
SpeedTouch™. If you specify flush = no, the new loaded configuration is
appended to the existing current configuration. The latter may result in an
unexpected behaviour of the SpeedTouch™.
echo = <{no|yes}>
Allows you to specify whether to echo each command string loaded from the
new configuration file (yes) or not (no). If not specified, echo=no.
filename = <string>
Allows you to specify the name of the configuration file to load, in case it is
different from user.ini. If not specified, the SpeedTouch™ will assume the file
name to be user.ini. It is also possible to load a script file (.sts) with the config
load command.
When loading a config file, the file is loaded to memory. However, to
make the configuration persistent you need to click saveall to save the
configuration.
32
E-DOC-CTC-20051017-0155 v1.0
Chapter 4
SpeedTouch™ Configuration Management
4.3.1 Back up Configurations via FTP
Introduction
For backup reasons, you can transfer configuration files from both the
SpeedTouch™ ‘/active’ and ‘/dl’ subdirectories to your local disk.
Remind that a user.ini file in the system’s ‘/active’ subdirectory may contain
an old saved configuration created before your latest software switch over.
Backup procedure
To backup the current SpeedTouch™ configuration to your local disk as backup
user.ini file, proceed as follows:
Step
Action
1
Open an FTP session to the SpeedTouch™. At the user name prompt,
enter a user name and at the password prompt, the password (see
“The SpeedTouch™ Multi Level Access Policy Configuration Guide”
for more information):
C:\>ftp <SpeedTouch™ IP address>
Connected to <SpeedTouch™ IP address>.
220 Inactivity timer = 120 seconds. Use 'site idle <secs>' to
change.
User (192.168.1.254:(none)): root
331 SpeedTouch Password required.
Password:
230 OK
ftp>
2
If required, save the current SpeedTouch™ configuration via the quote
site saveall command:
3
ftp> quote site saveall
200200 CLI command "saveall" executed
4
Enter binary file transfer mode. Optionally you can enable hashing:
ftp> bin
200 TYPE is now 8-bit binary
ftp> hash
Hash mark printing On ftp: (2048 bytes/hash mark).
5
Change to the SpeedTouch™ ‘/dl’ subdirectory from which you want to
get the latest configuration file from:
ftp>cd dl
250 Changed to /dl
E-DOC-CTC-20051017-0155 v1.0
33
Chapter 4
SpeedTouch™ Configuration Management
Step
Action
6
Optionally, you can make a listing of the subdirectory’s contents:
ftp> dir
200 Connected to 192.168.1.254
150 Opening data connection for /bin/ls
-rwxrwxrwx
1 0
0
20 Jun 29 1971 start.cmd
-rwxrwxrwx
1 0
0
2952448 Jun 29 1971 ZZUIAA5.314
-r--r--r-1 0
0
9 Jun 29 1971 seed.dat
-r--r--r-1 0
0
729 Jun 29 1971 sslcert.pem
-r--r--r-1 0
0
908 Jun 29 1971 sslkey.pem
-r--r--r-1 0
0
692 Jun 29 1971 sshdsa.pem
-rwxrwxrwx
1 0
0
66920 Jun 29 1971 user.ini
-rw-rw-rw1 0
0
4056 Jun 29 1971 user.tpl
-rw-rw-r-1 0
0
34633 Jun 29 1971 security.cfg
226 Options: -l : 9 matches total
ftp: 600 bytes received in 0,00Seconds 600000,00Kbytes/
sec.ftp: 400 bytes received in 0.01Seconds 40.00Kbytes/sec.
The configuration you saved in step 2 is stored in the user.ini file.
Other configuration files (stored via the :config save and
:config backup CLI commands) may be found.
7
Get the configuration file (in the example the saved configuration file
user.ini is backed up):
ftp> get user.ini
200 Connected to 192.168.1.254 port 1693
150 Opening data connection for user.ini (12016)
#####
226 File transfer complete
ftp: 12016 bytes received in 0.02Seconds 600.80Kbytes/sec.
As a result the configuration file, containing a saved SpeedTouch™ configuration
will be stored on the location from where you started the FTP session.
34
E-DOC-CTC-20051017-0155 v1.0
Chapter 4
SpeedTouch™ Configuration Management
4.3.2 Store Configurations via FTP
Introduction
Via the procedure described below you can:
Restore a configuration file you previously backed up via the procedure
described in “4.3.1 Back up Configurations via FTP” on page 33.
Apply a new configuration to the SpeedTouch™ by storing a new or changed
configuration file.
Store multiple SpeedTouch™ configuration and template files on the file
system for immediate use.
A configuration file has no limitations regarding the file name to be valid. However,
the SpeedTouch™ file system will truncate the full name (including the extension)
to maximum 13 characters. For example, when transferring a file
“abcdefghijklmnopqrstuvwxyz.ini” to the SpeedTouch™ file system it will be stored
as “abcdefghijklm”.
For your convenience, it is advised always to use the extension .ini for configuration
files.
Each file present in the ‘/dl’ subdirectory of the SpeedTouch™ file system must have
a unique file name.
You can use a similar procedure as the one described here to upload and
execute script files (.sts)
Restore/change
procedure
The procedure to restore or load a new SpeedTouch™ configuration consists of two
main steps:
Step
E-DOC-CTC-20051017-0155 v1.0
Action
1
Transfer the configuration file to the SpeedTouch™
2
Applying a configuration stored on the SpeedTouch™
35
Chapter 4
SpeedTouch™ Configuration Management
Transfer the
configuration file to the
SpeedTouch™
To transfer a SpeedTouch™ configuration file stored on your local disk to the
SpeedTouch™, proceed as follows:
Step
Action
1
Open an FTP session to the SpeedTouch™. At the user name prompt,
enter a user name and at the password prompt, the password (refer
to “The SpeedTouch™ Multi Level Access Policy Configuration
Guide” for more information).
2
If required, save the current SpeedTouch™ configuration via the
quote site saveall command:
ftp> quote site saveall
200200 CLI command "saveall" executed
3
Enter binary file transfer mode. Optionally you can enable hashing:
ftp> bin
200 TYPE is now 8-bit binary
ftp> hash
Hash mark printing On ftp: (2048 bytes/hash mark).
4
Go to the SpeedTouch™ ‘/dl’ subdirectory:
ftp> cd dl
5
You can check whether a user.ini configuration file, or other
configuration files are stored in the ‘/dl’ subdirectory by making a
listing of the subdirectory’s contents:
ftp> dir
200 Connected to 192.168.1.254
150 Opening data connection for /bin/ls
-rwxrwxrwx
1 0
0
20 Jun 29 1971 start.cmd
-rwxrwxrwx
1 0
0
2952448 Jun 29 1971 ZZUIAA5.314
-r--r--r-1 0
0
9 Jun 29 1971 seed.dat
-r--r--r-1 0
0
729 Jun 29 1971 sslcert.pem
-r--r--r-1 0
0
908 Jun 29 1971 sslkey.pem
-r--r--r-1 0
0
692 Jun 29 1971 sshdsa.pem
-rwxrwxrwx
1 0
0
66920 Jun 29 1971 user.ini
-rw-rw-rw1 0
0
4056 Jun 29 1971 user.tpl
-rw-rw-r-1 0
0
34633 Jun 29 1971 security.cfg
226 Options: -l : 9 matches total
ftp: 600 bytes received in 0,00Seconds 600000,00Kbytes/
sec.ftp: 400 bytes received in 0.01Seconds 40.00Kbytes/sec.
6
7
In case the configuration file you intend to upload has the same
name as (one of) the configuration file(s) on the SpeedTouch™ file
system (for example user.ini), you must either:
Rename the file name, of the configuration file stored on your
local disk
Delete the file from the SpeedTouch™ file system.
Optionally you can clean up the SpeedTouch™’s file system via the
:software cleanup CLI command:
ftp> quote site software cleanup
200200 CLI command "software cleanup" executed
36
E-DOC-CTC-20051017-0155 v1.0
Chapter 4
SpeedTouch™ Configuration Management
Step
8
Action
Put the configuration file to the SpeedTouch™ ‘/dl’ subdirectory:
ftp> put config.ini
200 Connected to 192.168.1.254 port 1657
150 Opening data connection for config.ini
##
226 File written successfully
ftp: 4472 bytes sent in 0.02Seconds 223.60Kbytes/sec.
ftp>
9
You can check whether the configuration file was stored successfully
by making a listing of the subdirectory’s contents:
ftp> dir
200 Connected to 192.168.1.254
150 Opening data connection for /bin/ls
-rwxrwxrwx 1 0
0
20 Jun 29 1971 start.cmd
-rwxrwxrwx 1 0
0
2952448 Jun 29 1971 ZZUIAA5.314
-r--r--r-- 1 0
0
9 Jun 29 1971 seed.dat
-r--r--r-- 1 0
0
729 Jun 29 1971 sslcert.pem
-r--r--r-- 1 0
0
908 Jun 29 1971 sslkey.pem
-r--r--r-- 1 0
0
692 Jun 29 1971 sshdsa.pem
-rwxrwxrwx 1 0
0
66920 Jun 29 1971 user.ini
-rw-rw-rw- 1 0
0
4056 Jun 29 1971 user.tpl
-rw-rw-r-- 1 0
0
34633 Jun 29 1971 security.cfg
-rw-rw-r-- 1 0
0
44721 Jun 29 1971 config.ini
226 Options: -l : 9 matches total
ftp: 600 bytes received in 0,00Seconds 600000,00Kbytes/
sec.ftp: 400 bytes received in 0.01Seconds 40.00Kbytes/sec.
E-DOC-CTC-20051017-0155 v1.0
37
Chapter 4
SpeedTouch™ Configuration Management
Applying a configuration
stored on the
SpeedTouch™
To activate a configuration file, stored on the SpeedTouch™ ‘/dl’ subdirectory, the
CLI command :config load is used.
Below the syntax of the config load CLI command is provided:
=>help config load
Load saved or default configuration.
Syntax : load [load_ip = <{disabled|enabled}>]
[defaults <{disabled|enabled}>] [flush = <{enabled|disabl
ed}>]
[echo = <{disabled|enabled}>] [filename = <string>]
Parameters :
[load_ip = <{disabled|enabled}>]
Load IP settings or not.
[defaults <{disabled|enabled}>]
Load default instead of saved configuration.
[flush = <{enabled|disabled}>]
Flush current configuration before loading new one.
[echo = <{disabled|enabled}>]
Echo each command string when loaded.
[filename = <string>]
Configuration filename.
Proceeding from the same FTP session you opened in the previous procedure, enter
the quote site config load command to load the configuration you
previously put on the SpeedTouch™ file system:
ftp> quote site config load
200200 CLI command "config load" executed
For more information on the config load options, see“ Applying a
configuration stored on the SpeedTouch™” on page 32
38
E-DOC-CTC-20051017-0155 v1.0
Chapter 4
SpeedTouch™ Configuration Management
In case the file name of the configuration file is different from user.ini, you should
specify the file name. This allows you to store multiple configuration files on the
SpeedTouch™ file system, and load them when needed:
ftp> dir
200 Connected to 192.168.1.254 port 2187
150 Opening data connection for /bin/ls
-rwxrwxrwx
1 0
0
20 Jun 29 1971 start.cmd
-rwxrwxrwx
1 0
0
2952448 Jun 29 1971 ZZUIAA5.314
-r--r--r-1 0
0
9 Jun 29 1971 seed.dat
-r--r--r-1 0
0
729 Jun 29 1971 sslcert.pem
-r--r--r-1 0
0
908 Jun 29 1971 sslkey.pem
-r--r--r-1 0
0
692 Jun 29 1971 sshdsa.pem
-rwxrwxrwx
1 0
0
66920 Jun 29 1971 user.ini
-rw-rw-rw1 0
0
4056 Jun 29 1971 user.tpl
-rw-rw-r-1 0
0
34633 Jun 29 1971 security.cfg
-rw-rw-r-1 0
0
44721 Jun 29 1971 config.ini
-rwxrwxrwx
1 0
0
66920 Jun 29 1971 config1.ini
-rw-rw-rw1 0
0
4056 Jun 29 1971 config2.tpl
-rw-rw-r-1 0
0
34633 Jun 29 1971 config3.cfg
-rw-rw-r-1 0
0
44721 Jun 29 1971 test.ini
226 Options: -l : 11 matches total
ftp: 803 bytes received in 0.10Seconds 8.03Kbytes/sec.
ftp> quote site config load filename=config3.ini
200200 CLI command "config load filename=config3.ini" executed
ftp>
E-DOC-CTC-20051017-0155 v1.0
39
Chapter 4
SpeedTouch™ Configuration Management
4.4 SpeedTouch™ Service Templates
Introduction
Template files are ASCII text files consisting of a set of SpeedTouch™ (embedded)
Easy Setup wizard specific commands and CLI commands.
Used by the SpeedTouch™ (embedded) Easy Setup wizard, template files allow
users to complete the configuration of the device in a convenient and
comprehensive way, without the need of manual configuration via CLI or the Web
Interface.
Delivered template files
Template files on the
SpeedTouch™ file
system
Three template files are by default delivered within the SpeedTouch™ System
software for use by means of the embedded Easy Setup wizard:
Template
Description
Bridge
A template to configure the SpeedTouch™ for Bridged Ethernet
WAN access (actually as an IEEE802.1D Transparent Bridge). In
this template, the DHCP Server has been disabled.
Router
A template to configure the SpeedTouch™ for Routed PPPoE or
PPPoA. For the local network the SpeedTouch™ acts as DHCP
server.
Routed IPoA
A template to configure the SpeedTouch™ for Routed IP over
ATM. For the local network the SpeedTouch™ acts as DHCP
server.
As the default templates, are embedded in the system software, these template files
will not be present in the ‘/dl’, (or ‘/active’) subdirectories by default.
However, via FTP access you are able to upload additional template files from the
SpeedTouch™ Setup CD, or custom template files to the SpeedTouch™ ‘/dl’
subdirectory, to extend the diversity of embedded configuration possibilities and/or
to avoid the need of using the SpeedTouch™ Home Install Wizard from the CD.
Each time the SpeedTouch™ Home Install Wizard is used to configure the
device a ‘backup’ user.tpl file is created/overwritten in the ‘/dl’ subdirectory,
for future use by the embedded Easy Setup wizard.
40
E-DOC-CTC-20051017-0155 v1.0
Chapter 4
SpeedTouch™ Configuration Management
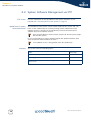
4.5 SpeedTouch™ System Languages
Management
Introduction
Uploading a new
system language
E-DOC-CTC-20051017-0155 v1.0
The following three actions are possible regarding the system languages.
Upload a new system language file, which can be found on the
SpeedTouch™ Setup CD, to the SpeedTouch™.
Switch between system languages via the system language bar.
Delete a system language via the SpeedTouch™ Web Interface.
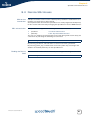
To upload a new system language, proceed as follows:
Step
Action
1
Open a web browser and go to the SpeedTouch™ Web Interface.
2
Go to Expert Mode.
3
Open the Upload File page via Home > SpeedTouch > System Update.
4
Click Browse and select the desired system language from the
SpeedTouch™ Setup CD.
5
Click Upload to start uploading the system language on to the
SpeedTouch™
41
Chapter 4
SpeedTouch™ Configuration Management
Switch between system
languages
To switch between system languages, select the desired system language in the
system language bar.
The system language bar can be found on the top right side of the SpeedTouch™
Web Interface:
By default, the SpeedTouch™ is shipped with only one language. The
system language bar will only be shown in case more than one valid system
language is stored on the SpeedTouch™.
The system language packs are related to the system software versions!
42
E-DOC-CTC-20051017-0155 v1.0
Chapter 4
SpeedTouch™ Configuration Management
Delete a system
language
E-DOC-CTC-20051017-0155 v1.0
Proceed as follows:
Step
Action
1
Open a web browser and go to the SpeedTouch™ Web Interface.
2
Go to the Expert Mode.
3
Open the language page via Home > SpeedTouch > System Update.
4
Click on the Language Packs tab:
5
Select the entry at the desired system language and click Delete.
6
Select Saveall to save your changes.
43
Chapter 4
SpeedTouch™ Configuration Management
44
E-DOC-CTC-20051017-0155 v1.0
Chapter 5
SpeedTouch™ Software Modules
5 SpeedTouch™ Software Modules
SpeedTouch™ software
module functionality
The SpeedTouch™ comes by default with an extended set of features to provide
end-to-end connectivity over the DSL line, IP Routing, RIP, Hyper-NAT, SNMP,
Syslog, DHCP, DNS, Remote Assistance, Game & Application Sharing, UPnP, Web
Site Filtering, IDS, DSD to name just a few.
The SpeedTouch™ is able to support additional functionality on top of its basic
feature set. These additional software modules however, are not enabled by default
and must be activated by means of a software activation key.
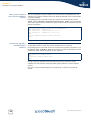
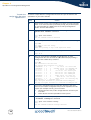
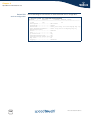
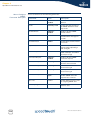
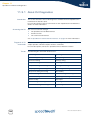
Overview Software
modules
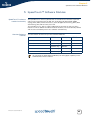
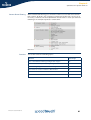
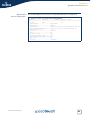
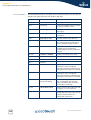
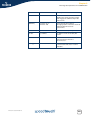
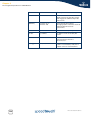
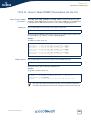
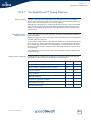
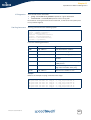
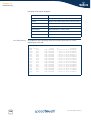
The table below describes the possible Software Modules:
Software Modules
ST620
ST608(WL)
ST605
IPSec (VPN256-32)
Software key
-
-
IPSec (VPN16-4)
Software key
Software key
-
IPSec (VPN16-1)
Software key
Available
-
ISDN
Software key
Software key
-
SIP PBX (SIP256)
Software key
-
-
By activating the ISDN Software Module, full throughput capability on the
ISDN interface will be enabled.
E-DOC-CTC-20051017-0155 v1.0
45
Chapter 5
SpeedTouch™ Software Modules
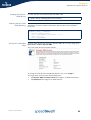
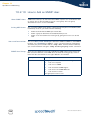
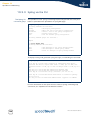
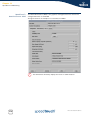
5.1 Software Activation Key Management
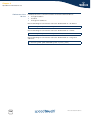
The SpeedTouch™
Software Modules web
page
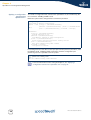
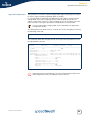
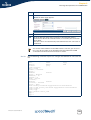
Via the SpeedTouch™ web interface you can easily overview the SpeedTouch™
available software activation keys and their current status:
The Software Module Status Display shows the available software modules that
can be activated via a software activation key.
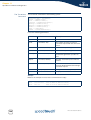
For each software module, following information is provided:
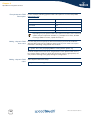
How to Access the
Software Modules Page
46
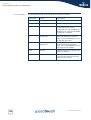
Table Item
Description
Name
The name of the software module.
The name also serves as an Internet link to the SpeedTouch™
software module server from which you can acquire a software
activation key for the particular software module.
Description
Describes the software module.
File
In case the software module is enabled, the software key’s file
name is displayed.
Status
Indicates the status of the module:
No key
Meaning that the software module is not enabled.
Key enabled
Meaning that the software module is enabled.
In expert mode, go to SpeedTouch™ > Addon.
E-DOC-CTC-20051017-0155 v1.0
Chapter 5
SpeedTouch™ Software Modules
Software activation key
management via the CLI
You can overview the software modules and their status and link information via
the SpeedTouch™ Command Line Interface (CLI).
See “2 SpeedTouch™ Command Line Interface” on page 5 for more information on
how to access the Command Line Interface.
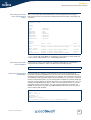
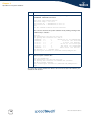
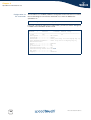
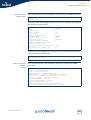
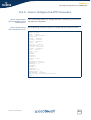
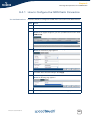
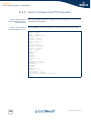
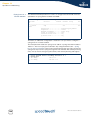
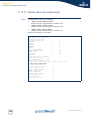
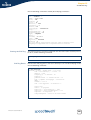
The :software addon list CLI command group allows you to overview the
current software modules, their status, and some additional information:
=>:software addon list
VPN256-32 module info :
Software key status : No Key
Filename :
Link : http://www.speedtouch.com/homeprod/addon.htm
Teaser : IPSec based VPN (256 Sessions, 32 Profiles)
VPN16-4 module info :
Software key status : No Key
Filename :
Link : http://www.speedtouch.com/homeprod/addon.htm
Teaser : IPSec based VPN (16 Sessions, 4 Profiles)
VPN16-1 module info :
Software key status : No Key
Filename :
Link : http://www.speedtouch.com/homeprod/addon.htm
Teaser : IPSec based VPN (16 Sessions, 1 Profile)
ISDN module info :
Software key status : No Key
Filename :
Link : http://www.speedtouch.com/homeprod/addon.htm
Teaser : ISDN Backup
SIP256 module info :
Software key status : No Key
Filename :
Link : http://www.speedtouch.com/homeprod/addon.htm
Teaser : SIP PBX (256 User Agents)
To allow for a successful activation of software modules no parts of the :software
addon CLI command group should be changed, unless specifically instructed by
your Service Provider.
Applying for a
software key
E-DOC-CTC-20051017-0155 v1.0
Contact your local product dealer for available software module activation
possibilities.
47
Chapter 5
SpeedTouch™ Software Modules
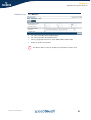
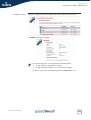
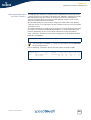
How to Install a
Software Key
After applying for a software key, your ISP should provide you with a software key
user name and password. Proceed as follows to install and activate the software key
via the GUI:
Step
Action
1
Go to the software modules page. Refer to How to Access the
Software Modules Page.
2
Click on the software module you want to activate. You are taken to
the software key request page.
3
Enter the user name and password you received and click Request
Software Key. You will receive the software key.
4
Copy the text of the software key, and paste it into the provided
window on the Software modules page.
5
Click Add.
The user name and password remain active. If for some reason, your software keys
are lost, proceed as described above to reactivate them.
How to Back Up the
Software Keys
Disabling software
modules on the
SpeedTouch™
Normally, you do not need to backup the software keys; However, should you want
to do so, use ftp to transfer the software key files (.swk) to a backup location.
Under normal conditions, once a software module has been activated, there is no
reason to disable this software module again.
However, via an FTP session to the SpeedTouch™ file system you are able to create
a backup of software activation keys (files with an extension .swk, stored on the
SpeedTouch™ ‘/dl’ subdirectory), delete keys and/or restore them.
Be aware that due to a previous system software update software keys may be
residing in the SpeedTouch™ ‘/active’ directory. If so, and you want to remove these
software keys in order to prevent them to re-activate a software module in a future
system software upgrade, follow the instructions below:
1
Make sure to save your current SpeedTouch™ configuration via the
:saveall CLI command.
2
Make sure that both the active and passive system software are the same. This
can be done via the :software duplicate CLI command.
3
Switch active and passive system software versions via the :software
switch CLI command.
4
After restart, remove the software keys (now residing in the ‘dl’ directory) via
an FTP session.
For more information on System software upgrades and management, see
“3 SpeedTouch™ System Software” on page 15. For information on SpeedTouch™
FTP access see “7 The SpeedTouch™ File System” on page 75.
48
E-DOC-CTC-20051017-0155 v1.0
Chapter 6
SpeedTouch™ System Services
6 SpeedTouch™ System Services
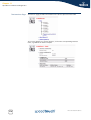
Overview
E-DOC-CTC-20051017-0155 v1.0
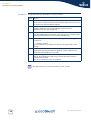
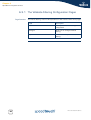
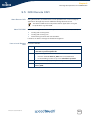
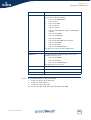
This chapter covers the following services:
Service
See
Dynamic DNS
6.1
Simple Network Time Protocol (SNTP)
6.2
Website Filtering
6.3
Intrusion Detection
6.4
Remote Assistance
6.5
49
Chapter 6
SpeedTouch™ System Services
6.1 SpeedTouch™ Dynamic DNS
Introduction
Dynamic DNS is a mechanism, offered by several dynamic DNS service providers
(available through the Internet) that allows the mapping of a worldwide resolvable
static DNS host name to a dynamically (and temporarily) assigned public IP address
used for Internet connectivity.
This allows you to offer basic Internet services to the world wide web, through a
DNS host name, without the need for obtaining a static and worldwide unique
public IP address.
In most cases dynamic DNS service providers offer various host applications, which
run in background on a local computer and send IP address updates to a dynamic
DNS service server whenever the dynamically assigned public IP address has been
changed.
The SpeedTouch™ offers you an embedded dynamic DNS client, making the use of
third party host applications running on a local computer superfluous.
Applying for the
dynamic DNS service
Before you are able to use the SpeedTouch™ dynamic DNS client functionality, you
must first apply for a dynamic DNS account (and DNS host name) at one of the
available dynamic DNS service providers available on the Internet.
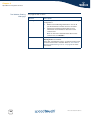
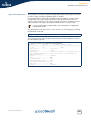
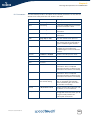
The SpeedTouch™ supports by default the following dynamic DNS service
providers:
Dynamic DNS client
configuration
DynDNS (www.dyndns.org/services/dyndns/)
StatDNS (www.dyndns.org/services/statdns/)
No-IP (www.no-ip.com)
DtDNS (www.dtdns.com)
GnuDIP
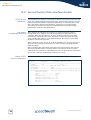
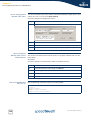
The SpeedTouch™ dynamic DNS client service can be configured via the CLI or the
SpeedTouch™ Web Interface.
Below a short description on how to prepare your SpeedTouch™ for dynamic DNS,
using an imaginary account at the DynDNS dynamic DNS service provider using the
CLI interface.
For more in-depth information on the CLI, see “2 SpeedTouch™ Command
Line Interface” on page 5 and the “SpeedTouch™ CLI Reference Guide”.
Preparing the
SpeedTouch™ dynamic
DNS client
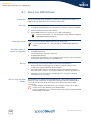
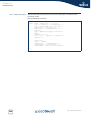
The procedure for enabling a dynamic DNS client consists of five steps:
1
Adding a dynamic DNS host name
2
Adding a dynamic DNS client
3
Modifying the dynamic DNS client
4
Refining the dynamic DNS service settings (optional)
5
Enabling the Dynamic DNS Service.
In a preliminary step, it is assumed that the SpeedTouch™ is already
correctly configured for your Internet subscription and connected to the
Internet, and that you have obtained a valid dynamic DNS account (and
DNS host name) at a dynamic DNS service provider (in this example
DynDNS).
50
E-DOC-CTC-20051017-0155 v1.0
Chapter 6
SpeedTouch™ System Services
The SpeedTouch™ CLI
dyndns commands
The SpeedTouch™ allows configuration of its dynamic DNS client functionality via
the :dyndns CLI command group:
=>:dyndns help
Following commands are available :
add
modify
delete
flush
list
:
:
:
:
:
Add a Dynamic DNS client.
Modify a Dynamic DNS client.
Delete a Dynamic DNS client.
Delete all Dynamic DNS clients.
List all Dynamic DNS clients.
Following command groups are available :
host
service
=>
In this command group all commands are available for adding/deleting and
configuring a dynamic DNS client.
It contains also two sub command groups:
:dyndns host
=>:dyndns host help
Following commands are available :
add
delete
flush
list
:
:
:
:
Add a fully qualified host name
Delete a host name
Delete all host names
List all host names
=>
This allows to specify one or more host name(s) corresponding to a dynamic
DNS client.
:dyndns service
[dyndns]=>:dyndns service help
Following commands are available :
modify
list
: Modify specific DynDNS service settings
: List all DynDNS services
=>
This allows you to view/configure the pre-configured dynamic DNS service
providers, or to create custom dynamic DNS service providers.
For a full description of the syntax of these commands, see the
“SpeedTouch™ CLI Reference Guide”.
E-DOC-CTC-20051017-0155 v1.0
51
Chapter 6
SpeedTouch™ System Services
Example dynamic DNS
subscription
For this example, following dynamic DNS subscription is assumed at DynDNS
(www.dyndns.org):
value
user name
[email protected]
password
john
Dynamic DNS host
johndoe.dyndns.org
Allow wildcards
yes
Depending on your dynamic DNS subscription some other, more advanced
options may be required or available, e.g. multiple host names, the Mail
Exchanger (MX) host name, update interval, etc.
Adding a dynamic DNS
host name
In a first step you must specify for which hostname(s) you want to enable the
dynamic DNS service for. According to the Example dynamic DNS subscription
information, following configuration must be done:
=>:dyndns host add group=MyDynDNSHost name=johndoe.dyndns.org
To allow multiple host names to be assigned to the same dynamic DNS service,
host names always reside in a group. You are free to choose a group name, it is
only used for referring to the group during CLI configuration.
Adding a dynamic DNS
client
Add a dynamic DNS client entry:
=>:dyndns add name=MyDynDNS
52
E-DOC-CTC-20051017-0155 v1.0
Chapter 6
SpeedTouch™ System Services
Modifying the dynamic
DNS client
Now the dynamic DNS client must be configured according your dynamic DNS
subscription. According the Example dynamic DNS subscription information,
following configuration must be done:
=>:dyndns modify
name = MyDynDNS
[intf] = PPPoE_1
[user] = [email protected]
[password] = ****
First time typing the password
Please retype password for verification.
[password] = ****
Second time typing the password for
verification
[group] = MyDynDNSHost
[mx] =
Left empty
[backmx] = disabled
[wildcard] = enabled
[offline] = disabled
[service] =dyndns
[status] = disabled
:dyndns modify name=MyDynDNS intf=DIALUP_PPPOE [email protected]
password=_DEV_2AF11E9E944667D4 group=MyDynDNSHost
The [intf] parameter requires you to select the SpeedTouch™ interface used
for your Internet connectivity.
E-DOC-CTC-20051017-0155 v1.0
53
Chapter 6
SpeedTouch™ System Services
Refining the dynamic
DNS service settings
If needed or required by the dynamic DNS service provider, you can change some
details of the dynamic DNS service.
The Example dynamic DNS subscription at DynDNS requires no changes in the
service settings, as the pre-configured settings should be adequate.
Below an overview of the default service settings per pre-configured dynamic DNS
service provider (and the custom dynamic DNS service):
=>:dyndns service list
dyndns
:
server
= members.dyndns.org
port
= 80
request
= /nic/update
update interval = 2097120s
retry interval = 30s
max retry
= 3
54
statdns
:
server
port
request
update interval
retry interval
max retry
=
=
=
=
=
=
members.dyndns.org
80
/nic/update
0s
30s
3
custom
:
server
port
request
update interval
retry interval
max retry
=
=
=
=
=
=
members.dyndns.org
80
/nic/update
0s
30s
3
No-IP
:
server
port
request
update interval
retry interval
max retry
=
=
=
=
=
=
dynupdate.no-ip.com
80
/ducupdate.php
86400s
30s
3
DtDNS
:
server
port
request
update interval
retry interval
max retry
=
=
=
=
=
=
dtdns.com
80
/api/autodns.cfm
86400s
30s
3
gnudip
:
server
port
request
update interval
retry interval
max retry
=
=
=
=
=
=
80
0s
0s
0
E-DOC-CTC-20051017-0155 v1.0
Chapter 6
SpeedTouch™ System Services
Enabling the Dynamic
DNS Service
In a final step you must enable the dynamic DNS client:
=>:dyndns modify name=MyDynDNS status=enabled
Checking dynamic DNS
client Resolving
You can easily check whether the dynamic DNS client is successfully updating the
SpeedTouch™ public IP address towards the dynamic DNS service provider’s
hostserver:
=>:dyndns list
MyDynDNS : PPPoE_1 [CONNECTED]
options = dyndns wildcard
user = [email protected] password = ********
addr = 141.11.1.1
group = MyDynDNSHost
The Dynamic DNS Web
Page
The Basic Web interface has a page on Dynamic DNS. To access this page, go to:
Basic mode > Toolbox >Dynamic DNS
This page shows the Dynamic DNS settings:
To change the settings and enable/disable Dynamic dns, click configure.
This page allows you to perform the following tasks:
E-DOC-CTC-20051017-0155 v1.0
Use dynamic DNS on multiple interfaces: configure an additional interface.
Use multiple hosts: configure an additional host.
55
Chapter 6
SpeedTouch™ System Services
6.2 The SpeedTouch™ SNTP Client
Introduction
The SpeedTouch™ Simple Network Time Protocol (SNTP) client allows you to
configure the SpeedTouch™ internal real-time clock (RTC), used for time-critical
operations, for example for online certificates enrolment (IPSec VPN client).
This section shortly describes the configuration and use of the SpeedTouch™ SNTP
client.
Daylight Saving Time
The RTC
The SNTP web page
Because the RTC does not have an automatic daylight saving switch, you should
update it manually at the correct moments (twice a year).
The SpeedTouch™ contains a battery to allow the RTC to maintain the time even
when the device is powered off and restarts. This helps security because even when
the NTP servers are temporarily inaccessible because of a power outage or network
traffic overflow, the SpeedTouch™ has the correct time allowing to correctly
correlate syslog events from various devices and perform correct diagnosis.
You can access the SpeedTouch™ SNTP page via Home > SpeedTouch > SNTP:
By default SNTP is disabled; internal clocking refers to the SpeedTouch™ up time
(i.e. the time passed since last reboot).
56
E-DOC-CTC-20051017-0155 v1.0
Chapter 6
SpeedTouch™ System Services
The Manual tab
Select Manual to:
Set a date manually. (format dd/mm/yyyy)
Set a time manually. (format HH:mm:ss)
Select a geographical timezone. (from GMT-12:00 to GMT+12:00)
Enable or disable summertime.
!
E-DOC-CTC-20051017-0155 v1.0
The Manual TAB, if selected, disables the SpeedTouch™ SNTP client
57
Chapter 6
SpeedTouch™ System Services
The SNTP tab
To enable the SpeedTouch™ SNTP client, select the SNTP TAB:
As long no NTP servers are configured, time will not be controlled by SNTP.
Proceed as follows to add an NTP server:
Step
Action
1
Click New.
2
Enter the IP address or DNS hostname of an NTP server.
3
Specify the NTP version of the server.
4
Click Apply. This enables the SNTP client, which contacts the NTP server,
in order to synchronize the SpeedTouch™ internal clock with the NTP
server. If needed, you can correct the synchronized time by selecting
your geographical timezone, optionally by enabling or disabling
summertime
From now on, your SpeedTouch™’s internal clock will be synchronized every 5
minutes (default setting) with the NTP server.
If needed you can enter additional redundant NTP servers to ensure that the
clock always is synchronized with at least one of the provided NTP servers.
58
E-DOC-CTC-20051017-0155 v1.0
Chapter 6
SpeedTouch™ System Services
Setting the time via CLI
The :system rtc settime CLI command allows you to overview the current
real-time clock settings and to configure them:
=>:system rtc settime
date = 04/07/2003
time = 10:34:55
timezone = +01:00
daylightsaving = off
=>
You can also use this CLI command to manually set the SpeedTouch™ internal realtime clock:
=>:help system rtc settime
Set/Get date, time, timezone, daylight savings time
Syntax : settime [date = <dd/mm/yyyy>] [time = <hh:mm:ss>]
[timezone = <(+ or -)hh:mm>]
[daylightsaving = <{disabled|enabled}>]
Parameters :
[date = <dd/mm/yyyy>]
Set the system date
[time = <hh:mm:ss>]
Set the system time
[timezone = <(+ or -)hh:mm>]
Set the system timezone(-12:00...+14:00 / 15 minute resolution)
[daylightsaving = <{disabled|enabled}>]
Enable/Disable daylight saving
SNTP via the CLI
The SpeedTouch™ SNTP client is configured via the :sntp CLI command group:
=>:sntp help
Following commands are available :
add
list
delete
flush
config
:
:
:
:
:
Add NTP server
List the NTP servers
Delete NTP server from list
Flush NTP server list and SNTP client configuration
Modify/Display configuration
You can use the following commands:
:sntp list
:sntp add and :sntp delete
List the configured NTP servers.
Add or delete NTP servers.
:sntp config
Enable/disable the SpeedTouch™ SNTP client and set the polling interval.
E-DOC-CTC-20051017-0155 v1.0
59
Chapter 6
SpeedTouch™ System Services
6.3 Website Filtering
About Website Filtering
Address Based Filtering
The website filtering feature offers you the possibility to control Internet Access by
filtering blocking access to certain websites. The SpeedTouch™ has two methods of
controlling access to the Internet:
Method
Description
Address Based Filtering
Allow or block access to specific sites
based on their address.
Content Based Filtering
Allow or block access to websites based on
their content.
With address based filtering, you can allow or block access to specific web sites
based on their address. You can also block access to a specific site and redirect the
browser to another site.
You can do this by configuring an address filter similar to this example:
If you create a rule for a specific URL, that rule also applies to child URLs,
unless otherwise specified in the filter.
Example:
Any rule created for www.Speedtouch.com also applies to
<anything>.speedtouch.com.
60
E-DOC-CTC-20051017-0155 v1.0
Chapter 6
SpeedTouch™ System Services
Content Based Filtering
With content based filtering, you can block or allow access to web sites based on
their content. To do this, you can apply a content level as filter. You can use (an, if
necessary, customize) one of the predefined content levels or create your own. The
following is an example of (part of) a content level:
Note that “x” marks forbidden content while “v” marks allowed content.
Overview
E-DOC-CTC-20051017-0155 v1.0
This section covers the following topics:
Section
See Page
“6.3.1 The Website Filtering Configuration Pages”
62
“6.3.2 How to Verify the Filtering Configuration”
63
“6.3.4 Configuring the Actions for Uncategorised Sites”
66
“6.3.5 How to Create an Address Based Filter”
67
“6.3.6 How to Create a Content Based Filter”
68
“6.3.7 How to Create a Content Level”
69
61
Chapter 6
SpeedTouch™ System Services
6.3.1 The Website Filtering Configuration Pages
Page Overview
62
The website filtering section of the SpeedTouch™ web interface offers three pages:
Page
Description
Overview
Allows you to view the filtering
configuration
Configure
Allows you to configure website
filtering
Help
Provides online help on Website
filtering
E-DOC-CTC-20051017-0155 v1.0
Chapter 6
SpeedTouch™ System Services
6.3.2 How to Verify the Filtering Configuration
Procedure
Proceed as follows to verify the website filtering configuration:
Step
Action
1
Go to the SpeedTouch™ configuration home page
2
In the Toolbox section, click Web Site filtering.
Result: you are taken to the website filtering overview page:
E-DOC-CTC-20051017-0155 v1.0
63
Chapter 6
SpeedTouch™ System Services
The Website Filtering
Web page
This page has two sections:
Section
Description
Filtering Information
This section provides information on the active filtering
configuration:
Address based filtering information: a list of all
specified websites and the actions to be taken.
Content based filtering information: license
information and information about the active
content level.
Note: to view more detailed information on the
content level, click Details...
Pick a task
64
List of possible tasks. In this case, any Activate Web
filtering license is available.
Note: after activating the license, a new task Create a new
content level becomes available. Refer to “6.3.3 How to
Activate a Web Filtering License” on page 65 for more
information.
E-DOC-CTC-20051017-0155 v1.0
Chapter 6
SpeedTouch™ System Services
6.3.3 How to Activate a Web Filtering License
Prerequisite
Procedure
Before you can activate the web site filtering license, you need a valid license key.
Proceed as follows to activate a web filtering license:
Step
Action
1
Go to the SpeedTouch™ configuration home page
2
In the Toolbox section, click Web Site filtering.
Result: you are taken to the website filtering overview page
3
In the Pick a task... section, click Activate Web filtering license.
Result: the Web filtering activation page appears:
4
Fill in a valid license key and click Apply.
Once you have activated the license, the Create New Content Level task
becomes available in the Pick a Task section of the filtering configuration
pages.
E-DOC-CTC-20051017-0155 v1.0
65
Chapter 6
SpeedTouch™ System Services
6.3.4 Configuring the Actions for Uncategorised
Sites
Filter Priority
Actions for
Uncategorised Sites
Procedure
66
The address based filter, if activated, has the highest priority. For web sites that are
not specified in the address based filter, the system uses the Content based filter (if
activated). If neither filter is activated, no filtering is applied.
Uncategorised sites are sites that are not targeted by any of the active filters. For
these sites, you can:
allow access
block access
Proceed as follows to set the actions for uncategorised sites:
Step
Action
1
Go to the SpeedTouch™ configuration home page
2
In the Toolbox section, click Web Site filtering.
3
In the top right corner, click Configure.
4
Go to the second bullet in the list (Content Based Filtering).
5
In the drop down list next to the option Action for uncategorised sites,
select the desired action (Block or Allow).
6
Click Apply.
E-DOC-CTC-20051017-0155 v1.0
Chapter 6
SpeedTouch™ System Services
6.3.5 How to Create an Address Based Filter
How to Create a New
Entry
How to Modify an Entry
How to Delete an Entry
E-DOC-CTC-20051017-0155 v1.0
Proceed as follows:
Step
Action
1
Go to the SpeedTouch™ configuration home page
2
In the Toolbox section, click Web Site filtering.
3
In the top right corner, click Configure.
4
Go to the first bullet in the list (Address Based Filtering).
5
In the last row of the table, enter the URL of the web site for which you
want to create an entry in the filter
6
Select the action to be taken (Block, Allow or Redirect)
In case of Redirect, enter the address to which you want to redirect.
7
Click Add
8
Repeat steps 5 to 7 for each entry you want to create in the filtering
table.
9
If necessary, select Use Address Based Filter and click Apply.
Proceed as follows to modify an entry in the filter table:
Step
Action
1
Go to the row you wish to change and click the corresponding Edit.
2
Modify the entry and click Apply.
To undo the changes, click Cancel.
Proceed as follows to delete an entry in the filter table:
Step
Action
1
Go to the row you wish to delete
2
Click the corresponding Delete.
67
Chapter 6
SpeedTouch™ System Services
6.3.6 How to Create a Content Based Filter
About Content Levels
Content levels determine which web sites will be targeted by the filter, based on
their content.
There are 5 pre-defined content levels:
Procedure
68
Level
Description
All
Allow all categorized web sites.
Legal
Allow all except illegal, extreme, spam
and spyware websites.
Teenagers
Block illegal, adult, extreme, online
ordering & gambling and spyware
websites.
Children
Allow only children-safe websites.
BlockAll
Block all categorized web sites.
Proceed as follows to create a content based filter:
Step
Action
1
Go to the SpeedTouch™ configuration home page
2
In the Toolbox section, click Web Site filtering.
3
In the top right corner, click Configure.
4
Go to the second bullet in the list (Content Based Filtering)
5
If not already set, select the desired action for uncategorised sites.
6
If necessary, create a new content level, or modify an existing one.
7
Select the content level of your choice.
8
Repeat steps 5 to 7 for each entry you want to create in the filtering
table.
9
Click Apply.
E-DOC-CTC-20051017-0155 v1.0
Chapter 6
SpeedTouch™ System Services
6.3.7 How to Create a Content Level
How to get a Detailed
View
How to Edit a Content
Level
E-DOC-CTC-20051017-0155 v1.0
Proceeds as follows to get a detailed view of an content level:
Step
Action
1
Go to the Web site filtering Overview page.
Result:
The Web interface shows a description of the content level as well as
full details on which type of content is allowed and which is not.
2
Click on Details...
Proceed as follows to edit an existing Content Level:
Step
Action
1
Go to the Web site filtering Overview page.
2
Select the content level you wish to edit and click the corresponding
Edit.
3
Modify the name, description and/or the content classes or subclasses
targeted by the filter. To select or de-select a content class or subclass,
click its checkbox.
4
Click Apply.
69
Chapter 6
SpeedTouch™ System Services
How to Create a New
Content Level
Proceed as follows to create a new content level:
Step
Action
1
Go to the Web site filtering Configure page
2
In the Pick a Task... list, select Create a new content level.
3
Fill in a name and a description and click Next
4
If you want to:
Start from a copy of an existing level, select Clone an Existing Level.
Start from a white list (everything blocked, leaving you to determine
which categories are to be allowed), select White List.
Start from a black list (everything allowed, leaving you to determine
which categories are to be blocked), select Black List.
5
Click Next.
6
Select or de-select the content classes and subclasses you want to
include or exclude.
Note that if you select a class, all subclasses in that class are
automatically included, unless you select at least one subclass. In that
case, only the selected subclasses are included.
Example:
If the filter is set to allow the sites targeted by the filter, the above
example will allow the following sites:
7
70
Sites related to swimwear or lingerie, but no other nudity related
sites
No sites in the Ordering class
In the Society/Education/Religion class, only sites related to Nongovernmental organizations, Cities/Regions and Countries and
political parties.
8
Click Apply.
E-DOC-CTC-20051017-0155 v1.0
Chapter 6
SpeedTouch™ System Services
6.4 Intrusion Detection and Protection
About Intrusion
Detection
How to View the
Intrusion Detection
statistics
Possible Tasks
The SpeedTouch™ actively protects your system against malicious intrusion. You
can view statistics on the intrusion attempts the SpeedTouch™ has detected.
Proceed as follows to see the intrusion statistics:
Step
Action
1
Go to the Basic configuration home page of the web interface
2
In the Toolbox section, click Intrusion Detection
Result: the Web Interface shows you a list of all possible intrusions and
the number of times each intrusion actually occurred.
The Intrusion Detection page also shows a Pick Task... section which has two
possible tasks:
Task
Description
View the security logs
View the security logs for more
information about the intrusion.
Clear intrusion detection statistics
Clears the intrusion detection statistics
and resets all counters to zero.
To execute a task, simply click it in the Pick a Task... section.
E-DOC-CTC-20051017-0155 v1.0
71
Chapter 6
SpeedTouch™ System Services
6.5 Remote Assistance
About Remote
Assistance
How to Set Up Remote
Assistance
Remote Assistance allows you to log on to the SpeedTouch™ from a remote
location and perform tasks.
Proceed as follows to set up Remote Assistance:
Step
Action
1
Go to the Basic configuration home page of the web interface
2
In the Toolbox section, click Remote Assistance
Result: the Web Interface shows the following page:
The system selects the user with the defremadmin property set to
enabled.
The SpeedTouch™has a pre-configured user called TechSupport
already configured for this purpose. Normally, the page should show
this user (see example above).
The system also generates a random password, which you can alter
manually.
3
How to Log On To The
SpeedTouch™
Remotely
Click Enable Remote Assistance.
Note that the system generates a new password every time you click
the enable button.
Proceed as follows to log on to the SpeedTouch™ remotely:
Step
Action
1
Open a browser window
2
Enter the URL of the SpeedTouch™ (public IP address of the
SpeedTouch™ with port number 51003, as shown on the Remote
Assistance page).
3
Log on using the user and the password on the Remote Assistance
page.
You are now remotely connected to the SpeedTouch™ and have access to all of its
functions, as if the connection were a local connection.
72
E-DOC-CTC-20051017-0155 v1.0
Chapter 6
SpeedTouch™ System Services
Connection Type
E-DOC-CTC-20051017-0155 v1.0
On most variants, the connection will be HTTPS (secure HTTP). However, some
variants do not support SSH and will therefore use an HTTP connection;
73
Chapter 6
SpeedTouch™ System Services
74
E-DOC-CTC-20051017-0155 v1.0
Chapter 7
The SpeedTouch™ File System
7 The SpeedTouch™ File System
Introduction
The SpeedTouch™ file system exists of nonvolatile memory responsible for storing,
retrieving and maintaining the system software files, configuration profile files,
language-pack files, software activation keys, secure storage files, etc.
The file system of the SpeedTouch™ is accessible via the well known File Transfer
Protocol (FTP). This allows to backup and restore files present on the SpeedTouch™
file system. Moreover, via FTP's quote site command you are able to use a
limited set of CLI commands from the FTP prompt.
Opening an FTP session
to the SpeedTouch™
Proceed as follows to open an FTP session to the SpeedTouch™ file system (the
example shows an ftp session opened from an MS Windows Command Prompt):
In the example above the default SpeedTouch™ IP address 192.168.1.254 is
assumed, however another IP address may be assigned to your
SpeedTouch™ device.
In its default firewall configuration, FTP access to the SpeedTouch™ file system is
restricted to access from the local network only.
File system structure
The file system features a tiny multilevel directory structure with two nodes '/active'
and '/dl'.
The root directory is secured and contains two subdirectories ‘/active’ and ‘/dl’.
The ‘/active’ subdirectory contains the system software in execution. Other files
may be present to ensure the good operation of the device, or due to previous
system software upgrades.
The ‘/dl’ subdirectory is the directory where you can find a user.ini file, holding the
most recently saved SpeedTouch™ configuration. The ‘/dl’ subdirectory also
contains the passive (dormant) system software (in most cases the passive system
software will be the same as the active system software present the ‘/active’
subdirectory. Optionally, the ‘/dl’ subdirectory may contain software activation keys
for enabling SpeedTouch™ software modules, language pack files and template
files. Other files may be present as well to ensure the good operation of the device.
There may be a user.ini file present in the ‘/active’ subdirectory. However,
this user.ini only contains the saved configuration since the last software
switchover, and hence may be not up-to-date.
E-DOC-CTC-20051017-0155 v1.0
75
Chapter 7
The SpeedTouch™ File System
Access rights to the file
system
Following access/action rights apply to the directories and its contents:
Preparing for FTP file
transfers
'root' Directory
Access is allowed
No Read access
No Write access
'/active' Subdirectory
Access is allowed
Listing of files (dir)
FTP (m)get of (multiple) files
'/dl' Subdirectory
Access is allowed
Listing of files (dir)
FTP (m)get of (multiple) files
FTP (m)put of (multiple) files
FTP (m)delete of (multiple) files
To allow correct file transfers the transfer mode must be set to "binary".
You can turn on the hashing option. This allows you to see the file transfer in
progress, by printing a mark for each 2048 bytes that have been transferred:
ftp> bin
200 TYPE is now 8-bit binary
ftp> hash
Hash mark printing On ftp: (2048 bytes/hash mark) .
ftp>
76
E-DOC-CTC-20051017-0155 v1.0
Chapter 7
The SpeedTouch™ File System
Files stored on the file
system
The following is an example output of the SpeedTouch™ ‘/dl’ and ‘/active’
subdirectory content:
C:\Documents and Settings\john_doe>ftp 192.168.1.254
Connected to 192.168.1.254.
220 Inactivity timer = 120 seconds. Use 'site idle <secs>' to change.
User (192.168.1.254:(none)):Administrator
331 SpeedTouch (00-0E-50-0F-FE-2A) Password required.
Password:
230 OK
ftp>cd dl
250 Changed to /dl
ftp>dir
200 Connected to 192.168.1.1 port 2055
150 Opening data connection for /bin/ls
-rwxrwxrwx
1 0
0
20 Jun 29 1971 start.cmd
-rwxrwxrwx
1 0
0
2889484 Jun 29 1971 ZZUIAA5.321
-r--r--r-1 0
0
9 Jun 29 1971 seed.dat
-r--r--r-1 0
0
729 Jun 29 1971 sslcert.pem
-r--r--r-1 0
0
908 Jun 29 1971 sslkey.pem
-rwxrwxrwx
1 0
0
54952 Jun 29 1971 user.ini
-r--r--r-1 0
0
692 Jun 29 1971 sshdsa.pem
226 Options: -l : 7 matches total
ftp: 466 bytes received in 0,02Seconds 29,13Kbytes/sec.
ftp>cd ..
250 Changed to /
ftp>cd active
250 Changed to /active
ftp>dir
200 Connected to 192.168.1.1 port 2056
150 Opening data connection for /bin/ls
-rwxrwxrwx
1 0
0
20 Jun 29 1971 start.cmd
-rwxrwxrwx
1 0
0
2889484 Jun 29 1971 ZZUIAA5.321
226 Options: -l : 2 matches total
ftp: 134 bytes received in 0,00Seconds 134000,00Kbytes/sec.
ftp>
E-DOC-CTC-20051017-0155 v1.0
77
Chapter 7
The SpeedTouch™ File System
File types
78
Following file types can be found:
System software files (e.g. ZZUIAA5.321)
The SpeedTouch™ system software file. The one in the ‘/active’ directory is
currently used by the SpeedTouch™; the one in the ‘/dl’ directory is dormant.
Software activation keys(e.g. VPN256-32.swk)
Software key files allowing the SpeedTouch™ to enable the corresponding
software module at startup. Per enabled software module, a software key
must be present in the ‘/dl’ directory.
Configuration files (e.g. user.ini)
The most recent saved configuration of the SpeedTouch™, or alternative
dormant configuration files, manually stored on the SpeedTouch™. At start-up
the SpeedTouch™ will load the user.ini configuration file residing in the ‘/dl’
directory.
Default configuration files (e.g. isp.def)
Depending on your ISP’s or network administrator’s preferences, your
SpeedTouch™ may have a deviant default configuration after a reset. The
isp.def file, if present, reflects this deviant default configuration.
Template files (e.g. custom.tpl)
Service template file, used by the embedded Easy Setup wizard.
Language-pack files (e.g. German.lng)
Files, allowing to view the SpeedTouch™ Web Interface in a local language.
Per
selectable language a language pack file should be available.
Secure storage files (e.g. ss_p12.dat)
Secure storage data files, containing certificate information for the
SpeedTouch™ IP Security VPN module (if enabled).
Flag and system files (e.g. build.flg, config.inf, start.cmd)
Protected files, created by the SpeedTouch™ for file system and startup
management. For proper operation, do not change or delete these files in any
way.
Script files (.sts)
E-DOC-CTC-20051017-0155 v1.0
Chapter 8
SpeedTouch™ Remote Access
8 SpeedTouch™ Remote Access
The SpeedTouch™
access methods
The SpeedTouch™ offers various access methods to allow configuration and
monitoring of the device.
SpeedTouch™ HTTP
SpeedTouch™ HTTPs access
SpeedTouch™ Telnet access
SpeedTouch™ FTP access
SpeedTouch™ SSH access
However, for obvious security reasons, in the default configuration all these
methods are denied from the WAN side. Explicit configuration is required in order
to allow remote management from the WAN.
Restrictions
Two important factors determine if you are allowed access via a specific method.
The SpeedTouch™ multi-level access policy:
It determines access rights for users.
For more information on the multi-level SpeedTouch™ access policy,
please refer to the SpeedTouch™ Multi-Level Access Policy
Configuration Guide.
The SpeedTouch™ system services:
The SpeedTouch™ access methods are linked to different SpeedTouch™
Services.
A Service is an application running on the SpeedTouch™. By activating a
service, the SpeedTouch™ adds the appropriate NAT entries and firewall rules,
for example to disable access to the SpeedTouch™ web host.
Access methods vs
system services
In the table below the access methods and their services are listed:
Access method
System service name
HTTP access
HTTP
HTTPs access
HTTPs
Telnet access
TELNET
SSH access
SSH
FTP access
FTP
Configuration via CLI
To allow remote access (from the WAN side) for a certain service, add the WAN
interface group to the interface access list of the service. See“ Configuration via CLI
commands” on page 81
Remote Assistance
It is possible to remotely access the SpeedTouch™ Web Interface for remote
assistance purposes. For more information, refer to Chapter 6, section “6.5 Remote
Assistance” on page 72.
E-DOC-CTC-20051017-0155 v1.0
79
Chapter 8
SpeedTouch™ Remote Access
Interface access list
The interface access list of a service contains the interface groups from where a
user is allowed access to that specific service.
The interface access list can contain 1 or more of the following groups:
IPSec Protection
80
lan:
the local or corporate network
local:
the serial console cable
wan:
the Internet
It is possible to use IPSec to protect remote management. You can either use IPSec
tunnel mode or IPSec transport mode. For more details, refer to the IPSec
configuration guide.
E-DOC-CTC-20051017-0155 v1.0
Chapter 8
SpeedTouch™ Remote Access
8.1 Remote Web Interface Access
Introduction
Default HTTP
service configuration
The SpeedTouch™ web interface is provided by the SpeedTouch™ HTTP web
server. Access to this server and hence the web interface is controlled by the HTTP
service. By default, the HTTP service is configured to let the web server accept http
requests from LAN side only. In addition the SpeedTouch™ provides HTTPs access.
This provides a more secure way (HTTP over ssl) of accessing the SpeedTouch™
HTTP web server.
Use the following CLI command to see the default HTTP service configuration.
=>:service system list name=HTTP expand=enabled
Idx Name
Protocol
SrcPort DstPort Group
State
----------------------------------------------------------------------1 HTTP
tcp
80
enabled
Description................ HTTP web server
Properties................. server
Managed parameters......... state port acl map log
Interface Access List...... lan local
Ip Access List............. any
NAT Port List.............. 80
=>
Configuration via
CLI commands
For WAN access, you should use HTTP. For this, additional configuration of the
HTTP service is needed.
Use the following CLI command to allow HTTP access from the WAN to the
SpeedTouch™:
=>:service system ifadd name=HTTP group=wan
=>
If you take a look at the HTTP service configuration, you will see that the wan group
is added to the Interface Access List:
=>:service system list name=HTTP expand=enabled
Idx Name
Protocol
SrcPort DstPort Group
State
----------------------------------------------------------------------1 HTTP
tcp
80
enabled
Description................ HTTP web server
Properties................. server
Managed parameters......... state port acl map log
Interface Access List...... lan local wan
Ip Access List............. any
NAT Port List.............. 80
=>
E-DOC-CTC-20051017-0155 v1.0
81
Chapter 8
SpeedTouch™ Remote Access
Refinement of the
Service
If needed, the service can be fine-tuned to restrict the allowed traffic to:
A single IP address
A subnet
A range of IP addresses
Use the following CLI command to restrict the allowed traffic to 1 IP address.
=>:service system ipadd name=HTTP ip=192.6.11.5
=>
Use the following CLI command to restrict the allowed traffic to a subnet.
=>:service system ipadd name=HTTP ip=192.6.11.0/24
=>
Use the following CLI command to restrict the allowed traffic to a range of IP
addresses.
=>:service system ipadd name=HTTP ip=192.6.[2-55].[2-55]
=>
82
E-DOC-CTC-20051017-0155 v1.0
Chapter 8
SpeedTouch™ Remote Access
Hyper-NAT Refinements
The SpeedTouch™ features a powerful Hyper-NAT engine allowing the local hosts
to share a single (remotely negotiated) public IP address.
In case Hyper-NAT is enabled on the WAN interface that will be used for remote
management, and a static mapping has been made to allow remote hosts to
address regular HTTP services on a host residing on your local network, you must
make sure that accessing the SpeedTouch™ Web Interface is still possible.
For more information on Hyper-NAT, see the SpeedTouch™ Hyper-NAT
Configuration Guide.
The default port for the HTTP server is set to 80. This can be changed by executing
the following command:
=>:service system modify name=HTTP state=enabled port=82
=>
The command above will change the HTTP server port of the SpeedTouch™ from
port 80 (default) to port 82.
=>:service system list name=HTTP expand=enabled
Idx Name
Protocol
SrcPort DstPort
Group
----------------------------------------------------------------------1 HTTP
tcp
82
Description................ HTTP web server
Properties................. server
Attributes................. state port aclip aclif aclifgroup map log
User Managed Attributes.... state port aclip aclif aclifgroup map log
Attribute Values :
State...................... enabled
Port....................... 82
Ip Access List............. any
Interface Access List...... any
Interface Group Access List lan
Map List................... 82
Logging.................... disabled
=>
!
E-DOC-CTC-20051017-0155 v1.0
NAT-refinements for SpeedTouch™ services should never be made in the
NAT configuration menu, but always in System Services.
83
Chapter 8
SpeedTouch™ Remote Access
8.2 Secure Remote Web Interface Access
HTTPs service
Introduction
The remote
management certificate
The SpeedTouch™ supports secure HTTP or HTTPS. The Transport Layer Security
(prior SSL implemented by Netscape) provides communications privacy over the
Internet. The protocol allows client/server applications to communicate in a way
that is designed to prevent eavesdropping, tampering, or message forgery.
The primary goal of the TLS Protocol is to provide privacy and data integrity
between two communicating applications.
When booting, the SpeedTouch™ verifies if a certificate exists for remote
management. If no certificate is found, the SpeedTouch™ generates its own
certificate. When the SpeedTouch™ receives an HTTPs request on port 443, it
transmits this certificate to the client. The client can either accept of refuse the
server identity. Depending on client implementation, the end-user is prompted
whether or not to trust the server.
When a web user logs in or tries to log in the SpeedTouch™, a syslog message is
generated. This message indicates the user name and the underlying protocol
(HTTP or HTTPS)
After negotiating the cipher between the two peers involved in the TLS protocol,
data is encrypted for further communications. The minimum level of security
required for the connection is indicated by each peer. If the minimum requirement
of each peer cannot be achieved, the connection is closed.
Default HTTPs
service configuration
Use the following CLI command to see the default HTTPs service configuration.
=>:service system list name=HTTPs expand=enabled
Idx Name
Protocol
SrcPort DstPort Group
----------------------------------------------------------------------1 HTTPs
tcp
443
Description............... HTTP web server over ssl
Properties................ server
Attributes................ state port aclip aclif aclifgroup map log
User Managed Attributes... state port aclip aclif aclifgroup map log
Attribute Values :
State...................... enabled
Port....................... 443
Ip Access List............. any
Interface Access List...... any
Interface Group Access List lan
Map List................... 443
Logging.................... disabled
=>
84
E-DOC-CTC-20051017-0155 v1.0
Chapter 8
SpeedTouch™ Remote Access
Configuration via
CLI commands
To have HTTPs access via WAN, additional configuration of the HTTPs service is
needed.
Use the following CLI command to allow HTTPs access from the WAN to the
SpeedTouch™:
=>:service system ifadd name=HTTPs group=wan
=>
If you take a look at the HTTPs service configuration, you will see that the wan
group is added to the Interface Access List:
=>:service system list name=HTTPs expand=enabled
Idx Name
Protocol
SrcPort DstPort Group
----------------------------------------------------------------------1 HTTPs
tcp
443
Description............... HTTP web server over ssl
Properties................ server
Attributes................ state port aclip aclif aclifgroup map log
User Managed Attributes... state port aclip aclif aclifgroup map log
Attribute Values :
State...................... enabled
Port....................... 443
Ip Access List............. any
Interface Access List...... any
Interface Group Access List lan wan
Map List................... 443
Logging.................... disabled
=>
E-DOC-CTC-20051017-0155 v1.0
85
Chapter 8
SpeedTouch™ Remote Access
Refinement of the
Service
If needed, the service can be fine-tuned to restrict the allowed traffic to:
A single IP address
A subnet
A range of IP addresses
Use the following CLI command to restrict the allowed traffic to 1 IP address.
=>:service system ipadd name=HTTPs ip=192.6.11.5
=>
Use the following CLI command to restrict the allowed traffic to a subnet.
=>:service system ipadd name=HTTPs ip=192.6.11.0/24
=>
Use the following CLI command to restrict the allowed traffic to a range of IP
addresses.
=>:service system ipadd name=HTTPs ip=192.6.[2-55].[2-55]
=>
86
E-DOC-CTC-20051017-0155 v1.0
Chapter 8
SpeedTouch™ Remote Access
Hyper-NAT Refinements
The SpeedTouch™ features a powerful Hyper-NAT engine allowing the local hosts
to share a single (remotely negotiated) public IP address.
In case Hyper-NAT is enabled on the WAN interface that will be used for remote
management, and a static mapping has been made to allow remote hosts to
address regular HTTPs services on a host residing on your local network, you must
make sure that accessing the SpeedTouch™ Web Interface is still possible.
For more information on Hyper-NAT, see the SpeedTouch™ Hyper-NAT
Configuration Guide.
The default port for the HTTPs server is set to 443. This can be changed by
executing the following command:
=>:service system modify name=HTTPs state=enabled port=448
=>
The command above will change the HTTPs server port of the SpeedTouch™ from
port 443 (default) to port 448.
=>:service system list name=HTTPs expand=enabled
Idx Name
Protocol
SrcPort DstPort Group
----------------------------------------------------------------------1 HTTPs
tcp
448
Description............... HTTP web server over ssl
Properties................ server
Attributes................ state port aclip aclif aclifgroup map log
User Managed Attributes... state port aclip aclif aclifgroup map log
Attribute Values :
State...................... enabled
Port....................... 448
Ip Access List............. any
Interface Access List...... any
Interface Group Access List lan wan
Map List................... 448
Logging.................... disabled
=>
!
E-DOC-CTC-20051017-0155 v1.0
NAT-refinements for SpeedTouch™ services should never be made in the
NAT configuration menu, but always in System Services.
87
Chapter 8
SpeedTouch™ Remote Access
8.3 Remote Telnet Access
About Secure Remote
Telnet Access and SSH
The SpeedTouch™ Telnet host is provided by the SpeedTouch™ Telnet server.
Access to this server and hence the Telnet interface is controlled by the Telnet
service. By default, the Telnet service is configured to let the Telnet server accept
telnet sessions from LAN side only. In addition the SpeedTouch™ provides SSH
remote access.
SSH provides a more secure way of accessing the SpeedTouch™ CLI interface and
should therefore be used.
Default Telnet
service configuration
Use the following CLI command to see the default Telnet service configuration.
=>:service system list name=TELNET expand=enabled
Idx Name
Protocol
SrcPort DstPort Group
State
-------------------------------------------------------------------1 TELNET
tcp
23
enabled
Description................ Virtual Terminal
Properties................. server
Managed parameters......... state port acl map log
Interface Access List...... lan
Ip Access List............. any
NAT Port List.............. 23
=>
Configuration via
CLI commands
To have Telnet access via WAN, additional configuration of the SpeedTouch™ Telnet
service is needed.
Use the following CLI command to allow WAN Telnet access to the SpeedTouch™.
=>:service system ifadd name=TELNET group=wan
=>
Use the following CLI command to take a look at the Telnet service configuration,
you will see that the wan group is added to the Interface Access List:
=>:service system list name=TELNET expand=enabled
Idx Name
Protocol
SrcPort DstPort Group
----------------------------------------------------------------------1 TELNET
tcp
23
Description................ Virtual Terminal
Properties................. server
Attributes................. state port aclip aclif aclifgroup map log
User Managed Attributes.... state port aclip aclif aclifgroup map log
Attribute Values :
State...................... enabled
Port....................... 23
Ip Access List............. any
Interface Access List...... any
Interface Group Access List lan wan
Map List................... 23
Logging.................... disabled
=>
88
E-DOC-CTC-20051017-0155 v1.0
Chapter 8
SpeedTouch™ Remote Access
Refinement of the
Service
If needed, the service can be fine-tuned to restrict the allowed traffic to:
A single IP address
A subnet
A range of IP addresses
Use the following CLI command to restrict the allowed traffic to 1 IP address.
=>:service system ipadd name=TELNET ip=192.6.11.5
=>
Use the following CLI command to restrict the allowed traffic to a subnet.
=>:service system ipadd name=TELNET ip=192.6.11.0/24
=>
Use the following CLI command to restrict the allowed traffic to a range of IP
addresses.
=>:service system ipadd name=TELNET ip=192.6.[2-55].[2-55]
=>
E-DOC-CTC-20051017-0155 v1.0
89
Chapter 8
SpeedTouch™ Remote Access
Hyper-NAT Refinements
The SpeedTouch™ features a powerful Hyper-NAT engine allowing the local hosts
to share a single (remotely negotiated) public IP address.
In case Hyper-NAT is enabled on the WAN interface that will be used for remote
management, and a static mapping has been made to allow remote hosts to open a
Telnet session to a host residing on your local network, you must make sure that
Telnet access to the SpeedTouch™ CLI is still possible.
For more information on Hyper-NAT, see the SpeedTouch™ Hyper-NAT
Configuration Guide.
The default port for the Telnet server is set to 23. This can be changed by executing
the following command:
=>:service system modify name=TELNET state=enabled port=50
=>
The command above will change the Telnet server port of the SpeedTouch™ from
port 23 (default) to port 50.
=>:service system list name=TELNET expand=enabled
Idx Name
Protocol
SrcPort DstPort Group
----------------------------------------------------------------------1 TELNET
tcp
50
Description................ Virtual Terminal
Properties................. server
Attributes................. state port aclip aclif aclifgroup map log
User Managed Attributes.... state port aclip aclif aclifgroup map log
Attribute Values :
State...................... enabled
Port....................... 50
Ip Access List............. any
Interface Access List...... any
Interface Group Access List lan wan
Map List................... 50
Logging.................... disabled
=>
!
90
NAT-refinements for SpeedTouch™ services should never be made in the
NAT configuration menu, but always in System Services.
E-DOC-CTC-20051017-0155 v1.0
Chapter 8
SpeedTouch™ Remote Access
8.4 Remote SSH Access
SSH service
Introduction
SSH authentication
SSH (Secure Shell) is to be used to establish privacy between 2 network devices. It
provides a secured layer on top of TCP/IP.
The implementation of SSH in the SpeedTouch™ is mainly targeted to allow privacy
for CLI sessions when remotely managing the SpeedTouch™ from a WAN interface.
The SpeedTouch™ supports the following authentication methods:
password
Password Authentication
publickey
Public Key Based Authentication
The user can configure the authentication to be used during SSH session setup, this
can be done by executing the following CLI command:
=>:ssh config auth=password
By choosing 'password', authentication is based on username / password.
By choosing 'public_key', authentication is based on public key, searching in the
database of installed public keys on the SpeedTouch™.
Enabling the Secure
Shell
The Secure Shell service can be enabled by executing the following CLI command:
=>:ssh config shell=enabled
E-DOC-CTC-20051017-0155 v1.0
91
Chapter 8
SpeedTouch™ Remote Access
Public Keys
The SpeedTouch™ supports management of SSH public keys. To each public key
installed on the SpeedTouch™, a role is assigned. This role defines the privileges, a
user accessing the SpeedTouch™, can have.
To view the public keys installed on the SpeedTouch™ use the following CLI
command:
=>:ssh publickey list
Name
Role
Size
Fingerprint
-------------------JohnD
Administrator 432
ssh-dss 1023
b8:6d:15:db:82:3f:69:b7:9b:d0:3f:75:84:a2:13:59
AnnC
User
435
ssh-dss 1024
0a:ba:d8:ef:bb:b4:41:d0:dd:42:b0:6f:6b:50:97:31
Total keys present 2
To install a new public key on the SpeedTouch™ use the following command:
=>:ssh publickey add name=Super role=SuperUser
Paste your public key here. End with ctrl-d.
AAAAB3NzaC1kc3MAAACAeFoVl4XEhVWB64jVtYRHCoGYuPWSkV79Xv4GkBxGIKpr
MUPO4DrkCPJrUb13QZ2ssBb4KBlKTCregdveujREBlO6e0qOMQNsVRUm1380b+kx
d8STt+2Bp2a4lW+D+jw8zUMb1xA6DWDYvm/BLi3EyCxKNOJkQ8QUO1HLDMvvDW8A
AAAVAJMlIB8+K+Lkmd2T8C4Kg+cKfGGxAAAAgCNZ5eKMTZR/qiwo68UgSNsXyEyV
WdC3B2byNImMp8V9Xo6CHWqswSry0Av7OwaIIMQ2sSYfoAixTYZZKxszqxx787Gt
kVFYRxTJp7t3ax1hoVniPLRYFmyqOpxEQzGyEhpfljHvOfUZW8l3Ot5BAObIyJtu
GUakj99kg7kqKtx7AAAAgCiVThLbqlq8ZCT8u2Q1aegrVE0ip4GaMK0aLRSk3cEM
MkPVw7fC/AMJyVXUMShdK3TXkppO+a1cauCSK42JzPbpfPLHpKHZBMHdAJIT/yUJ
3NVixT/6ZCk5e/YiFDcdXmljMoylmjkB+KjRR5Wafd1VzKolPl+t24Wf9BstYMgo
Read 576 bytes from stdin.
This command has added a new public key for the user “Super” who has role of a
SuperUser assigned.
Use the following CLI command to verify that the new publickey has been added:
=>:ssh publickey list
Name
Role
Size
Fingerprint
-------------------Tony
Administrator 432
ssh-dss 1023
b8:6d:15:db:82:3f:69:b7:9b:d0:3f:75:84:a2:13:59
Test
User
435
ssh-dss 1024
0a:ba:d8:ef:bb:b4:41:d0:dd:42:b0:6f:6b:50:97:31
Super
SuperUser
432
ssh-dss 1023
1c:68:dc:1e:37:3d:ab:dc:60:7f:97:62:03:22:87:83
Total keys present 3
92
E-DOC-CTC-20051017-0155 v1.0
Chapter 8
SpeedTouch™ Remote Access
Default SSH
service configuration
Use the following CLI command to see the default SSH service configuration.
=>:service system list name=SSH expand=enabled
Idx Name
Protocol
SrcPort DstPort Group
---------------------------------------------------------------------1 SSH
tcp
22
Description................ SSH server
Properties................. server
Attributes................. state port aclip aclif aclifgroup map log
User Managed Attributes.... state aclip aclif aclifgroup map log
Attribute Values :
State...................... enabled
Port....................... 22
Ip Access List............. any
Interface Access List...... any
Interface Group Access List lan
Map List................... 22
Logging.................... disabled
E-DOC-CTC-20051017-0155 v1.0
93
Chapter 8
SpeedTouch™ Remote Access
Configuration via
CLI commands
To have SSH access via WAN, additional configuration of the SSH service is needed.
Use the following CLI command to allow SSH access from the WAN to the
SpeedTouch™:
=>:service system ifadd name=SSH group=wan
If you take a look at the SSH service configuration, you will see that the wan group
is added to the Interface Access List:
=>:service system list name=SSH expand=enabled
Idx Name
Protocol
SrcPort DstPort Group
---------------------------------------------------------------------1 SSH
tcp
22
Description................ SSH server
Properties................. server
Attributes................. state port aclip aclif aclifgroup map log
User Managed Attributes.... state aclip aclif aclifgroup map log
Attribute Values :
State...................... enabled
Port....................... 22
Ip Access List............. any
Interface Access List...... any
Interface Group Access List lan wan
Map List................... 22
Logging.................... disabled
94
E-DOC-CTC-20051017-0155 v1.0
Chapter 8
SpeedTouch™ Remote Access
Refinement of the
Service
If needed, the service can be fine-tuned to restrict the allowed traffic to:
A single IP address
A subnet
A range of IP addresses
Use the following CLI command to restrict the allowed traffic to 1 IP address.
=>:service system ipadd name=SSH ip=192.6.11.5
Use the following CLI command to restrict the allowed traffic to a subnet.
=>:service system ipadd name=SSH ip=192.6.11.0/24
Use the following CLI command to restrict the allowed traffic to a range of IP
addresses.
=>:service system ipadd name=SSH ip=192.6.[2-55].[2-55]
E-DOC-CTC-20051017-0155 v1.0
95
Chapter 8
SpeedTouch™ Remote Access
Hyper-NAT Refinements
The SpeedTouch™ features a powerful Hyper-NAT engine allowing the local hosts
to share a single (remotely negotiated) public IP address.
In case Hyper-NAT is enabled on the WAN interface that will be used for remote
management, and a static mapping has been made to allow remote hosts to
address regular SSH services on a host residing on your local network, you must
make sure that accessing the SpeedTouch™ Web Interface is still possible.
For more information on Hyper-NAT, see the SpeedTouch™ Hyper-NAT
Configuration Guide.
The default port for the SSH server is set to 22. This can be changed by executing
the following command:
=>:service system modify name=SSH state=enabled port=35
The command above will change the SSH server port of the SpeedTouch™ from
port 22 (default) to port 35.
=>:service system list name=SSH expand=enabled
Idx Name
Protocol
SrcPort DstPort Group
---------------------------------------------------------------------1 SSH
tcp
35
Description................ SSH server
Properties................. server
Attributes................. state port aclip aclif aclifgroup map log
User Managed Attributes.... state aclip aclif aclifgroup map log
Attribute Values :
State...................... enabled
Port....................... 35
Ip Access List............. any
Interface Access List...... any
Interface Group Access List lan
Map List................... 35
Logging.................... disabled
!
96
NAT-refinements for SpeedTouch™ services should never be made in the
NAT configuration menu, but always in System Services.
E-DOC-CTC-20051017-0155 v1.0
Chapter 8
SpeedTouch™ Remote Access
8.5 Remote FTP Access
Introduction
The SpeedTouch™ FTP interface is provided by the SpeedTouch™ FTP server.
Access to this server and hence the FTP interface is controlled by the SpeedTouch™
FTP service. By default, the FTP service is configured to let the SpeedTouch™ FTP
server accept FTP requests from LAN side only. In addition the SpeedTouch™
provides FTP over SSH.
FTP over SSH provides a more secure way of accessing the SpeedTouch™ FTP
service and should therefore be used.
Default HTTP
service configuration
Use the following CLI command to see the default FTP service configuration.
=>:service system list name=FTP expand=enabled
Idx Name
Protocol
SrcPort DstPort Group
State
-------------------------------------------------------------------1 FTP
tcp
21
enabled
Description................ File Transfer
Properties................. server
Managed parameters......... state port acl map log
Interface Access List...... lan
Ip Access List............. any
NAT Port List.............. 21
Configuration via
CLI commands
To have FTP access via WAN, additional configuration of the SpeedTouch™ FTP
service is needed.
Use the following CLI command to allow WAN FTP access to the SpeedTouch™ via
CLI commands.
=>:service system ifadd name=FTP group=wan
Use the following CLI command to look at the FTP service configuration, we notice
that the wan group is added to the Interface Access List:
=>:service system list name=FTP expand=enabled
Idx Name
Protocol
SrcPort DstPort Group
State
----------------------------------------------------------------------1 FTP
tcp
21
enabled
Description................ File Transfer
Properties................. server
Managed parameters......... state port acl map log
Interface Access List...... lan wan
Ip Access List............. any
NAT Port List.............. 21
The added rules will allow any user on the WAN to open an FTP session to the
SpeedTouch™ and access the file system after authentication.
E-DOC-CTC-20051017-0155 v1.0
97
Chapter 8
SpeedTouch™ Remote Access
Refinement of the
Service
If needed, the service can be fine-tuned to restrict the allowed traffic to:
A single IP address
A subnet
A range of IP addresses
Use the following CLI command to restrict the allowed traffic to 1 IP address.
=>:service system ipadd name=FTP ip=192.6.11.5
Use the following CLI command to restrict the allowed traffic to a subnet.
=>:service system ipadd name=FTP ip=192.6.11.0/24
Use the following CLI command to restrict the allowed traffic to a range of IP
addresses.
=>:service system ipadd name=FTP ip=192.6.[2-55].[2-55]
98
E-DOC-CTC-20051017-0155 v1.0
Chapter 8
SpeedTouch™ Remote Access
Hyper-NAT Refinements
The SpeedTouch™ features a powerful Hyper-NAT engine allowing the local hosts
to share a single (remotely negotiated) public IP address.
In case Hyper-NAT is enabled on the WAN interface that will be used for remote
management, and a static mapping has been made to allow remote hosts to
address regular FTP services on a host residing on your local network, you must
make sure that accessing the SpeedTouch™ FTP server is still possible.
For more information on Hyper-NAT, see the SpeedTouch™ Hyper-NAT
Configuration Guide.
The default port for the FTP server is set to 21. This can be changed by executing the
following command:
=>:service system modify name=FTP
state=enabled port=26
The command above will change the FTP server port of the SpeedTouch™ from port
21 (default) to port 26.
=>:service system list name=FTP expand=enabled
Idx Name
Protocol
SrcPort
DstPort
Group
------------------------------------------------------------------1 FTP
tcp
26
Description................ File Transfer
Properties................. server
Attributes................. state port aclip aclif aclifgroup map log
User Managed Attributes.... state port aclip aclif aclifgroup map log
Attribute Values :
State...................... enabled
Port....................... 26
Ip Access List............. any
Interface Access List...... any
Interface Group Access List lan
Map List................... 26
Logging.................... disabled
E-DOC-CTC-20051017-0155 v1.0
99
Chapter 8
SpeedTouch™ Remote Access
8.6 Remote SFTP Access
SFTP Introduction
SSH authentication
SSH is to be used to establish privacy between 2 network devices. It provides a
secured layer on top of TCP/IP.
SFTP allows privacy during file transfer sessions.
The SpeedTouch™ supports the following authentication methods:
password
Password Authentication
publickey
Public Key Based Authentication
The user can configure the authentication to be used during SSH session setup, this
can be done by executing the following CLI command:
=>:ssh config auth=password
By choosing 'password', authentication is based on username / password.
By choosing 'public_key', authentication is based on public key, searching in the
database of installed public keys on the SpeedTouch™.
Enableing SFTP
The Secure Shell service can be enabled by executing the following CLI command:
=>:ssh config sftp=enabled
100
E-DOC-CTC-20051017-0155 v1.0
Chapter 8
SpeedTouch™ Remote Access
Public Keys
The SpeedTouch™ supports management of SSH public keys. To each public key
installed on the SpeedTouch™, a role is assigned. This role defines the privileges, a
user accessing the SpeedTouch™, can have.
To view the public keys installed on the SpeedTouch™ , use the following CLI
command:
=>:ssh publickey list
Name
Role
Size
Fingerprint
-------------------JohnD
Administrator 432
ssh-dss 1023
b8:6d:15:db:82:3f:69:b7:9b:d0:3f:75:84:a2:13:59
AnnC
User
435
ssh-dss 1024
0a:ba:d8:ef:bb:b4:41:d0:dd:42:b0:6f:6b:50:97:31
Total keys present 2
To install a new public key on the SpeedTouch™ use the following command:
=>:ssh publickey add name=Super role=SuperUser
Paste your public key here. End with ctrl-d.
AAAAB3NzaC1kc3MAAACAeFoVl4XEhVWB64jVtYRHCoGYuPWSkV79Xv4GkBxGIKpr
MUPO4DrkCPJrUb13QZ2ssBb4KBlKTCregdveujREBlO6e0qOMQNsVRUm1380b+kx
d8STt+2Bp2a4lW+D+jw8zUMb1xA6DWDYvm/BLi3EyCxKNOJkQ8QUO1HLDMvvDW8A
AAAVAJMlIB8+K+Lkmd2T8C4Kg+cKfGGxAAAAgCNZ5eKMTZR/qiwo68UgSNsXyEyV
WdC3B2byNImMp8V9Xo6CHWqswSry0Av7OwaIIMQ2sSYfoAixTYZZKxszqxx787Gt
kVFYRxTJp7t3ax1hoVniPLRYFmyqOpxEQzGyEhpfljHvOfUZW8l3Ot5BAObIyJtu
GUakj99kg7kqKtx7AAAAgCiVThLbqlq8ZCT8u2Q1aegrVE0ip4GaMK0aLRSk3cEM
MkPVw7fC/AMJyVXUMShdK3TXkppO+a1cauCSK42JzPbpfPLHpKHZBMHdAJIT/yUJ
3NVixT/6ZCk5e/YiFDcdXmljMoylmjkB+KjRR5Wafd1VzKolPl+t24Wf9BstYMgo
Read 576 bytes from stdin.
This command has added a new public key for the user “Super” who has role of a
SuperUser assigned.
use the following CLI command to verify that the new publickey has been added:
=>:ssh publickey list
Name
Role
Size
Fingerprint
-------------------Tony
Administrator 432
ssh-dss 1023
b8:6d:15:db:82:3f:69:b7:9b:d0:3f:75:84:a2:13:59
Test
User
435
ssh-dss 1024
0a:ba:d8:ef:bb:b4:41:d0:dd:42:b0:6f:6b:50:97:31
Super
SuperUser
432
ssh-dss 1023
1c:68:dc:1e:37:3d:ab:dc:60:7f:97:62:03:22:87:83
Total keys present 3
E-DOC-CTC-20051017-0155 v1.0
101
Chapter 8
SpeedTouch™ Remote Access
Default SSH
service configuration
Use the following CLI command to see the default SSH service configuration.
=>:service system list name=SSH expand=enabled
Idx Name
Protocol
SrcPort DstPort Group
---------------------------------------------------------------------1 SSH
tcp
22
Description................ SSH server
Properties................. server
Attributes................. state port aclip aclif aclifgroup map log
User Managed Attributes.... state aclip aclif aclifgroup map log
Attribute Values :
State...................... enabled
Port....................... 22
Ip Access List............. any
Interface Access List...... any
Interface Group Access List lan
Map List................... 22
Logging.................... disabled
102
E-DOC-CTC-20051017-0155 v1.0
Chapter 8
SpeedTouch™ Remote Access
Configuration via
CLI commands
To have SSH access via WAN, additional configuration of the SSH service is needed.
Use the following CLI command to allow SSH access from the WAN to the
SpeedTouch™:
=>:service system ifadd name=SSH group=wan
If you take a look at the SSH service configuration, you will see that the wan group
is added to the Interface Access List:
=>:service system list name=SSH expand=enabled
Idx Name
Protocol
SrcPort DstPort Group
---------------------------------------------------------------------1 SSH
tcp
22
Description................ SSH server
Properties................. server
Attributes................. state port aclip aclif aclifgroup map log
User Managed Attributes.... state aclip aclif aclifgroup map log
Attribute Values :
State...................... enabled
Port....................... 22
Ip Access List............. any
Interface Access List...... any
Interface Group Access List lan wan
Map List................... 22
Logging.................... disabled
E-DOC-CTC-20051017-0155 v1.0
103
Chapter 8
SpeedTouch™ Remote Access
Refinement of the
Service
If needed, the service can be fine-tuned to restrict the allowed traffic to:
A single IP address
A subnet
A range of IP addresses
Use the following CLI command to restrict the allowed traffic to 1 IP address.
=>:service system ipadd name=SSH ip=192.6.11.5
Use the following CLI command to restrict the allowed traffic to a subnet.
=>:service system ipadd name=SSH ip=192.6.11.0/24
Use the following CLI command to restrict the allowed traffic to a range of IP
addresses.
=>:service system ipadd name=SSH ip=192.6.[2-55].[2-55]
104
E-DOC-CTC-20051017-0155 v1.0
Chapter 8
SpeedTouch™ Remote Access
Hyper-NAT Refinements
The SpeedTouch™ features a powerful Hyper-NAT engine allowing the local hosts
to share a single (remotely negotiated) public IP address.
In case Hyper-NAT is enabled on the WAN interface that will be used for remote
management, and a static mapping has been made to allow remote hosts to
address regular SSH services on a host residing on your local network, you must
make sure that accessing the SpeedTouch™ Web Interface is still possible.
For more information on Hyper-NAT, see the SpeedTouch™ Hyper-NAT
Configuration Guide.
The default port for the SSH server is set to 22. This can be changed by executing
the following command:
=>:service system modify name=SSH state=enabled port=35
The command above will change the SSH server port of the SpeedTouch™ from
port 22 (default) to port 35.
=>:service system list name=SSH expand=enabled
Idx Name
Protocol
SrcPort DstPort Group
---------------------------------------------------------------------1 SSH
tcp
35
Description................ SSH server
Properties................. server
Attributes................. state port aclip aclif aclifgroup map log
User Managed Attributes.... state aclip aclif aclifgroup map log
Attribute Values :
State...................... enabled
Port....................... 35
Ip Access List............. any
Interface Access List...... any
Interface Group Access List lan
Map List................... 35
Logging.................... disabled
E-DOC-CTC-20051017-0155 v1.0
105
Chapter 8
SpeedTouch™ Remote Access
8.7 LAN Based Auto-Configuration (LAC) Support
(TR-064)
About TR-064
The SpeedTouch™ supports the DSL Forum’s TR-064 Technical Report on LAN
Based Auto-Configuration. This provides the possibility to automatically configure
the SpeedTouch™ from a management application running on a PC on the
customer premises LAN. For more information, refer to the DSL Forum’s Technical
Report TR-064.
Architecture
The diagram below shows the architecture and protocol stack for TR-064 on the
SpeedTouch™:
XML-based DSP CPE Management
SpeedTouch
Service Provider
XML Configuration
User Input
CPE Software
CPE Management App
XML
XML
HTTPMU HTTPU
SOAP
HTTP
SSDP
PC Operating System
HTTPMU
SOAP
HTTPU
HTTP
SSDP
SSL
TCP
UDP
SSL
UDP
TCP
IP
IP
Layer 2
Layer 2
Configuration Options
It is impossible to configure LAC via the Web interface. Only CLI commands can be
used.
How to Configure LAC:
Syntax
No configuration is needed for LAC. It simply needs to be enabled or disabled. From
the system prompt, use the following command:
[system]=>config
tr64 = disabled | enabled
tr64auth = disabled | enabled
106
E-DOC-CTC-20051017-0155 v1.0
Chapter 8
SpeedTouch™ Remote Access
How to Configure LAC:
Parameter Descripion
E-DOC-CTC-20051017-0155 v1.0
The CLI command uses the following parameters:
Parameter
Value
Description
tr64
enabled or
disabled
Enable or disable LAC/TR-064
tr64auth
enabled or
disabled
Enable or disable LAC/TR-064
Security
107
Chapter 8
SpeedTouch™ Remote Access
8.8 CPE WAN Management Protocol (CWMP)
Support (TR-069)
About CWMP
The SpeedTouch™ supports the DSL Forum’s TR-069 Technical Report on CWMP.
This allows the SpeedTouch™ to be configured and monitored from a management
application running on a remote Auto-Configuration Server (ACS). For more
information, refer to the DSL Forum’s technical report TR-069 “CPE WAN
Management Protocol”.
In any regular scenario, the ACS sets all connection request parameters to
their required values when the SpeedTouch™ connects to the ACS for the
first time.
Architecture
The diagram below shows the CWMP architecture for the SpeedTouch™:
ACS Server
ACS
Customer premises network
ISP-1
SpeedTouch
Supported Features
Configuration Options
108
DSLAM
BRAS
The TR-069 functionality as supported by the SpeedTouch™ has the following
features:
Start-up mechanism (including Remote Inventory) with support of SSL and
DNS name resolution for ACS
Transfer of files (firmware, configuration file, script file).
Data model supporting the following use cases: auto-provisioning, integrated
service activation, wireless LAN, diagnostics.
It is impossible to configure the CWMP parameters via the Web interface. Only CLI
commands can be used.
E-DOC-CTC-20051017-0155 v1.0
Chapter 8
SpeedTouch™ Remote Access
How to View the
Configuration
From the main prompt, use the following command to view the CWMP Parameters:
=>cwmp
=>[cwmp]config
This results in the following type of output on the screen, providing an overview of
all parameters and their values:
State
Mode
Max Envelopes
Session Timeout
No Ip Timeout
Connection Request Port
Periodic Inform
Periodic Inform Interval
Connection Request
Connection Request UserName
Connection Request PassWord
Connection Request Path
Connection Request Authentication
Qos class
Boot delay range between 0 and
:
:
:
:
:
:
:
:
:
:
:
:
:
:
:
disabled
full
2
60
10
51005
enabled
3600 s
disabled
none
12
0 s
Similarly, to view the CWMP Server configuration, enter the following command
sequence from the cwmp prompt:
=>[cwmp]server
=>[cwmp server]config
How to Configure
CWMP:
Syntax
From the cwmp prompt, use the following command to configure the CWMP
parameters:
config
[state = <{disabled|enabled}>]
[mode = <{read-only|full}>]
[periodicInform = <{disabled|enabled}>]
[periodicInfInt = <number>] [sessionTimeout = <number>]
[noIpTimeout = <number>] [maxEnvelopes = <number>]
[connectionRequest = <{disabled|enabled}>]
[connectionReqPath = <string>]
[connectionReqUserName = <string>]
[connectionReqPsswd = <string>]
[connectionReqAuth = <{none|basic|digest}>]
[qos-class = <number>] [bootdelayrange = <number>]
E-DOC-CTC-20051017-0155 v1.0
109
Chapter 8
SpeedTouch™ Remote Access
How to Configure
CWMP:
Parameter Descripion
110
The CLI command uses the following parameters:
Parameter
Value
Description
state
enabled or
disabled
Enable or disable the CWMP
daemon
mode
read-only or full
Set the operational mode of
the CWMP daemon to readonly or full.
periodicInform
enabled or
disabled
Enable or disable CWMP
periodic inform
periodicInfInt
number
Set the interval between two
periodicInform messages in
seconds
sessionTimeout
number
Set the HTTP session-timeout
in seconds
noIpTimeout
number
Set the time (in seconds) the IP
may be 0 after uploading a
new config file
maxEnvelopes
number
Set the maximum number of
SOAP envelopes sent within
one http-message
connectionRequest
enabled or
disabled
Enable or disable CWMP
connection request
connectionReqPath
text string
Set the path where the cwmp
daemon can be reached
connectionReqUserName
text string
Set the username the ACS
must use to log in
connectionReqPsswd
text string
Set the password the ACS
must use to log in
connectionReqAuth
none, basic or
digest
Set the authentication type of
modem CWMP server for
asynchronous connects
qos-class
number
Set the quality of service class
for outgoing CWMP data
bootdelayrange
number
Set the delay on boot before
inform is sent
E-DOC-CTC-20051017-0155 v1.0
Chapter 8
SpeedTouch™ Remote Access
How to Configure the
CWMP Server:
Syntax
From the cwmp server prompt, use the following commands to configure the
CWMP Server parameters:
config
[url = <string>]
[username = <string>]
[password = <string>]
How to Configure the
CWMP Server:
Parameter Description
E-DOC-CTC-20051017-0155 v1.0
The CLI command uses the following parameters:
Parameter
Value
Description
url
text string
URL used to contact the ACS server.
username
text string
User name for ACS Digest Authentication
password
text string
Password for ACS Digest Authentication
111
Chapter 8
SpeedTouch™ Remote Access
112
E-DOC-CTC-20051017-0155 v1.0
Chapter 9
The Integrated SpeedTouch™ ISDN Modem
9 The Integrated SpeedTouch™ ISDN Modem
Overview
E-DOC-CTC-20051017-0155 v1.0
This chapter covers the following topics:
Topic
See Page
About the ISDN Modem
114
How to Configure the ISDN Modem
116
ISDN Backup
117
ISDN Callback
124
ISDN Remote CAPI
131
113
Chapter 9
The Integrated SpeedTouch™ ISDN Modem
9.1 About the ISDN Modem
Introduction
Scenarios
Next to the DSL, Ethernet and Wireless interface, the SpeedTouch™ features an
ISDN modem, to allow the end user Internet connectivity.
The ISDN modem can be used as:
A stand alone WAN interface to connect to the Internet or corporate network
A fall back interface for the DSL interface.
Dial-in WAN interface for remote access or dial-in networking.
For more information see, “Fall-back Connections with the Integrated
ISDN Modem Application Note”
ISDN software key
It is necessary to enable the ISDN module for full deployment.
For more information see, “The SpeedTouch™ 605/608 (WL)/620 User’s
Guide”.
The ISDN modem as
initiator or responder
Security
PPP on top of the ISDN
Modem
The ISDN modem can be configured as follows:
As Initiator (Dial out):
The SpeedTouch™ starts the connection.
As Responder (Dial in):
Configure the SpeedTouch™ as a responder if you want to set up a connection
from another device towards the SpeedTouch™.
There are 3 ways of securing the ISDN modem of the SpeedTouch™.
Reduce the amount of people that can dial in to the SpeedTouch™ by
configuring a group of allowed dial-in numbers.
On a higher layer level, it is possible to configure the Stateful inspection
firewall to allow a range or one single IP address to dial in to SpeedTouch™.
Maintain a smart user policy by configuring users, using the multi-level
SpeedTouch™ access policy.
The SpeedTouch™ supports PPP over ISDN (PPPoI), which implies that all the
features of a PPP connection are applicable on the SpeedTouch™ ISDN modem
such as dial-on-demand (dod) connections which are mostly used for ISDN
connections.
If both an ADSL and ISDN interface are configured, make sure to give a
proper value to the doddelay of the ISDN modem.
For more information see, “Fall-back Connections with the Integrated ISDN
Modem Application Note”
!
114
E-DOC-CTC-20051017-0155 v1.0
Chapter 9
The Integrated SpeedTouch™ ISDN Modem
Scenario examples
The following 2 scenarios are examples of using the ISDN modem as a responder:
Dialling in to the SpeedTouch™ for remote management purposes:
This scenario is a good alternative for when the DSL line is down or
for when the SpeedTouch™ doesn’t have a fixed IP address.
Take into account the following configuration factors:
E-DOC-CTC-20051017-0155 v1.0
Log in with an account that is able to change the SpeedTouch™
configuration using a WAN interface.
Add the ISDN modem to the required service you want to use.
Dealing in via the SpeedTouch™ to surf to the corporate network.
Take into account the following configuration factors:
The router configuration of the SpeedTouch™ is correct.
The correct firewall rule is added to allow traffic from the ISDN modem
towards to corporate network.
115
Chapter 9
The Integrated SpeedTouch™ ISDN Modem
9.2 How to Configure the ISDN Modem
General configuration
procedure
Proceed as follows to configure the ISDN modem:
Step
Action
1
Add a new ISDN interface with name ISP1:
=>:isdn ifadd intf=ISP1
2
Configure the new ISDN interface with the dial-in number of the ISP:
=>:isdn ifconfig intf=ISP1 number=090934100 mlppp=disabled
mode=dialout
The PPP Multilink protocol (mlppp) can be enabled or disabled.
disabled: dialup 64 Kbps
enabled: dialup 128 Kbps
MLPPP is by default disabled. Choose mode=dialin to configure the ISDN
modem as a responder.
3
Attach the ISDN interface:
=>:isdn ifattach intf=ISP1
ISDN group
configuration
Proceed as follows to configure a group of allowed numbers:
Step
Action
1
Create a new group with the name friends:
=>:isdn group addgroup name=friends
2
Add the phonenumber 036467348 to the allowed list:
=>:isdn group addrule group=friends number=036467348
3
Use the character ? to add wildcards to the phone numbers in the
allowed list:
=>:isdn group addrule group=friends number=0154548??
116
E-DOC-CTC-20051017-0155 v1.0
Chapter 9
The Integrated SpeedTouch™ ISDN Modem
9.3 ISDN Backup
ISDN Backup
The SpeedTouch™ has an ISDN interface that can be used to create an ISDN backup
for the ADSL line. The process is shown in the diagram below:
ADSL
INTERNET
ISDN
ISDN
When the ADSL line fails, the SpeedTouch™ establishes a dial-in connection
towards the ISDN network. A PPP connection is then established over this ISDN
connection which takes over the traffic from the failed ADSL line.
ISDN Callback
If the SpeedTouch™ establishes the ISDN connection from the user end, the user
will be charged with the connection cost. To avoid this, it is possible to use the
callback option (if the other end supports it).
The SpeedTouch™ establishes a dial in connection and provides all necessary
information, and disconnects. The system then waits for a callback to establish the
ISDN connection over which the PPP connection is established.
Dial-In Modes
Configuring Callback
E-DOC-CTC-20051017-0155 v1.0
The dial in connection line can operate in one of two modes:
Always on: the backup connection is always on
Dial on demand: the backup connection is established when necessary, i.e.
when the ADSL line fails.
In order to configure callback, you need to do the following:
Action
See
Configure the ISDN Dial-In Connection
9.3.1
Configure the PPP connection
9.3.2
117
Chapter 9
The Integrated SpeedTouch™ ISDN Modem
9.3.1 How to Configure the ISDN Dial-In Connection
Via the Web Interface
118
Proceed as follows to configure the ISDN dial-in connection via the Web interface:
Step
Action
1
Go to Expert mode
2
Click Connections
3
Click Routed PPoI
Result: on the page that appears, you see a predefined connection called
ISDN backup.
4
Click the arrow to open the configuration pages for this connection.
Result: the Parameters page appears:
5
Fill in the user name and password for the connection, as well as the dialin number. Also select the link type. Click Apply.
6
Click Routing.
Result: the Routing page appears:.
7
If necessary, fill in the destination and a label. Click Apply.
E-DOC-CTC-20051017-0155 v1.0
Chapter 9
The Integrated SpeedTouch™ ISDN Modem
Step
Action
8
Click Other.
Result: the Other page appears:
9
Select the Mode (On-Demand or Always On)
10
Fill in the idle time limit. If the connection is On-Demand, and the
connection is idle for this amount of time (i.e. no traffic), the connection
shuts down.
The other values are automatically retrieved when the PPP connection is
established
.
You cannot enable Callback via the Web interface. For this, you must use
CLI. If you do not enable it, the SpeedTouch™ will establish the ISDN
connection over which the PPP connection is made.
Via CLI
Use the following command sequence to configure the ISDN dial-in connection via
CLI:
[isdn]=>ifconfig
intf
number
mlppp
BODstart
BODend
mode
callback
group
[isdn]=>ifconfig
intf = buisdn
[number] = 025292222
[mlppp] =
disabled
enabled
[mlppp] = disabled
[BODstart] = 40
[BODend] = 38
[mode] = dialout
[callback] =
disabled
enabled
[callback] = disabled
[group] = empty
:isdn ifconfig intf=buisdn mlppp=disabled callback=disabled
[isdn]=>:isdn ifconfig intf=buisdn mlppp=disabled callback=enabled
[isdn]=>saveall
[isdn]=>:ppp
[ppp]=>ifattach intf bu_isdn
[ppp]=>
[ppp]=>
E-DOC-CTC-20051017-0155 v1.0
119
Chapter 9
The Integrated SpeedTouch™ ISDN Modem
CLI Parameters:
120
The table below provides a description of the relevant parameters:
Parameter
Value
Description
intf
text string
name of the ISDN interface
number
numeric
Dial-in number for the ISDN line
mlppp
enabled or disabled
Enable or disable multilink ppp. This
means that the ppp can be
established over 1 or 2 ISDN B links
(64 kbps), thus creating a bandwidth
of either 64 or 128 kbps
BODStart
Numerical (in kbps)
Default: 40
If multilink ppp is enabled and the
required bandwidth exceeds this
value, a second ISDN B link is used
for the ppp connection
BODEnd
Numerical (in kbps)
Default: 38
If multilink ppp is enabled and the
required for it drops below this
value, the second ISDN B link in the
ppp connection is dropped.
mode
dialout
SpeedTouch™is set for dialout. This
value is mandatory.
callback
enabled or disabled
Enable or disable callback. Note that
the dial-in end must also be set for
callback if you enable it.
E-DOC-CTC-20051017-0155 v1.0
Chapter 9
The Integrated SpeedTouch™ ISDN Modem
9.3.2 How to Configure the PPP Connection
How to Configure the
PPP Connection Via the
Web Interface
If you used the Web interface to configure the Dial-In connection, you do not need
any additional configuration.
How to Configure the
PPP Connection Via CLI
Use the following command sequence to configure the PPP connection via CLI:
[ppp]=>ifconfig
intf = bu_isdn
[dest] = buisdn
[user] = cpesit@rednet
[password] =
[pcomp] = disabled
[accomp] = enabled
[trace] = disabled
[auth] = auto
[restart] = enabled
[retryinterval] = 10
[passive] = disabled
[silent] = disabled
[echo] = enabled
[mru] = 1500
[laddr] =
[raddr] =
[netmask] =
[format] =
[format] = none
[pool] =
[savepwd] = enabled
[demanddial] = enabled
[doddelay] = 30
[primdns] =
[secdns] =
[dnsmetric] =
[idletime] = 45
[idletrigger] = Tx
[unnumbered] = disabled
:ppp ifconfig intf=bu_isdn format=none
[ppp]=>
E-DOC-CTC-20051017-0155 v1.0
121
Chapter 9
The Integrated SpeedTouch™ ISDN Modem
CLI Parameters:
122
The table below provides a description of the relevant parameters. Do not alter the
default value of the parameters not shown in this table:
Parameter
Value
Description
intf
text string
name of the PPP interface
dest
text string
name of the ISDN interface on which
the PPP connection is built
user
text string
Username needed for the PPP
connection
password
text string
Password needed for the PPP
connection
auth
pap, chap or auto
Sets the authentication protocol
restart
enabled or disabled
Enable or disable the retry function.
This means that the system will try
again if establishing the link fails.
retryinterval
numeric
If the connection fails, and restart is
enabled, the system will retry
establishing the connection after this
interval.
passive
enabled or disabled
Enable or disable passive mode
silent
enabled or disabled
Enable or diable silent mode
echo
enabled or disabled
Enable or disable echo
mru
numeric
ladrress
IP address
Local IP address of the PPP
connection. This is completed
automatically when establishing the
connection. Do not fill it in manually.
radress
IP address
Remote IP address of the PPP
connection. This is completed
automatically when establishing the
connection. Do not fill it in manually.
netmask
Format depends on
the format setting
Netmask for the ppp connection.
This is completed automatically
when establishing the connection.
Do not fill it in manually.
format
cidr, dotted or none
Set the format of the netmask to cidr
or dotted , or use no netmask.
savepwd
enabled or disabled
Save the pasword. After establishing
the ppp link for the first time, you no
longer need to provide it for
subsequent connections.
E-DOC-CTC-20051017-0155 v1.0
Chapter 9
The Integrated SpeedTouch™ ISDN Modem
E-DOC-CTC-20051017-0155 v1.0
Parameter
Value
Description
demanddial
enabled or disabled
Enable or disable dial-on-demand
(DOD). This means that the system
will engage the ISDN backup if the
DSL line fils
doddelay
numeric (in s)
Default: 120
Delay during which DOD is
disengaged; This interval is meant to
allow the DSL line time to
synchronize
primdns
ip address
IP address of the primary dns server
secdns
ip address
IP address of the secondary dns
server
idletime
numeric
If the connection is idle for this
amount of time, the link is
disconnected
idletrigger
Tx or Rx
Idle time is trigered on either
transmission side (Tx) or receive
side (Rx)
123
Chapter 9
The Integrated SpeedTouch™ ISDN Modem
9.4 ISDN Callback
ISDN Backup
The SpeedTouch™ has an ISDN interface that can be used to create an ISDN backup
for the ADSL line. The process is shown in the diagram below:
ADSL
INTERNET
ISDN
ISDN
When the ADSL line fails, the SpeedTouch™ establishes a dial-in connection
towards the ISDN network. A PPP connection is then established over this ISDN
connection which takes over the traffic from the failed ADSL line.
ISDN Callback
If the SpeedTouch™ establishes the ISDN connection from the user end, the user
will be charged with the connection cost. To avoid this, it is possible to use the
callback option (if the other end supports it).
The SpeedTouch™ establishes a dial in connection and provides all necessary
information, and disconnects. The system then waits for a callback to establish the
ISDN connection over which the PPP connection is established.
This is typical for connections which are governed by an Service Level Agreement
(SLA).
More Information
Dial-In Modes
Configuring Callback
124
For more information, refer to the WAN Fallback Application Note.
The dial in connection line can operate in one of two modes:
Always on: the backup connection is always on
Dial on demand: the backup connection is established when necessary, i.e.
when the ADSL line fails.
In order to configure callback, you need to do the following:
Action
See
Configure the ISDN Dial-In Connection
9.3.1
Configure the PPP connection
9.3.2
E-DOC-CTC-20051017-0155 v1.0
Chapter 9
The Integrated SpeedTouch™ ISDN Modem
9.4.1 How to Configure the ISDN Dial-In Connection
Via the Web Interface
E-DOC-CTC-20051017-0155 v1.0
Proceed as follows to configure the ISDN dial-in connection via the Web interface:
Step
Action
1
Go to Expert mode
2
Click Connections
3
Click Routed PPoI
Result: on the page that appears, you see a predefined connection called
ISDN backup.
4
Click on the arrow to open the configuration pages for this connection.
Result: the Parameters page appears:
5
Fill in the username and password for the connection, as well as the dialin number. Also select the link type. Click Apply.
6
Click Routing.
Result: the Routing page appears:.
7
If necessary, fill in the destination and a label. Click Apply.
125
Chapter 9
The Integrated SpeedTouch™ ISDN Modem
Step
Action
8
Click Other.
Result: the Other page appears:
9
Select the Mode (On-Demand or Always On)
10
Fill in the idle time limit. If the connection is On-Demand, and the
connection is idle for this amount of time (i.e. no traffic), the connection
shuts down.
The other values are automatically retrieved when the PPP connection is
established.
You cannot enable Callback via the Web interface. For this, you must use
CLI. If you do not enable it, the SpeedTouch™ will establish the ISDN
connection over which the PPP connection is made.
Via CLI
Use the following command sequence to configure the ISDN dial-in connection via
CLI:
[isdn]=>ifconfig
intf
number
mlppp
BODstart
BODend
mode
callback
group
[isdn]=>ifconfig
intf = buisdn
[number] = 025292222
[mlppp] =
disabled
enabled
[mlppp] = disabled
[BODstart] = 40
[BODend] = 38
[mode] = dialout
[callback] =
disabled
enabled
[callback] = disabled
[group] = empty
:isdn ifconfig intf=buisdn mlppp=disabled callback=disabled
[isdn]=>:isdn ifconfig intf=buisdn mlppp=disabled callback=enabled
[isdn]=>saveall
[isdn]=>:ppp
[ppp]=>ifattach intf bu_isdn
126
E-DOC-CTC-20051017-0155 v1.0
Chapter 9
The Integrated SpeedTouch™ ISDN Modem
CLI Parameters:
E-DOC-CTC-20051017-0155 v1.0
The table below provides a description of the relevant parameters:
Parameter
Value
Description
intf
text string
name of the ISDN interface
number
numeric
Dial-in number for the ISDN line
mlppp
enabled or disabled
Enable or disable multilink ppp. This
means that the ppp can be
established over 1 or 2 ISDN B links
(64 kbps), thus creating a bandwidth
of either 64 or 128 kbps
BODStart
Numerical (in kbps)
Default: 40
If multilink ppp is enabled and the
required bandwidth exceeds this
value, a second ISDN B link is used
for the ppp connection
BODEnd
Numerical (in kbps)
Default: 38
If multilink ppp is enabled and the
required for it drops below this
value, the second ISDN B link in the
ppp connection is dropped.
mode
dialout
SpeedTouch™is set for dialout. This
value is mandatory.
callback
enabled or disabled
Enable or disable callback. Note that
the called party must also be set to
support callback.
127
Chapter 9
The Integrated SpeedTouch™ ISDN Modem
9.4.2 How to Configure the PPP Connection
How to Configure the
PPP Connection Via the
Web Interface
If you used the Web interface to configure the Dial-In connection, you do not need
any additional configuration.
How to Configure the
PPP Connection Via CLI
Use the following command sequence to configure the PPP connection via CLI:
[ppp]=>ifconfig
intf = bu_isdn
[dest] = buisdn
[user] = cpesit@rednet
[password] =
[pcomp] = disabled
[accomp] = enabled
[trace] = disabled
[auth] = auto
[restart] = enabled
[retryinterval] = 10
[passive] = disabled
[silent] = disabled
[echo] = enabled
[mru] = 1500
[laddr] =
[raddr] =
[netmask] =
[format] =
[format] = none
[pool] =
[savepwd] = enabled
[demanddial] = enabled
[doddelay] = 30
[primdns] =
[secdns] =
[dnsmetric] =
[idletime] = 45
[idletrigger] = Tx
[unnumbered] = disabled
:ppp ifconfig intf=bu_isdn format=none
[ppp]=>
128
E-DOC-CTC-20051017-0155 v1.0
Chapter 9
The Integrated SpeedTouch™ ISDN Modem
CLI Parameters:
E-DOC-CTC-20051017-0155 v1.0
The table below provides a description of the relevant parameters. Do not alter the
default value of the parameters not shown in this table:
Parameter
Value
Description
intf
text string
name of the PPP interface
dest
text string
name of the ISDN interface on which
the PPP connection is built
user
text string
Username needed for the PPP
connection
password
text string
Password needed for the PPP
connection
auth
pap, chap or auto
Sets the authentication protocol
restart
enabled or disabled
Enable or disable the retry function.
This means that the system will try
again if establishing the link fails.
retryinterval
numeric
If the connection fails, and restart is
enabled, the system will retry
establishing the connection after this
interval.
passive
enabled or disabled
Enable or disable passive mode
silent
enabled or disabled
Enable or diable silent mode
echo
enabled or disabled
Enable or disable echo
mru
numeric
ladrress
IP address
Local IP address of the PPP
connection. This is completed
automatically when establishing the
connection. Do not fill it in manually.
radress
IP address
Remote IP address of the PPP
connection. This is completed
automatically when establishing the
connection. Do not fill it in manually.
netmask
Format depends on
the format setting
Netmask for the ppp connection.
This is completed automatically
when establishing the connection.
Do not fill it in manually.
format
cidr, dotted or none
Set the format of the netmask to cidr
or dotted , or use no netmask.
savepwd
enabled or disabled
Save the pasword. After establishing
the ppp link for the first time, you no
longer need to provide it for
subsequent connections.
129
Chapter 9
The Integrated SpeedTouch™ ISDN Modem
130
Parameter
Value
Description
demanddial
enabled or disabled
Enable or disable dial-on-demand
(DoD). This means that the system
will engage the ISDN backup if the
DSL line fils
doddelay
numeric (in s)
Default: 120
Delay during which DoD is
disengaged; This interval is meant to
allow the DSL line time to
synchronize
primdns
ip address
IP address of the primary dns server
secdns
ip address
IP address of the secondary dns
server
idletime
numeric
If the connection is idle for this
amount of time, the link is
disconnected
idletrigger
Rx, Tx or RxTx
Consider the link as being idle if no
traffic is received (Rx), sent (Tx) or
neither sent nor received (RxTx)
E-DOC-CTC-20051017-0155 v1.0
Chapter 9
The Integrated SpeedTouch™ ISDN Modem
9.5 ISDN Remote CAPI
About Remote CAPI
Using RemoteCAPI, the ISDN interface of the SpeedTouch™ can be used by PC
applications that typically need an ISDN board integrated into the PC.
The Remote CAPI function only works with PC applications using the
Rcapi.dll driver e.g. RVS COM.
About RVS COM
RVS COM is an application that allows you to use voice based services such as:
sending and receiving faxes
sending and receiving sms
PC Answering machine with auto-attendant
It features an address manager and Outlook integration.
How to Install Remote
CAPI
E-DOC-CTC-20051017-0155 v1.0
Proceed as follows:
Step
Action
1
Delete the following file on your pc:
C:\windows\system32\capi2032.dll
2
Copy the file rcapi.dll :
from the subfolder Remote_CAPI on the installation disk
to the following location on your PC: C:\windows\system32
3
Rename the file Rcapi you just copied to capi2032.dll.
4
Run rcapi.exe located on the installation disk in the subfolder
Remote_CAPI .
131
Chapter 9
The Integrated SpeedTouch™ ISDN Modem
How to Configure the
Remote CAPI Client
The above installation procedure adds the Remote CAP20 Client application to your
system. You can access it via the Control Panel.
Proceed as follows to configure this client:
How to Configure
Remote CAPI via the
Web interface
Step
Action
1
Use the Control Panel to start the Remote CAP20 Client application:
2
In the IP box, enter the IP address of the SpeedTouch™ (192.168.1.254).
3
In the UDP Port box, enter the UDP port if necessary(default is 6789).
4
In the TCP Port box, enter the TCP port if necessary (default is 6789).
Prerequisite:
You need to have RVS Communication Center or any other software that uses the
Rcapi driver.
Procedure:
Proceed as follows to enable Remote CAPI via the Web Interface:
How to Enable Remote
CAPI via CLI
Step
Action
1
On the web interface home page, click Expert
2
In the navigation pane, click SpeedTouch™
3
Go to SpeedTouch™ Services
4
Select Remote CAPI Daemon
Use the following command sequence to enable RCAPI:
=>rcapi
[rcapi]=>
[rcapi]=>config
[RCAPID] state: disabled
[rcapi]=>config state enabled
132
E-DOC-CTC-20051017-0155 v1.0
Chapter 10
SpeedTouch™ Monitoring
10
Overview
SpeedTouch™ Monitoring
This chapter covers the following topics :
Topic
E-DOC-CTC-20051017-0155 v1.0
See Page
10.1 An Introduction to SNMP
134
10.2 SNMP configuration
139
10.3 The SpeedTouch™ Syslog
160
10.4 SpeedTouch™ Identification on AWS
169
133
Chapter 10
SpeedTouch™ Monitoring
10.1 An Introduction to SNMP
Introduction
The Simple Network Management Protocol (SNMP) is a widely spread method for
managing networks. Based on a client/server concept, the SNMP server (the SNMP
manager) gets or sets the values of objects defined in a Management Information
Base (MIB) kept by the SNMP client (the SNMP agent). In addition the SNMP agent
is also able to autonomously initiate an action by sending a trap to the SNMP
manager.
This section describes the SpeedTouch™ SNMP implementation and how to use it.
SNMP in the
SpeedTouch™
SNMP has become the de-facto standard for network management. Especially the
monitoring aspect has become important: network administrators want to be
notified when things go wrong in their network. In addition, to prevent problems,
they also want to be able to do network load and trend analysis.
SNMP allows the user to access data about the SpeedTouch™ as defined in several
MIBs. This way the SpeedTouch™ can perfectly fit in a managed network,
monitored by SNMP.
Depending on the type, the SpeedTouch™ supports SNMP V1or SNMP V1, V2 and
V3 simultanseously.
Overview
134
This section covers the following topics:
Topic
See Page
Basic Concepts
135
MIBs Explained.
136
E-DOC-CTC-20051017-0155 v1.0
Chapter 10
SpeedTouch™ Monitoring
10.1.1 Basic Concepts
Management
Information Base
The Management Information Base, or MIB, is a tree-like structure containing SNMP
objects, instances of these objects and their corresponding values. Parts of this tree
have been standardized, other parts may be specific to a device.
For the SpeedTouch™ a set of MIBs is provided on the Setup CD, some being
identical to the standard MIBs, others specifically made for the SpeedTouch™ .
The available data covers statistics of the traffic through an interface, errors and
setup information. For details of what information is available consult the MIB
definitions at “10.1.2 MIBs Explained.” on page 136.
Basic Commands
SNMP has two basic commands:
Get: gets the value of a specific parameter in a specific MIB.
Set: sets the value of a specific parameter in a specific MIB.
Traps
Traps are SNMP notification messages sent from the SpeedTouch™ to a manager. It
is possible to configure where the traps are sent and which traps are sent.
Community Names
Reading MIBs is harmless. However, some MIBs also contain sensitive security
parameters. Reading these parameters (get) may provide the user with information
he should not have access to.
Writing to a MIB (set) can have severe consequences. Therefore, as a security
measure, it is not possible to set any behavior changing objects using SNMP.
Furthermore, SNMP offers a possibility to restrict access to the SNMP MIBs by
means of SNMP ‘Community Names’.
To have specific kinds of access to the SNMP MIBs, the SNMP manager has to know
the correct Community Name. A Community Name serves as password and
authentication. On agent-side, a community name is associated with a specific MIBview (which MIB objects can be seen by a manager using that community name)
and an access policy (read-only or read-write).
By default, the SpeedTouch™ uses the default SNMP Community name for read
only (public). For read/write, no community name is assigned. It is recommended
however that the user should change the default community names in a way to
improve security.
In a saved configuration file (user.ini, etc.) the Community names are
encrypted to ensure confidentiality.
Simultaneous SNMP
Version Support
E-DOC-CTC-20051017-0155 v1.0
The SpeedTouch™ simultaneously supports SNMP V1, V2 and V3. This means that
it can handle messages from all three versions. The system forwards the message
to the appropriate subsystem based on the version indicator in the SNMP message.
135
Chapter 10
SpeedTouch™ Monitoring
10.1.2 MIBs Explained.
Introduction
As mentioned in “ Management Information Base” on page 135 both the
SpeedTouch™ SNMP agent and the SNMP manager rely on Management
Information Base (MIB) files containing all relevant SNMP objects.
In the following, all MIBs important for the SpeedTouch™ are described.
Additionally some of the most important and/or interesting SNMP counters are
shortly highlighted.
Standard MIBs
136
Following MIBs are common standard MIBs that are relevant to monitoring the
SpeedTouch™. All MIB manager implementations should provide these MIBs by
default. Updated copies of the MIBs have been provided on the SpeedTouch™
Setup CD. It is advised to load the copies provided on the SpeedTouch™ Setup CD
to your SNMP manager, instead of using the standard MIBs included with your
SNMP manager.
RFC1213 MIB-II
MIB-II is defined by IETF Full Standards RFC1213, RFC 2011, RFC 2012 and RFC
2013 and is the fundamental MIB for TCP/IP based Internet, describing objects
available from devices which run the Internet suite of protocols. The MIB is
fundamental to SNMP and is referenced by many other MIB modules. It
contains management information and statistics on the IP, ICMP, TCP, and UDP
protocols.
RFC2863 IF-MIB
The IF-MIB is an extension and replacement of the interface table in MIB-II. It
contains statistics on the number of bytes and packets transported across the
represented interfaces, including errors.
System MIB (Enterprise specific branch MIB)
This required MIB is for administrative use by the other MIBs only. It provides
the object IDs (OID) from the SpeedTouch™ specific MIBs and defines the
Enterprise specific object identifier.
RFC1493 Bridge MIB
The Bridge-MIB contains management information on the Bridge port(s). It
contains statistics on, for example, alignment errors, collisions and MAC
transition errors.
IANAifType MIB
This required MIB module is for administrative use only, by the other MIBs. It
defines the IANAifType Textual Convention, and thus the enumerated values
of the ifType object defined in MIB-II's ifTable.
RFC2665 Ethernet-like MIB
The Ethernet MIB contains management information on the Ethernet
interface(s). It contains statistics on, for example, alignment errors, collisions
and MAC transition errors.
RFC2668 MAU MIB
The Medium Access Unit (MAU) MIB contains management information about
medium access units. On SpeedTouch™ devices equipped with the four-port
Ethernet switch, four MAU ports are present. The MAU MIB will give details
about the type, status and provide statistics of each MAU. It also gives details
of the auto negotiation that has taken place on each ethernet port.
E-DOC-CTC-20051017-0155 v1.0
Chapter 10
SpeedTouch™ Monitoring
Standard MIBs
(Continued)
MIBs About SNMP
E-DOC-CTC-20051017-0155 v1.0
Continued from previous page.
RFC1213 MIB II
RFC 2790 Host Resources MIB
This MIB shows hot resource information such as software builds, CPE date
and time-of-day, the total and free amount of Flash Memory and RAM and
processor load.
RFC 2836 Interface MIB
RFC2851 INET-ADDRESS MIB
This MIB module defines textual conventions for representing Internet
addresses. An Internet address can be an IPv4 address, an IPv6 address or a
DNS domain name.
IPSec-flow-monitor MIB
This is a MIB Module for monitoring the structure and status of IPSec-based
networks. The MIB has been designed to be adopted as an IETF standard.
Hence vendor-specific features of the IPSec protocol are excluded from this
MIB
RFC1215 traps MIB
RFC2925 PING and Trace route MIB
The SpeedTouch™ contains a powerful embedded Service Level Agreement
(SLA) monitoring engine which enables Carriers, ISPs, ASPs, Integrators and
Managed Service Providers to monitor and deliver reports to their customers
and to be pro-actively aware of network problems that impact application
performance, and to solve the problems even before the customer complains.
The SpeedTouch™ can be configured to automatically generate active
measurement traffic (PING, Trace route) to another IP device (for example
another CPE, a web server,...), and collect and aggregate measurement
statistics (availability, delay, jitter,...) that shows compliancy to agreed SLAs,
The PING and Trace route SNMP MIB allows to fully manage this embedded
SLA monitoring engine and achieve easy integration with SLA monitoring
network management systems.
RMON MIB (RFC2819)
The SpeedTouch™ defines a portion of the MIB for use with network
management protocols in TCP/IP-based internets. In particular, it defines
objects for managing remote network monitoring devices.This MIB allows
custom traps, custom historic tables and extensive Ethernet statistics.
RFC 3635 Ethernet-like MIB
RFC 3636 MAU MIB
IP Tunnel MIB (RFC2667)
The SpeedTouch™ supports the following MIBs about SNMP:
RFC3411 SNMP-FRAMEWORK-MIB
SNMP-COMMUNITY-MIB
RFC3412 SNMP-MPD-MIB
RFC3413 SNMP-TARGET-MIB
RFC3413 SNMP-NOTIFICATION-MIB
RFC3414 SNMP-USER-BASED-SM-MIB
RFC3415 SNMP-VIEW-BASED-ACM-MIB
RFC3417 Transport Mappings for SNMP MIB
RFC3418 SNMPv2-MIB
137
Chapter 10
SpeedTouch™ Monitoring
ADSL and SHDSL MIBs
ILMI MIBs
ATM MIBs
138
Following two MIBs are specific per SpeedTouch™’s DSL variant (ADSL or SHDSL
variants). You should only load the appropriate MIB, although loading both will not
harm functionality. To retrieve maximum SNMP information it is imperative to use
the MIB provided on the SpeedTouch™ Setup CD, and not the one supported (if so)
by the SNMP manager.
RFC2662 ADSL MIB (containing ADSL-LINE-MIB and ADSL-TC-MIB)
The ADSL MIB is in fact a bundle of three MIBs: the ADSL-LINE-MIB, the ADSL
TC- MIB and additionally the PerfHist-TC-MIB. It contains management
information about the ADSL line such as Signal-to-Noise Ratio (SNR), output
power and attainable bit rate. For using the RFC2662 ADSL MIB, the PerfHistTC-MIB is required, available on the SpeedTouch™ Setup CD.
RFC3276 SHDSL MIB
The SHDSL MIB contains management information about the SHDSL line such
as Signal-to-Noise Ratio (SNR), Loop attenuation, PSD regional setting, line
rate and line status.
The SpeedTouch™ supports the following ILMI MIBs:
af-ilmi-065.000
fb-nm-0122
fb-nm-0165
Following MIBs are specific for the SpeedTouch™ ATM interfaces:
RFC2515 ATM MIB
This is the MIB Module for ATM and AAL5-related objects for managing ATM
interfaces, ATM virtual links, ATM cross-connects, AAL5 entities, and AAL5
connections.
RFC2514 ATM-TC-MIB
This MIB Module provides Textual Conventions and OBJECT-IDENTITY
Objects to be used by ATM systems.
E-DOC-CTC-20051017-0155 v1.0
Chapter 10
SpeedTouch™ Monitoring
10.2 SNMP configuration
About SNMP
configuration
There are a few configurable options covering the SNMP functionality. If you
require no traps are , the default options suffice to access information in the
SpeedTouch™ from the LAN.
Enabling SNMP
By default, the SNMP agent is disabled. Before using or configuring SNMP, you
must enable it:
Command Line
Interface (CLI)
All the SNMP settings can be changed or viewed using CLI commands. To enter a
CLI command from the root, precede it with “:”, and provide the full command
path. For more information on these commands, refer to the CLI Command Guide.
Overview
E-DOC-CTC-20051017-0155 v1.0
This section covers the following configuration tasks:
Task
See Page
How to Allow Access to the SNMP Agent
140
How to View the System Contact, Name and Location
142
How to Configure the System contact, Name and Location
145
How to Configure SNMPv1
143
How to Force the Source IP Address
146
How to Configure the SNMP Target
147
How to Read SNMP Parameters via the CLI
149
How to View the SNMP Configuration
141
How to Allow Remote SNMP
151
How to Add an SNMP User
152
How to Restrict SNMP Access
157
How to Configure the Traps
158
139
Chapter 10
SpeedTouch™ Monitoring
10.2.1 How to Allow Access to the SNMP Agent
Default Setting
Command
By default, access to the SNMP Agent is disabled. Before you are able to use SNMP,
you must enable it.
Use the following command to allow access to the SNMP Agent:
:service system modify name=SNMPV3_AGENT state=enabled
140
E-DOC-CTC-20051017-0155 v1.0
Chapter 10
SpeedTouch™ Monitoring
10.2.2 How to View the SNMP Configuration
About the SNMP
Service
Command
The SpeedTouch™ SNMP service controls all SNMP traffic from and towards the
SpeedTouch™. By default, no restrictions apply regarding SNMP traffic from and
towards the local network. However SNMP traffic from and towards the WAN will
be blocked.
Use the following command to view the SNMP configuration:
:service system list name SNMPV3_AGENT expand enabled
This returns the following output:
Description................
Properties.................
Attributes.................
User Managed Attributes....
Attribute Values :
State......................
Port.......................
Ip Access List.............
Interface Access List......
Interface Group Access List
Map List...................
Logging....................
Rx snmp GET, SET and GETNEXT PDUs
server
state port aclip aclif aclifgroup map log
state aclip aclif aclifgroup map log
(administratively) disabled
161
any
any
any
161
disabled
You can the same command to view the SNMPV3 Traps:
:service system list name=SNMPV3_TRAPS expand=enabled
E-DOC-CTC-20051017-0155 v1.0
141
Chapter 10
SpeedTouch™ Monitoring
10.2.3 How to View the System Contact, Name and
Location
Command
Use the following CLI command to view the default configuration:
{Administrator}[snmp]=>config
Default Configuration
The default configuration is as follows:
SNMP System Contact
: Service Provider
SNMP System Name
: SpeedTouch 620
SNMP System Location
: Customer Premises
All SNMP traps : DISABLED
142
E-DOC-CTC-20051017-0155 v1.0
Chapter 10
SpeedTouch™ Monitoring
10.2.4 How to Configure SNMPv1
Configuring SNMPv1 on
the SpeedTouch™
How to Configure the
SNMPv1 Client
The SpeedTouch™ supports SNMPv3, but is also backwards compatible with
SNMPv1. However, you need specific configuration procedures for this. Basically
you need to do the following in order to configure SNMPv1:
Configure the SNMPv1 Client
If applicable, enable SNMPv1 traps
Proceed as follows:
Step
1
Action
Create a new community:
:snmp community add index=RWCommunity
securityname=RWCommunity
communityname=private
2
Create a new view:
:snmp view add viewname=all
viewtree=iso
type=include
3
Configure a group with the required access rights to access that view:
:snmp group add groupname=test_groupname_write
securitymodel=snmpv1
securitylevel=noAuthNoPriv
readview=all writeview=all notifyview=all
4
Configure the community to have these group rights
:snmp securitytogroup modify securitymodel=snmpv1
securityname=RWCommunity
groupname=test_groupname_write
5
Allow external access to the SNMP agent:
:service system modify name SNMPV3_AGENT state enabled
E-DOC-CTC-20051017-0155 v1.0
143
Chapter 10
SpeedTouch™ Monitoring
How to Configure the
SNMPv1 Traps
Proceed as follows:
Step
1
Action
Create a new target:
:snmp target add name=Test_trap_pc addr=10.0.0.110
taglist=Trap_tag params=Trap_params
2
Create a notify filter:
:snmp notify add name=trap_notify_test tag=Trap_tag
3
Configure the target parameters:
:snmp targetparams add paramname=Trap_params mpmodel=v1
securitymodel=snmpv1 securityname=RWCommunity
securitylevel=noAuthNoPriv
4
Enable traps:
:snmp config traps enabled
5
Allow the traps to be sent to the target:
:service system modify name SNMPV3_TRAPS state enabled
144
E-DOC-CTC-20051017-0155 v1.0
Chapter 10
SpeedTouch™ Monitoring
10.2.5 How to Configure the System contact, Name
and Location
Command
You can set the System contact, System Name and the System Location in the MIB
II RFC1213. Use the following CLI command to do so:
config
[sysContact = <quoted string>]
[sysName = <quoted string>]
[sysLocation = <quoted string>]
[traps <{disabled|enabled}>]
Parameters
E-DOC-CTC-20051017-0155 v1.0
This command has the following parameters:
Parameter
Value
Description
sysContact
<quoted string>
System Contact
sysName
<quoted string>
System Name
sysLocation
<quoted string>
System Location
traps
enable or disable
Enable or disable the sending
of traps.
145
Chapter 10
SpeedTouch™ Monitoring
10.2.6 How to Force the Source IP Address
About Loopback
The SpeedTouch™ offers the possibility to send SNMP traps to an SNMP manager.
This facilitates the monitoring of the network. It is important that the source IP
address of the SNMP traps remains the same at all times, so the Network Control
Centre knows who is sending the traps.
Making the loopback interface the primary interface of the SpeedTouch™ ensures
that all messages leaving the SpeedTouch™ have the loopback interface’s IP
address as source address. This facilitates monitoring of the device by the Control
Centre. This address remains the same even when the SpeedTouch™ has slipped in
ISDN fallback WAN connectivity.
How to Assign an IP
Address to the Local
Loop Interface
How to Make the Local
Loop Address the
Primary Address
Use the following command to assign an IP address to the local loop interface:
=>:ip ipadd intf=loop addr=50.60.70.80 addroute=enabled
Use the folllowing commands to make this IP address the primary IP address of the
SpeedTouch™:
=>:ip ifconfig intf=loop primary=enabled
=>:ip ipconfig addr=50.60.70.80 primary=enabled
The first command sets the loopback interface as primary interface of the
SpeedTouch™. The second command sets the IP address as primary address of the
loopback interface (instead of the default 127.0.0.0)
How the View the
Loopback Configuration
Use the following command to view the loopback configuration:
=>:ip iflist expand=enabled
Interface
Group MTU
RX
TX
TX-Drop
0 loop
local 65535 31438 33137
0
0f
BRHW-address : ff:ff:ff:ff:ff:ff
RX unicastpkts: 335
brcastpkts : 0
TX unicastpkts: 502
brcastpkts : 0
Oper state
: UP
Admin State: UP
Flags
: PRIMARY LOOP INTERNAL
146
Status HW-address
[UP]
00:0e:50:5a:dd:
droppkts:0
E-DOC-CTC-20051017-0155 v1.0
Chapter 10
SpeedTouch™ Monitoring
10.2.7 How to Configure the SNMP Target
About the SNMP Target
Command
The SNMP target is the destination for the SNMP traps, e.g an SNMP Manager. You
can add up to nine different SNMP manager destination addresses, using the
:snmp target add command.
Use the following command to add an SNMP target:
add name = <string> addr = <ip-address> [port = <number{0-65535}>]
[mask = <ip-mask(dotted or cidr)>]
[timeout = <number{0-2147483647}>] [retries = <number{0-255}>]
[maxpertime = <number{0-255}>] [windowtime = <number{0-3600}>]
[taglist = <quoted string>] [params = <{V1Params}>]
[storage = <{other|volatile|nonVolatile|permanent|readOnly}>]
[mms = <number{484-65535}>]
Parameters:
E-DOC-CTC-20051017-0155 v1.0
The command has the following parameters:
Parameter
Value
Description
name
<string>
Name of this target.
addr
<ip-address>
IP address of the target
port
<number{0-65535}>
Target port number.
Default: 162.
mask
<ip-mask(dotted or cidr)>
IP bitfield mask,
This is only applicable in case of
source address checking.
timeout
<number{0-2147483647}>
SNMP expected maximum round
trip time (in hundredths seconds)
for communicating with the target
address.
retries
<number{0-255}>
Number of times the snmp entity
will attempt to retransmit an
inform when no response is
received.
maxpertime
<number{0-255}>
Maximum number of
notifications that can be sent
within a limited time base,
defined as window time.
windowtime
<number{0-3600}>
Time base (in seconds) that limits
the number of notifications. A
window time of 0 deactivates the
trap rate limitation mechanism.
147
Chapter 10
SpeedTouch™ Monitoring
Use of defaults
How to Delete a
Destination
Parameter
Value
Description
taglist
<quoted string>
String containing one or more
tags. A tag corresponds to a tag in
the usmUserTable, the
snmpCommunityTable or the
snmpNotifyTable.
params
<{V1Params}>
String used to select a set of
entries in the
snmpTargetParamsTable.
storage
other,volatile, nonVolatile,
permanent or readOnly
Storage type.
mms
<number{484-65535}>
Maximum message size that can
be retransmitted without risk of
fragmentation.
If you do not specify a parameter, default values are used. The key parameters are
name and addr.
To delete a manager destination, use:
{Administrator}[snmp]=>target delete name=<target_name>
148
E-DOC-CTC-20051017-0155 v1.0
Chapter 10
SpeedTouch™ Monitoring
10.2.8 How to Read SNMP Parameters via the CLI
About Reading SNMP
Parameters
SNMP get
The snmp get, snmp getNext and snmp walk commands allow you to Get,
GetNext or Walk SNMP settings and/or counters from a MIB object. The MIB object
is identified by the MIB object’s ID. This is only used for ebugging purposes.
Use the following CLI command to read a specific object ID:
{Administrator}[snmp]=>get [objectid = <string>]
With [objectID] the MIB ID of the object. This must include the instance which is 0
for scalar objects e.g. 1.3.6.1.2.1.1.1.0 or sysDescription.0
Example
To update the traffic load, use:
{Administrator}[snmp]=>1.3.6.1.2.1.10.94.1.1.7.1.12.601
VB_counter
.1.3.6.1.2.1.10.94.1.1.7.1.12.601
84275
{Administrator}[snmp]=>1.3.6.1.2.1.10.94.1.1.7.1.12.601
VB_counter
.1.3.6.1.2.1.10.94.1.1.7.1.12.601
84277
{Administrator}[snmp]=>1.3.6.1.2.1.10.94.1.1.7.1.12.601
VB_counter
.1.3.6.1.2.1.10.94.1.1.7.1.12.601
84278
{Administrator}[snmp]=>1.3.6.1.2.1.10.94.1.1.7.1.12.601
VB_counter
.1.3.6.1.2.1.10.94.1.1.7.1.12.601
84279
SNMP getnext
Use the following CLI command to get the next available object ID:
{Administrator}[snmp]=>get [objectid = <string>]
With [objectid] the object identity to getNext from.
Example:
To get the iP address table, use:
{Administrator}[snmp]getnext objectid .1.3.6.1.2.1.4.20.1.1
VB_ipAdr
.1.3.6.1.2.1.4.20.1.1.127.0.0.1
127.0.0.1
{Administrator}[snmp]getnext
VB_ipAdr
.1.3.6.1.2.1.4.20.1.1.192.168.1.254 192.168.1.254
=>
The object ID is only required the first time. The second time a getnext is
executed, the SpeedTouch™ will start looking from the previous object ID
E-DOC-CTC-20051017-0155 v1.0
149
Chapter 10
SpeedTouch™ Monitoring
SNMP walk
Use the following CLI command to skim through a MIB object:
{Administrator}[snmp]=> walk [objectid = <string>]
Example:
For example, objectid .1.3.6.1.2.1.1, identifies the SpeedTouch™ MIB system group.
The example below skims through this MIB object:
{Administrator}[snmp]=>walk ObjectId=1.3.6.1.2.1.1
VB_octetStr .1.3.6.1.2.1.1.1.0 SpeedTouch 620
VB_objId .1.3.6.1.2.1.1.2.0 .1.3.6.1.4.1.637.61.2
VB_timeTicks .1.3.6.1.2.1.1.3.0 9962843
VB_octetStr .1.3.6.1.2.1.1.4.0 Service Provider
VB_octetStr .1.3.6.1.2.1.1.5.0 SpeedTouch 620
VB_octetStr .1.3.6.1.2.1.1.6.0 Customer Premises
VB_integer .1.3.6.1.2.1.1.7.0 72
150
E-DOC-CTC-20051017-0155 v1.0
Chapter 10
SpeedTouch™ Monitoring
10.2.9 How to Allow Remote SNMP
About Remote SNMP
Command
It is possible to allow to allow a remote SNMP manager to monitor the
SpeedTouch™. To do this, add the WAN interface to the service access list.
Use the following command:
=>service system ifadd name SNMPV3_AGENT group wan
Receiving Traps
To allow the remote SNMP manager to receive SNMP traps generated by the
SpeedTouch™, no extra configuration is necessary. It is, however, possible to
configure which traps are sent to a manager. For more information, refer to
“10.2.12 How to Configure the Traps” on page 158.
You can also configure authentication for remote access to SNMP. For more
information, refer to “10.2.11 How to Restrict SNMP Access” on page 157.
E-DOC-CTC-20051017-0155 v1.0
151
Chapter 10
SpeedTouch™ Monitoring
10.2.10 How to Add an SNMP User
About SNMP Users
SNMP Users allow you to determine which MIBs a specific user is allowed to view
or change. This is done by adding a user to a user group. This user group
determines the user’s access to the MIBs.
Limiting MIB Access
You can limit the MIBs visible within a defined Read-Only (RO) or Read/Write (RW)
Community. To do so, you need to do the following:
Users and Communities
SNMP User Groups
Define the view with the MIBs you want visible
Define a group to determine the read/write/notify access
Define a user and add the user to the group, giving that user access to that
view
The use of Users, Views and Groups is defined in SNMPv3. SNMP v1 and SNMPv2
however, use communities. In SNMPv1, “users” are represented as communities.
Therefore, they are not visible with the :snmp user list command. However,
you can still view them using the :snmp securitytogroup list command.
There are 7 pre-defined user groups available for SNMP. These levels exist in the
MLP structure. However, since SNMP does not need this many groups, some of
them have the same default access rights. Below is an overview:
Group
User
Description
This group has read access to the following subtrees:
1.3.6.1.2.1.1 System
1.3.6.1.2.1.11 SNMP
1.3.6.1.6.3.10.2.1 SNMP Engine
1.3.6.1.6.3.11.2.1 SNMP MD Stats
1.3.6.1.6.3.15.1.1 Stats
This group has no CLI access.
152
E-DOC-CTC-20051017-0155 v1.0
Chapter 10
SpeedTouch™ Monitoring
Group
Description
Power User
Has the same rights as User, plus additional read
access to the following subtrees:
1.3.6.1.2.1.2: INTERFACES
1.3.6.1.2.1.4: IP
1.3.6.1.2.1.5: ICMP
1.3.6.1.2.1.6: TCP
1.3.6.1.2.1.7: UDP
1.3.6.1.2.1.10: ETHER-like (ADSL .1.10.94; HDSL
.1.10.48)
1.3.6.1.2.1.16: RMON
1.3.6.1.2.1.17: BRIDGE
1.3.6.1.2.1.26: MAU
1.3.6.1.2.6.3.10.2: SNMPv2 Framework
1.3.6.1.2.1.16: RMON
1.3.6.1.2.1.80: PING
1.3.6.1.2.1.81: TRACEROUTE
This group can use CLI for trap configuration.
LAN Admin
Has the same default rights as Power User.
WAN Admin
This group has the same read rights as User, plus
additional read access to:
1.3.6.1.2.1.16: RMON
1.3.6.1.2.1.80: PING
1.3.6.1.2.1.81: TRACEROUTE
This group has full CLI access
Case
Administrator
Full access rights to all subtrees
TechAdmin
Has the same default rights as Administrator
Super User
Has the same default rights as Administrator
As an example, we will create the following:
A new user group called “Grayskull”
A new user called “Musclor”
A new view called “View_All”
The user has full rights (read, write and notification) to all MIBs.
E-DOC-CTC-20051017-0155 v1.0
153
Chapter 10
SpeedTouch™ Monitoring
Procedure
The general flow of user configuration is as follows: you create a view, which is
basically a set of MIB access rights. after that, you create a user group with access
to that view. Then, you create a user and add it to the group. Thus, the user will
have the groups MIB access and have tha access rights you defined in the view.
Proceed as follows:
Step
Action
1
Use the following command to create a new view:
:snmp view add viewname=View_All viewtree=iso type=include
2
Use the following command to create a new group with read-, writeand notification access to that view:
:snmp group add groupname=Grayskull securitymodel=usm
securitylevel=noAuthNoPriv readview=View_all writeview=View_all
notifyview=View_all
3
Use the following command to create a new user:
:snmp user add securityname=Musclor snmpengineID=localSnmpID
authprot=usmNoAuthProtocol privprot=usmNoPrivProtocol
4
Use the following command to add the user to the group:
:snmp securitytogroup add securitymodel=usm
securityname=Musclor groupname=Grayskull
5
Use the following command to enable the SNMP service if necessary:
:service system modify name SNMPV3_AGENT state enabled
For a more detailed description of these commands and their parameters, refer to
the CLI command guide.
154
E-DOC-CTC-20051017-0155 v1.0
Chapter 10
SpeedTouch™ Monitoring
How to View the Users
Use the following command to view the users:
:snmp user list
This results in the following output:
securityname=SU snmpengineID=localSnmpID
authprot=usmNoAuthProtocol
privprot=usmNoPrivProtocol
targettag=
storage=nonVolatile
securityname=user snmpengineID=localSnmpID
authprot=usmNoAuthProtocol
privprot=usmNoPrivProtocol
targettag=
storage=nonVolatile
securityname=LanAdmin snmpengineID=localSnmpID
authprot=usmNoAuthProtocol
privprot=usmNoPrivProtocol
targettag=
storage=nonVolatile
securityname=WanAdmin snmpengineID=localSnmpID
authprot=usmNoAuthProtocol
privprot=usmNoPrivProtocol
targettag=
storage=nonVolatile
securityname=PowerUser snmpengineID=localSnmpID
authprot=usmNoAuthProtocol
privprot=usmNoPrivProtocol
targettag=
storage=nonVolatile
securityname=TechAdmin snmpengineID=localSnmpID
authprot=usmNoAuthProtocol
privprot=usmNoPrivProtocol
targettag=
storage=nonVolatile
securityname=Administrator snmpengineID=localSnmpID
authprot=usmNoAuthProtocol
privprot=usmNoPrivProtocol
targettag=
storage=nonVolatile
E-DOC-CTC-20051017-0155 v1.0
155
Chapter 10
SpeedTouch™ Monitoring
How to View the
Communities
Use the following command to view the communities:
:snmp securiytogroup list
This results in the following output:
securitymodel=snmpv1 securityname=ROCommunity groupname=V1ROGroup
storage=nonVolatile
securitymodel=snmpv1 securityname=RWCommunity groupname=V1RWGroup
storage=nonVolatile
securitymodel=usm securityname=SU groupname=SU_Group
storage=nonVolatile
securitymodel=usm securityname=user groupname=Basic_Group
storage=nonVolatile
securitymodel=usm securityname=LanAdmin groupname=Extended_Group
storage=nonVolatile
securitymodel=usm securityname=WanAdmin groupname=WanAdmin_Group
storage=nonVolatile
securitymodel=usm securityname=PowerUser groupname=Extended_Group
storage=nonVolatile
securitymodel=usm securityname=TechAdmin groupname=SU_Group
storage=nonVolatile
securitymodel=usm securityname=Administrator groupname=SU_Group
storage=nonVolatile
For backwards compatibility purposes, some defaults were added.
156
E-DOC-CTC-20051017-0155 v1.0
Chapter 10
SpeedTouch™ Monitoring
10.2.11 How to Restrict SNMP Access
SNMP Access
Restriction
You can restrict SNMP Access so that it is accepted from specific IP addresses only.
To do this, add the IP address or an IP Address range to the access list for the
service SNMPV3_Agent. Note that this also covers SNMPv1.
You can also restrict access to specific interface groups such as WAN, LAN, DMZ,...
How to Add an IP
Address to the Access
List
Use the following command:
:service system ipadd name=SNMPV3_AGENT ip=<ip-range>
with <ip-range> either the IP address or the range of IP addresses from which
SNMP access should be allowed.
How to Add an
Interface Group to the
Access List
Use the following command:
:service system ifadd name=SNMPV3_AGENT group =
<{wan|local|lan|tunnel|dmz|guest} or number>
The <group> parameter determines which interface group has access to the
SNMP service.
How to View the
Configuration
Use the following command to view the configuration:
:service system list name SNMPV3_AGENT expand enabled
This results in the following output:
Idx Name
Protocol
SrcPort
DstPort
Group
----------------------------------------------------------------------1 SNMPV3_AGENT
udp
161
Description................
Properties.................
Attributes.................
User Managed Attributes....
Attribute Values :
State......................
Port.......................
Ip Access List.............
Interface Access List......
Interface Group Access List
Map List...................
Logging....................
E-DOC-CTC-20051017-0155 v1.0
Rx snmp GET, SET and GETNEXT PDUs
server
state port aclip aclif aclifgroup map log
state aclip aclif aclifgroup map log
(administratively) disabled
161
any
any
any
161
disabled
157
Chapter 10
SpeedTouch™ Monitoring
10.2.12 How to Configure the Traps
Procedure
In order to configure which traps are sent where, you need to:
Step
Action
1
Set the message handling parameters
2
Create a notify filter
3
Create a notify profile using that filter
4
Create notify tags
5
Create a destination for the traps
6
Enable traps
If you simply want all tags to be sent, steps 2, 3 and 4 are not necessary.
How to Set the
Message Handling
Parameters
Use the :snmp targetparams add command.
Example:
:snmp targetparams add paramname=Trap_params mpmodel=v1
securitymodel=snmpv1 securityname=RWCommunity
securitylevel=noAuthNoPriv
How to Create a Notify
Filter
Use the :snmp notifyfilter add command.
Example:
:snmp notifyfilter add profilename=Trap_profile subtree=iso
How to Create a Notify
Profile Using that Filter
Use the :snmp notifyprofile add command.
Example:
:snmp notifyprofile add paramname=Trap_params profilename=Trap_profile
How to Create
NotifyTags
Use the :snmp notify add command.
Example:
:snmp notify add name=trap_notify_test tag=Trap_tag
158
E-DOC-CTC-20051017-0155 v1.0
Chapter 10
SpeedTouch™ Monitoring
How to Create a
Destination for
theTraps
Use the :snmp target add command.
Example:
:snmp target add name=Test_trap_pc addr=10.0.0.110 taglist=Trap_tag
params=Trap_params
How to Enable Traps
Use the following command sequence:
:snmp config traps enabled
:service system modify name SNMPV3_TRAPS state enabled
More Information
E-DOC-CTC-20051017-0155 v1.0
For more information about these commands, refer to the CLI Command Guide
159
Chapter 10
SpeedTouch™ Monitoring
10.3 The SpeedTouch™ Syslog
Introduction
Syslog is a basic, uncomplicated, yet powerful method to administer a network
device as the SpeedTouch™. By generating syslog messages, the SpeedTouch™ is
able to inform network managers about the general state of the device and to
record events which can be retrieved for later analysis and diagnosis.
This chapter describes how to use the SpeedTouch™ Syslog deamon.
WELF Compliancy
The SNMP service
All syslog messages are compliant with Webtrend Extended Log Format (WELF)
formatting.
Next to Syslog the SpeedTouch™ supports SNMP for extended device
management.
For more information on SNMP see “10.1 An Introduction to SNMP” on page 134.
The SNTP client
Because it is not only important to know which events occurred, but also when , the
SpeedTouch™ features an integrated real-time clock. This clock supports SNTP
(Simple Network Time Protocol) synchronization with one of Internet's many
relating NTP servers.
For more information on the configuration and use of the SpeedTouch™ SNTP
client, see “6.2 The SpeedTouch™ SNTP Client” on page 56.
160
E-DOC-CTC-20051017-0155 v1.0
Chapter 10
SpeedTouch™ Monitoring
10.3.1 The SpeedTouch™ Syslog Daemon
What is Syslog
Syslog is a message generating tool that can be implemented in any network
device. The intention of the tool is to send messages over the network indicating
status, actions, possible problems, etc. from the device.
Although the syslog protocol is widely spread and evolved to a de-facto standard,
only recently some first Internet drafts and informational Request For Comments
(RFC) became available to describe the existing protocol and some proposal for
enhancements.
The SpeedTouch™
Syslog daemon
For the SpeedTouch™, the syslog daemon conforms to the proposed standards as
much as possible.
Syslog messages consist of a message header called Priority and a message body
containing the message itself.
Via the Priority identification it is possible to determine the severity and facility of a
message, hence it allows to diversify the messages according to their importance.
Each severity and each facility can be identified by a numerical value. The sum of
the numerical values of the severity and the facility indicates (the numerical value
of) the priority.
In the following all severities and facilities are listed with respective notation and
numerical values.
Syslog priority severities
E-DOC-CTC-20051017-0155 v1.0
Following priority severities are possible for a syslog message generated by the
SpeedTouch™. The severities are listed by descending priority:
Severity
Notation
Code
Emergency conditions, system unusable
emerg
0
Alert conditions, immediate action is needed
alert
1
Critical conditions
crit
2
Error conditions
err
3
Warning conditions
warning
4
Normal but significant conditions
notice
5
Informational messages
info
6
Debug-level messages
debug
7
161
Chapter 10
SpeedTouch™ Monitoring
Syslog priority facilities
162
Following priority facilities are possible for a syslog message generated by the
SpeedTouch™. The facilities are listed by descending priority:
Priority
Notation
Code
Kernel messages
kern
0
User-level messages
user
8
Mail system
mail
16
System daemons
deamon
24
Authorization messages
auth
32
Syslog daemon messages
syslog
40
Line Printer subsystem
Lpr
48
Network news subsystem
news
56
UUCP subsystem
uucp
64
Clock daemon
cron
72
Security messages
security
80
FTP daemon
ftp
88
NTP subsystem
ntp
96
Log audit
audit
104
Log alert
alert
112
Clock daemon
clock
120
Local use messages
local0
local1
local2
local3
local4
local5
local6
local7
128
136
144
152
160
168
176
184
E-DOC-CTC-20051017-0155 v1.0
Chapter 10
SpeedTouch™ Monitoring
Syslog message bodies
The SpeedTouch™ syslog daemon is internally responsible for collecting and
administering messages generated by one or more of its subsystems. Following of
the SpeedTouch™ subsystems are able to trigger a message:
Auto-PVC module
Configuration module
DHCP Client module
DHCP Relay module
DHCP server module
Firewall module
HTTP module
IPSec VPN module
Linestate module
Login authentication module
NAPT module
PPP dial-in client module
Relayed PPPoA (PPTP) module
BGP/OSPF/RIP module
Routing module
SIP multi-media PBX module
SNTP client module
SpeedTouch™ kernel module
System software module
UPnP module.
Depending on the triggering event, fixed messages are generated. For a complete
listing of the possible syslog messages, see “SpeedTouch™ CLI Reference Guide”.
E-DOC-CTC-20051017-0155 v1.0
163
Chapter 10
SpeedTouch™ Monitoring
10.3.2 Syslog via the Web Interface
The Syslog web page
The SpeedTouch™ Syslog web page allows users to view all or a selection of syslog
messages the SpeedTouch™ has generated. Browse to the SpeedTouch™ Expert
pages and open the Syslog pages via Home > SpeedTouch > Syslog.
The advantage of offering the syslog Web Interface is that any authenticated user is
able to browse the SpeedTouch™ Web Interface. The Syslog page can be used to
view the latest event loggings, without the need for additional syslog software.
164
E-DOC-CTC-20051017-0155 v1.0
Chapter 10
SpeedTouch™ Monitoring
Syslog configuration
Via the SpeedTouch™ Syslog page, you can also configure the SpeedTouch™
syslog daemon to send syslog messages to one or more particular host IP
addresses.
This allows dedicated syslog software on the host to collect SpeedTouch™syslog
messages for immediate notification, future reference, and event archiving.
On the SpeedTouch™ Syslog page, select the Configuration tab:
The table allows you to overview the hosts configured to receive syslog messages
generated by the SpeedTouch™.
To add a host, you must type one or more (comma-separated) priority facility (type
all to send all facilities), select a priority severity, specify the host’s IP address and
click Add.
To enable forwarding of syslog messages to external hosts, select Activate. In case
syslog forwarding is enabled, you can disable all syslog forwarding again by
clicking Deactivate. For example, in the figure shown above, forwarding of Syslog
messages is enabled (as the Deactivate button is shown).
E-DOC-CTC-20051017-0155 v1.0
165
Chapter 10
SpeedTouch™ Monitoring
10.3.3 Syslog via the CLI
The Syslog CLI
command group
The SpeedTouch™ CLI syslog command group basically provides the same possibilities as provided on the SpeedTouch™ syslog web page:
=>:syslog help
Following commands are available:
config
ruleadd
ruledelete
flush
list
:
:
:
:
:
Set/Display configuration
Add a new rule to the syslog configuration.
Delete a rule in the syslog configuration
Flushes syslog rules.
List the current syslog configuration
Following command groups are available :
msgbuf
=>:syslog msgbuf help
Following commands are available :
show
send
flush
: Show messages in the syslog message buffer.
: Send messages to remote syslog server.
: Flush all messages in syslog message buffer.
=>
To display a listing of all generated syslog messages, use following CLI command:
=>:syslog msgbuf show
<173> May 20 17:52:47 xDSL linestate up (downstream: 8000 kbit/s,
upstream: 800 kbit/s; output Power Down: 7.0 dBm, Up: 8.5 dBm; line
Attenuation Down: 0.0 dB, Up: 0.0 dB; snr Margin Down: 9.0 dB, Up: 6.0
dB)
<38> May 20 17:52:50 PPP PAP Authenticate Request sent
<38> May 20 17:52:50 PPP PAP Authenticate Ack received
<132> May 20 17:52:50 PPP link up (Internet) [101.101.101.16]
<143> May 20 17:52:50 GRP Default destination is routed via gateway
101.101.101.16
<37> May 20 18:07:53 LOGIN User Administrator logged in on CONSOLE
=>
For more information on the syntax and use of the CLI syslog command group
commands, see “SpeedTouch™ CLI Reference Guide”.
166
E-DOC-CTC-20051017-0155 v1.0
Chapter 10
SpeedTouch™ Monitoring
10.3.4 Remote Syslog Notification
Introduction
Preconditions
Syslog host on
the local network
The SpeedTouch™ can be configured to send all or a selection of generated syslog
messages to a host on the local or a remote network IP address.
This section describes how to configure the SpeedTouch™ syslog daemon to send
messages to a particular host.
The host to send the syslog messages to, should have syslog daemon software
installed for capturing the messages, and a known, fixed IP address.
By default, no traffic restrictions apply for the local network. Simply add a syslog
rule via the SpeedTouch™ syslog configuration web page or the CLI. Specify the IP
address of the host, and optionally refine the set of syslog messages to send.
You can specify one or a selection of (comma-separated) or all facilities.
Specifying a severity actually means to send syslog messages with a
severity as specified, and all messages with a higher severity.
For a priority listing see “ Syslog priority severities”.
The following example shows the configuration via the CLI for a syslog host on the
local network with fixed IP address 192.168.1.10 to send all generated syslog messages (all facilities, with severity debug and higher) to:
=>:syslog ruleadd fac=all sev=debug dest=192.168.1.10
=>saveall
=>
E-DOC-CTC-20051017-0155 v1.0
167
Chapter 10
SpeedTouch™ Monitoring
Syslog host on a
remote network
The default SYSLOG SpeedTouch™ service is configured to allow traffic from the
SpeedTouch™ syslog daemon towards the WAN:
=>:service system list name=SYSLOG expand=enabled
Idx Name
Protocol
SrcPort DstPort Group
Sta
te
----------------------------------------------------------------------1 SYSLOG
udp
514
ena
bled
Description................ System Logging Events
Properties................. client
Managed parameters......... state srcip
Source Ip Selection........ auto
Interface Access List...... any
Ip Access List............. any
=>
Therefore, no additional configuration is needed in case you want to configure a
syslog host on a remote network.
The example below shows the syslog rule to add for a syslog host with IP address
192.6.11.1. The local syslog host (192.168.1.10), configured before (See “ Syslog
host on the local network”) will receive all generated syslog messages; the remote
syslog host only receives syslog messages from all facilities with severity warning,
error, critical, alert or emergency (all facilities, with severity warning and higher):
=>:syslog ruleadd fac=all sev=debug dest=192.6.11.1
=>:syslog list
1: all.debug
192.6.11.1
2: all.debug
192.168.1.10
=>
168
E-DOC-CTC-20051017-0155 v1.0
Chapter 10
SpeedTouch™ Monitoring
10.4 SpeedTouch™ Identification on AWS
Information Exchange
The SpeedTouch™ exchanges some variables after the DSL synchronisation with
the DSLAM (Digital Subscriber Line Access Multiplexer). These variables are hardcoded into the SpeedTouch™.
The following variables are exchanged:
How to Enable/Disable
the Information
Exchange
Chipset vendor ID:
For example the SpeedTouch™620 chipset vendor ID will be “BCM”
Software version number:
The software version number is retrieved from the ENV variables
_PRODNUMBER + _BUILD.
For example the SpeedTouch™620 software version number will be “620
5.3.2”.
Serial number:
The Serial number is retrieved from the ENV variables
BOARDSERIAL_NBR + _PRL.
For example the SpeedTouch™620 Serial number can be
“CP0452JT02D DSLBB620AA”.
Self test result:
The self test result will be retrieved from an ENV variable.
It is possible to disable (and re-enable) the sending of the SpeedTouch™
information using the adsl config CLI command:
{Administrator}[adsl]=>config
[opermode = <{multimode|multi_adsl2|multi_readsl2| multi_adsl2plus}>]
[trace = <{disabled|enabled}>]
Set the trace variable to disabled to disable the sending, or to enabled to re-enable
it.
Advantages of
SpeedTouch™
Identification
E-DOC-CTC-20051017-0155 v1.0
The SpeedTouch™ identification can be used to:
View the evolution of the network to an open CPE market.
Streamline customer support operation, and so it is mandatory to see which
CPE is attached to a certain port on the DSLAM.
169
Chapter 10
SpeedTouch™ Monitoring
SpeedTouch™
Identification over AWS
The ADSL Work Station (AWS) is the graphical management tool to control and
configure DSL lines on a DSLAM.
The figure below is an example of a screenshot of an AWS.
!
170
The CPE Remote Inventory displays the values in a HEX notation.
E-DOC-CTC-20051017-0155 v1.0
Chapter 11
SpeedTouch™ Advanced Diagnostics
11 SpeedTouch™ Advanced Diagnostics
About the Advanced
Diagnostics
Overview
E-DOC-CTC-20051017-0155 v1.0
The SpeedTouch™ features advanced diagnostics to allow for extended monitoring
of the system’s performance, operation and connection status. You can access the
diagnostics either with the Web interface or via CLI. The Web interface also provides
a page showing the entire office network.
This chapter covers the following topics:
Topic
See Page
The Office Network Web Page
172
The Diagnostic Web Page
175
Command Line Interface Diagnostics
179
171
Chapter 11
SpeedTouch™ Advanced Diagnostics
11.1 The Office Network Web Page
About the Office
Network Web Page
How to Access the
Office Network Page
Additional Pages
The Office Network Web page shows all devices on the LAN and their main
characteristics:
Proceed as follows:
Step
Action
1
Go to the Basic Web Interface
2
Do one of the following:
Click the Office Network option in the navigation pane.
Click the Office Network icon on the Basic home page.
There are two additional pages available in the Office Network submenu:
Devices: provides an overview of all devices.
Interfaces: provides an overview of all interfaces.
To access these pages, click on the corresponding option in the navigation pane.
172
E-DOC-CTC-20051017-0155 v1.0
Chapter 11
SpeedTouch™ Advanced Diagnostics
The Devices Page
The Devices page provides information on the devices present on the LAN:
To see more details of a specific device, click on the corresponding device name,
e.g. a00098 in the above example:
From these pages you can also perform the following tasks:
Assign a game or application to a device
Assign the public IP address of a connection to a device
To do this, click on the corresponding task in the Pick a task... area.
E-DOC-CTC-20051017-0155 v1.0
173
Chapter 11
SpeedTouch™ Advanced Diagnostics
The Interfaces Page
The Devices page provides information on the devices present on the LAN:
To see more details of a specific interface, click on the corresponding interface
name, e.g. lan1 in the above example:
174
E-DOC-CTC-20051017-0155 v1.0
Chapter 11
SpeedTouch™ Advanced Diagnostics
11.2 The Diagnostic Web Page
Introduction
Opening the
SpeedTouch™
Diagnostic Web
Interface
Navigation and action
buttons
In this section the Diagnostic Web Page is described.
Proceed as follows:
1
Open a web browser an go to the SpeedTouch™ Web Interface.
2
Go to the Expert Mode pages.
3
Open the diagnostic pages via Home > SpeedTouch > Diagnostics.
Following navigation and action buttons are available:
Click...
To..
Expand Diagnostics topics.
Collapse Diagnostics topics.
Refresh the Diagnostics readings.
Test IP connectivity (WAN access)
E-DOC-CTC-20051017-0155 v1.0
175
Chapter 11
SpeedTouch™ Advanced Diagnostics
System Diagnostics
Use the expand button (or Expand all) to open the System Diagnostics:
The information shown is mainly meant for uniquely identifying your device (for
example as reference for helpdesking).
Among others, following information is provided:
176
Device identifiers:
Serial number
Bootloader version
ASIC version
Board mnemonic
System software identifiers
System software version
CLI and TAG Parser version
E-DOC-CTC-20051017-0155 v1.0
Chapter 11
SpeedTouch™ Advanced Diagnostics
LAN Diagnostics
Use the expand button (or Expand all) to open the LAN Diagnostics:
The LAN Diagnostics provide information on the SpeedTouch™’s local network
Ethernet interface(s).
Per Ethernet interface a visual indicator shows whether:
The interface is connected.
The interface is disconnected.
Per interface following data are shown:
E-DOC-CTC-20051017-0155 v1.0
The interface’s mode (forwarding or disabled)
The operation mode of the interface:
10BaseTHD: 10MB/s Base-T Half Duplex
10BaseTFD: 10MB/s Base-T Full Duplex
100BaseTHD: 100MB/s Base-T Half Duplex
100BaseTFD: 100MB/s Base-T Full Duplex
Whether the operation mode is selected via negotiation (Yes) or manually set
(No)
The number of Kilo Bytes and Ethernet frames that are sent and received
The number of discarded Ethernet frames
177
Chapter 11
SpeedTouch™ Advanced Diagnostics
WAN Diagnostics
Use the expand button (or Expand all) to open the WAN Diagnostics:
The WAN diagnostics consists basically of two expandable parts:
The physical layer DSL diagnostics:
Next to some general information on the DSL line flavour, status, bandwidth
characteristic and throughput counters, some line properties and statistics are
shown.
The WAN connections diagnostics:
This section shows per WAN connection relevant information on:
Connection type and basic properties
IP related characteristics of the connection
(If applicable) PPP related characteristics
ATM related characteristics
You can check IP connectivity per WAN connection or for all WAN connections via
the check IP connectivity button.
178
E-DOC-CTC-20051017-0155 v1.0
Chapter 11
SpeedTouch™ Advanced Diagnostics
11.3 Command Line Interface Diagnostics
Overview
E-DOC-CTC-20051017-0155 v1.0
This chapter covers the following topics:
Topic
See Page
About CLI Diagnostics
180
Lower Layer Diagnostics
181
Router Services Diagnostics
184
Routing Diagnostics
186
Ethernet Diagnostics
189
Management Diagnostics
191
179
Chapter 11
SpeedTouch™ Advanced Diagnostics
11.3.1 About CLI Diagnostics
Introduction
This section describes some of the diagnostics available from the SpeedTouch™
Command Line Interface (CLI).
For a full description of the CLI commands see the “SpeedTouch™ CLI Reference
Guide” for more information.
Accessing the CLI
You can access the CLI through:
The SpeedTouch™ CLI Web Interface
A Telnet session
The serial Console interface
See “2 SpeedTouch™ Command Line Interface” on page 5 for more information.
Diagnostical CLI
commands
Most CLI command groups feature one or more diagnostical commands. this
chapter provides a brief description of these commands.
For a full description, refer to the “SpeedTouch™ CLI Reference Guide”.
Traces
180
The following CLI commands feature traces:
adsl config
grp config
connection appconfig
grp rip config
connection debug
hostmgr config
cwmp traceconfig
ids config
dhcp client debug traceconfig
ip debug traceconfig
dhcp relay debug traceconfig
isdn debug traceconfig
dhcp server debug traceconfig
label modify
dns client config
label rule debug traceconfig
dns server config
mlp debug traceconfig
dyndns modify
mlp import
firewall debug traceconfig
nat config
firewall rule debug traceconfig
ppp ifconfig
E-DOC-CTC-20051017-0155 v1.0
Chapter 11
SpeedTouch™ Advanced Diagnostics
11.3.2 Lower Layer Diagnostics
ADSL
The :adsl info displays ADSL statistics and information on current
SpeedTouch™ DSL line status.
Although it is the same command for both SpeedTouch™ ADSL/POTS and ADSL/
ISDN variants, the command features specific output parameters and counters per
variant. ADSL reporting has been extended to report the unrestricted ADSL
bandwidth, i.e. the bandwidth the line would have if the DSLAM would not be
configured to limit ADSL bandwidth.
The partial example below shows ADSL diagnostics for an ADSL/ISDN variant:
=>:adsl info
Modemstate
Operation Mode
Channel Mode
Number of resets
:
:
:
:
Vendor
Country
Vendor
VendorSpecific
StandardRevisionNr
:
:
:
:
Margin
Attenuation
OutputPower
:
:
:
Downstream
9.0
1.0
7.0
Upstream
6.0
0.0
8.5
Available Bandwidth
Downstream
Upstream
:
:
Cells/s
18867
1886
Kbit/s
8000
800
Transfer statistics
Errors
Received FEC
Received CRC
Received HEC
Transmitted FEC
Transmitted CRC
Transmitted HEC
:
:
:
:
:
:
0
0
0
0
0
0
Near end
Loss of
Loss of
Loss of
Errored
Near end
Loss of
Loss of
Loss of
Errored
Near end
Errored
Near end
Errored
[dB]
[dB]
[dBm]
failures
frame:
signal:
power:
seconds:
failures
frame:
signal:
power:
seconds:
failures
seconds:
failures
seconds:
up
G.992.1 Annex B
fast
1
Local
0f
TMMB
0000
00
Remote
00
0000
00
since reset
0 failures
0 failures
0 failures
0 seconds
last 15 minutes
0 seconds
0 seconds
0 seconds
0 seconds
current day
0 seconds
previous day
0 seconds
=>
E-DOC-CTC-20051017-0155 v1.0
181
Chapter 11
SpeedTouch™ Advanced Diagnostics
ATM
Several commands are available to display specific Asynchronous Transfer Mode
(ATM) statistics:
:atm debug aal5stats
Displays AAL5 port specific Asynchronous Transfer Mode (ATM) statistics
:atm debug gstats
:atm debug portstats
Displays global ATM statistics
Displays port specific ATM statistics
Below some examples are provided:
=>:atm debug aal5stats
port = dsl0
vpi = 8
[vci] = 36
[clear] =
:atm debug aal5stats port=dsl0 vpi=8 vci=36
# of CRC-32 errors = 0.
# of SAR timeouts = 0.
# of too long SDU errors = 0.
# of invalid CPI field = 0.
# of invalid length errors = 0.
# of aborted CPCS-PDUs = 0.
# of out of memory errors = 0.
=>
=>:atm debug gstats
# of received octets = 806130.
# of transmitted octets = 806766.
# of received cells = 15210.
# of transmitted cells = 15222.
# of unknown cells = 0.
# of errors on the input = 0.
# of errors on output = 0.
=>
ATM OAM
The SpeedTouch™ supports active Operation and Maintenance (F4/F5 OAM),
LoopBack (LB) and Continuity Checks (CC) statistics via following commands:
:atm oam cc send
Sends CC activate/deactivate to connection.
:atm oam ping
Sends ATM loopback cells
Below an example is provided of an ATM OAM ping:
=>:atm oam ping dest RtPPPoA count 5
loopback: successful, sequence: 1 time:
loopback: successful, sequence: 2 time:
loopback: successful, sequence: 3 time:
loopback: successful, sequence: 4 time:
loopback: successful, sequence: 5 time:
4702
4754
5200
5130
4785
usec
usec
usec
usec
usec
--- loopback statistics --5 loopbacks transmitted, 5 successful, 0% loss, time 180 ms
rtt min/avg/max = 4702/4914/5200
=>
182
E-DOC-CTC-20051017-0155 v1.0
Chapter 11
SpeedTouch™ Advanced Diagnostics
ATM Auto-Configuration
via TR-37/ ILMI 4.0
The ILMI operates between the network and the ATM Network Termination at the
customer premises for example the SpeedTouch™. ILMI 4.0 is supported on VP/VC
0/16. Meaning that the VCC or VPC can be provisioned via this management
channel. The information received via the management channel can be used to
dynamically add terminated connections.
The QOS information received via the management channel will create dynamic
“qosbook” entries. This information shall be available on the CLI. This information
shall not be saved.
The VP/VC information received via the management channel will dynamically add,
for example an enabled LLC/SNAP Bridged interface or an attached PPPoE relay
interface (depending on the received TR-37 information) on the SpeedTouch.
A CLI command is available to set the Auto-configuration mode between ACTIVE,
PASSIVE, and PSEUDO.
=>:autopvc config mode=active
=>
The third option “PSEUDO” is used for the SpeedTouch with ATMFORUM
that is using the VP= 0.
Use the following command to display the information retrieved via ILMI.
=>:autopvc list
Address Type
Class
8.36
CBR.c0/UBR.1 ubr
CBR.c0/UBR.1
=>
E-DOC-CTC-20051017-0155 v1.0
BestEff
Enabled
Par1 Par2
Tx: 120
24
Rx: 120
24
Par3 Par4
2048 12
24
0
Par5
12
0
183
Chapter 11
SpeedTouch™ Advanced Diagnostics
11.3.3 Router Services Diagnostics
DHCP
Following DHCP statistics are available:
:dhcp client debug stats
Displays statistics of SpeedTouch™’s DHCP client
:dhcp server debug stats
:dhcp relay debug stats
Displays statistics of SpeedTouch™’s DHCP server
Displays statistics of SpeedTouch™’s DHCP relay
Below some examples are provided:
=>:dhcp server debug stats
DHCP server state: Running
DHCP server statistics:
Corrupted packet recv
DISCOVER
REQUEST
DECLINE
RELEASE
INFORM
Pure BOOTP REQUESTS
Other message types
OFFERs sent
ACKs sent
NAKs sent
Relay agent options dropped
Lease table got full
: no
Ping table got full
: no
Second dhcp server seen : no
Total size of lease table: 256,
=>:dhcp relay debug stats
DHCP relay statistics
------------------------Client packet relayed
:
Server packet relayed
:
Bogus relay agent
:
Bogus giaddr recv
:
Corrupt agent option
:
Missing agent option
:
Bad circuit id
:
Missing circuit id
:
=>
184
:
:
:
:
:
:
:
:
:
:
:
:
1
5
3
15
1
6
0
213
9
29
3
0
in use: 0 free: 100 %
5
5
1
0
1
2
0
0
E-DOC-CTC-20051017-0155 v1.0
Chapter 11
SpeedTouch™ Advanced Diagnostics
DNS
Following DNS server/forwarding statistics are available:
:dns server debug stats
Displays statistics of SpeedTouch™’s DNS server/forwarder
=>:dns server debug stats
Corrupted packets received
Local questions resolved
Local negative answers sent
Total DNS packets forwarded
External answers received
Spoofed responses
Forward table full, discard
Spurious answers
Unknown query types
=>
E-DOC-CTC-20051017-0155 v1.0
:
:
:
:
:
:
:
:
:
1
5
9
3
8
1
0
1
0
185
Chapter 11
SpeedTouch™ Advanced Diagnostics
11.3.4 Routing Diagnostics
Firewall Rule
To check the operation of the SpeedTouch™ packet firewall following command is
available:
:firewall rule debug stats
Displays per firewall rule, the number of packets (and corresponding bytes)
that passed the firewall rule.
=>:firewall rule debug stats
chain
index
packets
bytes
----------------------------------------------------------------------sink
1
0
0
2
402
100663
forward
1
0
0
2
0
0
3
0
0
source
1
0
0
forward_level
1
0
0
sink_system_service
1
0
0
2
0
0
3
0
0
4
0
0
5
0
0
6
0
0
7
0
0
8
269
94423
9
0
0
10
0
0
11
0
0
12
0
0
13
0
0
14
0
0
15
0
0
16
4
48
17
0
0
18
129
6192
=>
To reset the firewall statistics, use :firewall rule debug clear.
186
E-DOC-CTC-20051017-0155 v1.0
Chapter 11
SpeedTouch™ Advanced Diagnostics
IP Diagnostics
There are two useful commands:
ping: Send IGMP ECHO_REQUEST packets to a given destination
traceroute: Send ICMP/UDP packets to trace the ip path.
Each of these can be given from the root of the CLI, as well as from any other place
in any command group.
The Ping Command
The Ping command has the following syntax:
ping addr = <ip-address>
[count = <number{1-1000000}>]
[size = <number{0-20000}>]
[interval = <number{100-1000000}>]
[listen = <{disabled|enabled}>]
[dffield = <{disabled|enabled}>]
[srcaddr = <ip-address>]
It uses the following parameters:
Parameter
Value
Description
addr
<ip-address>
The destination IP address.
count
<number{1-1000000}>
The number of pings to send.
size
<number{0-20000}>
The size of the ping payload(s).
interval
<number{100-1000000}
The interval in milliseconds between
packets.
listen
<{disabled|enabled}>
Don't send, just listen for incoming
ICMP packets.
dffield
<{disabled|enabled}>
Enables setting of the don't fragment
flag in the IP headers of the ping
srcadr
<ip-address>
The IP source address to use.
Example
Below is an example of a ping command and its reply:
{Administrator}=>ping addr 192.168.1.60
40 bytes from 192.168.1.60: icmp_id = 2,
40 bytes from 192.168.1.60: icmp_id = 2,
40 bytes from 192.168.1.60: icmp_id = 2,
40 bytes from 192.168.1.60: icmp_id = 2,
40 bytes from 192.168.1.60: icmp_id = 2,
E-DOC-CTC-20051017-0155 v1.0
icmp_seq=0
icmp_seq=1
icmp_seq=2
icmp_seq=3
icmp_seq=4
time=962
time=866
time=757
time=742
time=753
us
us
us
us
us
187
Chapter 11
SpeedTouch™ Advanced Diagnostics
The Traceroute
Command
The traceroute command has the following syntax:
traceroute addr = <ip-address>
[count = <number{1-10}>]
[size = <number{1-20000}>]
[interval = <number{1000-60000}>]
[maxhops = <number{1-255}>]
[dstport = <number{1-65535}>]
[maxfail = <number{0-255}>]
[type = <{icmp|udp}>]
[utime = <{disabled|enabled}>]
It uses the following parameters:
Parameter
Value
Description
addr
<IP-address>
The destination IP address
count
<number{1-10}>
The number of times to reissue a
traceroute request with the same time
to live.
size
<number{1-20000}
The size of the packet payload.
interval
<number{1000-60000}>
The size of the packet payload.
maxhops
<number{1-255}>
The upper limit on the number of
routers through which a packet can
pass.
dstport
<number{1-65535}>
The UDP destination port number to
send to.
maxfail
<number{0-255}>
The max number of consecutive
timeouts allowed before terminating a
traceroute request.
type
<{icmp|udp}>]
The type of traceroute packet(s).
utime
<{disabled|enabled}>
Display time in microseconds.
Example
Below is an example of a traceroute command and its reply:
{Administrator}=>traceroute addr 25.0.0.1 count 4
ttl=1
101.101.101.1
5731 us 5446 us 5466 us 5789 us
ttl=2
25.0.0.1
6089 us 5779 us 5699 us 6023 us
188
E-DOC-CTC-20051017-0155 v1.0
Chapter 11
SpeedTouch™ Advanced Diagnostics
11.3.5 Ethernet Diagnostics
Non-intrusive Sniffing
For debugging purposes, the SpeedTouch™ offers a port mirroring feature. This
means that, three out of the four physical ethernet ports can be used for network
connections, while the remaining ethernet port can be used to connect a sniffing
device. In this way, when there is a network problem, a sniffer can be connected
without causing any intrusion in the network.
The first thing to do is to determine which ethernet port will be used for sniffing
purposes. In the example below ethernet port four will be used. Use the following
command to set port four as capturing port:
=>:eth switch mirror capture port=4
=>
To verify which port has been set as capture port, use the following command:
=>:eth switch mirror capture
Mirror capture port=4
=>
You can now set a port that you want to monitor to on the mirror capture port. This
can be done for egress traffic (packets leaving the modem) and ingress traffic
(packets towards the modem). In the example below we will monitor ingress traffic
on ethernet port one and egress traffic on ethernet port two. Use the following
commands:
=>:eth switch mirror ingress port=1 state=enabled
=>:eth switch mirror egress port=2 state=enabled:
All traffic comming in to the modem on ethernet port one will now be mirrored on
ethernet port four. All traffic leaving the modem on port two will also be mirrored
on ethernet port four. During port mirroring the capture port can still be used as a
normal ethernet port.
E-DOC-CTC-20051017-0155 v1.0
189
Chapter 11
SpeedTouch™ Advanced Diagnostics
To verify which port is being mirrored (ingress or egress) use the following
commands:
=>:eth switch mirror ingress
Ingress mirror port = 1
=>:eth switch mirror egress
Egress mirror port = 2
=>
When there is no need to mirror traffic to ethernet port four any more you can
disable the mirroring by executing the following command:
=>:eth switch mirror ingress port=1 state=disabled
=>:eth switch mirror egress port=2 state=disabled
190
E-DOC-CTC-20051017-0155 v1.0
Chapter 11
SpeedTouch™ Advanced Diagnostics
11.3.6 Management Diagnostics
SNMP and Syslog
The SpeedTouch™ Simple Network Management Protocol (SNMP) and Syslog
modules are industry standard management utilities to diagnose the device’s
status, connections, etc.
For a full description of the SpeedTouch™ SNMP module and Syslog, see “10.1 An
Introduction to SNMP” on page 134 and “10.3 The SpeedTouch™ Syslog” on
page 160.
System
To monitor the SpeedTouch™ physical status, following command is available:
:system debug stats
Displays SpeedTouch™ cpu and memory statistics
=>:system debug stats
Cpu statistics:
--------------Maximum cpu load: 35%
Minimum cpu load: 0%
Average cpu load: 3%
Current cpu load: 7%
Memory statistics:
-----------------CHIP memory
total/used/free/min (in KB): 2815/1815/1000/1000
Application memory total/used/free/min (in KB): 17804/3200/14603/
14555
=>
E-DOC-CTC-20051017-0155 v1.0
191
Chapter 11
SpeedTouch™ Advanced Diagnostics
192
E-DOC-CTC-20051017-0155 v1.0
Chapter 12
SLA Monitoring.
12 SLA Monitoring.
Introduction
The SpeedTouch™ supports Service Level Agreement/QoS monitoring on a
continuous basis. An extended ping or trace route process can be started from the
SpeedTouch™ to another node in the worldwide IP network, to measure the QoS
(round-trip delay, packet loss, jitter, availability, routing stability, ..) to this other
node and all intermediate nodes. Interim and final results can be consulted on web,
CLI and via SNMP (RFC 2925).
Ping and traceroute are two very useful functions for managing networks. Ping is
typically used to determine if a path exists between two hosts while traceroute
shows an actual path
Ping Process
Ping is implemented using the Internet Control Message Protocol (ICMP) "ECHO"
facility. The SpeedTouch™ supports the DISMAN-PING-MIB as in RFC 2925 and up
to four concurrent ping tests.
SLA Ping Configuration
The SLA ping process can be configured by executing the following CLI command:
=>:sla ping add test=internet addr=11.0.0.138
The following parameters are mandatory :
test : this is just a name to identify the ping test
addr : this is the peer IP address to which the ICMP echo requests will be
send
E-DOC-CTC-20051017-0155 v1.0
193
Chapter 12
SLA Monitoring.
Now that we defined an SLA ping test we need to configure the test. The following
parameters can be configured:
194
Parameter
Description
Values
test
The name of the ping test to
configure.
string
addr
The destination IP address.
string
size
The size of the data portion to
be transmitted in a ping probe.
number{0-20000}
timeout
The timeout value, in seconds,
for a ping operation
number{1-60}
count
The number of times to send a
ping probe.
number{1-15}
datafill
The data fill pattern of a probe
packet.
quoted string
frequency
The number of seconds to wait
before repeating a ping test.
number{0-65535}
maxrow
The max number of entries in
the history table.
number{0-50}
storagetype
The storage type of this entry.
volatile or
nonVolatile
trap
The value determines when
and if to generate a
notification.
[+/-]flag[+/-flag...]
probeFailure
testFailure
testCompletion
trapprobefilter
The number of successive
probe failures before initiating
a pingProbeFailed notification.
number{0-15}
traptestfilter
The number of ping failures
within one test before initiating
a pingTestFailed notification.
number{0-15}
type
The implementation method to
be used for the ping test.
IcmpEcho or
UdpEcho
descr
The descriptive name of the
ping test.
quoted string
srcaddr
Ip source address to be used.
ip-address
intf
Interface name.
none|loop|ipsec0|In
ternet|lan1|wan1|d
mz1|guest1
bypassrt
Bypass the normal routing
tables.
disabled or enabled
dsfield
The value to store in the
Differentiated Service Field in
the IP packet
number{0-255}
E-DOC-CTC-20051017-0155 v1.0
Chapter 12
SLA Monitoring.
Use the following command to modify the SLA ping parameters:
=>:sla ping modify
test = internet
[addr] = 11.0.0.138
[size] = 200
[timeout] = 3
[count] = 15
[datafill] = test
[frequency] = 2
[maxrow] = 50
[storagetype] = nonVolatile
[trap] =
[trapprobefilter] = 2
[traptestfilter] = 12
[type] = IcmpEcho
[descr] =
[srcaddr] = 0.0.0.0
[intf] = lan1
[bypassrt] = disabled
[dsfield] = 0
:sla ping modify test=internet size=200 count=15 datafill=test
frequency=2 trapprobefilter=2 traptestfilter=12 intf=lan1
=>
Starting the SLA Ping
The SLA Ping process has been configured now. You now need to start the process,
to do so, use the following command:
=>:sla ping start test=internet
=>
SLA Ping Result
Now that the SLA ping process has been started you can view the SLA ping results.
Use the following command:
=>:sla ping list
internet : [owner = modem] dest = 11.0.0.138
size = 200 timeout[s] = 3 count = 15
datafill = test
frequency[s] = 2 maxrows = 50
trapflag =
probefailfilter = 2 testfailfilter = 12
type = IcmpEcho storagetype = nonVolatile
descr =
srcaddr = 0.0.0.0
intf = wan1 bypassrt = no dsfield = 0
result Info
status = in progress
minrtt[us] = 1104 maxrtt[us] = 8910
avgrtt[us] = 5006 rttsumofsqr[ms] = 130
responses = 4 sentprobes = 4
lastgoodresponse = 02/01/70 04:33:00.306942
=>
E-DOC-CTC-20051017-0155 v1.0
195
Chapter 12
SLA Monitoring.
Following results will be displayed :
SLA Ping History
Name
Description
status
In Progress, Stopped
minrtt
Minimum RTT (Round-Trip-Time): microseconds
maxrtt
Maximum RTT: microseconds
avgrtt
Average RTT: microseconds
rttsumofsqr
RttSumOfSquares : milliseconds
responses
Probe Responses: number of responses received
sentprobes
Sent Probes: number of probes sent
A complete list of the SLA pings send can be view as well. To do so, use the
following CLI command:
=>:sla ping hist test=internet owner=modem
Index
2968
2969
2970
2971
2972
2973
2974
2975
2976
2977
2978
2979
2980
2981
2982
2983
=>
196
Rtt[us]
1106
1120
1081
1134
1128
1108
1129
1128
1123
1129
1131
1153
1125
1087
1073
1124
resp
resp
resp
resp
resp
resp
resp
resp
resp
resp
resp
resp
resp
resp
resp
resp
Status
received
received
received
received
received
received
received
received
received
received
received
received
received
received
received
received
RC
0
0
0
0
0
0
0
0
0
0
0
0
0
0
0
0
02/01/70
02/01/70
02/01/70
02/01/70
02/01/70
02/01/70
02/01/70
02/01/70
02/01/70
02/01/70
02/01/70
02/01/70
02/01/70
02/01/70
02/01/70
02/01/70
Timestamp
05:00:45.840097
05:00:46.850092
05:00:47.860067
05:00:48.870117
05:00:49.880114
05:00:50.890088
05:00:51.900146
05:00:52.910103
05:00:53.920114
05:00:54.929483
05:00:55.939495
05:00:58.960329
05:00:59.969473
05:01:00.979445
05:01:01.989426
05:01:02.999517
E-DOC-CTC-20051017-0155 v1.0
Chapter 12
SLA Monitoring.
Traceroute Process
SLA Traceroute
configuration
Traceroute is usually implemented by transmitting a series of probe packets with
increasing time-to-live values. A probe packet is a UDP datagram encapsulated into
an IP packet. Each hop in a path to the target (destination) host rejects the probe
packet (probe's TTL too small) until its time-to-live value becomes large enough for
the probe to be forwarded. Each hop in a traceroute path returns an ICMP message
that is used to discover the hop and to calculate a round trip time. Some systems
use ICMP probes (ICMP Echo request packets) instead of UDP ones to implement
traceroute. In both cases traceroute relies on the probes being rejected via an ICMP
message to discover the hops taken along a path to the final destination. Both
probe types, UDP and ICMP, are encapsulated into an IP packet and thus have a TTL
field that can be used to cause a path rejection.
The SLA trace route process can be configured by executing the following CLI
command:
=>:sla traceroute add test=route addr=11.0.0.138
=>
The following parameters are mandatory :
E-DOC-CTC-20051017-0155 v1.0
test : this is just a name to identify the trace route test.
addr : this is the peer IP address of which we want to trace the route.
197
Chapter 12
SLA Monitoring.
Now that we defined an SLA ping test we need to configure the test. The following
parameters can be configured:
198
Parameter
Description
Values
test
The name of the traceroute
test to configure.
string
addr
The destination IP address.
string
size
The size of the data portion to
be transmitted in a traceroute
request.
number{0-20000}
timeout
The timeout value, in seconds,
for a traceroute request
number{1-60}
probePerHop
The number of times to
reissue a traceroute request
with the same time-to-live
value .
number{1-10}
port
The UDP destination port
number to send to.
number{1-65535}
maxTtl
The upper limit on the number
of routers through which a
packet can pass.
number{1-255}
initTtl
The initial time-to-live value.
number{0-255}
createHopEntries
Enables creation of traceroute
hop table.
disabled or enabled
frequency
The number of seconds to wait
before repeating a traceroute
test.
number{0-65535}
maxrow
The max number of entries in
the history table.
number{0-100}
storagetype
The storage type of this entry.
volatile or
nonVolatile
trap
The value determines when
and if to generate a
notification.
[+/-]flag[+/flag...]{pathChange
testFailure
testCompletion}
type
The implementation method to
be used for the traceroute test.
IcmpEcho ro
UdpEcho
descr
The descriptive name of the
traceroute test.
quoted string
srcaddr
Ip source address to be used.
ip-address
intf
Interface name.
none, loop, ipsec0,
Internet, lan1,
wan1, dmz1, guest1
E-DOC-CTC-20051017-0155 v1.0
Chapter 12
SLA Monitoring.
Parameter
Description
Values
maxfail
The max number of
consecutive timeouts allowed
before terminating a
traceroute request
number{0-255}
bypassrt
Enables bypassing of the
normal routing tables.
disabled or enabled
dffield
Enables setting of the don't
fragment flag in the IP headers
of the traceroute requests.
disabled or enabled
dsfield
The value to store in the
Differentiated Service Field in
the IP packet.
number{0-255
Use the following command to modify the SLA traceroute parameters:
=>:sla traceroute modify
test = route
[addr] = 11.0.0.138
[size] = 0
[timeout] = 3
[probePerHop] = 3
[port] = 33434
[maxTtl] = 30
[initTtl] = 1
[createHopEntries] = disabled
[frequency] = 0
[maxrow] = 50
[storagetype] = nonVolatile
[trap] =
[type] = UdpEcho
[descr] =
[srcaddr] = 0.0.0.0
[intf] = none
[maxfail] = 5
[bypassrt] = disabled
[dffield] = disabled
[dsfield] = 0
:sla traceroute modify test=route
=>
Starting the SLA
Traceroute
The SLA traceroute process has been configured now. You now need to start the
process, to do so, use the following command:
=>:sla traceroute start test=route
=>
E-DOC-CTC-20051017-0155 v1.0
199
Chapter 12
SLA Monitoring.
SLA Traceroute result
Now that the SLA traceroute process has been started you can view the SLA
traceroute results.
Use the following command:
=>:sla traceroute list
route: [owner = modem] dest = 11.0.0.138
size = 0 timeout[s] = 3 probePerHop = 3
port = 33434 maxTTL = 30 InitialTTL = 1
frequency[s] = 0 maxrows = 50
maxfailures = 5 createHopEntries = no
trapflag =
type = UdpEcho storagetype =nonVolatile
descr =
srcaddr = 0.0.0.0
intf = none
bypassrt = no dsfield = 0
dffield = no
result Info
status = stopped
currHopCount = 1 currProbeCount = 3
testAttempts = 1 testSuccesses = 1
lastGoodPath = 02/01/70 06:02:22.242930
=>
200
E-DOC-CTC-20051017-0155 v1.0
Chapter 12
SLA Monitoring.
Following results will be displayed :
SLA Traceroute History
Name
Description
status
In Progress, Stopped
currHopCount
Reflects the current TTL value (range from 1 to
255) for a traceroute operation.
currProbeCount
Reflects the current probe count (1..10) for a
traceroute operation.
testAttempts
The current number of attempts to determine a
path to a target.
testSuccesses
The current number of attempts to determine a
path to a target that have succeeded. The value
of this object MUST be reported as 0 when no
attempts have succeeded.
Lastgoodpath
Date and Time.
A history of the SLA traceroute can be view as well. To do so, use the following CLI
command:
=>:sla traceroute hist test route owner modem
Index Ttl
Count
Addr
Rtt[us]
Status RC
1
1
1
11.0.0.138 1266
resp received
06:02:19.215236
2
1
2
11.0.0.138 1267
resp received
06:02:20.224824
3
1
3
11.0.0.138 1295
resp received
06:02:21.234845
Timestamp
3 02/01/70
3 02/01/70
3 02/01/70
=>
E-DOC-CTC-20051017-0155 v1.0
201
Chapter 12
SLA Monitoring.
202
E-DOC-CTC-20051017-0155 v1.0
Chapter 13
Resetting the SpeedTouch™
13 Resetting the SpeedTouch™
Introduction
Normal reboot
If needed you can reset the SpeedTouch™ to factory defaults or just reboot.
To reboot the SpeedTouch™ without erasing the current configuration,use the
following command:
=>:saveall
This command will save the current configuration to the user.ini file.
Now enter the following command:
=>:system reboot
This command will reboot the SpeedTouch™ and will load the user.ini file upon
reboot so the previous saved configuration will be restored.
Reset to factory
defaults
To reset the SpeedTouch™ to factory defaults, usethe following command:
=>:system reset factory=yes proceed=yes
This command will delete the user.ini file (if the previous configuration was saved)
and reboots the SpeedTouch™.
If there is an isp.def file present in the ‘dl directory it will load this file. The isp.def
contains an Internet Service Provider specific configuration.
If no ips.def file is present on the device the SpeedTouch™ will reboot with the
hardware defaults.
E-DOC-CTC-20051017-0155 v1.0
203
Chapter 13
Resetting the SpeedTouch™
The Reset button
On the back side of the SpeedTouch™ there is a resetbutton. By pressing this button
for three to six seconds the device will reboot and startup with the settings defined
in the isp.def if present.
The reset button can be disabled by executing the following command:
=>:system config resetbutton=disabled
This command will disable the reset button on the back of the SpeedTouch™. In
case of problems proceed as follows to enable the reset button again:
204
Step
Action
1
Switch off the SpeedTouch™.
2
Press and hold the reset button.
3
Switch on the SpeedTouch™.
4
Keep the reset button pushed in for ca. 30 seconds.
5
Release the reset button.
E-DOC-CTC-20051017-0155 v1.0
© THOMSON 2006 All rights reserved. E-DOC-CTC-20051017-0155 v1.0 .
Need more help?
Additional help is available online at www.speedtouch.com