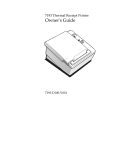
1
User’s Guide
80p3gb.p65
1
12/01/99, 11:43
Every effort has been made to ensure that the information in
this document is complete, accurate, and up-to-date. Oki assumes
no responsibility for the results of errors beyond its control.
Oki also cannot guarantee that changes in software and
equipment made by other manufacturers and referred to in this
guide will not affect the applicability of the information in it.
Mention of software products manufactured by other companies
does not necessarily constitute endorsement by Oki.
Oki and OKIPOS are registered trademarks of Oki Electric
Industry Company Ltd.
© Copyright 1998 by Oki. All rights reserved.
OKIPOS printers are UL & CSA Listed, VDE Certified, and
carry the CE Mark.
Epson is a registered trademark of Seiko Epson Corporation.
Axiohm is a registered trademark of Dardell Technologies.
UL, CSA, VDE, CE Safety Statement
Produced by the Oki Documentation Dept.
This product complies with the requirements of the Council
Directives 89/336/EEC and 73/23/EEC on the approximation
of the laws of the member states relating to electromagnetic
compatibility and low voltage.
Oki Systems (UK) Limited
550 Dundee Road
Slough Trading Estate
Slough
Berks SL1 4LE
Tel:
44 (0) 1753 819819
Fax: 44 (0) 1753 819899
http://www.oki.co.uk
Oki Systems (Ireland) Limited
The Square Industrial Complex
Tallaght
Dublin 24
Tel: (01) 4598666
Fax: (01) 4598840
http://www.oki.ie
Hawthorn Business Centre
Adelaide Industrial Estate
Falcon Road
Belfast BT12 6HP
Tel: (01232) 572355
Fax: (01232) 572350
http://www.oki.ie
This is a Class A product. In a domestic
environment this product may cause radio
interference, in which case the user may be
required to take adequate measures.
2
80p3gb.p65
OKIPOS 80 Plus III
2
12/01/99, 11:43
Safety Instructions .......................................................... 4
About the OKIPOS 80 Plus III Printer ........................ 5
What Is in This Book? ............................................. 5
Description of the OKIPOS 80 Plus III Printer ...... 6
Setting Up the Printer ................................................... 8
Unpacking the Printer .............................................. 8
Choosing a Location for the Printer .................... 10
Connecting the Power Cable ................................ 11
Loading and Removing Paper ............................. 12
Testing the Printer .................................................. 13
Connecting the Cables .......................................... 14
Setup Checklist ...................................................... 15
Operating the Printer .................................................
Operating the Keypad ...........................................
Cleaning the Printer ...............................................
Cleaning the Thermal Printhead ..........................
16
16
16
17
Appendix ....................................................................
Cash Drawer Pin Assignments .............................
Serial Cable ............................................................
Parallel Cable .........................................................
18
18
18
19
Index ........................................................................... 20
User’s Guide
80p3gb.p65
3
3
12/01/99, 11:43
English
Contents
Safety Instructions
Your Oki printer has been carefully designed to give you years
of safe, reliable performance. As with all electrical equipment,
however, there are a few basic precautions you should take to
avoid hurting yourself or damaging the printer:
•
•
Read the setup instructions in this handbook carefully.
Be sure to save it for future reference.
•
Read and follow all warning and instruction labels on the
printer itself.
If anything happens that indicates that your printer is not
working properly or has been damaged, unplug it immediately
and contact your dealer.
Aside from the routine maintenance described in this
handbook, do not try to service the printer yourself;
opening the cover may expose you to shocks or other
hazards.
These are some of the things to look for:
•
Unplug the printer before you clean it. Use only a damp
cloth; do not use liquid or aerosol cleaners.
•
Liquid has been spilled into the printer, or it has been
exposed to water.
•
Do not use your printer near water, or spill liquid of any
kind into it.
•
The printer has been dropped, or the cabinet is
damaged.
•
Be certain that your power source matches the rating listed
on the back of the printer. If you are not sure, check with
your dealer or with your local power company, or use the
appropriate Oki power supply unit.
•
The printer does not function normally when you are
following the operating instructions.
•
The power outlet into which you plug your printer must
remain accessible at all times.
•
If you are using an extension cable or power strip with
the printer, make sure that the total of the amperes required
by all the equipment on the extension is less than the
extension’s rating. The total ratings of all equipment
plugged into the outlet should not exceed 15 amperes.
4
80p3gb.p65
OKIPOS 80 Plus III
4
12/01/99, 11:43
This book also provides some general and technical information
about the printer, so you’ll know what the features are, how
reliable it is, and what its printing capabilities are.
What Is in This Book?
Where Can You Find More Information?
Who Is It For?
This book is an operator’s guide intended for new and
experienced operators. If you are going to set up, use, or maintain
the OKIPOS 80 Plus III Printer with any point-of-sale system,
then this book is for you.
What Does It Cover?
A Maintenance Manual is also available and is intended for
trained technicians who service the printer.
Contact your dealer to order these guides.
Of course, this book only covers the OKIPOS 80 Plus III Printer,
not the entire point-of-sale system, but it will tell you all you
need to know about using the printer properly. You’ll find out
what supplies you need to order, how to set up and test the
printer, and how to do the common tasks listed here:
•
•
•
A Programming Guide is available if you need to know how to
program a point-of-sale terminal or a PC to work with the printer.
It describes all the commands the printer recognises to perform
its functions.
Change the paper
Correct problems
Clean the printer
Service Information
If you need a printer serviced, whether it’s under warranty or
not, call your dealer. You may have several options for service
depending on the contract you have. Your dealer may service
the printer directly or have a service agreement with a local
service contractor.
You will need to re-pack the printer and ship it to a service
centre. Be sure to keep all the packing materials and the box.
Please refer to “Unpacking the Printer”.
User’s Guide
80p3gb.p65
5
5
12/01/99, 11:43
English
About the OKIPOS 80 Plus III Printer
Description of the OKIPOS 80 Plus III Printer
•
4.0 inch (approx. 10cm) diameter thermal paper roll, 420
feet (approx. 128m) per roll
The OKIPOS 80 Plus III Printer is a stand-alone, 40-column,
thermal printer. The OKIPOS 80 Plus III Printer performs high
speed receipt printing in a point-of-sale environment and is
available in the following models:
•
Automatic Cutter (partial cut)
•
Easy paper load
•
RS232C Serial Interface with 8K buffer
•
OKIPOS 80 Plus III Serial
•
Epson® TMT-88 and Axiohm® 793/794 Emulation
•
OKIPOS 80 Plus III Serial with power supply unit
•
Paper Out sensor
•
OKIPOS 80 Plus III Parallel
•
Operator controlled self-test
•
OKIPOS 80 Plus III Parallel with power supply unit
•
Dual cash drawer connectors (RJ12) and drivers (24V,
1.5 amp pulse for approximately 150 ms; drawer open/
closed status reporting)
•
Characters and Graphics
OKIPOS 80 Plus III Print Speed
•
Print Speed 135 mm. per second - text
•
Paper slew speed 135 mm. per second
•
Wide print Zone – 72 mm.
Standard Features
•
8 dots per mm (203dpi) horizontal and vertical
The following features and items are standard on all OKIPOS
80 Plus III printers:
•
All characters scalable up 8 times vertical and
horizontal
•
APA bit map graphics
TEXT - 6LPI
TEXT - 8LPI
•
32 LPS
42LPS
44-column printing at 15.6 characters per inch (6.14
characters per cm)
•
Reverse video, and rotated on the same line
6
80p3gb.p65
OKIPOS 80 Plus III
6
12/01/99, 11:43
Print Characteristics
The optional features either replace a standard feature or
enhance the operation of the printer. All optional features are
installed at the factory and must be selected when the printer is
ordered.
The OKIPOS 80 Plus III Printer prints characters in a variety of
pitches. All pitches are scaleable up to eight (8) times
horizontally or vertically.
•
IEEE 1284 Bi-Directional Parallel (Optional)
•
Custom colors and logo
For information about programming the printer to print a
particular pitch or style, please refer to the Programmer’s Guide.
You can order the Programmer’s Guide from your Oki dealer.
Pitch (Characters per Inch)
Reliability
•
Mean Time between failure: 93,600 hours @ 12.5% Ratio
•
Mean Cycles between Failure: 32,000,000 Print Lines
•
Mean time to repair: 15 minutes
•
Cutter: 1,000,000 Cut Life
44
20.3 CPI
57
User’s Guide
80p3gb.p65
Max. Characters per Line
15.6 CPI
7
7
12/01/99, 11:43
English
Optional Features
Setting Up the Printer
Follow the instructions in this chapter to quickly set up the
OKIPOS 80 Plus III Printer. We recommend that you check it
out first before you connect it to your system to make sure
everything is working properly. You should have it ready to
hook up to your system in just a few minutes.
Unpacking the Printer
Be sure to save the box and packing materials in case you
need to send the printer to be serviced.
1.
If any damage has occurred to the box, carefully examine
the printer and accessories before setting up the printer.
Report all evidence of damage or abuse to the dealer and
shipper.
Here is a list of what is covered in this chapter:
•
Unpacking the printer
•
Choosing a location for the printer
•
Connecting the power cord
•
Loading paper
•
Testing the printer
•
Connecting the communication and cash drawer cables
Before removing the printer, examine the outside of the
box for signs of damage.
2.
Open the box and remove all the papers and supplies
envelope.
3.
Carefully lift the printer (inside the packing material) out
of the box and set it on a sturdy, flat surface.
4.
Separate the printer from the packing material.
Simply reverse these steps if you need to repack the printer
to send in for service (you do not need to repack the
supplies).
5.
Check the printer for any signs of damage.
If the printer or any parts are damaged, report this to the
dealer or shipper immediately.
8
80p3gb.p65
OKIPOS 80 Plus III
8
12/01/99, 11:43
English
Check That All Items Are Present
The following items are packed in the box and supplies envelope.
If any items are missing, contact your dealer.
•
OKIPOS 80 Plus III Operator’s Guide
•
Printer
•
Supplies Envelope
•
Paper Roll
•
Power Supply Unit (if applicable)
User’s Guide
80p3gb.p65
9
9
12/01/99, 11:43
Choosing a Location for the Printer
Environmental Conditions
The OKIPOS 80 Plus III Printer is designed to be placed on
point-of-sale terminals, counter tops, or any other flat stable
surface that can support the weight of the printer (about 1.8kg).
Please refer to the dimensions when selecting the best possible
location. Be aware of the environmental conditions of the
location where you place the printer. Generally, the environment
in any store is suitable for operating the printer.
The printer will run at its best when stored and operated in an
environment that meets the following temperature and humidity
conditions:
Dimensions
•
Width: 152mm
•
Length: 216mm
•
Height: 142mm
•
Operating temperature: 0° to 40°C
•
Storage temperature: -10° to +60°C
•
Operating relative humidity: 10% to 90% (noncondensing)
•
Storage relative humidity: 5% to 90%
Weight
•
Approximate weight: 1.8kg
•
Approximate shipping weight: 4.5kg
10
80p3gb.p65
OKIPOS 80 Plus III
10
12/01/99, 11:43
The external power supply and AC power cable are
ordered and shipped separately.
2.
Connect the power cable to the external power supply.
3.
Plug the power cable into an earthed three-pin power
socket.
The printer must be earthed through the three-pin power
connector. DO NOT use any ground defeating adapter.
1.
Connect the external power supply cable to the power
supply connector located on the back of the back of the
printer.
The power cable should be connected to a nearby earthed
power socket which should remain easily accessible at
all times.
The LED turns green indicating the printer is on.
The printer takes about 1.5 seconds to begin operation.
User’s Guide
80p3gb.p65
11
11
12/01/99, 11:43
English
Connecting the Power Cable
Loading and Removing Paper
This section describes how to load and remove paper. Change
the paper when the Status LED flashes. This indicates that the
paper is low. The printer will stop. You must change the paper
for the printer to resume operating.
2.
Place the paper roll so the paper unwinds from the bottom
(front).
3.
Close the cover firmly.
Put in the New Paper Roll
Follow these instructions for loading paper.
If this is a new installation, a receipt roll is supplied with
the printer.
1.
Open the paper cover by firmly pressing the cover latch
button.
If you are changing the paper, remove the used supply
roll.
12
80p3gb.p65
OKIPOS 80 Plus III
12
12/01/99, 11:43
English
Testing the Printer
You can test the printer to ensure that it is running properly.
The sample on the following page shows what a printout of the
test may look like. The test pattern varies depending on the
printer model and the character set selected when the printer
was ordered.
Run the test after loading the paper, but before connecting it to
a host system. If the characters do not print properly, check to
make sure the paper is installed correctly, and that suitable
thermal paper is being used.
If the printer is still not working correctly, contact your dealer.
6.
Close the paper cover.
7.
The printer will print some technical information.
8.
To print some sample code pages, press the line feed
button.
These modes are described in the OKIPOS 80 Plus III
Programmer’s Guide.
To order this book, please contact your dealer. If you have
accidentally entered this menu mode, disconnect AC power and
then reconnect it again.
Test the Printer
1.
Open the printer cover.
2.
Plug the DC power cable from the external power
supply into the printer.
3.
Plug the AC power cable into the external power
supply.
4.
Plug the AC power cable into a grounded three-pin
power socket.
5.
The status LED will start flashing after approximately
1 ½ seconds.
User’s Guide
80p3gb.p65
13
13
12/01/99, 11:43
Connecting the Cables
Refer to the Appendix for information on the serial cable
requirements.
Now that you have set up and tested the printer, you are ready
to connect it to the point-of-sale system.
3.
Connecting the Communication Cable
Depending on the interface your system uses, connect either
the serial or parallel communication cable to the appropriate
connector on the back of the printer.
Connect the Parallel Cable
1.
Unplug the AC power cable from the earthed three- pin
power socket and turn the host system or PC off.
2.
Connect the 25-pin parallel interface cable to the connector
located on the back of the printer.
Cables are provided by your dealer or the system installer.
Connect the Serial Cable
1.
Unplug the AC power cable from the earthed three- pin
power socket and turn the host system or PC off.
2.
Connect the 9-pin serial interface cable to the connector
located on the back of the printer.
Tighten the two mounting screws on each side of the cable
connector.
Refer to the Appendix for information on the parallel cable
requirements.
14
80p3gb.p65
OKIPOS 80 Plus III
14
12/01/99, 11:43
Setup Checklist
1.
Unplug the AC power cable from the earthed three- pin
power socket.
Did you follow all of the steps to set up the printer? Here they
are again for you to check off.
2.
Connect the cash drawer cable to the connectors located
on the back of the printer.
•
Unpack the printer.
•
Choose a location for the printer.
•
Check the environmental conditions and the airflow
around the printer.
•
Connect the power cord.
•
Load the paper.
•
Test the printer.
•
Connect the communication and cash drawer cables.
Adapters are available for connecting cash drawers
equipped with BNC style connectors (the standard is a
modular, telephone style connector). The standard
connection emulates an Epson printer. Optional cash
drawer connections to emulate Axiohm® must be ordered
with the printer.
Contact your dealer for an adapter if required.
User’s Guide
80p3gb.p65
15
15
12/01/99, 11:43
English
Connecting the Cash Drawer Cables
Operating the Printer
Once the printer has been setup, there is very little that you
need to do during daily operation because most functions are
controlled by the host system. This chapter describes the
following few tasks that you will need to perform, some more
often than others:
In order of precedence:
Printer not configured
thermal head overheat
Cutter error
Cover open
Paper out
5 quick flashes
Rapid, continuous
3 quick flashes
Continuous
Slow, continuous
•
Operating the keypad
•
Cleaning the printer
Buttons
•
Cleaning the thermal printhead
The printer includes one button that has the following function:
For instructions on changing the paper, see “Loading and
Removing Paper”.
FEED Button
The FEED button advances receipt paper.
Operating the Keypad
The keypad contains one button and one status LED for easy
operation of the printer.
Status LED
There is a single status LED to display on-line and error
conditions. The following table describes the types of error
conditions possible and patterns that the LED will flash in those
conditions.
Cleaning the Printer
Cleaning the printer occasionally and keeping it well maintained
will help it to last longer and run better.
Do not use rubbing alcohol or any kind of cleaner on any
internal parts of the printer, as some parts may crack or
break as a result.
16
80p3gb.p65
OKIPOS 80 Plus III
16
12/01/99, 11:43
English
Cleaning the Thermal Printhead
Under normal conditions the thermal printhead does not need
cleaning.
If the print characters are not printing correctly, wipe the thermal
printhead with alcohol and a lint free cloth.
Do not get any alcohol on any of the other parts of the
printer mechanism or the casing.
User’s Guide
80p3gb.p65
17
17
12/01/99, 11:43
RS-232C Communication
Appendix
The RS-232C interface uses the following protocol and
communication characteristics:
Cash Drawer Pin Assignments
Function
Drawer Drive +
Drawer Drive Status Signal
Status Ground
Frame Ground
Drawer 1
Pin 4
Pin 5
Pin 2
Pin 3
Pin 6
Drawer 2
Pin 4
Pin 1
Pin 2
Pin 3
Pin 6
•
Up to 19.2K Baud
•
Up to 6K Buffer
•
Ready/Busy or XON/XOFF Protocol
•
Communications Diagnostic Mode
Pin Assignments for 9-pin Printer Connector
Pin
Pin 1
Pin 2
Pin 3
Pin 4
Pin 5
Pin 6
Pin 7
Pin 8
Pin 9
Serial Cable
Cable Requirements
Name
DCD
RX
TX
DTR
GND
DSR
RTS
CTS
SSD
Description
Data Carrier Detect
Receive Data
Transmit Data
Data Terminal Ready
Signal Ground
Data Set Ready
Request To Send
Clear To Send
Secondary Data
The OKIPOS 80 Plus III Printer requires an RS-232C shielded
cable, no more than 50 feet long.
18
80p3gb.p65
OKIPOS 80 Plus III
18
12/01/99, 11:43
Parallel Cable
The following cable configurations are for different host
requirements.
Cable Requirements
English
Serial Cable Configurations
The OKIPOS 80 Plus III Printer requires a 25-pin male D-Shell
connector at the printer. To connect the printer to most PC’s
use a 25-pin male to 25-pin male parallel interconnect cable.
9-pin Serial Cable
Pin Assignments
Use this cable for OKIPOS 80 Plus III printers connected to PCs
or PS/2s with 9-pin serial ports.
25-pin Serial Cable
Pin
Pin 1
Pin 2-9
Pin 10
Pin 11
Pin 12
Pin 13
Pin 14
Pin 15
Pin 16
Pin 17
Pin 18-25
Signal
STROBE
D0 - D7
ACK\
BUSY
PE
SLCT
AUTOFD
ERR\
INIT\
SLIN
GND
Description
Clock Data to printer
Data
Printer Accepted Data
Printer is Busy
Paper Out/ Status
Printer Selected
Auto feed paper
Printer Error
Initialize the Printer
Select Printer
Ground
Direction
Host to Printer
Host to Printer
Printer to Host
Printer to Host
Printer to Host
Printer to Host
Host to Printer
Printer to Host
Host to Printer
Host to Printer
Use this cable for OKIPOS 80 Plus III printers connected to PCs
or PS/2s with 25-pin serial ports.
User’s Guide
80p3gb.p65
19
19
12/01/99, 11:43
Index
B
buttons ....................................................... 16
C
cables
connecting ........................................... 14
cash drawer connector
pin assignments ................................... 18
character pitch ............................................ 7
character set
sample printout ................................... 13
cleaning ..................................................... 16
D
dimensions of printer ............................... 10
E
environment of printer ............................. 10
F
features ........................................................ 6
options ................................................... 7
Feed button ............................................... 16
K
keypad
button ................................................... 16
Status LED ........................................... 16
O
R
options ......................................................... 7
reliability ..................................................... 7
repacking the printer .................................. 8
RS-232C communication ........................ 18
P
paper
loading ................................................. 12
parallel cable
connecting ........................................... 14
requirements ........................................ 19
parallel cable connector
pin assignments ................................... 19
pin assignments
cash drawer connector ....................... 18
parallel cable connector ..................... 19
serial cable connector ......................... 18
pitch ............................................................. 7
power cord
connecting ........................................... 11
print characteristics .................................... 7
printer
cleaning ............................................... 16
dimensions ........................................... 10
environment ......................................... 10
features ................................................... 6
print speeds ............................................ 6
options .................................................... 7
reliability ................................................. 7
repacking ................................................ 8
testing ................................................... 13
unpacking ............................................... 8
weight ................................................... 10
S
serial cable
configurations ..................................... 19
requirements ........................................ 18
serial cable connector
pin assignments ................................... 18
service information ...................................... 5
Status LED ................................................ 16
T
test printout ............................................... 13
testing the printer ..................................... 13
thermal printhead
cleaning ............................................... 17
U
unpacking the printer ................................. 8
W
weight of printer ....................................... 10
20
80p3gb.p65
OKIPOS 80 Plus III
20
12/01/99, 11:43