1
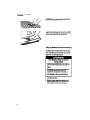
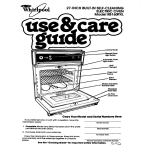
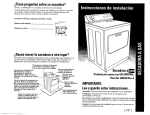
Use& CareGuide
CONTINUOUS-CLEANING
GASRANGE
SF337PEX(Shown)
STANDARD-CLEANING
GASRANGE
SF317PEX
Contents
hportsnt
Safety InstrucUons ..................!?!Z
Using Your Rang. .......................................... .6
Using the surface burners .............................. 6
Setting the dock ............................................ .7
Using the Minute Timer .................................. 7
Using the oven control ................................... 8
Baking/roasting .......................................... .8
Adjusting the oven temperature control.. .... .
Broiling.. .................................................... 10
The oven vent .............................................. 10
Cuing For Your Range ................................11
Control panel and knobs .............................. 11
Sudaca burner grates .................................. 12
Surface burnem and caps ............................ 13
Removable oven door ................................. -14
Using the standardcleaning oven.. ............. .14
Using the continuous-deaning oven ........... .15
Cleaning tips ................................................ 17
The oven li9ht ............................................... 18
If You Need Servloe Or Assistance ............ .19
WhIrlpool Cooking Product Warranty ........ .24
81991 Whlrlbcol Corporation
Thenk you for buying a Whirlpool qaplbnca
Pkrw complete and mall the Owner Fiegl*
trstlon Card provided wfth thls product. Then
complete ths form below. Have this information
ready if you need service or call with a question.
l Copy model and wrtal numbers from plate
(Imated on letI side ol toe panel) and purchase
date from sales slip.
l Keep this book, the Cooking Guide and sales
slip together in a handy place.
Uodd Number
Se&l Numbor
PurdunDau
You are responsible for:
Installing and leveling the range on a fbor
strong enough to support its weight, and where
it is protected from the elements. (See the
Installation Instructions.)
l Making sure the range is not used by anyone
unable to operate it properly.
. Properly maintaining the range.
l Using the range only for jobs expected of a
home range.
l Making sure the range is secured by a properly
installed anti-tip bracket.
l
ImportantSafetyInstructions
t&S ranges have been thoroughly tested for safe and efficient operation. However, as with any appllanca. there are specific installation and safety precautbns which must be folbwed lo ensure safe and
satisfactory operation.
To reduce the rWc of fire, l lactrlcal ahoc& Injury to .perstmr, of
lncludlng
demage when ushg the range, follow bask preaUons,
l FOR YOUR SAFETY l
DO NOT STORE OR USE GASOLINE OR OTHER FLAMMABLE
VAPORS AND LIQUIDS IN THE VlCINlTY OF THIS OR ANY
OTHER APPLIANCE. THE FUMES CAN CREATE A FlRE HAZARD
OR EXPLOSION.
l
IF
1.
2.
3.
4.
FOR YOUR SAFETY
l
YOU SMELL GAS:
OPEN WlNDOWS.
DON’T TOUCH ELECTRICAL SWITCHES.
EXllNGUlSH
ANY
OPEN FLAMES.
IMMEDIATELY CALL YOUR GAS SUPPLIER.
IMPROPER INSTALLATION, ADJUSTMENT, ALTERATION,
SERVICE OR MAINTENANCE CAN CAUSE INJURY OR
PROPERTY DAMAGE. REFER TO THIS MANUAL. FOR
ASSISTANCE OR ADDlTlONAL INFORMATlON CONSULT A
QUALlFlED INSTALLER, SERVICE AGENCY, MANUFACTURER
(DEALER) OR THE GAS SUPPLIER.
- IMPORTANT TO THE INSTALLER: PLEASE LEAVE THIS INSTRUCTION BOOK
WlTH THE UNIT.
TO THE CONSUMER: PLEASE READ AND KEEP THIS BOOK
FOR FUTURE REFERENCE.
fmportant !Safety lnstrudbns
Continued
l
Install or bcate the range only in accordance wlth the provided lnstallatiin Instructions. It Is recommended that the range bs
installed by a qualifii installer. The range
must be properly aDnnected to the oper
gas sqqdy and checked for leaks. r he
range must also be properly mnnected to
electrical supply and grounded.
l
l
l
l
l
l
l
l
To reduce the risk of tipping of the appliance, the appliance must be secured by a
properly installed anti-tip bracket. To check if
the bracket is installed properly, shine a
flashlight under range toward left rear cOrner
andverifythat the anti-tip bracket is
engaged. See Installation instructions for
further details.
Gas fuels and ambushon can resutl in
potential exposure to chemicals known to
cause cancer or reproductive harm. For
example, benzene is a chemical which is a
part of the gas supplied to the range. It is
amsumed in the flame during combustion.
However, exposure to a small amount of
benzene Is possble lt a gas leak occurs.
Formaldehyde, carbon mormxfde and soor
are by-products of incomplete combustion.
Properly adjusted burners with a bluish
rather than a yellow flame will minimize
incomplete 02mbustion.
Do not operate the range if it is not working
pmperly. or if i-thas been damaged.
Do not use the range for warming or heating
the room. Persons muld ba burned or
injured. or a fire could start.
l
l
l
Do not attempt to light the oven burner
during a power failure. Personal injury
could result.
Use the range only far its intended use as
described in this manual.
Do not wear loose or hanging garments
when using the range. They could ignite if
they touch a hot surface burner and you
could be burned.
Do not touch surface burners, areas near
burners or interior surfaces of oven. Areas
near surface burners and interior surfaces
of an oven beoome hot enough to cause
burns. During use, do not touch, or let
dothlng or other flammable materials
contact surface burners, areas near
sarlace burners or fnterbr surfaces of
oven. Other surfaces of the range may
beoome hot enough to cause burns; such
as, the oven vent opening. the surface
near the vent opening. the cooktop. the
oven door and window.
Make sure the utensils you use are large
enough to contain food and avoid boilovers and spill-avers. Heavy splattering or
spillcvers left on a range can ignite and
burn you. Pan she is especially important
In deep fat frying.
Turn pan handles inward, but not over
other surface burners, This will help
reduce the chance of burns, igniting of
flammable materials, and spills due to
bumping of the pan.
Use only dry potholders. Moist or damp
potholders on surface burners may result
in burns from steam. Do not let potholder
touch surface burners. Do not use a towel
or bulky doth for a potholder. It could
catch on fire.
l
l
l
l
l
l
l
l
l
l
Check to be sure glass cooking utensils are
safe far use on the range. Only certain
types of glass, glassceramic. ceramic.
earthenware or other glazed utensils are
suitable for ranges without breaking due to
the sudden change in temperature.
Do not use decorative covers or trivets over
the surface burners.
Do not heat unopened containers. They
could explode. The hot contents could
cause burns and container particles cnurld
cause injury.
Grease is flammable and should be
handled carefully. Let fat cool before
attempting to handle it. Do not albw grease
to a~llect around &top
or in vents. Ww
spiflovers immediately.
Do not use water on grease fires. Never
pick up a flaming pan. Smother flaming pan
on range by covering with a well-fitted lid,
cookie shoot or flat tray. flaming grease
outside of pan can be extinguished wilh
baking soda or, if available, a multipurpose
dry chemical or foam-type extinguisher.
Never leave surface burners unattended 1
high heat settings. A boil+ver could result
and cause smoking and greasy spill-avers
that may ignite.
Make sure surface burners are off when
you are finished, and when you are not
watching.
Use care when opening oven door. Let hot
air or steam escape before removing or
replacing food.
Always poslllon oven rack(s) in desired
location while oven is awl.
Do not store flammable materials on or
near the range. They coukl explode or
burn.
Do not store things children m’QM want
above the range. Children could be burned
or injured while climbing on it
l Do not have children alone or unattended
in area where the range is in use. They
should never be allowed to sit or stand on
any part of the range. They cculd be
burned or injured.
l Never use a match or other flame to look’
for a gas leak. Expbsion and injury could
result.
l Know where your main gas shut off valve is
located.
l Keep range vents unobstructed.
l Clean your range regularly. See care and
cleaning instructions in this manual.
l Be sure all range pafts are cool before
cleaning.
l Do not clean door heat seal. II ts essential
for a good seal. Care should be taken not
to rub, damage, or move the seal. Clean
only parts recommended in this Use and
Care Guide.
l Do not use oven deaners on continuouscleaning ovens. No commercial oven
cleaner or oven liner protective mating of
any kind should be used in or around any
part of the oven.
. Do not repair or replace any part of the
range unless specifically recommended in
this manual. All other servicing should be
referred to a qualified technician.
. Disconnect the electrical supply before
servicing the range.
l
- SAVE THESE INSTRUCTIONS -
5
UsingYourRange
Usingthe surface burners
Control knob0 must be pushed Irr, then turned
to the LITE fxuiitii. The cliiing riourKl is the
ignition sparking.
To stop the clicking sound after the burner
liits. turn the aontrol knob bedc to a desired
setting. The control knob can be set anywhere
between HI and OfF.
Surface burner rnarksm
The solid dot in the surface burner marker shows
which surfaca burner is turned on by that knob.
Unlll you get uti
to the ssttlng% w the
followhg as a gufde. For beat resutts. start
cooking at the high settings; then turn the control
knob down to continue cooking.
Upe UlE to light the burner. Aft&v the burner
lights, turn control back to a desired setting to
stop the clicking of the ignttii.
Uw HI to start foods cooking: to bring liquids
to a boil.
Use a rnedlum setting to continue cooking or
to fry chiien or pancakes; for gravy, pudding
and icing; to cook large amounts of vegetables.
Uee a low setilng to keep food warm until
ready to serve.
NOTE: Do not cook with the axltrol in the LITE
position.
In cast3 of a prolonged power failure:
Surface burners can tx manually lighted. Hold a
lighted match near a burner and turn the control
to the LITE position. After the burner lights. turn
the control to the desired setting.
Burn, Fire and Explosion Hazsrd
flame should not extend ayond
the edge of the caoklng utensil. The
flame can burn you and cause poor
cooklng results.
. Be sure all control knoba are turned to
OFF when you are not cookhg. Someone
oould be burned or a flrr could start If a
burner Is accidentally left ON.
l If the flame should go out while cooklng,
or If there Is a sfrong gas odor, turn ths
burners OFF. Walt five mlnutss for the
gas odor to dfsappsar, before rellghtlng
burner. If gas odor la still prewnt, sss
safety note on page 3. Failure to follow
thess precautions could reauff In
exploskn or flre.
l Do not attempt
to light the oven burner
durlng a power failure. personal injury
could result.
l
Burner
Settingthe clock
ven the range Is connectsd to power, the clock
p&p$y will blink at ‘88:W until the tlme-ofday
Tub the Set Knob in either direction to set
timedday.
(Knob must be turned four or fiie
cliis before time will advance.) The Inverted
triangle and the ckbck lights will light up on the
display while the time is being set.
Usingthe Minute Timer
The Minute Timer &es not start or stopthe
oven. tt works like a kitchen timer. il can be set
in minutes and seconds up to 9 hours 50
minutes. You will hear a tone when the set time
is up.
To eet the Minute Timer:
1. Push the Set button owe. A tone will sound
and the inverted triangle and bell lights will
light up on the display. The display will show
‘FOO.’
2. Turn the Set Knob clockwise to the desired
setting, up to 9 hours SO minutes.
NOTE: The knob must be turned within 15
seconds after the button is pushed.
The inverted triangle
light will go off. The
Minute Timer will count down the time and
sound a tone at the end of the set time. At the
end of the countdown ‘:OO’ will appear on the
display, followed by time-of-day.
NOTE: Once the countdown passes the onehour mark, the display will show minutes to the
left of the colon. For example, 59 minutes will
appear as F&:00.’
To check tlme-ofday durlng a Minute Tlrner
lmntel:
Push the Set button once. A tone will sound and
the timeofday will be displayed.
To return b the Wlnutr Timer dlaplay:
Push the Set button once. A tone will sound and
the Minute Timer will reappear.
7
Setting the clock and timer
The clock/timer acts as both a time-ofday clock and as a minute timer.
To set time of day:
When the range is connected to power,
the clock display will blink at 88:88 until
the time-of-day is set. To set time-of-day,
depress the Set Button once. The
triangle and clock signal lights on the
display will light up and remain lit until
the time is set. Within 15 seconds, turn
the Clock/Timer Knob to the correct
time.
To set the timer:
Turn the ClocWTimer Knob clockwise to
the desired setting, up to 9 hours 50
minutes. (Knob must be turned four or
five clicks before time will advance.) The
triangle and bell signal lights will light
up. The timer will count down the time
while flashing the time-of-day every 12
seconds. Three beeps will sound at the
end of the set time and the signal lights
will go off.
To cancel the Minute Timer before
the countdown
is completed:
Turn the Set Knob to “0:OO.” If no
other time is set within three seconds,
the time-of-day
will reappear on the
display.
Clock
Feature Change
When setting the clock or using the Minute Timer, please
instead of those found in your Use and Care Guide.
use the following
instructions
Setting the clock
When the range is connected
to power,
the clock display will blink at “88:88” until
the time-of-day
is set.
1. Push and hold the Set button while
turning the Set Knob in either direction
to the correct time-of-day.
2. Release the Set button
of-day is set.
after the time-
Using the Minute Timer
The Minute Timer does not start or stop
the oven. It works like a kitchen timer. It
can be set in minutes and seconds up to
60 minutes.
Turn the Set Knob clockwise
to the
desired setting (up to 60 minutes). The
Minute Timer will count down and the
colon will flash. When the set time is
up, a tone will sound.
Press the Set button. The tone will
stop and the display will show the
time-of-day.
To check time-of-day
Minute Timer:
when using
Push and hold the Set button.
of-day will appear.
The time-
To return to the Minute Timer display:
Release the Set button. The Minute
Timer will continue to count down.
To cancel the Minute Timer before the
countdown
is completed:
Turn the Set Knob to “0:OO“. If no other
time is set within three seconds, the timeof-day will reappear on the display.
Part No 76877-0014362868
01991 Whirlpool
Corporation
Printed
in U.S.A
Uslng Your Range
Continued
To MXOI the Ylnute Timer before the
oountdown lo completed:
Turn the Set Knob to ‘0~00.’ If no other time is
set within three seconds, the lime-May
will
reappear on the display.
Usingthe ovencontrol
Baklnglroastlng
1. Positiin the rack(s) properly before turning
on the oven. To change rack posltlon, pull
rack out to stop, raise front edge and lift out
When using one rack, the rack should be
placed so the top of the food will be centered
in the oven. Always leave at least 1 112 to 2
inches (4-5 cm) between the sides of the pan
and the oven walls and other pans. For more
information, see the Cooking Guide.
2. Push in and turn the Oven Temperature
Control to the baking/roasting temperature
you want. The oven burner will automatically
light in 50-60 seconds.
3. When baking, preheat the oven for 10
minutes. (Preheating is not needed when
roasting.) Put food in the oven.
NOTE: Do not p&a food directly on the oven
bottom.
4. During baking/roasting, the oven burner will
turn on and off to maintain the temperature
setting.
When baking/roasting is done, turn the
Oven Temperature Control to OFF.
Adjudlng lh@ oven temperature control
Does your oven seem hotter or colder than your
old oven? The temperature of your old oven may
have shifted gradually without you naticing the
change. Your new oven Is properly adjusted lo
provide accurate temperatures. But, when
mmpared to your old oven, the new design may
give you different results.
If. after using the oven for a period d time.
you are not satisfied with the temperature
setlings, they can be adJusted by folbwing these
steps:
1. Turn rhe Oven Temperature Control Knob to
the off position. Pull knob straight ofl and flip
it over.
2. Loosen the locking screws. Note the posltlon of the hdlcntor.
lndkator
KlKlbrkkt
Yorkera
3. To lower the temperature, hold knob handle
firmly and turn knob skirt &&wise to move
the indicator one marker line to the left. Each
line equals about 1OOF(SC).
4. To rake the temperature, hold knob handle
firmly and turn knob skirt cDunterc4ockwis.e to
move the indicator one marker line to the
right. Each line equals about 10°F (5%).
Tignh&~;~bocklng
.
wrmws and npba
the
Udng Your Range
conthlud
Brolllng
The bmller drawer is located below the oven
door. Always broil wfth the oven door clod.
1. PUNfhe broiler drawer open and tilt the door
panel down.
2 Place broiler pan grii so grease can drain
down sides into bwer part of broiler pan. See
picture.
3. Before the broiler is turned on. place food on
broiler pan and position the broiler pan at one
of the three lovsk. Refer to a reliable
cook&ok for bmlling chart.
4. Push in and turn the Oven Temperature
Control to BROIL. The broiler will aufomatitally light in 50-60 seconds.
5. When broiling is done, turn the Oven Temperature CWtrol to OFF.
Theovenvent
Hot air and moisture escape from the oven
through a vent just under the backguard. The
vent is needed for air circulation. Do not block
the vent. Poor baking/roasting will result.
Bum Hazard
When the oven Is ON, pans and mn
handbs left near the oven vent 6an
become hot enough to burn the user and
to malt plastics. Use potholder8 to move
pans. Never stofe plastka, paper or other
lterns that could melt or burn near the
oven vent, or any of the surface burners.
10
CaringForYourRange
Bun, ~ggy$gk~e
S
and
We sure all controls are OFF and the
range la cool before ckanlng.
l Do not we oven cleanera,
bleach or rust
rainovera
l Do not IJ~ grsollne
or other flammable
llqulds or vapors to clean this or any
other appliance.
l Keep the appllanoa
area clear and free
from combustfbk materials, gaoollne
and other flammabie vaporr and Ilqulda
. Do not obmuct
the flow of wmboatkn
and ventllatlon alr.
Falluri to follow these guldellner could
resull In burn& electrical shock, flre or
Dxploslon.
l
Controlpanel and knobs
1. Make sure all control knobs are turned
2. Pull control knobs straight otf.
Off.
3. Use warm soapy water or spray glass
deaner and a sofl doth to wipe the COIIW
panels. Rinse and wipe dry with a soft cbth.
4. Wash axxrol knobs in warm, soapy Water.
Rinse well and dry with a soft cloth. Do not
soak.
11
Csring For Your Ranga
5. Replace control knobs by pushing them firmly
into place.
NOTE When cleaning, never use steel wool,
abrasives, or ammerciial oven cleaners which
may damage the finish. After cleaning, make
sure all control knobs point to OFF.
2 Lift off the burner
grates.
3. Wash the grates with warm, soapy waler or in
a dishwsher. Use a nonabrasive plastic
scouring pad for heavily soiled areas. Rinse
and dry well.
4. Replace burner grates.
I2
Surfaceburnersand caps
The cooktop and buner box areas are specially
desIgned to make cleaning easier. Since the four
burners are sealed. cleanups are easy and
amvenient.
lghor
slot
Typlal l urfacm bumor Rsma
I
Clernlng the burnera
Always dean the burner caps after a spill-over.
Keeping the burner caps dean will prevent
Improper tgnition and an uneven flame. To’
dean, use warm, soapy water and a soft doth.
if burner caps must be removed for soaking,
folbw these steps:
1. Remove the burner grates and burner caps
by pulling upward. 2 Soak burner cap in warm, soapy water.
3. Aftersoaking, wipe with a wfl doth or a
nanabrasive scrubbing pad or cleanser. Do
not dean burner cap in a dishwasher. Rinse
and dry well
4. For proper fbw of gas and ignition of the
burner. DO NOT ALLOW SPILLS. FOOD.
CLEANING AGENTS OR ANY OTHER
MATERIAL TO ENTER THE IGNITOR SLOT.
II the sbt becomes soiled or cbgged, use a
ootton swab or a wfl cloth to clean the area
If needed, use swab or cloth with ammonia,
white vinegar or warm water. For Eookedon
soil, use a medium- to stiff -bristle tooth brush.
DO NOT USE HARD OR SHARP OBJECTS
TO CLEAN fGNfTOR SLOT. DO NOT USE
CLEANING SOLUTIONS.
NOTE: lgnitor slot should remain clean as
bng as burner cap is seated properly on
burner. Occasionally check burner cap to
make sure it is level and covers burner
completely.
Gas must fbw freely through the ignitor slot
for the burner to light properly. This area must
be free of any soil and t~3 kept protected fmm
Movers
and spillovers. ALWAYS keep the
burner caps in place whenever a surface
burner is in use.
5. After deaning the ignitor sbt, replace the
burner cap and burner grate.
6. Occasionally check the burner flames for
proper she and shape as shown. lf flames lift
off ports, are yelbw, or are noisy when turned
off. you may need to clean the burners. ff
ports are dogged. dean with a cotton swab
or a soft cbth. tl needed, use swab or cbth
with ammonia, white vinegar or w8rm water.
For cookedan soil, use a medium- to stiffbristle tooth brush, brushing out away from
center of burner. lf adjustment is needed, call
a qualified technician for service.
13
Caring For Your Range
Continued
7. To repface burner cap, make sure cap is
prqmrly aligned and leveled. Make sure that
the locating pegs in the burner body fit into
the recess in the underalde of the cap. The
cap must he correctly seated on the burner
body for proper operation of the burner.
8. Turn the burner on to determine if it will light
If the burner does not IigM after deaning.
contact an authoriied Whirlpoop” service
technician. Do not service the sealed burner
yourself.
Removableoven door
Removing the oven door will help make it easier
to clean the oven.
Burn and Electrical Shock Hazard
Make ewe all controls are OFF and the
oven la cool before removlng oven door.
Fall&m to do w can reauft In burns or
Olactrkal chock.
I. Open the door to the first stop position.
2. Hoki the door at both sides and lift it at the
aameanglet&bin
3. To replace, fit the bottom corners of the door
over the ends of the hinges.
Push the door down ever@. The door will
dose only when if is on the hinges mrrectfy.
Using the standard-cleaning
oven (Model SF317PEX)
The standard&aaning oven has to be handdeaned. Use warm, soapy water. soapy sleel
wool pads or a commercial oven cleaner. See
“Cbaning tips’ on page 17 for funher instruc-
tiOnS.
axlerkr
surfaces of lha oven. Damage will
Use foil during cooking to keep oven clean. See
‘Using loil’on page 16 for more information.
14
Fat wtter
bed8 up.
Tulll~ black
Usingthe continuous-cleaning
oven (Model SF337PEX)
Standard-deanirg oven walk are coated with
smooth porcelain. Your continuouscleaning
oven walk are coated with a special, rougher
porcelain. A fat apatter beads up on the smooth
surfax but spreads out on the rougher surface.
The bead of fat on the smooth surface chat’s and
turns Mack The spreadout fat on the rough
surface gradually bums away at medium to
high baking temperatures so the oven can
return to a presentably dean condition.
Cbanlng tips
1. The oven window and racks are not coated.
Clean them by hand.
2 The oven door does not get as hot as the
walk. Some handcleaning may be needed.
3. Y you do more broiling than baking, handcleaning may be needed.
4. Use aluminum foilfor a shallow pan on the
bwer radc aaxrding to instructions. Spillavers may not bum away and could stain the
bottom.
HandcleanIng
Per-nal
Injury Hazard
Do not use own ckanlng products h a
contlnuoua-cleanlng
oven. %me can
become trapped In the porcebln surface
and give off harmful fumes.
WINDOW-Keep clean with warm, soapy water
or spray gfaee ckarmr. Use a plastic scouring
pad for heavily aofled areas. Rinse well. Do not
use 8teel wool or abreslve cleansera
15
Caring For Your Range
Continued
RACKS-Use a soapy steel wool pad for best
cleaning results. Rinse well.
AND DOOR-Wash
with warm, soapy
water. Use a steel wool pad or plastic scouring
pad for heavily soiled areas. Rinse well.
WALLS
Using loll (standard and contlnuous-cleanlng
ovsns)
To catch sugar or starchy spills from pies and
casseroles, use a piece of heavy-duty aluminum
foil or a shallow pan on the lower rack, slightly
larger than the cooking container.
Burn, Electrkal shock and Producf
Dsmsge Hazard
l Make cure all oontrols
are OFF and the
oven fs cool before using fall. Fallure to
do so can resulf In bums or electrlcsl
shock
. Do not uaie foll to cover oven floor or to
COmpletely cover a rack. Good air
circulation Is needed for the oven to
operate properly. Pow moklng resulis
and damsga to the oven could occur.
1. Turn ofl all controls.
2 Put foil or pan under the cooklng contalner. Make sure the foil is centered and
large enough to catch any spill-avers.
16
Cleaningtips
Control knobs
Clean with warm, soapy water and a soft cloth.
l Wash, rinse and dry well.
l Do not soak.
Control panels
Clean with warm, soapy water or spray glass
cleaner and a soft doth.
. Wash, rinse and dry well.
* Follow directions provided with the cleaner.
Exterior surfaces (other than control panels)
Clean with warm, soapy water and a soft cbth.
l Wipe off reguiarly when cooktop and oven are
mol.
Use a nonabrasive plastic scruhbfrg pad for
heavily soiled areas.
l Do not use abrasive or harsh cleaners.
NOTE: Do nof allow food axttaining acids (such
as vinegar, tomato or lemon j&.9) to remain on
surface. Acids may remove the gbssy finish.
Also, wipe up milk or egg spills when cooktop is
cool. Be careful when cleaning around model
and serial number plate: the numbers wipe off
easily.
Surface burners, grates and caps
See pages 12 and 13 for cleaning instructions.
Broiler pan and grld
Clean with warm, soapy water or a soapy steel
wool pad.
l Clean after each us8.
l Wash, rlns.8 and dry well.
Oven racks
Clean with warm, soapy water or soapy steel
wool pads.
l Wash, rinse and dry. Use soapy steel wool pads
for heavily soiled areas.
Oven door glass
Use spray glass cleaner or warm, soapy water
and a nonabrasive plastic scrubbing pad.
l Make sure oven is cool.
l Fclbw directions provided with the cleaner.
l Wash, rinse and dry well.
StandardcleanIng
oven
Clean with warm. soapy water of soapy steel
wool pads.
l Make sure oven is cool.
l Remove door for easier access.
l Clean heavify soiled areas or stains. Rinse well
with water.
OR
Use com.mercial oven cleaners.
6 Remove door for easier access.
l Place newspaper on fbor to protect floor
surface.
l Folbw directions provided with the oven
deaner.
. Rinse well with clear water.
. Use in well-ventilated room.
. Do not allow commercial oven cleaners to
contact the heat seal, thermostat or exterior
surfaces of the range. Damage will occur.
Place piece of heavyduty aluminum foil or
shafbw pan, slighriy larger than the cooking
container. on lower radc to catch spillovers.
Ccntfnuouscleanlng
oven
Clean with warm, soapy water or a soapy steel
wool pad.
l Make sure oven is -1.
l Remove door for easier access.
l Clean
heavily soiled areas of stains. Rinse Well
with water.
Place piece of heavyduty aluminum foil or
shalbw pan, slightly larger than the cooking
container, on lower radc to catch spilloven.
l Do not use commercial
oven cleaners.
l Mosl fat splatters
on oven walls and floor
will gradually reduce to a presentably clean
condlllon durlng baklng.
17
Theoven light
The oven light will come on when you push the
Oven Light Swit& on the control panel.Push the
switch Gain to turn uff the light.
l
l
Electrical Shock and Personal
Injury Hazard
Mr~ka mre oven and light bulb are cool
and power to the oven has been turned
off before replacing the light bulb.
Failure to do so could result In electrlcal
ohock or burn&
Be careful not to drop the bulb. Broken
g&s could cause InJury.
To replace the oven Ilght:
1. Unplug appliance or disconnect at the main
power supply.
2. Remove the light bulb from its socket.
Replace with a 40-watt appliance bulb. Plug
in appliance or rwnnect at the main power
supply.
If YouNeedServiceOrAssistance.=
n
We suggestyou follow
these steps:
1. Before cslllng for asslstsnce ...
Performance problems often result from little
things you can find and fix without Eels of any
kind.
If nothlng operates:
Is the gas turned on?
l Is the power supply cord plugged into a live
circuit with the proper voltage? (See Installation Instrudions.)
l Have you checked your home’s main fuses or
cirarit breaker box?
l Have instructions in this book been followed?
l Is the control knob set in the correct position?
l Is the flow of combustbn
and/or ventilation air
to the unit obstructed? Do not obstruct
alrflow to and around unit.
l Recheck suspected defect.
l
If burner falls to Ilght:
Is the range connected to electrical power?
l Have you checked your home’e main fuses or
circuit breaker box?
l Are burner ports clogged? See page 13.
l
If burner ffames are uneven:
. Are burner potis dogged? See page 13.
If burner ftames lift off ports, are yellow, or
are nolsy when lumed off:
l The air/gas mixture may be incorrect. (Call for
service.)
If burner makes a popplng noise when ON:
. IS the burner wet from washing7 Let dry.
If sollts vlslble onoontlnuousctesnlng
oven
flnlsh:
l The special finish is designed to gradually
reduce oven solI during Ty)rmal baking or
roasting. It is net designed to keep your oven
spotless, only presentably dean. If you broil
often, you may see oven soil. Follow handcleaning tips on pages 15 and 16.
l The door is coder than the oven walls. Soil will
be more visibfe on the door than other areas in
the oven. See hand-cleaning tips on pages 15
and 16.
l Sugar and starchy spills may leave stains. See
pages 15 and 16 for hand-cleaning tips. Use
foil on lower rack to catch these spills.
If cooklng results are not what you expected:
Is the range level?
l Does the oven temperature
seem too bw or
too high? See page 9.
l If needed, have you preheated the oven as the
redpe cslls for?
l Does the flame size fit the awking
utensil
being used? (See the Cooklng Gukfe.)
. Are you following a tested rec’pe from a
reliable source?
l Are you using pans recommended in the
Cooking Guide?
l H baking, have you allowed 1 1R to 2 inches
(4-5 cm) on all sides of the pans for air
clrculatbn?
l Are the pans the size called for in the recipe?
l Do the oxking
utensils have smooth, flat
bottoms and fii the surface burners being
used?
See the Cooking Guide for more information on
cooking problems and how to solve them.
l
If control knob(s) will not turn:
Did you push in before trying to turn?
l
19
If You Need Ssrvka
Continued
Or Asslsfance
2. If you need as&tan&
._
Call Whlrlpool Consumer Asslstanca Center
telephona number. Dial free from anywhere h
the U.S.:
l-Boo-253-1301
and talk with one of our trained consultants. The
consultant can instruct you In how to obtain
satkfactory operation from your appliance or, if
service is necessary, recommend a qualified
service company in your area.
If you prefer. write to:
Mr. Donald Skinner
Director of Consumer Relations
Whirlpool Cerporatbn
2000 M-63
Benton Ha&x. MI 49022
Please include a daytime phone numbar in your
correspondence.
3. If you need aervIoe* -.
Whirlpool has a nationwide
network of authorized
- Whirlpot+ service compa-.
nies. Whirlpool service
technicians are trained to
9
fulfill the product warranty
and provide after-warranty service, anywhere in
the United States. To bcate the authorized
Whirlpool service company in your area, call our
Cbnsumer Assistance Cenler tebphone number
(see Step 2) or took In your telephone directory
Yellow Pages under:
01
20
4. tf you need FSP raplacarnenl parls’ ..FSP is a registered trademark of Whirlpool
Corporation for quality Parts. Lmk for this
symbol of quality whenever you need a replacement part for your Whirlpool appliance. FSP
replacement parts will fii right and work right,
because they are made to the same exacting
specifications used to bulb every new WhIrlpool
appliance.
To locate FSP replacement parts in your area,
refer to Step 3 above or call the Whirlpool
Consumer Assistance Center number in Step 2.
5. II you are nol satlsfled with how the
problem was solved’ _..
l Gontad the Major Appliance Consumer Action
Panel (MACAP). MACAP is a group of
independent ansumer experts that voices
consumer views at the hiihest levels of the
major appliance industry.
l Contact MACAP only when the dealer,
authorized servicer ar Whirlpool have failed tc
resolve your problem.
Major Appliance Consumer Acticn Panel
20 North Wacker Drive
Chicago, IL 60606
l MACAP will in turn inform us of your action.
l
When requesting a36latanc6,
please provide:
model number, serial number, date of purchase, and a complete dseuiption of the
problem.
This information is needed in order to
better respond to your request.
Notes
21
Notes
22
Notes
-
23
WHIRLPOOL
GasCookingProductWarranty
GRO02
1 LENGTH OF WARRANTY
1 WHIRLPOOL WILL PAY FOR
FULL ONE-YEAR WARRANTY
From Date of Purchase
FS~repJamrnent parts and repair labor tc correct defects in
materials or workmanship. Service must be provided by an
authorized Whirlpool M service company.
WHtRLPOOL WILL NOT PAY FOR
A Servkx calls b:
1. brrect the installatbn of the amking product.
2. lnstrud you how tc use the axking product.
3. Replace house fuses or coned house wiring or plumbing.
4. Replete owner aas-ssibie light bulbs.
B. Re@s when the cooking produd is used in other than normal, single-family household use.
C. Pi-up and delivery. This prcdu~ is designed to be reti
in the home.
D. Damage to the cooking product caused by accident, misuse, fie. fbcd. acts of God or use of
products not approved by Whirlpod.
WHIRLPCOL CORPOftATK)N SHALL NOT SE UAELE FOR NCIOENTAL OR CONSEQUENTlAL
DAMAGES. Some states dc not akw the exclusicn IX limitation of incidental or consequential damages so
this limitation or exduslon may not eppfy to you. This warranty gives you specific legal rights, and you may
also have other riihts which vary from state to state.
Outside the United States, a different warranty may apply. For details, please contad your authorized
Whirlpool distributor or military exchange.
ff you need smite. fist see the ‘Service and Assistance’se&n
of this bok. After checking “Service and
Assistance,’ additional help can be found by calling our Consumer Assistance Center telephone number,
l-80&253-1 301, from anywhere in the U.S.
@ Registered TradernarWSM Service Mark ot Whirlpool Corporation
Part No. 76786-00/4321146
01991 Whirlpool Corporation
Printed in U.S.A