1
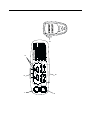
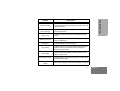
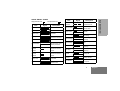
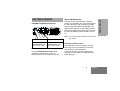
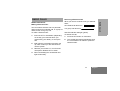
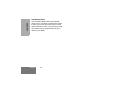
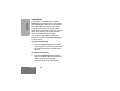
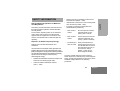
Professional Radio
GM340
User Guide
68P64110B88
Issue: July 2000
4
1
2
5
3
6
Features . . . . . . . . . . . . . . . . . . . . . . . . . .13
CONTENTS
Radio Controls . . . . . . . . . . . . . . . . . . . . . . 3
Programmable Buttons . . . . . . . . . . . . . . . 4
Audio Signal Tones . . . . . . . . . . . . . . . . . . 7
Getting Started . . . . . . . . . . . . . . . . . . . . . 9
Turning the Radio On-Off. . . . . . . . . . . . . . 9
Radio On Indication . . . . . . . . . . . . . . . . . . 9
Adjusting the Radio’s Volume . . . . . . . . . . 9
Selecting a Radio Channel. . . . . . . . . . . . . 9
Sending a Call . . . . . . . . . . . . . . . . . . . . . 10
Receiving a Call . . . . . . . . . . . . . . . . . . . . 10
Cancelling a Call . . . . . . . . . . . . . . . . . . . 10
Ending a Call . . . . . . . . . . . . . . . . . . . . . . 10
Utilities . . . . . . . . . . . . . . . . . . . . . . . . . . .15
Voice Recorder . . . . . . . . . . . . . . . . . . . . .16
Scan . . . . . . . . . . . . . . . . . . . . . . . . . . . . .17
Call Forward . . . . . . . . . . . . . . . . . . . . . . .19
Talkaround. . . . . . . . . . . . . . . . . . . . . . . . .20
External Alarm . . . . . . . . . . . . . . . . . . . . . .21
Lone Worker . . . . . . . . . . . . . . . . . . . . . . .22
Power Level. . . . . . . . . . . . . . . . . . . . . . . .23
Companding . . . . . . . . . . . . . . . . . . . . . . .24
Option Board . . . . . . . . . . . . . . . . . . . . . . .25
Voice Operated Transmit (VOX) . . . . . . . .26
Stun/Unstun. . . . . . . . . . . . . . . . . . . . . . . .26
Radio Calls . . . . . . . . . . . . . . . . . . . . . . . 11
Selective Calls . . . . . . . . . . . . . . . . . . . . .
Making a Selective Call . . . . . . . . . . . . . .
Receiving a Selective Call . . . . . . . . . . . .
Emergency Calls . . . . . . . . . . . . . . . . . . .
11
11
11
12
1
English
CONTENTS
Radio Overview . . . . . . . . . . . . . . . . . . . . 3
Public Address Mode. . . . . . . . . . . . . . . . .13
Car Radio Mute . . . . . . . . . . . . . . . . . . . . .14
CONTENTS
Safety Information . . . . . . . . . . . . . . . . . 27
Safe and Efficient Operation . . . . . . . . . .
Exposure to Radio Frequency Energy . . .
Electromagnetic Interference/
Compatibility. . . . . . . . . . . . . . . . . . . . . . .
Operational Warnings . . . . . . . . . . . . . . .
Potentially Explosive Atmospheres . . .
Blasting Caps and Areas. . . . . . . . . . .
Radio Operation and EME Exposure . . . .
Mobile Antenna Installation . . . . . . . . . . .
Control Station Operation. . . . . . . . . . . . .
General Radio Care . . . . . . . . . . . . . . . . .
27
27
28
28
28
28
29
29
29
30
Computer Software Copyright
The products described in this manual may include copyrighted computer
programmes stored in semiconductor memories or other media. Laws in the
United States of America and other countries preserve for Motorola Europe
and Motorola Inc. certain exclusive rights for copyrighted computer
programmes, including the right to copy or reproduce in any form the
copyrighted computer programme. Accordingly, any copyrighted computer
programmes contained in the products described in this manual may not be
copied or reproduced in any manner without the express written permission of
the holders of the rights. Furthermore, the purchase of these products shall not
be deemed to grant either directly or by implication, estoppel, or otherwise, any
licence under the copyrights, patents, or patent applications of the holders of
the rights, except for the normal non-exclusive royalty free licence to use that
arises by operation of the law in the sale of the product.
English
2
RADIO OVERVIEW
Please read pages 27 to 30 before using this radio.
RADIO CONTROLS
Programmable Buttons
4.
Mic Jack
5.
Programmable Buttons V W X Y
6.
Push-to-talk (PTT)
Press and hold down this button to talk;
release it to listen.
The numbers below refer to the illustrations on
the inside front cover.
1.
On-Off / Volume Knob
Used to turn the radio on or off, and to adjust
the radio’s volume.
2.
LED Indicators
Indicates channel, scan, and monitor status, as
well as receipt of a selective call.
Green: Successful power up.
Green Flashing: Radio scanning.
Red: Radio transmitting.
Red Flashing: Channel busy-when receiving.
Yellow: Radio called or Monitor (lower priority).
Yellow Flashing: Radio call reminder alert.
3
English
RADIO OVERVIEW
This user guide covers the operation of the
GM340 Professional Mobile Radio.
gh
3.
RADIO OVERVIEW
PROGRAMMABLE BUTTONS
Several of your radio buttons can be
programmed (by Customer Programming
Software CPS) to activate the radio features.
Above each button is an associated LED. For
buttons programmed as channel selectors,
only the LED of the selected channel will be lit;
for buttons programmed as feature on/off
switches, the LED will be lit if the feature is on.
Feature
Description
Monitor/Cancel
Monitor allows user to select between signalling squelch,
carrier squelch and unsquelch, and to suspend scan when
landed on a channel in scan mode.
Cancel allows user to cancel current incoming or outgoing
call.
Radio Call
To make an individual or group selective call.
Scan On/Off
To toggle between start and stop of the scan
operation.
Nuisance
Delete/Cancel
(Voice Storage)
English
The following table shows the features that can
be assigned to the P1and P2 buttons and the
1-4 buttons.
P1 and P2 are exchangeable for customised
icon buttons to match programming.
4
To delete a nuisance (unwanted) channel when scanning,
with exception of priority channel, last channel in scan list
and home channel.
Cancel, deletes messages being played back from the
Voice Storage feature.
Description
Nuisance Delete
To delete a nuisance (unwanted) channel when scanning,
with exception of priority channel, last channel in scan list
and home channel.
Cancel
(Voice Storage)
Cancel, deletes messages being played back from the
Voice Storage feature.
Power Level
To toggle the radio’s transmit power level between High
and Low.
Talkaround On/Off
Emergency
RADIO OVERVIEW
Feature
To talk directly with another radio without going through a
system or despatcher.
Activates emergency alarm sequence.
Lone Worker
To identify user as a lone worker. Radio enters emergency
sequence unless user responds, when prompted, by
pressing any radio button.
Call Forward
To transfer calls automatically to another radio if user is
unable to take the call.
Companding On/Off
To toggle between compression/expansion of audio signal
and normal audio signal.
Option Board
On/Off
Allows user to toggle the option board between on and off.
5
English
RADIO OVERVIEW
Feature
External Alarm
Record/Play-back
(Voice Recorder)
English
6
Description
To toggle the External Alarm feature on and off.
To record/play-back incoming calls or memos using voice
recorder feature.
AUDIO SIGNAL TONES
Tone
Tone
Signal
Description
Power up OK
Radio self-test OK.
Power up Fail
Radio self-test fail.
Button Error
Button press not
permitted.
Engaged
Signal
Description
Low pitched tone
Channel busy or not
permitted to transmit.
Call Failed
Call failed to connect.
Force Monitor
Radio must monitor
channel before transmission permitted.
Button
Feature
Enable
Any option button
pressed to enable a
feature.
Button
Feature
Disable
Any option button
pressed to disable a
feature.
Group Call
Radio receives a
Group Call.
Individual Call
Radio receives an
Individual Call.
Call
Reminder
Reminder of
unanswered call.
TOT Pre-Alert
Warns of expiry of
time out timer.
Monitor Alert
Alerts to change of
squelch.
Voice Storage
Voice StorageRecording.
Voice Storage
Voice StorageWarning.
Voice Storage
Voice StorageFull.
Scan Start
Radio starts
scanning.
Scan Stop
Radio stops
scanning.
Priority Call
Decode
Radio detects a
priority call.
Priority
Channel
Radio landed on the
priority channel.
Lone Worker
Reminds lone worker
to respond.
7
English
RADIO OVERVIEW
High pitched tone
RADIO OVERVIEW
Tone
Signal
Description
Hardware
Error
Hardware error, tone
continues until valid
operation.
Cancel
Message
Previous message or
message currently
being played from
Voice Storage has
been deleted.
Channel Free
Beep
Indicates current
channel is free.
Incoming
Emergency
Alert
Indicates an
emergency situation.
Ringtones
English
English/French/
General
8
Incoming calls (high
tones), outgoing calls
(low tones).
GETTING STARTED
RADIO ON INDICATION
At power up the radio performs a self test
routine. On completion of a successful self test
the radio will emit a high pitched tone (Radio
self test ok) and the green led will light. If the
radio fails the self test, an alternating high/low
pitched tone (Radio self test fail) will sound and
the red LED will flash until the radio is turned
off.
Note: If your radio fails the self test routine consult
your dealer.
ON
Push the On/Off/
Volume Control knob
until you hear a click.
OFF
Push the On/Off/
Volume Control knob
until you hear a click.
ADJUSTING THE VOLUME
Turn the On/Off/Volume Control knob
clockwise to increase the volume, or
counterclockwise to decrease the volume.
Selecting a Radio Channel
Your radio offers up to 6 channels, however
some may not be programmed. Check with
your dealer for more information.
To select a channel, press the appropriate
Channel Selector button, the LED above the
button will light.
9
English
GETTING STARTED
TURNING THE RADIO ON OR OFF
GETTING STARTED
Sending a Call
Receiving a Call
1.
Select the desired radio channel.
1.
2.
Press the PTT button and speak clearly
into the microphone.Your mouth should be
2.5 to 5 cm away from the microphone.
Turn your radio on and adjust the volume
level.
2.
Switch to the desired radio channel.
3.
If, at any time, a call is received you will
hear the call at the volume level you have
set.
3.
When transmitting, the red indicator will
light continuously.
4. Release the PTT button to listen.
Your radio may be configured for ‘Transmit
Inhibit’ under certain conditions (e.g. when the
channel is in use by others) in which case, the
channel busy tone will sound when you press
the PTT or call button to indicate that
transmission is inhibited.
When the channel is free, the Channel Free
beep
will sound, and you can
make a call.
If your radio is equipped with a transmit time
out timer (TOT), a warning tone
will sound a few seconds
before the transmission is cut off. Your radio
may be programmed to inhibit retransmission
within a preset time.
English
10
Note: The system may have a limited call time and
the call may be terminated automatically if
this call time is exceeded.
Cancelling a Call
At any time while setting up a call it may be
cancelled by pressing the Monitor/Call Cancel
button, or replacing the microphone in its holder
(referred to as going “on hook”) .
The call timer can also cancel a call.
Ending a Call
A call should always be ended by pressing the
Monitor/Call Cancel button, or replacing the
microphone in its holder.
RADIO CALLS
Making a Selective Call
You can make a selective call to a particular
radio, known as an individual call, or a group of
radios, known as a group call.
To make a Selective Call :
1.
Press the PTT or Call Button (depending
on the way your radio has been programmed by your dealer), to set up the
call.
2.
Wait until the conversation has been set
up, which means you are authorised to
use the system.
3.
Talk with your mouth 2.5 - 5cm from the
microphone. Release PTT to listen.
4.
When transmitting the red indicator will
light continuously.
When you receive a selective call, you will hear
either,
an individual call alert tone
,
or a group call alert tone
.
and LED Indicator will light (yellow).
To answer the call:
1.
Press the PTT button or Call button.
2.
The call will terminate automatically when
the conversation has ended or press the
Monitor button.
11
English
RADIO CALLS
SELECTIVE CALLS
Receiving a Selective Call
RADIO CALLS
EMERGENCY CALL
Your radio can be programmed to give you a
one-button quick access to call a particular
radio or centre (predefined by your dealer) in
emergency situations. This is the Emergency
Call.
When you make an Emergency call, your radio
goes into an Emergency state, which can be
programmed to:
•
continually receive speech,
•
the radio can receive and transmit.
1.
Press the Emergency button to initiate an
Emergency call.
2.
Emergency can be stopped by:
• Switching the radio Off and On again.
• A reset message is received by your
radio.
• The emergency time duration is
reached.
Note: The emergency time duration and reset
message are programmed into your radio by
your dealer.
English
12
Should you receive an Emergency call the
incoming emergency alert tone
will sound.
FEATURES
To access the Public Address system:
1
Turn external switch to the PA position.
The Public Address mode allows you to use
your radio audio as a public address system.
You can use your radio microphone as normal
and the audio is routed through the radio to an
external loudspeaker fitted to your vehicle.
A switch, external to your radio, switches the
audio from your radio to the external
loudspeaker.
This feature is programmed and fitted by your
dealer.
2
Press microphone PTT and talk.
3
To exit PA mode, turn external switch to the
RADIO position.
Note 1: While in PA mode you can still hear incoming radio calls as long as you do not press the PTT.
Note 2: You must exit PA mode in order to answer
or make radio calls.
13
English
FEATURES
PUBLIC ADDRESS MODE
FEATURES
CAR RADIO MUTE
The Car Radio Mute feature automatically
mutes your in-car audio entertainment system
to allow you to hear incoming calls or to stop
audio interference when you are making a call.
This feature may be programmed into your
radio by your dealer.
English
14
UTILITIES
UTILITIES
The utilities described below are programmed
into your radio by your dealer and are
accessible via a programmable button.
15
English
UTILITIES
VOICE RECORDER
You can record and playback incoming calls or
make a memo using the voice recorder feature,
which allows up to 2 minutes of recording.
To record an incoming call:
1.
Press and hold the Record/Playback button, the Voice Storage Recording alert
sounds momentarily.
2.
Record the call or part of the call.
3.
The Voice Storage Warning alert
sounds when the
memory is nearly full.
4.
The Voice Storage Full alert
sounds when the
memory is full and recording ceases.
2.
Speak clearly into the radio microphone to
recored your memo.
3.
The Voice Storage Warning alert
sounds when the
memory is nearly full.
4.
The Voice Storage Full alert
sounds when the
memory is full and recording ceases.
5.
Release the Record/Playback button at
any time to stop recording.
To playback a recorded call or memo:
1.
Press the Record/Playback button with the
radio in the idle state( i.e. not receiving or
transmitting calls) to playback the latest
recorded call or memo.
Release the Record/Playback button at
any time to stop recording.
To record a memo:
Press the Record/Playback button again to
skip to the next message to be played
back.
To delete a recorded call or memo:
1.
1.
5.
Press and hold the Record/Playback button, the Voice Storage Recording alert
sounds momentarily.
English
16
2.
Press the Cancel Message button to
delete the message currently being played
back.
PRIORITY CHANNEL
You can monitor several channels in order to
receive any call that is transmitted on any of
these channels. Sixteen channels can be
programmed into each scan list. Each channel
can share the same scan list or have different
scan lists assigned to them.
Once the radio’s scan operation is activated
and the radio detects a call coming through a
channel in its scan list, it switches to that
channel for you to receive the call.
A scan list may contain a priority channel. This
means that a particular channel (for example, a
commonly used channel) may be checked
more frequently than other channels in the list
during a scan operation. Priority channels are
programmed into your radio scan lists by your
dealer.
STARTING OR STOPPING SCAN
You can start or stop a scan operation by using
a pre-programmed Scan button.
1.
If the programmable Talkback option is set, you
can respond to any calls received during the
scan operation by pressing the PTT button
before the programmed hang-time ends.
Check with your dealer for details.
Press the Scan button to start scanning. The
scan start alert tone
and the associated LED will light.
2.
TALKBACK
will sound
Press the Scan button again to stop scanning.
The scan stop alert tone
sound and the associated LED will be
extinguished.
will
The LED indicator will blink green during a
scan operation. When a call on a channel is
detected the LED will stop blinking.
17
English
UTILITIES
SCAN
UTILITIES
DELETING A NUISANCE CHANNEL
If a channel continually generates unwanted calls/
noise (a “nuisance” channel), you can temporarily
remove it from the scan list by performing a
Nuisance Channel Delete operation:
1.
While the radio is on the Nuisance Channel, press and hold the Nuisance Delete
button until you hear the scan start alert
tone.
2.
Release the Nuisance Delete button.
Note:You cannot perform a Nuisance Channel Delete
on a priority channel or if there is only one
remaining channel in the scan list.
English
18
ADDING A DELETED NUISANCE CHANNEL
BACK INTO THE SCAN LIST
Using the Scan Button
1.
Press the Scan button to stop scanning.
The scan stop alert tone will sound.
2.
Press the Scan button again to re-start
scanning. The scan start alert tone will
sound, and the scan list will contain all
programmed channels.
CALL FORWARD
UTILITIES
You can call forward calls to your radio to
another radio if you are unable to take calls or
are away from your radio.
You can switch On or Off Call Forward by
using a pre-programmed Call Forward button.
To enable Call Forward
1.
Press the Call Forward button to switch
on Call Forward, when the feature enable
alert will sound and the associated LED
will light.
To disable Call Forward
1.
Press the Call Forward button again to
switch off Call Forward when the feature
disable alert will sound and the
associated LED will be extinguished.
19
English
UTILITIES
TALKAROUND
In your communications network, you may be using
a system to cover a larger area than is possible with
your radio. However, you can communicate with
another radio within your radio’s range without
going through the system by using the Talkaround
feature. This is especially useful when the system is
down.
You can switch On or Off Talkaround by using
a pre-programmed Talkaround button.
To enable Talkaround
1.
Press the Talkaround button to switch on
Talkaround when the feature enable alert
will sound and the associated LED will
light.
To disable Talkaround
1.
Press the Talkaround button again to
switch off Talkaround when the feature
disable alert will sound and the
associated LED will be extinguished.
English
20
EXTERNAL ALARM
UTILITIES
The external alarm feature activates the
vehicle horn and/or lights to inform you of an
incoming call when you are away from your
vehicle.
You can switch On or Off External Alarm by
using a pre-programmed External Alarm
button.
When the alarm is activated it can be cancelled by:
1.
Answering the call.
2.
The external alarm timer times out.
To enable External Alarm
1.
Press the External Alarm button to switch
External Alarm on, when the feature
enable alert will sound and the associated
LED will light.
To disable External Alarm
1.
Press the External Alarm button again to
switch External Alarm off, when the feature disable alert will sound and the
associated LED will be extinguished.
21
English
UTILITIES
LONE WORKER
To disable Lone Worker
The Lone Worker feature enables you to work
alone with added safety.
1.
Press the Lone Worker button again to
switch Lone Worker off, when the feature
disable alert will sound and the
associated LED will be extinguished.
2.
You may also switch off Lone Worker by
changing the channel or switching radio
off and on again.
You can switch On or Off Lone Worker by
using a pre-programmed Lone Worker button.
To enable Lone Worker
1.
Press the Lone Worker button to switch
Lone Worker on, when the feature enable
alert will sound and the associated LED
will light.
•
If you have not pressed any buttons within
a programmed time, you will be reminded
that Lone Worker is switched on by a high
pitched alert tone (Lone Worker Reminder)
being sounded.
•
Press any button to respond and cancel
the alert, if you do not the radio will enter
the Emergency state.
English
22
POWER LEVEL
UTILITIES
You can transmit your calls at different transmit
power levels. A higher level means you can
reach a radio that is farther away. A lower power
level reduces the possibility of interference. Use
the high power setting only when necessary.
You can switch between high and low power
levels by using a pre-programmed Power
Level button.
Using the Power Level Button
1.
Press the Power Level button to switch to
high power when the feature enable alert
will sound and the associated LED will
light.
2.
Press the Power Level button again to
switch to low power when the feature disable alert will sound and the
associated LED will be extinguished.
23
English
UTILITIES
COMPANDING
Companding is a collective term to define
compressing the audio signal on transmission
and expanding the audio signal on reception.
The overall effect is to reduce noise in the
received signal, giving you crisper, clearer
audio clarity. Companding should only be used
when other radios in your system have the
same companding feature available.
You can switch On or Off Companding by
using a pre-programmed Companding button
or via the menu.
To enable Companding
1.
Press the Companding button to switch
Companding on, when the feature enable
alert will sound and the associated LED
will light.
To disable Companding
1.
Press the Companding button again to
switch Companding off, when the feature
disable alert will sound and the
associated LED will be extinguished.
English
24
OPTION BOARD
UTILITIES
Your radio is capable of being fitted with an
option board. Each board will extend the
capability of your radio by adding a new feature
such as voice storage, voice scrambler or
trunking. See your dealer for the availability
and suitability of the various option boards.
You can switch On or Off the Option Board by
using a pre-programmed Option Board button
or via the menu.
To enable the Option Board
1.
Press the Option Board button to switch
the Option Board on, when the feature
enable alert will sound and the associated
LED will light.
To disable the Option Board
1.
Press the Option Board button again to
switch the Option Board off, when the feature disable alert will sound and the
associated LED will be extinguished.
25
English
UTILITIES
VOICE OPERATED TRANSMIT (VOX)
STUN/UNSTUN
When the VOX accessory is connected, your
radio may be used with hands-free operation.
The VOX feature intelligently senses
background noise, so that it adapts
automatically to the noise level in the
environment in which you are working.
To start the VOX feature:
For added security and to avoid abuse of the
radio system in which you operate, a feature
known as Stun/Unstun is included in your
radio.
1.
Ensure that the VOX accessory is
connected to the rear accessory connector of the radio.
2. Switch the radio to a VOX channel.
You can disable the VOX feature by pressing
the PTT button on the hand held microphone.
This allows you to use the hand held
microphone as normal.
To re-enable the VOX feature:
1.
Change channel away from and back to
the VOX channel.
English
26
This feature can only be activated by your
system manager or administrator.
For example, if your radio is stolen and is being
used illegally, your system administrator can
send a signal which will stun the radio making
it incapable of being used. This feature is also
useful if the system is being abused by a user
who is not complying with the correct
communications protocol.
The radio can only be unstunned, i.e. returned
to operational use, by an unstun signal sent
from the system administrator or returning the
radio for reprogramming.
SAFETY INFORMATION
This section provides information and instructions for
the safe and efficient operation of Motorola Mobile
Two-Way Radios.
For information regarding radio use in hazardous
areas, please refer to the Factory Mutual (FM)
approval manual supplement or Instruction Card
which is included with radio models that offer this
capability.
Exposure To Radio Frequency Energy
National and International Standards and
Guidelines
Your Motorola Two-Way Radio, which generates and
radiates radio frequency (RF) electromagnetic energy
(EME) is designed to comply with the following National
and International Standards and Guidelines regarding
exposure of human beings to radio frequency
electromagnetic energy:
•
Federal Communications Commission Report and
Order No. FCC 96-326 (August 1996)
•
American National Standards Institute
(C95.1 - 1992)
National Council on Radiation Protection and
Measurements (NCRP - 1986)
•
International Commission on Non-Ionizing Radiation Protection (ICNRP - 1986)
•
European Committee for Electrotechnical
Standardisation (CENELEC)
• ENV. 50166-1
1995 E
Human Exposure to Electromagnetic Fields Low Frequency (0Hz to 10kHz)
• ENV. 50166-2
1995 E
Human Exposure to Electromagnetic Fields High Frequency (10kHz to 300GHz)
• Proceedings of
SC211/8 1996
Safety Considerations for
Human Exposure to E.M.F.s
from Mobile Telecommunications Equipment (M.T.E.) in
the Frequency Range
30MHz - 6 GHz (E.M.F. Electromagnetic Fields)
To assure optimal radio performance and that
human exposure to radio frequency electromagnetic
energy is within the guidelines set forth in the above
standards, always adhere to the following
procedures:
27
English
SAFETY
Safe and Efficient Operation of Motorola
Two-Way Radios
•
Electromagnetic Interference/Compatibility
SAFETY
Note:
Nearly
every
electronic
device
is
susceptible to electromagnetic interference
(EMI) if inadequately shielded, designed or
otherwise configured for electromagnetic
compatibility.
To avoid electromagnetic interference and/or
compatibility conflicts, turn off your radio in any
facility where posted notices instruct you to do so.
Hospitals or health care facilities may be using
equipment that is sensitive to external RF energy.
When instructed to do so, turn off your radio when
on board an aircraft. Any use of a radio must be in
accordance with airline regulations or crew
instructions.
Operational Warnings
!
Vehicles With an Air Bag
WARNING
Do not place communications equipment in the area
over an air bag or in the air bag deployment area. Air
bags inflate with great force. If communications
equipment is placed in the air bag deployment area
and the air bag inflates, it may be propelled with
great force and cause serious injury to occupants of
the vehicle.
English
28
Potentially Explosive Atmospheres
Turn off your two-way radio when you are in any
area with a potentially explosive atmosphere.
Sparks in a potentially explosive atmosphere can
cause an explosion or fire resulting in bodily injury or
even death.
Blasting Caps and Areas
To avoid possible interference with blasting
operations, turn off your radio when you are near
electrical blasting caps, in a blasting area, or in
areas posted: “Turn off two-way radio.” Obey all
signs and instructions.
Note:
The areas with potentially explosive atmospheres
referred to above include fueling areas such as:
below decks on boats; fuel or chemical transfer or
storage facilities; areas where the air contains
chemicals or particles, such as grain, dust or metal
powders; and any other area where you would
normally be advised to turn off your vehicle engine.
Areas with potentially explosive atmospheres are
often but not always posted.
Mobile Antenna Installation
To assure optimal radio performance and that
human exposure to radio frequency electromagnetic
energy is within the guidelines referenced earlier in
this document, transmit only when people inside
and outside the vehicle are at least the minimum
distance away from a properly installed, externally
mounted antenna.
Table 1 lists the minimum distance for several
different ranges of radiated power.
Install the vehicle antenna external to the vehicle
and in accordance with:
Table 1: Radiated Power and Distance
Radiated Power of
Vehicle-installed
Mobile Two-way Radio
Minimum Distance
From Transmitting
Antenna
7 to 15 Watts
30.5 cm(1 Foot)
16 to 50 Watts
61 cm (2 Feet)
More than 50 Watts
91.5 cm (3 Feet)
•
The requirements of the antenna manufacturer/
supplier
•
Instructions in the Radio Installation Manual
Control Station Operation
When radio equipment is used to operate as a
control station, it is important that the antenna
be installed outside the building and away from
places where people may be in close proximity.
Refer to Table 1 for rated power and minimum
distant values for transmitting antennas.
29
English
SAFETY
Mobile Radio Operation and EME Exposure
SAFETY
General Radio Care
!
• The use of chemicals such as
detergents, alcohol, aerosol
Caution
sprays, and/or petroleum
products may be harmful to and damage the
radio housing.
• Avoid physical abuse of the radio.
• Clean the radio exterior using a cloth moistened
with clean water and a mild dishwashing liquid.
• The use of non-approved radio accessories may
damage the radio and invalidate warranty.
English
30
NOTES