1
ELECTRIC
WALL OVEN MODELS CWE5800,
CWFA800
USERS GUID
KEEP"IHESEIHSmUCTIONS FOR FUTUREREFERENCE
I!
TABLE OF CONTENTS
Page
For Future
Reference
• Model
Safety
Identification
Instructions
Electronic
................................................................................
Clock
• Function
1
...........................................................................
1
......................................................................................
0-4
..........................................................................................
4-5
Pads .....................................................................................
Automatic
Oven
Cooking
Self-Clean
Oven
...........................................................................................
7-8
Your Oven ..........................................................................................
9-13
Using
• Oven
Characteristics
• Oven Controls
• Indicator
Feature
...........................................................
5-6
6-7
...........................................................................
9
.....................................................................................
9
Light ....................................................................................
9
• Oven Racks ..........................................................................................
9
• Rack Positions
9
• Preheating
.....................................................................................
...........................................................................................
9-10
• How to Bake ........................................................................................
10-11
• How to Roast .......................................................................................
12
• How to Broil ........................................................................................
13
Maintenance
.................................................................................................
• Light Replacement
• Removable
Care
Service
14
......................................................................................
15
Chart ....................................................................................
15
...........................................................................................................
• Troubleshooting
• Adjusting
Wall Oven
14
Oven Door .......................................................................
and Cleaning
• Cleaning
.............................................................................
14
Chart ........................................................................
Oven Temperature
Warranty
.............................................................
.............................................................................
16
16
17
Back page
FOR FUTURE
Congratulations
oven!
As
voo
•_'ill appreciate
REFERENCE
on your choice ofa Maytag
}x)ur
nexv
oveD
_ve know you
the many features that provide
excellent pe&)rmance,
ease of cleaning,
convenienc_e and dependabilib;
New features
Model
Identification
use
have dramatically
changed
today's
cooking appliances and the way we cook. It is
therefore very" important to understand how
your new oven operates before you use it. On
tile following pages you will find a wealth of
information regarding all aspects of your oven.
By following the instructions carefully, you will
be able to fully enjoy and properly maintain your
Maytag oven and achieve excellent results with
the food you prepare.
Should you have any questions about using your
Maytag oven, call or write us. Be sure to provide
tile model and seri.,d number of your oven.
CONSUMER
MAY'rAG
If you have a question,
information ready:
1. Complete model and serial numbers
data plate wliich is located:
from the
A. Single Oven: Left side or lower right
side of oven trim.
B. Double Oven:
oven trim.
lower
right side of lower
2. Purchase or installation date from your
sales slip.
Copy this information
book, your warranty
in a handy place.
in these spaces. Keep this
and the sales slip together
Model Number
Serial Number
EDUCATION
ONE DEPENDABILITY
NEVCrON, IOWA 50208
or need service, have this
SQUARE
Purchase Installation Date
(515) 791-8911
(Mon.-Fri., 8 am-5 pm CST)
Service Company & Phone Number
HOMEOWNER:
Keep this booklet and the
installation instructions which are included in
rite literature
INSTALLER:
appliance
package.
Leave this booklet with the
for future reference.
PAGE
SAFETY
INSTRUCTIONS
The [bllowing instructions are based on safe_'
considerations
and must be stfietlv followed to
eliminate the potential risks of fire, electric
shock or personal injuu'.
Do not store nr use gasoline or other
flammable
materials,
vapors and liquids in
the vlcini_ of this or any other appliance.
Installation
Adjustment and service of this unit must be done
by a qualified installer to insure proper operation,
avoid possible damage of the unit or injuo" to an
unqualified installer. Be sure appliance is
properly grounded to avoid shock hazard.
Installation of unit must be in ac_ardance with
local and national fire codes and with clearances
from combustible surface or materials as listed in
the Installation Instructions.
Be certain all packing materi',ds are
removed
from the oven before operating,
to prevent fire or smoke damage should the
packing material ignite.
Circuit
locate
Breaker
or Fuse
Do nut repah or replacxe any part of this refit
unless such service is specifically rec_mmended
in this [×)oklet. All servicing not specifically
rec_ommeuded in this booklet nmst be referred
to a qualified
and mark circuit breaker or fuse. Never
replace a blown fuse or reset a circuit breaker
until you know what
has caused the fuse to
blow or circuit to be
broken. Mways
replace a blown fuse
with one of the
service technician.
Always disconnect unit or cut-off power to unit
by removing fuse or by tripping circuit breaker
manually to the "off" position, before anv
servicing.
IN CASE OF FIRE:
I 1. Turn oven controls and ventilating
equipped, off immediately.
correct amperage, do
not use a substitute.
hood, if
2. Smother fire or flame, use dr), chemical,
foam -_'pe extinguisher.
General
Never
Servicing
use oven to heat or warm a room.
This
instruction is
based on safety
considerations,
to prevent
potential
hazards and to
prevent
damage
unit.
to the
• If the fire is in the oven, smother
the oven door.
• Baking soda is also effective,
or a
it by closing
if available.
• Do not use water on grease fires.
Oven
Safety
Use care when upening oven door Let hot air or
steam escape before removing or replacing food.
Slide oven rack out to Md or remove food, using
dry, sturdy pot holders. Always avoid reaching
into oven to place or remove tood.
Al,a-ays plaee oven racks in the desired tx)sitions
while oven is c_x)l. Ira rack must be removed
while hot. be earetul to avoid contact
holders with hot oven elements.
PAGE 2
of pot
Venting
Child
Safety
1. Do not leave children alone or unsupervised
near the appliance when it is in use or is
still hot.
Never h]ock oven vent. Bk_'kage of vent prevents
proper o_en air circulation aud will M]_ct oven
perfbrmance.
Avoid tnucbing oven vent area
while oven is on and for several miuutes after
oven is turned off, Some parts of the vent and
surrounding area become hot enough to cause
burns.
2.Children
should never be allowed to sit or
stand on any part of the appliance.
3.Children
MUST be taught that the appliance
and utensils in or on it can be hot.
4. Children should be taught that an appliance is
not a to F They should not be allowed to play
with controls or other parts of the unit.
5. Let hot utensils cool in a
safe place, out of reach of
small children,
6.Caution:
Do not store
items of interest to
children in cabinets above
an appliance. Children
climbing on the appliance
to reach items could be
seriously injured. An
appliance should not be used as a step stool to
cabinets above.
Important
Warning
Safety
Notice
and
The California Safe Drinking Water and Toxic
Enforcement
Act of 1986 (Proposition _5)
requires the Governor of California to publish a
list of substances kno,x_l to the State of California
to cause canoer or reproductive harm, and
requires businesses to warn customers of
potential exposures to sudl substances. Users of
this appliance are herehy warned that when the
oven is engaged in the self-clean cycle, there )nay
be some low level exposure to some of the listed
substances, including Carbon Monoxide.
Exposure to these substances can be minimized
by"properly venting the oven to the outdoors
during the self-clean cycle.
Cleaning
Cooking
Safety
Du not use oven as a storage area for food or
cooking utensils.
Self-Cleaning
Oven
Do not clean ckx)r gasket. The door gasket is
essential for a good seal. Care should be taken
not to rub. damage, or move the gasket. Do not
use oven cleaners or oven liner protective coating
of any kind in or around any part of the self-clean
oven. Clean only parts listed in this booklet.
Before self-cleaning the oven, remove broiler
pan, oven racks, and other utensils.
Be sure all appliance parts are c(×)l before
touching or cleaning tbem. Clean oven witb
caution. Ira wet sponge or cloth is used to wipe
spills on a hot cooking area, be careful to avoid
steam bnrns. Snllle cleaners can produce noxious
fmnes if applied to a hut surface.
Storage
Above
Oven
If storage is provided, it shuuld be limited to
items which are used infrequently and which are
safely stored in an area subjected to heat from an
appliance. Temperatures
in storage areas above
the unit may be unsafe for some items, such as
volatile liquids, cleaners or aerosol spra)s.
PAGE 3
Plastics
Grease
Many plastics are vulnerable to heat. Keep
plastics away from parts of the applianoe that may
become wann or hot.
Use extreme caution when moving the grease
kettle or disposing of hot grea.se.
Aerosol
Sprays
Many aerosol- ,type spray cans ,are EXPLOSIVE
when exposed to heat and may, Ne highly
flammable. Avoid their use or storage near a }lot
appliance.
This appliance
performance
has been
using
Do not use any
devices
are not specifically
manual.
surface
tested
stove
cookware.
or accessories
recommended
Do not use eyelid
units,
for safe
conventional
in this
covers
top grills,
that
for
the
Hot grease is flammable.
Avoid letting grease
depnsits collect around applianoe, range hood or
vent fian. Do not leave container of grea, se arouud
a cooking appliance. In tim event of a grease fire,
do not attempt to move pan. Cover pan _'ith lid
to extinguish flame and turn su_aee element oG_
Do not douse flame with water. Use a dry
chemical or foaln-type fire extinguisher, if
available, or sprinkle heavily with baking soda.
Spills or boilovers which contain grease should be
cleaned up as soon as possible. If the.,:are
allowed to accumulate they could create a fire
hazard.
or add-on
oven convection
systems.
The use of
devices or accessories
that are not
expressly
recommended
in this manual
can
create serious safety hazards,
result in
performance
problems,
and reduce the life
of the components
CLOCK
of the appliance.
AND OVEN CONTROL
w
m
(Note: All indicator
wo rd_ are distglayed
The electronic clock and oven control on your
Mavtag oven is used for the time-of-day d(rck,
timer, bake, broil, delay start and self-clean
functions. A beep will sound each time a fimction
pad is pressed. At the end of an operation,
consecutive beeps will sound.
PAGE 4
to _hotc their location1.)
The display on the control will flash when power
is first supplied to the oven or if there is a power
failure. Once the time-of-day ckx:k has been set
(see Setting the Clock, page 5), the display will
stop blinking.
The oven win automatically
for 12 hours.
turn offifit
is left: on
NOTE:
Tile electronic
control is equipped
with
a self-diagnostic feature for service use ONLY. If
a fault code (F plus a number, ex. FI) appears in
tile display along with a continuous beeping
sound, press the CANCEL pad. See Before
Calling a Service Technician (page 16) if the fault
Clock
1. Press CLOCK.
2. Press • or • pat] until display shows correct
time of day.
in the display.
When pewer is first supplied to oven or if there
has been a power l_ailure, the display will flash.
Follow above instructions to set clock. Clock time
Tile following pads are found on )'our Maytag
electronic clock and cwen control:
cannot be changed when oven is set for a cook or
self-clean operation. Cancel operation to set
clock.
Cancel
Press CLOCK to recall time of day when another
function is displayed.
code reappears
Pad
Press this pad to cancel all operations except the
time-nf-day clock and timer. 1f)_lu are ever
unsure if you've programmed
tim control
oorreetly, press the CANCEL pad and start over.
•
and
•
Pads
Press or press and hold these pads to enter the
time or temperature
desired. These pads are 'also
used to select Ill or [x_ broil.
Timer
The timer can be set from l minute tn 9 hours,
50 minutes. It will count down by seconds (when
set for 1 minute) or minutes (when set for 2
minutes or more time). See below for instructinns
To begin
Time
cooking
immediately:
1. Press COOK TIME. Enter desired
time by pressing the • or • pad.
2, Press OVEN TEME
with • or • pad.
Pad
Use this pad to set the time-of-day clock. For
instructions to do this, see top of next column.
the
Clock
Enter cooking time with
"2. Press OVEN STOP. Enter the time you wish
the oven to turn offwitb • or • pad.
3. Press OVEN TEME
with • or • pad.
Press CANCEL
Enter oven temperature
to stop end-of-cooking
See pages 6 and 7 for additional
and .timer
Clean
1. Press TIMER.
1. PressSELF
beeps.
iMbrmation.
CLEAN.
2. Close and lock oven door.
pad to desired time.
TIMER can be set from i minute (0HR:01)
9 hours and 50 minutes (9 HR:50).
Enter oven temperature
To delay the start of cooking:
Timer
2. Press • or •
cooking
The oven will automatically turn on and off at the
preset times. 3 beeps will signal the end of
cx_oking. "End" will appear in the display and
continuous beeps will prompt you to remove the
food from the oven.
on setting the timer.
Setting
Time/Stop
1. Press COOK TIME.
• nr • pad.
Pad
Clock
Cook
up to
The timing operation will start automatically,
Colons will flash in the display to indicate a
timing operation. One long continuous beep
signals the end of the timing operation and "End"
briefly appears in the display. The time of day win
automatically reappear in the displa): The
TIMER does not oontrol the oven.
To cancel: Press TIM ER and hold for 3 seconds.
Time of day will reappear after a slight delav.
3. Oven will automatically clean for 3 hours.
Select 2 or 4 hours by pressing • or • pad.
"'door" win appear in display until the door is
properly locked. See pages 7 and 8 for additional
information.
Broil
1. Press BROIL.
2. Press • pad to select HI broil or • pad to
select Lo broil.
See page 13 for additional
information.
PAGE 5
Oven
Temp
7. Press (3LOCK pad and time ufday
in the displa__.
1, Press OVEN TEMP.
2. Press • or • pad tmtil desired oven
tmnperature
appears in the displa?:
See pages 9-12 for additional
baking and masting.
•
and
•
infonnation
on
reappears
The oven x_4lltuna on at 3:30; x_41lcook the food
for 21/2hours at 3500E and will automatiezdlv
turn offat 6:00.
NOTE: If you wish cooking to be_inl immediately, omit steps 3 and 4.
Pads
Press the • or • pad to enter time or
temperature.
These pads are also) used to select
HI or Lo broil.
ADDITIONAL
To set oven
for
immediate
1. Press COOK TIME
start:
pad.
INFORMATION:
A beep sounds each time a pad is pressed.
Ifa fault oode (example:
E 2) is displayed
beeps sound, press CANCEL.
code continues, see page 16.
• 0 HR:00 will appear m the displav and SET
COOK TIME will fl_sh in fl;e display;
and
If fault
Push tbe • or • pad to enter the cooking
time.
2.
• The display will show cooking time in
HOURS:MINUTES.
Cooking time can be
set from 10 minmtes (0:10) up to i1 hours
and 55 minutes (11:55).
AUTOMATIC
OVEN
COOKING
FEATURE
• If you delay in entering the eooking time.
the progra_n will automatically cancel and
the time of day will reappear in the disphly
The Automatic Oven Cooking feature is used to
turu flae oven on and offat a preset time of da.x:
The Automatic Oven Cooking feature
operate unless the elook is functioning
at the correct time of day
,MI] nut
and is set
Highly perishable foods such as dairy products,
pork, poultry, stuffing, seafoods, or baked goods
are not reeommended
tbr delay start cooking. If
canoking more than one food, seleet foods that
cook for the same length of time and at the same
• If you set the cooking time but delay in
entering the (wen tem[×_rature, beeps will
sound and the display will flash 000.
Press OVEN TEMP pad.
,
4. Enter oven temperature
• If yon press the OVEN TEMP pad hut
delay in entering the temperature,
the
program will cancel and the display _511
return to the time of day.
oven temperature.
Basic
Instructions
Press CLOCK pad and the time of day wiIl
reappear in the display. TIMED BAKE ON
indicator words x:ill remain in the disph_y to
show that the oven has been set for Automatic
,
Example: Focv,]is to cook fi)r 2 hours and 30
minutes (2:30) at an oven temperature of 350°F.
You wish the food to be cooked by 6 o'clock (6:00).
4. Press COOK TIME
pad.
2. Press • pad until 2:30 (2 bours and 30
minutes) is displayed.
3. Press OVEN STOP pad.
Oven Cooking.
After a few senoods, the oven will turn nu and
.
the display will begin to c,oont down.
7, At the end of the preset cooking time, the
oven will automatically tuna off. "End" will
appear in the displa) and 3 beeps will signal
the end of cooking. Continuous beeps x_,ill
prompt you to remove food from the oven.
4. Press • pad until 6:00 (6 o'clock) is displayed.
5. Press OVEN TEMP
pad.
6. Press • or • pad until 350 ° is displayed.
PAGE 6
\_sth the • or • pad.
.
Press CANCEL to cancel the beeps and
remove food from the oven.
To set oven
for
delayed
1. Press COOK TIME
start:
pad.
• 0 ltR:00 `sill appear in the display and
SET COOK TIME win flash in tile display
2. Press the • or • pad to enter the cooking
time.
• The display will show cooking time in
ItOURS:MINUTES.
Cooking time can be
set from 10 mimltes (0:10) up to 11 hours
and 55 minutes (11:55).
SELF-CLEAN OVEN
(IF EQUIPPED)
The self-clean oven uses temperatures
above
normal cooking temperatures
to antomaticall._
clean the oven interior.
Avoid cxmtact with the oven door and `s,indow as
tl_ese areas become
cycle.
warm during the self-dean
It is better to clean tim oven regularly rather than
to wait until there is a heax T huild-np of soil in
the oven.
Basic Instructions
3. Press OVEN
STOP pad.
• SET STOP TIME
1. Close o_n
,sill flash in the display:
4. Press the • or • pad to enter the stop time.
• If you delay in entering the stop time,
t×2eps will sound and the display will flash
SET BAKE and 000 °.
5. Press OVEN
TEMPpad.
6. Enter oven temperature
pad.
2. Move the door lock lever to the right or
hx:ked tx,sition.
3. Press SELF CLEAN pad.
4. Press • or • pad to select cleaning time.
• Light soil - 2 hours
• Average soil - 3 hours
wida the • or •
7. Press ('LOCK pad to return the current time
of da? to the display DELAY BAKE aud the
re'set oVell temperature
`s,ill appear in the
display to show that the oven has been set for
a delay start c_oking operation.
8. The oven will automatically turn on at the
preset time and TIMED BAKE ON will
appear to indicate that the food is cx)oking.
9. The oven x_411automatically turn offat the
preset stop time. "End" will appear in the
tisplay and continuous beeps will signal the
end of cooking.
10. Press CANCEL to cancel the beeps and
remove food from the oven.
Additional
door.
Information
If wm delay mort, than 30 seconds hetween
touching apad and pressing the • or • pad, the
display will either return to the pre_ious setting or
the time of the day ,ssll reappear and the program
will cancel.
To recall the preset stop time or cook time, just
press the correspending pad.
To reset or cancel the program, press the
CANCEL pad.
At the end of the cooking operation, continuous
beeps will sound until the CANCEL pad is pressed.
• Heavy soil - 4 hours
Before
Self-Cleaning
Remove all pans and the oven racks from the
oven. The racks will discolor and may not
slide easily after a clean cycle.
Turn off oven light before clean eycle. The life of
the bulb may, be shortened if left on during the
clean cycle.
Clean oven frame, door frame and around the
nven vent with a non-abrasive cleaning agent
such ;as Bon Ami or soap and water. These areas
are not exposed to cleaning temperatures
and
should be cleaned to prevent soil from haking on
during the clean cycle.
Wipe up excess grease or sl_il]oxers fi'om the
oven bottom to prevent exeessix e smoking
during the clean cycle.
Wipe tip acid spillovers such as lemon jnice,
tomato sauce or milk-hased sauces and sugary
spil]o_rs. Porcelain enamel is acid resistant, not
acid proof. The porcelain finish may discu)lor if
acid spills are not `s,iped up immediatelv.
]Do not
use
oven cleaners
or oven liner
protective coatings of any kind on the self-clean
oven finish or around any part of the oven. To
prevent damage, do not clean or rub the gasket
around the oven door. The gasket is designed to
seal in heat during the clean cycle.
PAGE 7
During
Self-Cleaning
.
When the SELF CLEAN pad is pressed and the
door is locked, the oven win automatieany begin
to heat to cleaning temperatures.
As the oven reaches cleaning temperatures,
the
LOCK indicator will tuna on to show that an
internal lock mechanism has engaged. At this
point, the oven door can not Ire unlocked and
opened.
To prevent damage to the door and lock lever, do
not force the door open when the LOCK
indicator is displayed.
The first few times tile oven is cleaned,
some
smoke and odor may be detected. This is normal
and will reduce or disappear with use. If the oven
is heavily soiled, or if the broiler pan is left in the
oven, smoke and odor may occur.
As the oven heats and cools, you may hear sounds
of metal parts expanding and contracting. This is
normal and will not damage your appliance.
After
Self-Cleaning
About one hour 'after tile end of the
the internal lock will disengage and
indicator will turn off. At this point,
be unlocked and opened. Move the
lever to the left or unlocked position
the door.
clean cycle,
the LOCK
the door can
door lock
and open
Press the SELF CLEAN
• 3 HR:00 x_ill appear in the display and SET
CLEAN TIME will flz_sh in the displa.v.
After a few seconds delay, the oven will
automatically tunl on. CLEAN and ON will
appear in the displa3:
• If you wish to change tile cleaning time,
press the SELF CLEAN pad and press tile
• or • pad to select 2 hours for light soil or
4 hours for heavy soil.
• "door" will appear in the display and
continuous beeps will sound if tile oven
door is not locked.
m If the door is not locked or the clean time is
not entered within 30 seconds of pressing
the SELF CLEAN pad, the program will
automatically be cancelled.
4. Press CLOCK pad and the current time of day
will reappear in the displa3_ CLEAN and ON
will remain in the display to show that the
oven is in a clean cycle.
About one hour after the clean cycle ends. the
LOCK indicator will turn offand the even door
can be opened.
The oven door and door lock lever will be
damaged if the oven door is forced to open when
the LOCK indicator is still displayed.
To cancel
Some soil may leave a light gray, powdery ash
which can be removed with a damp cloth. If soil
remains, it indicates that the clean cycle was not
long enough. The soil will be removed during the
next clean cycle.
If the oven racks do not slide smoothly after a
clean cycle, wipe racks and embossed raek
supports with a small amount of vegetable oil to
restore ease of movement.
Fine, hair-like lines inay appear in the oven
interior or oven door, This is a nonnal condition
resulting from heating and c,ooling of the
porcelain finish. These lines do not affect the
performance
of the oven.
To set oven
for a self-clean
cycle:
1. Remove oven racks and close the oven door.
2. Move the door lock lever to the right or locked
position.
PAGE 8
pad.
clean
1. Push CANCEL
cycle:
pad
2. lfthe LOCK indicator is displayed, allow oven
to cool up to one hour. Once LOCK indicator
turns off, the door can be unlocked and
opened.
If the LOCK indicator is not displayed the
oven door can be unlocked and opened.
USING
YOUR
OVEN
Indicator
Light
The OVEN indicator light turns on whenever
Oven
E\'e!_"
Characteristics
oven
hlks
its
characteristics.
o\vn
_tl)tl luav
find ihat the cooking times and temperatures
\'ou were accustomed
to \\dth ynur pre\ions oven
max" need to be altered slightly with your new
oven. Please expect some differences with the
new appliance.
Oven Control
for Lower
or Double
Oven Models
Oven
550
500
WARM
450
200
•
knob is used to select the oven temperature.
Always turn knob just to the desired
ten_perature, never to a higher temperature
and
then back. This allows ibr more precise oven
temperatures
and is especially important if oven
is being set for a critical baking operation.
(Self-Clean
DO NOT MOVE
TO THE RIGHT
Wall ovens m'e equipped with two lock-stnp oven
racks. One rack is a "straight" rack while the other
is an "nff-set" rack. The lower (wen has only one
nven rack.
To remove:
Be sure rack is cool. Pull rack out to
the "lock-stop" position. Tilt up and continue
pnlling until rack releases.
"lock-stop" position to be sure rack is correctly
replaced.
300
The lower oven of the double wall oven has a
mechanical control to operate the oven. The
knob is labeled LOWER OVEN TEMP. This
IMPORTANT
Racks
To replace:
Place rack on rack snpports, tilt up
and push tuward rear of oven. Pull rack ont to
250
350
Oven
When using two racks for haking, plate the uff-set
rack in the bnttnm rack position. It is
recommended that the straight rack be used for
broiling.
OFF
400
the
lower oven is tnmcd on for a c_kSng operation.
The light turns on and off_.s the oven elements
cycle on and off.
Oven
Only):
DOOR LOCK LEVER
DURING
BROILING
OR BAKING. The oven door may lock and
w_ not unlock unt_ the oven cools.
Fall
A fan automaticany turns on whenever the (wen
is set fbr a c_x)king or self-clean operation. The
tan will automatieallv tuna offwhen the oven has
cooled. (Note: The lower oven for model
CWE5800 does not have a _n.)
Rack
Positions
Never place pans directly nn the oven bottom. Do
not cover entire rack with aluminum foil or place
foil directly under utensil. To catch spilkwers, cut a
piec_e nf foil a little larger than the pan and plac_ it
on the semnd rack located below the utensil.
Rack 4 -- (top of oven) used for broiling thin
foods and for two rack baking.
Rack 3 -- used for baking and for broiling thicker
cuts of meat.
Rack 2 -- used for one- or two-rack baking and for
roasting shine inea|s.
Rack 1 1 (bottom of oven ) for cooking larger
fi)ods and for baking angel food cake or pie shells.
Place food in oven on center of rack. Allow 1 or 2
inches between edge of utensil and oven sides or
adjacent utensils. If cooking on two racks, stagger
fnods on racks. Use rack l×_sitions 2 and 4 when
cooking on two racks.
To operate the lower oven: Trim lower
OVEN TEMP knob to desired temperature.
After cook-iug, turn the lower OVEN TEMP
knob to OFF and remove the f(×_d from the
oven.
PAGE 9
:3. Place food in tile oxen. Check fi×_d at the
Preheating
Preheating is necessary for prowr baking results. It
is not necessary for broiling or roasting. Allow the
even to heat until the desired oven tcmperaturc is
reached (approximately 10-15 minutes).
Seleeting a tempeniture higher than desired will
not preheat the oven any' faster. Preheating at a
higher temperature may have a negative eitbet on
baking rcsults,
How
to Bake
Basic
in Upper
Oven
Instructions
2. Press OVEN TEMP pad,
4. At tile end of cxmking, remove t)_xl and press
the CANCEL pad to cancel the operation.
The current time of day xxSlIreappear in the
displa\'.
To recall the preset temi×_rature
press the OVEN TEMP pad.
temperature.
To set oven
or roasting:
to
TEMP knob to
desired temperature.
AIk)w oven to preheat
(approximately 10-15 mfimtes).
4,
2. To enter the oven temperature,
press the • or
• pad until the desired temperature
is
displayed.
• 3N) will appear ir, the displa) whe], the SET
pad is pressed. The temperature
can be set
from 170 to 550 ° .
The oven _qll turn on within a ti"w seconds.
The ON indicator word and 75 ° or the
is
in the display' will increase
until the m'en reaches the
preset temperature.
A single beep xx'ill
sign',d that the oven is preheated.
Allow 10
to 15 minutes tor the oven to preheat.
PAGE 10
Oven
3. Place food in center of oven, allowing a
minimum of :29inches between utensil and
oven walls.
• The display will return to tile current titnt*
of day if the oven temperature
is not
entered within 30 seconds.
The temperature
in 5 ° increments
in Lower
2. Push and turn h)wer OVEN
words _cill appear
actual oven temperature, whichever
higher, will appear in the display
to Bake
turn off if it is left on
1. When c,_)l, position racks in ovt,n according
what you art' baldng.
1. Press OVEN TEMP pad.
• O(hO° and BAKE indicator
in tile display
duriug preheat.
To change the preset iemlx'rature,
press the •
or • pad until tile desired temperalnre
is
displayed.
How
3. Press • or • pad to desired
baking
cooking time. Cook lon_er if
The oven win automatically
for 12 hours.
1. Position oven racks,
for
tniuimunl
needed.
Check fi×xl for &meness
at minimmn
time in
recipe. Cook longer if necessary. Titm lower
OVEN TEMP knob to OFF. Remove tb(xt
from the oven.
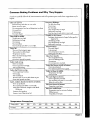
Common
Baking
Problems
and Why
They
Happen
Ifvoo have carefilllv fi)llowed tile basic instructions and still exq_erience p(x)r resuhs, these suggestions may be
he'lpful:
Cakes
are uneven.
Pans touching
each other or oven walls.
Batter
in pans.
uneven
Oven temperature
Oven not level.
Excessive
shrinkage.
Too little leavening,
Ovennixing.
Pan too large.
Oven temperature
too high.
Baking time too long,
Pans too close to each other or oven wall,
too low or baking time too short.
Undermixing,
Too much liquid.
Crumbly or dry texture.
Improper measurement of sugar, baking powder,
liquid or fat.
Ohl baking powder.
(Len temperature too high.
Baking time too lung,
Cakes high in middle.
Temperature
too high.
Baking time too long.
OvennL-dng.
Too much flour.
Pans touching
Cakes
each other
or oven walls.
Uneven
fail.
Too much shortening or sugar.
Too much or too little liquid.
Temperature
t(yo low.
Old or too little baking powder.
Pan too small.
Oven door opened
Cakes
brown
on top.
Cakes
Oven temperature
too low.
(N'er mixing,
To() much liquid.
Incorrect pan size or too little batter
Oven door opened
Cakes,
cookies,
too brown
not done
Pie crust edges too brown.
Oven temperature
too high.
in pan.
Pans touching each other or oven walls.
Edges of cntst t(m thin.
on bottom.
Oven not preheated.
Pans touching each other or oven walls.
Pies
Using glass, darkened, warped or dull firdsh
metal pans.
Incorrect rack position.
Incorrect use of aluminmn foil,
Pies have soaked
Temperature
I °Fahrenheit
°Celsius
in middle.
Temperature
too high.
Pan too small.
too often.
biscuits
tunnels.
Cakes don't brown evenly on bottom.
Oven not preheated.
Pans darkened, dented or warped
Oven temperature
too high.
Too much leavening.
don't
have
Not enough shortening.
Too much baking powder,
Ovennixing.
Oven temperature
too high.
frequently,
Cakes crack on top.
Batter overmixed.
Cakes
Texture.
Too nmch liquid,
Undermixing.
Oven temperature
too low.
Baking time too short.
don't
brown
on bottom.
Using shiny metal pans,
crust.
Temperature
too low at start of baking.
Filling too juic_
Using shitty metal pans.
Conversions
2(X)
100
250
120
275
140
300
150
325
160
350
180
375
190
400
200
425
220
4,50
030
PAGE
1
How
to Roast
Atler
Roasting is tile choking of tender cuts of meat
with d_'heat. No water is a&led nor is the
Check weight of meat and place )neat fi_t-side-up
on a rack in a shallow roasting pan.
Cooking time is detennined
by the weight of the
meat and the desired aloneness. Use the chart
given below as a gnide in detennining
cooking
times. For the most accurate results, use a meat
thermometer.
Insert the thermometer
so the tip
is in the center of the thickest part of the meat
and is not touching bone or fat.
Chart
Internal
Approximate
Weight
Cut of Meat
Beef
Standing
the riven _uKI
possible, however, to cook meat from the frozen
state. Follow the same roasting instructions but
increase cooking time appmxinlately
10 to g5
minutes per pound. When using frozen packaged
meat. _bllow package directions. Frozen ixndto '
shouM ahvavs, be thawed before cooking except
when package directions reconunend eooldng
from the frozen state such as for frozen turkey
rnlls, Do not refreeze
meats that have not
been cooked first,
is
Meats are masted at 3'25°F generally (except
tenderloin, 425°F and smaller poulto, at 375°F to
400°F).
Roasting
front
Frozen meat may be eooked in the same way _L_
fresh meat if the meat is thawed first. It is al[so
rack
positions before oven is turned on. Preheating
unnecessary for roasting meats.
remove lneat
tile oven when the internal temperature
is 5 to
I0 ° less than the final desired temperature
since
meat will eontinuc to eook slightly while standin_i.
cooking utensil covered. Seamlg is mmeeessaD=
If'desired, season meat u_ith salt and pepper.
Place oven rack in one of the two bottom
choking,
h't stand 15 to 215minntvs tbr easier caning. Rare
or medium
rare meats should be remox ed t'nnu
Bib
6-8 Ibs.
4-6 lbs.
Rolled Rib
5-7 Ibs.
Telrlp,
141)°F irare)
160°F (mediuud
170°F tuvll done)
140°F (rare)
160°F (medium)
170°F (well dotw)
3(X)-325°F
300-325°F
140°F (rare)
I60°F
(ll/Piliu)tl}
IT0°F (well
4-6 lbs.
cooking
Temp,
300-3_5°F
dont')
'lime
23-25 min./lb.
27-3[) min./lb.
32-35
26-32
34-3S
4(I-42
min./lb.
min./lb.
min./lb.
min./Ib.
32 min./lb.
3S min./[b.
48 imnJlb.
14(I°F (rare5
160°F [reed[and
170°F (well done)
350°F
4-6 lhs.
140°F (rare)
425°F
40-60 thins.
2-3 lbs.
140°F (rare)
4_5"F
(total time)
45-50 mira
(total time)
Sirloin Tip
(high qmdity)
3-4 lbs.
6-8 Ibs.
140-17(5°F
140-170 ° F
325-350°F
&5-4(I min./lb.
30-35 min./lb.
Rcdled Rump
(high quality)
Pork Loin
4-6 Ibs,
150-170 ° F
325-35[5 ° F
_5-3(5 min./lh
325°F
30-35 iuin./lb.
&5-40 rain.lib.
325 ° F
25-30 min./Ib.
Rib Eve
Tenderloin,
V_'hole
Center
Half
Lamb,
Leg
3-5 Ibs.
5-7 Ibs.
I80°F Throughout
160°F ThrougJlout
5-9 Ibs.
160°F (medium)
170-180 °F (wt-I1)
PAGE 12
18-20 min./Ib.
20-22 min./lb.
22-24 mirl./Ib,
30-35 mln./Ib.
How
to Broil
Brcfiling is a meth(;(1 (ffcooking tender meats by
direct lit'at. The e(_)king time is determined 1)(
the distance between the meat and the broil "
element, the desired degree nfdoneness
and the
thk'klless of the meat.
Broiling
_ps:
Broiling requires the use of tile broiler pan and
insert, The I)roi]er insert must be in place to allow
£tt and liquid to drain to the pan below to prevent
spatters, smoke _md flare-ups, hnproper use may
eatnse grease fire's.
Do not cover the broiler insert with aluminum
full as tiffs prevents fat fi'om draining into pan
beh+w. For easier clean ul3 the broiler pan can be
lined with {oil and spray tile insert with a nonstick vegetable spray'.
Remove cxoess fat and slash remaining fat to help
keel_ meat fronl curling, This also reduces
smoldng and spattering.
Place oven rack in the correct rack position when
oven is co(}I. Fur darker brox\ming, place meat
closer to the broil element. Place meat further
dnx_+ if"you wish meat to be well done or if
exeessivb sine)king and flaring occurs.
Broiling
Bacon
Beef Steak
1-inch thick
1 ]/.+-inch thick
Chicken
Whole, split
Piece_
To set oven
to broil:
1. Press BBOIL pad.
000° aml BROIL indicator words will appear
in the dispbe'.
2. Press • pad to select tlI for normal broiling
or • padto select Lo for low temperaturebroiling.
:3. For optinmm results, remove broiler pan and
preheat broil element 3 tn 5 minutes.4. Broil with tile oven dtx)r opened to the broil
•st(Pfmsiti°n" (oI-_ened about 6 inches) • Turn
meat onc_e about halfway through cookinR.
Check for doneness bv cutting a slit in the
meat near the center _'or desired t*)lor.
.5. At the end of cooldng, press CANCEr, to
cancel the brnil operation. The current time of
dav'Mll reappear in the display.
Use ttl BROIL for most broil operations. Select
[z) BROIL when broiling longer cooking fo(nts
such as poultry. The lower temperature
allows
fi_od to cook to the well done s{age whhout
excessive browning. Choking time max inerc_e;e
if La) BBOIL is se]ee{ed.
Broil times max' need to be inere_Lscd if range is
installed on a .9.708-voltcireuit.
Chart
Type of bleat
See Care and Cleaning Chart on page 15 for mstn]ctions on el_aning the broiler pan aud insert.
Rack Position*
Doneness
#4
Well Done
#4
#4
#4
#4
#4
#3
Medium
Well Done
Rare
Medium
\\'ell Done
#3
#3
\\'ell Done
"+VeilDone
Total Time (Minutes)**
Rare
6 to 10
lOto 14
15 to 18
19 to 22
18 to 20
22 tl) 24
E\ to 30
Ix) Broil
45 to 60
30 to 45
Fish Steak or Fillet
I/2-ilwll thick
Ground Beef Patties
:V4to l-inch thick
#4
Flakv
I0 to 12
#4
Rare
Medium
Well Done
Ill t(, 13
Ham Slice, precooked
l-indl thick
1 l/2-inch thick
#4
#4
Lamb Chops
1-inch thick
#4
1-1:2-inch
#3
thick
Pork Chops
:F4-inch thick
1-inch thick
*Bottom rack position is #l.
#4
#4
12 to ]5
15 to IS
12 to 16
21 to 26
Medium
Well Done
Medium
\Veil Done
12
16
15
95
Well Done
Well Done
15 to 20
21')to 25
to
to
to
to
15
20
19
30
**Times are approximate and may vat)' depending on t m meat
PAGE 13
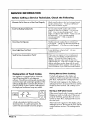
MAINTENANCE
Light
Replacement
Before replacing light bulb, disconnect
power
to oven. Be sure bulb is etx)l. Do not touch a hot
bulb with a damp eloth as the bulb maybreak.
Use a dr)' pot bolder to prevent possibk harm to
hands. If bulb should break, use a pot bolder to
_)rotect bands and ve O, carefully" remove bulb. If
ulb breaks at base, bare a service teehnieian
remove bulb.
3. As you lift the dnnr up. yen" slightly open
door by pulling door toward y'ou. Check to be
sure latches swing do\_aa into the notdles un
the hinge arms.
Oven light bulb is located on back oven wall.
Replace with a 40 watt appliance
bulb, Restore
power to oven. Reset clock.
Note
for
Self-Clean
Ovens:
Remove 4 screws and plates as illustrated below.
Use care when removing gasket, it may tear.
Replace
only with a 40 watt appliance
Reconnect
bulb.
power to oven and reset clock.
To replace
door:
1. Grasp sides of door and align slots in door with
hinge arms.
2. Very slightly pull door to a more open
position as you slide the door dowl_ onto the
hinge arms. The sliding acti]m of the door _I1
disengage the latches on the binge arms.
3. Gently push the door do_vnward until the dolor
rests evenly on the hinges. Close dcx_r.
Removable
To remove
Oven
Door
door:
1. Open door to the broil stop position (€_pen
about 4--6 inches).
2. Grasp the sides of the door at the middle of
the door. Slowly lift door straight up.
CAUTION:
Hinge arms are spring mounted and will slam
hut against the oven if aceidenta!ly hit. Never
]lace hand or fingers between the hinges
_nd the front oven frame. You could be
injured if hinge snaps back.
Do not attempt to open or close door until door
is completely seated on hinge arms. Never turn
on oven unless door is properly in place. When
baking, be sure door is completely closed.
Baking results will be affected if door is not
securely closed.
f
PAGE
14
L
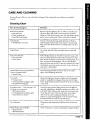
CARE AND
CLEANING
Be sure all parts of the oven are cool before cleaning.
correctly.
Cleaning
Parts
After cleaning
be sure all parts are replaced
Chart
& Cleaning
Agents
Directions
Broiler Insert al_d Pan
• Soap and water,
• Plastic scouring pad.
• Soap filled scouring pad.
Remove from the appliance after use. Allow to cool then pour
offgrease.
Place soap)' cloth over insert and pan; let soak to
loosen soil. Wash in warm soapy water. Use soap filled scouring
pad to remove stubborn soil. Clean in dishw_sher if desired.
Control Knobs
• Mild detergent
To remove knobs for cleaning, gently pull forwardi Wash in
mild detergent and water. Do not use ahrasixv cleaning agent.
and x_-ater,
They will scratch
replace.
Control
Panel
finish and remove
markings.
Rinse, dQ', and
Use a clean, soft cloth. Clean with glass clemmr or soap and
water,
Glass (Oven Window)
wash \_ith glass cleaner or with cloth wrung out in soapy water.
Do not oversaturate
cloth to avoid inside staining of oven door
glass. Do not use abrasive inaterials such 0.s sex)tiring pads. steel
w_rol, or powdered cleaning agents. They will diunage glass.
Rinse with clear water and d_'. To prevent staining of oven door
window glass, never use excessive amounts of water which may
seep under or behind glass.
• Soap and water.
• Glass cleaner.
Metal Finishes (Trim Parts,
('hrome
& Stainless Steel)
Aluminum,
\Vash \vith soap and water. Do not use a[)ntsix'e or caustic
agents. They v,51Idamage the finish,
• Soap & \\hter
Oven Racks
• Soap and water.
• Cleansing powder aud plastic pads.
• Soap-filled scouring pads.
Porcolain
self-clean
Enamel -- Oven (see page 7 for
oven instructions).
• Mild soap and water,
• Cleansing powder and plastic pads.
• Couullereia]
oven
cleaner.
Clean with soap)' waten Remove stubborn soil with cleansing
powder or soap-filled scouring pad. Rinse and dQ, Self-Clean
Oven: Racks will permanently
a clpan cycle.
discolor
if left in the _wen during
Clean _dth soap and water when parts are cool. All spillovers,
estx-ci_dly acid spillovers, should be wiped up immediately
with
a dr),' cloth. When surfime is cool, clean with warm soapy water.
Never _-ipe off a warm or hot enamel surface with a damp
cloth. This may cause cracking and chipping. Never ose
alm_sive or caustic cleaning agents on exterior finish of rm_ge.
Poreehdn enamel may crack or chip with misuse,
Oven Elements
Elements
used,
are self-cleaning,
Plastic Finishes (Door Handle)
• Soap and water
• Mild liquid sprays.
Never use abrasive
Soil will bona offas
or caustic cleaning
elements
are
agents on plastic finishes.
PAGE 15
SERVICE
Before
Elements
INFORMATION
Calling
a Service
Technician,
Fail to Turn on or Heat Food Properly
Check
the
Following
Check circuit breakers or fuse Ix)x iT,rtripped circuit
breakers of!,lt)v, lt fuses.
" Is element defective?
Have see,
icetechnician replace,
Food Not Baking Satisfactorily
Are your racks properly in place and in correci
position for what you are baking?
• Is your oven
level'? • Are you using the proper pan_ * Is it
bright, riot soiled or dark eolured?
• ltave you used
tbil incorrectly?
• Are ycm using standard '
measuring utensils?
• Did you preheat if
recommended?
Oven Does Not Operate
Was the automatic c'o,2king feature eorw(..tlv set?
• See page 6. • Is the oven disecmueeted "from the
electrical power?
•\;'as the ovencontrol properly
set.
Oven Light Does Not Work
ls vour
Need Service, Accessories
When vour oven requires st,rxiee or repiac,einent
parts, cont_mt ;,'our Dealer or Authorized
Semite
Agent');
" ('onsult the Yellow Pages ill your
telephone director)- under ranges filr the service
center nearest you,
• Be sure to include 3x)nr nanic,
address, and pfione nunlber, along with tlae model
and serial number of the applianee. (See inside front
cover fur location of your niodel and serial nllmbers).
Explanation
bulb loose or
cx_mected to power?
or Parts?
of Fault
Codes
Your apt_limace is equipped with an electronic
controlieaturing
built-in, self-diagnostic
software. This software continuously monitors the
c_ntroi to insure safe and proper operation. If the
software sh{mld detect a questionable
situati{m, a
FAULT CODE (F plus a number) will aptxear in
the display and cxmtinuous beeps may sound.
1
A t_ault code indicates that there may be a
functional error. As a safe_" precaution, the
control will automatically cancel the program.
PAGE 16
During
Normal
I)unl_'d
(nil?
Oven
• Is oveu
Cooking
Ifa fault code appears in tbe display and
continuous beeps sound, press the CANCEL
pad. Then, reprogram the cooking operutiun.
If the fault o3de reappears in the display, call an
authoriwed scrxScer. Do not use the oven until the
enntrol has been serviced. The e(x,ktop elin lie
used.
During
a Self-Clean
Cycle
If the oven is heaxilv soiled, exeessive smoke and
flaring may result in a fault e(×te. If this oeeurs,
press the CANCEL pad and allow the (wen to
cool tbr an hour. Tben, reprogram the oveu fur
the eleau cycle.
Iftbe Fault code reappears in the displa}, eall an
authorized semieer. Do not use the oven until the
control has been semieed.
used.
The cooktop can be
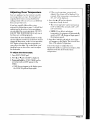
Adjusting
Oven
Temperature
Your new appliance has been l_teto]7 tested Ii)r
oven temperature
aec:t]raey. Even thonKh )our
rar_gc has been tested, \'on ma\ find that the
c_×_king results with \'ollr new o\'ell are difk_rent
from your previous oven.
If you have carefillly followed the recipe,
reviewed the baking tips on page 11 and still ti.'el
cooking results do not meet your expectations,
vou c;m adjust the oven teml×'rature.
DO NOT
ADJUST TIlE TEMPERATURE
if only one or
two items are not baking properly.
If you think the oven should be hotter or cooler,
you can adjust it yoorselL To decide how much to
change the thermostat, set the oven temper'ature
25°F higher or lower than the temperature
in
your recipe, then bake. Tile results of the "test"
should give you an idea of how much to adjust
the thermostat.
To adjust
the thermostat:
• l['the _;\en temperatntx' \v;uspre\ionsl?
adj.stell, the change _\qll
I)e disllla?,ed For
example, if the temperature
\\as wd,ced
by
15 °, -15 ¢ will be displayed.
4, Press the • or • pad to seleet tile
temperatare
chauge desired,
• The oven temperatm'e can be increased up
to 35 ° or reduced bv _Lsmuch as 35 ° (-35 °)
in 5° inerem(mts.
• NOTE: If you delay ill selecting a
temperature,
the program will automatieallv
cancel and 00 ° will disappeak_ Bebgu again if
the progl'am cancels.
5. Press the CANCEL
pad and the time of day
will reappear ill the display. The oven \\qll ilow
bake at tile adj_lsted temperature.
It is not necessary to readjust tile oven
temI×mlture if there is a power mtemlption.
adjustment \_411not affect broil or clean
This
temperatures.
1. Press OVEN TEMP pad,
2. Press • or • pad until .550° is displayed.
3. Press and hold the OVEN TEMP pad ibr
several seconds until 00 ° appears in the
display:
• If00 ° does not appear in the display press
the CANCEL pad and begin again,
PAGE 17
WALL OVEN WARRANTY
Full One Year Warrant'
For one (l) year fi'om date of'original retail i)urch_Lse, any part which fails m normal home
or replaced fl'ee of charge when tile applianee is located ill tile United States or Canada.
use xxil] be repaired
Limited Parts Warranty
All Wall Ovens: Alter the first year from the date of original retail purchase, through the second year,
parts which f_l in norlna[ honle use wi[I be repaired or replaced free of charge for the part itsel|_ with the
owner paying all other costs, including labor, when the appliance is located in the United States or
C'anada.
All Heating Elements: Atter the second year from the date of original retail purcho.se, through the fifth
year, the oven bake element and oven broil element in eleetric wall ovens which fail in normal home use
will be repaired or replaced free of charge for the part itselt, with the ox_ter paying all other costs,
including labor, when the appliance is located in the United States or Canada.
Limited Parts Warranty Outside
The United States Or' Canada
For two (2) years from the date of original retail purchase, any part which fails in normal home use will he
repaired or repla,_'ed free of charge far the part itself, with the ,,_wr paying all other c,,sts, including labor, when
the apptianee is located outside the United States or Canada..
This \Varran_' gives )xm specific legal rights, and you ntav also have other rights which vary from state to state.
To Receive
Warranty
Service
To locate an authorized
service _-'olllpany
in your area e(mtaet the Ma}'tag dealer frt)m whom your appliance was
purehased:
or call Max+tag (Jllstolller Set'dee. Should you not receive satisl;aetoO' warrallty
service, call or write:
Maytag Custouter Service
240 Edwards St. S.E.
Cleveland,
US
CANADA
TN 37311
1-800-688-9900
1-800-688-2002
When contacting Ma_ag Customer Serxice !)e snre to provide the nlode] and serial number of your appliance, the
name and address of the dealer from whom you purchased the appliance and the date of pureh;kse.
Should
you still have
(ilglo8, MA('AP
apl)liamv
a problem,
write t,_: Maic)r Appllanta,
is an industry SF_mSon'd hut independent
C_msmner
Actinn Panel. 2(I North \\itcker
group of _msmner
experts
I)fix,,. Chicago,
\xlL_ rt'ta'ive and act Oll cxm@aints
Inmois
from
ox_n_t.rs.
NOTE: When wrilin_ at_,ut an ims, dvt.d sere ic_"prl,hlem, pleltse include ti.. [bllox_6ngilfllmnation:
[a; "Jimr name. address and h,h.phone number:
ih) M_×M mmfl_er and serial nuulber (|ilund on the data plate I_wated on the left or [ox_x,rright side of oven trim on a
single o\'e. and on the lo.ver right side of oven trim on a d,mble I^en) of}our appliance:
(el Name and address ofy, mr defiler and d.tte tilt, appli;.it_' x_;mbought:
(d) A clear dt!scription of tile problem _o,] an' ha\ m_
Form No 259TM
MAYTAG • One Dependability
Part NO.8110P214-60
*"
Square
• Newton,
Iowa
50208
MP
: itho U,S.A