1
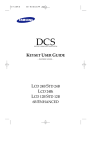
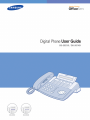
Digital Phone User Guide
DS-5021D / DS-5014D / DS-5014S / DS5038S / DS-5007S
SAFETY CONCERNS
For product safety and correct operation, the following information must be given to the
operator/user and shall be read before the installation and operation.
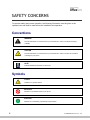
Conventions
WARNING
Provides information or instructions that you should follow in order to avoid personal injury
WARNING
or fatality.
CAUTION
Provides information or instructions that you should follow in order to avoid a service failure
CAUTION
or damage to your phone.
NOTE
Indicates additional information for reference.
Symbols
Caution
Indication of a general caution
Restriction
Indication of a prohibited action for the phone
Instruction
Indication for commanding a specifically required action
2
© SAMSUNG Electronics Co., Ltd.
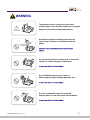
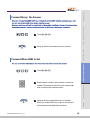
WARNING
Warning
The handset receiver on the phone may retain
metallic objects. Care should be taken when using the
handset in the vicinity of small metal objects.
Avoid placing objects containing water such as
vases, cups, cosmetics, and medicines near the
phone.
Moisture in the phone may cause a fire and electric
shocks.
Do not place the phone in a dusty area or areas with
extreme or volatile changes in temperature.
It may cause a fire or electric shocks.
Do not install the phone near a heater or
flames(cigarette lighter, heating apparatus, etc.).
It may cause a fire or electric shocks.
Do not use flammable solvent or materials
near the phone. Do not store them near the phone.
It may cause a fire or electric shocks.
© SAMSUNG Electronics Co., Ltd.
3
Caution
CAUTION
Use a soft dry cloth to clean the phone.
Do not use any chemical solvents like wax, benzene,
alcohol, thinner, aerosols, lubricant, or detergent.
The use of chemicals on the phone may cause
fading/discoloring or damage to the parts.
Do not place heavy things on the phone.
It may cause damage to some parts.
Do not install the phone on an unstable surface
or in direct sunlight.
It may cause severe damage to the plastic case of
the phone, and reduced the performance of your phone.
Do not separate, repair or remodel the phone
arbitrarily.
If a repair is needed, please contact your
Authorised Samsung Reseller.
If the phone makes excessive noise,
emits an odour, or smoke, immediately unplug
the phone and call your Authorised Samsung
Reseller.
4
© SAMSUNG Electronics Co., Ltd.
TABLE OF CONTENTS
SAFETY CONCERNS
Conventions..................................................................................................................................... 2
Symbols........................................................................................................................................... 2
Warning ........................................................................................................................................... 3
Caution ............................................................................................................................................ 4
PREPARATION
Main Features.................................................................................................................................. 8
Checking Parts in the Package...................................................................................................... 10
Front View of the DS-5021D / 5014D .............................................................................................11
Bottom View of the DS-5021D / 5014D ......................................................................................... 14
Connecting Lines to the Phone...................................................................................................... 18
THINGS YOU SHOULD KNOW
About Stations and Trunk Lines ..................................................................................................... 24
Selecting System Functions .......................................................................................................... 25
Entering Characters....................................................................................................................... 30
Configuring My Phone ................................................................................................................... 32
Volume Adjustment........................................................................................................................ 37
Types of Signal Tone ..................................................................................................................... 39
Telephone Status Indicator ............................................................................................................ 40
Button LED .................................................................................................................................... 40
BASIC FEATURES
Before Making / Answering a Call.................................................................................................. 42
Intercom Calls................................................................................................................................ 43
Outside Calls ................................................................................................................................. 49
Intercom / Outside Calls ................................................................................................................ 58
© SAMSUNG Electronics Co., Ltd.
5
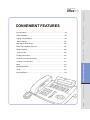
CONVENIENT FEATURES
Do Not Disturb ............................................................................................................................... 78
Call Forwarding.............................................................................................................................. 80
Paging and Messaging .................................................................................................................. 88
Alarm Features ............................................................................................................................ 101
Use with the Door Phone ............................................................................................................. 105
Executive / Secretary Hot Line..................................................................................................... 107
Group Listening............................................................................................................................ 108
Account Code .............................................................................................................................. 109
Locking Your Phone ..................................................................................................................... 110
Off-Hook Voice Announcement .....................................................................................................111
In Group / Out Of Group .............................................................................................................. 113
Mute............................................................................................................................................. 114
Background Music ....................................................................................................................... 115
Timer............................................................................................................................................ 116
APPLICATION MENUS
Navigation Buttons....................................................................................................................... 120
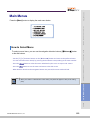
Main Menus ................................................................................................................................. 123
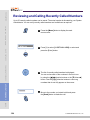
Reviewing and Calling Recently Called Numbers ........................................................................ 124
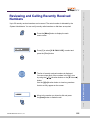
Reviewing and Calling Recently Received Numbers ................................................................... 125
Reviewing and Calling Speed Dial Numbers................................................................................ 126
Reviewing and Calling Numbers by Name................................................................................... 127
Setting Forward Type and Number .............................................................................................. 129
Setting Alarm Reminders ............................................................................................................. 131
ANNEX
Troubleshooting ........................................................................................................................... 134
Product Specifications.................................................................................................................. 136
6
© SAMSUNG Electronics Co., Ltd.
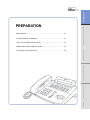
PREPARATION
Main Features.......................................................................................... 8
Checking Parts in the Package ................................................................ 10
Front View of the DS-5021D / 5014D....................................................... 11
THINGS YOU SHOULD KNOW
PREPARATION
Bottom View of the DS-5021D / 5014D.................................................... 14
BASIC FEATURES
Connecting Lines to the Phone................................................................ 18
CONVENIENT FEATURES
APPLICATION MENUS
ANNEX
PREPARATION
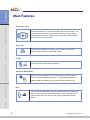
Main Features
THINGS YOU SHOULD KNOW
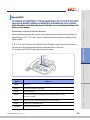
Application menu
This button allows you to access the digital phone’s menu functions. The
menu functions include the recent outgoing call log, incoming call log,
system directory functions, transferring incoming calls, inquiry of speed
dial numbers, and alarm function.
Speed Dial
BASIC FEATURES
For frequently used phone numbers, you can press one speed dial
button to make a call to the speed dial number.
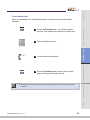
Pickup
You can answer a call at another extension.
CONVENIENT FEATURES
Automatic Redial/Retry
When your call is important but your party is busy on another call, you
can use automatic redial/retry function. The digital phone redials the
called number automatically until your party is free to take your call.
APPLICATION MENUS
Hold
You can use the Hold feature when you need something or another call
arrives. Use this button to temporarily hold the current call until you are
ready to resume the call. You can even pickup a held call at another
station.
ANNEX
8
© SAMSUNG Electronics Co., Ltd.
PREPARATION
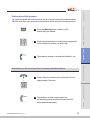
Conference Calls
THINGS YOU SHOULD KNOW
This button is used when multiple parties need to be connected
simultaneously during a phone conversation. Up to five parties including
you can be connected in a conference call.
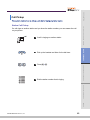
Call Forwarding
If you cannot answer an incoming call, the call can be forwarded to
another extension(unconditionally, while you are busy on a call,
or when you are away from your phone).
BASIC FEATURES
Do Not Disturb
When you do not want to be disturbed, the DND function can be set to
block incoming calls and the phone will not ring. Your calls can be
forwarded to another station when you do not wish to be disturbed.
CONVENIENT FEATURES
Paging
If you have an urgent announcement to make, or you wish to locate a
colleague, you can page through the speaker of other stations, or
through optional external speakers.
Call ID
APPLICATION MENUS
When there is an incoming call, the caller ID or name will be displayed
on the LCD screen. You can see who is calling before answering the
call and respond accordingly.
ANNEX
© SAMSUNG Electronics Co., Ltd.
9
PREPARATION
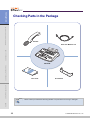
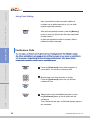
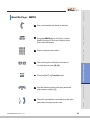
Checking Parts in the Package
THINGS YOU SHOULD KNOW
Handset
Dual–Jack Modular Line
BASIC FEATURES
DS-5021D
CONVENIENT FEATURES
User Guide
APPLICATION MENUS
NOTE
Phone Stand
Please contact your Authorised Samsung Reseller if any item above is missing or damaged.
ANNEX
10
© SAMSUNG Electronics Co., Ltd.
PREPARATION
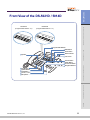
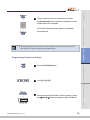
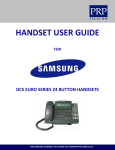
Front View of the DS-5021D / 5014D
DS-5014D
(Programmable Buttons : 14)
THINGS YOU SHOULD KNOW
DS-5021D
(Programmable Buttons : 21)
Programmable Buttons
BASIC FEATURES
Soft Buttons
Scroll Button
Speaker
Status Indicator
LCD screen
Volume Button
Redial Button
Conference Button
CONVENIENT FEATURES
Navigation Buttons
Dial Buttons
Speaker Button
Hold Button
Transfer Button
Microphone
APPLICATION MENUS
ANNEX
© SAMSUNG Electronics Co., Ltd.
11
PREPARATION
Part Name and Features
Programmable Buttons
THINGS YOU SHOULD KNOW
The DS-5021D digital phone has 21 programmable buttons and the DS-5014D digital
phone has 14 programmable buttons. The programmable buttons allow you to activate
desired functions or telephone numbers with a single button press.
Among the programmable buttons, the functions of 3 buttons are pre-set as follows.
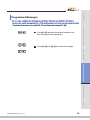
- Message Button
When someone has left you a message this button’s LED blinks.
- Call1, Call2 Buttons
While the hold or conference functions are in use, the corresponding button’s LED
blinks. Up to 6 call buttons can be set. By default 2 call buttons are set.
BASIC FEATURES
Soft Buttons
If the Scroll button is pressed, the function menus appear on the LCD screen. The Soft
buttons can be used to select the desired menu from the function menus displayed.
Scroll Button
CONVENIENT FEATURES
This button is used to activate the function menu on the LCD screen when in the idle
condition. If this Scroll button is pressed, 3 menus [CALL, OTHER, ANS] will be displayed
on the LCD screen.
Status Indicator
The indicator shows the status of the phone with 3 colours : red, green and yellow.
LCD screen
APPLICATION MENUS
The LCD screen shows the processing status and progress of a call, in addition to
the various function menus depending on the status of the phone.
Volume Button
The volume button is used to control the volume of the phone handset, speakerphone,
ringer, background music and voice announcements.
ANNEX
Redial Button
Pressing this button dials the last phone number that you just called or allows you to view
up to 10 previously dialled calls.
12
© SAMSUNG Electronics Co., Ltd.
PREPARATION
Conference Button
This button allows you to set up a conference call for up to 5 people, including you.
Navigation Buttons
Microphone
On the right side of speaker button, a microphone is located under a small hole in
the plastic casing. You use the microphone in speakerphone mode to speak to your caller.
THINGS YOU SHOULD KNOW
This button allows you to access the phone’s menu functions. The menu functions
Include the recent outgoing call log, incoming call log, system directory functions,
transferring incoming calls, inquiry of speed dial numbers, and alarm function.
Transfer Button
BASIC FEATURES
This button is used in the following cases:
- When transferring your current call to other extension, extension group or externally.
- During a screened transfer pressing the transfer button allows you to toggle between
the original caller and station user you wish to transfer the caller to.
- To enter station based programming options.
CONVENIENT FEATURES
Hold Button
The hold button is used to place an existing call on hold and return to the call at a later
time without hanging-up.
Speaker Button
This is used when you wish to use the phone’s speakerphone.
Dial Buttons
Speaker
APPLICATION MENUS
The dial buttons are used to input digits, and is made up of 10 digits [0]-[9] and [*], [#]
buttons. Also, if a dial button is pressed for a longer duration, the corresponding personal
speed dial number can be dialled.
You can hear call status tones and announcements over the phone’s speaker.
ANNEX
© SAMSUNG Electronics Co., Ltd.
13
PREPARATION
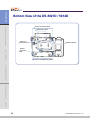
Bottom View of the DS-5021D / 5014D
THINGS YOU SHOULD KNOW
Groove for the Desk Stand
Wall Mounting Holes
Phone Line
Connection Port
Expansion Module
BASIC FEATURES
Handset
Connection
Port
Groove for the Wall Mounting Stand
CONVENIENT FEATURES
APPLICATION MENUS
ANNEX
14
© SAMSUNG Electronics Co., Ltd.
PREPARATION
Part Name and Features
Wall Mounting Holes
THINGS YOU SHOULD KNOW
When used as a wall mounting phone, these 2 holes are used to secure the phone on
screws that are installed in the wall.
Groove for the Desk Stand
When used as the desk phone, assemble the phone stand into these grooves.
Expansion Module
Plug the KDB module into this module and secure with the two screws provided.
BASIC FEATURES
Groove for the Wall Mounting Stand
When used as a wall-mounting phone, assemble the phone stand into these grooves.
Handset Connection Port
Plug the handset cord into this port marked with the
symbol.
CONVENIENT FEATURES
Phone Line Connection Port
Connect the phone line cord.
APPLICATION MENUS
ANNEX
© SAMSUNG Electronics Co., Ltd.
15
PREPARATION
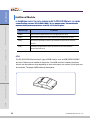
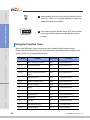
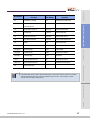
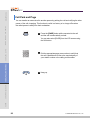
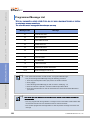
Additional Module
As the additional modules that can be connected to the DS-5021D/5014D phones and provide
various functions, there are KDB-D/KDB-S/KDB-F for the modules types. The acoustic optic
modulator(AOM) can be also connected to the DS-5021D/5014D phone.
THINGS YOU SHOULD KNOW
Module Type
Functions
KDB-D
Can connect the digital extension device.(Supplying the DLI Port)
KDB-S
Can connect a regular phone with a wireless phone.(Supplying the SLI port)
KDB-F
Changes the speakerphone mode to the full duplex and provides an enhanced
function.
AOM
Including 64 programmable buttons, this module can be connected to the
DS-5021D/5014D phone.
BASIC FEATURES
KDB
CONVENIENT FEATURES
The DS-5021D/5014D phone has 3 types of KDB module, such as KDB-D/KDB-S/KDB-F,
and one of these can be installed in the phone. If the KDB module is installed, the phone
function can be enhanced, and depending on the module types, the number of local ports can
be increased. The shape of KDB module is shown below.
APPLICATION MENUS
ANNEX
16
© SAMSUNG Electronics Co., Ltd.
PREPARATION
KDB-D
If the phone is added to the DLI(Digital Line Interface) port that supports 2B+D, the KDB-D module
can be installed. The KDB-D module provides the DLI port, so it connects the digital extension
devices, such as a digital phone or 64-button module.
If the phone is added to the DLI(Digital Line Interface) port that supports 2B+D, the KDB-S module can
be installed. The KDB-S provides the SLI(Single Line Interface) port that can connect a wireless phone
with a regular phone.
KDB-F
THINGS YOU SHOULD KNOW
KDB-S
The standard mode of speakerphone in DS-5021D/5014D phone is ‘Half Duplex’. The half duplex
speakerphone mode to the full duplex, so it can provide better communication. Connecting up to 3
external microphones to the KDB-F module, a conference can use this in a very convenient way. To use
this function, the phone shall have the pre-programmed EXTMIC button.
There is AOM(Add On Module) other than the KDB modules, as for the additional modules
that provide various functions by connecting to the DS-5021D/5014D phone.
The AOM is a button expansion box that is composed of programmable buttons only. The
DS-5021D/5014D phone can connect AOM of 64 buttons. If the AOM module is installed, that
means more programmable buttons are added. Then more functions can be registered for
convenient use.
CONVENIENT FEATURES
AOM
BASIC FEATURES
means that it can communicate in both directions but only one way at a time. The KDB-F enhances the
APPLICATION MENUS
ANNEX
© SAMSUNG Electronics Co., Ltd.
17
PREPARATION
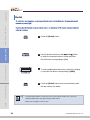
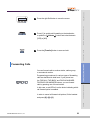
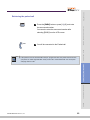
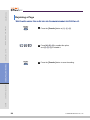
Connecting Lines to the Phone
1 Connect the handset cord to the port marked with the handset symbol.
THINGS YOU SHOULD KNOW
2 Connect the line cord to the phone line connection port.
BASIC FEATURES
CONVENIENT FEATURES
APPLICATION MENUS
ANNEX
18
© SAMSUNG Electronics Co., Ltd.
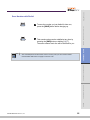
PREPARATION
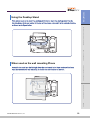
Using the Desktop Stand
If the phone needs to be used in a desktop environment, insert the desktop stand into the
two side holes, which are located at the rear of the phone, and push it in the upward direction,
as shown in the figure below.
THINGS YOU SHOULD KNOW
BASIC FEATURES
When used as the wall mounting Phone
CONVENIENT FEATURES
Assemble the stand into the left/right slots that are located in the lower section of the base.
Place the two holes for wall mounting on screws that are installed on the wall.
APPLICATION MENUS
ANNEX
© SAMSUNG Electronics Co., Ltd.
19
PREPARATION
When used as a wall mounted phone, the location of the handset hook should be
changed so that the handset can be secured. Take out the handset hook, flip it over
and then insert the hook back into the hook holder as shown.
THINGS YOU SHOULD KNOW
BASIC FEATURES
CONVENIENT FEATURES
APPLICATION MENUS
ANNEX
20
© SAMSUNG Electronics Co., Ltd.
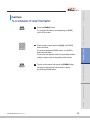
PREPARATION
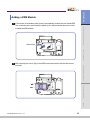
Adding a KDB Module
THINGS YOU SHOULD KNOW
1 In the center of the bottom panel, there is an expansion module that can install KDB.
Two connectors are covered with the plastic cover, which shall be removed in order
to install the KDB module.
Plastic Cover
BASIC FEATURES
CONVENIENT FEATURES
2 After removing the cover, plug in the KDB module and secure with the two screws
provided.
APPLICATION MENUS
KDB
ANNEX
© SAMSUNG Electronics Co., Ltd.
21
PREPARATION
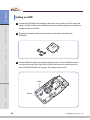
Adding an AOM
THINGS YOU SHOULD KNOW
1 Connect the DLI(Digital Line Interface) cable on the main system to the DLI port at the
bottom of AOM. At this time, the AOM extension pair shall be assigned at the telephone
system in order to use AOM.
2 Prepare the following AOM connectors and 4 screws that are provided with
AOM itself.
BASIC FEATURES
CONVENIENT FEATURES
3 Connect AOM to the phone by using the AOM connector. Place the AOM connector
over two screw holes in the right side of AOM and the other two screw holes at the
side of DS-5021D/5014D line cord port. Then tighten those screws.
AOM
APPLICATION MENUS
DLI port
ANNEX
22
© SAMSUNG Electronics Co., Ltd.
PREPARATION
About Stations and Trunk Lines ............................................................... 24
Selecting System Functions..................................................................... 25
Entering Characters ................................................................................. 30
Configuring My Phone ............................................................................. 32
Types of Signal Tone................................................................................ 39
Telephone Status Indicator....................................................................... 40
BASIC FEATURES
Volume Adjustment .................................................................................. 37
THINGS YOU SHOULD KNOW
THINGS YOU SHOULD KNOW
Button LED .............................................................................................. 40
CONVENIENT FEATURES
APPLICATION MENUS
ANNEX
PREPARATION
About Stations and Trunk Lines
A station is a digital or IP phone or standard telephone connected to the OfficeServ system
THINGS YOU SHOULD KNOW
BASIC FEATURES
A trunk line is directly connected to your phone company’s telephone network. It allows you
to make telephone calls to parties outside your office(for example, your home) or to receive
incoming calls from external parties.
CONVENIENT FEATURES
APPLICATION MENUS
ANNEX
24
© SAMSUNG Electronics Co., Ltd.
Using the Scroll / Soft Button
The Scroll button is used to display the function menu on the LCD screen. If the Scroll button is
pressed, the LCD screen will show three menus such as [CALL], [OTHER], and [ANS] in a row. If the
THINGS YOU SHOULD KNOW
To use the functions of the OfficeServ system you can: press the programmable button that is
registered with the required function, select the function by using the Scroll button and 3 Soft
buttons that are underneath the LCD screen or dial the function code.
For example, if the callback function is required, find the programmable button with this function
first. If this button doesn’t exist, then press the Soft button corresponding to the location of [CBK]
on the LCD screen.
PREPARATION
Selecting System Functions
Scroll button is pressed again, another menu appears.
BASIC FEATURES
Three Soft buttons are located underneath the LCD screen.
Among three Soft buttons, the one on the left is called the left Soft button, and the one in the
middle is called the middle Soft button, and finally the one on the right is called the right Soft
button.
APPLICATION MENUS
ANNEX
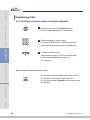
2 First, select one of the main menus ; [CALL], [OTHER],
or [ANS]. To select the [CALL] menu, press the left Soft
button, to select the [OTHER] menu, press the middle
Soft button, and finally to select the [ANS] menu, press
the right Soft button.
© SAMSUNG Electronics Co., Ltd.
CONVENIENT FEATURES
1 Press the Scroll button once when the phone is
in the idle state and the LCD screen will show the screen.
25
PREPARATION
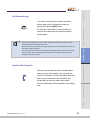
3 Keep pressing the Scroll button until the desired function
shows up. If there is a Æ symbol displayed, it means that
additional menus are available.
THINGS YOU SHOULD KNOW
4 If the desired function appears on the LCD screen, select
it by using the Soft button associated with the desired
function.
Using the Function Code
BASIC FEATURES
Many of the OfficeServ system functions can be invoked by dialling function codes.
Please refer to the table below for the default function codes(these maybe changed in your
system.) Refer to your System Administrator.
Dial Button
Function
Dial Button
Function
CONVENIENT FEATURES
0
Trunk access group number
55+0
Page internal zone 0
10+xxx
Answer parked calls
55+1
Page internal zone 1
11
Set calls on hold or clear on hold
55+2
Page internal zone 2
Answer call on hold at another
55+3
Page internal zone 3
12+xxx
station
APPLICATION MENUS
ANNEX
26
13
Release door lock
55+4
Page internal zone 4
16+xxx
Assign speed-dial number
55+5
Page external zone 1
17
Dial stored number
55+6
Page external zone 2
19
Redial
55+7
Page external zone 3
2xx
Station number
55+8
Page external zone 4
3xx
Station number
55 9
Page all external zones
400
Cancel DND
55+*
Page all zones
401
Set DND
56
Answer transfer page
41
Set Message No Ring
57
Clear alarm sensor
42+xxx
Cancel message
58
Clear DISA Alarm
© SAMSUNG Electronics Co., Ltd.
Function
Dial Button
PREPARATION
Dial Button
Function
43
Set/Return message
59
Change to my station level
44
Reserve connection to a busy
600
Cancel all call forwarding
THINGS YOU SHOULD KNOW
station/trunk line
601+xxx
Set Forward All Calls
46
Conference
602+xxx
Set Forward Busy
47
Enter account code
603+xxx
Set Forward No Ans
48
Set station message
604+xxx
Set Forward Busy/No Ans
49
Flash
66
Group call pickup
500~529
Station group
67
Night ring answer
53+grp+0
Exclude group
681
Voice Dialler
53+grp+1
Include group
682
Record Voice Dialler
54+zone
Transfer page
7xx
Trunk line
55+0
Page all internal zones
8x
Trunk group number
606 + xxx
Set Forward Follow me
9
Attendant Console group
65
Direct call pickup
NOTE
CONVENIENT FEATURES
Busy station Camp-on
BASIC FEATURES
45
If the table above does not have the desired function code or the function code does not match
with the desired function, the system’s numbering plan may have been changed ; please
consult with your System Administrator.
APPLICATION MENUS
ANNEX
© SAMSUNG Electronics Co., Ltd.
27
PREPARATION
Assigning the Programmable Button Extenders
By adding an extender to some buttons, you can use the phone more conveniently.
For example, if the extender 4 is added to the [PAGE] button, when this button is pressed, it will
THINGS YOU SHOULD KNOW
allow a page announcement to be made to stations in page zone 4. Refer to the following table to
select the extenders that can be assigned for each programmable button.
Button
Description
Extenders
BOSS
Director/Secretary
1-4
DP
Direct Call Pick-up
Station or station group number
DS
Direct Station
Required station numbers
FWRD
Call Forwarding
0=FWD Cancel, 1=FWD All, 2=FWD Busy, 3=FWD
No Answer, 4 FWD Busy/No Answer, 5=FWD DND
BASIC FEATURES
and-6=Follow Me
CONVENIENT FEATURES
APPLICATION MENUS
GPIK
Group Call Pick-up
01-20
GCONF
Conference group
1-5
IG
Group In/Out
Required station group 5XX(X)
MMPG
Meet Me Page
0-9, *
PARK
Park Orbits
0-9
PMSG
Programmed Message
01-20
PAGE
Paging
0-9, *
SG
Station Group Selection
5XX(X)
SPD
Speed Dial
Personal 00-49, or System 500-999
DIR
Directory Name Dialling
PERS(1), SYS(2) or STN(3)
VT
Voice Mail Transfer
Voice Mail Group(5XX)
ANNEX
28
© SAMSUNG Electronics Co., Ltd.
PREPARATION
1 Press the [Transfer] button.
THINGS YOU SHOULD KNOW
2 Press [1]►[0]►[7].
BASIC FEATURES
CONVENIENT FEATURES
3 Select the programmable button that requires
an extender by using the [TVolumeS] button
to, scroll through programmable buttons
and then press the right Soft button,
or press the programmable button to
add an extender.
4 When the cursor comes to the input area
on the LCD panel, dial the required extender.
APPLICATION MENUS
5 Save the extender by pressing the right or
left Soft button. Press the [Transfer] button
to finish programming.
ANNEX
© SAMSUNG Electronics Co., Ltd.
29
PREPARATION
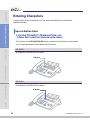
Entering Characters
Using the dial buttons of this phone, you can easily enter/edit letters, numbers and
special characters.
THINGS YOU SHOULD KNOW
Special Button Used
To enter letters of the alphabet the following special button is used.
- ‘A’ Button : Switch to capital/small letters when entering characters.
The ‘A’ button of the DS-5021D/5014D phone is located on the first button of the bottom
row of the programmable buttons below the LCD screen.
BASIC FEATURES
DS-5021D
An example for the DS-5021D is shown.
‘A’ Button
CONVENIENT FEATURES
DS-5014D
APPLICATION MENUS
An example for the DS-5014D is shown.
‘A’ Button
ANNEX
30
© SAMSUNG Electronics Co., Ltd.
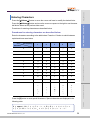
Procedures for entering characters are described below.
Enter the characters according to the table below. Press the ‘A’ button to switch between
capital and lower case letters.
Dial frequency
4
5
0
<
>
.
)
0
1
Space
?
,
!
1
2
A
B
C
@
2
3
D
E
F
#
3
4
G
H
I
$
4
5
J
K
L
%
5
6
M
N
O
^
6
7
P
Q
R
S
7
8
T
U
V
*
8
9
W
X
Y
Z
9
*
:
=
[
]
*
#
#
Space
&
!
:
?
.
,
%
$
-
<
>
/
=
[
]
@
^
(
)
_
+
{
}
I
;
”
→
’
APPLICATION MENUS
3
CONVENIENT FEATURES
2
BASIC FEATURES
1
Dial button
Press the [#] button to enter special characters. Special characters are displayed in the
following order.
ANNEX
# ▶ space ▶ & ▶ ! ▶ : ▶ ? ▶ . ▶ , ▶ % ▶ $ ▶ - ▶ < ▶ > ▶ / ▶ =
▶ [ ▶ ] ▶ @ ▶ ^ ▶ ( ▶ ) ▶ _ ▶ + ▶ { ▶ } ▶ | ▶ ; ▶ ” ▶ → ▶ ’
© SAMSUNG Electronics Co., Ltd.
THINGS YOU SHOULD KNOW
Press the [TVolumeS] button to move the cursor and insert or modify the desired letter.
Press the [TVolumeS] button and move the cursor one space to the right to use the same
dial button letters as the previous letter used.
Procedures for entering characters are described below.
PREPARATION
Entering Characters
31
PREPARATION
Configuring My Phone
Allows you to set the feature preferences for your phone.
THINGS YOU SHOULD KNOW
To Change the Passcode
The pre-assigned station passcode is 1234. You can change the station passcode if needed.
1 Press the [Transfer] button.
BASIC FEATURES
2 Press [1]►[0]►[1].
3 Enter the previous passcode.
CONVENIENT FEATURES
4 Enter the new passcode. The passcode must
be a 4-digit number.
APPLICATION MENUS
5 Re-enter the new passcode for confirmation.
If the passcode is entered correctly, a beep will be
heard twice. If four beeps are heard, it means that
the new passcode entry was unsuccessful.
Please re-enter the new passcode.
6 Save the new passcode by pressing the [Transfer] button.
ANNEX
32
© SAMSUNG Electronics Co., Ltd.
PREPARATION
Setting the Answer Mode
Intercom calls can be answered with one of three answer modes. A different answering mode
can be selected for
THINGS YOU SHOULD KNOW
- [0] ANS MODE : the answer mode when answering intercom calls.
- [1] EXEC ANS : the answer mode when answering calls using the executive/secretary hot line.
You must be a designated Boss or Secretary for this option to be available.
1 Press the [Transfer] button.
BASIC FEATURES
2 Press [1]►[0]►[3].
CONVENIENT FEATURES
3 Select the call type(ANS MODE or EXEC ANS) using
the [TVolumeS] button. Move the cursor by pressing
the right Soft button.
4 Press [0](Ring mode), [1](Auto Answer mode),
or [2](Voice Announce).
ANNEX
NOTE
If your phones is programmed for the Voice Announce answering function, and Call Forwarding
No Answer is set, you must press the [Speaker] button or [Send] button to answer before the no
an answer timer expires. Otherwise, the call will be forwarded.
© SAMSUNG Electronics Co., Ltd.
APPLICATION MENUS
5 Press the [Transfer] button and save the selected entry.
33
PREPARATION
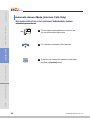
Using the Headset / Handset (Headset Operation)
The DS-5021D/5014D Digital phone user can switch between handset mode and headset mode.
In headset mode, you can answer or end a call by pressing the [Send] button or [End] button.
THINGS YOU SHOULD KNOW
1 Press the [Transfer] button.
2 Press [1]►[1]►[0].
BASIC FEATURES
CONVENIENT FEATURES
3 To use the handset, press [0]►[2]►[0], and to use
the headset, press [0]►[2]►[1].
APPLICATION MENUS
4 Save the selected entry by pressing the
[Transfer] button.
ANNEX
34
© SAMSUNG Electronics Co., Ltd.
PREPARATION
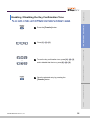
Enabling / Disabling the Key Confirmation Tone
You can enable or disable a short confirmation tone whenever a dial button is pressed.
THINGS YOU SHOULD KNOW
1 Press the [Transfer] button.
2 Press [1]►[1]►[0].
BASIC FEATURES
3 To use the key confirmation tone, press [0]►[4]►[1],
and to disable that the tone, press [0]►[4]►[0].
CONVENIENT FEATURES
4 Save the selected entry by pressing the
[Transfer] button.
APPLICATION MENUS
ANNEX
© SAMSUNG Electronics Co., Ltd.
35
PREPARATION
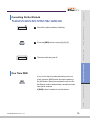
Pulse to Tone Changeover
THINGS YOU SHOULD KNOW
When making an outside call on a dial pulse(mechanical)
line, press the [#] button. All digits dialled after the [#] button
will be sent as tones(electronic method).
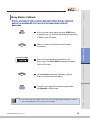
Hot Keypad
The hot keypad allows you to make a call or activate the other functions of the OfficeServ system
by pressing the dial buttons or function keys directly, without picking up the handset or pressing
the [Speaker] button.
BASIC FEATURES
If the hot keypad function is turned off, you must pick up the handset or press the [Speaker] button
first.
1 Press the [Transfer] button.
CONVENIENT FEATURES
2 Press [1]►[1]►[0].
APPLICATION MENUS
3 To enable hot keypad, press [0]►[3]►[1], and to
disable, press [0]►[3]►[0].
ANNEX
4 Save the selected entry by pressing the
[Transfer] button.
36
© SAMSUNG Electronics Co., Ltd.
PREPARATION
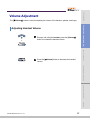
Volume Adjustment
The [TVolumeS] button is used for adjusting the volume of the handset, speaker, and ringer.
THINGS YOU SHOULD KNOW
Adjusting Handset Volume
1 During a call using the handset, press the [VolumeS]
button to increase the handset volume.
BASIC FEATURES
2 Press the [TVolume] button to decrease the handset
volume.
CONVENIENT FEATURES
APPLICATION MENUS
ANNEX
© SAMSUNG Electronics Co., Ltd.
37
PREPARATION
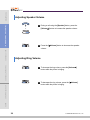
Adjusting Speaker Volume
THINGS YOU SHOULD KNOW
1 During a call using the [Speaker] button, press the
[VolumeS] button to increase the speaker volume.
2 Press the [TVolume] button to decrease the speaker
volume.
BASIC FEATURES
Adjusting Ring Volume
CONVENIENT FEATURES
1 To increase the ring volume, press the [VolumeS]
button while the phone is ringing.
APPLICATION MENUS
2 To decrease the ring volume, press the [TVolume]
button while the phone is ringing.
ANNEX
38
© SAMSUNG Electronics Co., Ltd.
PREPARATION
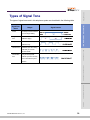
Types of Signal Tone
The types of signal tone used in this telephone system are described in the following table.
Usages
Name
al tone
THINGS YOU SHOULD KNOW
SignalTone
Signal Interval
A steady tone that indicates
you can begin dialling.
Ring back
Indicates the station you
tone
dialled is ringing.
Busy tone
Indicates the station you
dialled is busy.
Transfer tone
Indicates your call is being
BASIC FEATURES
held and you can dial
another station.
Confirmation
Very short beeps that
tone
indicate you have correctly
set or cancelled a system
feature.
CONVENIENT FEATURES
APPLICATION MENUS
ANNEX
© SAMSUNG Electronics Co., Ltd.
39
PREPARATION
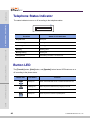
Telephone Status Indicator
The status indicator turns on or off according to the telephone status.
THINGS YOU SHOULD KNOW
Status of LCD Indicators
Functions
BASIC FEATURES
Busy/Off-hook
Steady red.
Extension Ring
Flashing red.
Trunk Ring
Flashing green.
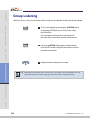
Recalling
Flashing yellow.
Message waiting
Flashing red.
Calling Denied
Fast flashing red within 1 second interval.
CONVENIENT FEATURES
Button LED
The [Transfer] button, [Hold] button, and [Speaker] button have a LED that turns on or
off according to the phone status.
Button LED
LED Status
Function
APPLICATION MENUS
Steady red
When ‘Forward All Calls’ is set or a Follow me has been set.
Flashing red
When the phone is locked for any outgoing Trunk call.
Steady red
When the entire phone is locked.
Steady red
When the phone is used as a speakerphone.
ANNEX
40
© SAMSUNG Electronics Co., Ltd.
PREPARATION
Before Making / Answering a Call ............................................................ 42
Intercom Calls.......................................................................................... 43
Outside Calls ........................................................................................... 49
THINGS YOU SHOULD KNOW
BASIC FEATURES
Intercom / Outside Calls........................................................................... 58
BASIC FEATURES
CONVENIENT FEATURES
APPLICATION MENUS
ANNEX
PREPARATION
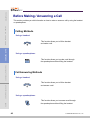
Before Making / Answering a Call
This section provides you with information on how to make or answer a call by using the handset
or speakerphone.
THINGS YOU SHOULD KNOW
Calling Methods
Using a handset
This function allows you to lift the handset
and make a call.
BASIC FEATURES
Using a speakerphone
This function allows you to make a call through
the speakerphone without lifting the handset.
CONVENIENT FEATURES
Call Answering Methods
Using a handset
APPLICATION MENUS
This function allows you to lift the handset
and answer a call.
Using a speakerphone
ANNEX
This function allows you to answer a call through
the speakerphone without lifting the handset.
42
© SAMSUNG Electronics Co., Ltd.
PREPARATION
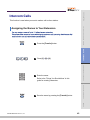
Intercom Calls
This function is used when you want to make a call to other stations.
THINGS YOU SHOULD KNOW
Assigning the Names to Your Extension
You can assign a name of up to 11 letters to your extension.
This allows other extension users with display stations to call you using the directory dial
feature and to see your name when you call them.
1 Press the [Transfer] button.
BASIC FEATURES
2 Press [1]►[0]►[4].
CONVENIENT FEATURES
3 Enter the name.
Refer to the ‘Things You Should Know’ in this
guide for entering characters.
APPLICATION MENUS
4 Save the name by pressing the [Transfer] button.
ANNEX
© SAMSUNG Electronics Co., Ltd.
43
PREPARATION
Calling an Extension Number
THINGS YOU SHOULD KNOW
1 Pick up the handset and check for dial tone.
BASIC FEATURES
2 Dial the extension number or station group number.
Wait until the other party answers the call.
If a short signal tone(not a ringing tone) is heard,
the receiving extension has set up the Voice Announce
or Automatic Answer function.
3 Replace the handset or press the [End] button
to finish the call.
CONVENIENT FEATURES
NOTE
If you have a [DSS] button assigned to an extension number or station group, press this button
instead of dialling the corresponding station number.
APPLICATION MENUS
ANNEX
44
© SAMSUNG Electronics Co., Ltd.
PREPARATION
Answering an Intercom Call
THINGS YOU SHOULD KNOW
1 When the phone rings, pick up the handset
or press the [Speaker] button or [Send] button.
2 To finish the call replace the handset or press
either the [Speaker] or [End] button.
BASIC FEATURES
Voice Page Announce Mode (Intercom Calls Only)
When another station calls you, a short signal tone will be heard followed by the caller’s
announcement.
CONVENIENT FEATURES
1 To answer the call, pick up the handset
or press the [Send] button.
APPLICATION MENUS
2 To end the call, replace the handset or press either
the [End] or [Speaker] button.
ANNEX
© SAMSUNG Electronics Co., Ltd.
45
PREPARATION
Automatic Answer Mode (Intercom Calls Only)
When another station calls you, a short signal tone will be heard and then the phone
automatically answers the call.
THINGS YOU SHOULD KNOW
1 The microphone and speaker are turned on and
you can communicate hands-free.
2 For a private conversation, lift the handset.
BASIC FEATURES
3 To end the call, replace the handset or press either
the [End] or [Speaker] button.
CONVENIENT FEATURES
APPLICATION MENUS
ANNEX
46
© SAMSUNG Electronics Co., Ltd.
PREPARATION
Busy Station Callback
When the called station is busy, you can set a busy station callback. When the busy station
becomes free, your phone will ring. If you pick up the phone, the other station will
begin to ring.
2 When you hear the confirmation signal, replace
the handset.
BASIC FEATURES
CONVENIENT FEATURES
3 When the reserved station becomes free, your
phone rings. The ‘CALL BACK’ message will appear
on the LCD screen.
4 Lift the handset or press the [Speaker] or [Send]
button to call the current idle station.
APPLICATION MENUS
5 To end the call, replace the handset or press either
the [Speaker] or [End] button.
NOTE
THINGS YOU SHOULD KNOW
1 When you hear a busy signal, press the [CBK] button
or press [4]►[4]. Or, press the Soft button corresponding
to [CBK] on the LCD panel.
If you do not answer the Callback within 30 seconds, the callback will be cancelled. If a callback
is set up, the [CBK] button’s LED, if programmed, will light.
ANNEX
© SAMSUNG Electronics Co., Ltd.
47
PREPARATION
Busy Station Camp-On
When you call another station and receive a busy signal, you can give the called station off-hook
ring tone and wait for a little while.
THINGS YOU SHOULD KNOW
1 Press the [CAMP] button or press [4]►[5].
Or, press the Soft button corresponding to the [CAMP]
on the LCD screen.
BASIC FEATURES
2 The called station will receive off-hook ring tone
repeated every few seconds and an available
[Call] button will flash to indicate your call is waiting.
CONVENIENT FEATURES
3 Wait for the called party to answer.
The called station must release its first call or place
it on hold before answering your camp-on.
Calling Your System Operator
APPLICATION MENUS
Press [9] to call your system operator or operator
group. If you want to call a specific operator,
dial that person’s extension number.
ANNEX
48
© SAMSUNG Electronics Co., Ltd.
PREPARATION
Outside Calls
This function is used when you want to make an external call using any available trunk line.
THINGS YOU SHOULD KNOW
Calling Outside numbers
You can use a handset or speakerphone when calling an external number.
To make an external call with a handset, follow the procedures below.
1 Pick up the handset.
BASIC FEATURES
2 Press the trunk or trunk group button or dial the
trunk group access code(e.g., 0).
CONVENIENT FEATURES
3 Dial the telephone number you want to call.
APPLICATION MENUS
4 Finish your call by replacing the handset or pressing
the [End] button.
NOTE
If the hot keypad feature is used, you can make an external call without picking up a handset by
dialling the trunk access code.
ANNEX
© SAMSUNG Electronics Co., Ltd.
49
PREPARATION
To make an external call with a speakerphone, follow the procedures below.
1 Press the [Speaker] button.
THINGS YOU SHOULD KNOW
2 Press the trunk line or dial the trunk access code.
BASIC FEATURES
3 Dial the telephone number.
CONVENIENT FEATURES
4 Finish the call, by pressing the [Speaker] button.
NOTE
APPLICATION MENUS
If the LCR(Least Cost Routing) feature is enabled on the OfficeServ system, press the [LCR]
button or dial the LCR access code.
ANNEX
50
© SAMSUNG Electronics Co., Ltd.
PREPARATION
Authorization Code and Account Code
Authorization Code
THINGS YOU SHOULD KNOW
If your OfficeServ system is programmed to require
you to enter an authorization code before making
a call, press [*] plus a valid code before selecting
a trunk line.
Account Code
Ask your System Administrator for more information on authorization codes and account
codes.
CONVENIENT FEATURES
NOTE
BASIC FEATURES
If your OfficeServ system is programmed to require
you to enter an account code before making a call,
press the [ACCT] button or press [4]►[7] plus a valid
code, press the [ACCT] button again and then select
a trunk line.
Answering an Outside Call
APPLICATION MENUS
If you lift up the handset when the phone is ringing,
you are automatically connected to the ringing call.
Or, press the [Send] button to automatically answer
on the speakerphone.
NOTE
© SAMSUNG Electronics Co., Ltd.
ANNEX
If a call is flashing at your phone but not ringing, you must press the flashing button to answer.
51
PREPARATION
Universal Answer
THINGS YOU SHOULD KNOW
External calls may be programmed to ring through
an external speaker. In this case, press [6]►[7] or the
press [UA] button to answer the call.
New Call
BASIC FEATURES
Press the [NEW] button to disconnect your existing
call, wait for dial tone and then make a new call
on the same line. If this [NEW] button does not appear
on your phone, press the Soft button corresponding
to [NEW] on the LCD screen.
CONVENIENT FEATURES
Busy Line Queuing With Callback
If there are no available trunk lines, you will hear busy tone when you try to make an external
call, you can set a callback. When a line becomes free, your phone will ring. You can reserve
up to 5 callbacks for extension or trunk calls.
APPLICATION MENUS
1 If you receive a busy tone when trying to access a trunk
line, press the [CBK] button or press [4]►[4].
Or, press the Soft button corresponding to [CBK] on the
LCD screen.
2 When confirmation tone is heard, put down the handset.
ANNEX
52
© SAMSUNG Electronics Co., Ltd.
PREPARATION
3 When the line becomes free, the system will call
you back.
THINGS YOU SHOULD KNOW
4 Lift the handset or press the [Send] button to respond
to the Callback. Wait for dial tone and dial the telephone
number or speed dial number again.
NOTE
A callback will be cancelled if not answered within 30 seconds. If you have set a callback, your
[CBK] button’s LED, if programmed, will light.
BASIC FEATURES
Cancelling Callback
A maximum of 5 callbacks can be set for extensions or external calls lines at the same time.
To cancel a callback, follow the procedure below.
CONVENIENT FEATURES
1 Press the [CBK] button or press [4]►[4].
You will hear confirmation tone.
APPLICATION MENUS
2 Press the [Hold] button. This will cancel the oldest
callback that you have set.
ANNEX
© SAMSUNG Electronics Co., Ltd.
53
PREPARATION
Redial
To redial the last telephone number you dialled, press the [Send] button for approximately 2
seconds or press [1][9].
THINGS YOU SHOULD KNOW
Pressing the [Redial] key will give you the option to review up to 10 of your previously dialled
external numbers.
1 Press the [Redial] button.
BASIC FEATURES
2 Use the direction buttons or the [TVolumeS] button
to select the required number to redial and press
the Soft button corresponding to [Dial].
CONVENIENT FEATURES
3 To review details about the previous call prior to dialling
it, press the Soft button corresponding to [NND].
APPLICATION MENUS
4 Press the [Redial] button twice to automatically redial
the last number you dialled.
NOTE
- If the hot keypad feature is turned off, you have to lift up the handset first or press the
[Speaker] button before you begin using the redial feature.
- Redial does not apply to intercom calls.
ANNEX
54
© SAMSUNG Electronics Co., Ltd.
PREPARATION
Save Number with Redial
THINGS YOU SHOULD KNOW
1 To save the number you just dialled for later use,
press the [SAVE] button before hanging up.
2 This saved number can be redialled at any time by
pressing the [SNR] button or dialling [1]►[7].
The same external trunk line will be selected for you.
BASIC FEATURES
NOTE
- The saved telephone number will be saved in memory until you save another number.
- Saved Number Redial does not apply to intercom calls.
CONVENIENT FEATURES
APPLICATION MENUS
ANNEX
© SAMSUNG Electronics Co., Ltd.
55
PREPARATION
Automatic Redial / Retry
When you make an outside call and receive a busy signal, the OfficeServ system can automatically
redial the number for you. It will automatically redial at a pre-programmed interval for up to 99
attempts.
THINGS YOU SHOULD KNOW
1 When you hear a busy signal, press the [RETRY]
button or press the Soft button corresponding to
[RETRY] on the LCD screen.
BASIC FEATURES
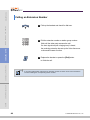
2 The system will reserve the line and automatically
redial the same number for you. You will hear the
call progress tones through the speaker. At this time,
the microphone is muted.
CONVENIENT FEATURES
3 When the called party answers, you must pick up
the handset or press the [Speaker] or [Send] button
before you begin speaking.
You must answer within 10 seconds.
NOTE
- If you make another call, auto-redial is cancelled.
APPLICATION MENUS
- To cancel a retry, lift and replace the handset.
ANNEX
56
© SAMSUNG Electronics Co., Ltd.
PREPARATION
Call Park
You can park an outside call in one of 10 ‘parking orbits’.
THINGS YOU SHOULD KNOW
1 Press the [PARK] button.
Or, press the Soft button corresponding to [PARK]
on the LCD screen.
BASIC FEATURES
2 Dial the orbit number required, [0]-[9] ; the [PARK]
button will flash.
Or, press a dedicated [PARK] button ; the [PARK ]
button will also flash.
To have the call ’parked’ picked up by another station,
notify the station user of the parking orbit number.
CONVENIENT FEATURES
3 To pick up the parked call, press the [PARK] button
followed by the required orbit number or press
the flashing [PARK] button.
APPLICATION MENUS
ANNEX
© SAMSUNG Electronics Co., Ltd.
57
PREPARATION
Intercom / Outside Calls
THINGS YOU SHOULD KNOW
Holding a Call
You can temporarily suspend a conversation without ending the call by placing the call on hold.
Or, when another call is received, you can put your first call on hold and answer the new call.
You can simply press the button on hold again to resume the conversation.
The types of hold available are system hold(general hold), automatic hold, exclusive hold, and
consultation hold.
System Hold
BASIC FEATURES
1 While you are engaged in a conversation, press
the [Hold] button.
2 The call on hold will flash green on your phone
and this line will flash red on other stations.
CONVENIENT FEATURES
3 To return to the held call.
Press the line button. The green LED will stop flashing.
APPLICATION MENUS
4 Resume your conversation with the other party.
NOTE
While you are on a call, pressing a trunk line button or flashing Call button will automatically
put your first call on hold and connect you to the new call. Refer below.
ANNEX
58
© SAMSUNG Electronics Co., Ltd.
PREPARATION
Automatic Hold
With Automatic Hold set, when you are answering an outside call, pressing the trunk line
or flashing Call button will automatically put your outside call on hold and connect you to
the next call. You can set Automatic hold on your phone by following the procedure below.
THINGS YOU SHOULD KNOW
1 Press the [Transfer] button.
2 Press [1]►[1]►[0].
BASIC FEATURES
3 To use this function, press [0]►[0]►[1], and if this
function is not required, press [0]►[0]►[0].
CONVENIENT FEATURES
4 Press the [Transfer] button to save the selected item.
NOTE
APPLICATION MENUS
Intercom calls will be placed on hold by pressing the [Hold] or [Transfer] button. If you press
another trunk line button or flashing Call button while you are on an intercom call, the intercom
will be disconnected.
ANNEX
© SAMSUNG Electronics Co., Ltd.
59
PREPARATION
Exclusive Hold
To place an outside call on hold exclusively so that other users cannot get it.
THINGS YOU SHOULD KNOW
1 Press the [Hold] button twice.
2 The call will flash green on your phone and this line
will show a steady red light on other stations.
BASIC FEATURES
3 To retrieve the call on hold, press the flashing green
line button or press the [Hold] button.
CONVENIENT FEATURES
NOTE
Intercom calls will always be placed on exclusive hold.
APPLICATION MENUS
ANNEX
60
© SAMSUNG Electronics Co., Ltd.
PREPARATION
Consultation Hold
When you are talking to an external caller and it is necessary to consult with another
extension.
THINGS YOU SHOULD KNOW
1 Press the [Transfer] button ; you will hear transfer
dial tone. Your outside call is placed on Transfer hold.
2 Dial the extension number.
BASIC FEATURES
3 Consult with the internal party.
CONVENIENT FEATURES
4 Press the [Transfer] button to return to the outside
party or to hang up to transfer the call.
NOTE
APPLICATION MENUS
Repeatedly pressing the [Transfer] button will toggle between the outside party and internal
extension.
ANNEX
© SAMSUNG Electronics Co., Ltd.
61
PREPARATION
Hold Recall
THINGS YOU SHOULD KNOW
1 If you leave a call on hold longer than the system
hold timer allows, it will recall your station.
At this time, the call button on hold will have a slow
flashing amber light. If you do not answer this recall
within a pre-programmed period of time, it may go to
the system operator depending upon your OfficeServ
system programming.
2 When your phone rings, lift the handset or press
the [Send] button to answer the recall.
BASIC FEATURES
Retrieving Calls Held at Another Station
CONVENIENT FEATURES
1 When a line is on system hold, the line will have
a flashing red light. To retrieve the call on hold,
press the line button with the red flashing light.
APPLICATION MENUS
2 When a line is on hold and it does not appear on
your phone, press [1]►[2] plus the line number or
the extension number of the station that placed
the call on hold.
ANNEX
62
© SAMSUNG Electronics Co., Ltd.
PREPARATION
Call Pickup
This section explains how to pickup a call that is ringing at another station.
Station Call Pickup
THINGS YOU SHOULD KNOW
If a call rings on another station and you know the station number, you can answer the call
on your phone.
1 A call is ringing on another station.
BASIC FEATURES
2 Pick up the handset and listen for the dial tone.
CONVENIENT FEATURES
3 Press [6]►[5].
4 Dial the station number that is ringing.
APPLICATION MENUS
ANNEX
© SAMSUNG Electronics Co., Ltd.
63
PREPARATION
Group Call Pickup
Each station can be assigned to a call pickup group. Refer to your System Administrator for
details on your pick up group.
THINGS YOU SHOULD KNOW
1 When a call is ringing on another station assigned to
your pick up group.
2 Pick up the handset and check for dial tone.
BASIC FEATURES
3 Press [6]►[6].
CONVENIENT FEATURES
4 Or press the flashing [GROUP PICKUP] button,
or press [GROUP PICKUP] button followed by
the related group number.
APPLICATION MENUS
NOTE
- A group number(extender) can be assigned to the [GROUP PICKUP] button.
- Station Call Pickup and Group Call Pickup may not enable you to answer the recalls at stations
depending on the OfficeServ system programming. Refer to your Samsung Authorised Reseller
for further details.
ANNEX
64
© SAMSUNG Electronics Co., Ltd.
PREPARATION
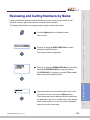
Dialling by Directory Name
Each extension number or speed dial number can have a relevant directory name.
You can select the extension number or speed dial number from the list of directory names by
scrolling down in alphabetical order. This online directory allows you to make any extension call
THINGS YOU SHOULD KNOW
or to find a speed dial number within just a few seconds.
1 Press the [DIR] button, or press the Soft button
related to [DIR] in the CALL menu.
BASIC FEATURES
2 Select the directory you wish to use, PERS(Personal,
Speed Dial Number), SYS(System Speed Dial Number)
or STN(Station Name).
3 Press the dial button that matches the first letter of
name that you wish to find.
CONVENIENT FEATURES
4 Find the required name by using the [TVolumeS]
button.
NOTE
© SAMSUNG Electronics Co., Ltd.
ANNEX
To directly move to one of the directories, an extender can be added to [DIR] button.
[1] for the Personal Speed Dial list, [2] for the System Speed Dial list and [3] for the Station list.
APPLICATION MENUS
5 Press the Soft button corresponding to [DIAL] on
the LCD screen to make the call to the selected number.
65
PREPARATION
Transferring Calls
You can transfer your call to another extension or return to the outside party.
THINGS YOU SHOULD KNOW
1 While on a call, press the [Transfer] button.
Your call is automatically put on transfer hold.
2 Dial an extension or group number.
Or, press the [DSS] button or station group button.
Your call will be automatically put on transfer hold.
BASIC FEATURES
3 For blind transfer, hang up
when you hear ringing. Or, wait for the called party
to answer and advise him/her of the call.
Then hang up.
CONVENIENT FEATURES
Reconnection with the Outside Party
If the transfer is refused and the called station hangs
up, you will be reconnected to the outside line.
Or, you can press the [Transfer] button to return to the
outside party.
APPLICATION MENUS
ANNEX
66
© SAMSUNG Electronics Co., Ltd.
PREPARATION
Call Retransferring
NOTE
THINGS YOU SHOULD KNOW
If you wish to send the call to another extension
without waiting for the first station to hang up,
simply press another [DSS] button.
Or, press the CALL button or trunk line button to
return to the outside party and begin the transfer
process again.
- When you are transferring a call to a station programmed for Voice Announce or Auto
Answer, the transferred call will always ring.
BASIC FEATURES
- After the internal party answers, you may alternate back and forth between the parties by
pressing the [Transfer] button.
- You cannot transfer an Intercom call by pressing the [DSS] button for the station required.
You must press the [Transfer] button first and then press the [DSS] button or dial the
destination extension number.
CONVENIENT FEATURES
Transfer With Camp-On
APPLICATION MENUS
When you are transferring a call to another station
and you receive a busy signal, you may camp the
call on to this station. So, when this station becomes
free, it can be connected to the transferred call.
Simply hang up when you hear a busy signal.
Then, the called party will be alerted by a call waiting
tone.
ANNEX
© SAMSUNG Electronics Co., Ltd.
67
PREPARATION
Transfer To Voice Mail
This feature is used to send a call directly to a voice mailbox. Your phone must have
a correctly programmed [VT] button to accomplish this.
THINGS YOU SHOULD KNOW
1 Press the [VT] button while you are on a call.
Or, press the Soft button corresponding to [VT] on
the LCD screen.
2 Dial the mailbox number.
BASIC FEATURES
3 Hang up when dialling is completed.
Call Waiting
CONVENIENT FEATURES
If an outside call or another station has camped-on to you, your phone will ring and the
waiting call’s LED will flash green.
1 Press the flashing button to answer the waiting call.
If your phone has the Automatic Hold feature set,
your current call will go on hold automatically.
APPLICATION MENUS
2 If Automatic Hold is not set, press the [Hold] button
and then press the button with the flashing LED.
Or, finish the first call and hang up ; the waiting call
will ring your phone.
ANNEX
3 Lift the handset or press the [Send] button to answer.
68
© SAMSUNG Electronics Co., Ltd.
You may assign any frequently used numbers to a personal speed dial number list for your station.
PREPARATION
Speed-Dial
These personal speed dial numbers are in addition to the system Speed dial numbers available.
Speed dial numbers can be allocated to buttons which allow you to press the one touch speed dial
THINGS YOU SHOULD KNOW
button to call the number.
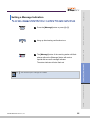
Explanation of Special Feature Buttons
When programming speed dial numbers, the special feature buttons are used and they are
designated as A, B, C, D, E, and F buttons. Each special feature button is explained in the
following table.
Features
Not used.
B Button
To insert a FLASH(time loop break).
C Button
To insert a PAUSE.
APPLICATION MENUS
A Button
D Button
CONVENIENT FEATURES
Button
BASIC FEATURES
A, B, C, D, E, and F buttons of the DS-5021D/5014D digital phone are the first 6 buttons in
the last row of the programmable buttons located below the LCD screen.
For example, the DS-5021D digital phone is shown below.
To convert from the pulse dialling(mechanical method) to the tone dialing
(Electronic method).
Used to hide the numbers from showing up on the LCD screen.
F Button
Used to input a speed dial name.
Hold Button
To clear a speed dial number.
© SAMSUNG Electronics Co., Ltd.
ANNEX
E Button
69
PREPARATION
Programming the Speed Dial Numbers
Your station can be assigned up to fifty numbers, 00~49. Ask your System Administrator
for the number of speed dial numbers that have been assigned to your station.
THINGS YOU SHOULD KNOW
To program the personal dial numbers,
1 Press the [Transfer] button and press [1]►[0]►[5],
without lifting the handset.
BASIC FEATURES
2 Select a free speed dial number location(00-49).
CONVENIENT FEATURES
3 Dial either a specific trunk line number or the
trunk access code.
APPLICATION MENUS
4 Dial the telephone number to be saved(maximum of
24 digits), including the #, *, FLASH, PAUSE, etc.
Press the special key [F] to enter a name for the Speed
dial number then press the special key [F] to return to
the speed dial entry menu again.
5 Press the [Transfer] button to save the number.
Or press the right Soft button and repeat steps 2 to 5.
ANNEX
70
© SAMSUNG Electronics Co., Ltd.
PREPARATION
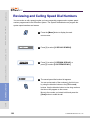
Dialling Speed Dial Numbers
You can dial a speed dial number stored in the list of system speed dial numbers between
500-999 or the list of your personal number between 00-49 using the following procedure.
THINGS YOU SHOULD KNOW
1 Press the [Memory] button or press [1]►[6],
without lifting the handset.
2 Dial the speed dial location number that is programmed
with the telephone number you wish to call.
BASIC FEATURES
3 The telephone number is automatically dialled for you.
CONVENIENT FEATURES
Alternatively, to dial one of your first 10 personal speed dial numbers.
1 Without lifting the handset, press a dial button 0-9 for
approximately 2 Seconds.
APPLICATION MENUS
© SAMSUNG Electronics Co., Ltd.
ANNEX
2 The telephone number programmed in the
corresponding personal speed dial location(00-09)
will be dialled automatically.
71
PREPARATION
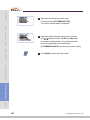
Assigning a Name to the Speed Dial Button.
A name of 11 characters can be assigned for each speed dial button.
This name is used to dial the telephone number using the directory feature.
THINGS YOU SHOULD KNOW
1 Press the [Transfer] button.
2 Press [1]►[0]►[6].
BASIC FEATURES
3 Press the speed dial number location to be
assigned with a name(00-49).
CONVENIENT FEATURES
4 Enter a name. Refer to the ‘Things You Should Know’
in this manual for how to enter a letter.
APPLICATION MENUS
5 Press the [Transfer] button to save the speed dial
name or the right Soft button to .enter further names
by repeating steps 3 to 5.
ANNEX
72
© SAMSUNG Electronics Co., Ltd.
PREPARATION
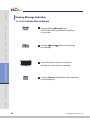
Programming One-touch Speed Dial Buttons
You can assign a frequently used number from the speed dial numbers to one of the
programmable keys on the phone for one touch speed dial use.
THINGS YOU SHOULD KNOW
1 Without lifting up the handset, press the
[Transfer] button.
2 Press [1]►[0]►[7].
BASIC FEATURES
3 Locate a vacant [SPD] button using the
[VolumeS] button and press the right Soft button.
CONVENIENT FEATURES
4 Dial the speed dial number location(00-49 or 500-999)
to be assigned for this button.
APPLICATION MENUS
5 Press the [Transfer] button to save the selected
number.
© SAMSUNG Electronics Co., Ltd.
ANNEX
6 If the one touch speed dial button is pressed,
a call is made to this saved speed dial number
automatically.
73
PREPARATION
Using Chain Dialling
THINGS YOU SHOULD KNOW
After a speed dial number is pressed, additional
numbers can be dialled manually or you can chain
together speed dial numbers.
After the first speed dial number, press the [Memory]
button or press [1]►[6] and then dial other speed dial
number location.
Or after the speed dial number is pressed, dial the
additional numbers manually.
BASIC FEATURES
Conference Calls
You can make a conference call of up to 5 parties including yourself. The OfficeServ system
also allows each station to pre assign up to 5 conference groups so you can set up a conference
call by pressing a single [Group Conference] programmable button. Refer to your System
Administrator to confirm that this option is available to you.
CONVENIENT FEATURES
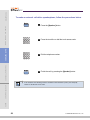
1 Press the [Conference] button while engaged in a
conversation. You will hear conference tone.
2 Make another call, either intercom or outside.
Press the [Conference] button and you will hear
conference Tone.
APPLICATION MENUS
ANNEX
3 Make another call to add additional parties or press
the [Conference] button to join all parties into the
conference.
Then, Repeat the last step, until all other parties required
are connected.
74
© SAMSUNG Electronics Co., Ltd.
PREPARATION
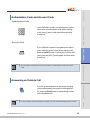
4 To drop a person from your conference call, press
the [Conference] button and dial the extension or trunk
number that is to be dropped.
THINGS YOU SHOULD KNOW
Press the [Conference] button again to re-establish
the conference.
NOTE
BASIC FEATURES
When attempting to add another person to the conference and you are not able to reach the
desired person, simply press the [Conference] button again.
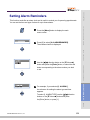
Programming Conference Groups.
CONVENIENT FEATURES
1 Press the [Transfer] button.
2 Press [1]►[1]►[8].
APPLICATION MENUS
3 Select the required Conference Group number by using
the [TVolumeS] button and press the right Soft button.
ANNEX
© SAMSUNG Electronics Co., Ltd.
75
PREPARATION
THINGS YOU SHOULD KNOW
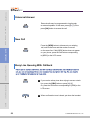
4 Select ‘Name’ and press the right Soft button
to enter the Conference Group name.
Refer to the ‘Things You Should Know’ in this guide
for entering characters.
Press the right Soft button to save the name.
5 Using the [TVolumeS] button to select [MBR1~4]
and press the right Soft button.
BASIC FEATURES
CONVENIENT FEATURES
6 Dial the extension number or outside telephone
number remembering to dial the trunk access code
first and press the right Soft button. Repeat steps
6 and 7 to add conference group members.
APPLICATION MENUS
7 Save the settings by pressing the [Transfer] button.
To make a group conference call press the [GCONF]
button followed by the group number and the conference
will be setup automatically. If an extender has been
added to the [GCONF] button(1~5) just press the
[GCONF] programmable button.
ANNEX
76
© SAMSUNG Electronics Co., Ltd.
PREPARATION
Do Not Disturb ........................................................................................... 78
Call Forwarding.......................................................................................... 80
Paging and Messaging .............................................................................. 88
Alarm Features ........................................................................................ 101
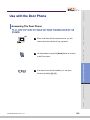
Use with the Door Phone ......................................................................... 105
THINGS YOU SHOULD KNOW
CONVENIENT FEATURES
Executive / Secretary Hot Line................................................................. 107
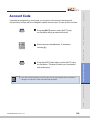
Account Code .......................................................................................... 109
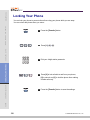
Locking Your Phone ................................................................................. 110
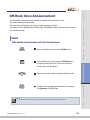
Off-Hook Voice Announcement ................................................................ 111
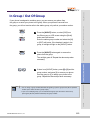
In Group / Out Of Group .......................................................................... 113
Background Music ................................................................................... 115
Timer........................................................................................................ 116
Ring Preference....................................................................................... 118
CONVENIENT FEATURES
Mute......................................................................................................... 114
BASIC FEATURES
Group Listening ....................................................................................... 108
APPLICATION MENUS
ANNEX
PREPARATION
Do Not Disturb
When Do Not Disturb is registered, you can block incoming calls to your phone yet still use
the phone for outgoing calls.
THINGS YOU SHOULD KNOW
Setting Do Not Disturb
1 Press the [DND] button or press [4]►[0]►[1] while
on-hook, or select [DND] from the LCD screen using
the Scroll button and [Other] Soft button.
BASIC FEATURES
2 The status indicator and/or [DND] button LED flashes
to inform you that the Do Not Disturb mode is set.
CONVENIENT FEATURES
NOTE
- When the phone is set in the Do Not Disturb mode, the phone status indicator(LED above the
LCD) flashes indicating that the Do Not Disturb mode is set.
- If a Forward DND destination has been set, all incoming calls will be forwarded to that
destination when DND is enabled.
APPLICATION MENUS
ANNEX
78
© SAMSUNG Electronics Co., Ltd.
PREPARATION
Cancelling Do Not Disturb
The procedure for cancelling the Do Not Disturb mode is described below.
THINGS YOU SHOULD KNOW
1 Check if the status indicator is flashing.
2 Press the [DND] button or press [4]►[0]►[0].
BASIC FEATURES
3 The status indicator goes off.
CONVENIENT FEATURES
One Time DND
APPLICATION MENUS
If you do not wish to be disturbed while you are on
a call, press the [DND] button and set the station to
Do Not Disturb. When you complete the call, the Do
Not Disturb mode is automatically cancelled and new
calls will be received.
A [DND] button is needed to use this feature.
ANNEX
© SAMSUNG Electronics Co., Ltd.
79
PREPARATION
Call Forwarding
This section explains various call forwarding features available on your OfficeServ system.
THINGS YOU SHOULD KNOW
Call Forward Option
You can verify or change the Call Forward settings and the number specified for forwarding
from the LCD screen of your phone. Enabling Call Forwarding can also be achieved using
the dial buttons or the Forward Set Menu.
1 Press the [Transfer] button.
BASIC FEATURES
2 Press [1]►[0]►[2].
CONVENIENT FEATURES
3 Select the Call Forward option by dialling from [0]
to [5], or by using the [TVolumeS] button.
APPLICATION MENUS
4 Press the right Soft button to move the cursor.
ANNEX
5 Dial the station, station group, or external number
remembering to insert the trunk access code prior
to the external number.
80
© SAMSUNG Electronics Co., Ltd.
PREPARATION
6 Press the right Soft button to move the cursor.
THINGS YOU SHOULD KNOW
7 Press [1] to enable call forwarding to the destination,
or press the [TVolumeS] button and select between
[YES] or [NO].
BASIC FEATURES
8 Press the [Transfer] button to save and exit.
In order to cancel all forward call options, lift the handset
and press [6]►[0]►[0].
APPLICATION MENUS
You can forward calls to another station, station group,
or an external number.
Programming procedures for various types of forwarding
calls are described in detail next. If your phone has
the FWD ALL, FWD BUSY, and FWD NO ANSWER
FWD BUSY/NO ANSWER buttons, you can forward
calls by pressing one of these buttons.
In this case, a red LED is lit on the button indicating which
call forward option is enabled.
CONVENIENT FEATURES
Forwarding Calls
ANNEX
© SAMSUNG Electronics Co., Ltd.
81
PREPARATION
Forwarding All Calls
You can forward all your calls to another internal, station group or external number.
THINGS YOU SHOULD KNOW
1 Press [6]►[0]►[1].
BASIC FEATURES
2 Dial the station number, group number, or external
number. Remember to insert the trunk access code
prior to entering the external number.
3 Hang up after the confirmation tone is received.
CONVENIENT FEATURES
NOTE
- The station receiving a forwarded call can transfer the call back to the forwarding station.
This feature is very useful when you are expecting an important call and do not want to be
disturbed.
- If you set your phone to Forward All Calls, and you do not have a [FORWARD ALL] button
the [Transfer] button will light. This indicates that your phone is set to Forward All Calls.
APPLICATION MENUS
ANNEX
82
© SAMSUNG Electronics Co., Ltd.
PREPARATION
Forward Busy
When you are busy on a call, incoming calls can be forwarded to another station, station group
or an external number.
THINGS YOU SHOULD KNOW
1 Press [6]►[0]►[2].
BASIC FEATURES
2 Dial the station number, group number, or external
number. Remember to insert the trunk access code
prior to entering the external number.
CONVENIENT FEATURES
3 Hang up after the confirmation tone is received.
APPLICATION MENUS
ANNEX
© SAMSUNG Electronics Co., Ltd.
83
PREPARATION
Forward No Answer
Calls can be forwarded when you are not available to answer the call.
THINGS YOU SHOULD KNOW
1 Press [6]►[0]►[3].
BASIC FEATURES
2 Dial the station number, group number, or external
number. Remember to insert the trunk access code
prior to entering the external number.
3 Hang up after the confirmation tone is received.
CONVENIENT FEATURES
APPLICATION MENUS
ANNEX
84
© SAMSUNG Electronics Co., Ltd.
PREPARATION
Forward Busy / No Answer
When the Forward Busy(FWD BUSY) and Forward No Answer(FWD NOANS) destinations are both
set, you may enable both these options simultaneously.
When you are busy, calls will be transferred to the number specified in Forward Busy destination.
THINGS YOU SHOULD KNOW
If you do not answer, the calls will be forwarded to the Forward No Answer destination.
1 Press [6]►[0]►[4].
2 Hang up after the confirmation tone is received.
BASIC FEATURES
Forward When DND is Set
CONVENIENT FEATURES
You can set a forward destination for those times you need to set Do Not Disturb.
1 Press [6]►[0]►[5].
APPLICATION MENUS
2 Dial the station number, group number, or external
number. Remember to insert the trunk access code
prior to entering the external number.
© SAMSUNG Electronics Co., Ltd.
ANNEX
3 Hang up after the confirmation tone is received.
When you enable DND on your phone, all calls will
be forwarded to the destination set above.
85
PREPARATION
Forward Follow Me
All incoming calls to your phone can be forwarded to the station you are currently using.
In addition, you can arrange for calls to another station to be forwarded to your phone
(Remote Forwarding).
THINGS YOU SHOULD KNOW
To forward all calls to your phone to the station you are currently using:
1 Press [6]►[0]►[6] at the station you are using.
‘enter the station to follow from’ is displayed.
BASIC FEATURES
2 Dial the station number of your phone.
CONVENIENT FEATURES
3 Hang up after the confirmation tone is received.
APPLICATION MENUS
ANNEX
86
© SAMSUNG Electronics Co., Ltd.
PREPARATION
To forward calls from a specific station to your phone (Remote Forwarding):
THINGS YOU SHOULD KNOW
1 Press [6]►[0]►[6].
‘enter the station to follow from’ is displayed.
2 Dial the station number.
BASIC FEATURES
3 Hang up after the confirmation tone is received.
CONVENIENT FEATURES
APPLICATION MENUS
ANNEX
© SAMSUNG Electronics Co., Ltd.
87
PREPARATION
Paging and Messaging
This section explains how to use the OfficeServ paging and messaging functions.
NOTE
THINGS YOU SHOULD KNOW
- You must use the phone handset when paging.
- If you are a frequent user of paging you can have a dedicated page zone button as one of
your programmable buttons, making it unnecessary to press the [PAGE] button followed
by the zone number.
Internal Page
You can make a page announcement through the station speakers.
There are 5 internal zones 0-4.
BASIC FEATURES
1 Pick up the handset and check for dial tone.
CONVENIENT FEATURES
2 Press the [PAGE] button or press [5]►[5], or select
[PAGE] from the LCD screen by using the Scroll
button and Soft buttons.
3 Select a zone number from [0], [1], [2], [3], and [4].
APPLICATION MENUS
4 Start your announcement after receiving confirmation
tone.
ANNEX
5 Hang up after paging.
88
© SAMSUNG Electronics Co., Ltd.
PREPARATION
External Page
You can page externally through optional external speakers.
There are 4 external zones 5-8 and [9] for all external zones.
THINGS YOU SHOULD KNOW
1 Pick up the handset and check for dial tone.
BASIC FEATURES
2 Press the [PAGE] button or [5]►[5], or select [PAGE]
from the LCD screen by using the Scroll button and
Soft buttons.
CONVENIENT FEATURES
3 Select a zone number from [5], [6], [7], and [8],
or page all external zones by dialling [9].
4 Start your announcement after receiving
confirmation tone.
APPLICATION MENUS
5 Hang up after paging.
ANNEX
© SAMSUNG Electronics Co., Ltd.
89
PREPARATION
All Page
You can also page all external zones and internal page zone 0 simultaneously.
THINGS YOU SHOULD KNOW
1 Pick up the handset and check the dial tone.
2 Press the [PAGE] button or [5]►[5], or select
[PAGE] from the LCD screen by using the Scroll
button and Soft buttons.
BASIC FEATURES
3 Press the [*] or [ALL PAGE] button.
CONVENIENT FEATURES
4 Start your announcement after receiving
confirmation tone.
APPLICATION MENUS
5 Hang up after paging.
ANNEX
90
© SAMSUNG Electronics Co., Ltd.
PREPARATION
Meet Me Page : MMPG
THINGS YOU SHOULD KNOW
1 Pick up the handset and check for dial tone.
2 Press the [MMPG] button or [5]►[4], or select
[MMPG] from the LCD screen using the Scroll
button and Soft buttons.
BASIC FEATURES
3 Dial the required zone number.
CONVENIENT FEATURES
4 After receiving the confirmation tone instruct
the other party to press [5]►[6].
5 Press the [WAIT] or [Transfer] button.
APPLICATION MENUS
6 Hold the handset until the other party enters the
page answer code([5]►[6]).
© SAMSUNG Electronics Co., Ltd.
ANNEX
7 The call is automatically connected when the other
party enters the page answer code.
91
PREPARATION
Call Park and Page
THINGS YOU SHOULD KNOW
You can transfer an external call to another person by parking the call and notifying the other
person of the call via paging. This function is useful in a factory or in a large office when
the called person is away from their workstation.
1 Press the [PAGE] button while connected to the call
and the call is automatically on hold.
You can also select [PAGE] from the LCD screen using
the Soft button.
BASIC FEATURES
2 Dial the appropriate page zone number to notify that
the call is parked and to inform the required party of
your station number or the calling trunk number.
CONVENIENT FEATURES
3 Hang up.
APPLICATION MENUS
ANNEX
92
© SAMSUNG Electronics Co., Ltd.
PREPARATION
Retrieving the parked call
THINGS YOU SHOULD KNOW
1 Press the [PARK] button or press [1]►[0], and enter
the announced number.
You can also enter the announced number after
selecting [PARK] from the LCD screen.
2 You will be connected to the Parked call.
BASIC FEATURES
NOTE
If the parked call is not retrieved within the pre-programmed time, the parked call will recall to
your phone, an amber light will blink slowly on the Call or trunk button LED. You cannot park
and page intercom calls.
CONVENIENT FEATURES
APPLICATION MENUS
ANNEX
© SAMSUNG Electronics Co., Ltd.
93
PREPARATION
Rejoining a Page
With this option, you can listen to the latter part of a page announcement after finishing a call.
THINGS YOU SHOULD KNOW
1 Press the [Transfer] button or [1]►[1]►[0].
2 Press [0]►[5]►[1] to enable this option,
and [0]►[5]►[0] to disable it.
BASIC FEATURES
3 Press the [Transfer] button to save the setting.
CONVENIENT FEATURES
APPLICATION MENUS
ANNEX
94
© SAMSUNG Electronics Co., Ltd.
PREPARATION
Setting a Message Indication
You can leave a message indication when there is no answer or if the station required is busy.
THINGS YOU SHOULD KNOW
1 Press the [Message] button or press [4]►[3].
2 Hang up after hearing confirmation tone.
BASIC FEATURES
3 The [Message] button of the receiving station will flash.
phones without the [Message] button will receive
special dial tone as a message indicator.
The status indicator will also flash red.
CONVENIENT FEATURES
NOTE
You can leave up to 5 messages on a station.
APPLICATION MENUS
ANNEX
© SAMSUNG Electronics Co., Ltd.
95
PREPARATION
Cancelling Messages
You can cancel messages you have left on other stations or messages left at your station.
THINGS YOU SHOULD KNOW
1 Press [4]►[2] and enter the station number where you
left your message.
BASIC FEATURES
2 To cancel all numbers left at your station, press [4]►[2]
and enter your station number.
The LED on your [Message] button and the status
indicator will go out.
CONVENIENT FEATURES
APPLICATION MENUS
ANNEX
96
© SAMSUNG Electronics Co., Ltd.
PREPARATION
Returning Messages
THINGS YOU SHOULD KNOW
1 Press the [Message] button to review the stations
that have left messages and press the Soft button
associated with [Dial] on the LCD screen to call
the station. Or, press [4]►[3] and the first station that
left its number will be rung automatically.
BASIC FEATURES
2 The LED on your [Message] button and status
indicator will remain flashing until the station responds.
Repeat the above steps to respond to all station
messages received.
NOTE
CONVENIENT FEATURES
3 The LED on your [Message] button and status
indicator will go off when all messages are returned
or cancelled.
- You can view the numbers left and return messages in any order through the LCD screen.
- If a message was left at your phone by a station in Auto Answer mode, you must cancel the
message manually, after returning the message.
APPLICATION MENUS
ANNEX
© SAMSUNG Electronics Co., Ltd.
97
PREPARATION
Viewing Message Indication
You can view all messages before returning them.
THINGS YOU SHOULD KNOW
1 Press the flashing [Message] button.
The first station that left its number is displayed
on the screen.
2 Press the [TVolumeS] button to scroll through
the messages.
BASIC FEATURES
CONVENIENT FEATURES
3 Use the Soft buttons to return or cancel the
message or to move to the next message.
4 Press the [Speaker] or [End] button after responding
to the message left.
APPLICATION MENUS
ANNEX
98
© SAMSUNG Electronics Co., Ltd.
PREPARATION
Programmed Messages
You can leave a programmed message on your station when you are away from your phone.
The caller will see the message on their LCD when they call you and know that you are not available.
15 system wide messages are available(01-15) and 5 personal messages(16-20)
THINGS YOU SHOULD KNOW
1 Press [4]►[8] and select the desired message code
from the programmed message list.
2 Press [4]►[8] then [0]►[0] to cancel the message.
BASIC FEATURES
CONVENIENT FEATURES
APPLICATION MENUS
ANNEX
© SAMSUNG Electronics Co., Ltd.
99
PREPARATION
Programmed Message List
When you are away for a certain period of time, you can leave a message of absence on stations
by selecting a message accordingly.
The caller will see the message and know that you are away.
THINGS YOU SHOULD KNOW
Message
Message code
BASIC FEATURES
CONVENIENT FEATURES
NOTE
01
GIVE ME THE CALL
02
TAKE A MESSAGE
03
ASK THEM TO HOLD
04
SEND TO MY VM
05
TRSF TO MY SECY
06
LEAVE A MESSAGE
07
PAGE ME
08
OUT OF TOWN
09
IN A MEETING
10
I WILL CALLBACK
11-15
Defined by the System Administrator.
16~20
Blank Message(You can set up)
- Your System Administrator can edit the first 15 Programmable Messages.
APPLICATION MENUS
- Your personal Programmed Messages using the following procedure:
1. Press the [Transfer] button when your phone is in the idle condition.
2. Press [1][1][5].
3. Select the Programmed Message you wish to insert or modify(e.g. 16).
4. Enter the characters required in accordance with the procedure below.
5. Press the [Transfer] button to save the information and set the Programmed Message to
your phone.
NOTE
Your phone may have multiple programmed message buttons, each of which has different
message codes.
ANNEX
- Press any programmed message button. A red light comes on the button’s LED indicates that
the message has been set. Press the button again to clear the message.
- Press another programmed message button to clear the previous message and set the new
message.
100
© SAMSUNG Electronics Co., Ltd.
PREPARATION
Alarm Features
THINGS YOU SHOULD KNOW
Appointment Reminder / Alarm Clock
This feature serves as an alarm clock. Up to 3 alarms may be set. Each alarm can be set as
a one time alarm or a daily alarm.
Three short rings will repeat three times. Lift the handset to answer the alarm.
If you do not answer, the alarm will ring two more times at 5-minute intervals.
1 Press the [Transfer] button.
BASIC FEATURES
2 Press [1]►[1]►[2].
3 Dial the alarm number [1], [2] or [3].
CONVENIENT FEATURES
4 Enter the time at which you want the alarm to sound.
Enter the time as HHMM(hours and minutes) based
on a 24 hour clock.
6 Press the [Transfer] button to save settings.
Repeat the above steps to set other alarms as needed.
APPLICATION MENUS
5 Select the type of alarm between [0](Not Set),
[1](Today) or [2](Daily).
ANNEX
© SAMSUNG Electronics Co., Ltd.
101
PREPARATION
Alarm Cancel
Procedure for cancelling all previously registered alarms is described below.
THINGS YOU SHOULD KNOW
1 Press the [Transfer] button.
2 Press [1]►[1]►[2].
BASIC FEATURES
3 Dial the alarm number [1], [2] or [3].
CONVENIENT FEATURES
4 Press the [Hold] button.
NOTE
APPLICATION MENUS
You can view the alarm message on the LCD screen. Refer to the next paragraph
‘Alarm Message’ for details.
ANNEX
102
© SAMSUNG Electronics Co., Ltd.
PREPARATION
Alarm Message
You can make a 16-character message to be associated with an alarm.
THINGS YOU SHOULD KNOW
1 Press the [Transfer] button.
2 Press [1]►[1]►[6].
BASIC FEATURES
3 Dial the alarm number [1], [2] or [3].
CONVENIENT FEATURES
4 Enter the time at which you want the alarm to sound.
Enter the time as HHMM(hours and minutes) based
on a 24-hour clock.
5 Select the type of alarm between [0](Not Set),
[1](Today) or [2](Daily).
APPLICATION MENUS
6 Enter the message using the dial buttons.
Refer to ‘Things You Should Know’ of this guide
for procedures on entering characters.
© SAMSUNG Electronics Co., Ltd.
ANNEX
7 Press the [Transfer] button and save the alarm time
and message. Repeat the above steps to set other
alarms and messages when needed.
103
PREPARATION
Alarm Message Cancel
You can verify or change the Alarm settings from the LCD screen of your phone.
Cancelling alarms can also be achieved using the dial buttons.
THINGS YOU SHOULD KNOW
1 Press the [Transfer] button.
2 Press [1]►[1]►[2].
BASIC FEATURES
3 Dial the alarm number [1], [2] or [3].
CONVENIENT FEATURES
4 Press the right Soft button twice.
APPLICATION MENUS
5 Press the [Hold] button to cancel.
NOTE
ANNEX
104
You can view the alarm message on the LCD screen. Refer to the above section ‘Alarm Message’
for details.
© SAMSUNG Electronics Co., Ltd.
PREPARATION
Use with the Door Phone
THINGS YOU SHOULD KNOW
Answering The Door Phone
You can answer calls from the Door phone or open the door if an optional electric door lock
is installed.
1 When a call from the Door phone arrives, you will
receive three short bursts of ring, repeated.
BASIC FEATURES
2 Lift the handset or press the [Send] button to connect
to the Door phone.
CONVENIENT FEATURES
3 If an electric door lock is installed, you can open
the door by dialling [1]►[3].
APPLICATION MENUS
ANNEX
© SAMSUNG Electronics Co., Ltd.
105
PREPARATION
Calling The Door Phone / Room Monitor
You can call the Door phone and listen to what is happening outside or in another room.
THINGS YOU SHOULD KNOW
1 Dial the station number of the Door phone.
2 You can listen or have a conversation when
you are connected to the Door phone.
BASIC FEATURES
CONVENIENT FEATURES
3 If an electric door lock is installed, you can
open the door by dialling [1]►[3].
APPLICATION MENUS
ANNEX
106
© SAMSUNG Electronics Co., Ltd.
PREPARATION
Executive / Secretary Hot Line
Executive and secretary can have a hotline set up between their stations.
When the Executive is in DND mode or busy on a call, all new calls will forward to the
secretary station.
THINGS YOU SHOULD KNOW
1 Either the Executive or the secretary can make
a call to the other station by pressing the [BOSS]
button or by selecting [BOSS] from the LCD screen
using the Soft buttons.
BASIC FEATURES
2 If DND is set on the executive station or it is busy,
all calls will be forwarded to the secretary station.
When the secretary station receives the call,
a red light flashes on the executive station.
CONVENIENT FEATURES
You can transfer important calls to the [BOSS] station set as DND.
1 Press the [Transfer] button then the [BOSS] button,
or select [BOSS] from the LCD screen using the
Soft buttons.
APPLICATION MENUS
2 Wait until the [BOSS] station answers to announce
the call. Then, hang up.
You can blind transfer the call by pressing the [BOSS]
button and hanging up.
ANNEX
© SAMSUNG Electronics Co., Ltd.
107
PREPARATION
Group Listening
While you are in a call, you can allow others to hear the conversation through the phone speaker.
THINGS YOU SHOULD KNOW
1 Turn on the speaker by pressing the [LISTEN] button,
or selecting [LISTEN] from the LCD screen using
the Soft button.
The microphone of the phone is not active and
the other party cannot hear sounds via that source.
BASIC FEATURES
2 Press the [LISTEN] button again, or select [listen]
from the LCD screen using the Soft button to resume
a private conversation.
3 Repeat the above steps when needed.
CONVENIENT FEATURES
NOTE
Depending on the speaker volume and acoustics of your office, it may be advisable to turn the
group listening option off before hanging up. This will prevent a momentary howling.
APPLICATION MENUS
ANNEX
108
© SAMSUNG Electronics Co., Ltd.
If specified by programming, at any stage you can print out the account code along with
the call history to allow calls to be charged to specific account code. To enter an Account Code:
PREPARATION
Account Code
THINGS YOU SHOULD KNOW
1 Press the [ACCT] button or select [ACCT] using
the Soft button during an external trunk call.
2 Dial the account code(Maximum 12 characters
including [#]).
BASIC FEATURES
NOTE
CONVENIENT FEATURES
3 Press the [ACCT] button again or select [ACCT] using
the Soft button. This does not affect your conversation
with another party.
If you make a mistake entering an account code, press the [ACCT] button twice and enter the
code again. Only the last account code entered will be printed.
APPLICATION MENUS
ANNEX
© SAMSUNG Electronics Co., Ltd.
109
PREPARATION
Locking Your Phone
You can lock your phone to prevent others from using your phone while you are away.
You can unlock the phone when you return.
THINGS YOU SHOULD KNOW
1 Press the [Transfer] button.
2 Press [1]►[0]►[0].
BASIC FEATURES
3 Dial your 4-digit station passcode.
CONVENIENT FEATURES
4 Press [2] to lock all calls to and from your phone,
[0] to unlock, and [1] to lock the phone from making
outside calls only.
APPLICATION MENUS
5 Press the [Transfer] button to save the settings.
ANNEX
110
© SAMSUNG Electronics Co., Ltd.
PREPARATION
Off-Hook Voice Announcement
THINGS YOU SHOULD KNOW
You can make a separate announcement to a station user currently on a call.
This is not heard by the other party.
This feature is useful when you have an urgent message to deliver.
You cannot receive [OHVA] calls in DND mode. The [OHVA] feature can be used for intercom
and transferred calls.
OHVA
Follow the below procedure to make an off-hook voice announcement.
BASIC FEATURES
1 Dial the extension number or the [DSS] button.
CONVENIENT FEATURES
2 If you hear the busy tone, press the [OHVA] button
or select [OHVA] from the LCD screen using the
Scroll button and Soft button.
3 Start announcement after hearing confirmation tone.
APPLICATION MENUS
4 Finish the call by replacing the handset, or pressing
the [Speaker] or [End] button.
NOTE
When voice announcing to a nearby station, use the handset to avoid echoes.
ANNEX
© SAMSUNG Electronics Co., Ltd.
111
PREPARATION
OHVA Cancel
When receiving OHVA, you will hear the OHVA through your handset or speaker
depending on which one you are using. In both cases, you can continue your call with the original
party whilst listening to the OHVA. You can also talk to the announcing party, temporarily putting
THINGS YOU SHOULD KNOW
the other party on hold.
1 Press the flashing [CALL] button. This places the
original party on hold and allows you to talk to the
announcing party.
BASIC FEATURES
2 Press the related [CALL] button to return to the
original party. This disconnects the OHVA call.
OHVA Block
CONVENIENT FEATURES
You can block Off-Hook Voice Announce button on your
phone. OHVA calls will not be received until you cancel
the block function by pressing the [BLOCK] button again.
If there is no [BLOCK] button, select [OHBLK] in the Other
menu from the LCD screen using the [Scroll] button and
Soft buttons.
APPLICATION MENUS
OHVA Reject
ANNEX
You can set an OHVA [REJECT] button on your phone. When
receiving an OHVA, press the [REJECT] button to
disconnect the OHVA call and return to the original caller.
If there is no [REJECT] button, select [REJECT] from the
LCD screen using the Soft button.
112
© SAMSUNG Electronics Co., Ltd.
PREPARATION
In Group / Out Of Group
If your phone is assigned to a station group, you can remove your phone from
the group or re-enter your phone to the group. When your phone is removed from
the group, you will not receive calls to the station group, only calls to your station number.
THINGS YOU SHOULD KNOW
1 Press the [IN/OUT] button, or select [IOG] from
the Other menu on LCD screen using the [Scroll]
button and Soft buttons.
Enter the station group number and select the [IN]
or [OUT] soft button. If the handset is active in the
group, a red light will light on the [IN/OUT] button.
BASIC FEATURES
2 Press the [IN/OUT] button again to remove the
phone from the group.
The red light goes off. Repeat the above step when
necessary.
CONVENIENT FEATURES
3 If there is no [IN/OUT] button, press [5]►[3] and the
group number, and press [0] to remove your phone
from the group or [1] to assign your phone to the
group. Repeat the above steps when necessary.
- You can assign a group number(Extender) designating a specific group to the [IN/OUT] button
to allow you to enter and exit a group simply.
- If you are in multiple groups, you can decide which group you will receive calls from by
pressing the [IN/OUT] button followed by the group number.
APPLICATION MENUS
NOTE
ANNEX
© SAMSUNG Electronics Co., Ltd.
113
PREPARATION
Mute
This feature disables the handset or phone’s microphone, depending on which is in use.
Thus, the other party cannot hear what you are saying.
THINGS YOU SHOULD KNOW
1 Press the [MUTE] button or select [MUTE] from
the LCD screen using the Soft button.
The LED of the [MUTE] button flashes.
BASIC FEATURES
2 Press the [MUTE] button again to cancel.
The red light on the LED of the button goes off.
CONVENIENT FEATURES
APPLICATION MENUS
ANNEX
114
© SAMSUNG Electronics Co., Ltd.
PREPARATION
Background Music
You can listen to music through the phone’s speaker if a music source is provided.
THINGS YOU SHOULD KNOW
1 To listen to the music, press the [Hold] button
while on-hook.
BASIC FEATURES
2 Press the [Hold] button again to cancel.
CONVENIENT FEATURES
3 Use the [TVolumeS] button to adjust the music Volume.
This does not affect the speaker volume setting.
APPLICATION MENUS
ANNEX
© SAMSUNG Electronics Co., Ltd.
115
PREPARATION
Timer
THINGS YOU SHOULD KNOW
Call Duration Timer
You can set the timer to be activated automatically for external calls. The timer appears
on the LCD screen immediately on answering an incoming call and after a period of time
or when the other party answers an outgoing call.
The call duration time is displayed in minutes and seconds, and is reset when the call lasts
longer than 100 minutes. Selecting [TIMER] from the LCD screen will manually reset the timer.
If the automatic timer is not set, while on a call press the [TIMER] button to start the timer.
Press the [TIMER] button again to stop the timer. If you press the [TIMER] button while the
Auto timer is on, the call timer starts again.
BASIC FEATURES
Auto Timer
Your phone may have an automatic timer that starts automatically after a short period of
time for forwarded and outgoing calls. This can be enabled or disabled as follows.
CONVENIENT FEATURES
1 While on-hook, press the [Transfer] button.
2 Press [1]►[1]►[0].
APPLICATION MENUS
3 Press [0]►[1]►[1] to activate the Auto timer
or [0]►[1]►[0] to deactivate.
ANNEX
4 Press the [Transfer] button to save the settings.
116
© SAMSUNG Electronics Co., Ltd.
PREPARATION
Timer Function
For phones, the timer can be used as a stopwatch.
THINGS YOU SHOULD KNOW
1 Press the [TIMER] button, or select [TIMER] from
the Other menu on the LCD screen using the [Scroll]
button and Soft button when the phone is in idle mode.
2 Press the [TIMER] button again to stop the timer.
BASIC FEATURES
3 Note the elapsed time on the LCD screen.
CONVENIENT FEATURES
4 Lift and replace the handset and the time and date
display on the LCD will resume.
APPLICATION MENUS
ANNEX
© SAMSUNG Electronics Co., Ltd.
117
PREPARATION
Ring Preference
THINGS YOU SHOULD KNOW
You can answer a call automatically by lifting the handset or by pressing the [Send] button.
Calls are answered in the order that they arrive at your phone. If the ring preference option is
off, you must answer calls by pressing the flashing button. In this case you may answer the calls
without regard to the order in which they arrived.
1 Press the [Transfer] button.
BASIC FEATURES
2 Press [1]►[1]►[0].
CONVENIENT FEATURES
3 Press [0]►[6]►[1] to enable the ring preference feature.
To disable, press [0]►[6]►[0].
4 Press the [Transfer] button to save the settings.
APPLICATION MENUS
ANNEX
118
© SAMSUNG Electronics Co., Ltd.
PREPARATION
Navigation Buttons................................................................................... 120
Main Menus ............................................................................................. 123
Reviewing and Calling Recently Called Numbers .................................... 124
THINGS YOU SHOULD KNOW
APPLICATION MENUS - DS-5021D / DS5014D
Reviewing and Calling Recently Received Numbers ............................... 125
Reviewing and Calling Numbers by Name............................................... 127
Setting Forward Type and Number .......................................................... 129
BASIC FEATURES
Reviewing and Calling Speed Dial Numbers............................................ 126
Setting Alarm Reminders ......................................................................... 131
CONVENIENT FEATURES
APPLICATION MENUS
ANNEX
PREPARATION
Navigation Buttons
The DS-5021D and DS-5014D Digital phones are equipped with navigation buttons for
convenient use of the Digital phone functions. This chapter introduces the functions available
using the navigation buttons and procedures for using the various applications.
THINGS YOU SHOULD KNOW
BASIC FEATURES
Menu Button
1 The main menu is displayed when the [Menu] button
is pressed in the idle state, You can select from
the presented options.
CONVENIENT FEATURES
2 This menu is displayed when the [Menu] button is
pressed when dialling mode or when transferring calls.
This allows you select to select and perform a function.
APPLICATION MENUS
NOTE
Calls will be maintained even if the [Menu] button is pressed while you are talking. If you press
the [End] button or the other buttons except the Navigation buttons in menu mode, you will
automatically exit from the menu mode and return to the idle screen.
ANNEX
120
© SAMSUNG Electronics Co., Ltd.
PREPARATION
Send Button
THINGS YOU SHOULD KNOW
If you press the [Send] button while the [OUTGOING LOGS], [INCOMING LOGS],
[SPD NO. SEARCH], or [DIRECTORY DIAL] function is selected, the corresponding
number will be dialled.
- If you press the [Send] button in idle mode, you enter the [OUTGOING LOGS] menu.
- If you press the [Send] button in dial mode, you enter the [OUTGOING LOGS] menu regardless
of the numbers previously dialled.
- If you press the [Send] button while a call is arriving(ringing status), you will answer the call
on the speakerphone.
End Button
BASIC FEATURES
This button is used to disconnect calls or to exit the phone menus and return to
the idle display.
Cancel button
CONVENIENT FEATURES
The [Cancel] button is used in menu mode to move to the previous level.
If the [Cancel] button is pressed when you first enter menu mode, the menu mode
is exited.
The [Cancel] button is also used to delete the characters previously entered when
entering numbers or characters.
APPLICATION MENUS
Enter button
This button is used in the menu mode to select or save the item that the cursor is
indicating. This button may also be used for the [NND(Name Number Display)] button
when receiving calls.
- The [NND] button displays ‘caller number’, ‘caller name’, and ‘received time’ when you press
the button, if the caller information is available.
ANNEX
© SAMSUNG Electronics Co., Ltd.
121
PREPARATION
Direction button
These buttons are used when editing menu entries, or when moving between menu items.
THINGS YOU SHOULD KNOW
[ ∧ ] button is used
Used for moving to the previous menu.
[ > ] button is used
In cases where the phone number is long, this button
is used for displaying the rear part of the number which is
not displayed on the LCD screen.
BASIC FEATURES
[ ∨ ] button is used
Used for moving to the next menu.
[ < ] button is used
CONVENIENT FEATURES
In cases where the phone number is long, this button is used for displaying the front part
of the number which is not displayed on the LCD screen.
APPLICATION MENUS
ANNEX
122
© SAMSUNG Electronics Co., Ltd.
PREPARATION
Main Menus
Press the [Menu] button to display the main menu below.
THINGS YOU SHOULD KNOW
How to Select Menu
∧]/[∨] direction buttons or the [TVolumeS] button and move to the preferred menu.
- Use the [
- You can select the menu directly by pressing the dial button corresponding to the menu number.
BASIC FEATURES
To select a menu items, you can use the navigation direction buttons, [TVolumeS] button
or the dial buttons.
- Press the [Enter] button to select the menu underlined by the cursor to expose sub-menus.
CONVENIENT FEATURES
- Press the [End] button to exit the menu and return to the idle screen.
- When buttons other than the navigation buttons are pressed, the menu mode will end.
NOTE
When your station is called while in menu mode, your phone will appear as busy to the calling
party.
APPLICATION MENUS
ANNEX
© SAMSUNG Electronics Co., Ltd.
123
PREPARATION
Reviewing and Calling Recently Called Numbers
Up to 50 recently called numbers can be saved. The actual number is allocated by your System
Administrator. You can verify recently called numbers and redial them as required.
THINGS YOU SHOULD KNOW
1 Press the [Menu] button to display the main
menu screen.
BASIC FEATURES
2 Press [1] to select [1. OUT CALL LOG] or select and
press the [Enter] button.
CONVENIENT FEATURES
3 The list of recently called numbers is displayed.
You can review each of the numbers in the list in turn
by using the [∧]/[∨] direction buttons or the [TVolumeS]
button. Use the [<]/[>] direction buttons to view long
numbers that do not fully appear on the screen.
APPLICATION MENUS
4 Move to the number you intend to dial and press
the [Send] button to make the call.
ANNEX
124
© SAMSUNG Electronics Co., Ltd.
PREPARATION
Reviewing and Calling Recently Received
Numbers
THINGS YOU SHOULD KNOW
Up to 50 recently received numbers can be saved. The actual number is allocated by the
System Administrator. You can verify recently called numbers or dial them as required.
1 Press the [Menu] button to display the main
menu screen.
BASIC FEATURES
2 Press [2] to select [2. IN CALL LOG], or select and
press the [Enter] button
APPLICATION MENUS
4 Move to the number you intend to dial and press
the [Send] button to make the call.
CONVENIENT FEATURES
3 The list of recently received numbers is displayed.
You can review each of the numbers in the list in turn
by using the [∧]/[∨] direction buttons or the [TVolumeS]
button.
Use the [<]/[>]direction button to view long numbers
that do not fully appear on the screen.
ANNEX
© SAMSUNG Electronics Co., Ltd.
125
PREPARATION
Reviewing and Calling Speed Dial Numbers
You can review or call a speed number you have personally programmed or system speed
number programmed in the OfficeServ system. The System Administrator can program the
system speed numbers and names.
THINGS YOU SHOULD KNOW
1 Press the [Menu] button to display the main
menu screen.
2 Press [3] to select [3. SPD NO. SEARCH].
BASIC FEATURES
CONVENIENT FEATURES
3 Press [1] to select [1. PERSON SPD NO.] or
press [2] to select [2. SYSTEM SPD NO.].
APPLICATION MENUS
4 The saved speed dial number list appears.
You can review each of the numbers in the list in turn
by using the direction buttons or the [TVolumeS]
buttons. Use the direction button to view long numbers
that do not fully appear on the screen.
Move to the number you intend to dial and press the
[Send] button to make the call.
ANNEX
126
© SAMSUNG Electronics Co., Ltd.
PREPARATION
Reviewing and Calling Numbers by Name
Using the OfficeServ system’s internal directories you can review by name and then call
personal or system speed dial numbers or internal station numbers.
The System Administrator can program system speed numbers and names.
THINGS YOU SHOULD KNOW
1 Press the [Menu] button to display the main
menu screen.
BASIC FEATURES
2 Press [4] to select [4. DIRECTORY DIAL] or select
and press the [Enter] button.
The submenu below is displayed.
127
ANNEX
© SAMSUNG Electronics Co., Ltd.
APPLICATION MENUS
4 Use the dial buttons to enter the first letter of the name
you intend to review, and press the [Enter] button.
The numbers with names starting with the entered letter
are displayed. If there is no number with a name starting
with the letter entered, ‘It is not found’ will be displayed
and you may enter a new letter.
CONVENIENT FEATURES
3 Press [1] to select [1. PERSON SPD NO.] or press [2] to
select [2. SYSTEM SPD NO.] or press [3] to select
[3. STATION NO.], or select by using the [TVolumeS]
button and press the [Enter] button.
PREPARATION
5 Move to the name in the list you intend to dial and
press the [Send] button to make the call.
THINGS YOU SHOULD KNOW
NOTE
- Refer to the ‘Things You Should Know’ of this guide for how to enter characters. Use the
[∧]/[∨] direction buttons to move the cursor in the input screen. Press the [Cancel] button to
erase the entered letter.
- Press the [Cancel] button to return to the previous menu.
BASIC FEATURES
CONVENIENT FEATURES
APPLICATION MENUS
ANNEX
128
© SAMSUNG Electronics Co., Ltd.
When you are unavailable to answer your calls on the DS-5021D or DS-5014D Digital phone,
you can set the forwarding function to have the calls answered at another station, station group
or external number. Procedures for setting the forward type and numbers are described below.
2 Press [5] to select [5. FORWARD SET] or select and
press the [Enter] button.
THINGS YOU SHOULD KNOW
1 Press the [Menu] button to display the main menu screen.
PREPARATION
Setting Forward Type and Number
BASIC FEATURES
APPLICATION MENUS
ANNEX
4 Enter the destination number using the dial buttons.
For example, if you selected [1. FORWARD ALL],
enter the numbers in the LCD screen as shown.
If an external number is required please insert the
trunk access code(e.g. 0) in front of the number.
Press the [Enter] button to save the number entered
and to move to the upper menu.
If a destination number already exists you do not need
to erase it. Just enter the new destination number.
© SAMSUNG Electronics Co., Ltd.
CONVENIENT FEATURES
3 Select the type of forward you wish to set a destination
for using the [∧]/[∨] direction buttons or the [TVolumeS]
button and press the [Enter] button. Or select using
the dial button corresponding to the forward type.
129
PREPARATION
5 Select the forward type you wish to set.
Press [0] to select [0. FORWARD TYPE].
The current forward setting is displayed.
THINGS YOU SHOULD KNOW
6 Select the required forward type to be set by using
the [∧]/[∨] direction button, the [TVolumeS] button
and press the [Enter] button, or by pressing the dial
button corresponding to the forward type.
[0. FORWARD CANCEL] cancels your previous setting.
BASIC FEATURES
7 Press [End] to return to the idle screen.
CONVENIENT FEATURES
APPLICATION MENUS
ANNEX
130
© SAMSUNG Electronics Co., Ltd.
This function works like an alarm clock and is useful to remind you of upcoming appointments.
You can set the time and type of alarm for up to three alarms.
PREPARATION
Setting Alarm Reminders
THINGS YOU SHOULD KNOW
1 Press the [Menu] button to display the main
menu screen.
2 Press [6] to select [6. ALARM REMINDER].
The submenu below is displayed.
BASIC FEATURES
CONVENIENT FEATURES
3 Use the [∧]/[∨] direction button or the [TVolumeS]
button and press the [Enter] button, or select the dial
button corresponding to the alarm number you wish
to set.
APPLICATION MENUS
4 For example, if you selected [1. ALARM 1],
the submenu for setting the alarm type and time
appears.
To select [1. ALARM TYPE] use the [∧]/[∨] direction
buttons or the [TVolumeS] button and press
the [Enter] button, or press [1].
ANNEX
© SAMSUNG Electronics Co., Ltd.
131
PREPARATION
THINGS YOU SHOULD KNOW
5 The submenu for the three alarm types is displayed
as shown.
Use the [∧]/[∨] direction buttons, the [TVolumeS] button,
or the dial buttons to select to select the alarm type,
and press the [Enter] button.
[0. NOT SET] the alarm does not ring.
[1. TODAY] the alarm rings only once at the set time
when selected.
[2. DAILY] an alarm rings every day at the set time
when selected.
The selected alarm type is saved and you move to the
upper menu displaying the submenu shown below.
BASIC FEATURES
6 To select [2. ALARM TIME] use the [∧]/[∨] direction
buttons or the [TVolumeS] button and press the
[Enter] button, or the press [2] to set the alarm time.
CONVENIENT FEATURES
APPLICATION MENUS
7 Use the dial buttons to enter the alarm time in 24
hour mode.
Use the [Cancel] button to erase all entered numbers.
Press the [Enter] button to save the entered time and
move to the previous menu.
ANNEX
132
© SAMSUNG Electronics Co., Ltd.
PREPARATION
Troubleshooting ....................................................................................... 134
Product Specifications ............................................................................. 136
THINGS YOU SHOULD KNOW
ANNEX
BASIC FEATURES
CONVENIENT FEATURES
APPLICATION MENUS
ANNEX
PREPARATION
Troubleshooting
The troubleshooting for your phone is described below.
Check the troubleshooting steps before contacting your Authorised Samsung Reseller.
THINGS YOU SHOULD KNOW
Dial tone is not heard when you lift the handset or press the [Speaker] button.
Check if the handset and phone line are correctly connected to each port of the phone.
(Refer to ‘Connecting Lines to the Phone’ section of ‘Preparation’ in this guide.)
Nothing appears on the LCD screen while the phone is being used.
BASIC FEATURES
Check if the phone line is correctly connected to the port of the phone.
(Refer to ‘Connecting Lines to the Phone’ section of ‘Preparation’ in this guide.)
The phone does not ring and volume is too low.
CONVENIENT FEATURES
Press the [TVolumeS] button to adjust the volume.
(Refer to ‘Volume Adjustment’ section of the ‘Things You Should Know’ section in
this guide.)
Conversation quality is reduced due to noise and echo.
APPLICATION MENUS
If you are using the speakerphone, lift the handset and try speaking.
Excessive echo is emitted during a page announcement or with Auto Answer set.
ANNEX
If phones are too close to each other, sound from one speaker might echo during
a page or on auto answer call.
Maintain a reasonable distance(about 1 m) between phones.
134
© SAMSUNG Electronics Co., Ltd.
PREPARATION
An alarm does not ring at the programmed time.
- Check the current time is set on the phone correctly.
If the current time setting needs to be changed, contact your System Administrator.
THINGS YOU SHOULD KNOW
- Check if an alarm is set.(Refer to ‘Setting Alarm Reminders’ in the
‘Application Menus’ section of this guide.)
Caller IDs are not displayed on the LCD screen.
- Confirm with your System Administrator that the caller ID service is available from
your telephone company.
- If the caller blocks the sending of their caller ID, the caller ID will not be displayed.
BASIC FEATURES
- If the caller makes a call from an area where the caller ID cannot be provided
(e.g., international calls), the caller ID will not be displayed.
- If the caller makes a call from a public phone, the caller ID will not be displayed.
- If the caller ID received from the Telephone Company is corrupt, the caller ID will
not be displayed.
CONVENIENT FEATURES
- If the Telephone Company does not send a caller ID, the caller ID will not be
displayed.
APPLICATION MENUS
ANNEX
© SAMSUNG Electronics Co., Ltd.
135
PREPARATION
Product Specifications
The specifications and features of the DS-5021D/5014D Digital phone are as follows.
Specification
THINGS YOU SHOULD KNOW
Items
Model
DS-5021D
Weight(kg)
Size(mm)
1.1
266(width)×206(length)×119(height)
Operating Temperature(°C)
0 to 45
Operating Humidity(%)
Number of the
DS-5014D
10 to 90 non condensing
21
14
[Programmable] buttons
BASIC FEATURES
Navigation Buttons
O
Speakerphone
Full Duplex mode
LCD
2 Line LCD
24 characters long : English
CONVENIENT FEATURES
CLASS B (Digital device or Peripheral)
APPLICATION MENUS
This equipment has been tested and found to comply with the limits for a Class B digital
device, pursuant to International Standards EN55022, and EN61000, Part 15 of the FCC
Rules and Australian Standard AS/NZS3548. These limits are designed to provide
reasonable protection against harmful interference in a residential installation.
This equipment generates, uses and can radiate radio frequency energy and, if not installed
and used in accordance with the instructions, may cause harmful interference to radio
communications. However, there is no guarantee that interference will not occur in a
particular installation. If this equipment does cause harmful interference to radio or
television reception, which can be determined by turning the equipment off and on, the user
is encouraged to try to correct the interference by one or more of the following measures:
ANNEX
- Reorient or relocate the receiving antenna.
- Increase the separation between the equipment and receiver.
- Connect the equipment into an outlet on a circuit different from that to which the receiver is
connected.
- Consult the dealer or experienced radio TV technician for help.
136
© SAMSUNG Electronics Co., Ltd.