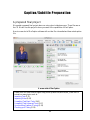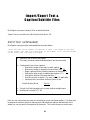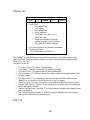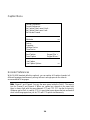
1
(Macintosh OS X)
Closed Captioning/Subtitling Software
[Includes patented [#6,895,166] software engine}
MacCaption-Live, WebPlus, Classic, DV, NLE, DTV-M/A, DTV & HD
Complete closed captioning and subtitling
preparation & encoding software
MacCaption Encoder-DV, Classic, NLE, DTV & HD
Closed captioning and subtitling encoding software
User’s Guide
Version 5.0.1
August 2009
MacCaption does the entire captioning and subtitling processes, from text entry, positioning and
time coding to encoding DV, NLE, MPEG-2, HD and video residing on the hard drive without
using a closed caption encoder.
This manual covers all features of all versions of MacCaption. Please check the feature
comparison chart for the features available in the version you are licensed to use. You can
always upgrade your software to a higher version, in most cases, by paying the difference in the
price of the software you are licensed to and the price of the software you like to upgrade to.
Computer Prompting & Captioning Co.
The Industry Leader Since 1985
1010 Rockville Pike, Suite 306
Rockville, MD 20852 USA
[email protected]
www.cpcweb.com
voice (301) 738-8487
fax (301) 738-8488
Information in this document is subject to change without notice. Copyrighted names used herein
are the property of their respective owners. No part of this document may be reproduced or
transmitted in any form or by any means for any purpose, without the express written consent of
CPC.
Copyright ©1985-2009, CPC
MacCaption® is a registered trademark of CPC.
2
Table of Contents
OVERVIEW .................................................................................................................... 6
Video Tutorials and Support ....................................................................................................... 6
WebEx Training .......................................................................................................................... 6
One Price - Both Platforms (Mac and Win)................................................................................ 7
Captioning Process at a Glance................................................................................................... 9
Captioning Digital Videos .......................................................................................................... 9
Subtitling Digital Videos .......................................................................................................... 12
Feature Comparison .................................................................................................................. 12
HARDWARE REQUIREMENTS ................................................................................... 14
Operating System Required ...................................................................................................... 14
CPC Protection Key (Key)........................................................................................................ 14
Compatible DV Decks & NLE Systems ................................................................................... 14
MacCaption DTV-M, DTV and HD Enterprise ....................................................................... 19
MacCaption DTV-A, DTV and HD Enterprise ........................................................................ 19
SOFTWARE INSTALLATION ...................................................................................... 20
Installing MacCaption software ................................................................................................ 20
CPC Protection Key (Key)........................................................................................................ 20
HASP Driver Installation .......................................................................................................... 20
CAPTION/SUBTITLE PREPARATION ........................................................................ 21
A prepared final project ............................................................................................................ 21
The Captioning Process ............................................................................................................ 23
The Edit Window ...................................................................................................................... 23
Now Let’s Get Your Feet Wet .................................................................................................. 26
Retrieve Captions ...................................................................................................................... 39
Roll-up Captioning.................................................................................................................... 40
Suggested Styles and Conventions ........................................................................................... 43
SPECIAL TOPICS ........................................................................................................ 44
Captioning a Commercial Spot ................................................................................................. 44
Caption up to 4 Channels .......................................................................................................... 45
Batch Processing ....................................................................................................................... 45
Multiple Language Option ..................................................................................................... 47
Assemble Captions.................................................................................................................... 49
Command Line.......................................................................................................................... 51
3
IMPORT/EXPORT TEXT & CAPTION/SUBTITLE FILES............................................ 56
ASCII Text (unformatted)........................................................................................................ 56
ASCII Text (formatted)............................................................................................................ 57
ASCII Text Files (Tab Delimited) ............................................................................................ 57
Caption Center Files (.tds) ........................................................................................................ 58
Captions, Inc. Files (.cin) .......................................................................................................... 59
Cheetah Caption Files (.asc) ..................................................................................................... 60
Cheetah Caption Files (.cap) ..................................................................................................... 60
CPC-715 Online Files (.onl) ..................................................................................................... 60
DVD Caption Files (.scc) .......................................................................................................... 60
QuickTime/Podcast Closed Caption File (.srt) ......................................................................... 61
EBU Subtitle File (.stl) ............................................................................................................. 61
Ultech Files (.ult) ...................................................................................................................... 61
Exporting ASCII Text Files ...................................................................................................... 62
Using International Character Sets with MacCaption .............................................................. 63
Preparing Foreign Language Text ............................................................................................ 63
EXPORTING CAPTIONS/SUBTITLES ......................................................................... 65
DV – 720x480 video ................................................................................................................. 66
NLE 720x486 Videos ............................................................................................................... 68
MPEG-2 (DVD) 720x480 Video .............................................................................................. 73
MPEG-2 (DTV/ATSC) ............................................................................................................. 74
HD Tapes .................................................................................................................................. 75
HD/SD Captioning using Matrox MXO2 ................................................................................. 78
HD/SD Captioning using AJA Kona ........................................................................................ 81
Add Subtitles to Digital Videos ................................................................................................ 86
Adding Captions to Videos for Webcasts ................................................................................. 88
Flash Video. .............................................................................................................................. 88
YouTube/Google Video ............................................................................................................ 90
QuickTime Text Track .............................................................................................................. 91
QuickTime Movie ..................................................................................................................... 92
Real Video ................................................................................................................................ 93
Windows Media Video ............................................................................................................. 95
IMPORTING CAPTIONS ............................................................................................... 97
Retrieve Captions from a DV Movie ........................................................................................ 97
Retrieve captions from an NLE 720x486 movie ...................................................................... 97
Retrieve captions from a MPEG-2 movie................................................................................. 98
Retrieve captions from HD movie ............................................................................................ 98
Capture Video ........................................................................................................................... 99
CAPTIONING WITH AN EXTERNAL ENCODER ....................................................... 100
Hardware Encoders Supported by MacCaption ...................................................................... 100
What to do if your Mac doesn’t have a Serial Data Port ........................................................ 101
Tape to Tape with a Transcript ............................................................................................... 101
Live Captioning ...................................................................................................................... 101
4
MENUS ....................................................................................................................... 103
Preferences .............................................................................................................................. 103
File Menu ................................................................................................................................ 107
New Window/Close Window ................................................................................................. 107
Edit Menu................................................................................................................................ 111
Display Menu .......................................................................................................................... 113
Subtitle Menu .......................................................................................................................... 123
Time Code Menu .................................................................................................................... 125
Format Menu ........................................................................................................................... 128
Special Menu .......................................................................................................................... 131
Windows Menu ....................................................................................................................... 136
Help Menu .............................................................................................................................. 137
Suggestions for Breaking Lines .............................................................................................. 139
Selecting Multiple Caption Text Boxes .................................................................................. 140
Moving Caption Text in the Movie Window.......................................................................... 141
Suggested Styles and Conventions ......................................................................................... 141
TROUBLE SHOOTING .............................................................................................. 142
Proper QT Movie .................................................................................................................... 142
Capturing Bad DV Movie ....................................................................................................... 142
Movie Time Code vs. Simulated Time Code.......................................................................... 142
Transferring files between Mac and PC.................................................................................. 143
BlackMagic Hardware & Final Cut Pro.................................................................................. 143
Losing First Caption ............................................................................................................... 144
APPENDIX ................................................................................................................. 145
Description File ....................................................................................................................... 145
5
Overview
This manual covers all features of all versions of MacCaption. Please check the feature
comparison chart later in this chapter and also the most recent chart at
www.cpcweb.com/caption_common/MacCaption-Features.pdf for the features available in
the version you are licensed to use.
Video Tutorials and Support
Knowledge base documents, Updates and Upgrades
•
•
•
Video Tutorials: www.cpcweb.com/tutorial
Forum: www.cpcweb.com/forums
Updates and Upgrades: www.cpcweb.com/free_updates
WebEx Training
CPC conducts training sessions for both MacCaption and CaptionMaker on a regular basis.
There are separate training sessions for beginning, intermediate and advanced users... For more
information, check the page: www.cpcweb.com/training.
Telephone Support Contract
Free five (5) hours of support following three (3) months from date of purchase of CPC software.
Free two (2) hours of support following one (1) month from the date of purchase of a CPC
software update.
You can buy additional support from the following plan. If you sign up for additional software
support at the time of purchase of the software, pay only 50% of standard support fees listed at
www.cpcweb.com/support/support-costs.pdf
6
One Price - Both Platforms (Mac and Win)
Whether you work with Mac or Windows, we have a solution for you. When you purchase
MacCaption, you will receive a USB key that will work with both Windows and Mac captioning
software.
If you decide to work on Windows, you can easily download and install the Windows software
by clicking on our downloads page: www.cpcweb.com/download.
Two flavors – Complete and Encoding only
MacCaption comes in two flavors, MacCaption and MacCaption Encoder, and they are available
for most versions of MacCaption.
MacCaption is a caption/subtitle editor and closed caption/subtitle encoder. It allows you to do
a complete captioning/subtitling job from start to finish. It accepts text from a variety of sources.
MacCaption lets you edit, position, and synchronize the captions/subtitles with video using time
code. It then combines the captions/subtitles with the video as open captions, closed captions or
subtitles, and allows you to save them in a number of different formats. MacCaption supports
drop frame as well as non-drop frame NTSC/PAL video.
MacCaption Encoder does not have caption/subtitle preparation and editing capabilities. It is
closed caption/subtitle encoding software only. It requires a prepared caption/subtitle file from a
different source such as CPC CaptionMaker (full version), MacCaption (full version) or other
caption preparation software. After you import a prepared file, you can encode captions/subtitles
to a video as open captions, closed captions or subtitles, and it allows you to save the file in a
number of different formats. MacCaption Encoder supports drop frame as well as non-drop
frame NTSC/PAL video.
Complete Preparation and Encoding Software
You can enter/import raw text, format and timecode captions, and encode captions to multiple
formats and multiple media – with each of the below software packages.
Live (Realtime captioning, Live text streaming)
Caption live video using speech recognition software or a steno machine. Also stream text on the
web for live events.
WebPlus (Caption preparation, Web video-on-demand, Live text streaming, DVD, Realtime
captioning)
If webcast (QT, WMP, Flash, YouTube, Real) and DVD captioning are your main needs,
WebPlus is your solution. It lets you prepare captions for web video-on-demand. You can also
use it for live text streaming and live broadcast captioning, with your choice of caption inputs,
including: speech recognition, steno, pre-scripted text, and traditional keyboard text entry.
7
Classic (WebPlus + Post caption using CC hardware interface)
Do you own a hardware closed caption encoder? If so, the Classic version is designed for you. It
lets you enter, position and time-stamp captions, and it encodes captions with a hardware
encoder. The Classic is compatible with most manufacturer’s hardware closed caption encoders.
DV (Classic + Caption/subtitle for DV video)
If you work with DV 720x480 video and use FireWire to transfer the video in and out of the
computer, DV is for you.
NLE (DV + Caption/subtitle 720x486 NLE video)
If you edit with uncompressed 720x486 video with FCP, Avid, Adobe Premier, etc. and use
AJA, Blackmagic or other NLE hardware to transfer uncompressed video in and out of the
computer, choose NLE.
DTV-M (SD/HD captioning with Matrox MXO2)
If you own a Matrox MXO2, DTV-M is designed for you. It has easy to use caption entry,
positioning and time-stamping features. It lets you export captions to all HD and SD formats.
DTV-A (SD/HD captioning with AJA Kona)
If you own an AJA Kona 3 or LHi, DTV-A is designed for you. It has easy to use caption entry,
positioning and time-stamping features. It lets you export captions to all HD and SD formats.
DTV (SD/HD captioning with MXO2, Kona, and BlackMagic DeckLink; plus Webcast & DVD
captioning)
It has easy to use caption entry, positioning and time-stamping features, plus it lets you export
captions to all HD and SD formats. It can also export files for webcast captioning and DVD
captioning/subtitling.
HD Enterprise (All features included)
Are you a major captioning provider? If so, HD Enterprise is your designated software. It
contains every captioning feature CPC offers, allowing you to meet virtually any captioning
requirement today… and in the future. Its unique features include XDCAM HD, DVCPRO-HD,
MPEG-2 with Manzanita, Assemble captions from EDL.
Encoding Only Software
Do you already have a formatted and timecoded caption file from a caption service provider? If
so, our encoder only software is the right choice for you.
Classic Encoder (Classic + but without caption preparation option) [formerly CPC-710]
If clients provide you with time-stamped caption files, and you just need to encode captions with
a hardware encoder, Classic Encoder is your economical caption software solution.
DV Encoder (DV but no caption preparation option)
If you only need to do caption encoding because your clients provide a time-stamped caption
8
file, and you go in and out of your NLE with FireWire, then DV Encoder will encode your
captions with software only – no hardware encoder required.
NLE Encoder (NLE but no caption preparation option)
Same as DV encoder, plus encodes uncompressed 720x486 video.
DTV Encoder (DTV but no caption preparation option)
Same as NLE encoder, plus encodes SD and HD videos using Matrox MXO2, AJA Kona 3 or
BlackMagic HD.
HD Enterprise Encoder (HD but no caption preparation option)
Same as NLE encoder, plus captions HD materials.
Note: Encoder versions only allow 40 changes (key strokes & a limited number of other
things) to an imported file.
Captioning Process at a Glance
To caption a video, you need to go through the following steps:
Captioning is a three-step process.
• Transcribe the video.
• Caption file creation; this is when the timing and placement of the captions are done.
• Encoding process; the caption data is encoded on to the video for display on TV sets with
built-in closed caption decoder, or using an external decoder.
Captioning Digital Videos
(No generation loss)
If you are dealing with digital videos, once the caption file has been created, you have three
distinct options for creating your captioned master directly on the hard drive without using a
closed caption encoder hardware.
If you are dealing with 720x480 DV25 or DV50 (compressed) video, or MPEG-2 video, you
choose the DV and MPEG-2 route. No need for any Non-Linear system. On the other hand if
you are using a Non-Linear system and want to work with 720x486 uncompressed video, then
you choose the NLE route. For HD video, there are a few options.
9
Captioning DV Video
If your original digital video is a DV video, and you transfer the video to a tape via FireWire,
then the DV function will work well. MacCaption can create a copy of your 720 x 480 DV video
file with the caption data in the VAUX data area. You would need a caption compatible DV deck
or a Sony DVMC-DA2 digital to analog (in case you want a BetaSP or Digibeta) converter to
dump the DV video on a tape.
For details on compatible hardware for DV video, visit
www.cpcweb.com/dv/dv-hardware.htm#Sony_DVMC-DA2
You can then use the MacCaption’s “print to video” function to get a closed captioned version of
the video out to tape.
Captioning MPEG-2 (SD & DVD) Video
You can also add captions to the data area of all SD (720x480 or so) and DVD MPEG-2 video
directly, without using an NLE system. After adding captions to a DVD MPEG-2 video you can
burn a DVD.
After adding captions to a SD MPEG-2 video, you can store the video on your video data server,
and transmit the video to a different location. Captions are going to stay in the data area of the
video.
Captioning MPEG-2 (HD) Video
MacCaption (including the demo version) can decode/retrieve both 708 and 608 captions from
MPEG-2 transport streams, including ATSC DTV broadcast streams. You can verify that your
stream is compliant with FCC regulations and that the 708 captions are encoded properly.
MacCaption-HD ties into Manzanita’s multiplexing software to generate 708/608 closed captions
in CableLabs-compliant HD MPEG-2 transport streams (requires Manzanita software to be
installed separately) for tapeless delivery to networks and VOD.
Users without Manzanita software can add captions to generic MPEG-2 Elementary and Program
streams. The MPEG-2 can be SD or HD. Captions can be formatted in any one of the following
styles: ATSC DTV 608/708, DVD, CCube/LSI DVx 608 Linear or CCube/LSI DVx 608
Temporal. SCTE20-style 608 captions can also be decoded.
Captioning NLE Video
The advantage of a non-linear solution is that you can work with your 720x486 uncompressed
video and add captions without losing any quality.
The editing software package that you use to create the video is not as big of a concern as the
hardware path used to get the video off of your system and onto the tape. Some hardware boards
10
/ break-out boxes will ignore the caption data. See the link
www.cpcweb.com/nle/nle-hardware.htm for a list of compatible NLE systems.
Captioning HD Video
Using Matrox MXO2
MacCaption can encode and decode HD captions to and from any HD or SD decks using the
Matrox MXO2 and HD-SDI, SDI, or Analog I/O. MacCaption exports a file which you then
drag onto your Final Cut Pro timeline. It can then be played out in real time without any
rendering needed. The MXO2 can also up/down/cross-convert any video format to any other
format while maintaining the captions.
Using AJA Kona
MacCaption DTV and HD Enterprise software now works with the AJA KONA 3 and LHi cards
along with Final Cut Pro 7 to create HD closed captions. This means AJA users that edit with
Final Cut Pro 7 can utilize MacCaption to create HD closed captions.
Panasonic DVCPRO HD
Captions can be added to DVCPRO-HD .mov (QuickTime) files. You need to use MacCaptionHD to print the captioned video via FireWire to a compatible VTR such as a Panasonic AJHD1400.
SONY XDCAM HD
MacCaption-HD can decode and encode captions from Sony XDCAM MXF files (1080i and
720p) which came from a Sony XDCAM HD deck or the Sony XDCAM Transfer tool for Final
Cut Pro.
Sony XDCAM EX and HDV decks currently do not support HD captioning.
Omneon Server
MacCaption can export a caption encoded DVCPro HD file for playback to the Omneon Server.
Captioning Webcasts
MacCaption can generate captions for video on the web for players like QuickTime, Podcast,
iTune, Flash, Google, YouTube, RealVideo and Windows Media. For sample webcasts with
captions, check the link: www.cpcweb.com/webcasts/webcast_samples.htm.
11
Subtitling Digital Videos
Adding Subtitles to DV
MacCaption can add subtitle to a DV video and print the video to a tape via FireWire.
Adding Subtitles to DVD
MacCaption can generate subtitle files for use with DVD Studio Pro and Spruce, Sonic and
Scenarist DVD authoring systems.
Adding Subtitles to 720x486 NLE Video
MacCaption can add subtitles directly to a 720x486 NLE video, or transfer subtitles to a 720x486
NLE video using a 720x486 black video with subtitles.
Adding Subtitles to DV-2000 and DV-3000
MacCaption can generate subtitle files for use with Ultech DV-2000 (SD) and DV-3000 (HD).
Adding Subtitles using Apple XML file
With MacCaption software, you can export an Apple XML file, which can be brought into Final
Cut Pro to subtitle a video residing inside Final Cut Pro.
Adding Subtitles to Digital Video
With MacCaption-NLE you can add subtitles to a digital video. You can add subtitles to most
movies that can be displayed by MacCaption. Video can be of any size 320x240 to 720x480.
Features include multi-language capability, border around characters, translucent backgrounds,
proportionally spaced fonts, kerning, and line spacing.
Adding Subtitles to TI DLP using CineCanvas XML File
With MacCaption-NLE & MacCaption-HD you can add subtitles to a digital cinema using Texas
Instruments DLP Cinema Technology. MacCaption can export a CineCanvas XML file. This file
can be used to create very sharp subtitles on Digital Cinemas.
Feature Comparison
The chart below shows the details of the capabilities of all MacCaption versions. For an up-todate listing, check www.cpcweb.com/caption_common/MacCaption-Features.pdf.
12
* Encoder versions cannot prepare or edit caption text/timing. Limited keystrokes allowed for
last minute fixes. Encoder versions can only export captions from a pre-prepared caption
formatted file.
** DTV version can caption SD MPEG-2 videos (up to 720x480).
High definition videos will have watermarks inserted.
Import:
Plain Text files
Industry standard caption files
Retrieve captions from existing video
Caption Preparation*:
Transcribe & Time Stamp videos
Formatting & Editing
CLI & Batch Processing
Assemble Captions (conform to FCP .xml)
Export Captions:
Plain Text files
All caption formatted files
DVD closed captions (.scc)
DV (720x480) video (for DVCAM, miniDV, etc.)
MPEG-2 708/608 captions
Line 21 CC ("Black Movie") for SD 720x486
Line 21 CC (Matrox 4VANC) for MXO2
HD-SDI 708/608 via Matrox MXO2
QuickTime DTV 708/608 track for AJA Kona
XDCAM-HD .mxf, DVCPRO-HD .mov
Manzanita Mux HD MPEG-2 Transport Stream
Export for Web:
Flash. QT. YouTube, WMV, Real etc.
Live Text Stream
Export Subtitles:
DVD subtitles (DVDSP, Encore, etc.)
Apple XML Subtitles
Advanced subtitles (Scenarist, Blu-ray BDN)
Subtitles with Alpha channel
Hardware Encoder Support:
Live Captioning for broadcast
Post Captioning w/SMPTE timecode from tape
Live
Web
Plus
Classic
DTVM/A
DV
DTV
HD
Enterprise
√
√
√
√
√
√
√
√
√
√
√
√
√
√
√
√
√
√
√
√
√
√
√
√
√
√
√
√
√
√
√
√
√
√
√
√
√
√
√
√
√
√
√
√
√
√
√
√
√
√
√**
√
√
√
√
√
√
√
√
√
√
√
√
√
√
√
√
√
DTV-M
DTV-M
DTV-A
√
√
√
√
√
√
√
√
√
√
√
√
√
√
√
√
√
√
√
√
√
√
√
√
√
Live
Web
Plus
√
√
Classic
√
√
DV
√
√
DTV
√
√
HD
Enterprise
√
13
DTV-M
Hardware Requirements
Operating System Required
•
•
Macintosh OS X “Leopard” 10.5
QuickTime 7.0
CPC Protection Key (Key)
A CPC Protection Key (USB type) is supplied with MacCaption software. The Key must be
attached to a USB port on the computer for MacCaption to work. MacCaption is protected by
this hardware.
Warning: If you lose the CPC Protection Key, you will not be able to run the software!
You will have to pay a hefty price to replace it. You may move the Protection Key from
computer to computer, allowing different users to operate the MacCaption software on
different computers, but only one user may run the software at a time.
Compatible DV Decks & NLE Systems
MacCaption-DV
MacCaption-DV works with both DV25 and DV50 video. You can create your DV video in any
NLE system or simply import from a video tape format.
Up-to-date List: For most recent list of caption compatible DV decks, please check
www.cpcweb.com/dv/dv-hardware.htm.
After you caption a 720x480 DV video sitting on your hard drive, using Windows or Mac CPC
software, you need to dump the video to a tape format via FireWire using any DV or mini-DV
deck.
Caption data sits in the VAUX Data area of a 720x480 DV video. On the other hand, caption
data sits in Line 21 of NTSC (525 lines) video. When you transfer the DV video to NTSC, you
must use a deck which can transfer the caption data from the DV VAUX data area to the NTSC
Line 21.
14
We have tested the following decks and media converters, which do the job successfully. If your
deck is not listed below, you can use the compatibility check below to test your deck.
DV Decks - Caption Compatible (partial list)
•
•
•
•
•
•
Panasonic AJ-D650, AJ-D455
SONY DHR-1000
SONY DSR-11, DSR-20, DSR-30, DSR-40, DSR-80
SONY GV-D300 portable
SONY DCR-TRV110, TRV720, TRV820 Digital8 camcorder
JVC DV-3000
Sony DVMC-DA2 Media Converter - Caption Compatible
Converts Analog Video to Digital Video, or Digital Video to Analog with timecode information.
Sony brings a new media converter that allows to convert analog signal, such as 8mm or VHS to
a digital video signal that is output to i.LINK/FireWire interface.
DV Decks - Not Caption Compatible (partial list)
The following video decks and video cameras do not do the proper transfer of caption data onto
NTSC video. But you can still record closed captioned DV video using any DV video deck,
including the ones below, even though you cannot play back the video with captions from these
decks. This is a subtle, but important distinction.
•
CANON XL-1 camcorder
•
SONY DSR-PD100
•
SONY DSR-85
•
Panasonic AG-DV1000
Note from a Sony Rep. on DSR 45, 50 and 85:
The DSR-45 does output Closed Captions only in NTSC and only on the monitor out connector.
Not the component, main video or S-Video outputs. There is no
magic mod to my knowledge to turn this on and it has been asked for previously to my
recollection.
By the way, among the DVCAM products, CC only exists in NTSC machines or NTSC mode.
The DSR-85 never supported Closed Captioning, the DSR-45 as you now know only outputs CC
on the monitor output and the DSR-50 only outputs CC on the video output. All the other
DVCAM machines basically output Closed Captioning. The POSC Group at 800-883-6817 has
this information in their FAQ database.
Please refer the customer to the Sales brochure and maybe give a heads-up to
the other Sales people who may need to know this gotcha. Sorry again for
the bad news.
15
The Sony Business Solutions & Systems Product Operations Support Center:
http://bssc.sel.sony.com/BroadcastandBusiness/minisites/HDV/support.shtml
DV Compatibility Check 1
There are many other DV hardware devices which work with CPC CaptionMaker and
MacCaption/CCaption. To check whether your specific hardware is caption compatible or not,
you can do the following test.
Take a commercial video with closed captions and save it via FireWire on your hard drive. Now
print the video out of your computer via FireWire to your DV hardware and then finally to a TV
with its closed caption decoder turned on. If you see captions, your hardware is caption
compatible.
DV Compatibility Check 2
Download one of the following videos (295 MB) which are already captioned using CPC
software
Demo_DV_720x480_CC.mov (QT mov)
CPCDemo_DV_720x480_CC.avi (avi)
and open the video in your NLE system or any software which allows you to dump the video via
FireWire to your deck. Now connect the deck to a TV with its closed caption decoder turned on
and output the video. If you see captions, your hardware is caption compatible.
MacCaption-NLE
MacCaption can add captions directly to video using NLE systems. After adding captions to a
720x486 video with an NLE system you typically write the final video to video tape. You output
the 720x486 video from your NLE system to NTSC videotape using the hardware associated
with your NLE system.
Up-to-date List: For most recent list of caption compatible NLE Systems, please check
www.cpcweb.com/nle/nle-hardware.htm.
NLE Hardware
Caption data sits in 720x486 video in Row 0 or Row 1 depending on the NLE system. In NTSC
(525 line) video caption data sits in Line 21. When you transfer the video to NTSC, you must
use an NLE system that can transfer the caption data from Row 0 or Row 1 of 720x486 video to
NTSC video Line 21. The following NLE systems can do this, which makes them caption
compatible. Caption data for use with NLE systems is stored in the following locations:
16
NLE Systems
Primary
Row
AJA Io LA *
1
AJA KONA *
2
AJA KONA (alternate) *
1
AJA KONA LH/Lhe, LS/LSe *
2
AJA KONA LH/Lhe, LS/LSe (alternate)* 1
Avid ABVB
0
Avid ABVB (alternate)
480
Avid Adrenaline
0
Avid Adrenaline (alternate)
1
Avid DS Equinox
1
Avid Express Pro
1
Avid Meridien
1
#
Blackmagic DeckLink
1
Blackmagic DeckLink (alternate) *
2
Leitch DPS Velocity
1
#
Matrox DigiSuite
1
Media 100
1
#
NewTek Video Toaster 3 & 4
1
Sony XPRI
1
TARGA 1000-3000
1
Starting
Column
24
24
24
24
24
35
35
22
35
26
26
26
26
26
26
30
26
19
26
26
* Works with Mac Final Cut Pro
#
Works with Windows Adobe Premier
The Primary Row is the row number, 0 – 484, where caption data is placed in a 720x486 video
for use within an NLE system. The Starting Column is the middle pixel number, 14 – 40, of the
first caption run-in white small dashed line of the caption placed onto the Primary Row.
NLE Compatibility Check 1
There may be other NLE hardware devices which work with CPC CaptionMaker and
MacCaption software. To check whether the CPC software works with your specific hardware,
you can do the following test.
Take a commercial video with closed captions and save it uncompressed via your video
input/output device (not FireWire) on your hard drive. Now send the uncompressed video out of
your computer to a TV with its closed caption decoder turned on. If you see captions, your
hardware is most likely compatible.
NLE Compatibility Check 2
You can download one of the two sample NLE 720x486 black videos containing closed captions
which were created with CPC software:
MOV files for a number of NLE systems:
17
http://www.cpc-usa.com/1ccaption/NLE_MOV_Exports.zipAVI files for a number of NLE
systems:
http://www.cpc-usa.com/1ccaption/NLE_AVI_Exports.zip
Chose either the mov or the avi zip file, unzip it and choose the appropriate mov or avi file for
your system. Open the video in your NLE software and output the video via your video
input/output device (not FireWire) to your video deck. For details, click here. To see the
captions, you would need a TV with its closed caption decoder turned on. If you see captions,
your NLE hardware is compatible.
NLE Systems Not Listed Above
Closed Caption data sits on Line 21 in NTSC (525 line) video. Captions sits on 720x486 NLE
video somewhere on row 0 through Row 2 depending on the NLE system. When you transfer
the 720x486 video to NTSC, you must use an NLE system which can map the caption data from
Row 0, 1 or 2 of 720x486 video to Line 21 of NTSC video.
CPC created a calibration video (7:30 minutes). The closed caption content of the first 5 seconds
of the calibration movie is "Row 0, Col 14" and it is generated with primary row set to 0 and
starting column set to 14; the next 5 seconds of the movie has the CC content of "Row 0, Col 15"
and is generated with primary row set to 0 and Starting Column set to 15. This shifting continues
through Row 0 and Column 40 at which time it shifts to Row 1 Column 15. The last movie
segment is Row 4 Column 40.
Please download and play one of the following caption encoded calibration videos (created with
different codecs) from www.cpcweb.com/blackmovie on your NLE system and print the video
through your NLE hardware (not FireWire), you would be able to determine the preset values
(row/column) for your NLE system.
•
Avid Meridian Codec (Adrenaline, Symphony)
•
Uncompressed 8 bit 422 (AJA, Blackmagic, Premiere, Final Cut)
•
QuickTime Animation (Generic Codec)
•
Apple ProRes 422 (Final Cut Studio 2)
Finding row/column
Download and unzip the Caption Encoded Calibration QuickTime movie that corresponds with
your NLE sequence codec settings. (A matching codec can cut down or avoid render time)
Import the caption encoded calibration movie into your NLE system. For Avid, import
720x486/Non-Squared/Upper Field First)
For details on how to find the row and column for your NLE system, please check the page
www.cpcweb.com/blackmovie
If do not see any captions at all, your NLE system is not caption compatible. And if you do see
captions, you need to pick a row and column value pair from the numbers you see. To avoid
errors, you pick the mid-value of all visible column numbers. In this example it is C 25. So the
preset NLE values for your NLE system is Primary Row: 0 and Starting Column: 25. Once you
18
have determined these values, you can use these values in the CPC software and caption your
videos using your NLE system.
MacCaption DTV-M, DTV and HD Enterprise
As of July 2009, you can use Matrox MXO2 to caption your SD and HD videos. For details on
MXO2, click on http://www.matrox.com/video/en/products/mxo2.
For details on how MXO2 works with MacCaption, click on http://www.cpcweb.com/mxo2.
MacCaption DTV-A, DTV and HD Enterprise
As of August 2009, you can use AJA Kona 3 or LHi to caption your SD and HD videos. For
details on AJA Kona, click on http://www.aja.com/products/kona/.
For details on how they work with MacCaption, click on http://www.cpcweb.com/hdtv/aja.htm.
19
Software Installation
Installing MacCaption software
Inside the CD you will find a file similar to MacCaptionV5.0.hqx. V5.0 reflects the version of
the software available at the time of writing this manual. Your version might be different. Install
the software the same way you install any other Mac software. After installing MacCaption
software, you have to install the driver for the CPC software protection key. Follow the steps
below.
CPC Protection Key (Key)
A CPC Protection Key (USB type), also known as Dongle, is supplied with MacCaption
software. The CPK must be attached to a USB port on the computer for MacCaption to work.
MacCaption is protected by this hardware.
Warning: If you lose the CPC Protection Key, you will not be able to run the software!
You will have to pay a hefty price to replace it. You may move the Protection Key from
computer to computer, allowing different users to operate the MacCaption software on
different computers, but only one user may run the software at a time.
All CPC software is protected by a USB hardware key. The HASP driver can be found on the
CD or can be downloaded from www.cpcweb.com/download/MAC_HASP_driver.zip.
The hardware key is manufactured by Aladdin. The most recent driver for the keys may be found
at the following link: http://www.ealaddin.com/support/hasp/hasp4/enduser.asp.
HASP Driver Installation
CPC software distribution CD has a folder: HASP_Setup_ForMacOS-X containing a file
HaspDriverForMacOS-9-X.sit.hqx
After you run the Hasp driver software you are ready to run MacCaption. You must have the
USB CPC software protection key attached to a USB port.
20
Caption/Subtitle Preparation
A prepared final project
We created a prepared final project demo.cca using a short video demo.mov. These files are on
the CD. We will use this project to show you some of the capabilities of MacCaption.
Here is screen shot of MacCaption software with a video file a formatted and time coded caption
file.
A screen shot of MacCaption
Please check the video tutorial page at http://www.cpcweb.com/tutorial/mac_index.htm for
tutorials on many topics such as
Importing Text (2:11)
Importing Video (0:58)
Formatting Text Basic Tools (3:43)
Formatting Text Advanced Tools (5:07)
Synchronizing Captions (Timing) (3:39)
Checking your Timing (2:18)
21
You may also download the most recent manual and project files described below from the
downloads page: www.cpcweb.com/download/mac-download.htm to get a complete picture of
how MacCaption works from start to finish.
You may download the files below to get a complete picture of how MacCaption works.
a. Overall picture - Installation - Import/Exports:
www.cpcweb.com/demo/MacCaption_demo_Instructions.pdf
b. Step by step instructions to prepare a caption file:
www.cpcweb.com/demo/Prepare_Captionfile_MacCaption.pdf
c. Demo text and completely prepared caption files (5 KB)
www.cpcweb.com/download/MacCaption/Demo.zip
d. Complete MacCaption manual (in PDF format)
www.cpcweb.com/download/MacCaption/MacCaptionTutorial.pdf
e. Sample DV_720x480.mov (295 MB)
www.cpc-usa.com/1ccaption/DemoDV720_480_MOV/Demo_DV_720x480_CC.mov
To get an idea of how the text is broken up into individual captions or subtitles, you may open
the project demo.cca and invoke AutoSync. To accomplish this,
Run the MacCaption software.
1. Drag the demo.cca file to anywhere inside the MacCaption application.
2. Click on the Autosync button in the Control Mode section under the Movie Area
You will see the video being played on the screen and captions will appear on the video. You
will notice
1. Captions are placed at different locations on the screen
2. Captions in Italics
3. Three different modes of captions – Pop-on, Paint-on and Roll-up
4. All available accented characters for Spanish, French, German, Portuguese, Italian and
Dutch, and a few special characters
The video is about a minute and a half long. There are about 30 captions in all. This project is a
very complex one covering almost all possible scenarios you will encounter in captioning your
videos. We did this to illustrate the capabilities of MacCaption.
If you follow the instructions below, you will be able to create a project like demo.cca in an hour
(we hope). After you master it, it should not take more than 6-10 minutes to caption a very
complex 1-1/2 minute job such as this demo.
To caption a video, you must have the script of the video in hand before starting the caption
processes. To format and time Roll-up captions, (since it does not involve any positioning),
typically it takes about 2 to 3 times the length of the video. To format and time Pop-on captions,
it can take anywhere between 6 to 8 times the length of the video.
22
The following instructions will show you how to open a text file and a video file, format the text
into individual captions, and then time stamp each caption to synchronize the captions with the
video. After you are done, you should be able to produce a project file like demo.cca.
The Captioning Process
This section concentrates on formatting, positioning, and timing. We also discuss the three
display modes for captioning: Pop-on, Paint-on and Roll-up.
Caption Display Modes
There are three display modes for closed captions: Pop-on, Paint-on and Roll-up.
Roll-up captioning is the easiest to learn. Plus it takes less time to caption a video in the Roll-up
mode than in the Pop-on or Paint-On modes. If you want to caption a video quickly, use the Rollup mode. Roll-up captions are typically used for videos involving one person on the screen –
such as a lecture and training videos.
The Pop-on mode is normally used for movies, sit-coms, and videos when several people are on
the screen simultaneously. Pop-on captions will pop on the screen one caption at a time.
The Paint-on mode is rarely used. It is similar to the Roll-up mode. All three modes can be used
within the same captioning job.
The Edit Window
The Edit Window is the focal point of the activity in MacCaption. The Edit Window contains the
Movie Area and the Caption Text Area plus control and status information about the captions
currently being edited.
The Movie Area
The large rectangle on the left side of the edit window is the Movie Area. You can open a movie
by dragging it into the Movie Area and can edit captions by directly typing into the Movie Area.
You can drag various sized movies into the Movie Area but they must be capable of being
played back with a QuickTime software codec. MacCaption does not support hardware video
playback. The current movie time is displayed just above the right corner of the Movie Area. In
order to create a DV movie with closed captions the Movie Area must contain a standard DV
720x480 movie.
The buttons below the movie area can be used to play the movie at continuous play, at 1, 10 or
30 frames (= to 1 second) at a time (forward or reverse).
23
In addition to clicking on these buttons, you can use your keyboard to do the same things.
To go forward or back by 1 frame: press right or left arrow keys.
To go forward or back by 10 frames: press Control + right or left arrow keys.
To go forward or back by 30 frames: press Shift + right or left arrow keys.
Video Control Hotkeys
You can also use the standard J, K, and L keys to control playback of the video. The “J” key will
rewind the video at a progressively faster rate the more you press it, the “K” key will play and
pause the video, and the “L” key will forward the video at a progressively faster rate the more
you press it.
The Caption Text Area
The Caption Text Area occupies the right side of the Edit Window. By dragging a text file or a
data file into the Caption Text Area you can import caption text into MacCaption.
The upper part of the Caption Text Area displays the Starting Time, Horizontal and Vertical,
Justification and Display Mode of the currently selected caption. You can set the Horizontal
Position, Vertical Position, Justification, or Display Mode of the currently selected caption or a
range of captions with these controls.
Located below the status information for the currently selected caption are a number of controls
that allow you to format a caption. Starting at the left side are three controls with the letters L, C
and R. Each of these controls can be set to one of three justification modes with its associated
pull down menu. These controls along with their respective pull down menu will format the
current caption or a selected range of captions to be Left, Center or Right justified, and within
the caption the individual lines will be left, center or right justified. The respective L, C or R
buttons are grayed when the justification of the currently selected caption matches the
justification associated with the button.
The
and
controls to the immediate right of the R button move caption text to the top and
bottom of the caption area.
The
and
Underline.
The
,
controls will respectively change the current caption's selected text to Italic and
,
, and
controls will respectively insert, delete, split and merge captions.
There are also in and out buttons, which are used to assign time codes to each caption.
24
Edit Window Controls
To edit text, make sure the Edit button is checked as shown below.
But when you want to Time Stamp the captions or AutoSync (to be explained later), you have to
check the check the appropriate button. This is also where you go into Live Caption mode.
Formatting
Even though the text import option will do basic formatting per your instructions, you still need
to do more fine tuning. We will use the following icons to fine tune the formatting.
Caption Creation and Deletion Operations:
Insert Row - Insert a blank caption before the currently selected caption
Delete Row - Delete the currently selected caption
Split Row - Split the currently selected caption into two captions at the insertion point
Merge Row - Merge the currently selected caption with the caption following it
Caption Text Formatting Operations:
Pull First Word - Pull the first word from the next caption into current caption
Push First Word - Push the last word from current caption into the next caption.
Compress Text Block - Compress the line length of the currently selected caption
Expand Text Block - Expand the line length of the currently selected caption
Alternate Break - Select an alternate line break word in the currently selected caption
Positioning
Position captions to appropriate places on the screen by clicking on the left, right, center, top and
bottom icon.
The icons used for these purposes are
25
Directly above these icons, there are three drop-down menus which can be used to perform the
same tasks, but more precisely.
Caption Display Modes
The desired mode for post production captioning is Pop-on. We will discuss Pop-on first. At the
end of the chapter you will find how to format for Roll-up mode which is much simpler than
Pop-on mode. After selecting a caption or a number of captions, you may change the caption
display mode to any one of the three display modes by clicking on the Display Mode area.
Now Let’s Get Your Feet Wet
Opening the video file
Go to File menu and select Open movie.
(You may also drag the video file Demo_DV_720x480_CC.mov to the video area on the left
side)
Select video file Demo_DV_720x480_CC.mov.
Proper QT Movies: QT DV video must be 29.97 fps and audio must be either 32KHz for 4
12-bit audio channels or 48KHz for 2 16 bit audio channels. There are no exceptions to
these rates. The video must be compressed with DV codec. If the video and audio rates
are incorrect, you can fix it using QuickTime Pro by re-exporting the file with proper
video/audio rates.
Note: You can also control the video with the left and right arrow buttons below the video
and also the standard J, K and L keys.
Transcription of the video file
Transcribing text with a foot pedal control
vPedal works with iTunes (Mac). See the link for details: |www.vpedal.com/download.html.
26
It also works with OS X Mac applications by using the OMNI application:
|www.vpedal.com/omni.php.
Note: Although it is technically possible, we strongly recommend that you do not try to
transcribe the video within MacCaption. MacCaption works most efficiently, if you
transcribe the video as a text document in your favorite word processor and then import
the file to MacCaption. MacCaption will automatically break the text into individual
captions in split seconds - saveing lots of time.
Caption File Creation
First you will need the transcript of the video. The transcript simply needs to be a plain text file.
No special formatting is necessary. There are several ways to get the transcript of your
production:
You can use a foot pedal control like vPedal from www.vpedal.com.
Or, you can use speech recognition software such as MacSpeech from www.macspeech.com or
ViaVoice. After training the speech recognition software, you listen to the video and repeat the
dialogue into the microphone. At the beginning, you are going to get lot of errors. But you can
teach the software to fix the errors and down the road you can expect to get about 95% accuracy.
Once you’ve obtained the script of the show, you import the text into our software. Our software
will automatically break up the text into caption blocks with about 80% accuracy. You can easily
do the final 20% manually using our software.
Working with vPedal
To control videos using the vPedal you must first download the plug-in for the media player you
will be using to play your videos. There are plug-ins for QuickTime and iTunes available for
download at http://www.vpedal.com and also an Omni plug-in that allows vPedal to work with
any program.
Transcribing Using QuickTime Videos
•
Download the QuickTime Player plug-in at:
http://www.vpedal.com/QuickTime.php
•
After you’ve installed it, double click the vPedal Player icon
•
Then click on the File menu and choose Open
27
•
There are no settings or configurations you need to setup. The vPedal will operate the
play, pause, forward, and rewind functions of the video
•
When you hit pause, and then resume again, the video will skip back 1 second so you do
not have to rewind
•
To change this skip time to something longer than the 1 second default, go to vPedal
Player >> Preferences and change the value in the Auto-backup time field
•
To change how fast the video plays, change the Default forward/rewind rate field
•
Now open up a TextEdit file or a Word document and begin transcribing. If you want to,
you can resize the video and your Text Editing window so that the two or side by side.
Text file formats
You can use text files in one of the following formats.
1. The unformatted demo.txt file provided for this video looks like this
I'M AT THE LEFT OF THE SCREEN. SO CAPTIONS OF WHAT I SAY APPEAR
AT THE LEFT OF THE SCREEN, TOO. NOW I'M AT THE RIGHT OF THE
SCREEN, SO MY CAPTIONS APPEAR AT THE RIGHT. NOW I AM GOING OFFSCREEN. TO INDICATE THAT I'M OFF-SCREEN, WHATEVER I SAY IS
ITALICIZED. NOW MY NAME APPEARS AT THE BOTTOM OF THE SCREEN, WE
PUT CAPTIONS OF WHAT I SAY AT THE TOP, SO THAT MY NAME IS NOT
COVERED BY CAPTIONS. UP UNTIL NOW, WE HAVE BEEN USING POP-ON
CAPTIONS. WHEN A NEW CAPTION POPS ON, THE OLD CAPTION DISAPPEARS.
THIS IS A PAINT-ON CAPTION. ONE CAPTION BLOCK IS PAINTED ON THE
SCREEN, FROM LEFT TO RIGHT, ONE CHARACTER AT A TIME. NOW THE
ROLL-UP MODE. THIS MODE IS NORMALLY USED FOR TV NEWS PROGRAMS.
CAPTION LINES ROLL UP FROM THE SCREEN BOTTOM ONE LINE AT A TIME.
Captions can appear in lower case, and also in Spanish: ¿Dónde
está el niño? Está en la casa. And in French: Parlez-vous
français? Répétez, s'il vous plaît. THE FOLLOWING SPECIAL
CHARACTERS ARE ALSO AVAILABLE. á é í ó ú à è ì ò ù ä ë ï ö ü â ê
î ô û THEY INCLUDE THE MUSIC SYMBOL AND ACCENTED CHARACTERS. ç ã
ñ õ å ¿ ¡¢ £ ¥ © ® ™ ° ß §
2. Formatted text where each line of text is formatted as one caption.
I'M AT THE LEFT OF THE SCREEN.
SO CAPTIONS OF WHAT I SAY
APPEAR AT THE LEFT OF THE SCREEN, TOO.
NOW I'M AT THE RIGHT OF THE SCREEN,
SO MY CAPTIONS APPEAR AT THE RIGHT.
NOW I AM GOING OFF-SCREEN.
TO INDICATE THAT I'M OFF-SCREEN,
WHATEVER I SAY IS ITALICIZED.
28
NOW MY NAME APPEARS AT THE BOTTOM OF THE SCREEN,
WE PUT CAPTIONS OF WHAT I SAY AT THE TOP,
SO THAT MY NAME IS NOT COVERED BY CAPTIONS.
UP UNTIL NOW, WE HAVE BEEN USING POP-ON CAPTIONS.
WHEN A NEW CAPTION POPS ON, THE OLD CAPTION DISAPPEARS.
THIS IS A PAINT-ON CAPTION.
ONE CAPTION BLOCK IS PAINTED ON THE SCREEN,
FROM LEFT TO RIGHT, ONE CHARACTER AT A TIME.
NOW THE ROLL-UP MODE.
THIS MODE IS NORMALLY USED
FOR TV NEWS PROGRAMS.
CAPTION LINES ROLL UP
FROM THE SCREEN BOTTOM
ONE LINE AT A TIME.
Captions can appear in lower case,
and also in Spanish:
¿Dónde está el niño? Está en la casa.
And in French:
Parlez-vous français? Répétez, s'il vous plaît.
THE FOLLOWING SPECIAL CHARACTERS ARE ALSO AVAILABLE.
á é í ó ú à è ì ò ù ä ë ï ö ü â ê î ô û
THEY INCLUDE THE MUSIC SYMBOL AND ACCENTED CHARACTERS.
ç ã ñ õ å ¿ ¡¢ £ ¥ © ® ™ ° ß §
(Notice that each line is formatted to be one caption)
29
Opening a Text File
Note: Besides opening a simple free format text file, you can also import many other
text files with time codes and caption files. For details, see the chapter entitled Importing
Text and Caption File.
In this section we will describe how to format the text for Pop-on captioning.
Roll-up Captioning: Since Roll-up captioning is the easiest mode of captioning, check
the end of this chapter for instructions to create roll-up captions.
Go to the File menu and select Import captions. Select Plain Text File format.
(You may also drag the text file demo.txt to the text area on the right side)
Select the file demo.txt. A Text Import Options window will pop up.
•
Treat each line of text as one caption.
(Text may include an optional tab delimited in and out time code)
•
Combine text lines to form captions.
o Maximum number of text rows for each caption: 1
o Maximum number of characters for each line of text: 29
o Begin caption with the following sequence of characters: >
o End caption with an end of sentence punctuation: (.?!)
o End caption with the following character: }
o End last row with a comma (,) or semi-colon (;) if applicable.
o Square up text if more than oneline of text in a row.
Default Display Mode
•
•
Pop-On
Convert UniCode characters such as open quote to straight quote.
Read text as Unicode (UTF-16)
If you are working with English or any European languages, make sure you do not check the box
•
Read text as Unicode (UTF-16)
30
You need to check this box only when you work with Chinese (Traditional or Simplified),
Japanese (Hiragana or Katakana) or Korean (Hangul).
If you do have a file like option 2 above where each line is pre-formatted as an individual
caption, you should the check the box
•
Treat each line of text as one caption.
and MacCaption is going to import each line as an individual caption.
Cells
1
2
3
4
5
6
7
8
9
10
Captions
I'M AT THE LEFT OF THE SCREEN.
SO CAPTIONS OF WHAT I SAY
APPEAR AT THE LEFT OF THE SCREEN,
TOO.
NOW I'M AT THE RIGHT OF THE
SCREEN
SO MY CAPTIONS APPEAR AT THE
RIGHT.
NOW I AM OFF-SCREEN.
TO INDICATE THAT I'M OFF-SCREEN
WHATEVER I SAY IS ITALICIZED.
NOW MY NAME APPEARS AT THE
BOTTOM OF THE SCREEN,
WE PUT CAPTIONS OF WHAT I SAY AT
THE TOP,
Note: File format described in Option 2 is not recommended. MacCaption will break long
individual text lines into multiple lines arbitrarily. Use file formats described in option 1.
You will have much better control to break the text into individual captions to your liking
as described below.
On the other hand, most of the time text is going to be unformatted as shown in option 1 above.
In that case you should have the box checked as shown below:
•
Combine text lines to form captions.
Check the Maximum number of text rows box. Choose 2 text rows for Pop-on/Paint-on or
1 text row for Roll-up. For this tutorial choose 2.
Check the Maximum number of characters box. The usual number of characters per line
is 26 for Pop-on/Paint-on or 29 for Roll-up. For this tutorial choose 26.
31
Check the End caption at end of sentence punctuation: (.?!) box for all caption modes
Pop-on/Paint-on/Roll-up. For this tutorial, check the box.
For Pop-on/Paint-on captions, check the End a row at a comma (,) or semi-colon (;) if
applicable box. For Roll-up, leave this unchecked. For this tutorial, check the box.
Check the Square up text box. It makes the captions of more than 1 line squared up.
Click OK
Before we start formatting, positioning and time coding the individual captions, let’s get familiar
with the most frequently used icons used in that process. All of these icon operations can be
accessed from the menus and almost all of these operations can also be accessed via keystrokes.
With the knowledge of all the operations described above, let’s format the text, and assign time
codes to each caption.
After you import the text file, the file will be automatically formatted per your instructions as
follows:
Cells
1
2
3
4
5
6
7
8
9
10
11
12
13
14
15
16
Captions
I'M AT THE LEFT
OF THE SCREEN.
SO CAPTIONS OF WHAT I SAY
APPEAR AT THE LEFT OF THE
SCREEN, TOO.
NOW I'M AT THE RIGHT
OF THE SCREEN,
SO MY CAPTIONS APPEAR
AT THE RIGHT.
NOW I AM OFF-SCREEN.
TO INDICATE THAT I'M
OFF-SCREEN,
WHATEVER I SAY IS ITALICIZED.
NOW MY NAME APPEARS
AT THE BOTTOM OF THE SCREEN,
WE PUT CAPTIONS OF WHAT I
SAY AT THE TOP,
SO THAT MY NAME IS NOT
COVERED BY CAPTIONS.
UP UNTIL NOW, WE HAVE
BEEN USING POP-ON
CAPTIONS.
WHEN A NEW CAPTION POPS
ON,
THE OLD CAPTION DISAPPEARS.
THIS IS A
PAINT-ON CAPTION.
32
17
18
19
20
21
22
23
24
25
26
27
28
29
30
31
32
ONE CAPTION BLOCK IS
PAINTED ON THE SCREEN,
FROM LEFT TO RIGHT, ONE
CHARACTER AT A TIME.
NOW THE ROLL-UP MODE.
THIS MODE IS NORMALLY
USED FOR TV NEWS PROGRAMS.
CAPTION LINES ROLL UP
FROM THE SCREEN BOTTOM ONE LINE
AT A TIME.
Captions can appear in
lower case,
and also in Spanish: ¿Dónde
Está el niño?
Está en la casa.
And in French:
Parlez-vous français?
Répétez, s'il vous plaît.
THE FOLLOWING SPECIAL
CHARACTERS ARE ALSO
AVAILABLE.
á é í ó ú à è ì ò ù ä
ë ï ö ü â ê î ô û THEY INCLUDE
THE MUSIC SYMBOL
AND ACCENTED CHARACTERS.
ç ã ñ õ å ¿ ¡ ¢
£ ¥ © ® ™ ° ß §
Formatting
Let’s do a few of the operations using the following icons associated with Rows 2 and 3:
Pull First Word - Pull the first word from the next caption into current caption
Push First Word - Push the last word from current caption into the next caption.
Compress Text Block - Compress the line length of the currently selected caption
Expand Text Block - Expand the line length of the currently selected caption
Alternate Break - Select an alternate line break word in the currently selected caption
The formatting operations are quite intuitive. After a little practice, you will get a hang of it. Try
to reproduce the following:
2
3
SO CAPTIONS OF
WHAT I SAY APPEAR
AT THE LEFT
OF THE SCREEN, TOO.
The goal is to make each and every caption as readable as possible. Go through the entire file
and try to come close to the demo.cca file provided.
33
Caption limitations: Closed caption technology allows no more than 32 characters on
a line, and a maximum of 4 lines of text on one screen.
Delete/Insert/Merge/Split Cell(s)
As you go through the formatting process, you may need to add or delete a cell, or sometimes
merge two cells, or split one cell into two. Use the following icons for this purpose:
Insert Row - Insert a blank caption before the currently selected caption.
Delete Row - Delete the currently selected caption.
Split Row - Split the currently selected caption into two captions at the insertion point.
Merge Row - Merge the currently selected caption with the caption following it.
Positioning
The default caption position is the bottom center of the screen. You may need to re-position
some captions to the left, right, top or any other locations on the screen.
.
The icons used for these purposes are
In this video the first three captions are placed at the left bottom since the speaker is located at
the left of the screen. Select the first three cells by clicking and dragging the mouse, and then
click on the
icon to set all of them to the left.
You may also drag each caption on the screen to any location you want.
Attribute
When there is an off-screen narrator, it is customary to italicize the captions. Highlight one or
more captions and Click on the
icon to italicize all of them.
Roll-up Caption
The default mode for MacCaption is the Pop-on mode. To change the caption mode for the
following cells
19
20
21
22
NOW THE ROLL-UP MODE.
THIS MODE IS NORMALLY
USED FOR TV NEWS PROGRAMS.
CAPTION LINES ROLL UP
FROM THE SCREEN BOTTOM
ONE LINE AT A TIME.
34
to the Roll-up mode, you first need to make sure that there is only one line of text per cell. (The
Roll-up mode is the only caption mode that requires that there be only one line of text per cell).
Use the Split Cell
following way.
icon or Insert Cell
icon to create new cells and modify the text in the
NOW THE ROLL-UP MODE.
THIS MODE IS NORMALLY
USED FOR TV NEWS PROGRAMS.
CAPTION LINES ROLL UP
FROM THE SCREEN BOTTOM
ONE LINE AT A TIME.
Music Symbol
The last character in the file is a music symbol. From the demo.text file it is imported as .
Replace the character by \m. You will see \m will be replaced by a symbol that looks like a
music symbol. You may also choose the music symbol from the Attribute menu.
A Useful Trick
Let’s do a special trick to split a caption into two. Let’s start with a caption cell like this:
24
¿Dónde Está el niño?
Está en la casa.
On the video area, double click on the first line of captions. It will turn to gray. Now click on it
and drag it to the left and a couple of lines up. This is how you can place portions of a single
caption cell into different locations on the screen.
Time Stamping
Now is the time to synchronize the captions with the video. This is done by pressing the [+] key.
Reassignment of [+] Key: Besides the [+] key, you may also choose one of the
function keys F1 through F12 from the Preference menu for time stamping.
Make sure to take these steps before you begin time stamping:
•
Click on the first text cell
•
Position the movie slider below the video to the beginning of the movie. Click on the
Time Stamp button in the Control Mode section.
35
Listen to the audio and press the [+] key on the right hand side of the keyboard at the appropriate
time to match the text on the current cell with the audio. MacCaption continues playing the
movie, records the time code, and automatically advances to the next caption. Keep on pressing
the [+] key to time stamp all captions. If you make a mistake, move the video slider bar to the left
a little and press the [+] key again at the right moment.
Proceed in this manner through your entire movie.
Time Stamp Frame Adjustment is inside the Preference menu. This feature can
compensate for your reaction time when pressing the [+} key to time code a caption file –
as long as your reaction time is consistent. For example, if you consistently press the [+]
key 10 frames after the time it should ideally be pressed to sync the audio and captions,
then set the time frame adjustment to –10. The software will automatically subtract 10
frames from the time code each time you press the [+] key, thereby compensating for
your 10 frame lag time.
Caution: if there are multiple users of the software, and each has a different reaction time,
you should reset the Time Stamp Frame Adjustment to zero after each use of the software
so as not to throw off the timing of the next user!
In addition to the [+] key, there are also in and out buttons that can be used to assign time codes
to each caption.
When the in button is pressed, it marks the start time of the caption, just as the [+] key does.
The end time of the caption can be marked in two ways:
1) Pressing the in button to mark the in time of the next caption which will also be out time of
the previous caption2) Pressing the out button will also mark the end time of the caption. This is
also used to wipe captions off the screen when there is no dialogue.
Another way to wipe captions off the screen when there is no dialogue is to create a blank line
with no captions with its own in time or in and out time.
36
AutoSyncing
To check your work – formatting, positioning, time stamping, you need to check the Autosync
button as shown below:
The video will start playing and you will see the captions displayed on top of the video at the
time you assigned.
If, after checking the placement of the captions, you notice any timing or positioning is not
correct, click the Stop button under the Movie Area. Then click on the caption block before the
one you need to fix and press the Time Stamp button. When the movie starts to play again, you
can assign the new time code by pressing the in button again. You can repeat this step as many
times as necessary until the caption appears at the desired time. The time code can also be
adjusted manually by clicking in the time code field and entering the desired time code with the
number keys.
Exporting Video with Captions
After you create a caption/subtitle file, you are ready to export caption or subtitles to multiple
media. To export, go to the file menu and click Export. Choose the desired format and select the
desired options.
MacCaption can export closed captions and open captions for a number of different uses.
Caption Formatted Files
• CPC-715 ".onl" file use CPC-715 ".onl" File. This file can be used with the Windows
based CPC CaptionMaker® software.
• MacCaption Closed Caption “.mcc” document that contains both 608/708 closed caption
data for HD/SD equipment such as the Harris Nexio server, use the MacCaption VANC
data file (.mcc) file option.
• Cheetah “*.asc” file, use Cheetah International (.asc) file option.
• Cheetah “*.cap” file, use Cheetah International (.cap) file option.
• DVD closed caption data file, use DVD File (.scc) file option.
• Caption Center “*.tds” file, use Caption Center (.tds) file option.
• Caption, Inc. “*.cin” file, use Captions, Inc. (.cin) file option.
• Evertz Procap text file, use Evertz Procap (.txt) file option.
• Ultech “*.ult” file, use the Ultech (.ult) file option.
Webcast Group
• RealVideo RealText file use RealText ".rt" File.
37
•
•
•
•
•
•
•
Windows Media Player file SAMI (version 6 or version 7, 8, 9 and 10), use Windows
Media Player.
Timed Text DFXP file for Flash, use the Flash XML for CS3 [Timed Text DFXP] (.xml)
file option.
Flash Captionate plug-in, use the Flash XML for Captionate (.xml) file option.
Flash text file with timecode, use the Flash Text (.txt) file option.
SRT for YouTube or Google Video, use the YouTube (.srt) file option.
QuickTime SMIL and Text file, use the QuickTime (.txt, smi) file option.
Tab delimited plain text file, use the export Plain Text file option and select the
appropriate settings for tab separators.
Multi Language Export
• Merge import template for translators and editing text in a word processor, use the For
Multiple Language file option.
Caption Formatted Video Files
• MPEG-2 (DTV/ATSC) movie, use ATSC DTV 608/708 Closed Captions (to MPEG2).
(for transport stream multiplexing select the Manzanita option in the pop-up window,
Manzanita multiplexer must be installed in your Applications folder).
• DV, use DV/DVCPRO 720x480 (25/50) Closed Captions file option.
• DV (open caption), use NLE >> Video with Open Captions.
• Add SD closed captions using Premiere, Final Cut Pro, Avid, Media 100 or TARGA
hardware, use Black 720x486 NLE Movie with Closed Captions. (editing timelines in the
non-linear editing system must be set to 720x486 for this option).
• 720x486 NLE QuickTime Movie directly, use CCIR 601/4:2:2 P@ML Video with
Closed Captions.
• MPEG-2 (DVD) movie, use DVD closed captions (to MPEG-2).
• MXF file for playback on an XDCAM HD Sony VTR, use HD>Material eXchange
Format (.mxf) file option.
• 4VANC closed captions to a QuickTime video file for playback on the Matrox MXO2,
use the HD>Matrox 4VANC Closed Captions file option. (MacCaption can add an 8th
audio track to your existing QuickTime video file with the proper 4VANC closed caption
data)
• 4VANC audio file for importing into a Final Cut Pro timeline, use the HD>Matrox
4VANC Closed Caption option and de-select “create closed caption output movie using
currently opened movie”.
• 608/708 QuickTime Closed Caption Track to QuickTime Video File for playback on the
AJA Kona cards, use the QuickTime DTV 608/708 Closed Caption Track file option.
• Add 608/708 closed caption data to a DVCPRO HD (100) QuickTime file compatible
with a FireWire DVCPRO 1400 Panasonic VTR or Omneon Server, use the
HD>DVCPRO HD (100) .mov closed captions file option.
• Add 608 closed captions to any QuickTime file for playback on QuickTime Player,
iTunes, iPod/iPhone, use the Web/Podcast>QuickTime Closed Caption (Podcast/Web)
file option.’
38
•
Add a QuickTime Text Track to a QuickTime file, use the Web>QuickTime Text Track
file option.
Exporting Video with Subtitles
To export, go to the file menu and click Export. Choose the desired format and select the desired
options.
MacCaption can export subtitles for a number of different uses.
•
•
•
•
•
•
•
For Final Cut Pro, use Apple XML file to be
For single frame per subtitle movie use Black Movie with Single Frame Subtitles
For multiple frame per subtitle movie use Black Movie with Multiple Frame Subtitles
For DVD subtitle for DVD studio Pro, Spruce, Scenarist data file use DVD Subtitles File.
For MPEG movie use MPEG Movie with Subtitles
For QuickTime file, use the Web >> QuickTime Subtitle Track file option.
Texas Instruments DLP file for Cinema viewing, use the Texas Instruments DLP Cinema
XML (.xml) file option.
Check the online help and also the Chapter on Exporting Files in the later part of this manual for
details.
Retrieve Captions
MacCaption can display and decode video and its associated closed captions, plus capture the
closed captions as a text file with timecodes from a
• 720x480 DV video residing on the hard drive
• 720x486 NLE video residing on the hard drive
• MPEG-2 Transport/Program Stream video residing on the hard drive
• DV tape via FireWire
• DVD-Video VOB file or MPEG-2 ripped from DVD-Video.
• DVCPRO HD QuickTime File (Captured FireWire or through Omneon Server)
• MXF XDCAM HD File
• MXF Harris Nexio Teletext DV File
• SD/HD video via Matrox MXO2 4VANC Audio File
• QuickTime/Podcast 608 Closed Caption Track
• QuickTime File with Text Track
• SD/HD via AJA Kona 608/708 QuickTime Track
• HD via BlackMagic 10 bit uncompressed QuickTime file
39
To watch a real time analog TV broadcast with captions on your computer, connect the analog
video and audio output from a VCR (connected to the broadcast signal) to the analog video and
audio input of your DV camera or DV VCR and connect the Digital/FireWire output of your
camera to your computer.
You may use the retrieved caption data to edit the captions or create a DVD video with captions
or export caption files for video-on-demand Webcasts for QT, WMP or RealPlayer.
Roll-up Captioning
A Roll-up Captioning Exercise: Since Roll-up captioning is the easiest mode of
captioning, the following section is devoted to all the information you need to caption a
video in Roll-up mode.
Roll-up captioning is a good starting point because it is the easiest method to learn and use. With
a minimum of time and effort, you can actually do some real captioning using the Roll-up mode.
We will use the same the text file, demo.txt, and the video file demo.mov for this tutorial.
In Roll-up captioning, each row in the Work Area equals one caption line of up to 32 characters.
First, enter the dialogue that is on the video into any word processor. Save the file as a text file.
MacCaption can import a text file.
Next we will show how the text is broken up into individual captions automatically, with each
new caption starting at the end of sentence punctuation points (.?!).
To have MacCaption automatically break the text so it can be used for Roll-up captioning,
choose the following Text Import Options.
Check the Maximum number of text rows box. Choose 1 text row for Roll-up.
Check the Maximum number of characters box. The usual number of characters per line
is 29 for Roll-up.
Check the End caption at end of sentence punctuation: (.?!) box.
(32 is the maximum # of characters per line. See note below why choose 29)
Note on formatting: The selection of Each Row made of [1 ] line(s) of text is
extremely important. You must always select 1 line per row (cell) when captioning in the
Roll-up mode.
40
The above choices will result in:
1. Each row of text will contain only one line.
2. As many words as possible are placed into each caption cell, until the number of
characters in the words reaches a maximum of 29. Once that limit is reached, the next
word becomes the first word of the following caption.
3. The only exception to the above occurs at the end of a sentence. The first word of a new
sentence will always become the first word of a caption. The reason for this is that
captions typically correspond to naturally occurring pauses in speech. At the end of a
sentence, there is always a pause.
In the example that follows, the second caption consists of only one word, “SCREEN.” The
reason of course is that it is the last word of the first sentence.
Up to this point text has been imported into the MacCaption, and we have a text file
automatically broken up into individual captions.
The Import Option choices will format the text as follows.
Row
1
2
3
4
5
6
7
8
9
10
11
12
13
14
15
16
17
18
19
20
21
22
23
24
25
26
27
28
29
30
31
32
33
Captions
I'M AT THE LEFT OF THE
SCREEN.
SO CAPTIONS OF WHAT I SAY
APPEAR AT THE LEFT OF THE
SCREEN, TOO.
NOW I'M AT THE RIGHT OF THE
SCREEN, SO MY CAPTIONS
APPEAR AT THE RIGHT.
NOW I AM GOING OFF-SCREEN.
TO INDICATE THAT I'M
OFF-SCREEN, WHATEVER I SAY
IS ITALICIZED.
NOW MY NAME APPEARS AT THE
BOTTOM OF THE SCREEN, WE
PUT CAPTIONS OF WHAT I SAY
AT THE TOP, SO THAT MY NAME
IS NOT COVERED BY CAPTIONS.
UP UNTIL NOW, WE HAVE BEEN
USING POP-ON CAPTIONS.
WHEN A NEW CAPTION POPS ON,
THE OLD CAPTION DISAPPEARS.
THIS IS A PAINT-ON CAPTION.
ONE CAPTION BLOCK IS
PAINTED ON THE SCREEN, FROM
LEFT TO RIGHT, ONE
CHARACTER AT A TIME.
NOW THE ROLL-UP MODE.
THIS MODE IS NORMALLY USED
FOR TV NEWS PROGRAMS.
CAPTION LINES ROLL UP FROM
THE SCREEN BOTTOM ONE LINE
AT A TIME.
Captions can appear in
41
34
35
36
37
38
39
40
41
42
43
44
45
46
47
48
49
lower case, and also in
Spanish: ¿Dónde está el
niño?
Está en la casa.
And in French: Parlez-vous
français?
Répétez, s'il vous plâit.
THE FOLLOWING SPECIAL
CHARACTERS ARE ALSO
AVAILABLE.
á é í ó ú à è ì ò ù ä ë ï ö
ü â ê î ô û THEY INCLUDE
THE MUSIC SYMBOL AND
ACCENTED CHARACTERS.
ç ã ñ õ å ¿ ¡ ¢ £ ¥ © ® ™ °
ß ∫
For instructive purposes, we purposely inserted two sections in which the text should be further
refined to improve the appearance of the captions. The top of the file does not need any
refinements. The bottom of the file is further refined from lines 35 through 50 using Push and
Pull functions as shown below.
35
36
37
38
39
40
41
42
43
44
45
46
47
48
49
50
Spanish:
¿Dónde está el niño?
Está en la casa.
And in French:
Parlez-vous français?
Répétez, s'il vous plâit.
THE FOLLOWING SPECIAL
CHARACTERS ARE ALSO
AVAILABLE.
á é í ó ú à è ì ò ù
ä ë ï ö ü â ê î ô û
THEY INCLUDE THE MUSIC
SYMBOL
AND ACCENTED CHARACTERS.
ç ã ñ õ å ¿ ¡ ¢ £
¥ © ® ™ ° ß ∫
We also need to change the Display Mode to Roll-up. Select the cells, click on the Display Type
and choose Roll-up 3 Lines. This will change all the cells to Roll-up 3. This selection will display
a maximum of 3 lines of captions on the video at any given time.
Notes on Roll-up captioning
1. Pop-on and Paint-on captions can be placed in any of 15 rows on the video screen and
can have a maximum of 32 characters. But Roll-up captions can be placed in only the
bottom 4 rows and top 4 rows on the video screen. To place Roll-up captions anywhere
within these allowable rows, you need to select the cell(s) and change the display mode to
Roll-up.
42
2. Roll-up captioning is available for 2, 3 or 4 lines of captioning. When you choose any
one of these modes, you will see a maximum of 2, 3 or 4 lines of text on the video
monitor. It is very important to note that in the Video Window of MacCaption, the
Roll-up mode does not appear to be a smooth roll up; this is due to technical reasons,
which we will not go into. But rest assured, when the video is encoded, the resulting
captions will appear as standard Roll-up captions.
3. If there is more than one person on the video screen, to distinguish the speakers, you
should use the following technique. Use the symbol
> for the first person and
>> for the second person
> for the third person (if exists) or for the first person.
The idea is use of > and >> alternatively distinguishes one speaker from the other.
> SPEAKER ONE TALKING
SPEAKER ONE STILL TALKING
SPEAKER ONE STILL TALKING
SPEAK ONE STILL TALKING
>> SPEAKER TWO TALKING
SPEAKER TWO STILL TALKING
> BACK TO SPEAKER ONE
SPEAKER ONE STILL TALKING
>> SPEAKER THREE TALKING
Now you know why we chose 29 as the maximum number of characters per line. If there
are more than one speakers in the video, you would need to 3 characters ‘>> ’. If there is
only one speaker, you may use 32 characters per line.
4. Keep in mind that the maximum number of characters you can fit in one line is 32. So if
you have an indentation of 4 characters (horizontal position = 5), and want to put one or
two > symbols to indicate a change of speakers, you should import the original text file
with no more than 25 ( = 32 – 4 – 3) characters per row.
To clear captioning from the screen when there is no one speaking for more than 3 seconds or so,
you can clear the captions by inserting blank a row.
Suggested Styles and Conventions
Caption Media Program (National Association of Deaf) has created a style guide, which is
available from www.cpcweb.com/download/CaptionKey.pdf.
This is a very helpful guide to understand the styles and conventions used to caption a video. We
strongly encourage you to read this document before producing captioned video.
43
Special Topics
Captioning a Commercial Spot
If you are captioning a short commercial this issue is very important. If you do not do it right the
first closed caption will not appear when your commercial is edited into the broadcast video
stream since the caption data associated with your commercial precedes your actual video
content and will not be there when your video is played.
When you export a DV movie with closed captions you should specify the lower limit for the
closed caption data. This is necessary because all of the closed caption data for certain types of
captions such as Pop-on must precede the display of the actual closed caption itself and for Rollup and Paint-on closed captions some caption data is placed a few frames before the start of the
caption's display.
If you are using pop-on captions and your movie time code starts at 0:59:00:00, your video
content starts at 1:00:00:00 and the first closed caption appears at 1:00:01:00, which is one
second into the video content, the actual closed caption data is placed into the DV movie before
the caption is scheduled to pop on at 1:00:01:00. In this case you would set the Caption Data
Lower Limit to 1:00:00:00 to force MacCaption to begin putting the closed caption data into the
movie no earlier than time code 1:00:00:00.
If you do not set a lower Limit within the actual video content area, you may lose the first
caption when the beginning of the video is edited out later.
Without the Caption Data Lower Limit the caption data might be placed a number of seconds
before the closed caption is scheduled to be displayed and the closed caption data could occupy
the portion of the movie containing bars and tone, the slate, or the countdown. Setting Lower
Limit assures that all of the closed captioning data is placed into the actual video content area of
the movie.
Within MacCaption, during closed caption generation the Message Window will display the
unadjusted time code of the first closed caption data byte. If this value is less than the value of
the Caption Data Lower Limit the closed caption data is automatically readjusted during movie
export to start at the Caption Data Lower Limit. If some adjustment is required the first and
possibly a few subsequent captions may not appear exactly where they have been timed to
appear.
As with all closed captioning be sure to verify the accuracy of your work by viewing a playback
of the final product.
44
Caption up to 4 Channels
You can caption all 4 caption channels in 4 different languages simultaneously as long as there is
enough space on the video to accommodate all 4 languages.
Note: Channel 1 and Channel 2 occupy the same space inside the Field 1. The same is
true for Channel 3 and Channel 4. When you caption two channels in the same field,
there is always fight with the space between CC1 and CC2. CC1 has the first priority.
Whatever space is left, is used by CC2. It is good idea to para-phrase the text and make it
short in both languages when you do CC1 and CC2 caption simultaneously.
There are four independent text editing areas in MacCaption. These are labeled Program A,
Program B, Program C and Program D. To switch between the different programs use the
Program pull down menu located at the top right corner of the main window.
For more details, see Encode Preferences under the Special menu and Duplicate Program under
the Edit menu in the Menu Chapter.
Batch Processing
The Batch function is used to perform a single repetitive import and export operation on a
number of files. A batch job can consist of the simple operation of extracting captions from a
series of QuickTime movie files and creating a .scc file for each of them or a more complicated
operation such as importing subtitles, putting them onto a second video and outputting the results
to a third video.
To select the batch function choose File > Batch or Command-B.
The Batch window consists of four separate functional areas:
The first area is the top half of the batch window. This is where the caption and subtitle source
and source files are specified. The Program A, Program B, Program C and Program D pop up
menus are used to select which programs are active and how caption and subtitle data is to be
imported into that program. Each export operation examines all four caption and subtitle
programs and imports data into those programs that require it. The CC1, CC2, CC3 and CC4 pop
up menus are used to specify which close caption data channel is to be extracted from the source
file. When extracting caption data from a MacCaption .cca file the CC1-4 selections are used to
choose which .cca program data, Program A – D, is to be extracted.
The second area is located in the middle of the bottom section of the batch window. This is
where the export operation is chosen.
45
The third area is located at the bottom left side of the batch window. This is where input
movies are selected for all export operations that require a source movie. The “Use current
open movie” check box selects the movie that is currently open in the main window. This
check box is hidden if no movie is open in the main window.
The fourth area is located at the bottom right side of the batch window. This is the output
area and is used to specify the output location for exported data.
The RUN button activates when all of the required information for an operation has been
selected. When information is needed a red text message is displayed and indicates what
information is required.
The CLEAR button removes all file names from the batch window.
Files in the Caption and Subtitle Source area and in Movie Source area can be selected by their
respective Choose button or by drag and drop. If a folder is dropped into a file acceptance area
only those files that have the appropriate file suffix are selected. Files are deleted by selecting
them and pressing the delete key.
Output file naming is automatic. The method of naming output files is chosen with the “Name
comes from” pop up menu. All output files are placed in a single output folder. The output folder
is chosen with the “Select Output Folder” button.
One output file is generated for each output file name. Usually there is a one to one
correspondence between each Caption and Subtitle Source entry, each Movie Source entry and
each Output file. During output, if there are fewer input files than output files the input file
source selection begins again starting with the first input file source.
A check of all output files is performed when the Run button is pressed. The run operation is not
performed if any output file is also an input file. Also, if any output file already exists the user is
given the opportunity to cancel the Run operation. Once batch is running all output files are
silently overwritten.
Some export operations require specific information, such as specifying the output compression
codec. This information will be requested once for each batch job and will then be used for all
subsequent processing on that batch job.
Examples:
To create Scenarist .scc files from 720x486 QuickTime movies:
1. Under Caption and Subtitle Source Program A: Select “NLE 720x486 Movie”
2. Choose or drag movies into the Program A files area
3. Under Export As: Select “Scenarist .SCC file”
4. Under Output File Naming “Name comes from”: Select “Program A”
5. Under Output File Naming: Use “Select Output Folder” and choose an output folder
6. Press RUN
46
To add close captions in previously prepared .cca files to DV QuickTime movies:
1. Under Caption and Subtitle Source Program A: Select “Use .cca File”
2. Choose or drag .cca files into the Program A files area
3. Under Export As: Select “NTSC DV 720x480 CC video”
4. Choose or drag DV movies into Movie Source files area
5. Under Output File Naming “Name comes from”: Select “Movie Source”
6. Under Output File Naming: Use “Select Output Folder” and choose an output folder
7. Press RUN
Multiple Language Option
This option is designed for people who have to caption or subtitle videos in multiple languages that they
themselves are not fluent in. If you have an English transcript and send that off to a translator, you will
get a translated text file back that you cannot time stamp because you do not know the language. On
the other hand, if you go through and time all the captions or subtitles in English and send a time coded
text file to a translator, they will not be able to match the time coded portions since words and phrases
cannot be translated directly like that. So in order to work with multiple languages in MacCaption you
will be time stamping the beginning of each portion of dialogue or scene so that the translator you are
sending it to can translate full sentences instead of single phrases. This way, you can retain the
important time stamps when sentences or dialogue begin, and the translator can translate on a
sentence by sentence or paragraph by paragraph basis.
The first step is to import an English transcript into MacCaption. After the English transcript has been
brought in, go through and time stamp the first caption of each sentence or piece of dialogue. This
should be done at your own discretion based on the scene you are watching. If you have a quick 3second scene where only 1 sentence is said before it switches to another scene you would want to time
stamp that. But if you have a long monologue, say 3 minutes or so, and the timing would be way off if
you only marked the beginning, then it would be a good idea to time code the beginning of each
sentence or time code your breaks at the points where the person pauses. Once you are finished, go to
File >> Export >> For Multiple Language and export the text file. This text file is what you will send to
your translator.
As an example, this is a segment that you might have in your text file:
00:09:12:07
On December 3rd, while Teodoro Petkoff, one of Rosales
campaign managers made a speech which effectively
committed and encouraged the loser to make a positive
response in the face of a crushing electoral defeat.
And this is what you might get back from your translator:
00:09:12:07
En medio de unas declaraciones de Petkoff que comprometieron
y apresuraron una respuesta positiva por parte del candidato
de “la negra”, ante la clara y contundente derrota electoral.
47
Now that you have a translated file with all the important time stamps marked, it's time to import. Go
to File >> Import >> For Multiple Language and select the translated text file. At the screen for Text
Import Options, use the option to “Treat each line of text as one caption” or if you exported a tab
delimited file use the option “Replace caption text by sequence number”. It will say to use this option
for importing text for Multiple Language. Once your file has been imported, go to Time Code >> Fill-In
All Caption Times and choose the first option to Fill-In time code values for the entire selected range
using the first row's Start Time, and the last row's Start Time and a calculated words per minute. The
captions or subtitles will then be filled-in with time codes based on the points you initially timed when
you went through the text the first time in English.
Alternately, a tab delimited file can be exported that contains no timecode information, but rather
has sequence numbers followed by a tab character and then text. Please see below for an
example of the tab delimited file for merge import and export.
1
2
3
4
5
6
7
8
9
10
11
12
13
I'M AT THE LEFT OF THE SCREEN.
SO CAPTIONS OF
WHAT I SAY APPEAR AT
THE LEFT OF THE
SCREEN, TOO.
NOW I'M AT THE RIGHT OF THE SCREEN,
SO MY CAPTIONS APPEAR AT
THE RIGHT.
NOW I AM OFF SCREEN.
TO INDICATE THAT I'M OFF
SCREEN,
WHATEVER I SAY IS ITALICIZED.
NOW MY NAME APPEARS AT THE
BOTTOM OF THE SCREEN,
WE PUT CAPTIONS OF WHAT I
SAY AT THE TOP,
SO THAT MY NAME IS NOT COVERED BY CAPTIONS.
UP UNTIL NOW, WE HAVE BEEN
USING POP-ON CAPTIONS.
WHEN A NEW CAPTION POPS ON,
This type of file export is called a tab delimited file because it uses tab characters to separate the
sequence numbers and the line brakes. When a text line is replaced with either a correction or a
translation, it can be re-imported into MacCaption without the need to adjust the timecode or
placement of the captions. This workflow is the same as that typically used to send to clients for
approval and spelling or grammar corrections, however it can also be used for translation
purposes.
For example, if you needed to make a change to the spelling or the script in line 11, we
recommend the following:
Original –
11
SO THAT MY NAME IS NOT
COVERED BY CAPTIONS.
Fix (change the word “by” to “with”) –
11
SO THAT MY NAME IS NOT
COVERED WITH CAPTIONS.
48
Once the change is made to the tab delimited file, it can be imported into MacCaption and
replace the existing line of text without compromising the timing or formatting. To do this,
simply drag and drop the new edited text file on top of your caption blocks on the left of the
MacCaption user interface. A window will pop-up asking if you would want to insert or replace,
Select replace. Finally, select “Replace caption text by sequence number” and press OK. You
will notice that line 11 now has the edited text according to the tab delimited file.
Assemble Captions
Assemble Captions is a feature that is very similar to an assemble edit feature in a non-linear
editing system. It is designed to import an edit decision list from Final Cut Pro via an Apple
Interchange Formatted XML file. With this function MacCaption can conform the caption edits
to the video edits in the Final Cut Pro timeline, provided that the original video clip being edited
has closed caption data.
Originally, this feature was conceived to solve the problem of editing digital video in the Final
Cut timeline without losing closed caption data. When editing video that contained closed
caption data, any rendering such as transitions, color correction, or compositing of graphics
would cause deletion of closed caption data. MacCaption’s Assemble Captions feature can find
the original captioning data and re-insert it into the final video after all the editing is completed.
Below is a list of practical applications of this feature:
-
Editing previously captioned SD and HD video clips
Combining two or more previously captioned clips in one timeline
Adding graphics to a captioned video clip
Editing a vendor master for web delivery without losing caption data
Color enhancing or correcting a video master after it has been closed captioned
Fixing flash frames in the final video master without losing caption data
Cutting foul language or adult content in a video master without losing caption data
Cutting video master to clock making space for more commercial time without losing
caption data
Assemble Captions will try to decode the captions from the QuickTime files in the Final Cut Pro
timeline. If SCC caption files are available with the same file name(s) as the source clips, they
can be placed either in the same folder the QuickTime files are located, or they can be placed in a
user selectable folder either on the network, or on the desktop of the MacCaption user.
Below are the steps which should be followed when doing the Assemble Captions option.
1. After editing 2 captioned clips Export an Apple Interchange Format XML Version 4 from
Final Cut Pro.
2. In MacCaption go to File>Import>Assemble Captions
3. Browse for and Open the Apple Interchange Format XML that was exported from Final
Cut Pro
49
4. The Assemble Captions window will pop up and you will have the following options:
a.
b.
c.
d.
e.
f.
g.
Conform .scc time codes to 00:00:00:00
Conform final result to sequence starting time
Erase current program data before adding new captions
Force caption erase at clip boundary
Preserve MacCaption decoded caption data as .scc files
Remove clip boundary captions that display less than 1 second
Use specific decoded data file location and the “Set Location” button
5. Once you have set your desired Assemble Caption Setting press OK and the captions for
the edited clip will now sync up to the final edited video.
There are several options that should be set according to different needs. This manual will cover
all the options associated with the Assemble Captions menu below:
Decoding Final Cut Pro QuickTime video assets for Assemble Captions option
Go to Caption>Decode Preferences… and you will find 3 options for decoding closed caption
information from a QuickTime File. Select “Remove erase if caption blanking is less than __
frames” if you would like MacCaption to keep all the captioning data that comes after an edited
cut in the Final Cut Pro timeline. Otherwise, MacCaption will automatically delete captions that
are less than the specified frame time.
The following options will appear in the Assemble Caption windows:
a. Conform .scc time codes to 00:00:00:00 – This option allows MacCaption to decode SCC
files from captioned QuickTime video files and offset them to a starting time
00:00:00:00. The resulting SCC file can appear in either the same folder as the
QuickTime video by default, or in a user selected folder location.
b. Conform final result to sequence starting time – Selecting this option will conform the
starting timecode of the captions to the starting timecode of the Final Cut Pro sequence.
If the FCP sequence starts at 01:00:00:00 then the decoded captions will also start at this
time. When deselected, the starting timecode of the captions is set to 00:00:00:00 by
default.
c. Erase current program data before adding new captions - This option erases any captions
currently opened in your MacCaption application prior to importing the new assemble
caption from Final Cut Pro. This feature saves the extra step of starting a new project in
order to clear the caption project of caption data before doing the Assemble Caption
function.
d. Force caption erase at clip boundary – Depending on the caption data, there may be times
when a cut in the video may break the caption timecode that extends beyond the length of
the cut. In addition, there may be captions that come in before the dialogue starts and the
Final Cut Timeline may have edited out the rest of the dialogue. This option
automatically deletes these captions in order to accurately represent the edited timeline.
50
e. Preserve MacCaption decoded caption data as .scc files – MacCaption decodes captions
from QuickTime videos into .SCC files in order to accomplish the Assemble Caption
operation. This option permanently saves these .SCC files alongside the QuickTime
videos in their corresponding folder or in a user specified location.
f. Remove clip boundary captions that display less than 1 second – This function is similar
to the “Force caption erase at clip boundary” except that it only affects captions that
display less than 1 second.
g. Use specific decoded data file location and the “Set Location” button – This option
enables 2 functionalities. First, it lets MacCaption users select a specific location where
existing SCC files can be read and edited based on the XML exported from Final Cut
Pro. Second, it enables MacCaption to save decoded SCC files to a specific folder as it
decodes the caption data from QuickTime files. If this is not selected by default,
MacCaption will save and/or look for SCC files in the same folder that the QuickTime
video files reside.
Command Line
MacCaption features a command line interface that works with the OS X Terminal application.
This feature is ideal for developers who rely on 3rd party software solutions to deliver captions to
their clients, and broadcast facilities using automated processes. Command line interface can
also be used in conjunction with internet browser applications geared to automatically delivery
captioning document and video files via the web.
A specification for command line interface can be found by going to top menu Help>Command
Line Interface.
When this menu item is selected the user will launch a browser page that contains all the
import/export functions associated with command line interface. There are many input and out
settings that can be specified within the command line interface, however more advanced
settings must be made within the MacCaption GUI such as Assemble Caption Options and
Decoded settings. Please see below:
NAME
maccaption – MacCaption command line interface
SYNOPSIS
maccaption [-options] import_parameters [movie_parameters] export_parameters
DESCRIPTION
The maccaption command line interface first imports captions and subtitles under control of any number
of import_parameters sequences and then exports captions and subtitles under control of any number
of export_parameters sequences. The optional movie_parameter argument specifies a second movie
required for some export operations.
Import parameters are gathered until a -input parameter is discovered at which time an import is
executed. Export parameters are gathered until a -output parameter is discovered at which time an export
is executed.
-options
51
-help
-s
-m
-tcmode=mode
-codec=codec
- Output a brief command line summary
- Silent – suppress most processing status messages
- Invoke MacCaption program after processing
- Time code calculation mode: where mode can be one of:
23.976, 23.98, 24, 25, 29.97df, 29.97ndf, 59.94
Default is 29.97df
- Choose output codec:
Valid codecs: animation, appleprores422, appleprores422hq, uncompressed8bit422, uncompressed10bit422
-codecdepth=[24,32]
-displaymode=[caption,subtitle]
for 48columns
-onleprimaryrow=[0-484]
-ostartingcolumn=[14-39]
-osmallQuickTime=[TF]
-ousenativeycbcrlevels[TF]
- Specify the codec depth: 24 (millions) or 32 (millions+)
Default is 32
- Choose the display mode: use ‘caption’ for 32 columns, use ‘subtitle’
Default is ‘caption’
- NLE black movie export primary row
- NLE black movie export starting column
- NLE small QuickTime enabled (True), disabled (False)
- NLE black movie export use native YCbCr levels
input_parameters
-import=type –ioptions=options –input=input_file
where type is one of the following kind of files to import
assemblecaptions_applexml
- Assemble captions from an Apple Interchange Format
XML file
captioncenter_tds
cca
cheetah_asc
cheetah_cap
cpc_onl
dv
mcc
nci_cap
nle
plaintext
scc
subrip_srt
ultech_ult
- Caption Center .tds file
- MacCaption .cca file
- Cheetah .asc file
- Cheetah .cap file
- CPC 715 .onl file
- DV 720x480 video
- MacCaption .mcc file
- NCI .cap file
- CCIR 601 720x486 video
- Plain text file
- Scenarist .scc file
- subrip .srt file
- Ultech .ult file
options follows the following format
[ABCD]
- Specifies which Program (A, B, C or D) receives import
- Default is 'A'
[123456789] - Specifies which type of caption to import
- Use 1, 2, 3, and 4 for CC1, CC2, CC3 and CC4
- Use 5, 6, 7, and 8 for CC1, CC2, CC3 and CC4 in DTV
- Use 9 for 708 captions in DTV
- Default is '1'
[abcd]
- Specifies source Program A, B, C or D when importing a
.cca file
- Default is 'a'
output_parameters
-export=type -encodecc=encode_options –output=output_file
where type is one of the following kind of files to export
apple_xml
- Apple XML Interchange Format
black601
- Black CCIR 601 720x486 movie
dv
- DV movie
dv_ksc5601
- DV movie with Korean captions
matrox4vanc
- Matrox 4VANC file for MXO2
mcc
- MacCaption .mcc file
52
mpeg608708
- MPEG DTV 608 and 708 captions
mpegccubelinear
- CCube linear 608 captions
mpegccubetemporal - CCube temporal 608 captions
QuickTime_podcast
- QuickTime EIA-608 podcast captions
scc
- .scc file
timedtext
- Timed Text DXFP XML file
encode_options follows the following format
AnBnCnDn
- Encode Program A, B, C, D to CCn where n = 0-9,a-f
- (eg. Use A5 (1+4) to encode Program A to CC1 and CC4)
- Default is 'A1B0C0D0'
EXAMPLES
Create an Apple XML file from Program B of a previously prepared MacCaption .cca file:
./MacCaption.app/Contents/MacOS/MacCaption \
–import=cpc_cca -tcmode=29.97df -displaymode=caption –ioptions=Ab –input=my.cca \
–export=apple_xml –output=my.xml
Import CC1 captions from a .scc file and create a QuickTime Podcast movie:
./MacCaption.app/Contents/MacOS/MacCaption \
–import=scc -tcmode=29.97df -displaymode=caption –ioptions=A1 –input=my_input.scc \
-movie=my_source_movie.mov \
–export=podcast –output=my_podcast.mov
Decode CC1 and CC2 captions from the same CCIR 601 720x486 video and add the caption data to an MPEG-2
video using the CCube Linear encoding algorithm.
./MacCaption.app/Contents/MacOS/MacCaption \
-import=nle -tcmode=29.97df -displaymode=caption -ioptions=A1 -input=my_720x486_movie \
-ioptions=B2 -input=my_720x486_movie \
-encodecc=A1B2 \
-movie=my_input_mpeg_movie.mpg \
–export=mpegccubelinear –output=my_output_mpeg_movie.mpg
Import CC1 captions from .scc file1 into Program A and CC1 captions from .scc file 2 into Program B;
Export a .scc file containing the original CC1 from file 1 and CC2 converted from CC1 from file 2;
Export a black movie containing the same CC1 and C2 data and insert the same captions into a DV movie.
./MacCaption.app/Contents/MacOS/MacCaption \
–import=scc -tcmode=29.97df -displaymode=caption –ioptions=A1 –input=my_file1.scc \
–ioptions=B1 –input=my_file2.scc \
-encodecc=A1B2 \
–export=scc –output=my_output.scc \
–export=black601 –output=my_nle_movie.mov \
-movie=my_input_dv_movie \
-export=dv -output=my_dv_movie.mov
SEE ALSO
MacCaption User Manual located at http://www.cpcweb.com
HISTORY
Last revision May 25, 2009
Working with Manzanita Multiplexer
To add closed captioning data to MPEG-2 Transport Streams, MacCaption works with
Manzanita software Multiplexers MP2TSMS, MP2TSMM, or MP2TSME. If the MacCaption
53
user has a copy of any of the 3 Manzanita Multiplexers installed in their Applications folder in
OS X, the “Generate a Transport Stream using Manzanita software” option will be enabled when
they select File>Export>ATSC DTV 608/708 Closed Caption (to MPEG-2) file option.
Before beginning this operation, make sure that a “Scratch Folder” for MacCaption is selected
for the demux and remux operation. To set a “Scratch Folder” go to top menu
MacCaption>Preferences. In the Preference window select the General tab and press the Scratch
Disk option to set your scratch disk location. If possible, set the scratch disk to a raid or
secondary hard drive location on your Mac.
Also, the user must set the proper encoding settings for both 608/708 closed caption data
insertion. We recommend that both 608 and 708 data be added to both Standard Definition
MPEG-2 material as well as High Definition MPEG-2 streams. To ensure that both 608 and 708
is encoded into your transport stream follow the directions below:
Go to top menu Caption>Encode Preferences
In the Encode Preferences window make sure that program A is set to CC1 for 608 Encode
Targets, and Program A is set to “1” for 708 Encode Service Number Targets.
Enable the checkboxes that say Include 608 captions in DTV export operations and 708 captions
in DTV export operations.
Click OK.
Once these settings are enabled you are ready to encode your transport stream with closed
captions. Follow the directions below to add captions to a transport stream with MacCaption.
1.
2.
3.
4.
5.
Select File>Export>ATSC DTV 608/708 Closed Caption (to MPEG-2) file option
Save the output TS (transport stream) file on your desktop
Select the “Generate a transport Stream using Manzanita software” option
Press the button “Configure”
You must specify the Video ID and Audio ID of your input Transport Stream. If you
know you are encoding for CableLabs set and enable “Use Video ID” to 481 and set and
enable “Use Audio ID” to 482. If you do not know the Video ID or Audio ID of your
transport stream please download MPEG Streamclip from www.squared5.com or
purchase Manzanita MPEG ID to find the correct parameters.
6. If you have a Manzanita configuration file it can be applied by selecting “Encode using
user specified Manzanita cofig file” and clicking “Choose”. This feature is optional and
if left disabled, Manzanita multiplexer will use the default CableLabs configuration for
the multiplexing.
7. Press OK and then press Save
8. Finally, select the input file located in your hard drive. This last step will commence the
encoding and multiplexing of your transport stream. Please allow some time for this
process to complete.
54
To verify and check the timing of the output MPEG-2 Transport stream the user can purchase
Elgato EyeTV software (www.elgato.com), or can use the latest VLC player from
www.videolan.com to playback the transport stream video with closed captions turned on. To
open a TS file in both of these programs simply drag the .TS or .MPG file into the application
icon on your OS X dock at the same time press Command+Option.
55
Import/Export Text &
Caption/Subtitle Files
MacCaption can import variety of files as described below.
Sample files are included on the MacCaption distribution CD.
ASCII Text (unformatted)
MacCaption can import plain unformatted text as shown below.
I'M AT THE LEFT OF THE SCREEN. SO CAPTIONS OF WHAT I SAY APPEAR AT THE LEFT
OF THE SCREEN, TOO. NOW I'M AT THE RIGHT OF THE SCREEN, SO MY CAPTIONS APPEAR
AT THE RIGHT. NOW I AM GOING OFF-SCREEN.
•
Treat each line of text as one caption.
(Text may include an optional tab delimited in and out time code)
•
Combine text lines to form captions.
o Maximum number of text rows for each caption: 1
o Maximum number of characters for each line of text: 29
o Begin caption with the following sequence of characters: >
o End caption with an end of sentence punctuation: (.?!)
o End caption with the following character: }
o End last row with a comma (,) or semi-colon (;) if applicable.
o Square up text if more than oneline of text in a row.
Default Display Mode
•
•
Pop-On
Convert UniCode characters such as open quote to straight quote.
Read text as Unicode (UTF-16)
Here you can choose how you want your text broken up into individual captions. For those who
insert special characters into their transcripts to indicate where captions start and end, this is
where you can you specify those particular characters. This is also where you can do some
56
preliminary formatting of your captions by having the transcript break up captions according to
punctuation marks, and then square up text for captions with multiple rows.
ASCII Text (formatted)
Formatted text where each line of text is formatted as one caption.
I'M AT THE LEFT OF THE SCREEN.
SO CAPTIONS OF WHAT I SAY
APPEAR AT THE LEFT OF THE SCREEN, TOO.
NOW MY NAME APPEARS AT THE BOTTOM OF THE SCREEN,
WE PUT CAPTIONS OF WHAT I SAY AT THE TOP,
SO THAT MY NAME IS NOT COVERED BY CAPTIONS.
You do not have any choice how an individual text is broken up into multiple lines. MacCaption
will break the line assuming maximum number of characters in one line is 32.
ASCII Text Files (Tab Delimited)
MacCaption can import various text files with and without time codes. Each line must contain
one caption.
•
•
•
Text broken up into individual caption/subtitles
Text with In time code (Tab delimited)
Text with In and Out time codes (Tab delimited)
Text Only (Must Be Separated by Tab)
You can import text files with text separated by Tab characters.
Here is a short example of the file with text only and the individual captions separated by a Tab
character. The Tab inside each line will separate the text into two lines of caption.
NOW MY NAME APPEARS
AT THE BOTTOM OF THE SCREEN,
WE PUT CAPTIONS
OF WHAT I SAY AT THE TOP,
SO THAT MY NAME IS NOT
COVERED BY CAPTIONS.
After opening the file in the CaptionMaker software, it will look like the following. The lines
within each caption are broken at the Tab position.
NOW MY NAME APPEARS
AT THE BOTTOM OF THE SCREEN,
WE PUT CAPTIONS
OF WHAT I SAY AT THE TOP,
57
SO THAT MY NAME IS NOT
COVERED BY CAPTIONS.
Note: If you do not have a Tab character inside the text line, the line would break into multiple
lines according to the choice of Max characters per line.
Time Code In and Text (Must Be Separated by Tab)
Import text files with time code in and text separated by Tab characters.
Here is a short example of the file with time code in and the individual caption separated by a
Tab character. The tab still marks the desired line breaks.
01:03:31:08 NOW I'M AT THE
RIGHT OF THE SCREEN,
01:03:33:07 SO MY CAPTIONS
APPEAR AT THE RIGHT.
01:03:35:13
01:03:36:13 NOW I AM GOING OFF-SCREEN.
After opening the file in the CaptionMaker software, it will look like the following.
01:03:31:08
NOW I'M AT THE
RIGHT OF THE SCREEN,
SO MY CAPTIONS
APPEAR AT THE RIGHT.
01:03:33:07
01:03:35:13
01:03:36:13
NOW I AM GOING OFF-SCREEN.
Time Code In, Out and Text (Must be separated by tab)
You can also import a text file with time code in, time code out and text separated by Tab
characters.
Here is a short example of the file with time code in, out and the individual caption separated by
a Tab character. The Tab character separates lines of caption.
01:03:31:08
01:03:33:07
01:03:35:17
01:03:36:13
01:03:33:05 NOW I'M AT THE
01:03:35:15 SO MY CAPTIONS
01:03:36:11
01:03:38:06 NOW I AM GOING
RIGHT OF THE SCREEN,
APPEAR AT THE RIGHT.
OFF-SCREEN.
Caption Center Files (.tds)
You can import/export Caption Center .tds files from File >> Import/Export menu.
58
Captions, Inc. Files (.cin)
You can import/export Captions, Inc. .cin files from the file >> Import/Export menu.
CCaption Description File – Import Only
You can import a text file with time codes originally created for CCaption software. The
following are examples of closed caption description files:
Lines that start with ** are comments. Lines that start with * are command directives.
Example #1
** This is a complete description file to generate
** 2 line Roll-up closed captions with a delay of
** 1 second between each caption. The closed captions
** are left justified on row 15 at column 4.
*NonDropFrame
*RollUp2
*Left 15,4
FIRST LINE OF DIALOG.
SECOND LINE OF DIALOG.
THIRD LINE OF DIALOG.
FOURTH LINE OF DIALOG.
FIFTH LINE OF DIALOG.
There is no automatic text wrap around when generating Roll-up captions, so be sure to have a
return character in your closed caption description files at each place you want the text to Rollup. The maximum number of characters that can be displayed by a closed caption decoder is 32
characters per line. Television closed caption decoders do not wrap around.
Example #2
** This is a complete description file to generate a
** Pop-on closed caption sequence with time code
** positioning for each caption.
*PopOn
*Center 15,16
** This is the first Pop-on caption
*TC 00:00:10:05
FIRST LINE OF DIALOG.
SECOND LINE OF DIALOG.
** This is the second Pop-on caption
*TC 00:00:15:21
THIRD LINE OF DIALOG.
** This is the third Pop-on caption
*Right 3,30
*TC 00:00:19:00
FOURTH LINE OF DIALOG.
FIFTH LINE OF DIALOG.
*Erase 00:00:24:10
A detailed listing of command directives for Description file can be found in the Appendix.
59
Cheetah Caption Files (.asc)
You can import/export Cheetah ASCII files from File >> Import/Export menu.
Here is a sample example:
** Caption Number 2
*T 01:00:06:06
*TopDown
*C116
The Office of the Ombudsperson
exists\E
** Caption Number 3
*T 01:00:07:28
\AI\solely\AW\ to provide service
to American Express people.\E
** Caption Number 4
*T 01:00:12:22
*BottomUp
*Cb16
We have no agenda of our own.\E
Cheetah Caption Files (.cap)
You can import/export Cheetah .cap captions files created by Cheetah Caption software from
File >> Import/Export menu.
CPC-715 Online Files (.onl)
You can import/export CPC-715 online file (*.onl) from File >> Import/Export menu. The CPC715 file looks like the following. This file was generated for Pop-On captions. It is a binary file.
It is actually a long string of characters that is broken up here into different lines.
CPC-715 Online CaptionMaker Datafile →☻ ♠☺ ♥☺3 2 F1♪
9 01:03:24:22¶.¶ ¶PI'M AT THE LEFT¶pOF THE SCREEN.|¶,
¶/
4 01:03:26:21¶.¶ ¶PSO CAPTIONS¶pOF WHAT I SAY|¶, ¶/
A 01:03:28:01¶.¶ ¶PAPPEAR AT THE LEFT¶pOF THE SCREEN, TOO.|¶,
¶/
DVD Caption Files (.scc)
You can import/export DVD binary file (*.scc) from File >> Import/Export menu. The DVD
Caption file format is universal for all DVD authoring systems. Some authoring systems call for
60
a .cc file. The contents of .cc and .scc files are identical, the only difference is the extensions in
the names. A typical DVD caption file looks like this.
01:03:24:22
01:03:26:21
01:03:28:01
94AE
5494
0000
94AE
A24F
94AE
4C45
2054
9420
FE97
0094
9420
4620
9420
4654
4F4F
945E
A24F
2F00
945E
57C8
945E
94FE
AE94
97A2 49A7 CD20 C154 2054 C845 204C 4546
4620 54C8 4520 D343 5245 45CE AE94 2C00
97A2
C154
97A2
97A2
2C00
D34F
2049
C1D0
4F46
0000
2043
20D3
D045
2054
0094
C1D0
C1D9
C152
C845
2F00
5449
942C
20C1
20D3
4FCE
0000
5420
4352
D394
0000
54C8
4545
FE97
942F
4520
CE2C
DVD Studio Pro
1. Go to File >> Export and choose the DVD .scc File option.
2. In the “Caption Data Lower Limit” window, leave the box unchecked and the time codes
at 00:00:00:00, click OK.
3. Open your DVD Studio Pro project and import the movie (to the assets folder) that you
used to create the time-stamped .scc file. Drag that movie to your timeline.
4. From the Inspector, click the “Other” tab and check the box next to either Field 1 or Field
2.
5. Click the “Choose” button and select the .scc file that you exported from MacCaption,
click OK (Also see pages 557 and 558 in the DVD Studio Pro manual).
6. Build and Burn your DVD
QuickTime/Podcast Closed Caption File (.srt)
You can import/export QT Podcast closed caption file (.srt) from File >> Import/Export menu.
EBU Subtitle File (.stl)
You can import/export EBU STL file (.stl) used by European companies to subtitle on-air
broadcasts. This feature is essential to convert already subtitled programs for DVD, Broadcast,
and Webcast applications.
Ultech Files (.ult)
You can import/export Ultech .ult files from File >> Import/Export menu.
61
Exporting ASCII Text Files
In addition to importing ASCII text files in different formats, you can also export them.
MacCaption has a number of different options available for exporting text files. Simply go to
File>>Export>>Plain Text File and choose how you want the text file formatted.
•
•
•
•
•
•
•
•
•
•
•
•
o
o
o
o
o
o
Include Caption Type Information
Include Sequence Number
Include Words Per Minute
Include Starting Time
Include Ending Time
Put Text on one line
o Put Sequence Number on Text Line
o Put Time information on Text Line
Field separator character: tab
•
•
•
•
•
•
Insert Blank Line between each caption
Remove Text Style information
Remove Text Color information
Include CCaption file header at start of file
Encode Text as Unicode (UTF-16)
Encode output file in RTF format
Include Caption Type Information will insert lines like *POPON to indicate what type of
captions the following lines are formatted in.
Include Sequence Number will insert lines like ** Caption Number 1
Include Words Per Minute will insert lines like ** 450 WPM
Include Starting Time will insert lines like *T 00:00:09:25
Include Ending Time will insert lines like *E 00:00:01:24
Put Text on one line take each caption and put all the text on one line, regardless of how
it is formatted in MacCaption. The option to Put Time Information on Text Line will
insert Start and End Timecode before the text of each caption. It will look like this:
00:00:00:00 00:00:05:01 Caption Text
You may also choose whether you want a space, tab, or \ character to separate fields with
the Field Separator Character option.
Insert Blank Line between each caption simply spaces your caption lines out by inserting
blank lines between them
Remove Text Style information will remove style information from the text
Remove Text Color information will remove the color information
Include CCaption file header at the start of file will insert **CCaption at the top of the
text file
Encode Text as Unicode (UTF-16) will export it as a UTF-16 format file, this is what you
will need to export for foreign languages
Encode output file in RTF format simply exports the file in .rtf format
62
Using International Character Sets with MacCaption
MacCaption supports 16 bit Unicode and can be used with 16 bit International character sets.
To enable International character input on Mac OS X:
1. Go to System Preferences and choose International.
2. Under the Input Menu select all of the International input methods you wish to enable.
3. Select "Show input menu in menu bar" at the bottom of the International dialog box.
To use a file with International Characters, you need to set select it from the flag menu at the top
right side of the monitor screen. Each input method behaves differently.
To use the Japanese input method:
1.
2.
3.
4.
5.
6.
7.
8.
Select "Show Character Palette" and "Show Japanese Kana Palette" from the flag menu.
In the Character Palette View menu select Japanese.
Start MacCaption.
Click on the Subtitles button in the Display As selection box.
Under the Display/Edit Text Font menu select the Japanese font that ends in "Pro W3".
Under the Subtitle/Font menu select the same font.
Highlight the uppermost text input box in MacCaption
Double click on a Japanese Kanji character in either of the character palettes to enter it
into MacCaption.
Preparing Foreign Language Text
Chinese, Korean, Japanese and Hebrew
1.
2.
3.
4.
5.
Open your document (make sure the text ‘reads’ properly)
Go to File>Save As
Save the file as “Encoded Text (*.txt)
Name your .txt file and click ‘Save’
A window will appear telling you that: “the formatting will not be saved…Is this OK?”
Click ‘Yes’
Another window will appear asking you to specify the encoding
Select “Unicode (Big-Endian)”
Click ‘OK’
IMPORTANT – When importing this file into MacCaption, check the box next to “Read text as
Unicode (UTF – 16)”.
63
Spanish, Portuguese and European Languages
1.
2.
3.
4.
5.
Open your document (make sure the text ‘reads’ properly)
Go to File>Save As
Save the file as “Encoded Text (*.txt)
Name your .txt file and click ‘Save’
A window will appear telling you that: “the formatting will not be saved…Is this OK?”
Click ‘Yes’
Another window will appear asking you to specify the encoding
Select “Western European (mac)”
Click ‘OK’
IMPORTANT – When importing this file (ES and PT) into MacCaption, do not check the box
next to “Read text as Unicode (UTF – 16)”.
64
Exporting Captions/Subtitles
MacCaption encodes captions directly onto digital video without the need for encoding
hardware. MacCaption can insert open and closed captions directly into a DV QuickTime movie
and directly into DVD MPEG video assets. It can also add captions to all types MPEG-2 video
(SD and HD) for DTV and ATSC.
MacCaption can also be used to add captions to a QuickTime movie's Text Track or to create a
RealVideo smil and Windows Media sami caption file for webcast. The software also generates
open captions that can be merged with video material and DVD description files that can be used
by DVD authoring systems to create closed captions. Here is a list of exports:
•
•
•
•
•
•
•
•
Open and closed caption DV video
Caption MPEG-2 (DVD) and MPEG-2 (DTV/ATSC) – both 4:3 and 16:9
Caption NLE video directly and via a 720x486 black video
DVD caption file (.scc) for DVD studio Pro, Sonic, Scenarist
Caption/Subtitle Webcast for Quick Time, Windows Media Video, Real Video & Flash
Subtitle Texas Instruments DLP Cinema XML
Subtitle with Final Cut Pro using Apple XML file
Subtitle DVD using Spruce, Sonic Solutions, DVD Studio Pro authoring systems
Sample Files: Sample examples of almost all kinds of files, which can be exported from
MacCaption are available on the MacCaption distribution CD.
Movie Time Code vs. Simulated Time Code: MacCaption can read the time codes from a DV
video if the DV video contains time codes. MacCaption can also simulate time codes by
simply converting number of frames to time codes either in Drop frames or Non-drop frames.
You have to be very careful which time code you use to time stamp a caption/subtitle file. If
you produce your final product from MacCaption, it does not matter which TC you use. But
if you export a file to be used with software like DVD Studio Pro or any other software, you
must use the same type of TC (DF or NDF). Otherwise you will notice caption/subtitle will
slowly go out of sync with time. For 1 hour video you will be off by 3 seconds and 18
frames.
There is way to fix this problem by using the functions like Convert TC (DF to NDF or NDF
to DF) and also TC Stretch/Shrink function.
65
DV – 720x480 video
Digital Video format / DV format is video that is transferred in and out of the computer via a
FireWire (IEEE 1394) interface.
Caption Compatible DV decks: For caption compatible DV decks and media converters, check
the chapter Hardware Requirements.
DV video contains closed captions in its VAUX data area. MacCaption inserts closed captions
directly into this data area. When a closed caption encoded DV video data file is put on video
tape and played back in a VCR, the closed caption information is output directly from the VCR
onto the video signal. Using a laptop computer with an IEEE 1394 / FireWire interface anyone
can add closed captions to DV video material.
Proper QT Movies: To work with CaptionMaker: QT DV video must be 29.97 fps and audio
must be either 32KHz for 4 12-bit audio channels or 48KHz for 2 16 bit audio channels.
There are no exceptions to these rates.
The video must be compressed with DV codec. If the video and audio rates are incorrect, you
can fix it using QuickTime Pro by re-exporting the file with proper video/audio rates.
Lower Limit: When you export a DV movie with closed captions you should specify the
lower limit for the closed caption data. This is necessary due to the way closed captions are
combined with the DV movie.
For example, if you are using pop-on captions and your actual movie content time code starts
at 1:00:00:00 and the first closed caption appears one second into the movie at 1:00:01:00 the
closed caption data is placed into the DV movie before the caption is scheduled to pop on. By
setting Lower Limit to 1:00:00:00 you force MacCaption to begin putting the closed caption
data into movie no earlier than time code 1:00:00:00.
This issue is extremely important when you caption a commercial spot. If you do not set a
Lower Limit within the actual video content area, you may lose the first caption when the
beginning of the video is edited out later. For more details, check the chapter A Short
Tutorial.
Use the Movie With Closed Captions option under the File Export menu to add closed captions
to video stored in DV format. When processing Digital Video, MacCaption puts closed captions
into a copy of the currently open movie.
After you export the captions to the movie, the Print to Video option under the File menu can be
used to write the movie to a videocassette recorder (VHS, Beta SP, MiniDV, DVCAM, or
66
DVCPRO) with a DV Converter connected with a FireWire cable. Connect the outputs from the
converter to the inputs of your video recorder.
Go to: File > Print to Video and open the movie that you created with MacCaption. Connect the
outputs from your recorder to a TV monitor so you can watch exactly what you are recording.
Play the movie to test your connection to your recorder. Once you have established the
connection (i.e. - you can hear and see the movie through the monitor), cue the movie at the
beginning of the movie. Press record on your recorder and then start playing the movie. When
you play back the video from the DV VCR, the VCR converts the digital video signal to an
analog video signal and puts the embedded closed caption data onto line 21 of the analog video
signal. When a television receives a video signal containing closed captions, it decodes the signal
and displays the captions. To see the captions, your television must be set up to decode the
closed caption CC1 data channel.
Digital Video consists of video that is formatted with the DV-NTSC codec and consists of video
that is 720 pixels across by 480 lines high. With the exception of the closed caption data all other
data in the DV movie is simply copied to the target DV movie. There is no loss of video or audio
quality while adding closed captions to DV.
NLE 720x486 video using an NLE system
MacCaption for NLE systems works by putting a 2-D visual representation of the appropriate
closed caption commands into a QuickTime or AVI movie. This movie file is then imported into
a non-linear editing system, and put on the editing system time line exactly like other video
material. A picture-in-picture effect or a crop effect is then applied to the imported movie to
mask off all but the closed caption image lines, and the NLE system is used to merge the
imported movie with video program material. The resulting video output from the NLE system is
closed captioned. Using this method, no additional hardware encoder is needed to produce closed
captioned video.
This method requires the NLE system to be able to display a line from the visual picture area into
line 21 of the television signal vertical blanking interval (VBI). Video editing hardware from
Avid, Media 100, Blackmagic Decklink, AJA, Matrox and Pinnacle Systems, among others,
supports this capability.
Caption Compatible NLE Systems: For compatible caption compatible NLE systems, check the
chapter Hardware Requirements. For most upto date listing, check the link:
http://www.cpcweb.com/nle/nle-hardware.htm
You can caption a 720x486 NLE video in two different ways:
1. add captions to the 720x486 video directly.
2. export a black 720x486 video with closed caption data at the top row and bring that video
to the NLE system and superimpose the black video on top of your video.
67
First option is straight forward. We will explain how to use the second method in detail in the
following sections. The advantage of the second method is that the captioner does not have to
use MacCaption software on the NLE system; and after exporting the black video, can send it to
the computer having the original video inside the NLE system which might be at a completely
different location.
Choose Your NLE System: Using the Preferences NLE Tab you can change the image file data
generation lines. You must specify the type of NLE system you are using in the Preferences
NLE Tab. You must do this before proceding to the next step.
NLE 720x486 Videos
Use the Black 720x486 NLE Movie with Closed Captions option under the File Export menu
to add closed captions to video stored in the NLE 720x486 format. The NLE processing mode
creates a new QuickTime movie using the codec of your choice. Each frame within the movie is
mostly black with a couple of lines of gray scale information towards the top of each frame and a
couple of lines of gray scale information towards the bottom of each frame. These lines are the 2D pictorial representation of VBI (Vertical Blanking Interval) line 21 closed caption information.
When exporting the black video, choose the Codec used by the NLE system that is going to
import the black video, otherwise choose Animation Codec.
This black 720x486 movie is then imported into your non-linear editing system, where through
the use of a picture-in-picture effect or crop effect, two of its lines are merged with your video
program material. On output, the NLE maps the closed caption information to line 21 of the VBI.
The NLE must support a 720x486 pixel frame size for this to work properly. Video editing
hardware from Avid, Media 100, Matrox and Pinnacle Systems, among others, supports this
capability.
The 720x486 Black Video also contains frame sync indicator text.
The NLE processing mode cannot be used to add closed captions to a DV movie. This is because
the image size of the DV format is 720x480 pixels and a size of 720x486 is required to properly
handle closed caption data in picture form.
Avid Media Composer
To output Black Movie with Closed Captions for Avid media composer, the MacCaption user
must select the QuickTime with Avid Meridien Compressed codec set to Millions of Colors.
(No alpha channel required)
Download the Avid codecs from www.avid.com
68
Notes on Animation Codec
Animation codec is lossless. When you compress an image with the animation codec it
preserves all of the data. You should not use this codec on normal video because it generates
very big files, but since the NLE file is about 98% black the animation codec is very good for
this purpose.
The millions of colors+ codec generates a movie that contains an alpha track. The resulting video
will contain 32 bits per pixel (8 bits for each of R, G, B and alpha). A millions of colors video
only contains R, G and B data. Millions of colors+ makes the file 33% bigger (24 bits to 32 bits
per pixel) but it also means that you can use an alpha track effect on the imported clip when you
import the movie into your NLE. It is not necessary to use millions of colors + if you do not use
alpha channel to merge the black video to your NLE video.
If you use Animation codec, the Quality option should not do anything since it is lossless but it
should be at 100% anyway.
FPS must be 29.97 for drop frame video as most video on NLE systems use drop frame.
Key frames are not meaningful for the Animation codec. A key frame is a frame that is self
contained and doesn't reference any other video frame in order to construct its own video frame
data. As each frame of video in an animation codec should be spatially independent, probably
key frame in the animation codec has no meaning.
Data rate limit should not be specified, since by putting a value here it will cause the video to be
limited in its resolution and we want 100% quality. This value should be meaningless for the
animation codec. You would want to limit the data rate if you were streaming your video and
needed to limit the size of each frame to a specific value. When you limit the data rate the quality
of the compressed image will decrease. This is not what we want for our NLE closed caption
image.
Black Video File Size If you use Animation codec or any uncompressed codec to
generate the black video, the size of the file would be enormous. If you need to transfer
the file to a different location, it is advisable to zip the file before transfer, Typically the
file will be reduced to less than 5% of the original file.
Alpha Channel: You can select either AVI file output or QuickTime file output if
QuickTime is installed. The selection of “Millions of Colors+” in the QuickTime codec
dialog box will generate a 32-bit output file containing an alpha channel. Other output
selections generate 24 bit movies. Note: If you generate an alpha channel you should set
the Secondary Row equal to the Primary Row in the Preferences dialog, to prevent a
second occurrence of closed caption data from being inserted into your video program.
69
Primary Row: If your system is not listed, you need to know the primary Row and
Starting Column numbers for your NLE system. If you know those values from the test
described earlier in this chapter, please enter those numbers here. Note: Secondary Row
information is not important.
Add Captions using AJA Io Hardware
To use AJA Io hardware with MacCaption the Final Cut Pro time line must be configured for a
video size of 720x486. Export an NLE video from MacCaption using the Animation codec at the
uncompressed resolution and import it into FCP. When you play the imported video clip the
closed captioned video will appear on the SDI, component and composite video outputs. To
merge the imported closed caption video with the underlying video material put the imported clip
on a higher video track than the rest of the video and crop the imported clip up from the bottom
leaving the closed caption data at the top. When cropping the imported clip you should leave one
extra line of black below the closed caption data to act as a clean separator line between the
closed caption data and your video program. The AJA Io hardware cannot be used to export
video containing closed captions in DV video.
Add Captions using Avid ABVB Hardware
To superimpose closed caption data onto an actual video image, place the QuickTime movie
onto its own video track above your background image. Place a Blend:Picture-In-Picture effect
onto the imported clip and set the PIP Size to 100 and V Position to -941 for a Media Composer
Version 6 or to -991 for a Media Composer Version 7. This PIP effect positions the closed
caption control codes that are located towards the bottom of the QuickTime image file to line 1
of the NLE image. Line 1 of the NLE image corresponds to Line 21 of the VBI output signal.
This has been found to be the most reliable way to superimpose clean image data onto line 21 of
the VBI.
Add Captions using Avid Express Pro
Make sure to set Avid Express Pro HD to allow it to pass line 21 caption data. Two settings are
required to allow Avid Express Pro HD to work with MacCaption. These are
• Preserve VBI which is located in the video output tool and
• Set Effects Aperture to ITU601 in the General Settings
70
To superimpose closed caption data onto an actual video image, follow the instructions described
below for other Avid systems.
Add Captions using Avid Meridien Hardware
Avid Meridien users should use the Meridien QuickTime codec. Select NTSC, Meridien
Interlaced, Odd Field Dominant. To superimpose closed caption data onto an actual video image,
place the AVI movie onto its own video track above your background image. Place a
Blend:Picture-In-Picture effect onto the imported clip and set the Crop Bottom value to -989. Set
the Width and Height scaling to 100%.
On Macintosh Avid systems without real time effects the PIP effect must be rendered and is time
consuming. This can be avoided by the use of the Alpha Mask file as follows. Place your
background clip on V1 and place the Alpha Mask file on V2. Step Into the Alpha Mask clip and
put the imported QuickTime movie onto the Graphic Fill portion, V2, of the Alpha Mask image.
Step Out of the track and play the timeline. You should see a closed caption message
superimposed on the output video image. Using this method you are using closed caption
information located on the first line of the generated image file.
71
Add Captions using the Media 100
To superimpose closed caption data onto an actual video image, place the QuickTime movie
onto a video track. Place a Picture-In-Picture effect onto the imported clip, set the PIP Size to
100 and V Position to 479. This PIP effect positions the closed caption control codes that are
located towards the bottom of the QuickTime image file to line 1 of the NLE image. Line 1 of
the NLE image corresponds to Line 21 of the VBI output signal. This has been found to be the
most reliable way to superimpose clean image data onto line 21 of the VBI. Using the
Preferences NLE Tab you can change the image file data generation lines.
Add Captions using Pinnacle Systems
(TARGA 2000 RTX, DTX, PRO and SDX and TARGA 1000 PRO)
To superimpose close-caption data onto an actual video image the QuickTime movie should be
created with the Animation codec at 30 fps and Millions of Colors+. Place the QuickTime movie
onto its own video track above your background image. Highlight the clip, select Clip: Video:
Transparency and select Key Type - Alpha Channel.
Add Captions using Pinnacle TARGA 3000 & Adobe Premier
Instructions for Inserting Closed Captions into an NLE Video using a Pinnacle TARGA 3000
with Adobe Premier
•
Export the Encoded CC NLE Video using the TARGA settings and the appropriate
compressor that matches your video
•
Place your original video on Track 1A or Track 1B
•
Place the Closed Caption NLE video on a Super Track (Any Track from 2 – 99)
•
Apply a Luminance Key to the Closed Caption NLE video
•
Print to tape
Add Captions using Blackmagic Design DeckLink Extreme
The Blackmagic Design DeckLink Extreme hardware requires a specific video setting to work
with close captions. To configure DeckLink Extreme hardware to work with close captions open
the Macintosh System Preferences, find the DeckLink Extreme control panel and set up the 3:2
Pull down & VANC settings as follows:
72
You can verify that closed captions are being properly handled by DeckLink Extreme by
digitizing an analog video broadcast signal containing closed captions and then playing it back
into a TV receiver to display the closed captions. When this works successfully choose the NLE
preference panel in MacCaption and select Blackmagic DeckLink Extreme in the "Set NLE
Values to" pull down menu. In MacCaption under File/Export use "Black 720x486 NLE Movie
with Closed Captions" and generate a QuickTime movie containing just closed captions. To
superimpose closed caption data onto an actual video image, place the QuickTime movie onto a
video track and crop the video keeping just the close caption lines that are located near the very
top of the video frame.
MPEG-2 (DVD) 720x480 Video
You can add captions to the data area of MPEG-2 video (for DVD) directly without using a NLE
system.
Note: To caption a DVD video, you have another choice. You can export a .scc file from
MacCaption and bring it to DVD Studio Pro (DSP), Sonic or Scenarist DVD authoring
system. The authoring system will add the captions to the caption track of the DVD.
73
MPEG-2 (DTV/ATSC)
MacCaption software has been able to add closed captions to MPEG-2 video used in the
authoring of DVDs for a number of years but recently CPC has successfully implemented a way
to embed both 608 and 708 closed captions in DTV/ATSC MPEG-2 video for both 4:3 and 16:9
formats. TV Transmissions over the air in the U.S. and Canada is basically MPEG-2 streams so
the concepts here will work for HD as well as SD MPEG-2 video.
Captions can be added to generic MPEG-2 Elementary and Program streams. The MPEG-2 can
be SD or HD. Captions can be formatted in any one of the following styles: ATSC 608/708,
DVD, CCube/LSI DVx 608 Linear or CCube/LSI DVx 608 Temporal and Sigma Streams with
Line-21. To add captions to Transport Streams please see the section in the manual that talks
about encoding with Manzanita software.
In MPEG-2 video closed captions are carried in User Data packets in the MPEG data stream.
There are three distinct closed caption data formats used in MPEG video:
• One format is used for encoding CCs into MPEG data that will be used as video
assets in DVD authoring;
• A second format is used for Digital Television (DTV) and carries EIA 608 and
formatted closed captioning data;
• A third format is used for encoding DTV EIA 708 closed captioning data. This is the
same as HD. (SD MPEG-2 streams can also carry 708 data)
The MacCaption software supports adding closed captions to DTV MPEG video; and CPC is
researching adding EIA 708 closed captions into DTV baseband HD-SDI. At present the current
MacCaption software can decode EIA 708 closed captions from both MPEG-2 video and HDSDI captured QuickTime clips from the Matrox MXO2.
MacCaption will decode and encode standard MPEG-2 closed caption User Data packets in
video encoded with the Vela Research MPEG hardware, http://www.vela.com.
MacCaption can also decode the SCTE 20 608 closed caption specification from MPEG-2
streams. To decode this style of closed caption data go to File>Import>SCTE 20 608 Closed
Captions.
The DVD and DTV 608 closed caption formats both conform to the EIA 608 standard
specification for closed caption data encoding, but they differ in their physical positioning and
bit coding layout in the MPEG data stream. The DTV 608 and the DTV 708 formats differ in
their standard specifications for closed caption data encoding, but they are transmitted together
and in the same User Data packet in the MPEG data stream. Therefore, MacCaption can add
both 608 and 708 closed captions to the one MPEG-2 file. This feature guarantees compatibility
with both HDTV sets and standard definition TV sets that receive DTV transmission through
converter boxes.
DTV 608 closed caption data that is inserted into MPEG video is typically copied directly from
its analog standard definition video EIA 608 closed caption counterpart.
74
EIA 608 closed captions for MPEG-2 streams can be encoded with 4 channels of alternate
languages these include CC1,CC2, CC3, and CC4 data respectively.
EIA 708 closed captions for MPEG-2 streams can be encoded with 6 channels of alternate
languages these include Service numbers 1,2,3,4,5,6. Because MacCaption has the world’s first
true 708 authoring software engineering it can include text style and opacity options as well as
Unicode Asian language settings in the encoding process.
In order to include multiple alternate languages in your encode please populate programs A
through F in your MacCaption project. These can be assigned to different closed caption
channels in the top menu Caption>Encode Preferences.
MacCaption can currently encode closed captions for the following MPEG formats:
• DVD Closed Captions (*.m2v)
• DVD Style Closed Captions (*.mpg)
• ATSC DTV 608/708 Closed Captions (*.mpg)
• CCube/LSI DVx 608 Linear Closed Captions (*.mpg)
• CCube/LSI DVx 608 Temporal Closed Captions (*.mpg)
• Sigma MPEG-2 line-21 720x512 (*.mpg)
MPEG-2 Video Codecs
If you do not have a good Mpeg codec on your computer, you may consider Main Concept
MPEG codec. The codec works well for MacCaption. You may get this codec from
www.mainconcept.com/products.shtml.
HD Tapes
Panasonic DVCPRO HD
Captions can be added to DVCPRO HD QuickTime files. You need to use FireWire to send the
captioned video to a compatible VTR such as a Panasonic AJ-HD1400. This FireWire operation
must be done from MacCaption, and does not work with Final Cut Pro Studio 2. In addition,
MacCaption can capture DVCPRO HD video content from FireWire and decode the caption data
from it.
DVCPRO HD video content can contain both 608 and 708 caption data and so the process for
encoding closed captions to DVCPRO HD should be set for both 608/708. To ensure that the
encoding includes both 608/708 go to top menu Caption>Encode Preferences and enable both
608 and 708 options for encoding to DTV.
75
DVCPRO HD video content can also be encoded with closed captions for the Omneon Spectrum
Playout Server with the optional HD-SDI DV100 I/O port attached to the server. The Omneon
Specturm Playout Server can translate the user data packets in the DVCPRO HD QuickTime file
and converts them to VANC information for HD-SDI playout of closed captions. DVCPRO HD
QuickTime files with closed captions captured from the Omneon server can also be decoded by
MacCaption.
DVCPRO HD video content can also be encoded with closed captions for the SKY Micro
playout board. This board also translates the user data packets in the DVCPRO HD QuickTime
file and converts them to VANC information for HD-SDI playout of Closed Captions. Please go
to http://www.skymicro.com/ for more information.
DVCPRO HD QuickTime files cannot be edited once they are encoded with closed caption
information. To edit these clips please refer to the Assemble Captions section of this manual.
DVCPRO HD is a codec that is compatible with QuickTime and is installed on the Mac with
Final Cut Studio 2. To check if your QuickTime file contains the DVCPRO HD codec, open
your file in QuickTime player and press Command+I. This option will open an information
window with the listing of the formatted codec. If this format reads DVCPRO HD then your file
is created with the appropriate codec.
Alternately, DVCPRO HD content can be closed captioned within Final Cut Pro using the
Matrox MXO2 board and the Matrox 4VANC audio file that MacCaption can generate and
export for the Final Cut Pro timeline. For more information about the MXO2 and closed
captions go to www.cpcweb.com/mxo2.
SONY XDCAM HD
Captions can be added to XDCAM HD MXF files which can be played back in the Sony
XDCAM HD 1500 VTR.
To caption XDCAM HD follow the directions below:
Go to top menu Caption>Encode Preferences
In the Encode Preferences window makes sure that program A is set to CC1 for 608 Encode
Targets and Program A is set to “1” for 708 Encode Service Number Targets.
Enable the checkboxes that say Include 608 captions in DTV export operations and 708 captions
in DTV export operations.
Click OK.
Now go to File>Export>HD>Material eXchange format MXF
76
Save the new Captioned MXF on your desktop, and when prompted select the original MXF.
Once the new MXF with captions is generated the user can simply drag and drop into the
mounted professional disc using the OS X finder. Make sure that the file is placed in the clips
folder inside the professional disc.
The Sony VTR XDCAM HD 1500 must be set up with specific settings in order to support
closed caption data in MXF files. Also, MXF files that are 1080 HD cannot be added to a disc
that already contains 720P HD video and vice versa.
To write a file to the PDW-HD1500, you must write the high res MXF file to the Clip folder.
You also need to make sure of the following:
You must set the XDCAM machine's REC FORMAT menu (item 31) to match the file you are writing
(ie 1080 / 59.94i, 720 / 59.94p, etc).
The deck's red REC INHIBIT light is off
Currently, you cannot mix the following MXF file types on the same disc:
A. Cannot mix 1080i and 720p MXF files
i.e. Writing 720 / 59.94p MXF file to disc with 1080i clips on it
B. Mixing files of different system frequencies (frame rates)
i.e. Writing 1080 / 50i MXF file to disc with 1080 / 59.94i clips on it
Notes:
1. The following frame rates are "related" and can be mixed together on the same disc:
A.
29.97p / 59.94p / 59.94i
B.
25p / 50p / 50i
2. You do not have to format a disc to use a certain MXF file type. The first MXF file copied to the
Clip folder determines the "disc type" (i.e. is it a 1080i/720 disc, etc). So if you erase all of the
files in the Clip folder, you can copy anything to the disc
The FTP daemon of the PDW-HD1500 will give you better information about why it won't allow the file to be
written (especially if it is a simple configuration problem).
Within the deck inputs and output menus the following settings should be set:
652 and 653 (UMID SD and HD VANC Lines) - They should be set to 17H
658 and 659 (EMK SD and HD VANC Lines) - They should be set to 17H
Alternately, XDCAM HD content can be closed captioned within Final Cut Pro using the Matrox
MXO2 board and the Matrox 4VANC audio file that MacCaption can generate and export for the
Final Cut Pro timeline. For more information about the MXO2 and closed captions go to
www.cpcweb.com/mxo2.
77
Proofing your 708 captions from MPEG-2 streams
You can use MacCaption to proof your HD captions. We have a Print to FireWire function in the
software that will generate and send an MPEG Transport Stream to a standard off-the-shelf HD
TV. The TV will directly decode the HD captions so that you can verify your work. We use a
SHARP AQUOS LC-26D7U TV with FireWire input for this purpose.
HD/SD Captioning using Matrox MXO2
Importing Matrox 4VANC audio file into Final Cut Pro and Print to tape settings
MacCaption can export a special audio only file that contains Matrox 4VANC closed captioning
data for 608/708 TV broadcast standards. In addition, MacCaption can embed the 4VANC audio
channel into a QuickTime movie resulting in a new QuickTime file that contains 8 audio
channels. Both of these output files are wrapped in an MOV container and are able to be read by
the Final Cut Pro timeline. The audio only Matrox 4VANC has the .MOV extension, but in fact
only contains 1 channel of audio data and is read accordingly inside Final Cut Pro.
Once the user imports the MacCaption generated Matrox 4VANC audio file into Final Cut Pro,
the sequence settings must be set to support 8 channels of audio with channels 7 and 8 set to
mono. To set this operation in Final Cut Pro, follow the instructions below:
1. Start a new sequence or select the sequence opened that contains the video that is ready to
be output via the Matrox MXO2.
2. Go to top menu and select Sequence>Settings…
3. Select the “Audio Outputs” tab and change the “Outputs” parameters to 8.
4. Output 7 and 8 should be set to Dual Mono.
5.
6. Press OK.
7. Drag your Matrox 4VANC audio file into any of the audio tracks beneath your video on
the Final Cut Timeline. (Preferably “A8”)
78
8. Control-click or right-click on the “Source” field to the left of you “A8” or audio track
containing the 4VANC audio file.
9. In the drop down menu of the “Source” field select Audio Outputs>8. (This will route
your Matrox 4VANC audio file to channel 8 of the MXO2 board for Closed Caption
insertion)
10. Go to OS X System Preferences and select the Matrox MXO2 preference pane.
11. Select the “Captioning” tab in the preferences and enable Matrox 4VANC Playback by
placing a check box next to “Retrieve closed captioning from audio track 8”
12. Select “Embed in SDI VANC (HD/SD) if you are printing to an HD-SDI compatible
VTR (such as an HDCAM, XDCAM, DVCPRO-HD, etc. deck) or appliance (Omneon
Server, Optibase Encoder, etc).
79
13. Select “Embed in SDI Line 21 (SD) if you are printing to an SDI compatible VTR (such
as Digital Betacam or DVCPRO50 deck).
14. Select “Embed in analog Line 21 (SD) if you are printing to an analog compatible VTR
(such as Betacam SP, Umatic, or SVHS deck) via composite, component, or S-Video.
15. Close the Matrox System Preferences and go back to Final Cut Pro.
16. Print to tape with closed captions. (no rendering required)
The sequence timeline in Final Cut Pro can be in either SD (720x486 or 720x480) or HD (720P,
1080i, or 1080p). The Matrox MXO2 will support closed caption data for any codec or
resolution that is compatible with Final Cut Pro and the Matrox MXO2. Some of these include:
DV25, DV50, DVCPRO HD, ProRes, XDCAM HD, Uncompressed 8bit and 10bit.
Furthermore, changes can be made to the video on the timeline such as color correction and
graphic lower third additions without affecting or deleting the 4VANC captions.
Upconverting and Downconverting video with closed captions using the MXO2
The Matrox MXO2 can upconvert and downconvert closed captions from SD to HD and vice
versa along with the video. For example, If there is a 1080i video clip on the Final Cut Pro
timeline It can be output to HD-SDI with VANC closed captions, or the video output can be set
from the Matrox MXO2 to downconvert the video signal to SD 720x486 with Line-21 closed
captions without any rendering. The Matrox MXO2 can output to HD-SDI and its SD analog
outputs (composite, component, S-Video) simultaneously with closed captions. The MXO2 HDSDI outputs will carry the 1080i signal with VANC closed captions, while the analog outputs
will carry the line-21 respectively. Although the Matrox MXO2 has two SDI outputs that can
both be set to output HD-SDI or standard definition SDI, they cannot be set to output
independent formats. The MXO2 user must choose to output either HD-SDI or standard
definition SDI from both outputs. However, HD-SDI can be output simultaneously with SD
analog using the settings seen below:
80
HD/SD Captioning using AJA Kona
To work with AJA KONA 3 and LHi, you need MacCaption DTV, DTV-A, or HD Enterprise, as
well as Final Cut Pro 7 and the most recent Kona drivers. Please check the following pages:
http://www.aja.com/support/kona/kona-3-3x.php (KONA 3)
http://www.aja.com/support/kona/kona-lhi.php (LHi)
See details of HD caption workflow on pages 2-4 on KONA Release notes.
Current Status: MacCaption + FCP 7 + KONA Workflow
The Kona cards can output captions in one of 2 ways:
1. Output via the AJA TV program
2. Output via Final Cut Pro 7's "Print to Video" or "Edit to Tape" dialog
Both AJA TV and FCP output methods support either HD or SD, but not HD + SD
simultaneously.
To export HD closed captions via HD-SDI choose
•
QuickTime DTV 608/708 Closed Captions Track
81
To export SD closed captions choose
•
QuickTime 608 Closed Captions (FCP/Podcast/Web)
Initial Steps for All Workflows
1. If you are starting with a FCP project, export your timeline as a QuickTime movie (this
can be a reference movie, i.e. not self contained; or self contained if you prefer).
2. Import this QuickTime movie into MacCaption and transcribe & time-stamp your
captions as normal.
3. If your MacCaption project doesn't begin at 00:00:00:00 (e.g., most FCP timelines start at
01:00:00:00), you must ripple (Time Code > Ripple Time Code) your project so that the
time codes in MacCaption reference 00:00:00:00 as the starting point (i.e. the first
caption should start shortly after 00:00:00:00.)
4. For HD captions, you need to check the VANC check box in the KONA 3 Control Panel,
and make sure the Primary Format is set to the format you will be outputting (the Kona
cards currently can not preserve captions when converting the format):
82
5. If you will be outputting for HD, make sure you have at least one 708 target specified in
MacCaption Caption > Encode Preferences (usually, Program A to Service 1).
6. If you will be using FCP for SD output, MacCaption must be set to export at least CC1
and CC3 (it will not work with CC1 only). To check your MacCaption settings, go to
Caption > Encode Preferences, and make sure your screen matches this picture. (If you
want to put a different Program, e.g. Spanish on CC2 or CC3, you may do that as well,
but you must at least export something on CC1 and CC3.)
Kona HD workflow
1. MacCaption Export > HD > QuickTime DTV 608/708 Closed Captions Track. Your
settings should match the picture below:
83
2. To output via AJA TV: simply open this movie file in AJA TV and play it out through
your Kona card. (Make sure your Display setting is set to the same format as your video
file.)
3. To output via FCP: select your original time line and make sure your View > Video
Playback is set to the same format as your video file, then go to the Print to Video menu.
In the Closed Captioning setting of the Print to Video dialog box, select the QuickTime movie
with the DTV 608/708 track that you exported in Step 7 above.
84
Kona HD-to-SD workflow for FCP7
1. MacCaption Export > Podcast/Web/QuickTime 608 > QuickTime 608 Closed Captions
(FCP/Podcast/Web). Your settings should match this picture:
2. To output via FCP, select your original time line and make sure your View > Video
Playback is set to AJA Kona 525i29.97, then go to the Print to Video menu.
85
3. In the Closed Captioning setting of the Print to Video dialog box, select the QuickTime
movie with the 608 track that you exported in Step 7 above.
Kona SD workflow
1. MacCaption Export > Podcast/Web/QuickTime 608 > QuickTime 608 Closed Captions
(FCP/Podcast/Web).
2. To output via AJA TV: simply open this movie file in AJA TV and play it out through
your Kona card. (Make sure your Display setting is set to AJA Kona 525i29.97)
3. To output via FCP: select your original time line and make sure your View > Video
Playback is set to AJA Kona 525i29.97, then go to the Print to Video menu.
4. In the Closed Captioning setting of the Print to Video dialog box, select the QuickTime
movie with the 608 track that you exported in Step 7 above.
Add Subtitles to Digital Videos
DV
Digital Video format / DV format is video that is transferred in and out of the computer via a
FireWire (IEEE 1394) interface.
Use the Video With Subtitles, go to File > Export menu to add subtitles to video stored in DV
format (.dv). When processing Digital Video, MacCaption puts subtitles into a copy of the
currently open movie. (Only available if you purchased the subtitle option).
After you export the subtitles to the movie, the Print to Video option under the File menu can be
used to write the movie to a videocassette recorder (VHS, Beta SP, MiniDV, DVCAM, or
DVCPRO) with a DV Converter connected with a FireWire cable. Connect the outputs from the
converter to the inputs of your video recorder.
Go to File > Print to Video and open the movie that you created with MacCaption. Connect the
outputs from your recorder to a TV monitor so you can watch exactly what you are recording.
Play the movie to test your connection to your recorder. Once you have established the
connection (i.e. - you can hear and see the movie through the monitor), cue the movie at the
beginning of the movie. Press record on your recorder and then start playing the movie. When
you play back the video from the DV VCR, the VCR converts the digital video signal to an
analog video signal and puts the embedded subtitles onto the analog video signal.
Digital Video consists of video that is formatted with the DV codec and consists of video that is
720 pixels across by 480 lines high.
86
FCP using Apple XML Format
MacCaption can create an XML file containing subtitles that can be directly imported by Apple
Final Cut Pro.
First create a finished caption project using MacCaption. Then use File > Export > Apple XML
Interchange Format to export an XML file.
In Final Cut Pro use File > Import > XML to import the XML file created by MacCaption and
look for the subtitles in your asset bin.
Annotation Edit FCP Subtitle plugin
MacCaption supports Annotation Edit FCP Subtitle plugin for Apple XML Interchange Format
export. The FCP plug-in for Annotation Edit will need to be installed and can be found at
http://www.zeitanker.com/. This plug-in is free and must be placed in Library >> Application
Support >> Final Cut Pro System Support >> Plugin folder. This enables real-time text color,
font, and outline functionality for Apple XML Export from MacCaption. MacCaption also
supports CGM Text effect plugin for Apple XML Interchange Format export.
TI DLP using CineCanvas XML File
With MacCaption-NLE and MacCaption-HD you can add subtitles to a digital cinema using
Texas Instruments DLP Cinema Technology. MacCaption can export a CineCanvas XML file.
This file can be used to create very sharp subtitles on Digital Cinemas.
DVD/DV-2000/DV-3000
You can add subtitles to DVD using one of the following DVD authoring systems. You can also
add subtitles to video using Ultech DV-2000/DV-3000. DV-3000 is now sold by Link under the
name HDE-3000.
After you export DVD subtitle files for your DVD authoring system, bring the file(s) to your
DVD authoring system and follow the instructions on how to add the subtitles to the DVD.
Below is a brief summary for DVD Studio Pro.
For Ultech DV-2000/DV-3000 and Link HDE-3000, please check the respective manuals on
how to add the subtitles to the video directly.
87
Subtitle with DVD Studio Pro
1. Go to File >> Export and choose the DVD Subtitles >> DVD Studio / Spruce option to
export out a .stl file.
2. In the “Caption Data Lower Limit” window, leave the box unchecked and the time codes
at 00:00:00:00, click OK.
3. Open your DVD Studio Pro project and import the movie (to the assets folder) that you
used to create the time-stamped .stl file. Drag that movie to your timeline.
4. Double-click on a subtitle stream (on the timeline) approximately where you want the
first subtitle to appear.
5. From the Inspector, click the “General” tab, at the bottom choose the language from the
drop-down menu.
6. Click on the “Import Subtitles” button and select the .stl file that you exported from
MacCaption, click OK.
7. You will see the individual subtitles appear on the timeline
Note – You can edit the subtitle text and or style settings by double-clicking on the individual
subtitle (See Chapter 13 in the DVD Studio Pro manual for details).
Adding Captions to Videos for Webcasts
You can export captions to videos for webcast for the following types of videos.
Flash Video.
There are two exports for Flash video. The export to Flash (.txt) is an old option. The .xml is a
much more informative export which retains caption positions too. Here we will describe how to
caption a Flash video with an XML.
You will need these 4 items to caption a Flash video:
• MacCaption software
88
•
•
•
Captionate (This is the program that will allow you to embed captions inside your .flv
files. You can find it here: http://www.buraks.com/captionate/6.html )
Macromedia Flash Professional 8 or higher (This is the program that will allow you to
build the .swf and/or .html files using your .flv video. You can find it here:
http://www.adobe.com/products/flash/ )
Skins for FLV Playback that support Captionate
You can download them from the following link:
http://blogs.adobe.com/accessibility/assets/CaptionedFLVSkins.mxp
Just double click the .mxp to install after you download
Creating an .flv using Macromedia Flash 8 Video Encoder
• If you purchased Flash Professional 8, it should come with Macromedia Flash 8 Video
Encoder
• You can use that to encode almost any type of video into an .flv file
• Open Flash 8 Video Encoder, click Add, and choose your video
• You can add as many videos as you want and the Video Encoder will convert all of them
into .flv videos
• If you don’t have any specific video settings you want to set, just use the default Medium
Quality (400kbps)
• After you have all your videos added in, just click Start Queue
Creating an .xml using CaptionMaker
• CaptionMaker cannot play .flv videos so use your original video to time, position, and
format all your captions inside CaptionMaker
• When you are finished, go to File >> Export DVD/DV2000/Webcast Subtitle and choose
Webcast - Flash XML for Captionate from the pull down menu
Combining the .xml with the .flv
• Run Captionate and go to File >> Open and choose to open the .flv video you converted
earlier
• Go to File >> Import >> Captionate XML and choose the .xml file you just exported
from CaptionMaker
• After it imports all your captions in go to File >> Save
• Now all of your captions are saved inside your .flv video
Creating a .swf and an .html file using Macromedia Flash
• Run Macromedia Flash and choose to start a new Flash Document
• Make sure to save this project in the same folder as your .flv video
• From the Components, & Actions, & Properties & Parameters panel, go to the
Components tab
• Expand FLV Playback – Player 8 and drag the FLVPlayback component from the tab
into your work area
• Now that you have a component to work with, go over to the Parameters tab and under
Content Path put the full filename of your .flv (ex: MyVideo.flv). You should not
include the entire path to where your .flv is located. Just put the name of the actual .flv
89
•
•
•
•
•
•
Then under Skin choose any skin that begins with the word Captioned
If you want your captions to appear over your video, choose a skin that contains the word
External. If you want your captions to appear below the video, choose a skin that
contains the word Over. In either case you can choose to auto-hide the video control
panel by setting the Parameter skinAutoHide to true.
After that you can go to Control >> Test Movie to see a sample of what your video will
look like.
Press the CC button to turn your captions on or off
Once you are ready to create the final files go to File >> Publish Settings to confirm the
names and types of files you want to export
Then go to File >> Publish to actually create them
Playing your finished captioned flash videos
• Make sure all 4 of the following files are in the same folder:
1. The .flv video
2. The .swf file for your video
3. The .html file (for those who exported .html)
4. The .swf file you chose as your skin
• Then just double click the .swf file to bring up a player in flash, or double click the .html
to bring up the flash player inside your web browser (IExplorer, Firefox, Safari, etc)
Note
It is extremely important to remember that when you are building your project in Macromedia
Flash that you do not include the entire path to your .flv in the Content Path section of the
Parameters tab. Doing so will make the video work perfectly fine on your computer, but it will
not work for anyone else.
Sample Flash video with captions:
http://www.cpcweb.com/Webcasting/Webcast_Samples/All/Flash_CPC_Demo_Video.html
YouTube/Google Video
This feature provides a direct workflow to export a .srt file for Google video.
Register with Google Video
Register with Google video at http://video.google.com. Once you register, your username will be
your current e-mail address. The e-mail address is not necessarily a gmail.com address.
You will be sent a confirmation email once you finish registering. Please confirm through this email before you upload any video.
Compress video file for Google Video Upload
90
Google guidelines for videos accepted: Goggle accepts AVI, MPEG, QuickTime, Real, and
Windows Media. If your video file is over 100 MB, please use the desktop uploader.
Create an *.SRT (Subrip)
From MacCaption, use the Export >> Webcast >> Google (*.srt) option to create an .srt file like
below.
0:01:23.000,0:01:25.000
Text shown at 1 minute 23 seconds into the video, for 2 seconds
0:02:20.250,0:02:23.8
Text shown at 2 min 20.25 sec, until 2 min 23.8 sec
0:03:14.159
Text shown at 3 min 14.159 sec for an undefined length of time.
Upload subtitles on Google video event viewer page
https://upload.video.google.com/Status
It is not necessary to do an upload of the UTF-8 file. You may also cut and paste the text into a
window if the upload feature is not working. Please allow Google a few minutes to format the txt
for flash CC and also to compress your video to Flash.
For more detailed information directly from Google please click on the link below:
http://video.google.com/support/bin/answer.py?answer=26577
Sample of Google video with captions
http://video.google.com/videoplay?docid=5827384524886853570
QuickTime Text Track
MacCaption produces QuickTime text track captions directly from the text in the Caption Text
Area. Choose File > Export > Movie with Text Track to export a QuickTime movie containing
a text track. The exported movie is a movie that consists of the text track itself and pointers back
to the original movie's video and audio tracks. To make this movie totally self contained use
QuickTime Pro's Save As feature and save the movie as a Self-contained movie.
Re-sizing Video and Text Track
Choose the desired Font type from Display > Font before starting the following steps.
File > Export > Movie with Text Track
Name file and click Save
91
The Text Display Options window will appear;
In the Text Box Size and Location areas, we recommend;
Font Size: 30
Style: Plain
Justification: Center
White Font on Black background
In the Text Box Size and Location area, you can adjust the size and placement of the text track
(not the video screen size- that can be done in QuickTime Pro)
The default settings are as follows:
Horizontal size: 720
Vertical size: 160
Offset from left: 0
Offset from top: 480
Adjust the size of the video screen and/or text track size
Open your exported movie in QuickTime Player to make sure that your features have been
enabled.
Open the movie’s properties by selecting Window (from the tool bar), then Show Movie
Properties (or by pressing the Apple button and the letter “J”). The Properties window will
appear. Using the Properties window you can further adjust the text track appearance if
necessary.
QuickTime Movie
MacCaption produces text captions for QuickTime directly from the captions in the Caption Text
Area. Choose the Export > Webcast > QuickTime option in the File Menu to export captions
for QuickTime.
MacCaption creates two files for Webcast > QuickTime: One is a file ending in ".txt" and the
other is a file ending in ".smi."
QuickTime Webcast also requires the name of a QuickTime movie to play. This movie can be
specified as the currently opened movie in MacCaption, a specific movie in the Macintosh file
system, or a default movie named 'video.mov'.
Choose the desired Font type from Display > Font before starting the following steps.
File > Export > Webcast > QuickTime
Name txt file and click Save
Name smi file and click Save
Choose the source of the QuickTime movie to play and click OK
The Text Display Options window will appear;
In the Text Box Size and Location areas, we recommend;
92
Font Size: 14
Style: Default
Justification: Center
White Font on Black background
If the style is set to Default each caption text's style is taken from the style of the caption itself
instead of from the style pull down menu. If the justification is set to Default the justification of
each caption is taken from the position of the caption text itself instead of from the justification
pull down menu.
The default settings are as follows:
Horizontal size: 720
Vertical size: 160
Offset from left: 0
Offset from top: 480
Adjust the size and/or location of the text box and click Apply
When you are finished adjusting the text placement click Done
Open the exported smi file in QuickTime Player and play the movie while viewing the caption
text.
The following is an example of a ".txt" file generated by MacCaption.
{QTText}{font: Arial}{size: 24}{plain}{justify: center}
{textcolor: 65535, 65535, 65535}{backcolor: 0, 0, 0}
{timescale: 100}{width: 720}{height: 160}
[00:00:00.00]
[music][music]
[00:00:07.40]
I'M AT THE LEFT
OF THE SCREEN.
[00:00:09.17]
SO CAPTIONS
OF WHAT I SAY
[00:00:10.50]
APPEAR AT THE LEFT
OF THE SCREEN, TOO.
When you open the.smi file with QuickTime Player the text will display when your QuickTime
movie plays.
Sample examples are available on the MacCaption distribution CD.
Real Video
MacCaption produces text captions for RealVideo directly from the captions in the Caption Text
Area. Choose the RealText File option in the File Export Menu to export captions for RealText.
93
MacCaption creates two files for RealText: One is a file ending in ".rt" and the other is a file
ending in ".smi."
When you click on the .smi file your text will display when your RealVideo movie plays. But if
you put the smi file on the web, you can create another dummy .rm file. See the details below.
Sample example of a .smi file (RealVideoDemo.smi)
The .smi file contains the name of the .rt file and the video file.
<smil>
<head>
<meta name="author" content="CPC CCaption"/>
<layout>
<root-layout height="360" width="350" background-color="black"/>
<region id="top" width="340" height="250" left="5" top="0" />
<region id="video" width="340" height="240" left="5" top="5"
fit="fill"/>
<region id="bottom" width="340" height="270" left="5" top="255" />
</layout>
</head>
<body>
<par>
<video src="RealVideoDemo.mpg” region="video"/>
<seq>
<textstream src="RealVideoDemo.rt" region="bottom" />
</seq>
</par>
</body>
</smil>
Sample example of a .rt file (RealVideoDemo.rt)
<window type="teleprompter"
duration="41.00"
width="320"
height="324"
loop=true
bgcolor="black"/>
<time begin="0.00" />
<font face="Arial" size=4 color="white">
<center/>
<time
<time
<time
<time
<time
<time
<time
begin="7.00" /><br/><clear/>I'm at the left<br/>of the screen.
begin="8.96" /><br/><clear/>So captions<br/>of what I say
begin="10.30" /><br/><clear/>appear at the left<br/>of the screen, too.
begin="13.53" /><br/><clear/>Now I'm at the right<br/>of the screen,
begin="15.50" /><br/><clear/>so my captions appear<br/>at the right.
begin="17.83" /><br/><clear/>
begin="18.70" /><br/><clear/><i/>Now I am off screen.</i>
94
<time begin="20.53"
<time begin="22.20"
<time begin="24.10"
screen,
<time begin="27.00"
<time begin="29.50"
<time begin="32.46"
captions.
<time begin="36.53"
disappears.
/><br/><clear/><i/>To indicate that<br/>I'm off screen,</i>
/><br/><clear/><i/>whatever I say<br/>is italicized.</i>
/><br/><clear/>Now my name appears at<br/>the bottom of the
/><br/><clear/>we put captions<br/>of what I say at the top,
/><br/><clear/>so that my name<br/>is not covered by captions.
/><br/><clear/>Up until now, we have been<br/>using pop-on
/><br/><clear/>When a new caption pops on,<br/>the old caption
</center>
</font>
</window>
Sample example of a .rm file (RealVideoDemo.rm)
If you wish to host this RealVideo with captions on the web, yon would need
to create another file .rm that should contain one line as below:
http://www.website.com/RealVideo/RealVideoDemoLink.smi
Hosting the RealVideo files on the web
Copy all four files to the folder RealVideo on your web site www.website.com:
RealVideoDemo.rm
RealVideoDemo.rt
RealVideoDemo.smi
RealVideoDemoLink.rm
Now make a link to the file RealVideoDemoLink.rm and when you click on this link,
RealVideo is going to be launched and display the video with captions.
Sample examples are available on the MacCaption distribution CD.
Windows Media Video
MacCaption produces text captions for Windows Media Player directly from the captions in the
Caption Text Area. Choose the Webcast > Windows Media Player option in the File Export
Menu to export Windows Media captions. MacCaption can play the video with captions in three
different ways. Simply upload the files created by MacCaption and the video in the same folder
on the web and make a link to the appropriate file.
You have three choices.
1. Play video with captions in standalone WMP. Two files .asx and .smi are created. Make a
link to the .asx file to see the Webcast with captions. To test the files, place all files (.asx,
95
.smi and .wmv) in one folder and double-click on the .asx file. The video will play and
display the captions.
2. Play video with captions below the video in WMP embedded in Internet Explorer. Two
files .html and .smi are created. Make a link to the .html file to see the Webcast with
captions. To test the files, place all files (.html, .smi and .wmv) in one folder and doubleclick on the .html file. The video will play and display the captions.
3. Play video with captions on the side in Book format in WMP embedded in Internet
Explorer. Three files .html, .dat and .smi are created. Make a link to the .html file to see
the Webcast with captions. To test the files, place all files (.html, .dat, .smi and .wmv) in
one folder and double-click on the .html file. The video will play and display the
captions.
Sample examples are available on the MacCaption distribution CD.
To see captions on Windows Media Player, make sure to turn the captions on. For different
versions of WMP, the steps to turn caption on are different. For details, check the link:
www.cpcweb.com/wlive/WMPSwitches.html.
96
Importing Captions
Retrieve Captions from a DV Movie
(Real Time Decode over FireWire)
MacCaption will display and decode video and its associated closed captions, Program Name
and V-Chip information coming in over FireWire. To decode closed captions from a DV movie
over FireWire:
•
•
•
•
•
•
Attach a FireWire device such as a DV camera or DV VCR to the computer FireWire
port and turn it on.
Under the File menu, choose Real Time Decode and a Decode Window will appear.
Start sending a video source to the FireWire port and watch the video in the Decode
Window.
Click the Show Captions option to see the closed captions in the video.
Check the Save Captions option to begin saving the closed captions.
Uncheck the Save Captions option to stop saving closed captions.
Many Digital Video cameras and VCRs will convert an analog signal to a digital FireWire
signal. To watch a real time TV broadcast with your computer, connect the analog video and
audio output from a VCR to the analog video and audio input of your DV camera or DV VCR
and connect the Digital/FireWire output of your camera to your computer. In the MacCaption
Decode Window you can watch a television broadcast with its associated closed captioning.
If Closed Captions do not appear, verify that
•
•
Your analog or DV video signal actually contains closed captions. You can do this by
playing your analog or DV video into a TV that has its closed caption decoding feature
enabled. If you are using DV you can verify that your DV record/playback device is
closed caption capable by recording a TV broadcast that contains closed captions and
then playing it back into a TV over the composite video input and watching for closed
captions.
Your analog to DV converter hardware is capable of converting an analog video signal
that contains closed captions into a DV data stream that contains closed captions.
Retrieve captions from an NLE 720x486 movie
MacCaption will decode the closed caption information contained at the upper lines of a full
frame 720x486 QuickTime Movie. This information consists of an identifier of seven small
white dashed lines followed by two 8 bit characters that are also represented by small dashed
lines.
97
MacCaption searches for the upper most closed caption data line in the input file and then
decodes the closed captions in the rest of the file. To inhibit auto search and use the Row and
Column that has been previously manually set in the Preferences/NLE tab check "Inhibit auto
scan for first caption Row and Column" in the import file input dialog.
Decoding closed caption data from an NLE 720x486 movie can be used for determining the Row
and Column to set in the Preferences NLE tab for enabling MacCaption to generate closed
captions for a particular non linear editing system. To do this:
• Import a movie containing closed captions into your NLE system
• Using your NLE system make a full frame 720x486 29.97 frames per second QuickTime
movie
• Using MacCaption decode the closed captions in the QuickTime movie and have
MacCaption determine the Row and Column of the closed captions.
MacCaption is now set up to export properly placed closed captions for use with your NLE.
Retrieve captions from a MPEG-2 movie
MacCaption will decode the closed caption information contained in MPEG-2 video. Go to File
>> Import option and choose one of your desired options – DVD, DTV 608, DTV 708, CCube,
Sigma MPEG-2, or SCTE 20 608 depending on your video source. You will see captions appear
on the screen after decoding is completed. To decode alternate channels of captioning like CC2,
CC3, CC4 or Service number 2,3,4,5,or 6, go to top menu Caption>Set Decode Channel and
Caption> Set Decode Channel Service Number.
Retrieve captions from HD movie
MacCaption will decode the closed caption information contained in an HD QuickTime file. Go
to File >> Import option and choose one of your desired options – XDCAM HD Material
eXchange Format (.mxf), DVCPRO HD (DV100), QuickTime 608/708 track, and Matrox
4VANC depending on your video source. You will see captions appear on the screen after
decoding is completed. To decode alternate channels of captioning like CC2, CC3, CC4 or
Service number 2,3,4,5,or 6, go to top menu Caption>Set Decode Channel and Caption> Set
Decode Channel Service Number.
To retrieve captions from XDCAM HD Material eXchange Format (.mxf) simply connect your
Sony XDCAM HD VTR to the FireWire port of your Mac and mount the Professional Disk in
the Finder. Once the Professional Disk icon appears on your desktop, go to the Clips Folder and
copy one of the captioned MXF files to your desktop. Once it is finished copying, go to
File>Import>Material eXchange Format (.MXF) in order to browse and open the closed
captioned MXF with MacCaption.
To retrieve captions from DVCPRO HD (DV100) QuickTime files, you must capture the video
from FireWire using MacCaption. Panasonic VTR 1400 DVCPRO HD is compatible with
98
closed captions. Once you have captured the QuickTime file, go to File>Import DVCPRO HD
(DV100) Closed Captions.
Similarly, DVCPRO HD QuickTime files with closed captions captured through the Omneon
Spectrum server are able to be decoded using MacCaption File>Import> DVCPRO HD (DV100)
Closed Captions option.
QuickTime HD files containing the DTV 608/708 closed caption track can also be decoded using
File>Import>QuickTime DTV 608/708 closed captions option.
QuickTime HD compatible Podcast files containing 608 closed caption track for QuickTime can
be decoded using the File>Import>QuickTime/Podcast Closed Captions (.mov, .m4v).
QuickTime HD files captured through the Matrox MXO2 containing 4VANC audio caption data
can be decoded using the File>Import>Matrox 4VANC Closed Captions. When capturing
closed captioned HD video through the HD-SDI input of the MXO2, go to the Mac system
preferences and select the Matrox options to include the closed captions in audio track 8. Once
in Final Cut Pro export a reference QuickTime Movie to the desktop to decode the HD closed
caption data in MacCaption.
Capture Video
(Creating a QT movie)
Connect the FireWire cable to your hard drive and to the DV converter (DV in/out).
Connect the video player outputs to the DV converter's inputs (R, L and Video) and turn on the
DV Converter. Cue your video tape to about 10 seconds before you want to start recording.
Go to File>Capture Video... The MacCaption Capture Window will appear.
Note - If the Capture Window does not appear and you receive an error message, check all of
your connections (FireWire, inputs, outputs, power on the converter and the player).
Click on the Record button at the bottom of the Capture Window. MacCaption will then ask you
to name the file that you are about to create. Name the file, select the location and click save.
Press play on your player and you will see a multi-colored progress wheel spinning.
This means that MacCaption is now capturing the audio and video that you are sending through
the converter. You will also see the video, from your player, in the Capture Window.
You will not be able to hear the audio from your drive, that's OK.
When your video is completed, simply click anywhere in the Capture Window to end the
capture. Then minimize MacCaption and open the movie that you created to check the video and
audio.
99
Captioning with an External Encoder
Hardware Encoders Supported by MacCaption
•
•
•
Link Electronics PCE 845-D/885/890 and other encoders
EEG Smart Encoders
SoftTouch Hubcap Mag (Decoder to create open captions only)
Setting Up Link PCE 845-D
•
Plug a BNC cable from the Video Out on your play deck to the NTSC IN slot on the
Encoder.
• Make sure the MODE switch is flipped to NTSC.
• Plug a BNC cable from the ENCODER slot under OUTPUTS to the Video In on your
record deck.
• Plug a Straight Serial Data Cable from the TO COMPUTER slot on the Encoder into the
Serial Data Port on your computer.
Notes
• If the Video Out and Video In slots on your play and record decks are RCA, you will
have to get BNC to RCA Adapters or BNC to RCA cables. These are common cables
and can be found at your local electronics store.
• If you are using SVHS, use the SVHS IN and OUT slots and make sure to flip the
switch to SVHS under MODE.
Setting up SoftTouch Hubcap Mag
•
Plug a BNC cable from the Video Out on your play deck to the Video In slot on the
Encoder.
• Plug a BNC cable from the Video Out slot on the encoder to the Video In on your record
deck.
• Plug a Straight Serial Data Cable from the Data Port slot on the Encoder into the Serial
Data Port on your computer.
Notes
• If the Video Out and Video In slots on your play and record decks are RCA, you will
have to get BNC to RCA Adapters or BNC to RCA cables. These are common cables
and can be found at your local electronics store.
100
Initializing the Encoder in MacCaption
Now that you’ve got your encoder physically set up, it's time to activate it in MacCaption. Go to
the Caption menu and select Device…now select your encoder. Then go to Configure and select
the correct port that your device is connected to. Each encoder’s configuration is defaulted to the
correct settings for Baud rate, Data bits, Parity, and Stop bits so leave those untouched unless
you need to change them for a specific reason. When you have set the correct configuration, go
to the Caption menu again and choose Initialize Device. If you select this and nothing happens,
that means your device has been successfully initialized, otherwise an error message will pop up.
What to do if your Mac doesn’t have a Serial Data Port
Some Mac notebooks and systems do not come with a Serial Data Port. If you are operating on a
desktop, you may purchase a PCI card with a Serial Data Port on it and install it. If you are
using a notebook and cannot install a serial data port, we recommend that you purchase a Serial
to USB device. These devices plug into a USB slot and have a number of Serial Data Port slots
on them. We recommend using the Keyspan brand Serial to USB adapters as these are the ones
we used while developing these functions.
Tape to Tape with a Transcript
Linear captioning with the MacCaption works the same way as post production captioning, the
only difference is that when you hit the “+” key, you will be sending the caption out to the
encoder for broadcast or tape instead of time coding it. Simply import your text file into
MacCaption and format the entire text file accordingly as you would for any post production job.
Now make sure your hardware encoder is setup properly and that you have your video source
going into the input on the encoder and the output going to your record deck. When you are
ready to begin recording captions, simply press play on the play deck, press record on the record
deck, and as you hear the first word of each caption, hit the “+” key to send that particular
caption to the hardware encoder. If you mess up you will have to stop and rewind both tapes to
the same point and start from there again.
Live Captioning
With a Transcript
This works the same exact way as the Tape to Tape method, except instead of setting up a record
deck to the output of your encoder, you will be sending your output signal from the encoder to a
deck for broadcast.
101
On the Fly Without a Transcript
Make sure your encoder is setup correctly. You may refer to the earlier sections in this chapter
for specific instructions on how to setup your particular encoder. Once it is setup, go to Caption
>> Device and select your encoder and configure it if necessary, then go to Caption >>
Initialize Device. Once your encoder has been initialized, you may go to Live Caption Options
and make any final adjustments before beginning. When it is time to begin Live Captioning your
program, go to Caption >> Live Caption or select Live Caption from the Control Mode panel on
the main MacCaption interface. Once Live Caption has been activated, anything you type will
be sent to the encoder and output. Based on the number of characters you specified per line,
once you have typed that many characters, the full line will be output to the screen.
Speech Recognition with MacSpeech
If you are using MacSpeech (also known as iListen) for real-time speech recognition captioning,
the only thing you have to remember is to keep the MacCaption window on top. As long as the
MacCaption application is the current window on top, anything you say into the microphone will
be typed into MacCaption. And in Live Caption Mode, anything that is typed into MacCaption
will be sent out to the encoder.
Changing the Position on Screen of the Caption in Live Caption Mode
When doing Live Captions, sometimes it is necessary to move the position of the caption on
screen. For instance if the captions are rolling up from the bottom of the screen and at the same
time a phone number appears at the bottom of the video, it is the job of whoever is doing the
captioning to move the captions to the top. In the Caption >> Live Caption Options menu you
can see a list of all the options for moving captions. These are all hot-keyed so you can make
quick changes accordingly. To move captions up and down or side to side you can simply use
the arrow keys. To move captions to the very top or bottom, use the Apple+T or Apple+B
commands.
Switching Between Pre-prepared and Live Captions on the Fly
If you already have a script for a portion of a Live Broadcast, you can use that in addition to
captioning on the fly using a real-time method. You can load your script into the MacCaption
beforehand and as you are sending out the live captions, when it comes time to use your preprepared script, you can hit the “+” key and send out the captions you already have loaded line
by line. To switch back, simply begin typing or speaking again.
102
Menus
Preferences
There are three tabs in the Preference Dialog; the General Tab, the Display Tab and the NLE
Tab.
General Tab
General
•
•
•
•
•
•
I/O
Display
NLE
Remote
Preserve Movie Timecode
Remove trailing blanks in captions
Open last .cca file on program launch
Adjust video timing in FCP captured movies
Auto save a copy every 10 minutes
Log Message Window
Caption Timecode Sync Function Key is F12
User Time Stamp Frame Adjustment is 0
(Scratch Disk)
Macintosh HD:Users:username
The selections in this tab affect the general operation of MacCaption.
Preserve Movie Timecode
The Preserve Movie Time code option preserves the current movie's time code when importing
closed captions and calculating caption offsets and caption positioning. If this option is not
selected a starting time code of 00:00:00:00 is used. A movie's starting time can be changed with
the Set Movie Time option in the Special Menu.
Remove trailing blanks in captions
This deletes any trailing blanks at the end of a caption.
Adjust video timing in FCP captured movies
Allows you to automatically adjust timing to Final Cut Pro movies.
Auto save
The Auto save a copy every N minutes option automatically saves a copy of your project every
N minutes.
103
Caption Timecode Sync Function Key
Caption Timecode Sync Function Key is the [+] key near the keypad by default. But you can
assign any function key of your choice.
User Time Stamp Frame Adjustment
User Time Stamp Frame Adjustment Time Stamp Frame Adjustment is inside the Preference
menu. This feature can compensate for your reaction time when pressing the [+} key to time
code a caption file – as long as your reaction time is consistent. For example, if you consistently
press the [+] key 10 frames after the time it should ideally be pressed to sync the audio and
captions, then set the time frame adjustment to –10. The software will automatically subtract 10
frames from the time code each time you press the [+] key, thereby compensating for your 10
frame lag time. Caution: if there are multiple users of the software and each has a different
reaction time, you should reset the Time Stamp Frame Adjustment to zero after each use of the
software so as not to throw off the timing of the next user!
Scratch Disk
Sets the folder on one of your local hard drives which will be used as the scratch disk. This
folder is used for temporary files during some import and export operations.
I/O Tab
General
[ ]
I/O
Display
NLE
Remote
Always ask for video capture device
Video Playback : [
Apple FireWire NTSC
]
Always ask for video capture device
If checked, MacCaption will always ask you which video capture device to use.
Video Playback
Allows you to choose the playback mode for your video when using the “Print to Video”
function. Choose between Apple FireWire NTSC, Apple FireWire PAL, Apple FireWire
DVCPRO NTSC, Apple FireWire DVCPRO PAL, and Apple FireWire DVCPRO-HD.
104
Display Tab
General
I/O
NLE
Display
Remote
•
Show Errors
o No Caption Type
o Line Length
o No Starting Time
o Out of Sequence
o Too Many Lines. Max is [ 4 ]
o Erase Too Long
o Illegal Closed Caption Character
o Caption Overlaps Scene Transition
o Non Optimal Character Sequence
•
•
Play a sound when a long operation completes
Disable Help Tags
( Choose Selected Text Cell Color )
This Display Tab controls the type of errors that are reported for individual captions in the
caption text area. Select the error to include it. All errors can be disabled by deselecting the
Show Errors check box.
The caption errors are:
•
•
•
•
•
•
•
•
•
No Caption Type - The caption Type is missing
Line Length - A caption is more than 32 characters in length
No Starting Time - The caption does not have a starting time
Out of Sequence - The Starting Time of this caption is ahead of the starting time of the
previous caption.
Too Many Lines - The current caption has more than the specified number of lines
(default is 4), or more than 1 line if the caption is a roll up caption
Erase Too Long - The Erase Time of the current caption extends into the next caption
Illegal Closed Caption Character - A text character in the caption cannot be represented
as a closed caption character
Caption Overlaps Scene Transition - The current caption overlaps a scene transition such
as a cut or dissolve.
Non Optimal Character Sequence – Detects unusual formatting errors, such as a nonitalics space in between two italics words, etc.
NLE Tab
105
General
I/O
Display
Primary Row
Starting Column
•
•
NLE
Remote
(0-484) 1_
(14-39) 24
Small QuickTime
Use 0 IRE YCrCb levels for 4:2:2 video
NLE Values set to My NLE
Set current values as ‘My NLE’
Video non-linear editing systems from different vendors require specific set up values to
generate proper closed-caption image data files. The NLE Tab is used for setting these specific
values. The information in the NLE Tab is not used when MacCaption adds closed captions to
Digital Video.
The "NLE Values set to" pull down menu contains specific presets for various NLE hardware
systems. Select AJA Io LA for AJA Io LA hardware, select Avid ABVB when using an Avid
Media Composer with the ABVB hardware board set, select Avid DS for an Avid DS system,
select Avid Meridien for an Avid NLE with the Meridien hardware board set, select Blackmagic
DeckLink Extreme or Media 100, etc. This operation only has to be done once.
MacCaption can be configured for additional NLE systems by directly modifying the Primary
Row and Starting Column data fields in this Tab. The "Set current values as 'My NLE'" button
copies the current NLE setting into 'My NLE' setting where they can be modified.
Primary Row is the row number where field 1 data will be placed. Field 2 data will be put on
Primary Row + 1. The Primary Row data value must be between 0 and 484 inclusive for NTSC
(0 and 574 for PAL).
Starting Column is the column offset for the center point of the first closed-caption clock run-in
bit. The Starting Column data value must be between 14 and 39 inclusive.
Small QuickTime allows the generation of QuickTime data files that reuse a previously
compressed image frame. For example, the QuickTime frame corresponding to the closedcaption binary values of 0, 0 occurs fairly often in a closed-caption QuickTime movie. With
Small QuickTime selected, when a second 0, 0 frame is about to be compressed a pointer is built
into the QuickTime file that references the previously compressed 0, 0 image frame. The use of
the previously compressed image frame saves both the time needed to compress the image as
well as the space needed to store it. A QuickTime movie file created in this manner is
significantly smaller in size than one created without this option, however, not all non-linear
106
editing systems are able to display video that is composed with this type of previously referenced
frames. Deselecting Small QuickTime can turn off this feature.
File Menu
New Window
Open Project
Open Movie
Open Recent
*N
*O
>>
Close Window
Close Project
Close Movie
*W
Save
Save As…
*S
Import
Export
>>
>>
Batch…
Capture Video…
Real Time Decode…
Print MPEG to FireWire
Print to Video…
*P
New Window/Close Window
Creates an entirely new file. If you have a window open, you will need to close the currently
open window using Close Window, before it will create a new file. MacCaption cannot support
two files open at once. Close Window is used to close the window without quitting the
application.
Open Project/Close Project
Open Project/ Close Project options allow you to Open and Close projects without quitting the
application. If you have a project open, you will need to close the currently open project using
Close Project before it will allow you to open a different one. If you want to start an entirely
107
new project, you will need to use Close Window after you close the project and use the New
Window feature to start a completely new file.
Save/Save As
Save/Save As options handle only MacCaption files. To open and save any other kind of file, you
must use Import/Export options.
Saving files in a non-MacCaption file format (e.g. text or MS Word file) will still set the name of
the file as "Untitled". Also when you open a non-MacCaption file and if you have the Auto Save
option on, MacCaption will prompt you to save the file under the name “untitled.cca” in
MacCaption format every few minutes (according to the AutoSave time interval).
Open Movie
Movies can be opened in two ways:
•
Drag a movie from the Desktop into the movie display area. To open the movie as well
as extract the captions from the movie release the mouse midway between the movie
display area and the caption text area.
•
Choose the Open Movie command under the File menu.
o Select 'Extract caption data from movie" to decode existing closed captions in the
movie.
o Select "Preserve movie time code" to keep the movie's time code reference point;
otherwise a time of 00:00:00:00 will be used. To change a movie's starting time,
use the Set Movie Time command.
The movie must be playable by QuickTime.
You can capture a DV QuickTime movie into your computer by using the FireWire port and the
Capture Video option in the File menu.
Close Movie
This option closes current movie.
108
Import Captions
Import Captions is used to import text files for captioning or subtitling, or to retrieve captions
from existing captioned videos and many other kinds of files.
MacCaption can import the following file types:
109
Export Captions
Export is used to create/export your final caption/subtitle, text or movie file.
NLE:
HD:
Web/Podcast:
110
Batch…
Please see chapter Exporting Captions/Subtitles for details.
Capture Video…
Please see chapter Importing Captions for details.
Print To Video…
Please see chapter Exporting Captions for details.
Real Time Decode…
Please see chapter Importing Captions for details.
Edit Menu
Undo
Redo
*Z
*Y
Cut
Copy
Paste
Delete
Select All
*X
*C
*V
*A
Previous Error
Next Error
Find…
Replace…
*F
*R
Clear
Duplicate Program A
>>
>>
Undo
This command will undo your last action. The computer maintains a deep stack of past actions. If
there is nothing that can be undone, nothing will happen. The keyboard shortcut for Undo is
[Command/Apple] + Z.
111
Redo
If you have undone too many actions, this will redo those actions. The keyboard shortcut for
Redo is [Command/Apple] + Y.
Cut
Takes the selected text and puts it onto the clipboard. Unlike Copy, it does not preserve the text
selected. The keyboard shortcut for Cut is [Command/Apple] + X.
Copy
Takes the currently selected text or graphic and temporarily copies it onto the Clipboard. The
keyboard shortcut for Copy is [Command/Apple] + C.
Paste
Takes whatever is on the clipboard and puts it into the Work Area. Preserves some formatting
(color, font), but not all of it. The keyboard shortcut for Paste is [Command/Apple] + V.
Delete
Deletes the selected item and sends it to the trash can. The del button on the keyboard can also be
used to perform the same task.
Select All
Selects/highlights all items in a given field or area. The keyboard shortcut for Select All is
[Command/Apple] + A.
Note: You may use Shift-Option-Click to select all captions above or below the currently
selected caption.
Previous Error
Selects the previous caption with an error from the current caption selected.
Next Error
Selects the next caption with an error from the current caption selected.
Find Text
In the Find what box, enter the text that you want to search for.
To match the case of the text that you entered, check the box next to ‘Match case’.
112
From the drop-down menu, you can also select whether you’d like to search the entire project
(All), Down or Up from where you are currently working.
Click on Find Next. To cancel a search in progress, press Cancel.
Clear
Choose to clear the Starting and Ending Time codes, Durations and Text for currently selected
captions.
Replace Text
In the Find what box, enter the text that you want to search for.
In the Replace with box, enter the replacement text.
Select any other options that you want.
For Help on an option, click the question mark and then click the option.
Click Find Next, Replace, or Replace All as you desire.
To cancel a search in progress, press ESC.
Duplicate Program
This option is used when you like to caption multiple channels (up to 6 channels) simultaneously
on the same video. For details see Encode Preferences under the Caption menu (in the Menu
chapter). Choose to make a copy of your current project and create a duplicate for the other
channels. MacCaption makes an identical copy of the program. You need to translate the text to
another language.
Display Menu
Font
>>
Program A
Program B
Program C
Program D
Program E
Program F
Show Caption Grid
Show Safe Titles
Show Time Code
Display as Captions 113
*D
Font
Used to change the font of the selected text.
Program A, B, C, D, E, F
Opens the selected program.
Show Caption Grid
Shows caption grid in the movie area. This feature is useful when dragging your captions to
desired locations.
Show Safe Titles
Shows safe title boundaries in the movie area. It is good practice to keep your captions and/or
subtitles inside these areas.
Show Time Code
Shows time code in bottom right corner of movie window.
Display as Subtitles or Captions
Choose to run MacCaption in Caption mode or Subtitle mode. The option will change
depending which mode you choose to display in.
Subtitles are created in one of two ways: they are created using subtitle attributes or created
using caption attributes.
If Display as Subtitles is selected, all created subtitles will have a Bold, Italic or Underline
attribute if the respective option is selected in the subtitle menu.
If Display as Captions is selected, each caption is created using the exact character attributes of
the caption text it represents. For example, if individual words in the caption text are italicized
you should use the Display as Captions option to maintain the exact caption look when a
subtitle is created.
The following table describes how a subtitle attribute is used when a subtitle is created in each of
these two cases:
114
Attribute
Render Using Subtitle
Render Using Caption
Font
Uses Subtitle Menu font
Use Subtitle Menu font size
Font Size
Uses Subtitle Menu font size
Use Subtitle Menu font size
Font Color
Uses Subtitle Menu font color
Use caption font color if not
black otherwise use Subtitle
Menu font color
Font Outline Size
Background Color
Background Opacity
Uses Subtitle Menu attribute
Uses Subtitle Menu attribute
Bold
Italic
Underline
Uses Subtitle Menu attribute for
all subtitles
Use caption text attribute for
each caption text character
Leading
Tracking
Uses Subtitle Menu attribute for
all subtitles
Uses Subtitle Menu attribute
for all subtitles
Additional Information:
Subtitle menu items are only available when displaying text as Subtitles. Subtitle fonts look best
when they are made with bright colors as dark font colors do not look good when rendered with
the DV codec.
115
Caption Menu
Encode Preferences…
Decode Preferences…
Set Caption Data Lowest Limit…
Set Caption Data Lower Limit
Set Decode Channel
Attributes
>>
Device…
Properties…
Initialize Device
Close Device
Send Caption
Erase Caption
Keypad Plus ‘+’
Keypad Minus ‘-‘
Live Caption
Live Caption Options
>>
Encode Preferences
With EIA-608 (standard definition captions), you can caption all 4 caption channels in 4
different languages simultaneously as long as there is enough space on the video to
accommodate all 4 languages.
Note: Channel 1 and Channel 2 occupy the same space inside the Field 1. The same is
true for Channel 3 and Channel 4. When you caption two channels in the same field,
there is always fight with the space between CC1 and CC2. CC1 has the first priority.
Whatever space is left, is used by CC2. It is good idea to para-phrase the text and make it
short in both languages when you do CC1 and CC2 caption simultaneously.
116
There are six independent text editing areas in MacCaption. These are labeled Program A
through Program F. To switch between the different programs use the Program pull down menu
located at the top right corner of the main window.
608 Encode Targets
CC1
CC2
CC3
CC4
•
None
Program A
Program B
•
Program C
•
Program D
•
• Blank between pop-on
• Duplicate control codes when sending captions
• Force an erase on a roll up caption base row change
The EIA-608 standard for line 21 captioning provides for four independent closed caption data
channels. These are named CC1, CC2, CC3 and CC4. MacCaption can generate closed captions
for all of these closed caption data streams. There is no direct correspondence between a
Program and a specific CC channel but typically one uses Program A for CC1 and Program B for
CC2, or Program A for CC1 and Program B for CC3.
708 Encode Targets
Program A
Program B
Program C
Program D
Program E
Program F
[
[
[
[
[
[
1
Do not encode
Do not encode
Do not encode
Do not encode
Do not encode
]
]
]
]
]
]
The EIA-708 standard for DTV captioning provides for 64 independent closed caption data
channels called “Service Numbers.” These are named Service Number 1 through 63, however
typically only the first six (1-6) are used. MacCaption can generate closed captions up to six of
these closed caption data streams. There is no direct correspondence between a Program and a
specific Service Number, but typically one uses Program A for Service 1 and Program B for
Service 2, etc.
EIA-708 captions also allow you to specify additional display options such as font size and style,
foreground/background color and opacity, and character edge (drop shadow). However, not all
TVs and decoders will respect all possible settings. Many new HDTVs allow the user to
override the caption display settings to their own preferences as well.
117
The Program button allows you to toggle between six separate caption text areas. The area that is
currently selected is the one in which MacCaption will place its text when it does import
operations. Unless you are captioning a video with two channels, such as English language
closed captions and Spanish language closed captions, there is no need to use any Program other
than Program A.
To make a copy of an existing Program including all of its text and time codes to another
program, use the Duplicate Program option in the Edit menu.
Copy to Program A
Copy to Program B
Copy to Program C
Copy to Program D
Copy to Program E
Copy to Program F
This option will allow you to copy all the time codes and positional information from one
language (for example, Program A) to another language (for example, Program B). Now you can
translate the text (Program B) to another language.
Once all of the individual Programs have been synchronized to a movie use the Encode
Preferences option in the Special menu to assign each Program to a specific closed caption
channel. For example, you may want to assign Program A to CC1 and Program B to CC3. If
desired, it is also possible to encode Program A to more than one CC channel.
CC1 and CC2 are both transmitted in the Odd Field of a video frame and CC3 and CC4 are both
transmitted in the Even Field of a video frame. Due to closed caption bandwidth considerations it
is important to keep in mind that two closed caption programs containing a lot of text may
appear fine when placed in CC1 and CC3 but may appear later than their intended display time
when placed in CC1 and CC2 or CC3 and CC4. As with all closed captioning a careful view of
the final output tape containing all closed captioned channels is a good idea.
Decode Preferences
Opens a window that has a checkbox option to "Remove erase if caption blanking is less than __
frames." If checked, you can input how many frames you'd like to set it to.
Set Caption Data Lowest Limit…
This allows you to set the lowest limit or starting time for caption data to begin in your exported
file. Certain exports, such as Black Movie or Matrox 4VANC, use this time code as the starting
time code of the exported file. Please see the section entitled Captioning a Commercial Spot in
the A Short Tutorial chapter.
118
Set Caption Data Lower Limit
This allows you to set the lower limit for caption blocks. Captions before the lower limit (LL)
mark will not be encoded.
Set Decode Channel
Set the channel to CC1, CC2, CC3, or CC4 for decoding line 21 captions. Set the channel to
“CC1 in DTV” through “CC4 in DTV” to decode 608 captions from DTV encoded files. Set the
channel to “708 in DTV” and then select a service number in the “Set Decode Channel Service
Number” menu to decode 708 captions. Captioned videos that you are importing from the
Import menu will then be decoded according to the channel you have selected.
Attributes
Display Mode
The Display Mode menu item opens a submenu, which offers the following options for caption
appearance: Pop-On, Paint-On, Roll-Up 2 lines, Roll-Up 3 lines, Roll-Up 4 lines.
Subtitles can only appear as Pop-On.
Text Color
Used to change the color of the text.
Bold/Flash
Makes the selected text bold. Bold text is not supported for captioning. Bold text can only be
used for subtitling. Flashing text is not supported for subtitling. Flashing text can only be used
for captioning.
Italic
Makes the selected text italic. Italics are used to indicate off-screen speakers in captioning, or
untranslatable and/or stressed words in subtitling.
Underline
Underlines the selected text.
Horizontal Justification
There are three possible horizontal justifications: Left, Center and Right
Horizontal Position
In captioning, there are only 32 possible horizontal positions. They are numbered 1 through 32. 1
also means L (left).
119
Vertical Position
In captioning, there are only 15 possible vertical positions. They are numbered 1-15.
Insert Music Symbol
Inserts a music symbol (the quarter note) to the caption text. There are two choices for this menu
item; Single Music Symbol and Surrounding Music Symbols (Places a music symbol before the
first letter and after the last letter in the caption text area).
To add Surrounding Music Symbols you may highlight a number of captions or a single caption,
and invoke this option. This option will place music symbols before the first letter and after the
last letter in the caption text area for all highlighted captions.
Convert Illegal Caption Characters
Many document editing programs may automatically change some punctuation or special
characters in your document into fancy Unicode characters such as the single-character ellipsis,
long dash, smart quotes, etc. However, these Unicode characters cannot be used in 608 closed
captions. Select this menu option to convert any illegal Unicode characters which are in your
caption text area, into their standard ASCII equivalents.
Device
The Caption Device function allows you to select which Hardware Encoder you will be using to
broadcast your live captions. Simply select which encoder you are using and then click on
Configure to choose which port your encoder is connected to. The Baud rate, Parity, Data bits,
and Stop bits will automatically default to the correct values for each encoder so it is not
necessary to change them.
Properties
Upstream Transparency
•
•
Allow existing Field 1 data to pass through untouched.
Allow existing Field 2 data to pass through untouched.
Live Caption Options
Hardware Device CC Channel: CC1
Roll up lines: 3
Base row:
3
•
•
Left indentation:
Characters/Line:
Convert to uppercase
Save live captions
120
0
26
Upstream Transparency
The option to allow existing Field 1 data and Field 2 data to pass through untouched may be
toggled here.
Live Caption Options
The options for conducting live captions are as follows:
• Selecting a CC Channel on CC1 through CC4
• Choosing the style of captions, such as Roll-Up 2, 3, or 4 lines
• Positioning such as the Left Indentation, Base Row
• And character formatting such as the number of Characters per Line and All Uppercase
options.
• Saving live captions
Initialize Device
This function initializes the device selected according to the configuration and properties that
were set. If something is not configured correctly, an error message will appear. If everything
initialized smoothly, nothing will happen.
Close Device
Closes the device you currently have initialized.
Send Caption
This function is defaulted to the “+” key on your keypad. When pressed, it will send the current
caption block you have selected to the encoder.
Erase Caption
This function is defaulted to the “-“ key on your keypad. When pressed, it will clear the screen
of captions.
Live Caption
This function activates Live Caption Mode. Once activated, you can begin typing and the
captions will be sent out to the encoder line by line according to the options you set.
121
Live Caption Options
Here you can select the number lines for roll-up, the maximum characters per line, left indent,
and move the caption horizontally or vertically around the screen.
Roll-Up Lines
>>
Characters Per Line
>>
Move Left 1 Space
Move Right 1 Space
Move Left 4 Spaces
Move Right 4 Spaces
Left Indent
Move to Top
Move to Bottom
Move Up 1 Row
Move Down 1 Row
Left Arrow
Right Arrow
Shift Left Arrow
Shift Right Arrow
>>
*T
*B
Up Arrow
Down Arrow
122
Subtitle Menu
Subtitle Preferences…
Font
Font Size
Font Color…
Font Outline Size
Font Outline Color…
>>
>>
>>
Background Color…
Background Opacity
>>
Bold
Italic
Underline
Line Spacing
Character Spacing
>>
>>
Draw Vertically
Subtitle Preferences
The Subtitle Preferences dialog box can be found directly under the Subtitle main menu. The
“Select programs to display” options allow you to select which Program’s subtitles are displayed.
Choose “Currently selected program” to display the one set of subtitles from the currently
selected Program.
Choose “All programs” to display subtitles from all Programs that have subtitles.
Choose “Individually selected programs” to display subtitles from the specific Programs you
select.
Choose “Render using Subtitle Attributes Setting” if you are working with languages that
generate character ligatures, such as Arabic.
Select programs to display
•
•
•
•
Currently selected program
All programs
Individually selected programs
A
B
C
D
E
F
Render using Subtitle Attributes Setting
123
Font
Used to change the font.
Font Size
Used to change the size of the text.
Font Color
Used to change the color of the text.
Font Outline Size
Used to change the size of the outline (similar to shadow) of the text.
Background Color
Changes the color of the background for the text.
Background Opacity
Changes the width of the background for the text.
Bold
Makes the selected text bold. Bold text is not supported for captioning. Bold text can only be
used for subtitling.
Italic
Makes the selected text italic. Italics are used to indicate off-screen speakers in captioning, or
untranslatable and/or stressed words in subtitling.
Line Spacing
Changes the spacing between the lines of text.
Character Spacing
Changes the spacing between letters or characters
124
Draw Vertically
This allows you to align the caption vertically so that the letters are displayed from top to bottom
instead of left to right. The mapping of vertical captions is based on the positions of the captions
in normal horizontal mode. Which means captions placed closer to the bottom will appear on the
right side of the screen when drawn vertically and vice versa. So for positioning with vertical
subtitles the Left side is equivalent to the Top and Right side is equivalent to the Bottom of the
screen. This function is mostly used for character based foreign languages like Chinese,
Japanese.
Time Code Menu
Mode
>>
Set Blank Frames…
Convert Time Code…
Fill-In All Caption Times…
Movie Time…
Reading Speed…
Ripple Time Code…
Stretch/Shrink Time Code…
MacCaption has two situations where it deals with time code. One of these is when it matches
the current movie frame with a given caption or subtitle time and the other is when it displays the
current time code for a caption or subtitle.
The Time Code > Mode menu sets the basic frame counting and time code display algorithm for
MacCaption. If the mode is set PAL all time codes have a maximum of 25 frames. If the mode is
set to NTSC drop frame all time codes will correspond to the NTSC drop frame specification.
When MacCaption plays a movie and displays its associated caption, the software looks for the
closest caption whose time code is less than the current movie time. The manner in which it does
this is to calculate an absolute frame offset starting from time code 00:00:00:00. The frame offset
for the movie as well as the frame offset for the caption is performed in the current time code
mode. MacCaption will warn you if the current movie's time frame is different from the current
calculation mode and if you are going to eventually put captions into your movie, MacCaption's
time code mode should be set to your movie time code frame display rate before you begin to
synchronize caption or subtitle text.
The options under Time Code > Convert Time Code can be used to change imported captions in
one time frame to another. The Convert Time Code function also changes the current time code
calculation mode to the target time code calculation mode.
125
Mode
Allows you to choose the time code mode that matches your video mode. The options include:
NTSC drop frame (29.97 fps, the most common format), NTSC non drop frame (30 fps),
PAL/SECAM (25 fps), 59.94fps (used by some HD formats such as 720p), 23.976fps (used by
some HD formats and TV movies made from film), and FILM (24 fps, used only for actual film
projections, not for film on TV).
Set Blank Frames
This feature allows you to ensure a minimum number of blank frames between the out-point of
any caption or subtitle, and the in-point of the next one. Some DVD and Blu-ray authoring
systems give errors if subtitles are timed too close together. Usually a setting of 5 blank frames
is plenty. Note that this function can only increase the number of blank frames; setting a smaller
number will never reduce the time between two captions/subtitles.
Convert Time Code
From
•
•
•
•
•
•
To
•
•
•
•
•
•
23.976fps
FILM (24 fps)
PAL/SECAM (25 fps)
NTSC drop frame (29.97 fps)
NTSC non drop frame (30 fps)
59.94fps
23.976fps
FILM (24 fps)
PAL/SECAM (25 fps)
NTSC drop frame (29.97 fps)
NTSC non drop frame (30 fps)
59.94fps
This option allows you to convert time code between NTSC Drop Frame and NTSC Non Drop
Frame as well as PAL/SECAM and FILM frame. If you assigned the time code to a cca file in
DF while the video is really a NDF, you can convert the time code to NDF and vice versa. If
there is any inconsistency with DF/NDF issue, it will show clearly when you do AutoSync. The
same applies to any PAL/SECAM or FILM format videos. The difference between DF and NDF
time code is 3 seconds and 18 frames over an hour of video.
Fill-In All Caption Times
This feature will assign a time code to selected rows if a time code is set for the first and last line
of the selected rows. This can be used when a person is speaking for a long period of time (a
lecture or speech) at a fairly steady rate. This feature can save time when subtitling a video, since
it does not require you to enter a time code for each row. Select a segment of the video needing
time codes. Then do the following:
1. Assign a time code to the first row of text needing time code to be filled in.
2. Find the last line of the segment and assign the time code to it.
126
3. Highlight the block of text.
4. Then choose the Fill-In Time code option from the menu bar or by right-clicking on
any of the highlighted cells. A dialog box will open.
Then choose the Fill-In Time code option from the menu bar. A dialog box will open up.
•
•
•
Fill-In time code values for the entire selected range using the first row’s
Start Time, the last row’s Start Time, the last row’s Start Time and a
calculated words per minute.
Only fill-in time code values for the entire selected range that have
cleared Start Times.
Minimum frame duration 00:00:00:20
MacCaption will fill in the time codes and give you an average WPM reading speed for the block
of text.
Note two important issues.
1. If you have time codes assigned to some key points on the video where the time codes must
be your assigned values and like to fill-in all time codes in between the assigned time codes,
you should choose the second radio button.
2. You would also like to check the box: Force a Minimum Cell Duration of to 20 to 30
frames or so, so captions with a single or a few words, would not end up
Movie Time
If your movie does not contain time code, you can assign a time code (movie or caption) start
time.
Set Movie Starting Time
•
•
•
01:00:00:00
Movie Time Code
Caption Starting Time
Reading Speed
Adjust caption text display times so that words are displayed at a specific Words Per Minute
reading speed
127
Ripple Time Code
This feature will change the time code within the currently selected block, or from a selected row
to the end of a file. There are two uses of this function:
• Adjusting time cue to rectify human reaction time during manual time stamping
• Fixing the difference between the time codes on your work tape and the actual master
tape that you will be using to AutoSync the video to produce the final captioned or
subtitled copy.
Stretch/Shrink Time Code
This option might be very useful when you work with a digital video (work copy) and do all the
time coding and then need to match the time coded file with another copy of the video (original
copy), which may have a slightly different code at the end of the video. One reason it could
happen is due to drop frame/no drop frame issue. To match the time code of the caption file with
the video, make sure the first time code of the caption file matches with the original copy. Then
choose this option and enter the last time code from the original copy. This option will stretch or
shrink all the time codes in the caption file to match the original copy.
Format Menu
Insert Row
Delete Row
Split Row
Merge Row
Consolidate Blank Rows
Remove Blank Rows without Time Code
Remove Leading and Trailing Spaces
Reformat Captions to Roll-up…
Reformat Captions to Pop-on…
Reformat Pop-on Captions…
Compress Text Block
Expand Text Block
Alternate Break
Compress Text Blocks for Captions
Insert Music Symbol
>>
Upper and Lower Case
>>
128
Insert/Delete/Merge/Split Row(s)
As you go through the formatting process, you may need to add or delete a cell or sometimes
merge two cells or split one cell into two. Use the following icons for this purpose:
Insert Row - Insert a blank caption before the currently selected caption
Delete Row - Delete the currently selected caption
Split Row - Split the currently selected caption into two captions at the insertion point
Merge Row - Merge the currently selected caption with the caption following it.
Erase Blank Rows - Erases all blank captions.
Reformat Captions to Roll-up…
Opens a window that allows you to choose the Roll-up style you want to format all captions to.
You may choose 2, 3, or 4 Line Roll Up.
Reformat Captions to Pop-on…
Opens a window that allows you to choose how many lines per caption you want. You may
choose 1, 2, 3, or 4 Lines per Caption for Pop-on.
Reformat Pop-on Captions…
If your project is already in pop-on and you want to continue using pop-on but with a different
number of lines per block, or if many blocks were edited and now have too many lines, this
option will make all your pop-on captions have a consistent look.
Compress Text Block
Compress the line length of the currently selected caption
Expand Text Block
Expand the line length of the currently selected caption
Alternate Break
Select an alternate line break word in the currently selected caption
129
Insert Music Symbol
Inserts a music symbol (the quarter note) to the caption text. There are two choices for this menu
item; Single Music Symbol and Surrounding Music Symbols (Places a music symbol before the
first letter and after the last letter in the caption text area).
To add Surrounding Music Symbols you may highlight a number of captions or a single caption,
and invoke this option. This option will place music symbols before the first letter and after the
last letter in the caption text area for all highlighted captions.
Upper and Lower Case
These menu items correspond with the formatting icons on the interface, with one exception;
Upper and Lower Case. This item can be used to customize the case of the text. All Upper Case
is normally used for captioning and Sentence Wise Upper and Lower Case is normally used for
subtitling.
Pull First Word
Pull the first word from the next caption into current caption
Push Last Word
Push the last word from the current caption into the next captions.
130
Special Menu
Autosync Playback
*K
Equate Movie Time to Captions
Position Video When Selecting Caption
Position Video When Selecting Caption Text
Time Stamp
Customize Keystrokes…
NLE Calibration Movie…
Scene Detection Scan…
Spell…
Content Advisory Information…
V-Chip…
Automatic Match Text with Audio…
Autosync Playback
This item corresponds with the Autosync button on the interface.
Equate Movie Time to Captions
When it indicates =, MacCaption keeps the captions synchronized with the movie as it is being
played, and keeps the movie synchronized with the captions as they are being scrolled. When
this indicator indicates , MacCaption allows the movie and its captions to be accessed
independently.
Position Video When Selecting Caption
This option will cause MacCaption to jump the movie to the time code of any caption block
which is selected.
Position Video When Selecting Caption Text
This option will cause MacCaption to jump the movie to the time code of any caption block in
which you place the text editing cursor.
Time Stamp
This item corresponds with the Time Stamp button on the interface.
131
Customize Keystrokes
This will open a window that tells you how to customize keystrokes. First find the command
that you want to assign or change a keystroke to from its place in the menu. Then hold down the
Control Key and click on it. A Customize keycode window will pop up that will let you choose
the keystroke you want to assign this command to, and whether you want to hold down the Shift,
Option, or Command button when using it.
NLE Calibration Movie
This feature allows you to create a black NLE movie that you can play using any NLE system.
The Calibration Movie contains Row and Column information that will display captions telling
you which rows and columns have available pixels to store captions in. This is especially helpful
if you are not familiar with the specific type of NLE system or hardware you are using.
The closed caption content of the first 5 seconds of the movie is "R 0, C 14" and it is generated
with Primary Row set to 0 and Starting Column set to 14; the next 5 seconds of the movie has the
CC content of "R 0, C 15" and is generated with Primary Row set to 0 and Starting Column set
to 15. This continues through Row 0 and Column 40 at which time it shifts to Row 1 Column 15.
The last movie segment is Row 3 Column 40. The entire movie is approximately 4 minutes long.
When the you import the video into your NLE system, put it on the timeline and play the video
through your NLE hardware to a TV with the built-in closed caption decoder set to CC1 channel,
you will see the content of the Primary Row and Starting Column only when it successfully
decodes the captions. You just have to watch the TV screen for up to 4 minutes until you see a
few captions like
R 0, C 21
R 0, C 22
R 0, C 23
.
.
R 0, C 29
To avoid errors, we will pick the mid value of all visible column numbers. In this example it is C
25. So the preset NLE values for your NLE system is Primary Row: 0 and Starting Column: 25.
Once you have determined these values you need to go to the NLE tab in the Preferences and
enter the numbers into the appropriate boxes. You do not need to change the number in the
Secondary Row box and the check box labeled Small QuickTime should be unchecked.
Scene Detection
The Scene detection function scans the entire movie looking for changes in the luminance of
successive video frames. If there is a gradual change in the luminance of successive video frames
then a dissolve is indicated; if the change is abrupt then a cut is indicated. In the Preferences
menu under the Display Tab there is a check box labeled Caption Overlaps Scene Transition.
If this box is checked and the scenes in the current movie have been scanned MacCaption will
display an error whenever a caption is found to display during a dissolve or cut transition.
132
To enable Scene Detection
•
Check the box labeled Caption Overlaps Scene Transition in Preferences > Display
•
Select Scene Detection under the Special menu
When scenes have been detected, the caption text area displays a green indicator whose length is
inversely proportional to how close the current movie time is to the detected scene transition.
The number of frames remaining until the scene transition is reached is also displayed. If the
movie frame extends into the scene transition a red "!"error indicator is shown. The details of the
transition violation can be obtained by putting the cursor over the "!" character or by directly
clicking on the "!" character.
Scene transition data is saved in a .cca file for subsequent use. Scene transition data must be
rescanned whenever a new movie is imported into MacCaption.
Once the video has been scanned, you will be alerted to shot changes with a shot change
indicator that appears in your caption window. This indicator will alert you to approaching shot
changes with a countdown timer and a progressive green bar. Once the countdown hits 0 and the
green bar fills up, the shot change occurs.
Spell Check
MacCaption will check the spelling of your caption text. Spell checking begins with the first
caption and ends with the last caption.
Words that are not found in the dictionary are displayed in the Not in dictionary box. To correct
a word, press the Change button or double click the appropriate word in the Suggestions box. If
no suggestion is presented or you wish to enter your own corrected word type the correct word in
133
the Change to box and click Change. To change all occurrences of the word in the caption text
click Change All.
To ignore the specific word click Ignore. To ignore all occurrences of the word click Ignore All.
MacCaption maintains a dictionary of user supplied words. To add the current word to the User
Dictionary click Add. To create a new User Dictionary or change the current User Dictionary
click Dictionary. The MacCaption User Dictionary typically has a file name that ends with the
.ccd suffix although this is not required. Words are stored in the User Dictionary as 16 bit
Unicode wit one word per line. The User Dictionary can be edited with a text editor that supports
16 bit Unicode.
To switch the language that the dictionary is using choose the appropriate language with the
Language pop up in the Spell Check dialog box. To restart spell checking at the beginning of the
caption text after choosing a new language click on Cancel and reenter the Spell Check dialog.
Content Advisory Information
MacCaption has the capability to generate Content Advisory Information and V-Chip Program
Rating Data.
Content Advisory Information is specific information about the program material. The Content
Advisory Information is sent along with video and close caption information to the end user. You
can enter any, all, or none of the information in the Content Advisory Information dialog box.
Select Include Content Advisory Information to generate Content Advisory Information.
The window allows you to enter information about your program, including; Program Name,
Length (hours and minutes), Keyword Group and Details.
In the United States the Television Parental Guide rating system should be used for all
productions that are not motion pictures.
V-Chip
V-Chip Program Rating Data
The V-Chip is a small electronic part in a television receiver that implements a program rating
system and controls whether or not a specific television program can be viewed. The V-Chip
supports the Television Parental Guidelines, the Motion Picture Association of America
Guidelines, the Canadian English Language and the Canadian French Language rating systems.
Only one rating system can be specified for a program.
The V-Chip program rating information is sent along with the video and close caption
information to the end user.
134
Select Include V-Chip Information to generate V-Chip Program Rating Data.
Additional information on the V-Chip, Television Parental Guidelines, Motion Picture
Guidelines and Canadian Guidelines can be found at TV Parental Guidelines
(http://www.tvguidelines.org/), Motion Picture Association of America (http://www.mpaa.org/),
and V-Chip Canada (http://www.vchipcanada.ca/) web sites.
MacCaption generates rating information for the Television Parental Guideline Rating system,
the Motion Picture Association of America (MPAA) Rating system, the Canadian English
Language Rating System and the Canadian French Language Rating System.
Each of these rating systems is accessible from the Type drop-down menu. The rating
abbreviations are explained on each menu except the Television Parental Guidelines, they are as
follows:
TV-MA – Mature Audiences Only
TV-14 – Parents Strongly Cautioned
TV-PG – Parental Guidance Suggested
TV-G – General Audience
TV-Y7 – Directed To Older Children
TV-Y – All Children
-----------------------------------------------FV – Fantasy Violence
V – Graphic Violence
S – Explicit Sexual Activity
L – Crude and/or Indecent Language
D - Intensely Suggestive Dialogue
To generate a movie containing just Television Parental Guide Rating information, select Special
> V-Chip.
Automatic Match Text with Audio
With CaptionSync automated captioning software from Automatic Sync Technologies, the
captioner connects to the internet and uploads the script and the corresponding audio file to a file
server. Within minutes, a time stamped script file will be displayed on the computer.
You can buy this service by contacting Automatic Sync Technologies directly at 510-582-3437
or [email protected]|. For more info please check |www.automaticsync.com
This process automates the labor-intensive job of having a captioner listen to the audio, manually
break the text into captions, and then synchronize the captions with the dialogue.
To caption a video, you need to have a text file of the audio. Usually a captioner would listen to
the audio, and manually synchronize the captions with the audio using time code. This is a
painstaking and time-consuming job. With Automatic Match Text with Audio automated
captioning service, the captioner simply connects to the internet and uploads the script and the
corresponding audio file to a file server. Within minutes, a time stamped script file will be
displayed on the computer. After reviewing the time stamped file and making some minor
135
changes, the file is ready for to be combined with the video as captions or subtitles using
MacCaption software.
By utilizing the Automatic Match Text with Audio process, you are able to create a file that is
more tightly synchronized than the traditional method, while dramatically increasing your
productivity.
Text and Audio Files
You have to upload a text file to Automatic Sync. Follow this guideline for the text file:
• Do not use any illegal caption character, such as, * \ ~ ` | _
• Use square brackets for name of the speaker, music etc., like [Paul], [ music]
• Spell out numbers from one to ten, but use numerals for all numbers over ten.
• Avoid confusing abbreviations. Use ‘number ‘ instead of ‘No.’ and ‘street’ instead of
‘St.’
• You also have to upload a corresponding mp3 audio file at
o 16 KHz, 22.05 KHz or 44.1 KHz only
o 8 bits or 16 bits (16 bits recommended)
• Mono or stereo (mono recommended)
• Typically, mp3 file size is about 1 MB per minute of audio.
Creating an MP3 file on Macintosh
Step 1. Extracting an audio track from a QuickTime Movie.
Double click the QuickTime movie to open it in QuickTime Player. Under the File/Export pull
down menu select Export. Choose “Sound to Wave” and under options select Compressor: None,
Rate: 44.1 kHz, 16 bit Stereo. Click OK and then click Save to create a .wav sound file.
Step 2. Convert a .wav sound file into an MP3 file.
Start a MP3 conversion application such as Amadeus II from http://www.hairersoft.com. Choose
Save As from the File menu then select Format: Mp3. Select Settings and under the Encoder Tab
select 64 kbps and Quality: Best. Under the Expert Tab select vbr_rh and Force mono encoding.
Click OK then Select Save to generate your MP3 audio file.
Windows Menu
Full Size Display
MacCaption.cca
Message Window
*0
*1
Compact Display
MacCaption.cca 136
Message Window
*0
*1
The Window Menu allows you to adjust the display size of the interface; Compact
or Full Size. It also displays the name of the project that you have open and the message window.
The Message Window contains detailed information about the various tasks that MacCaption has
performed (importing, exporting, etc.).
Help Menu
MacCaption Help
You can get help with all MacCaption options from this help file.
MacCaption User Guide on the Web
This will open up your web browser and direct you to the online user guide.
Tip of the Day
Tip of the Day displays at startup and can be accessed under the help menu. These tips address
the most common issues regarding use of MacCaption.
Automatic Match Text Help
MacCaption software can now automatically break and accurately time closed captions at the
click of button. There is a service fee for this function. This automates the labor-intensive job of
having a captioner listen to the audio, manually break the text into captions, and then
synchronize the captions with the dialogue.
For details, check this option under the Special Menu.
Upgrading MacCaption Software
You can upgrade your MacCaption software from any level to a higher level (i.e., MacCaptionDV to MacCaption-NLE etc.) over the internet. You do not need to send the USB software
security key via mail to be replaced. We will upgrade the key via internet.
2. Run MacCaption software. Go to the Help menu and click on Update License
(If you do not find the menu item Upgrade License, follow the step below to install the most recent
version of your level of software. Now you will see the Upgrade License Screen under the Help menu.)
3. Now click on Display License ID.
137
4. Copy and paste the string of characters to [email protected]
We will email you a *.dat file.
Now you need to follow step 3 inside the Upgrade License screen to upgrade your software to a
higher level.
Download Latest Universal Binary
This will take you to the direct download page for the latest version of the MacCaption Universal
Binary.
138
Caption Tips
Suggestions for Breaking Lines
You should watch captioned programs on the television to get an idea how professional
captioning is done. You will learn a lot in regards to breaking text into individual captions,
positioning the captions and use of time sequencing. You will notice, many times professional
captioners adjust the timing of the captions to give uniform readability.
There are various signs that will indicate that text needs to be broken into separate captions.
1. End a caption at the end of a sentence. The import file option can make these breaks
automatically (“.”, “?”, and “!”)
2. End captions at commas and semicolons if they come at a natural pause in the dialog and
conclude a phase. The import file option can make these breaks automatically as well, but
there are many commas in English that are NOT good places to break text.
However, when you break text into individual captions, they should make grammatical sense.
Here is an example:
Unformatted, Raw Text:
On the way to the airport, I got caught in
traffic and ended up being late for my
flight. I had to wait around for five hours
to catch the next available flight.
A poor way to caption it:
On the way to the airport,
I got caught in
traffic and ended up being late
for my flight. I had to wait
around for five hours to catch
the next available flight.
A good way to caption it:
On the way to the airport,
I got caught in traffic
and ended up being late
for my flight.
I had to wait around
for five hours
to catch
the next available flight.
We will go over some basic captioning guidelines. The first basic convention in captioning
concerns the difference between how you represent on-screen and off-screen speakers. The
139
words spoken by off-screen speakers (commonly narrators) appear in italics (but italics can be
skipped if the speaker comes in and out of view). The words of on-screen speakers appear in the
normal (Roman) font.
The next convention concerns centering and non-centering. However, if centering the caption
would interfere with a graphic and/or important on-screen visual information, then the caption
should be moved to another location.
The main objective is to have each caption represent a single thought. There is no single right
way to caption a video, but a few additional guidelines may help:
1. Your captioning style should be consistent throughout the video.
2. Whenever possible, you should break captions into logical phrases. Captions randomly
broken up may convey a different meaning than intended.
3. Captions can indicate the location of the speaker. For instance, a caption on the left side
of the screen will indicate the speaker is on the left, while a centered caption shows that
only one person is speaking throughout a scene.
4. Words can be emphasized by underlining.
5. Use Insert Music Symbol to place a musical note at the beginning and end of musical
lyrics. Never paraphrase lyrics. Use the title of the song when possible.
6. Indicate sound effects in parentheses in lower case: (boom), (applause).
Selecting Multiple Caption Text Boxes
Many caption and text formatting operations will operate on more than one caption at a time so it
is sometimes useful to select multiple captions. A multiple caption selection is indicated by grey
shading of the caption text area in all captions that have been selected.
There are three ways to select multiple captions:
The first way to select multiple captions is to use Edit > Select All (Command-A) in the
main pull down menu. This will select all of the captions in the current Program.
The second way to select multiple captions is to click and drag the mouse in a specific
caption and drag the mouse up or down into adjacent captions. The location of the mouse click in
the first caption should be done in an area that does not contain any specific operation display or
control such as a time code indicator or the caption text area itself. Any blank area can be
chosen.
The third way to select multiple captions is to do a shift click or option-shift click in a
caption. The caption that is chosen becomes the anchor caption. You can use the shift key or
option-shift key click in any part of the caption except the caption text area. Once the anchor
caption is selected shift click in any other caption to select that caption and all of the captions
between that caption and the anchor caption. If you hold down the shift and option keys when
selecting a second caption all of the captions from the anchor caption to the last caption (or first
caption in the upward direction) will be selected. For example, a quick way to select all of the
140
captions from the current caption to the last caption is to option-shift click two times in the
current caption. To select all of the captions from the current caption to the first caption simply
option-shift click in the first caption and then option-shift click in the caption immediately above
it.
Moving Caption Text in the Movie Window
When displaying text as captions, the captions may be moved directly in the movie window in a
number of ways.
In the movie window
1. Click in the caption text and drag it to a new position.
2. Double click on a caption row to highlight it and drag that row to a new position or shift
click on more than one row and drag the selected rows to a new position.
3. Click once in the movie window to select it. The selected movie window will have a
highlighted border. Then…
1. Use the arrow keys to move the caption text one text space at a time.
2. Use shift arrow keys to move the captions to the left, right, top and bottom edges.
3. Use the ‘l’, ‘r’, ‘t’ and ‘b’ keys to move the captions to the left, right, top and
bottom edges.
Suggested Styles and Conventions
Caption Media Program (National Association of Deaf) has created a style guide, which is
available from www.cpcweb.com/download/CaptionKey.pdf.
This is a very helpful guide to understand the styles and conventions used to caption a video. We
strongly encourage you to read this document before producing captioned video.
141
Trouble Shooting
Proper QT Movie
QT DV video must be 29.97 fps and audio must be either 32KHz for 4 12-bit audio channels or
48KHz for 2 16 bit audio channels. There are no exceptions to these rates.
The video must be compressed with DV codec. If the video and audio rates are incorrect, you
can fix it using QuickTime Pro by re-exporting the file with proper video/audio rates.
Capturing Bad DV Movie
Using MacCaption, when you capture a DV movie (.mov) from a DV tape using FireWire, if you
click on the [Start] button first to save the video and then play the video from the DV tape, the
resulting video will have an inconsistent frame rate. If you use this movie to add captions, you
will NOT get a good result.
On the other hand, if you play the video from the DV tape first and then click on the [Start] to
save the video, then it captures at 29.97 fps and it will work.
Movie Time Code vs. Simulated Time Code
MacCaption can read the time codes from a DV video if the DV video contains time codes.
MacCaption can also simulate time codes by simply converting number of frames to time codes
either in Drop frames (DF) or Non-drop frames (NDF).
You have to be very careful which time code you use to time stamp a caption/subtitle file. If you
produce your final product from MacCaption, it does not matter which TC you use. But if you
export a file to be used with software like DVD Studio Pro or any other software, you must use
the same type of TC (DF or NDF). Otherwise you will notice caption/subtitle will slowly go out
of sync with time. For 1 hour video you will be off by 3 seconds and 18 frames.
There is way to fix this problem by using the functions like Convert TC (DF to NDF or NDF to
DF) and also TC Stretch/Shrink function.
142
Transferring files between Mac and PC
Use a standalone FireWire Disk that is formatted for the PC and plug it into the Mac's FireWire
port. The Mac will recognize it and allow you to read and write it. Then drag the files you wish
to copy from the Macintosh disk to the PC FireWire disk icon. This will copy the file(s). When
the copy is complete drag the FireWire disk icon into the trash to unmount the disk. Take the
disk to the PC, plug it in, and you should be able to read the files on the PC.
Self contained QuickTime Movie
You should be aware that MacCaption only process movies that are "Self Contained". This
means that all of the QT movie's data must be present within the movie file itself and that there
cannot be any references to movie data in other files. A QuickTime movie can be made selfcontained by using the QuickTime Player Application, choosing Save As and making sure the
Save As Self Contained box is checked. Most of the movies on the Macintosh are self contained
but occasionally someone will attempt to play a non self-contained movie in MacCaption.
MacCaption only makes self-contained movies. By using Command-J in QuickTime Player you
can examine what files a given QuickTime movie uses. Also if a QuickTime movie seems very
small, like 4KB or so, it is not self-contained.
BlackMagic Hardware & Final Cut Pro
The BlackMagic hardware has a problem working with CC data because its real data path tends
to be 720x480 rather than 720x486, however, we believe that some customers with certain
hardware have gotten it to work.
You can try the following:
1. Digitize a known broadcast containing close captions into your BlackMagic hardware system.
Then play it back into their CC enabled TV receiver. If you see the CCs then that system will
work with MacCaption.
3. There is an option that in MacCaption (under File/Import/Decode NLE 720x486) that
will automatically search for the proper CC Primary Row and Starting Column CC data
information in the captured 720x486 NLE type QuickTime file. This feature will fill in
the proper values under Preferences/NLE for the given hardware and then it will decode
all of the captions in the original analog movie. Then you can use NLE exporter as usual.
This option will allow you to decode the captions in all types of video files, however,
decoding the captions in the image portion of a 720x486 movie is somewhat slow, but it
does work.
143
Losing First Caption
When you export a DV movie with closed captions you should specify the lower limit for the
closed caption data. This is necessary due to the way closed captions are combined with the DV
movie.
For example, if you are using pop-on captions and your actual movie content time code starts at
1:00:00:00 and the first closed caption appears one second into the movie at 1:00:01:00 the
closed caption data is placed into the DV movie before the caption is scheduled to pop on. By
setting Lower Limit to 1:00:00:00 you force MacCaption to begin putting the closed caption data
into movie no earlier than time code 1:00:00:00.
This issue is extremely important when you caption a commercial spot. If you do not set a lower
Limit within the actual video content area, you may lose the first caption when the beginning of
the video is edited out later.
144
Appendix
Description File
Command Directives
An external description file or an on screen Text I/O Window (Macintosh only) can contain all of
the information necessary to create closed captions, program rating, and interactive television
links for a video program.
When processing a command line the following rules are followed:
Lines that contain no characters, including no blank characters, are ignored.
Lines that begin with a single asterisk ‘*’ character are keyword lines.
Lines that start with two asterisk characters ‘**’ are treated as comments and can be
used for file annotation.
All other lines are text data lines.
Keywords may be entered in upper case or lowercase characters. For example, the
keywords “*DROPFRAME”, “*dropframe” and “*DropFrame” are equivalent.
The time code data fields are of the form HH:MM:SS:FF or +HH:MM:SS:FF. Time
codes are interpreted from right to left so a time code data field with one number, such
as 15, indicates 15 frames and a time code data field with two numbers, such as +45:15,
indicates an additional 45 seconds and 15 frames from the current time marker.
The bracket characters, ‘[‘ and ‘]’, indicate optional parameters in each of the keywords and they
should not be typed. A summary of all of the keywords can be found in Appendix.
MacCaption recognizes the following keywords:
*DROPFRAME
*DF
Indicates the time code values in this file are to be interpreted as drop frame time codes.
Example:
*DF
This command causes subsequent absolute time code data to be interpreted as drop frame
time code values.
*NONDROPFRAME
145
*NDF
Indicates the time code values in this file are to be interpreted as non drop frame time
codes.
Example:
*NDF
This command causes subsequent absolute time code data to be interpreted as non drop
frame time code values.
*POPON
Indicates the subsequent text lines are to be interpreted as Pop-on closed caption data.
Example:
*POPON
This command causes subsequent closed captions to be displayed with Pop-on mode.
*PAINTON
Indicates the subsequent text lines are to be interpreted as Paint-on closed caption data.
Example:
*PAINTON
This command causes subsequent closed captions to be displayed with Paint-on mode.
*ROLLUP2,*ROLLUP3, ROLLUP4
*RU2, *RU3, *RU4
Indicates the following text lines are to be interpreted as Roll-up closed caption data with
a window size of 2, 3, or 4 rows.
Example:
*ROLLUP2
This command establishes Roll-up 2 as the current closed caption mode.
*LEFT r[, c]
*L r[,c]
*LEFTLEFT r[, c]
*LEFTCENTER r[, c]
*LEFTRIGHT r[, c]
Indicates left edge alignment of caption information at position r,c. Row numbers range
from 1 to 15 and column numbers range from 1 to 32. The left keyword must precede the
actual text data. If the column number is omitted the previous column number is used.
Example: *LEFT 4,6
This command places text so that its left edge is located at Row 4 and Column 6.
The left center and left right directives will cause the longest row to be left justified and
the remaining rows to be center justified or right justified respectively around the longest
row.
*RIGHT r,[c]
*R r[,c]
*RIGHTRIGHTr[, c]
*RIGHTLEFT r[, c]
*RIGHTCENTER r[, c]
Indicates right edge alignment of caption information at position r,c. Row numbers range
from 1 to 15 and column numbers range from 1 to 32. The right keyword must precede
the actual text data. If the column number is omitted the previous column number is used.
146
Example:
*RIGHT 12,28
This command places text so that its right edge is located at Row 12 and Column 28.
The right left and right center directives will cause the longest row to be right justified
and the remaining rows to be left justified or center justified respectively around the
longest row.
*CENTER r[,c]
*C r[,c]
*CENTERCENTER r,[c]
*CENTERLEFT r,[c]
*CENTERRIGHT r,[c]
Indicates center alignment of caption information around the indicated row and column.
Row numbers range from 1 to 15 and column numbers range from 1 to 32. The center
keyword must precede the actual text data. If the column number is omitted the previous
column number is used.
Example:
*CENTER 15,16
This command places text on row 15 in such a way that the horizontal center of each
caption line is located at Column 16. Row numbers range from 1 to 15 and the column
numbers range from 1 to 32. The left keyword must precede the actual text data. If the
column number is omitted the previous column number is used.
The center left and center right directives will cause the longest row to be center justified
and the remaining rows to be left justified or right justified respectively around the
longest row.
*IMMEDIATE r,c
*I r,c
Forces the left edge of the next caption to be positioned at row r column c. Both the row
and column must be specified. Row numbers range from 1 to 15 and the column numbers
range from 1 to 32. This command must immediately precede the actual text data. The
row and column numbers are in effect for this operation only.
Example:
*IMMEDIATE 10,4
This command positions the left edge of the next caption at Row 10 Column 4.
*CAPTIONGROWDOWN
*GROWDOWN
Indicates that the caption row grows down from a row number.
Example:
*GROWDOWN
*CAPTIONGROWUP
*GROWUP
Indicates that the caption row grows up from a row number.
Example:
*GROWUP
*ITVLINK
*ITV
147
Indicates the following data lines are to be interpreted as an Interactive Television
crossover link.
Example:
*ITV
<http://www.ccaption.com>[n:CPC]
<http://www.whitehouse.gov>[n:See Congress]
A checksum field of the form [XXXX] is automatically generated and appended to the
input data if it is not present.
*TIMECODE [+]HH:MM:SS:FF
*TC [+]HH:MM:SS:FF
*T [+]HH:MM:SS:FF
Set the current time marker to the indicated time code data value. If the plus (+) character
is present, the current time marker is advanced by the indicated amount.
Example:
*TC 10:15
Set the time marker to 10 seconds, 15 frames.
*ERASE[+] [HH:MM:SS:FF]
*E [+][HH:MM:SS:FF]
Erase the current caption from the screen at the indicated time code.
Example 1: *ERASE 1:5:10
This example will set the time marker to 1:05:10 and erase the screen at that time. If the
time code data portion of this keyword is not included, the erase command will erase the
screen at the current time marker. For example, the above erase command is equivalent
to:
*TC 1:5:10
*ERASE
Example 2:
*ERASE +2:10
This example will advance the time marker by 2 seconds 10 frames and cause the screen
to be erased.
*PAD [MM:SS:FF]
Increase the current time code index by the indicated amount. If no time code value is
specified the PAD command defaults to one second.
Example:
*PAD 0:25
This command will advance the current time code index by 25 frames.
Example:
*PAD
This command will advance the current time code index by 1 second.
*DELAY HH:MM:SS:FF
Set the amount of time to insert between rollup text lines if no TIMECODE keyword is
present between each rollup data line.
Example:
*DELAY
1:05
This command will insert a 35 frame delay between text Roll-up lines.
*DURATION MM:SS:FF
Set the total duration of the generated video data.
148
Example:
*DURATION 10:00:00
This command will cause the generated video to be 10 minutes in length. Video frames at
the end are filled with rating data and program information data if specified.
*TIMECODEOFFSET HH:MM:SS:FF
*TCOFFSET HH:MM:SS:FF
Establishes an offset value for all of the absolute time code values in a description file.
Example:
*TCOFFSET 1:30:00:00
This command establishes 1 hour 30 minutes as the offset value for all absolute time code
numbers in a description file.
*PARENTALGUIDERATING
[Y,Y7,G,PG,14,MA,NONE][FV,V,S,L,D]
*PGRATING [Y,Y7,G,PG,14,MA,NONE][FV,V,S,L,D]
Indicates U.S. Parental Guidelines television rating information. One of the following
values must be selected Y, Y7, G, PG, 14, MA and NONE. One or more of the following
values may be selected FV, V, S, L and D.
Example:
*PGRATING 14
This example will establish TV-14 Parental Guide rating information for this program.
*MOTIONPICTUREASSOCIATIONOFAMERICARATING
[NA,G,PG,PG13,R,NC17,X,NR]
*MPAARATING [NA,G,PG,PG13,R,NC17,X,NR]
Indicates Motion Picture Association of America movie rating information. One of the
following values must be selected NA, G, PG, PG13, R, NC17, X and NR.
Example:
*MPAARATING PG13
This example will establish PG13 MPAA rating information for this program.
*CANADIANENGLISHLANGUAGERATING [E,C,C8,G,PG,14,18]
*CERATING [E,C,C8,G,PG,14,18]
Indicates Canadian English Language rating information. One of the following values
must be selected E, C, C8, G, PG, 14, 18.
Example:
*CERATING PG
This example will establish a PG Canadian English Language rating for this program.
*CANADIANFRENCHLANGUAGERATING [E,G,8,13,16,18]
*CFRATING [E,G,8,13,16,18]
Indicates Canadian French Language rating information. One of the following values
must be selected E, G, 8, 13, 16, 18.
Example:
*CFRATING E
This example will establish an E Canadian French Language rating for this program.
*NORATING
Turns off program rating generation at the current time index.
Example:
*NORATING
*PROGRAMNAME NAME
149
Specifies program name information. The name must be between 2 and 32 characters in
length.
Example:
*PROGRAMNAME THE AVENGERS
This example will set the program name to “THE AVENGERS”.
*NOPROGRAMNAME
Turns off program name generation at the current time index.
Example:
*NOPROGRAMNAME
*PROGRAMLENGTH HH:MM
This command specifies the programs running time. It should indicate the scheduled
length of the show.
Example:
*PROGRAMLENGTH 30
This example sets the scheduled program length to 30 minutes.
*NOPROGRAMLENGTH
Turns off program length data generation at current time index.
Example:
*NOPROGRAMLENGTH
*PROGRAMTYPE [Basic Keywords][Detail Keywords]
This command sets the program type to the value of the parameters. At least one basic
keyword must be chosen. Some detail keywords may be chosen. The hex codes
associated with each of the keywords may be used in place of the actual descriptive
keyword. No more than 32 keywords may be selected.
See Appendix for a list of the Basic Keywords, Detail Keywords and corresponding hex
codes.
Example: *PROGRAMTYPE ENTERTAINMENT,34,55,SPECIAL
This example sets the program type to the basic keyword “entertainment” with the detail
keywords “comedy”, “international” and “special”.
*NOPROGRAMTYPE
Turns off program type generation at the current time index.
Example:
*NOPROGRAMTYPE
Special Characters
Caption text may contain certain special characters. These special characters can be generated
either with a ‘\’ backslash character in combination with a second character or with a specific
combination of Macintosh keyboard characters.
Character
desired
á
à
â
é
Backslash
Specific Macintosh
combination keyboard combination
\’a
Option-e then a
\`a
Option-` then a
\^a
Option-i then a
\’e
Option-e then e
150
ê
ç
í
î
Ñ
ñ
ó
ô
ú
û
÷
°
¢
£
®
™
1/2
¿
Music note
\^e
\c
\’i
\^i
\N
\n
\’o
\^o
\’u
\^u
\=
\o
\$
\l
\r
\t
\v
\?
\b
Option-i then e
Option-c
Option-e then i
Option-i then i
Option-n then N
Option-n then n
Option-e then o
Option-i then o
Option-e then u
Option-i then u
Option-=
Option-shift-8
Option-4
Option-3
Option-r
Option-2
Option-v
Option-shift-?
Option-b
Arrow keys
Shift selected text in the indicated direction
The \E character can be used to indicate the end of a multi line pop up or Paint-on caption.
Changing Character Styles
Caption text may contain special character styles such as color, italic, underline or flash. Style
information is inserted into a closed caption by the use of the ‘\’ (backslash) character and a
specific style code.
To change the character color of the text of a line use the following codes before the first
character whose color you wish to change. Capitalization is required.
White
\W
Green
\G
Blue
\B
Cyan
\C
Red
\R
Yellow
\Y
Magenta
\M
To change to italic use
To change to underline use
To change to flashing use
\I
\U
\F
A character style change takes effect until the end of the given line. All lines begin with the
default of white characters and a plain character style.
To return to plain style before the end of a line use \P
151