1
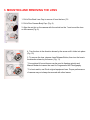
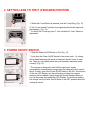
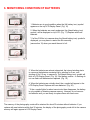
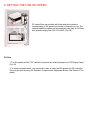
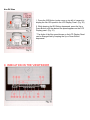
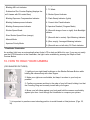
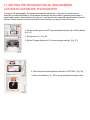
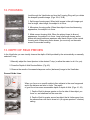
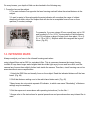
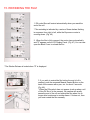
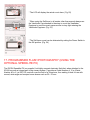
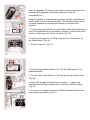
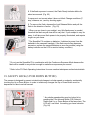
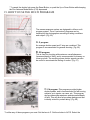
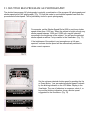
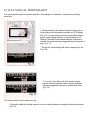
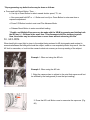
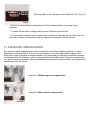
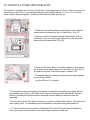
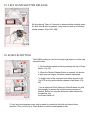
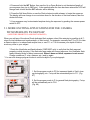
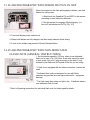
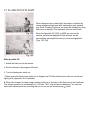
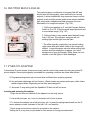
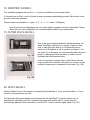
Ricoh XR-M/XR-X
The these two cameras are identical, the XR-X is European
This camera manual library is for reference and historical purposes, all rights reserved.
. M. Butkus, N.J.
This page is copyright by
This page may not be sold or distributed without the expressed permission of the producer
This is the full text and images from the manual. This may take 3 full minutes for all images to appear.
If they do not all appear, try clicking the browser "refresh" or "reload button".
If you find this manual useful, how about a donation of $3 to:
M. Butkus, 29 Lake Ave., High Bridge, NJ 08829-1701 ?
This will allow me to continue to purchase new manuals and their shipping.
It'll make you feel better, won't it?
If you use Pay Pal, use the link below. Use the above address for a check, M.O. or cash.
Back to main Chinon site
TABLE OF CONTENTS
1. Attaching the Strap - 9
25. Reset Button
2. Inserting Batteries - 11
26. AE Lock
3. Mounting and Removing the Lens - 12
27. Exposure Compensation - 58
4. Setting Lens to the "P" Position - 14
28. Interval Timer Photography - 60
5. Power On/Off Switch - 15
29. Left Hand Shutter Release - 61
6. Monitoring Condition of Batteries - 16
30. B (Bulb) Setting - 62
7. Loading the Film - 18
31. More Exciting Applications for the Camera with
Speedlite PX/300P/260P - 64
8. Setting the Film ISO Speed - 21
9. Indications in Viewfinder - 23
10. How to Hold Your Camera - 24
32. Flash Photography with Other Ricoh Flash
Units - 66
33. Flash Photography with Speedlite PX plus 300P
- 67
11. Setting the Program for AE Photography
12. Focusing
34. Flash Photography with Non-dedicated Flash
Units - 68
13. Depth-of-Field Preview
35. Flash in Daylight - 69
14. Infrared Mark
36. Shutter Bias Flash AE - 73
15. Rewinding the Film
37. P-mount Adapter - 74
16. Self-timer Photography
38. Dioptric Lenses - 75
17. Programmed Flash Photography (Using the
Optional Speedlite PX)
39. Super Data Back 4 - 76
40. Data Back 3 - 76
18. Safety Lock (Up or Down Button)
41. Interchangeable Viewfinder Screens - 77
19. How to Use the Multi-programs
42. Speedlite PX - 78
20. Aperture-priority AE Photography
43. XR Speedlite 300P - 78
21. Shutter-bias Program AE Photography
44. Speedlite 260P - 79
22. Full Manual Photography
45. Speedlite 200 - 79
23. TV Mode
46. Care of Batteries - 80
24. Exposure Metering Systems
47. Proper Care of Your Camera - 81
48. Major Specifications - 82
<<< update - I have been told a Olympus and Pentax eyecups and other accessories will work on XR cameras >>>
1. ATTACHING THE STRAP
1. Remove the Battery Holder by turning the Battery Holder Screw counter
clockwise with a coin. (Fig. 1)
2. Slip the Viewfinder Cap on to the strap. (Fig. 2) Slip Cap over Viewfinder. (Fig.
3)
Adjust strap so that it extends about 25 cm (10 I) from Viewfinder.
3. Run the strap down through the Upper Strap Lug until it protrudes about 8 cm
(3") from the lug. Then feed the end through the Buckle. (Fig. 4.)
4. Remove Viewfinder Cap off camera, straighten out strap and attach other end
to Lower Lug in a similar manner.
4www.butkus.org
5. Adjust the strap length as desired.
2. INSERTING BATTERIES
1. Insert four fresh batteries into the Battery Holder, first checking that the + and on each battery are lined up correctly according to the polarity diagram inside the
Battery Holder. (Fig. 5)
2. Secure the Battery Holder to the camera body by turning the Battery Holder
Screw clockwise with a coin. (Fig. 6)
Battery Choices:
* Four Penlight (AA/AAA) manganese batteries, alkaline batteries or nickel cadmium batteries.
(We recommend Alkaline batteries.)
* Condition of batteries should be monitored frequently. See Section 6 for details.
3. MOUNTING AND REMOVING THE LENS
1. Pull off the Back Lens Cap to remove it from the lens. (Fit
2. Pull off the Camera Body Cap. (Fig. 8)
3. Align the red dot on the camera with the red dot on the 1' and mount the lens
on the camera (Fig. 9)
4. Turn the lens in the direction shown by the arrow until it clicks into place.
(Fig. 10)
5. To remove the lens, depress Lens Release Button, then turn the lens in
the direction shown by the arrow. (Fig. 11)
* Conventional K mount lenses can be used in Aperture priority and
Manual Modes but cannot be used for Programmed AE Photography.
* For best results, use Ricoh original equipment lens. Proper performance
of camera may not always be assured with other lenses.
4. SETTING LENS TO THE P (PROGRAM) POSITION
1. While the P Lock Button is pressed, turn the F-stop Ring. (Fig. 12)
2. Set it to the locked P position for programmed automatic exposure
photography. (Fig. 13) I
* To unlock the F-stop ring from P. turn it while the P Lock | Button is
depressed.
5. POWER ON/OFF SWITCH
1. Slide the Power On/Off Switch to ON. (Fig. 14)
* If you slide the Power On/Off Switch to the sound mark ·1)), a beep
will be heard whenever the mode is changed, the self- timer is used,
etc. Then you can audibly know that your operation has been made
correctly. (Fig. 15)
* The camera is designed to shut off the main power supply
automatically to save battery energy when the camera is not in use for
about 30 sees. even if the Power On/Off Switch is left ON. This will turn
off the top LCD Display, but the information contained in camera
memory will be retained. Lightly press the Shutter Release Button to
turn on the power and update the LCD Display. For maximum battery
life, always turn the Power On/Off Switch to the OFF position when the
camera is stored.
4www.butkus.org
6. MONITORING CONDITION OF BATTERIES
1. Batteries are in good condition when the (full battery icon) symbol
appears on the top LCD Display Panel. (Fig. 16)
2. When the batteries are nearly exhausted, the (blank battery icon)
symbol | will be displayed on top LCD. (Fig. 17) Replace with fresh
batteries.
* If a Non-DX film is in camera when the (blank battery icon) symbol is
displayed, you may have to rewind the film manually
(see section 15) when you reach the end of roll.
3. When the batteries are almost exhausted, the interval winding starts
to conserve the batteries remaining life by winding for 2 sec. and
shutting off for 0.5 sec. in sequence. The (blank battery icon) symbol will
blink in LCD Display Panel. (Fig. 18) If the battery outline ~ is flashing do
not use flash until batteries are replaced. (Fig. 19)
4. When the batteries are virtually dead, the c symbol will appear in the
LCD Display Panel. Replace with new batteries. (Fig. 20)
* If the c symbol lights for about one minute, then disappears, the battery
is only capable of retaining camera memory. However, do not remove
old batteries until you are ready to replace them with fresh ones.
The memory of the photography mode will be retained for about 30 minutes without batteries. If you
replace with new batteries within that 30 minutes, the display of the photography mode left in the camera
memory will again appear in LCD Display Panel.
* Cold temperatures will reduce battery efficiency. In freezing weather, the symbol may turn off
and only the (low battery icon) symbol may show on the LCD Display Panel. If you are taking
pictures in cold weather, keep the batteries warm and insert them just before shooting.
7. LOADING THE FILM
Always avoid direct sunlight when loading the film.
1. Depress the Back Cover Lock Release (Red) Button and slide
the Back Cover Latch down. (Fig. 21)
2. Load the Film Cassette into the Film Chamber and pull out
enough film leader to extend just beyond the green mark,
against the Take-up Spool. (Fig. 22)
3. Make sure that the film is within the Film Guides, and that the
upper sprocket edge is under the Guide Plate. (Fig. 23)
4. Close the Back Cover so that the Back Cover Latch snaps
shut. (Fig. 24) The film will now automatically advance until
number "1" appears on the top LCD Display Panel. (Fig. 25)
5. As soon as you close the Back Cover, the film speed appears on LCD
Display Panel for 1—2 seconds. Then the LCD Display Panel will show
the following signs (Fig. 26):
(1) Program mode
(2) Total number of exposures on film roll loaded
(3) DX verification
(4) Shutter SPEED
(5) Film advance mode (C/S)
(6) Film taken up onto Film Take-up Spool
(7) Film advance symbols (these symbols will flash in sequence
toward the right to tell you the film is winding)
(8) Film Cassette loaded symbol
(9) Exposure Counter
* If display shuts off, lightly press Shutter Release Button to
update LCD.
* LCD display data can be verified by checking the information
visible through Film Loaded Window on camera back. (Fig. 27)
6. If the film has not advanced correctly or was not taken up onto the Film Take-up Spool, the Film
Cassette loaded symbol will blink until the film has been loaded correctly. Reload the film by repeating
steps 1 - 5 shown above.
If Non-DX films are loaded in the camera, no LCD warnings will be observed.
(The film ISO speeds must also be set manually. See next section.)
4www.butkus.org
8. SETTING THE FILM ISO SPEED
DX coded films are provided with black-and-silver patterns
corresponding to film speed and number of exposure on roll. The
camera reads this pattern and automatically sets itself for DX films
with speeds ranging from ISO 12 to 6400. (Fig. 28)
DX films
1. The film speed and the "DX" verification symbols are briefly displayed on LCD Display Panel.
(Fig. 29)
* For advanced applications, you may wish to raise or lower the ISO speed of a DX coded film.
This may be done by using the Exposure Compensation Adjustment Button. See Section 27 for
details.
Non DX films
1. Press the ISO Button (under cover on top left of camera) to
display the film ISO speed in the LCD Display Panel. (Fig. 30)
2. While keeping the ISO Button depressed, press the Up or
Down Button until the desired film speed appears on the LCD
Display panel. (Fig. 31)
* The digits of the film speed shown on the LCD Display Panel
can be changed fast by keeping the Up or Down Button
depressed.
9. INDICATION IN THE VIEWFINDER
10. Program Mode
1. Blinking AE Lock Indicator
11. TV Mode
2. Subtractive Film Counter Display (displays the
last 9 frames with DX-coded films)
12. Shutter Speed Indicator
3. Blinking Exposure Compensation Indicator
13. Flash Ready Indicator (lights)
4. Blinking Underexposure Indicator
14. Correct Auto Flash Indicator
5. Blinking Overexposure Indicator
15. Aperture Readout (Program Mode)
6. Shutter Speed Scale
16. (Box with image of sun on right): Auto Backlight
Indicator
7. Slow Shutter Speed Zone (orange)
17. (Box with dot in center): Spot Metering Indicator
8. Manual Mode
18. (Box, empty): Averaged Metering Indicator
9. Aperture Priority Mode
19. (Box with sun on left side): Fill Flash Indicator
* Viewfinder illumination
An auxiliary light turns on automatically when finder LCD is dark and difficult to see. If you can not easily
see the LCD information in the Viewfinder, the light is also available by pressing the Depth-of-field
Preview Button.
10. HOW TO HOLD YOUR CAMERA
(FOR SHARPER PICTURES)
1. Lightly put your right-hand forefinger on the Shutter Release Button while
holding the camera body with other fingers.
2. Make your right arm comfortable, but keep it as close to your body as
possible.
3. Cradle your camera and lens in the palm of your left hand, holding it so that
the Focusing Ring can be easily turned with your fingers.
4. Brace your left elbow against your body and hold the camera comfortably
against your face. Look through the Viewfinder to compose your picture.
* It is important to practice correct shooting position to avoid blurred or tilted pictures. (Figs. 33,
34)
11. SETTING THE PROGRAM FOR AE (PROGRAMMED
AUTOMATIC EXPOSURE) PHOTOGRAPHY
In program AE photography, the camera automatically selects the F-stop and the shutter speed
according to subject illumination. Programmed exposures are best suited for general photography of
people and scenery. Special-effects shooting, etc., can best be done using the camera's many override
options. Please keep in mind however that for most shooting you can just focus and shoot.
1. Set the shutter speed to AUTO by pressing/holding the Up or Down Button.
(Fig. 35)
2. Set the lens to P. (Fig. 36)
4www.butkus.org
3. Set the Program Selector to P (normal program setting). (Fig. 37)
4. Set the Exposure Mode Selector Switch to AUTO BLC. (Fig. 38)
* Refer to the Sections 19 - 23 for more advanced shooting modes.
12. FOCUSING
Look through the Viewfinder and turn the Focusing Ring until you obtain
the sharpest possible image. (Figs. 39-A, 39.B)
1. Split image focusing spot: When both images in the split-image spot
form a single, clear image, the subject is in focus.
2. Microprism focusing collar: When the subject loses its shimmering
appearance, the subject is in focus.
3. Matte screen focusing field: When the subject loses its blurred
appearance, the subject is in focus. Long focal length lenses and/or
lenses with small maximum apertures may black-out part of the central
focusing aids. When using these lenses, you must rely on the matte
screen for accurate focusing.
13. DEPTH OF FIELD PREVIEW
In the Viewfinder you can visually observe the depth-of-field provided by the automatically or manually
selected F-stop.
1. Manually adjust the Lens Aperture to the desired F-stop (or allow the meter to do it for you).
2. Press the Depth-of-field Preview Button. (Fig. 40)
3. Observe the results of increased sharpness on the (darkened) image in the Viewfinder.
General Guide Lines
When you focus on a specific subject often subjects in the near foreground
and in the distance are also in focus. The region
of good focus has some measurable depth or depth-of-field. (Figs. 41, 42)
1. Depth-of-field is always greater on the far side of the subject you
focus on, and shallower on the near side.
2. Depth-of-field is greater around a subject that is further away from
the camera than one that is close to it (at a given aperture F-number)
setting.
On many lenses, your depth-of-field can be checked in the following way:
1. Focus the lens on the subject.
2. The main indicator line opposite the lens focusing scale will show the actual distance to the
subject.
3. A pair (or pairs) of lines alongside the main indicator will now show the range of subject
sharpness on either side of the subject that will also be in acceptable focus at one or more
aperture (F-number) settings.
For example, if you are using a 50 mm normal lens, set to f/16
and focused to 3.0 m (10 ft.), the two depth-of-field indicators
(for f/16) will show a range of sharp focus from about 1.8 m (6
ft.) to 7.6 m (25 ft.). Subjects within this range will be in good
focus. (Fig. 43)
14. INFRARED MARK
Always re-adjust your focus to the infrared focusing mark when
using infrared films and an R60 (or equivalent) filter. This is necessary because the image forming,
invisible IR rays have longer wave lengths than the visible light rays you see and focus with, and the
camera lens focuses them slightly further back inside the camera. Therefore, visual focusing can not be
accurate without some compensation.
1. Attach the R60 fiIter and visually focus on the subject. Read the indicated distance off the lens
barrel. (Fig. 44)
2. Shift that distance setting over to the red infrared index mark. (Fig. 45)
* Many lenses do not provide separate IR indicator, in which case some "Bracketing" of distance
settings may be necessary.
3. Set the exposure in accordance with operating instructions | for the film. I
* Always refer to film instructions for special precautions and procedures when any infrared film is
used.
15. REWINDING THE FILM
1. DX coded films will rewind automatically when you reach the
end of the roll.
* Film rewinding is indicated by a series of three dashes flashing
in sequence from right to left, while the Exposure counter is
counting down. (Fig. 46)
2. When the film is fully rewound, the motor stops automatically
and "E" appears on the LCD Display Panel. (Fig. 47) You can now
open the Back Cover to unload the film.
* The Shutter Release is locked when "E" is displayed.
3. If you wish to rewind the film before the end of roll is
reached, push the recessed Manual Rewind Button on the
back of the camera with a pen, etc. for about 2 seconds.
(Fig. 48)
* When the DX symbol does not appear (such as when a rolI
of Non-DX film is in the camera), the camera will usually
sense the end of the roll and rewind the film when it is no
longer able to advance to another frame. If it does not, then
you must rewind the film manually.
16. SELF TIMER PHOTOGRAPHY
The Self-timer is used to include yourself in your pictures and normally
provides a delay of 10 seconds, other times are available and may be
changed as follows:
1. Switch to single exposure mode. (Fig. 49)
* If full display information is not showing, lightly touch the Shutter
Release to make the information reappear.
2. Press and hold the INT Button to display the interval time on the LCD
Display Panel.
3. While keeping the INT Button depressed, press the Up or Down
Button until the desired delay time is displayed on the LCD. (Fig. 50)
The LCD will automatically return to the normal display within seconds
after the INT Button is released, and INT will blink to indicate that a
special delay time has been set.
4. Press the Self-timer Button. The Self-timer Green Indicator lamp will blink and the Self-timer
audible beep (if switched on) will be heard. (Fig. 51)
For the last 3 seconds before the shutter releases, the red lamp (and continuous beep) will warn you
that the shutter will release soon.
5. To cancel the Self-timer after it has been started, press the Self-timer Button again or turn the
Power Switch OFF.
* The LCD will display the actual count down. (Fig. 52)
* When using the Self-timer in all modes other than manual always use
the Viewfinder Cap attached to the strap to covet the Viewfinder
Eyepiece to avoid incorrect exposure due to stray light entering the
Viewfinder Eyepiece. (Fig. 53)
* The Self-timer sound can be eliminated by setting the Power Switch to
the ON position. (Fig. 54)
17. PROGRAMMED FLASH PHOTOGRAPHY (USING THE
OPTIONAL SPEEDLITE PX)
The RICOH Speedlite PX is a powerful, but highly compact electronic flash that, when attached to the
XR-M, become an integral part of the camera system. If provides a Guide Number of 12 m (Guide
Number 40 in ft.) at ISO 100, and will cover the field of a 35mm lens, thus making it ideal for use with
normal, wide-angle and compact zoom lenses such as 35—70 mm.
When the Speedlite PX is used on the camera, and the camera is set to
program AE photography, the shutter speed and F-stop are
automatically set.
Flash photography is a direct metering system and light is measured off
the film plane to control the flash duration. This makes possible a world
of special applications, as well as the ultimate in point and shoot
simplicity.
1. Carefully align the Guide Pin with the Guide Holder while inserting the
hook of the Speedlite PX into the holder of camera. Push the flash in the
direction of the arrow until it clicks into place. (Fig. 55)
2. Set the shutter speed to AUTO by using the Up or Down Button (or
the Reset Button). (Fig. 56)
3. Set the F-stop to P. (Fig. 57)
4. Set the Program Mode Selector to P. (Fig. 58) (See Section 31 for
additional details.)
5. Turn the Flash Power Switch on. This will also flip up the flash head.
(Fig. 59)
6. When fully charged, the Flash Ready Indicator ( ~ ) lights in the
Viewfinder and the Flash Ready Lamp on the back of the flash lights.
(Fig. 60)
7. Focus on your subject and press the Shutter Release Button to take
your picture automatically. (Fig. 61)
8. If the flash exposure is correct, the Flash Ready Indicator blinks for
about one second. (Fig. 62)
If exposure is not correct when it does not blink. Change conditions (Fstop, distance, etc.) and try shooting again.
9. To remove the flash, depress the Lock Release Button and pull the
flash in the direction of arrow. (Fig. 63)
* When you are close to your subject, very little flash power is needed,
therefore the flash recycle time will be very fast. If your subject is very far
away, it will take more flash power to be properly illuminated, and require
longer re-cycle times.
* The Speedlite PX contains no batteries. It obtains its power from the
batteries in the camera's handgrip. If the flash recycle time becomes
excessive, replace the camera batteries as soon as possible (using the
battery indicator on the LCD to monitor battery condition).
* Do not use the Speedlite PX in combination with the Continuous Exposure Mode because the
flash will be unable to recycle fast enough to make three exposures per second.
* Refer to the PX Flash Operating Instructions for more creative techniques and technical details.
18. SAFETY LOCK (UP OR DOWN BUTTON)
The camera is designed to prevent unintentional changes in shutter speed or modes by accidentally
touching the Up or Down Button. In order to initiate any changes the Up or Down Button must be
depressed for about one-half second.
* Any shutter speed setting may be locked in by
pressing the Film Advance Mode (C/S) Selector
Switch and U p or Down Button at the same time. The
LCD will I now blink the setting you have locked-in.
(Fig. 64)
* To cancel the shutter lock press the Reset Button, or push the Up or Down Button while keeping
the Film Advance Mode Button (C/S) depressed.
19. HOW TO USE THE MULTI PROGRAMS
The camera exposure meters are designed to utilize a multprogram system. Three "customized" programs can be
selected by the photographer according to taking conditions
and subject. (Fig. 65)
A. P program:
An average shutter speed and F-stop are combined. This
program is recommended for general shooting. (Fig. 66)
4www.butkus.org
B. PD program:
This is used for shooting with maximum overall sharpness
(increased depth-of-field), and is recommended for scenery or
close-up shots. The resulting slower shutter speeds can also
be useful to accentuate the feeling of motion. (Fig. 67)
C. PA program: This program provides higher
shutter speeds, and is recommended for fast moving
subjects, as in sports, car races, etc. This program
also provides wider apertures and decreased depthof-field. This will allow a less sharp background and
is ideally suited for portrait taking. (Fig. 68)
To utilize any of these programs you must: Set the lens to P. Set the shutter to AUTO. Select the
program with the Program Mode Selector Switch.
20. APERTURE-PRIORITY AE (AUTO EXPOSURE) PHOTOGRAPHY
In aperture-priority AE photography, the camera automatically sets correct shutter speeds according to
your pre-selected F-stop number and the brightness of your subjects. This is suitable for photography
taking advantage of specific depth-of-field requirements as in portraits or scenic pictures.
1. Set the shutter speed dial to AUTO. (Fig. 69)
2. Turn the F-stop Ring to set the desired F-stop number.
* When the Shutter Speed Indicator is in the yellow range, the shutter speed is too slow to
handhold. (Fig. 70)
Either select a new F-stop or mount the camera on a tripod or other suitable support.
* When an overexposure symbol ( ) or underexposure
symbol ( ) appears in the Viewfinder, the camera is unable
to provide the proper shutter speed for correct exposure.
(Fig. 71)
Adjust the F-stop Ring (to change the F-stop number) until you are able to obtain an acceptable
exposure within the available shutter speed range and extinguish the over/underexposure symbol.
21. SHUTTER BIAS PROGRAM AE PHOTOGRAPHY
The shutter bias program AE photography is actually a combination of the program AE photography and
shutter speed priority AE photography. (Fig. 72) Use this mode to avoid shutter speeds lower than the
pre-selected shutter speed. This is particularly useful in sports photography.
For example, set the Shutter Speed Dial at 250 to avoid any shutter
speed slower than 1/250 sec. When the subject is bright enough, any
shutter speed between 1/250 and 1/2000 sec. may be selected
according to the brightness of the subject. You will see the selected
shutter speed as well as F-stop number in the Viewfinder. (Fig. 73)
If the brightness of the subject is not enough even at full open
aperture, a slower shutter speed will be automatically selected to
obtain correct exposure.
Set the minimum desired shutter speed by pushing the Up
or Down Button. Your pre-selected shutter speed is shown
by the blinking indicator on the LCD Meter Display in the
Viewfinder. The row of indicators in sequence, short of, or
beyond the blinking indicators, show a shutter speed
suggested for the conditions. (Fig. 75)
22. FULL MANUAL PHOTOGRAPHY
You may manually select the shutter and the F-stop number for unusual or creative picture taking
situations.
1. Set the shutter to the desired speed using the Up or
Down Button and information provided on LCD Display.
(Fig. 76) Your pre-selected shutter speed will be shown
by the single steady indicator on the Viewfinder LCD
Display A second shutter speed indicator may blink to
indicate the camera meters suggested speed at a given fstop. (Fig. 77)
* The shutter speed setting will also be displayed in the
Top LCD.
4www.butkus.org
2. Turn the F-stop Ring until your shutter speed
indicator and the camera meter's blinking indicator
(showing suggested exposure) overlap each other.
(Fig. 78)
This confirms that correct exposure is set.
3. Manually adjust the shutter speed to move the setting indicator towards the blinking indicator.
(Fig. 78)
23. TV MODE
Use this mode to record TV images.
1. Select the TV mode by pressing the Up or Down Button until TV
appears on either LCD Display.
(Fig. 79)
2. Set the Program Mode Indicator (on the Top LCD) to the type of TV
system you are using by sliding the Program Mode Selector Switch. (Fig.
80)
Shutter Speed
TV
Program Selector
System of TV
Country
PAL
PAL or SECAM
in Europe
NTSC
NTSC
In U.S. & Japan
CRT
Still TV images
(Used for computers, etc.)
3. Turn the F-stop Ring to P (Fig. 81)
* Indicators for TV mode, shutter speed and F-stop are also shown on
the Viewfinder LCD. (Fig. 82)
* In order to achieve correct exposure, compose TV images to fill the frame.
* Use of a tripod is absolutely necessary for all TV modes, because the shutter speeds are very
slow. Use of a Ricoh electronic cable release is recommended to prevent unintentional camera
movement.
Compensation filters are available to remove the strong blue cast in TV images.
* Do not use any electronic flash when taking pictures off your TV the camera will not fire dedicated flash units in the
TV mode).
24. EXPOSURE METERING SYSTEMS
The camera is designed with 3 types of exposure metering systems: center-weighted average, spot and
automatic backlight control. Each system can be easily chosen by the Exposure Mode Selector Switch
according to taking conditions, subjects, and experience.
1. Center-weighted average exposure metering system
Lighting situations vary and the camera provides you with the means to
master them. Under normal conditions, center weighted average metering
is most applicable and determines an ideal balance between subject and
background lighting. (Fig. 83)
4www.butkus.org
* This is a convenient metering system for general photography under
normal shooting conditions. It measures the viewing area, emphasizing
the center portion where the subject is likely to be, with diminishing
sensitivity toward the edges.
2. Spot metering system
This is especially advantageous for photomicrography, photography of
subjects on stage, etc. It measures the central spot (about 4%) if the
total image area, as defined by the edges of the central microprism area
for subjects which require selective measurement. (Fig. 84)
3. Automatic backlight control system
This is particularly effective when a subject is surrounded by an especially
light or dark background. This adjusts the average reading to obtain
proper exposure for the main subject.
Automatic backlight control (ABLC) is especially recommended for the
beginning to intermediate photographer. It uses both the spot and
average meters together to determine an ideal exposure.
Here's how it works (for the technically inclined):
1. First it makes and compares two separate readings for the overall average light level and
the central spot area.
2. If they are both similar, the average reading is used.
3. If the center is 2—3 stops darker than the overall average, the exposure will be increased by 12 stops above the average setting.
4. As the difference approaches 5 stops, the adjustment actually decreases in an effort to
preserve the visual effect.
5. If the metering systems, on the other hand, find the center (spot) brighter than the surroundings
(average area), the exposure will be decreased progressively, so that the background can go
black, while preserving detail in the center (e.g. spot lit) area
* The effect of this programmed ABLC system is most pronounced at bright light levels.
* At medium light levels, the amount of correction is reduced somewhat, while at very low light
levels there will be no correction at all.
25. RESET BUTTON
This button is used to reset the shutter speed, interval time, film advance mode or exposure
compensation back to a default value. First, lightly press the Shutter Release Button to update the LCD
with your currently entered information. Now you may reset one, or single values as follows:
1. Press the Reset Button (found under the Control Button Cover) to
return all of the following items to their default values: (Fig. 85)
- Shutter speed to AUTO from any manually set time, bulb, or a TV mode.
- Interval Timer to 10 seconds from any manually entered time (0 to 3600 sec.).
* This changes (to 10 sec.) will occur whether the INT Indicator is blinking or not, and from
any operating mode, i.e. Self-timer, Interval Timer, or Long Exposure (Bulb) Timer.
- Film advance mode to continuous - If presently set for single frame shooting.
- Exposure compensation to +/-0 from any manually entered value (O to +/-4 EV).
2. Press the Interval Timer Button (INT), then immediately press reset.
3. Press the Exposure Compensation Button (+ / - ), then immediately press reset.
* Reprogramming any default value may be done as follows:
a. Press and hold Reset Button. Then, ...
b. Use Up or Down Button to select manual shutter speed, TV, etc.
c. Also press and hold INT or + /- Button and use Up or Down Button to enter new time or
exposure adjustment.
d. Press C/S Button to select most used Film Advance Mode.
e. Release Reset Button to enter new default setting.
* Double, and Multiple Exposures my be made with the XR-M by pressing and holding both
the ISO and + / - Buttons at the same time. This disconnects the film transport system.
Now, the shutter may be released one or more times without advancing the film.
26. AE LOCK
When back light or spot light is given to the subject being metered in AE photography and contrast is
excessive between the background and the subject, under or over exposed pictures may result. Use the
AE lock to remember, or lock into the camera's electronic memory a close-up reading of the subject.
4www.butkus.org
Example 1: When not using the AE lock
Example 2: When using the AE lock.
1. Bring the camera close to subject to the point that exposure will not
be affected by the background (or use the spot reading).
2. Press the AE Lock Button once to memorize the exposure. (Fig.
86)
A flickering AEL is now displayed on the Viewfinder LCD. (Fig. 87)
3. AE lock is automatically cancelled after the Shutter Release Button is pressed for the
exposure.
* To cancel AE lock without taking a picture press AE Button a second time.
* For a continuous exposure series under similar conditions all requiring the use of AE lock, you
may wish to adjust your exposure using the exposure compensation feature instead.
27. EXPOSURE COMPENSATION
Any camera's center-weighted meter can be fooled under very extreme lighting conditions, or when
attempting to read very light (e. 9. snow or beach scenes) or very dark (night scene) subjects. Also,
when back or spot lit subjects are being metered in AE photography and contrast is excessive between
the background and the subject, under or overexposed pictures usually result. Exposure compensation
may also be used to intentionally take over/underexposed pictures for creative effects, and to adjust ISO
speeds away from DX values.
Example 1: Without exposure compensation
Example 2: With exposure compensation
Exposure adjustment examples:
SUBJECT
Figures in back light
Scenery with much sky
Figures with snow mountains
or sea on the background
Figures in spot light
(on stage etc.)
EXPOSURE ADJUSTMENT
+4 to +1
+1
- 4 to - 1
1. Press and hold the Exposure Compensation (+ / - ) Button. (Fig.
88)
2. Press the Up or Down Button until the desired amount and
direction of the compensation appears on the LCD. Adjust meets
may be made up to + / - 4 EV (stops) in 1/3 EV increments. (Fig.
89)
* Be sure to set it back to the "O" position after use. (See Reset
Button section.)
* When the exposure compensation is set at positions other than
0, the + / - symbols are displayed on both LCD's. (Fig. 90)
* Remember that you must increase exposures to keep light
subjects light, and decrease exposures to keep dark subjects
dark.
28. INTERVAL TIMER PHOTOGRAPHY
The camera is equipped with a built-in interval timer. (Pre-programmed for 10 sec. delay) However, the
interval timer may be set to automatically take pictures at regular intervals of 1 sec. to 1 hr. for time
lapse studies, astrophotography, recording of wild animals, plants growing, etc.
1. While the Interval Timer Button is held down, set the desired
interval timer by pressing the Up or Down Button. (Fig. 91)
2. Be sure to set the Continuous/Single Frame Button (CS) to
Continuous (C) or you will only get one picture, after which the
interval timer will cancel itself. (Fig. 92)
4www.butkus.org
3. Press the Self-timer Button to start the sequence. An exposure
will be taken at the preset interval until the film's end (Fig. 93), or
you push the Interval Timer Button again to switch it off.
* To eliminate electronic beep sound during interval photography,
be sure Power Switch
is in the ON (not ·I)) ) position.
4. The sequence may be temporarily interrupted, or cancelled completely, by pushing the Self
timer Button once. (The Top LCD will return to its normal display mode with the INT Indicator
blinking.) Pressing the Self-timer Button a second time will restart the sequence from the
beginning.
* Pressing the Interval Timer Button during a count-down will cancel the function - after the end of
the on-going count. To immediately stop the sequence, turn the camera power switch off.
5. To clear the interval mode (and turn off blinking INT on the LCD) press the Interval Button
once, your preset time will remain in the interval timer memory for later use.
29. LEFT HAND SHUTTER RELEASE
Set the Interval Timer to 0 seconds to release shutter instantly when
the Self-timer Button is pressed. It may now be used as a left-hand
shutter release. (Figs. 94A, 94B)
30. B (BULB) SETTING
The B (Bulb) setting is used for shooting night scenes or other long
exposure times.
1. Set the shutter speed to bulb by pressing the Up or Down
Button. (Fig. 95)
2. When the Shutter Release Button is pressed, the shutter
is kept open as long as the button remains depressed.
* A digital count of the exposure time will be shown on the
Top LCD as long as the shutter release is held down. (Fig.
96)
* Use a tripod and Ricoh Electronic Cable Release for bulb
photography to prevent the unintentional movement of
camera. Before you plug the electronic cable release into
the camera, turn
the Power Switch off.
3. Very long timed exposure may also be made by combining the bulb and interval timer
functions. First, use the Up or Down Button to set the shutter speed to bulb.
4. Press and hold the INT Button; then use the Up or Down Button to set the desired length of
your exposure time (up to 3600 sec.). A few seconds after the time has been entered the LCD will
change back to bulb and the INT Indicator will be blinking.
5. Press the Self-timer Button or use the Ricoh electronic cable release, to begin the exposure.
The display will now change to a count-down timer for the duration of the time entered, then the
shutter will close.
* A long exposure may be terminated anytime during the exposure by pushing the camera power
switch to OFF.
31. MORE EXCITING APPLICATIONS FOR THE CAMERA
WITH SPEEDLITE PX/300P/260P
(APERTURE-PRIORITY FLASH PHOTOGRAPHY)
When you add any of the above Ricoh dedicated flash systems, direct film metering is possible at all Fstops for total distance and creative depth -of-field control. For example, manually use F2 or F2.8 to take
a distant subject or to reduce flash recycle time; or use F11 or F16 to increase your depth-of-field or
work very close to your subject.
* Check the Viewfinder and flash indicator (300P/260P only) to verify that the flash exposed
properly or while shooting. If the flash shot was made with correct exposure, the Viewfinder flash
ready indicator blinks for about one second. When it does not blink, exposure is not correct.
Change conditions (F- stop, distance, etc.) and try again.
* You can also change program modes to suit the subject of your photograph.
1. Set the program mode to PD for increased depth-of- field, close
up photography, etc. F-stop will be automatically set to F11. (Fig.
97)
2. Set the program mode to P for general flash photography. F-stop
will be automatically set to F5.6.
(Fig. 98)
3. Set the program mode to PA for sports, car racing, etc., or a
greater working (flash) range.
F-stop will automatically be set to F2.8 (except, of course, on
lenses with smaller
maximum apertures). (Fig. 99)
* When the Speedlite 260P is used alone, the flash program mode is automatically set to P (even
when you set the program mode to PD or PA). The flash ready indicator does not hi ink and the
camera beep will not be heard even if the flash shot is made with correct exposure.
32. FLASH PHOTOGRAPHY WITH OTHER RICOH FLASH UNITS
Ricoh flash units such as the Speedlite 200 and 400 can be used with the camera when the shutter
speed is set to AUTO. However, auto flash control will be done by the sensor on the flash unit. Direct
off-the-film metering is not available.
* When the flash is fully charged, the flash ready indicator in
the Viewfinder will light up (Fig. 100), as the ready lamp lights
up on the flash itself.
4www.butkus.org
* Shutter speed will be automatically set to 1/100 sec.
Setting F-stop Ring of the lens
With Speedlite 200: Set the F-stop Ring to R The camera selects proper F-stop number automatically.
With Speedlite 400: Manually set the F-stop Ring to the designated number.
* You may set shutter speed and F-stop manually but the shutter speed must be slower than
1/100 sec. If you select shutter speeds faster than 1/100 sec. while using these Ricoh flash
systems the shutter speed will be automatically reset to 1/100 sec.
* Refer to Operating Instructions for each flash unit for additional details.
33. FLASH PHOTOGRAPHY WITH SPEEDLITE PX PLUS 300P
When the subject for the flash photography is distant, use dual
flashes for extra power.
1. Attach both the Speedlite PX and 300P to the camera
according to their Instruction Manuals.
2. Set the camera for program AE photography. (i.e.
lens at P and shutter on AUTO) (Fig. 101)
3. Turn both flashes power switches on.
4www.butkus.org
4. When both flashes are fully charged, the flash ready indicator blinks slowly.
5. Focus on the subject and press the Shutter Release Button.
34. FLASH PHOTOGRAPHY WITH NON-DEDICATED
FLASH UNITS (GENERAL INSTRUCTIONS)
1. Set the shutter speed to 1/60 sec. when a non-dedicated
flash unit is used. (Fig. 102) Note: Such units cannot be used
in auto mode. Set your F-stop according to the flash F-stop
dictated by the flash and ISO speed of the film you are using.
* If flash is not equipped with hot shoe connection, it cannot be
used.
* Dedicated flash units not designed for use with Ricoh
cameras may provide incorrect exposures and/or equipment
damage.
* The flash ready lamp does not light in the Viewfinder when a
non-dedicated flash is used.
* Refer to Operating Instructions for individual flash units for further specific details.
35. FLASH IN DAYLIGHT
When taking pictures in back light, the subject is affected by
strong background light and dark (underexposures) subjects
may result. Properly lit pictures can easily be obtained by using
flash even in daylight. This technique is known as fill-flash.
When the Speedlite PX, 300P or 260P are used on the
camera, professional daylight fill-flash pictures can be
automatically accomplished even by novice photographers.
(Figs. 103,104)
With Speedlite PX:
1. Attach the flash unit on the camera
2. Set the camera to the program AE mode.
3. Turn the flash power switch on.
* When turning the flash power switch on in daylight, the Fill Flash Indicator (box with sun on left and
lighting bolt), appears in the Viewfinder.
4. When fully charged, the flash ready indicator lights up on the back of the flash and in the Viewfinder.
The shutter speed is set automatically to 1/100 sec. The F-stop will also be displayed. You can now
shoot well exposed pictures, providing that you do not see an overexposure ( ) mark.
* If the ambient light level dictates an unusually small aperture
for correct over all exposure, the camera will automatically
select and set it.
* If the camera's audio signal is turned on and there is sufficient
ambient light for good average exposure, you will hear a beep
each time the flash fires, irregardless of the level of fill-flash
provided. (Fig. 105)
* When the flash shot is made with correct exposure, the flash
ready indicator in the Viewfinder will blink. If it does not blink,
change conditions and try shooting again.
* The ambient/fill-flash light ratio is programmed to be
automatically set to 1:4.
With Speedlite 300P:
1. Attach the flash unit onto the camera and turn its power switch on.
Set the flash A/M (Auto/Manual) Selector to A.
2. Follow steps 2 - 4 (as shown above).
* When the flash shot is made with correct exposure, the flash ready indicator in the Viewfinder will blink.
If it does not blink, change conditions and try again.
4www.butkus.org
* The ambient/fill-flash light ratio is programmed to be automatically set to 1:2.
* The shutter speed (normally set to Auto) can be changed to any manual shutter speed (1/100 sec. or
slower), to give correct exposure to the background in a room or other dark place.
With Speedllte 260P, 240 and 200
1. Attach the flash unit onto the camera.
2. Set the shutter speed to AUTO and set the F-stop to R
3. Turn the flash power switch on.
4. When fully charged, the flash ready light turns on.
* Remember that the aperture you select must not overexpose the film with ambient light when the
shutter speed is set to 1/100 sec. or longer. In bright sunlight this may be avoided by using slower (lSO
100) films.
36. SHUTTER BIAS FLASH AE
This method uses a combination of program flash AE and
shutter bias AE photography, when used with non-moving
subjects, it allows intentionally long exposure times to record
subjects (such as night scenes) under more natural available
light, along with a supplemental flash exposure for extra
illumination of a foreground subject. (Fig. 106)
1. Set the lens aperture to P. and the Program Selector
Switch to P or PA. (PA will provide larger apertures and
a more distant range.) (Fig. 107)
2. Set the shutter to any manual speed desired longer
than 1/100 sec. The camera's computer will mix
existing light and the light from the flash.
* The effect typically sought after is a natural-looking
night scene with good detail visible in the foreground
subject. Longer exposures can also allow moving light
sources such as headlights, air planes, etc. in the
background of your photograph. [Mike: these turn into
streams of red tail lights or white headlights
37. P MOUNT ADAPTER
Conventional P-mount lenses (screw mount lens) can be used on the camera by using an optional Pmount adapter. General photography is available but operating conditions are some what limited.
A. Programmed exposures can not work (due to different lens coupling systems).
B. Any automatic diaphragm will not function. (Some lenses may remain wide open, while others
remain stopped down, depending on how they were designed.)
C. Automatic F-stop setting with the Speedlite PX flash unit will not occur.
Inserting and removing the adapter
1. Align the red dots and carefully fit the adapter into the body mount.
4www.butkus.org
2. Use a ball-point pen, etc. to turn it clockwise until it locks in place.
3. To remove the adapter use a ball-point pen, etc. to press the spring inwards and turn the Pmount adapter counter clockwise to the limit. Lift it out carefully.
* Some screw mount lenses cannot be mounted on the camera.
Testing the fit of any lens you purchase for this camera is strongly recommended.
38. DIOPTRIC LENSES
The viewfinder eyepiece has a built-in -1 correction (suitable for most normal vision).
If a dioptric lens is fitted, you do not have to wear eye-glasses when taking pictures. Slip the lens in the
groove in the finder eyepiece.
Dioptric lenses are available in 7 types: -4, -3, -2, -1, +1, +2 and +3 (Diopters)
Note: Some forms of astigmatism etc. may make dioptric eyepiece correction impossible. Please
check with your vision specialist for a recommendation based on your prescription.
39. SUPER DATA BACK 4
One of the most versatile databacks offered anywhere, the
Super Data Back 4 allows you to imprint a choice of date,
time, or date plus time, and up to 10 characters from a
choice of a full alphabet, a set of symbols and digits 0 - 9 in
two lines. So, for example, you can record the date, time and
place of a photograph when traveling, or make a note of
birthdays and other special events.
It also incorporates a release timer, interval timer and very
long exposure time controller, and gives you control over the
number of exposures in a sequence to be made. (Fig. 108)
40. DATA BACK 3
When the Back Cover of the camera is replaced by the Data Back 3, "year, month and date", or "hour,
minute" can be printed on your film.
The automatic dating mechanism is incorporated into the Data Back 3. Once the date is set, no
adjustment is necessary until 2019, because leap years and months with 31 or less days are
automatically adjusted. When the switch is turned OFF, it can be used as digital watch. (Fig 109)
41. INTERCHANGEABLE VIEWFINDER SCREENS
Ricoh offers a choice of 3 additional viewfinder screens to suit your needs
or tastes. Each features Ricoh's Acu-Bright mat for optimum brightness and
easier focusing in dim light. The XR-M mirror is multi-coated and the
pentaprism is silver-vapor coated to provide the brightest possible viewing
image.
(Figs. 110 A, 110-B, 110-C)
42. SPEEDLITE PX
The Speedlite PX is dedicated to the camera exposure is controlled TTL by
measuring light off the film plane.
Its real advantage lies in the fact that because it mounts so conveniently, you can
leave it on the camera at all times giving you the option of compensating for back
lit situations by setting the camera to the Auto Fill Flash setting rather than the
ABLC mode.
4www.butkus.org
It offers a guide number of 12 (24 for fill flash) and thanks to its thyristor-type,
energy efficient design, charges in approximately 3 seconds. (Fig. 111)
43. XR SPEEDLITE 300P
The XR Speedlite 300P unit provides full AE through-the-lens flash and simple daylight flash by
measuring light off the film plane and simple pro-fill daylight flash photography. Lots of modes - Program
Flash AE, Aperture Priority Flash AE, Shutter Bias Flash AE, Manual Flash and Program Daylight
Synchronization - open up exciting creative possibilities and assure great results. (Fig. 112)
44. SPEEDLITE 260P
The Speedlite 260P provides full AE through-the-lens flash either day or night by
measuring light off the film plane and works well with XR-M's many programmed
modes. (Fig. 113)
45. SPEEDLITE 200
Flash a smile with the compact, lightweight Speedlight 200. Just slip it on the camera hot shoe. When
fully charged, the flash-ready LED is visible in the viewfinder and the shutter speed is automatically set
to 1/100 sec. for perfect exposures from 0.8—3.6m (2.15—11.8 ft). This easy-to-use strobe quickly
recycles in 8 seconds and provides about 130 flashes on alkaline batteries. (Fig. 114)
46. CARE OF BATTERIES
1. Before installing, be sure to clean all moisture and skin oil off both battery contact surfaces in
order to avoid future problems of corrosion and poor electrical contact.
2. Remove batteries when the camera is not used for a long period of time.
* Removal of the battery case may result in a loss of camera memory.
The film may also advance two or three frames when the batteries are replaced.
* Dispose of batteries properly. Do not throw them into fire or expose to high temperature.
47. PROPER CARE OF YOUR CAMERA
1. Do not touch lens or mirror surfaces with your fingers to clean them. Blow dust away with a
blower or wipe gently with soft cloth. If you must clean the lens surface use only 1 drop of lens
cleaning fluid on a camera lens tissue.
2. Excessive shock and humidity, or salt may make any camera malfunction. When you use the
camera at the beach, in a corrosive atmosphere, or in a place where chemicals are used,
carefully wipe it clean.
3. Do not expose camera and film to temperature extremes.
4. Do not leave your camera in a car at the beach, in the desert, or in other high temperature
conditions to prevent possible damage.
5. When using a tripod, do not try to force a long screw into the socket. (The screw length should
not extend more than 5.7 mm (1/4 ")
6. Do not store the camera near a television, radio or other strong magnetic source.
7. Store camera in a humidity and dust free place.
48. MAJOR SPECIFICATIONS
Type: 35mm SLR with focal plane shutter and automatic electronic exposure control
Photographic Modes: Multi-program automatic exposure mode, aperture-priority automatic exposure mode, shutter bias
automatic exposure mode, TV mode, TTL auto flash mode and manual mode
Film Format: 35mm film, 24 x 36mm
Lens Mount: Ricoh system R-K mount
Shutter: Electrically controlled, vertically moving focal plane shutter
Automatic: 30 sec. to 1/2000 sec.
Manual: 16 sec. to 1/2000 sec.
TV
B - selectable operating time from 1 sec. to one hour4www.butkus.org
Self Timer: Operating time:
1. 10 seconds
2. 0 seconds - shutter release with left hand
3. Selectable - from 1 sec. to one hour with blinking LED and audible signal
Interval Timer: Photography at regular intervals. Selectable interval time from 1 sec.. to one hour
Viewfinder: Field of view covers 91% horizontally and vertically
Magnification: 0.80X (with 50mm F1.4 standard lens)
Viewfinder Display: AE lock, exposure compensation, fill flash mode, auto back light control mode, spot metering mode,
average metering mode, underexposure mark, shutter speed indicator, long time exposure, manual, aperture-priority, P
mode, TV mode, overexposure mark, remaining frame,
programmed f-stop number, flash ready indicator and
correct auto flash indicator
Focusing: Diagonal split-image spot in microprism band4www.butkus.org
Focusing Screen: Interchangeable screens are available optionally
Exposure Metering System: Three selectable TTL full open metering systems
1. Center-weighted average metering
2. Auto backlight control metering
3. Spot area metering
Exposure Coupling Range: EV 0 -18 (with ISO 100 film, 50mm F1.4 standard lens)
Flash Terminal: X synchro contact on the hot shoe, and synchro socket for Speedlite PX
Flash Modes: Full AE TTL metering with Speedlite 300P, 260P and PX
1. Program flash AE
2. Aperture-priority flash AE
3. Shutter bias flash AE (except 260P)
4. Program fill flash AE (except 260P)
5. Multiple flash AE And
6. Manual Flash
Exposure Compensation : Exposure adjustment system (+ 4 to - 4 in 1/3 increments)
Film Loading: Ricoh Auto-Load system. Automatic 1st frame setting
Film Advance: Automatic with a built-in motor. Two selectable modes; S (single)
and C (continuous approx. 3 fps)
Film Rewind: Automatic reverse at the end of film. Manual rewind is possible
Program Preview Button: Electronic program preview button is provided
Remote Control: Remote control socket is provided
Back Cover: Removable
LCD Display: P mode, P mode indicator, TV mode, film loaded, film advance, film taken up onto
film take-up spool, exposure counter, film reverse, film reverse completion, exposure
compensation mark, interval mode, ISO, number of exposures of film (when DX film is used),
DX, shutter speed, film speed, selected exposure compensation, selected time
(self-timer, bulb, interval), film advance mode (S/C), battery indication (good, alarm,
low and low for flash)
Power Source: Four AA batteries. AAA battery holder (4 x AAA batteries) is available optionally 4www.butkus.org
Dimensions: 151 (W) x 91 (H) x 51 (D) mm (5.9" x 3.6" x 2.0") (with AA battery holder)
Weight: 510g (18.0 oz) (body only with AA battery holder
* Specifications and appearance of this camera are subject to change without notice