1
BENEFON ESC!
Owner’s Manual
All rights reserved.
© Benefon Oyj, 2002.
Publication number: YZ2400-4*
I
DECLARATION OF
CONFORMITY
Mediante el presente documento, Benefon Oyj declara que este
teléfono móvil, del tipo TGP77EU, satisface los requisitos esenciales
y todas las demás disposiciones pertinentes de la Directiva 1999/5/
EC.
Benefon Oyj erklærer herved, at denne mobiltelefon af typen
TGP77EU er i overensstemmelse med de væsentlige krav og andre
relevante betemmelser i Directive 1999/5/EC.
Hiermit erklärt Benefon Oyj, daß dieses Mobiltelefon vom Typ
TGP77EU die wesentlichen Anforderungen und andere relevante
Bestimmungen der Richtlinie 1999/5/EC erfüllt.
Bij deze verklaart Benefon Oyj dat deze mobiele telefoon, type
TGP77EU, voldoet aan de voornaamste eisen en andere relevante
voorwaarden van Richtlijn 1999/5/EC.
A Benefon Oyj declara pela presente que este telemóvel, do tipo
TGP77EU, está em conformidade com os requisitos essenciais e
outras disposições relevantes da Directiva 1999/5/EC.
Benefon Oyj vakuuttaa, että tämä matkapuhelin, tyyppiä TGP77EU,
on direktiivin 1999/5/EC olennaisten vaatimusten ja muiden
asianomaisten määräysten mukainen.
Härmed förklarar Benefon Oyj att denna mobiltelefon, typ
TGP77EU, överenstämmer med de grundläggande kraven och andra
relevanta bestämmelser i Direktiv 1999/5/EC.
Με το παρόν , η Benefon Oyj δηλώνει ότι αυτό το κινητό τηλέφωνο, τύπου
συµµορφώνεται µε τις ουσιώδεις απαιτήσεις και άλλους
σχετικούς όρους της Οδηγίας 1999/5/EC.
TGP77EU,
Hereby, Benefon Oyj declares that this mobile phone, type
TGP77EU, is in compliance with the essential requirements and
other relevant provisions of Directive 1999/5/EC.
Benefon Oyj déclare par les présentes que ce téléphone mobile, de
type TGP77EU, est conforme aux exigences essentielles et aux
dispositions correspondantes de la Directive européenne 1999/5/
EC.
Benefon Oyj dichiara che questo modello di telefono cellulare, tipo
TGP77EU, risponde alle principali specifiche e misure previste dalla
Direttiva 1999/5/EC.
II
Manufacturer : Benefon Oyj
P.O.Box 84
24101 Salo
Finland
0168
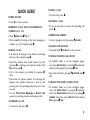
QUICK GUIDE
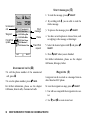
ENDING A CALL
POWER ON/OFF
•To end a call, press c.
•Press / for a few seconds.
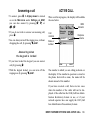
IGNORING A CALL
EMERGENCY CALL TO LOCAL EMERGENCY
NUMBER (E.G. 112)
•If you do not want to answer an incoming call,
press c.
•Press . SOS and - OK, or
CORRECTING ERRORS
•Dial normally by keying in the local emergency
number (e.g. 112) and pressing l.
MAKING A CALL
•Call directly by keying in the number (including
the area code) and pressing l.
•Recall the number from redial memory by first
pressing l, scrolling to the desired number with
n and pressing l.
•Call to the number just dialled by pressing l
twice.
•Quick dial the phone number by selecting the
memory slot number (between 2 and 9) and
pressing the corresponding numeric key for a few
seconds.
•Use the Phone book, Messages or Recent calls
menus for recalling numbers and making calls.
ANSWERING A CALL
•Correct typing errors by pressing . CLEAR .
CLEARING THE DISPLAY
•Press and hold . CLEAR for a few seconds.
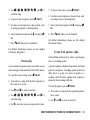
TURNING THE KEYLOCK ON/OFF
•In stand-by mode or on the navigator pages,
enter the Quick menu by pressing n downwards,
and lock the keypad by pressing - OK.
•Open the keylock by pressing . UNLOCK and OK.
TURNING THE SILENT ALERT ON/OFF
•In stand-by mode or on the navigator pages,
enter the Quick menu by pressing n upwards.
Enter the Environment selection by pressing CHANGE. Select the option Silent with the help of
n and press - OK.
•To answer a call, press l.
III
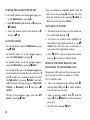
TURNING THE GPS RECEIVER ON/OFF
1. In stand-by mode or on the navigator pages, enter the Quick menu by pressing n.
2. Find GPS receiver with the help of n and press
- CHANGE.
•You can return to stand-by mode from all
menu levels by pressing c. Another way: first
enter the main menu by pressing . MENU, in
which you select the option Phone.
USING MENU FUNCTIONS
3. Select the desired activity with the help of n
and press - OK.
1. The menu items are shown as a list which can
be scrolled with the help of n.
ACCESSING MENUS
•In stand-by mode, enter the GSM menu by pressing - GSM.
2. To choose one of these items, highlight the
item and press the right function key, e.g. SELECT. You will then enter a sub-menu or
have some other appropriate options.
•In stand-by mode (or on the navigator pages),
enter the Quick menu by pressing n.
3. Press . QUIT to return to the previous menu
level or c to return to stand-by mode.
•In stand-by mode (or on the navigator pages),
enter the Main menu by pressing . MENU.
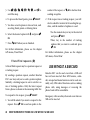
READING NEW SHORT MESSAGES AND
RESPONDING TO UNANSWERED CALLS
•In stand-by mode, enter the navigator pages (or
browse them) by pressing the lower side keys <
and >. Another way: in stand-by mode, first enter
the Main menu by pressing . MENU, then highlight the desired navigator page (i.e. Map, Guide,
Position, or Movement) with n and press SELECT.
•On any of the navigator pages, enter the GPS
menu by pressing - GPS.
Unanswered calls and new short messages you
have recently received are shown in "a traffic
list" in stand-by mode.
1. Select an unanswered call, marked with J,
with the help of n. Press l to call its number.
You can also save it at once.
2. Select a message, marked with s, with the
help of n. Press - SELECT to read or otherwise
process it.
3. Exit the list by pressing . QUIT.
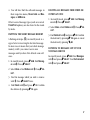
IV
4. You will later find the calls and messages in
their respective menus, Recent calls and Messages, in GSM menu.
Other received message types (such as received
Friend Find updates) are also listed in the standby mode.
EMPTYING THE SHORT MESSAGE MEMORY
A flashing envelope ( s) in stand-by mode is a
sign of error in receiving the last short message.
In most cases it means that your short message
memory is full: you cannot receive new
messages until you have first deleted some old
ones.
1. In stand-by mode, press - GSM. Find Messages with n. Press - SELECT.
DELETING ALL MESSAGES FROM INBOX OR
OUTBOX AT ONCE
1. In stand-by mode, press - GSM. Find Messages with n. Press - SELECT.
2. Select Inbox or find Outbox with n. Press - SELECT.
3. Find Delete all with n and press - OK. Confirm
the deletion by pressing - OK again or cancel
the deletion by pressing . NO.
LISTENING TO MESSAGES LEFT IN YOUR
VOICEMAIL SERVICE
In stand-by mode, press - GSM. Find Messages
with n and press - SELECT. Find Call voicemail
with n and press - SELECT.
2. Select Inbox or find Outbox with n. Press - SELECT.
3. Find the message which you wish to remove
with n. Press - SELECT twice.
4. Find Delete with n and press - OK. Confirm
the deletion by pressing - OK again.
V
KEY FUNCTIONS FOR THE T9 SHORT MESSAGES
key
+
1
§
1 1-2 sec.
- ACCEPT
n
0 1-2 sec.
VI
function
verify the word and make space
turn the T9 mode on/off
change the character forms
change the language
verify the compound word
scroll the alternative words or sub-menu
access the whole selection of special characters
display shows
cursor moving forward
,
U, a, V, Z
available languages
selection list in the sub-menu
lines 1/5, 2/5, 3/5, 4/5, 5/5 (scroll with n), press the
numeric key, which corresponds to the desired character
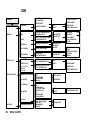
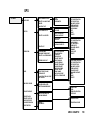
CONTENTS
BENEFON ESC! ............................................... 7
Removing the battery ............................... 17
Initializing the phone ................................ 17
Turning the phone on ............................... 17
Turning the phone off ............................... 18
Changing the language ............................ 18
SOME KEY FEATURES ................................................ 7
OVERVIEW....................................................... 19
INTRODUCTION....................................... 7
T9 text input technology .......................... 8
Global Positioning System (GPS)............ 8
New services ............................................. 9
REGISTER FOR FREE SERVICES...............................
MOBILE MAP SERVICE................................................
HELP DESK ...................................................................
MORE SERVICES TO COME........................................
9
9
9
10
For service providers ............................... 10
NEW LOCATION SERVICES ........................................ 10
Stand-by mode .......................................... 19
INDICATORS ................................................................. 19
Navigator pages ........................................ 22
Menus ........................................................ 24
Keypad....................................................... 25
ALPHANUMERIC KEYS AND T9 .................................. 26
EMERGENCY KEY ........................................................ 27
PAUSE AND SUB-ADDRESS CHARACTERS ............. 27
CHARACTERS AVAILABLE ........................................ 29
SAFETY AND PRECAUTIONS ........................ 10
General ...................................................... 10
Radio frequency (RF) energy ................... 11
GPS and map data .................................... 12
Privacy ....................................................... 12
Emergency calls and messages .............. 13
Splash proofness...................................... 13
BRIEF OVERVIEW OF
PHONE USE .............................................30
QUICK START.......................................... 14
RECEIVING A CALL ........................................ 32
Call Line Identification (CLI) .................... 32
Answering a call ....................................... 33
WHAT TO DO FIRST........................................ 14
Inserting the SIM card .............................. 14
Inserting the rubber seal .......................... 15
Fitting the battery ..................................... 16
MAKING A CALL ............................................. 30
International calls ..................................... 30
Redialling................................................... 30
Quick dialling ............................................ 32
ACTIVE CALL .................................................. 33
Advanced options during a call ............... 34
1
NEW CALL.....................................................................
CONFERENCE CALL ....................................................
SELECTING A CALL .....................................................
ENDING A CALL............................................................
PICKING A WAITING CALL ..........................................
DROPPING A WAITING CALL......................................
MUTING A CALL ...........................................................
CALL MENU...................................................................
34
34
35
35
35
35
36
36
QUICK MENU............................................51
KEYPAD LOCK ................................................ 51
LOCKING THE KEYPAD .............................................. 51
UNLOCKING THE KEYPAD ......................................... 52
ENDING CALLS................................................ 36
GPS RECEIVER ACTIVITY .............................. 52
EMERGENCY CALLS....................................... 36
SELECTING AN ENVIRONMENT..................... 53
INCOMING TRAFFIC ........................................ 37
MAIN MENU ..............................................54
USE WITHOUT A SIM CARD ........................... 40
BRIEF OVERVIEW OF
NAVIGATOR USE .................................... 41
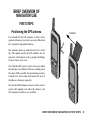
FIRST STEPS ................................................... 41
Positioning the GPS antenna ................... 41
Turning the GPS receiver on or off .......... 42
GETTING FIRST GPS POSITION..................................
GPS RECEPTION ..........................................................
POOR GPS COVERAGE ...............................................
INITIALIZING THE GPS RECEIVER .............................
42
43
43
44
USING THE NAVIGATOR PAGES ................... 45
MAP .................................................................. 45
Pointing mode ........................................... 47
FRIEND FIND OPTIONS................................................ 47
GUIDE ............................................................... 48
POSITION ......................................................... 49
2
MOVEMENT...................................................... 50
ACCESSORIES ................................................ 54
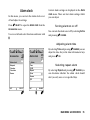
Alarm clock................................................ 55
ALARM CLOCK ALERT ............................................... 56
Notepad...................................................... 57
Calendar..................................................... 61
DAY VIEW .....................................................................
CHOOSE DATE.............................................................
VIEWING ALL ENTRIES (AGENDA) ............................
ADDING A NEW CALENDAR ENTRY..........................
VIEWING A CALENDAR ENTRY (AGENDA)...............
CALENDAR ALERT ......................................................
61
61
62
62
63
64
Calculator................................................... 64
Games ........................................................ 66
GALACTIC GUNNER ....................................................
BLASTER MASTER ......................................................
WORM ...........................................................................
PICTURE PUZZLE ........................................................
WALL BREAKER ..........................................................
LABYRINTH ..................................................................
TICTACTOE ..................................................................
66
66
67
67
67
68
69
SETTINGS ........................................................ 69
Environments ............................................ 69
EDITING NORMAL ENVIRONMENT.............................
EDITING SILENT, DISCREET,
NOISY AND NIGHT ENVIRONMENTS .........................
CAR KIT ENVIRONMENT .............................................
CREATING NEW ENVIRONMENT................................
DELETING AN ENVIRONMENT....................................
70
71
72
72
73
User interface ............................................ 73
SELECTING LANGUAGE .............................................
ADJUSTING CONTRAST..............................................
SCREEN SAVER ...........................................................
AUTOMATIC KEYLOCK ...............................................
73
74
74
74
Time settings............................................. 75
TIME ...............................................................................
DATE..............................................................................
SATELLITE TIME ..........................................................
TIME ZONE ....................................................................
DAYLIGHT-SAVING TIME.............................................
75
75
75
76
76
Units........................................................... 76
DISTANCE & SPEED .................................................... 76
ELEVATION ................................................................... 77
CURRENCY ................................................................... 77
Power ......................................................... 77
POWER ON TIMER ....................................................... 77
POWER OFF TIMER...................................................... 77
GSM ........................................................... 78
MESSAGE SETUP.........................................................
BROADCAST SETUP....................................................
ANYKEY ANSWER........................................................
AUTO ANSWER ............................................................
DIALLING PREFIX.........................................................
REDIAL MEMORY .........................................................
QUICK DIALLING ..........................................................
78
79
80
80
80
81
81
GSM MODULE ............................................................... 81
GPS ............................................................ 82
MAP DETAILS ............................................................... 82
POSITIONING ................................................................ 84
COURSE ALERTS ......................................................... 85
LEFT AND RIGHT DATA FIELD.................................... 86
NMEA OUTPUT ............................................................. 87
AGPS.............................................................................. 87
RESET POSITION.......................................................... 88
Help desk................................................... 88
NUMBER ........................................................................ 88
LANGUAGE ................................................................... 88
Emergency calls to
pre-determined numbers.......................... 89
EMERGENCY KEY ........................................................ 89
EDIT MESSAGE............................................................. 89
CALL LIST ..................................................................... 89
MAKING EMERGENCY CALLS .................................... 90
Security ..................................................... 91
ASK PIN CODE .............................................................. 91
ASK PHONE CODE ....................................................... 91
CHANGE PIN CODE ...................................................... 92
CHANGE PIN2 CODE .................................................... 92
CHANGE PHONE CODE ............................................... 92
CHANGE NETWORK CODE ......................................... 92
FIXED DIALLING (FDN) ................................................ 93
IMEI ................................................................................ 93
Reset default settings............................... 93
GSM MENU...............................................94
PHONE BOOK.................................................. 94
Recalling a phone number ....................... 95
EDITING A PHONE BOOK ENTRY ............................... 96
3
DELETING A PHONE BOOK ENTRY ........................... 97
Storing a phone number ........................... 97
KEYING IN A NEW NUMBER
IN STAND-BY MODE..................................................... 98
ADDING A NEW NUMBER
IN THE NAME LIST........................................................ 98
MESSAGES ...................................................... 99
Inbox .......................................................... 99
RECEIVING A NEW MESSAGE .................................... 99
RECALLING INCOMING MESSAGES .......................... 99
READING AND PROCESSING AN
INCOMING MESSAGE .................................................. 100
Outbox ....................................................... 104
RECALLING OWN MESSAGES.................................... 104
READING OR PROCESSING OWN MESSAGES......... 104
Broadcasts................................................. 108
RECEIVING A NEW BROADCAST ............................... 108
RECALLING BROADCASTS ........................................ 108
Call voice mail ........................................... 109
Write message ........................................... 109
NEW MESSAGE ............................................................
POSTPONED MESSAGES............................................
WRITING A MESSAGE..................................................
SENDING AND SAVING THE MESSAGE.....................
109
109
110
111
RECENT CALLS............................................... 112
Unanswered calls ...................................... 112
PROCESSING UNANSWERED CALLS........................ 112
Received calls ........................................... 113
PROCESSING RECEIVED CALLS ............................... 113
Call counters ............................................. 113
NETWORK SERVICES ..................................... 114
4
Network selection...................................... 114
Call diverts................................................. 114
(DIVERT) ALL ...............................................................
(DIVERT) BUSY ............................................................
(DIVERT) NOT ANSWERED .........................................
(DIVERT) NOT REACHABLE .......................................
CLEAR ALL DIVERTS ..................................................
114
115
115
115
115
Call barrings .............................................. 116
OUTGOING CALLS ...................................................... 116
INCOMING CALLS........................................................ 117
CLEAR BARRINGS ...................................................... 117
Call waiting ................................................ 117
Call cost ..................................................... 117
LAST CALL COST ........................................................
TOTAL CALLS COST ...................................................
MONEY LEFT ................................................................
MAXIMUM UNITS..........................................................
PRICE/UNIT...................................................................
118
118
118
118
119
HELP DESK ...................................................... 120
GPS MENU................................................121
WAYPOINTS..................................................... 121
CREATING A NEW WAYPOINT ...................................
SETTING DESTINATION ..............................................
SETTING POSITION .....................................................
SENDING SMS WITH COORDINATES ........................
SENDING A WAYPOINT...............................................
REQUESTING A ROUTE ..............................................
VIEWING THE MAP ......................................................
MOVING A WAYPOINT ................................................
EDITING ........................................................................
DELETING .....................................................................
122
122
123
123
123
124
124
124
125
125
ROUTES ........................................................... 126
CREATING A NEW ROUTE ..........................................
SETTING DESTINATION...............................................
VIEWING THE MAP.......................................................
WAYPOINT LIST:
VIEWING AND EDITING................................................
SENDING A ROUTE ......................................................
MEASURING LENGTH..................................................
RENAMING ....................................................................
DUPLICATING ...............................................................
DELETING .....................................................................
REQUESTING AGPS ....................................... 138
128
128
128
129
129
129
SKIPPING ROUTE POINT................................ 138
FRIEND FIND ................................................... 129
Friend list .................................................. 130
TRACKING INFO ...........................................................
CREATING A NEW FRIEND POINT .............................
SETTING DESTINATION...............................................
SETTING POSITION......................................................
AUTHORIZING...............................................................
SENDING A POSITION UPDATE..................................
REQUESTING A POSITION UPDATE ..........................
SENDING TRACKING ...................................................
CANCELLING SENDING...............................................
REQUESTING TRACKING............................................
CANCELLING A TRACKING REQUEST ......................
SENDING SMS WITH COORDINATES.........................
REQUESTING A ROUTE...............................................
SHOWING ON MAP.......................................................
SAVING AS A WAYPOINT............................................
DELETING .....................................................................
REQUESTING SERVICE .................................. 137
126
127
127
131
131
132
132
132
133
133
133
134
134
134
134
135
135
135
136
MAPS ............................................................... 136
Viewing and processing maps................. 136
SENDING SMS WITH
COORDINATES................................................ 137
UPDATING POSITION ..................................... 138
CLEARING DESTINATION .............................. 138
RESETTING METERS...................................... 139
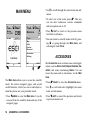
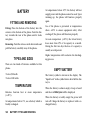
BATTERY..................................................140
FITTING AND REMOVING ............................... 140
TYPES AND SIZES .......................................... 140
TEMPERATURE............................................... 140
EMPTY BATTERY ............................................ 140
MAINS CHARGERS ......................................... 141
CHARGING ...................................................... 141
Charging times.......................................... 142
CARE AND MAINTENANCE ............................ 142
DISPOSAL........................................................ 143
OPERATING TIME ........................................... 143
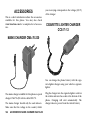
ACCESSORIES ........................................144
MAINS CHARGER CMA-70-230 ...................... 144
CIGARETTE LIGHTER CHARGER CCS-71-12 144
5
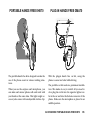
PORTABLE HANDS FREE EHE70................... 145
PLUG-IN HANDS FREE GMA70 ...................... 145
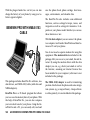
BENEWIN PRO WITH NMEA 0183 CABLE ..... 146
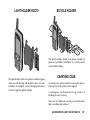
LIGHT HOLDER KGC70 ................................... 147
BICYCLE HOLDER........................................... 147
CARRYING CASE ............................................ 147
EXTERNAL GPS ANTENNA ............................ 148
CROSS-COUNTRY ANTENNA......................... 148
APPENDIXES ........................................... 149
CARE AND MAINTENANCE ............................ 149
PROBLEMS YOU CAN SOLVE ........................ 149
If the phone will not turn on ..................... 149
If the SIM card has been blocked ............. 149
If you lose your SIM card .......................... 150
If your phone gets lost .............................. 150
If your phone does not function............... 150
If you cannot read, store or modify
information in phone book ....................... 150
Wrong language ........................................ 150
"Searching for network" ........................... 151
"Poor GPS coverage" ............................... 151
VOCABULARY OF GSM TERMS ..................... 151
SIM card ..................................................... 151
6
PIN code..................................................... 151
PIN2 code................................................... 152
PUK code ................................................... 152
PUK2 code ................................................. 152
Phone code ................................................ 152
Network code............................................. 153
IMEI code ................................................... 153
Network operator....................................... 153
Service provider ........................................ 153
VOCABULARY OF GPS TERMS ..................... 153
Waypoint .................................................... 153
Route .......................................................... 154
Friend Find................................................. 154
Friend point ............................................... 154
Destination................................................. 154
Track .......................................................... 154
Bearing....................................................... 154
Estimated Time Enroute (ETE) ................. 154
Estimated Time of Arrival (ETA)............... 154
MENU CHARTS ........................................155
CYRILLIC CHARACTER SET ..................161
INTRODUCTION
BENEFON ESC!
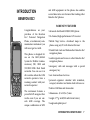
and GSM equipment in this phone also enables
several innovative new features like tracking other
Benefon Esc! phones.
SOME KEY FEATURES
Congratulations on your
purchase of the Benefon
Esc! Personal Navigation
Phone, a revolutionary communication instrument you
will never get lost with.
This phone is designed for
use on the GSM (Global
System for Mobile Communications) 900, 1800 and
900/1800 MHz Dual Band
networks. You can use it in
all countries where the GSM
network operators have a
roaming contract with your
network operator.
•advanced dual band GSM900/1800 phone
•12-channel, high-performance GPS receiver
•Mobile Map Service: download maps to the
phone using any PC with Internet browser
•Friend Find: track and find another Benefon Esc!
navigation phone
•send waypoints and routes to other Benefon Esc!
navigation phones
•emergency calls and messages with a special
emergency key
•new location-based services
•personal organizer: calendar with reminders,
notepad, calculator and alarm clock with snooze
•built-in GSM data and fax modem
The instrument features a
powerful GPS navigator that
works even if you are outside GSM coverage. The
unique combination of GPS
•dimensions: 49 x 129 x 23 mm
•weight: 177 g with 900 mAh Li-Ion battery
•tough and splash proof.
INTRODUCTION: BENEFON ESC!
7
The high quality Benefon Esc! is developed and
manufactured by Benefon Oyj. Benefon is a company operating worldwide and specializing in wireless communication instruments. The high-quality
and user-friendly Benefon products are developed
and manufactured in Finland.
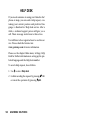
T9 text input technology
This phone has one of the world’s most developed
text input software systems - T9. The T9 Text Input
software is a technology for enabling rapid entry of
text on reduced-key keypads - one press for each
letter is enough.
On phone keypads, as well as in other reduced-key
keypads, one key is assigned more than one letter
or function, and selecting a letter is normally done
by pressing the key however many times necessary
to get the letter desired. T9 removes this necessity
by using a database with a vocabulary and linguistic rules that recognizes which word you are writing.
If there is more than one word possible for the key
combination, T9 will choose the most commonly
used word and also allow selection from a list.
8
INTRODUCTION: BENEFON ESC!
T9 is a trademark of
Tegic Communications, Inc. For
further information about T9,
please see www.tegic.com
(T9 is patented under the following U.S. Patents:
5,818,437, 5,953,541, 5,187,480, 5,945,928,
6,011,554 and additional patents are pending
worldwide.)
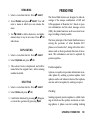
Global Positioning System (GPS)
The Global Positioning System is a worldwide system of 24 satellites which orbit the earth twice a
day, transmitting precise time and position information. The system is operated and maintained by
the government of the United States.
The GPS receiver in your Benefon Esc! receives signals from up to twelve satellites at once, and using
this information calculates your position and
tracks your movement on Earth, and also sets your
phone’s clock on time.
Benefon Esc! is able to translate and use the changing position information from the satellites up to
23 different types of navigation-related data items,
including speed and heading, average and top
speed, trip odometer, waypoints and routes, direction, ETA, and distance to a waypoint. Esc! also
supports the NMEA 0183 interface.
Information must be received from at least three
suitably positioned satellites for position calculation. The signals sent by the GPS satellites are quite
weak and do not travel through solid objects.
New services
REGISTER FOR FREE SERVICES
Register as a user of Benefon Esc! at www.genimap.com and get access to free benefits, including
a choice of free maps included with Esc! and the
Help desk service. The free maps are re-downloadable at no extra cost within one year from registration.
Registration does not cost anything and the information given in registration is confidential.
MOBILE MAP SERVICE
Benefon Esc! is the first navigation instrument to
support the Genimap® Mobile Maps service. The
phone can be connected to the service for easy
downloading of maps, using any PC with an Internet browser.
By downloading the map of a given location to
their phones, Benefon Esc! owners are able to see
how they themselves, as well as the person they are
trying to reach are situated on the map and thus be
easily guided to their destination.
The service covers road maps, city maps, nautical
charts and topographical maps from around Europe. Check www.genimap.com from time to
time for geographical coverage of maps in other areas. Maps are provided by Genimap and other leading suppliers of geographical data.
HELP DESK
As a registered user you are authorized to use Help
desk services. You can get assistance in using the
phone and maps (usage limitations). Just select
Help desk from the GSM menu, and an expert help
desk operator will call you in a few minutes.
INTRODUCTION: BENEFON ESC!
9
MORE SERVICES TO COME
SAFETY AND PRECAUTIONS
Check www.benefon.com periodically for tips
about location-based services.
General
For service providers
NEW LOCATION SERVICES
Benefon Esc! utilizes Mobile Phone Telematics Protocol (MPTP) and Mobile Maps Service Protocol
(MMSP) which provide a sophisticated set of
telematics commands and a map protocol for service integrators and providers to build and provide
location-based value added services for consumers
and businesses. MPTP makes it possible to send
position, tracking and route messages between service center and MPTP enabled terminals by using
SMS. For information and specifications visit Benefon Esc! Partners Area at www.benefon.com.
•Road traffic: There are reasons to be concerned
about traffic safety when using a mobile phone
or other similar instrument while driving a
motor vehicle. While the actual risk varies greatly
according to the conditions and the driver, it is
advisable to strictly adhere to all eventual European and national legislation and also honour
other eventual safety recommendations. It is specifically advisable to install and use a hands-free
operating system in a car for minimizing the distraction from using the phone. When receiving a
call in an awkward driving situation, you should
always put safety before other priorities and
courtesy. If you feel uncomfortable about using
an instrument while driving, you simply should
not use it.
•External alert: Use of the alert device to operate
a vehicle´s lights or horn on public roads is not
permitted.
•Children: Keep your phone and its accessories
away from small children to avoid causing injury
to themselves or others. Damage to the phone or
its accessories is also thus avoided.
10
INTRODUCTION: SAFETY AND PRECAUTIONS
•Power supplies: This equipment is intended for
use with the following power supplies: batteries
BBL-77-N and BBL-77-P, mains charger
CMA-70-230 (with cable FMC-70), and cigarette
lighter charger CCS-71-12. Any other usage will
invalidate any approval given to this apparatus
and may be dangerous.
or disrupt the mobile network. Failure to comply
with this instruction may lead to suspension or
denial of mobile phone services, and possibly
even legal action.
•Other accessories: Any other accessories used
should also be approved by the phone manufacturer. Check the compatibility of new power supply units and other accessories at the dealer.
•Hospitals: Turn your phone off before entering
hospitals or other health care facilities where
medical electronic equipment may be in use.
Such devices are extremely sensitive to radio frequency interference. Only use the phone with
permission and under instruction of the hospital
staff.
•Magnetic fields: Benefon Esc! contains small
magnetic components. Even though the magnetic fields of the components are weak, they
might damage magnetic cards, such as bank and
credit cards. We recommend that you keep your
mobile phone away from magnetic cards.
•Medical devices: Remember that any personal
medical devices (such as hearing aids or pacemakers) may be affected by RF energy if they are
not adequately shielded. Consult the manufacturer or vendor of the equipment to determine
the proper shielding.
Radio frequency (RF) energy
•Aircrafts: Turn your phone off before boarding
any aircraft and do not use the phone while in
the air. Also make sure that the automatic
power on or alarm clock functions will not
activate the phone during the flight. Besides
being illegal, the use of a mobile phone in an aircraft may endanger the operation of the aircraft
•Explosive atmospheres: Turn off the phone at
refuelling points, e.g. gas stations. Also observe
restrictions on the use of radio equipment in
fuel depots, chemical plants or where blasting
operations are in progress because remote control RF devices are often used to set off explosives.
•Other electronical equipment: Using the
phone may cause interference with a vehicle's
electronic equipment if it is not adequately
INTRODUCTION: SAFETY AND PRECAUTIONS
11
shielded. Consult the manufacturer or the vehicle seller to determine the proper shielding.
•Computers: Remember that using the phone
close to a computer may cause interference.
When using your phone near such equipment
keep a distance of about one meter.
•Body parts: When the phone is in operation do
not touch the antenna with eyes, mouth or bare
skin to guarantee proper function.
•Roadways and other map data are constantly
being modified, so the maps in your Benefon
Esc! may not always reflect the latest changes. No
warranty, express or implied, is given for completeness or accuracy of the map data in this
product.
•Benefon Esc! supports some third-party services
such as the Request route and Request service
features. Benefon is not responsible for the content and accuracy of such services.
Always follow the country-specific regulations applicable to where you are using the phone.
Privacy
GPS and map data
•The Global Positioning System (GPS) is operated
by the government of the United States, which is
solely responsible for its accuracy and maintenance. The system is subject to changes that
could affect the accuracy and performance of all
GPS equipment.
•GPS signals are weak and do not penetrate solid
objects such as people, buildings, rocks, or
heavy tree cover. This may affect GPS receiver
performance indoors, in urban areas with tall
buildings, or whenever the GPS antenna doesn’t
have an unobstructed view of the sky.
12
INTRODUCTION: SAFETY AND PRECAUTIONS
•Using some of Benefon Esc!’s features, such as
Request route and Request service, may reveal
your position to a service provider.
•All Friend Find functions require authorization,
so only people you have specifically authorized
can learn your position.
Emergency calls and messages
Benefon Esc! is and aid and should never be relied
upon as an only emergency device. Its functionality
is dependent on GSM network and GPS satellites
which may not be available at all times.
The unique combination of GSM and GPS features
does, however, make Benefon Esc! helpful in urgencies as long as one does not depend one’s life
on it.
Splash proofness
Benefon Esc! is splash proof only when the battery
and its rubber seal have been properly attached.
Even then, the phone must not be immersed in liquid.
INTRODUCTION: SAFETY AND PRECAUTIONS
13
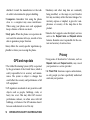
QUICK START
WHAT TO DO FIRST
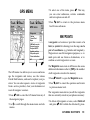
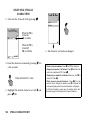
Inserting the SIM card
First remove the battery.
1. Slide the SIM card holder to the right. Lift the
holder into an upright position.
14
QUICK START: WHAT TO DO FIRST
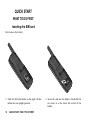
2. Insert the card into the holder. Check that the
cut corner is at the lower left corner of the
holder.
Inserting the rubber seal
Cap
3.
Close the holder by pushing it towards the
phone. Slide the holder back to the left until it
locks.
After inserting the SIM card, fit the battery back
into place.
Rubber tab
Installing the rubber seal is optional. Please note,
however, that the phone is splash proof only when
the rubber seal is inserted correctly in the phone.
First make sure that the battery has been removed.
1. Place the rubber seal so that it lies in the bottom of the battery hole.
2. Fit the rubber tab into the recess in the upper
left corner.
QUICK START: WHAT TO DO FIRST
15
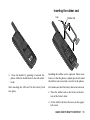
Fitting the battery
Bottom cover
Bottom
connector
3. Lift the cap on the top of the rubber tab.
4. Fit the battery into place as described in the
next chapter. The idea is that the battery will be
securely fastened in the battery hole.
5. Finally stuff the bottom cover into the bottom
connector so that the cover will be firmly secured around the connector.
16
QUICK START: WHAT TO DO FIRST
1. Place the bottom of the battery into the small
hollows at the bottom of the phone.
2. Push the battery towards the rear of the phone
until it locks into place.
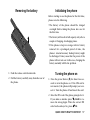
Removing the battery
Initializing the phone
Before starting to use the phone for the first time,
please note the following:
•The battery of the phone should be charged
overnight before taking the phone into use for
the first time.
•The battery will reach its full capacity only after a
couple of charging - discharging times.
•If the phone is kept in storage with its battery
removed for a prolonged period of time, the
phone’s internal memory backup battery might
be discharged. It may cause that the power of the
phone will not turn on. In this case, charging the
battery normally will fix the problem.
1. Push the release catch downwards.
2. Pull the battery carefully away from the rear of
the phone.
Turning the phone on
1. Press the power button ( /) for about two seconds to turn the phone on. If the SIM card is
not inserted, the phone will prompt you to insert it. Turn the phone off and insert the card.
2. Enter the PIN code if the phone prompts for it.
If you make a mistake press . CLEAR to remove the wrong digits. When the correct PIN
code has been keyed in, press - OK.
QUICK START: WHAT TO DO FIRST
17
3. Enter the phone code if the phone prompts for
it. When the phone code has been keyed in,
press - OK.
4. The abbreviations of the country and network
operator are displayed immediately or after the
Searching for networks... message. ESC! logo,
time, date and some symbols are also displayed. If you are outside the network’s coverage area, the message Searching for networks...
will remain in the display and you cannot make
or receive calls.
The power will also turn on when the phone is
connected to a charger, or when the timer options
Power ON timer or Alarm clock are set on.
Turning the phone off
Press and hold the power button ( /) down for a
couple of seconds to turn the phone off.
The power will also turn off when the battery is
completely empty or when the timer option Power
OFF timer is set on.
18
QUICK START: WHAT TO DO FIRST
Changing the language
When the menu language is set to Automatic, the
language is chosen according to your SIM card’s
language preference. In case the information is not
available, a default language setting is used.
Once you have turned your phone on, you can
change the language in the Main menu.
1. Press . MENU to enter the Main menu.
2. Select the Settings menu with the help of n.
Press - SELECT.
3. Select the User interface menu with the help of
n. Press - SELECT.
4. Enter the Language sub-menu by pressing CHANGE.
5. Select the desired language with the help of n.
Press - OK.
6. Press c to exit the menu.
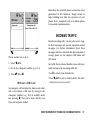
OVERVIEW
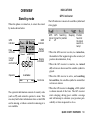
INDICATORS
GPS indicator
Stand-by mode
When the phone is turned on, it enters the standby mode shown below.
GPS
indicator
Date
and time
GSM
indicator
Monday
21.01.2002
Battery
indicator
Normal
Current
sound
environment
Display
indicators
The GPS indicator consists of a satellite symbol and
a bar graph.
GPS
GPS Searching
turned turned for position
on
off
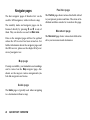
Sleeping
Position
found at
the latest
search attempt
•When the GPS receiver is active, i.e. turned on,
the number of bar segments gives the accuracy of
position determination, if any.
•When the GPS receiver is inactive, i.e. turned
off, no bars are shown and the satellite symbol is
greyed.
FI NETWORK
Operator
MENU
GSM
Functions
The operator information consists of country code
(such as FI) and network operator‘s name. This
area may hold other information when a valid SIM
card is missing, or when a network is missing or is
not available.
•When the GPS receiver is active, and searching
for satellites, the satellite symbol is normal but
no bars are shown.
•When the GPS receiver is sleeping, a ZZZ symbol
is shown instead of the bars. The GPS receiver
starts sleeping during poor satellite coverage
and will attempt to calculate your position periodically or when requested to do so.
QUICK START: OVERVIEW
19
are shown and the phone symbol is greyed.
•When the GPS receiver is in Economy or At intervals mode, and it has searched and found position at the latest attempt, the bars are shown
greyed.
When you are roaming, i.e. in an area of a network
other than your own, the h symbol is shown in the
GSM indicator.
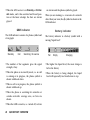
GSM indicator
Battery indicator
The GSM indicator consists of a phone symbol and
a bar graph.
The battery indicator is a battery symbol with a
moving "liquid level".
Stand-by
Call
Searching No service
Full
Empty
Charging
•The number of bar segments gives the signal
strength, if any.
•The higher the liquid level, the more charge is
left in the battery.
•When the phone is in stand-by mode, i.e. no call
is coming or in progress, the phone symbol is
shown with hook down.
•When the battery is being charged, the liquid
level will repeatedly rise from bottom to top.
•When a call is in progress, the phone symbol is
shown with hook up.
•When the phone is searching for networks or
outside network’s coverage area, no bars are
shown.
•When the GSM is inactive, i.e. turned off, no bars
20
QUICK START: OVERVIEW
Display indicators
Some of the following symbols may be shown in
stand-by mode:
s
v
diverted to another phone number or to a
voicemail service. The type of service depends
on your network operator.
Envelope. This symbol indicates, you have
received a new short message. The symbol
flashes when the short message memory is
full. Flashing also means, you cannot receive
or store any new messages unless you first
delete some old ones.
Tape recorder. This symbol indicates, you
have received a new voice mail and it is waiting for you in the Call voice mail menu. Voice
mail service is a network feature. It depends
on the operator, whether you will receive an
sms of the voice mail waiting, as well.
i
Automatic power on. The phone will automatically turn itself on at the set time.
o
Automatic power off. The phone will automatically turn itself off at the set time.
N
Automatic power on/off. Shown when both
automatic power on and off timers are set.
k
Alarm clock. Shown when the alarm clock is
turned on.
%
All calls diverted. Shown only when Divert all
calls option is used. Incoming calls can be
QUICK START: OVERVIEW
21
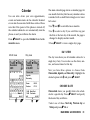
Navigator pages
Position page
The four navigator pages of Benefon Esc! can be
used for GPS navigation, with or without a map.
The Position page shows various data fields related
to your present position and time. The status of individual satellites can also be viewed on this page.
The stand-by mode and navigator pages can be
browsed directly by pressing < and > in any of
them. They can also be accessed via Main menu.
Data on the navigator pages will not be updated
unless the GPS receiver has been turned on. For
further information about the navigator pages and
the GPS receiver, please see the chapter Brief overview of navigator use.
Map page
If a map is available, your immediate surroundings
can be viewed on the Map navigator page. Also
shown on the map are various navigational symbols like waypoints and routes.
Guide page
The Guide page is typically used when navigating
to a destination without a map.
22
QUICK START: OVERVIEW
Movement page
The Movement page shows various data fields related to your movement and destination.
Monday
21.01.2002
Normal
Speed
Time
Speed
Odometer
Track
Bearing
FI NETWORK
Destination
MENU
GSM
Phone
(stand-by mode)
MENU
GPS
Speed
Time
Map
Next
Last
ETA next
ETA last
MENU
Date
Time
Dawn
Elevation
GPS
Movement
Coordinates
>
<
Satellites
MENU
GPS
Guide
MENU
GPS
Position
QUICK START: OVERVIEW
23
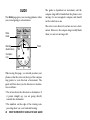
Menus
Most features of Benefon ESC! can be accessed via
menus. There are four of these: Main menu, Quick
menu, and GSM and GPS-specific menus. Each
menu contains its own menu items and submenus.
When the phone is in stand-by mode, you can access the following menus:
Each menu has a title, an icon and some menu
items. You can select one of these items by highlighting it with n and pressing -.
You can exit a menu by pressing . QUIT.
Main menu
The menu items of the main menu are
•Phone (stand-by mode)
•Enter the Main menu by pressing . MENU.
•Map (navigator page)
•Enter the Quick menu by pressing n.
•Guide (navigator page)
•Enter the GSM menu by pressing - GSM.
•Position (navigator page)
•Movement (navigator page)
•Accessories
Title
Icon
Main menu
•Settings.
1
Phone
Quick menu
Map
Guide
Position
Movement
Menu items
The menu items of the quick menu are
•Lock keypad
Accessories
Settings
•GPS receiver
•Environment.
QUIT
24
SELECT
QUICK START: OVERVIEW
GSM menu
•Skip route point
The menu items of the GSM menu are
•Clear destination
•Phone book
•Reset meters.
•Messages
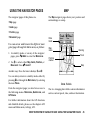
Keypad
•Recent calls
•Network services
•Help desk.
GPS menu
The GPS menu can be accessed through the Navigator pages as follows: in stand-by mode first press a
side key (< or >). Then press - GPS.
The menu items of the GPS menu are
Power on/off
•Waypoints
Adjustment
keys
•Routes
•Friend Find
Function keys
Handset up
Handset down
Scroll key
•SMS with coords
Alphanumeric keys
•Request service
Star key
Hash key/
emergency
button
•Maps
•Request AGPS
•Update position
QUICK START: OVERVIEW
25
/
Power on/off. Press and hold to turn the
phone on or off.
><
Adjustment keys. Press to adjust earpiece volume during a call. By pressing these keys you
can also access the navigator pages from
stand-by mode and browse the navigator
pages.
l
Handset up. Press to make a call.
c
Handset down. Press to disconnect a call, and
to return to stand-by mode at any time.
.- Function keys. The function of these keys
depends on the guiding texts on the bottom
line of the display.
n
Scroll key. The function of this key depends
on the guiding symbol on the bottom line of
the display. It is usually used for scrolling
through a list of menu items and moving a
cursor, or entering the Quick menu.
+
Star. Press to get a space character when writing text, or to zoom out when viewing a map.
Pressing this key for five seconds changes the
language to English and resets the phone to
factory installed settings. This reset does not
affect phone book entries, maps, and navigational data such as waypoints, routes, and
friend points.
26
QUICK START: OVERVIEW
§
Hash. Press to switch between upper case letters, lower case letters and numbers when
writing text, or to zoom in when viewing a
map. This key is also needed when using
some memory functions and network features.
0 ... 9 Alphanumeric keys. Press to enter numbers, or letters when writing text. These keys
can also be used for scrolling a map.
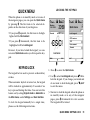
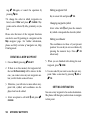
ALPHANUMERIC KEYS AND T9
You need the alphanumeric keys for entering text.
•Traditional spelling mode: In traditional spelling mode you get the first letter of the key when
pressing the key once, the second letter when
pressing the key twice, and so on. When the cursor appears to right of the letter just entered you
can enter the next character.
•T9 text input mode: You can also use the T9
text input tools for keying in the letters. Turn the
T9 mode on or off by pressing 1 when editing
text. By pressing 1 for a few seconds, languages for the T9 are available. For further information about using T9, please see the chapter
Main menu, Accessories, Notepad, Writing a
note in T9 mode.
•Special characters: By pressing 0 for a few
seconds, all the special characters are available.
You may select a row of characters with n, and
make the final selection by pressing the numeric
key, which corresponds the desired character.
•Character forms: You can enter both upper case
and lower case letters as well as numbers. You
can switch between them by pressing §. When
upper case letters are in use the symbol U is
highlighted in the upper row and when lower
case letters are in use the symbol V is highlighted. The a symbol is useful when writing
words which start with a capital letter (so that
you do not need to switch between the upper
case and lower case letters). When the symbol Z
is displayed, entry of any number is direct.
•Spacebar: Enter a space by pressing +.
•Corrections: In case of a misspelling, move with
n to the letter you wish to correct and press .
CLEAR . Pressing . CLEAR for a few seconds will
clear the whole text.
EMERGENCY KEY
The hash key (§) is also used as an emergency
key, so that pressing and holding it for five seconds
starts making emergency calls and sending emergency messages. For further information about the
emergency key, please see the chapter Main menu,
Settings, Emergency calls.
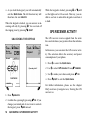
PAUSE AND SUB-ADDRESS
CHARACTERS
The hash key ( §) can be used for keying in the
pause (P) and sub-address (S) characters. These
characters can be used in a phone number.
•If your answering machine has a remote-retrieve
function, you can listen to the voice messages
left for you in your answering machine at home.
First key in the home phone number. When the
line is connected, key in the code number of
your answering machine. Within a few seconds
you will hear the recordings. If you wish to store
the string in the phone book, do as follows: key
in your home phone number, press the § key
twice (the letter P will be displayed) and key in
the code number of your answering machine.
Store the string in the phone book normally. For
further information about storing a number in
QUICK START: OVERVIEW
27
the phone book, please see the chapter GSM
menu, Phone book, Storing a phone number.
• If you wish to make a direct call to an ISDN subnumber or store the sub-number in your phone
book, key in the string as follows: key in the
main phone number, press the § key three
times, (the letter S will be displayed) and key in
the sub-number.
28
QUICK START: OVERVIEW
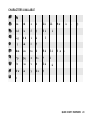
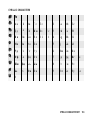
CHARACTERS AVAILABLE
1
,
2
Aa
Bb
Cc
2
Ää
3
Dd
Ee
Ff
3
É é
4
Gg
H h
I i
4
Ì
5
J j
Kk
Ll
5
6
Mm
Nn
Oo
6
Ññ
Öö
7
Pp
Qq
Rr
Ss
7
ß
8
Tt
Uu
Vv
8
Üü
9
Ww
Xx
Yy
Zz
9
0
0
Åå
Ææ
à
ß
Ç
è
Ø
ø
ò
ù
QUICK START: OVERVIEW
29
BRIEF OVERVIEW OF
PHONE USE
2. Enter the country code, the area code (without
the first number), and the phone number.
MAKING A CALL
If the network operator does not implement this
function and you try to make a call by using the +
character, a message Illegal will be displayed.
You can call a number in stand-by mode by entering the number, including the area code, and
pressing l. The text Calling and the number you
are calling will be displayed and a call will be set
up.
You can also make a call by using the phone book,
quick dialling, redialling, short messages, or recent
calls functions.
International calls
You can use the + character when making international phone calls. When the + character is in use,
the call centre will automatically select the correct
international prefix.
3. Press l.
You can also make international calls without the
+ character, by making the call as any conventional
international phone call.
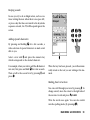
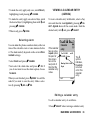
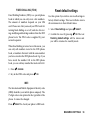
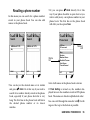
Redialling
The latest numbers dialled are stored in the redial
memory.
In order to use this function, you need to turn the
Redial memory option on in the Main menu, under
Settings and GSM.
1. Press 0 for a few seconds until the + character
is displayed.
30
BRIEF OVERVIEW OF PHONE USE: MAKING A CALL
4. Press l to call the number displayed. You can
also call directly to the number last dialled by
pressing l l.
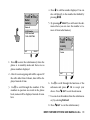
Redial
memory
l
5. By pressing - SELECT you will enter the submenu where you can store the number or remove it from redial memory.
2
Delete all
14:12 Benefon
12:02 John Swirl
11:08 +358277400
Redial
memory
QUIT
n
1
Save
Delete
SELECT
-
1. Press l to enter the redial memory when the
phone is in stand-by mode and there are no
phone numbers displayed.
2. A list of recent outgoing calls will be opened. If
the call is older than 24 hours, date will be displayed instead of time.
3. Use n to scroll through the numbers. If the
numbers in question are stored in the phone
book, names will be displayed instead of numbers.
QUIT
OK
n
-
6. Use n to scroll through the functions of the
sub-menu and press - OK to accept your
choice. Press . QUIT to exit the sub-menu.
7. You can clear all numbers from the redial memory by selecting Delete all.
8. Press . QUIT to exit the redial memory.
BRIEF OVERVIEW OF PHONE USE: MAKING A CALL
31
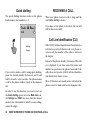
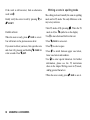
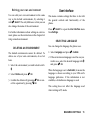
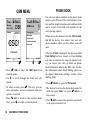
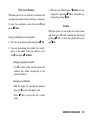
Quick dialling
RECEIVING A CALL
The quick dialling function works on the phone
book memory slot numbers 2...9.
When your phone receives a call, it rings and the
text Call is coming is shown.
If you have set the phone to be silent, the text will
still be shown normally.
Call
Call Line Identification (CLI)
9
Calling
Susan
If you wish to make a call by using quick dialling,
press the desired number (between 2 and 9) and
hold it down for a few seconds. The phone makes
a call to the phone number stored in that memory
slot.
If the CLIP (Call Line Identification Presentation) is
activated as a network feature and your phone receives a call, the number of the caller is shown in
the display.
Instead of the phone number, the name of the caller is displayed if you have stored the name and
number in question in the phone book and if the
caller does not have the CLIR (Call Line Identification Restriction) feature in use.
These CLI features are usually active only when the
phone is used to make and receive domestic calls.
In order to use this function, you need to turn on
the Quick dialling option on in the Main menu, under Settings and GSM. Also note that the desired
memory slot (the number to which you are calling)
cannot be empty.
32
BRIEF OVERVIEW OF PHONE USE: RECEIVING A CALL
Answering a call
•To answer, press l. If Anykey answer is turned
on in the Main menu under Settings and GSM,
you can also answer by pressing §, +, or
1...9.
•If you do not wish to answer an incoming call,
press c.
•You can always turn off the ringing tone, without
dropping the call, by pressing . QUIET.
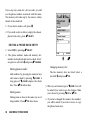
ACTIVE CALL
When a call is in progress, the display will look like
the one below.
GSM
indicator
Call
duration
Wednesday
12.4.2002
Earpiece
volume
00:05:37
Name or
number
1 Susan
Answering when
the keypad is locked
•If you have locked the keypad you can answer
only by pressing l.
•With the keypad locked, you can turn off the
ringing tone by pressing . QUIET.
MENU
SELECT
The number to which you are calling is shown on
the display. If the number in question is stored in
the phone book with a name, the name will be
shown instead of the number.
If you have received a call, there are two cases
when the number of the caller will not be displayed: if the caller has the CLIR (Call Line Identification Restriction) feature in use, or if your
network operator does not supply the CLIP (Call
Line Identification Presentation) feature.
BRIEF OVERVIEW OF PHONE USE: ACTIVE CALL
33
You can adjust earpiece volume during a call by
pressing > and <. However, adjusting the volume
is not possible if the microphone is muted.
Advanced options during a call
Several advanced options, such as muting the microphone, managing multiple calls, and accessing
the phone book are available during a call.
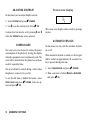
NEW CALL
Use this function to make a new call during an active call. The currently active call will be put on
hold.
1. Press . MENU to access the Call menu.
2. Use n to select New call. Press - SELECT.
3. Key in the desired phone number. If the number is stored in the phone book, you can recall
it from there by pressing - SEARCH. For further information about using the phone book,
please see the instructions in the chapter GSM
menu, Phone book, Recalling a phone number.
4. When the number has been keyed in, press l
to initiate the call.
34
BRIEF OVERVIEW OF PHONE USE: ACTIVE CALL
You can also make a new call by dialling the number directly, without selecting New call first.
All calls are shown in the active call display and can
be selected there with n. The currently active call is
marked with the K symbol, while held ones are
marked with J.
CONFERENCE CALL
Use this function if you wish combine all simultaneous calls to a conference call. This function is
only available when at least one of the calls is active
and another is put on hold.
1. Press . MENU to access the Call menu.
2. Combine the desired calls together by using n
to select Conference and press - SELECT.
Depending on the state of the conference call,
some of the functions may not be available even if
you select them. In a case like that the text Not allowed will be displayed.
SELECTING A CALL
To pick up a waiting call, do as follows:
When there are several simultaneous calls, you can
make one of them active as follows:
1. Use n to select the waiting call and press - SELECT.
1. Use n to select a call and press - SELECT.
2. Press - OK to select Pick. The waiting call will
be made active, while the previously active call
is put on hold.
2. Press - OK to select Select. The selected call
will be made active, while the previously active
call is put on hold.
You can also make a call active directly by selecting
it with n and pressing l.
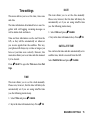
ENDING A CALL
1. Use n to select a call and press - SELECT.
2. Use n to select End and press - OK. The selected call will be ended.
PICKING A WAITING CALL
Use this function if you wish to pick up an incoming call and put the currently active call on hold.
When a call is in progress and you have another incoming call, the network will notify you of a call
waiting. The waiting call will also appear in the active call display, accompanied by a P symbol.
You can also pick up a waiting call directly by selecting it with n and pressing l.
Please note that in order to use this function, the
Call waiting option must be turned on in the GSM
menu, under Network services.
DROPPING A WAITING CALL
If you do not want to pick up a waiting call, you can
drop it as follows:
1. Use n to select the waiting call and press - SELECT.
2. Use n to select Drop and press - OK. The waiting call will be dropped, and the caller will
hear a busy signal.
BRIEF OVERVIEW OF PHONE USE: ACTIVE CALL
35
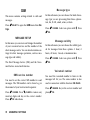
MUTING A CALL
1. Press . MENU to access the Call menu.
2. Use n to select Mute and press - OK. Calls will
be muted.
Muting can later be turned off in a similar manner.
ENDING CALLS
To end a call, press c. When the call ends, the
GSM indicator will return to the usual hook-down
position.
Please note that if there are several simultaneous
calls, pressing c will end them all at once.
CALL MENU
The Call menu is a special menu, which is only
available during an active call. It provides access to
some common menus like Phone book, Messages,
Recent calls, Call costs, Calendar, Calculator and
Notepad. For further information about using
these menus, please see the instructions in chapters Main menu and GSM menu.
You can access the Call menu during a call by pressing . MENU.
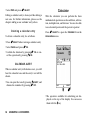
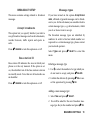
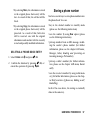
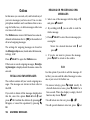
EMERGENCY CALLS
With a SIM card
When the SIM card is inserted, you can make an
emergency call as a normal phone call to the emergency number (e.g. 112).
With the keypad locked, you can still make an
emergency call directly by keying in the emergency
number and pressing l.
If the PIN code is requested when the phone is
turned on, you can make an emergency call without entering any access codes as follows:
1. Select . SOS.
2. Press - OK.
36
BRIEF OVERVIEW OF PHONE USE: ENDING CALLS
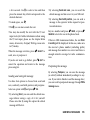
PIN code
Thursday
13.4.2002
Enter code
|
Emergency call
Press ’Ok’ or dial ’112’
Remember that a mobile phone connection is not
guaranteed in all conditions. Rough terrain or
large buildings may limit the operation of your
phone. Never completely rely on a mobile phone
for essential communications.
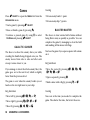
INCOMING TRAFFIC
SOS
OK
CANCEL
.
Besides incoming calls, you may also receive regular short messages and special, navigation-related
messages. For further information about these
messages and the events that take place upon their
receipt, please see the chapters GSM menu and
GPS menu.
OK
-
This is another way to do it:
1. Select . SOS.
2. Key in the emergency number (e.g. 112).
Any traffic that you do not handle at once will eventually end up in the incoming traffic list.
3. Press - OK or l.
•Use n to select items from the list.
•Press . QUIT to exit to stand-by mode. The list is
cleared as soon as you exit it.
Without a SIM card
An emergency call can always be made as any other
call, even without a SIM card, by keying in the
emergency number (e.g. 112) in stand-by mode
and pressing l. This can be done directly even
when the keypad is locked.
BRIEF OVERVIEW OF PHONE USE: INCOMING TRAFFIC
37
S h o r t m e s s a g e s ( s)
1. To read the message, press - SELECT.
Unanswered
call
Waypoint
Friend Find
update
2. By scrolling with n, you are able to read the
whole message.
Tuesday
30.5.2002
23:57 Northfield H
22:01 Swirl Sam
08:30 Rolling Kim
29.05 Defile Mike
29.05 Swirl Susan
28.05 Meadow S
28.05 Rockfeld Tom
QUIT
Short
message
Route
Friend Find
request
SELECT
3. To process the message, press - SELECT.
4. You have several options to choose from, such
as replying to the message or deleting it.
5. Select the desired option with n and press SELECT.
6. Press . QUIT when you are finished.
For further information, please see the chapter
GSM menu, Messages, Inbox.
U n a n s w e r e d c a l l s ( J)
•To call the phone number of the unanswered
call, press l.
•To save the phone number, press - SAVE.
For further information, please see the chapter
GSM menu, Recent calls, Unanswered calls.
W a y p o i n t s ( q)
A waypoint can be received as a message from another Benefon ESC! phone.
To view the waypoint on map, press - SELECT.
1. You will see a map with the waypoint in its center.
2. Use + and § to zoom in and out.
38
BRIEF OVERVIEW OF PHONE USE: INCOMING TRAFFIC
3. Use 1, 2, 3, 4, 6, 7, 8, and 9 to
scroll the map.
4. To process the waypoints, press - SELECT.
5. To process the routes, press - SELECT.
6. You have several options to choose from, such
as setting routes or deleting them.
5. You have several options to choose from, such
as setting waypoints or deleting them.
7. Select the desired option with n and press -
6. Select the desired option with n and press -
8. Press . QUIT when you are finished.
OK.
OK.
For further information, please see the chapter
GPS menu, Routes.
7. Press . QUIT when you are finished.
For further information, please see the chapter
GPS menu, Waypoints.
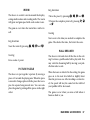
F r i e n d F i n d u p d a t e s ( um)
R o u t e s ( b)
A Friend Find update may be either a position update or a tracking update.
A route and its waypoints can be received as one or
more messages from another Benefon ESC! phone.
To view the route on map, press - SELECT.
1. You will see a map with the first waypoint of
the route in its center.
2. Use + and § to zoom in and out.
3. Use 1, 2, 3, 4, 6, 7, 8, and 9 to
scroll the map.
A position update refreshes the position of a friend
point in your phone. A tracking update works similarly, but it is a part of a series of updates, i.e.
tracking. Only the latest update from a phone is
shown in the incoming traffic list.
To view the update, press - SELECT.
1. You will see a map with the updated position
in its center.
2. Use + and § to zoom in and out.
4. Use n to trace the route one waypoint at a time.
BRIEF OVERVIEW OF PHONE USE: INCOMING TRAFFIC
39
3. Use 1, 2, 3, 4, 6, 7, 8, and 9 to
scroll the map.
sender of the request, or . NO to decline from
sending an update.
4. To process the friend points, press - SELECT.
2. If the request was a tracking request, you will
also be asked for an interval for sending the updates, and the number of updates to send.
5. You have several options to choose from, such
as setting friend points or deleting them.
6. Select the desired option with n and press OK.
7. Press . QUIT when you are finished.
For further information, please see the chapter
GPS menu, Friend Find.
•Use the numeric keys to key in the interval
and press - NEXT.
•Then, key in the number of tracking
updates that you want to send and press
- OK.
For further information, please see the chapter
GPS menu, Friend Find.
F r i e n d F i n d r e q u e s t s ( H)
A Friend Find request may be a position request or
a tracking request.
USE WITHOUT A SIM CARD
By sending a position request, another Benefon
ESC! user may ask you to send a position update.
Similarly, a tracking request is sent to ask for a series of tracking updates. Only the latest request
from a phone is shown in the incoming traffic list.
Benefon ESC! can be used even when a SIM card
has not been inserted. Most GPS features, calendar, notepad and menu functions can be used normally; only SIM related functions such as making
phone calls, using messages or accessing the
phone book will be unavailable.
To respond to the request, press - SELECT.
1. You will be asked if you want to respond to the
request. Press - OK to send an update to the
40
Emergency calls can always be made even when no
SIM card is inserted.
BRIEF OVERVIEW OF PHONE USE: USE WITHOUT A SIM CARD
BRIEF OVERVIEW OF
NAVIGATOR USE
FIRST STEPS
Positioning the GPS antenna
Satellites
You should lift the GPS antenna so that it faces
open sky whenever you want to use any of Benefon
Esc!’s position dependent features.
The antenna needs an unobstructed view of the
sky. The signals sent by the GPS satellites do not
penetrate solid objects such as people, buildings,
rocks, or heavy tree cover.
Note that the GPS receiver can be active even when
the antenna is not lifted. In this case, finding satellites may still be possible, but positioning accuracy
is likely to be worse than usual unless the rear of
the phone is facing an open sky.
The external GPS antenna accessory can be used to
receive GPS signals even when the phone's own
GPS antenna is unable to see satellites.
BRIEF OVERVIEW OF NAVIGATOR USE: FIRST STEPS
41
Turning the GPS receiver on or off
• Low power. Satellites are tracked at slightly
longer intervals. While this mode has the
lowest power consumption, it may not be
reliable in limited satellite coverage.
You need to turn on the GPS receiver to make position determination possible. Once activated, the
receiver will calculate your position at given intervals.
• Economy: Tracking satellites is adapted to
the present circumstances. This mode
uses no fixed interval for tracking satellites; tracking is optimized according to
the power consumption.
To keep power consumption as low as possible, it
is advisable to turn the GPS receiver off when no
GPS features are being used.
• At intervals: You can select the interval,
which determines the frequency for the
GPS receiver to search for position. Select
the time and confirm it by pressing OK.
1. In stand-by mode or on any of the navigator
pages, press n to enter the Quick menu.
2. Use n to select GPS receiver. Press - CHANGE.
3. Select a GPS operating mode by using n, and
press - OK. Note that all the GPS modes described below are not available in all phone
models.
• Off. No satellites are tracked; your position
is not calculated.
• Full power. The GPS receiver monitors the
satellites constantly, calculating your position at short intervals. Using this mode
consumes more power than the other
modes but it has the best accuracy and it
works even in limited satellite coverage.
42
4. Press . QUIT to exit the menu.
GETTING FIRST GPS POSITION
The GPS receiver normally stores the last known
position and satellite data so as to help reacquisition of position after loss of satellite signals or
power down. When the GPS receiver is used for the
first time, it has no previous position information
and position acquisition takes longer.
BRIEF OVERVIEW OF NAVIGATOR USE: FIRST STEPS
When using the GPS receiver for the first time, do
as follows:
determination is shown by the bars in the indicator. The more bars the better the accuracy.
1. Go to an open site outdoors, with unobstructed view of the sky.
You can also view the status of individual satellites
on the Position navigator page. For further information, please see the following chapter Position.
2. Position the GPS antenna and turn the GPS receiver to Full power mode.
3. Hold the phone still and wait until the GPS indicator shows bars, signifying that your position has been successfully calculated. This may
take a few minutes.
4. Wait one more minute before turning the GPS
receiver off, changing it to Low power mode, or
going indoors.
GPS RECEPTION
Once the GPS receiver has been activated, finding
satellites and locking to them usually happens
within a few minutes. At least three suitably positioned satellites are needed for two-dimensional
position calculation, while four or more make
three-dimensional calculation (including elevation) possible.
The GPS indicator shows no bars while the GPS receiver is searching for satellites. As soon as position has been determined, the accuracy of position
POOR GPS COVERAGE
If the GPS receiver is unable to determine your current position within a few minutes, the text Poor
GPS coverage will be shown. This happens when
not enough satellites are visible.
If the GPS has been set to Economy, At intervals, or
Low power mode, the GPS starts sleeping to conserve battery as soon as it detects poor GPS coverage. This is indicated by a ZZZ symbol in the place
of the GPS indicator bars.
When sleeping, the GPS receiver will wake up automatically every few minutes and look for satellites. It will go back to sleep if adequate satellite
coverage is not available.
When using the Economy or At intervals mode, position found at the latest attempt is indicated by a
grey bar symbol. When using the Low power mode,
previously searched and found position is indicated by a black bar symbol.
BRIEF OVERVIEW OF NAVIGATOR USE: FIRST STEPS
43
You can also wake up the GPS receiver manually as
follows:
1. Make sure that the GPS antenna has an unobstructed view of the sky. The GPS receiver does
not work indoors.
2. On any of the navigator pages, press - GPS to
enter the GPS menu.
3. Use n to select Update position and press OK.
INITIALIZING THE GPS RECEIVER
4. Use 1, 2, 3, 4, 6, 7, 8, and 9 to
move the pointer on the map to your present
position.
5. Press - SELECT.
6. Initialize the GPS receiver by selecting Set as
position. Press - OK.
7. Do as described under Getting first GPS position above.
In case the problem persists, you can reset the GPS
receiver by selecting Reset position from the Main
menu, Settings, GPS, and try again.
The GPS receiver may experience trouble in a calculating your position e.g. after long international
flights or when it has been off for an extended period of time.
If this happens, you can speed up the position acquisition as follows:
1. On any of the navigator pages, press - GPS to
enter the GPS menu.
2. Use n to select Maps and press - SELECT.
3. Show the World map by pressing - SELECT.
44
BRIEF OVERVIEW OF NAVIGATOR USE: FIRST STEPS
USING THE NAVIGATOR PAGES
The navigator pages of this phone are:
• Map page
MAP
The Map navigator page shows your position and
surroundings on a map.
• Guide page
• Position page
• Movement page.
Data
fields
You can access and browse the different navigator pages through the Main menu, as follows:
1. In stand-by mode or on any of the navigator
pages, press . MENU to enter the Main menu.
2. Use n to select either Map, Guide, Position, or
Movement. Press - SELECT.
Another way: Press the lower sidekeys > and <.
You can always return to stand-by mode either by
pressing c or through the Main menu, by selecting
the item Phone.
From the navigator pages you also have access to
the following menus: Main menu, Quick menu, and
GPS menu.
Speed
Time
Map
scale
Bearing
Track
Position
marker
Map
MENU
GPS
Data fields
The two changing data fields contain information
such as current speed, time, and next destination.
For further information about the GPS functions
and datafield details, please see the chapters GPS
menu and Main menu, Settings, GPS.
BRIEF OVERVIEW OF NAVIGATOR USE: USING THE NAVIGATOR PAGES
45
Map scale, track and bearing
Map symbols
•Map scale is shown as a scalebar. It changes as
you zoom the map by pressing + and §.
•Waypoints are used for marking points of interest or as destinations for navigation. They are
shown as an identifying symbol (e.g. q) and a
title.
•Track (x) is your direction of movement. It is
given in degrees.
•Bearing ( y) is the direction to your destination, if any. It is given in degrees.
Position marker
Your position is shown on the map with a circular
position marker.
•Your direction of movement is shown with a
black spot on the marker’s edge.
•If you have set a destination for navigation, a
radial line will show the direction to there.
•The marker will leave a trace of your movements
on the map.
•Friend points mark the known positions of
other Benefon ESC! phones. They are shown as a
symbol (u or m) accompanied by some identifying text.
•Routes are combinations of several waypoints
and can be used as destinations for navigation.
They are shown as interconnected waypoints.
The following options are available to you on
the Map page:
•Press + and § to zoom the map.
•Press 1, 2, 3, 4, 6, 7, 8, or 9 to
enter pointing mode.
•Press 0 to hide and show the data fields.
46
BRIEF OVERVIEW OF NAVIGATOR USE: MAP
Pointing mode
In pointing mode, you can move a pointer to scroll
the map and use it to create and process waypoints, set a point for use as destination, measure
distances, and send your position in a short message - to give a few examples.
•Highlight the desired option with n and press
the function keys . or - according to the
guiding texts on lower part of the display.
•Exit pointing mode by pressing . QUIT.
The map will not automatically scroll when you are
in pointing mode. Your position will be updated as
soon as you exit it, however.
FRIEND FIND OPTIONS
Coordinates
Pointer
123
4 5 6
789
QUIT
.
SELECT
-
•Use the numeric keys to move the pointer. The
map will be scrolled if you try to move out of it.
•Press 5 or - SELECT to select a point on the
map and get a list of functions such as creating a
new waypoint, setting a point as destination and
so on.
The Friend Find features are designed to take advantage of the unique combination of GPS and
GSM equipment of Benefon ESC!. Based on position information and the short message service
(SMS), they make functions such as accurate locating or tracking a friend possible.
You can point at a friend point in pointing mode to
use any of the Friend Find features: request or send
a position update, request or send tracking, cancel
your request, or save the friend point as a waypoint.
1. In pointing mode, select a friend point.
2. Use n to select an option and press - OK.
For further information about the Friend Find features, please see the chapter GPS menu, Friend
Find.
BRIEF OVERVIEW OF NAVIGATOR USE: MAP
47
GUIDE
The Guide page gives you steering guidance when
you are navigating to a destination.
Data
fields
Speed
The arrow is not shown if you have not set a destination. Moreover, the compass ring is totally blank
when you are not moving at all.
Time
Bearing
(destination)
Track
Compass
ring
MENU
GPS
When using this page, you should position your
phone so that the arrow on the top of the compass
ring points to your direction of movement. The
guide will then show you the direction to destination as follows:
•The arrow shows the direction to destination. If
it points straight up, you are going directly
towards the destination.
•The numbers on the edge of the rotating compass ring show you your track and bearing.
48
The guide is dependent on movement, and the
compass ring will be blank when the phone is not
moving. It is not a magnetic compass, and should
not be relied on as one.
BRIEF OVERVIEW OF NAVIGATOR USE: GUIDE
POSITION
used for navigation, while grey bars signify satellites that are still being locked to.
The Position page shows various data fields related
to your present position, time, and satellite status.
Data
fields
Depending on currently used GPS operating mode,
the satellite status text buffer may also show, how
old the last found position is.
Some of the data on this page depends the GPS receiver’s ability to determine your position.
Date
Time
Dawn
Elevation
Coordinates
Satellite
status
Satellites
MENU
GPS
The data fields are constantly changing, and show
information such as date, time, sunrise, elevation
above sea level, coordinates, and satellite status.
The satellite status field can hold up to twelve bars;
one for each visible satellite. Bar height signifies
signal strength - the higher the bar, the stronger
the signal. Satellites with black bars are currently
BRIEF OVERVIEW OF NAVIGATOR USE: POSITION
49
MOVEMENT
The Movement page shows various data fields related to your movement and destination.
Movementrelated
data fields
Speed
Odometer
Track
Bearing
Many data fields on this page are dependent on
movement, so they will be blank when you are not
moving or when the GPS receiver is unable to determine your position.
Destination
Next
Last
ETA next
ETA last
MENU
Destinationrelated
data fields
GPS
The data fields are constantly changing, and show
information such as speed, odometer, track, bearing, next/last destination, distance to next/last destination, ETA (estimated time of arrival) and ETE
(estimated time enroute) to next/last destination.
The "last destination" fields only apply when your
current destination is a route. When you are navigating to a waypoint or a friend point, those data
fields will be left blank.
50
BRIEF OVERVIEW OF NAVIGATOR USE: MOVEMENT
QUICK MENU
When the phone is in stand-by mode or in one of
the navigator pages, you can open the Quick menu
by pressing n. The first item to be selected depends on the direction of your keypress:
•If you press n upwards, the first item to be highlighted will be Environment.
LOCKING THE KEYPAD
Monday
21.01.2002
Quick menu
Normal
Lock keypad
1
GPS receiver
Off
Environment
Normal
•If you press n downwards, the first item to be
highlighted will be Lock keypad.
However, if you have locked the keypad, you cannot enter Quick menu unless you first open the keypad.
KEYPAD LOCK
The keypad lock is used to prevent accidental key
strokes.
When automatic keylock is turned on, the keypad
will be locked in approximately 20 seconds if no
key is pressed during that time. You can turn this
feature on by setting Keylock mode to Automatic in
the Main menu, under Settings and User interface.
To lock the keypad manually for a single time,
please see the following instructions.
FI NETWORK
MENU
GSM
QUIT
OK
-
n
1. Press n to enter the Quick menu.
2. Use n to select Lock keypad and press - OK to
lock the keypad. If you change your mind and
do not want to lock the keypad, press . QUIT
to exit the menu.
3. Shortcut to lock the keypad: when the phone is
in stand-by mode or in any of the navigator
pages, press n downwards for a few seconds.
The keypad will be locked.
QUICK MENU: KEYPAD LOCK
51
4. As you lock the keypad, you will automatically
exit the Quick menu. The left function key will
then have the text UNLOCK.
When the keypad is locked, you can answer an incoming call only by pressing l. You can turn off
the ringing tone by pressing . QUIET.
GPS RECEIVER ACTIVITY
The GPS receiver receives signals from the satellites and calculates your position from the information.
UNLOCKING THE KEYPAD
Monday
21.01.2002
While the keypad is locked, pressing c or . will
set the lights on for 10 seconds. This way, you are
able to see how to unlock the keypad even when it
is dark.
In this menu, you can select the GPS receiver activity. The selection affects the accuracy and power
consumption of your phone.
Request
Normal
1. Press n to enter the Quick menu.
2. Use n to select GPS receiver. Press - CHANGE.
Open key lock?
3. Use n to make your choice and press - OK.
4. Press . QUIT to exit the Quick menu.
FI NETWORK
UNLOCK
.
NO
OK
-
1. Press . UNLOCK.
2. Confirm the opening by pressing - OK. If you
change your mind and do not want to unlock
the keypad, press . NO instead.
52
QUICK MENU: GPS RECEIVER ACTIVITY
For further information, please see the chapter
Brief overview of navigator use, Turning the GPS
receiver on.
SELECTING AN ENVIRONMENT
An environment is a combination of tone and light
settings made suitable for particular situations. For
information about editing the environment settings, please see the instructions in the chapter
Main menu, Settings, Environments.
In this menu you can turn on the environment
you wish to use. The default setting is Normal.
1. Press n to enter the Quick menu.
2. Use n to select Environment. Press - CHANGE.
3. The shortcut to access the environment selection list: when the phone is in stand-by mode
or in any of the navigator pages, press n upwards for a few seconds. The environment list
will be displayed.
4. Use n to select the desired environment and
press - OK.
5. You will automatically exit the menu.
The currently used environment is shown in standby mode.
QUICK MENU: SELECTING AN ENVIRONMENT
53
•Use n to scroll through the menu items and submenus.
MAIN MENU
•To select one of the items, press -. This way,
you can enter sub-menus, activate commands
and turn options on or off.
Monday
21.01.2002
Main menu
Normal
Phone
1
•You can return to stand-by mode either by pressing c or going through the Main menu, and
selecting the item Phone.
Map
Guide
Position
Movement
Accessories
Settings
FI NETWORK
MENU
GSM
QUIT
.
ACCESSORIES
SELECT
n
-
The Main menu allows you to access the stand-by
mode, the various navigator pages, and several
useful functions, which you can set and adjust to
make the phone suit your particular needs.
•Press . MENU to enter the Main menu. It can be
accessed from the stand-by mode and any of the
navigator pages.
54
MAIN MENU: ACCESSORIES
•Press . QUIT to return to the previous menu
level from a sub-menu.
The Accessories menu contains some useful applications, such as Alarm clock, Notepad, Calendar, Calculator, and some entertaining Games. You can
access the menu and its sub-menus via the Main
menu.
•Press - SELECT to enter the Accessories menu.
•Use n to scroll and select (highlight) the menu
items and sub-menus.
•Press . QUIT to cancel the operation and return
to previous menu level.
Alarm clock
In this menu, you can turn the alarm clock on or
off and adjust its settings.
Press - SELECT to open the Alarm clock from the
Accessories menu.
You can scroll and select functions and items with
n.
Current alarm settings are displayed in the Alarm
clock menu. There are four alarm settings which
you can adjust.
Turning alarm on or off
You can turn the alarm on or off by selecting Active
and pressing - CHANGE.
Adjusting alarm time
Accessories
Alarm clock
1
Alarm clock
Notepad
Calendar
Calculator
Games
QUIT
By selecting Time and pressing - CHANGE you can
adjust the time. Key in the time with numeric keys
and press - OK.
1
Active
Time
00:00
Repeat
Once
Snooze
Off
SELECT
-
Selecting repeat alarm
By selecting Repeat and pressing - CHANGE you
can determine whether the alarm clock should
alert you only once or on specified days
QUIT
CHANGE
n
-
MAIN MENU: ACCESSORIES
55
Selecting snooze interval
.
Alarm clock
1
Once
If you do not want to use the snooze option at all,
choose Off.
Monday
Tuesday
Wednesday
Thursday
Friday
Saturday
Sunday
DONE
ALARM CLOCK ALERT
CHANGE
n
-
•To make the alarm clock alert only once, mark
Once by selecting it and pressing - CHANGE.
•To make the alarm clock alert on selected days,
mark the desired days by highlighting them and
pressing - CHANGE.
•When ready, press . DONE.
56
By selecting Snooze and pressing - CHANGE you
can determine whether the phone alerts you repeatedly, e.g. every 10 minutes. Select the desired
option and press - OK.
MAIN MENU: ACCESSORIES
When the alarm clock alerts, you will hear the
alarm tone and the text Wake up will be shown.
•You can end the alert by pressing any key.
•If snooze was used, the phone will show the text
Snooze off? and will alert you again after a while.
•To turn off the alarm once and for all, press OK when the Snooze off? text is shown.
Notepad
The Notepad can be used for writing and saving
short notes.
Use n and press - SELECT to open the Notepad
from the Accessories menu. You will enter a menu
titled Notes which contains several notes.
•Use n to select a note and press - SELECT to
edit it.
•Select Delete all to clear all notes. Confirm the
deletion by pressing - OK or cancel the operation by pressing . NO.
Notepad
Notepad
1
150
Delete all
I remember|
<empty
<empty
<empty
<empty
<empty
<empty
QUIT
note>
note>
note>
note>
note>
note>
OK
CLEAR
SAVE
Writing mode
You have two ways to write notes:
•When writing in T9 mode you need to press a
key just once to enter the desired letter - please
note, however, that a single word takes its form
only after you have entered all the letters, so do
not worry if you see some gibberish first.
•When writing with spelling mode you get the
first letter of the key when pressing the key once,
the second letter when pressing the key twice,
and so on.
Writing a note in T9 mode
A note can have a maximum of 160 characters.
When editing, the number of characters left is
shown in the upper right corner of the note.
Selecting T9 language
Press and hold 1 for a few seconds. Select the desired T9 language with n and press - OK. This T9
language selection does not affect the menu language you are using.
MAIN MENU: ACCESSORIES
57
Turning T9 mode on or off
Writing compound words
Press 1. When the T9 mode is on, the , symbol
is shown on the display.
When writing a compound word, you are assumed
to press - ACCEPT after each part of the word until the whole compound word has been entered.
Switching character forms
Press § to switch the character forms. Selected
form is shown highlighted. The symbol U stands
for upper case letters, V for lower case letters,
and Z for numbers.
Looking for alternative words
The a form is useful when writing a sentence and
you want to key in just one upper case letter and
let the rest of the letters to be lower case.
In case the phone cannot find the correct word,
switch into the spelling mode by pressing 1.
Write the whole word (or words) once again. As
you switch back into T9 mode, the new word (or
words) will be saved automatically into memory.
Writing text with T9 text input
Use the letter keys ( 2...9) for writing. Press the
key just once to enter the desired letter. The maximum amount of characters in one word is 32.
A single word takes its form only after you have entered the whole word. If you are satisfied with the
word the phone offers you, accept it by pressing +
or - ACCEPT. The + key also serves as a spacebar.
58
MAIN MENU: ACCESSORIES
If the final word is incorrect, scroll through the alternatives with n to find the right one and press +
to accept it.
Saving new words
T9 has an automatic saving system, which means
that it will learn the most frequent words you use,
even if they are not used in common language.
The automatic saving takes place when switching
from the spelling mode to the T9 mode or when
pressing . QUIT or - SAVE.
Beeping sounds
In case you try to do an illegal action, such as continue writing the note when there is no space left,
or press a key that does not match to the keystroke
sequence entered, the T9 will beep and ignore the
action.
Notepad
123
4 5 6
789
Adding special characters
By pressing and holding 0 for a few seconds, a
wide selection of special characters is made available to you.
Select a row with n and press the numeric key
which corresponds to the desired character.
For example, when you wish to add the & character
into text, first press and hold 0 for a few seconds.
Then scroll to the second row by pressing n and
press 5.
QUIT
n
When the key has been pressed, you will automatically return to the text you are writing at the moment.
Making final corrections
You can scroll through your note by pressing n. To
change a word, move the cursor to the right side of
the incorrect word and press . CLEAR.
Write the word once again. You can also switch
into the spelling mode (by pressing 1).
MAIN MENU: ACCESSORIES
59
If the word is still incorrect, find an alternative
word with n.
Writing a note in spelling mode
Finally verify the correct word by pressing + or
- ACCEPT.
The editing tools are basically the same in spelling
mode and in T9 mode. The only difference is the
way to key in letters.
Further actions
•Turn T9 mode off by pressing 1. When the T9
mode is off, no , symbol is on the display.
When the note is ready, press - SAVE to save it.
You will return to the previous menu level.
•Press . CLEAR to erase text.
If you want to delete your note, first open the note
and clear it by pressing and holding . CLEAR for
a few seconds. Press . QUIT.
•Use n to move back and forth in the text.
•Press + to enter a space.
•Press § to switch between upper case letters,
lower case letters and numbers.
•Use 0 to enter special characters. For further
information, please see the T9 instructions
above in the chapter Writing a note in T9 mode,
Adding special characters.
•When the note is ready, press - SAVE to save it.
60
MAIN MENU: ACCESSORIES
Calendar
You can write down your own appointments,
events and anniversaries in the calendar. Reminders can also be associated with these entries. Please
note that if the power of the phone is turned off,
the calendar alarms do not automatically turn the
phone on and you will miss the alarm.
The main calendar page shows a calendar page for
one month. Each day that has any calendar entries
is marked with a small black triangle in its lower
left corner.
•Use + and § to switch between months.
Press - SELECT to open the Calendar from the Ac-
•Use n to select a day. If you scroll this way past
the first or the last day of the month, the page is
changed to display another month.
cessories menu.
•Press - SELECT to view a single day’s page.
DAY VIEW
Month view
Day view
December
2001
M T W T
F
04
S S
Tuesday
4.12.2001
Week 2
SELECT
n
-
Now you have three options to choose from:
Choose date, Agenda, and New entry. Highlight the
desired option with n and press - SELECT.
Choose date
Agenda
New entry
Dawn:
Sunrise:
QUIT
The day view shows you all calendar entries for a
single day, if any. You can also see the dawn, sunrise, and sunset times for the day.
06:28
07:15
QUIT
SELECT
n
CHOOSE DATE
Choose date shows you quickly what is the sched-
10:00 Meet Paul
16:00 Tea break
-
ule for a specific day. Press - SELECT and specify
the desired day as follows:
•Select one of these: Next day, Previous day or
Today and press - OK or
MAIN MENU: ACCESSORIES
61
•Select Go to date by pressing - CHANGE. Key in
the date you wish to view and press - OK.
ADDING A NEW CALENDAR ENTRY
By selecting New entry you can add a new event to
your calendar.
VIEWING ALL ENTRIES (AGENDA)
By selecting Agenda, you can view all your calendar entries at once.
Agenda
You can give the calendar entry a title text by selecting Text and pressing - CHANGE. Key in the
text with alpha-numeric keys. Press - OK.
Adjusting entry time
New entry
Delete all
Mon 1.5.2002
12:00
Changing entry text
wk 18
You can adjust the time of the event by selecting
Time and pressing - CHANGE. Key in the numbers
and finish by pressing - OK.
Picnic
Tue 2.5.2002
wk 18
10:00 Meet Paul
16:00 Tea break
QUIT
SELECT
n
-
Changing entry date
You can adjust the date of the event by selecting
Date and pressing - CHANGE. Key in the numbers
and finish by pressing - OK.
Selecting entry repeat
•Select Delete all to remove all calendar entries.
Confirm the deletion by pressing - OK or cancel the operation by pressing . NO.
•Select an existing entry to view, edit or delete it.
62
MAIN MENU: ACCESSORIES
By selecting Repeat and pressing - CHANGE you
can determine whether the entry should apply only
once or on specified days.
•To make the entry apply only once, mark Once by
highlighting it and pressing - CHANGE.
VIEWING A CALENDAR ENTRY
(AGENDA)
•To make the entry apply on selected days, mark
the desired days by highlighting them with n and
pressing - CHANGE.
To view a calendar entry with details, select a Day
view and then the item Agenda by pressing - SELECT. Agenda shows all the events made. Find the
desired entry with n and press - SELECT.
•When ready, press . DONE.
Selecting alarm
You can make the phone sound an alarm, either on
time of the calendar event or some minutes before
it. The alarm melody depends on the current Environment settings.
•Select Alarm and press - CHANGE.
•Next select the alarm time and press - OK. If
you do not want to use the alarm option, choose
No alarm.
When you are finished, press . DONE. You will be
asked if you want to save the entry. Make a selection by pressing . NO or - OK.
If the calendar
has an active
repeat option,
the point of
time shown
here is the
next point of
time that the
calendar entry
is due.
Calendar
entry
Tue 2.5.2002
wk 18
On time
10:00
wO
Meeting Paul in Café
Regal
QUIT
The w
symbol
indicates,
the alarm
is turned
on for this
calendar
entry.
SELECT
Editing a calendar entry
To edit a calendar entry, do as follows:
•Press - SELECT when viewing a calendar entry.
MAIN MENU: ACCESSORIES
63
•Select Edit and press - SELECT.
Calculator
Editing a calendar entry is done just like adding a
new one. For further information, please see the
chapter Adding a new calendar entry above.
With the calculator you can perform the basic
mathematical operations such as addition, subtraction, multiplication, and division. You are also able
to use decimal points and the percent operator.
Deleting a calendar entry
Press - SELECT to open the Calculator from the
Accessories menu.
To delete a calendar entry, do as follows:
•Press - SELECT when viewing a calendar entry.
•Select Delete and press - OK.
•Confirm the deletion by pressing - OK or cancel the operation by pressing . NO.
CALENDAR ALERT
Calculator
50*2 = 25
25 - 10% = 22.5
When a calendar entry with alarm occurs, you will
hear the calendar tone and the entry’s text will be
shown.
•You can quiet the tone by pressing . QUIET, and
dismiss the reminder by pressing - OFF.
QUIT
SELECT
n
-
•The operators available for calculating are displayed on the top of the display. You can access
them with the n key.
64
MAIN MENU: ACCESSORIES
•The &, M, and z can alternatively be keyed in
by subsequent presses of the + key. Similarly, _
and # can be keyed in with §.
•A decimal point can also be keyed in by pressing
and holding the 0 key.
•By pressing . CLEAR you can correct any incorrect numbers and symbols you may have keyed
in.
sign
(
.
_
&
=
M
#
}
function
resets the display
decimal point
subtraction
addition
gives result
multiplication
division
percent
The maximum size of a number is 8 digits. When
using a decimal point, the amount of digits will be
7 plus the decimal point (for example: 123456.7).
In case you try to key in an illegal mathematical expression (for example 5/0), the text Error is displayed.
The accuracy of the calculation is up to 6-digits.
When needed, the result will be displayed with the
exponent (for example: the result 1234567 is displayed as 1.23457E6).
An example of the percent calculation
50.2+50-6%=94.188
1. Enter the number 50.2 by pressing the numeric
keys. Press and hold 0 to get the decimal
point.
2. Select the desired operator ( &) with n and
press - SELECT. The chosen operator appears
on the display.
3. Enter the number 50 by pressing 50.
4. Select the desired operator ( _) with n and
press - SELECT.
5. Enter the number 6 by pressing 6.
6. Select the desired operator ( z) with n and
press - SELECT.
7. Select the equal sign ( =). Press - SELECT to
get the result.
Calculation can be continued from the last result.
MAIN MENU: ACCESSORIES
65
Games
Press - SELECT to open the Games list from the
Accessories menu.
Scoring
•Hit an enemy bomb: 1 point.
•Hit an enemy ship: 5 points.
•Start a game by pressing - SELECT.
•Pause or finish a game by pressing ..
•Continue a paused game by using n to select
Continue and pressing - SELECT.
GALACTIC GUNNER
The idea is to shoot the enemy above you while
avoiding the bombs being dropped onto you. The
enemy moves from side to side and after each
sweep it comes closer to you.
BLASTER MASTER
The idea is to clear a mine field of mines without
being blown away as quickly as possible. You can
complete the game by managing to clear the field
and marking all the mines with flags.
You lose the game if you open a square with a mine
on it.
Key functions
If you manage to shoot the whole enemy fleet, the
game goes on to the next level, which is slightly
faster than the previous level.
•Move the cursor by pressing 1, 2, 3, 4,
6, 7, 8 or 9.
The game is over when the enemy bombs you or
lands on the row right next to your ship.
•Mark a mine with a flag by pressing + or §.
Key functions
Scoring
•Move left by pressing 1, 4, 7, or +.
You score is the time you needed to complete the
game. The shorter the time, the better the score.
•Move right by pressing 3, 6, 9, or §.
•Shoot by pressing 2, 5, 8, or 0.
66
MAIN MENU: ACCESSORIES
•Open a square by pressing 5.
WORM
The idea is to control a worm around the display,
eating small cookies and avoiding walls. The worm
will grow and gain speed with each cookie it eats.
The game is over when the worm hits a wall or itself.
Key functions
Key functions
•Move the piece by pressing 2, 4, 6 and 8.
•Preview the complete picture by pressing +, 0
or §.
Scoring
Your score is the time you needed to complete the
game. The shorter the time, the better the score.
Steer the worm by pressing 2, 4, 6 and 8.
WALL BREAKER
Scoring
Eat a cookie: 1 point.
PICTURE PUZZLE
The idea is to put together a picture by moving a
piece of it around the playing area. When the piece
is moved it changes place with the piece that occupies the square being moved into. You can complete the game by putting all the pieces in the right
order.
The idea is to hit and clear all the tiles in the ceiling. You have a paddle and a ball to play with. You
may catch the bouncing ball by moving your paddle from side to side.
When there are no tiles left in the ceiling, the game
goes on to the next level which is slightly faster
than the previous one. After reaching a certain level, the speed will stay the same but the width of
your paddle will be decreased.
The game is over when you miss a ball when it
bounces back to you.
MAIN MENU: ACCESSORIES
67
LABYRINTH
Key functions
•Release the ball by pressing 2, 5, 8, or 0.
•Move left with wide steps by pressing 1.
•Move left normally by pressing 4 or 7.
•Move left with tiny steps by pressing +.
•Move right with wide steps by pressing 3.
•Move right normally by pressing 6 or 9.
•Move right with tiny steps by pressing §.
The idea is to walk through the labyrinth starting
from the upper left corner, going to the lower right
corner as fast as possible. Only part of the labyrinth
is displayed at once, in fact the whole labyrinth is
much larger. There is only one way to go through
the labyrinth, no shortcuts are available.
Please note, that it might take few seconds to load
the game on the display for playing.
Key functions
Scoring
•1 point for one tile.
•5 points for clearing the level.
Move by pressing 2, 4, 6 and 8.
Scoring
Your score is the time you needed to complete the
game. The shorter the time, the better the score.
68
MAIN MENU: ACCESSORIES
TICTACTOE
SETTINGS
The idea is to add crosses in the grid, taking turns
with your opponent. The winner of the game is the
one who first manages to get five marks in a row.
The row can be formed either horizontally, vertically or diagonally. Only part of the grid is displayed at once, in fact the whole grid is much
larger.
You can access the settings of the phone via the
Settings menu. The settings are divided into subcategories, such as Environments, User interface,
Time, Units, Power, GSM, GPS, Help Desk, Emergency calls, and Security.
You can access the menu and its sub-menus via the
Main menu.
Key functions
•Press - SELECT to enter the Settings menu.
•Move the cursor by pressing 1, 2, 3, 4,
6, 7, 8 or 9.
•Press . QUIT to cancel the operation and return
to previous menu level.
•Place a cross by pressing 5.
Environments
An environment is a combination of sound and
lights settings. Different environments can be
used for different situations, such as attending a
meeting or going outdoors.
There are several default environments available:
e.g. Normal, Silent, Discreet, Noisy, and Night. Additionally, you can create up to two environments of
your own.
Environments have default settings, so you may
use them as they are. However, in this menu you
MAIN MENU: SETTINGS
69
can customize these environments to your own
needs, if you so desire.
Editing incoming call, alarm,
messages or calendar settings
You can turn on a specific environment in the
Quick menu. For further information about it,
please see the instructions in the chapter Quick
menu, Selecting an environment.
Select either Incoming call, Alarm, Messages or Calendar, and press - SELECT. The current environ-
The environment you are currently using is shown
in stand-by mode.
Setting tone
Press - SELECT to open the Environments menu
from Settings.
ment settings for the chosen option are displayed.
1. Select Tone and press - CHANGE.
2. You will hear samples of each tone listed as you
scroll them with n. Make a selection and press
- OK.
EDITING NORMAL ENVIRONMENT
To view or adjust the normal environment, select
Normal and press - SELECT.
When you are finished, press . DONE. If you have
made any changes to the environment, you will be
asked if you want to save them. Make a selection by
pressing . NO or - OK.
Renaming the environment
The default environments, Normal, Silent, Discreet,
Noisy and Night, cannot be renamed.
Setting volume
1. Select Volume and press - CHANGE.
2. Use n to set the volume level. You can also set
it to zero level, i.e. totally silent.
3. Press - OK when done.
Volume level can also be set by pressing > and <
when the Volume menu item is selected.
Setting ringing mode
Ringing mode is not available in message setting.
70
MAIN MENU: SETTINGS
1. Select Ringing mode and press - CHANGE.
•To have the lights always on, select On.
2. Select either Fixed or Increasing and press
- OK.
•To have the lights automatically turn on
when keys are pressed or important notifications are displayed, select Automatic.
Changing use of vibration
You can turn vibrating alert on or off by selecting
Vibration and pressing - CHANGE.
Changing volume for
key tones or notifications
Select either Key tones or Notifications and press
- CHANGE to adjust the selected option.
1. Use n to set the volume level. You can also set
it to zero level, i.e. totally silent.
2. Press - OK when done.
Volume level can also be set by pressing > and <
when either Notifications or Key tones is selected.
Changing use of lights
Keeping lights constantly on will rise the power
consumption of the phone considerably.
Resetting an environment
To reset the environment settings to factory defaults, do as follows:
1. Select Reset and press - OK.
2. Confirm the reset by pressing - OK or cancel
the operation by pressing . NO.
EDITING SILENT, DISCREET,
NOISY AND NIGHT ENVIRONMENTS
You can edit these environments in the same way
as the Normal environment. For detailed information, please see the previous chapter Editing normal environment.
1. Select Lights and press - CHANGE.
2. Select an option and press - OK.
•To have the lights always off, select Off.
MAIN MENU: SETTINGS
71
CAR KIT ENVIRONMENT
CREATING NEW ENVIRONMENT
In this menu you can set one of the environments
to be the default environment for the car kit. Each
time when you connect the phone to a car kit, the
default car kit environment will be turned on automatically. As you disconnect the phone from the
car kit, previously used environment will be turned
on.
To create an environment of your own, select New.
At most two additional environments can be made.
Select Car kit and press - CHANGE. Highlight the
desired environment with n and press - OK.
1. Select Name and press - CHANGE.
If you do not want to use any specific environment
with the car kit, select the option None. This way,
the environment will not be changed automatically
when the phone is connected to the car kit.
If you want to use some other environment than
the default car kit environment while the phone is
connected to the car kit, you may select another
environment in the Quick menu.
Naming the environment
You can change the name of an environment,
which you have created yourself.
2. Key in a new name with alphanumeric keys and
press - OK.
Changing base environment
You can select which one of the default environments your new environment is based on. The initial values of all the environment settings will be
copied from that environment.
1. Select Based on and press - CHANGE.
2. Select the base environment and press - OK.
3. When you are finished, press . DONE. If you
have made any changes to the environment,
you will be asked if you want to save or discard
them. Make your choice and press - OK.
72
MAIN MENU: SETTINGS
Editing your own environment
User interface
You can edit your own environment in the same
way as the default environments, by selecting it
with - SELECT. The only difference is that you can
also change the name of the environment.
This menu contains settings that have to do with
the general outlook and functionality of the
phone.
For further information about editing an environment, please see the instructions in the chapter Editing normal environment.
DELETING AN ENVIRONMENT
The default environments cannot be deleted. To
delete one of your own environments, do as follows:
1. Select the environment you wish to delete with
n.
2. Select Delete and press - OK.
3. Confirm the deletion by pressing - OK or cancel the operation by pressing . NO.
Press - SELECT to open the User interface menu
from Settings.
SELECTING LANGUAGE
You can change the language the phone uses.
1. Select Language and press - CHANGE.
2. If the current menu language is not the one you
wish to use, select the desired language with n
and press - OK.
When the language is set to Automatic, it means the
language is chosen according to your SIM card’s
language preference. If the information is not
available, a default menu language is used.
This setting does not affect the language used
when writing in T9 mode.
MAIN MENU: SETTINGS
73
ADJUSTING CONTRAST
Screen saver display
In this menu you can adjust display contrast.
1. Select Contrast and press - CHANGE.
2. Use n to set the contrast level. Press - OK.
Contrast level can also be set by pressing > and <
when the Contrast menu item is selected.
The screen saver display can be exited by pressing
any key.
AUTOMATIC KEYLOCK
SCREEN SAVER
The screen saver can be used to reduce the power
consumption of the phone by clearing the display
when the equipment is not continuously used. The
saver will be started when the phone has not been
used for a specified time.
The saver will not be started during a call or when
the phone is connected to a car kit.
To set the idle time or disable the feature, select
Screen saver and press - CHANGE. Select an option and press - OK.
74
MAIN MENU: SETTINGS
In this menu you can turn the automatic keylock
on or off.
When automatic keylock is turned on, the keypad
will be locked in approximately 20 seconds if no
key is pressed during that time.
1. Select Keylock mode and press - CHANGE.
2. Make a selection of either Manual or Automatic
and press - OK.
Time settings
DATE
This menu allows you to set the time, time zone
and date.
This item allows you to set the date manually.
Please note, however, that the date will always be
automatically set if you are using Satellite time
(see the following instructions).
The time information determined here is used together with call logging, incoming messages as
well as alarm clock and timers.
Time and date information can be read from the
GPS, so they will be automatically set whenever
you receive signals from the satellites. This way,
your phone will always stay on time as long as you
have set your time zone correctly. However, this
menu also allows you to set time and date manually if so desired.
1. Select Date and press - CHANGE.
2. Key in the date with numeric keys. Press - OK.
SATELLITE TIME
You can have the time and date automatically set to
satellite time, which is received from the GPS.
Select Satellite time and press - CHANGE.
Press - SELECT to open the Time menu from Settings.
TIME
This item allows you to set the clock manually.
Please note, however, that the time will always be
automatically set if you are using Satellite time
(see the following instructions).
1. Select Time and press - CHANGE.
2. Key in the time with numeric keys. Press - OK.
MAIN MENU: SETTINGS
75
TIME ZONE
Units
The GPS satellites broadcast Coordinated Universal Time (UTC), the standard time common to every place in the world. To make automatic clock
resetting possible, this data needs to be corrected
to match your local time zone.
The Units menu allows you to set the measurement
systems for distance, speed and elevation and currency unit for call cost counters.
1. Select Time zone and press - CHANGE.
2. Key in your local time zone shift with numeric
keys. If needed, change the +/- sign with +.
3. Press - OK.
DAYLIGHT-SAVING TIME
If the daylight-saving time is in use in your country,
you need to change the time zone manually each
time, when shifting from winter time to summer
time and vice versa. E.g. in Finland time zone in
winter is +2:00 but time zone in summer is +3:00.
76
MAIN MENU: SETTINGS
Press - SELECT to open the Units menu from Settings.
DISTANCE & SPEED
1. Select Distance & speed and press - CHANGE.
2. Select the units you wish to use for distance
and speed measurements: Meters, Miles, Yards,
or Nautical. Press - OK.
Power
ELEVATION
1. Select Elevation and press - CHANGE.
2. Select the units you wish to use for elevation
measurements: Meters, or Imperial feet. Press
- OK.
In this menu you can make the phone turn itself on
and off at specified times.
Press - SELECT to open the Power menu from Settings.
CURRENCY
POWER ON TIMER
The currency unit is used for call costs. Use a 3-letter abbreviation for the currency.
When the Power on timer is activated, the phone
turns itself on every day at the same time.
1. Select Currency and press - CHANGE. You may
need the PIN2 code for changing the setting.
2. Key in the currency unit with alphanumeric
keys. Press - OK. If needed, you can clear the
buffer by pressing . CLEAR few times.
•To change the set time of the timer, select Power
ON timer and press - CHANGE. Key in a time
with the numeric keys, and press - OK.
•To turn the timer on or off, select Active and
press - CHANGE.
POWER OFF TIMER
When the Power off timer is activated, the phone
turns itself off every day at the same time.
The Power off timer is set in the same way as the
Power on timer.
MAIN MENU: SETTINGS
77
GSM
Message type
This menu contains settings related to calls and
messages.
In this sub-menu you can choose the kind of message type you are processing from these options:
text, fax, X.400, email, ermes, or data.
Press - SELECT to open the GSM menu from Settings.
Press - CHANGE. Select an option with n. Press
- OK.
MESSAGE SETUP
In this menu you can store and change the number
of your voicemail service and the number of the
short message centre. You can also determine settings for other message operations, such as message type and validity.
The Short Message Service (SMS) and the Voicemail Service are network features.
Message validity
In this sub-menu you can choose the validity period for messages from these options: 1 hour, 6
hours, 24 hours, 1 week, or maximum time.
Press - CHANGE. Select an option with n. Press
- OK.
Voicemail number
SMS service number
You need to set the correct SMS number to send
messages. The SMS number can be found e.g. in
the manual of your local network operator.
Press - CHANGE. Press . CLEAR to remove any
incorrect digits and key in the correct number.
Press - OK when done.
78
MAIN MENU: SETTINGS
You need the voicemail number to listen to the
messages left for you. The same number is also
used in connection with the function Call diverts.
Press - CHANGE. Key in the correct number and
press - OK.
BROADCAST SETUP
Message types
This menu contains settings related to broadcast
messages.
If you have turned on the option Accept broadcasts, all kinds of general messages can be broad-
Accept broadcasts
This option lets you specify whether you wish to
accept broadcast messages such as advertisements,
weather forecasts, traffic reports and sports results.
Press - CHANGE to turn this option on or off.
cast to you. In this sub-menu you can add or delete
certain message types, e.g. advertisements, which
you do or do not want to accept.
The broadcast message types are identified by
numbers. In order to find out which number corresponds to a certain message type, please contact
your network operator.
Select Types and press - SELECT to enter this
menu.
Base station ID
Base station ID indicates the area in which your
phone is at the very moment. If the option is set
on, the identifier text of the base station is shown
in stand-by mode. Note that not all networks use
an identifier.
Press - CHANGE to turn this option on or off.
Deleting a message type
1. Use n to select the number of a type which you
do not want to accept, and press - DELETE.
2. Confirm the deletion by pressing - OK or cancel the operation by pressing . NO.
Adding a new message type
1. Select New and press - SELECT.
2. You will be asked for the new broadcast message type. Key in the number and press - OK.
MAIN MENU: SETTINGS
79
Message languages
DIALLING PREFIX
As a default setting, broadcast messages will be
broadcast in all possible languages. To ignore the
messages sent in an unfamiliar language, do as follows:
A dialling prefix is sent to the network before any
dialled number. This kind of prefix could be e.g.
#31#, which tells the network not to show the
callers number when making calls. *31# works the
other way around.
1. Select Languages. Press - SELECT.
2.
Use n to select a language and press CHANGE to turn it on or off.
3. When finished, press . DONE.
ANYKEY ANSWER
If the Anykey answer is turned on, you can answer
an incoming call by pressing any key, not just l.
In this menu you can add dialling prefixes and select one of them for use.
Press - CHANGE to enter this menu.
Using a prefix
Select a prefix from the list and press - OK. If you
do not want to use a dialling prefix at all, choose
Off.
Press - CHANGE to turn this option on or off.
Adding a prefix
AUTO ANSWER
If the Auto answer is turned on, an incoming call is
automatically answered after certain number of
rings.
Press - CHANGE to turn this option on or off.
80
MAIN MENU: SETTINGS
1. Select New and press - SELECT.
2. You will be asked for a new dialling prefix. Key
it in and press - OK.
REDIAL MEMORY
GSM MODULE
If the Redial memory is turned on, the last dialled
numbers are stored into memory. These numbers
can be recalled by pressing l in stand-by mode
when no numbers have been keyed in.
In this menu you can turn the GSM module on or
off.
Press - CHANGE to turn this option on or off.
2. Make a selection of either On or Off and press
- OK.
QUICK DIALLING
When the quick dialling option is turned on, you
can call quickly to those phone numbers stored in
the phone book entries 2 - 9.
Press - CHANGE to turn this option on or off.
1. Select GSM module and press - CHANGE.
When the GSM module is off it will not send or receive radio frequency signals. This has the following effects:
•No calls (including emergency calls) can be
made or received. It will seem to anyone trying
to call you as if your phone is off.
•No short messages (including Friend Find messages, etc.) can be sent or received.
•Power consumption of the phone is lowered,
especially when in areas with no GSM network
coverage.
MAIN MENU: SETTINGS
81
GPS
Show data fields
In this menu you can adjust map and navigation
settings.
This option allows you to specify whether you
want to see the two additional data fields on the
Map navigator page.
Press - SELECT to open the GPS menu from Settings.
Press - CHANGE to turn this option on or off.
MAP DETAILS
You can also quickly turn the data fields on or off
by pressing 0 on the Map navigator page.
In this menu you can determine the outlook of the
Map navigator page.
Show labels
Select Map details and press - SELECT to enter the
menu.
Auto scrolling
This option allows you to specify whether you
want to see waypoint and friend point labels on the
map.
Press - CHANGE to turn this option on or off.
When the auto scrolling option is turned on, the
map will be constantly scrolled to keep the position marker in the middle. Otherwise, the map is
only scrolled when the marker is about to move off
the display.
This option allows you to specify whether you
want to see the waypoints of the destination route
joined by lines on the map.
Press - CHANGE to turn this option on or off.
Press - CHANGE to turn this option on or off.
82
MAIN MENU: SETTINGS
Show route
Show trace
Preferred map type
This option allows you to specify whether you
want to see the trace left by your movement on the
map.
When you have more than one map loaded into
your phone, the most accurate one available for
your position will generally be used. In this submenu, you can set the map type you prefer. You
can choose from the following options:
Press - CHANGE to turn this option on or off.
Clear trace
This option allows you to clear your trace on the
map and start drawing it from this point onwards.
To hide the trace altogether, also turn off the Show
trace option.
Press - OK to clear the trace.
• Any. The phone will always use the most accurate map available.
• City, Road, Topographic or Nautical. The phone
will use a map of the chosen type when available. If not, it will choose another map according
to its similarity to the preferred type.
• None. The phone never uses a map, even when
one is available.
To change the preferred map type, do as follows:
1. Select Preferred map type. Press - CHANGE.
2. Select an option and press - OK.
MAIN MENU: SETTINGS
83
POSITIONING
When using the mobile phone positioning along
with some separate map, e.g. a paper map, the GPS
position format and map datum need to match the
position format and map datum listed on the corresponding paper map.
The settings below are correction factors, which
will be applied to GPS position fixes before they
are displayed.
•In one of the pre-defined grid formats.
•In User UTM grid. In case you need to use a grid
which is not available in the list, you can create a
user UTM grid to match your paper map. Select a
line by pressing n and - CHANGE. Fill in the digits and press - OK. Complete the grid by pressing . DONE.
On the Position page and in other similar places selected position format is shown abbreviated.
Position format
Map datum
Position format indicates the way the position will
be displayed. The position can be displayed either
by the most common latitude/longitude system or
some other coordinate measuring system.
Map datum, such as WGS84, determines a starting
reference point for selected position format as well
as the shape of an ellipsoid.
1. Select Position format and press - CHANGE.
2. Select an option with n. Press - OK.
2. Select an option with n. Press - OK.
You can choose in which format you want to see
the coordinates:
•In degrees, minutes and seconds
(hddd°mm’ss.s’’).
•In degrees and minutes ( hddd°mm.mmm’).
•In degrees only ( hddd.ddddd°).
84
MAIN MENU: SETTINGS
1. Select Map datum and press - CHANGE.
•You can select one of the pre-defined map
datums shown in the list.
•You can create your own datum, i.e. User datum,
as well. When creating the user datum, the first
two lines indicate the starting point of the coordinates while the rest two lines indicate the
shape of the ellipsoid, which is used to represent
the shape of the Earth.
COURSE ALERTS
Confirm arrival
In this menu, you can set up alerts to be used when
you are going off course, or arriving at your destination.
This option allows you to specify whether you
want to confirm the arrival to a point on a route before starting to navigate to the next one.
Select Course alerts and press - SELECT to enter
the menu.
Press - CHANGE to turn this option on or off.
Off course alert
Arrival alert
This option allows you to specify whether you
want to get an alert when you arrive at your destination. The destination can be a waypoint, a friend
point, or the last point of a route.
Press - CHANGE to turn this option on or off.
Arrival distance
In this menu you can choose the distance to use for
arrival alerts.
1. Select Arrival distance and press - CHANGE.
This option lets you specify whether you want to
get an alert when you deviate too much from the
direct path to the point you are navigating to.
Press - CHANGE to turn this option on or off.
Off course distance
In this sub-menu you can choose the distance to
use for off course alerts.
1. Select Off course distance. Press - CHANGE.
2. Select an option and press - OK.
2. Select an option. Press - OK.
MAIN MENU: SETTINGS
85
LEFT AND RIGHT DATA FIELD
You can see two data fields on the Map and Guide
navigator pages. In these two menus, you can specify the type of information you want to see in each
of them. You can choose more than one option for
each data field, in which case the contents of the
field change cyclically.
You can select the data field contents as follows:
•Select either Left data field or Right data field and
press - SELECT to enter the appropriate submenu.
•Use n to select an option and press - CHANGE
to turn it on or off.
•When finished, press . DONE.
Data field contents
Speed: Current ground speed.
Average speed: Average ground speed.
Top speed: Top ground speed.
Odometer: Ground distance travelled.
Travel time: Time travelled since the meters were
last reset.
Elevation: Elevation from hypothetical sea level.
Next destination: Name of next waypoint on route;
or name of waypoint or friend point set as destination.
Last destination: Name of last waypoint on route.
Distance to next: Ground distance to next waypoint on route; or distance to waypoint or friend
point used as destination.
Distance to last: Ground distance to last point on
route.
ETE to next (Estimated Time Enroute): Estimated
time needed to reach next waypoint on route; or to
reach a waypoint or a friend used as destination.
ETE to last: Estimated time needed to reach last
waypoint on route.
86
MAIN MENU: SETTINGS
ETA at next (Estimated Time of Arrival): Estimated
time of arrival at next waypoint on route; or at
waypoint or friend used as destination.
ETA at last: Estimated time of arrival at last waypoint on route.
Off course: distance from correct course (left or
right).
Turn: Angle between bearing to destination and
current track, including a letter (left / right) indicating the recommended direction to turn to.
Date: Current date.
Time: Current time.
UTC (Universal time constant): World standard
time. Also known as Greenwich Mean Time (GMT).
Dawn: Time of dawn (end of darkness) on current
day.
Sunrise: Time of sunrise on current day.
Sunset: Time of sunset on current day.
Dusk: Time of dusk (beginning of darkness) on
current day.
Maidenhead: Current position in Maidenhead coordinates.
NMEA OUTPUT
In this menu you can turn the NMEA output on or
off. This phone supports the NMEA protocol,
which is used for transferring position data between the phone and some navigation systems, e.g.
a map software. For the connection you also need
a separate NMEA cable, which is sold as an accessory.
Press - CHANGE to turn the option on or off.
Highlight the desired option with n and press OK. By selecting a transferring speed you will turn
the NMEA output on.
When the NMEA output is turned on, the phone
will consume slightly more power.
AGPS
In this menu you can specify settings for ordering
assisted GPS (AGPS) information from a service
provider. The AGPS contains ephemeris information from a given number of satellites. It is used for
speeding up the initial position fix. The AGPS information may also help in finding satellites and
getting position in difficult conditions.
Enter the AGPS menu by pressing - SELECT.
MAIN MENU: SETTINGS
87
•Press - CHANGE and key in the phone number
of the AGPS service. By pressing - READ you
can also recall the number from your phone
book. The number is needed for sending an
AGPS request.
•Press - CHANGE and select with n the number
of satellites. However, please note that the more
satellites selected, the higher the charge will be.
Help desk
If you need assistance when using your Benefon
Esc! phone and maps, you can send a help request
to Benefon Esc! Help desk service. A technical support person will then give you a call. There are usage limitations to this service.
Enter the Help desk settings menu by pressing SELECT.
RESET POSITION
NUMBER
This option allows you to reset your position information. Use it if the GPS receiver has trouble calculating your position, this could happen e.g. after
long international flights or extended periods of
time when the GPS receiver has not been used at
all.
This option allows you to set the phone number of
the Help desk service. The default phone number
is Benefon Esc! international Help desk service
number, which you may want to change to a region
specific one, if available.
Reset position by pressing - OK.
1. Select Number. Press - CHANGE.
2. Key in the number and press - OK.
LANGUAGE
This options allows you to select the language that
you prefer speaking with the technical support
person.
1. Select Language. Press - CHANGE.
2. Select an option with n and press - OK.
88
MAIN MENU: SETTINGS
Emergency calls to
pre-determined numbers
In a case of dire emergency, it is useful to have
your phone send your position information and
make calls to pre-determined phone numbers at a
press of a single button. In this menu, you can set
the options related to this emergency cycle.
Press - SELECT to open the Emergency calls
menu from Settings.
The emergency calls described here have nothing
to do with calling the local emergency number
(e.g. 112 in Finland).
EMERGENCY KEY
This option allows you to specify whether you
want the § key to be used as an emergency key.
When this option is not used, the emergency cycle
cannot be started at all.
Press - CHANGE to turn this option on or off.
EDIT MESSAGE
You can specify the short message that will be automatically sent to numbers specified in the call list
in case of emergency.
The emergency message will always contain your
position and other relevant data, but by writing
this message you can add text to it. Some suggestions for this additional information include medical allergies, heart disease, diabetes, and so on.
1. Select Edit message and press - SELECT.
2. The message is edited like a standard note. For
further information, please see the chapter
Main menu, Accessories, Notepad.
3. Press - SAVE when you are finished.
CALL LIST
The emergency call list is an ordered list of phone
numbers which are used for sending messages and
making calls. Initially the call list is empty but you
can add, edit or remove information in it.
The number of entries in the call list is limited.
Select Call list and press - SELECT.
MAIN MENU: SETTINGS
89
Adding an emergency call
To add the first call to the list, press - INSERT.
Press - CHANGE and key in the receiver´s phone
number. You can also recall it from the phone
book by pressing - SEARCH.
Next you can choose whether the phone number
should receive a call, the emergency short message, or both. Scroll and check the desired options.
Exit the menu by pressing . DONE. Save the current settings by pressing - OK or cancel them by
pressing . NO.
To add more calls to the list, select an existing
number and press - SELECT. Select the calling order: whether you want to insert this new call before or after the selected call in the list. Press SELECT.
keys. To add a prefix, press n. Press - OK.
•Scroll and check the other options by pressing n
and - CHANGE.
Finally exit the menu by pressing . DONE. Save
the current settings by pressing - OK or cancel
them by pressing . NO.
Deleting an emergency call
To remove a number in the list, select the number
in question and press - SELECT.
Scroll and select Delete.
Confirm the deletion by pressing - OK or cancel
the operation by pressing . NO.
MAKING EMERGENCY CALLS
Editing an emergency call
To edit a number in the list, select the number in
question and press - SELECT.
Scroll and select Edit.
•To change the phone number, select Number and
press - CHANGE. Remove numbers by pressing
. CLEAR . Add numbers by pressing numeric
90
MAIN MENU: SETTINGS
To start making emergency calls, press and hold §
for five seconds. This works in stand-by mode or in
any of the navigator pages, and even when the keyboard is locked. Please note, however, that the
Emergency key option has to be turned on for
this to work.
After pressing the emergency key for a few seconds, you will see the following text: Starting emergency calls in 15 seconds.
You have then fifteen seconds to cancel the operation by pressing . CANCEL. If you do not do this,
or if you press - OK, the emergency cycle will be
started.
First, emergency short messages containing your
position and any additional text you may have provided, will be sent to all numbers in the call list
specified as message recipients.
Next, a voice call is made to each number in the list
specified as a voice call recipient. A call will be attempted to a number three times, after which the
number is skipped and the next number will be
tried.
You can stop the emergency cycle, and thus stop
sending any more messages and making any more
calls, by pressing . CANCEL at any time.
Security
This menu contains settings related to managing
security codes.
Press - SELECT to open the Security menu from
Settings.
ASK PIN CODE
This option allows you to specify whether you
want the PIN code to be asked when the phone is
turned on.
1. Select Ask PIN code and press - CHANGE to
turn this option on or off.
2. You will be asked for the PIN code. Key it in and
press - OK.
Please note that some SIM cards do not allow turning this option off.
ASK PHONE CODE
This option allows you to specify whether you
want the phone code to be asked when you are resetting the call counters. The phone code is associated with the phone itself, not the SIM card.
MAIN MENU: SETTINGS
91
1. Select Ask phone code and press - CHANGE to
turn this option on or off.
2. You will be asked for the phone code. Key it in
and press - OK.
CHANGE PIN CODE
In this menu you can change the PIN code in your
SIM card.
CHANGE PIN2 CODE
In this menu you can change the PIN2 code in your
SIM card. You need the PIN2 code for setting and
resetting functions in the Call cost menu, and also
for using most of the FDN phone book functions.
The menu works in the same way as the PIN code
menu. However, if the SIM card does not support
the PIN2, the text Feature not on available on SIM
will be shown.
1. Press - CHANGE.
2. First key in the current PIN code, then the new
code, and finally repeat the new code by keying
it in again. Press - NEXT after each level.
3. If the current PIN code matches the PIN code
stored in the SIM card, and the two new PIN
codes match each other, the text PIN code
changed will be displayed.
When changing the PIN code, the Ask PIN code option needs to be turned on.
CHANGE PHONE CODE
In this menu you can change the phone code. You
need the phone code for resetting the call
counters.
The menu works in the same way as the PIN code
menu.
CHANGE NETWORK CODE
In this menu you can change the network code.
You need the network code for Call barring and
some other functions governed by the operator.
The menu works in the same way as the PIN code
menu.
92
MAIN MENU: SETTINGS
FIXED DIALLING (FDN)
Reset default settings
Fixed Dialling Numbers (FDN) is a special phone
book in which you can only store a few numbers.
The amount of numbers depends on your SIM
card. Please note that you need your PIN2 code for
turning fixed dialling on or off, and also for storing, modifying and deleting numbers from the FDN
phone book. The PIN2 code is supplied by your
network operator.
Use this option if you wish to restore all settings to
factory default settings. This reset will also restore
all environments to their default values.
1. Select Reset settings and press - SELECT.
2. Confirm the reset by pressing - OK. The text
Restoring default settings will be shown and
you will be returned to stand-by mode.
When fixed dialling is turned on in this menu, you
can only call numbers stored in the FDN phone
book, or numbers that start with the same number
you have stored in the FDN phone book. E.g. if you
have stored the number 040 in the FDN phone
book, you can call any number that starts with 040.
1. Press - CHANGE.
2. Key in the PIN2 code and press - OK.
IMEI
The International Mobile Equipment Identity code
(IMEI) identifies your mobile phone uniquely. The
15-digit code is also printed in the type label of the
phone. It cannot be changed.
Press - SELECT to check your phone’s IMEI code.
MAIN MENU: SETTINGS
93
GSM MENU
PHONE BOOK
Monday
21.01.2002
GSM menu
Normal
Phone book
Messages
Recent calls
Network services
Help desk
1
If there are no free memory slots left, No free memory will be shown. You cannot store any new
phone numbers unless you first delete some old
ones.
FI NETWORK
MENU
GSM
QUIT
-
SELECT
n
You can store phone numbers in the phone book
entries on the SIM card. The actual number of entries and the length of names and numbers which
can be stored on the SIM card depends on the
card’s storage capacity.
-
•Press - GSM to enter the GSM menu from
stand-by mode.
•Use n to scroll through the items and submenus.
If the text (Fixed) is displayed, the function called
Fixed dialling has been turned on. Fixed dialling
sets some restrictions for using the phone book,
e.g. you cannot store, edit, or delete any phone
book information without the PIN2 code. For further information about Fixed dialling, please see
the chapter Main menu, Settings, Security, Fixed
dialling (FDN).
•Press - SELECT to open the Phone book.
•To select an item, press -. This way, you can
enter sub-menus, activate commands and turn
options on and off.
•The shortcut to access the phone book name list
(with the option New) is to press - GSM for a
few seconds.
•Press . QUIT to return to the previous menu
level., press c to return to stand-by mode.
•Press . QUIT to cancel the operation and return
to the previous menu level.
94
GSM MENU: PHONE BOOK
Recalling a phone number
In this menu you can search for a phone number
stored in your phone book. You can also add
names to the phone book.
•Or, you can press - READ directly. Do it this
way if your phone book list is quite short or you
wish to add (store) a new phone number in your
phone book. The first line in the phone book
will offer you the option New.
Search
Search
Phone book
AB Ab ab 12 T9
AB Ab ab 12 T9
Be|
|
Name
list
CLEAR
READ
n
-
QUIT
READ
n
xx
243 free
012 reserved
-
•You can key in the desired name or its initials
and press - READ. Do it this way if you wish to
search for a number already stored in the phone
book, especially if your phone book list is very
long. The first line in the phone book will show
the desired phone number or its closest
matches.
Memory
slot
New
Benefon
Meadow Simon
Rockfeld Thomas
Swirl Susan
Torrent Samuel
QUIT
SELECT
n
-
A list of all names in the phone book is shown.
If Fixed dialling is turned on, the numbers displayed here are the numbers stored in FDN phone
book. The names are listed in alphabetical order.
You can scroll through the name list with n. Scrolling over the top to the bottom is possible.
GSM MENU: PHONE BOOK
95
If you stop on a name for a few seconds, you will
see the phone number associated with the name.
The memory slot taken up by the name is always
shown in the small tab.
1. If you wish to make a call, press l.
2. If you wish to edit or delete (empty) the chosen
phone book entry, press - SELECT.
Phone book
entry
1
Number
+358001234567
Name
Torrent Samuel
Memory slot
13
EDITING A PHONE BOOK ENTRY
1. Select Edit by pressing - SELECT.
2. The phone number, name and memory slot
number are displayed and can be edited. Select
an option to edit with n and press - CHANGE.
Editing phone number
Add numbers by pressing the numeric keys
and remove them by pressing . CLEAR. A
long press of . CLEAR empties the whole
line. Press - OK when done.
Editing name
Editing name is done in the same way as editing number. Press - OK when done.
96
GSM MENU: PHONE BOOK
DONE
CHANGE
n
-
Changing memory slot
The free memory slots are listed. Select a
slot with n and press - OK.
3. When you are finished, press . DONE. You will
be asked if you want to save the changes. Make
your choice by pressing . NO or - OK.
4. If you have changed the memory slot number,
you will be asked if you want to move or copy
the phone book entry.
•By selecting Move, the information stored
in the original phone book entry will be
lost. As a result of that, the old slot will be
freed.
•By selecting Copy, the information stored
in the original phone book entry will be
preserved. As a result of that, both slots
will be reserved: one with the original
information and another with the recently
stored and possibly modified information.
DELETING A PHONE BOOK ENTRY
1. Select Delete with n and press - OK.
2. Confirm the deletion by pressing - OK, or
cancel the operation by pressing . NO.
Storing a phone number
You have several ways to store phone numbers into
the phone book. You can:
•key in the desired number in stand-by mode
(please see the following instructions)
•save the number by using New option (please
see the following instructions)
•pick up numbers from an SMS message, including the sender’s phone number (for further
information, please see the chapter GSM menu,
Messages, Inbox, Reading and processing an
incoming message, Pick number)
•pick up a caller’s number (for further information, please see the chapter GSM menu, Recent
calls)
•save the receiver’s number by using redial memory (for further information, please see the chapter Brief overview of phone use, Making a call,
Redialling).
In all of the cases above, the storing is eventually
done in the same way.
GSM MENU: PHONE BOOK
97
KEYING IN A NEW NUMBER
IN STAND-BY MODE
ADDING A NEW NUMBER
IN THE NAME LIST
1. When the phone is in stand-by mode, key in the
desired number and press - SAVE.
1. In stand-by mode, press - GSM and then SELECT to select Phone book.
2. A new phone book entry will be displayed. Key
in the desired name and press - OK.
2. Press - READ directly. The phone will offer
you the name list, including the option New.
3. Press - CHANGE and select a memory slot
with n. Press - OK. Only free memory slots
are available.
3. Choose New by pressing - SELECT.
4. When you are finished, press . DONE. Save
changes by pressing - OK or cancel them by
pressing . NO.
4.
A new phone book entry will be displayed.
First, key in the desired name and press - OK.
5. You can then edit the phone number, memory
slot number, or the name. Select an option to
edit with n and press - CHANGE.
6. When you are finished, press . DONE. Save
changes by pressing - OK or cancel them by
pressing . NO.
98
GSM MENU: PHONE BOOK
MESSAGES
The Short Message Service (SMS) is a network feature.
•Press - SELECT to enter the Messages menu.
If there are neither new nor read incoming messages, No incoming messages is displayed and the
menu cannot be entered.
RECEIVING A NEW MESSAGE
•Press . QUIT to cancel the operation and return
to previous menu level.
When receiving a new message, an alert sound is
heard, and the text New message is shown.
Inbox
New messages are accessible in stand-by mode immediately after they are received. For further information, please see Brief overview of phone use,
Incoming traffic.
In this menu you can read a message you have received. You can send a message back to its sender
or forward it to someone else. You can also pick
phone numbers and coordinates from a message
for further use, or delete messages either one at a
time or all at once.
The Inbox menu item in GSM menu has some additional information after it: [MM] is the number of
all incoming messages, and the presence of the s
symbol shows that there are one or more unread
messages in the inbox.
The settings for incoming messages are found in
the Message setup menu, under Main menu, Settings, GSM.
Press - SELECT to open the Inbox menu.
All new messages will also be stored into the Inbox
where they can be recalled at a later time.
RECALLING INCOMING MESSAGES
The inbox contains all the incoming messages. The
name or the number of the sender and the delivery
time of the message are displayed.
If the message is older than 24 hours, the delivery
time is replaced by the delivery date.
Closed envelope (s) on the left indicates that the
message is new and unread. Open envelope ( {)
on the left indicates that the message is old and
read.
GSM MENU: MESSAGES
99
If you wish to delete all the messages displayed in
this list, select the option Delete all with n and
press - OK. Confirm the deletion by pressing OK again, or cancel the operation by pressing .
NO.
READING AND PROCESSING AN
INCOMING MESSAGE
1.
Highlight the desired message with n, and
press - SELECT.
2. By scrolling with n, you are able to read the
whole message.
3. To process the message, press - SELECT.
•Select the desired function with n and
press -.
4. If you do not want to process the message,
press . QUIT to return to the previous menu
level.
Write and edit the text as follows:
•To remove letter(s), press . CLEAR shortly.
•To add letters into text, press 2...9.
•To add special characters into text, press 0 for
a few seconds. Use n to select a line and then
press the numeric key, which corresponds to the
desired character.
•To enter a space, use +.
•To move inside the text, press n.
•You may also modify the text with the T9 text
input tools (for further information about using
the T9 text input, please see the chapter Main
menu, Accessories, Notepad, Writing a note in
T9 mode).
When the message is written, press - SELECT to
send, save or postpone it.
If you do not want to go further, press . QUIT to
cancel the operation and return to the message
processing list.
Reply
Use this option if you wish to send a message back
to the sender. That way, you do not need to key in
the phone number or recall it from phone book.
100
GSM MENU: MESSAGES
Sending and saving the message
You have four options to choose from: send and
save, send only, send with position, and postpone.
Select an option with n and press - OK.
•By selecting Send, you can send the message
without saving a copy of it for yourself.
•By selecting Send and save, you can send the
message and also save it to your SIM card. The
message is stored into the outbox. The original
message sent to you is still kept in the inbox.
However, if there is not enough free memory
space to save the message, No free memory will
be displayed and you will return to previous
menu level. The message will not be sent either.
In this case you may delete some old messages to
make some free memory space or select the Send
option.
•By selecting Send with position, you can send a
message to the operator with a request for position information.
The default destination number for the reply message is the number from where the original message was sent. If the number in question is stored
in the phone book, the name of the caller is displayed instead of the number.
To change the number, press . CLEAR for a few
seconds. You can then either key in another number, or press - SEARCH to look for the desired
number in the phone book.
To send the message, press - SEND.
If there is SMS transmission failure, the text Error
in sending will be displayed. In this case, make sure
the receiver’s phone number (including prefix)
and the message box number are correct and there
is enough network coverage for radio communication.
Postponing the message
By selecting Postpone, you can save the message
(as a draft) without immediately sending it to anyone. If you wish to finish or send the message later,
you can recall a postponed message through Write
message menu.
Forward
Use this option if you wish to send the selected
message to a new receiver. Forwarded messages
are not stored as extra copies into SIM card.
Key in another number, or press - SEARCH to
look for the desired number in the phone book.
To send the message, press - SEND.
GSM MENU: MESSAGES
101
If there is SMS transmission failure, the text Error
in sending will be displayed. In this case, make sure
the receiver’s phone number (including prefix)
and message box number are correct and there is
enough network coverage for radio communication.
If you do not want to forward the message, press
. CLEAR for a few seconds to empty the display
and right after . QUIT to return to the previous
menu level. You can also press c to return directly
to stand-by mode.
Pick number
With this option you can pick the phone number of
the sender and save it into your phone book or
make a call to the number in question. If the message itself contains numbers, you can also select
them for later use.
If the picked number is stored in the phone book,
the associated name is shown instead of the number.
1. To call a number, select it with n and press l.
2. To save the number into the phone book, select
it with n and press - SAVE.
102
GSM MENU: MESSAGES
Saving a picked number into the phone book
1. First, key in the desired name and press - OK.
2. You can then edit the phone number, memory
slot number, or the name. Select an option to
edit with n and press - CHANGE.
Editing phone number
Add numbers by pressing the numeric keys
and remove them by pressing . CLEAR. A
long press of . CLEAR empties the whole
line. Press - OK when done.
Changing memory slot
The free memory slots are listed. Select a
slot with n and press - OK.
3. When you are finished, press . DONE. You will
be asked if you want to save or discard the
phone book entry. Make your choice and press
- OK.
Pick coordinates
With this option you can pick any coordinates the
message may contain, and save them as a waypoint.
To save the coordinates, select them with n and
press - SAVE.
Saving coordinates as a waypoint
1. First, key in the desired name and press - OK.
3. When you are finished, press . DONE. Save the
waypoint by pressing - OK or cancel the operation by pressing . NO.
Delete
With this option you can delete the selected message from your SIM card. Confirm the deletion by
pressing - OK, or cancel the operation by pressing . NO.
2. You can then change the symbol, the coordinates, or the name. Select an option to edit
with n and press - CHANGE.
Changing waypoint symbol
•Use n to select a line and then press the
numeric key, which corresponds to the
desired character.
Changing coordinates
•Edit the digits by pressing the numeric
keys and n to select the digit to edit.
•Press - OK to accept the new coordinates.
GSM MENU: MESSAGES
103
Outbox
In this menu you can read, edit, and forward any of
your own messages you have saved. You can also
pick phone numbers and coordinates from a message for further use, or delete messages either one
at a time or all at once.
The Outbox menu item in GSM menu has some additional information after it: [MM] is the number of
all saved outgoing messages.
The settings for outgoing messages are found in
the Message setup menu, found under Main menu,
Settings, GSM.
Press - SELECT to open the Outbox menu.
If there are no saved outgoing messages, No outgoing messages is displayed and the menu cannot be
entered.
RECALLING OWN MESSAGES
The outbox contains all your saved outgoing messages. The messages are shown in their order in
the SIM.
If you wish to delete all the messages displayed in
this list, select the option Delete all with n and
press - OK. Confirm the deletion by pressing OK again, or cancel the operation by pressing .
NO.
104
GSM MENU: MESSAGES
READING OR PROCESSING OWN
MESSAGES
1. Select one of the messages with the help of n,
and press - SELECT.
2. By scrolling with n, you are able to read the
whole message.
3. Press - SELECT to enter the own message processing list.
•Select the desired function with n and
press -.
4. If you do not want to process the message,
press . QUIT to return to the outbox.
Edit
Use this option if you wish to edit the message. After that, you can send the edited message to someone or just save it for further use.
•To remove letter(s), press . CLEAR shortly. To
clear all characters at once, press . CLEAR for a
few seconds. When the display is empty, the left
function key shows . QUIT.
•To add letters into the text, press 2...9.
•To add special characters into text, press 0 for
a few seconds. Use n to select a line and then
press the numeric key, which corresponds to the
desired character.
•To make space, use +.
•With n you can move inside the text.
•You may also modify the text with the T9 text
input tools (for further information about using
the T9 text input, please see the chapter Main
menu, Accessories, Notepad, Writing a new note
in T9 mode).
When the message is written, press - SELECT to
send, save or postpone it.
If you do not want to go further, press . QUIT to
cancel the operation and return to the message
processing list.
Sending and saving the message
You have four options to choose from: send and
save, send only, send with position, and postpone.
Select an option with n and press - OK.
•By selecting Send and save, you can send the
edited message and also save it to your SIM card.
•By selecting Send with position, you can send a
message to the operator with a request for position information.
Key in a number and press - SEND, or press to look for one in the phone book.
SEARCH
If there is SMS transmission failure, the text Error
in sending will be displayed. In this case, make sure
the receiver’s phone number (including prefix)
and message box number are correct and there is
enough network coverage for radio communication.
Postponing the message
By selecting Postpone, you can save the message
(as a draft) without immediately sending it to anyone. If you wish to finish or send the message later,
you can recall a postponed message through Write
message menu.
•By selecting Send, you can send the edited message without saving a copy of it for yourself.
Please note that by using this option the edited
message will be lost.
GSM MENU: MESSAGES
105
Forward
Pick number
Use this option if you wish to send a selected message to a new receiver. Forwarded messages are
not stored as extra copies in SIM card.
With this option you can pick a phone number
from the message and save it in your phone book
or make a call to the number in question.
In order to send the message to another receiver,
the number need to be changed:
If a picked number is stored in the phone book, the
associated name is shown instead of the number.
1. Key in the desired number or recall the desired
number from the phone book (assuming you
have stored it in there). To recall the number
from the phone book, press - SEARCH.
1. To call a number, select it with n and press l.
2. If desired, key in the initials of the name.
3. Scroll through the phone book with n until the
correct number is selected.
4. Press - SEND.
If you do not want to forward the message, press
CLEAR for a few seconds to empty the display
and right after that . QUIT to return to the outbox.
.
106
GSM MENU: MESSAGES
2. To save the number into the phone book, select
it with n and press - SAVE.
Saving a picked number into the phone book
1. First, key in the desired name and press - OK.
2. You can then edit the phone number, memory
slot number, or the name. Select an option to
edit with n and press - CHANGE.
Editing phone number
Add numbers by pressing the numeric keys
and remove them by pressing . CLEAR. A
long . CLEAR empties the whole line. Press
- OK when done.
Changing memory slot
Changing waypoint symbol
The free memory slots are listed. Select a
slot with n and press - OK.
•Use n to select a line and press the
numeric key, which corresponds to the
desired symbol.
3. When you are finished, press . DONE. Save the
entry by pressing - OK, or discard the entry
by pressing . NO.
Pick coordinates
With this option you can pick any coordinates the
message may contain, and save them as a waypoint.
To save the coordinates a waypoint, select them
with n and press - SAVE.
Saving coordinates as a waypoint
1. First, key in the desired title and press - OK.
2. You can then change the symbol, the coordinates, or the name. Select an option to edit
with n and press - CHANGE.
Changing coordinates
•Edit the digits by pressing the numeric
keys and n to select the digit to edit.
•Press - OK to accept the new coordinates.
3. When you are finished, press . DONE. Save the
waypoint by pressing - OK, or discard it by
pressing . NO.
Delete
With this option you can delete the selected message from your SIM card. Confirm the deletion by
pressing - OK, or cancel the operation by pressing . NO.
GSM MENU: MESSAGES
107
Broadcasts
Cell broadcasts are general messages, which are
broadcast to all receivers within a particular region. They may contain advertisements, local
weather reports and information about road traffic, stock exchange and sport results, etc.
Cell Broadcast Service categorizes the type of information that these messages contain and the language in which the message has been compiled.
According to your choice, you are then able to ignore certain message types, e.g. advertising information or messages in an unfamiliar language.
Cell Broadcast Service is a network feature. For further information, please contact your network operator.
set on the option Accept broadcast messages in
the Broadcast setup menu.
Press - SELECT to open the Broadcasts menu.
If there are neither new nor read broadcast messages, No broadcast messages is displayed and the
menu cannot be entered.
RECEIVING A NEW BROADCAST
When receiving a new message, an alert sound is
heard, and the text New message is shown.
New messages are accessible in stand-by mode immediately after they are received. For further information, please see Brief overview of phone use,
Incoming traffic.
The Broadcasts menu item in GSM menu has some
additional information after it: [MM] is the number
of all broadcast messages, and the presence of the
s symbol shows that there are one or more unread messages.
All new broadcast messages will also be stored into
the Broadcasts where they can accessed at a later
time.
The settings for broadcast messages are found in
the Broadcast setup menu, found under Main
menu, Settings, GSM.
The Broadcasts menu contains all the broadcast
messages. The type numbers of the messages are
displayed from the newest to the oldest.
In this menu you can view, save or delete the general messages broadcast to you, assuming you have
108
GSM MENU: MESSAGES
RECALLING BROADCASTS
If you wish to delete all the messages displayed in
this list, select the option Delete all with n and
press - OK. Confirm the deletion by pressing OK again, or cancel the operation by pressing .
NO.
Write message
In this menu you can:
•write new messages
•edit postponed messages.
You can read single messages as follows:
1. Select a message with n, and press - READ.
NEW MESSAGE
2. By scrolling with n, you are able to read the
whole message.
Press - SELECT to enter the Write message menu.
Alternatively, you can press 1 in the stand-by
mode and hold it for a few seconds.
3. To read the next message, press - NEXT. When
all the messages are read, the right function key
shows - OK.
Call voice mail
With this option you can listen to the messages left
on your voice mail service. Press - SELECT or l
and the phone will call the number of your voice
mailbox service. To disconnect the call press c.
Make sure you have stored your voice mail number
correctly. The setting can be adjusted in the Message setup menu, found under Main menu, Settings, GSM.
If there are no postponed messages, the display is
empty and you can start writing new message immediately.
If there are postponed messages, the selection list
with the messages will be displayed. Select New by
pressing - SELECT.
POSTPONED MESSAGES
The maximum number of postponed messages is
limited. If the limit is reached, the oldest postponed message is overwritten by the newest one.
Turning the phone off does not clear the postponed messages, however.
Voice mail service is a network feature.
GSM MENU: MESSAGES
109
1. Press - SELECT to enter the Write message
menu.
2. Select one of the postponed messages with n
and press - SELECT.
for a few seconds. Select a line with n . Press the
numeric key, which corresponds to the desired
character.
•To make space, use +.
•With n you can move inside the text.
Deleting a postponed message
If you want to remove a postponed message without sending it to anyone, open the message and
press - SELECT.
Scroll the function list with n and highlight the option Delete. Press - OK.
WRITING A MESSAGE
The maximum amount of characters in one message is 160. The number in the upper right corner
of the display indicates how many characters can
still be used for the message. For example, when
you start writing the message, you have space for
160 characters. The more you write, the smaller
the number the indicator shows. When there is no
space left, it shows 0.
•To remove letter(s), press . CLEAR shortly.
•To add letters into the text, press 2...9.
•To add special characters into the text, press 0
110
GSM MENU: MESSAGES
•You may also modify the text with the T9 text
input tools (for further information about using
the T9 text input, please see the chapter Main
menu, Accessories, Notepad, Writing a note in
T9 mode).
•If you wish to start writing a totally empty message, press . CLEAR for a few seconds. When
the display is empty, the left function key shows
. QUIT and pressing it allows you to cancel writing if desired.
When the message is written, press - SELECT to
send, save or postpone it.
SENDING AND SAVING THE MESSAGE
You have four options to choose from: send and
save, send only, send with position, and postpone.
•By selecting Send, you can send the message
without saving a copy of it for yourself.
•By selecting Send and save, you can send the
message and also save it to your SIM card. The
message is stored into the outbox.
Key in a number and press - SEND, or press SEARCH to look for one in the phone book.
Recall a phone number from the phone
book as follows:
If desired, key in the initials of the name.
Scroll through the phone book with n until
the correct number is highlighted.
Press - SEND.
However, if there is not enough free memory
space to save the message, No free memory will
be displayed and you will return to previous
menu level. The message will not be sent either.
In this case you may delete some old messages to
make some free memory space or select the Send
option.
If there is SMS transmission failure, the text Error
in sending will be displayed. In this case, make sure
the receiver’s phone number (including prefix)
and message box number are correct and there is
enough network coverage for radio communication.
•By selecting Send with position, you can send a
message to the operator with a request for position information.
•By selecting Postpone, you can save the message
(as a draft) without immediately sending it to
anyone. If you wish to finish or send the message
later, you can recall a postponed message
through Write message menu.
Select an option with n and press - OK.
GSM MENU: MESSAGES
111
RECENT CALLS
PROCESSING UNANSWERED CALLS
This menu and its sub-menus allow you to keep
track of unanswered and received calls.
The unanswered call list contains all the unanswered calls. The calls are sorted in order from the
newest to the oldest.
•Press - SELECT to enter the Recent calls menu.
•Press . QUIT to cancel the operation and return
to previous menu level.
You can scroll through the numbers with n.
Unanswered calls
Displayed are the number or the name of the caller
(depending on whether you have stored the caller’s name and number in your phone book) and
also the delivery time of the call.
In this menu you can manage any calls you may
have recently missed.
If a call attempt is older than 24 hours, the delivery
time is replaced by the delivery date.
The Unanswered calls menu item in GSM menu has
some additional information after it: [MM] is the
number of all unanswered calls listed, and the
presence of the J symbol shows that there are
one or more unanswered calls you have not called,
saved or deleted yet.
In two cases neither the number nor the name of
the caller will be displayed: if the caller has the
CLIR (Call Line Identification Restriction) feature
in use, or if your network operator does not supply
the CLIP (Call Line Identification) option. In these
cases your phone counts and displays only one
call, which is the last one you have received.
Press - SELECT to open the Unanswered calls
menu.
Unanswered calls are only detected when the
phone is turned on and in the network coverage area.
112
GSM MENU: RECENT CALLS
If you wish to delete all the calls displayed in this
list, select the option Delete all with n and press OK. Confirm the deletion by pressing - OK again,
or cancel the operation by pressing . NO.
You can also process single calls as follows:
•To call a number in the list, press l.
•To save a phone number from the list, select a
call and press - SELECT. Then select Save and
press - SELECT.
•To delete a call, select it with - SELECT. Then
select Delete and press - OK. Confirm the deletion by pressing - OK, or cancel the operation
by pressing . NO.
Received calls
In this menu you can manage any calls you may
have recently received.
Call counters
Information about call durations is shown at the
bottom of the Recent calls menu.
The Last call item shows you the duration of the
last call in hours and minutes. The call can be either outgoing or incoming call.
The Total calls item shows the total duration of all
calls in hours and minutes.
You can reset the total calls counter in the Network
services menu, under the Call cost sub-menu.
Please note that you need the PIN2 code to reset
the counter.
The Received calls menu item in GSM menu has
some additional information after it: [MM] is the
number of all received calls listed.
Press - SELECT to open the Received Calls menu.
PROCESSING RECEIVED CALLS
This received call list contains all the received
calls.
You can process received calls in the same way as
unanswered calls.
GSM MENU: RECENT CALLS
113
NETWORK SERVICES
This menu and its sub-menus allow you to access
various network services such as call diversions,
call barrings, call waiting and call costs.
•Press - SELECT to enter the Network services
menu.
•Press . QUIT to cancel the operation and return
to previous menu level.
Select the desired option with n and press - OK.
The phone will register with the chosen network.
The * symbol indicates that use of the operator is
not allowed. If you choose this operator, you can
only make emergency calls.
Call diverts
Press - SELECT to open the Call diverts menu.
(DIVERT) ALL
Network selection
You can change the network you are using with this
item. By pressing - CHANGE the phone starts
scanning available networks. After that, a list of
available networks will be displayed.
If you select Automatic, the phone selects the most
suitable allowed network for you.
When travelling abroad use of the Automatic is recommended.
If you select any of the named networks, the network selection mode is changed to manual and the
phone always tries at first to connect with the chosen network and if it is not available, the list of
available networks will be displayed.
114
GSM MENU: NETWORK SERVICES
By selecting All and pressing - SELECT you can
view and set up the phone number that is used as
a target for call diverts.
To clear the diversion, select Clear and press The text Divert "All" cleared will be shown.
OK.
To set up a diversion, select Divert calls to and
press - CHANGE. Key in a phone number and
press - OK. You can also select a number from
the phone book by pressing - SEARCH.
Recalling a phone number from the phone book
is done as follows:
1. If desired, key in the initials of the name. If you
do not provide any initials, you will start
searching at the top of the phone book list.
2. Scroll through the phone book with n until the
correct number is selected. The first item in the
list is Voice mailbox.
3. Press - OK.
When the divert is succesfully set up, a text such as
(DIVERT) NOT ANSWERED
The call will be diverted when you do not answer
it after certain number of rings. This sub-menu
functions as the All sub-menu.
(DIVERT) NOT REACHABLE
The call will be diverted when the phone is outside
the network coverage area or is turned off. This
sub-menu functions as the All sub-menu.
Divert "All" active to +358277400 will be shown. If
CLEAR ALL DIVERTS
the number which the calls are diverted to is stored
in the phone book, the name is displayed instead
of the number (e.g. Divert "All" active to Benefon).
Use this option if you wish to clear all diverts at
once. Press - OK, and confirm your choice by
pressing - OK again.
As a sign of diverting all calls, an arrow ( %), will
be displayed when the phone is returned to standby mode.
(DIVERT) BUSY
The call will be diverted when the phone is busy.
This sub-menu functions as the All sub-menu.
GSM MENU: NETWORK SERVICES
115
Call barrings
In this menu you can bar both outgoing and incoming calls. Please note that call barring also affects
call diverts.
The call barring option is usually a network feature
and you need the network code for activating the
call barring option. The network code is given you
by the operator when the barring service is subscribed.
Press - SELECT to open the Call counters menu.
4. Key in the network code and press - OK.
5. When finished, press . QUIT to return to the
Call barrings menu.
Bar outgoing international calls
With the International option you can bar all outgoing international calls. You can still make domestic
calls and receive both domestic and international
calls.
This sub-menu functions as the Bar all outgoing
calls feature described above.
OUTGOING CALLS
The first section of the menu allows you to set barrings that concern outgoing calls only.
Bar all outgoing international calls
except to home country
Bar all outgoing calls
With the Int’l except home option you can bar all
outgoing international calls, except calls to your
home country. You can also make domestic calls
and receive both domestic and international calls.
With this option you can bar all outgoing calls, so
you can only receive incoming calls.
1. Press - SELECT to select All.
2. You will see a checkbox that indicates whether
the barring is on or off.
3. Press - CHANGE to turn the option on or off.
116
GSM MENU: NETWORK SERVICES
This sub-menu functions as the Bar all outgoing
calls feature described above.
INCOMING CALLS
Call waiting
The second section of the menu allows you to set
barrings that concern incoming calls only.
If a call is in progress and you have an incoming
call, the network will notify you if you have the call
waiting option turned on. Call waiting is a network
feature.
Bar all incoming calls
With the All option you can only make calls, not receive them. This sub-menu functions as the Bar all
outgoing calls feature described above.
Bar incoming calls when roaming
With the When roaming option you can receive calls
only when you are within the area of your own network operator.
You may need this option when you are roaming
because many network operators and service providers charge for receiving calls when you are
roaming.
This sub-menu functions as the Bar all outgoing
calls feature described above.
CLEAR BARRINGS
Use this option if you wish to clear all call barrings
at once. Press - OK, enter the network code and
press - OK again.
1. Press - SELECT to select Call waiting.
2. You will see a checkbox that indicates whether
call waiting is on or off.
3. Press - CHANGE to turn the option on or off.
Call cost
This menu contains information on the call charges. It also provides options for resetting the charge
counter and setting a charge limit for calls. These
options are useful especially when the user is not
the subscriber.
Call cost is a network feature. In order to use some
of these options, you need to have a specific SIM
card as well as a PIN2 code. For further information on these charging services, please contact
your network operator.
If the call cost feature is not enabled on your SIM
card, you cannot enter the Call cost menu at all.
GSM MENU: NETWORK SERVICES
117
1. Press - SELECT to enter the Call cost menu.
2. You will see a menu with the items Last call, Total calls, Money left, Maximum units, and Price/
Unit.
3. Select one of the four options with n. Press -.
LAST CALL COST
Use this option to check the cost of the last call.
Last call counter value is displayed in currency if
you have determined price for unit in Price/unit
(and set value for currency in Main menu, under
Settings, Units, Currency).
The counter value of the last call will be reset automatically when the SIM is removed, or a new call
attempt is made or call is received.
cy in the Main menu, under Settings, Units, Currency) .
Resetting the cost of total calls
1. Press - RESET to reset the counter.
2. You are asked the PIN2 code. Key it in and
press - OK.
3. The text Counter reset will be displayed.
MONEY LEFT
Use this option to check the amount of money you
have left.
The amount of money left is displayed if you have
determined price for unit in Price/unit (and set value for currency in the Main menu, under Settings,
Units, Currency).
TOTAL CALLS COST
This menu item shows the cost of all preceding
calls including the last call.
Counter value for total calls is displayed in currency if you have determined currency and set value
for unit price in Price/unit (and set value for curren-
118
GSM MENU: NETWORK SERVICES
MAXIMUM UNITS
Use this option if you wish to view, set or change
the credit limit for total calls.
If the counter reaches the limit during a chargeable
call, the call will be terminated. As soon as the limit
has been exceeded, only local emergency calls and
other non-chargeable calls can be made. If you try
to make or receive a chargeable call under these
conditions, the text No money will be displayed.
You can check the maximum call cost in your selected currency by using n to select Maximum units
and waiting for a few seconds. If you wish to find
out when the cost of your calls is about to reach the
limit, you may substract the total calls cost from
the maximum cost. E.g. if the maximum cost is
500.00 FIM and the total calls counter shows that
you have already spent 300.00 FIM, it means you
still have 200.00 FIM to spend for calls.
1. The maximum credit that can be used for nonfree calls is shown. The credit limit for total
calls is displayed in currency if you have set value for unit price in Price/Unit. Otherwise, the
credit for total calls will be displayed in units.
2. If you wish to set or change the limit, press CHANGE.
3. Key in the PIN2 code and press - OK.
4. If the limit has been set previously, the current
setting is shown here. If you wish to change the
limit, key in the new limit value and press OK. In case the limit is set to zero (0), it is assumed that there is no limit in use.
PRICE/UNIT
Charging information is calculated and stored as
charging units. Units are independent of any currency.
Use this option if you wish to read and set price for
unit. After completing the setting, the call cost information will be displayed in currency instead of
units.
1. If you wish to set or change the price per unit,
press - CHANGE.
2. Key in the PIN2 code and press - OK.
3. Key in the desired price per unit and press OK. To add a decimal point, press +.
4. The price per unit depends on your operator.
The price per unit can be set higher than the
actual charge, so that all the extra costs will
also be covered. In case the price per unit is set
to zero (0), this feature is not in use.
Changing the price of an unit may cause minor inaccuracies in the result displayed. However,
rounding the number does not affect counter values, which are stored in units.
GSM MENU: NETWORK SERVICES
119
HELP DESK
If you need assistance in using your Benefon Esc!
phone or maps, you can send a help request, containing your current position and preferred language, to Benefon Esc! Help desk service. After a
while, a technical support person will give you a
call. There are usage restrictions to this service.
You will have to be a registered user to use this service. Please check the Internet site
www.genimap.com for more information.
Please see the chapter Main menu, Settings, Help
Desk for further information on setting up the preferred language and the Help desk number.
To send a help request, do as follows:
1. Use n to select Help desk.
2. Confirm sending the request by pressing - OK
or cancel the operation by pressing . NO.
120
GSM MENU: HELP DESK
•To select one of the items, press -. This way,
you can enter sub-menus, activate commands
and turn options on and off.
GPS MENU
Speed
Time
•Press . QUIT to return to the previous menu
level from a sub-menu.
GPS menu
Waypoints
Routes
Friend Find
Maps
1
[28]
[03]
[15]
[03]
SMS with coords
Request service
Request AGPS
Update position
Skip route point
Clear destination
MENU
GPS
-
QUIT
SELECT
n
-
The GPS menu tree allows you to access and manage the waypoints and routes, use the various
Friend Find features; and send or update your position. You can also request a route or waypoints
from a service provider, clear your destination or
reset all navigator counters.
•Press - GPS to enter the GPS menu from any of
the navigator pages.
•Use n to scroll through the menu items and submenus.
WAYPOINTS
A waypoint is a location or spot that consists of a
label, a symbol for showing it on the map, and a
pair of coordinates (e.g. latitude and longitude).
Waypoints are used for navigation purposes, i.e. to
mark spots and use them as destinations, or to
combine several waypoints to a route.
The Waypoints menu item in GPS menu has some
additional information after it: [WW] is the number
of all waypoints stored in the memory.
•Press - SELECT to open the Waypoints menu.
•Press . QUIT to cancel the operation and return
to previous menu level.
The waypoints menu shows you all the waypoints
that are currently stored in your phone’s memory.
•To delete all waypoints at once, select Delete all
and press - OK. Confirm the deletion by pressGPS MENU: WAYPOINTS
121
ing - OK again, or cancel the operation by
pressing . NO.
•To change the order in which waypoints are
listed, select Order and press - CHANGE. Waypoints can be ordered by title, proximity, or symbol.
Please note that most of the waypoint functions
can also be used by pointing at a waypoint on the
Map navigator page. For further information,
please see Brief overview of navigator use, Map,
Pointing mode.
Editing waypoint title
Key in a new title and press - OK.
Changing waypoint symbol
Select a line with n and press the numeric
key which corresponds the desired symbol.
Editing coordinates
The coordinates are those of your present
position. You can key in new coordinates by
pressing the numeric keys. Press - OK
when ready.
CREATING A NEW WAYPOINT
1. Choose New by pressing - SELECT.
2. If there is no free memory for waypoints left,
the text No free memory will be shown. In this
case, you cannot store any new waypoints unless you first delete some old ones.
3. Otherwise, you will enter a menu where waypoint title, symbol, and coordinates are displayed and can be edited.
4. Select an option to edit with n and press CHANGE.
122
GPS MENU: WAYPOINTS
5. When you are finished with editing the new
waypoint, press . DONE.
6. You are asked if you want to save the new waypoint. Make a selection by pressing . NO or
- OK.
SETTING DESTINATION
You can set any waypoint to be used as destination.
The phone will then give you directions to navigate
to that point.
1. Select a waypoint from the list and press - SELECT.
2. Select Set as destination and press - OK. .
3. You can now enter a short message to accompany the coordinates. This can be done the
same way as writing any short message. For further information, please see the chapter GSM
menu, Messages, Write message.
SETTING POSITION
You can trick the phone into believing that the selected waypoint is your current position. This is
useful e.g. when you want to use the map while
conserving the battery by not having the GPS on, or
when you want to speed up the initial position calculations of the GPS.
SENDING A WAYPOINT
You can send a waypoint to another Benefon ESC!
phone.
1. Select a waypoint from the list and press - SELECT.
1. Select a waypoint from the list and press - SELECT.
2. Use n to select Send waypoint and press - SELECT.
2. Select Set as position and press - OK.
3. Key in the receiver´s phone number, using numeric keys and . CLEAR, or select a number
from the phone book.
This option is only available when the GPS module
is not active or has no valid position.
SENDING SMS WITH COORDINATES
To recall a phone number from the phone
book, please do as follows:
You can send the coordinates of a waypoint as a
part of a short message.
•Clear any numbers by pressing and holding . CLEAR for a few seconds.
1. Select a waypoint from the list and press - SELECT.
•Press - SEARCH. If desired, key in the initials of the name.
2. Select SMS with coords and press - SELECT.
•Press - READ.
GPS MENU: WAYPOINTS
123
•Scroll through the phone book with n
until the correct number is selected.
•Press - OK.
4. Press - SEND.
Please note that waypoint is sent as a short message, so the price of a regular short message will be
charged from you for each waypoint you send.
REQUESTING A ROUTE
You can request a service provider to send you a
route to the selected point.
over, the service provider may charge you for sending the route.
This service is only available from certain service
providers.
VIEWING THE MAP
1. Select a waypoint from the list and press - SELECT.
2. Select Show on map and press - SELECT.
3. You will see a map, with the selected waypoint
shown in the middle.
•Use + and § to zoom in and out.
1. Select a waypoint from the list and press - SELECT.
•Use 1, 2, 3, 4, 6, 7, 8, and 9
to scroll the map.
2. Use n to select Request route and press - SELECT.
MOVING A WAYPOINT
3. Key in receiver´s phone number, using numeric keys and . CLEAR, or select the number
from the phone book.
1. Select a waypoint from the list and press - SELECT..
4. Press - SEND.
2.
Please note that request is sent as a short message,
so the price of a regular short message will be
charged from you for each request you send. More124
GPS MENU: WAYPOINTS
Select Move and press - SELECT. Selected
waypoint starts to blink.
3. The selected waypoint, its label and symbol will
move along with the pointer on the map. Coordinates are displayed on the top of the display.
EDITING
1. Select a waypoint from the list and press - SELECT.
2. Select Edit and press - SELECT.
3.
You can now choose whether you want to
change the title, symbol, or coordinates of the
waypoint. Choose the item you want to edit by
selecting it with n. Press - CHANGE.
Editing waypoint title
in new coordinates by pressing the numeric
keys. Press - OK when ready.
4. When you are finished with editing the waypoint, press . DONE.
5. Save the changes by pressing - OK or cancel
the operation by pressing . NO.
DELETING
1. Select a waypoint from the list, and press SELECT.
2. Select Delete and press - OK.
3. Confirm the deletion by pressing - OK again,
or cancel the operation by pressing . NO.
Remove characters by pressing . CLEAR.
Key in a new title and press - OK.
Changing waypoint symbol
Select a line with n and press the numeric
key which corresponds the desired symbol.
Editing coordinates
As a default setting, the coordinates are
those of your present position. You can key
GPS MENU: WAYPOINTS
125
ROUTES
A route is a combination of two or more waypoints,
combined to define a course of travel. Routes are
used for navigation purposes as destinations.
The Routes menu item in GPS menu has some additional information after it: [RR] is the number of
all routes stored in the memory.
•Press - SELECT to open the Routes menu.
•Press . QUIT to cancel the operation and return
to previous menu level.
The routes menu shows you all the routes that are
currently stored in your phone’s memory.
To delete all routes at once, select Delete all and
press - OK. Confirm the deletion by pressing OK again, or cancel the operation by pressing .
NO.
CREATING A NEW ROUTE
Choose New by pressing - SELECT. If there is no
free memory for routes left, the text No free memory will be shown. In this case, you cannot store
any new routes unless you first delete some old
ones.
126
GPS MENU: ROUTES
Initially, there are no waypoints on a new route,
but you can add and remove them as you like.
Adding a waypoint
1. To add the first waypoint to the route, press INSERT.
2. To add more waypoints to the route, select a
row and press - SELECT. Select whether you
want to add a waypoint before or after the selected waypoint on the route, and press - SELECT. You will enter a menu in which you can
select a waypoint. Make a choice and press OK.
Deleting a waypoint
Select a waypoint from the route. Press - SELECT.
Select Delete and press - OK.
Finishing route creation
1. When you are finished with creating the new
route, press . DONE.
2. If there are several waypoints on the route, you
will enter a menu in which you can name the
route, and choose whether you want to save or
discard it.
3. As a default setting, the route name will consist
of the first and last waypoint on the route.
•Select Name and press - CHANGE if you
wish to edit the name.
•Use . CLEAR to delete characters, and
alpha-numeric keys to enter new ones.
4. You are asked if you want to save the route.
Make a selection by pressing . NO or - OK.
SETTING DESTINATION
You can set a route to be used as destination. Benefon ESC! will then give you directions to navigate
the route, from point to point.
1. Select a route from the list. Press - SELECT.
2. Select Set as destination and press - OK.
3. You will enter a menu where you can choose
the starting point and travelling direction you
wish to use when navigating.
•Select a waypoint and press - OK.
Changing travelling direction
•Select Travelling direction and press CHANGE.
•Travelling direction can be chosen from
two options, where the direction is
implied by the first and last point on a
route. Make a choice and press - OK.
4. When you are finished, press . DONE.
VIEWING THE MAP
1. Select a route from the list. Press - SELECT.
2. Select Show on map and press - SELECT.
3. You will see a map, with the first waypoint of
the selected route shown in the middle.
•Use n to move between the waypoints.
•Use + and § to zoom in and out.
•Use 1, 2, 3, 4, 6, 7, 8, and 9
to scroll the map.
Changing starting point
•Select Starting point and press - CHANGE.
GPS MENU: ROUTES
127
WAYPOINT LIST:
VIEWING AND EDITING
1. Select a route from the list. Press - SELECT.
2. Select List waypoints and press - SELECT.
3. You can now view a list of route waypoints, and
add and remove waypoints from it. This submenu functions as the Creating a new route
feature described above.
If desired, key in the initials of the name.
Press - READ.
Scroll through the phone book with n until
the correct number is selected. Press - OK .
4. Press - SEND.
SENDING A ROUTE
Please note that route is sent in one or more short
messages, so the price of a regular short message
will be charged from you for each message you
send. You can cancel the sending whenever you
want by pressing . CANCEL.
You can send a route with all its waypoints to another Benefon ESC! phone.
MEASURING LENGTH
1. Select a route from the list and press - SELECT.
2. Use n to select Send route and press -SELECT.
3. Key in receiver´s phone number, using numeric keys and . CLEAR, or select a number from
the phone book.
Recall a phone number from the phone
book as follows:
Clear any numbers by pressing . CLEAR for
a few seconds. Then press - SEARCH.
128
GPS MENU: ROUTES
1. Select a route from the list. Press - SELECT.
2. Select Measure length and press - SELECT. You
will see the route length.
3. Press . QUIT when done.
FRIEND FIND
RENAMING
1. Select a route from the list. Press - SELECT.
2. Select Rename and press - SELECT. You will
enter a menu in which you can rename the
route.
3. Use . CLEAR to delete characters, and alphanumeric keys to key in new ones. Press - OK
when done.
DUPLICATING
1. Select a route from the list. Press - SELECT.
2. Select Duplicate and press - OK.
3. The selected route is duplicated, and will be
named after the original route, with a running
number included.
DELETING
The Friend Find features are designed to take advantage of the unique combination of GPS and
GSM equipment of Benefon Esc!. Based on position information and the short message service
(SMS), they make functions such as accurate locating or tracking a friend possible.
The basic principle of the Friend Find functions is
storing the positions of other Benefon ESC!
phones in a Benefon Esc!, along with other information such as their speed and direction of movement. This information can later be updated by
position updates.
Position updates
A phone can update its position information in another phone by sending a position update. Such
updates can be sent whenever desired, but a phone
can also ask for an update by sending a request.
1. Select a route from the list. Press - SELECT.
2. Select Delete and press - OK.
Tracking
3. Confirm the deletion by pressing - OK again,
or cancel the operation by pressing . NO.
Sending repeated position updates is called tracking, in which case the updates are known as tracking updates. A phone can start sending tracking
GPS MENU: FRIEND FIND
129
updates whenever desired, but tracking can also be
requested by another phone.
The following restrictions apply to sending and receiving tracking updates:
•You can send tracking updates to one phone
number at a time. To start sending tracking to
another phone, you need to cancel the original
tracking.
•You can receive tracking from any number of
phones.
Friend list
The Friend Find menu item in GPS menu has some
additional information after it: [FF] is the number
of all friend points stored in the memory.
•Press - SELECT to open the Friend Find menu.
•Press . QUIT to cancel the operation and return
to previous menu level.
The Friend Find menu shows you all the friend
points.
The position information from position and tracking updates is stored as a friend point, which can
be viewed on a map, used as a destination, or saved
as a regular waypoint.
To delete all friend points at once, select Delete all
and press - OK. Confirm the deletion by pressing
- OK again, or cancel the operation by pressing
. NO.
None of the Friend Find features allow your position to be revealed to anyone else without your
specific consent.
Please note that many Friend Find functions can
also be used by pointing at a friend point on the
Map navigator page.
As the Friend Find features are based on short messages, the price of a regular short message will be
charged from you for each Friend Find message
you send, whether it be an update or a request.
For further information, please see Brief overview
of navigator use, Map, Pointing mode.
130
GPS MENU: FRIEND FIND
TRACKING INFO
If you are being tracked by another phone, you can
find out information about this as follows:
1. Select Tracking info by pressing - SELECT.
2. You will see the phone number you are sending
tracking updates to, or the name if it is available in the Phone book. You will also see the
number of tracking updates you have sent. If
you are not constantly sending tracking updates, you will just see the text No active tracking.
3. To stop sending updates, press - CANCEL.
CREATING A NEW FRIEND POINT
Each phone to which you want to send updates or
requests is assumed to be specified as a friend
point.
1. To create a new friend point, choose New by
pressing - SELECT.
2. If there is no free memory for friend points left,
the text No free memory will be shown. In this
case, you cannot store any new friend points
unless you first delete some old ones.
3. If there is enough memory, you will be asked
for the phone number of the friend. Key it in
and press - OK. You can also recall a number
from the Phone book by pressing - SEARCH.
Recalling a phone number from the
phone book is done as follows:
•If desired, key in the initials of the name.
Press - READ. If you do not provide any
initials, you will start searching at the top
of the phone book list.
•Scroll through the phone book with n
until the correct number is selected.
•Press - OK.
4. Having pressed - OK, you will be returned to
the Friend Find menu, where you will see the
new friend point.
The position of a new friend point will initially be
unknown, so you may want to send a position request to it.
A new friend point is also always "unauthorized",
which means that you will under no circumstances
respond to any requests sent by it automatically.
For further information, please see Authorizing below.
GPS MENU: FRIEND FIND
131
Please note that a new, unauthorized friend point
is also automatically created whenever you receive
a request or an update from a phone number that
has not previously been specified as a friend point.
SETTING DESTINATION
You can set any friend point to be used as destination. Benefon ESC! will then give you directions to
navigate to that point.
1. Select a friend point from the list and press SELECT.
2. Select Set as destination and press - OK.
3. If the position of the friend point is unknown
(i.e. no updates have been received from it
yet), the text Position unknown will be shown
and destination will not be changed.
Please note that a friend point’s position may
change while you are using it as destination. In this
case, navigating will be automatically continued towards the new, updated position.
132
GPS MENU: FRIEND FIND
SETTING POSITION
You can trick the phone into believing that the selected friend point is your current position. This is
useful e.g. when you want to use the map while
conserving the battery by not having the GPS on, or
when you want to speed up the initial position calculations of the GPS.
1. Select a friend point from the list and press SELECT.
2. Select Set as position and press - OK.
This option is only available when the GPS module
is not active or has no valid position.
AUTHORIZING
When you receive a request from another phone,
asking that you send a position update or start
sending tracking updates, you will usually be asked
for a confirmation.
Sometimes, however, you may want to make a
friend point authorized so that all requests from
that friend’s phone number will be automatically
responded.
SENDING TRACKING
To authorize a friend, do as follows:
1. Select a friend point from the list and press SELECT.
1. Select a friend point from the list and press SELECT.
2. Select Authorize and press - CHANGE.
2. Select Send tracking and press - SELECT.
To unauthorize a friend again, select Unauthorize
and press - CHANGE.
3. You can only send tracking to one friend at a
time. If you are already sending tracking to
some other phone, the text Tracking is already
active is shown. In this case, you will have to
cancel the currently active sending before you
can start to send tracking to another phone.
Authorized friends are shown in the Friend Find
menu with the m symbol beside them, while unauthorized ones have the u symbol.
SENDING A POSITION UPDATE
1. Select a friend point from the list and press SELECT.
2. Select Send update and press - OK.
3. The text Sending... will be shown, followed by
the text Position update sent.
4. Your position will be updated in the receiving
Benefon ESC! phone.
REQUESTING A POSITION UPDATE
1. Select a friend point from the list and press SELECT.
4.
You will be asked to specify an interval for
sending position updates. Key it in with the numeric keys and press - NEXT.
5. You will be asked to specify the number of updates that will be sent. Key it in with the numeric keys and press - OK.
6. Tracking will start. Your phone will automatically send tracking updates at the set interval,
until you either cancel the sending, or the receiver requests to stop it, or the set number of
updates have been sent.
7. Whenever a tracking update is sent, the text
Sending... will be shown.
2. Select Request update and press - OK.
GPS MENU: FRIEND FIND
133
CANCELLING SENDING
CANCELLING A TRACKING REQUEST
Once you have started sending tracking updates to
a phone, the phone will go on tracking until you
stop it manually, or the set number of updates have
been sent. You may stop the tracking as follows:
You may request a phone to stop sending you
tracking updates at any time.
1. Select the friend point to which you are sending tracking from the list and press - SELECT.
2. Select Cancel request and press - OK.
2. Select Cancel sending and press - OK.
Moreover, the receiving party can send you a request to stop sending updates. In this case, tracking will end at once.
Moreover, the receiving party can send a request
that you stop sending updates, which will also end
tracking at once.
REQUESTING TRACKING
1. Select a friend point from the list and press SELECT.
2. Select Request tracking and press - SELECT.
3. Key in the desired interval for receiving tracking updates. Press - NEXT when you are done.
4. Specify the number of updates that will be sent.
Key it in with the numeric keys and press OK.
134
GPS MENU: FRIEND FIND
1. Select friend point from which you are receiving tracking. Press - SELECT.
SENDING SMS WITH COORDINATES
You can send the coordinates of a friend point as a
part of a short message.
1. Select a friend point from the list and press SELECT.
2. Select SMS with coords and press - SELECT.
3. You can now enter a short message to accompany the coordinates. This can be done the
same way as writing any short message. For further information, please see the chapter GSM
menu, Messages, Write message.
REQUESTING A ROUTE
SHOWING ON MAP
You can request a service provider to send you a
route to the selected point. This is done as follows:
1. Select a friend point from the list and press SELECT.
1. Select a friend point from the list and press SELECT.
2. Select Show on map and press - SELECT.
2. Use n to select Request route and press - SELECT.
3. You will see a map, with the selected friend
point shown in the middle.
•Use + and § to zoom in and out.
3. You will be requested to select a receiver for
the request. Either key in a phone number, using numeric keys and . CLEAR, or select a
number from the phone bookphone book.
4. Press - OK.
Please note that request is sent as a short message,
so the price of a regular short message will be
charged from you for each request you send. Moreover, the service provider may charge you for sending the route.
This service is only available from certain service
providers.
•Use 1, 2, 3, 4, 6, 7, 8, and 9
to scroll the map.
SAVING AS A WAYPOINT
1. Select a friend point from the list and press SELECT.
2. Select Save as waypoint and press - SELECT.
3. If there is no free memory for waypoints left,
the text No free memory will be shown. In this
case, you cannot store any new waypoints unless you first delete some old ones.
4.
You can now choose whether you want to
change the title or symbol of the waypoint.
Choose the item you want to edit by selecting
it with n. Press - CHANGE.
GPS MENU: FRIEND FIND
135
Editing waypoint title
Remove characters by pressing . CLEAR.
Key in a new title and press - OK.
Changing waypoint symbol
A total of five rows of waypoint symbols with
nine icons on each are available to you. Select a row with n. Press the numeric key
which corresponds the desired symbol.
5. When you are finished with editing the new
waypoint, press . DONE.
6. You are asked if you want to save the new waypoint or discard it. Use n to make the selection
and press - OK.
DELETING
1. Select a friend point from the list and press SELECT.
2. Select Delete and press - OK.
3. Confirm the deletion by pressing - OK again,
or cancel the operation by pressing . NO.
136
GPS MENU: MAPS
MAPS
You can view and manipulate the maps in the
phone’s memory by accessing them via this menu.
The Maps menu item in GPS menu has some additional information after it: [MM] is the number of
all maps stored in the memory.
•Press - SELECT to open the Maps menu.
•Press . QUIT to cancel the operation and return
to previous menu level.
Viewing and processing maps
1. Use n to select the world map or one of the additional maps from the list and press - SELECT.
2. The selected map will be shown in a mode similar to Pointing mode. In it you can move a
pointer to scroll the map, or use it to manipulate the waypoints and other data. For further
information, please see the chapter Brief overview of GPS use, Map, Pointing mode.
SENDING SMS WITH
COORDINATES
You can send the coordinates of your present position as a part of a short message.
1. Press - GPS to enter the GPS menu.
2. Use n to select SMS with coords and press SELECT.
3. You can now enter a short message to accompany the coordinates. This can be done the
same way as writing any short message. For further information, please see GSM menu, Messages, Write message.
REQUESTING SERVICE
You can request service provider to send you a
waypoint or a route to a point, defined by some
text; e.g. a street address.
1. Press - GPS to enter the GPS menu.
2. Use n to select Request service and press SELECT.
3. You will then be able to enter some text. Key it
in with the alphanumeric keys and press - SELECT.
4. You will be requested to choose the type of service:
•To request one or more waypoints, e.g.
positions of local pizzerias, select Request
waypoint and press - SELECT.
•To request a route to a specific point, e.g.
nearest local pizzeria, select Request route
and press - SELECT.
5. You will be requested to select a receiver for
the request. Either key in a phone number, using numeric keys and . CLEAR, or select a
number from the phone book.
6. Press - SEND.
Please note that request is sent as a short message,
so the price of a regular short message will be
charged from you for each request you send. Moreover, the service provider may charge you for sending a route or waypoints.
In order for these services to work, your position
is sent to the service provider each time you use
GPS MENU: SENDING SMS WITH COORDINATES
137
the services. The services are only available from
certain service providers.
SKIPPING ROUTE POINT
Use this option if your current destination is a
route and you want to skip a route point.
REQUESTING AGPS
You can request the service provider to send you
assisted GPS information. Before sending the request, make sure, the AGPS settings are correctly
done. For further information, please see the chapter Main menu, Settings, GPS, AGPS.
1. Press - GPS to enter the GPS menu.
2. Use n to select Request AGPS and press - SELECT.
3. Confirm the request by pressing - OK.
UPDATING POSITION
You can make the GPS receiver to update your position at once.
1. Press - GPS to enter the GPS menu.
2. Use n to select Update position and press OK.
1. Press - GPS to enter the GPS menu.
2. Use n to select Skip route point and press - SELECT.
3. Select your next route point by scrolling the list
and highlighting the point with n. Press - SELECT.
CLEARING DESTINATION
When you no longer want to use a point as destination, do as follows:
1. Press - GPS to enter the GPS menu.
2. Use n to select Clear destination. Press - OK.
After clearing the destination, the navigator pages
will no longer provide any guidance in navigating
to a destination.
You do not need to clear the destination to be able
to select a new destination.
Destination can only be cleared when a point is being used as destination.
138
GPS MENU: REQUESTING AGPS
RESETTING METERS
To reset the speed and odometer information in
your phone, do as follows:
1. Press - GPS to enter the GPS menu.
2. Use n to select Reset meters. Press - SELECT.
3. Select which meters you want to reset. Turn the
options on and off by selecting them with n
and pressing - CHANGE.
4. Press . DONE when you are finished.
GPS MENU: RESETTING METERS
139
BATTERY
FITTING AND REMOVING
Fitting: Place the bottom of the battery into the
corners at the bottom of the phone. Push the battery towards the rear of the phone until it locks
into place.
Removing: Push the release catch downwards and
pull the battery carefully away of the phone.
TYPES AND SIZES
There are two kinds of batteries available for this
phone:
•Li-Ion 900 mAh
•Li-Ion 1200 mAh.
TEMPERATURE
Batteries function best at room temperature
(+20°C).
At temperatures below 0°C, use a battery which is
freshly recharged.
140
BATTERY: FITTING AND REMOVING
At temperatures below -25°C the battery will not
supply power and the phone cannot be used. Upon
warming up, the phone will function properly
again.
Use of the phone is prevented at temperatures
above +60°C to ensure equipment safety. After
cooling off, the phone will function properly.
At room temperature (+20°C) the Li-Ion battery
loses more than 15% of its capacity in a month.
During the first two days the loss of a capacity is
usually several percent.
Higher temperatures will accelerate the discharging process.
EMPTY BATTERY
The battery symbol is shown in the display. The
"liquid level" in the symbol shows how full the battery is.
When the battery is almost empty a beep is heard
and the text Battery low will be displayed.
When the battery is totally empty the power will
turn off. Charge the battery or replace it with a recharged battery.
MAINS CHARGERS
CHARGING
The mains charger available for this phone is the
quick charger CMA-70-230 with its cable FMC-70.
The phone controls the charging status, battery
temperature and power supply during the charging operation.
The mains charger should only be used indoors.
Make sure that the voltage in the country which
you are staying corresponds to the voltage (230 V)
of the charger.
When charging, connect the round end of the cable
into the charger and lock it by turning it half a turn
clockwise. Plug the square end of the cable (with
the arrow facing down) into the left side of the bottom connector on the phone.
Plug the charger into a mains outlet. Charging will
start automatically.
The mains charger is usually provided with the
phone, but is also available from the assortment of
Benefon accessories.
Other charger types are introduced in the chapter
Accessories.
The phone will turn on when the charger is connected.
However, when charging a totally empty battery,
the phone might not turn on immediately.
The phone and the battery can be left in the charger even for several days without any fear of damage.
The ideal temperature range for charging is
+10°...+30°C. If charging the battery above or below these temperatures the life of battery may be
shortened. Also, the battery may not reach full capacity.
When charging, the display will repeatedly show
the "liquid level" rising from top to bottom.
When the battery is fully charged, the charging status will remain on the display.
Please note, that in case you change the battery to
another battery, we cannot guarantee that the battery indicator will show the right state of charge auBATTERY: MAINS CHARGERS
141
tomatically. To reset the battery indicator to
correspond with the "new" battery, you must
charge the "new" battery until it is full.
Charging times
Charging time depends on what kind of charger
and battery you have in use. E.g. when charging
the Li-Ion batteries with the quick charger, about
70% of the battery capacity will be charged quickly,
but charging the remaining 30% takes a relatively
longer time.
Also please note, that the following charging times
are approximate and measured at room temperature (+20°C) with the GPS turned off.
Quick mains charger
CMA-70-230:
•about 2...3 hours with an empty Li-Ion battery,
size 900 mAh
•about 2,5...3,5 hours with an empty Li-Ion battery, size 1200 mAh
CARE AND MAINTENANCE
Note, that if you use an old battery, the continuous
operating time is less than when using a new battery.
The battery must be cared for and stored properly
to ensure that the battery reaches and maintains
the fullest possible capacity. Proper care and storage also guarantee maximum battery life.
Sometimes a new or a long-stored battery has a
voltage so low that the phone will not turn on immediately after you have fitted the battery. Wait
and the phone will turn on after a few moments.
When storing batteries for a long time, it is recommended that the batteries are kept cool and fully
charged in a dry place.
Safety regulations
(applying to batteries in use as well
as batteries taken out of use):
•Protect the battery from heat. High temperatures
may damage batteries. Do not warm up the battery or use it near a fire.
•Do not open the battery by yourself or pierce
holes in it.
142
BATTERY: CARE AND MAINTENANCE
•Do not drop, knock, twist or shake the battery or
otherwise handle the battery roughly.
•Do not wet the battery or immerse it in water.
•Charge and recharge the battery only with a
charger specified in the manual. Use the battery
only for the purpose it is intended for.
•Only allow service personnel authorised by
Benefon to service your phone.
DISPOSAL
Li-Ion batteries do not contain heavy metals which
can damage the environment. Batteries should be
disposed of according to the country-specific regulations.
OPERATING TIME
To conserve battery, you may consider the following:
Turning the GPS receiver on.
•Keep the GPS receiver Off when you are not
actively navigating.
•You can view maps even without running the
GPS receiver. You may also use the Set as position feature to set your position manually if
desired (for further information, please see the
chapters GPS menu and Brief overview of navigator use, Map, Pointing mode ).
•Use the Screen saver. For further information,
please see the chapter Main menu, Settings, User
interface, Screen saver.
• Turn off the lights of the phone. Especially, only
use the Night environment when you specifically
need to have the lights on all the time. For further information, please see the chapter Main
menu, Settings, Environments.
•Turn off the GSM module when in an area with
no GSM network coverage. For further information, please see the chapter Main menu, Settings, GSM, GSM module.
•Use Low power or Economy GPS receiver mode
when you do not need the best possible accuracy
and reliability provided by the Full power mode.
For further information, please see the chapter
Brief overview of navigator use, First steps,
BATTERY: DISPOSAL
143
ACCESSORIES
This is a short introduction about the accessories
available for this phone. You may also check
www.benefon.com for a complete list of accessories.
you are staying corresponds to the voltage (230 V)
of the charger.
CIGARETTE LIGHTER CHARGER
CCS-71-12
MAINS CHARGER CMA-70-230
You can charge the phone battery with the cigarette lighter charger using your vehicle’s cigarette
lighter.
The mains charger available for this phone is quick
charger CMA-70-230 with its cable FMC-70.
The mains charger should only be used indoors.
Make sure that the voltage in the country which
144
ACCESSORIES: MAINS CHARGER CMA-70-230
Plug the charger into the cigarette lighter outlet in
the vehicle and into the socket at the bottom of the
phone. Charging will start automatically. The
charger takes its power from the vehicle battery.
PORTABLE HANDS FREE EHE70
PLUG-IN HANDS FREE GMA70
+12 V
GND
The portable hands free kit is designed to make the
use of the phone easier in various working situations.
When you use the earpiece and microphone, you
can make and answer phone calls and work with
your hands at the same time. This light weight accessory also comes with an adjustable clothes clip.
With the plug-in hands free car kit, using the
phone is easier and safer while driving.
The portable car kit needs no permanent installation. This makes it easy to install: all you need to
do is plug the car kit into the cigarette lighter outlet in the car and into the bottom connector of the
phone. Make sure the microphone is placed in an
audible position.
ACCESSORIES: PORTABLE HANDS FREE EHE70
145
With the plug-in hands free car kit you can also
charge the battery of your phone by using your vehicle’s cigarette lighter.
BENEWIN PRO WITH NMEA 0183
CABLE
save the phone book, phone settings, short messages, environments, and calendar data.
The BeneWin Pro also includes some additional
functions, such as settings for maps, routes, and
waypoints as well as settings for telematics. It depends on your phone model whether you can use
these functions or not.
With the data adapter you can connect the phone
to a computer and transfer BeneWin-based data between a PC and your phone.
You do not need a separate modem for using this
equipment. The modem drivers included in the
package offer you access to your email, fax and Internet. By using the modem drivers with the data
adapter you can, e.g. check your email or surf in
the Internet, assuming an Internet browser has
been installed in your computer (a browser is not
included in the package).
This package includes BeneWin Pro software, modem drivers, and NMEA 0183 cable (with data and
NMEA adapters).
BeneWin Pro is a PC-based program that allows
you to access the memory data of your phone. With
the help of BeneWin Pro, you can also compose
your own alert tone for your phone. Using the BeneWin Pro and a PC, you can easily edit, read and
146
The NMEA 0183 adapter is used for transferring
position data between the phone and some navigation systems (e.g. a map software). A map software
is sold separately, it is not included in this package.
ACCESSORIES: BENEWIN PRO WITH NMEA 0183 CABLE
LIGHT HOLDER KGC70
BICYCLE HOLDER
The bicycle holder holds your phone steadily in
place on your bike’s handlebar so it can be easily
viewed while riding.
The light holder holds your phone steadily in place
when you are driving. The holder is also very useful when, for example, you are charging the battery
with the cigarette lighter charger.
CARRYING CASE
A carrying case can be used for carrying the phone.
It also protects the phone from impacts.
A carrying case can be fastened to e.g. a belt or a
backbag for easy carrying.
There are two different carrying case models available: trendline and outdoor.
ACCESSORIES: LIGHT HOLDER KGC70
147
EXTERNAL GPS ANTENNA
CROSS-COUNTRY ANTENNA
The cross-country (power) antenna can be used to
replace the regular GSM antenna. It is useful in areas where the GSM network signal strength is
weak.
The external (active) GPS antenna can be used
when reliable satellite signals for navigation are
needed. In addition for being more powerful than
the regular GPS antenna, it can also be placed as
far as five meters away from the phone. This way,
it can be placed for example on the roof of a car or
a boat. The antenna can be attached to a backbag
strap, as well.
148
ACCESSORIES: EXTERNAL GPS ANTENNA
APPENDIXES
CARE AND MAINTENANCE
•Dust and dirt may damage the moving parts of
your phone. Do not use or keep the phone in
dusty or dirty surroundings.
•Protect the phone from heat. High temperatures
may shorten the life of the electronical devices,
melt or warp plastics and damage batteries. Do
not use the battery near fire.
•Only allow service personnel authorised by the
dealer to service your phone. Do not open the
phone or battery by yourself.
•Charge and recharge the battery only with the
charger specified in the manual. Use the battery
only for the purpose it is intended.
•Rough handling may break the circuitry inside
the phone. Do not drop, knock or shake the
phone or its battery.
•Keep the phone dry. Although the phone is
splash water proof, you should not let it get completely soaked. Liquids contain minerals which
could corrode electronic circuits. If the phone
gets wet, turn it off and dry the phone and the
battery immediately. Put the phone into an
upright position and let it dry. It is recommended that a dealer or service personnel check
that the phone functions properly.
•Clean the phone with a soft cloth, dampened
slightly with mild soapy water. Do not clean the
phone with harsh chemicals, solvents or other
corrosive substances.
PROBLEMS YOU CAN SOLVE
If the phone will not turn on
Make sure that,
•the battery is correctly in place
•the battery is not totally empty.
•the battery contacts are clean.
If the SIM card has been blocked
If the PIN code has been entered incorrectly three
times in a row, the PIN code will be locked. To unlock the code you must enter the PUK code.
If you fail to enter the correct PUK code within ten
attempts, your SIM card will be permanently
APPENDIXES: CARE AND MAINTENANCE
149
blocked. In that case the text Card blocked will be
displayed. Contact your network operator to get a
new SIM card.
If your phone does not function
Make sure that
•your phone is turned on
If you lose your SIM card
Contact your network operator to invalidate the
card and get a new one. A lost card can be misused
if you have disabled the Ask PIN code option.
•you are in the network operator's coverage area
•the malfunction is not caused by the Call barring
or Call divert options
•the SIM card is correctly inserted and it is not
damaged or invalidated.
Even though you find the lost card later, it cannot
be used if it has once been invalidated.
If your phone gets lost
Contact your network operator immediately and
let them know the IMEI code to prevent the unauthorized use of the phone.
You find the 15-digit IMEI code easily from the
type label of the phone. It is recommended to
write down the IMEI code and store it in a safe
place right after you have bought the phone.
Let the network operator know if the SIM card was
in the phone. If the phone has been stolen, notify
the police.
150
APPENDIXES: PROBLEMS YOU CAN SOLVE
If you cannot read, store or modify
information in phone book
The FDN phone book may be in use. You need the
PIN2 code for turning it off. For further information about the FDN phone book, please see the
chapters Main menu, Settings, Security, Fixed Dialling and GSM menu, Phone book.
Wrong language
If the language of the phone has changed for some
reason, pressing + for five seconds will change
the language to English.
At the same time the settings will be reset to the
factory ones. Use of this key does not affect the
contents of the phone book entries.
"Searching for network"
The message Searching for network is displayed
when you are outside the network operator’s coverage area. You are in a "shadow area" where signal strength is too weak for radio communication.
In any unclear situation, you are always welcome
to contact your dealer, an authorized Benefon service centre or the network operator.
"Poor GPS coverage"
The text Poor GPS coverage is displayed when the
GPS receiver is active and unable to determine
your current position within a few minutes. This
happens when not enough satellites are visible.
Make sure that the GPS antenna is pointing up and
that it has an unobstructed view of the sky. The
GPS receiver does not work indoors.
VOCABULARY OF GSM TERMS
SIM card
The SIM card supplied by your network operator
contains all subscriber-related information, for example, your international mobile subscriber identity (IMSI) number. The SIM card memory can
store phone numbers and names.
If your SIM card gets lost or misplaced contact your
network operator immediately.
A phone without a SIM card can be used to make
only emergency calls, although many other features such as GPS navigation will work normally.
PIN code
Your SIM card is protected by a PIN (Personal Identification Number) code of 4 to 8 digits. Using this
code prevents unauthorized use of your phone and
SIM card. Your PIN code is normally supplied with
the SIM card.
Your phone prompts you to enter your PIN code
when you turn on the phone. You can disable the
Ask PIN code option from the menu, but it is recAPPENDIXES: VOCABULARY OF GSM TERMS
151
ommended you keep the request on. You can
change the PIN code in the menu.
If the correct PIN code is not entered after three attempts the SIM card will be disabled. You then
must use your PUK code to enable the PIN code
and the SIM card.
PIN2 code
You need a PIN2 code for setting and resetting certain SIM functions, e.g. charge counters and limits.
The PIN2 code (4 to 8 digits) is supplied by your
network operator.
PUK code
The PUK code is used to open the disabled SIM
card. The 8-digit PUK code is normally supplied
with the SIM card.
The SIM card will be permanently disabled after
entering wrong PUK code ten times. After that only
emergency calls can be made. Contact your network operator for a new SIM card.
152
APPENDIXES: VOCABULARY OF GSM TERMS
PUK2 code
The PUK2 code is used to open the disabled PIN2
code. The 8-digit PUK2 code is supplied with the
PIN2 code.
In case your PUK2 code gets lost, contact your network operator.
Phone code
The phone code (4 - 8 digits) is used to prevent the
unauthorized use of the phone. When the phone
code request is set on in the menu the phone
prompts you to enter the phone code when you
turn the phone on. If you wish, you can also turn
the phone code request off as well as change the
phone code in the menu.
The phone code is a security code, which is associated with the phone itself, not with the SIM card.
The code is given by the manufacturer and provided in the sales package of the phone. Keep the
code in the safe place, separate from the phone.
Network code
Service provider
You need a network code for certain network services, e.g. call barring. The network code (4 digits)
is supplied by your network operator.
The service provider is an organization which provides telecommunication services to the users. The
service provider can also be a network operator.
You can set Call barring options and change the
network code from the menu.
In this manual the term ‘ network operator’ indicates both the network operator and the service
provider.
IMEI code
An IMEI (International Mobile Equipment Identity)
code is used to identify the mobile phone. You will
find your 15-digit IMEI code easily from the type label of the phone.
VOCABULARY OF GPS TERMS
Waypoint
It is also recommended that you write down your
IMEI code and store it in a safe place. This will help
prevent unauthorized use of the phone if it gets
lost or stolen.
A waypoint is a location or spot that consists of a
label, a symbol for showing it on the map, and a
pair of coordinates (e.g. latitude and longitude).
Waypoints are used for navigation purposes, i.e. to
mark spots and use them as destinations, or to
combine several waypoints to a route.
Network operator
For further information about waypoints, please
see the chapter GPS menu, Waypoints.
An organization which maintains a mobile network
providing telecommunication connections and
services.
APPENDIXES: VOCABULARY OF GPS TERMS
153
Route
Destination
A route is a combination of two or more waypoints,
combined to define a course of travel. Routes are
used for navigation purposes as destinations.
Benefon Esc! can give you navigational guidance to
a point or along a route. That point or route is
called destination.
For further information about routes, please see
the chapter GPS menu, Routes.
The terms "next destination" and "last destination"
refer to the next waypoint and last waypoint on a
route used as destination, respectively.
Friend Find
The Friend Find features are based on sharing position information via the short message service
(SMS). Friend Find makes functions such as accurate locating or tracking a friend possible.
For further information about Friend Find, position updates and tracking, please see the chapter
GPS menu, Friend Find.
Track
Compass direction of movement, in degrees.
Bearing
Compass direction to destination, in degrees.
Estimated Time Enroute (ETE)
Friend point
The position information of another Benefon Esc!
user. It can be used for navigation as a waypoint,
but can be updated by using the Friend Find features.
Approximate time needed to travel to the destination, calculated using average speed and distance
to the destination.
Estimated Time of Arrival (ETA)
Approximate time of arrival at the destination, calculated using average speed and distance to the
destination.
154
APPENDIXES: VOCABULARY OF GPS TERMS
MENU CHARTS
QUICK MENU
QUICK MENU
LOCK KEYPAD
TURN THE GPS
RECEIVER ON OR OFF
SELECT AN
ENVIRONMENT
FOR USE
OFF
FULL POWER
LOW POWER
ECONOMY
AT INTERVALS
NORMAL
SILENT
NOISY
DISCREET
NIGHT
CAR KIT
OWN
MENU CHARTS:
155
MAIN MENU
MAIN MENU
ACCESS TO STAND-BY
MODE...
PHONE
MAP
GUIDE
POSITION
MOVEMENT
ACCESSORIES
FOUR NAVIGATOR PAGES: DISPLAY MAPS, COMPASS, AND
DATA FIELDS RELATED TO NAVIGATION.
ALSO ACCESS TO GPS-MENU, AND MAIN MENU
ALARM CLOCK
TURN ON OR OFF
ADJUST WAKE UP TIME
SELECT REPEAT ALARM
SELECT SNOOZE TIME
NOTEPAD
DELETE ALL NOTES
SELECT A WRITTEN NOTE
SETTINGS
CALENDAR
ONCE
MONDAY
TUESDAY
WEDNESDAY
THURSDAY
FRIDAY
SATURDAY
SUNDAY
OFF
5 MIN
10 MIN
30 MIN
EDIT, SAVE OR DELETE A
WRITTEN NOTE HERE..
SELECT AN EMPTY NOTE
WRITE AND SAVE
A NEW NOTE HERE..
MONTH VIEW
CHOOSE DATE
AGENDA
NEXT DAY
PREVIOUS DAY
TODAY
ENTER SPECIFIED DATE
DELETE ALL
CALENDAR ENTRIES
VIEW ALL CALENDAR
ENTRIES
CALCULATOR
SELECT AN ENTRY
TO EDIT OR DELETE IT
GAMES
LIST OF GAMES
CONTINUE PREVIOUS GAME
156
MENU CHARTS:
ADD A NEW CALENDAR ENTRY
TEXT
TIME
DATE
REPEAT
ALARM
SETTINGS
MAIN MENU
PHONE
MAP
GUIDE
POSITION
MOVEMENT
ACCESSORIES
SETTINGS
ENVIRONMENTS
USER INTERFACE
TIME
ADD NEW
NORMAL
SILENT
NOISY
DISCREET
NIGHT
CAR KIT
OWN
LANGUAGE
CONTRAST
SCREEN SAVER
KEYLOCK MODE
TIME
DATE
SATELLITE TIME
TIME ZONE
UNITS
GPS
EMERGENCY CALLS
SECURITY
RESET SETTINGS
INCOMING CALL
ALARM
CALENDAR
MESSAGES
VIBRATION
KEY TONES
NOTIFICATIONS
LIGHTS
RESET
ENTER HELP DESK NUMBER
SELECT LANGUAGE
EMERGENCY KEY ON/OFF
EDIT MESSAGE
CALL LIST
SELECT TONE
ADJUST VOLUME
SELECT RINGING MODE
ADJUST VOLUME
DISTANCE & SPEED
ELEVATION
CURRENCY
MESSAGE SETUP
BROADCAST SETUP
ANYKEY ANSWER
AUTO ANSWER
DIALLING PREFIX
REDIAL MEMORY
QUICK DIALLING
GSM MODULE ON/OFF
HELP DESK
EDIT AN ENVIRONMENT:
POWER ON TIMER
POWER OFF TIMER
POWER
GSM
NAME AN ENVIRONMENT
BASED ON:_
SMS SERVICE NUMBER
MESSAGE TYPE
MESSAGE VALIDITY
VOICE MAIL NUMBER
ACCEPT BROADCASTS
BASE STATION ID
SELECT TYPES
SELECT LANGUAGES
MAP DETAILS
POSITIONING
COURSE ALERTS
LEFT DATA FIELD
RIGHT DATA FIELD
NMEA OUTPUT
AGPS
RESET POSITION
AUTO SCROLLING
SHOW DATA FIELDS
SHOW LABELS
SHOW ROUTE
SHOW TRACE
CLEAR TRACE
PREFERRED MAP TYPE
ASK PIN CODE
ASK PHONE CODE
CHANGE PIN CODE
CHANGE PIN2 CODE
CHANGE PHONE CODE
CHANGE NETWORK CODE
FIXED DIALLING
IMEI
MENU CHARTS:
157
GSM
X PCS FREE PHONE BK ENTRIES
X PCS RESERVED
GSM MENU
PHONE BOOK ENTRY:
ENTER NUMBER
ADD NEW ENTRY
PHONE BOOK
ENTER NAME..
MESSAGES
INBOX
DELETE ALL INBOX MESSAGES
INBOX MESSAGE LIST
OUTBOX
DELETE ALL OUTBOX MESSAGES
OUTBOX MESSAGE LIST
BROADCASTS
BROADCAST MESSAGE LIST
CALL VOICEMAIL
CALLING VOICE MAILBOX...
WRITE MESSAGE
NEW MESSAGE
POSTPONED MESSAGE
RECENT CALLS
UNANSWERED CALLS
PHONE BOOK NAME LIST
DELETE ALL UNANSWERED CALLS
LIST OF UNANSWERED CALLS
RECEIVED CALLS
CALL COUNTERS:
LAST CALL
TOTAL CALL
NETWORK SERVICES
NETWORK SELECTION MODE
CALL DIVERTS
CALL BARRINGS
CALL WAITING
CALL COST
HELP DESK
158
CONFIRM HELP REQUEST
MENU CHARTS:
EDIT
DELETE
READ SELECTED
MESSAGE TEXT...
READ SELECTED
BROADCAST
MESSAGE...
WRITE OR EDIT
MESSAGE TEXT ...
SAVE
DELETE
DELETE ALL RECEIVED CALLS
LIST OF RECEIVED CALLS
ENTER NAME
SELECT MEMORY SLOT
REPLY/EDIT
FORWARD
PICK NUMBER
PICK COORDINATES
DELETE
SEND & SAVE
SEND
SEND WITH POSITION
POSTPONE
DELETE
PHONE BOOK ENTRY:
CHECK NUMBER
ENTER NAME
SELECT MEMORY SLOT
ALL
BUSY
NOT ANSWERED
NOT REACHABLE
CLEAR ALL
OUTGOING CALLS:
ALL
INTERNATIONAL
INT´L EXCEPT HOME
INCOMING CALLS:
ALL
WHEN ROAMING
CLEAR BARRINGS
LAST CALL COUNTER
TOTAL CALLS COUNTER
MONEY LEFT
MAXIMUM UNITS
PRICE/UNIT
DIVERT CALLS TO:_
CLEAR DIVERTS
TURN ON
TURN OFF
ENTER PIN2 CODE
ENTER NETWORK CODE
GPS
GPS MENU
ADD A NEW WAYPOINT
WAYPOINTS
ROUTES
DELETE ALL WAYPOINTS
ORDER
WAYPOINT LIST
TITLE
SYMBOL
COORDINATES
ADD A NEW ROUTE
INITIALLY BLANK, ADD FIRST
WAYPOINT
DELETE ALL ROUTES
SELECT ORDER FOR
SECOND WAYPOINT
ADD SECOND
WAYPOINT
SELECT ORDER FOR
THIRD WAYPOINT ETC.
ROUTE LIST
FRIEND FIND
TRACKING INFO
ADD NEW FRIEND POINT
DELETE ALL FRIENDPOINTS
FRIEND POINT LIST
MAPS
SMS WITH COORDS
FIRST SELECT A MAP,
THEN SELECT
A WAYPOINT OR ANY POINT
ON THE MAP
COORDS DISPLAYED,
WRITE AN SMS MESSAGE
REQUEST SERVICE
REQUEST AGPS
UPDATE POSITION
SKIP ROUTE POINT
CLEAR DESTINATION
WRITE A REQUEST AS
AN SMS MESSAGE
SET AS DESTINATION
SET AS POSITION
AUTHORIZE
SEND UPDATE
REQUEST UPDATE
SEND TRACKING
CANCEL SENDING
REQUEST TRACKING
CANCEL REQUEST
SMS WITH COORDS
REQUEST ROUTE
SHOW ON MAP
SAVE AS WAYPOINT
DELETE A FRIENDPOINT
SET AS DESTINATION
SET AS POSITION
SMS WITH COORDS
SEND WAYPOINT
REQUEST ROUTE
SHOW ON MAP
EDIT
MOVE
DELETE
SET AS DESTINATION
SHOW ON MAP
LIST WAYPOINTS
SEND ROUTE
MEASURE LENGTH
RENAME
DUPLICATE
DELETE
(ADD A NEW WAYPOINT)
SET AS DESTINATION
SET AS POSITION
SMS WITH COORDS
SEND WAYPOINT
REQUEST ROUTE
MEASURE DISTANCE
EDIT
MOVE
DELETE
SEND & SAVE
SEND
SEND WITH POSITION
POSTPONE
REQUEST ROUTE
SPEED
ODOMETER
REQUEST WAYPOINT
RESET METERS
MENU CHARTS:
159
160
MENU CHARTS:
CYRILLIC CHARACTER SET
This guide includes some additional information
and specifications applying to the Benefon Esc!
phone model sold in some market areas of Eastern
Europe.
GENERAL INFORMATION
Cyrillic characters can be used with these functions, whenever alpha keys are normally available:
•Short messages
•Phone book
•Calendar
•Environments.
With this phone model you can use cyrillic characters. The cyrillic character set is available in the
normal text input mode, i.e. the spelling mode.
When writing text with the T9 text input mode,
the character set is determined according to the
chosen T9 language.
Also note that the maximum amount of characters
in one message is limited to 160.
If you write a long message mainly with cyrillic
characters, the message will be sent in several
packages (i.e. the charge of this message might be
increased).
Cyrillic and latin characters can be mixed in one
word or message.
CYRILLIC CHARACTER SET
161
SELECTING CYRILLIC
CHARACTERS
1. First turn the T9 mode off by pressing 1.
-
Latin
Cyrillic
160
When the T9 is
turned on,
O, is visible.
OK
When the T9 is
turned off,
O, is invisible.
4. The character set has been changed.
SELECT
QUIT
2. Enter the character set menu by pressing § for
a few seconds.
§
Press and hold for 1-2 sec.
3. Highlight the desired character set with n and
press - OK.
162
n
CYRILLIC CHARACTER SET
• Direct access to numbers: Press § until Z is displayed.
• Always key in number 1 as follows: Press § until the character form is switched to Z. Press 1.
• Always key in number 0 as follows: Make sure, the , is
turned off. Press 0.
• Direct access to special characters: Press 0 for a few
seconds. Scroll through the selection with n and press the
corresponding key when the desired character is displayed.
For further information, please see the chapter Quick start,
Overview, Keypad in the Benefon Esc! Owner‘s Manual.
CYRILLIC CHARACTERS
1
2
,
A a
Б б
В в
Г г
Ґ ґ
3
Д д
Е е
Ё ё
Ж ж
З з
4
И и
Й й
К к
Л л
І і
5
Мм
Нн
О о
6
Р р
С с
7
Ф ф
8
2
Aa
Bb
Cc
Є є
3
Dd
Ee
Ff
Ї ї
4
Gg
Hh
Ii
П п
5
Jj
Kk
Ll
Т т
У у
6
Mm
Nn
Oo
Х х
Ц ц
Ч ч
7
Pp
Qq
Rr
Шш
Щщ
Ъ ъ
Ыы
8
Tt
Uu
Vv
9
Ьь
Ээ
Юю
Я я
9
Ww
Xx
Yy
0
0
Ss
Zz
CYRILLIC CHARACTER SET
163