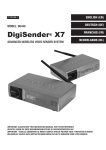
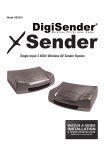
Download AEI Security & Communications DigiSender X7 DG440 Specifications
Transcript
190308-7
SPECIFICATIONS
Transmitter :
Remote Relay Receiver
Audio/Video Frequency
Channel Frequency
Modulation
Video Input Level
Colour Video Input
Audio Input Level
Audio Bandwidth
Input Connectors
Power Source
Receiver :
Remote Relay Transmitter
Audio/Video Frequency
Modulation
Video Output Level
Sensitivity
Audio Output Level
Audio Bandwidth
Output Connectors
Power Source
MODEL: DG440
433.92MHz
2.4000GHz ~ 2.4835GHz
Channel 1
2.414GHz
Channel 2
2.432GHz
Channel 3
2.450GHz
Channel 4
2.468GHz
FM
1V PP/75Ω
Phase Alternate Line (PAL)
1.0v PP (Mod 1KHz, Dev 15KHz)
10Hz - 22KHz (-1dB)
DigiConnector Euro SCART x2, RCA Phono x2
DC
See Decleration of Conformity
Antenna System
Internal Omni-directional dipole (2.4GHz)
Omni-directional dipole (433.92MHz)
≤ 200metres free air space
≈ 40 metres in-building (through walls)
RC5, RC6, Active Digital
IrDA 16 Channel
Remote Relay Protocol Coding
Wireless Video Sender System
433.92MHz
2.4000GHz ~ 2.4835GHz
FM
1V PP/75Ω
-80dBm
1.0V PP (Mod 1KHz, Dev 15KHz)
10Hz - 22KHz (-1dB)
Euro SCART
DC
Approvals
System Range
DigiSender™ X7
(c)2007 AEI Security & Communications Ltd. All rights reserved.
Registered in England: 02831823
AEI Security & Communications Ltd
Weslake Industrial Park
Rye Harbour Road, Rye
East Sussex
TN31 7TE
United Kingdom
DigiConnector, IR Systeme Technik and DigiEye are trademarks of AEI Security & Communications Ltd
DigiSender is a registered trademark of AEI Security & Communications Ltd
IMPORTANT: ALWAYS KEEP THIS
INSTRUCTION MANUAL FOR
FUTURE REFERENCE
Functions of this product are covered
by one or more patents.
DG440 DigiSender™ X7
WARNING
To prevent damage do
not expose this unit to
rain or moisture.
Table of Contents
Page 3
Introduction
SECTION 1: Step by Step Installation Guide
Page 4,5
Page 6,7
Page 8
Page 9
Page 10,11
Unpacking your DigiSender™ X7
Install the DigiSender™ X7 Transmitter Unit
Install the IR Systeme Technik™ Remote Extender
OPTIONAL: Connecting Inputs 3 & 4
Install the DigiSender™ X7 Receiver Unit
SECTION 2: Daily Usage
Page 12,13
Using your DigiSender™ X7 System
SECTION 3: Setup Troubleshooting
Page 14,15
Page 16
Page 17
Page 18,19
Page 20,21
Troubleshooting: Picture Problems
Troubleshooting: Sound Problems
Troubleshooting: Remote Extender Problems
Frequently Asked Questions (FAQ) & Technical Support
Rear Panel Descriptions
SECTION 3: Further Information
Page 22
Page 23
Page 2
Upgrades
Declaration of Conformity
Waste electrical products
should not be disposed of with
household waste. Please
recycle where facilities exist.
Check with your local Authority
or retailer for recycling waste
Online Support at www.digisender.net
DG440 DigiSender™ X7
DG440 DigiSender™ X7
INTRODUCTION
DigiSender™X7 - Advanced Wireless Video Sender
Upgrades & Accessories
Congratulations
on
purchasing
the
DigiSender™ X7. This product represents state
of the art wireless video and infra red
technology at exceptional value for money.
This system is fully upgradable. You can add
additional receivers, aerial convertors, wireless
baby monitor cameras and countless other
upgrades.
DigiSender™ Receiver - Part DG44RX
• Add as many receivers as you require
to your DigiSender™ system
• Connect to any SCART enabled
television or use with the MOD01PIS
Aerial Converter
• Supplied with PSU
• Requires DigiSender™, PCSender™,
or Baby Monitor transmitter
Aerial Convertor - Part MOD01PIS
• Connect a DigiSender™ receiver to
an aerial socket on your T.V.
• Shares the power supply with your
DigiSender
• Test Card signal for easy set up
• Compatible with every UK television
• Adds the DigiSender™ signal to your
existing aerial signal
www.digisender.net
http://
for the latest info, upgrades and technical support
Page 22
Online Support at www.digisender.net
What makes the DigiSender™ X7 so different is
that it provides compatibility with virtually any
make of Satellite receiver, Cable receiver, VCR,
DVD and Freeview in the market today.
You also have the ability to select which video
source you want to watch whilst you
comfortably rest in bed. You can select between
VCR, DVD and Satellite/Cable without
interfering with the channel being viewed on
your main TV.
Benefit from 4 video channels, stunning hi-fi
quality
stereo
sound
and
digital
communication providing an astounding
degree of flexibility.
Your purchase of this DigiSender™ system
represents an investment in the very latest
wireless communication technology for the
home.
CUSTOMER CARE
Telephone: 0845 1667940
E-mail: [email protected]
Please read this instruction manual carefully prior to installation
Page 3
DG440 DigiSender™ X7
DG440 DigiSender™ X7
STEP 1
Unpacking your DigiSender™ X7
Rear Panel Descriptions
RECEIVER
X
U
A
V
C
R
D
D
V
T
A
S
2
4. Audio/Video Channel
Default: Channel 1
See Advanced Section for details.
1
1. Remote Extender Channel
Default: Channel 1
See Advanced Section for details.
5. Power Supply
Connect one of the supplied power
supply adaptors here.
DigiSender
2. Audio/Video Output
Use these jacks for connection to a
RCA input on your video or Hi-Fi
DigiSender™ Transmitter
3. Audio/Video Out (SCART)
Use this lead to connect to an available
SCART input on your remote television.
All packs are computer weigh checked when packed. However, it is a good idea to
check all kit contents are present before proceeding with the installation.
POWER
T R A N S M I T T I N G
X
U
A
V
C
R
D
V
D
S
A
T
3
POWER
R E C E I V I N G
Page 4
Online Support at www.digisender.net
5
DigiSender™ Receiver
4
DigiSender
Please read this instruction manual carefully prior to installation
Page 21
3
4
5
AUX
6
7
8
1. Remote Extender Channel
Default: Channel 1
See Advanced Section for details.
5 & 6. RCA Input 3 & 4
Use these to connect to a RCA phono
device such as a CCTV camera
2. IR Emitter Output
Connect the supplied IR Emitter
remote extender here.
7. Audio/Video Channel
Default: Channel 1
See Advanced Section for details.
3. DigiConnector™ 1
Use this to connect to your satellite,
cable or terrestrial decoder
8. Power Supply
Connect one of the supplied power
supply adaptors here
4. DigiConnector™ 2
Use this to connect to your DVD player
or VCR
Online Support at www.digisender.net
2
VCR
Page 20
2 x Power Supply Unit
Remote Control
continued...
Rear Panel Descriptions
TRANSMITTER
DG440 DigiSender™ X7
1
Please read this instruction manual carefully prior to installation
1x IR Systeme Technik IR Emitter
2 x RCA Phono - 4.5mm Jack Leads
Page 5
DG440 DigiSender™ X7
DigiConnectors
SAT
DVD
DG440 DigiSender™ X7
DG440 DigiSender™ X7
STEP 2
Install the DigiSender™ X7 Transmitter Unit
Audio/Video Channel
Remote Relay Channel
The transmitter unit is designed to send video and sound from one of up to 4
connected sources to a receiver somewhere else in your home.
The DigiSender™ X7 features 4 audio/video channels and 4 primary remote relay
channels. For the unit to function correctly the audio/video channel must be set
the same on both the transmitter and receiver. Also, the remote relay channel
must be the same on both the transmitter and receiver.
STEP 2
G
IN
V
LI
M
O
O
R
Connect DigiConnector™ 2 into your VCR or
DVD. Where available, use SCART sockets labelled
OUT or TV. Connect any existing SCART lead in to
the rear socket of the DigiConnector™
Page 6
M
O
O
R
M
O
O
R
Connect DigiConnector™ 1 into your satellite or
cable receiver. Use the SCART socket labelled ‘TV’
and connect any existing SCART lead (if present)
into the rear (socket) of the DigiConnector™.
Place the DigiSender™ transmitter on a flat
surface near to your source equipment. Avoid
placing the transmitter directly on top of other
electrical devices (see troubleshooting guide)
STEP 3
G
IN
V
LI
G
IN
V
LI
STEP 1
What’s the A/B switch for??
The Contrast A/B
switch is present
to compensate
for differences in
equipment/setups.
Once installation
is complete, if
you experience a
poor picture then
adjust the A/B
setting.
Online Support at www.digisender.net
Transmitter Channel Settings
Receiver Channel Settings
1
2
3
4
Channel 1
Channel 2
Channel 3
Channel 4
ON
OFF
OFF
OFF
OFF
ON
OFF
OFF
OFF
OFF
ON
OFF
OFF
OFF
OFF
ON
Please read this instruction manual carefully prior to installation
Page 19
DG440 DigiSender™ X7
DG440 DigiSender™ X7
Frequently Asked Questions (FAQ) & Technical Support
Q:
A:
STEP 6
M
O
O
R
STEP 7
M
O
O
R
Please note that calls are charged at the local
rate and your call may be recorded for training
purposes.
Connect the IR Systeme Technik™ IR Emitter to
the socket labelled IR on the rear of the
transmitter. Follow the steps overleaf to install the
IR Systeme Technik™ IR Emitter.
G
IN
V
LI
Free technical advice is available online 24/7 at
our dedicated support web site:
Page 18
We have a dedicated helpline, Monday to Friday,
9AM - 5PM.
Ensure that both the A/V Channel and IR
Channel are set to 1.
See the trouble shooting sections for further
information on the channel selection process.
UK Customers only:
0845 166 7940
1. On the web...
http://www.aei.eu
2. By telephone...
M
O
O
R
During busy periods we would suggest using
the web option to obtain support.
A:
STEP 5
G
IN
V
LI
We have provided you with 2 methods of
obtaining technical advice on this product.
Q:
STEP 4
G
IN
V
LI
AEI Security & Communications Ltd is
dedicated to providing our customers with first
class customer care and technical support.
A:
Avoid positioning the transmitter near to 2.4GHz wireless enabled devices
such as modern games consoles, wireless controllers, laptops, DECT phones
or wireless networking equipment.
M
O
O
R
A:
Q:
and/or Audio/Video channel. It will not
operate any satellite or cable systems.
You need to use your original
satellite/cable remote control.
My neighbour is changing my
Satellite/Cable channel!
You need to change the Remote Control
Extender channel of your DigiSender™.
See page 19 for details.
Why can I see my neighbours
satellite/cable channels on my TV!
You need to change the audio/video
channel of your DigiSender™. See page
19 for details.
G
IN
V
LI
Q:
My DigiSender™ remote control has
stopped working
You need to replace the remote control
batteries. It takes a CR2025 battery,
available from most electrical outlets.
Some electrical equipment may interfere
with the remote controls operation.
Move the DigiSender™ transmitter and
receiver away from other electrical
devices and keep cables neat and tidy.
My DigiSender™ remote control won’t
change my Satellite/Cable channel!
The DigiSender™ Remote Control is
designed for changing the input device
continued...
Overseas Customers:
+44 (0) 1797 226123
Online Support at www.digisender.net
Connect the power supply unit to the socket
labelled PSU.
Connect the power supply unit (PSU) into an
available wall socket.Press the POWER button on
your DigiSender remote control to switch the
transmitter on.
Please read this instruction manual carefully prior to installation
Page 7
DG440 DigiSender™ X7
DG440 DigiSender™ X7
STEP 3
Install the IR Systeme Technik™ remote extender
TROUBLESHOOTING
Remote Control Extender
Once set up correctly, the remote
extender will enable you to utilise your
remote control in the remote location in
your home.
If you have any difficulty operating your source equipment remote control in
your second room please follow the advice below below:
Because everyone’s set up is different
there are many ways you can install the
remote extender system.
G
IN
V
LI
Ex. 1
M
O
O
R
Accessory #1
1) Ensure the IR Systeme Technik™ IR Emitter is connected to the DigiSender™
transmitter.
2) Ensure you are using the correct remote control in the second room. For
instance, if you are trying to control your satellite channel you will need to use
the satellite remote control.
Extension Pieces
3) Ensure the IR Systeme Technik™ IR Emitter is facing the remote sensor on your
source equipment.
Accessory #2
IR Emitter
Use accessories 1 and 2 to mount the IR Emitter
vertically with the IR emitting LED facing the
remote sensor of your source equipment.
5) Move the transmitter AND receiver further away from other electrical devices.
6) Choose a new remote relay channel taking care that the same channel is
selected on both transmitter and receiver.
G
IN
V
LI
Ex. 2
4) Move the IR Emitter further away from the source equipment using the
supplied extension accessory.
M
O
O
R
7) Operate the remote control closer
to the DigiSender™ receiver.
8) Replace the batteries in the
source remote control.
Mount the IR Emitter horizontally using the
supplied sticky pad. Ensure the IR emitting LED is
facing the remote sensor of the source equipment.
Page 8
Online Support at www.digisender.net
Please read this instruction manual carefully prior to installation
Page 17
DG440 DigiSender™ X7
DG440 DigiSender™ X7
OPTIONAL
Connecting inputs 3 & 4
TROUBLESHOOTING
Sound Problems
Please follow the guide below if you experience any trouble with the picture and
sound. If this guide does not solve your problem please call our customer care line
on 0845 1667940 for further assistance or email [email protected].
START
HERE
Q: What seems to
be the problem
with the sound?
1. Disconnect both the transmitter
AND receiver SCART’s. Reconnect the
leads ensuring they are pushed into
the sockets firmly.
2. If you are using a home cinema
DVD player with surround sound,
please ensure the analogue audio
output on SCART is switched on.
These inputs are ideal for:
PC with TV Out Card
Laptop
CCTV Camera
Games Console
etc.
White: AUDIO LEFT
Red: AUDIO RIGHT
Yellow: VIDEO (CCIR)
There is a hissing sound
and the volume must be
turned up high on the
second TV to hear
anything.
1. Turn the output volume UP (if
possible) on the source equipment,
such as your satellite/cable receiver
or DVD player.
2. Ensure the transmitter and receiver
are within the usable range (40m avg)
3. Switch off your microwave oven if
present.
Online Support at www.digisender.net
STEP 1
STEP 2
M
O
O
R
Change the Contrast A/B setting on
the transmitter DigiConnector™
connected to the offending
equipment.
Connect the Yellow, White & Red connectors to
the source device. Please note the connectors are
optional so for instance just white & red could be
used for a Hi-Fi element or just yellow for CCTV.
G
IN
V
LI
There is a buzzing sound
present. It seems to get
worse during on-screen
menus or bright pictures.
3.5mm Connector
for DigiSender™
Transmitter Inputs 3 & 4
M
O
O
R
The sound is distorted.
Turn down the volume on the source
device such as your satellite/cable
receiver or DVD player.
G
IN
V
LI
Page 16
I can see the picture but
can’t hear anything.
Inputs 3 & 4 can be used with any PAL
video device featuring RCA Phono
output sockets. Use the supplied
3.5mm to Phono leads to connect the
device(s) to the DigiSender™
transmitter.
Connect the 3.5mm jack to input 3 or 4 on the
DigiSender™transmitter.
Please read this instruction manual carefully prior to installation
Page 9
DG440 DigiSender™ X7
DG440 DigiSender™ X7
STEP 4
Install the DigiSender™ X7 Receiver Unit
cont...
The DigiSender™ X7 Receiver will pick up transmitted signals from the transmitter
unit and output them to a television. In addition, the receiver detects remote
controls being used in the second room and will send those signals to the source
equipment in your main lounge.
STEP 2
Switch OFF your DigiSender® RECEIVER.
Q: What do you now see at the second TV?
Place the DigiSender™ receiver on a flat surface
near to your second television. Avoid placing the
receiver directly on top of other electrical devices
such as the television.
M
O
O
R
D
E
B
STEP 3
Connect the SCART output to the second
television.
I now see a Black screen
No SCART socket on the TV??
AEI produce an ‘Aerial
Convertor ‘ enabling
you to connect
the receiver to
any TV without a
SCART socket.
Ensure that both the A/V Channel and IR Channel
are set to 1.
See the trouble shooting sections for further
information on the channel selection process.
Page 10
I see lines over the picture
M
O
O
R
D
E
B
M
O
O
R
D
E
B
STEP 1
I see a snowstorm effect or
plain blue screen
Ask for part
number
MOD01PIS
Online Support at www.digisender.net
I still see a snowstorm or
blue picture
NOT RECEIVING
SIGNAL
WRONG TV
CHANNEL SELECTED
1. Switch the DigiSender®
Receiver back on
2. Ensure the DigiSender®
Transmitter is switched on
3. Select a different audio/video
channel ensuring an identical
channel is chosen on both the
transmitter and receiver
4. Switch off any wireless
cameras and/or networks in your
household.
This indicates the SCART
Channel has NOT been selected
on the second television. Look
for buttons on this televisions
remote control which could
select the AV Channel such as
EXT, AV, VIDEO, VCR, AUX,
Channel 0 AND
.
Please read this instruction manual carefully prior to installation
INTERFERENCE
This indicates one or more
electrical devices are interfering
with the DigiSender®. To
ascertain the source of the
interference, switch OFF any
wireless networking equipment,
laptops, 2.4GHz DECT phones,
games consoles or bluetooth
devices. Try all 4 audio/video
channels as one or more may
still be available. Visit
digisender.net or contact our
helpline for information on
configuring your equipment to
work together.
Page 15
DG440 DigiSender™ X7
DG440 DigiSender™ X7
TROUBLESHOOTING Picture Problems
continued...
Q: What do you see on your second television?
The picture is present but
poor quality
I see black or blank screen
Did you know? The receiver can be connected to a Hi-Fi unit using
the Left & Right Audio outputs on the rear of the DigiSender™receiver unit.
Phono cable may be required.
Page 14
Switch OFF your DigiSender® TRANSMITTER
What do you now see at the second TV?
I still see a Black Screen...
Connect the power supply unit to the socket
labelled PSU.
Connect the power supply unit (PSU) to an
available wall socket.
STEP 6
Press the POWER button on your DigiSender
remote control to switch the receiver on. The
power LED will be green to indicate the device is
switched on.
Switch on the second television and select it’s
SCART channel. This will be labelled on the
remote control as one of the following buttons:
I now see a snowstorm or
blue screen...
WRONG AV TV
CHANNEL SELECTED
RECEIVING BLANK
SIGNAL
1. Switch the transmitter back
on.
2. Ensure the correct SCART
channel is selected on your
second television. Some
televisions feature multiple AV
channels for one or more
SCART, phono and S-Video
inputs.
3. If available try another SCART
socket on the remote television
1. Switch the transmitter on.
2. Ensure the transmitter is
connected to your source device.
3. Ensure that the source
equipment is switched on (such
as your satellite or freeview box)
4. Use the supplied remote
control to select the correct
input channel. This can be done
at either the transmitter or
receiver.
Online Support at www.digisender.net
M
O
O
R
D
E
B
1. The picture & sound quality is
affected by the transmitter and
receiver’s location. Try
positioning them in different
locations. The transmitter and
receiver must be connected to a
mains extension lead that can be
moved.
2. Try the 3 other available
channels ensuring that the
audio/video channel is set to the
same on both the transmitter
and receiver
3. Ensure the units are within
the usable range, normally this
would be 40m when passing
through 2 average internal walls.
Thicker or stone/granite walls
may lower the usable range of
this device.
STEP 5
M
O
O
R
D
E
B
POOR RANGE
M
O
O
R
D
E
B
STEP 4
AV, VIDEO, VCR, AUX, SCART,
EXT, 0
Refer to your tv’s manual for further assistance.
Please read this instruction manual carefully prior to installation
Page 11
DG440 DigiSender™ X7
DG440 DigiSender™ X7
STEP 5
Using the DigiSender™ X7
continued...
The DigiSender™X7 is designed to be
simple to use once set up.
STEP 2
M
O
O
R
M
O
O
R
D
E
B
G
IN
V
LI
STEP 1
The supplied remote control can be
used to switch between sources, such
as Satellite/Cable, DVD and VCR.
2nd TV
REMOTE
CONTROL
Select the SCART channel on the second television
using the televisions remote control. Look for a
button labelled AUX, AV, VIDEO, VCR or
.
Switch on the source equipment such as your
satellite receiver or DVD player.
DIGISENDER
REMOTE
CONTROL
Select the correct source device using the
supplied remote control pointed at the
DigiSender™ receiver - see opposite.
Page 12
STEP 4
M
O
O
R
D
E
B
M
O
O
R
D
E
B
STEP 3
SOURCE
REMOTE
CONTROL
Transmitter Source Select Controls.
The POWER button toggles the
DigiSender transmitter and receiver
mode between STANDBY and ON. The
power LED indicates the current mode
- GREEN for ON, RED for STANDBY.
Press 1,2,3 or 4 with the remote
pointing at your receiver, to select a
device connected to your DigiSender™
transmitter. For example you could
switch between your satellite/cable,
DVD, VCR and CCTV camera from your
bedroom.
1
2
3
4
=
=
=
=
DigiConnector 1
DigiConnector 2
RCA Input 3
RCA Input 4
Please use your original or compatible
remote controls to control your source
equipment. The supplied remote
control cannot be used to achieve
this.
Use your original source equipment remote control
to control what channel you watch or your DVD
player or VCR.
Online Support at www.digisender.net
Please read this instruction manual carefully prior to installation
Page 13


