1
Common Development Models
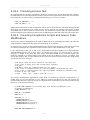
a. Use the Oracle JDK. If you don't have that, go to http://www.oracle.com/technetwork/java/
javase/downloads/jdk7-downloads-1880260.html and download the appropriate tarball for your
development system and extract it into your home directory.
b. In the shell you are going to do your work, export the location of the Oracle Java as follows:
export PATH=~/jdk1.7.0_40/bin:$PATH
2. In the same shell, create a Git repository with:
$ cd ~
$ git clone git://git.yoctoproject.org/eclipse-poky-kepler
Note
If you are using Juno, the repository is located at git://git.yoctoproject.org/eclipsepoky-juno.
For this example, the repository is named ~/eclipse-poky-kepler.
3. Change to the directory where you set up the Git repository:
$ cd ~/eclipse-poky-kepler
4. Be sure you are in the right branch for your Git repository. For this release set the branch to dizzy:
$ git checkout dizzy
5. Change to the scripts directory within the Git repository:
$ cd scripts
6. Set up the local build environment by running the setup script:
$ ./setup.sh
7. When the script finishes execution, it prompts you with instructions on how to run the build.sh
script, which is also in the scripts directory of the Git repository created earlier.
8. Run the build.sh script as directed. Be sure to provide the name of the Git branch along with the
Yocto Project release you are using. Here is an example that uses the dizzy branch:
$ ECLIPSE_HOME=/home/scottrif/eclipse-poky-kepler/scripts/eclipse ./build.sh dizzy dizzy
After running the script, the file org.yocto.sdk-<release>-<date>-archive.zip is in the current
directory.
9. If necessary, start the Eclipse IDE and be sure you are in the Workbench.
10.Select "Install New Software" from the "Help" pull-down menu.
11.Click "Add".
12.Provide anything you want in the "Name" field.
39