1
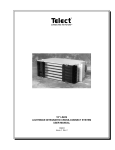
® CONNECTING THE FUTURE ® 23" LINXS LIGHTWAVE INTEGRATED CROSS-CONNECT SYSTEM USER MANUAL 107336 Issue A Rev 1 23" Lightwave Integrated Cross-Connect System (LINXS) User Manual Document Number 107336 Issue A Rev 1 Copyright© Telect, Inc., 1998, All Rights Reserved. Telect and Connecting the Future are registered trademarks of Telect, Inc., 2111 N. Molter Rd., Liberty Lake, Washington 99019 Note: Telect assumes no liability from the application or use of these products. Neither does Telect convey any license under its patent rights nor the patent rights of others. This document and the products described herein are subject to change without notice. ii Telect, Inc. 107336 Issue A Rev 1 Contents Section 1 Descriptions 23" LINXS .................................................................................. Main Assemblies.......................................................................... Shelf Assemblies.................................................................... Tray Components ................................................................... 1-1 1-1 1-2 1-2 Section 2 Installation Installation Considerations .......................................................... 2-1 Inspection ..................................................................................... 2-1 Equipment to be Installed ...................................................... 2-1 Required Tools ....................................................................... 2-2 Installation Procedure .................................................................. 2-2 Mounting the LINXS Shelf to a Rack ................................... 2-2 Tray Installation ..................................................................... 2-3 Cabling the Rack.................................................................... 2-4 Splicing.................................................................................. 2-5 Patching ................................................................................. 2-9 Storing Cables...................................................................... 2-11 Issue A Rev 1 107336 Telect, Inc. iii 1 Descriptions 23" LINXS LINXS (Lightwave Integrated CrossConnect System) is an advanced, integrated fiber optic cable management system. It provides a central location for fiber splicing, patching, and storage. It includes shelves, trays that mount into the shelves, and accessories. Telect engineered the 23" LINXS for central office, outside plant, and customer premise environments or for any application where 23" (58.4 cm) equipment racks are standard. MAIN ASSEMBLIES LINXS is a totally integrated system. It includes: • • • • • Issue A Rev 1 Network frame relay racks and accessories. Four types of shelf assemblies. Four types of trays that mount into the shelf assemblies. Routing and protection hardware for fiber cable. Multifiber cable assemblies and industry-standard assemblies. 107336 Telect, Inc. 1-1 Descriptions 23" LINXS User Manual Shelf Assemblies There are four types of LINXS shelves: patch, splice, and storage (which come loaded with the same type of tray), and the unloaded shelf (no trays installed). But any LINXS shelf can have a mix of trays. Shelves come in three sizes: single-tray, three-tray, and six-tray (single-tray shelf shown). Each shelf includes a metal chassis, transparent front and rear access door, springloaded door latches, cable management hardware, and mounting screws. Tray Components The four types of trays include: splice, right patch (fiber enters & exits tray on the right side), left patch (fiber enters & exits tray on the left side), and storage trays. Each plastric tray includes slack cable spools, cable management hardware, designation strips, and cable warning labels. (The right patch tray is shown here.) REAR Flip Top Gate Slack Cable Spool Bulkhead Plate K1 Fiber Channel TOP Warning Label Designation Strip ® FRONT 1-2 Telect, Inc. 107336 Issue A Rev 1 2 Installation INSTALLATION CONSIDERATIONS Telect engineered the 23" LINXS central office, outside plant, and customer premis environments or for any application where 23" (58.4 cm) equipment racks are standard. INSPECTION Compare the contents of the LINXS shipping container with the packing list. Call Telect if anything is missing. NOTE Telect is not liable for shipping damage. If the shipping container is damaged, keep it for the carrier’s inspection. Notify the carrier and call Telect’s Customer Service Department: 1-800-551-4567 or 1-509-926-6000 Keep the container until you have checked equipment operation. If you experience any kind of problem, call Telect’s Customer Service Department. Use the original, undamaged container if you are instructed to return the LINXS to Telect. Equipment to be Installed • LINXS shelf and trays • Cable clamp kit • Splice mechanism Issue A Rev 1 107336 Telect, Inc. 2-1 Installation 23" LINXS User Manual • • • • • • Splice pad appropriate for splice method Adapters (for patch trays) Pigtails or patch cords (for patch trays) Optional— K2 Post & Gate cable management components Optional— 3/8" heat-shrink tubing (for outside plant cable to splice tray) Optional— Talcum powder NOTE Contact a Telect Customer Service Representative if you need to order any of the parts listed above: 1-800-551-4567 or 1-509-926-6000 If you order cable clamp kits (PN 027-1000-1001 through 1005) and K2 Post & Gate (PN 027-0000-2000) cable management components, specify rack or shelf clamping, and if shelf, front or back. Required Tools • Cable stripper • Kevlar cutter • Screwdrivers— Phillips and small flathead • Buffer tube stripper • Wrenches— 5/32" Allen and 3/8" open (or adjustable) • Nut drivers or wrenches— 5/16" and 7/16" INSTALLATION PROCEDURE Mounting the LINXS Shelf to a Rack Each shelf, except a base shelf, comes loaded with trays and K1 fiber routing components installed. Also, every shelf comes with the K2 components and screw bags. The screw bags include ten 12-24 mounting screws and eight 6-32 screws. NOTE If possible, mount the shelves intended for splicing between 20" and 50" (51–127 cm) from the floor for easy access and central location. 2-2 Telect, Inc. 107336 Issue A Rev 1 23" LINXS User Manual Installation Step Action 1. Attach the narrow side of the mounting brackets to each side of the shelf using the 6-32 screws. ð 2. Attach the shelf to the rack using four 12-24 mounting screws on each side. Tray Installation These instructions concern those shelves that do not have trays already installed. If these instructions do not pertain to you, see the next subsection, "Cabling the Rack," on page 4. Step Action 1. Open the front shelf door by pulling outward on the spring-loaded latches at the top. ð 2. Fully extend the tray guides. ò Shelf Left Tray Guide 3. Position the nose of the left tray tab into the middle of the tray guide slot, behind the nub, where the slot is the most expandable. ð NOTE It will not be possible to snap the tab into position near the ends of the tray guide, nor exactly next to the metal shelf, where the slot is not expandable. Issue A Rev 1 107336 Lower Groove Tray (Top Left Corner) Telect, Inc. 2-3 Installation 23" LINXS User Manual 4. Snap the tab into the tray guide slot by squeezing the tray guide against the support between the thumb and forefinger. This may require a moderate amount of force. ð This should result in the left edge of the tray correctly placed in the lower groove of the guide. Tray (Top Left Corner) Tab Tray Guide Front View Lower Groove 5. Bend the end of the right tray guide out sufficiently (about 1/4") to position the nose of the right tray tab into the slot of the tray guide. 6. Repeat Step 4 on the right side of the tray. 7. Close tray fully and confirm that it seats properly. Cabling the Rack K2 Posts & Gates can route, protect, and store fiber cable on racks. The racks can be 19" or 23", and unequal-flange or equal flange with extender panels. K2 Posts & Gates mounted back-toback on extender panels that are attached to any kind of rack can serve as storage spools. 2-4 Telect, Inc. 107336 Issue A Rev 1 23" LINXS User Manual Installation Step Action 1. Attach the K2 posts to the rack with the supplied screws. 2. Snap open the K2 gates. ð 3. Route fiber cables over the K2 posts. 4. Close the K2 gates to retain the cables. 5. Clamp loose tube and break-out fiber cable to the rear of the fiber distribution frame (FDF) adjacent to the appropriate LINXS shelf position using a cable clamp. ð Post Gate Attach the clamp, using the supplied screws, either to a mounting flange or directly to the rack: Rack Mount to Rack Directly Attaching Mounting Flange to Rack Splicing Issue A Rev 1 107336 Telect, Inc. 2-5 Installation 23" LINXS User Manual Before starting to splice cables, verify the shelf is equipped with splice tray(s) and that each splice tray contains the correct type of splice pad. Do not remove the splice tray when splicing cables. Step Action 1. Remove 76" (193 cm) or more of the outer sheath and kevlar from the cable. 2. Clean off excess sheath and kevlar material. 3. Trim strength member to a length of 16" (40 cm) from the end of the outer sheath. 4. Attach a ground lug (provided in the clamp kit) to the rack at least 5" (13 cm) from the clamp: Plant Cable Dielectric/ Strength Member Clamp K2 Gate Rack Rack Flange Ground Lug 5. Insert the strength member into the ground lug, tighten the lug firmly, and cut off the excess length. ö 6. Remove the 6-foot length of flexible tubing and the K1 gate clips from the splice tray. 7. Outside plant cable requires the application of flexible tubing to the 6- or 12-strand fiber bundles in place of the stiffer buffer tube: a. Extend the buffer tube from the cable clamp to the entry link on the rear corner of the LINXS shelf. b. Cut the buffer tube jacket 2 inches (5.1 cm) before the entry link and remove it from the cable. c. Clean the gel from the fiber strands and apply talcum powder, if desired, to reduce friction. d. Cut the flexible tubing in half. e. Feed the fiber strands through one piece (about 3 feet or 0.91m) of the flexible tubing. 2-6 Telect, Inc. 107336 Issue A Rev 1 23" LINXS User Manual Installation f. Slide the flexible tubing over the end of the buffer tube with 1/2" (1.5 cm) of overlap. The flexible tubing should fit tightly over the buffer tube. ð g. Optional–Apply 3/8" (0.95 cm) heat-shrink tubing to further secure the flexible tubing to the buffer tube. h. If necessary, repeat Step 7a through 7g for a second buffer tube. However, do not repeat Step 7d (do not cut the flexible tube in half again). 8. 9. Secure the cable to the rear entry link with a cable tie threaded through the slots in the link . For the outside plant cable, secure the fiber at the flexible tubing. ð Cable Tie Remove the K1 fiber channel from the side of Flexible Tube the tray that will receive this outside plant cable. Entry Link a. With the tray open, detach the channel from its tray link by lifting up on the locking tab of the link with a small screwdriver and pulling off the channel, or by removing the tray link screw. ð b. With the tray closed, detach the channel from its rear entry link: Push a small screwdriver into the last small hole underneath the attachment point to release the locking tab, then pull the channel from the link. ð Channel Link Locking Tab Entry Link (Rear) c. Remove the channel from the rear of the tray. Issue A Rev 1 10. Place the flexible tubing containing the fiber strands into the K1 fiber channel, and attach K1 gate clips to one in every three or four links to secure the tubing within the channel. 11. Slide the tray-link end of the K1 fiber channel back into the tray. Push the attachment link of the K1 channel onto the rear entry link. 107336 Telect, Inc. 2-7 Installation 23" LINXS User Manual 12. Repeat Steps 8–11 for the pigtails that come into the tray from the other side. Flexible tubing is not necessary for pigtails. However, remove the jacket from the pigtails where they extend beyond the cable-tie point. 13. Place the fibers that extend Spools Routing Guides beyond the tray link of the Pigtails K1 fiber channel into the routing guides at the rear of K1 Fiber the tray, bringing them beChannel hind both spools and down to the front. Fiber and pigtails should cross each other behind the spools. There should be about 40 inches (102 cm) of slack fiber and pigtails draped over the front of the tray. 14. Push the red rubber tube pieces (supplied in the tray) into the routing guides to hold fibers and pigtails in position. ð 15. Now fiber can be spliced and stored: Cable Fiber, Pigtails NOTE From the rear of the splice pad to the front, each spice requires about 1/4" more fiber length than the previous one. a. Guide two fiber strands (cable and pigtail) into the rearmost splice position and adjust their length so that after being prepared, spliced, and wrapped, they will lie neatly across the splice tray. b. Remove the fiber strands to the splice table. c. Prepare the fiber, then splice according to the splice manufacturer. d. Place the completed splice into the splice pad. e. Repeat substeps a through d for remaining splices, working forward. f. Wrap the slack fiber around the spools. Here is a completed tray: 2-8 Telect, Inc. 107336 Issue A Rev 1 23" LINXS User Manual Installation 16. Identify each splice on the designation strip in the tray and/or on the strip on the front of the tray. 17. Replace the plastic splice compartment cover and close the splice tray. Patching NOTE You can purchase LINXS patch trays with or without adapters. Specify adapters— Telect stocks most of the industry standards— even when you order trays without them to ensure proper-sized mounting holes. Slack Cable Spool K1 Fiber Channel Flip Top Gate LEFT Bulkhead Plate Step Action 1. Open the patch tray. 2. If adapters are installed, go directly to Step 3. RIGHT To install adapters: a. Remove the two Phillips screws that secure the patch plate to the tray, then pull out the plate. b. Mount the adapters on both sides of the patch plate. c. Secure the patch plate in the tray by reinstalling the two screws. 3. Remove the rear K1 fiber channel from the tray. a. With the tray open, detach the channel from its tray link by lifting up on the locking tab of the link with a small screwdriver and pulling off the channel, or by removing the tray link screw. ð Issue A Rev 1 107336 Telect, Inc. 2-9 Installation 23" LINXS User Manual b. With the tray closed, detach the channel from its entry link: Push a small screwdriver into the last small hole underneath the attachment point to release the locking tab, then pull the channel from the link. ð Channel Link Locking Tab Entry Link (Rear) c. Remove the channel from the tray. 2-10 4. Place the pigtails into the K1 fiber channel, and attach K1 gate clips to one in every three or four links to secure the tubing within the channel. 5. Slide the tray-link end of the K1 fiber channel back into the tray. Push the attachment link of the K1 channel onto the rear entry link. 6. Open the tray and reattach the channel to the tray link. 7. Wrap the pigtails entering the patch tray at the rear K1 fiber channel around the slack cable spools, then connect them to the rear of their respective adapters. 8. Pull the jumper cables into the left or right side of the tray (as appropriate), and route these cables through the guides in the tray. 9. Connect the jumper cables to the front side of their respective adapters. Once these cables are in place, attach gate clips to hold the cables in place. 10. A completely cabled patch tray looks like this: 11. Close the patch tray. Telect, Inc. 107336 Issue A Rev 1 23" LINXS User Manual 12. Installation Remove the designation strip from the front of the tray, identify each patch, and replace the strip. ð Storing Cables The LINXS storage tray can be used to store excess fiber cable and as a cross-over point for patch cords. Issue A Rev 1 Step Action 1. Open the storage tray. 2. Place the fiber cable into the K1 fiber channels. 3. Secure the cable in the channel with the K1 gate clips supplied with the tray. 4. Route the cables around the spools to take up the slack: 5. Close the tray. 107336 Telect, Inc. 2-11 Telect, Inc. 2111 N. Molter Rd. P.O. Box 665, Liberty Lake, WA 99019 509-926-6000, 800-551-4567, Fax 509-926-8915 E-mail: [email protected] Internet: http://www.telect.com