1
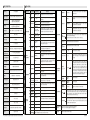
SPECIFICATON
Model No.
OSD MENU
SK-B260/G1
Function
setting menu
Select menu
Fixed focal lens or Vari-focal auto iris lens
0 ~ 100
In case of manual lens selection, adjust the
brightness
AUTO
Shutter speed auto adjustable
1/60(1/50) ~
1/100,000
Select shutter speed manually
AGC
OFF, LOW,
MIDDLE, HIGH
Determines that use the AGC function or not
and AGC level selectable(You can not use the
Auto D&N change mode when AGC is off)
DWDR
OFF, LOW,
MIDDLE, HIGH
Digital Wide Dynamic Range
BLC
OFF, ON
BLC function
HLC
OFF, ON,
AUTO
High Light Mask function
In case of AUTO mode, the function will off in
daytime and on at night
0 ~ 100
According to the threshold value, the camera
will recognize as High light or not.
ATW
Color temperature 2500 ~ 9500°
K
MANUAL
Adjust the Red or Blue values to shift the color
of the object
AWC↓
Move the camera lens toward to white paper
then press the enter button to find the optimal
white balance for current environment
AUTO
Auto day&night switching mode
COLOR
Fixed at color
B&W
Fixed at B/W
OFF, ON
Determines whether to transmit the burst signal
or not in B/W mode
COLOR→BW 75 ~ 170
BW→COLOR 40 ~ 135
You can select brightness of illumination about
changing the day ↔ night mode
1/3" COLOR SONY SUPER HAD CCDⅡ
BRIGHT
Effective Pixel
768(H) x 494(V)Pixel(NTSC)
752(H) x 582(V)Pixel(PAL)
Cell Size
6.35㎛(H) x 7.4㎛(V)(NTSC)
6.5㎛(H) x 6.25㎛(V)(PAL)
Resolution
TV Type
Sync. Type
Scanning System
Color : 60 0 TV-Line, B/W : 680 TV-Line
NTSC / PAL
Internal
2 : 1 Interlace
Video Output
1.0Vp-p(Sync, Negative) Termination 75Ω
Gamma
Characteristic
γ = 0.45 Typ.(Adjustable)
Min. Illumination
0.1 Lux(at F/1.2)
Day & Night
Electronic D&N
S/N Ratio
E.SHUTTER
1. EXPOSURE
HLC THR
2. WHITE
BALANCE
AWB MODE
48dB over(AGC OFF)
D&N MODE
Test Illuminance
Area
Shutter
Power Supply
Current
Consumption
Reverse Polarity
Protection
LENS
Operation Temp.
Preservation Temp.
Dimension
Weight
Average test illuminance by front view
1/50(1/60) ~ 1/100,000 sec
3. DAY&NIGHT
Regulated 12V DC
Non-polarity
CS Mount
-10℃ ~ 50℃
-20℃ ~ 60℃
36.5mm(W) x 36.5mm(H) x 51mm(L)
Approx. 100g
※All specification is subject to change without notice to improve the quality.
BURST
3 ~ 15
You can select the duration time about chainging
the day ↔ night mode
MIRROR
OFF, ON
Set a horizontal image inversion
SHARPNESS
0 ~ 50
Sharpness adjustable
GAMMA
0.45, 0.6, 1,
USER
Gamma adjustable
LSC
OFF, ON
Determines whether to use the brightness
compensation of four lens' corners(LSC) or not
DELAY TIME
Max. 105mA(at 12V DC)
4. IMAGE
ADJUST
Contents
MANUAL, DC
LENS
Image Sensor
Sub menu
LSC LEVEL
0 ~ 50
MOTION
DISPLAY
5. MOTION
6. PRIVACY
MASK
8. SPECIAL
The LSC level selectable
R-Y GAIN
0 ~ 200
Adjust Red tone of the image
B-Y GAIN
0 ~ 200
Adjust Blue tone of the image
PATTERN
GENERATOR
Test signal. Press the enter button, color bar appeared on the
screen and press any key to return to menu
OFF, ON
Determines whether to use the motion detection
function or not
NONE
No display on the screen though movement is
detected
MESSAGE
The words 'MOTION' appear on the screen
when movement is detected
MASK
Motion detection area appear on the screen
when movement is detected
SET
WINDOW
Press the enter button to move into the motion detection area
section to set the 64 areas.
Press the enter button for a few second to move out.
ALL SET↓
Press the enter button to select all area
ALL
CLEAR↓
Press the enter button to remove all area
SENSITIVITY 0 ~ 255
Motion detection sensitivity
HOLD TIME
1 ~ 15
Set the duration of outside alarm. If the way of
display is message, it means display time of
message
MASK
1, 2, 3, 4
OFF, ON
Display each privacy mask or not. Press the
enter button to move into the privacy mask
setting section, whenever you press the enter
button, the mask color is changed. When the
mask color is red you can adjust the size by
up, down, left and right button. When the mask
color is blue you can set the position of mask
by up, down, left and right button. Press the
enter button for a few second to escape
MASK
COLOR
BLACK,
GRAY …
Select mask color
LANGUAGE
ENGLISH,
KOREA …
Select language
NAME
DISPLAY
OFF, ON
Display the camera ID on the screen
EDIT
Press the enter button to move into the name setting section.
You can choose the letter by using up and down button and
move next letter by using left and right button. Press the enter
button for a few second to move out.
POSITION
Press the enter button to move into the position setting section.
You can move the camera ID to your wanted position by using
up, down, left and right button.
9. FACTORY
SET
To reset your camera to factory default condition.
Notice : Lens and language is not changed.
10. EXIT
Save the value and then restart.
3B15808A