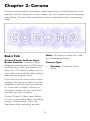
1
permission of Alien Skin Software, LLC.
Don’t make us come after you; we
have more fun things to do.
Alien Skin Software
1111 Haynes Street, Suite 113
Raleigh, NC 27604 USA
Phone:
1-919-832-4124
Toll-free in USA: 1-888-921-SKIN
(7546)
Fax: 1-919-832-4065
Email: [email protected]
For Tech Support:
[email protected]
On the Web:
http://www.alienskin.com
This manual is copyright 2004 by Alien
Skin Software, LLC. All rights reserved.
Alien Skin is a trademark and Eye
Candy is a registered trademark of
Alien Skin Software, LLC. All rights
reserved.
The Eye Candy software is furnished
under a license agreement found in the
software installation program.
Information in this document is subject
to change without notice. No part of
this document may be reproduced or
transmitted in any form or by any
means, electronic or mechanical, for
any purpose, without the written
Adobe and Adobe Photoshop are
registered trademarks of Adobe
Systems, Incorporated. Macintosh is a
trademark of Apple Computer,
Incorporated. Windows is a trademark
of Microsoft Corporation. Fireworks is
a registered trademark of Macromedia,
Incorporated. Paint Shop Pro is a
registered trademark of Jasc,
Incorporated. All other product names
mentioned in this manual are used for
identification purposes only and may
be trademarks or registered trademarks
of their respective companies.
Registered and unregistered
trademarks used herein are the
exclusive property of their respective
owners. Alien Skin Software, LLC,
makes no claim to any such marks, nor
willingly or knowingly misused or
misapplied such marks.
We will never wear suits.
Contents
Getting Started ................................................................................ 1
Welcome ........................................................................................... 1
What’s New ....................................................................................... 1
Eye Candy 5 Release Schedule ........................................................... 3
Host Requirements .............................................................................. 3
System Requirements .......................................................................... 3
Macintosh Installation......................................................................... 4
Windows Installation........................................................................... 5
Registering Nature .............................................................................. 6
User Interface ..................................................................................... 6
Common Tools .................................................................................. 6
Using Settings .................................................................................. 10
Keyboard Shortcuts........................................................................... 13
Corona ........................................................................................... 14
Fire ................................................................................................. 18
Drip ................................................................................................ 21
Icicles ............................................................................................. 25
Ripples ........................................................................................... 28
Rust ................................................................................................ 32
Smoke ............................................................................................ 35
Snow Drift ...................................................................................... 39
Squint ............................................................................................. 42
Water Drops ...................................................................................45
Troubleshooting ............................................................................. 48
ii
Chapter 1: Getting Started
Welcome
Welcome to Eye Candy 5: Nature
(Nature), a set of 10 plug-in effects
for Photoshop and other compatible
graphics host programs.
What’s New
•
Eye Candy 5 Release Schedule
•
Host Requirements
•
System Requirements
•
Macintosh Installation
•
Windows Installation
•
User Interface
•
Keyboard Shortcuts
•
Ripples
•
Snow Drift
Several interface improvements
appear in the Eye Candy 5 series:
What’s New
•
Improved Settings management—settings are now accessed
under the Settings tab. You can
create, manage, save, share and
backup settings. See the Using
Settings section for more details.
•
UpToDate—a messaging system
we will use to communicate with
our users. See the UpToDate
Messages section for more
details.
•
Intra-product navigation—switch
from one Eye Candy 5 filter set to
another from within the Nature
user interface.
Changes to Existing
Filters
This section lists the new filters,
features and improvements included
in Nature.
Besides the aforementioned user
interface changes and new filters, Eye
Candy veterans will notice the
following updates to pre-existing
filters:
New Filters
Nature adds four new effects to the
Eye Candy family of filters:
•
Rust
Interface Improvements
This chapter explains how to install
your software and provides an
overview of the features common to
each filter. In this chapter, you’ll find
the following sections:
•
•
Icicles
1
•
Corona —Corona can create a
new layer in Photoshop, then
apply the effect there. We’ve also
added a Photoshop style gradient
editor so you can recreate perfect
solar flares.
•
Drip—Melt and drip have been
combined. They were so complimentary, we figured you were
wasting your time jumping from
filter to filter.
“Click here for new messages from
Alien Skin Software.” Click this link to
read your new messages. See the
interface example below:
Customizing UpToDate
Preferences
•
Fire—Fire has an all-new photoReceiving messages is optional. You
realistic look. This one gets the
can specify the intervals at which your
gradient editor, and new layer
UpToDate system checks for
features too.
messages. To customize your
• Smoke—Smoke has also been UpToDate message preferences, use
the following instructions:
rewritten for a brand-new look
and more versatility. Like Fire,
1. In any filter, Click Edit >
you can apply smoke to its own
Preferences .
layer from the filter itself.
2. Select the frequency at which you
• Squint—Squint has new streakwould like the UpToDate system
ing features to imitate light
to check for new messages. If you
refracted by water and more.
don’t want to receive messages,
• Water Drops—Water drops is
select Never.
much more realistic. Drops pool
Windows users: If you have a dialtogether more naturally and the
up Internet connection, you should
lighting tools have improved.
select the Ask me before making
an Internet connection option. If
UpToDate Messages
not, your computer will make
unexpected phone calls.
The UpToDate messaging system
keeps you informed about the latest
Macintosh users: If you have a
Alien Skin Software products, special
dial-up Internet connection, deselect
offers, software updates and other
the Ask me before making an
news.
Internet connection option. You
must establish an Internet connection
When you receive a message, an
before receiving UpToDate messages.
unobtrusive visual cue announces,
2
Seamless Tiling
Host Requirements
Some filters feature a seamless tiling
option. Seamless tiles are rectangular
images that fit together like a puzzle
when lined up next to each other.
This is a plug-in; you must use it with
a compatible host program.
Note: Seamless tiles should only be
used for specialized jobs, such as
desktop wallpaper, Web backgrounds
or 3-D graphics. Don’t use this
feature unless you have to.
Adobe Photoshop 7 or later
Macintosh Hosts
Adobe Photoshop Elements 2 or later
Macromedia Fireworks MX 2004 or
later
Windows Hosts
To get the best results when creating
seamless tiles, you should follow a
few simple guidelines:
Adobe Photoshop 7 or later
Adobe Photoshop Elements 2 or later
•
Always create seamless tiles in
rectangular selections.
•
Don’t use tiny tiles. Small tiles
create obvious repetitive patterns.
•
If you intend to use seamless tilRequirements
ing, select the Seamless Tile
option before you tweak the
Macintosh Systems
effect. If you don’t, the filter may
need to stretch the texture dispro- • 500 MHz PowerPC G3 processor
portionately.
• 256 MB RAM
Macromedia Fireworks MX 2004 or
later
Jasc Paint Shop Pro 8 or later
System
•
Eye Candy 5
Release Schedule
Mac OS X 10.2.6 or later
Windows Systems
Eye Candy 5 is being upgraded in
three collections. Textures was the first
and Nature is the second set in the
series. Each set contains 10 filters.
The final upgrade to Eye Candy 5,
Impact, will be released by the
summer of 2005.
3
•
1 GHz Pentium III processor
•
256 MB RAM
•
Windows 2000 or Windows XP
Macintosh
Installation
12-letter code in the e-mail
invoice, sent with your
downloaded software. Store this
e-mail in a safe place for future
installations.
Use the following instructions to install
Nature:
1.
8.
Shut down your graphics host
program (Photoshop, Fireworks,
or Elements).
Our installer will now search for
Photoshop 7, CS, Elements or
Fireworks MX 2004.
Note: To install Nature, your OS
X user account must have
administrator privileges. For
information on configuring your
user account for administrator
privileges, talk to your IT guy or
consult your OS X user manual.
2.
9.
Insert the Nature CD into your
computer. If you purchased an
electronic version of Nature,
locate the Nature installation
program that you downloaded
from the online store.
3.
Double-click the Install Nature
icon.
4.
Click Continue.
5.
Read the License Agreement.
6.
Click Accept.
7.
Enter your name, company name
(optional) and your registration
code.
Click Register.
Photoshop users: Highlight
<Drive> / Applications /
Adobe Photoshop (7 or CS)
/ Plug-ins and click OK to
install Nature. The installer will
find the Photoshop plug-ins
folder and install Nature there.
Elements users: Highlight
<Drive> / Applications /
Adobe Photoshop Elements
2 / Plug-ins and click OK to
install Nature. The installer will
find the Photoshop plug-ins
folder and install Nature there.
Fireworks MX 2004 users:
Highlight <Drive> /
Applications / Macromedia
Fireworks MX 2004 / Plugins and click OK to install
Nature. The installer will find the
Photoshop plug-ins folder and
install Nature there.
Note: The registration code is a
12-letter sequence inside the
front cover of your manual.
Photoshop users can check for
the plug-in location by selecting
the Plug-In option under the
Preferences sub-menu of
Photoshop’s Edit menu.
If you purchased an electronic
version of Nature, you’ll find the
4
If the installer does not
find the plug-ins folder:
Click the Choose another
install location button.
Locate your plug-in folder. If you
do not choose the proper folder,
the filters will not show up in your
Filters menu.
Note: If you are not sure where
to install Nature, consult your
graphics program user manual.
10. Highlight the folder and click the
Choose button to return to the
main installation screen. The
installer copies the files to your
hard disk.
2.
Insert the Nature CD into your
computer. If you purchased an
electronic version of Nature,
locate the installation program
that you downloaded from the
online store.
3.
Double-click the Setup.exe
icon.
4.
Click Next.
5.
Read the License Agreement.
6.
Click Accept.
7.
Enter your name, company name
(optional) and your registration
code.
Note: The registration code is a
12-letter sequence inside the
front cover of your manual.
Rerun the installer if you wish to
install Nature into other graphics
programs.
If you purchased an electronic
version of Nature, you’ll find the
12-letter code in the e-mail
invoice, sent with your
downloaded software. Store this
e-mail in a safe place for future
installations.
Windows Installation
Use the following instructions to install
Nature:
1.
Shut down your graphics host
program (Photoshop, Fireworks,
Elements or Paint Shop Pro).
8.
Note: To install Nature, your
Windows 2000 or XP user
account must have administrator
privileges. For information on
configuring your user account for
administrator privileges, talk to
your IT guy or consult your user
manual.
9.
Click Next.
Our installer will search for all
compatible graphics programs
on your computer and display
them in a list.
Highlight one program (you can
only install into one graphics
program at a time) and click OK .
Rerun the installer if you wish to install
Nature into other graphics hosts.
5
Registering Nature
The Edit menu also allows you to
copy, cut, paste and delete values
from parameter fields.
You must register your software to
receive technical support and critical
product updates. Registration also
qualifies you for product discounts
and upgrade pricing on future
versions of Eye Candy.
Filters Menu: This menu allows you
to switch between filters in the user
interface. Photoshop users should
note that they switch between filters in
the Filters menu, the Actions,
History, and Last Filter Used
functions record the filter you initially
selected.
If you purchased Nature directly from
Alien Skin Software, you are
automatically registered with us. You
only need to register if you purchased
Nature elsewhere.
View Menu: This menu allows you
to zoom the preview in and out. To
display the preview at 100%
magnification, select Actual Pixels .
See Keyboard Shortcuts on page13.
You can register online at
http://www.alienskin.com/register. If
you don’t have access to the World
Wide Web, mail in the registration
card included with your software.
Help Menu: The Help menu leads
to local documentation and online
Web pages. Clicking Help > Filter
accesses filter-specific
documentation. The same assistance
can be reached by pressing F1
(Windows) or Help (Macintosh).
User Interface
Menus: Command menus are
accessible when you launch any filter.
Macintosh users will see the menus in
place of their usual menu bar.
Windows users will see the menus at
the top of the filter preview window.
Edit Menu: This menu allows you
an unlimited number of Undos and
Redos. If you experiment with the
sliders, and find that you prefer a
previous group of settings, simply use
the Undo command in the Edit
menu, or use Command + Z (Control
+ Z on Windows machines) to back
up as many times as necessary.
To access a Table of Contents for the
online help, click Help > Contents.
Common Tools
To limit redundancy in the filter
chapters, we’ve adopted the policy of
6
documenting common tools in one
section of the manual. Conveniently,
you have arrived at this magical
place. Here you’ll find explanations
for how to use the Color Picker, the
Color Cube and the Gradient Editor
Eye Dropper: Select the Eye
Dropper to sample a color from
anywhere in the preview window.
Foreground or Background
Color: Choose either of the two.
Black or White: Choose either of
these timeless colors.
Color Selection Tools
Six Previous Colors: You can
choose any of the six most recently
chosen colors, which is good: you
probably chose them for a reason.
Color Picker
Using the Color Picker, you can select
colors based on any reasonable color
model (RGB, CMYK, etc.). You can
also specify colors by hexadecimal
values (if you’re a nerd) or use Web
safe colors.
Gradient Editor
Use the Gradient Editor dialog box to
create custom gradients by modifying
old ones. You can add colors to the
gradient to blend more than two
colors.
To launch the Color Picker, click the
color swatch next to any color control.
If you don’t know how to use a color
picker, consult your host program’s
documentation.
Let’s start with the basics. Take a long,
hard look at the illustration below.
Familiarize yourself with the elements
of the gradient editor.
Color Cube
To the right of the color swatch, you’ll
notice a color selection tool, which
offers the following four options.
Smoothness Slider (A)
Use this slider to even out color and
opacity transitions in gradients.
7
Opacity Stops (B)
Editing Color Stops: Once you’ve
added that color stop, you’ll want to
choose a color for it.
Opacity stops build a bridge between
differing levels of opaqueness. The
midpoint (diamond shaped buttons)
and smoothness controls establish
where and how quickly opacity
transitions take place. Slide them
around to get a feel for how they
work.
1.
Position the cursor over any color
stop and click it.
2.
Using any of the color picking
tools, choose a color, and click
OK .
Deleting Color Stops: Easy. Just
click and drag the stop off the
gradient bar.
Adding Opacity Stops: Click
above the gradient bar to add an
opacity stop.
Modifying Opacity Stops:
Position the cursor over any opacity
stop and click it. Tweak the opacity
slider.
Deleting Opacity Stops: Click
and drag the stop off the gradient bar.
Color Stops (C)
Color stops add colors to your
gradient and establish transitions to
neighboring hues. The midpoint
(diamond shaped buttons) and
smoothness controls establish where
and how quickly the color transition
will take place. Slide them around to
get a feel for how they work.
Adding Color Stops: Use color
stops to add a new colors to your
gradient.
To add a color stop, click below the
gradient bar.
8
The Preview Window
Slider Controls (A): Slider controls
and radio buttons appear along the
left side of the filter window. These
controls perform most functions in our
filters. Refer to the filter chapters for
detailed slider descriptions.
Thumbnail Navigation (B):
Click and drag the movable red box
to move the preview to any spot in the
selected layer.
Move, Zoom and Show
Original (C): The Move (hand),
Zoom (magnifying glass) and Show
Original buttons are found above
the preview window.
9
Click the hand to enable the Move
tool, then click and drag to move
around the preview image.
Click the magnifying glass to enable
the Zoom tool. Click in the preview
window to zoom into your image;
Command + click to zoom out (Alt +
click for Windows users). Doubleclicking the Zoom tool at any time
resets the preview window to 100%
magnification.
The Show Original button toggles
the preview between filtered and
unfiltered versions of your image.
Click and hold the button to view the
unaffected image. Release the button
to preview the effect.
Magnification Indicator (I): The
current level of magnification is
shown to the right of the render status
bar at the lower right corner of the
filter window.
Using Settings
UpToDate Message Indicator
(D): When you see this visual cue,
you have a new message from Alien
Skin Software. See the UpToDate
Messages section for more details.
OK and Cancel Buttons (E):
Clicking the OK button applies the
filter with the current settings. Clicking
Cancel closes the filter window
without applying the effect.
Mouseover Help String Area
(F): Elements in each filter have
mouseover help text. Whenever you
move your cursor over a user
interface element, a short description
appears in the bottom left corner of
the window.
The Settings tab in each filter
window allows you to create,
manage, download, share and back
up your favorite filter recipes.
To use a setting, simply click the
Settings tab and highlight the
desired setting in the list.
Saving Settings
To save a setting:
1.
Adjust sliders to taste.
2.
Click the Settings Tab.
3.
Click the Save button.
4.
Type a name for your new setting
into the Save Setting window.
5.
Click OK .
Preview Window Area (G):
Preview the effect on your image here.
The preview area can be resized by
clicking and dragging any corner or
edge of the filter window.
Progress Bar (H): The rectangle to Renaming Settings
the left of the magnification indicator To rename a setting:
displays the percentage of rendering
1. Click the Settings Tab.
completed.
2. Click Manage.
10
3.
Highlight the setting that you
want to rename.
4.
Click Rename.
5.
Type in the new name.
6.
Exit the Manage Settings dialog.
2.
Highlight the setting you want to
export.
3.
Click Export.
4.
Navigate to the location where
you want to store the settings file.
5.
Click OK .
Deleting Settings
To delete a setting:
1.
Click Manage .
2.
Highlight the setting you wish to
delete.
3.
Click Delete.
4.
Confirm that you want to delete
the setting by clicking Yes.
Exporting Settings
When you export a setting, the plug-in
packages the recipe in a tiny file,
which you can share with friends. You
can also use the export feature to
back up settings that you can’t live
without. To export a setting:
1.
Click Manage .
Importing Settings
There are two ways to extract and
route settings to any installed Eye
Candy 5 filter set. The first method, is
the simplest way to import shared or
archived settings:
1.
Find the setting that you want to
add.
2.
Double-click it.
3.
Click OK .
4.
You’re done.
11
5.
If you prefer doing things the
hard way, use the following
method:
6.
From within the user interface,
click the Settings tab.
7.
Click Manage .
8.
Click Import .
2.
Highlight the setting you wish to
e-mail.
3.
Click E-Mail.
4.
If your e-mail client is compatible
with our settings manager, a
message will pop up like magic,
with the setting attached. Yay!
5.
Eudora, Outlook, Microsoft
Entourage (Mac), Apple Mail and
Outlook Express work great.
Netscape Mail is not compatible
with our e-mail feature.
Resetting Settings to
Factory Default
9.
Navigate to the location where
you’ve stored the setting.
Every filter has a Factory Default
setting. Clicking this setting resets the
current filter parameters. You can also
press the F5 (Windows) or
Command+ R (Macintosh) key to
reset the filter.
That’s it for the opening section.
We’ve designed this software to be
both fun and easy to use. We hope
you enjoy using the filters.
10. Click Open.
11. Exit the Manage Settings dialog.
E-mailing Settings
To email a setting:
1.
Click Manage .
12
Keyboard Shortcuts
Shortcut Function
Macintosh
Windows
Next Editable Text Field
Tab
Tab
Previous Editable Text Field
Shift + Tab
Shift + Tab
OK
Return
Return
Cancel
Escape
Escape
Undo
Command + Z
Control + Z
Redo
Shift + Command + Z
Control + Y
Cut
Command + X
Control + X
Copy
Command + C
Control + C
Paste
Command + V
Control + V
Next Filter
Command +]
Control +]
Previous Filter
Command + [
Control + [
Zoom In
Command + +
Control + +
Zoom Out
Command + -
Control + -
Actual Pixels
Option + Command + Zero
Alt + Control + Zero
Restore Default Settings
Command + R
F5
Load Last Used Setting
Command + L
Ctrl + L
Save Setting
Command + S
Ctrl + S
Switch to Move Tool (hand)
H
H
Switch to Zoom Tool
Z
Z
Zoom In (with zoom enabled)
Mouse Click
Left Mouse Click
Zoom Out
Option + Mouse Click
Alt + Mouse Click
Zoom to Actual Pixels
Double-click Zoom Tool
Double-click Zoom Tool
Increase/Decrease Slider by 1
Up/Down Arrow
Up/Down Arrow
Increase/Decrease Slider by 10
Shift + Up/Down Arrow
Shift + Up/Down Arrow
Access Online Help
Command + / or Help
F1
13
Chapter 2: Corona
Corona creates radiant solar flares, glowing aurora, and fills selections with
gaseous clouds. Using one of two modes, you can create linear or wavering
solar flares. You can also control the corona’s expansion from the selection
edge.
Basic Tab
Create Output In New Layer
Below Current: Creates a layer
below the working layer ( in Photoshop
and Elements only) and renders the
effect to it. This feature allows you to
view, edit, or turn off the effect without
affecting the original layer.
Note: This feature cannot be used
on a background layer.
Corona Type
•
If you switch filters from within a filter
window, the new layer feature will be
disabled in the filter you’ve switched
to. If you want to apply a filter in a
new layer, make sure you start with
the filter you plan to apply.
Create Output In New Layer Below
Current is unavailble when recording
actions in Photoshop. Clear this
checkbox when recording actions.
14
Streaky—Produces linear
flares.
•
Turbulent—Creates chaotic,
wavering flares.
Flare Width: Controls the average
width of the flares. Higher values yield
wider flares.
Stretch: Controls the amount of
flare elongation. Higher values stretch
the shorter flares towards the edge of
the glow radius.
Waver: Controls the random
bending of individual flares. Higher
values yield curvier flares.
Left: Streaky. Right: Turbulent.
Glow Radius: Controls the distance
that the flares expand from the
selection edge. Higher values render
a larger corona.
Left to right: Increasing Waver.
Left to right: Increasing Glow Radius.
15
Blur: Softens the edges of the flares.
Higher values yield softer edges.
Note: Mask Selection is disabled
when Create Output In New
Layer Below Current is selected.
Left to right: Increasing Blur.
Overall Opacity: Controls the
transparency of the corona. Low
values yield a more transparent effect.
Underlying images remain more
visible. Higher values reduce the
visibility of underlying images.
Left: Mask Selection disabled. The white lines text
outlines represent the original selection. Right: Mask
Selection enabled.
Random Seed: Controls the
random elements of this filter. Click it
until you get a result you like.
Gradient Controls
Corona Offset Tab
For complete information on how to
use Gradient Controls, see Gradient
Editor on page7.
Offset Corona Center: Select this
option to enable the offset controls.
Offset Corona Center is only
available when the Radiate From
Selection check box is cleared.
Radiate From Selection: Select
this option to expand the effect from
the edge of the selection, rather than
radially from a single point inside the
selection.
Mask Selection: Select this option
to make the effect appear to radiate
from the back of the selection.
Horizontal Offset: Shifts the
center of the corona right or left. Zero
produces no shift. Positive values shift
the corona right. Negative values shift
the corona left.
Vertical Offset: Shifts the center of
the corona up and down. Zero
16
produces no shift. Positive values shift
the corona up. Negative values shift
the corona down.
17
Chapter 3: Fire
Fire simulates a wide variety of flames and flame-like effects. Using direction
controls, you can simulate effects far beyond simple fires, like rocket exhaust.
Color controls allow you to simulate anything from blue propane flames and
to white hot blast furnaces.
Basic Tab
Create Output on New Layer
Above Current: Creates a layer
above the working layer (in Photoshop
and Elements only) and renders the
effect to it.
travels. Click and drag within the
control box to change the direction,
or enter a value between 0 and 360
degrees.
Column Length: Controls the
length of the fire column.
If you switch filters from within a filter
window, the new layer feature will be
disabled in the filter you’ve switched
to. If you want to apply a filter in a
new layer, make sure you start with
the filter you plan to apply.
Create Output In New Layer Above
Current is unavailble when recording
actions in Photoshop. Clear this
checkbox when recording actions.
Fire Direction: Controls the
direction in which the fire column
18
Flame Width: Controls the average
width of the smaller flames forming
the fire column.
Higher values increase the twisting.
Low values render fire that travels
along a linear path.
Turbulence: Adds twisting details to
the tips of the flame. High values
resemble flickering.
Left to right: Increasing Flame Width.
Expansion: Controls the growth of
the column into a V-shape. High
values widen the V.
Left to right: Increasing Turbulence.
Flame Intensity: Brightens the
inside color to simulate hotter flames.
Higher values appear “white hot.”
Left to right: Increasing Expansion.
Waver: Controls the amount of
meandering in the fire column.
Left to right: Increasing Flame Intensity.
19
Soften Edges: Blurs the edges of
the flames and elevates the fire above
the selection. High values soften the
flame more.
For more information on using
gradients, see Gradient Editor on
page7.
Left to right: Softened edges.
Start From Bottom: Select this
option to cover the entire selection
with fire.
Mask Selection: Select this option
to make the effect appear to rise from
the back of the selection.
Random Seed: Controls the
random elements of this filter. Click it
until you get a result you like.
Colors Tab
Natural Flame Colors: Select this
option to simulate common fire
tinting, like a match or campfire.
Clear Natural Flame Colors to
enable the gradient editor.
20
Chapter 4: Drip
Drip simulates liquid trickling from the bottom of a selection and, optionally,
melts the original selection. Drips flow from the bottom of the selection like
paint dribbles. Image features stretch along the path of the drips. By tweaking
melt features, you can liquefy the entire selection.
Drip Tab
Drip Length: Controls the average
distance that drips run from the
bottom of the selection.
Density: Controls the number of
drips falling from your selection. High
values add more drips.
Width: Controls the average
thickness of each drip. High values
reduce the number of drips in your
selection.
Left to right: Increasing Density.
21
Taper: Thins the area between the
bottom of the selection and the drip’s
teardrop end. Low values look like
liquid running down a wall. High
values look like drops falling from the
bottom of the selection.
uneven edges and separate the drip
from the selection.
Left to right: Increasing Dribble.
Left to right: Increasing Taper.
Random Seed: Controls the
random elements of this filter. Click it
until you get a result you like.
Dribble: Controls the irregularity of
the drip edges. High values make
22
Melt Tab
Melt Length: Controls how much
the entire selection is stretched
downwards in wavy distortions.
of the selection. High values
compress the selection downward.
Left to Right: Increased pooling.
Left to right: Increasing Melt Length.
Ripple Width: Controls the
average width of the distortions in the
selection. If you go too small, you’ll
get speckles. In small selections, a
value too large might result in little
visible distortion.
Pooling: Controls how much the
affected area sags toward the bottom
Lighting Tab
Direction: Controls the direction
from which the light falls on the
surface. Click and drag within the
lighting control box to change the
direction, or enter a value between 0
and 360 degrees.
Inclination: Controls the angle
formed by the light and the page.
Click and drag within the lighting
control box to change the inclination,
or enter a value between 0 and 90
degrees.
Highlight Brightness: Controls
the intensity of the shiny highlights
appearing on the surface.
Highlight Size: Controls the size of
the shiny highlights on areas facing
23
the light; higher values yield larger
highlights.
Highlight Color: Choose any color
for the shiny highlights.
Shadow Strength: Controls the
shadow darkness. Higher values
render darker shadows.
Shadow Color: Choose any color
for the shadows.
Lighting Coverage: Controls how
far the shiny highlights climb up the
dribbles.
Left to right: Increasing Lighting Coverage adds
three dimensionality to the drips.
24
Chapter 5: Icicles
Icicles renders dripping ice from any selection. You can specify the length,
width, pointedness and color of the icicles. You can also manipulate opacity
and refraction to reveal images under the ice. As you might imagine, Icicles
compliments Snow Drift nicely.
Basic Tab
Maximum Length: Specifies the
maximum length to which icicles can
grow.
Higher values increase the uniformity
of these three features.
Width: Specifies the average width
of icicles.
Note: Extremely wide icicles which fill
the breadth of a selection limit the
effectiveness of the Density slider.
Density: Controls the number of
icicles rendered in the selection.
Higher values insert more icicles,
packing them together closely.
Pointedness: Sharpens the tips of
icicles.
Icicle Regularity: Randomizes the
length, width and spacing of icicles.
Left to right: Increasing Icicle Regularity.
Ice Height: Controls how far the ice
grows upward from the bottom of the
25
selection. Larger values cover more of
the selection with a solid sheet of ice.
rough surface, mangling images
beneath the ice.
Left to right: Increasing Ice Height.
Left to right: Ice on entire selection is enabled on
both stoplights. Refraction is enhanced in the right
frame.
Ice on Entire Selection: Selecting
this option covers the inside of the
selection with a sheet of ice.
Random Seed: Controls the
random elements of this filter. Click it
Ice Color: Selects the color the ice is until you get a result you like.
tinted. The higher the Opacity slider,
the stronger this color appears. For
Lighting Tab
more information on selecting colors,
see Color Selection Tools on page7. Direction: Controls the direction
from which the light falls on the ice.
Opacity: Low values allow
Click and drag within the lighting
underlying images to shine though.
control box to change the direction,
High values obscure underlying
or enter a value between 0 and 360
images. Extremely high values render degrees.
solid, dripping goo, like wax.
Inclination: Controls the angle
Refraction: Roughens the surface of formed by the light and the page.
the ice and underlying images. Less
Click and drag within the lighting
refraction creates a smoother surface, control box to change the inclination,
allowing a clearer view of objects
or enter a value between 0 and 90
under the ice. High values create a
degrees.
26
Highlight Brightness: Controls
the intensity of the shiny highlights
appearing on the ice surface.
Highlight Size: Controls the size of
the shiny highlights on areas facing
the light; higher values yield larger
highlights.
Highlight Color: Choose any color
for the shiny highlights.
Shadow Strength: Controls the
shadow darkness. Higher values
render darker shadows.
Shadow Color: Choose any color
for the shadows. For more
information on color selection,
see Color Selection Tools on page7.
27
Chapter 6: Ripples
Ripples’ three modes create anything from perfect concentric waves to the
random surface waves of a pond on a windy day. You can add reflection
maps to create a shiny surface and use refraction controls to make images
look like they are underwater. You can use the Time control to make GIF
animations.
Basic Tab
Ripple Generator: Choose one of
three modes:
•
Raindrops—Creates circular
waves emanating from distinct
points. Adding more than one
raindrop creates overlapping ripples.
Raindrops mode.
28
•
Expand from Selection—
Creates concentric waves radiating from selection edges.
Ripple Wavelength: Controls the
average distance between wave
crests.
Time: Chooses a moment in the
timeline of ripple formation and
dissipation. Early in the timeline,
wavelengths are small and radiate
directly from the selection or
raindrop. In the latter stages of wave
development, the ripples move away
from the selection and dissipate.
Random Wave Amplitude: Adds
random ripples to the surface of your
selection. Higher values create taller
waves.
Expand from Selection mode
•
None—Covers the entire selection with random waves.
Left to right: Increasing Random Wave Amplitude.
Random waves in None mode.
Random Wave Wavelength:
Controls the average spacing
between random wave crests.
Extremely low values speckle the
Number of Raindrops: Selects
the number of rain impact points in
your selection.
29
surface with tiny ripples. High values
create large swells.
Left to right: Increasing Refraction.
Left to right: Increasing Random Wave Wavelength.
Note: This value is linked to Ripple
Wavelength .
Refraction: Controls the strength of
distortion in opaque selections.
Refracted selections look like they are
under water. To be visible,
Refraction must be used in an
opaque layer.
Draw Outside Selection: Select
this option to fill the entire layer with
ripples.
Random Seed: Controls the
random elements of this filter. Click it
until you get a result you like.
Lighting Tab
Lighting Controls
Direction: Controls the direction
from which the light falls on the
surface. Click and drag within the
lighting control box to change the
direction, or enter a value between 0
and 360 degrees.
Inclination: Controls the angle
formed by the light and the page.
Click and drag within the lighting
control box to change the inclination,
or enter a value between 0 and 90
degrees.
30
Highlight Brightness: Controls
the intensity of the shiny highlights
appearing on the surface.
Highlight Size: Controls the size of
the shiny highlights on areas facing
the light; higher values yield larger
highlights.
Highlight Color: Choose any color
for the shiny highlights.
Reflection Map Controls
None: Choose this option if you do
not want an image reflected on the
surface of your liquid.
Select From File: Selects a
reflection map file. Reflection maps
color the wave contours to simulate a
shiny liquid surface.
Reflection Strength: Controls the
opacity of the reflection map. Higher
values yield a brighter, more reflective
surface. Lower values allow more of
the original selection to shine
through.
31
Chapter 7: Rust
From crusty iron oxide to aluminum scaling, rust recreates virtually any severe
metallic corrosion. You can control the size and color of rust spots, the size
and sharpness of surface details and the density of coverage.
Basic Tab
Create Output in Layer Above
Current: Creates a layer above the
working layer (in Photoshop and
Elements only) and renders the effect
to it. This feature allows you to view,
edit, or turn off the effect without
affecting the original layer.
Feature Size: Zooms the rust
patches in and out. High values yield
a close up view; the spots grow larger
and the spacing between each patch
increases. Surface features, such as
flaking, become more larger and
more detailed.
If you switch filters from within a filter
window, the new layer feature will be
disabled in the filter you’ve switched
to. If you want to apply a filter in a
new layer, make sure you start with
the filter you plan to apply.
Create Output In New Layer Above
Current is unavailble when recording
actions in Photoshop. Clear this
checkbox when recording actions.
32
Left to right: Increasing Feature Size.
Coverage: High values fill empty
space with more rust patches.
Left to right: Increasing Coverage.
Edge Roughness: Adds a jagged
edge to spots. Higher values render
an uneven edge. Low values make
smooth edges.
yield a transition from crusty inner rust
to translucent surface rust.
Left to right: Increased softening with added water
streaks.
Texture Variation: Adds contrast
and detail to the flaky surface
features.
Soften Spots: Creates a transition
of opacity in spots. Low values create
patches with defined edges and
consistent surface detail. High values
Rust Color: Selects the dominant
rust color.
33
Draw Water Streaks: Select this
option to smear rust downward from
the main spots.
Streak Length: Increases the
distance that streaks are smeared
from the patches.
Streak Opacity: Controls the
darkness of the smears. The
opaqueness tails off toward the end
of the streaks.
Seamless Tile: Select this box to
create a repeatable pattern with no
seams.
Note: Selecting Seamless Tile
disables streak controls.
Random Seed: Controls the
random elements of this filter. Click it
until you get a result you like.
34
Chapter 8: Smoke
Using two modes, Smoke simulates anything from pyroclastic eruptions to
gentle wisps emerging from the end of a gun barrel. You can control the
direction of the smoke, its color, how high it rises and much more.
Basic Tab
Smoke Type
Create Output on New Layer
Above Current: Creates a layer
above the working layer (in Photoshop
and Elements only) and renders the
effect to it. This feature allows you to
view, edit, or turn off the effect without
affecting the original layer.
•
Wispy—Creates tendrils of
smoke, like a cigarette in an ashtray.
•
Billowing —Renders puffy
clouds—like the emissions from
If you switch filters from within a filter
window, the new layer feature will be
disabled in the filter you’ve switched
to. If you want to apply a filter in a
new layer, make sure you start with
the filter you plan to apply.
Create Output In New Layer Above
Current is unavailble when recording
actions in Photoshop. Clear this
checkbox when recording actions.
35
a smokestack in Elizabeth, New
Jersey or a forest fire.
column. Larger values yield wider
individual wisps.
Left: Wispy. Right: Billowing.
Left to right: Increasing Wispy Puff Size.
Smoke Direction: Controls the
direction in which the smoke column
travels. Click and drag within the
control box to change the direction,
or enter a value between 0 and 360
degrees.
In Billowing mode, Puff Size
controls the average size of the puffy
clouds that form the smoke.
Column Length: Controls the
length of the smoke column.
Puff Size: In Wispy mode, Puff
Size controls the average width of
the tendrils forming the smoke
Left to right: Increasing Billowing Puff Size.
Expansion: Controls the growth of
the column into a V-shape. High
values widen the V.
36
Waver: Controls the amount of
meandering in the smoke column.
Higher values increase the twisting.
Low values render smoke that travels
along a linear path.
Layered Smoke: Select this option
to render a second layer of smoke in
front of the original.
Roughness: Controls the
smoothness of the smoke. High
values render turbulent smoke.
Left: Non-layered. Right: Layered Smoke selected.
Start From Bottom: Select this
option to cover the entire selection
with smoke.
Left to right: Increasing Roughness.
Overall Opacity: Controls the
transparency of the entire smoke
column. High values make a more
visible smoke column.
Mask Selection: Select this option
to make the effect appear to rise from
the back of the selection.
Random Seed: Controls the
random elements of this filter. Click it
until you get a result you like.
Color and Lighting Tab
Smoke Color: Tints the smoke any
color.
Soot: Darkens the edges of the
smoke and adds contrast to the effect.
Light Direction: Controls the
direction from which the light falls on
the smoke. Click and drag within the
37
lighting control box to change the
direction, or enter a value between
0and 360 degrees.
Light Strength: Boosts the intensity
of the light source. It’s like increasing
the wattage of a light bulb.
Light Color: Tints the light source.
You can make smoke in the red light
district.
38
Chapter 9: Snow Drift
Snow Drift adds piles of snow to horizontal sections of a selection. You can
pile snow on the top or bottom of the selection. You can also control the
thickness and lumpiness of the snow. Optionally, you can dust the surfaces of
your entire selection, or entire image, with light snow. By adding more dust to
bright spots you can simulate snow piling on rooftops, trees, or any other
bright surface.
Basic Tab
Create Output on New Layer
Above Current: Creates a layer
above the working layer (in Photoshop
and Elements only) and renders the
effect to it.
If you switch filters from within a filter
window, the new layer feature will be
disabled in the filter you’ve switched
to. If you want to apply a filter in a
new layer, make sure you start with
the filter you plan to apply.
Drift Height: Specifies the
maximum drift height. Higher values
make taller piles.
Note: The selection edge limits the
maximum attainable snow height.
Clumping: Controls the lumpiness
of the snow. Higher values create
Create Output In New Layer Above
Current is unavailble when recording
actions in Photoshop. Clear this
checkbox when recording actions.
39
more lumps of increasingly random
size and height.
values increase the distance that the
snow sags beneath the selection.
Top to bottom: Increased Clumping.
Top to bottom: Increasing Droop.
Surface Roughness: Adds a rough
texture to the surface. Low values
render a shiny surface. High values
yield a textured surface, like snow that
has melted and refrozen.
Start Snow Drift from Selection
Bottom: Select this option to place
the snow on the lower, horizontal
areas the selection.
Droop: Expands the bottom edge of
the snow below the selection. Higher
Dust on All Features: Covers the
entire selection with a uniform dusting
of light snow. Higher values increase
the dust density.
Dust on Bright Features: Places
a thicker coating of dust on bright
areas within your selection. Higher
values amplify the effect.
Note: Dust on All Features and
Dust on Bright Features are
disabled when Create Output In
New Layer Above Current is
selected.
40
Bright Features Threshold:
Adjusts the level of brightness that the
filter recognizes as “bright enough” to
receive additional dusting. Low values
specify that only the brightest features
get extra dust. High values extend the
added dusting into darker areas.
Random Seed: Controls the
random elements of this filter. Click it
until you get a result you like.
Lighting Tab
Light Direction: Controls the
direction from which the light falls on
the snow surface. Click and drag
within the lighting control box to
change the direction, or enter a value
between 0 and 360 degrees.
Shadow Strength: Controls the
shadow darkness. Higher values
render darker shadows.
Shadow Color: Choose any color
for the shadows. For more
information on selecting colors,
see Color Selection Tools on page7.
Tip
When adding dust to bright surfaces
in your selection, use an extremely
low Dust on All Features amount.
A value of zero typically works best.
41
Chapter 10: Squint
Squint imitates the blurring that might result from bad vision or a shaky
cameraman. Squint also creates bright light streaks and kaleidoscopic effects
like you might see from oncoming traffic in a rainstorm.
Basic Tab
Ghost Radius: Controls the
expansion of the blur. Low values
render a thin, visible halo; the original
image details, though blurred, are still
visible. High values obscure the
original image. A zero value results in
no ghosting.
Left to right: Increasing Ghost Radius.
42
Ghost Segments: Breaks the halo
into smaller pieces. Higher values
yield more pieces.
Streak Selection Threshold:
Adjusts the level of brightness that the
filter recognizes as “bright enough” to
radiate streaks of light. Low values
allow virtually any area to emit
streaks. High values allow only the
brightest areas to do so.
Left to right: The subtle effect of adding ghost segments.
Ghost Rotation: Controls the
direction in which the segments travel.
Click and drag within the control box
to change the direction, or enter a
value between 0 and 360 degrees.
Draw Light Streaks: Select this
option to add rays of light that burst
from bright areas in the image.
Streak Brightness: Enhances the
whiteness of the streaks, making them
appear brighter.
Streak Opacity: Controls the
visibility of the light streaks. Low
values render imperceptible rays.
High values create visible streaks and
smear colors like a motion trail.
Left to right: Increasing Streak Selection Threshold.
Streak Length: Specifies the
average length of the streaks.
Number of Streaks: Controls the
density of streak placement. High
values add more radial streaks, which
eventually overlap to render a brilliant
glow.
Streak Variation: Increasingly
randomizes the direction in which
individual streaks point.
Streak Rotation: Controls the
direction of the streaks. Click and
drag within the control box to change
the direction, or enter a value
between 0 and 360 degrees.
43
Random Seed: Controls the
random elements of this filter. Click it
until you get a result you like.
44
Chapter 11: Water Drops
Water Drops creates a wide variety of liquid shapes: spheres, spurts, spills,
spots and more. You can select the color of the drops, make them pool
together and distort underlying images as if they had been rained on.
Basic Tab
Drop Size: Controls the size of the
liquid blobs. High values yield fewer,
larger drops. Low values splatter the
selection with small drops.
You can select any value between 1
and 100 percent.
Coverage: Controls the percentage
of the selection covered with liquid.
Left to right: Increasing Coverage.
Clumping: Creates gravity between
the drops. At higher values the liquid
45
pools together, forming large
irregularly shaped blobs.
water drops. Higher values increase
the distortion.
Opacity: Controls the transparency
of the liquid. High values obscure any
underlying images.
Tinting: Chooses the amount of
Liquid Color revealed by light
passing through the blobs. Low values
show less of the liquid color.
Liquid Color: Choose any color for
your water drops. For more
information on selecting colors,
see Color Selection Tools on page7.
Lighting Controls
Left to right: Increasing Clumping.
Focus: Sharpens the edges of drops
and boosts the brightness of the liquid
color.
Direction: Controls the direction
from which the light falls on the
drops. Click and drag within the
lighting control box to change the
direction, or enter a value between 0
and 360 degrees.
Inclination: Controls the angle
formed by the light and the page.
Click and drag within the lighting
control box to change the inclination,
or enter a value between 0 and 90
degrees.
Highlight Brightness: Controls
the intensity of the shiny highlights
appearing on the drops.
Left to right: Increasing Focus.
Refraction: Controls the amount
that the selection is warped by the
Highlight Size: Controls the size of
the shiny highlights on areas facing
the light; higher values yield larger
highlights.
Highlight Color: Choose any color
for the shiny highlights. For more
46
information on selecting colors,
see Color Selection Tools on page7.
Random Seed: Controls the
random elements of this filter. Click it
until you get a result you like.
47
Chapter 12: Troubleshooting
We’ve documented the most
commonly-asked tech support
questions here. A regularly updated
troubleshooting guide can be found
in the Support section of our Web site.
If you get really stuck, send E-mail to
[email protected]. Include in
the E-mail your 12-letter registration
code, whether you are using Mac or
Windows, and your graphics host
program (Photoshop, Paint Shop Pro,
etc.).
•
This chapter covers the following
troubleshooting issues:
If you have the code: Make sure
that you are entering the 12-letter
code and other registration fields
correctly. The Name field must
contain at least three characters.
•
Installation Problems
•
Performance Issues
•
Error Messages
On the download page and in
an email invoice (electronic version).
If you've registered the software with
us (by purchasing directly from us,
registering online or sending in a
registration card), we'll have the code
in our database.
If you didn't register with us, contact
us at [email protected] to
receive a new registration code.
Lost registration code: The
product registration code (serial
number) is a 12-letter code located in
one of the following three places:
Make sure that you are using a valid
code. Product registration codes are
not interchangeable. For example, an
Eye Candy 4000 code will not work
with any other product. You will need
to use the code that you received
when you purchased the software.
This 12-letter code can be found on
the web page from which you
downloaded the software, in an email
invoice you received while
downloading the product or on a
sticker inside the front cover of the
manual.
•
Your user manual (physical version).
Problem
•
On the CD jewel case (physical
version).
Installation Problems
Problem
The installer won't accept my 12-letter
registration code, or I can't find my
code.
Solution
When I try to install, I get an error
dialog saying that I don’t have
48
privileges or permission to install the
software.
Problem
My software doesn’t work with a
graphics program that claims to use
Photoshop plug-ins.
Solution
The installer, like most installation
programs, needs to write files to
secure folders on your computer. If
you use OS X, Windows 2000 or
Windows XP, you must have
administrator privileges. For
information on configuring your user
account for these privileges, see your
system administrator or your
operating system manual.
Solution
Some host programs claim to work
with all Photoshop plug-ins without
testing thoroughly or strictly following
the Photoshop plug-in standard. If
you’d like to use our software with a
host not listed in this manual, please
visit our Web site for the latest list of
compatible hosts.
Problem
Problem
After installing the plug-ins and
starting the graphics host program,
the filters do not appear in the Filter
or plug-in menu.
How do I uninstall my software?
Solution
The filters were not installed in your
graphics program’s plug-in folder.
Find out which folder your host
program uses for plug-ins. With
Photoshop, you can determine this by
going to Edit > Preferences >
Plug-ins. Then, install the filters
again, making sure you select the
proper plug-in folder.
Also, remember that after installing
new filters, you must restart your
graphics host for the plug-ins to
become available. With other host
programs, consult your user manual
for more information about where
plug-ins need to be installed and how
to access them.
Macintosh Users: Find the Nature
folder in your graphics program’s
plug-in folder and delete it. Also
delete the
/Users/<user name>/Library/
Application Support/Alien
Skin/Nature folder.
Windows Users: Run Add/
Remove Programs from your
Windows Control Panel. Select
Nature from the program list and
click the Add/Remove button. This
will remove the program and most of
its components. To remove your
settings, navigate to the
/Documents and Settings/
<user name>/Application
Data/Alien Skin/Eye Candy 5
Nature folder.
49
Performance Issues
Solution
Problem
Sometimes the preview begins in a
transparent part of a layer. Click an
opaque area of your selection in the
navigation thumbnail.
Some or all of the filters appear
grayed out in the Filter menu.
Solution
Grayed-out filters in the Filter menu
occur if you are in certain color
modes (such as CMYK, Lab or
Bitmap) that won’t allow a specific
filter to work properly.
Problem
I get a message that my software ran
out of memory while rendering the
preview.
Solution
There are a few things you can do to
free up more memory. In Photoshop,
the history palette and other features
take up a lot of memory. You can free
this memory by selecting Edit >
Purge > All.
To free up even more memory in
Photoshop, select Edit >
Preferences > Memory &
Image Cache . Then, increase the
Maximum Used value.
If you routinely work with huge
images, we recommend that you have
ten times as much physical RAM as
the image size in memory.
Problem
A filter makes the graphics program
or the entire computer crash or freeze
up.
Solution
Sometimes freezes or crashes occur
when your computer runs out of
available memory. If you are using
Photoshop, you can sometimes free
up large amounts of memory by
selecting Edit > Purge > All .
Also, make sure that your computer
system meets the minimum
requirements to run our software.
Shut down other programs before you
run your image editing program, as
there might be a conflict between
another program and our software. If
you notice such a conflict, we will love
you very much if you try to identify the
problem program and inform us of
the conflict at
[email protected] .
Problem
I can’t switch between filters inside the
Eye Candy user interface.
Problem
Solution
The preview seems broken. It only
shows the checkerboard pattern.
The feature only works in Photoshop
CS and Elements. Other hosts don’t
50
support the necessary parts of the
Photoshop plug-in specification.
Also, if you switch filters using the
menu on the filter dialog, the new
layer feature will be disabled in the
filter you’ve switched to. If you want to
apply a filter in a new layer, make
sure you start with the filter you plan
to apply.
Error Messages
Error Message
User Remedy
This host application does not support
enough of the Photoshop filter specification for this filter to run.
Sorry! Your host graphics program is incompatible with our
software. Consult the list of compatible host programs in the
Host Requirements section of the Getting Started chapter.
This filter requires editable transparency. Please turn OFF Preserve Transparency in the Layer palette.
In the Layers tab, deselect the Lock Transparent Pixels
button.
The filter ran out of available memory
while rendering the preview image.
The history palette and other features take up a lot of memory. In Photoshop, you can free up this memory by selecting
Edit > Purge > All.
You may not have enough physical memory (RAM) to handle
the image that you’re working with.
Macintosh users only: This filter
only runs on Mac OS X 10.2 or later.
Check the operating system requirements for this software in
your user manual. Nature only works with Mac OS X 10.2 or
later.
51