1
uniFLOW Capture V5.3 SR6
4.9.4
Scan to Email
Time to complete tasks: 5 minutes
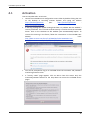
1. From the Quick Start screen, select Scan Configuration.
2. Click on the New icon on the top right hand side of the screen.
3. Select Scanning and click Next.
4. From the list of wizards, select Scan to Email and click Next.
5. Leave the default Workflow Selection Scan to Email and click Next.
6. For Email Send Method, leave the setting SMTP and click Next.
7. For Directory, leave the setting uniFLOW Database and click Next.
8. Leave the default settings for Email Data input and click Next.
9. Leave the settings for Scan Job Input Configuration and click Next.
10. For Scan Conversion Configuration, leave the default settings and click Next.
11. For Workflow Name, enter a name, then click Finish.
4.9.5
Scan to Evernote
Time to complete tasks: 5 minutes
1. From the Quick Start screen, select Scan Configuration.
2. Click on the New icon on the top right hand side of the screen.
3. Select Scanning and click Next.
4. From the list of wizards, select Scan to Evernote and click Next.
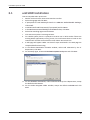
5. Click Add Identity Type and configure the following Identity Type:
o Identity Category: Email Address
o Identity Type ID: evernote
o Identity Type Name: Evernote
6. Ensure that the newly created Identity is selected and click Next.
7. Leave the identity warnings and click Next.
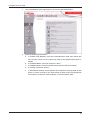
8. If the company wants to receive email notification in case of an error (TABLE 3: 4.1
- Send an Email on Error), set Send an Email on Error to Yes before you click Next.
9. Leave the Scan Job Input Configuration and click Next.
10. Leave the settings for Scan Conversion Configuration and click Next.
11. For Workflow Name, enter a name, then click Finish.
4.9.6
Scan to Folder
Time to complete tasks: 5 minutes
1. From the Quick Start screen, select Scan Configuration.
2. Click on the New icon on the top right hand side of the screen.
3. Select Scanning and click Next.
31