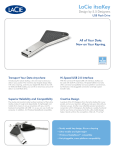
1
July 2009
DoubleClick
2009 MaUsE Executive
• Grand Wazoo: Michael Shaw
[email protected]
• Vice President: Aaron Vegh
[email protected]
• Apple Liaison: Bruce Cameron
[email protected]
• Treasurer: Stan Wild
[email protected]
• Logistics: Chris Greaves
[email protected]
• Publicity Director: Jim Danabie
• Photographer: Irma Shaw
• DoubleClick Editor:
Michael Shaw
[email protected]
• Secretary: Jeff Hurd
• Director: Guy Lafontaine
[email protected]
• Director: Marcel Dufresne
MaUsE Contact Information:
The MaUsE
c/o Stan Wild
58 Rothean Drive
Whitby, Ontario, Canada
L1P 1L5
w w w. m a u s e . c a
From The Editor
What you are looking at is the July 2009 edition of the
MaUsE DoubleClick, the online publication of the Macintosh Users East, (MaUsE), a motley collection of
mostly harmless cranks who reside in Southern Ontario
with their motley collection of old and new Macintosh
computers.
The DoubleClick is published using a 2.8 GHz Aluminum iMac and QuarkXPress 8. An antique Kodak
DX7590 is used for all pictures. Everything not specifically attributed to someone else can probably be
blamed on the Editor. Back issues can be downloaded
from the MaUsE website: < www.mause.ca >.
Submissions from MaUsE Club members are almost always welcome.
No Meeting This Month
Summertime and the living is
easy. The fish are jumping
and the cotton is high. The
MaUsE will resume regular
meetings in September after a
two-month hiatus but the
DoubleClick will continue
through the summer months.
Send your submissions and articles to me at
< [email protected] >, especially if there are files
or pictures attached. I have never refused a submission
yet. Because we care about the environment, the
MaUsE DoubleClick is created using only recycled
electrons: matter was neither created nor destroyed in
the process of creating this issue. There are no infractions of the law of matter conservation. There is always
room for another piece on any Mac-related topic and Iʼll
make room if there isnʼt. I would like your submissions.
But I wonʼt beg.
Apple, Macintosh, and the Apple logo are trademarks of
Apple Computer, Inc., registered in the U.S. and other
countries. The MaUsE (Macintosh Users East) is an independent Mac user group and has not been authorized, sponsored, or otherwise approved of by Apple
Computer, Inc. Its very much like they don’t even know
we exist.
Michael Shaw, Editor
MaUsE Meetings are held in Room 1 at the new Whitby Public Library
on the south-east corner of Henry and Dundas West in Whitby, Ontario.
Meetings start at 7:00 PM but there is an early session from 6:30 for people who wish to discuss hardware or software issues or problems. Macintosh virus problem discussion from 6:58 to 7:00 PM. Meetings are open to
the public and admission is free. Raffle tickets at MaUsE events are free
but the free raffle tickets for Macintosh hardware or software will only be
given to paid-up MaUsE Members. Please remember to bring your Membership card to every meeting. No Meeting this month.
Photographic Composition Part 3*: Framing
Once you learn the guidelines, you will find that they will become part
of your thinking when you are looking at the world, especially if you
have a camera in your hand. What are these guidelines you ask, well
I'll tell you.
There are six basic guidelines as follows:
1. Simplicity
2. Rule of Thirds
3. Lines
4. Balance
5. Framing
6. Mergers
The fifth guideline is Framing. I am not talking about what goes on a
wall, but what objects are used to frame the center of interest. Framing is done by having something in the foreground that adds depth to
the subject. Below are two examples of framing used to convey different messages about the same lighthouse.
In the first photo, the framing is done by the buildings and the tree
branch. This gives a message about how tall the lighthouse is, by giving us a reference to objects on the ground. The tree branch helps
pull our eye to the center of interest the lighthouse. The overhanging
tree branch completes the frame, and adds depth to the shot.
In the second photo the tree branches help pull our eye to the center
of interest the man who is on top of the lighthouse roof. Again the
overhanging tree branch adds depth to the shot.
The last guideline we will look at is Mergers. No not corporate mergers but the merger of an object into the subject. In the group photo
you see three trees growing out of the heads of your subjects, and
one window frame. You would think that the photographer would have
seen these things, but they didn't. That is because we see things in
three dimensions, so it's easier then you might guess to focus our
eyes on the principal subject only and not see the background at all.
You can be sure the camera always sees mergers, so look for plain
backgrounds before you pose your subject. Eventually you will get
into the habit to automatically check your background for possible
mergers.
Two other merger problems are border mergers where
you cut off heads or feet of a subject. This is usually
caused by poor alignment of the photographers eye
and the view finder. With todays digital cameras you get
this from using the display screen to frame your
photo's. The other merger problem is near mergers
which may not be quite so objectionable but can steal
attention away from your main subject. Near mergers
are when objects or lines are just too close to the principal subject.
Now you know the principals for good composition.
Take them and your camera and go forth to take lots of
photos. With practice they will become second nature
to you and you will enjoy seeing how good a photographer you really can be.
*This is the third in a series of articles. Parts 1 and 2
of this series appear in previous DoubleClick issues.
Submitted by Kevin Livesey <><
AppleScript 1-2-3
Article Submitted by Marcel Dufresne
Many of you have probably heard of AppleScript,
about how it can make multiple processes a one
click affair. But a programming language is a
fearful thing for most of us. The best way to determine if you can handle it is to try out some examples. You can find these online or in books.
AppleScript 1-2-3 is one of the best sources that
can help explain what AppleScript is all about.
AppleScript is a language used to automate the
actions of the Macintosh operating system and
many of its applications. To automate the actions
of applications, the computer reads the sequential instructions contained in an AppleScript script
written by you, and then it communicates those
instructions to targeted applications where the instructions are carried
out. AppleScript is an English-like language containing many of the
verbs, nouns, adjectives and articles that we use everyday. For instance, typing this instruction (tell the application "Finder" to get the
name of the front Finder window) will give us the name of the top
open window on the desktop. It is designed to be easily understandable, and the syntax and grammar are similar to those we use in normal sentences. The scripts are written in the Script Editor application,
a free utility included with every copy of the Mac OS. The scripts are
compiled in the editor to check for any syntax errors. Then they are
ready to be run or saved for later use. They are thus available for use
at any time from within any application. You launch the scripts by double-clicking their icons.
Thanks to many enthusiastic writers, you can find a whole host of
books and Internet sites to help learn the basics of AppleScript quickly
and easily. In no time at all you could be writing useful scripts after
reading just the first few chapters. However, it won't take long before
you will be wanting to write a script but not have the expertise to do it.
To deal with this, you’ll either need to spend a good deal of time
camped out in the various AppleScript forums or spend some time
with a real AppleScript master and learn the program from the ground
up. In this case, the real master is one Sal Soghoian, the founder of
the AppleScript Sourcebook Web site, which offers a most comprehensive training guide to the language. AppleScript 1-2-3 is written to
help us get familiar with the ins and outs of this programming language. It is chock full of examples. The first chapter itself has over 50
sample scripts that you can input in the Script Editor and then run. It
is a hands-on process, which is the best way to learn a new scripting
language. The examples are very easy to follow and are often accompanied with screen shots of the result one should get from running the
script. The authors often go to great lengths to provide clear, realworld examples to illustrate many of the more abstract concepts.
Chapter one uses simple one line script sentences to allow us to be-
come familiar with the Script Editor. After reading the first chapter I was able to automate a
task that actually uses three aplications in order
to work. Now I can do this with one double-click
of the script I wrote. Chapter two shows us how
to access the dictionary of words that is found in
the script editor. AppleScript 1-2-3 shows us
where this dictionary is located and explains the
structure needed to understand what the dictionary is trying to show us. There are another
28 chapters, each with a main topic and a lot of
script examples and screen shots. Included are
charts of abbreviations, such as the special
folder codes or a list of operators, that would
take a long time to find if you were searching
them out on your own. If you’re totally new to
the concept of programming a computer, don’t
be put off by the book’s size and obvious depth.
One of its greatest strengths is that it will take you from the point of
not knowing how to program at all to understanding how to write programs well. This is true even for those of us who have done a bit of
coding in the past.
You can get a brief look at the book by going to www.peachpit.com.
There you can get a better description of the book, look at some other
reviews and read a sample section of the text. One of the big advantages of buying this book through Peachpit Press is that when you
register the book at their web site, you get access to all the scripts
that are contained in the book. You can download all of the scripts so
that they can be easily pasted into the Script Editor. These are quite
short in the first few chapters, but as the training moves along, it is a
real time saver to simply paste them in. Since you have registered the
book at Peachpit, the scripts are always available to you on-line.
AppleScript 1-2-3 starts at square one and walks you through the
process of understanding and writing AppleScript step by step, one
concept at a time, until you find yourself suddenly creating powerful
and useful automated solutions. The lessons in this book are based
on the teaching experiences of hands-on classes. This book attempts
to give us enough basic knowledge of scripting so that we can experiment with new ones on our own afterwards. No matter what your degree of expertise in writing code, AppleScript 1-2-3 will have
something to teach you. If you want to learn AppleScript and possibly
move on to more powerful programming tools later, it will give you the
best possible foundation.
Title: AppleScript 1-2-3.
Authors: Sal Solghoian and Bill Cheeseman
Publisher: Peachpit Press (www.Peachpit.com)
Price: $49.99
Page Count : 879 pages,
ISBN : 978-0-321-14931-2
GenAudio Inc.’s
AstoundSound Expander 2.1
Here is a program you are going to have to hear to believe! You can
download a copy from < www.astoundsound.net/expander.php >
and try it out for a month before deciding whether or not to buy it. AstoundSound Expander 2.1 costs US $39.95. (Apple liked it so much
they listed it on their website as a Staff Pick and made AstoundSound Expander 2.1 their featured audio download application).
AstoundSound Expander 2.1 is a software application that runs on
your Macintosh or PC. The software is always running in the background processing audio from all applications such as iTunes, Safari,
DVD player, QuickTime and more. The audio is expanded in real-time
and sent to the speakers, headphones, or other output device. It
takes any stereo audio as input and produces a significantly wider
stereo image while preserving center information (e.g. vocals or center staged instruments) in real time. The result is a wider, fuller and
richer listening experience that can be heard while playing
music, movies, video games or any application that produces
audio. This sounds simple but the actual results can be amazing.
The application re-processes the stereo effect into a sphere of sound
so that the various components of the music seem to be separated
better and come from various discreet sources. The instruments stand
out from each other and the texture of the music is richer and fuller.
If you compare mono to stereo you can hear the difference. Mono
was just good enough until stereo came along and showed us what
we had been missing. If you compare stereo to stereo enhanced with
AstoundSound Expander 2.1 you will experience a similar revelation.
It reminds me of improved quadraphonics but without the expensive
hardware. You feel like you are surrounded by the sound with the
music coming at you from all sides and from above. Going back to ordinary stereo feels like a loss of texture after listening to the same
music with Expander 2.1. What is really amazing is that this effect is
achieved purely with software and can be accomplished so well
through a minimum of two speakers, with no additional hardware.
The Expander interface has controls that allow you to switch listening
modes on demand, meaning you can adjust from settings that are
made for music to settings for movies and to settings for games, each
with its own slider.
After you install the AstoundSound Expander program you look for it in either the System Preferences panes, where is shows up in the “Other” list
at the bottom of the Preferences window, or in the
menu bar, where it appears as an icon. Clicking on
the icon gives access to the AstoundSound Expander Preferences, the window here ar right. In the Preferences
window you set keyboard shortcuts for all commands in the program, choose the audio output device, and set Preamp and Stereo
Expansion. Listening Mode must be set for best results and
Movies, Music and Games are the three modes available. All of the
parameters can also be set by keyboard shortcuts and from the Intensity, Preamp and Listening Mode tabs in the pulldown menu.
No matter what I tell you about this program I cannot do justice to it. For that, you will have to listen
to some samples of normal stereo and AstoundSound Expander 2.1 enhanced stereo recordings.
Visit: < http://astoundsound.net/ > to listen online to samples of various types of music by several professional recording artists and a sample
from a recent movie soundtrack that show the difference between listening to the same audio with
AstoundSound turned off and with AstoundSound
turned on. These enhanced stereo recordings will
help clarify a lot of what I have written here and
are a very convincing argument for using the software for everything you listen to on your Mac.
Enhanced stereo is something that I enjoy a lot
because many of the audio files I listen to are either comedy routines or vintage Firesign Theatre
radio plays and live recordings of their stage performances. I have found that with a collection of
similar male voices speaking their lines, combined
with lots of outlandish sound effects and sporadic
laughter and applause from a live audience, the
exaggerated clarity of separated sound sources
really helps to keep track of which of the characters is saying which lines.
The GenAudio corporation developed AstoundSound, a 4D sound
localization technology intended for professional and consumer
software and hardware integration with a variety of products for
consumers and professional audio engineers. The 360-degree
spherical sound field experience the program generates is changing
how people everywhere listen to audio.
Go to: < http://genaudioinc.com/download/ > to download a sixty-second demo sound-studio recording of AstoundSound Expander in
action and to download your own free 30-day trial copy of the program. If you decide to buy it the cost is only US $39.95. You will
need to be running Leopard to use AstoundSound Expander 2.1.
Article by Michael Shaw
Global Delight Technologies : Voila !
Command Shift 3 or Command-Shift 4.... There is so much more to capturing
what is on your Desktop than just using the Apple keyboard commands and we
have looked at quite a few really excellent programs recently (including Screenium and iShowU) for doing just that. With Voila 2.0.1, from Global Delight Technologies we have the next step in screen capture. Voila was nominated in two
categories for the prestigious
2009 Macworld Awards. The
awards recognize the most innovative and successful products developed by the
companies that produce for
the Mac community. Voila was
nominated for the prestigious
Macworld Award in the Consumer Software category by
the Macworld Editorial team
and also received a nomination in the Readers Choice:
Best Software category.
Voila is a unique, first-of-its
kind image capturing and
annotating tool on the Mac
platform. It allows you to capture anything or everything on
your desktop. With Voila you
can grab right from your iSight
camera or you could snap a
whole webpage as well. You
can capture, annotate and
share the pictures with everyone. Voila is the first tool that
offers complete freedom to
capture any shape of your
choice like Circular, Polygonal, Triangular or a Freehand
capture. Apart from these, you
have a Menu Capture,
Fullscreen Capture, Object Capture, Rectangular Capture and a Timed Capture as well. You
can snap a whole web-page, regions of webpage or multiple DOM elements. You can also
capture from built-in or external webcams. All
your snaps will be managed with the built-in
image Organizer, into Smart Collections like
Smart Folders. Once you are done with snapping the images you can either export them to iPhoto or share them
with anyone through Mail, Flickr or FTP.
The ability to have multiple screen capture options, along with the capability to use them in a variety of combinations with a good blend of
Annotations and Special Effects and the ability to automatically organize them makes Voila very special and different from the other screen
capture tools we have looked at. I can’t begin to tell you how impressed I am with Voila. A lot of very expensive and useful programs
appear in the DoubleClick and receive less attention than Voila is getting in this issue. That’s is because I think that Voila has the potential
to be useful to more members of the MaUsE club than most of them.
This program takes screen capture to new heights
with a clear and intuitive interface combined with
the ability to print on your captures in any font at
any size and colour, draw on them, stamp them
with labels and apply special effects:
• The Tools tab: provides Pencil, Paint, Spray,
Text, Shape, Arrow, Callout, Line Stamp and Blur.
Each tool has a little control panel of its own that
opens when invoked that allows you to customise or control the tool.
• The Effects tab: gives the power to Skew, customise Edges, apply
Filters, make colour Adjustments, and Crop. The program has every
feature I could think of including (sensible and obvious) multiple
undos and some that would never occur to me.
The Voila screen captures are kept together in any location of your
choosing. Sensibly. the default location is in a folder called “Voila” in
your Pictures Folder in your Home Folder. They are also shown in an
expandable bin (Capture Tray) below the application’s viewing window. Capture images can be dragged right out of the tray and
dropped onto the Desktop. I found this to be a very convenient fea-
ture. The program keeps a record of the snaps that you have dragged
out of the application tray onto the Desktop in a Smart Collections
folder called Dragged Out. The other Smart Collections include: Recent snaps, Screen Snaps, Web Snaps, Cam Snaps, Imports, Flikr
Exports, and FTP Exports. Clicking on each of these Smart Collection
folders in the Organizer window automatically loads the contents of
the Folder into the Capture Bin.
If you want to see Voila in action you have to download a copy of your own. It will appear as a 27-meg
disk image on your Desktop. (We did get a copy to
be used as a MaUsE raffle prize and it was pounced
upon at the June MaUsE Meeting).
It will take a bit of time to learn all of the tricks but the
time spent investigating the program interface is well
worth it. Luckily for us the people at Global Delight have provided
copies for all of us at their website at :
< http://www.globaldelight.com/ >.
And about the user manual: it is an excellent resource and available
from the Help menu any time the program is open. It describes how to
use the program and contains a Frequently Asked Questions section that will get you through any difficulties. Not that you can expect
many difficulties with Voila. My impression is that the program is
hugely rewarding and entertaining as well as an effective tool for capturing and working with images.
I suggest you have a look at the Global Delights website and download a 30-day demo of Voila. Find out what the fuss is about. Macworld likes Voila. Apple likes Voila. I like it and you will, too. No matter
what else you do with your Mac, the ability to record what is on your
Desktop is as basic to the Mac OS as copy / paste. This program
makes the most out of screen capture and it will definitely make a difference to how you harvest images off your Desktop and what you
can do with them.
Article by Michael Shaw
iamaKey
USB Flash Drive from LaCie
Data storage has had quite an evolution. The
floppy disk was an early data storage
medium that you could read and write
to. You could erase it and add data
many times over. The floppy disk is a
thing of the past, never more to make a return. Gone are the days of
putting 180 KB on a 5 1/4 inch floppy. Gone are the day of inserting a
3 1/2 inch hard disk to save 1.44 MB of info. You would be hard
pressed to find a drive that would take either of these dinosaurs (although I have an imation SuperDisk drive that does take the hard
disk). Nowadays with the large amount of information that needs to be
transferred, one needs the flash drive, a mini portable hard drive.
I can remember being very disappointed when I bought my first iMac
(the bondi blue one) and there was no floppy drive. How would I
transfer data from my computer at home to the one at work. I
could of course burn a CD but that would be expensive and too
static. I bought the imation SuperDisk to help me out. Apple of
course was way ahead of the technology game. Somehow they
foresaw the death of the floppy; that its limited capacity would
soon be outdated. Those first generation iMacs did have the USB
port and it was not long before the first flash drives (called thumb
drives) were out on the market. Nowadays, who would want to
save data on a floppy when you can easily save more on the
flash drive and then stick it in your pocket or attach it to a key
chain.
The flash drive comes in many sizes from 128 Mb to 16 GB and growing. The price varies greatly depending on the storage space, the
company that produces it and when it reaches the market. These
drives keep coming down in price all the time and their capacity keeps
growing. At one time, I was pleased with the 1 GB flash drive that I
bought for $100 (that was three years ago). I recently purchased an 8
GB drive for $20. But that is the way of technology. The idea is not to
wait for the price to come down but rather buy what you need at the
time. If you wait too long, it could be obsolete. I am still happy
with my first drive. It served its purpose. But nowadays I
use the larger drive. The insides of a flash drive
have already been written about in a
past DoubleClick article by
Michael (see DC Nov 2008
page 10). You can refer to that
if you need to know more on that topic.
The biggest problem with flash drives is
that they are made of plastic and feel
flimsy. Drop them a few times and it loosens as if it could split apart. I
have found that the protective end breaks easily if dropped from a
very low height. They feel cheap. One cure for this is to not drop it.
Easier said then done. Another is to get the iamaKey which is made
of metal. It is much more rugged and will stand up those unfortunate accidents. As you can see from the picture, it actually does
look just like a key. This key-shaped design is both functional and
memorable and the protection it offers makes it extremely reliable. It
is thinner than most thumb drives. The gold SIP connector is both
water- and scratch-resistant. I have not actually put it in water to
prove this but I trust that it will be so if the need arises. The connector
end also looks a bit different from most USB devices as it is not the
usual full rectangular shape. However, there is no need to fear, it can
only be inserted one way. Because of its storage size, you will need
Mac OS 10.3.5 or higher to use it. The one thing that I miss when
using the iamaKey is the lack of an LED light to show that the drive is
being accessed. I completely understand that imbedding an LED
would remove the intended visual resemblance to a key and so it has
been left out. It is just something I will have to get used to.
There is always a question of formatting new external drives, which would include the flash drives. Disk
utility, which comes with all Mac OS systems, allows
you six formats: the most common being the Mac OS
Extended (Journaled) and the MS-DOS File System.
Any drive that I have bought always comes with the
Windows (MS-DOS) format on it. This means that we
simply have to stick the drive into the USB port and
the drive shows up on our desktop ready to be
used. Data can now be read by both Mac and IBM
computers. There is a draw back to this set up and
that is in the drive's speed, both reading and writing.
If you knew that your external drive was to be used by Macs, then
you should erase the drive and put the Mac OS Extended format on it.
I don't recommend this for the flash drives. I did erase the iamaKey
and put the Mac OS on it. It loaded up on the screen noticeably faster
but it was not readable by my IBM computer. It asked if I wanted to reformat the drive when I plugged it in. Since I want to be able to transfer data easily from one system to another, I reinstalled the MS-DOS
format. Slower it is, but more versatile. I leave it to you to decide
how to handle the formatting.
In the end, I now have a 4 GB thumb drive formatted to work on
both systems. It is metallic and so I have no fear that dropping it will
break the case. It can easily fit on my key ring and not look out of
place. It is less bulky and gives me the faith that my data is well
protected from most accidents. LaCie actually has two other metal
thumb drives, with different shapes and storage space. You can do
an online search to see where they are available. I have found
the price ranges from $30-$40 CAN for the iamaKey depending on the store and the shipping and handling fees. As always, the price will change with time as new technology
takes over. Act now if you like what you see.
Submitted by Marcel Dufresne
June Meeting Report
The hot weather arrived just in time for the June 24th Meeting. The Library room was very comfortable but it was very warm & humid outside. Aaron returned after being AWOL for the past two meetings and
made up for lost time. Stan gave the Treasurers Report and ran the
loyalty draw for the $100.00 gift certificate and 8-gig flash drive at the
end of the Meeting. I did a brief show & tell about Smart Folders, and
Chris showed us KickYouTube. All of the rest of the Meeting was
Aaron’s shout. He acted as Master of Ceremonies, And did the Ask
The Experts segment, and gave us a splendid presentation on Twitter, and another presentation on Using a Document Scanner to
achieve a paperless office, and he told us about the new iPhones,
Snow Leopard, and the latest news from Apple. We got two new
members and I think
they both won something in the MaUsE
raffle. There were several really nice raffle prizes, including several
books, a vintage Apple PowerBook, copies of Bokeh and Snap Art 2
from Alien Skin, Data Rescue PC3 from Prosoft, Nik Software’s
Viveza, Global Delight Technologies’ Voila, Mariner Software’s Paperless, AstoundSound Expander and other programs and games. SecureMac donated 30 one-month demo copies of MacScan that went
very fast.
Before and during the meeting there was a lot of activity at the back of
the hall with several computers, software, cables, RAM upgrades,
keyboards, mice, connectors, digital cameras, iPod accessories, and
other computer accessories available for the annual MaUsE Swap
Meet. Some stuff was free (a lot of it in fact) and the rest was at very
attractive terms. As usual, the
evening ended all too soon. See
you all in September !
Prosoft for Windows
Data Rescue PC3:
Prosoft has been a big supporter of the
MaUsE for many years and many of their
excellent Macintosh programs (like Drive
Genius) have been featured in recent issues of the MaUsE DoubleClick, at our
MaUsE Meetings, and in many of our
MaUsE Raffles. Although we know Prosoft
Engineering best as makers of fine Macintosh utilities, Prosoft also makes an excellent product line for computers infested with
the dreaded Microsoft operating system known as Windows.
Although we are primarily a Macintosh Users Group there are some
poor fools among us who either use the Windows OS on their Macs
secretly or who are forced to use Windows-based computers at work.
For those unfortunates in the MaUsE Club Prosoft has sent us a copy
of their brilliant new Windows data recovery program called Data Rescue PC3.
• Data Rescue PC3 is the best solution for recovering files from a
crashed or virus-corrupted hard drive. Other utilities can cause more
damage to your hard drive and files by trying "fix" the problem, instead of focusing on recovering your files. Do not use a disk repair
utility until you've safely recovered your important files and stored
them in a safe location. Data Rescue PC3 should be your first option
to recover your important data, before you try any risky "repair" utility.
Simply put, Data Rescue PC3 is the best data recovery solution.
Data Rescue PC3 is revolutionary in both ease-of-use and power.
You can use Data Rescue PC3 in two ways:
• As an application: If you need to recover an external drive or a
secondary drive, you can just load Data Rescue PC3 onto your computer and start up the application — Data Rescue PC3 will then scan
your drive for your files, allowing you to copy them over to a second
drive (not included). This is the only safe way to do recovery, since
you will not be recovering files to the drive you're scanning.
• Using Included Emergency Boot CD: If your main computer
hard drive has crashed, has a virus or you need to recover deleted
files, you can use the included emergency boot CD. This CD will boot
up your computer and then allow you to scan your internal boot drive.
Once the scan is done, you can chose which files you want to copy
over to your secondary drive (not included) — Using Data Rescue
PC3 in this manner allows you to scan your drive without loading the
software onto that drive. That's important since the simple act of loading an application may not be possible due to a drive crash or virus
and would potentially write-over the deleted files you're trying to recover — To use the Emergency Boot CD, simply insert the CD and reboot your computer. Data Rescue PC3 will automatically access your
drive and then guide you through the file recovery process with simple
step-by-step directions. You then simply select the files you wish to
recover and Data Rescue PC3 will copy those files over to your external USB or FireWire hard drive, secondary internal hard drive, or a
network drive (not included). Because Data Rescue PC3 comes on a
bootable CD, it works in more cases than traditional Windows-based
recovery tools which require your computer to be running Windows in
order to install and run the application.
Why do I need Data Rescue PC3?
• If you own a Microsoft Windows-infested computer
• If your hard drive won't mount.
• If your hard drive is corrupt due to viruses, errors or operating
system failure and you can't access files from it.
• If you need to recover deleted files.
Do-it Yourself Data Recovery Software
• Award-winning technology, works when other software fails.
• Recovers all types of files from your hard drive.
• Works if the drive fails to mount or only partially operates.
• Recovers deleted, lost and damaged files.
• Recovers digital pictures from your camera media even after it
has been erased or reformatted.
• Recovers your whole drive or just the files you need.
• Recovers pictures, movies and music from PC drives and any
type of digital camera media.
Fast and Easy Results
• Bootable emergency CD - No need to install.
• No need to disassemble your computer.
• Data Rescue PC3 guides you through the recovery process, then
saves the files to a second hard drive (not included).
• FREE technical support via phone and email.
MacSpeech Dictate 1.5
The Upgrades !
We’ve had some fun and more than a few
laughs at recent MaUsE Meetings when
two of our members did presentations of
the latest voice-to-text software for Macintosh, the MacSpeech Dictate 1.3 program. That is the software that
Michael used to show how well he could recite Bob Dylan lyrics and
nonsense rhymes into QuarkXPress 8 (remember - The boy stood on
the burning deck eating peppers by the peck...) and the same program that Ian demonstrated at the June 2009 meeting when he
showed us how well MacSpeech Dictate handles text in Pages and
Mail in decidedly foreign (British) accents. The MacSpeech people
have been working hard addressing issues that needed improvement
and now the Dictate program had been updated and improved. It is
better, stronger, and faster.
The new MacSpeech Dictate 1.5 does not disappoint. I noticed a definite improvement in accuracy and right out of the box, compared to
Dictate 1.3, and after using it for a few weeks the accuracy is still improving. It's dramatically optimized for performance with two of the
cornerstone applications for the Macintosh; Microsoft Word and
Apple's TextEdit. And more speed in these critical applications means
a more natural, intuitive experience and increased productivity for
you.
MacSpeech Dictate works with any word processing application and
any open document that you can type text into. It even works with online chat site windows like Google chat and Skype chat. Besides dictation, MacSpeech Dictate lets people perform basic navigation of
their Macintosh and control it with their voice to launch applications,
open new windows, execute menu commands, etc. The more you use
it the smarter Dictate gets and the better you sound.
MacSpeech Dictate is renowned for its accuracy, and
with its newly upgraded engine, it's even more accurate—in fact, up to 20% more accurate. MacSpeech
Dictate 1.5 provides an astounding accuracy rate of up
to 99% ... near perfection. Of course, you can continue
to increase accuracy as you use MacSpeech Dictate.
And let's not forget, MacSpeech Dictate NEVER misspells a word. With MacSpeech Dictate, typos are a
thing of the past.
In addition to amazing accuracy, MacSpeech Dictate
1.5 also recognizes 13 distinct English dialect variations, providing exceptionally strong recognition. And with the new Vocabulary Editor, MacSpeech Dictate 1.5 lets you train individual words
and even add new ones such as proper nouns, giving even more control over how it recognizes your speech. So no matter what English dialect you speak, MacSpeech Dictate 1.5 is there for you.
Go to < http://www.macspeech.com/ > to find out more about this
new upgrade to the program that has the potential to radically change
the way you interact with your Mac. And have a look at the next page
to see where speech recognition software from MacSpeech is expanding into professional fields.
MacSpeech Dictate Medical
& MacSpeech Dictate Legal
MacSpeech Dictate 1.5 is not the only big news
from MacSpeech.
World-class solutions are critical to the day-today needs of medical and dental professionals
alike. From advancements in medical and dental treatments and procedures, to the latest
equipment and tools, you rely on technology
advancements in order to provide patients with
superior care and quality. At MacSpeech, they
know the importance of world-class medical
tools that epitomize quality, craftsmanship, innovation, and technological advancement: Introducing MacSpeech Dictate Medical, the premier Macintosh speech recognition solution for medical and dental professionals. MacSpeech Dictate Medical supports a wide variety of
medical and dental disciplines and specialties; and includes a certified, noise-canceling microphone headset. You may choose a different
high-quality microphone, including one of the wireless options.
With MacSpeech Dictate Medical, you just talk and let your Mac do the work. MacSpeech Dictate Medical takes care of the typing in the applications you already use, including word processors, databases, chat applications, email apps, and many more. MacSpeech Dictate Medical is the most advanced, easiest-to-use speech recognition solution available for the Mac.
To find out more, visit: < http://www.macspeech.com/pages.php?pID=145 >
And there’s yet another new member of the MacSpeech Dictate family: MacSpeech Dictate Legal, the premier Macintosh speech recognition solution for legal professionals.
With MacSpeech Dictate Legal, you just talk
legalese and let your Mac do the work. MacSpeech Dictate Legal takes care of the typing
in the applications you already use, including
word processors, databases, chat applications,
email apps, and many more. MacSpeech Dictate Legal is the most advanced, easiest-to-use
speech recognition solution available for the
Mac. Here's a peek at a few other goodies
awaiting you:
MacSpeech Dictate Legal will astonish you with
its superior accuracy. In fact, MacSpeech Dictate Legal provides an accuracy rate of up to 99% … near perfection. What's more, MacSpeech Dictate Legal NEVER misspells a word, so
typos are a thing of the past. Its advanced capabilities require only a few minutes of training as it effortlessly learns your voice, and with
continued usage MacSpeech Dictate Legal gets even more accurate. That's power and performance you'll not only appreciate, but rely
upon.
MacSpeech Dictate Legal is wonderfully versatile. It fully understands and supports more than 30,000 legal words and terms, so it's up to
your most arduous legal writing tasks and projects. MacSpeech Dictate Legal also recognizes 13 distinct English dialect variations for exceptionally strong recognition, and works with the applications you already use. Word processors, contact management solutions, billing
and project time tracking apps, spreadsheets, page layout solutions, email apps, chat programs, graphics applications, Apple's iWork &
iLife, and so many others, MacSpeech Dictate Legal works with them all. It even works effortlessly with most text documents created by
other applications.
MacScan: The World’s First Anti-spyware
Security Software for the Macintosh
As Macintosh users, we tend to be a bit
smug about how virus-free our Mac
computers are when compared to Windows-infested systems. Smug is good
but blind to the possibilities is bad.
There is more out there than just virus
infections that we should be aware of.
As the Macintosh OS gains wider acceptance the likelihood of malicious attacks on Mac computers will increase.
Already there are several different nasty
program types designed to maliciously
compromise our beloved Macintoshes. SecureMac has developed a way to fight them.
Using advanced detection methods SecureMac’s software can detect,
isolate and remove any programs which could allow our privacy to be
violated. Since early 2002, SecureMac has been developing its proprietary anti-spyware application, MacScan. MacScan seeks out and
targets suspicious software like trojan horses, keystroke loggers, and
specific cookies that have the ability to trigger unwelcome events.
Trojan horses are programs that allow a remote user to connect to
your computer over the Internet, network or telephone line, effectively
taking control over your computer, including the files stored on it. Keystroke loggers are programs that are used to record everything that is
typed on the keyboard, and log them to a file. Some keystroke loggers will send the logs over the Internet to a specified address pro-
grammed into the application. Keystroke loggers are not limited to
what text they record,so if you’re typing a letter, or typing your passwords or your credit card number it is all logged.
If there is anything on your Mac that even looks like it might possibly
be a trojan horse or a keylogger MacScan will detect it and give you a
chance to isolate and remove it. All of your browser cookies are
scanned to see if they are suspect. Mac users can now remove over
8,000 known cookies for adware and malware with a single click and
without losing any of their saved cookies. The Cookie Blacklist definitions, like the Spyware definitions, come in easy to download updates. MacScan also audits and protects your system from remote
administrative programs that may have inadvertently been left on or
installed.
January 2006 saw the release of MacSan for OS X at MacWorld San
Francisco. In 2007, the MacScan team released MacScan 2 with key features such
as frequent definition updates and the
ability to scan Macintosh computer for the
cookies on their Cookie Blacklist. Using
the program is as easy as setting the
Scheduler preferences to scan for spyware at a certain time each week and then
leaving MacScan to do its business. (The
program can also be run manually by
clicking the Scan button in the application
window).
By running MacScan you can protect your
privacy by checking for known programs which could be running without your knowledge. SecureMac is always adding more support; if
users find an application that is currently not detected or is not being
detected properly, the information can be sent to SecureMac to improve MacScan.
When you launch MacScan you can choose which type of scan you
wish to perform: Full Scan, Quick Scan, or Custom Scan. The
Quick Scan simply checks your home directory for known spyware
applications, but the quick scan will not scan the whole hard disk for
spyware. Full Scan scans your whole hard drive for spyware. Custom
Scan allows you to scan a folder or drive for spyware. Quick Scan
and Full Scan will automatically scan for internet tracking cookies,
which can be used to monitor your web surfing habits. When isolating
spyware, tracking cookies will be immediately removed. When performing a custom scan, you can choose not to scan for tracking cookies. MacScan currently detects and removes tracking cookies for
Safari, Internet Explorer, Netscape, Firefox, and Camino. Under Mac
OS X, to perform a full volume scan or scan of files which belong to
another user restricted by privileges, you must be logged in as one of
the administrator accounts and authenticate when asked. MacScan
for OS X now has authentication support built in. Simply run the MacScan program, and it will prompt you to authenticate. If you choose to
authenticate, MacScan will be run with root privileges, and you will be
able to scan any directory on your hard drive. If you choose not to authenticate, MacScan will run in “normal” mode, and you will not be
able to scan folders that you do not have privileges to access. Without
granting MacScan administrative rights, it will only be able to scan
files your account has privileges to access, and this may prevent a
successful full audit for spyware. Detection will only identify what is
believed to be spyware and will only log what it has found. Possible
problem files will be listed as spyware and colour-coded (green, yellow, or red) to indicate the level of threat they might represent. Upon
examining the list, the administrator will then be able to select and
isolate the items. The program also comes with an extensive list
(under the Info tab) that names all of the common threats and tells
what type of malware they are.
The MacScan program comes with a fully-illustrated clearly-written little 16-page .PDF Users Manual that describes how the MacScan program does what it does. I have this program installed on my own Mac
and between MacScan, iAntiVirus and Little Snitch I feel I have got
enough preventative medicine to protect me from myself and others!
Check out MacScan at: < www.macscan.securemac.com >. For
what MacScan does the price (US $30) is very reasonable. Since 1999, SecureMac.com has been at the
forefront of Macintosh security. Their website at < www.securemac.com > not only
features complete Macintosh Anti-Spyware and Antivirus solutions, but also operates as a clearinghouse for news, reviews and
discussion of Apple computer security issues. Users from
novice to the most advanced will find useful information at
SecureMac that is designed to make their computer experience trouble free.
Submitted by Michael Shaw
SecureMac.com
I mentioned SecureMac.com in the MacScan
article that preceeds this page. I think
that this website is an important resource for Mac users and it has the
potential to become even more important in the future. The site was established because there was a lack of
security-related news for the Macintosh
being covered elsewhere. This site is
devoted to the security of your Macintosh
computer and the programs or servers you
run on it. SecureMac started over ten years
ago, early in 1999. Since then they have
served thousands of people,
helping them secure their networks and detect hackers.
The SecureMac website has become the best source of up-to-date
information about possible threats to Mac systems.
SecureMac.com is run by a group of Macintosh security experts
around the world. Over the past few years SecureMac.com has
published over 300 reviews, advisories, and news articles. On their
website you will learn how to secure your Macintosh and detect any
hackers that might be present on it.
SecureMac.com is the most reliable source
of security related products, with extensive
reviews and ratings evaluated by the top
Macintosh security experts. Every product
listed on SecureMac.com is evaluated to its
fullest, from secure programming, concept
and design. Every product is given a rating
and explained in detail. Each developer or
developing group is notified of any security
issues or advisories before released to the
public to ensure a safe transition for all of
their users.
As I said in the MacScan article, we tend to
be a bit smug about how virus-free our Mac
computers are when compared to Windowsinfested systems. This can be a big problem
if it blinds us to the other threats that are out
there. Its very possible that there are much
worse things than just viruses lurking in wait
out there, and we have to understand that it
may take some effort to start taking precautions now before we learn the hard way just
what perils there are. SecureMac.com gives
Macintosh users some advance warning.
McVitie’s HobNobs:
The Official Biscuit of the MaUsE DoubleClick
You must enable cookies to view this page properly. Or, as the British might
say, although it doesn’t sound correct, you must enable biscuits.
McVitie’s HobNobs, plain and milk chocolate varieties, are available from the
Sobey’s grocery store on the south side of Hwy. 2 between Oshawa and
Whitby. Don’t buy any unless you can afford to acquire a delicious addiction.
Please note: the chocolate coating is on the BOTTOM of the biscuits, not on
the top, so be very careful how you eat them. Britain sends her best.
The Best Computer Ever Made
My First Love : The Sinclair ZX81
Although I’d worked at IBM for 25 years and
watched, with interest, the introduction of the IBM
personal computer in 1981, my first computer purchase was a Sinclair ZX81 - advertised as the first
computer for under $100.
This little gem measured only 6.5 X 6.5 X 1.5
inches including the ‘membrane’ keyboard. The
memory was 1K RAM (that’s KB, not MB or
GB) and the CPU chip was rated at 3.25 MHz
(my current Mac is 1.25 GHz). A cassette
tape recorder was required for program storage (no floppies, diskettes, hard drives, CDs or memory
sticks) and a black-white TV was connected as the monitor. In spite
of the primitive nature of the Sinclair ZX81, it provided the most fun
I’ve ever experienced with a computer.
Because of the built-in Basic programming language, users usually
learned how to write their own programs. That was the greatest fun! I
quickly became an amateur programmer and created dozens of useful applications. There were many computer magazines in the 80s
dedicated to the computer hobbyist and some featured how-to-articles
regarding homemade attachments and add-ons. That aspect of computing really appealed to me. Tinkering with the hardware, unfortunately, is something that’s now discouraged since the modern
computer is extremely complex.
I learned how to rewire an old full-size NCR keyboard so that it could
be used with the Sinclair. A new fire-engine-red housing was made of
plywood and Masonite, complete with a tiny Timex-Sinclair dot-matrix
thermal printer and associated switches (Timex manufactured Sinclair
products at their plant in Scotland and eventually added
their own name to the product in North America). Attached are some photos to reveal the results of my “computer manufacturing” project. I named the machine:
Lobotics 1. I wish I could have as much fun today with my
eMac!
Only recently, I once again powered-up
the Lobotics 1 - it’s been unused for 15
years or so. It was quite a surprise to
find that the old cassette tapes were still
useable and the programs ran without a
hitch. That product became a landmark
in my ongoing computer love affair.
I bought my Sinclair ZX81 in 1983 after a
price reduction to $69.95. I later graduated
to an Atari 800XL, an IBM PS/1 (286), a MAC LC630 and finally to my
current eMac. Recently, I found another ZX81 at a garage sale which
I’ll make available to any computer enthusiast who would like to go
back in time.
Submitted by George Dunbar ([email protected])
Photographic Composition Part 4*: Cropping
You learned the basic guidelines for good Photographic Composition
in my previous articles in the DoubleClick. As a follow up to the statement made in the June article about balance, "The photo of the two
soldiers is symmetrically balanced. If you imagine that they are sitting
at either end of a pair of scales, you would see that they are balanced. With this type of arrangement, the subjects tend to divide the
viewers attention. This is because the shot could be divided into two
vertical photo's" I have decided to do a short article on Cropping.
Cropping is the process of looking at a photograph and removing the
distracting parts that take your eye away from the main subject. In the
example above you see the two soldiers sitting side by side. By cropping that shot down to just the single soldier, you now concentrate
more on him and what he is doing. With this particular shot, even the
single vertical shot can be cropped down even further. That is because your eye is split between what he is doing above the table with
his hands and what he is doing below the table, with his legs and feet.
The table is a dividing point for your eyes. This is because his legs
are framed by the table.
By cropping out the table and his legs we get to the real reason the
photographer took the shot, to emphasize a soldier working on his
leather backpack. By careful cropping we still have a good photograph, because it still has the
basic guidelines involved in it. We
have strong visual unity in the
shot due to the triangle formed by
the imaginary lines running from
the peak of the hat to the elbows.
This tends to frame the face,
which has a triangle of its own,
the eyes and noise. You will also
notice that the eyes are looking at
what he is doing and not at the
photographer. This also helps, as
the eyes should be looking where
the noise is pointing.
Most cropping today is done using a photo processing program on the
computer. In the days before digital, yes there was a time when digital
didn't exist and photo cropping was done in a darkroom using an enlarger.
To crop a photo, you select
the Cropping tool from the
Tool box. Using your mouse,
select a starting point and anchor one corner. By dragging
your pointer over the area you
want to keep you will see
dashed lines appear. You
drag these till you have sized
the cropped window around
everything you want in the
new photo. The program asks
you if this is what you like,
and if it is than you can select
the cropped area. If not just
reject it and restart your crop.
Once accepted this becomes
your new photo, which you
will want to re-name and
save.
For this reason NEVER,
NEVER work on your Original
photograph. The first task is
to make a duplicate of the
original, and do all your adjustments on the duplicate. Making the duplicate saves your original. Your original is the same as the film negative from days gone by. Photographers took great care with their
negatives, as they knew that the negative could make them some
money, by selling the prints that it made.
*This is the fourth in a series of articles. Parts 1 and 2 of
this series appear in previous DoubleClick issues. Part 3
appears earlier in this issue.
Submitted by Kevin Livesey <><
The First PowerBook:
The 25 MHz PowerBook 170
I saw one of these over at the Goodwill store in
Ajax a few weeks ago amongst the other electronic debris. It happened during their Half-Price
Wednesday Sale so the $29.95 price tag indicated that they really only wanted
$15.00 for it. That’s a far cry from
the US $4,600.00 it cost when
new. The battery was dead but
someone had plugged it in and it was running off
the power supply. I played with it for a few minutes and it was neat to
see it working so well. As usual, there were lots of personal files on it
that should have been erased before it was donated but that’s another story. I checked out the used paperbacks on the bookshelf for a
quarter of an hour and when I walked past the electronics shelf again
the PowerBook 170 was gone. I hope it found a good home.
The PowerBook 170 was released by Apple Inc. in October 1991
along with the PowerBook 100 and the PowerBook 140. Identical to
the 140, the 170 model was the high end of the original PowerBook
line featuring a faster 25 MHz Motorola 68030 processor with Floating
Point Unit (FPU) and a more expensive and significantly better quality
10-inch active matrix display. It was produced for one year and was
discontinues in October 1992 when it was replaced by the 33 MHz
68030 PowerBook 180. The PowerBook 180 introduced a new power
saving feature which allowed the processor to run at a slower 16 MHz
rate to extend battery life.
Though the PowerBook 100 is the direct descendant of the Macintosh
Portable based on its internal architecture, the 170 is the Portable's
direct successor. A no compromise portable version of the desktop
Macintosh, the 170 includes virtually all of the features incorporated in
the original Portable, as on a comparable desktop of the day, but in a
smaller and sleeker case design. Initiated as a more suitable replacement for the Portable, the only features the first generation 170 did
not include in its reduced space were an external video port and internal ROM & PDS expansion slots. Indeed, Apple canceled its own external monitor adapter for the Portable shortly after it was announced,
instead relying on numerous third party providers for solutions (still
applicable to the 170) and FCC regulations of the day prevented any
real use of the PDS expansion slot, by restricting any external connections to it. The PowerBook 180 replacement would address external video less than a year later, but expansion slots would not return
to Macintosh portables until 3 years later with the PowerBook 500 series, in the form of PCMCIA cards. The 170 also dropped the external
floppy disk port (only the Macintosh Classic II still had one) and made
no provision for a second internal floppy disk port (a feature also
missing from the rest of the desktop line by this time). Overall, it had
roughly the equivalent features and performance of the powerful
Macintosh IIci desktop in a laptop.
Though released at the same time as the PowerBook 140 and
PowerBook 100, both the 140 and 170 were designed entirely by
Apple, while the 100 was being miniaturized by Sony from the fullsized Macintosh Portable. As a result, the 170 represents the very
first PowerBook created by Apple, with the 100 actually representing the first design improvements, though its internal architecture is the oldest in the series.
The 170 was introduced with System 7.0.1, specifically to support
new power management and other unique hardware features. However, due to the RAM prices in 1991, combined with its already high
list price, the 170, like the 100 & 140, only had 2 megabytes (MB)
RAM soldered directly onto the logicboard, which critics felt was restrictive for use with System 7. The North American models were
grey, like the one pictured above.
Eventually phased out in October 1992, the 170 did briefly
re-appear in 1994 in a special edition 'white' version and,
later still, in an extremely rare multi-colour guise for the
JLPGA (Japan Ladies' Professional Golf Association), as
seen here at right.
Ethernet was optional but the PowerBook 170 came with 1
ADB port, 2 serial ports (one for printer, one for modem), 1
SCSI port (HDI-30) and audio in and out (8-bit Mono).
Maximum RAM was 8 Megs (4 Megs standard) and the
PowerBook 170 came with a 40 or 80 Meg SCSI hard
drive. Access to the 1.44 Meg floppy drive was on the right
side towards the rear and there was no built-in CD.
Since localized versions of System 7 were not yet available worldwide, the Japanese 6.0.7 KanjiTalk version of
Apple's System software, was modified to support all three
new PowerBooks and released as version J-6.0.7.1. As a
result, this version was unofficially adapted for use with
the standard 6.0.7 allowing many users to run System 6
on their PowerBooks, rather than upgrading on-board
RAM with an expensive proprietary RAM card (a 6 MB
card was US $899). The 170 shipped with an additional
2 MB RAM card already installed, so it was less of a problem, however 4 MB was the minimum recommended RAM
size for use with System 7 and not practical for use with a
RAM Disk, a battery power-saving feature.
Noise Ninja 2
The digital era has brought with it an increased
awareness of noise issues in digital cameras.
With the ever-increasing mega-pixel counts in
todays digital cameras increased emphasis is
being placed on reducing noise artifacting on
these digital sensors. While film grain could
often be used for creative effect, digital noise
results in unwanted colour artifacts and strange
looking ugly speckles. Digital noise is defined
as electronic static in a digital camera and appears as darker spots (similar to film grain) in a
photograph. This static is amplified at higher iso
settings and longer exposures and is particularly obvious in flat areas of colour (like the
sky). The small digital sensors employed in todays point-and-shoot cameras are particularly
vulnerable to noise issues though all cameras
are affected to some degree. Digital SLR models employing full-frame sensors such as a
Nikon D3 or D700 are best at controlling noise
and are usable to higher iso values without
noise reduction but unfortunately these models
retail for $3000 and up. Adobe Photoshop provides users with rudimentary controls for controlling noise from these cameras and, although
helpful, Photoshop does not possess the
amount of control necessary to fulfill the task of
reducing unwanted noise and holding critical detail in these images.
At this point software developers such as PictureCode have stepped
in as a viable alternative.
PictureCode was founded in November of 2003 by Dr. Jim Christian,
a veteran computer scientist and an avid amateur photographer. PictureCode develops innovative software technology to enable new levels of image quality, utility and productivity in the photographic
workflow. Their software, called Noise Ninja, can be used not only for
improving low light and high iso shots but also for creating bigger enlargements from lower iso shots. Noise Ninja users report a two stop
improvement in noise efficiency. The software can also be used to
clean up digitized film based scans (as I will demonstrate later in this
review). Noise Ninja is available as a stand alone application or as a
plug-in for Adobe Photoshop, Apple Aperture 2 and Adobe Lightroom
2. The cost for the Pro bundle is about $100 Canadian, however the
stand-alone versions are available at much lower cost. The Adobe
Photoshop plug-in under review today is listed as Noise Ninja 2 Version 2.3.2. The Noise Ninja plug-in is accessed as a convenient drop
down under the Photoshop filter menu. I did not encounter any issues
loading or running the Noise Ninja software during the review period.
Mac system requirements are listed as 10.4 or later and Apple Aperture 2.1. I am using an early version Intel iMac 2 Ghz with 2 Gb of
ram and running the latest Leopard 10.5.7 software.
Noise Ninja is based on a powerful and robust mathematical approach to noise reduction using what is termed as "wavelet theory".
The wavelet theory is a cutting-edge technology used for transforming
images from pixels to a rich spacial-spectral representation that improves the ability to automatically identify and suppress noise at different frequencies, locations and colour channels. Noise varies by
frequency, colour and brightness and it is different for every type of
camera. For this reason Noise Ninja provides free profile downloads
available for dozens of cameras on their website (http://www.picturecode.com/profile_upload.php). If your camera is not represented, a
simple profile chart can be downloaded in order to profile your own
camera (see image above). The user would print out this profile chart
and shoot it with their camera at various iso settings and through the
use of a button Noise Ninja will create noise profiles for your particular
camera model. I did not use this method of calibration as my specific
camera model was found in their database and I was quite happy with
the results, however information on the PictureCode website indicates
that creating your own custom profile may or may not produce a superior result to the stock profiles.It should also be noted that best results will be achieved when Noise Ninja is applied as early as
possible in your workflow. Any pixel adjustments made to the image
will make it more difficult for Noise Ninja to work effectively.
Noise Ninja provides the
user with a simple and
clean layout (see image
above) and a logical
menu-driven approach to
correcting noise in the
images. The three most
used boxes are profile,
filter and noise brush
which are arranged neatly together. Image information is also found
here as is an action button for batch processing multiple images.
Images are corrected easily using a series of slider controls and the
user can visualize the changes in real time on the smaller preview
window. As mentioned previously there are three methods that can be
utilized to effectively reduce noise. The first method allows the program to auto-profile the image itself and provide a result viewable on
the smaller preview window. Or, alternatively, you can load supplied
iso profiles for your particular camera, or you may wish to create your
own profile using your actual camera and load these to the program. I
found the auto-profile to provide a good result overall however the
supplied profiles did provide a superior result. Noise reduction can be
accomplished using the luminance or colour channels independently.
All results can be modified and improved by utilizing the many controls found in the filter box. The noise brush can be utilized by simply
painting parts of the image to undo or redo the effects of noise removal in the luminance channel, chroma channels or all colour channels providing selective control over noise removal in localized areas
of the image. In use I found the preview window too small for my liking. I would much prefer to view the changes on a larger scale even if
the program would slow somewhat. I particularly found the preview
window difficult for using the noise brush and changed my workflow
over to Photoshop using a duplicate layer with layer masks for controlling brush effects.
I found the results using Noise Ninja
to be extremely satisfying. The results
definitely exceeded my expectations
for the program. I have been apprehensive to push my Nikon D300 past
800 iso but with Noise Ninja I can
easily exceed those limits. I found
great care needs to be taken to find
the best balance between noise reduction and detail retention. Areas
with fine detail may have to be
brushed back using the noise brush at
times. This is why the noise brush is
provided. The three images at right
show the fine results Noise Ninja is
capable of providing on a digitized scan from a Kodachrome transparency. I found the films grain
structure and noise made worse from enlarging the scan cleaned up nicely using Noise Ninja. The
image at the bottom of this page shows the results from my Nikon D300 at iso settings ranging from
200 iso to 3200 iso with and without Noise Ninja correction. The Noise Ninja noise brush was used to
protect some areas and no post sharpening has been added to these samples. There is a very slight
detail loss as the iso scale rises however this is also due to the in camera noise reduction taking effect. Better results may be obtained by turning the cameras high iso noise reduction off and letting
Noise Ninja do the work more effectively. The negative effects such as halos and speckles are minimal and would be difficult to see on a printed image. Noise Ninja will definitely become an integral part of my workflow in the future. Please
bear in mind it may be difficult to see these results properly on the low-res .pdf you are looking at. For more information and individual
price packages regarding Noise Ninja visit PictureCode at www.picturecode.com.
Submitted by Paul Danabie, Prepress Colour Specialist
Email : < [email protected] >
Website: http://web.me.com/pdanabie/Site/Welcome.html
Please note:
As part of my review I
have placed high
resolution images on
my mobile me gallery
for you DoubleClick
readers to download if
you like! This gallery is
found at :
http://gallery.me.com/
pdanabie#100179
I will leave the images
available for three
months or so.
Paul Danabie
New from Mariner: Paperless
Introducing Mariner Paperless
For Mac OS X
We are judged by the company we keep. And we judge others the
same way. It is with that thought in mind that I introduce this new
product that has just been released by Mariner Software. The company has been around since 1990 but has been expanding its list of
Mac titles aggressively since 2002. Mariner now has a stable of nine
solid performers and products that simplify life by offering outstanding
capability and compatibility at a reasonable price. Mariner Software
offers good value for the money. And Mariner has been a supporter of
the MaUsE for many years. All of their Macintosh-compatible products
have been featured at our MaUsE meetings, in our MaUsE raffles,
and here in past issues of the DoubleClick.
Formerly known as ReceiptWallet, the newly-rebranded Mariner Paperless allows you to scan and manage all of your receipts and documents. Simply scan receipts, warranties, deposit slips and other
paperwork. The Optical Character Recognition (OCR) in Paperless
automatically recognizes and helps categorize documents. When you
scan in each receipt or document, you enter a few pieces of information about it and then you can quickly and easily locate your receipts
and documents. With Paperless, you can view the receipts right on
the screen, print them, email them, or save them as PDFs. In addition
to the powerful search tools built into Paperless, you can organize
your receipts and documents into collections. These collections can
contain whatever you want and even better than that is the ability to
create ”smart collections” that automatically create collections based
Mariner Paperless can
help you organise all
of the little important
pieces of paper that
may be cluttering up
your life. If you need to
keep track of your
expenses or any other
paper-bound data and
are tired of filing and
losing your
documents, Mariner
Paperless is for you !
on whatever criteria you like. Nearly any scanner will work with Paperless through the Image Capture method, however for best results
Mariner Software recommends using a TWAIN compliant scanner or
Fujitsu ScanSnap S1500M, or S300M or a Pentax DS mobile 600.
Fujitsu and Pentax have the best drivers on the market at this time.
Your results may vary using any other scanner. However, all Mariner
Software products can be downloaded and tried out at no cost for 15
or 30 days before purchasing so if you are unsure whether or not Paperless will meet your expectations, please feel free to download a
trial copy to test in your own environment before purchasing.
< http://www.marinersoftware.com/download.php >
Store owner's manuals and other PDFs
Are you finding that most owner's manuals these days come as PDFs
and are either on the manufacturer's website or on a CD? Can you
ever locate the information when you need it? Simply add these manuals to a Paperless library and they're accessible with a few quick
keystrokes.
Be ready in case of a disaster
We all hate to think what could happen in a disaster like a flood or fire.
Recovering from one can be a trying experience. If you prepare
ahead of time and put all your important documents into Paperless
and back them up off-site before the disaster, recovery is just a little
easier.
Access legal documents
If you're a professional or anyone that has lots of documents about
various cases or topics, Paperless can help you organize. Many
lawyers are moving from the massive amounts of paper they generate
to electronic storage. This is economical and easy to do. Combine Paperless with a fast scanner such as the Fujitsu ScanSnap and paper
can virtually be eliminated.
System Requirements.
• Mac OS X 10.4.11 or later; Mac OS X 10.5.4 is recommended for full
use of all the features.
There is no limit to what you can do with Paperless
Upgrade from QuarkXPress
Before September 30, 2009
For US $299 !
Before the rise of Adobe InDesign and the
Adobe “Gang of Four”, QuarkXPress was
the premier software solution for most of
the people who did desktop publishing on
the Macintosh platform. Because of this
fact, there are a lot of old no longer in use
copies of QuarkXPress around. You might
have one. Think your old QuarkXPress 3,
4, or 5 licenses are beyond use, relegated
to a dusty cupboard? Think again. Until September 30, 2009, you can upgrade ANY previous version to QuarkXPress 8 for one low price.
QuarkXPress 8 delivers an intuitive new interface, easy web and Flash® authoring, stunning new typographic features, native Illustrator®
file import, and global publishing. of everything that’s been added since your previous version.
Simply put, QuarkXPress 8 is the version of QuarkXPress you’ve always wanted, and upgrading is easy. After you’ve purchased you’ll
need your previous serial number to install your QuarkXPress 8 upgrade. Don’t worry if you can’t locate your software box or serial
number - fill in your details at < http://8.quark.com/quarkupgrade/missingserialnumber.html > and the people at Quark will do their
best to identify your serial number to enable you to install your upgrade. It’s time to do the math. Upgrade all your licenses today from ANY
previous version of QuarkXPress for just US $299 (excludes Shipping and Taxes) and transform your old license into the next evolution in
page layout.