1
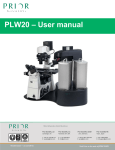
PLW20 Prior Automatic Plate Loader Manual Version 1.0 PLW20 1 Table of Contents Contents Section1 SAFETY INFORMATION Section 2 SPECIFICATIONS Section 3 UNPACKING THE SYSTEM Section 4 INSTALLATION Section 5 ROUTINE MAINTENANCE Section 6 ADVANCED OPERATION Section 7 TROUBLESHOOTING Section 8 REPLACEMENT PARTS Section 9 RETURNS & REPAIRS Section 10 APPENDICES 2 Prior Scientific Section 1 1.1 Safety Information Important Safety Information SAFETY WARNINGS Always observe the following safety precautions The PL200 must only be connected to a power outlet, which provides a protective earth. Use only the mains cord supplied. If this does not fit your power outlet, contact your distributor for the correct power lead. The unit is heavy and weighs 37kg. Remove the microscope before transporting. It should only be lifted by two people: use side handle and lip of the rear cable entry area to lift safely. Always disconnect the equipment before moving. This equipment is for use in moderate climates only. NEVER use the equipment in damp or wet conditions. Avoid excessive heat, humidity, dust & vibration. Do not use where the equipment may be subjected to dripping or splashing liquids. This equipment contains no user-serviceable parts. Refer all repairs to qualified service personnel. Keep fingers and hands clear of the PL200 moving parts when it is operating. It is the user/operators responsibility to ensure good laboratory practise is followed if slides contain hazardous material. PLW20 3 SAFETY SYMBOLS Retain these instructions. The following symbols mean: Warning: read instructions to understand possible hazard Warning: hazardous voltage GENERAL GUIDELINES FOR USE/OPERATION. The PLW20 forms part of an automated microscopy system, which may be used in research or production laboratories. It will pick-up, present, sort and return plates to any of the two preloaded racks that are positioned at the front. Whilst operating if a plate becomes misaligned, do not attempt to correct this during the operation cycle. Turn off the mains power before correcting plate position or removing any obstruction. Reinitialise the system. The PLW20 rotary arm may move unexpectedly, under automatic control. 4 Prior Scientific Section 2 Specification 2.1 Specifications This equipment is for indoor use and will meet its performance figures within an ambient temperature range 5 to 40°C with maximum relative humidity of 80% humidity (deteriorating linearly to 50% above 31ºC). Size 60cm deep x 70cm wide x 71cm high Weight 57Kg gross, (includes Slide loader, all accessories and packaging). 37Kg Net (plate loader fully assembled with accessories, but no packaging). The weight of the microscope is not included in these figures. Capacity of 20 slides (2 racks of 10) Plate type 75mm x 25mm conforming to ISO8037/1 Plate change time of 25 seconds Input Voltage 100v to 240v Fuse rating for both fuses is T2A Communication Via USB PLW20 5 Section 3 3.1 6 Unpacking The System Unpacking The System Prior Scientific Section 4 4.1 Installation Installing Your System Remove X-axis assembly from packaging case and place on suitable bench. Remove Y-axis tower assembly from packaging and lower onto x-axis assembly as shown. Ensure mating faces are debris free and aligned correctly. Anti rotation shipping PLW20 Insert M5 x 16 socket button head screw into each of four Insert M3 x 6 socket pan head screw to 7 With Y-axis tower installed, remove anti rotation shipping screw. Remove well plate racks from packaging and fit onto loader plate. Ensure locking clasp is positioned as shown below: Plate Well plate rack locking Locate dovetail on front of rack under plate dovetail on loader and lower rear of rack down onto plate. Rack With rack in position move clasp to right to secure rack in place and activate ‘rack present’ switch. Repeat for rack 2. 8 Prior Scientific Rear view of loader shows cable entry points. Mains socket. To supply.4 way binder from well plate on stage sensor. USB to PC. Main 4 way PLW20 US 9 1. Connection 1.1. Connect the Well Plate Loader to the PC with a standard USB cable. 1.2. Connect Well Plate Stage to a Proscan III controller using the Prior Stage cable. 1.3. After checking that the Well Plate Loader and Proscan III controller switched off, connect them to the mains supply. 2. Initialisation 2.1. Remove any hotels (well plate cassettes) from the loader. 2.2. If possible, manually move the loader into a clear, unrestricted position. 2.3. Make sure that nothing is in a position where the loader can collide with it. 2.4. Switch on the Well Plate Loader. 2.5. Open Prior Well Plate Loader software. 2.6. On the menu bar, click “Connect”, then select or confirm the Comm port number. 2.7. Enter or confirm the Proscan III Comm port number. 2.8. The manual mover screen will appear, use this to move the loader to a position clear of the stage and about half way up the Y axis. A warning may appear indicating that a well plate is in the gripper. Manually remove this well plate and continue. Use the G button in the manual mover screen to open the gripper. Closing the manual move screen will result in the stage being moved to its far left position and then the robot will auto initialise. 3. Setup – Part 1 10 Prior Scientific After initialisation has completed and if setup has note been done, then the manual mover screen will re-appear. . Screenshot of Manual Move interface 3.1. Use the manual move buttons to step the gripper to the hotel1 reference point. Check that the gripper arms are central in the insert, flush with the base, and the leading edges of the gripper paddles are flush with the tabs. 3.2. Click “Store Hotel 1 Position” on the setup. Screenshot: Store Hotel 1 position Screenshot: Store Stage Position 3.3. Using the manual move buttons drive the gripper arm to a safe point above the stage. 3.4. Click “Store Stage Position” to save this temporary safe position. 3.5. Click “Save and Exit”. The Manual Move setup screen will close. 3.6. On the menu bar click “Disconnect”. PLW20 11 Screenshot: Save and Exit Screenshot: Disconnect 4. Setup – Part 2 4.1. On the menu bar click “Connect”. 4.2. Allow the loader to initialise. 4.3. Place a hotel (well plate cassette) containing one well plate in the “Hotel 1” position on the kidney plate. 4.4. Click the “Scan” button below the “Hotel 1” column. 4.5. When the scan has completed, the well plate should be indicated by a green bar in the “Hotel 1” column. 4.6. Click “Debug”>”Single Step Enable”. Screenshot: Debug>Single Step Enable 4.7. Start transfer of the well plate to the stage by Clicking on the green well plate indicator (the cursor icon will change) and then clicking on the stage indicator. Single-step the operation until the plate is completely clear of the hotel. 12 Prior Scientific 6.8. Check the setup position of the well plate in the gripper. The bottom of the plate should be flush with the bottom of the gripper paddles. 6.9. Click “Pause”, then “Stop”. 6.10. Click “Debug” and uncheck “Single Step Mode”. 6.11. On the menu bar click “Stage”>”Stage to load”. The stage will move to the loading position. 6.12. On the menu bar, click “Options”>”Redo Setup”. 6.13. Move the stage switch to the open position. 6.14. Use the buttons on the manual move interface to transfer the well plate to the stage insert and adjust the microscope base until the well plate bears against the tabs on the back and left-hand faces of the stage insert Adjust the Y height so that the well plate is sitting on the insert face. 6.15. . PLW20 13 6.16. Click “Store Stage Position”. 6.17. Click “Save and Exit”. Click “Disconnect”. 7. References HLW20 Well Plate Loader User Manual 14 Prior Scientific Section 5 Routine Maintenance SAFETY - MAINTENANCE Clean with a clean, slightly dampened cloth. Do not wet or allow moisture to penetrate the unit. Do not use solvents on the slide loader as these may stain or damage the plastic covers. To ensure correct slide handing it is important that the interface between the slide racks and the slide rack mounting face is kept clean and free of debris. Remove dust and debris from the slide rack mounting plate using a brush. If the slide racks should become soiled with slide mounting media they can be cleaned using your laboratories standard cleaning procedure. The PLW20 only contains primary circuits with EMC filters. If PAT testing, apply DC flash tests only. Avoid repeated application of such tests as this may damage insulation. SERVICING (only to be undertaken by a competent person) This equipment contains no user-serviceable parts. Refer all repairs to qualified service personnel. Opening the product voids the warranty. Oil and residue removal Rinse the slide racks in your laboratories designated cleaning solvent to remove the oil (Refer to your health and safety procedures on using this solvent). PLW20 15 Section 6 Advanced Operation Software Integration. The information required for software integration is included in the software development kit. This can be downloaded from the Prior Scientific website at www.prior.com. 16 Prior Scientific Section 7 PLW20 Troubleshooting 17 Section 8 Replacement Parts Replacement Parts 18 Prior Scientific Section 9 Returns and Repairs Returns and Repairs Should you experience problems with your Plate Loading System and want to send it back for service, warranty or otherwise, a Return Material Authorisation (RMA) number must be obtained from the appropriate Prior Scientific office before returning any equipment. For North and South America contact Prior Scientific Inc. and for the rest of the world call Prior Scientific Instruments Limited on the telephone numbers shown below. Prior Scientific Instruments Ltd, Unit 4, Wilbraham Road, Fulbourn, Cambridge, ENGLAND, CB1 5ET Tel: 01223 881711 Fax: 01223 881710 email: [email protected] Prior Scientific Inc. 80 Reservoir Park Drive, Rockland, MA 02370-1062 USA Tel: 781 878 8442 Fax: 781 878 8736 email: [email protected] Prior Scientific GmbH Wildenbruchstr. 15 D-07745 Jena GERMANY Tel: +49 (0)3641 675 650 Fax: +44 (0)3641 675 651 email: [email protected] Prior Scientific KK Kayabacho 3rd Nagaoka Bldg. 10F 2-7-10 Nihonbashi Kayabacho, Chuo-Ku Tokyo 103-0025 JAPAN Tel: +81 (0) 3 5652 8831 Fax: +81 (0) 3 5652 8832 email: [email protected] PLW20 19 Section 10 20 Appendices Prior Scientific