1
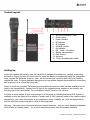
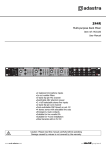
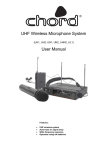
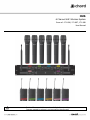
Control Layout
1.
2.
3.
4.
5.
6.
7.
8.
9.
10.
11.
12.
Antenna connection (TNC)
Power switch
Power indicator
RF indicator
AF indicator
VOLUME control
On indicator
Off – Mute – On switch
Battery compartment
Gain control
Antenna
3.5mm threaded jack socket
Setting Up
Insert the supplied AA batteries into the handheld or beltpack transmitters by carefully unscrewing
the base or flipping forward the front cover to reveal the battery compartment inside the transmitter
body, connect the batteries (ensure + and - are the correct way round for each cell) and carefully
replace the cover. Connect neckband microphones to the relative beltpack transmitters by connecting
and screwing in the 3.5mm jack plug fully.
Screw on the front-mounted TNC antennas and position the receiver within the best available line of
sight to the transmitter(s). Connect the DC jack of the supplied power adapter to the receiver and
the plug top to the mains outlet. Turn microphone level(s) down on the receiver.
A choice of mixed output of all 6 microphones on 6.3mm jack or individual balanced XLR outputs is
available on the rear panel of the receiver. Connect jack or XLR (optional) leads to the relative output
connector(s), turn down the volume of any equipment (mixer, amplifier etc.) that the signal will be
fed into and then connect the jack or XLRs to the equipment.
Warning! - take care not to point microphones towards speakers – this can cause damaging feedback
(loud whistle or howling noise) – try to point microphones away from the speaker cabinets.
171.896UK, 171.897UK, 171.898UK User Manual