1
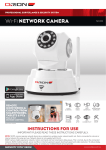
PROFESSIONAL
surveillance SYSTEM
video door phone
SC122
18cm lcd monitor
18cm
COLOUR
LCD Screen
NIGHT VISION
18
cm
8 infra-red
LEDs for night
TIME operation
STylish
modern design
low profile monitor
with illuminated
touch buttons
intercom
FOR two WAY AUDIO
COMMUNICATION
CLEAR COLOUR VIDEO FROM
HIGH QUALITY CAMERA
Instructions for use
Important! Please read these instructions carefully.
PROFESSIONAL
surveillance SYSTEM
IMPORTANT
BEFORE RETURNING THIS
PRODUCT TO THE RETAILER
PLEASE CONTACT
IF YOU HAVE ANY
CONCERNS OR PROBLEMS WITH THIS PRODUCT
Customer Service Phone: (03) 9982 5111 (Monday to Friday 8.30am – 5.30pm EST)
Email: [email protected]
For further information visit www.orionlive.com.au
1identification
2 3
1
2
3
4
5
6
7
8
9
4
5
6
7
8
9
1
Microphone
18cm (7”) LCD colour display screen
Settings button
10
10
11
12
13
Adjustment control buttons
13
12
11
Microphone
Camera with infra-red LED
Door bell button
Speaker
Door bell chime selection button
Mute button
Unlock button, to unlock door strike if
connected (door strike not included)
Intercom/monitor button, to communicate
with the outdoor camera
CONTENTS:
OUTDOOR
CAMERA
18cm LCD
MONITOR
15m
EXTENSION
CABLE
LOW VOLTAGE
POWER
SUPPLY
MOUNTING SCREWS,
PLUGS & BRACKETS
USER MANUAL
4 x Deterrent
Stickers
2
VIDEO DOOR PHONE 18cm LCD MONITOR SC122
PROFESSIONAL
surveillance SYSTEM
2CONNECTIONS
14
16
17
15
14
15
16
17
Connection of the video monitor
Power supply connection
Connection of the outdoor camera
Connection for door strike (not included)
3ACCESSORIES
15 metre extension cable
Power supply
Mounting screws,
plugs and brackets
Protective film
VIDEO DOOR PHONE 18cm LCD MONITOR SC122
3
PROFESSIONAL
surveillance SYSTEM
4 System connection
›
Before installation check the unit functionality
Power supply to video monitor
Video monitor to outdoor camera
White (Audio)
Yellow (Video)
Black (GND)
Red (VDD)
White (Audio)
Cable colour wiring
diagram based on cables
supplied with this unit.
1. Connect the 15 metre connection cable as
supplied, to the back of the monitor and
camera unit.
2. Connect the power supply to the back of
the monitor and plug into 240V AC 50Hz
power point.
Note: During pre-installation check feedback
interference noise that might be generated due
to the close proximity of the monitor and the
camera, this phenomenon is normal.
Red (VDD)
Black (GND)
Yellow (Video)
3. O
nce you assured that the system operates
correctly, plan the monitor and camera
installation points within 15 metres.
Lay the extension cable out between the
desired locations for the outdoor camera and
video monitor. If you are not comfortable
doing this you may need the services of an
electrician or licenced cabler.
5installation of monitor
1
Positioning
Depend on
user’s height
1. Select a suitable installation point.
2. Install the bracket.
a: D
rill holes in the wall and insert plugs.
b: Tighten the screws.
3. Run the extension cable through the bracket hole and connect the
wires to video monitor according to wiring diagram.
4. C
onnect the power supply to the video monitor.
5. Insert the bracket to the slots on the rear panel of video monitor.
2
3
4
VIDEO DOOR PHONE 18cm LCD MONITOR SC122
4
5
PROFESSIONAL
surveillance SYSTEM
6installation of outdoor camera
1
70°
Depend on
user’s height
50cm
About 65cm
1. S
elect a suitable installation point. It is
recommended to mount the outdoor camera
under eave at height of 1.5-1.7m from the
ground.
2. Install the bracket.
a. Drill holes in the wall and insert plugs.
b. Tighten the screws.
3. R
un the extension cable through the bracket
hole and protective film. Connect the wires
to outdoor camera according to wiring
diagram. Attach protective film to the rear
panel to protect wiring connection.
White (Audio)
2
Red (VDD)
Black (GND)
Yellow (Video)
Lock
* Cable colour wiring diagram based on cables
supplied with this unit.
3
4. Insert the bracket to the slots on the rear
panel of outdoor camera.
5. T
ighten the screw at the bottom of outdoor
camera to secure it to the bracket.
5
4
When installing the
camera, ensure that it is
located in a dry place.
It is important that the
camera or the electronics
do not get wet.
VIDEO DOOR PHONE 18cm LCD MONITOR SC122
5
PROFESSIONAL
surveillance SYSTEM
7FOR extended wiring
For extended wiring, existing wiring or CAT5E/CAT6
cable can be used. For use of CAT5E/CAT6 cable,
pairing of wires is recommended for installation.
Ensure that you match up connections at each end
by following the conductor colouring.
Note: maximum distance for extended wiring, retrofit existing
wiring or CAT5E/CAT6 cable connection is 100 metre.
8Operation
› LCD Display Setting
› Monitoring
Press
settings button to go into LCD display
setting menu, to adjust LCD display brightness,
contrast, saturation and reset. Inside the LCD
display setting menu, press
settings button
to navigate to between Brightness, Contrast,
Saturation and Reset options, then press
or
button to adjust the setting.
› B
rightness adjustment
The brightness is divided into different divisions,
press
or
to adjust the setting.
› Contrast adjustment
The contrast is divided into different divisions,
press
or
to adjust the setting.
› Saturation adjustment
The saturation is divided into different divisions,
press
or
to adjust the setting.
› Reset
Press the
If electric door strike is installed, press
unlock button to unlock door strike.
› Door Bell Chime Setting
Press
Door bell chime selection button to
select different door bell chime. There are
12 different door bell chimes.
1.Ding Dong1
7.
Digital Tune
2.Ding Dong2
8.
Trumpets
3.Ding Dong3
9.
Dog Bark
4.Ding Dong4
10. Digital Tune2
5.Westminister
11. Old Phone Ring
6.Ding Dong5
12. Funky Music
› Ring Volume Adjustment
to exit LCD display
› intercom
Press
or
chime volume.
button to adjust door bell
› Mute
When the door bell button on outdoor camera
got pressed, the video monitor bell chime will ring,
activate the video monitor LCD screen and display
images from the outdoor camera.
Press
intercom button to communicate with
the outdoor camera. When you have finished,
press
intercom button again and the video
monitor LCD screen will switch off.
6
› Unlock
to reset to factory setting.
› Exit
Press
or
setting menu.
Press
intercom button, the video monitor
LCD screen will display images from the outdoor
camera. Press
intercom button again, the
video monitor LCD screen will switch off.
Press
mute button to go into mute mode.
In mute mode, when the door bell button on
door camera unit is pressed, the mute indicator
LED will flash, no bell chime and the video
monitor LCD screen will just display images from
the door camera unit.
VIDEO DOOR PHONE 18cm LCD MONITOR SC122
PROFESSIONAL
surveillance SYSTEM
9specifications
VIDEO MONITOR
Display Screen
Resolution
Buttons
Adjustment
Ringtone
OUTDOOR CAMERA
18cm Colour TFT-LCD Screen
480 X 3 (RGB) X 234
Intercom/Monitor, Unlock, Ringtone, Volume,
Mute, Settings, Adjustment Control
Brightness/Contrast/Saturation/Volume
12 Selectable Ringtones
› GENERAL
Power Supply
Power
Consumption
Dimensions
Weight
Operation
Temperature
Operating Humidity
Sensor
Horizontal Resolution
Lens
View Angle
215(H) X 195(W) X 75(D) mm
-5°C ~ 50ºC
10% ~ 85%
6mm
70°
Infrared Light
8 IR LEDs
Range
Up to 1m
› GENERAL
Power Supply
Dimensions
460g
420TVL
› NIGHT VISION NIGHT VISION
DC 15V 1A
10W Max including camera
6mm CMOS Sensor
Weight
Operation temperature
Operating Humidity
From Video Door Phone
170(H) x 95(W) x 52(D) mm
400g
-5°C ~ 50ºC
10% ~ 85%
10WARNING
› Do not drop, puncture, or violently shake the camera or monitor.
› Do not tug the power supply cord, use the plug to remove it from the wall.
› Do not press more than one button at the same time.
› Do not mount in position directly exposed to sun or rain. Avoid mounting near radio transmitting
devices, metal object or heat sources.
› Do not use camera or monitor when there is a storm or lightning in your area.
› Do not crush or damage the power cable.
› Do not cover the vents on the unit, leave adequate space for ventilation.
› Use the cameras and monitor with care, avoid unnecessary force or impact.
VIDEO DOOR PHONE 18cm LCD MONITOR SC122
7
PROFESSIONAL
surveillance SYSTEM
11TROUBLESHOOTING GUIDE
Problem
Monitor or door camera has
no power or not powering up
Possible Cause
Suggested Remedy
Power supply is loose or unplugged,
no power at socket outlet/power point
Check all cables and power supply connection.
Check power at socket outlet/power point.
Camera not connected
Please check wiring connection, make sure all
wires are connected correctly.
Signal interference
Relocate camera and monitor, away from sun, rain,
radio transmitting devices, heat sources, metal objects
or major obstacles.
No power at monitor/camera or no power at
socket outlet/power point
Check all cables and power supply connection
Check power at socket outlet/power point.
Frozen white screen
-
Disconnect power to monitor, then reconnect.
When IR night vision is
activated, screen only
displays white
Infra-red LED light is reflected off from glass or
reflective objects that causing white light
Relocated camera away from windows, reflective and
glass objects, or remove obstacles.
When IR night vision is
activated, screen only
displays black and white
Infra-red LED light is activated
This is normal, no action required.
Signal interference
Relocate camera and monitor, away from sun, rain,
radio transmitting devices, heat sources, metal objects
or major obstacles.
Relocate camera and monitor to a different location.
LCD require adjustment
Adjust brightness, contrast and saturation in
settings menu.
Camera and monitor are too close
Camera has a high sensitivity microphone, keep the
door camera and monitor at least 5 metres apart, if the
camera must be within 5 metres of the monitor, reduce
the volume.
No picture
Poor image quality
Audio interference
12Warranty
Arlec guarantees this product in accordance with the Australian
Consumer Law.
Arlec also warrants to the original first purchaser of this product
(“you”) from a retailer that this product will be free of defects
in materials and workmanship for a period of 12 months from
the date of purchase; provided the product is not used other
than for the purpose, or in a manner not within the scope of the
recommendations and limitations, specified by Arlec, is new and
not damaged at the time of purchase, has not been subjected
to abuse, misuse, neglect or damage, has not been modified or
repaired without the approval of Arlec and has not been used for
commercial purposes (“Warranty”).
If you wish to claim on the Warranty, you must, at your own expense,
return the product, and provide proof of original purchase and your
name, address and telephone number, to Arlec at the address
below or the retailer from whom you originally purchased the
product within 12 months from the date of purchase.
Arlec will (or authorise the retailer to) assess any claim you may make
on the Warranty in the above manner and if, in Arlec’s reasonable
opinion, the Warranty applies, Arlec will at its own option and
expense (or authorise the retailer to) replace the product with the
8
same or similar product or repair the product and return it to you
or refund the price you paid for the product. Arlec will bear its
own expenses of doing those things, and you must bear any other
expenses of claiming on the Warranty.
The Warranty is in addition to other rights and remedies you
may have under a law in relation to the product to which the
Warranty relates.
Our goods come with guarantees that cannot be excluded
under the Australian Consumer Law. You are entitled to a
replacement or refund for a major failure and for compensation
for any other reasonably foreseeable loss or damage. You are
also entitled to have the goods repaired or replaced if the goods
fail to be of acceptable quality and the failure does not amount to
a major failure.
Arlec Australia Pty. Ltd. ACN 009 322 105 (“Arlec”) gives the Warranty.
Arlec’s telephone number, address and email address are:
Customer Service: (03) 9982 5111
New Zealand Toll Free: 0800 003 329
Building 3, 31 – 41 Joseph Street, Blackburn North, Victoria, 3130
Blackburn North LPO, P.O. Box 1065, Blackburn North, 3130
Email: [email protected]
VIDEO DOOR PHONE 18cm LCD MONITOR SC122
CPIN002634/3