1
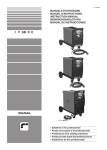
INSTRUCTION
MANUAL
FUSION 151 HF
FUSION 151 PHF
FUSION 200 HF
FUSION 200 PHF
Issue 02: Sept 2006
Made in Britain
CAUTION: Ensure the operator of this equipment reads this information.
Additional copies can be obtained from your equipment supplier.
If you are not fully conversant with the principles of operation and safe working practices for
arc welding, we recommend that you read the HSE Booklet HSG204 (Health & Safety in Arc
Welding).
Do not attempt to install or operate this equipment until you have read and fully understood
the contents of this manual. If you do not fully understand any instruction, contact your
supplier for further information and advice before attempting any welding or installation
procedure.
24pp A5 Instruction Manual.indd 1
28/9/06 3:33:09 pm
24pp A5 Instruction Manual.indd 2
28/9/06 3:33:09 pm
INDEX
Subject
Page
EQUIPMENT INSTALLATION
1
DESCRIPTION OF CONTROLS
2
EQUIPMENT SPECIFICATIONS
3
MMA (Stick) WELDING FUNCTION & OPERATION
4
MMA (Stick) WELDING REMOTE CONTROL
4
HF TIG WELDING FUNCTION & OPERATION
5-6
LIFT TIG WELDING FUNCTION & OPERATION
7
TIG WELDING REMOTE CONTROL
7
TIG SPOT WELDING FUNCTION & OPERATION
8
REMOTE CONTROL CONNECTIONS
9
FUNCTION GUIDE
10-11
MMA (STICK) WELDING GUIDE
12
TIG WELDING GUIDE
13
INSULATION & PAT TESTING
14-15
WARRANTY INSTRUCTION
16-17
CARE & MAINTENANCE
18
TROUBLESHOOTING GUIDE
19
NOTICE:
Failure to adhere to the advice and instruction given in this manual or to the
implementation of the National/International Safety in the Workplace Regulations could
render the operator liable to danger that could be avoided. Inverter Fusion Limited
takes no responsibility for any accident that could occur from non-compliance of any
Safety Advice or the relevant Safety Standards.
24pp A5 Instruction Manual.indd 3
28/9/06 3:33:09 pm
INSTALLATION
Correct Installation can contribute materially to the satisfactory working of the welding inverter.
Each step in this section should be studied and adhered to as closely as possible.
A
INSPECTION & PLACEMENT
1.
Remove all packaging and inspect for any evidence of damage. Immediately notify the
supplier of any defects.
2.
Check the unit for any loose parts. Ensure that air louvers are free from any packaging
material that could obstruct the airflow through the machine.
3.
The components in the inverter operate at high temperatures and it is important that the fan
input and output louvers are not obstructed. Locate the unit in an open area allowing air to
circulate freely around the machine. The area around the machine should be relatively free
from dust and excessive heat.
4.
Complete a risk assessment of the area to ensure that no danger to the Health & Safety of
the operator or any other person can be incurred during the equipment operation.
Consideration to noxious gases, fume, arc glare, fire risk and moisture should also be fully
considered.
B
PRIMARY ELECTRICAL INPUT CONNECTION
WARNING
All possible measures should be taken to provide maximum protection against electrical shock.
Ensure the mains power is isolated before making any primary connections.
1.
Ensure that an adequate mains power supply is available with a correct fuse rating, to
supply the machine at the duty cycle the operator requires to work within.
2.
The machine is supplied with a two metre 3 core input power cable for connection to a
suitable single-phase power supply. The earth conductor in the power cable must at all times
be secured to ground earth.
3.
Fit and use only plugs or circuit breakers that are designed for the level of primary input
voltage and input current required for the safe operation of the machine.
4.
Extension cables may result in excessive voltage drops that will influence the welding output
of the machine. Use only industrial grade extension cables and ensure that the cable
conductor sizes are relevant to the required current draw.
C
SECONDARY (WELDING OUTPUT) CONNECTIONS
WARNING
Before making any connections to the welding output terminals of the machine, ensure that the
mains power to the machine is switched off and the power cable is unplugged.
1. The machine is fitted with 35mm Dix style output connections; always use connection plugs of a
compatible size. Ensure that the connection plugs are free from damage and are fully locked
into the output terminals. Loose or damaged connections will cause the plugs to overheat
and will cause damage to the machine.
11
24pp A5 Instruction Manual.indd 4
28/9/06 3:33:09 pm
DESCRIPTION OF CONTROLS
FUSION HF & PHF
Front View
CONTROL FUNCTION
F1
Current Adjustment
F2
Output Display Meter
F3
LED Function Display
F4
Positive Output Dix Socket
F5
Negative Output Dix Socket
F6
Mains Power On/Off Switch
F7
Mode Selector TIG & MMA
F8
Program Selection Control
F9
Program LCD Menu Display
F10
Gas Output Connection
F11
Gas Input Connection
F12
Remote Control Socket 3 Wire **
F13
Remote Control Socket 5 Wire**
FUSION HF & PHF
Rear View
LED 1
LED 2
LED 3
LED 4
LED 5
LED 6
Mains Power Indicator
MMA Mode Indicator
Lift TIG Indicator
HF TIG Indicator
Meter Hold Indicator
Overheat Indicator
Torch Switch Plug Connection
Connect the torch switch leads to pins 1
& 2 in the remote connection plug
supplied.
Remote Current Plug Connection
Refer to the diagram on Page 14 for
connection instructions.
NOTE:
**The equipment is supplied as standard with a 5-wire remote control receptacle for torch
switching and current control. A 3-wire remote control option is available upon request. It is not
possible to fit both 3 & 5 wire options simultaneously.
Dead Man Safety Feature.
A dead man safety feature is installed in the HF & PHF units to reduce the danger from the torch
arcing accidentally on surfaces other than the welding fixture.
In the TIG Welding Mode, if the arc fails to establish after 3 seconds (Not including any pre-gas
time if selected) the unit is programmed to switch off. To re-start the arc release the torch switch
and recommence the welding start sequence.
If at any time during the TIG welding sequence of operation the arc is accidentally broken the
machine is programmed to switch off. If a down-slope time has been selected the machine will
remain inoperative until both the down slope, crater and post gas times as selected have
expired.
2
2
24pp A5 Instruction Manual.indd 5
28/9/06 3:33:10 pm
SPECIFICATION DETAIL
EQUIPMENT
P/No. 000633
P/No. 000634
P/No. 000485
P/No. 000200
Fusion 151 HF
Fusion 151 PHF
Fusion 200 HF
Fusion 200 PHF
110V- 150 Amp MMA/LT/HF TIG Inverter.
110V - 150 Amp MMA/LT/PHF TIG Inverter.
230V - 200 Amp MMA/LT/HF TIG Inverter.
230V - 200 Amp MMA/LT/PHF TIG Inverter.
OPTIONAL ACCESSORIES
P/No. 000537
150 Amp GP17 Air Cooled TIG Welding Torch, Fitted with 4 Metre Hose
Assembly, Plugs & Handle Mounted On/Off Switch. P/No. 000561 150 Amp
GP17R Air Cooled TIG Welding Torch, Fitted with 4 Metre Hose
Assembly, Plugs & Handle Mounted On/Off Switch & Thumb Wheel for
Remote Current Control. P/No. 000111 GP17 Torch Accessory Kit.
Including Long Back Cap, Collet Bodies,
Collets and Tungsten Electrodes. P/No. 000320 Footswitch for Remote
Current Control & On/ff Switching, Fitted with 3 Metre
Cable & Plug. P/No. 000313 Argon Gas Supply Hose, 3 Metre Fitted with 1/43/8" BSP Fittings. P/No. 000080 Electrode Holder, Fitted With 3 Metre Power Cable & 35mm
Male Dix Plug. P/No. 000079 Earth Clamp, Fitted With 3 Metre Power Cable & 35mm Male
Dix Plug.
SPECIFICATIONS
Fusion
151 HF
110V AC
Fusion
151 PHF
110V AC
Fusion
200 HF
230V AC
Fusion
200 PHF
230V AC
32A Slow
Blow
5KVA
7KVA
22A Slow
Blow
22A Slow
Blow
Power Transformer Rating
Power Generator Rating
32A Slow
Blow
5KVA
7KVA
7KVA
7KVA
MMA Power Output Amps
TIG Power Output Amps
100% Duty Cycle MMA Amps
100% Duty Cycle TIG Amps
20-120
10-150
120
150
20-120
10-150
120
150
20-180
5-200
160
180
20-180
5-200
160
180
Max Open Circuit Voltage
Power Factor @ 100%
Efficiency® 100%
Enclosure Class
Application Class
Ambient Temperature
92 Volts
0.71
0.96
IP 23
S
92 Volts
92 Volts
0.71
0.71
0.96
0.96
IP 23
IP 23
S
S
-10 <>+40 Degrees C
Input Volts 50/60Hz +/-15%
Typical Input Fuse Rating
Cooling Method
-
92 Volts
0.71
0.96
IP 23
S
Forced Fan
Standard
Warranty
Weight
Dimensions
-
IEC 60974 CE Marked
9 Kg
24 Months Full Parts & Labour
9 Kg
9 Kg
L 365mm x H 360mm x W 220mm
9 Kg
33
24pp A5 Instruction Manual.indd 6
28/9/06 3:33:10 pm
MMA (Stick) WELDING FUNCTION & OPERATION
1.
GENERAL
The Fusion range of digital welding inverters is designed to operate at optimum
performance when supplied with a suitable mains input supply, as specified.
2.
MAINS POWER CONNECTION
On applying power to the unit, the inverter will perform a self-setting check. This will
be indicated by all displays briefly flashing on then off. Following this, LED 1 will stay
lit to indicate that mains power is present and the unit is ready for operation.
3.
(1)
MMA (STICK) WELDING SET UP (Panel Control)
Connect the electrode & work return supply cables into the Dix sockets (F4 & F5)
Check the consumable manufacturers specification for the correct polarity required.
(2)
Set the mains power switch (F6) to the on position. The welding output meter (F2) will
light up as will the LCD display (F9). The selected welding mode LED (MMA/TIG) will
also be lit in the LED display (F3).
(3)
Ensure that at no time the electrode holder and work return clamp come into contact
as this could cause the machine to arc and could result in personal injury.
(4)
Rotate the mode selection knob (F7) in either direction until LED 2 is illuminated and
'MMA MODE' is displayed in the menu display window (F9).
(5)
Select the output current required by rotating the control knob (F1). The selected
output will be displayed in the digital output meter (F2).
(6)
Using a swift motion, Rotate control knob (F8) clockwise until the text 'REMOTE
CURRENT is displayed in the window (F9). Rotate control knob (F1) in an anti
clockwise direction until the text in window (F9) reads 'PANEL CONTROL'.
(7)
Using the correct safety equipment to protect the body and eyes fit an electrode in the
holder and connect the work return cable to the work piece. Strike the electrode on the
work piece to establish the welding arc. To end the welding application, quickly lift the
electrode away from the work piece.
(8)
At the end of the weld, LED 5 will be illuminated, indicating that the welding output
meter hold feature is activated. (The hold feature displays the last welding current
used) This will re-set on welding re-start or if the output current is adjusted.
(9)
When the welding application is completed, place the mains switch (F6) in the off
position and disconnect the unit from the mains power supply.
4.
(1)
MMA (STICK) WELDING SET UP (Remote Current Control)
Connect the remote current control device into the receptacle (F12/F13). Follow the
MMA set up procedure as described in paragraph 3 (1 to 5).
(2)
Rotate control knob (F8) until the text 'REMOTE CURRENT' is displayed in the
window (F9). Rotate control knob (F1) in a clockwise direction so that the text in
window (F9) reads either 'FOOT CONTROL' or TORCH CONTROL' as required for
the type of remote control device to be used.
(3)
The welding current is now adjustable with the remote control device between the
machines minimum output and the main welding current output as selected on the
digital meter (F2). Complete the welding process as detailed in paragraph 3 (7 to 9).
4
24pp A5 Instruction Manual.indd 7
28/9/06 3:33:11 pm
TIG WELDING FUNCTION & OPERATION
5.
(1)
HF TIG WELDING SET UP (Panel Control)
Connect the work return cable into the positive Dix socket (F4). Connect the TIG welding
torch (use a torch TIG adapter if required) into the negative Dix socket (F5). Attach the
torch gas supply hose to the shielding gas outlet (F10). Screw the torch switching control
plug into the remote control socket (F13). Fit the shielding gas supply hose to the gas
inlet connection (F11). Adjust the shielding gas inlet pressure and flow as required.
(2)
Set the mains power switch (F6) to the on position. The welding output meter (F2) will
light up as will the LCD display (F9). The welding mode as selected will also be shown on
the LED display (F3) and in the LCD menu display (F9).
(3)
Rotate the mode selection knob (F7) in either direction until LED 3 is illuminated and 'TIG
MODE' is showing in the menu display window (F9). At this point LED 4 may also be
illuminated indicating that the HF start function is selected.
(4)
Select the main welding output current required by rotating the control knob (F1). The
selected output will be displayed on the digital output meter (F2).
(5)
The menu selection control knob (F8) is used to move through the welding function menu.
Using a swift motion rotate the menu selection control knob (F8) clockwise approximately
90 Degrees. The text in the display window (F9) will change and display the next function
in the menu. By repeating this operation the complete menu sequence can be stepped
through and welding parameter adjustments can be made as required using the control
knob (F1). The selected menu function will be displayed for twenty seconds, after which
the display widow (F9) will return to a datum point and display TIG MODE'. At any time
during the menu set up, the display can be signalled to return to the datum point by
pressing and releasing the torch on/off switch. The selection control knob can be rotated
in either direction to move both forward and backward through the welding sequence
program.
(6)
The menu display function and operations as described in the following instructions
(7),(8),(10),(11),(12),(13,(15) & (16) are only available on the Fusion PHF models.
(7)
Rotate the control knob (F8) clockwise until the text 'PRE GAS TIME' is displayed in
window (F9). Rotate control knob (F1) to select the required pre-gas time.
(8)
Rotate the control knob (F8) clockwise until the text 'START CURRENT is displayed in
window (F9). Rotate control knob (F1) to select the required start current amps.
(9)
Rotate the control knob (F8) clockwise until the text 'HF START is displayed in window
(F9). Rotate control knob (F1) to switch the HF start on. When the HF start is switched on
the LED 4 will be illuminated. When the HF start is switched off the machine will operate
in the Lift TIG mode. The Lift TIG welding mode and operation is explained in section (5)
page (7).
(10)
Rotate the control knob (F8) clockwise until the text 'UP SLOPE TIME' is displayed in
window (F9). Rotate control knob (F1) to select the required up slope time.
(11)
Rotate the control knob (F8) clockwise until the text 'PULSE CURRENT is displayed in
window (F9). Rotate control knob (F1) to select the required pulse base (background)
current amps required. Rotate the control knob (F8) anticlockwise to switch the pulse
mode off. If the pulse current is adjusted to display off, the pulse timers described in the
following section will be disenabled.
(12)
Rotate the control knob (F8) clockwise until the text 'BASE TIME' is displayed in window
(F9). Rotate control knob (F1) to select the required base pulse time.
24pp A5 Instruction Manual.indd 8
55
28/9/06 3:33:11 pm
TIG WELDING FUNCTION & OPERATION
(13)
Rotate the control knob (F8) clockwise until the text 'PULSE TIME' is displayed in window (F9).
Rotate control knob (F1) to select the required high pulse time.
(14)
Rotate the control knob (F8) clockwise until the text 'DOWN SLOPE TIME' is displayed in window
(F9). Rotate control knob (F1) to select the required slope down time.
(15)
Rotate the control knob (F8) clockwise until the text 'CRATER CURRENT is displayed in
window (F9). Rotate control knob (F1) to select the required crater amps level.
(16)
Rotate the control knob (F8) clockwise until the text 'CRATER TIME' is displayed in window
(F9). Rotate control knob (F1) to select the required crater current time.
(17)
Rotate the control knob (F8) clockwise until the text 'POST GAS' is displayed in window (F9).
Rotate control knob (F1) to select the required post gas time.
(18)
Rotate the control knob (F8) clockwise until the text 'TIG SWITCH' is displayed in window (F9).
Rotate control knob (F1) to select either 2T or 4T touch operation. In 2T operation the weld
sequence will start and stop as selected when the torch switch is depressed and released. In 4T
operation when the torch switch is depressed the arc will strike in and hold at the start current
level, when the switch is released the arc will upslope to the main welding current level. When
the switch is again depressed the arc will down-slope and hold at the crater current level, when the
switch is released the arc will switch off. If the torch switch is released during the down slope time
the weld will switch of at that point.
(19)
Rotate control knob (F8) clockwise until the text 'REMOTE CURRENT' is displayed in the window
(F9). Rotate control knob (F1) in an anticlockwise direction so that the text in window (F9)
reads 'PANEL CONTROL'
(20)
It is not necessary to adjust the welding sequence menu parameters in the order as described.
Any parameter can be individually adjusted by rotating the control knob (F8) in either direction until
the required area of the program is displayed in the window (F9) and the adjustment made as
required using control knob (F1)
(21)
When all required parameters have been set in the sequence menu program, the unit will store
the data until any further adjustment is made. The data will also be stored ready for future use
even when the mains power is switched off.
(22)
Using the correct safety equipment to protect both the body and the eyes, hold the torch at an
angle of 45 degrees so that the tungsten electrode is approximately 2-3 mm away from the work
piece. Depress the torch switch, the gas will start to flow and a HF spark will jump from the
tungsten to initiate the welding arc.
(23)
Once the welding arc is established the unit will operate as programmed. At any time in the 2T
switch mode the welding arc can be stopped by releasing the torch switch. In the 4T switch mode
the arc is stopped by pressing and releasing the torch switch.
(24)
Complete the welding application as required making output and control parameter adjustments
as necessary.
(25)
If at any time the welding arc is broken prior to signalling the machine to switch off, the dead man
device installed in the machine will be activated and it will not be possible to re-strike the arc until
the post flow gas time has completed.
(26)
When the welding application is completed, turn the power switch (F6) to the off position and
disconnect the unit from the mains power supply.
6
6
24pp A5 Instruction Manual.indd 9
28/9/06 3:33:11 pm
TIG WELDING FUNCTION & OPERATION
5.
(1)
LIFT TIG WELDING SET UP (Panel Control)
To use the machine for LIFT TIG applications follow the instruction as described and
detailed for' HF TIG Welding Set Up' in paragraphs (1) through to (8)
(2)
Rotate the control knob (F8) clockwise until the text 'HF START is displayed in window
(F9). Rotate control knob (F1) anticlockwise to switch the HF start off. When the HF start is
switched off the LED 4 will not be illuminated. The machine will now operate in a Lift TIG
mode and no HF will be present at the start of the welding sequence.
(3)
Continue to complete the program sequence set up as described for 'HF TIG Welding Set
Up' In section 4 paragraphs (10) through to (21)
(4)
Using the correct safety equipment to protect the body and the eyes, rest the torch gas
shroud on the work piece at an angle of 45 degrees to the work piece. Depress the torch
switch, this will start the shielding gas to flow, still resting the torch gas shield on the work
piece, rotate the torch forward until the tungsten electrode touches the work piece, then lift
gently away approximately 4mm. This will cause the arc to establish and the welding
application can be commenced. The method of starting the arc in the Lift TIG mode
requires that the electrode is made to momentary make contact with the work piece,
practice will provide the individual operator with the best method of completing this task.
(5)
Complete the welding application and set up procedure as detailed in 'HF TIG Welding Set
Up' in paragraphs (23) through to (26).
6.
(1)
TIG WELDING SET UP (Remote Current Control)
Connect the remote current control device to be used into the receptacle (F12/F13) and
complete the set up and operational instructions as detailed for HF TIG Welding Set-Up in
paragraphs (1) through to (18).
(2)
Rotate control knob (F8) clockwise until the text 'REMOTE CURRENT' is displayed in the
window (F9). Rotate control knob (F1) in either direction so that the text in window (F9)
reads 'FOOT CONTROL' or TORCH CONTROL'
(3)
Complete the welding application and set up procedure as detailed in 'HF TIG Welding Set
Up' in paragraphs (20) through to (26).
(4)
If 'FOOT CONTROL' is selected the machine will switch on and off when the foot switch is
depressed and released. The welding output current will increase and decrease as the
footswitch regulation is varied. Full depression of the footswitch will allow up to 99% of the
welding current value as selected on the (F2) display meter. If the 'FOOT CONTROL'
option is selected then Start Current, Up-Slope Time, Down-Slope Time and Crater Current
settings in the LCD window menu are disabled. The operator will have full control of all the
functions via the remote control foot pedal device.
(5)
If TORCH CONTROL' is selected this will allow the main welding output current to be
controlled from a remote current adjustment control device. The welding output current will
increase and decrease as the remote regulation is varied and will allow variation of the
welding output current value as selected on the (F2) display meter. The machine welding
sequence will be switched On & Off as detailed in HF TIG Welding Set Up paragraph (18).
When a remote current device is adjusted, the output current as selected will be displayed
in the (F2) meter. All other available LCD menu options will be fully functional.
7
24pp A5 Instruction Manual.indd 10
7
28/9/06 3:33:12 pm
TIG SPOT WELDING FUNCTION & OPERATION
7.
(1)
TIG SPOT WELDING
The TIG SPOT welding menu function option is only available on the Fusion PHF models.
(2)
Connect the work return cable into the positive Dix socket (F4). Connect an appropriate TIG
Spot Welding Torch (use a TIG torch adapter if required) into the negative Dix socket (F5).
Attach the torch gas supply hose to the shielding gas outlet (F10). Screw the torch switch
control plug into the remote control socket (F13). Fit the shielding gas supply hose to the
gas inlet connection (F11). Adjust the shielding gas pressure and flow as required.
(3)
Set the mains power switch (F6) to the on position. The welding output meter (F2) will light
up as will the LCD display (F9).
(4)
Rotate the mode selection knob (F7) in either direction until LED 3 is illuminated and 'SPOT
MODE' is showing in the program display window (F9) At this point LED 4 will also be
illuminated.
(5)
Select the main welding output current required by rotating the control knob (F1). The
selected output will be displayed on the digital output meter (F2).
(6)
Rotate the control knob (F8) clockwise until the text 'PRE GAS TIME' is displayed in window
(F9). Rotate control knob (F1) to select the required pre-gas time.
(7)
Rotate the control knob (F8) clockwise until the text 'SPOT TIME' is displayed in window
(F9). Rotate control knob (F1) to select the required spot weld time.
(8)
Rotate the control knob (F8) clockwise until the text 'DOWN SLOPE TIME' is displayed in
window (F9). Rotate control knob (F1) to select the required time.
(9)
Rotate the control knob (F8) clockwise until the text 'POST GAS' is displayed in window
(F9). Rotate control knob (F1) to select the required post gas time.
(10)
It is not necessary to adjust the welding sequence parameters in the order as described.
Any parameter can be individually adjusted by rotating the control knob (F8) in either
direction until the required area of the program is displayed in the window (F9) and the
adjustment made as required using control knob (F1).
(11)
Using the correct safety equipment to protect both the body and the eyes, position the spot
welding torch as required. Depress the torch switch, the gas will start to flow and a HT spark
will jump from the tungsten to initiate the welding arc. The arc will remain established to
complete the spot welding time and down slope time as selected. Once the spot time is
completed the post flow gas will operate for the time as programmed.
(12)
Complete the welding application as required making parameter adjustments as necessary.
(13)
When the welding application is completed, turn the power switch (F6) to the off position
and disconnect the unit from the mains power supply.
8
8
24pp A5 Instruction Manual.indd 11
28/9/06 3:33:12 pm
REMOTE CONTROL CONNECTION
FIVE WIRE REMOTE CONTROL CONNECTION
For 5-wire remote control connection, the remote control receptacle (F13) is installed as
detailed.
Any 5-wire remote control device should be connected as follows:
TIG Torch Switch
Pin 1...Trigger Switch
Pin 2...Trigger Switch
Pin 3...Not Used
Pin 4...Pot Start (Bottom)
Pin 5...Pot Wiper
Pin 6...Pot End (Top)
Pin 7...Ground
The remote source for the control is ratio
metric.
Any potentiometer with a value between
1K & 10K Ohms can be used for the
control.
Remote Potentiometer
current increase —>Ŷ
THREE WIRE REMOTE CONTROL CONNECTION
For 3-wire remote control connection, the remote control receptacle (F12) is installed as
detailed.
Any 3-wire remote control device should be connected as follows:
Remote Potentiometer
current Increase —>
TIG Torch Switch
Pin 1...Pot End (Top) & Pot Wiper
Pin 2...Trigger Switch & Pot Start (Bottom)
Pin 3...Not Used
Pin 4...Not Used
Pin 5...Not Used
Pin 6...Trigger Switch
Pin 7...Ground
For 3-wire remote control connection a
potentiometer value of 10K Ohms must be
used.
9
24pp A5 Instruction Manual.indd 12
9
28/9/06 3:33:12 pm
FUNCTION GUIDE
Control
Function
Pre-Flow
Gas Time
Controls the length of time that the
shielding gas flows before the arc is
started.
Controls the power output amps that
the arc will start and strike in at.
Allows sufficient shielding gas to be
present in the weld area to avoid any
contamination in the welding puddle.
The size and type of tungsten electrode
used will determine the optimum start
current level. 1.0mm electrodes will
require a minimum of 10amps, 2.4mm
20amps and for larger sizes the current
would be increased as required.
Lift TIG
Start
Operation
Provides a method of starting the arc
without the use of HF.
Allows the arc to be established by
touching the electrode on the work piece
and then lifting away avoiding the
necessity to scratch the electrode and
reduces the potential for the electrode to
stick down and contaminate.
HFTIG
Start
Operation
Provides method of starting the arc
using a high frequency generated
spark.
Allows the arc to be established without
the necessity of touching the electrode
on the work piece. A high voltage spark
jumps from the electrode to the work
piece, ionising the shielding gas allowing
the arc to establish.
Up-Slope
Timer
Controls the time the arc takes to ramp
up from the start current setting to the
selected main welding output current.
Allows the welding current to be gently
increased in the weld puddle.
Pulse
Mode
Selection
Allows a controllable high current level
to be used for the welding application
without the risk of burn through. It also
allows for a wide weld bead to be
completed on thin gauge material.
Base Pulse
Time
If turned to minimum the pulse is
switched off. If a current level is
selected the machine will pulse
between the level selected and the
current level displayed on the main amp
display meter.
Controls the time that the base
current selected is operational.
Peak Pulse
Time
Controls the time that the peak / main
current selected is operational.
Start
Current
Control
Explanation
Allows the base / low current pulse time
to be adjusted so that burn through or
excessive current is not used in the
welding application.
Allows the main / high pulse current time
to be adjusted so that optimum weld
penetration is maintained during the
welding application.
DownSlope
Time
Controls the time the arc takes to ramp
down from the main welding current to
the crater / final current if selected or to
switch off.
Allows the weld current to be gently
reduced as required allowing weld
overlaps to be completed without excess
weld bead material build up.
Crater
Current
Control
When a crater current level is
selected the weld output will ramp down
to the selected level at the end of the
weld sequence.
To maintain the arc at the end of the
weld sequence allowing welds to be
completed right up to the edge of the
component.
10 10
24pp A5 Instruction Manual.indd 13
28/9/06 3:33:13 pm
FUNCTION GUIDE
Control
Function
Explanation
Crater
Current
Time
This controls the time that the arc will
be maintained at the selected crater
current level.
As described for Crater Control.
Post-Flow
Gas Time
Controls the length of time the
shielding gas flows after the arc is
switched off..
To prevent contamination of the weld puddle
and to also allow the tungsten and welding
torch to cool down.
2 Touch
Torch
Control
Signals the machine to start and end
the welding sequence.
When the torch switch is depressed the
weld sequence will begin. When the switch
is released the weld sequence will be
signalled to end.
4 Touch
Torch
Control
Signals the machine to start and step
through the welding sequence.
Allows for easy control at the start and end
of the welding application.
Remote
Control
Provides method of adjusting the
welding current output using either a
foot or hand operated device.
The remote control device will allow 0-100%
adjustment of the current as selected on the
main current display.
FUNCTION SEQUENCE
11
24pp A5 Instruction Manual.indd 14
11
28/9/06 3:33:13 pm
MMA (STICK) WELDING GUIDE
MMA(STICK)
(STICK)
WELDING
GUIDE
MMA (STICK)
WELDING
GUIDEGUIDE
MMA
WELDING
The following notes are aimed at providing the operator with a basic overview of MMA welding
Thefollowing
following
notes
areat
aimed
providing
theoperator
operator
withaoverview
abasic
basic
overview
MMAwelding
welding
The following
notes
aimed
providing
theoroperator
with of
a basic
of welding
MMAofof
welding
The
notes
aimed
atatproviding
the
with
overview
MMA
techniques
andare
do
notare
provide
instruction
explanation
welding
theory
or
practice.
techniques
andprovide
donot
notprovide
provideinstruction
instruction
explanation
welding
theory
welding
practice.
techniques
and do and
not
instruction
or explanation
of welding
theory or
welding
practice.
techniques
do
ororexplanation
ofofwelding
theory
ororwelding
practice.
PREPERATION
PREPERATION
PREPERATION
AllPREPERATION
materials to be welded should be clean and free from rust and grease. The joint to be welded
Allmaterials
materials
be
weldedshould
should
be
clean
and
free
from
rust
andgrease.
grease.
The
joint
bewelded
welded
All materials
to be
welded
should
be
clean
and
free
from
rust
andrust
grease.
The
joint
to joint
be
welded
All
totobe
welded
be
clean
and
free
from
and
The
totobe
should
be
suitably
prepared
and
clamped
in
position.
should
besuitably
suitably
prepared
andclamped
clamped
position.
should should
be
suitably
prepared
and clamped
in position.
be
prepared
and
ininposition.
All welding processes produce fume and full consideration to this should be given before any
Allwelding
welding
processes
produce
fume
and
full
consideration
todanger
thisshould
should
bebefore
given
beforeany
any
All welding
processes
produce
fume
full
consideration
to this
should
be
any
All
processes
produce
fume
and
consideration
to
this
be
given
before
welding
is commenced
as
shouldand
any
risk
offull
fire,
explosion
and
togiven
either
the
operator
or
welding
iscommenced
commenced
asshould
should
any
riskof
offire,
fire,explosion
explosion
anddanger
danger
either
theoperator
operator
welding
isother
commenced
as should
any
riskany
of fire,
explosion
and danger
to
eithertotothe
operator
or
welding
is
as
risk
and
either
the
oror
any
personnel.
any
otherpersonnel.
personnel.
any other
personnel.
any
other
The welding arc produces harmful ultra violet and infrared rays that can cause serious eye
The welding
welding
arc produces
produces
harmful
ultra
violet
and infrared
infrared
rays
that
can
cause
eye
The welding
arc
ultra
violet
and
infrared
rays
that
can
cause
eye
The
arc
harmful
ultra
violet
and
rays
that
can
cause
eye
damage
andproduces
burns
toharmful
the skin.
Ensure
that
the
correct
safety
equipment
isserious
worn serious
toserious
provide
damage
andto
burns
tothe
the
skin.
Ensure
that
the
correct
safety
equipment
worn
provide
damage
and burns
thefrom
skin.
Ensure
that thethat
correct
safety
equipment
is hot
wornisis
toworn
provide
damage
and
burns
to
skin.
the
correct
safety
equipment
totoprovide
optimum
protection
both
the Ensure
welding
rays
and
to protect
against
optimum
protection
from
both
thewelding
welding
rays
andtotoprotect
protectagainst
against
hot
optimum
protection
from both
the
welding
rays and
to and
protect
against
hot
optimum
protection
from
both
the
rays
hot
metal
burns.
metalburns.
burns.
metal burns.
metal
ELECTRODE SELECTION
ELECTRODE
SELECTION
ELECTRODE
SELECTION
ELECTRODE
SELECTION
MMA
(Stick)
welding
is still probably the most commonly known and
MMA (Stick)
(Stick)
welding
is still
still
probably
thecommonly
most commonly
commonly
knownit and
and
MMA recognised
(Stick)
welding
is ofstill
the most
knownresults
and
MMA
welding
isprobably
probably
the
most
known
method
joining
most
metals.
To
achieve
optimum
is
recognised
method
of
joining
most
metals.
To
achieve
optimum
recognised
method
ofthe
joining
most
metals.
To
achieve
optimum
results
itresults
is
recognised
of joining
most
achieve
optimum
results
ititisis
important
thatmethod
correct
type
and metals.
size
ofTo
electrode
is
selected
for the
important
that
the correct
correct
type
and
size
electrode
selected
for the
the
important
thattothe
correct
type
and
size
ofsize
electrode
is selected
for the for
important
that
the
type
and
ofof electrode
isis selected
material
be
welded.
material
bewelded.
welded.
materialmaterial
to be welded.
totobe
Electrodes are manufactured using a core rod that is encased in a flux
Electrodes
are manufactured
manufactured
using
a core
core
rod
that is
is encased
encased
flux
Electrodes
areThe
manufactured
ausing
corematerial
that
is that
encased
in a with
flux
Electrodes
are
arod
rod
inineach
aa flux
material.
type
of
coreusing
rod and
flux
used
can
be
varied,
material.
The
typeof
ofcore
core
rod
and
fluxmaterial
material
used
can
bevaried,
varied,
withand
each
material.
The
of type
core
rod
andmanufactured
fluxand
material
used
can
be can
varied,
with
each
material.
The
rod
flux
used
be
with
each
type
of type
electrode
being
for specific
types
of metal
type
electrode
being manufactured
manufactured
for specific
specific
types
metal and
and
type applications.
oftype
electrode
being manufactured
for specific
types of
metal
ofof electrode
being
for
types
ofof and
metal
applications.
applications.
applications.
During the welding process the flux is used to provide a gaseous shroud
During
theweld
welding
process
the
flux
used
provide
gaseous
shroud
Duringaround
the
welding
process
the
is to
used
toused
provide
a gaseous
shroud metal
During
the
welding
process
the
flux
isis
totoprovide
aagaseous
shroud
the
puddle
in flux
order
provide
protection
to the
molten
around
the
weldcontamination.
puddle
order
provide
protection
theis
molten
metal
around
the
weld
puddle
in
orderinintoorder
provide
protection
to application
the molten
metal
around
the
weld
puddle
totoprovide
protection
totothe
molten
metal
from
atmospheric
After
the welding
complete
from
atmospheric
contamination.
After
thewelding
welding
application
complete
from atmospheric
contamination.
welding
application
is complete
from
contamination.
After
the
application
isiscomplete
the
slagatmospheric
residue
encasing
theAfter
weld the
bead
should
be removed.
the
slagresidue
residueencasing
encasing
the
weld
beadshould
should
beremoved.
removed.
the slagthe
residue
encasing
the weld
bead
should
be
removed.
slag
the
weld
bead
be
Always check the electrode manufacturers specification for the
Always
check
the electrode
electrode
manufacturers
specification
for to
the
Always
check check
theamperage
electrode
manufacturers
specification
forelectrode
the
Always
the
specification
for
the
recommended
setting
and manufacturers
connection
polarity
for the
recommended
amperage
setting
and
connection
polarity
for
the
electrode
recommended
amperage
setting
and
connection
polarity
for
the
electrode
to
recommended
amperage
setting
and
connection
polarity
for
the
electrode
toto
be used.
beused.
used.
be used.
be
WELDING TECHNIQUE
WELDING
TECHNIQUE
WELDING
TECHNIQUE
WELDING
To
strike
the TECHNIQUE
arc,
the electrode should be directed at an angle of 90 degrees
To
strike
the
arc,
theelectrode
electrode
should
bedirected
directed
angle
of90
90degrees
degrees
To strike
the
arc,the
electrode
be
directed
at striking
an angle
ofangle
90 degrees
To
strike
the
should
be
atatan
of
and
moved
on arc,
the
plate
inshould
a motion
similar
to
aan
match.
Care
should
and
moved
onthe
the
plate
motion
match.
Care
should
and moved
on
theavoid
plate
inplate
a motion
similar
tosimilar
striking
astriking
match.
Care
should
moved
on
ininaathe
motion
similar
totostriking
aawill
match.
Care
should
beand
taken
to
lengthening
arc once
struck,
as
this
cause
porosity
be
taken
to
avoidlengthening
lengthening
thearc
arc
oncestruck,
struck,
asthis
thiswill
willporosity
causeporosity
porosity
be taken
totaken
avoidto
lengthening
the arc the
once
struck,
as
this as
will
cause
avoid
once
cause
inbe
the
weld
puddle.
the
weldpuddle.
puddle.
in the weld
puddle.
ininthe
weld
It is essential with normal welding electrodes that an arc length of no greater
essential
withnormal
normal
welding
electrodes
thatlength
anarc
arcof
length
nogreater
greater
It is essential
with is
normal
welding
electrodes
that
an that
arc
no greater
ItItisis2.0mm
essential
with
electrodes
an
length
ofofno
than
visible
at anywelding
time
during
welding.
than2.0mm
visible
any
timewelding.
duringwelding.
welding.
than 2.0mm
is2.0mm
visible
any time
during
than
isisat
visible
atatany
time
during
Once the arc is struck the electrode should be drawn along the plate at an
Once
the
arcisisthe
struck
thedegrees
electrode
should
bealong
drawn
along
the
plate
atan
an
Once angle
the
arcofthe
is
struck
electrode
should
be
drawn
the
plate
at
an at
Once
arc
struck
the
electrode
be
drawn
along
the
plate
approximately
75
atshould
a continuous
speed
that
allows
the
angle
approximately
75weld
degrees
atarequired.
acontinuous
continuous
speed
thatallows
allowsthe
the
angle molten
of
approximately
at joint
a continuous
speed speed
that
allows
the
angle
ofofapproximately
75
degrees
at
that
weld
puddle75
to degrees
fill the
as
molten
weldpuddle
the
weld
jointas
asrequired.
required.
molten molten
weld
puddle
topuddle
fill the
joint
asjoint
required.
weld
totoweld
fillfillthe
weld
During welding a horse shoe pattern will be seen to form behind the molten
During
welding
horse
shoepattern
pattern
will
be
seen
to
form
behind
the
molten
Duringweld
welding
acaused
horseaashoe
pattern
will
be will
seen
toseen
form
the
molten
During
horse
shoe
be
form
behind
molten
poolwelding
as
the
molten
metal
freezes
andtobehind
this
should
bethe
kept
as
weld
pool
caused
asthe
themolten
moltenfreezes
metalfreezes
freezes
and
thisshould
should
be
keptas
as
weld pool
caused
as as
thepossible.
molten
metal
and thisand
should
be
keptbe
askept
weld
pool
caused
as
metal
this
uniform
in width
uniform
width
aspossible.
possible.
uniformuniform
in
widthinin
aswidth
possible.
as
12
24pp A5 Instruction Manual.indd 15
12
12
12
12
28/9/06 3:33:15 pm
TIG WELDING GUIDE
The following notes are aimed at providing the operator with a basic overview of TIG welding
techniques and do not provide an instruction or explanation of welding theory or welding practice.
PREPERATION
All materials to be welded should be clean and free from rust and grease. The joint to be welded
should be suitably prepared and clamped in position.
All welding processes produce fume and full consideration should be given to this before any
welding is commenced, as should any risk of fire, explosion and danger to either the operator or
any other personnel.
The welding arc produces harmful ultra violet and infrared rays that can cause serious eye
damage and burns to the skin. Ensure that the correct safety equipment is worn to provide
optimum protection from both the welding rays and to protect against hot metal burns.
TIG WELDING PRINCIPLES
TIG (Tungsten Inert Gas) welding uses an arc between the tungsten electrode
and the work to fuse the joint. The electrode is not melted and filler metal to
build up the weld profile is added separately.
The molten metal in the weld puddle together with the electrode and the tip of
the filler material used are protected from atmospheric contamination by a
shield of inert gas. Normally argon gas is used but mixes of helium and
hydrogen may be used for special applications.
The TIG welding process is ideal for thin gauge materials and also for quality
work such as stainless steel applications for the food and chemical process
industries.
There is no flux used in the TIG welding process so the finished weld requires
the minimum of cleaning afterwards. Wide ranges of gas shrouds are available
that allow access into difficult weld positions. The selected filler material should
be an ideal match for the parent material to be welded.
WELDING TECHNIQUE
Two normal methods of striking an arc are either with an HF arc starter or by
the Lift TIG method. With the HF method, when the machine is signalled to start
a high voltage spark jumps from the electrode to the work to establish the
welding arc. With the Lift TIG method it is necessary to momentary allow the
electrode to make contact with the work piece.
Once the arc is established the welding torch is pointed in the direction of the
weld joint and filler material as required is added to the weld puddle. The travel
speed for the torch is adjusted to match the time needed to melt the joint.
For optimum arc striking when welding with DC power the electrode should be
ground to a sharp point. The welding arc length is controlled by the operator
and should be between 2mm and 5mm.
The shielding gas flowing through the torch as well as providing protection from
atmospheric contamination also assists in cooling the welding torch head. For
standard gas shrouds when welding materials between 1.6mm and 6.0mm a
gas flow rate should be set for between 5 and 8 Litres per min.
When the arc is switched off the shielding gas continues to flow for several
seconds, during this time the torch should be held in position over the molten
metal to prevent weld puddle contamination.
13
24pp A5 Instruction Manual.indd 16
28/9/06 3:33:15 pm
INSULATION / PAT TESTING PROCEDURE
All electrical insulation within the Inverter Fusion Limited welding inverters provides Class II
protection in accordance with the international standard for arc welding power sources
IEC60974.
Portable Appliance Testing (PAT) as detailed in the IEE "Code of Practice for In-service
Inspection and Testing of Electrical Equipment", when applied to Inverter Fusion Limited
welders providing Class II protection requires the following tests and inspection.
(1) Visual Inspection
(2) Insulation Resistance Testing
(3) Functional Checks
1. Visual Inspection
To visually check that the equipment is in sound condition, check the following;
a)
b)
c)
d)
e)
f)
g)
There is no damage (apart from light scuffing) to the cable sheath.
The plug is not damaged (the casing is not cracked or split and the pins are not
bent)
There are no inadequate joints in the cable (taped joints are not allowed)
The outer sheath of the cable is effectively secured where it enters the plug or the
equipment. Obvious evidence of damage would be if the coloured insulation of the
internal cable cores were showing.
The equipment has not been subjected to conditions for which it is not suitable, (eg)
it is wet or excessively contaminated.
There is no damage to the external casing of the equipment or there are no loose
parts or screws.
There is no evidence of overheating (burn marks or discolouration).
2. Insulation Resistance Testing
To check that electrical resistances between the mains terminals and the user accessible
terminals are greater than 2MQ, the following test instrument and test procedure is required.
Test instrument
The resistance tester should apply a test voltage of approximately 500Vdc. The tester should
be capable of maintaining this test voltage with a load resistance of 0.5MQ.
Alternatively a PAT tester that can measure resistance with 500Vdc-applied voltage can be
used.
Procedure
a)
b)
The phase and neutral conductors are to be connected together. This connection is
best made with a dedicated test socket with phase and neutral connected together.
Connect one test lead to the phase/neutral pair. Connect the other test lead in turn
to each of the welding output terminals and the gas port on the front of the
enclosure and check that the resistance is greater than 2MQ.
Note
DO NOT FLASH OR HI-POT TEST
DO NOT PERFORM EARTH LEAKAGE TESTING
14 14
24pp A5 Instruction Manual.indd 17
28/9/06 3:33:16 pm
INSULATION / PAT TESTING PROCEDURE
DO NOT FLASH OR HI-POT TEST WELDERS
Some PAT testers are marketed as do-it-all units and incorporate hi-pot or flash tests. Such
tests are not only superfluous to the requirements of PAT testing, but can be damaging to
otherwise satisfactory equipment.
If a PAT tester that incorporates hi-pot/flash testing as part of a programmed test routine is to be
used for the insulation resistance test, then the hi-pot/flash test function must be disabled.
Dielectric strength testing is performed by Inverter Fusion Limited during product manufacture
and is not required as an in-service test.
DO NOT PERFORM EARTH LEAKAGE TESTING ON WELDERS
An earth continuity test is not required on Class II welding equipment as such equipment does
not rely on a protective earth connection to the welding circuit for electrical safety. There are no
exposed conductive parts on the Marvel welders that are directly connected to earth.
WARNING The welder (in common with all solid state power converters) operates with high
earth leakage current. An earth connection is essential before connecting the mains supply to
the welder.
3. Functional Checks
To check that the equipment is functioning correctly, confirm that the unit operates and functions
in accordance with the operator's instruction manual supplied for the relative model under test.
For any further information or advice regarding the Pat Testing of the Fusion Product range
please contact our Technical Department.
Tel: +(0)1404
+(0)1404 549791
549791
Fax: +(0)1404
+(0)1404 46718
46718
Or Write To:
Inverter Fusion Limited
Heathpark Way
Heathpark Industrial Estate
Honiton
Devon
EX14 1BB
England
15
24pp A5 Instruction Manual.indd 18
28/9/06 3:33:16 pm
WARRANTY INSTRUCTION & PROCEDURE
GENERAL
The Warranty Registration Card enclosed must be completed and returned at the time of
purchase in order to register the new product with Inverter Fusion Limited.
In the event of a claim, the claimant must first contact Inverter Fusion Limited for a warranty
claim authorisation number.
Following this, the Warranty Claim form, as printed on the reverse side of this page should be
completed with all the details as requested and forwarded to Inverter Fusion Limited along with
the faulty product and a copy of the original purchase receipt.
The claimant will be responsible for all carriage, insurance and transportation costs in returning
the product to Inverter Fusion Limited.
Upon receipt and inspection of the product, the product will be repaired or replaced at the
discretion of Inverter Fusion Limited. In the event of a chargeable repair, or a repair being
required that is not considered to be a warranty issue, the claimant will be contacted for his
further instruction.
Following the completion of any authorised warranty claim work, the product will be returned to
the original claimant at the cost of Inverter Fusion Limited. (UK Customers Only)
Failure to comply with the above procedure could invalidate or delay the completion of any
warranty work.
Improper use, abuse or any attempt to repair the product by an unauthorised third party will
invalidate any warranty claim.
Any parts or consumables fitted or used in conjunction with the Inverter Fusion Limited product
which affect the equipment operation, which are deemed by Inverter Fusion Limited to be of
inferior quality or not fit for that purpose will be regarded as abuse and will invalidate the
warranty claim.
Limited Warranty.
st
(Effective 1 September 2004)
This limited warranty supercedes all previous Inverter Fusion Limited warranties and applies to
sales of Inverter Fusion Limited equipment in the UK only.
Warranty Terms & Conditions
Subject to the following Terms and Conditions, Inverter Fusion Limited warrants to the original
retail purchaser, that new Inverter Fusion Limited equipment sold in the UK after the effective
date of this limited warranty is free of defects in material and workmanship at the time of it's
dispatch from Inverter Fusion Limited.
Within the warranty period as listed, Inverter Fusion Limited will repair or replace any warranted
parts or components that fail due to such defects in material or workmanship. Inverter Fusion
Limited must be notified within 3 working days of any such defect of failure so that the
procedure for a warranty claim can be followed.
16 16
24pp A5 Instruction Manual.indd 19
28/9/06 3:33:16 pm
WARRANTY INSTRUCTION & PROCEDURE
Inverter Fusion Limited shall honour all warranty claims on warranted equipment as listed
below in the event of such a failure within the warranty time period. All warranty time periods
start on the date the equipment was delivered to the original retail purchaser, and are as
follows:
•
•
The period as detailed in the equipments original manual and specification issued at the
time of purchase.
Extended Warranty may be purchased. Details are available and supplied on application.
Inverter Fusion Limited Warranty shall not apply to:
•
•
•
Goods supplied by Inverter Fusion Limited but manufactured by others, such as trade
accessories. These items will be covered by the manufacturers warranty, if any.
Consumable components: electrodes, contactors and relays.
Equipment that has been modified by a third party, equipment that has been improperly
installed, misused improperly operated or used in a manor that does not comply with an
industry standard. Any equipment that has been used for a purpose outside the
specifications for that equipment or any equipment that has not been maintained in a
condition that would make it suitable for use.
In the event of a valid warranty claim being made on any Inverter Fusion Limited product, the
exclusive remedies shall be, at the discretion of Inverter Fusion Limited and shall be one of the
following:
•
•
•
•
Repair
Replacement
Where authorised by Inverter Fusion Limited, the reasonable cost of a repair carried out by
a third party.
Payment for or a credit for the purchase price of the Inverter Fusion Limited product.
(Less reasonable depreciation based on actual usage)
In each case the product must be returned to Inverter Fusion Limited or to it's authorised
service centre, at the claimants own risk and expenditure. No compensation or reimbursement
for transport costs of any kind will be allowed.
To the extent permitted by Law, the remedies provided herein are the sole and exclusive
remedies. Inverter Fusion Limited liability under this warranty shall not exceed the cost of
correcting the defect. In no event shall Inverter Fusion Limited be liable for direct, indirect,
special, incidental or consequential damages (including loss of profit), whether based on
contract, tort, or any other legal theory.
Any express warranty not provided herein and any implied warranty, guarantee, or
representation as to the performance, and any remedy for breach of contract, tort or any other
legal theory which, but for this provision, might arise by implication, operation of Law, Custom
of Trade, or course of dealing, including and implied warranty or merchantability for a particular
purpose, with respect to any and all equipment furnished by Inverter Fusion Limited, is
excluded and disclaimed by Inverter Fusion Limited.
1717
24pp A5 Instruction Manual.indd 20
28/9/06 3:33:17 pm
CARE & MAINTENANCE
Under normal circumstances the Freeman range of welding inverter machines are virtually
maintenance free. However certain points should be observed to ensure the trouble free
operation of the machine. Amongst these are regular checks as described below, the
frequency of these checks will depend on the type of environment the unit will be operated
within and the overall usage of the equipment.
CAUTION
Any internal inspection, testing or repairs to the equipment should only be carried out by
personnel trained and qualified to do so. The following description of tests either visual or any
other are extracts of various Standards regarding the safe servicing and maintenance of
electrical equipment. The following recommendations are for guidance only and we suggest
that they are completed at least once every 12 months or in the case of excessively high use
more often as required.
VISUAL CHECKS
The unit should be inspected externally for visible faults (without opening the unit). In the
course of this inspection the following points should be checked and if necessary service and
repair should be arranged immediately.
Ŷ
Any damage to the mains supply plug or cable. Examine for any signs of faulty insulation,
scorching of pressure marks.
Ŷ
Ensure all cable glands and fittings are secure and that no kinking or twisting of the
supply cable has occurred.
Ŷ
Check the machine outer casings for any sign of cracking or breakage.
Ŷ
Inspect welding and work return leads for any breakdown in insulation. Ensure connection
plugs, welding torch, electrode holder and earth clamp assemblies are damage free and
secure.
Ŷ
Check for any signs of overloading or improper use and that no unauthorized
modifications have been carried out to the equipment.
Ŷ
Make sure that the mains power on / off switch is functioning correctly.
MEASUREMENT OF INSULATION RESISTANCE
Depending on National and Company Standards insulation testing should be completed and
carried out to the relevant safety laid down criteria. For full instruction and guidance on this
subject contact either the supplier or the manufacturer of the unit.
OPEN CIRCUIT VOLTAGE
Testing the open circuit voltage of the unit should be carried out in accordance to the Standard
EN60974-1. Copies of which can be obtained from the National Standards Authority or the
equivalent Authority in the country the equipment is being used. If outside the EU contact the
standards authority for that region.
FUNCTION TEST
A periodic function test of the equipment should be completed to ensure the unit performs and
operates in line with the original specification for the unit as supplied.
CAUTION
Only spares which are of Inverter Fusion Limited origin, will be deemed fit for purpose. Any
other makes or type used in any repair or servicing procedure will render any and all statutory
rights invalid.
18
18
24pp A5 Instruction Manual.indd 21
28/9/06 3:33:17 pm
TROUBLESHOOTING GUIDE
FAULT
CAUSE
REMEDY
No Power On LED
Lamp
No mains power available.
The LED & Meter
Display Is Not Lit Up
The machine power switch is Ensure that the machine power
switch located on the rear of the
turned off.
machine is switched to the on
position.
No Welding Output
Incorrect mode setting.
Check that the correct welding (MMA
/ TIG) mode is selected in the LED
display.
Machine Does Not
Operate With TIG
Torch Switch.
Broken torch lead or faulty
torch switch. In-correctly
fitted remote connection
plug.
Use a meter to check that the torch
switch is functioning and check that
the remote control plug is wired
correctly.
No Shielding Gas
Empty gas cylinder or incorrectly adjusted gas flow
rate.
Replace & adjust as required. Check
that no kinks are present in the gas
and torch supply hose.
Welding Operation Is
Erratic Or Not As
Required.
Incorrect welding current
selected. Faulty or damp
electrodes.
Check that the current level is correct
for the application. Select an
alternative electrode.
Erratic Or
Uncontrollable
Welding Arc
Faulty welding torch or bad
earth returns (work lead)
connection.
Check that the correct sized
components are fitted and that the
welding torch is in good condition.
Ensure that all connections are
secure and that there is a good earth
return connection with the work piece.
Machine Overheats
The machine working duty
cycle has been exceeded.
Check and ensure that there is no
restriction in the machine fan in and
output ducts. Also ensure that there
is adequate ventilation space around
the machine.
Ensure that the machine is
connected to a suitable live mains
power source and switched on.
WARNING
If any fuses need to be changed, these must be replaced by ones of the same value. No
warranty claims will be accepted in respect of damage caused or resulting from the use of
higher rated fuses.
Under no circumstances should any attempt be made to operate the equipment with any of
the machine casings removed or in a dangerous condition. The machine operates at very high
voltages and serious personal injury could be incurred if unqualified persons make any repair
attempt. If in any doubt immediately disconnect the unit and contact the supplier.
19
19
24pp A5 Instruction Manual.indd 22
28/9/06 3:33:17 pm
24pp A5 Instruction Manual.indd 23
28/9/06 3:33:18 pm
If at anytime, further information is required regarding the safe operation or servicing of any
Inverter Fusion Limited products please contact us at the address provided below:
Inverter Fusion Limited
Heathpark Way
Heathpark Industrial Estate
Honiton
Devon
EX14 1BB
England
Tel:
Fax:
Email:
Web:
24pp A5 Instruction Manual.indd 24
+(0)1404 549791
+(0)1404 46718
[email protected]
www.inverterfusion.com
28/9/06 3:33:18 pm