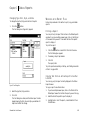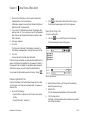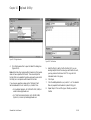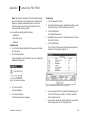
1
VERSION
2.3
▲
®
SchwabLink 2.3
User Manual
Ta b l e o f C o n t e n t s
SchwabLink 2.3 User Manual
Access to electronic services may be limited or unavailable during
periods of peak demand, market volatility, system upgrades,
maintenance or for other reasons.
The material in this document may not be reproduced, distributed,
or shared with anyone outside of your organization.
SchwabLink User Manual
1
Ta b l e o f C o n t e n t s
Other SchwabLink Installation Options
Chapter 1 I n t r o d u c t i o n
2.23
1.11
Custom SchwabLink Setup
2.23
What’s New?
1.11
Removing SchwabLink
2.24
Installing SchwabLink
1.11
Using This Manual
1.11
Post-Setup Sequence for New Users
2.24
Getting Help
1.11
Post-Setup Sequence for Ongoing Users
2.25
Welcome!
Post-Setup Activities
Installing SchwabLink on a Network
Chapter 2 G e t t i n g S t a r t e d
Welcome to SchwabLink 2.3 and the
Schwab Institutional Web Site
2.12
2.24
2.25
Network Installation Tips
2.25
Client/Server Network Installation
2.26
Peer-to-Peer Network Installation
2.27
Network Control Directory
2.27
Record Locking
2.27
Getting Immediate Assistance
2.12
Other Resources
2.12
Contents of the CD-ROM
2.12
Before You Begin
2.13
Chapter 3 S c h w a b I n s t i t u t i o n a l We b S i t e
Recommended System Configuration
2.13
Overview
Installing SchwabLink on Your Computer
2.14
Security and System Requirements
3.28
Accessing the SchwabLink Desktop and Services
2.19
Key Features
3.28
Accounts
2.20
Backup Network
3.29
Trade
2.20
Utilities
2.21
Chapter 4 D o w n l o a d U t i l i t y
2.21
Overview
Setting Up Master Accounts and Preferences
3.28
4.30
Adding a Master Account
2.22
The Download Function
4.30
Editing and Deleting Master Account Details
2.23
Launching Download Utility
4.30
SchwabLink User Manual
2
Ta b l e o f C o n t e n t s
Downloading All New Files from the
Schwab Institutional Web Site
4.31
Using Build/Update
5.42
Client Information Viewer
5.42
Security
4.31
Configuration
4.31
Fields and Columns in the Client Information
Viewer
5.43
Operations
4.31
Adjusting the Client Information Viewer Display
5.44
Download All New Files Setup and Procedure
4.32
Navigating in the Client Information Viewer
5.44
Modifying the Completion Task
4.32
Printing from the Client Information Viewer
5.44
Maintaining File Directories
4.33
Viewing the Audit Trail of Recently Downloaded Files 4.36
Download Utility Logs
4.37
Setting the Number of Download Attempts
4.37
Downloading Historical Files
4.37
Client Account Positions Viewer
5.45
Fields and Columns in the Client Account
Positions Viewer
5.45
Adjusting the Client Account Positions
Viewer Display
5.48
Navigating in the Client Account Positions Viewer 5.48
Printing from the Client Account Positions Viewer 5.48
Chapter 5 A c c o u n t Vi e w e r
Overview
Security List Viewer
5.49
5.38
Fields and Columns in the Security List Viewer
5.50
Account Viewer Window
5.38
Adjusting the Security List Viewer Display
5.50
Account Viewer Toolbar
5.39
Navigating in the Security List Viewer
5.50
The Nine Viewers
5.39
Printing from the Security List Viewer
5.50
Navigating in Account Viewer
5.40
Selecting and Viewing Master Accounts
5.41
Opening a Viewer
5.41
Closing a Viewer
5.41
Closing All Viewers
5.41
SchwabLink User Manual
Composite Security Positions Viewer
5.51
Fields and Columns in the Composite Security
Positions Viewer
5.52
Adjusting the Composite Security Positions
Viewer Display
5.52
Navigating in the Composite Security
3
Ta b l e o f C o n t e n t s
Positions Viewer
5.52
Printing from the Composite Security
Positions Viewer
5.53
Security Cross Reference Viewer
5.53
Fields and Columns in the Security Cross
Reference Viewer
5.54
Adjusting the Security Cross Reference
Viewer Display
5.54
Navigating in the Security Cross Reference Viewer 5.54
Printing from the Security Cross Reference Viewer 5.55
Transactions List Viewer
5.55
Fields and Columns in the Transactions
List Viewer
5.56
Adjusting the Transactions List Viewer Display
5.58
Navigating in the Transactions List Viewer
5.58
Adding the Previous Day’s Transactions
5.59
Opening an Individual Transactions File
5.59
Using the Query Command for Transactions
5.60
Printing the Transactions or Query Results List
5.62
Using the Purge Function
5.63
Deposit/Withdrawal List Viewer
5.64
Fields and Columns in the Deposit/Withdrawal Viewer
5.64
Adjusting the Deposit/Withdrawal Viewer Display 5.65
SchwabLink User Manual
Navigating in the Deposit/Withdrawal Viewer
5.65
Printing the Deposit/Withdrawal or Query Results List
5.66
Trade Confirmations List Viewer
5.66
Fields and Columns in Trade Confirmations
List Viewer
5.67
Adjusting the Trade Confirmations List
Viewer Display
5.68
Navigating in the Trade Confirmations List Viewer
5.69
Adding the Previous Day’s Confirmations
5.69
Opening an Individual Confirmations File
5.69
Using the Query Command for Confirmations
5.70
Printing the Confirmations List or Query
Results List
5.72
Using the Purge Function
5.73
Storing Your Trade Confirmations
5.74
Trade Confirmation Detail Viewer
Fields in the Trade Confirmation Detail Viewer
Account Viewer Features
5.74
5.75
5.76
Build/Update
5.76
Running Build/Update
5.77
Using the Find Command
5.81
Using the Find Command in the Positions and
Security Cross Reference Viewers
5.82
4
Ta b l e o f C o n t e n t s
Changing Column Order
5.83
Opening a Report by Report Type
6.93
Adjusting Column Width
5.83
Saving a Report
6.94
Sorting Data
5.83
Closing a Report Viewer
6.95
Exporting Data
5.84
Customizing the Status Reports Display
6.95
Customizing the Account Viewer Window
5.84
Hiding or Showing the Toolbar
6.95
Customizing Data in Account Viewer
5.86
Adjusting the Width of the Master Account List
6.95
5.88
Tiling Report Viewers
6.95
Selecting the File Data Type
5.89
Cascading Open Report Viewers
6.96
Including Cash in Positions
5.89
Minimizing Viewers
6.97
Reconciling Files Using Four-Digit Year
5.89
Arranging Icons
6.97
Specifying Preferences for Build/Update
5.89
Changing Type Font, Style, and Size
6.98
Specifying the Transaction and Confirmation
Record Retention Period
5.90
Rebuild Consolidated Portfolios for
Fund Rebalancer
5.90
Setting Preferences
Working with Report Files
6.98
Printing a Report
6.98
Copying Text From an Active Report to
Another Location
6.98
Deleting Report Files
6.99
Setting Preferences
Chapter 6 S t a t u s R e p o r t s
6.99
6.91
Changing the Opening Display
6.100
Downloading Data into Status Reports
6.91
Setting Automatic Actions
6.100
Status Reports Window
6.91
Setting Default Text Options
6.100
Viewing Master Account Data
6.92
Codes Used in TOA Status and TOA
Complete Reports
6.101
Selecting a Report Viewer
6.92
Selecting a Report File from an Open Viewer
6.92
Overview
SchwabLink User Manual
5
Ta b l e o f C o n t e n t s
Chapter 7 M u t u a l F u n d Tr a d i n g
Overview
7.103
Showing or Hiding Titles in the Grid
7.119
Checking File Format on Import
7.119
Prerequisites
7.103
Main Steps
7.103
Chapter 8 S e c u r i t i e s A l l o c a t i o n
Mutual Fund Trade List
7.103
Overview
Mutual Fund Template Window
7.103
Working with Data in the Mutual
Fund Template
7.104
8.120
Prerequisites
8.120
Main Steps
8.120
Securities Allocation Window
8.120
Master Account Field
8.121
Single Trade Orders
7.104
Selecting Symbols to Duplicate a Trade Order
7.107
Linked Trade Orders
7.108
Importing Trading Files
7.112
Saving a Mutual Fund Trade List
7.115
Printing a Mutual Fund Trade List
7.116
Opening a Previously Saved Mutual Fund
Trade Order File
7.116
Saving Files
8.126
Sending a Mutual Fund Trade List to Schwab
7.117
Sending Files
8.127
Handling Duplicate Orders
7.117
Requeuing Deleted Files
8.128
Archiving Files
7.117
Opening Existing Files
8.128
Setting Preferences
7.118
Printing Securities Allocations
8.129
Selecting the Fund Instruction Default
7.119
Checking for Duplicates
7.119
SchwabLink User Manual
Allocating Securities
8.121
Entering Schwab Trades
8.121
Entering Prime Broker Trades
8.122
Completing the Allocation Worksheet
8.125
Sending Securities Allocation Files to Schwab
8.126
Importing Trade Files
8.129
Schwab Trade File Format
8.129
Prime Broker Trade File Format
8.131
Example: Importing an Excel Spreadsheet
8.132
6
Ta b l e o f C o n t e n t s
Setting Preferences
Chapter 9 M a n a g e m e n t F e e s
9.141
9.134
Setting Up Disbursement Accounts
9.142
Prerequisites
9.134
Specifying Account Validation
9.142
Main Steps
9.134
Management Fee Processing Window
9.134
Chapter 10 U p l o a d U t i l i t y
Selecting Master Accounts
9.135
Overview
Overview
Entering Account and Fee Data
10.143
9.135
Setting Preferences
10.143
Manually Entering Data
9.136
Adding Master Accounts
10.144
Loading Data from the SchwabLink Database
9.136
Adding a Data Folder
10.145
Importing Data
9.136
Default Settings
10.146
Opening Previously Created Files
9.138
Editing Master Accounts
10.146
9.138
Editing Data Paths
10.147
Editing Information
9.138
Deleting Master Accounts
10.147
Deleting Rows
9.138
Deleting Zero Fees
9.139
Editing the File Transfer List
10.150
Sorting Information
9.139
Removing a File from the Transfer List
10.150
Revising Information
Transfer Lists
10.148
Printing the Worksheet
9.139
Sending the Files to Schwab
10.150
Sending Files to Schwab
9.139
Maintaining Directories
10.151
Saving the Worksheet as a File
9.140
Changing Archive Directories
10.151
Sending Files
9.140
Changing Default Directories
10.152
Requeuing Deleted Files
9.141
Unattended PCRA Upload Setup
10.153
SchwabLink User Manual
7
Ta b l e o f C o n t e n t s
Appendix A Tr a n s a c t i o n F i l e F o r m a t s
Using Filter Profiles
B.168
Overview
A.157
Using Predefined Filter Profiles
B.169
What You Download
A.157
Modifying an Existing Profile
B.170
Transaction File Formats
A.158
Creating a New Profile
B.173
Generic Transaction File Format
A.158
Filtering on Comment Lines
B.175
Advent Transaction File Format
A.160
Deleting a Profile
B.175
Using SchwabLink with Other Programs
A.164
Additional Information
A.164
Appendix B Tr a n s a c t i o n F i l e F i l t e r
Overview
B.165
Running the Transaction File Filter
B.176
Viewing the Selection Criteria
B.176
Running the Filter in Manual Mode
B.176
Running the Filter in Unattended Mode
B.178
Canceling the Results of the Filter Process
B.178
Log File
B.179
Installing the Filter
B.165
Launching the Filter
B.165
Setting User Preferences
B.166
Appendix C F u n d R e b a l a n c e r
Opening the User Preferences Dialog Box
B.166
Overview
Selecting the File Format
B.166
Fund Rebalancer Program Structure
C.181
Choosing Directories for Filtered Files
B.167
Getting Help
C.182
Selecting a Default Filter
B.167
Using This Appendix
C.182
Combining Multiple Transaction Files
(Appending Files)
B.168
SchwabLink User Manual
Tutorial
C.180
C.182
Accessing SchwabLink Fund Rebalancer
C.183
Understanding the Fund Rebalancer Work Area
C.184
8
Ta b l e o f C o n t e n t s
Step 1: Creating Models
C.185
Adding a New Fund to a Model
C.206
Step 2: Assigning an Account to a Model
C.187
Model Assignment
C.207
Step 3: Defining Account Exclusions
C.189
Overview
C.207
Step 4: Moving Accounts to the Select List
C.190
Understanding the Work Area
C.207
Step 5: Inputting Cash Management Options
C.191
Assigning Accounts to a Model
C.208
Step 6: Generating the Order List
C.193
Removing Accounts from a Model
C.208
Step 7: Reviewing Orders
C.194
Showing All Accounts
C.208
Step 8: Approving Accounts for Order Export
C.197
Sorting Columns
C.209
Step 9: Exporting the Orders
C.198
Step 10: Importing the Trade File
C.199
Understanding Account Exclusions
C.209
Model Configuration
C.200
Setting Cash Exclusions—Entire Cash Position
C.209
Overview
C.200
Setting Cash Exclusions—Specific Dollar Amount
C.210
Understanding the Model Configuration Work Area
C.200
Excluding Specific Funds
C.211
Working with Models
C.201
Excluding Mutual Funds in the Margin Account
C.212
Creating a Model
C.201
Deleting a Model with Assignments
C.201
Filtering by Account Number
C.213
Deleting a Model without Assignments
C.202
Filtering by Account Name
C.213
Copying a Model
C.203
Filtering by Portfolio Model
C.214
Changing Model Contents
C.203
Filtering Accounts with Rebalancing Exclusions
C.214
Deleting an Asset from the Model
C.203
Showing All Accounts
C.214
Changing an Asset’s Percentage
C.204
Filtering Accounts by Multiple Selection Criteria
C.214
Adding Cash to a Model
C.205
SchwabLink User Manual
Account Exclusions
Filtering Accounts
C.209
C.213
9
Ta b l e o f C o n t e n t s
Fund Rebalancer
C.215
Fund Rebalancer Reports
C.227
Understanding Rebalancing Methods
C.215
All Trade Orders
C.227
Comparison Example of Rebalancing Methods
C.218
All Orders within an Account Range
C.228
Setting Minimum Order Thresholds
C.219
Exported Orders for the Current Session
C.228
Excluding Assets from the Actual Portfolio Tab
C.220
Excluded Orders
C.229
C.222
Trade Orders by Asset
C.229
Filtering the Account List in Fund Rebalancer
C.222
Account Rebalancing Summary
C.229
Displaying All Assigned Accounts
C.222
Account Rebalancing Detail
C.230
Selecting Accounts by Account Description
C.222
Selecting Accounts by Portfolio Variance
C.223
Model Portfolios by Name
C.230
Selecting Accounts by Export Date
C.224
Assets for All Portfolios
C.230
C.224
Individual Asset Reports
C.231
Filtering Accounts
Options
Model Configuration Reports
C.230
Restoring Screen Defaults
C.224
Model Assignment Reports
C.231
Starting a New Session
C.224
All Model Assignments
C.231
Viewing Portfolio Charts
C.224
One Model Assignment
C.232
Changing Master Accounts
C.224
Accounts without Models
C.232
Sorting Columns
C.225
Model Assignments by Account
C.232
Resizing Columns
C.226
Reports
C.226
Overview
C.226
Saving Reports
C.227
Viewing Saved Reports
C.227
SchwabLink User Manual
10
Chapter 1
Introduction
WELCOME!
SchwabLink®
Welcome to
2.3. SchwabLink helps you maximize
performance by automating your routine trading tasks, so you
can focus your attention on building relationships and gathering
assets. SchwabLink links your personal computer to the Schwab
network and the wide range of resources and data it provides.
SchwabLink facilitates trading, receives confirmations, obtains
prices, and provides up-to-date client account information.
With SchwabLink you can transfer data directly from Schwab
into your portfolio management software (PMS) and record
keeping software databases, spreadsheet, or customized software
program, thus eliminating time-consuming manual data entry
and costly errors. SchwabLink also enables you to send trade
and management fee files to Schwab securely and efficiently.
W h a t ’s N e w ?
New features of SchwabLink 2.3 include:
Installing SchwabLink
Before you begin installation, review the “Recommended System
Configuration” section in Chapter 2 or in “Getting Started—
SchwabLink 2.3 with Fund Rebalancer.”
SchwabLink 2.3 is easy to install. When you insert the
SchwabLink CD-ROM into your CD-ROM drive, installation
begins automatically. The first installation screen is displayed,
and guides you, step by step, through the installation process.
After you install SchwabLink, you can reinsert the CD-ROM to
add additional modules as needed. Steps for installing
SchwabLink are provided in Chapter 2 of this manual and in
“Getting Started—SchwabLink 2.3 with Fund Rebalancer”
Using This Manual
Each chapter begins with an overview that provides a general
description of and activities associated with the module.
Following the overview are detailed, step-by-step procedures
that enable you to take full advantage of each module within
SchwabLink.
Fund Rebalancer
Fund Rebalancer is an automated tool allowing you to manage
model portfolios, as well as perform mutual fund allocation and
rebalancing functions. It also includes the ability to perform
“what-if” analyses and generate trades via the SchwabLink
Mutual Fund Trading template.
Getting Help
If you have questions or need assistance, please contact Technical
Client Services between 8:00 a.m. and 6:00 p.m., Eastern Time,
Monday through Friday.
• For investment advisors, call 1-800-647-LINK (5465) or
e-mail [email protected].
• For Third Party Administrators, call 1-800-231-2855
(Option 2) or e-mail [email protected].
SchwabLink User Manual
(0901-03181)
1.11
Chapter 2
Getting Started
WELCOME TO SCHWABLINK 2.3 AND
SCHWAB INSTITUTIONAL WEB SITE
THE
Welcome to SchwabLink 2.3 for Windows. Make the most of
your time and resources by using SchwabLink to place trade
orders, receive up-to-date account and financial data, and
manage assets more efficiently.
The Schwab Institutional Web site (www.schwabinstitutional.com)
is your source for downloading account information and transaction data. In addition to providing account information to
SchwabLink, the Web site is your Internet channel to Schwab
Institutional.
Getting Immediate Assistance
If you have questions or need assistance, please contact Technical
Client Services between 8:00 a.m. and 6:00 p.m., Eastern Time,
Monday through Friday.
• For investment advisors, call 1-800-647-LINK (5465) or
e-mail [email protected]
• For Third Party Administrators, call 1-800-231-2855
(Option 2) or e-mail [email protected].
Other Resources
As you use SchwabLink, you will learn how to take advantage
of the wide variety of activities and information it offers. For
additional help, use these tools:
• The SchwabLink 2.3 User Manual. The chapters provide a
detailed description of each SchwabLink module, and
step-by-step procedures. Chapter 3 provides an overview
of the Schwab Institutional Web site.
SchwabLink User Manual
• SchwabLink Help. Get immediate help with the module
you are working in by selecting the Help menu from the
top of the SchwabLink window.
• Schwab Institutional Web Site Help. Log on for a detailed
description of the site’s features. After logging onto the
site, click on “Help” located in the top right corner.
• Microsoft® Windows user documentation and telephone
support for questions concerning your Windows software.
Contents of the CD-ROM
Install SchwabLink 2.3 from the CD-ROM your firm received
from Schwab Institutional. The CD-ROM contains additional
applications you can choose to install now or later.
The SchwabLink 2.3 CD-ROM contains:
Autorun Installer
When you insert the SchwabLink CD-ROM into your CD-ROM
drive, Autorun begins installation automatically. It displays the
first installation screen, then steps you through the installation
process.
SchwabLink 2.3 for Windows
Place trades and view account data with the latest version of
SchwabLink for Windows.
Transaction File Filter (TFF) 1.1
Automatically eliminate transaction information that might
duplicate data from DTC, IDC, or your own trading system. The
TFF streamlines daily data processing by filtering out transaction
data already imported into your portfolio management system.
Refer to Appendix B of this manual, “Transaction File Filter”,
for more information.
2.12
Chapter 2
Getting Started
Note: Transaction File Filter is necessary only if you have more than
one data feed and you require reconciliation conflict resolution.
Web Forms Database
Install the Web Forms Database to create a database for completed
and partially completed forms. The database allows you to save
forms that you complete on the Schwab Institutional Web site for
future use.
Java Plug-In 1.3.1
Access Web Forms and Web Trading on the Schwab Institutional
Web site with the latest version of the Java Plug-In.
Adobe Acrobat Reader 4.0
Use Adobe Acrobat Reader to access Web Forms from the
Schwab Institutional Web site.
Backup Network Scripts
Access the Schwab Institutional Web site directly through the
Schwab Backup Network with these required scripts. The
Backup Network is an optional service offered to Schwab
Institutional Web site users for a nominal fee, which is billed by
and paid to UUNET™, an MCI WorldCom® company.
License Agreement
This file contains the text of the license agreement for the
products on this CD-ROM. Installing any of these products on
your computer constitutes acceptance of the agreement.
SchwabLink 2.3 User Manual
An electronic copy of this user manual is available on the
CD-ROM in a file compatible with Adobe Acrobat.
B e f o r e Yo u B e g i n
In order to download data from the Schwab Institutional Web
site to SchwabLink, your firm needs access to the Schwab
Institutional Web site. Each user within your firm must have a
SchwabLink User Manual
valid user ID and password. Schwab Institutional initially sets up
one user ID and password for each firm. Contact your Firm
Security Administrator for additional user accounts.
If your firm does not have access to the Web site, or you do not
have an initial user ID and password, your Firm Security
Administrator should contact Technical Client Services between
8:00 a.m. and 6:00 p.m., Eastern Time, Monday through Friday.
• For investment advisors, call 1-800-647-LINK (5465) or
e-mail [email protected]
• For Third Party Administrators, call 1-800-231-2855
(Option 2) or e-mail [email protected].
Recommended System Configuration
To use SchwabLink effectively, we recommend that you have a
personal computer that meets these minimum requirements:
SYSTEM COMPONENT
RECOMMENDED MINIMUM
Operating system
Microsoft® Windows® 98 or Windows NT® 4.0
with SP 6, or Windows 2000 with SP1.
Processor
Pentium® 200 MHz or faster.
Memory
64 megabytes of RAM.
Hard drive
200 megabytes of free space to install all applications.
Internet Connection
56.6 Kbps modem or higher, or a persistent Internet
connection such as T1, ISDN, DSL, or cable modem.
An Internet Service Provider (ISP).
2.13
Chapter 2
Getting Started
Browser
Microsoft® Internet Explorer 5.0 or higher, and
Sun Microsystems® JavaTM Plug-in 1.3.1 or higher,
with 128-bit encryption
Note: If the Setup Program menu does not appear:
• Click the Windows Start button.
• Select Run.
• In the Run dialog box, type D:\setupapp.exe
(where D: is the letter address of your CD-ROM drive).
• Click the OK button.
Monitor
17-inch SVGA, 1024 x 768 resolution.
CD-ROM drive
8x or higher CD-ROM drive.
Network operating system Microsoft Windows 98 or Windows NT 4.0.
(for network installation only)
Additional Programs
Adobe Acrobat Reader 4.0 with Search plug-in.
I N S TA L L I N G S C H WA B L I N K
ON
YOUR COMPUTER
Note: To install SchwabLink on a network, refer to the
“Installing SchwabLink on a Network” section that begins on
page 2.25.
To install SchwabLink on your computer:
1.
Close all open applications.
2.
Insert the SchwabLink 2.3 CD-ROM.
The Setup Program menu appears on your screen (Figure 2-1).
Figure 2-1 SchwabLink Setup Program Menu
SchwabLink User Manual
2.14
Chapter 2
3.
Getting Started
Click SchwabLink Desktop 2.3 to install the application.
We recommend that you install SchwabLink 2.3 first, then
install other applications as needed.
A welcome screen (Figure 2-2) appears.
Note: A message may appear indicating that you do not have
Administrator privileges. We recommend that the installer have
Administrator privileges.
Figure 2-3 Software License Agreement Window
5.
Review the software license agreement. To accept it and
continue installation, click the Yes button. To decline and
end the installation, click No.
If you click Yes, the User Information window (Figure 2-4)
appears.
Figure 2-2 Welcome to SchwabLink Desktop Setup Screen
4.
Click the Next button.
The SchwabLink Software License Agreement window
(Figure 2-3) appears.
SchwabLink User Manual
2.15
Chapter 2
Getting Started
Figure 2-4 User Information Window
Figure 2-5 Choose Destination Location Window
6.
7.
Type your user name and company name, then click Next.
The Choose Destination Location window (Figure 2-5)
appears. At the bottom of the screen, the Setup program
displays the recommended folder in which your SchwabLink
files will be installed. C:\ represents your hard disk drive.
The SchwabLink files will be installed on your hard disk in
the SchwabLink Desktop folder, which resides in the
Program Files folder. The Setup program will also create a
shortcut icon on the Windows Start ➔Programs menu.
SchwabLink User Manual
To accept the destination folder displayed, click the Next
button. To change the destination folder, click the Browse
button and select the drive and folder you want to use.
When you finish, click Next.
The Setup Type window (Figure 2-6) appears. It provides
two setup options: Custom and Typical. We recommend
that you select Typical to install all SchwabLink modules.
Custom enables users to select and install specific SchwabLink
modules, including sample data. To perform a Custom installation,
see “Other SchwabLink Installation Options” on page 2.23.
2.16
Chapter 2
Getting Started
Figure 2-6 Setup Type Window
Figure 2-7 Select Program Folder Window
8.
9.
Click the Next button.
The Select Program Folder window (Figure 2-7) appears,
displaying the SchwabLink Desktop folder that will be
added to the Program Files folder on your hard disk. You
can rename the folder or select a folder from the list of
existing folders to add to the Program Files folder.
SchwabLink User Manual
Click the Next button.
The Create Desktop Shortcuts window (Figure 2-8) appears.
You can have the installation create desktop shortcuts for
SchwabLink Windows and/or Download All New Files.
2.17
Chapter 2
Getting Started
Figure 2-8 Create Desktop Shortcuts Window
Figure 2-9 Start Copying Files Window
10. Click the Next button.
11. To accept the installation settings proposed by the Setup
program, click the Next button. To make changes to the
settings, click the Back button. When you finish making
changes, return to this step and click Next.
The Start Copying Files window (Figure 2-9) appears.
Setup displays the proposed setting for your computer
environment, setup type, and target folder.
The setup program begins copying files from the CD-ROM
to the destination folder and displays the progress of the
installation (Figure 2-10).
SchwabLink User Manual
2.18
Chapter 2
Getting Started
Figure 2-10 Setup Program Copying Files from the CD-ROM
After all files are copied, the Setup Complete window
(Figure 2-11) appears.
12. To read the Read Me file for SchwabLink, which contains
the most current information available, select the check
box, then click the Finish button.
Figure 2-11 Setup Complete
ACCESSING
SERVICES
THE
SCHWABLINK DESKTOP
AND
You access SchwabLink modules by clicking icons on the
SchwabLink Launcher screen.
To access SchwabLink, in Windows select Start ➔Programs
➔SchwabLink Desktop. The SchwabLink Launcher (Figure 2-12)
appears.
The SchwabLink launcher is organized into three folders:
• Accounts
• Trade
• Utilities
SchwabLink User Manual
2.19
Chapter 2
Getting Started
Tr a d e
Select the Trade tab to display the Trade folder icons
(Figure 2-13).
Figure 2-12 SchwabLink Launcher
When you select the tab for a folder, it opens and displays icons
for services related to that folder.
Figure 2-13 Trade Folder
Accounts
The Accounts folder provides these services:
• Account Viewer
You can display a wide range of account-related information, including security positions, cash balances, client
account names and addresses, client transactions for a
single date or across a range of dates, confirmations, and
results of queries for which you specify parameters.
• Download All New Files
Download your daily client data files from Schwab.
The Trade folder provides these services:
• Fund Rebalancer
Perform mutual fund allocation and rebalancing functions.
• Mutual Fund Trading
Execute mutual fund trade orders for client accounts.
• Securities Allocation
Allocate block trades to your client accounts.
Note: Allocations may also be done via Web Trading on
www.schwabinstitutional.com
• Status Reports
Status Reports provides next-day access to a variety of
timely, accurate account status data. You receive these
reports as part of your download from Schwab each day.
SchwabLink User Manual
2.20
Chapter 2
Getting Started
Utilities
Select the Utilities tab to display the Utilities folder (Figure 2-14).
Note: The Transaction File Filter icon does not appear
until after you launch the Transaction File Filter application,
which you install from the SchwabLink CD-ROM.
• Upload Utility
Use the Upload Utility to send files directly to Schwab that
are not created in SchwabLink. You can send multiple files
in one operation. This utility is used primarily by clients of
Schwab Institutional’s Retirement Plan Services.
SETTING UP MASTER ACCOUNTS
PREFERENCES
Figure 2-14 Utilities Folder
The Utilities folder provides these services:
After you complete the SchwabLink installation and configuration,
you need to set up the following:
• Master Accounts
• Download Utility
Define parameters associated with your daily download of
client data files.
• Account Viewer preferences
• Fund Rebalancer Update
View the status of or manually initiate the Fund
Rebalancer update process for specific master accounts.
• Management Fees preferences
• Management Fees
Submit your management fees to Schwab electronically.
• Schwab Institutional
Launch your browser to take you to the login page of the
Schwab Institutional Web site.
• Transaction File Filter
Eliminate specific transactions from the daily downloaded
transaction files to avoid duplication from other interfaces
such as DTC or IDC.
SchwabLink User Manual
AND
• Mutual Fund Trading preferences
• Status Reports preferences
• Upload Utility preferences
Note: Master Accounts can be set up from Mutual Fund
Trading, Account Viewer, Securities Allocation, Status Reports,
Management Fees, and Download Utility. Master Account
information that is added or deleted in one of those modules
is automatically reflected in the others.
The following section explains how to set up Master Accounts.
After you set up a Master Account, refer to the chapters about
each module for instructions on setting module specific
preferences.
2.21
Chapter 2
Getting Started
Adding a Master Account
To set up a Master Account:
2.
If the directory you want to access is not listed in the Master
Account list, you need to add it. Click the Add button.
1.
The Add Master Account dialog box (Figure 2-16) appears.
From the Options menu in one of the SchwabLink modules,
select Preferences.
The Preferences Dialog Box (Figure 2-15) appears.
Figure 2-16 Add Master Account Dialog Box
Figure 2-15 Preferences Dialog Box (Account Viewer)
SchwabLink User Manual
3.
Select the directory and drive that you want to add.
4.
Type in the Master Account number and give the account a
description (optional). This description is useful if you have
more than one Master Account.
5.
Click the OK button.
You are returned to the module Preferences dialog box. The
number and description of your Master Account, plus the
directory that contains the Master Account, should be displayed
in the Master Account List. You can add as many Master
Accounts as required by repeating steps 2 through 5.
2.22
Chapter 2
Getting Started
Editing and Deleting Master Account Details
To edit existing Master Account details:
1.
2.
3.
To install SchwabLink on a network, see a later section,
“Installing SchwabLink on a Network,” on page 2.25.
In the Master Account list in the Preferences dialog box (Figure
2-15), click on the Master Account that you want to edit.
Custom SchwabLink Setup
Click the Edit button.
To perform a Custom setup of SchwabLink:
The Edit Master Account dialog box appears. Revise the
Master Account number, description, and destination as
appropriate.
1.
Refer to the earlier section, “Installing SchwabLink on
Your Computer,” on page 2.14. Preform steps 1 through 7.
2.
When the Setup Type window (Figure 2-17) appears, select
the Custom option.
Click the OK button.
Your changes appear in the Master Account list of the
Preferences dialog box.
To delete a Master Account:
1.
2.
In the Preferences dialog box, click on the Master Account
that you want to delete.
Click the Delete button.
A dialog box appears asking you to confirm the deletion of
the selected Master Account.
3.
Click the Yes button if you want to continue with the deletion.
The Master Account no longer appears in the Master
Account list.
Note: Deleting a Master Account from the list in the Preferences
dialog box does not delete the account from the database.
O T H E R S C H WA B L I N K I N S TA L L AT I O N O P T I O N S
In addition to performing a Typical SchwabLink installation on
your computer, you can:
• Perform a Custom installation of SchwabLink
• Remove SchwabLink
• Install SchwabLink on a network
SchwabLink User Manual
Figure 2-17 Setup Type Window
3.
Click the Next button to proceed with the Custom installation.
The Select Components window (Figure 2-18) appears. The
default display selects all SchwabLink components to install.
2.23
Chapter 2
4.
Getting Started
Review the list of components and click the box next to the
component to indicate which one(s) you do not want to
install. The check mark disappears.
Removing SchwabLink
To remove SchwabLink from your computer, in Windows select
Start ➔Settings ➔Control Panel ➔Add/Remove Programs.
Select SchwabLink Desktop and click the Add/Remove button.
P O S T- S E T U P A C T I V I T I E S
After you install SchwabLink, you need to complete post-setup
activities to verify that your computer can link to the Schwab
computer, receive data, and display the data you receive.
Post-Setup Sequence for New Users
The post-setup sequence of activities for new users of
SchwabLink differs slightly from post-setup for ongoing users. If
you are using SchwabLink for the first time, you must complete
the following activities.
If you need assistance, refer to the appropriate section in the
SchwabLink User Manual chapter for the module referred to in
the steps.
Today:
Figure 2-18 Select Components Window
5.
Download your data files from the Schwab computer.
2.
Set up the Download Utility for ongoing daily downloads
and the Build/Update process, starting tomorrow. (See
Chapter 4, “Download Utility.”)
3.
Use Account Viewer to run the Build/Update function and
verify client positions and balances. (See Chapter 5,
“Account Viewer.”)
4.
Use Account Viewer to view and verify transaction file data.
(See Chapter 5, “Account Viewer.”)
Click the Next button.
In the Select Program Folder window, the Setup program
displays the name of the SchwabLink folder to be added to
the Program Files folder on your hard disk. You can rename
the folder or select a folder from the existing line of folders.
6.
1.
Follow steps 9–12 of the installation procedure beginning on
page 2.17.
The program installs only the SchwabLink components you
have selected.
SchwabLink User Manual
2.24
Chapter 2
Getting Started
Tomorrow:
I N S TA L L I N G S C H WA B L I N K
1.
Perform the daily download and process the update file.
2.
Use Account Viewer to view account and position data for
each or all of your portfolios.
Sharing data on a network allows several workstations to access
SchwabLink’s Paradox® data tables and other data simultaneously.
3.
Use Account Viewer to view and verify your most recent
files of all transactions you made through Schwab.
4.
Use Account Viewer to view and verify confirmation data.
Post-Setup Sequence for Ongoing Users
If you have used SchwabLink prior to installing the current
Windows version of SchwabLink, you have already downloaded
your daily files. You must complete the following activities:
Today:
1.
Set up the Download Utility for ongoing daily downloads
and Account Viewer updates that will begin tomorrow.
(See Chapter 4, “Download Utility.”)
2.
Use Account Viewer to view account and position data for
each or all of your portfolios. (See Chapter 5, “Account
Viewer.”)
3.
Use Account Viewer to view and verify your most recent file
of all transactions you made through Schwab.
4.
Use Account Viewer to view and verify confirmation data.
Tomorrow:
1.
Perform the daily download. (See Chapter 4, “Download
Utility.”)
2.
Use Account Viewer to view and verify your most recent file
of all transactions you made through Schwab.
3.
Use Account Viewer to view and verify confirmation data.
(See Chapter 5, “Account Viewer.”)
SchwabLink User Manual
ON A
NETWORK
Note: The SchwabLink software must be installed on each workstation. Although the data files can be shared, the SchwabLink
software is not a true network application. The program
executable files cannot be loaded onto a network drive and
shared among several workstations.
Each workstation should have the SchwabLink software installed
on the C:\ drive, as in a stand-alone installation. You then set the
path to the data directory to a shared directory on a network
server or designated “peer” workstation. You specify the data
directory accessed by SchwabLink applications in the Preferences
section of the applications. Directories are created as needed
through the Preferences dialog box. In order to share the data,
the workstations should have access to a common network drive
and directory. Refer to the sections that follow for specific
guidelines on installing SchwabLink on client/server and
peer-to-peer networks.
Note: Installing this program adds the Borland Database Engine,
which may replace an existing version on your computer. In
addition, it creates entries in the system Registry file.
N e t w o r k I n s t a l l a t i o n Ti p s
Before installing SchwabLink on your network, review the
following points with your network administrator, who may
need to make changes. The network administrator normally
performs these operations because they may affect the operation
of the computer, or of applications already installed.
2.25
Chapter 2
Getting Started
Note: For time-saving tips on installing SchwabLink on four or
more workstations, contact Technical Client Services between
8:00 a.m. and 6:00 p.m., Eastern Time, Monday through Friday.
• For investment advisors, call 1-800-647-LINK (5465) or
e-mail [email protected]
• For Third Party Administrators, call 1-800-231-2855
(Option 2) or e-mail [email protected].
Before Installing
Shared Data Directory
When you are performing more than one installation of the
SchwabLink program files, you must specify the same network
control directory for each installation. Do not overwrite or
replace previous data files. Do not select a new directory.
The SchwabLink installation program will ask for the drive and
directory destination for program files. This drive may be a
network drive, but must not be a RAM drive.
Access Rights
Network operating systems allow limited access to the file server
directories. To install SchwabLink, you must have the following
rights to file server program and data directories: Read, Write,
Create, Delete, and Modify.
Drive Letter Assignments
C:\ is usually the name DOS assigns to the hard disk drive in the
computer. Network operating systems allow drive letters to be
assigned to sub-directories on other computers, known as file servers.
After Installing
Time and Date Restrictions
You must have the correct date and time set on your computer to
access SchwabLink’s Paradox data tables. To check the date and
time settings and change them, if necessary, follow these steps.
1.
Open the Start Menu on your desktop.
2.
Select Settings.
3.
Select Control Panel.
4.
Click the Date/Time icon.
5.
Change the date, time, or time zone as necessary on the screen.
6.
Click OK to update and exit the screen.
If you display a clock at the lower right corner of the screen, you
can confirm the date and time on your PC quickly. Move the cursor
to the Time indicator in the lower right-hand corner of your screen
and double-click the time. The Date/Time properties dialog box
appears. Make necessary changes and close the dialog box.
Client/Server Network Installation
Use Windows Explorer to create a network directory on the server.
This directory must be available to all workstations accessing
SchwabLink. The network user login IDs must have read, write,
and create rights for the network data directory. For example,
each workstation could have access to an R:\SchwabLink Data
directory. This directory will contain the downloaded data files
and the Account Viewer database files to be shared by the workstations. When defining preferences on each client machine, this
data path should be used for the specific Master Account. This
will configure the network location as the data path and cause
all applications in the SchwabLink software to use that directory.
Before you begin using SchwabLink on a network for the first
time, please review the following:
SchwabLink User Manual
2.26
Chapter 2
Getting Started
Peer-to-Peer Network Installation
3.
Double-click the BDE Administrator icon.
To install SchwabLink on a peer-to-peer network:
4.
Select the Configuration tab.
1.
Install SchwabLink on one PC as described earlier in
“Installing SchwabLink on Your Computer” on page 2.14.
5.
Double-click on Configuration ➔Drivers ➔Native.
6.
2.
In a module Preferences dialog box, set up a Master Account
and associate it with a directory as described earlier in
“Adding a Master Account” on page 2.22.
Click on Paradox, then click on the C:\ displayed in the NET
DIR box7. Type the drive letter and path for the network
control
directory, or click on the “…” box to browse and select the
desired path.
Map a drive letter on the other PCs to the C:\ drive on the first
PC. If possible, make the path similar in all remote machines.
8.
As you exit the BDE Administrator application, it offers to
save the changes. Click Yes.
For example, G:\SchwabLink Data would correspond to the
C:\SchwabLink Data directory on the PC where SchwabLink
and the data are installed on that C:\ drive. During the
software installation on remote stations, select the
G:\SchwabLink Data directory instead of the
C:\SchwabLink Data directory.
9.
Repeat these steps for all workstations.
This procedure assumes that you use the C:\ drive.
3.
Network Control Directory
In both client/server and peer-to-peer networks it is necessary to
set up the network control directory. The software will use this
directory to govern file sharing. The network control directory
path must correspond to the same location for all workstations
accessing the SchwabLink data. The directory must have read,
write, create, modify, and delete privileges for all users.
To set up the network control directory:
1.
2.
Install SchwabLink on the client/server or peer-to-peer
network as described in the preceding sections.
On the server (client/server) or local (peer-to-peer)
machine, click the Windows Start button and select
Settings ➔Control Panel..
SchwabLink User Manual
(0901-03180)
Record Locking
When directories are shared by two or more computers, it is
possible that two or more people will attempt to update the same
records simultaneously. In order to prevent the same record from
being updated by several persons concurrently, SchwabLink
provides a record locking process.
With record locking, the first person to access the record can
update it. Everyone else has “read only” access to that record
until the first person releases it by saving changes, moving to
another record, or exiting the file.
The network administrator must set up the network control
directory to make sure that record locking is in effect. We
recommend that the network administrator complete this
procedure before using the system.
Note: In order to prevent simultaneous multiple updates of
records, you must perform the steps described on this page in
“Network Control Directory” on every computer that uses
SchwabLink 2.3.
2.27
Chapter 3
S c h w a b I n s t i t u t i o n a l We b S i t e
OVERVIEW
Key Features
The Schwab Institutional Web site
(www.schwabinstitutional.com) simplifies your business
dealings with both your clients and Schwab Institutional. Used in
conjunction with SchwabLink® for Windows, the Web site and
SchwabLink enable you to provide efficient, high-quality client
service.
Some key features of the Web site include:
Security and System Requirements
Before you access the Schwab Institutional Web site, review the
“Recommended System Configuration” section in Chapter 2 or
in “Getting Started—SchwabLink 2.3. With Fund Rebalancer”
All users of the Web site within your firm must have a valid user
ID and password which are available from your Firm Security
Administrator (FSA). If your firm does not have access to the
Web site, or you do not have an initial user ID and password,
your Firm Security Administrator should contact Technical Client
Services between 8:00 a.m. and 6:00 p.m., Eastern Time,
Monday through Friday.
• For investment advisors, call 1-800-647-LINK (5465) or
e-mail [email protected].
• For Third Party Administrators, call 1-800-231-2855
(Option 2), or e-mail [email protected].
For additional information on the role of the Firm Security
Administrator, please refer to the Help section of the Web site.
• Alerts: Receive real-time notifications from Schwab
Institutional regarding new account and account transfer
status. (Only available to investment advisors).
• Customization: Customize your home page by selecting
what kind of information you want to view. Elect to
receive e-mail notification of relevant news available on
the Web site.
• Site demo: Take a tour of the Web site to learn more about
the key features.
• Balances: View intraday balances of your client’s accounts,
which reflect transactions, deposits and withdrawals that
occur during the day. Available account information
includes total account value, cash balance, and cash
available to withdraw.
• Positions: View intraday security holdings for your client’s
accounts that are valued based on delayed quotes. Account
information includes securities, market value and dividend
reinvestment options.
• Electronic Account Submission: Electronically submit
account holder information to Schwab Institutional and
receive a reserved account number immediately. (Only
available to investment advisors.)
• Web Forms: Improve the speed and accuracy of
completing forms by accessing the most current version of
frequently used forms online. Accelerate the completion
process by auto-populating* account holder information
from a desktop database.
• Upload Activity Log: Check the receipt of your
uploaded files.
SchwabLink User Manual
3.28
Chapter 3
S c h w a b I n s t i t u t i o n a l We b S i t e
• Web Trading: Place trades of individual securities via the
Internet. Access real-time quotes and online trade order
status.
• Mutual Funds: Search by fund family, name or symbol.
Create, view and print complete or customized lists of
funds. Access individual fund facts, performance data,
changes and updates.
• Individual Securities Research: Provides complimentary
research from leading providers including Argus, Credit Suisse,
Market Edge®, Morningstar®, Ned Davis Research, Inc.,
Thomson-Reuters, Standard & Poor’s, Stanford-Washington
Research Group and the Schwab Center for Financial Research.
* Some features are blocked for Third Party
Administrators.
Backup Network
In the event that you are unable to use the Internet to access
Schwab due to an outage or access problem with your Internet
service provider (ISP), an alternate backup network is available
through UUNET“, an MCI WorldCom Company. This backup
network service is completely separate from the Internet and will
enable you to have a reliable, non-Internet connection to Schwab
Institutional anytime. There is a nominal fee for the backup
network service. Additional information and instructions on
how to register are available in the Help section of the Schwab
Institutional Web site.
Real-time quotes may be subject to Internet traffic or other
delays
Note: These features provide an overview of the site as of
August 2001. We are committed to improving the site to
meet your business needs and encourage you to share your
feedback via the Suggestion Box on the Home page. Watch
for future announcements on the Web site as we introduce
new products and services.
SchwabLink User Manual
(1000-0821)
3.29
Chapter 4
Download Utility
OVERVIEW
The Download Utility function of the Schwab Institutional Web
site (www.schwabinstitutional.com) allows you to transfer files
containing price, balance, portfolio activity, and other data from
Schwab’s computers to your workstation or network server via the
Internet. This file transfer is called downloading. Files can be
downloaded to workstations at one location or multiple locations.
You can import files into spreadsheet software, portfolio management software, record-keeping software or custom applications.
You can also view them in SchwabLink® for Windows.
The Download Function
Using the Schwab Institutional Web site, you can download:
• All “new files,” which are defined as files that have
become available since your last file download. You can
download all new files in one operation.
use to perform automated reconciliation with your portfolio
management software.
The Download Utility allows you to indicate the folder location
your download files will reside on your computer’s hard drive
or network drive. After files have downloaded, the Download
Utility’s Processed File List window displays the list of files that
were downloaded. It also lists the directories to which they
were copied.
Note: The Download Utility module must be installed on each
workstation that you will use for downloading files from the
Schwab Institutional Web site. You must designate a separate
directory for each Master Account number that receives downloaded files. Existing SchwabLink for Windows users already
have separate directories for each Master Account. However, you
should verify the setup of these directories before installing the
Download Utility.
• Files for specific dates.
Launching Download Utility
• Files for one or more Master Accounts.
A successful installation of the software automatically will add
the Download Utility icon to the SchwabLink Launcher screen if
you accept the default checked box. Once installed, the Download
Utility launches when one or more files are downloaded from the
Schwab Institutional Web site.
• Files of a specific type.
While you are using the Web file download function, you can
also view:
• A list of new files not yet downloaded.
• A list of all new and previously downloaded files that are
still available for download.
To exit the application, click the X in the top right corner of the
application window or select Exit from the File menu. To launch
the application and manually execute the download:
• The download history for one or more specific groups
of files.
1.
Locate the SchwabLink icon on your desktop.
Double-click the icon to launch it.
2.
Select the Utilities tab.
You can set up your Web file download to run the SchwabLink
Build/Update process automatically, or you can run it manually
using existing SchwabLink for Windows procedures. This
process also creates the .RPS reconciliation file that you may
SchwabLink User Manual
3.
Click the Download Utility icon.
4.
From the File menu, select Download All New Files.
4.30
Chapter 4
Download Utility
DOWNLOADING ALL NEW FILES FROM
SCHWAB INSTITUTIONAL WEB SITE
THE
With the Download Utility you can download all your new
files with one operation. The Download All New Files feature
performs the following functions:
• Dials up your Internet service provider (ISP) to get on the
Internet, unless your ISP is America Online (AOL). AOL
users must connect to AOL prior to starting the download
process.
• Goes to the URL for the Schwab Institutional Web site
(www.schwabinstitutional.com).
• Logs into the Schwab Institutional Web site using your
user ID and password.
• Downloads all “new” files. New files are defined as files
that have become available since the last time the specified
user ID downloaded files.
Note: The next three sections, “Security,” “Configuration,” and
“Operations,” contain pre-requisite steps and other information
you need to know in order to set up the Download All Files
function effectively. Read these sections before proceeding to
“Download All New Files Setup and Procedure.”
• For investment advisors, call 1-800-647-LINK (5465) or
e-mail [email protected].
• For Third Party Administrators, call 1-800-231-2855
(Option 2) or e-mail [email protected].
Note: The Schwab Institutional Web site requires users to change
their password immediately after their first successful logon to
the site. If you are logging on to the Web site for the first time,
log on to www.schwabinstitutional.com manually using your
user ID and temporary password. You will be required to reset
your password before running the Download All New Files
function of the Download Utility.
Configuration
The Download All New Files feature of the Download Utility is
designed to support various ways to connect to the Web site,
including dial-up networking. Prior to your first download you
will need to setup Destination Directories. See “Maintaining File
Directories” on page 4.33.
Note: You must test your dial-up networking at least once
before using Download All New Files. Verify that you are able
to connect to your ISP.
Security
Operations
Set up a user ID and password to be used by the Download All
New Files function of the Download Utility. This user ID must be
set up with access to the Web file downloads function for some or
all Master Accounts as appropriate. Contact your Firm Security
Administrator to set up this user account. Or contact Technical
Client Services for assistance between 8:00 a.m. and 6:00 p.m.,
Eastern Time, Monday through Friday.
The Download All New Files function of the Download Utility
does not automatically log you off your ISP connection at the
end of the file download. In order to avoid unexpected charges,
you should verify whether your ISP automatically logs off
inactive sessions after a pre-specified number of minutes. This
functionality is especially important when you run the Download
All New Files function on an unattended basis using event
scheduling software.
SchwabLink User Manual
4.31
Chapter 4
Download Utility
Download All New Files Setup and Procedure
M o d i f y i n g t h e C o m p l e t i o n Ta s k
To set up and execute the Download All New Files function of
the Download Utility:
3.
Enter your user ID and password. (For security purposes, the
password that you enter is not displayed in clear text.)
The Download Utility allows you to execute one task automatically at the end of every download. This feature can be used to
automatically run the Build/Update process that is required to
update the SchwabLink for Windows Account Viewer and
generate the reconciliation (.RPS) file that is used by most
portfolio management applications. If you have SchwabLink for
Windows on the workstation where you installed the Download
Utility module, you were given the option to run the Build/Update
process automatically during the initial installation of the
Download Utility.
4.
Click OK to save your entry.
To enter, disable, or enable a completion task:
The user ID and password are stored in the Download
Utility. If you want to exit without entering a user ID or
changing your password, click Cancel.
1.
Start up the Download Utility module as described in
“Launching Download Utility.”
2.
From the View menu, select Completion task.
1.
Start up the Download Utility module as described earlier in
“Launching Download Utility” on page 4.30.
2.
From the Security menu, select User ID and Password.
A window is displayed in which you can enter your user ID
and password.
Note: If you log on to the Schwab Institutional Web site and
change your password—which you need to do the first time
you log on to the Web site—you will also need to change
your password in the Download Utility in order to use the
Download All New Files.
5.
The Completion Task window (Figure 4-1) is displayed,
showing details of the task that has been set up. If no tasks
are set up, the Completion Task window is empty.
From the File menu, select Download All New Files.
This action logs you into your ISP using dial-up networking;
logs into the Schwab Institutional Web site with the user ID
and password you specified in Step 3; and downloads all
your new files. This operation is the same as the one performed by the Download All New Files function of the
Schwab Institutional Web site browser application.
Note: If no new files are available when you select
Download All New Files function, a message is displayed
and no files are downloaded.
Figure 4-1 Completion Task window
SchwabLink User Manual
4.32
Chapter 4
3.
Download Utility
v. Select Task Enabled. A checked box indicates that
the task will run automatically after a download is
complete.
Do one of the following:
A. To enter a completion task:
i. Enter the Command Line execution string of the task
to be automatically executed when a file download
successfully completes. Use the folder icon to the right
of the Command Line box to find the executable that
you want to run. To run the SchwabLink for Windows
Build/Update process, access the following file:
vi. Click OK.
Note: This task will launch the Account Viewer to run
the Build/Update process and will automatically shut
down the Account Viewer after it completes.
B. To disable the completion task that has been set up:
C:\ Program Files\SchwabLink Desktop\Account
Viewer\acctvw32.exe
i. Select Task Enabled. An unchecked box indicates that
the task will not run automatically after a download.
ii. Enter the parameters for the task to be executed. To
run the SchwabLink for Windows Build/Update
process, enter:
ii. Click OK.
C. To enable the completion task that has been set up:
i. Select Task Enabled. A checked box indicates that
the task will run automatically after a download is
complete.
/U
iii. Enter the working directory for the task. The folder
icon to the right of the Working Directory box
allows you to browse to find the working directory
you want to use. In order to run the SchwabLink
for Windows Build/Update process, the working
directory should be set up as follows:
C:\Program Files\SchwabLink Desktop\Account
Viewer
iv. Enter the run style for this task by selecting one of the
following options on the drop-down list: Normal,
Maximized, or Minimized. In order to run the
SchwabLink for Windows Build/Update process, the
run style should be:
Normal
ii. Click OK.
M A I N TA I N I N G F I L E D I R E C T O R I E S
After the initial installation and setup of the Download Utility, you
can review or update the directories where files for a particular
Master Account are copied. If you set up a new Master Account
at Schwab Institutional, you must manually add the new Master
Account to the Download Utility Destination Map. To maintain
the file directories, do the following:
1.
Start up the Download Utility module as described earlier in
“Launching Download Utility.”
2.
From the View menu, select Destination Map.
The file directories that have been specified for each Master
Account are displayed (Figure 4-2). If no directories are set
up, the map is empty.
SchwabLink User Manual
4.33
Chapter 4
Download Utility
Figure 4-2 File Destination Map
3.
Do one of the following:
A. To add a new entry to the Destination Map:
i. Click the Add button. The Add Destination dialog
box is displayed (Figure 4-3).
Figure 4-3 Add Destination window
ii. Enter the new Master Account number. This should
be a numeric, eight-digit number with no punctuation.
For Broker/Dealer Master Accounts, there should be
one leading zero. For example: 08123456. For
Charles Schwab Trust Company Master Accounts
which are 3 digits, there should be at least 5 leading
zeroes. For example: 00000999.
iii. You may enter a description for the master account.
This field is optional.
SchwabLink User Manual
4.34
Chapter 4
Download Utility
iv. Select the drive using the drop-down box below the
Destination directory area. This drop-down box
displays the other drives that are accessible by your
workstation. Highlight and double-click on the
directory name to open it.
v. To create a new directory:
a) Double-click on the folder in which you want to create
the new directory, and click New Folder. The Create
New Folder window appears. The base folder that the
new directory is added to is displayed at the top.
Note: Directories MUST exist before they can be
assigned.
b) Enter the name of the new folder. Click OK to add
the folder, or click Cancel to exit the window
without adding the new folder.
c) Click OK to add the new destination directory to the
Download Utility Destination Map
Note: Master Accounts may not share a directory.
B. To change the Master Account number or Description for
an existing entry in the Destination Map:
i. Highlight the row to be changed and click the Edit
button. The Edit Destination dialog box (Figure 4-4) is
displayed. The Master Account number that is currently
set up for the selected entry is displayed at the top.
SchwabLink User Manual
Figure 4-4 Edit Destination window
ii. Enter the new Master Account number or
Description.
iii. Click OK to save the change.
C. To change the directory for an existing entry in the
Destination Map:
i. Highlight the row in the Destination Map to be
changed, and click the Edit button. The Edit
Destination window (Figure 4-4) is displayed. The
selected directory is highlighted in the Destination
area of the window.
4.35
Chapter 4
Download Utility
ii. Select the drive using the drop-down box below the
Destination directory area. This drop-down box
displays the other drives that are accessible by your
workstation. Highlight and double-click on the
directory name to open it.
3.
Do one of the following:
A. If you do not want to view the file list after every
download:
i. Select “Show this window after files are downloaded.”
An empty check box indicates that this window
will not be displayed automatically after every file
download.
iii. Click OK to save the change.
D. To delete an entry in the Destination Map:
ii. Click OK.
i. Highlight the row to be deleted.
ii. Click the Delete button.
B. To view the file list after every download:
iii. Click OK.
VIEWING THE AUDIT TRAIL
DOWNLOADED FILES
OF
i. Select “Show this window after files are downloaded.”
An X in the box indicates that the window will be
displayed automatically after every file download.
R E C E N T LY
The Download Utility automatically logs an audit trail of the most
recent download from the Schwab Institutional Web site. This log
can be displayed automatically after a successful download.
To review the files that were downloaded in your most recent
download:
1.
Start up the Download Utility module as described earlier in
“Launching Download Utility.”
2.
From the View menu, select Processed File List.
ii. Click OK.
4.
To change the number of days the log is retained, select
Options, from the View menu.
i. At the bottom of the Options Window enter the
number of days the log should be retained. The
default setting is one (1) day, which means the log
will be overwritten during the next day’s download
attempt.
The Most Recently Processed Files window is displayed. This
window shows information about the file(s) that were copied
to the workstation or network drive in the most recent download. The window shows the directory where the file was
copied along with the file name.
SchwabLink User Manual
4.36
Chapter 4
Download Utility
Download Utility Logs
Setting the Number of Download Attempts
Changing the number of days the Download Logs for the
Unattended PCRA Upload are retained.
1.
From the View menu, select Options.
2.
Enter the number of download attempts the Download
Utility should execute until a successful download is
completed.
1.
Select Options from the View menu.
2.
The Download Utility Log information will appear in the
lower portion of the dialog box.
3.
Enter the number of days to retain the log files.
Note: Zero (0) days means that the logs are only kept for the
current transmission and will be deleted the next time the
Download Utility is run. One (1) or more days means the
logs are kept for that number of days. So, if it’s set to 1 then
it will keep all of the current day’s logs. If 2, it will keep the
current day and the day before.
Note: The number of days are date based. If the field has the
amount set for 2 days and the utility hasn’t run for a week,
all the logs, except the current day’s, will be deleted because
the logs are more than two days old. One (1) day is the
default.
SchwabLink User Manual
(0901-03207)
Note: The default setting is (0) zero attempts. A retry count
= 0 means that the download will be attempted once, with
no retries.
3.
Click OK.
Downloading Historical Files
1.
From the File menu, select Download Files By Date.
2.
Use the arrows to change the date to the desired file date.
Note: Only one day’s worth of files can be downloaded at a
time. If additional files are needed the dates must be adjusted
accordingly and another download must be executed.
3.
Click OK to execute the download process.
4.37
Chapter 5
A c c o u n t Vi e w e r
OVERVIEW
A c c o u n t Vi e w e r Wi n d o w
Use the Account Viewer module to update the SchwabLink
Account database with the latest client, account, and securities
information. You can display or print the information in nine
different views and view information from different Master
Accounts at the same time, with no limit to the number of
viewers that can be open at once.
To open SchwabLink Account Viewer:
1.
2.
Select the Accounts tab from the SchwabLink Launcher
screen.
Click the Account Viewer icon.
The Account Viewer window (Figure 5-1) appears.
Note: In order for your data to show up in Account Viewer,
you must set up at least one Master Account. See Chapter 2,
“Getting Started.”
This chapter shows you how to:
• View, navigate, and print from nine viewers that
show client account, securities, transactions, and trade
confirmation information
• Use the Query command to search for, display, and work
with selected transactions and confirmations
• Purge transactions and confirmations automatically or
manually
• Run Build/Update to update the database manually
• Add transactions and confirmations manually
• Speed searches by setting up and editing your own customized values for account and security information
• Set other Account Viewer preferences
Note: Build/Update now simultaneously updates all Master
Accounts included in SchwabLink preferences. Alternatively, you
can run Build/Update for a selected Master Account.
SchwabLink User Manual
Figure 5-1 SchwabLink Account Viewer Window
To exit Account Viewer, select Exit from the File menu.
5.38
Chapter 5
A c c o u n t Vi e w e r
A c c o u n t Vi e w e r To o l b a r
The first nine buttons in the Account Viewer toolbar represent
the nine viewers (Figure 5-2). Click a viewer button to go to that
viewer. The button position varies according to window size. If
you cannot see all the buttons, you may need to increase the size
of the window.
Client Account Positions
A summary list of position information for each security
held in one client’s account. Includes cash and margin
account balances for each client account.
Security List
A summary list of all securities held in all client accounts
within one Master Account, with pricing information.
Composite Security
Positions
A detailed list of all security positions held by all client
accounts in one Master Account, grouped by security
type. Includes market value of each position.
Security Cross Reference
Lists of client accounts that hold a specific security.
Transactions List
Next-day access to a selected Master Account’s transactions, such as buys, sells, dividends, and cash transfers.
Deposit/Withdrawal
A summary of all cash deposit and withdrawal
transactions from the Transactions List.
Trade Confirmations List
A list of trade execution information for all trades you
placed through Schwab.
Trade Confirmation Detail
Detailed information on each trade listed in the Trade
Confirmations List.
Figure 5-2 Account Viewer Toolbar
Use the remaining buttons of the toolbar to:
• Link to the Status Reports module
• Enter an alphanumeric string to find a record
• Print from the active viewer
• Navigate between records in the active viewer
T h e N i n e Vi e w e r s
The following table summarizes the contents of each Account
Viewer screen, or viewer. Refer to the specific viewer section later
in this chapter for detailed information about fields and functions.
VIEWER NAME
DESCRIPTION
Client Information
A summary list of all client accounts related to a Master
Account number. Use this feature to review a list of
clients quickly. Includes address, biographical data,
and handling instructions for each client account.
SchwabLink User Manual
V I E W E R I N F O R M AT I O N S U M M A R Y
AND
LINKS
The following table summarizes viewer information. The “Links
With” column tells you which viewer you can access by doubleclicking on a record in the viewer named in the “Viewer” column.
Unless you hide the toolbar, all the viewer command buttons
remain visible, so that you can move immediately to another
viewer as required.
5.39
Chapter 5
A c c o u n t Vi e w e r
VIEWER
SECURITY
INFO
ACCOUNT
INFO
LINKS
WITH
Client
Information
N/A
All client accounts in the
selected Master Account,
with single account details
Client Account
Positions
Client Account
Positions
All securities
Single account
Security Cross
Reference
Security List
All securities
N/A
Composite
Security
Positions
Composite
Security Positions
All securities
N/A
Security Cross
Reference
Security Cross
Reference
Single security
Transactions List
All securities with
activity dating to
the period that you
specify (trades,
dividends, etc.)
Trade Confirmations All confirmed
List
security trades
All accounts linked to
the confirmed trade
Trade
Confirmation
Detail
Trade Confirmation
Detail
Single account
N/A
N AV I G AT I N G
Deposit/Withdrawal Cash only
All accounts holding
the security
Client Account
Positions
All accounts with
activity dating to the
period that you specify
N/A
Single security
IN
ACCOUNT VIEWER
As discussed in previous sections, you can go from one viewer to
another by clicking the appropriate toolbar button. Also, most
viewers are linked to another viewer, which you can access by
double-clicking a record.
In general you navigate among records in a viewer using the following methods. Refer to the individual viewer sections in this
chapter for additional information.
• Use the Find command to locate a specific record quickly.
(See “Using the Find Command” on page 5.81.)
• Use the record navigation buttons in the second row of the
toolbar:
Selects the first record in the list
Selects the previous record
All accounts with
activity dating to the
period that you specify
N/A
Selects the next record
Selects the last record in the list
• Use the scroll bars or page up and down functions.
• Use the record navigation functions in the Window menu
(identical to toolbar buttons).
In the Transactions List, Deposit/Withdrawal List, and Trade
Confirmations List viewers, you can also use the Query
command to go directly to specified individual and groups of
transactions and confirmations.
SchwabLink User Manual
5.40
Chapter 5
A c c o u n t Vi e w e r
S e l e c t i n g a n d Vi e w i n g M a s t e r A c c o u n t s
O p e n i n g a Vi e w e r
To select a Master Account:
To open a viewer in Account Viewer, do one of the following:
1.
2.
In the Master Accounts list in the SchwabLink Account
Viewer main window (Figure 5-1), highlight the Master
Account.
Open a viewer, and the information for that Master Account
is displayed.
To switch from one Master Account to another:
1.
Close all open viewers.
2.
In the Master Accounts list (Figure 5-1), highlight the
Master Account that you want to view.
3.
Open the viewers that you want to see for the selected
Master Account.
• Click the viewer button on the toolbar.
• From the View menu, select Open Viewer, and select the
viewer from the drop-down list.
C l o s i n g a Vi e w e r
To close a viewer:
1.
Make sure that the viewer is active.
2.
From the View menu, select Close.
The activated viewer will close.
C l o s i n g A l l Vi e w e r s
All viewers can be closed at once.
To view more than one Master Account at a time:
1.
Select a Master Account in the SchwabLink Account Viewer
window.
2.
Open the viewer you want to see for the Master Account.
3.
Select the next Master Account.
4.
Open the view without closing the previous viewer.
From the View menu, select Close All Viewers.
The new viewer opens and displays information for the new
Master Account. The original viewer remains open, displaying the original Master Account information.
Note: When you select a new Master Account number, the information in viewers that are already open still relates to the previous Master Account. Only the new viewers that you open will
show information for the newly selected Master Account.
SchwabLink User Manual
5.41
Chapter 5
A c c o u n t Vi e w e r
U S I N G B U I L D / U P D AT E
The Build/Update program builds files on your PC hard drive
that contain your most recent account data. These files update
the data that appears in your Account Viewer windows. Each
day after the daily download is completed, you need to run
Build/Update to make sure that the most current data is available
in Account Viewer.
Before you run Build/Update, you must set appropriate preferences. See “Specifying Preferences for Build/Update.” on page 5.89.
To run Build/Update manually, see “Running Build/Update” on
page 5.77. To run Build/Update automatically as part of your daily
downloads routine, see “Modifying the Completion Task” in
Chapter 4, “Download Utility.”
C L I E N T I N F O R M AT I O N V I E W E R
The Client Information viewer (Figure 5-3) is divided into two
sections. The lower half of the viewer displays a list of all client
accounts within the selected Master Account. To display information for a specific account, highlight (click on) the account in
the lower account grid. The upper section of the screen displays
information for that account.
In addition to clicking on the Client Info button in the toolbar,
you can display this viewer by clicking on a Master Account in
the Master Accounts list.
Figure 5-3 Client Information Viewer
To display the Client Account Positions window for an
individual account, double-click on a record line in the list.
The selected Master Account is shown in the title bar (Client
Information – 08000000).
SchwabLink User Manual
5.42
Chapter 5
A c c o u n t Vi e w e r
Fields and Columns in the Client
I n f o r m a t i o n Vi e w e r
*Account Name
Account name as registered with Schwab.
New Account
The letter Y indicates that the account was linked to
the Master Account within the last seven days.
Otherwise the field is blank.
Client name and address
Open Date
The date the account was opened at Schwab.
Social Security Number
Account Restriction
The account restriction code indicates a particular
restriction on the account.
An asterisk (*) indicates a field or column that can be customized.
FIELD/COLUMN
Opened
DESCRIPTION
Date the client account was opened.
Home and Business
Phone #, Branch ID
Cash Instructions
Margin Instructions
Fund Selection
Abandoned account
B
Blocked account due to Exception Registration
C
Cash and stock up front
D
Required documents or information missing
Cash account instructions for handling securities,
proceeds, and dividends.
L
Liquidations only
Margin account instructions for handling securities,
proceeds, and dividends.
P
No activity, pending receipt of documentation
S
Student – cash and stock up front
T
Outgoing transfer of account in progress
Indicates which Schwab money market fund the
account is set up for.
Option Approval Level
Indicates level of approved option trading for the
account.
Securities, Proceeds,
Dividends
Cash and margin instructions for securities
proceeds and dividends.
*Account Number
Eight-digit account number as registered with
Charles Schwab & Co., Inc.
SchwabLink User Manual
A
M Mail undeliverable
U
Unemployed – cash and stock up front
X
Closed per internal Schwab request
Z
Closed per customer request
5.43
Chapter 5
A c c o u n t Vi e w e r
A d j u s t i n g t h e C l i e n t I n f o r m a t i o n Vi e w e r D i s p l a y
P r i n t i n g f r o m t h e C l i e n t I n f o r m a t i o n Vi e w e r
You can change how information in the viewer is displayed. To
change the order and width of columns or to sort data in the
account list, see “Changing Column Order”, “Adjusting Column
Width” and “Sorting Data” on page 5.83.
You can print details from the grid in the lower half of the screen
and from the individual account information in the upper part of
the viewer.
You can also expand the account list display by adjusting the
proportions of the two parts of the Client Information viewer:
1.
Select an account in the grid in the lower portion of the
viewer.
1.
Move the mouse pointer between the account list grid and
the account information grid until the cursor changes to a
double arrow.
2.
Click the Print button on the toolbar or select Print from the
File menu.
2.
Hold down the mouse button and move the arrow cursor
up, until the account list grid covers the information in the
upper portion of the screen that you no longer need to view.
To redisplay the information, drag the arrow down.
To print from the Client Information viewer:
The Client Information Print Selection dialog box (Figure 5-4)
appears. You can select from one or both portions of the dialog
box. If you select from both, you will receive two separate
printouts.
N a v i g a t i n g i n t h e C l i e n t I n f o r m a t i o n Vi e w e r
Display a client account by selecting it from the lower half of the
viewer. To find a record in the viewer, do one of the following:
• Use the record navigation keys and the record navigation
functions in the Window menu to move through the client
accounts in the list.
• Scroll or page through the list until you locate the record
you want.
• Use the Find command to locate the record. (See “Using
the Find Command” on page 5.81.)
Double-click on any record in the account list to display the
details for that account in the Client Account Positions viewer.
SchwabLink User Manual
Figure 5-4 Client Information Print Selection Dialog Box
5.44
Chapter 5
A c c o u n t Vi e w e r
CLIENT ACCOUNT POSITIONS VIEWER
The Client Account Positions viewer (Figure 5-5) displays a complete list of security positions held by the client account displayed
in the Account Number and Account Name fields.
Fields and Columns in the Client Account
P o s i t i o n s Vi e w e r
An asterisk (*) indicates fields or columns that can be customized.
Summary securities and cash values are displayed in the upper
part of the viewer for the account.
FIELD/COLUMN
DESCRIPTION
The grid in the lower part of the viewer lists the name of and
information about each security held in the account.
*Account Number
Eight-digit client account number as registered with
Charles Schwab & Co., Inc.
The selected Master Account is shown in the title bar (Client
Account Positions – 08000000).
*Account Name
Account name as registered with Schwab.
TOTAL ACCOUNT BALANCES
Figure 5-5 Client Account Positions Viewer
Net Market Value
The total market value of all long positions in the account.
Portfolio Value
The total market value of all short positions, long positions,
and cash positions in the account.
Market Value Short
The total market value of all short positions in the account.
Invested Cash
Any cash invested in a money market fund.
Idle Cash
Uninvested cash plus balances in the FDIC insured Bank Deposit feature.
Total Cash
The total market value of all invested cash and idle cash.
To display the Security Cross Reference viewer for an individual
security, double-click on a record line in the list.
SchwabLink User Manual
5.45
Chapter 5
A c c o u n t Vi e w e r
CASH ACCOUNT BALANCES
Net Credit or Debit
Amount of money on deposit in the cash account. If the
figure is negative, the client owes Schwab this amount.
Net Market Value
Market value of security positions held long in the cash
account
Money Market Funds
Amount currently invested in Schwab money market funds.
ACCOUNT STATISTICS
Equity Percentage
Option Requirements
Equity in a margin account divided by the market value of the
positions held. The balance reflects the percentage of the
current margin account value that the client would receive if
positions were liquidated and any margin debt paid off.
Market Value Short
Total market value of all short positions in the margin
account.
Equity Including Options
Total equity and value of any option positions in the margin
account. This is the liquidation value of the margin account
if it has option positions.
Margin Cash Available
Amount of money that can be withdrawn from the margin
account. Includes credit balance in margin account plus
maximum amount that can be borrowed against marginable
securities.
Equity Excluding Options Dollar value of securities in the margin account less any
amount owed to Schwab, plus any cash in margin account.
This is the liquidation value of the margin account if it does
not have any options.
Margin Buying Power
Maximum value of additional marginable securities in
which the client can invest without depositing equity in the
margin account.
MTD (month to date)
Margin Interest
Amount of interest that has accrued on the margin debit
from the beginning of the interest period.
Total equity required to maintain current option positions.
MARGIN ACCOUNT BALANCES
Credit or Debit
Balance of the margin account reflecting settled and
unsettled transactions. Can be debit or credit.
Market Value Long
Total market value of all long positions in the margin
account.
SchwabLink User Manual
5.46
Chapter 5
A c c o u n t Vi e w e r
Security Type
Abbreviation for the type of security. To view a
list of the security types used in Account
Viewer, select Security Type Descriptions from
the View menu. This list is shown below.
ca
Cash Equivalent
mb
Municipal Bond
cb
Corporate Bond
mf
Mutual Funds (Taxable)
cd
Certificate of Deposit
mn
Mutual Funds (Non-taxable)
cl
Call Option
oa
Other Assets
cp
Convertible Preferred
ps
Preferred Stock
CUSIP number.
cs
Common Stock
pt
Put Option
A CUSIP number contains nine characters,
but some portfolio management programs
use only eight. The ninth character is reserved
for use as a check character. Most bond
transactions are downloaded with a CUSIP
number.
dl
Reorganization
tb
Treasury Bill
ep
Expense Account
tn
Treasury Note
ex
Expense Account
un
UIT (Non-taxable)
gb
Government Bond
ut
UIT (Taxable)
gm
GNMA
wt
Warrants
ip
Index Participation Contracts
zt
Zero Coupon Bond (Taxable)
SECURITIES INFORMATION
*Symbol
Symbol or CUSIP number for identifying and pricing the
security.
Schwab downloads security symbols from the following
sources and in the following formats:
Primary
Secondary
Tertiary
NYSE, AMEX, NASD ticker symbols. Schwab
uses the standard, industry-accepted ticker
symbols frequently used by quotation services
such as Quotron or ADP.
Schwab security number.
Transmitted by SchwabLink if no ticker symbol
or CUSIP number is available. The security
symbol contains seven numbers. For example,
1234567. This security number is internal to
Schwab and serves no other use. Contact the
Schwab trading desk for the security description that matches the number. Schwab
security numbers are currently assigned to
Certificate of Deposit transactions.
SchwabLink User Manual
*Security Description
The name of the security.
Cash/Margin
The account from which payment for the security was
drawn.
Number of Shares
Number of shares in the selected security that the
client holds.
Long/Short
Indicates whether the position is long or short.
5.47
Chapter 5
Price
A c c o u n t Vi e w e r
Market price per unit of the security as of the date in the
Date of Price field in the Security List viewer. Schwab
transfers these prices and dates to you as part of your daily
download.
Market Value
The number of shares multiplied by the current price per
unit in the Price field.
Percentage
Percentage of the account portfolio each security listed
represents.
Navigating in the Client Account
P o s i t i o n s Vi e w e r
To switch the viewer display between accounts, use the navigation buttons on the toolbar or the record navigation functions on
the Window menu.
To find a record in the viewer, select the appropriate account
and do one of the following:
• Scroll or page through the list until you located the record
you want.
• Use the Find command to locate the record. (See “Using
the Find Command in the Positions and Security Cross
Reference Viewers” on page 5.82)
Note: Price and Market Value fields may be gray to identify any securities with
stale prices.
Adjusting the Client Account Positions
Vi e w e r D i s p l a y
Double-click on any record in the positions table to display the
Security Cross Reference view for that security.
You can change how viewer information is displayed. To change
the order and width of columns or to sort data, see “Changing
Column Order”, “Adjusting Column Width”, and “Sorting
Data” on page 5.83.
Printing from the Client Account
P o s i t i o n s Vi e w e r
You can also expand your view of the client security list by
expanding that portion of the screen. To adjust the proportions
of the two parts of the viewer:
To print from the Client Account Positions viewer:
1.
Move the mouse pointer between the security list grid and
the summary grid until the cursor changes to a double
arrow.
2.
Hold down the mouse button, and move the arrow cursor
upwards until the security list grid covers the information in
the upper portion of the screen that you no longer want to
view. To redisplay the information, move the arrow cursor
down.
SchwabLink User Manual
You can print statements, balances, and positions for all accounts
or for a selected account.
1.
If you will be printing information from one account, select
the account.
2.
Click the Print button on the toolbar, or select Print from the
File menu.
The Positions Print Selection dialog box (Figure 5-6) appears.
5.48
Chapter 5
A c c o u n t Vi e w e r
SECURITY LIST VIEWER
The Security List viewer (Figure 5-7) shows a list of all securities
held in all client accounts within the selected Master Account.
For each security in the selected Master Account, the Security
List viewer shows the symbol, type, security description, price,
and date of price.
Figure 5-6 Positions Print Selection Dialog Box
3.
Specify whether to print statements, balances, and/or
positions by selecting the appropriate check box.
4.
Select whether you want each option to print for a selected
account or for all accounts.
5.
Click OK.
The print dialog box appears.
6.
Select appropriate parameters and click OK.
Figure 5-7 Security List Viewer
To display the Composite Security Positions window, doubleclick on a record in the list.
SchwabLink User Manual
5.49
Chapter 5
A c c o u n t Vi e w e r
F i e l d s a n d C o l u m n s i n t h e S e c u r i t y L i s t Vi e w e r
A d j u s t i n g t h e S e c u r i t y L i s t Vi e w e r D i s p l a y
An asterisk(*) indicates a field or column that can be customized.
You can change how information in the viewer is displayed. To
change column order and width or to sort data, see “Changing
Column Order”, “Adjusting Column Width”, and “Sorting
Data” on page 5.83.
FIELD/COLUMN
DESCRIPTION
*Symbol
Symbol or CUSIP number used to identify and price the
security. For details, see the Symbol field description on
page 5.45 of the “Fields and Columns in the Client Account
Positions Viewer” section.
Type
N a v i g a t i n g i n t h e S e c u r i t y L i s t Vi e w e r
To find a record in the viewer, do one of the following:
• Use the record navigation keys and the record navigation
functions in the Window menu to move through the
securities in the list.
Abbreviation for the type of security. To view a list of the
security types used in Account Viewer, select Security Type
Descriptions from the View menu. Or see the Security Type
field description on page 5.45 of the “Fields and Columns in
the Client Account Positions Viewer” section.
*Security Description
The name of the security.
Price
Market price per unit of the security as of the date in the
Date of Price field.
Date of Price
The date on which Schwab recorded the current price per
unit that appears in the Price field.
Note: Schwab transfers these prices and dates as part of
the daily download.
Note: Price and Date of Price fields may be gray to identify stale prices.
• Scroll or page through the list until you locate the record
you want.
• Use the Find command to locate the record. (See “Using
the Find Command” on page 5.81.)
Double-click on any record in the security list to display the
Composite view for that security in the Composite Security
Positions viewer.
P r i n t i n g f r o m t h e S e c u r i t y L i s t Vi e w e r
You can print a list of all securities in a selected Master Account
or only those securities that have a stale price. Stale prices refer to
security prices with price dates prior to the last Build/Update date.
To print a securities list from the active Security List viewer:
1.
Click the print button on the toolbar or select Print from the
File menu.
The Security List Print Selection dialog box (Figure 5-8)
appears.
SchwabLink User Manual
5.50
Chapter 5
A c c o u n t Vi e w e r
Figure 5-8 Security List Print Selection Dialog Box
2.
Select the “Print a security list” check box, and select the
entire security list or only securities with stale prices.
3.
Click OK.
4.
In the print dialog box, set appropriate print parameters and
click OK.
Figure 5-9 Composite Security Positions Viewer
To display the Security Cross Reference viewer, double-click on a
record line in the list.
COMPOSITE SECURITY POSITIONS VIEWER
Use the Composite Security Positions viewer (Figure 5-9) to view
cumulative positions for individual securities across all managed
client accounts. Select a security type from the drop-down list to
display cumulative positions for all securities of that type.
Securities are displayed alphabetically by symbol.
The selected Master Account is shown in the title bar (Composite
Security Positions – 08000000).
SchwabLink User Manual
5.51
Chapter 5
A c c o u n t Vi e w e r
Fields and Columns in the Composite Security
P o s i t i o n s Vi e w e r
Fields and columns that you can customize are marked with an
asterisk (*).
FIELD/COLUMN
DESCRIPTION
Security type
drop-down list
Shows a list of security classifications, such as cs-Common
Stock. The default is all – All Security Types. (Security types
are listed under the Security Type field description on page
5.45 of the “Fields and Columns in the Client Account
Positions Viewer” section.)
*Symbol
Symbol or CUSIP number used in identifying and pricing the
security. For details, see the Symbol field description on
page 5.45 of the “Fields and Columns in the Client Account
Positions Viewer” section.
Market Value
Market value of the security held by all clients in the
Selected Master Account.
% of Type
Shows the percentage of each security as a proportion of the
type selected in the drop-down list at the top of the screen.
% of All Types
Shows the percentage of each security as a proportion of all
the securities in the Master Account.
Market Value Long
The total market value of the all long positions for all
accounts.
Market Value Short
The total market value of all short positions for all accounts.
Note: Latest Price and Market Value fields may be gray to identify any securities with
stale prices.
*Security Description
The name of the security.
Cash/Margin
The account from which payment for the security was
drawn.
Number of Shares
The number of units of the security held by all clients in
the selected Master Account.
Long/Short
Indicates whether the position is long or short.
Navigating in the Composite Security
P o s i t i o n s Vi e w e r
Latest Price
Market price per unit of the security as of the date in the
Date of Price field in the Security List viewer.
Display a security type by selecting it from the drop-down list at
the top of the viewer. To find a record in the viewer, do one of
the following:
SchwabLink User Manual
Adjusting the Composite Security Positions
Vi e w e r D i s p l a y
You can change how information in the viewer is displayed. To
change column order and width or to sort data, see “Changing
Column Order”, “Adjusting Column Width”, and “Sorting
Data” on page 5.83.
5.52
Chapter 5
A c c o u n t Vi e w e r
• Use the record navigation keys and the record navigation
functions in the Window menu to move through the security types, not the securities listed in the grid.
see total quantities (long and short) for that security across all
client accounts and total market value (long and short) across all
client accounts.
• Scroll or page through the security types list until you
locate the record you want.
The selected Master Account is shown in the title bar (Security
Cross Reference – 08000000).
• Use the Find command to locate the record. (See “Using
the Find Command” on page 5.81)
Use the Find function to find records in the list of securities for
the security types you currently have listed. Find will not search
the full list unless you select all – All Security Types. You can
also use the scrollbar and the keyboard up and down keys.
Printing from the Composite Security
P o s i t i o n s Vi e w e r
To print from the Composite Security Positions viewer:
1.
Using the drop-down list box at the top left of the screen,
select the security types for which you want to print information (for example, ca – Cash and Equivalents).
2.
Click the Print button on the toolbar or select Print from the
File menu.
3.
Set print parameters and click OK.
SECURITY CROSS REFERENCE VIEWER
Use the Security Cross Reference viewer (Figure 5-10) to see
which client accounts hold a position in a specific security, bond,
fund, or money market instrument. Records in the viewer appear
by account number in ascending order, according to the particular
security selected from the list at the top of the screen. In addition
to client account number and name, you see the quantity held
and the current market value. At the bottom of the viewer, you
SchwabLink User Manual
Figure 5-10 Security Cross Reference Viewer
To display the Client Account Positions viewer, double-click on a
record line in the list.
5.53
Chapter 5
A c c o u n t Vi e w e r
Fields and Columns in the Security Cross
R e f e r e n c e Vi e w e r
Fields and columns that can be customized are marked with an
asterisk (*).
FIELD/COLUMN
DESCRIPTION
*Symbol
Symbol or CUSIP number of the security for which client
details are being displayed. Used to identify and price the
security. For details, see the Symbol field description on
page 5.45 of the “Fields and Columns in the Client Account
Positions Viewer” section.
Quantity Long and
Quantity Short
Total number of long positions and total number of short
positions for the selected security type across all accounts.
Market Value Long and
Market Value Short
Total market value of long positions and total market value
of short positions for the selected security type held across
all accounts.
Note: The Market Value field may be gray to identify any securities with stale prices.
Adjusting the Security Cross Reference
Vi e w e r D i s p l a y
You can change how information in the viewer is displayed. To
change column order and width or to sort data, see “Changing
Column Order”, “Adjusting Column Width”, and “Sorting
Data” on page 5.83.
*Security description
The name of the security for which information is displayed.
*Account Number
The client account number assigned by
Charles Schwab & Co., Inc.
*Account Name
Account name as registered with Charles Schwab & Co., Inc.
Navigating in the Security Cross
R e f e r e n c e Vi e w e r
Cash/Margin
The account from which payment for the security was
drawn.
Number of Shares
Number of shares of the selected security type held
by a client.
To navigate through the lists of securities place the cursor in the
Symbol or Security Description field at the top of the viewer, and
use the navigation buttons on the toolbar or the record
navigation functions on the Window menu.
Short/Long
Market Value
Indicates long or short position of the security type held
by a client.
Market value of the security held by a client.
SchwabLink User Manual
To find a record in the viewer, select the appropriate security and
do one of the following:
• Scroll or page through the list until you locate the record
you want.
• Use the Find command to locate the record. (See “Using
the Find Command in the Positions and Security Cross
Reference Viewers” on page 5.82.)
5.54
Chapter 5
A c c o u n t Vi e w e r
Double-click on any record in the account table to display the
details for that account in the Client Account Positions viewer.
Printing from the Security Cross Reference
Vi e w e r
To print from the Security Cross Reference viewer:
1.
Make sure that the data you want to print appears in the
active viewer.
2.
Click the Print button on the toolbar or select Print from the
File menu.
To open the Transactions List viewer, make sure the correct
Master Account is selected in the SchwabLink Account Viewer
window, and click the Transactions button. The Transactions List
viewer (Figure 5-11) appears.
The selected Master Account is shown in the title bar
(Transactions List – 08000000).
The Print dialog box appears.
3.
Set print parameters as appropriate and click OK.
TRANSACTIONS LIST VIEWER
The Transactions List viewer provides next-day access to all
transactions in the selected Master Account. Transactions can be
reviewed, sorted, and queried, and dollar totals can be tracked.
Note: The viewer retains transaction records for transactions that
take place within the time period you specify in the “Transaction
records retention period (days)” field of the Account Viewer
Preferences dialog box. (See “Specifying the Transaction and
Confirmation Record Retention Period” on page 5.90.)
Figure 5-11 Transactions List Viewer
To designate an automatic update of the Transactions List
viewer during the Build/Update process, see “Include Positions,
Balances, Transactions, and Confirmations” on page 5.90.
If you have not set preferences to update this viewer as part of
Build/Update, you can still view and add transactions by using
the add feature described in “Adding the Previous Day’s
Transactions,” on page 5.59.
SchwabLink User Manual
5.55
Chapter 5
A c c o u n t Vi e w e r
F i e l d s a n d C o l u m n s i n t h e Tr a n s a c t i o n s
L i s t Vi e w e r
days may occur before a transaction appears in the client
account. If you run a performance report the day after month
end, the numbers may not match the Schwab monthly statement if the trailing transactions have yet to be posted. It is
Schwab policy to pay all distributions within a five-day window
of the actual payable date. SchwabLink’s use of the actual pay
date is consistent with accrual accounting procedures.
An asterisk (*) indicates total amounts that will change when
files are added to or removed from the viewer list.
Note: Although you can customize certain fields and columns—
such as Account Number—in other viewers, the customized values
for those same fields and columns do not show up in the Transactions List, Deposit/Withdrawal List, Trade Confirmations List,
or Trade Confirmation Detail viewers. The fields in these viewers
revert to Schwab-assigned values.
FIELD/COLUMN
Account Number
Transaction Code
A code representing the type of transaction, such as sl (Advent
code) or sel (generic code) for Sell. To see a list of Advent and
generic transaction codes, select Transaction Code Descriptions
from the View menu.
Occasionally, the Transaction Code field is blank (generic file
format) or is populated with an xx code (Advent file format).
Schwab transmits a blank or the xx code to indicate the transaction is uncoded or is an adjustment to the account. The blank
field or xx code requires you to edit the transaction before
posting it to your portfolio accounting system. If you are using
portfolio management software, see the editing and posting
sections of your user manual.
DESCRIPTION
Your client’s 8-digit Schwab account number.
If you are using portfolio management software, you can
translate these Schwab account numbers to your designated
account codes. Refer to the translation program section of the
manual for your portfolio management or operations software.
Sub Account Name
Account name as registered with Schwab.
Transaction Date
The actual activity date on which the transaction occurred
(transaction date or ex-dividend date), not the date that the
transaction was posted in the client's Schwab account.
The type of security involved in the transaction. To view a list of
security types, select Security Type Descriptions from the View
menu. Or see the Security Type field description on page 5.10 of
the “Fields and Columns in the Client Account Positions Viewer”
section.
For example, if a dividend was paid by a mutual fund company
on February 27, 2000, but was not posted to the client's Schwab
account until March 5, then the transaction date displayed is
02/27/00. However, note that this transaction will be downloaded as part of the March 5 transaction file.
If you are using portfolio management software, you can set up
or access a translation program to translate an existing security
type code to another security type code. Refer to the translation
program section of the manual for your portfolio management
or operations software.
Security Type
Note: Because Schwab does not credit client accounts until we
receive payment from the appropriate source, a delay of several
SchwabLink User Manual
5.56
Chapter 5
Security Symbol
A c c o u n t Vi e w e r
short
Records all short-term capital gain investments.
long
Records all long-term capital gain investments.
NYSE, AMEX, NASD ticker symbols.
dvwash
Schwab uses the standard, industry-accepted
ticker symbols frequently used by quotation
services such as Quotron or ADP.
Provides wash treatment. Records all mutual fund
dividend investments.
dvshort
For short-term dividends.
dvlong
Records all mutual fund long-term capital gain
reinvestments. Same treatment as dvwash.
calong
Records all mutual fund long-term capital gain
distributions paid in cash.
cashort
Records all mutual fund short-term capital gain
distributions paid in cash.
xxlong
Records all non-reinvested long-term capital gain
dividends to an account such as client. Note that if
your portfolio management or operations software
offers this account type, you can substitute any
two characters for xx.
xxshort
Records all non-reinvested short-term capital gain
dividends to an account such as client. Note that if
your portfolio management software offers this
account type, you can substitute any two characters for xx.
Schwab downloads security symbols from the following sources
and in the following formats:
Primary
Secondary
CUSIP number.
A CUSIP number contains nine characters, but
some portfolio management programs use only
eight. The ninth character is reserved for use as
a check character. Most bond transactions are
downloaded with a CUSIP number.
Tertiary
Schwab security number.
Transmitted by SchwabLink if no ticker symbol or
CUSIP number is available. The security symbol
contains seven numbers. For example, 1234567.
This security number is internal to Schwab and
serves no other use. Contact the Schwab trading
desk for the security description that matches the
number. Schwab security numbers are currently
assigned to Certificate of Deposit transactions.
Dollar Amount
The net dollar amount of the transaction. This amount is the net
cost or net proceeds as displayed on an individual confirmation
slip, or on your electronic confirmation.
Quantity
The number of shares or the face value of an asset, such as a
corporate bond, denominated in dollars. All downloaded transactions, where applicable, are carried out to four decimal places.
Account Type
The account from or to which funds are being transferred. This
field can contain any of the following types:
Commission
Amount
The dollar amount of the commission charge as displayed on an
individual confirmation. When you complete a transaction on a
principal basis, no commission amount appears.
Unit Cost
The dollar amount of the cost of one unit of the security.
cash
Cash account.
margin
Margin account.
client
Client fees and charges.
SchwabLink User Manual
5.57
Chapter 5
Accrued Interest
A c c o u n t Vi e w e r
The dollar amount of accrued interest paid. Most often used in
determining the cost basis of a bond. When you purchase a new
bond, the accrued interest shows as 0.00. When you purchase a
non-interest-bearing security, this field is blank.
Broker Code
When applicable, the broker code is transmitted as schwab. If the
trade was executed with another broker (Prime Broker trade), that
broker’s code will be shown.
Original File/
Record #
(This column is at the far right of the viewer screen.) The downloaded file name in the format CSMMDDYY.TRN and the allocated
record number. Record numbers are allocated in the order in which
the transaction is received that day.
This aggregate data can provide fast reporting on your Schwab
activity. For example, if you complete a query to display only the
previous day’s transactions, the aggregate summary data amounts
to a report of your Schwab transactions for that day. When you
complete a query to display the transactions for one client
account for a specific period of time, the aggregate data shows
Schwab activity totals for that account for that period.
A d j u s t i n g t h e Tr a n s a c t i o n s L i s t Vi e w e r D i s p l a y
You can change how information in the viewer is displayed. To
change column order and width or to sort data, see “Changing
Column Order”, “Adjusting Column Width”, and “Sorting Data”
on page 5.83.
For example, CS011200.trn 1 refers to a record that was the
first in a list of transactions for January 12, 2000.
N a v i g a t i n g i n t h e Tr a n s a c t i o n s L i s t Vi e w e r
Comments
One line of explanatory notes about the transaction. This field
may be empty. Comments are formatted so that they will post to
individual portfolios with their transactions.
Use any of the following methods to find records in the
Transactions List viewer:
• Record navigation buttons
*Total Dollar Amount Cash total of all transactions listed in the viewer.
• Record navigation functions in the Window menu
*Total Commissions Total of all amounts listed in the Commission column of the list.
• Find function (see “Using the Find Command” on
page 5.81)
• Scroll bars
Summary totals change to reflect query results as well as additions or deletions to the viewer list. Using the Query command,
you can display summary totals for a client or group of accounts
for a specific period of time, or for one or more securities.
SchwabLink User Manual
• Query function to find groups of records with common
criteria (see “Using the Query Command for
Transactions” on page 5.60)
5.58
Chapter 5
A c c o u n t Vi e w e r
A d d i n g t h e P r e v i o u s D a y ’s Tr a n s a c t i o n s
2.
If you do not specify transactions as part of the Build/Update
process, you can add the previous day’s transactions from the
Add Transaction Files dialog box.
To add the previous day’s transactions:
1.
Select the file name of the transaction file you want to add.
The file name appears in the “File name” field.
You can select more than one file using standard Windows
Ctrl and Shift click functionality.
3.
From the File menu, select Transaction File, then select Add.
Click Open.
SchwabLink checks the records in the file(s) you selected
against the records already in the list. Duplicates will not be
added to the list.
The Add Transaction File(s) dialog box (Figure 5-12)
appears.
You return to the Transactions List viewer, and the new transaction file records are added to the grid. For each record the
Original File/Record# column will list the file from which each
transaction was added, plus the transaction number within that
file. For example, CS011200.trn 1 indicates that the record was
the first in a list of transactions for January 12, 2000.
O p e n i n g a n I n d i v i d u a l Tr a n s a c t i o n s F i l e
A transactions file consists of one day’s transactions for one
Master Account.
In addition to listing all transactions over a certain period of
time, you can open a file that contains one day’s transactions.
Those transactions will be listed in a new Transactions List
viewer when you open the file.
Figure 5-12 Add Transaction File(s) Dialog Box
To open a transactions file:
1.
The file names appear in CSMMDDYY.trn format. For
example, if the previous day’s date is March 9, 2000, the
transaction file name is CS030900.trn.
From the File menu, select Transaction File, then
select Open.
The Open Transaction File dialog box (Figure 5-13) appears.
To locate a transaction file in another directory, select the
drive and directory from the “Look in” field. All transaction
files for the directory you select appear in the window.
SchwabLink User Manual
5.59
Chapter 5
A c c o u n t Vi e w e r
Making an Initial Query
Follow the steps in this procedure to set search parameters, then
search the transactions list.
1.
Make sure that the transactions list that you want to query
is open.
2.
From the View menu, select Query.
The Query Builder window opens (Figure 5-14).
Figure 5-13 Open Transaction File Dialog Box
2.
Select the file that you want to open and click Open.
A new Transactions List viewer opens, containing only the
transactions for the file you have opened.
U s i n g t h e Q u e r y C o m m a n d f o r Tr a n s a c t i o n s
Use the Query command to search for, display, and work with
selected transactions on your list. If you receive large numbers of
transactions each day, the Query command can greatly simplify
your work by taking you directly to the subset of transactions
you want to work with. After selecting the Query command,
you specify the transaction list field(s) you want to search and
the value for each field. You can search for any field in the
transactions list.
In addition to specifying values, you can select search parameters
such as “less than” and “greater than” and sort the columns in
your query results to focus, speed, and refine your search.
SchwabLink displays the results of your query in a Transactions
Query Results List viewer, which you can sort and print.
SchwabLink User Manual
Figure 5-14 Transactions Query Dialog Box
3.
Select the field or column you want to search.
5.60
Chapter 5
4.
5.
A c c o u n t Vi e w e r
Select one of the Operator options:
Specifying Additional Search Criteria
=
SchwabLink finds records with a value equal
to the one entered in the Value field (in the
field that you selected to search).
≤
Select to find values less than the one you
entered.
You can refine your search by completing additional sets of
search criteria. For example, in addition to specifying transactions greater than $100 in the first set of fields, you can specify
that they have a value of less than $200.
≤=
Select to find values less than or equal to the
one you entered.
≥
Select to find values greater than the one you
entered.
≥=
Select to find values greater than or equal to
the one you entered.
IN
Select to find records matching any of the
values entered.
LIKE
Select to find records that begin with the
value entered.
In the Value field, select or type the value you want to
locate.
For example, to locate transactions over $100.00, you select
Dollar Amount as the Field, ≥ as the Operator, and $100.00
as the Value.
9.
Select the And radio button in the New Atom section to find
records that contain both values you specify. Select the Or
radio button to find records that contain either set of
values you specify.
10. Repeat steps 3 through 6 as appropriate to complete the
additional search criteria.
11. Click Add.
You can repeat these steps as many times as necessary to
refine your search.
12. When finished, you can save your set of selection criteria for
future use. Click Save Query and enter a file name. Click
Save to return to the Query Builder screen.
13. Click Run Query to begin the search.
Loading a Previously Saved Query
You can load previously saved queries in order to save time when
running similar reports on a regular basis.
6.
Click Add.
7.
If you would like to save your Query now for future use,
click Save Query and enter a file name. Click Save to return
to the Query Builder screen. You may save your query at any
stage during the query building.
1.
Make sure that the transactions list that you want to query
is open.
2.
From the View menu, select Query.
If you are finished entering search parameters, click Run
Query to begin the search. To refine your search further, go
to step 9 in the next section.
3.
8.
SchwabLink User Manual
The Query Builder window opens (Figure 5-14).
Click Load Query.
Select a saved query and click Open. The previously defined
search criteria appear in the Query screen. To further refine
the search, see the section “Specifying Additional Search
Criteria” on this page.
5.61
Chapter 5
4.
A c c o u n t Vi e w e r
Click Run Query to begin the search.
To print a Transactions List or Transactions Query Results List:
1.
Make sure the list you want to print is active.
Completing the Query
To print the entire list, go to step 3.
SchwabLink conducts the query and displays the results in the
Account Viewer window as a new Transactions Query Results
List viewer (Figure 5-15). The basis of the query is displayed
beneath the title bar.
To print selected records, go to step 2.
2.
Select records to print using one of the following procedures:
• To select contiguous records, use the up or down curser
keys on the keyboard while holding down the Shift key.
• To select non-contiguous records, click on individual lines
while holding down the Ctrl key.
3.
Click the Print button on the toolbar or select Print from the
File menu.
The Print Records dialog box (Figure 5-16) appears.
Figure 5-15 Transactions Query Results List Viewer
P r i n t i n g t h e Tr a n s a c t i o n s o r Q u e r y R e s u l t s L i s t
You can print the Transactions List or a Transaction Query
Results List. The lists print continuously, on multiple pages if
necessary.
SchwabLink User Manual
Figure 5-16 Print Records Dialog Box
4.
Select whether you want to print selected record(s) or all
records.
5.
Click Print. The Print dialog box appears.
5.62
Chapter 5
6.
A c c o u n t Vi e w e r
Set appropriate print parameters and click OK.
SchwabLink prints the appropriate records from the active
Transactions List or Transactions Query Results List.
Using the Purge Function
When you add a file of transactions to the Transactions List,
SchwabLink combines the new transactions with those already
added. Over time, your summary list may become too large or
contain information you no longer need. Use the SchwabLink
purge function to delete transactions from the display in your
summary list automatically, after a number of days that you
specify or upon demand.
Remember that you are not deleting the original transactions
from the files sent by SchwabLink. The transactions on the
Transactions List are copies SchwabLink made when you added
the new transaction file to the list. If you need to view a transaction record you have purged, you can go back to the original
files on your hard drive (or on a backup diskette) and add them
to your Transactions List again.
Setting Up the Automatic Purge Function
Figure 5-17 Transaction Purge Dialog Box
To purge the records, click Yes. The dialog box closes and the
Transactions List appears. The transactions you were prompted
to purge are no longer on the list.
If you do not open the Transactions List Viewer on the day of
the scheduled purge, the purge does not take place. You will
receive the Transaction Purge message the next time you open
the Transactions List Viewer.
P u r g i n g Tr a n s a c t i o n s B e f o r e t h e S c h e d u l e d P u r g e D a y
To purge transactions manually prior to the scheduled purge date:
1.
Decrease the number of days set in the Account Viewer
Preferences dialog box to a number low enough to include
the transactions you want to remove. (Refer to “Specifying
the Transaction and Confirmation Record Retention Period”
on page 5.90.)
2.
From the File menu, select Purge.
You set up the automatic purge function in the Account Viewer
Preferences dialog box. Refer to “Specifying the Transaction and
Confirmation Record Retention Period” on page 5.90.
P u r g i n g Tr a n s a c t i o n s o n t h e S c h e d u l e d D a y
The Purge Records dialog box (Figure 5-18) appears.
When you open Account Viewer on the day of the scheduled
purge, the Transaction Purge dialog box (Figure 5-17) appears.
The message prompts you to delete transactions older than the
number of days set in the Account Preferences dialog box.
SchwabLink User Manual
5.63
Chapter 5
A c c o u n t Vi e w e r
Viewer window, and click the Deposit/Withdrawal button. The
Deposit/Withdrawal List viewer (Figure 5-19) appears.
Figure 5-18 Purge Records Dialog Box
3.
Click in the Purge Transaction records? check box.
A ✔ appears. (You can also purge your Trade Confirmations
List records by clicking in the appropriate check box.)
4.
Click OK. SchwabLink deletes the transactions (and the confirmations if selected). Prior to purging, SchwabLink will
close any open Transactions and Confirmations List Viewers.
Make sure that you reset your automatic Transactions List purge
date in Account Viewer Preferences if necessary.
Figure 5-19 The Deposit/Withdrawal List Viewer
DEPOSIT/WITHDRAWAL LIST VIEWER
FIELDS AND COLUMNS IN THE
DEPOSIT/WITHDRAWAL VIEWER
The Deposit/Withdrawal List Viewer provides next-day access to
all cash deposit and withdrawal transactions in the selected
Master Account. Transactions can be reviewed, sorted, and
queried, and dollar totals can be tracked. These records are identical to ones that can be found in the Transactions List Viewer.
To open the Deposit/Withdrawal List Viewer, make sure the correct Master Account is selected in the SchwabLink Account
SchwabLink User Manual
An asterisk (*) indicates total amounts that will change when
files are added to or removed from the viewer list.
Note: Although you can customize certain fields and columns –
such as Account Number – in other viewers, the customized
values for those same fields and columns do not show up in the
Transactions List, Deposit/Withdrawal List, Trade Confirmations
List, or Trade Confirmations Detail viewers. The fields in these
viewers revert to Schwab-assigned values.
5.64
Chapter 5
A c c o u n t Vi e w e r
FIELD/COLUMN
DESCRIPTION
Account Number
Your client’s 8-digit Schwab account number.
Sub Account Name
Account name as registered with Schwab.
Transaction Date
The actual activity date on which the transaction occurred.
Type
Designates a deposit or withdrawal transaction.
D
Deposit
W
Withdrawal
Account Type
The account from or to which funds are being transferred.
This field can contain the following types:
cash
Cash account.
margin Margin account.
A d j u s t i n g t h e D e p o s i t / Wi t h d r a w a l Vi e w e r D i s p l a y
You can change how information in the viewer is displayed. To
change column order and width or to sort data, see "Changing
Column Order," "Adjusting Column Width" and "Sorting Data"
on page 5.83.
N AV I G AT I N G
VIEWER
IN THE
DEPOSIT/WITHDRAWAL
Use any of the following methods to find records in the
Deposit/Withdrawal List viewer :
• Record navigation buttons
• Record navigation functions in the Window menu
• Find function (see "Using the Find Command" on page
5.81)
The dollar amount of the transaction.
• Scroll bars
*Total Deposits
Total of all deposits listed in the viewer.
• Query function to find groups of records with common
criteria (see "Using the Query Command for
Transactions" on page 5.60)
*Total Withdrawals
Total of all withdrawals listed in the viewer.
Dollar Amount
Summary totals change to reflect query results as well as additions or deletions to the
viewer list. Using the Query command, you can display summary totals for a client or group
of accounts for a specific period of time, or for one or more securities.
SchwabLink User Manual
5.65
Chapter 5
A c c o u n t Vi e w e r
PRINTING THE DEPOSIT/WITHDRAWAL
R E S U LT S L I S T
OR
QUERY
You can print the Deposit/Withdrawal List or a Deposit/
Withdrawal Query Results List. The lists print continuously, on
multiple pages if necessary.
Trade confirmations can be reviewed, sorted, and queried, and dollar totals can be tracked. As with the Transactions List viewer, you
can have the Trade Confirmations List updated automatically as
part of Build/Update, or you can add the confirmations manually.
To print a Deposit/Withdrawal List or Deposit/Withdrawal
Query Results List:
1.
Make sure the list you want to print is active.
2.
Click the Print button on the toolbar or select Print from the
File menu.
The Print dialog box appears.
3.
Set appropriate print parameters and click OK.
SchwabLink prints the the active Deposit/ Withdrawal List or
Deposit/Withdrawal Query Results List.
T R A D E C O N F I R M AT I O N S L I S T V I E W E R
The Trade Confirmations List viewer (Figure 5-20) provides
next-day access to trade execution reports for all trades that you
placed through Schwab.
Note: The viewer retains records for trade confirmations
that take place within the time period you specify in the
“Confirmation records retention period (days)” field of the
Account Viewer Preferences dialog box. (See “Specifying the
Transaction and Confirmation Record Retention Period”
on page 5.90.)
SchwabLink User Manual
Figure 5-20 Trade Confirmations List Viewer
Double-click on a row in the list to be taken to the Trade
Confirmation Detail Viewer for that record.
5.66
Chapter 5
A c c o u n t Vi e w e r
F i e l d s a n d C o l u m n s i n Tr a d e C o n f i r m a t i o n s
L i s t Vi e w e r
FIELD/COLUMN
DESCRIPTION
The following table lists and describes the columns and fields in
the Trade Confirmations List viewer.
Account Number
The account number assigned by Charles Schwab & Co., Inc.
Note: The Totals fields display summary totals for the list you are
viewing. The numbers in these fields change each time confirmations are added to or purged from the Trade Confirmations List.
Symbol
Security symbol. Used for identifying and pricing the
security that was traded. For details, see the Symbol field
description under “Fields and Columns in the Client
Account Positions Viewer” on page 5.45.
CUSIP
CUSIP number of the security.
Executed Date
The date on which the trade was executed.
Action
Indicates whether securities were bought or sold.
Account Name
Account name as registered with Charles Schwab & Co., Inc.
Quantity
The number of units of the security that were traded.
Price
The price per unit of the security.
Principal
Principal dollar amount involved in the trade.
Commission
The dollar amount of the commission charge.
Total Amount
Total dollar amount of the trade.
Item Description
The name of the security.
This aggregate data is useful for fast reporting on your Schwab
trading for one or many accounts. For example, if you complete
a query to display only the previous day’s confirmations, the
aggregate summary data reflects your Schwab trading for that
day. When you complete a query to display the confirmations for
one client account for a specific period of time, the aggregate data
shows Schwab activity totals for that account for that period. For
assistance with queries, refer to the “Using the Query Command
for Confirmations” section on page 5.70.
Note: Although you can customize certain fields and columns—
such as Account Number—in other viewers, the customized
values for those same fields and columns do not show up in the
Transactions List, Deposit/Withdrawal List, Trade Confirmations
List, or Trade Confirmation Detail viewers. The fields in these
viewers revert to Schwab-assigned values.
Confirm ID
The file name and the confirmation number for the record.
To display this column, place the cursor to the left of the
Account Number column. When the double arrow cursor
appears, click and drag the Account Number column to
the right.
SchwabLink User Manual
5.67
Chapter 5
A c c o u n t Vi e w e r
TOTALS FIELDS
Buys
Other Fee
Aggregate miscellaneous fees for all trades.
State Tax
Aggregate state tax amount for all trades.
Buys
Total number of buy confirmations.
Commissions
Aggregate commission amounts for all trades.
Commission
The total dollar amount of the commission charges for buys.
Principal
Aggregate principal dollar amount for all trades.
Principal
Principal dollar amount total involved in the buys.
Total Amount
Aggregate total dollar amount for all trades.
Total Amount
Total dollar amount of the buys.
The bottom left corner of the Trade Confirmations List shows
the number of records in the list and the number of the record
that is selected in the list.
Sells
Sells
Total number of sell confirmations.
Commission
The total dollar amount of the commission charges for sells.
Principal
Principal dollar amount total involved in the sells.
Total Amount
Total dollar amount of the sells.
Summary
Summary totals and the record totals also appear when you complete a query. They appear at the bottom of the list SchwabLink
displays in response to your query. By using the Query command, you can display summary totals for a client or group of
accounts for a specific period of time.
A d j u s t i n g t h e Tr a d e C o n f i r m a t i o n s
L i s t Vi e w e r D i s p l a y
You can change how the information in the viewer is displayed.
SEC Fee
Aggregate SEC fees for all trades.
Prime Broker Fee
Aggregate fees for all trades that require a Prime Broker Fee
Executing Broker
Commission
Aggregate commissions on those trades that require an
Executing Broker Commission
Trans Fee
Aggregate transaction fees for all trades.
SchwabLink User Manual
To change column order and width or to sort data, see
“Changing Column Order”, “Adjusting Column Width”, and
“Sorting Data” on page 5.83.
5.68
Chapter 5
A c c o u n t Vi e w e r
N a v i g a t i n g i n t h e Tr a d e C o n f i r m a t i o n s
L i s t Vi e w e r
Use any of the following methods to locate a record in the Trade
Confirmations List viewer:
• Record navigation buttons
• Record navigation functions in the Window menu
• Find command (see “Using the Find Command”
on page 5.81.)
• Scroll bars
• Query function to find groups of records with common
criteria (See “Using the Query Command for
Confirmations” on page 5.70.)
A d d i n g t h e P r e v i o u s D a y ’s C o n f i r m a t i o n s
If you do not specify confirmations as part of the Build/Update
process, you can use the File menu to add the previous day’s
confirmations.
SchwabLink sends confirmation files with the prefix cs, followed
by the execution date of the trades whose confirmations are in
the file: CSMMDDYY.cnf. The file type is .cnf, for confirmation.
3.
The confirmations are added to the Trade Confirmations List.
For each record the Confirm ID column displays the file from
which each confirmation was added, plus the confirmation
number associated with that file. For example, CS011200.cnf
1 indicates that the record was the first in a list of confirmations
for January 12, 2000.
Opening an Individual Confirmations File
A confirmations file consists of one day’s confirmations for one
Master Account.
In addition to listing all confirmations over a certain period of
time, you can open a file that contains one day’s confirmations.
Those confirmations will be listed in a new Trade Confirmations
List viewer when you open the file.
To open a confirmations file:
1.
From the File menu, select Confirmation File, then select
Add.
The Add Confirmations File(s) dialog box appears.
2.
From the File menu, select Confirmation File, then select Open.
The Open Confirmation File dialog box appears.
To add the previous day’s confirmations:
1.
Click Open.
SchwabLink checks the records in the file(s) you selected
against the records already on the list. Duplicates will not be
added to the list.
2.
Select the file that you want to view and click Open.
A new Trade Confirmations List viewer opens containing
only the confirmation records for the file you have opened.
Locate and select the name of the confirmation file you want
to add to the Trade Confirmations List.
The file name appears in the File Name field.
You can select more than one file using standard Windows
Ctrl and Shift click functionality.
SchwabLink User Manual
5.69
Chapter 5
A c c o u n t Vi e w e r
Using the Query Command for Confirmations
You can use the Query command to search for, display, and
work with selected confirmations on your list. If you receive
large numbers of confirmations each day, the Query command
can greatly simplify your work by allowing you to go directly to
the confirmations you need. After selecting the Query command,
you specify the field(s) you want to search for and the value for
each field.
In addition to specifying values, you can select parameters such
as “less than” and “greater than” and sort the columns in your
query result to focus, speed, and refine your search.
SchwabLink displays the results of your query in a Trade
Confirmations Query Results List viewer, which you can sort
and print.
Making an Initial Query
Follow the steps in this procedure to set search parameters, then
search the confirmations list.
1.
Make sure that the Confirmations List that you want to
query is open.
2.
From the View menu, select Query.
The Query Builder window opens (Figure 5-21).
SchwabLink User Manual
Figure 5-21 Trade Confirmations Query Dialog Box
3.
Select the field or column you want to search.
4.
Select one of the Operator options:
=
SchwabLink finds transactions with a value
equal to the one entered in the Value field (in
the field that you selected to search).
≤
Select to find values less than the one you
entered.
5.70
Chapter 5
≤=
Select to find values less than or equal to the
one you entered.
≥
Select to find values greater than the one you
entered.
≥=
Select to find values greater than or equal to
the one you entered.
10. Repeat steps 3 through 6 as appropriate to complete the
additional search criteria.
IN
Select to find records matching any of the
values entered.
11. Click Add.
LIKE
5.
A c c o u n t Vi e w e r
Select to find records that begin with the
value entered.
In the Value field, select or type the value you want to
locate.
9.
Select the And radio button in the New Atom section to find
records that contain both values you specify. Select the Or
radio button to find records that contain either set of values
you specify.
You can repeat these steps as many times as necessary to
refine your search.
12. When finished, you can save your set of selection criteria for
future use. Click Save Query and enter a file name. Click
Save to return to the Query Builder screen.
For example, to locate trades over $100.00, you select
Dollar Amount as the Field, > as the Operator, and $100.00
as the Value.
13. Click Run Query to begin the search.
6.
Click Add.
7.
If you would like to save your Query now for future use,
click Save Query and enter a file name. Click Save to return
to the Query Builder screen. You may save your query at any
stage during the query building.
You can load previously saved queries in order to save time when
running similar reports on a regular basis.
8.
If you are finished entering search parameters, click Run
query to begin the search. To refine your search further, go
to step 9 in the next section.
Loading a Previously Saved Query
1.
Make sure that the confirmations list that you want to query
is open.
2.
From the View menu, select Query.
The Query Builder window opens (Figure 5-14).
3.
Select a saved query and click Open. The previously defined
search criteria appear in the Query screen. To further refine
the search, see the section “Specifying Additional Search
Criteria” on this page.
Specifying Additional Search Criteria
You can refine your search by completing additional sets of
search criteria. For example, in addition to specifying transactions greater than $100 in the first set of fields, you can specify
that they have a value of less than $200.
SchwabLink User Manual
Click Load Query
4.
Click Run Query to begin the search.
5.71
Chapter 5
A c c o u n t Vi e w e r
Completing the Query
SchwabLink conducts the query and displays the results in the
Account Viewer window as a new Trade Confirmations Query
Results List viewer (Figure 5-22). The basis of the query is
displayed beneath the title bar.
To print a Trade Confirmations List or Trade Confirmations
Query Results List:
1.
Make sure that the list you want to print is active.
To print the entire list, go to step 3.
To print selected records, go to step 2.
2.
Select records to print using one of the following procedures:
• To select contiguous records, use the up or down cursor
keys on the keyboard while holding down the Shift key.
• To select non-contiguous records, click on individual lines
while holding down the Ctrl key.
3.
Click the Print button on the toolbar or select Print from the
File menu.
The Print Records dialog box (Figure 5-23) appears.
Figure 5-22 Trade Confirmations Query Results List Viewer
Printing the Confirmations List or Query
Results List
You can print the Trade Confirmations List or a Trade
Confirmations Query Results List. The lists print continuously
on multiple pages if necessary.
Figure 5-23 Print Records Dialog Box
4.
Select whether you want to print selected record(s) or all
records.
5.
Click Print.
The Print dialog box appears.
SchwabLink User Manual
5.72
Chapter 5
6.
A c c o u n t Vi e w e r
Set appropriate print parameters and click OK.
SchwabLink prints the appropriate records from the active
Trade Confirmations List or Trade Confirmations Query
Results List.
Using the Purge Function
When you add a file of confirmations to the Trade Confirmations
List, SchwabLink combines the new confirmations with those
already added. Over time, your summary list may become too
large or contain information you no longer need. Use the
SchwabLink purge function to delete confirmations from the display in your summary list automatically, after a number of days
that you specify or upon demand.
Figure 5-24 Confirmation Purge Dialog Box
Remember that you are not deleting the original confirmations
from the files received in SchwabLink. The confirmations on the
Trade Confirmations List are copies SchwabLink made when the
new confirmation file was added to the list. If you need to view a
confirmation record you have purged, you can go back to the
original files on your hard drive (or on a backup diskette) and
add them to your Trade Confirmations List again.
If you do not open the Trade Confirmations List Viewer on the
day of the scheduled purge, the purge does not take place. You
will receive the Confirmation Purge message the next time you
open the Trade Confirmations List Viewer.
Setting Up the Automatic Purge Function
You set up the automatic purge function in the Account Viewer
Preferences dialog box. Refer to “Specifying the Transaction and
Confirmation Record Retention Period” on page 5.90.
Purging Confirmations on the Scheduled Day
When you open Account Viewer on the day of the scheduled
purge, the Confirmation Purge dialog box (Figure 5-24) appears.
The message prompts you to delete confirmations older than the
number of days set in the Account Preferences dialog box.
SchwabLink User Manual
To purge the records, click Yes. The dialog box closes and the
Trade Confirmations List appears. The purged records are
removed from the list.
Purging Confirmations Before the Scheduled Purge Day
To purge confirmations manually prior to the scheduled
purge date:
1.
In the Account Viewer Preferences dialog box, decrease the
entry in the “Confirmation records retention period (days)”
to a number low enough to include the transactions you
want to remove. (Refer to “Specifying the Transaction and
Confirmation Record Retention Period” on page 5.90.)
2.
From the File menu, select Purge.
The Purge Records dialog box (Figure 5-25) appears.
5.73
Chapter 5
A c c o u n t Vi e w e r
consider storing daily confirmation files on a diskette or other
storage media.
Note: Consult with your compliance or legal expert for information concerning record-keeping requirements.
T R A D E C O N F I R M AT I O N D E TA I L V I E W E R
For every item in the Trade Confirmations List or Trade
Confirmations Query Results List, SchwabLink provides a
detailed record (Figure 5-26). You access the details for a record
by double-clicking on the record in the Trade Confirmations List
or the Query Results List.
Figure 5-25 Purge Records Dialog Box
3.
Click in the “Purge Confirmation records?” check box.
A ✔ appears. (You can also purge your Transaction List
records by clicking in the appropriate check box.)
4.
Click OK.
SchwabLink deletes the confirmations (and the transactions if
selected). Prior to purging, SchwabLink will close any open
Transactions and Confirmations List viewers.
Make sure you reset your automatic trade confirmations purge
date in the Account Viewer Preferences dialog box, if necessary.
The SchwabLink trade confirmation you see on your PC screen
captures key information provided by the paper confirmation
that Schwab sends to your clients. If you prefer to store this data
on your PC, you may want to receive electronic confirmations
instead of hard copy confirmations.
Note: Regardless of whether you choose to receive hard copy or
electronic confirmations of your clients’ trades, you may need to
supplement the information if you plan to use the confirmations to
meet any of your regulatory books and records requirements.
Consult with your legal and compliance advisors to determine
whether you need to supplement the confirmations with your own
information to fulfill your regulatory responsibilities.
Receiving client data electronically can save you time and effort
because you:
• No longer receive hundreds of pieces of mail
S t o r i n g Yo u r Tr a d e C o n f i r m a t i o n s
• Save valuable storage space
Each day a confirmation file is downloaded, additional
storage space is taken up on your hard disk. Although the trade
confirmation files are not exceedingly large, you may want to
• Can sort and organize electronic confirmations with
SchwabLink for Windows
SchwabLink User Manual
5.74
Chapter 5
A c c o u n t Vi e w e r
The selected Master Account Number is shown in the title bar
(Trade Confirmations Detail – 08000000).
F i e l d s i n t h e Tr a d e C o n f i r m a t i o n D e t a i l Vi e w e r
DATA TYPE
FIELD NAME
DESCRIPTION
Account Data
Variables
Account Number
Number of the account in which the trade
was placed.
Account Name
Registered name and address of the
account for which the trade was placed.
Account Type
Type of account in which the trade was
processed (for example, cash or margin).
Action
Action taken for the trade (usually bought
or sold).
Quantity
Security units traded.
Item Description
Description of the security.
Executed
Date on which the trade was executed.
Symbol
Ticker symbol for the security.
Price
Unit price of the trade.
Settlement
Date the trade will settle.
CUSIP Number
CUSIP number for the security traded.
Security Number
Internal Schwab number assigned to the
security.
Trade-Related
Variables
Figure 5-26 Trade Confirmation Detail Viewer
The following table describes fields in the Trade Confirmation
Detail viewer.
Note: Although you can customize certain fields and columns—
such as Account Number—in other viewers, the customized
values for those same fields and columns do not show up in the
Transactions List, Deposit/Withdrawal List, Trade Confirmations
List, or Trade Confirmation Detail viewers. The fields in these
viewers revert to Schwab-assigned values.
Principal
SchwabLink User Manual
Principal dollar amount involved in the trade.
5.75
Chapter 5
A c c o u n t Vi e w e r
A C C O U N T V I E W E R F E AT U R E S
Commission
Commission charged for the trade.
Exec Br Com
Commission paid to the executing broker
for Prime Broker trades.
Trans Fee
Transaction fee charged for the trade.
• Use the Find command
Accrued Int
Accrued interest due.
• Change column order
Follow the procedures in this section to:
• Run Build/Update
• Delete old Build/Update files
• Adjust column width
State Tax
State tax charged for the trade.
SEC Fee
SEC fee charged for the trade.
Other Fee
Any miscellaneous fee charged for the trade.
Total Amount
Total dollar amount of the trade.
Prime Br Fee
Fee charged for Prime Broker trades.
Net Amount
Net amount for the trade transactions.
Comments
Up to 14 lines of explanatory notes about
the trade. Use the scroll bar at the right
of the field to move from comment to
comment. This field may be empty.
The number of the record in the list from which the detail is currently being displayed and the total number of records on that
list are shown in the bottom left-hand corner of the viewer. For
example, 12 of 154.
SchwabLink User Manual
• Sort data in grids/tables
• Export data
• Customize the Account Viewer window
• Customize account and securities data
Build/Update
The Build/Update process updates the database tables with the
most recent Build/Update files. These tables provide the information that appears in your Account Viewer windows.
Each day after the daily download is completed, you should run
Build/Update to make sure the most recent data is available in
Account Viewer.
The daily download inserts build (.bld), update (.upd), and/or
confirmation (.cnf) and transaction (.trn) files in the appropriate
Master Account folder as specified in the Account Viewer
Preferences dialog box. These files will generally reflect the
activity that was executed through SchwabLink on the previous
business day.
When Build/Update is run, it searches for the most recent build
file for the Master Account(s) and then the consecutive update
files for all the business days since that build file was created.
5.76
Chapter 5
A c c o u n t Vi e w e r
The program can recognize weekends and holidays and calculate
the next working day accordingly. If there are no build files, the
Build/Update process will find all consecutive update files from
the last update date to the current day and process those files.
3.
From the Tools menu, select Run Build/Update.
The Build Update Selection dialog box (Figure 5-27) appears.
Note: If update files are missing for any of your Master Accounts
since the last Build/Update was executed, an error message appears
when the Build /Update process is run in manual mode. If you
receive this message, contact Technical Client Services between
8:00 a.m. and 6:00 p.m. Eastern Time, Monday through Friday.
TCS can generate build and update files appropriate to resolve
your problem.
• For investment advisors, call 1-800-647-LINK (-5465) or
email [email protected].
Figure 5-27 Build Update Selection Dialog Box
• For Third Party Administrators, call 1-800-231-2855
(Option 2) or e-mail [email protected].
4.
Select the appropriate option.
5.
Click OK.
The following message (Figure 5-28) appears.
Running Build/Update
Note: Before running Build/Update, make sure that you set
appropriate preferences. See “Specifying Preferences for
Build/Update” on page 5.89.
You can run the Build/Update function automatically as part of
the completion task of your daily download process. For more
information, see “Modifying the Completion Task” in Chapter 4,
“Download Utility.”
Figure 5-28 Build/Update Time Message
To run Build/Update in attended (manual) mode:
1.
Open Account Viewer.
2.
If you want to run Build/Update for one Master Account
only, select that Master Account from the Master Account
List and go to the next step. If you want to run Build/Update
for all Master Accounts, go directly to the next step.
SchwabLink User Manual
6.
Click Yes to continue.
Build/Update begins to run and a progress bar appears on
your screen, similar to the one shown in Figure 5-29.
5.77
Chapter 5
A c c o u n t Vi e w e r
To delete old build and update files:
1.
From the Master Account list, select the Master Account
from which you want to delete the files.
2.
From the Tools menu, select Delete Old Data Files.
The Delete Old Data Files dialog box (Figure 5-31) appears.
Figure 5-29 Build/Update Progress Bar
When Build/Update is complete, the following message
appears (Figure 5-30).
Figure 5-30 Build/Update Complete Message
7.
Click OK.
You return to Account Viewer. The files are updated.
Note: During the Build/Update process the file extension is changed
for build files and update files. Build files change from the extension
.bld to .bkb, and update files change from .upd to .bku. These files
will remain in the relevant Master Account folder until deleted.
Deleting Old Data Files
All backup build and update files for each Master Account are
stored in the Master Account folder, which may eventually cause
problems with storage space. You can delete build files that you
no longer require.
SchwabLink User Manual
Figure 5-31 Delete Old Data Files Dialog Box
3.
To delete an individual file, select the file you want to delete
and click Delete.
To delete contiguous files, select the first file you want to delete,
hold down the Shift key, and select the last file that you want to
delete. The files in between should be highlighted. Click Delete.
To delete non-contiguous files, select the files you want to
delete while holding down the Ctrl key. When all the files
you want to delete are highlighted, click Delete.
If you want to delete all files in the list, click Delete All.
After clicking Delete or Delete All you are returned to the
Account Viewer window.
5.78
Chapter 5
A c c o u n t Vi e w e r
Log Files for Build/Update
When Build/Update is run, a log file is created that shows the
tasks that have run as part of the process. This file is placed in
the Logs folder in the SchwabLink Desktop directory where your
SchwabLink files are held. For example, if SchwabLink is held in
C:\Program Files\ SchwabLink Desktop, the log folder will be
under SchwabLink Desktop. The log entry for the Build/Update
process will be placed in this file.
The log is a text file that can be opened in Wordpad (or any text
editor). You can print this file.
Figure 5-32 Rebuild Secondary Table Selection Box
When Build/Update is run again in attended mode, either for another
Master Account or for another day, the log entry is overwritten.
4.
Select the appropriate option and click OK.
A progress bar appears. When the task is complete, the bar disappears and the following message is displayed (Figure 5-33).
R e b u i l d i n g S e c o n d a r y Ta b l e s
As part of Build/Update, the database tables that support
Account Viewer are rebuilt. Occasionally it is necessary to
reproduce this function on its own, rather than as part of
Build/Update. You may need to rebuild secondary tables when:
• The Build/Update process is interrupted before the
secondary tables are created
• You undo customized changes to the tables
Figure 5-33 Rebuild Success Message Box
To rebuild secondary tables:
1.
Open Account Viewer.
2.
If you want to rebuild database tables for one Master
Account, select the Master Account. To rebuild tables for all
Master Accounts, proceed to the next step.
3.
From the Tools menu, select Rebuild Secondary Tables.
5.
Click OK and you are returned to the Account Viewer window.
The table rebuild will be shown as entries in the log.
The following dialog box (Figure 5-32) appears.
SchwabLink User Manual
5.79
Chapter 5
A c c o u n t Vi e w e r
Vi e w i n g H i s t o r i c D a t a
You may need to look at historic views of data. For example, for
audit purposes, you may want to look at the status of a Master
Account at a date six months previous to the present date.
To review positions and balances for a certain period of time:
1.
Open the folder that contains the data for the Master
Account you want to view.
2.
Find the most recent build file prior to the date for which
you want to view your data. The build file should have the
extension .bkb if Build/Update has been run consistently.
3.
Change the extension to .bld.
4.
Find all the update files between that first build file and the
last date for which you want to view information. The
update files should have the extension .bku.
5.
Figure 5-34 Change Update Dates Dialog Box
Change the extensions to .upd.
For example, suppose you want to view data as of 6/30/00.
The first build file prior to that may be cs062300.bkb.
Find the update files cs062600.bku, cs062700.bku,
cs062800.bku, cs062900.bku, and cs063000.bku. Change
the file extensions so that the file names read as follows:
cs062300.bld, cs062600.upd, cs062700.upd, cs062800.upd,
cs062900.upd, and cs063000.upd.
6.
Open Account Viewer and select the Master Account you
want to view.
7.
From the Tools menu in Account Viewer, select Change
Update Date.
The Change Update Dates dialog box (Figure 5-34) appears.
SchwabLink User Manual
The dialog box should show the date when Build/Update for
positions and balances was last run.
8.
Using the scroll arrows, change the date for “Last update of
Positions/Balances.” The date should be any day prior to the
date of the build file. In the example from step 5, the date
can be set to 6/22/2000, the day before the build file date of
6/23/2000.
9.
Click OK.
10. Run Build/Update. (See “Running Build/Update” on
page 5.77.)
A message appears, indicating that a more recent build file is
required. In this instance, this message can be ignored.
Account Viewer will now show your data as per the date
selected.
5.80
Chapter 5
A c c o u n t Vi e w e r
To restore your data to the current date, follow the same procedure. Rename the file extension for the most recent build file
before the current date, and rename all subsequent update files.
Set the “Last update of Positions/Balances” date to any day prior
to the build file. Run Build/Update.
To review transactions for a particular period of time:
1.
Select the appropriate Master Account from the Master
Account list.
2.
From the Options menu, select Preferences.
3.
In the Account Viewer Preferences dialog box, purge the
transactions table of all records by setting the “Transaction
records retention period (days)” to zero.
3.
In the Account Viewer Preferences dialog box, purge
the confirmations table of all records by setting the
“Confirmation records retention period (days)” to zero.
4.
Click OK.
5.
From the File menu, select Purge.
6.
In the Purge Records dialog box, select the box to purge
confirmations and click OK.
7.
From the File menu, select Confirmations, then select Add.
8.
In the Add Confirmations Files dialog box, select the files for
the time period that you want to view, and click OK.
The files are added to the Trade Confirmations List viewer. After
viewing the desired files, be sure to reset the Trade Confirmation
retention period in the Account Viewer Preferences, and add the
purged files, if desired, to restore the Trade Confirmations List
viewer to its normal display.
4.
Click OK.
5.
From the File menu, select Purge.
6.
In the Purge Records dialog box, select the box to purge
transactions and click OK.
7.
From the File menu, select Transactions, then select Add.
Using the Find Command
8.
In the Add Transactions Files dialog box, select the files for
the time period that you want to view, and click OK.
Use the Find function to search every field in a viewer and locate
specific information.
The files are added to the Transactions List viewer. After viewing
the desired files, be sure to reset the Transaction record retention
period in the Account Viewer Preferences, and add the purged
files, if desired, to restore the Transactions List viewer to its
normal display.
To review trade confirmations for a particular period of time:
1.
Select the appropriate Master Account from the Master
Account list.
2.
From the Options menu, select Preferences.
SchwabLink User Manual
Note: See the next section for special features of the Find function for the Positions and Security Cross Reference Viewers.
1.
Make sure that the appropriate viewer is active.
2.
Click the Find button or select Find from the Edit menu.
The Find dialog box (Figure 5-35) appears.
5.81
Chapter 5
A c c o u n t Vi e w e r
Figure 5-36 Find Message Box
Figure 5-35 Find Dialog Box
6.
3.
Enter the text and/or numeric string that you want to find.
4.
Click Find Next.
To restrict the search, you can select the options to find only
records that start with the string you entered, or to search
the selected column only.
SchwabLink locates the first record that meets your search
criteria.
5.
Do any of the following:
Click OK.
Using the Find Command in the Positions and
S e c u r i t y C r o s s R e f e r e n c e Vi e w e r s
Use the Find function in the Positions Viewer to switch to another
account or to search fields within the viewer.
1.
2.
Open the Positions Viewer.
Click the Find button or select Find from the Edit menu.
The Find dialog box appears (Figure 5-37).
• Click Find Next to find the next instance of your search
string.
• Enter another string of characters and then click Find Next.
• Click Cancel to close the Find dialog box.
If no matches are found, the following message (Figure 5-36)
appears.
Figure 5-37 Find Dialog Box
3.
Do one of the following to enter search criteria.
A) Enter the account number for which you would like
to display positions.
Click Find Next.
The Positions Viewer displays data for the selected account.
SchwabLink User Manual
5.82
Chapter 5
A c c o u n t Vi e w e r
B) Enter the text and/or numeric string that you want to find
within the Positions Viewer.
To restrict the search to values within the viewer, select
the option to Search Top Window. You can also select
the options to find only records that start with the string
you entered, or to search the selected column only.
Click Find Next.
SchwabLink locates the first record that meets your search
criteria.
Changing Column Order
In some viewers, you can change the order of the columns:
1.
Move the mouse pointer to the header of the column you
want to move.
2.
Hold down the mouse button and drag the column to the
desired location.
3.
Release the mouse button.
The column should now be in its new position.
Use the Find function in the Securities Cross Reference Viewer to
switch to another security or to search fields within the viewer.
A d j u s t i n g C o l u m n Wi d t h
1.
Open the Securities Cross Reference Viewer.
In some viewers, you can resize the columns.
2.
Click the Find button or select Find from the Edit menu.
To make columns wider or narrower:
The Find dialog box appears.
1.
Move the mouse pointer over the line between the header of
the column you want to adjust and the neighboring column
header until the cursor changes to a double-headed arrow.
2.
Hold down the mouse button and drag the column border in
the direction you want it to go.
3.
Release the mouse button when the column is the desired width.
3.
Do one of the following to enter search criteria:
A) Enter the symbol for which you would like to display a
cross referenced account list.
Click Find Next.
The Securities Cross Reference Viewer displays data for
the selected security.
B) Enter the text and/or numeric string that you want to find
within the Securities Cross Reference Viewer.
To restrict the search to values within the viewer, select
the option to Search Top Window. You can also select the
options to find only records that start with he string you
entered, or to search the selected column only.
Click Find Next.
Sorting Data
You can sort data by column headers in the viewers.
Click on the header of the column you want to sort by. The data
sorts immediately, and the text in the header becomes bold so
that you can identify how the data is sorted. All columns toggle
between ascending and descending order when you click on the
column header.
SchwabLink locates the first record that meets your search
criteria.
SchwabLink User Manual
5.83
Chapter 5
A c c o u n t Vi e w e r
To perform a secondary sort, hold down the Ctrl key and click
on a different column header. The text in the header becomes
italicized so that you can identify the secondary sort criteria. To
toggle between ascending and descending order, hold down the
Ctrl key and click the italicized column header again.
DESIGNATION
VIEWER
CL
Client Information
CP
Client Positions
SL
Securities List
Exporting Data
CM
Composite Security Positions
You can export data from Account Viewer grids either by using
the Export feature or by copying and pasting data directly from
the grid to a spreadsheet program.
SC
Security Cross Reference
TR
Transactions List
DW
Deposit/Withdrawal List
CN
Trade Confirmations List
To copy and paste data to a spreadsheet program:
1.
Select records in the grid to be exported.
2.
Select Copy from the Edit menu.
3.
Open you spreadsheet. Select Paste from the Edit menu in
your spreadsheet program.
C u s t o m i z i n g t h e A c c o u n t Vi e w e r Wi n d o w
You can customize the Account Viewer window as follows:
The Account Viewer data should appear in your spreadsheet.
• Hide or show the Master Account list.
To export data:
• Hide or show the toolbar.
1.
• Resize the open viewers.
Make sure that the screen you want to export is active. If
you are exporting query results, run the query first and make
sure that the Query Results List viewer is active.
2.
Select Export from the File menu.
3.
Choose a location and file name for the exported file.
A default file name is provided in XXmmddyy.csv format
where XX is the designation for the exported viewer, and
mmddyy represents the update date for the data. You may
override the default file name with one of your own. All files
are exported in comma-delimited format.
4.
Click Save.
SchwabLink User Manual
• Rearrange the open viewers.
Hiding and Showing the Master Account List
If you only have one Master Account, or you want to expand the
screens fully within Account Viewer, you may want to hide the
Master Account list on the left-hand side of the Account Viewer
window.
From the View menu, select Master Account List to show or hide
the list.
5.84
Chapter 5
A c c o u n t Vi e w e r
H i d i n g a n d S h o w i n g t h e To o l b a r
2.
To rearrange the screens, select the appropriate command:
To hide or show the Account Viewer toolbar, select Toolbar from
the View menu.
• Cascade—Returns the screens to standard size and cascades the viewers with the active one on top.
R e s i z i n g Vi e w e r s
• Tile Horizontal—Displays the screens in rows, sized to fill
the Account Viewer window.
You can resize viewers with the standard Windows resizing tools.
• Tile Vertical—Displays the screens in columns, sized to fill
the Account Viewer window.
Refer to your Windows documentation.
• Arrange Icons—Rearranges the icons of any minimized
screens at the bottom of the Account Viewer window.
R e a r r a n g i n g Vi e w e r s
• Minimize All—Minimizes all the open screens and tiles the
icons at the bottom of the Account Viewer window.
You can open any number of viewers at one time. The default
view of multiple viewers is standardized screens, cascaded, with
the active viewer on top.
To change the way open viewers are displayed in the Account
Viewer window:
1.
Select Window from the menu bar.
The Window menu (Figure 5-38) appears.
If the Account Viewer window is resized and/or the open viewers
are out of sequence, choosing any one of these options refreshes
the arrangement accordingly. For example, if you are working
with several viewers open and cascaded and then maximize the
Account Viewer window, the viewers stay the same size. If you
then reselect Cascade from the Window menu, the viewers will
re-cascade in a size appropriate to the maximized Account
Viewer window. Similarly, if the cascaded viewers become
disordered due to switching between the views, reselecting
Cascade from the Window menu reorders them in the sequence
they were opened.
Note: The Cascade, Tile Vertical, and Tile Horizontal selections
only arrange those screens that are open and that are standardized or maximized. Minimized viewers will not be cascaded
or tiled.
Figure 5-38 Window Menu
SchwabLink User Manual
5.85
Chapter 5
A c c o u n t Vi e w e r
C u s t o m i z i n g D a t a i n A c c o u n t Vi e w e r
SchwabLink uses client account names, account numbers, and
security descriptions that are recognized by Schwab. However,
you may be more familiar with different numbers or names for
client accounts and different security symbols. SchwabLink offers
a feature to customize your data so that you can view numbers
and figures with which you are familiar, yet Schwab will only
receive data that Schwab recognizes.
If you want your customized data to appear automatically after
you run Build/Update, you must set the preferences appropriately.
See “Setting Preferences” on page 5.88.
Note: Although you can customize certain fields and columns—
such as Account Number—in some viewers, the customized
values for those same fields and columns do not show up in
the Transactions List, Deposit/Withdrawal List, Trade
Confirmations List, or Trade Confirmation Detail viewers. The
fields in these viewers revert to Schwab-assigned values.
Figure 5-39 Account Customization List Window
The first account in the grid in the upper part of the window is
the Master Account.
Customizing Account Data
To customize client account data:
1.
From the Master Account list in the Account Viewer window, select the Master Account that contains the client
account information that you want to customize.
2.
From the Tools menu, select Account Customization.
The Account Customization List window (Figure 5-39)
appears.
3.
Select an account in the grid in the upper part of the window.
The details of that account appear under Schwab Account
Information on the left side of the window.
4.
If you want to customize only one or two lines of the information, click on the arrow button next to the Schwab Account
Information line. The information is duplicated on the right
side of the window under Custom Account Information.
Edit the data that you want to change by deleting the information in the right side of the window and typing in the new
information as appropriate.
SchwabLink User Manual
5.86
Chapter 5
A c c o u n t Vi e w e r
If you want to customize all the account information, simply
begin entering data into the fields on the right-hand side of
the window.
5.
Repeat steps 3 and 4 for every account that you want to customize.
6.
When you finish customizing accounts for this Master
Account, click Customize.
7.
Click Close.
The details are removed from the right-hand side of the
Account Customization window.
5.
Click Customize.
6.
When you finish erasing customized values for your selected
accounts, click Close.
Customizing Security Information
To customize security symbols and names:
1.
Select the Master Account that contains the securities you
want to customize.
2.
From the Tools menu, select Security Customization.
Editing Customized Account Data
To edit customized account data:
1.
Select the Master Account that contains the information you
want to change.
2.
From the Tools menu, select Account Customization.
3.
Select the account.
4.
Change the details in the right-hand side of the Account
Customization window.
5.
Click Customize.
6.
When you finish editing the details of your customized
accounts, click Close.
The Security Customization List (Figure 5-40) appears.
R e s t o r i n g S c h w a b - A s s i g n e d Va l u e s
To restore Schwab-assigned values:
1.
Select the Master Account that contains the information you
want to change.
2.
From the Tools menu, select Account Customization.
3.
Select the account.
4.
Click Erase.
SchwabLink User Manual
Figure 5-40 Security Customization List
5.87
Chapter 5
3.
4.
A c c o u n t Vi e w e r
From the grid in the upper part of the window, select the
security to be customized.
• Specify how long transaction and confirmation record
details should be retained for each Master Account
The details appear under Schwab Security Information on
the left side of the window.
• Specify whether to rebuild the consolidated portfolios for
Fund Rebalancer
Do one of the following:
• Click the arrow button next to Schwab Security
Information. The Schwab details appear under Custom
Security Information on the right side of the window. Edit
these details as appropriate.
From the Options menu, select Preferences. The Account Viewer
Preferences dialog box (Figure 5-41) appears. Select the Master
Account for which you will be setting preferences.
• Enter the new security identifier and description on the
right side of the screen.
5.
Repeat steps 3 and 4 to customize details for other securities
in this Master Account.
6.
When you finish entering securities details, click Customize.
7.
When you finish customizing securities, click Close.
SETTING PREFERENCES
Use the preferences section of Account Viewer to:
• Set up a Master Account (see Chapter 2, “Getting Started”)
• Select the data type of the files you work with for each
Master Account
• Specify whether to include cash in positions for each
Master Account
• Specify whether to use a four-digit year for reconcile files
• Specify preferences for the Build/Update function for each
Master Account
• Specify whether to include master account information in
printouts
• Specify whether to include column headers in export files
Figure 5-41 Account Viewer Preferences Dialog Box
SchwabLink User Manual
5.88
Chapter 5
A c c o u n t Vi e w e r
S e l e c t i n g t h e F i l e D a t a Ty p e
If you work with Schwab Institutional on the selected Master
Account, select Broker/Dealer as the data type. If you work with
Retirement Plan Services, select Trust Company. Broker/dealer
files start with “cs” and trust company files start with “ts.”
Including Cash in Positions
To show cash balances as entries in positions, make sure that the
Preferences dialog box has a ✔ in the box next to Include Cash
in Positions.
R e c o n c i l i n g F i l e s U s i n g F o u r - D i g i t Ye a r
Select this option to specify that the reconciliation file name
will include a four-digit year instead of a two-digit year. For
more information on the function of the reconciliation file, see
“Extract Position Reconcile Values on Build/Update” on this
page.
Specifying Preferences for Build/Update
Include any or all of the following options in the Build/Update
process by checking the appropriate box.
E x t r a c t P o s i t i o n R e c o n c i l e Va l u e s o n B u i l d / U p d a t e
If this option is activated, a position reconciliation file
(CSMMDDYY.RPS) will be extracted automatically from
SchwabLink when the Build/ Update process is run. Select this
option if you want to create a position reconciliation file in the
Master Account folder.
SchwabLink User Manual
The reconciliation file represents the client positions in the
Schwab database. This file can be used in the reconciliation
process with your portfolio software to determine whether client
information as presented by Schwab is consistent with the information in your portfolio software. The portfolio management
software compares the values of the Schwab reconciliation file to
the values in the port-folio management software and creates an
exception report.
Include MVS Cash in Reconcile
If this option is activated, two additional fields are added to
the position reconciliation file for market value totals of short
positions in the cash account. Consult with your portfolio management software to determine whether these fields can be used.
S u b s t i t u t e C u s t o m A c c o u n t I n f o r m a t i o n Va l u e s o n
Build/Update
Although account details can be customized in the SchwabLink
Database, SchwabLink communicates with Schwab using
Schwab-specific account details. Your customized details are
displayed, but the Schwab-specific account details run in the
background.
You must activate this option in order to display your customized account details after Build/Update is run. In the Account
Viewer Preferences dialog box, check “Substitute Custom
Account Information Values on Build/Update.”
If the option is not activated, SchwabLink reverts to displaying
Schwab account details.
5.89
Chapter 5
A c c o u n t Vi e w e r
I n c l u d e P o s i t i o n s , B a l a n c e s , Tr a n s a c t i o n s ,
and Confirmations
To include positions and balances, transactions, and trade confirmations in Build/Update, check the appropriate boxes in the
Account Viewer Preferences dialog box.
If you do not include transactions or confirmations in the
Build/Update process, you can add them manually. See “Adding
the Previous Day’s Transactions” and “Adding the Previous
Day’s Confirmations” on pages 5.59 and 5.69, respectively.
Include Master Account Information on Printouts
You can set the maximum amount of time to keep these records.
When you open the Transactions or Trade Confirmations List
viewer on or after the scheduled purge date, you receive a prompt
asking whether you want to purge the records.
In the Account Viewer Preferences dialog box, enter the retention
period in days for transactions and/or confirmations.
Rebuild Consolidated Portfolios for Fund
Rebalancer
Select this option to include master account information to all
printouts from Account Viewer.
If you use Fund Rebalancer, select this option to automatically
rebuild the consolidated portfolio tables immediately upon
completion of the Account Viewer Build/Update. (See Appendix C,
“Fund Rebalancer.”)
Include Column Headers in Export Files
Note: This option is available only if Fund Rebalancer is installed.
Select this option to include column headers in exported files
using the Export feature.
S p e c i f y i n g t h e Tr a n s a c t i o n a n d C o n f i r m a t i o n
Record Retention Period
When you add a confirmations or transactions file to the
Trade Confirmations List or the Transactions List, respectively,
SchwabLink combines the new confirmations or transactions with
those already added. Over time, these lists may become too large
or may contain information that you no longer need. SchwabLink
provides a purge function that enables the old data records to be
deleted automatically from the Trade Confirmations List and
the Transactions List. The files from which these records were
added to the list remain in the Master Account folder and can
be added again.
SchwabLink User Manual
(0901-03256)
5.90
Chapter 6
Status Reports
OVERVIEW
• Select a report to view
The Status Reports module contains the following reports:
• Customize the viewer display
• Print a report
• Transfer of Account (TOA) Status—Shows the status of
your requests to transfer accounts to Schwab. The report
displays TOAs sorted by Schwab client account number,
with completed TOAs listed first. This data is available on
a daily basis.
• TOA Complete—Shows completed requests to transfer
accounts, sorted by account number. This data is available
weekly, on Monday.
• Event Notifications—Displays notifications regarding
changes (bond calls, bond rating changes, etc.) to fixed
income securities held in client portfolios. Notifications
are listed by security.
• Copy the contents of a report
• Save reports to another location
• Set Status Reports preferences
Downloading Data into Status Reports
Note: In order for your data to show up in Status Reports,
you must:
• Set up the appropriate Master Accounts. (See Chapter 2,
“Getting Started.”)
• Download data into folders associated with the Master
Account. (See Chapter 4, “Download Utility.”)
• Deposits & Withdrawals—Summarizes the preceding business day’s cash activity. The report displays deposits, then
withdrawals, by account number, with totals for both.
• Confirmation Summary—Summarizes the preceding
business day’s trade activity. The report displays buys,
then sells, by account number.
Note: New SchwabLink users will receive this information
in the Confirmation List of Account Viewer. (See Chapter 5,
“Account Viewer.”)
See the end of this chapter for a glossary of codes used in the
TOA Status and TOA Complete reports.
S t a t u s R e p o r t s Wi n d o w
To open the SchwabLink Status Reports module:
1.
Select the Accounts tab on the SchwabLink Launcher screen.
2.
Click the Status Reports icon.
The SchwabLink Status Reports window (Figure 6-1)
appears.
This chapter shows you how to:
• Open and exit the Status Reports module
• Select a Master Account
SchwabLink User Manual
6.91
Chapter 6
Status Reports
Vi e w i n g M a s t e r A c c o u n t D a t a
To view data for a particular Master Account, select the appropriate Master Account number in the list on the left side of the
Status Reports window.
The five report viewers immediately show the report data for the
Master Account you selected.
S e l e c t i n g a R e p o r t Vi e w e r
To select a report viewer, do one of the following:
• If the report is minimized, double-click on the report icon.
• If the report is cascaded or tiled, double-click on the
report title bar.
• Select the report from the Window menu.
Figure 6-1 SchwabLink Status Reports Window
When the Status Reports module opens, all the report viewers
are open and populated with the data from the first Master
Account in the Master Account list on the left side of the screen.
Each report viewer has a tab at the bottom of the screen for each
day for which there is data.
SchwabLink User Manual
S e l e c t i n g a R e p o r t F i l e f r o m a n O p e n Vi e w e r
Each report viewer holds a report for each day of data. Each
report has a tab that shows the day it was generated. For example,
if the report is generated on April 28, 2000, the tab displays
04/28/2000.
To select a report page from an open viewer, select the tab
that contains the report you want to see. Figure 6-2 shows an
example of a Transfer of Account (TOA) Complete report.
6.92
Chapter 6
Status Reports
Figure 6-3 Open Dialog Box
Figure 6-2 TOA Complete Report
2.
In the “Look in” field, select the directory that holds the
status report.
3.
In the “Files of type” field, select the type of status report
from the drop-down list.
O p e n i n g a R e p o r t b y R e p o r t Ty p e
In order for you to see report data in Status Reports, the data
must be downloaded to a Master Account folder. However, you
can view reports that have been saved elsewhere (for example, to
a disk for archive purposes, or in another program).
To open a report by a specific report type:
1.
Click the
button or select Open from the File menu.
The Open dialog box (Figure 6-3) appears.
SchwabLink User Manual
6.93
Status Reports
Chapter 6
The following is a list of each file type and its matching
report:
FILE EXTENSION
DESCRIPTION
Saving a Report
In addition to storing reports in the Master Account folder, you
can save a report to a diskette on your floppy (A or B) drive or
to another drive, to a different directory, or to a different file.
To save the report to another location:
TXT
May be any one of the reports below, saved as a text file. Can
be opened in Status Reports.
DEP
Deposits and Withdrawals report.
EVT
Event Notifications report.
TOA
TOA (Transfer of Account) Status report.
TOC
TOA Complete report.
CON
Confirmation Summary report.
*.*
All files.
1.
Display the report in the Status Reports window.
2.
Click the
button or select Save As from the File menu.
The Save As dialog box (Figure 6-4) appears.
The files are named in CSMMDDYY.ext format. For
example, the file name of the Deposit and Withdrawal
report for April 28, 2000 is cs042800.dep.
4.
5.
Click the file icon for the file that you want to open. The file
name appears in the “File name” field.
Figure 6-4 Save As Dialog Box
Click Open.
The Status Reports window with the file you selected is
displayed in the report viewer. The file name is listed on
the title bar.
SchwabLink User Manual
3.
In the “Save in” field, select the drive and directory where
the report is to be saved.
If you do not change the file name, it will be saved with its
original name and extension (for example, CS061298.DEP).
6.94
Chapter 6
Status Reports
If you rename the file, it will be saved as a text file (.txt).
Text files can be opened and reformatted in some word processing packages. Text files created from Status Reports that
have not been saved in a different file format can be
reopened in Status Reports.
4.
Click the Save button. SchwabLink saves the report to the
new location.
H i d i n g o r S h o w i n g t h e To o l b a r
To hide or show the toolbar, select Show Toolbar from the
Options menu. When you select to show the toolbar, a check
appears next to the option. To hide the toolbar, select the option
again, and the check disappears.
A d j u s t i n g t h e Wi d t h o f t h e M a s t e r A c c o u n t L i s t
To adjust the width of the list:
C l o s i n g a R e p o r t Vi e w e r
1.
Select the viewer you want to close by clicking in it. If you
have multiple viewers open, click on the title bar of the
Status Reports viewer you want to close.
Move the cursor over the right-hand border of the Master
Account list until the pointer changes to a double-headed
arrow.
2.
Hold down the left mouse button, then drag the border in
the direction you want the border to move.
From the File menu, select Close.
3.
When the list is the appropriate width, release the mouse
button.
To close a Status Reports viewer:
1.
2.
The viewer closes.
CUSTOMIZING
THE
S TAT U S R E P O R T S D I S P L AY
You can customize the Status Reports display as follows:
• Hide or show the toolbar.
• Adjust the width of the Master Account list.
Ti l i n g R e p o r t Vi e w e r s
If you have more than one report viewer open, you can tile or
cascade them for ease of use.
Viewers can be tiled horizontally or vertically.
• Tile, cascade, or minimize the report viewers. (Viewers are
cascaded by default the first time you run Status Reports.
To change the default for the opening display, see “Setting
Preferences” on page 6.99.)
• Change the type size, style, and font of reports.
SchwabLink User Manual
6.95
Chapter 6
Status Reports
To tile viewers horizontally, click the
button or select Tile
Horizontal from the Window menu. The reports appear tiled as
shown in Figure 6-5.
Figure 6-6 Vertically Tiled Report Viewers
Cascading Open Report Viewers
Figure 6-5 Horizontally Tiled Report Viewers
To cascade open report viewers, click the
button or select
Cascade from the Window menu. The reports appear cascaded as
shown in Figure 6-7.
To tile viewers vertically, click the
button or select Tile
Vertical from the Window menu. The reports appear tiled as
shown in Figure 6-6.
SchwabLink User Manual
6.96
Chapter 6
Status Reports
• If the Arrange Icons on Minimize All preferences option is
set, click the
button or select Minimize All from the
Window menu. (To set this preference, see “Setting
Automatic Actions” on page 6.100.)
• Regardless of whether the preferences option is set, select
Arrange Icons from the Window menu.
Figure 6-7 Cascaded Report Viewers
M i n i m i z i n g Vi e w e r s
To minimize open report viewers, click the
Minimize All from the Window menu.
button or select
Arranging Icons
If viewers or icons get out of alignment, you can rearrange them
so that they appear minimized and neatly arranged at the bottom
of the viewer as shown in Figure 6-8. Do one of the following:
SchwabLink User Manual
Figure 6-8 Minimized, Arranged Report Viewers
6.97
Chapter 6
Status Reports
C h a n g i n g Ty p e F o n t , S t y l e , a n d S i z e
WORKING
To change the type font, style, and size for all reports:
Follow the procedures in this section to print, copy, and delete
reports.
1.
Click the
button.
The Font dialog box (Figure 6-9) appears.
WITH
REPORT FILES
Printing a Report
You can print only the report that is active in the Status Reports
window. If you have multiple viewers open, click on the title bar
of the viewer that you want. Then select the tab of the specific
report to display it.
To print the report:
1.
Click the
button or select Print from the File menu.
The Print dialog box appears.
2.
If necessary, set print parameters.
3.
Click OK.
The report prints.
To print reports automatically at startup, see “Setting Automatic
Actions” on page 6.100.
C o p y i n g Te x t F r o m a n A c t i v e R e p o r t t o A n o t h e r
Location
Figure 6-9 Font Dialog Box
You can copy only the report currently displayed in the Status
Reports viewer.
To copy a report to another location:
2.
3.
Select the type font, style, and size.
Click OK.
The Font dialog box closes, and the status report is redisplayed showing the font, size, and style you selected. All
reports will reflect this change.
SchwabLink User Manual
1.
If you have multiple viewers open, click on the title bar of the
Status Report viewer that contains the report you want to copy.
2.
Select the tab of the specific report to display it.
3.
Highlight part or all of the report, or select Select All from
the Edit menu.
6.98
Chapter 6
Status Reports
4.
4.
Click
or select Copy from the Edit menu.
5.
Place the cursor at the location where you want to paste the
report. This location can be in another application.
6.
Select Paste from the Edit menu to paste the copied report
into the new location or document.
Deleting Report Files
Click OK.
SchwabLink deletes the report file.
Note: This procedure does not delete the file from the computer,
rather it deletes the file from the Status Reports viewer.
SETTING PREFERENCES
From the Options menu, select Preferences. The Status Reports
Preferences dialog box appears (Figure 6-11).
You can delete older reports that you no longer want to view.
You can delete only one report at a time.
To delete a report file:
1.
Click on the title bar of the Status Reports viewer that
contains the report you want to delete.
2.
Select the tab that displays the specific report you want to
delete.
3.
Click the
button or select Delete from the File menu.
The Confirm dialog box appears (Figure 6-10).
Figure 6-10 Confirm Dialog Box
Figure 6-11 Status Reports Preferences Dialog Box
SchwabLink User Manual
6.99
Chapter 6
Status Reports
This section explains how to:
• Change the default opening display of Status Reports
• Use the Automatic Actions boxes to automate Status
Reports features
• Format the report fonts
For information on adding, editing, and deleting Master
Accounts, see Chapter 2, “Getting Started.”
Changing the Opening Display
Setting Automatic Actions
In the Automatic Actions section of the Preferences dialog box,
you can set the following preferences:
• Arrange Icons on Minimize All – Icons appear neatly
arranged at the bottom of the Status Reports window
when you click
Window menu.
or select Minimize All from the
• Print Recent Reports on Startup – All current Status
Reports automatically print the next time you open the
Status Reports module. Make sure your printer is on.
The first time you run Status Reports, the report viewers are
cascaded. You can change this default opening display in the
Status Reports Preferences dialog box.
To activate these options, simply click in the check box next to
the appropriate option.
In the New Document Layout area, select the option that
describes how you want the viewers to appear each time you
open Status Reports:
S e t t i n g D e f a u l t Te x t O p t i o n s
• Cascaded, the default, shows the report viewers in
cascaded format (Figure 6-7).
• Tiled Horizontally opens the report viewers in tiled
horizontal format (Figure 6-5).
You can change the type font, size, and style for the text that
appears in the Status Reports. In the Text Options area of the
Preferences dialog box, click the Font button. In the Font dialog
box (Figure 6-9) that appears, select a font, font style, and
type size.
• Tiled Vertically opens the viewers in tiled vertical format
(Figure 6-6).
• Minimized shows the report viewers as icons at the bottom
of the Status Reports window (Figure 6-8).
• Maximized shows the reports in maximized format. Switch
to other reports by selecting from the Window menu.
SchwabLink User Manual
6.100
Chapter 6
Status Reports
C O D E S U S E D I N T O A S TAT U S
COMPLETE REPORTS
CODE
ACAT
CLOS
CLSPRG
AND
TOA
CODE
HOLD
DESCRIPTION
The Automated Customer Account Transfer (ACAT) system electronically
transfers between member firms more quickly than non-ACAT systems
do. For a transfer of account to qualify for the ACAT system, it must be a
full account transfer Mutual fund, bank, and insurance accounts may
not qualify for ACAT transfers.
Closed; The transfer of assets has been closed with no transfer of
assets occurring. The transfer will be resubmitted or returned to the
delivering firm for additional information.
DELV
Hold; The transfer request has been received and reviewed. During
review, a problem was detected requiring resolution before processing
may continue.
NOTE: Mutual Fund transfers have a temporary HOLD status as the
proper re-registration paperwork is prepared and forwarded, along with
the transfer form, to the delivering firm.
INIT
MEMO
Initiated; For Non-ACAT transfers only, the transfer papers received by
Schwab will be forwarded to a Schwab transfer representative for
processing.
Memo PTR; The receiving firm initiates a Partial Transfer request.
Information is passed to the delivering firm as a memo.
Close Purge; The Closed item is purged from ACAT system.
MEMPRG
COMP
DESCRIPTION
Completed; The transfer has been completed and assets have
transferred. For ACAT transfers, the status changes to COMP when the
assets are received from the delivering firm. Not all assets need to be
received for the status to change to COMP. For example, trailing
dividends are transferred through the ACAT system after the initial
transfer is complete.
NEW
For non-ACAT transfers, the transfer receives a COMP status only after
all the assets being transferred are received into the Schwab account.
NON-ACAT
Delivered; For incoming/outgoing ACAT transfers, this status means the
transfer form has been transmitted to the NSCC. The transfer has a
DELV status for one day only.
OPEN
For incoming non-ACAT transfers, this status means the transfer form
has been mailed to the delivering firm. The status changes from INIT to
DELV once a Schwab transfer representative processes the appropriate
transfer papers. The transfer remains in the DELV status until the assets
are received by Schwab.
SchwabLink User Manual
Memo PTR Purge; The Memo PTR is purged from NSCC files at the end
of the day it is submitted.
New; For ACAT transfers only, delivering firm prepares assets for
delivery to Schwab. For IRA transfers, status remains NEW for a
maximum of 10 business days. For brokerage transfers, the status
remains NEW for a maximum of 5 business days.
Non-ACAT; Non-ACAT transfers are used for non-member firms (banks,
Savings & Loans, some brokers), and all partial transfers.
Opened; The transfer request is received by Schwab, but not yet
processed.
For ACAT transfers, status remains OPEN until the transfer information
is transmitted to the delivering firm through the ACAT system.
For Non-ACAT transfers, status remains OPEN until Schwab transfer
representatives receive and process transfer papers.
6.101
Chapter 6
CODE
OPT
PND
REJ
Status Reports
DESCRIPTION
Option; For ACAT transfers that have Option assets transferring, these
assets settle manually through the OCC. The TOA department verifies
completion of transfer before manually updating the status to completed.
Pending; For ACAT transfers only, the delivering firm advises Schwab of
the assets being delivered via the ACAT system. The transfer status
remains PND for 3 business days unless the delivering firm makes
adjustments to the delivering assets. If adjustments occur, the transfer
is delayed an additional 2 to 3 days.
Reject; The delivering firm rejects a transfer because it is a duplicate
request, the account is already in distribution or transfer, the Account
Holder rescinded the instructions or the transfer is missing authorized
signatures.
CODE
RQSADJ
DESCRIPTION
Request Adjust; The receiving firm adjusts a transfer previously rejected
as a 24-hour pend.
24-Hour Pend Rejects include: SSN/Tax ID mismatch, Account title
mismatch, Additional documentation required, Delivering account is flat
and Invalid account number.
RQSADP
Request Adjust Past; The delivering firm fails to validate or reject a
transfer previously rejected as a 24-hour pend AND the receiving firm
has adjusted the transfer form. If no action is taken, the transfer form
is purged after seven days.
RQSPST
Request Past; The delivering firm fails to validate or reject a transfer in
the allotted time. If no action is taken, the transfer is purged after
seven days.
RQSREJ
Request Reject; The delivering firm rejects a transfer because of a
24-Hour Pend reject. If the receiving firm adjusts the transfer within
24 hours, the status changes to Request Adjust. If no adjustment is
made, the transfer is purged.
The receiving firm may also reject an account or non-standard transfer.
REVACL
Review Accelerate; The receiving firm initiates an acceleration of a FULL
transfer, thereby shortening the settlement period.
REVADJ
Review Adjust; The delivering firm adjusts assets being delivered.
REVERR
Review Error; The delivering firm had an error on assets validated for
transfer. If no adjustment is made in the allotted time, the account is
purged after seven days.
REVW
Review; The receiving and delivering firms review the assets to transfer.
SchwabLink User Manual
(1000-0885)
24-Hour Pend Rejects include: SSN/Tax ID mismatch, Account title
mismatch, Additional documentation required, Delivering account is flat
and Invalid account number.
RQST
SET
Request; The receiving firm transmits the transfer form to the NSCC.
Set; For ACAT transfers only, assets are in the process of being settled.
The transfer status remains SET for 2 business days until the assets
are actually received into the Schwab account.
6.102
Chapter 7
M u t u a l F u n d Tr a d i n g
OVERVIEW
The SchwabLink Mutual Fund Trading module enables you to create
mutual fund trade orders and transfer them to Schwab electronically.
You can create trade orders directly in the Mutual Fund Template
and send them to Schwab. You can also create orders in a spreadsheet or portfolio management program and import them into the
Mutual Fund Template, where you transmit them to Schwab.
This chapter shows you how to:
If you are not sure of your user ID and password, or do not
know whether they are authorized for trading, contact your Firm
Security Administrator (FSA). For further information, visit the
online help section of the Schwab Institutional Web site.
Main Steps
Using the Mutual Fund Trading module to send a trade order list
to Schwab involves four main steps:
• Create, edit, and remove single and multiple trade orders
1.
Enter or import trade orders into the Mutual Fund Template.
• Select accounts for duplicating trades
2.
Send the mutual fund trade order list to Schwab.
• Create, duplicate, edit, and remove linked trade orders
3.
Visit the Schwab Institutional Web site
(www.schwabinstitutional.com) to review the status of the
uploaded mutual fund trade order file.
• Print a mutual fund trade order list
4.
Store and back up mutual fund trade order files.
• Send a mutual fund trade order list to Schwab
SchwabLink archives trade orders you send to Schwab through
the Mutual Fund Trading module (see “Archiving Files” on page
7.117). Check the regulations in your state regarding storage and
backup of mutual fund trades.
• Format trading files created in another application and
import them to the Mutual Fund Trading module
• Save and archive trade order files
• Open a previously saved trade order file
• Set preferences specific to Mutual Fund Trading
M u t u a l F u n d Tr a d e L i s t
Prerequisites
To use the Mutual Fund Trading module, you need the following:
• At least one Master Account that is set up. (To set up
a Master Account for the first time, see Chapter 2,
“Getting Started.”)
A mutual fund trade list is a list of trade orders for one Master
Account that you send to Schwab. The list can include orders for
numerous clients within that Master Account. You can send only
one mutual fund trade list at a time.
• A list of the single trade and/or linked trade orders to be
made in each client account.
M u t u a l F u n d Te m p l a t e Wi n d o w
• Schwab Institutional Web site user ID and password that
are authorized for trading.
1.
On the SchwabLink Launcher screen, select the Trade tab.
2.
Click the Mutual Fund Trading icon.
To open the Mutual Fund Trading module:
The Mutual Fund Template window (Figure 7-1) appears.
SchwabLink User Manual
7.103
Chapter 7
M u t u a l F u n d Tr a d i n g
If this is the first time that you have opened the template, the
Archive dialog box appears, instructing you to select a location
for archived files. Click OK to accept the default archive drive,
typically C:\. To select another default archive drive, see
“Archiving Files” on page 7.117.
To exit the Mutual Fund Trading module:
1.
From the File menu, select Exit.
If you added or edited trades and did not save them prior to
selecting Exit, the File New Information dialog box
(Figure 7-2) appears.
2.
Click Yes to save the trade order list and exit the Mutual
Fund Trading module.
Figure 7-2 File New Information Dialog Box
W O R K I N G W I T H D ATA
F U N D T E M P L AT E
IN THE
MUTUAL
The procedures in this section show you how to:
• Create, edit, and delete single trade orders
• Create, edit, and delete linked trade orders
• Create multiple trade orders
• Save and print a mutual fund trade order list
S i n g l e Tr a d e O r d e r s
A single trade order consists of one buy or one sell transaction.
C r e a t i n g a S i n g l e Tr a d e O r d e r
To create a single trade order:
Figure 7-1 Mutual Fund Template Window
SchwabLink User Manual
1.
In the Mutual Fund Template window, select the Master
Account to which the trades apply by clicking the scroll
arrow next to the Master Account Number field and selecting from the drop-down list.
2.
From the drop-down lists in the Select by Account Number
or Name fields, select the client account number or name for
which you want to place the trade order. The corresponding
field populates.
7.104
Chapter 7
3.
M u t u a l F u n d Tr a d i n g
In the Action field, select the type of transaction from the
drop-down list:
• Sell %: Enter the percentage of the fund you are selling.
You cannot enter less than a whole percentage point or
more than 100%.
Buy $ (buy dollars). The actual purchase amount will be less
than the quantity entered by the amount of the commission.
Buy $+Comm (buy dollars plus commission). The commission
is charged in addition to the purchase amount entered.
• Sell All: The Quantity field is populated with 100%.
5.
In the Symbol field, enter the five-character fund symbol or
select from the drop-down list. If you select a fund that is
already in your database, the fund name appears in the Fund
Name field.
6.
Sell $ (sell dollars). The commission is deducted after the
amount entered is sold.
If you are entering a buy order, select the appropriate fund
instruction. (To set up a fund instruction default, see
“Selecting the Fund Instruction Default” on page 7.119.)
7.
Sell $+Comm (sell dollars plus commission). The amount of
the sale is increased to cover the commission.
Click the Add/Update button. The trade order details appear
in the grid in the lower half of the template.
8.
Repeat steps 1–7 for each mutual fund trade order for each
client.
Sell Shares
Sell %
Sell All
You cannot execute a Sell $ or a Sell $+Comm trade order
on funds that involve any of the following factors:
• Contingent redemption fees
• Mixed positions that include both NTF and non-NTF
holdings
You are now ready to send your trade orders to Schwab. If you
exit the Mutual Fund Trading module before sending your
orders, you will need to save them manually. See “Saving a
Mutual Fund Trade List” on page 7.115.
• Short-term redemption fees
• Linked trades
If you select a sell option other than Sell $ or Sell $+Comm,
the Swap field is enabled. (This field is not relevant for single
trades.)
4.
E d i t i n g a S i n g l e Tr a d e O r d e r
To edit a single trade order:
1.
The trade order information appears in the Enter/Edit Trade
area of the window.
Complete the Quantity field according to the type of transaction (action) you selected:
• Buy $, Buy $+Comm (Buy + Commission), Sell $ or Sell
$+Comm (Sell + Commission): Enter the dollar amount of
the trade.
In the Mutual Fund Template grid, select (highlight by
clicking on) the trade order that you want to edit.
2.
Make the necessary changes to the fields, then click the
Add/Update button.
The changes appear in the grid.
• Sell Shares: Enter the number of shares being sold.
SchwabLink User Manual
7.105
Chapter 7
M u t u a l F u n d Tr a d i n g
D e l e t i n g a S i n g l e Tr a d e O r d e r
To delete a single trade order:
1.
Select the trade order that you want to remove from the grid.
The order is highlighted.
2.
Click the Delete button.
A message appears asking whether you want to delete the
trade order.
3.
Click Yes.
The trade order is deleted from the grid.
S e l e c t i n g A c c o u n t s t o D u p l i c a t e a Tr a d e O r d e r
You may be entering multiple trade orders that are the same or
very similar for multiple accounts. For example, you may be
selling shares in the same mutual fund for several clients with
the same numbers of shares for each client. The Mutual Fund
Trading module enables you to create multiple trade orders
without having to re-enter all the same data.
You can use the Security Cross Reference Viewer in Account
Viewer to report the accounts that hold positions in a specific
mutual fund. See “Security Cross Reference Viewer” beginning
on page 5.53
To select accounts for duplicating a trade order in the Mutual
Fund Template window:
1.
Enter a new order or select a trade order from the grid.
2.
Click the Select Accounts button. The Select Account
window appears, displaying all accounts that belong to
the selected master account.
SchwabLink User Manual
Figure 7-3 Select Account Window
3.
Select from the list of Available Accounts for which the trade
order will apply. You may select more than one account at a
time using standard Windows functionality.
7.106
Chapter 7
M u t u a l F u n d Tr a d i n g
Click the Add button to add them to the list of Selected
Accounts. Click the Add All button to add every account to
the list of Selected Accounts.
4.
To deselect a symbol for duplication, highlight the symbol
from the list of Selected Symbols, then click Remove. To
deselect all symbols, click Remove All.
4.
To deselect an account for duplication, highlight the account
from the list of Selected Accounts, then click Remove. To
deselect all accounts, click Remove All.
5.
Click OK. The duplicated orders appear in the Mutual Fund
Template window for the selected symbols.
5.
Click OK. The duplicated orders appear in the Mutual Fund
Template window for the selected accounts.
A d j u s t i n g t h e M u t u a l F u n d Te m p l a t e G r i d
S e l e c t i n g S y m b o l s t o D u p l i c a t e a Tr a d e O r d e r
You may be entering multiple trade orders that are the same or
very similar in a single account. For example, you may be selling
all of the shares in several different mutual funds for an individual client. The Mutual Fund Trading module enables you to
create multiple trade orders without having to re-enter all the
same data.
To select symbols for duplicating a trade order in the Mutual
Fund Template window:
1.
Enter the account, action, and quantity for a new order.
2.
Click the Select Symbols button. The Select Symbols window
appears, displaying available symbols from the selected
master account.
Note: If the trade is a Sell action, only positions held by the individual account will appear as available symbols.
3.
To adjust the column width:
1.
Place the mouse pointer over the line between the column
header you want to change and the neighboring column.
The cursor changes to a double-headed arrow.
2.
Press and hold down the mouse button, then drag the column border in the direction you want it to go.
3.
When the column reaches the desired width, release the
mouse button.
Deselecting a Row
To deselect a row that has been inadvertently highlighted, do one
of the following:
• Click on the row that you want to highlight. That row is
highlighted, and the incorrect row is no longer highlighted.
• From the Edit menu, select Deselect. The row is no longer
highlighted.
Select from the list of Available Symbols for which the trade
order will apply.
Click the Add button to add them to the list of Selected
Symbols. Click the Add All button to add every symbol to
the list of Selected Symbols.
SchwabLink User Manual
7.107
Chapter 7
M u t u a l F u n d Tr a d i n g
• When selling one mutual fund and dividing the proceeds
into multiple alternate funds, use the Linked Trade function rather than Swap. For example, enter
L i n k e d Tr a d e O r d e r s
Use the linked trades feature to link the proceeds from a sell or
group of sells to a buy or group of buys for one client.
The procedures in this section show you how to:
Sell All
100
ABCDX
• Create swaps in the Mutual Fund Template window
Buy %
50
LMNOX
• Create linked trade orders in the Linked Trades window
Buy %
50
WXYZX (one linked trade group)
• Duplicate linked trade orders
rather than
• Edit and delete linked trade orders
Sell %
50
ABCDX
Buy %
100
LMNOX
L i n k e d Tr a d e R e q u i r e m e n t s
Sell %
50
ABCDX
When creating a linked trade order, be aware of the following:
Buy %
100
WXYZX (two separate swaps)
• The proceeds from the sells are applied to the buys on the subsequent business day according to the percentages specified.
• You must always start with at least one sell trade order.
• The total value of the buys cannot exceed 100%.
• If the buys total less than 100% of the sells, the unused
sell proceeds will go to the client’s cash account.
C r e a t i n g a S w a p i n t h e M u t u a l F u n d Te m p l a t e Wi n d o w
The simplest form of linked trade order is a swap, whereby all
or some of a client’s shares in one mutual fund are sold, and the
proceeds are fully reinvested in one other mutual fund. Swaps are
created in the Mutual Fund Template window.
• You cannot create a linked trade order from a dollar sell
(Sell $ or Sell $ + Commission).
To create a swap in the Mutual Fund Template window:
1.
Select the account.
• There must be at least one Sell %, Sell All, or Sell Shares
and at least one Buy %.
2.
In the Action field, select Sell %, Sell Shares, or Sell All.
(You cannot select Sell $ or Sell $+Comm for a linked trade.)
• Buy % is the only buy action available for linked trade
orders.
• A maximum of 30 trade orders can be linked in one transaction. That is, you can link 1 sell to 29 buys, or 14 sells
to 16 buys, and so forth.
• A Fidelity or Vanguard exchange done to preserve loads
must be sent as a one-to-one swap. The buy side must be
100%. No other option is allowed.
SchwabLink User Manual
The Swap field is enabled.
3.
In the Quantity field, enter the percentage or number of
shares to sell.
If you selected Sell All in step 2, the quantity appears as 100%.
4.
Select or enter the symbol for the mutual fund to be traded.
7.108
Chapter 7
5.
M u t u a l F u n d Tr a d i n g
In the Swap field, select or enter the fund in which the
proceeds of the sale are to be reinvested. If you select a fund
already contained in your database, the fund name appears
in the Swap Fund Name field.
F
The Fund Instruction field is enabled. Select the appropriate
fund instruction.
Note: To duplicate swap orders for multiple accounts, click
Selected Accounts before adding the trade to the grid.
Follow the procedures for “Selecting Accounts to Duplicate
a Trade Order” on page 7.106.
6.
Click Add/Update.
The sell and the buy are entered in the Mutual Fund
Template grid as two entries.
Editing or Deleting a Swap
To edit or delete a swap:
1.
In the Mutual Fund Template window, select the swap.
Figure 7-4 Linked Trades Window
The Edit Linked Trades dialog box appears.
2.
3.
Click the Yes button.
Creating a Linked Sell and Buy Order
The Linked Trades window (Figure 7-4) appears.
To review the requirements for linked trade orders, see “Linked
Trade Requirements” on page 7.108.
Follow the procedures for editing or deleting linked trade
orders later in this chapter.
To create a linked trade order:
1.
In the Linked Trades window, select an account number or
name, and the corresponding number or name appears.
Use the Linked Trades window to create linked trade orders
other than swaps. After you create the linked trade order, it will
also be displayed in the Mutual Fund Template window.
2.
In the Action field, select an available sell option.
3.
Complete the Quantity field according to the sell options
you selected.
To open the Linked Trades window, click the Linked Trades button in the Mutual Fund Template window. The Linked Trades
window (Figure 7-4) appears.
4.
Select or enter the symbol for the fund you are selling.
C r e a t i n g a L i n k e d Tr a d e O r d e r i n t h e L i n k e d Tr a d e s Wi n d o w
SchwabLink User Manual
7.109
Chapter 7
5.
M u t u a l F u n d Tr a d i n g
Click Add/Update Trade.
1.
After you create all linked trades for the account, click OK.
The data you entered in the Enter/Edit Trade area of the
Linked Trades window appears in the Sells grid of the
Allocation Group area.
2.
The Accept Changes dialog box appears (Figure 7-5).
6.
To enter more sell trade orders for the same client, repeat
steps 2 through 5.
7.
In the Action field of the Linked Trades window, select Buy %.
8.
In the Quantity field, enter the percentage you want to buy.
For example, if you want to use 25% of the total sell
proceeds to purchase a certain fund, enter 25.
9.
In the Symbol field, enter the five-character symbol of the
mutual fund you want to purchase, or select it from the
drop-down list.
10. In the Fund Instruction field, select the fund instruction for
the mutual fund being bought.
11. Click Add/Update Trade.
The data you entered in the Enter/Edit Trade fields appears
in the Buys section of the Allocation Group area.
Figure 7-5 Accept Changes Dialog Box
3.
Click OK.
If the buys equal 100% of the sells, you are returned to the Mutual
Fund Template. The linked trade orders are added to the grid.
If the buys are less than 100% of the sells, the unused sell proceeds are allocated to the client’s cash account, and the message
shown in Figure 7-6 appears.
12. To enter more buys for the same client, repeat steps 7
through 11.
Remember that the total value of the buys cannot exceed
100%.
13. After you create all trades for the account, go to the next
section, “Accepting a Linked Trade Order.”
A c c e p t i n g a L i n k e d Tr a d e O r d e r
You must accept linked trade orders in order to transmit them.
To accept the linked trade orders that you have made for an
account:
SchwabLink User Manual
Figure 7-6 Link Trade Information Message
Click OK. You are returned to the Mutual Fund Template. The
linked trade orders appear in the Mutual Fund Template grid.
7.110
Chapter 7
M u t u a l F u n d Tr a d i n g
D u p l i c a t i n g a L i n k e d Tr a d e O r d e r i n t h e
L i n k e d Tr a d e s Wi n d o w
D e l e t i n g a S i n g l e L i n k e d Tr a d e O r d e r f r o m t h e
L i n k e d Tr a d e s Wi n d o w
To duplicate a linked trade order in the Linked Trades window:
To delete a linked trade order from the Linked Trades window:
1.
Select the trade order that you want to duplicate.
1.
In the grid, select the trade order that you want to remove.
2.
Click the Duplicate button. SchwabLink copies the selected
trade order and places it in the appropriate Buys or Sells
section in the Allocation Group area of the Linked Trades
window.
2.
Click the Delete button.
3.
Select the duplicated trade order, so that the details appear in
the Enter/Edit Trade area of the window.
D e l e t i n g A l l L i n k e d Tr a d e O r d e r s f r o m t h e
L i n k e d Tr a d e s Wi n d o w
4.
Make the appropriate changes.
5.
Click Add/Update Trade, and the amended information
appears in the grid.
The trade order is removed.
To remove all the trade orders currently displayed in the Linked
Trades window:
1.
Click the Delete All button. The Delete All Confirmation
box (Figure 7-7) appears.
E d i t i n g a L i n k e d Tr a d e O r d e r
To edit a linked trade order:
1.
To edit a linked trade order in the Linked Trades window,
select the linked trade that you want to edit. The trade information appears in the Enter/Edit Trade fields. Go to step 2.
To edit a linked trade order that is displayed in the Mutual
Fund Template window, select the trade that you want to
edit. In the Edit Linked Trades dialog box, click Yes. The
Linked Trades window is displayed. Make sure that the
trade order you want to edit is selected. Go to step 2.
2.
Figure 7-7 Delete All Confirmation Box
2.
Click Yes. All trade orders are removed.
Make the necessary changes, then click the Add/Update
Trade button. The edited information appears in the appropriate grid in the lower part of the Linked Trades window.
SchwabLink User Manual
7.111
Chapter 7
M u t u a l F u n d Tr a d i n g
I m p o r t i n g Tr a d i n g F i l e s
You may want to send Schwab a trade file that was created with
Fund Rebalancer (see Appendix C), a spreadsheet or portfolio
management software. Each trade record must adhere to the
format rules and parameters described on the next several pages
in “Import File Format Requirements,” “Header Record Format
Parameters,” and “Trade Record Format Parameters.” These
requirements enable SchwabLink to process the record and edit it
for errors, inconsistencies, and discrepancies.
If you have any questions, contact your assigned Trading Desk.
There are two ways to send these files to Schwab:
• Via the browser and the Schwab Institutional Web site
(www.schwabinstitutional.com).
• Import the files into the Mutual Fund Template and send
to Schwab.
To import correctly formatted files into the Mutual Fund
Template:
1.
From the File menu, select Import External File. The Import
dialog box (Figure 7-8) appears.
2.
In the “Look in” field, select the drive and directory where
the Import file is held.
The “Files of type” field is set to External Import file, and
only files with .txt or .prn file extensions are listed in the
window. To view all file types, select “All Files” in the “Files
of type” field.
SchwabLink User Manual
Figure 7-8 Import Dialog Box
3.
From the list of files in the window, select the file that you
want to import, then click the Open button. If errors were
detected, the Import File Format Errors window appears
(Figure 7.9). Error messages are displayed for transaction
lines with format errors or invalid data. If no errors were
found, a message appears to indicate that no format errors
were detected.
7.112
Chapter 7
M u t u a l F u n d Tr a d i n g
Figure 7-9 Import File Format Errors Window
To deactivate the files format validation, see “Checking File
Format on Import” later in this chapter.
4.
To print the list of error messages, click Print.
Figure 7-10 Mutual Fund Template with Imported Files
5.
Click Close. You are returned to the Mutual Fund Template,
and the trade information is displayed as shown in
Figure 7-10.
To send the file to Schwab, follow the instructions in “Sending a
Mutual Fund Trade List to Schwab” on page 7.117.
Import File Format Requirements
This section contains the file format rules required for files that
are imported into the Mutual Fund Template from spreadsheet
or portfolio management software.
Note: Charles Schwab & Co., Inc. is not responsible for trade
errors caused by incorrect formatting of trade orders created
outside the Mutual Fund Template.
SchwabLink User Manual
7.113
Chapter 7
M u t u a l F u n d Tr a d i n g
• Orders that are not linked must have an allocation group
code of 0.
• Enter all characters in UPPER CASE.
• The Quantity field entry for Buys, Sell $, and Sell $ +
Commission must be in dollars and cents. For Sell Whole
Shares, the format is XXXXXXX.XXX. (The number of
whole shares cannot exceed seven digits.) For example,
enter 100 shares as 100.000.
• The Quantity field entry for Sell % and Sell All is a threedigit number in the format X.XX, where 100% is 1.00
and 10% is 0.10.
• Follow the rules regarding linked trades. Refer to “Linked
Trade Requirements” on page 7.108.
• Do not use dollar signs ($), minus signs (-), or commas (,)
to separate numbers.
• Each set of linked trades must have a different time stamp.
Header Record Format Parameters
Format parameters for a mutual fund trade record header (first
record only):
Note: When creating the file in a spreadsheet program, simply
type the entire header record as shown in the example below into
the first cell.
OFFSET
WIDTH
CONTENT
EXAMPLE
• Save the trade order file you created with your spreadsheet
or portfolio management software as a space-delimited or
fixed format file. (Save files from Microsoft Excel as .prn
and save files from other programs as .txt.)
0-6
7
HD FA M
HD FA M
Note: Space after D and A
(identifies the header record)
• Right-justify each quantity in its field.
8-15
8
MASTER ACCOUNT
08000000
17-20
4
FA30
FA30
(identifies the file format)
22
1
M
M
23-29
7
MASTER ACCOUNT
8000000
(last 7 digits)
• The Action field for all Buy options must read BUY DLRS
and for Sells either SELL SHRS or SELL DLRS. Sell %
and Sell All must be entered as SELL SHRS. The system
distinguishes the different types of buys and sells by
examining the quantity fields for data.
• BUY DLRS must have two spaces after BUY and before DLRS.
• Use decimals when indicating percents. For example, enter
100% as 1.0 and 50% as 0.50.
• Time stamps must be identical for each grouping of linked
trade orders.
SchwabLink User Manual
Tr a d e R e c o r d F o r m a t P a r a m e t e r s
Format parameters for mutual fund trade record details (all
subsequent records):
7.114
Chapter 7
OFFSET
0-1
M u t u a l F u n d Tr a d i n g
WIDTH
CONTENT
EXAMPLE
68
1
Blank Space
2
TR
TR
(All trade detail records
begin with TR)
69-76
8
TIME STAMP
77
1
Blank Space
08001234
78
1
ALLOC GROUP
2-9
8
ACCOUNT NO.
10
1
Blank Space
11-19
9
ACTION
BUY DLRS, SELL SHRS, or
SELL DLRS
20-35
16
QUANTITY ($)
150.37
36-51
16
QUANTITY (SHR)
1000.546
52
1
Blank Space
53-56
4
QUANTITY (%)
57
1
Blank Space
58-62
5
SYMBOL
63
1
Blank Space
64
1
COMMISSION
65
1
Blank Space
66-67
2
FUND INST
13051299
0=No Allocation Group
1=Allocation Group
(Linked Trades)
EXAMPLE
HD FA M 08000000 FA30 M8000000
0.50
TR23456789 BUY DLRS
100.00
TEST1 N RR 15394598 0
TR23456789 BUY DLRS
500.00
TEST2 N RR 15394597 0
TR45678901 BUY DLRS
10000.00
TEST4 N RR 15394596 0
EXMAX
N (Y on Buy+Comm and
Sell $+Comm trades)
TR56789012 SELL SHRS
35.0000
TEST4 N RR 15394596 0
TR56789012 SELL SHRS
0.90
TEST4 N RR 15394596 0
S a v i n g a M u t u a l F u n d Tr a d e L i s t
CC for Cash Divs, Cash Cap
Gains; RR for Reinvest
Divs/Reinvest Cap Gains;
CR for Cash/Reinvest
When you send a mutual fund trade order list to Schwab, it is
automatically saved as a file. However, you may not want to
send your list right away. If you exit the application before you
send the list, you will need to save it manually as a file.
To save a mutual fund trade order list as a file:
1.
SchwabLink User Manual
Click the
button or select Save As from the File menu.
The Save As dialog box (Figure 7-11) appears.
7.115
Chapter 7
2.
M u t u a l F u n d Tr a d i n g
Change the drive, directory, and file name if required.
Opening a Previously Saved Mutual Fund
Tr a d e O r d e r F i l e
You can open previously saved files to print, amend, or send to
Schwab.
To open a previously saved mutual fund trade order file:
1.
Click the
button or select Open from the File menu.
The Open dialog box (Figure 7-12) appears.
Figure 7-11 Save As Dialog Box
3.
Click the Save button.
You return to the Mutual Fund Template.
P r i n t i n g a M u t u a l F u n d Tr a d e L i s t
Follow the steps in this procedure to print the list of mutual fund
trade orders displayed in your Mutual Fund Template window.
You can print the entire list or a range of pages.
Figure 7-12 Open Dialog Box
1.
Click
or select Print Report from the File menu. The
print dialog box appears.
2.
Select the drive, directory, and file type of the previously
saved file.
Set your print parameters, then click OK.
3.
Select the file that you want to open. The file name appears
highlighted in the File name field.
4.
Click Open. The mutual fund trade information appears in
the grid.
2.
The trade orders are printed as a report.
SchwabLink User Manual
7.116
Chapter 7
M u t u a l F u n d Tr a d i n g
SENDING A MUTUAL FUND TRADE LIST
TO SCHWAB
For information on the archive functions of the Mutual Fund
Trading module, see “Archiving Files” on this page.
Before sending the mutual fund trade order list for the first time,
contact your Firm Security Administrator to ensure that your
user ID has been activated with trading authorization. For further information, visit the online help section of the Schwab
Institutional Web site.
If file transmission is unsuccessful, try to resend the file to
Schwab. If the transmission is still unsuccessful, please contact
Technical Client Services between 8:00 a.m. and 6:00 p.m.
Eastern time.
To send a mutual fund trade order list to Schwab:
1.
Verify that the trade list you want to send is displayed in the
Mutual Fund Template window. If it is not, select Open
from the File menu, then select the trade file.
2.
Click the
File menu.
button or select Send Trade List from the
A dialog box appears, showing the last user ID that was entered.
3.
If your user ID is different from the displayed user ID, enter
your user ID. (You must enter your user ID and password
every time you use the Mutual Fund Trading module to send
a trade order list to Schwab.)
4.
Enter your password.
5.
Click OK.
The file is sent to Schwab. If transmission is successful, a
confirmation message appears, showing the file name.
6.
Click OK. You are returned to the Mutual Fund Template
window.
You can review the status of the uploaded mutual fund
trade file by visiting the Schwab Institutional Web site
(www. schwabinstitutional.com). Go to the Upload Activity
Log located in the Trade section.
Sent files are automatically archived with a .TM* extension.
SchwabLink User Manual
• For investment advisors, call 1-800-647-LINK (5465) or
e-mail [email protected].
• For Third Party Administrators, call 1-800-231-2855
(Option 2) or e-mail [email protected].
Handling Duplicate Orders
If you have activated the “Check for duplicates” feature, the
system checks for identical orders within the trade order list
when you try to transmit it. If identical orders are found, a
duplicate error message appears.
To complete sending of the identical files to Schwab, click Yes in
the dialog box.
If you click No, you are returned to the Mutual Fund Template
window, where you can delete the duplicate trade order.
To activate or deactivate this feature, see “Checking for
Duplicates” on page 7.119.
Archiving Files
Consult with your compliance or legal expert for information
concerning electronic and non-electronic record-keeping
requirements for mutual fund trades.
Mutual Fund Trading automatically archives all Mutual Fund
Trade files that are sent to Schwab. (To save a mutual fund trade
list to a file manually at any time, see “Saving a Mutual Fund
7.117
Chapter 7
M u t u a l F u n d Tr a d i n g
Trade List” on page 7.115.)
SETTING PREFERENCES
The files are archived in CSmmddyy.TM* format. The * sequentially names your files from 0 to 9, and then from A to Z.
Use Mutual Fund Trading preferences to:
For example, if the first trade file is sent on May 1, 2000, and
your Master Account Number is 08000000. The file is archived
as C:\08000000\CS050100.TM0. The second trade file you send
that day is C:\08000000\CS050100.TM1.
Mutual Fund Trading archives these files to a Master Account
subdirectory created from the root directory of the archive drive.
Typically, the default archive drive is C:\.
If the system cannot create a subdirectory from the root directory
of the archive drive, you can select an alternate archive drive:
1.
• Set up a Master Account (see Chapter 2, “Getting Started”)
• Select a fund instruction default
• Automatically check for duplicate trades
• Show or hide titles in the Mutual Fund Template
window grid
• Check file format in imported files
From the Options menu, select Preferences. The Mutual Fund
Trading Preferences dialog box appears (Figure 7-14).
From the File menu, select Archive File Path. The Archive
Dialog box appears (Figure 7-15).
Figure 7-13 Archive Dialog Box
2.
Select an alternate drive and click OK.
You return to the Mutual Fund Template window.
Future files are archived automatically to this directory after they
are sent to Schwab.
Figure 7-14 Mutual Fund Trading Preferences Dialog Box
SchwabLink User Manual
7.118
Chapter 7
M u t u a l F u n d Tr a d i n g
Selecting the Fund Instruction Default
S h o w i n g o r H i d i n g Ti t l e s i n t h e G r i d
This option applies to buys only. To change the Fund Instruction
Default, select the radio button next to your preferences in the
Mutual Fund Trading Preferences dialog box.
When the “Show titles in grid” box in the Mutual Fund Trading
Preferences dialog box has a ✔, titles are displayed in the Mutual
Fund Template window.
When you open the Mutual Fund Trading Template, the option
selected in the Preferences window will be the default fund
instruction for new buys. You can specify a different fund
instruction in the Fund Instruction field of the Mutual Fund
Template each time you make a buy; otherwise the fund instruction
defaults to your selection in the Preferences dialog box.
To deactivate this feature, select the check box. The ✔ disappears. When you return to the Mutual Fund Template window,
the column titles will not show.
Note: Payment instructions for subsequent purchases will default
to the same instructions as the existing position regardless of the
Fund Instruction selection in the Mutual Fund Template. To
change payment instructions on an existing position, contact
your Institutional Service Group. Changes must be made at least
one business day before record date of a distribution to be
effective for that distribution.
Checking File Format on Import
When the “Check file format on import” box in the Mutual
Fund Trading Preferences dialog box has a ✔, imported files will
be checked for format errors.
To deactivate this feature, select the check box. The ✔ disappears. A warning dialog box appears (Figure 7-15) to confirm
that you want to continue. Click Yes. Imported files will no
longer be checked for format errors.
Checking for Duplicates
You can check for identical trade orders in a mutual fund trade
order list. This check occurs during file import format validation
and when sending the files to Schwab.
To activate this setting, select the box next to “Check for
duplicates” in the Mutual Fund Trading Preferences dialog box.
A ✔ appears.
Figure 7-15 Warning Dialog Box
To deactivate the setting, select the box again, and the ✔
disappears.
SchwabLink User Manual
(0901-03255)
7.119
Chapter 8
Securities Allocation
OVERVIEW
Use the Securities Allocation module to allocate block-traded
shares electronically among multiple client accounts. Securities
Allocation supports both Prime Broker trades and Schwab trades.
Once the securities are allocated, the allocation information is
sent to the Schwab Institutional Trading Desk for processing.
In order to use Securities Allocation, you must set up at least one
Master Account. Refer to Chapter 2, “Getting Started.”
If you are not sure of your user ID and password, or do not
know whether your ID is authorized for trading, contact your
Firm Security Administrator (FSA).
Main Steps
Using the Securities Allocation module to send a Securities
Allocation file to Schwab involves four main steps:
1.
Enter or import trade data into the Schwab Trade or Prime
Broker Trade view of the Securities Allocation module.
• Open and exit the Securities Allocation module
2.
Send the Securities Allocation file to Schwab.
• Allocate securities traded via Schwab or Prime Broker
3.
Visit the Schwab Institutional Web site
(www.schwabinstitutional.com) to review the status of the
uploaded Securities Allocation file.
4.
Store and back up Securities Allocation files according to
state regulations.
The procedures in this chapter show you how to:
• Save Allocation Worksheets to a file
• Send files to Schwab for processing
• Print Allocation Worksheets
• Open existing files
• Import external files
SchwabLink archives files you send to Schwab through the
Securities Allocation module. Check the regulations in your state
regarding storage and backup of Securities Allocation files.
Prerequisites
To use the Securities Allocation module, you need the following:
S e c u r i t i e s A l l o c a t i o n Wi n d o w
• At least one Master Account that is set up. (To set up a
Master Account for the first time, see Chapter 2, “Getting
Started.”)
To open the Securities Allocation module:
• Trade allocation information for each client account.
(See “Entering Schwab Trades” on page 8.121 and
“Entering Prime Broker Trades” on page 8.122.)
2.
• Schwab Institutional Web site user ID and password that
are authorized for trading.
SchwabLink User Manual
1.
Select the Trade tab from the SchwabLink
Launcher screen.
Click the Securities Allocation icon.
The Securities Allocation window opens in the Schwab
Trade view (Figure 8-1).
8.120
Chapter 8
Securities Allocation
A L L O C AT I N G S E C U R I T I E S
If the block trade you want to allocate was placed through
Schwab, refer to the next section, “Entering Schwab Trades.” If
another firm executed the trade, refer to “Entering Prime Broker
Trades” on page 8.122.
E n t e r i n g S c h w a b Tr a d e s
Before using the Securities Allocation module to enter and allocate Schwab traded securities, you must ensure that the order has
been placed and executed. You also must have the following
information:
• Name of the security
• Total buy or sell price of the trade
• Total number of shares to be allocated
• Action (buy or sell options)
Figure 8-1 Securities Allocation Window (Schwab Trade View)
The Inv. Manager and Master Account fields are populated with
the details of the selected Master Account. If you have not yet set
up a Master Account, these fields will be blank. To set up a
Master Account, refer to Chapter 2, “Getting Started.”
• A list of the accounts to which these shares are to be
allocated, and the quantity of shares to be allocated to
each account
To exit Securities Allocation, select Exit from the File menu.
Note: If this information is already held in a spreadsheet or other
account management software, you may be able to import it into
the Securities Allocation module for transmission to Schwab. See
“Importing Trade Files” on page 8.129.
Master Account Field
To complete the Schwab Trade Detail page:
To display a Master Account, select the Master Account number
from the drop-down list in the Master Account field.
1.
SchwabLink User Manual
Open the Securities Allocation module.
The system defaults to the Schwab Trade view shown in
Figure 8-1. If this view is not displayed, make sure that the
Schwab Trade option button and the Schwab Trade Detail
tab are both selected.
8.121
Chapter 8
Securities Allocation
Note: The following fields require data: Master Account,
Action, Security Symbol, Quantity, Price, and Trade Date.
These fields are marked on screen with an asterisk (*).
2.
3.
4.
5.
6.
7.
8.
Complete the Master Account, Action, and Security Symbol
fields by selecting the appropriate values from the dropdown lists. Completing the Security Symbol field automatically populates the Security Description field.
E n t e r i n g P r i m e B r o k e r Tr a d e s
Before you begin to enter and allocate Prime Broker trades, make
sure that the order has been placed and that you have the following information:
• Name of the security (symbol or CUSIP). CUSIP may not
be available for new issue bonds.
• Total buy or sell price of the trade
In the Quantity field, enter the total number of purchased or
sold shares up to a maximum of nine characters. This field
allows only whole shares.
• Broker’s commission if any
• Number of shares or face value for bonds being allocated
• Action (buy or sell)
In the Price field, enter the purchase or sell price of the
shares (does not include commission). This field can hold up
to 14 characters, including a maximum of 4 decimal places.
• A list of the accounts to which these shares are to be
allocated, and the quantity of shares to be allocated to
each account
The Trade Date field automatically defaults to today’s date.
If you are allocating the shares proactively or retroactively,
use the scroll arrows to select the appropriate date.
• Name and capacity of the executing broker
• Name of the clearing broker (if different)
Enter the contact name and phone number of someone who
may be contacted by the Schwab Institutional Trading Desk
in the event of any questions on your data.
In the Note field, you can enter up to 256 characters of
information or comments about the allocation. The first 56
characters of data will be sent to Schwab with the worksheet
file, so this should include any specific instructions for the
Schwab Institutional Trading Desk.
If necessary, edit your field entries by highlighting the information and typing in new information over the highlighted
text. Or, where applicable, make a new selection from the
drop-down list.
• Stock exchange on which the shares were traded
• Whether the shares were IPO/New Issue
C o m p l e t i n g t h e P B Tr a d e D e t a i l I P a g e
To complete the PB Trade Detail I page:
1.
Select the Prime Broker Trade option button.
The PB Trade Detail I page (Figure 8-2) appears. Make sure
that the PB Trade Detail I tab is selected.
You have now completed the Schwab Trade Detail page and are
ready to complete the Allocation Worksheet. See “Adding
Information to the Allocation Worksheet” on page 8.125.
SchwabLink User Manual
8.122
Chapter 8
Securities Allocation
listed, select the appropriate account from the drop-down
list in the Master Account field.
3.
Select the Executing Broker from the drop-down list.
Securities Allocation automatically updates the DTC # field
and inserts the same broker name into the Clearing Broker
field.
You can also enter information in these fields, in which case
the DTC # of the Clearing Broker will be entered by the
Prime Broker Team.
4.
In the Exchange field, select the stock exchange through
which the trade was executed, or type in the stock exchange
name.
5.
In the Capacity of Executing Broker field, select the capacity
from the drop-down list: Agent, Principal, or Not Disclosed.
You can also type the information.
6.
Complete the Executing Broker Contact and Clearing Broker
Contact fields as appropriate.
Figure 8-2 Securities Allocation Window (Prime Broker Trade View)
2.
7.
If you have already set up a Master Account, the Investment
Manager and Master Account fields should be populated
with your default Master Account information. If these fields
are blank, you will need to set up a Master Account. Refer
to Chapter 2, “Getting Started.”
If you are allocating securities from a new issue or from an
IPO, click in the IPO/New Issue check box to activate it.
Once activated, a ✔ appears.
8.
Note: The following fields are required: Master Account,
Executing Broker, Clearing Broker, Exchange, Capacity of
Executing Broker. (The IPO/New Issue field is required if
you are allocating securities from a new issue or IPO.) These
fields are marked with an asterisk (*).
In the Note field, you can enter up to 256 characters of
information or comments about the allocation. The first 56
characters of data will be sent to Schwab with the worksheet
file, so this should include any specific instructions for the
Schwab Institutional Trading Desk.
9.
If necessary, edit your field entries by highlighting the information and typing in new information over the highlighted
text. Or, where applicable, make a new selection from the
drop-down list.
If you have more than one Master Account, make sure that
the correct one is selected. To change the Master Account
SchwabLink User Manual
8.123
Chapter 8
Securities Allocation
Proceed to the next section to complete the second page of the
Prime Broker Trade view.
C o m p l e t i n g t h e P B Tr a d e D e t a i l I I P a g e
Note: The following fields are required: Trade Date,
Settlement Date, Action, Security Symbol, Quantity, Security
Desc, and Price. These fields are marked with an asterisk (*).
2.
If necessary, edit the Trade Date and Settlement Date fields
by scrolling backwards or forwards through dates. By
default, the Trade Date field shows today’s date, and the settlement date is set at three business days after the trade date.
3.
Select the appropriate action (buy or sell) from the list.
4.
Select a Security Symbol, and the Security Description field
populates accordingly. If the security you want is not shown
in the Security Symbol list, you can type in the security
description.
Note: Some fields have drop-down lists from which you make
selections, but you can also enter data in these fields.
To complete the second page of Prime Broker Trade Detail:
1.
Click the PB Trade Detail II tab.
The PB Trade Detail II page appears (Figure 8-3).
5.
Enter information in the remaining fields:
Quantity: Number of shares being allocated. For bonds,
enter the face value (for example, 25000, not 25). This
numeric field accepts whole numbers only.
Principal, Interest, Commission, Net Amount, SEC Fee and
Other Fees: Numeric fields that take numbers with up to 2
decimal places.
Price: Takes numbers with up to 4 decimal places.
Other Description: A notes field for adding miscellaneous
information. Enter up to 24 characters.
6.
Edit the fields as necessary.
Go to “Adding Information to the Allocation Worksheet” on the
next page to allocate the trade.
Figure 8-3 PB Trade Detail II Page
SchwabLink User Manual
8.124
Chapter 8
Securities Allocation
C o m p l e t i n g t h e A l l o c a t i o n Wo r k s h e e t
2.
Use the Allocation Worksheet to distribute the Schwab or Prime
Broker block trade among client accounts. On this screen you
indicate how many shares are bought or sold by each client.
A d d i n g I n f o r m a t i o n t o t h e A l l o c a t i o n Wo r k s h e e t
Note: Accounts are sorted by account number, not
client name.
3.
Click the Allocation Worksheet tab, or select Allocation
Worksheet from the Window menu.
In the Client Allocation field, enter the number of shares you
are allocating to the selected client account. For bonds, enter
the face value (for example, 25000, not 25).
4.
Figure 8-4 shows the Allocation Worksheet in the Schwab
Trade view. The worksheet is the same for the Prime Broker
Trade view.
Click the Add/Edit button to add the information to the grid
at the bottom of the screen.
5.
Repeat steps 2–4 for each client to whom you are allocating
shares, until all the shares are allocated.
To add information to the Allocation Worksheet:
1.
Select accounts by client account number or by account name.
The corresponding name or number appears in the respective
field. You cannot type in these fields.
As you add each allocation to the grid, the information in
the Allocation Summary portion of the window changes.
The number of shares in the Total Shares Allocated field
increases, and the number of shares in the Total Shares
Remaining field decreases, corresponding to the data you
enter.
Editing Allocation Information
To edit allocation information:
1.
In the grid, click on the record that you want to edit.
The client record is highlighted, and the fields in the boxes
above the grid are populated with that client information
(Figure 8-5).
Figure 8-4 Allocation Worksheet (Schwab Trade View)
SchwabLink User Manual
8.125
Chapter 8
Securities Allocation
between will be highlighted. You must reallocate the shares from
the deleted rows.
Any changes you make are reflected in the Allocation
Summary window.
S E N D I N G S E C U R I T I E S A L L O C AT I O N F I L E S
SCHWAB
TO
Before sending the Securities Allocation files to Schwab for the
first time, contact your Firm Security Administrator to ensure
that your user ID has been activated with trading authorization.
For further information, visit the online help portion of the
Schwab Institutional Web site.
Note: You must transmit a Securities Allocation file no later than
one hour after the market closes on the day the associated trade
was made.
Figure 8-5 Selecting a Row to Edit
Saving Files
2.
To edit the number of shares in the selected record, highlight
the Client Allocation field and type in the revised number of
shares. (You must allocate any remaining shares.)
Before you send a Securities Allocation file to Schwab, you must
save it. The files that you save are automatically queued for
transmission in the Worksheet Queue. You send the Securities
Allocation files to the Schwab Institutional Trading Desk from
this queue.
Deleting Accounts
To delete the selected record, click the Delete button. The client
record is removed from the grid.
To select contiguous multiple accounts for deletion, click on the
first account you want to delete, hold down the Shift key, and
click on the last account you want to delete. All the accounts in
SchwabLink User Manual
To save the active trade allocation:
1.
Click the
button or select Save As from the File menu.
The Save As dialog box (Figure 8-6) appears.
8.126
Chapter 8
Securities Allocation
Sending Files
Note: You must transmit a Securities Allocation file to Schwab
no later than one hour after the market closes on the day the
associated trade was made.
To send files to Schwab:
1.
Click the
File menu.
button or select Send to Schwab from the
The Worksheet Queue dialog box appears (Figure 8-7).
Figure 8-6 Save As Dialog Box
In the File name field, the default name for your file consists
of “CS” plus today’s date. The file will be saved with the
extension of eq for Schwab trades, or pb for Prime Broker
trades, plus a sequential number or letter. The sequential
naming convention is 0–9 then a–z.
For example, if today’s date is March 24, 1999, and you are
saving the first Schwab trade file of the day, the default file
name is cs032499.eq0.
2.
3.
The default allocation file storage location is C:\Program
Files\SchwabLink Desktop\Securities Allocation\Data. You
can change the file name, default drive, and directory if you
choose. You cannot change the file extension.
Click the Save button.
The file is saved to the location specified and is placed in the
Worksheet Queue.
SchwabLink User Manual
Figure 8-7 Worksheet Queue Dialog Box
All files in the queue are automatically selected (highlighted)
for transmission to Schwab. Deselect files by using Ctrl-Click
(standard Windows selection functionality).
To remove files from the queue, highlight them and click the
Delete button. If you accidentally delete a file from the
Worksheet Queue, you can requeue it. See “Requeuing
Deleted Files” on the next page.
8.127
Chapter 8
2.
Securities Allocation
Make sure that the files you want to send to Schwab are
highlighted, then click the Send button.
2.
If your user ID is different from the user ID displayed, enter
your own user ID. (You must use your user ID and password
every time you use the Securities Allocation module to send
files to Schwab.)
4.
Enter your password.
5.
Click OK.
or select Send to Schwab from the File menu.
The Worksheet queue appears, with the file requeued.
A dialog box appears, showing the last Schwab Institutional
Web site user ID that was entered.
3.
Click
Opening Existing Files
To open an existing file:
1.
Click the
icon or select Open from the File menu.
The Open dialog box (Figure 8-8) appears.
The file is sent to Schwab. If transmission is successful, a
confirmation message appears, showing the name of the file.
6.
Click OK.
You are returned to the Allocation Worksheet.
Files that are sent successfully are automatically deleted from the
queue. Files that were not selected from the queue will remain in
the queue until sent or deleted. It is possible to make changes to
these files. However, you must re-save them before sending.
You can view the Worksheet Queue at any time by clicking
.
Figure 8-8 Open Dialog Box
Requeuing Deleted Files
Files that are deleted from the Worksheet Queue are still present
on the drive to which they were originally saved. To requeue an
allocation file:
1.
Do one of the following:
• Open the file, click Save As in the File menu, and rename
the file.
• Open the file, edit it, and save it.
SchwabLink User Manual
2.
Select the drive, directory, and file type of the previously
saved file you want to open.
3.
Select the file.
The file name appears highlighted in the File name field.
4.
Click the Open button.
The fields in the Securities Allocation window are populated
with the file information.
8.128
Chapter 8
Securities Allocation
You can edit the information in this file in the Schwab Trade or
Prime Broker detail pages and the Allocation Worksheet.
3.
In the Open dialog box (Figure 8-8), select the drive and
directory of the file you want to import.
4.
In the “Files of type” field, select All to view the file you
want to import.
5.
Select the file. The file name appears highlighted in the File
name field.
Printing Securities Allocations
You can print one or more pages of your Securities Allocation
information. Securities Allocation prints a report of the data
that you have entered for a particular file. The first page of the
report consists of the trade and broker information. The subsequent pages list the allocations by client account (that is, the
worksheet grid).
6.
Click Open.
The details and Allocation Worksheet tabs should populate with
the information from your spreadsheet, and the window should
show the appropriate view (Schwab Trade or Prime Broker).
To print one or more pages of your allocation file:
1.
Open the file.
2.
Click the
S c h w a b Tr a d e F i l e F o r m a t
icon or select Print from the File menu. The
print dialog box appears.
3.
Set your print parameters.
4.
Click OK.
Header Format
OFFSET
WIDTH
CONTENT
EXAMPLE
1-2
2
Record type
EH = Header
3-10
8
Transmission Date
19940317
11-18
8
Send Master Account #
08000000
19-21
3
Action
B = Buy
IMPORTING TRADE FILES
This section explains how to import a correctly formatted file
from spreadsheet software. For an example of how to import
only the allocation details from a Microsoft ExcelTM spreadsheet,
see “Example: Importing an Excel Spreadsheet” on page 8.132.
To import information from a spreadsheet file into the Security
Allocation module:
1.
2.
Format the file as described in one of the following sections,
“Schwab Trade File Format” or “Prime Broker Trade File
Format.”
From the File menu in Securities Allocation, select Import
Schwab Trade File or Import Prime Broker Trade File.
SchwabLink User Manual
BCC = Buy Call Close
BCO = Buy Call Open
BPO = Buy Put Open
BPC = Buy Put Close
8.129
Chapter 8
Securities Allocation
Tr a i l e r F o r m a t
Header Format (Continued)
OFFSET
WIDTH
CONTENT
EXAMPLE
OFFSET
WIDTH
CONTENT
EXAMPLE
S = Sell
1-2
2
Record Type
ET = Trailer
SCC = Sell Call Close
**3-7
5
Number of Records
00003
SCO = Sell Call Open
**8-16
9
Total Number of Shares
000014140
SPC = Sell Put Close
**Right justified
SPO = Sell Put Open
Sample Data
SS = Sell Short
22-30
9
Security Symbol
ICMB or 123123xx2
**31-43
13
Average price
00000074.3200
44-51
8
Trade date
19940317
The following is an example of how your spreadsheet file will
look, taken from the data above.
EH1994100108000000B ICMB 00000074.320019940317
12345678 0000000840
23456789 0000001000
**Right justified
45692924 0000012300
File Format
ET00003000014140
OFFSET
WIDTH
CONTENT
EXAMPLE
1-8
8
Client Account Number
12345678
9
1
Blank Space
**10-18
9
Shares to Allocate
00000840
**Right justified
SchwabLink User Manual
8.130
Chapter 8
Securities Allocation
P r i m e B r o k e r Tr a d e F i l e F o r m a t
File Format
Header Format
OFFSET
WIDTH
CONTENT
EXAMPLE
12345678
OFFSET
WIDTH
CONTENT
EXAMPLE
1-8
8
Sub-Account Number
1-2
2
Record Type
PH = Header
9
1
Blank Space
3-10
8
Transmission Date
19950123
**10-18
9
Shares to Allocate
00000840
11-18
8
Sender Master Account #
08001234
**Right justified
*19-43
25
Executing Broker/Dealer
Goldman Sachs
*44-68
25
Clearing Broker Name
Goldman Sachs
Tr a i l e r F o r m a t
69-72
4
Clearing Agent DTC 3
0372
*73-78
6
Action
Buy or Sell
79-86
8
Trade Date
19950123
87-94
8
Settlement Date
19950128
95-103
9
CUSIP Number
938424de2
*104-112
9
Security Symbol
IBM
*113-121
9
Capacity of Exec. Broker
Agent or Principal or N/A
*122-125
4
Exchange Where Executed
NYSE
*126-150
25
Security Description
US TREAS NOTE
*Left justified
SchwabLink User Manual
OFFSET
WIDTH
CONTENT
EXAMPLE
1-2
2
Record Type
PT = Trailer
**3-7
5
Number of Records Allocated 000002
8-10
3
New Issue? (Yes or No)
YES
**11-19
9
Total Shares Allocated
000012345
**20-33
14
Price
000000023.4212
**34-46
13
Principal
000000123.56
**47-55
9
Interest
000234.66
**56-64
9
Taxes
000345.67
**65-73
9
Commission
000452.54
**74-82
9
Other Fee
000345.64
8.131
Chapter 8
Securities Allocation
Example: Importing an Excel Spreadsheet
Tr a i l e r F o r m a t ( C o n t i n u e d )
OFFSET
WIDTH
CONTENT
EXAMPLE
**83-95
13
Net Amount
0000034521.37
96-151
56
Prime Broker Notes
These are the notes.
**Right justified
1.
Sample Data
PH1995012308001234GOLDMAN SACHS
0372BUY 1995012319950128938424DE2IBM
Follow the steps in this section to import Schwab trade data
from a Microsoft Excel spreadsheet into a Securities Allocation
Worksheet. (The format presented here can also be used to
import Prime Broker trade data from Excel spreadsheets.) The
data is for the Allocation Worksheet only.
GOLDMAN SACHS
AGENT NYSEUS TREASURY NOTE
12345678 000000840
Column
A
B
C
Column width
8
1
9
Data
Client account number
Blank space
Quantity of shares
52342094 000001000
59260342 000005000
84922941 000000325
PT00004NO
000007165000000025.6250000256250.00000000.00000000.00000894.65000000.0000
002 57144.65
Format the spreadsheet data according to the specifications
in the following table:
Note: Client names are not used in the import data.
2.
Adjust column width in Excel by selecting the column,
selecting Format Column Width, and filling in the desired
column width in the dialog box.
3.
Enter data into the formatted spreadsheet.
4.
Save the file in Excel spreadsheet format, so you can edit the
file in the spreadsheet program. Select Save As from the File
menu.
The Save As dialog box appears.
5.
SchwabLink User Manual
Type in a file name and save the file in spreadsheet format to
the desired location.
8.132
Chapter 8
6.
Securities Allocation
After you save the file in spreadsheet format, select Save As
again and select “Formatted Text (Space Delimited)” in the
Save File as Type field.
You will import this file into the Securities Allocation
module. This format preserves the text contents and spacing
to accommodate Securities Allocation.
7.
Select a destination in SchwabLink for the file.
The default file storage location is C:\Program
Files\SchwabLink Desktop\Securities Allocation\Data.
8.
Click OK.
9.
Open the Securities Allocation module.
10. From the File menu, select Import Schwab Trade File.
11. Navigate to and select the previously saved text file.
12. Click OK.
The data from the file should be displayed in the Allocation
Worksheet.
13. Select the Schwab Trade Detail tab and complete the
worksheet.
14. Save the file in the Securities Allocation module format
(defaults to extension of EQ0), queue it, and send it to
Schwab. (See “Sending Securities Allocation Files to
Schwab” on page 8.126.)
SchwabLink User Manual
(1000-0764)
8.133
Chapter 9
Management Fees
OVERVIEW
• Fee amount being charged to each client
Use the Management Fees module to process your client
management fees electronically. You enter management fees in
the Management Fee Processing Worksheet and then transmit
them to Schwab, where the fees are processed for payment.
• Schwab Institutional Web user ID and password that are
authorized for file uploads
This chapter shows you how to:
• Enter and edit data in the Management Fee Processing
Worksheet
If you are not sure of your user ID and password, or do not
know whether you are authorized for file uploads, contact your
Firm Security Administrator (FSA). For further information, visit
the online help portion of the Schwab Institutional Web site.
• Import data into the Management Fees module
Main Steps
• Save the Management Fee Processing Worksheet file
The Management Fees processing procedure requires six steps:
• Send the file to Schwab
1.
Enter or import data into the Management Fee Processing
Worksheet.
Prerequisites
2.
Save the worksheet as a file.
Note: You must have written approval from your clients when they
open their Schwab accounts in order to debit management fees automatically from their accounts. The appropriate forms for obtaining
client authorization to deduct fees are available electronically on the
Schwab Institutional Web site (www.schwabinstitutional.com) or
from your Institutional Service Group.
3.
Send the file to Schwab for processing.
4.
Visit the Schwab Institutional Web site to review the status
of the uploaded Management Fees file.
5.
Store and back up Management Fees files* according to
state regulations.
6.
Invoice your clients.
Before you can use the Management Fees module to send files to
Schwab, you need the following:
• At least one Master Account that is set up (see Chapter 2,
“Getting Started”)
M a n a g e m e n t F e e P r o c e s s i n g Wi n d o w
• Disbursement Account number for the first time you
process fees for each Master Account (see “Setting Up
Disbursement Accounts” on page 9.142). Contact your
Institutional Service Group if you do not know your
disbursement account number.
1.
Select the Utilities tab on the SchwabLink Launcher screen.
2.
Click the Management Fees icon.
• Client account numbers for each client account that you
will charge
* Please consult with your firm’s compliance expert or legal counsel to
ensure that the record-keeping and other procedures established in your
firm comply with applicable standards.
SchwabLink User Manual
To open the Management Fee Processing window:
The Management Fee Processing window opens (Figure 9-1).
9.134
Chapter 9
Management Fees
To exit the Management Fee Processing module, select Exit from
the File menu.
Selecting Master Accounts
Before entering any data, make sure that the correct Master
Account is selected. If it is not, select the account from the
drop-down list in the Master Account field.
You cannot enter a Master Account number manually. If you do
not see the Master Account number you need and attempt to
type it in, the Master Account Changes dialog box (Figure 9-2)
appears.
Figure 9-1 Management Fee Processing Window
When the Management Fee Processing window opens, the
Master Account and the Disbursement Account fields should be
populated. If these fields are not populated, you will need to set
up a Master Account and a Disbursement Account. See Chapter 2,
“Getting Started.”
If you created a Master Account in a module other than
Management Fees and have not entered a Disbursement Account,
you should store the Disbursement Account number for your
records in the Management Fees module.
Follow the procedure in “Setting Up Disbursement Accounts” on
page 9.142.
Figure 9-2 Master Account Change Dialog Box
To set up or modify a Master Account, see Chapter 2, “Getting
Started.”
ENTERING ACCOUNT
AND
F E E D ATA
There are several ways to enter data into the Management Fee
Processing Worksheet:
• Manually enter data.
• Load account information from the SchwabLink database
and enter fee information into the worksheet.
• Import information from an external file.
• Open and edit a previously created Management Fees file.
SchwabLink User Manual
9.135
Chapter 9
Management Fees
Manually Entering Data
Loading Data from the SchwabLink Database
To enter data manually:
To load all the accounts from the selected Master Account:
1.
Make sure that the correct Master Account is selected.
1.
2.
Select or enter the client account number or name to which
you will charge a fee.
Select from the drop-down list in the Account Number or
Account Name field. The corresponding field automatically
populates.
Alternatively, place the cursor in the Account Number field
and enter the number. If the account is in the database, the
Account Name field will populate.
3.
Enter the fee amount.
4.
Click the Add/Update Fee button.
The account fee information appears in the worksheet grid.
5.
Repeat these steps for all accounts to which you want to
charge a fee.
The total number of fees and total fee amount are automatically
calculated for you on the worksheet.
Note: The worksheet automatically validates the data that
you enter into the worksheet against the details held in the
SchwabLink database. If you enter a client account number that
is not in the database and you have not selected the “Validate
typed sub accounts” option in the Management Fees Preferences
dialog box, an asterisk appears in the question mark (?) column
next to the account number. If you have selected this option, you
receive a warning message that the account number is unknown,
and you will not be able to enter a fee amount or transmit the
account information to Schwab. (There may be a one-day delay
between the time you set up a client account number and the
time it appears in the SchwabLink database.)
SchwabLink User Manual
Click the
button, or select Load from Database from
the File menu.
All the accounts from the selected Master Account appear in
the Worksheet grid, with a fee amount of $0.00.
3.
Click on a client account in the grid.
The account details appear in the Enter/Edit Fee section of
the window.
3.
In the Fee Amount field, enter the management fee to be
charged to this account.
4.
Click Add/Update.
The fee amount is added to the listing in the Worksheet grid.
5.
Repeat this procedure for all accounts to which you are
charging a fee.
6.
If there are accounts that you do not want to charge, follow
the procedure in “Deleting Zero Fees” on page 9.139.
Importing Data
To import data from another application:
1.
Make sure the file follows the format described in the next
section, “Import File Format.” The extension for an external
file is either .csv (comma delimited) or .txt (tab delimited).
2.
Make sure that the correct Master Account is selected in the
Management Fee Processing window.
3.
From the File menu, select Import External File.
The Open dialog box (Figure 9-3) appears.
9.136
Chapter 9
Management Fees
asterisk appears in the question mark (?) column next to
each client account number that the database does not yet
recognize. (There may be a one-day delay between the time
you set up a client account and the time it appears in the
SchwabLink database.)
Import File Format
You can import fee information from a spreadsheet or an external database into the Management Fee Processing Worksheet if it
is formatted as described below.
Figure 9-3 Open Dialog Box
4.
From the drop-down list in the “Files of type” field, select
the type of file that you want to import (.txt or .csv).
5.
6.
The fields must be separated by commas in files with a .csv
extension, or by tabs in files with a .txt extension.
FIELD NAME
MAXIMUM FIELD LENGTH
From the “Look in” field, select the file that you want to
import. The file name appears in the “File name” field.
Account Number
8
Click the Open button.
Fee Amount
If the account names and numbers already appear in the
database, you are immediately returned to the Management
Fee Processing window. The imported account names, numbers, and fees appear in the Worksheet grid.
If the account names and numbers are not already in the
database, you get a message telling you that they are not recognized and asking whether you want to abort the Import
function. If you want to add these accounts to the grid, click
Yes for each account that the database does not recognize,
or click Yes to All.
You are returned to the Management Fee Processing window,
which will display the information you have imported. An
SchwabLink User Manual
8
(including the decimal point and
two decimal places)
Account name (optional)
35
Import File Format Example
11111111,00500.00,Test account 1
22222222,10000.00,Test account 2
33333333,00250.00,Test account 3
9.137
Chapter 9
Management Fees
Opening Previously Created Files
5.
If you are sending similar Management Fees files on a regular
basis, you may want to open a previously created file and edit it.
Select Save As from the File menu and save the new file with
another name.
To open a previously saved Management Fees file:
R E V I S I N G I N F O R M AT I O N
1.
Select the Master Account that contains the file you want to
open.
After you enter or import data in the worksheet grid, you can
edit, delete, or sort it.
2.
Click
or select Open from the File menu.
The Open dialog box (Figure 9-4) appears.
Editing Information
To edit information in the worksheet:
1.
In the Management Fee Processing Worksheet grid, click on
the row that you want to change.
The details appear in the Enter/Edit section of the
Management Fee Processing window.
2.
Place your cursor in the Fee Amount field and enter the
new fee.
3.
Click the Add/Update Fee button.
The record is updated in the grid.
Deleting Rows
Figure 9-4 Open Dialog Box
To delete rows of information:
1.
3.
From the “Look in” field, select the file you want to open
and click Open.
To select contiguous rows for deletion, highlight the first
row you want to delete, hold down the Shift key, and click
on the last row you want to select. Or, hold down the mouse
button and drag the cursor until all the rows you want to
select are highlighted.
You are returned to the Management Fee Processing
window, and the grid is populated with the fee information
from that file.
4.
Make the necessary changes. (See the next main section,
“Revising Information.”)
To select a single row for deletion, click anywhere in the
row. The line is highlighted.
2.
Click the Delete Fee(s) button.
The Delete Fees dialog box (Figure 9-5) appears.
SchwabLink User Manual
9.138
Chapter 9
Management Fees
Sorting Information
To sort information in the Management Fee Processing
Worksheet grid, do one of the following:
• Click on the column header that you want to sort by.
Figure 9-5 Delete Fees Dialog Box
3.
• From the Options menu, select the name of the column
you want to sort by.
The column sorts in ascending order.
Click Yes.
All the highlighted rows are deleted.
Deleting Zero Fees
PRINTING
THE
WORKSHEET
You can only print the Management Fee Processing Worksheet
currently displayed in the Worksheet grid.
You may not want to charge a fee to some accounts. After you
complete the procedure in “Loading Data from the SchwabLink
Database” on page 9.136 for all accounts that you want to
charge, follow these steps to avoid charging the remainder:
To print the displayed worksheet:
1.
2.
Specify print parameters.
3.
Click OK.
In the Management Fee Processing Worksheet, click the
Delete Zero Fees button.
The Verify Deletion dialog box (Figure 9-6) appears.
1.
Click
or select Print from the File menu.
The Print dialog box appears.
SENDING FILES
TO
SCHWAB
You must save Management Fees files before sending them to
Schwab. Saved files are automatically placed in the Worksheet
Queue for transmission to Schwab.
Figure 9-6 Verify Deletion Dialog Box
2.
Click Yes.
Before sending a Management Fees file for the first time, contact
your Firm Security Administrator to ensure that your Schwab
Institutional Web user ID has been activated with file upload
authorization. For further information, visit the online help
portion of the Schwab Institutional Web site.
You are returned to the Management Fee Processing Worksheet.
Only the rows with fees allocated appear in the grid.
SchwabLink User Manual
9.139
Chapter 9
Management Fees
S a v i n g t h e Wo r k s h e e t a s a F i l e
Sending Files
To save a Management Fee Processing Worksheet as a file:
To send files to Schwab:
1.
Make sure the worksheet you want to save is displayed.
1.
2.
Click the
button or select Save As from the File menu.
The Save As dialog box (Figure 9-7) appears.
The Worksheet Queue dialog box (Figure 9-8) appears.
After saving the files that you want to send, click the
icon or select Send to Schwab from the File menu.
Figure 9-7 Save As Dialog Box
3.
In the “Save in” field, select the destination for the file.
(The default location is C:\Program Files\SchwabLink
Desktop\Management Fees\Data.)
4.
Enter a name in the “File name” field.
5.
Click Save.
All files are saved with the extension .mfa.
The file name appears at the top of the Management Fee
Processing Worksheet.
SchwabLink User Manual
Figure 9-8 Worksheet Queue Dialog Box
All files in the queue are automatically selected (highlighted).
Deselect files that you do not want to send by using Ctrl-Click
(standard Windows selection functionality).
You can remove a file from the queue by selecting (highlighting)
it and clicking the Delete button. (To deselect, use Ctrl-Click.)
If you accidentally delete a file from the queue, you can requeue
it by following the procedures on page 9.141, “Requeuing
Deleted Files.”
9.140
Chapter 9
2.
Management Fees
Make sure that the files you want to send to Schwab for
processing are selected, and click the Send to Schwab button.
The following acknowledgement appears (Figure 9-9).
Requeuing Deleted Files
Files that are deleted from the Worksheet Queue are still present
on the drive in which they were originally saved. To requeue a
Management Fees file:
1.
Do one of the following:
• Open the file, select Save As from the File menu, and
rename the file (with the same name if desired).
• Open the file, edit it if necessary, and save it.
2.
Click
or select Send to Schwab from the File menu.
The Worksheet Queue appears with the file requeued.
SETTING PREFERENCES
Figure 9-9 Acknowledgement Dialog Box
3.
Click Yes to accept the terms.
A dialog box appears, showing the last Web user ID that
was entered.
4.
If your user ID is different from the user ID displayed, enter
your user ID. (You must use your user ID and password
every time you use the Management Fees module to send
files to Schwab.)
5.
Enter your password.
6.
To begin setting preferences, select Preferences from the Options
menu to display the Management Fees Preferences dialog box
(Figure 9-10).
For information about adding, editing, and deleting Master
Accounts, see Chapter 2, “Getting Started.” You can set up and
revise Master Accounts in Management Fees, Mutual Fund
Trading, Securities Allocation, Account Viewer, Status Reports,
and Download Utility. Any changes made to Master Account
details in the preferences of one of these modules will
automatically apply to the other modules.
Click OK.
The file is sent to Schwab. If transmission is successful, a
confirmation message appears, showing the file name.
The sent files disappear from the queue.
SchwabLink User Manual
9.141
Chapter 9
Management Fees
2.
In the “Disbursement Account for the selected Master
Account” field, enter the Disbursement Account number or
select it from the drop-down list.
3.
Repeat steps 1-2 as necessary for each Master Account.
S p e c i f y i n g A c c o u n t Va l i d a t i o n
There can be a one-day delay between the time you set up a
client account and the time it appears in the SchwabLink
database. Management Fees can validate the data that you enter
into the worksheet against the details held in the SchwabLink
Database.
Figure 9-10 Management Fees Preferences Dialog Box
Setting Up Disbursement Accounts
When you set up a Master Account, you may also enter a
Disbursement Account number.
Note: Although you can create Master Accounts in most other
modules, you can enter a Disbursement Account number only in
the Management Fees Preferences dialog box
If you enter a client account number that is not in the database
and have selected the “Validate typed sub accounts” option in
the Preferences dialog box, a warning message tells you that the
account number is not yet in the database. You will not be able
to transmit the information to Schwab. To select this option,
click the “Validate typed sub accounts” checkbox. A check
appears.
If you enter a client account number that is not in the database
and have not selected the “Validate typed sub accounts” option,
an asterisk appears in the question mark (?) column next to
the unrecognized account in the Management Fee Processing
Worksheet grid. You will be able to transmit the information.
To deselect this option, click in the “Validate typed sub
accounts” checkbox, and the check disappears.
To set up a Disbursement Account:
1.
In the Management Fees Preferences dialog box, highlight
the Master Account to which you will add a Disbursement
Account number.
SchwabLink User Manual
(1000-0897)
9.142
Chapter 10
Upload Utility
OVERVIEW
The Upload Utility allows you to create a list of multiple files
and send it to Schwab, all within one transmission. This transfer
list may contain files of different types as well as different Master
Accounts. Once Schwab receives the files, the software archives
the transmitted files to a directory of your choice.
Note: The Upload Utility is used primarily by clients of
Retirement Plan Services (RPS). These clients typically send
multiple files of varying types to Schwab.
The upload utility allows you to transfer the following file types:
• CSTC Disbursements
• CSTC Trades
• Management Fees
• Mutual Fund Trades
• PCRA Account Open/Cashiering
• Securities Allocation (Prime Broker)
Figure 10-1 Upload Utility Main Menu
• Securities Allocation (Schwab)
• Universal Trades
SETTING PREFERENCES
• U.S. Trust Management Fees
Before transferring files to Schwab, you should set the preferences for the SchwabLink Upload Utility. The Upload Utility has
several settings that can be adjusted from Preferences on the
Options menu.
To access the Upload Utility, select the Utilities tab for the
Utilities folder, and click on the Upload Utility icon. The Upload
Utility Main Menu appears (Figure 10-1).
Within the Upload Utility Preferences dialog box you may edit
the following:
• Archive directories
• Default directories
• Default Master Account
• Default File Type
SchwabLink User Manual
10.143
Chapter 10
Upload Utility
• Unattended Personal Choice Retirement Account (PCRA)
Upload Archive directories
• Unattended PCRA Upload directories
• Unattended PCRA Upload Login Information
• Number of days to keep the Upload Utility logs
Note: Only clients of RPS, who transmit PCRA Account
Opening and Cashiering files, have the ability to use the
Unattended PCRA Upload feature that is built into the Upload
Utility. All other file types do not have the capability to use the
unattended upload process.
“Unattended” is defined as a process initiated by a scheduled
task or command requiring no intervention. Contact RPS
Technical Clients Services (TCS) for additional information.
In order for the Unattended PCRA Upload to work, both the
Unattended PCRA Archive and Upload directory, as well as the
Unattended PCRA Login User Id and Password fields (this is the
same User ID and Password for the Schwab Institutional Web
site) must be set. While the directories are set for each master
account, the Unattended PCRA Upload Login Information
applies to all listed master accounts.
Adding Master Accounts
If a Master Account was added in any other module within
SchwabLink, you do not have to repeat the steps here.
To add a Master Account,
1.
Select Preferences from the Options menu. The Upload
Utility Preferences Window appears (Figure 10-2).
Figure 10-2 Upload Utility Preferences Window
2.
SchwabLink User Manual
Click the Add button or press ALT + A. The Add Master
Account dialog box appears (Figure 10-3).
10.144
Chapter 10
Upload Utility
5.
Click OK. The new Master Account number, description, and
data path are added to the Upload Utility Preferences grid.
6.
Click OK to return to the Upload Utility main menu.
Adding a Data Folder
To add a data folder:
In the Destination area of the Add Master Account window,
navigate to the “base folder” that you want to add the new
folder to (as a sub-directory, for instance).
1.
Click the New Folder button on the Add Master Account
dialog. The Create New Folder dialog box (Figure 10-4)
appears.
Figure 10-3 Add Master Account Window
Figure 10-4 Create New Folder Dialog Box
3.
Type in the new Master Account number and Description in
the appropriate text boxes.
4.
In the Destination section, double-click on the folder that
contains your Master Account data. (If the directory
does not exist, see the next section, “Adding a Data Folder”)
SchwabLink User Manual
2.
Enter the new folder name
3.
Click OK to accept the new folder name.
10.145
Chapter 10
4.
Upload Utility
Click OK to return to the Upload Utility Menu.
Note: Any changes to the Master Account details in the
Preferences section of the Upload Utility will show in the
Preferences for Account Viewer, Securities Allocation, Mutual
Fund Trading, Status Reports and Management Fees.
Default Settings
You have the ability to select a specific default master account
number and file type in the Upload Utility Preferences screen.
This feature is beneficial if you frequently upload the same file
type for the same master account.
The Defaults button on the Upload Utility Main Menu
(Figure 10-1) allows you to reset the fields to the default Master
Account and File Type.
Editing Master Accounts
To edit Master Account details:
1.
Select Preferences from the Options menu. The Upload
Utility Preferences Window appears (Figure 10-2).
2.
Click the Master Account you would like to edit from the
Upload Utility Preferences grid.
3.
Click Edit or press ALT + E. The Edit Master Account
dialog box appears (Figure 10-5).
Figure 10-5 Edit Master Account Dialog Box
• Change the Master Account, Description and/or
Destination fields as appropriate.
Note: If you change the Master Account Number, make sure
that you do not use a preexisting Account. If you enter a
preexisting Master Account Number, a warning appears
(Figure 10-6).
SchwabLink User Manual
10.146
Chapter 10
Upload Utility
• Click Yes to cancel the edit. Then,
click OK to return to the Upload Utility main menu.
Deleting Master Accounts
You are returned to the Upload Utility Preferences window
and the changes are reflected in the grid.
When you delete a Master Account from the Upload Utility
Preferences dialog box, the database is not erased. Only the
Master Account number is deleted from the Options|Preferences
screens of all SchwabLink applications. If you wish to reinstate a
Master Account, you can do so by using the Add Master Account
function. Only one Master Account can be deleted at a time.
Click OK to return to the Upload Utility main menu.
To remove a Master Account from the Upload Utility module:
OR
• Click No to overwrite the information, then click OK.
1.
Select Preferences from the Options menu. The Upload
Utility Preferences dialog box appears (Figure 10-2).
2.
Click on the Master Account that you wish to delete.
3.
Click Delete. A Confirm Delete dialog box appears
(Figure 10-7).
Figure 10-6 Preexisting Master Account Conflict
Editing Data Paths
To edit a Master Account data path:
1.
Select Preferences from the Options menu.
2.
Highlight the Master Account to edit.
3.
Click the Edit button, or press ALT + E, on the Upload
Utility Preferences dialog.
4.
Select the new folder where the data should reside.
5.
Click OK.
Figure 10-7 Delete Confirmation
4.
Click Yes to delete the Master Account. The Master Account
is deleted from the grid. You will no longer be able to select
this Master Account in the Upload Utility template.
5.
Click OK to return to the Upload Utility template.
Note: Any changes to the Master Account details in the
Preferences section of the Upload Utility will show in the
Preferences for Account Viewer, Securities Allocation, Mutual
Fund Trading, Status Reports and Management Fees.
SchwabLink User Manual
10.147
Chapter 10
Upload Utility
TRANSFER LISTS
Once you have set up your preferences, you are now ready to
transfer file lists to Schwab.
To create a file transfer list:
1.
Open the Upload Utility.
2.
Default Master should automatically appear in the Master
Account Field. (Figure 10-8).
Note: To select a different master account click the master
account drop down and select the appropriate master account.
(Refer to Default Settings on page 10.146).
3.
The Default File Type should also automatically appear in
the File Type Field.
Note: To select a different file type click the File Type drop down
and select the appropriate master account. (Refer to Default
Settings on page 10.146).
Figure 10-8 Master Account Selection
SchwabLink User Manual
10.148
Chapter 10
Upload Utility
Figure 10-9 File Type Selection
Figure 10-10 File Selection
4.
Click the Browse button to open the Select File dialog box
(Figure 10-10).
Note: Unlike the other modules within SchwabLink this module
does not have a specified file format. There are multiple file
formats that can be selected, therefore users need to ensure that
the file(s) are in compliance with Schwab file formats.
If you have any questions, please contact Technical Client
Services between 8:00 a.m. and 6:00 p.m., Eastern Time.
• For investment advisors, call 1-800-647-LINK (5465) or
e-mail [email protected]
5.
Select the file(s) to add to the file transfer list. If you are
sending multiple files of the same type and Master Account,
you may press and hold down the CTRL key, and click
individual items in the group.
6.
Click Open.
7.
Click the Add/Update button, or press ALT + A. The selected
files will populate the SchwabLink Upload Utility grid.
8.
Repeat steps 2-7 for each file type or Master you wish to
transfer.
• For Third Party Administrators, call 1-800-231-2855,
(Option 2) or e-mail [email protected]
SchwabLink User Manual
10.149
Chapter 10
Upload Utility
E d i t i n g t h e F i l e Tr a n s f e r L i s t
3.
You may edit the file transfer list including the associated Master
Account or file type.
To edit the list of files:
1.
Click on the file you wish to edit on the transfer grid. The
file specifics will display in the top portion of the template.
2.
From the top portion of the template, make any changes to
the Master Account number or file type. You may also select
a different file by using the Browse button.
3.
Click Yes. The file is deleted from the grid.
Note: Only one file may be deleted from the grid at a time.
SENDING
THE
FILES
TO
SCHWAB
To send a file transfer list to Schwab:
1.
Click
2.
Fill in your Schwab Institutional Web User ID and Password
in the Upload Information Dialog Box (Figure 10-12).
Click Add/Update, or press ALT + A. The new file attributes
will appear on the grid.
or select Send to Schwab from the File menu.
R e m o v i n g a F i l e f r o m t h e Tr a n s f e r L i s t
To remove a file from the file transfer list:
1.
Select the file to delete by clicking on any of its fields within
the transfer grid. The file will be highlighted.
2.
Click the Delete button. The Delete Confirmation dialog box
appears (Figure 10-11).
Figure 10-12 Upload Information Dialog Box
3.
Click OK to connect to Schwab and begin the transfer
process. A confirmation message indicates that the files were
successfully transferred (Figure 10-13).
Figure 10-11 Delete Confirmation Dialog Box
SchwabLink User Manual
10.150
Chapter 10
Upload Utility
2.
Highlight the Master Account for which you would like to
change the Archive Directory. The directory information will
appear in the lower portion of the dialog.
3.
Click the Browse button to the right of the Archive
Directory textbox.
4.
Navigate to the new directory from the Add Archive
Directory dialog box (Figure 10-14). Double-click on the
desired directory.
Figure 10-13 Upload Successful Confirmation Message
4.
Click Close to close the dialog box.
Note: Files that are sent successfully are automatically saved
in your archive directory and removed from the list.
Each selected file must be less than 1 MB in size.
M A I N TA I N I N G D I R E C T O R I E S
Within the Upload Utility, you can change the Archive directories
or the Default directories to any directory on a local or
network drive.
Changing Archive Directories
The SchwabLink Upload Utility module automatically saves files
that are successfully transmitted to Schwab in a directory of your
choice. This directory is known as the Archive directory.
To change the Archive directory:
1.
Select Preferences from the Options menu.
Figure 10-14 Add Archive Directory Dialog Box
SchwabLink User Manual
10.151
Chapter 10
Upload Utility
5.
Click OK.
6.
Click OK on the Upload Utility Preferences dialog box.
Note: Any subsequent file sent to Schwab will be saved to
this new location directory.
Changing Default Directories
When files are added to the file transfer list by clicking the
Browse button, the SchwabLink Upload Utility points to a
starting directory where you can select files. This directory is
known as the Default directory.
To change the Default directory:
1.
Select Preferences from the Options menu.
2.
Highlight the Master Account you would like to change the
Default directory for. The directory information will appear
in the lower portion of the dialog.
3.
Click the Browse button to the right of the Default Directory
textbox.
4.
Navigate to the new directory from the Add Default
Directory dialog box (Figure 10-15). Double-click on the
desired directory.
Figure 10-15 Add Default Directory Dialog Box
SchwabLink User Manual
5.
Click OK.
6.
Click OK on the Upload Utility Preferences dialog box.
10.152
Chapter 10
Upload Utility
Unattended PCRA Upload Setup
To set or change the Unattended PCRA Upload Archive directory:
1.
Select Preferences from the Options menu.
2.
Highlight the Master Account for which you would like to
set or change the Unattended PCRA Upload Archive
Directory. The directory information will appear in the middle portion of the dialog box.
Note: If the Unattended PCRA Upload, Upload & Archive
directories are going to be the same as the general directories
you can simply press the copy button located at the top right
corner of the Unattended PCRA Upload section.
3.
Click the Browse button to the right of the Archive
Directory textbox if you wish to setup a unique directory for
the Unattended PCRA Upload process.
Figure 10-16 Unattended Archive Directory Dialog Box
SchwabLink User Manual
10.153
Chapter 10
Upload Utility
4.
Navigate to the new directory from the Set Unattended
Archive Directory dialog box. Double-click on the desired
directory.
5.
Click OK.
6.
Click OK on the Upload Utility Preferences dialog box to
save the set up or change.
Note: Any subsequent files sent to Schwab will be saved to
this new directory.
To s e t o r c h a n g e t h e U p l o a d d i r e c t o r y :
1.
Select Preferences from the Options menu.
2.
Highlight the Master Account for which you would like to
set or change the Unattended PCRA Upload Directory. The
directory information will appear in the middle portion of
the dialog box.
Note: If the Unattended PCRA Upload, Upload & Archive
directories are going to be the same as the general directories
you can simply press the copy button located at the top right
corner of the Unattended PCRA Upload section.
3.
Click the Browse button to the right of the Upload Directory
textbox.
4.
Navigate to the new directory from the Set Unattended
Upload Directory dialog box. Double-click on the desired
directory.
Figure 10-17 Set Unattended Upload Directory Dialog Box
5.
Click OK.
6.
Click OK on the Upload Utility Preferences dialog box to
save the set up or change.
Note: Any subsequent files sent to Schwab will be uploaded
from this new directory.
Unattended PCRA Upload Login Information
1.
SchwabLink User Manual
Select Preferences from the Options menu.
10.154
Chapter 10
Upload Utility
2.
Enter in the www.schwabinstitutional.com User ID and
Password.
3.
Click OK on the Upload Utility Preferences dialog box.
Upload Utility Logs
Changing the number of days the Upload Logs for the
Unattended PCRA Upload are retained.
1.
Select Preferences from the Options menu.
2.
The Upload Utility Log information will appear in the lower
portion of the dialog box.
3.
Enter the number of days to retain the log files.
Note: Zero (0) days means that the logs are only kept for the
current transmission and will be deleted the next time the
Unattended PCRA Upload utility is run. One (1) or more
days means the logs are kept for that number of days.
Therefore, if it’s set to 1 then it will keep all of the current
day’s logs. If set to 2, it will keep the current day and the
day before.
Note: The number of days is date based. If the field has the
amount set for 2 days and the utility hasn’t run for a week,
all the logs, except the current day’s, will be deleted because
the logs are more than two days old. One (1) day is the
default.
Figure 10-18 Upload Utility Preferences Dialog Box
SchwabLink User Manual
10.155
Chapter 10
Upload Utility
Upload Utility Confirmation Log
The Upload Utility automatically generates a confirmation log of
Uploaded files to the Schwab Institutional Web site. This log can
be viewed by using any text editor program.
Opening the sendtoschwab log file.
1.
Open Notepad.
2.
Select Open from the File menu.
3.
Navigate to the directory of C:\program files\schwablink
desktop\logs.
4.
Find the most recent SendtoSchwab.log file.
Note: The actual name of the log will contain a time and
date stamp.
5.
Select the log file to open.
6.
Click Open.
File Count
The gray box in the lower right corner shows the number of files
in the grid not yet uploaded.
If you have any questions, please contact Technical Client
Services between 8:00 a.m. and 6:00 p.m., Eastern Time.
• For investment advisors, call 1-800-647-LINK (5465) or
e-mail [email protected]
• For Third Party Administrators, call 1-800-231-2855,
(Option 2) or e-mail [email protected]
SchwabLink User Manual
(0901-03199)
10.156
Appendix A
Tr a n s a c t i o n F i l e F o r m a t s
OVERVIEW
W H AT Y O U D O W N L O A D
The first time you perform the Download Utility operation, the
initial transaction file is the first file you receive as part of the
download. The initial transaction file sets up security positions
and balances within your portfolios. All you have to do is post
the initial transaction file to your individual client portfolios
within your portfolio management system. The initial transaction
file is generated automatically when you first use the Download
Utility, so you do not have to request it separately.
Schwab downloads all transactions in our ledger records that
affect your client accounts. The majority of transactions represent the following activities:
• Money market fund share purchases/sales
• Cash deposits/withdrawals
• Securities deposits/withdrawals
• Cash dividend positions
The naming convention for the file is CSMM00YY.TRN.
• Re-invested dividends
Example: CS070099.TRN
• Mutual fund dividend and capital gain distributions
Note: You may not want to post the initial transaction file if you
already have current client account data in your portfolio management system. If you choose not to use the file, simply delete it.
• Trade-related activity:
Note that two data items are not included in the initial
transaction file:
• Historical cost basis
• Historical date of purchase
You must enter this data manually before you post. Once you set
up the positions and balances within your portfolios, you can
begin downloading the daily transaction files from which you
can generate up-to-the-day reports.
If you have questions about setting up your portfolios and
transferring the data in your initial transaction file, contact
customer service for your portfolio management system.
SchwabLink User Manual
- Equities
- Mutual funds
- Fixed income
- Certificates of deposit
- Options
The remaining data consists of transactions for reorganization
and other corporate actions. You may also see transactions that
are uncoded. Please contact your Institutional Service Group
between 8:00 a.m. and 8:00 p.m., Eastern Time, Monday
through Friday, to clarify these entries.
The key to SchwabLink focuses on Schwab’s ability to convert
its daily ledger records into a data format that your portfolio
management system can use. After each Schwab ledger record is
converted, SchwabLink downloads the converted records in a
trade blotter formatted file.
A.157
Appendix A
Tr a n s a c t i o n F i l e F o r m a t s
T R A N S A C T I O N F I L E F O R M AT S
The transaction file structure is in ASCII text format. Two transaction file formats are available for your use—the generic file
and the Advent file. The generic file is compatible with most
portfolio management programs. At the time you subscribe to
SchwabLink, you select which file format best meets your needs.
The Advent file is compatible with all Advent software portfolio
management software programs, including The Professional
Portfolio, Axys Advantage™, and Axys™.
G e n e r i c Tr a n s a c t i o n F i l e F o r m a t
The generic transaction file consists of up to twelve data elements
and has a fixed length of 104 characters. The data elements
appear as follows:
• All numeric fields are right justified.
• All alphabetic fields are left justified.
• All data elements are separated by a comma.
• All characters appear in lower case.
Your portfolio management software’s standard file structure is
in ASCII text format. Each transaction record consists of up to
12 data elements, which will appear directly on your trade blotter
screen after the transaction program is run. (See your portfolio
management system user manual for a detailed description of
the trade blotter file format or its equivalent.) The generic
transaction file format includes:
• Account number. This is your client’s 8-digit Schwab
account number. To translate this number to your
designated portfolio code, see the user manual for your
portfolio management system.
SchwabLink User Manual
• Transaction code. This will be one of the eight acceptable
portfolio management operations transaction codes:
buy
sel
dep
wdl
cdt
dbt
int
div
A generic uncoded transaction comes down as a credit or
debit.
• Transaction date. This date is the actual activity date that
the transaction occurred (trade date or ex-dividend date),
not the date that the transaction was posted in the client’s
Schwab account.
Example: A dividend was paid by a mutual fund
company on February 27, but was not posted to the
client’s Schwab account until March 5. Therefore the
transaction date is 0227YY. However, please note that
this transaction will be downloaded as part of the
March 5 transaction file.
Because Schwab does not credit client accounts until it
receives payment from the appropriate source, there may
be a delay of several days before a transaction appears in
the client account. If a performance report is run the day
after month-end, the numbers may not match the Schwab
monthly statement, because the transactions are yet to be
posted. Schwab’s policy is to pay all distributions within a
five-day window of the actual payable date. SchwabLink’s
use of the actual pay date is consistent with accrual
accounting procedures.
A.158
Appendix A
Tr a n s a c t i o n F i l e F o r m a t s
• Security type. One of the Schwab-defined security types:
ca Cash Equivalent
mf Mutual Funds (Taxable)
cb Corporate Bond
cd Certificate of Deposit
mn Mutual Funds
(Non-taxable)
cl
oa Other Assets
Call Option
cp Convertible Preferred
ps Preferred Stock
cs
Common Stock
pt
Put Option
dl
Reorganization
tb
Treasury Bill
ep Expense Account
tn
Treasury Note
ex Expense Account
un UIT (Non-taxable)
gb Government Bond
ut
gm GNMA
wt Warrants
ip
zt
Index Participation
Contracts
UIT (Taxable)
Zero Coupon Bonds
(Taxable)
mb Municipal Bonds
• Security symbol. Schwab downloads security symbols from
the following sources and in the following format:
- Primary: NYSE, AMEX, NASD ticker symbols. Schwab
uses the standard, industry-accepted ticker symbols
frequently used by major financial newspapers and by
quotation services such as Quotron or ADP.
- Secondary: CUSIP number. Most bond transactions are
downloaded with a 9-digit CUSIP number.
- Tertiary: Schwab security number. If no ticker symbol or
CUSIP number is available, then the Schwab security
number is transmitted.
SchwabLink User Manual
This security number is internal to Schwab and serves
no other purpose. When a Schwab security number
appears in a downloaded transaction, please contact
the Schwab Trading Desk and give them the security
number. They will give you the security description
that matches the number.
Note: The Primary Security Symbol, the ticker symbol, is in the file, if it is available. If not, then the
Secondary Symbol is in the file. If neither are present,
then the Tertiary Symbol is in the file.
• Dollar amount of transaction. The net dollar amount of the
transaction. This amount is the net cost or net proceeds, as
displayed on an individual trade confirmation.
• Account type. One of these:
- Cash: Transactions occurring in a cash account
- Margin: Transactions occurring in a margin account
- Short: Transactions occurring in a short account
• Quantity. The number of shares or the face value of an
asset if denominated in dollars. All downloaded transactions, where applicable, are carried out to three decimal
places. Fractional shares of mutual funds are rounded to
the nearest thousandth:
.0011 to .0014 is rounded down to .001.
.0015 to .0019 is rounded up to .002.
The method of rounding excess digits is consistent with
the Schwab system.
• Commission amount. The dollar amount of the commission
charges as displayed on an individual trade confirmation.
When a transaction is completed on a principal basis, no
commission is shown.
A.159
Appendix A
Tr a n s a c t i o n F i l e F o r m a t s
• Unit cost. Where applicable, this is the unit cost of the
security.
• Accrued interest. Where applicable, this is the dollar
amount of accrued interest paid, mostly used in determining the cost basis of a bond. When you purchase a new
bond, the accrued interest shows as 0.00. When you purchase any noninterest-bearing security, this field is blank.
• Broker code. Where applicable, the broker code is transmitted as schwab. If the trade was done with another broker
(Prime Broker trade), that broker’s code will be shown.
A d v e n t Tr a n s a c t i o n F i l e F o r m a t
Working with Advent software, Schwab has developed a transaction file formatted for use with Advent’s popular portfolio management software programs that enables fast, easy daily updating
of your client portfolios. The data you receive in your download
includes Schwab account, price, and transaction information that
mirrors the format used by the Schwab brokerage system. As a
user of Advent software programs, you receive the data in a format that is immediately readable by your portfolio management
software. You do not need to spend time typing transactions or
reformatting the data before you start work.
Schwab Brokerage System
To use the Advent transaction file effectively with your portfolio
management software program, you need to understand how
Schwab brokerage conventions will affect what posts to your
portfolio accounting system. The Schwab brokerage system
clears all transactions through a cash account.
The Schwab system records the movement of funds to or from
money market accounts, as well as movement of funds between a
cash and a margin account. These movements can occur at any
SchwabLink User Manual
time, but they occur most often on a settlement date, when funds
are needed to settle a security purchase, when proceeds have settled from a security sale, or when a client makes a deposit into
his or her account.
Because both the Schwab brokerage system and Advent’s portfolio
management system use a double-entry accounting system to
record transactions, each single transaction produces an entry in
two accounts: an account that is the source of the funds or
assets, and one that is the destination of the funds or assets.
Although Advent software allows transactions to be cleared
through the Schwab cash accounts, you may choose to clear
all transactions through one default cash account on Advent’s
system. Instead of recording all inter-fund movements, you can
establish one “ca” (cash) type per portfolio. The main advantage
of this method is that the number of transactions posted to your
client portfolios is minimized.
SchwabLink uses the “dp” (deposit) and “wd” (withdrawal)
transaction codes to record the movement of funds to or from
money market accounts or between a cash and margin account.
In the daily transaction file that you download, one of the
Schwab cash security types listed in “Source and Destination
Codes” on page A.163 is always used as the source or destination of the funds involved in the transaction.
Example: One of your clients has a money market balance of
$100,000. As his advisor, you decide to buy $50,000 worth
of stock in the cash account.
The day after the trade date, the money market balance
remains at $100,000, but the cash account shows stock
valued at $50,000 and an outstanding debit of $50,000 for
the purchase of the stock, due on settlement date.
On the settlement date, $50,000 is withdrawn from the
money market account and deposited into the cash account
A.160
Tr a n s a c t i o n F i l e F o r m a t s
Appendix A
to pay for the stock purchase. The money market balance is
reduced to $50,000, the outstanding debit of $50,000 is
settled, and the cash account has stock valued at $50,000.
As a user, if you are not clearing transactions through a cash
account, the transaction would be recorded in the following
manner:
Now editing: TABLE BLOTTER:
PORT TC DATE
CODE
Jonesl by
TY
032290 cs
SECURITY
SYMBOL
DOLLAR.
AMT
SOURCE/
DEST.
QTY.
BROKER
CODE
COMMISS.
AMT.
icm
5049.00
mxmx
45.00
schwab
49.00
Note how the SOURCE/DEST field displays the symbol
“mxmx,” which in this example is the code that describes the
client’s money market account. The funds to pay for the
trade are immediately debited from the mxmx account.
In contrast, if clearing through a cash account, SchwabLink
transmits the following transaction on the initial trade date:
Now editing: TABLE BLOTTER:
PORT TC
CODE
DATE
TY
Jonesl by
032290 cs
SECURITY
SYMBOL
DOLLAR.
AMT
SOURCE/
DEST.
QTY.
BROKER
CODE
COMMISS.
AMT.
icm
5049.00
cash
45.00
schwab
49.00
On settlement date, the following transaction is transmitted:
PORT TC
CODE
DATE
Jonesl wd 03
TY
SECURITY
SYMBOL
DOLLAR.
AMT
SOURCE/
DEST.
ca
mxmx
5049.00
cash
SchwabLink User Manual
QTY.
BROKER
CODE
COMMISS.
AMT.
D a t a E l e m e n t s o f t h e A d v e n t Tr a n s a c t i o n F i l e
Data elements in the Advent transaction file include:
• Account number. This is your client’s 8-digit Schwab
account number. To translate this number to your
designated portfolio code, see the user manual for your
portfolio management system.
• Transaction code. This will be one of the fourteen acceptable portfolio management operations transaction codes:
by
sl
dp
wd
dv
in
ss
cs
ai
rc
ac
xx
xc
;
Schwab does not use the Advent pv (Present Value) code.
• Transaction date. This date is the actual activity date that
the transaction occurred (trade date or ex-dividend date),
not the date that the transaction was posted in the client’s
Schwab account.
Example: A dividend was paid by a mutual fund company
on February 27, but was not posted to the client’s Schwab
account until March 5. Therefore the transaction date is
0227YY. However, please note that this transaction will
be downloaded as part of the March 5 transaction file.
Because Schwab does not credit client accounts until it
receives payment from the appropriate source, there may
be a delay of several days before a transaction appears in
the client account. If a performance report is run the day
after month end, the numbers may not match the Schwab
monthly statement, because the transactions are yet to be
posted. Schwab’s policy is to pay all distributions within a
five-day window of the actual payable date. SchwabLink’s
use of the actual pay date is consistent with accrual
accounting procedures.
A.161
Appendix A
Tr a n s a c t i o n F i l e F o r m a t s
• Security type. Security types for Advent transaction file
format are the same as those for the generic format. See
the Security Type entry on page A.158 of the “Generic
Transaction File Format” section.
where applicable, are carried out to three decimal places.
Fractional shares of mutual funds are rounded to the
nearest thousandth:
.0011 to .0014 is rounded down to .001
• Security symbol. Schwab downloads security symbols from
the following sources and in the following format:
• Primary: NYSE, AMEX, NASD ticker symbols.
Schwab uses the standard, industry-accepted ticker
symbols frequently used by major financial newspapers
and by quotation services such as Quotron or ADP.
• Secondary: CUSIP number. Most bond transactions
are downloaded with a CUSIP number that contains
nine digits. Advent software only uses eight. The ninth
digit is used as a check digit.
• Tertiary: Schwab security number. If no ticker symbol
or CUSIP number is available, the Schwab security
number is transmitted.
This security number is internal to Schwab and serves
no other purpose. When a Schwab security number
appears in a downloaded transaction, contact the
Schwab Trading Desk and give them the security number. They will give you the security description that
matches the number.
• Dollar amount of transaction. The net dollar amount of
the transaction. This amount is the net cost or net proceeds, as displayed on an individual trade confirmation.
• Source/destination code. This field should always contain
a ca security type, or the word client or none. See “Source
and Destination Codes” on page A.163.
• Quantity. The number of shares or the face value of an
asset if denominated in dollars. All downloaded transactions,
SchwabLink User Manual
.0015 to .0019 is rounded up to .002
The method of rounding excess digits is consistent
with the Schwab system.
• Broker code. Where applicable, the broker code is transmitted as schwab. If the trade was done with another
broker (Prime Broker trade), that broker’s code will be
shown. The broker code must be defined in the Security
Information File of your portfolio management system.
(See your portfolio management system user manual for
details on the Security Information File.)
• Commission amount. The dollar amount of the commission charge, as displayed on an individual confirmation.
When a transaction is completed on a principal basis, no
commission is shown.
• Comments. Schwab downloads specific comments, where
applicable, to assist in editing the transactions before posting. The comments are formatted to post to individual
portfolios.
Schwab-Defined Security Types
Schwab has created the following seven security type codes.
These are used in downloads. Please note that these are additional security type codes. You must add these codes to your Security
Type file when needed:
cd Certificate of Deposit
ip
Index Participation Contracts
A.162
Tr a n s a c t i o n F i l e F o r m a t s
Appendix A
mn Mutual Funds (Non-taxable)
Security and Expense Account Symbols
tn
The following security and expense symbols should be defined in
your Security Information File. The download will transmit these
security types and symbols.
Treasury Note
un UIT (Non-taxable)
ut
UIT (Taxable)
wt Warrants
TYPE
SYMBOL
DESCRIPTION
ca
mmp
Schwab Money Fund
ca
gsp
Schwab Government Securities Fund
ca
tef
Schwab Tax-Exempt Fund
ca
schwab1
Source of Schwab One interest credits. Interest paid to a
Schwab Account will show this as the security symbol.
ex
tefra
Destination of any type of backup withholding.
ex
expone
Schwab One fees
ex
exptwo
Miscellaneous fees. Examples: wire charges, billing for
services.
ex
expthre
IRA/Keogh account fees
ex
expfour
Consolidated fee charged to account
ex
expfive
Trade Away and Prime Broker fees
ex
expsix
Dividend reinvestment fee
ep
manfee
Financial advisor management fees
Source and Destination Codes
Schwab downloads seven “ca” security types to the SOURCE/
DESTINATION field. The seven symbols and their definitions
are as follows:
cash
Cash account
margin
Margin account
dvwash
Provides wash treatment
dvlong
Records all mutual fund long-term capital gain reinvestments
dvshrt
Records all mutual fund short-term capital gain reinvestments
calong
Records all mutual fund long-term capital gain distributions
paid in cash
cashrt
Records all mutual fund short-term capital gain distributions
paid in cash
Set up each of these source and destination codes in your
Security Information File.
SchwabLink User Manual
A.163
Appendix A
Tr a n s a c t i o n F i l e F o r m a t s
USING SCHWABLINK
WITH
OTHER PROGRAMS
SchwabLink works with any spreadsheet software that can
import an ASCII text file. Check the sections on importing files
in your spreadsheet software user manual.
SchwabLink also works with software programs created and customized to meet individual needs. The custom program must be
able to import an ASCII text file.
To create a successful interface with the Schwab file structure,
consider two points:
• Should you keep the current method of identifying transactions, or switch to the Schwab system format?
• How will you restructure the file format if data elements
need to be rearranged?
A D D I T I O N A L I N F O R M AT I O N
To get additional information about file format specifications
and using SchwabLink transaction file formats with your
portfolio management system:
• Refer to your portfolio management system user manual.
• Contact Technical Client Services between 8:00 a.m. and
6:00 p.m. Eastern Time, Monday through Friday.
• For investment advisors, call 1-800-647-LINK (5465) or
e-mail [email protected].
• For Third Party Administrators, call 1-800-231-2855
(Option 2) or e-mail [email protected].
Note: For questions regarding record-keeping file format
specifications, contact Technical Client Services at
1-800-231-2855 (Option 2).
Example:
You need to translate the Schwab account number to
match the value you currently use. Additionally, you want
the new number to appear in column five rather than column one—the location to which Schwab sends it. You will
need to write a translation program to convert the
location.
SchwabLink User Manual
(1000-0765)
A.164
Appendix B
Tr a n s a c t i o n F i l e F i l t e r
OVERVIEW
Installing the Filter
Use the SchwabLink (SL) Transaction File Filter to select a
customized subset of transactions from the daily downloaded
Schwab transaction file (.trn). The filter gives you the ability to
customize the daily transaction file so that it includes only those
transactions from Schwab that are not included in other feeds,
such as cash deposits and withdrawals. You implement this feature by using filter profiles that come with the application or by
creating new ones. Filter profiles contain the selection criteria
used to select transaction records. You can modify the profiles.
Before you install the SchwabLink Transaction File Filter, make
sure SchwabLink for Windows is installed on your system. You
should also be familiar with the structure and purpose of .trn
files before using this product. This product is designed for
experienced SchwabLink users.
The filter is particularly useful if you import transaction data
into a portfolio management system from sources that include
duplicate information. For example, you may manually enter
data, download Schwab data, use DTC, and/or use a trading
system to input data into your portfolio system. Using the filter
application helps eliminate the posting of duplicate data from the
Schwab file.
To install the Transaction File Filter:
1.
Close down the launcher and close all applications, including
the MS Office toolbar.
2.
Choose SLFILTER from the CD-ROM or open the .exe file
to begin the installation process. Follow the onscreen
instructions to complete the installation.
Alternatively, from the CD-ROM, select the Transaction File
Filter from the Setup application. Follow the on-screen
instructions.
The installation process automatically creates a Transaction
File Filter icon on the Utilities tab of the SchwabLink
Launcher.
The filter can operate in two different modes—manual and
unattended. Run it in manual mode from within the Transaction
File Filter application, and in unattended mode from the command line or a third-party scheduler.
Note: Please consult the Readme.txt file for the latest information regarding SchwabLink Transaction File Filter. It is
available after you install the filter.
The procedures in this appendix show you how to:
• Install the SchwabLink Transaction File Filter
• Launch the filter
Launching the Filter
• Set up user preferences
To launch the SchwabLink Transaction File Filter:
• Use predefined filter profiles
1.
• Modify and create filter profiles
2.
• Run the filter
SchwabLink User Manual
Select the Utilities tab of the SchwabLink Launcher.
Click the Transaction File Filter icon.
The SL Transaction File Filter main window (Figure B-1)
appears.
B.165
Appendix B
Tr a n s a c t i o n F i l e F i l t e r
The buttons at the top of the window are, from left to right:
Open Files, Run Filter, Set Up Filter, User Preferences, Help, Exit.
Figure B-1 SchwabLink Transaction File Filter Main Window
Figure B-2 User Preferences Dialog Box
SETTING USER PREFERENCES
When you run the SchwabLink Transaction File Filter (also known
as SL Filter) for the first time, the User Preferences window pops up.
Before you run, create, or modify a filter for the first time, make
sure the information in the User Preferences dialog box is correct for
the particular filter. The User Preferences box gives the filter application all the information it needs to run your filter properly.
Selecting the File Format
In the upper portion of the dialog box, specify which transaction
file format you use: Advent or Generic.
If you will be using the filter in manual mode, you have
completed the setup. Proceed to “Using Filter Profiles” on
page B.168 and “Running the Filter in Manual Mode” on
page B.176.
Opening the User Preferences Dialog Box
To open the User Preferences dialog box (Figure B-2), click the
User Preferences button on the SL Transaction File Filter toolbar
or select Preferences from the Options menu.
SchwabLink User Manual
B.166
Appendix B
Tr a n s a c t i o n F i l e F i l t e r
Choosing Directories for Filtered Files
2.
In the Drive field, select the drive you want.
The remaining parameters in the User Preferences dialog box are
used with the application in unattended mode only. The first list
of directories specifies the directories from which the input transaction files are read. In unattended mode, the program looks in
each of these directories for a file named csmmddyy.trn where
mmddyy is the prior business date. For example:
3.
In the Directory box, use your mouse and scroll bar to find
and highlight the directory from which the file will be read.
4.
Double-click on the directory you have selected or click the
Select button.
5.
cs101397.trn
Use the Unattended Mode portion of the User Preferences dialog
box to specify the input and output directories used by the
SchwabLink Transaction File Filter. Initially, SL Filter displays
default directories in this field. These are the directories that you
have selected during the setup of SchwabLink. However, you can
delete any of these directories at any time.
Click OK.
The dialog box disappears and the name of the selected
directory appears in the Default Directories List box of the
User Preferences dialog box.
6.
Repeat steps 1–5 for every directory you want to add.
7.
When you finish adding directories, click OK in the User
Preferences dialog box.
All changes are saved.
To add directories follow this procedure:
1.
Click the Add button.
Selecting a Default Filter
The Add Data Directory dialog box (Figure B-3) appears.
If you plan to run the filter in unattended mode, you must select
the active, or default, filter that SL Filter uses to process the
transaction files.
1.
In the “Default filter for unattended mode” field of the User
Preferences dialog box, click the arrow button to display a
list of filters.
2.
Use your up and down arrow keys to highlight the default
filter you want to use, and press Enter. You can also click on
the name of the filter in the list. Only existing filter profiles
for the selected file type are displayed. If you want to use a
filter other than one of the filters that come with the
application, it must be created first before it can be selected.
(See “Modifying an Existing Profile” on page B.170 or
“Creating a New Profile” on page B.173.)
Figure B-3 Add Data Directory Dialog Box
SchwabLink User Manual
B.167
Appendix B
3.
Tr a n s a c t i o n F i l e F i l t e r
This action activates the Select button. If this option is not
selected, the output files are not appended, and the separate
output files are written to the same directories that hold the
input file.
Exit the User Preferences dialog box by clicking the OK button to save your changes, or click Cancel to abandon your
changes.
C o m b i n i n g M u l t i p l e Tr a n s a c t i o n F i l e s
(Appending Files)
3.
If you have more than one Master Account, you will download
more than one transaction file per day into more than one directory. When you use unattended mode, you have the option of
having SL Filter combine (append) the resulting filtered files into
one large .trn file, instead of separate ones for each directory. By
combining the files, you only need to import one file into your
portfolio management system.
4.
To do this, you need to specify in the User Preferences dialog box
the output directory that will hold the resulting appended file.
The output directory should be different from those that hold the
transaction files to be filtered.
The Select Data Directory dialog box appears.
1.
If you are not in the User Preferences dialog box, click the
User Preferences button of the SL Transaction File Filter
window.
The User Preferences dialog box appears.
2.
In the bottom portion of the screen, click the small square
checkbox next to the heading, “Append all the resulting
filtered files together to create one large TRN.”
SchwabLink User Manual
In the Directory box, use your mouse and arrow keys to
highlight the directory where the appended files will be
placed.
You can choose only existing directories; therefore, if you
want to have a new directory for this purpose, you must
create one first, using standard Windows procedures.
5.
Double-click on the directory you have selected (or click the
Select button).
6.
Click OK.
The dialog box disappears, and the name of the selected
directory appears in the “Append all the resulting filtered
files together to create one large TRN” field.
Note: The append files option applies only when you run the
filter in unattended mode.
To append files:
Click the Select button.
7.
Click OK.
U S I N G F I LT E R P R O F I L E S
A filter profile contains all the criteria necessary to select a transaction file. Profiles are used to select data from the downloaded
files, to eliminate transactions that would duplicate data received
from other sources, and to select specific transactions. A filter
profile does not exclude data from your .trn file, but rather sorts
through the downloaded data and extracts files based on userselected criteria.
B.168
Appendix B
Tr a n s a c t i o n F i l e F i l t e r
The logic in a profile specifies which transactions are included
in the resulting filtered transaction file. Only those transactions
meeting the criteria are included in the resulting filtered files. The
profiles allow you to include common types of transactions.
There are three types of filter profiles:
• Predefined filter profiles
• Modified existing profiles
• New custom profiles
This main section contains subsections on using predefined filter
profiles, modifying existing profiles, and creating new, custom
profiles.
Figure B-4 Setup Filter (Advent Format) Dialog Box
Using Predefined Filter Profiles
Included in the SL Filter software are several predefined profiles
designed to meet the needs of most users. You can also use these
predefined profiles as a template to create other profiles. Users
fall into two general categories: Advent transaction file recipients
and Generic transaction file recipients. Each category of user has
its own list of file filter profiles. You can view the existing profiles through one of the following dialog boxes:
• Setup Filter for Advent Format dialog box
• Setup Filter for Generic Format dialog box
Vi e w i n g t h e P r o f i l e s L i s t
To view the profiles list:
1.
In the main window, click the Setup Filter button.
2.
Specify the file format in the File Format portion of the User
Preferences dialog box as described in “Setting User
Preferences” on page B.166.
Vi e w i n g t h e S e l e c t i o n C r i t e r i a
To view the selection criteria:
1.
From the Setup Filter dialog box, click on the box to the left
of the name field.
2.
Part of the criteria may be hidden. Move the line to the
left or right by clicking on the arrow keys on the bottom
scrollbar.
You can get a better view of the profile by using the Filter
Builder window.
The Setup Filter dialog box (Figure B-4) appears.
SchwabLink User Manual
B.169
Appendix B
Tr a n s a c t i o n F i l e F i l t e r
A c c e s s i n g t h e F i l t e r B u i l d e r Wi n d o w
Example:
To access the Filter Builder:
The logic for the DTC user profile means that the following
transactions will be included in the .trn file:
1.
In the main window, click the Setup Filter button.
2.
In the Setup Filter dialog box, highlight the profile you want
to work with.
• Cash deposits and withdrawals
3.
Double-click the selection or click the Edit button.
• Expenses
The Filter Builder Window (Figure B-5) appears.
• Cash dividends
• Interest on cash security types
• Mutual funds transactions
• Receipts of securities
• Other assets
• Return of capital transactions
• Adjusted capital transactions
After you review any set of criteria, you may decide to customize
a filter based on one of the existing profiles. To do this, follow the
instructions as needed in the next section, “Modifying an Existing
Profile,” and in “Filtering on Comment Lines” on page B.175.
Figure B-5 Filter Builder Window, DTC User
In the Filter Builder, each selection criterion is listed on a separate line. Scroll up and down the list with the scrollbar at the
right to view the complete list.
Modifying an Existing Profile
When you modify a profile, it is strongly recommended that you
either start from an existing profile and save it under another
name or create a new profile. It is often easier to make modifications in an existing profile.
The logic is read from the top down, and each line is a separate
statement in a complex logical expression. Groups of field selections are enclosed in parentheses.
To modify an existing profile:
1.
Click the Setup Filter button in the SL Transaction File Filter
main window.
Each line is connected to form one stream of logic for which the
rules of Boolean logic apply.
2.
Highlight the profile that you want to modify.
3.
Double-click on the selection or click on the edit button.
The Filter Builder appears.
SchwabLink User Manual
B.170
Appendix B
Tr a n s a c t i o n F i l e F i l t e r
Note: The buttons at the bottom of the Filter Builder dialog
box are the same as on the previous screen, the Setup Filter
dialog box. However, these buttons refer to actions performed on single lines in the profile, while actions in the
prior screen refer to entire profiles.
You can modify an existing profile as follows:
To edit a line:
1.
Click the Setup Filter button.
2.
In the Setup Filter dialog box, highlight the profile you want
to edit by clicking to the left of the name in the list.
3.
Click the Edit button.
The Filter Builder appears.
• Delete lines
• Edit existing lines
• Add lines
To delete a line:
1.
From the Filter Builder, highlight the line you want to delete
by clicking on it.
2.
Click the Delete button.
4.
Highlight the line you want to change by clicking in the box
to the left of the line.
5.
Click the Edit button.
The SL Filter Criteria portion of the dialog box appears at
the bottom of the window (Figure B-7).
You are prompted to confirm whether you want to delete the
selected line. (Figure B-6)
Figure B-6 Filter Builder-Edit Dialog Box
3.
Click the Yes button.
The line disappears.
4.
Figure B-7 Filter Builder Edit Function, with SL Filter Criteria
6.
If you are going to filter on the field that is displayed in the
SL Filter Criteria box, go to step 7. Or select a new field
from the drop-down list.
7.
If you want to modify the operator, select the new operator
from the drop-down list in the Operator field.
Click the Close button.
The Setup Filter window reappears.
SchwabLink User Manual
B.171
Appendix B
8.
9.
Tr a n s a c t i o n F i l e F i l t e r
Enter a new value, or click on the down arrow button of the
value field and select the value. If there are no values in the
drop-down menu, enter the data.
After completing either of the above actions, the SL Filter main
window reappears. The next time you access the Setup Filter
function, you see the new filter listed in the dialog box.
Note: Although SL Filter gives you the ability to type in
information that is not listed in the pull-down menus, it does
not validate information that is entered in this manner. If
you choose to do this, make sure the information you enter
exactly matches the target criteria.
Note: If at any point during the editing process you do not want
to continue, click the Cancel button.
1.
Click the Setup Filter button.
Click the OK button.
2.
Highlight the profile to which you will add a line.
The Filter Criteria dialog box disappears. The changes you
have made are shown in the Filter Builder listing.
3.
Click the Edit button.
4.
The Filter Builder appears.
10. Repeat steps 4–9 for as many lines you need to change.
11. You have two choices for saving the altered profile:
• Save the changes you made as a new profile with a different
name, which is the recommended approach. To do this, click
the Save As button in the Filter Builder dialog box. The SL
Filter Name dialog box appears (Figure B-8). Type in the
new name and description in the name field and click OK.
To add a line:
5.
Click the Add button.
The SL Filter Criteria portion of the dialog box appears at
the bottom (Figure B-9). This part of the screen allows you
to enter an additional criterion to the bottom of the profile
by specifying the name, operator, and value of a field.
Figure B-8 SL Filter Name Dialog Box
• Save the changes in the same profile. To do this, click the
Save button.
SchwabLink User Manual
Figure B-9 Filter Builder Add Function
B.172
Appendix B
Tr a n s a c t i o n F i l e F i l t e r
6.
Select the operator, And or Or.
Creating a New Profile
7.
Click the down arrow button of the Field Name field.
A drop-down list shows the fields in this transaction
(Figure B-10).
If you have changed a profile according to the instructions in
“Modifying an Existing Profile” and saved it with another name,
you have created a new profile. The other way of creating a
profile is to build an original profile by inputting each selection,
line by line.
There are three main steps to creating a new, original profile. See
also the following “Example” section on page B.174.
1.
In the SL Filter main window, click the Setup Filter button.
The Setup Filter dialog box appears.
2.
Figure B-10 Field Name Drop-Down List
8.
Scroll through the list to find the field you want to add, then
select the field by clicking on it.
9.
Select an operator from the Operator field drop-down list.
From the Setup box, click the Add button at the bottom of
the screen.
A blank Filter Builder entitled “New Filter” (Figure B-11)
appears.
10. Select a value from the Value field drop-down list. You can
also enter the value in the value field. If no value is listed for
this field, type it in.
Note: Although SL Filter gives you the ability to type in
information that is not listed in the pull-down menus, it will
not validate information that is entered in this manner. If
you choose to do this, make sure the information you enter
exactly matches the target criteria.
If you do not want to make an addition, click the Cancel
button.
Figure B-11 New Filter Dialog Box
3.
SchwabLink User Manual
Construct the statements that specify the new selection
criteria, line by line. Use the six fields in the SL Filter
Criteria dialog box.
B.173
Appendix B
Tr a n s a c t i o n F i l e F i l t e r
These six fields are:
• And/Or operator
• Optional open parenthesis
• Field Name
• Operator
• Value
• Optional close parenthesis
The procedure is the same as editing existing profile lines. The
Field Name, Operator, and Value fields all have a pull-down
menu that you access by clicking on the down arrow. The Field
Name box displays all field names that are valid for either the
Advent or Generic transaction file, depending on your User
Preferences selection. The Operator field lists possible Boolean
operations. The Value field lists predefined values, unless it is a
variable such as an amount, in which case you must type it in.
Enter all criteria via this dialog box.
Figure B-12 Entering Filter Criteria
2.
Example
Click the OK button.
The criterion appears in the main portion of the Filter
Builder. The SL Filter Criteria portion disappears.
To create a profile that includes all dividend and buy transactions, enter criteria with the Transaction Code equal to “dv” or
“by” for Advent format or “div” or “buy” for Generic format.
3.
Click the Add button to enter the second selection.
1.
4.
In the And/Or field, select Or. This field does not apply to
the first line of a profile.
5.
Select a field name, operator, and value.
Enter Field Name, Operator, and Value.
Example:
Under Field Name, enter Transaction Code
Under Operator, enter =
Under Value, enter dv for Advent or div
for Generic
Example:
Under Field Name, select Transaction Code.
Under Operator, select =
Under Value, select by for Advent or buy for Generic.
Review the statement and cancel it if it is incorrect.
SchwabLink User Manual
B.174
Appendix B
Tr a n s a c t i o n F i l e F i l t e r
6.
Click OK.
7.
From the Filter Builder, click the Save button to store the profile. The SL Filter Name dialog box appears (Figure B-13).
2.
Select Comment from the Field Name list.
The operator “Like” automatically appears in the Operator
name list. “Like” and “Not Like” are the only choices.
3.
Type in the comment, or a portion of it, in the Value field.
Figure B-14 Filtering on Comment Lines
Figure B-13 Saving a New Profile in the SL Filter Name Dialog Box
4.
8.
To save the profile, enter the name and description and click
the OK button to complete the save action. Click Cancel if
you do not want to save the profile. The SL Filter window
reappears.
The addition of a new profile is complete. Click the Setup Filter
icon to view the Profiles list. The new profile is added to the profiles list along with its description.
Filtering on Comment Lines
Click OK.
The new selection criterion appears at the bottom of all
other criteria.
5.
Click the Close button.
You return to the Setup Filter dialog box. If you have
unsaved changes, you are prompted to save.
Deleting a Profile
To delete a profile:
1.
Click the Setup Filter button to view the profiles list in the
Setup Filter box.
For example, you may want to select transactions that have the
words “cash-in-lieu” in the Comment field:
2.
Highlight the profile you want to delete by clicking to the
left of the name.
1.
3.
You can filter on comment lines.
In the Filter Builder dialog box, click the Edit button.
The SL Filter Criteria box appears (Figure B-14).
SchwabLink User Manual
Click the Delete button.
SL Filter asks you to confirm the deletion. If you click Yes,
the profile is deleted, its name disappears from the list, and
it is not available for use.
B.175
Appendix B
Tr a n s a c t i o n F i l e F i l t e r
RUNNING
T R A N S A C T I O N F I L E F I LT E R
THE
The filtering process can be automated so that the user does not
have to filter each transaction file manually every day. At times
you will want to run the filter in manual mode on a daily basis
in order to keep a closer watch over the process, usually when
you are starting or changing a procedure.
There are four ways to run the SchwabLink (SL) Transaction
File Filter:
The Setup Filter dialog box appears.
2.
Select a filter by clicking the box to the left of the filter name.
3.
To get a more detailed view of the criteria, double-click the
selection or click the Edit button.
The Filter Builder (Figure B-5) appears. See “Accessing the
Filter Builder Window” on page B.170 for more information.
• Manually
If you determine that the selection criteria need to change, follow
the instructions as needed in “Modifying an Existing Profile” on
page B.170 and “Filtering on Comment Lines” on page B.175.
• In unattended mode in conjunction with any scheduling
software you have installed
Running the Filter in Manual Mode
• Launched in unattended mode using an icon on the
desktop
You can filter a transaction file manually, whenever necessary.
• In unattended or manual mode from the Windows
command line
1.
Use the manual mode to familiarize yourself with the filtering
process. When you are comfortable with your knowledge of
filters and how they work, you can use scheduling software you
already have installed to set the time of your daily download and
filter process.
To run a filter in manual mode:
Open the transaction file(s) by clicking the Open Files icon.
The File Open dialog box appears (Figure B-15).
Alternatively, set up a shortcut on your Windows desktop and
select this shortcut after you have manually downloaded your
daily transaction files from Schwab.
Vi e w i n g t h e S e l e c t i o n C r i t e r i a
Before you run a filter you may want to view your selection criteria.
To review the selection criteria for a filter:
1.
In the SL Transaction File Filter main window, click the
Setup Filter button.
SchwabLink User Manual
Figure B-15 File Open Dialog Box
B.176
Appendix B
2.
Tr a n s a c t i o n F i l e F i l t e r
Click on the file name of the transaction file to filter.
The file appears in the File name field.
3.
To choose a file in a different directory, select the appropriate
drive in the Drives field, then navigate to the correct directory
in the Folders field. If you want to select only one file, go to
step 5.
4.
If you need to select multiple files, you can do so with the
Shift, Ctrl, and Arrow keys.
• To open consecutive files, hold down the Shift key, then
click on the first and last file you want to open. You can
also hold the Shift key, and use the up and down arrow
keys.
• To open files not listed consecutively, hold down the Ctrl
key, and use the mouse to select each file you want to
open.
5.
Figure B-16 Select Filter Dialog Box
7.
The filtering process begins.
If you have chosen multiple files, SL Filter processes each file
in the order listed.
Click OK.
The SL Filter main window reappears. The names of the files
you chose appear in a shaded list box in the toolbar at the
top of the window.
6.
You can monitor the filtering process by looking at the
record count in the status bar at the bottom of the dialog
box. When the process is complete, SL Filter displays a
separate window, with the results of the filtering process,
for each file selected.
Click the Run Filter button.
The Select Filter dialog box (Figure B-16) appears. The box
lists all created filters for the selected file format (Advent or
Generic).
If you expand the results box(es) within the window, you can
view the results. SL Filter displays all results for the files that
could be processed. Check the filter log file (“SLFilter.log” in
the same directory where the SL Filter application is installed)
in a word processing program to identify any files that were
unable to be processed.
The file type is always either Advent or Generic and is
specified in the File Format portion of the User Preferences
dialog box.
8.
SchwabLink User Manual
Select one filter and click the OK button.
To save the results of the filtering process, click Save in each
results window.
B.177
Appendix B
Tr a n s a c t i o n F i l e F i l t e r
Running the Filter in Unattended Mode
In unattended mode, SL Filter filters transaction files from the
directories you specified in the User Preferences dialog box. SL
Filter only chooses those files with names that contain the prior
business day’s date.
Running the filter in unattended mode gives you the ability to:
• Filter transaction files for multiple Master Accounts at
one time.
Figure B-17 Run Dialog Box
• Append multiple transaction files into one file.
• Run the filter automatically after your daily download.
There are two ways to run SL Transaction File Filter in
unattended mode:
• Launch the filter from an icon on your desktop. To get help
setting this up, contact Technical Client Services between
8:00 a.m. and 6:00 p.m., Eastern Time, Monday through
Friday.
• For investment advisors, call at 1-800-647-LINK (5465), or
e-mail [email protected].
• For Third-Party Administrators, call 1-800-231-2855
(Option 2) or e-mail [email protected].
• Run the filter from a command line.
To run the application from the command line or from a shortcut on the desktop, select Run from the Windows Start menu
and enter the full path of the filter application (Figure B-17).
Example:
c:\Program Files\SchwabLink Desktop\SLFilter.exe /u
Note: If the /U parameter is not used, the program will run in
manual mode.
SchwabLink User Manual
Canceling the Results of the Filter Process
If you do not want to save the results of the filter process, click
Cancel or the “X” button in each results window.
You can still reverse the filtering process, even if you clicked
Save, although the reversal process is more lengthy.
When SL Filter successfully filters a transaction file, the following actions take place:
• The SL Filter renames the original downloaded transaction
file extension from .trn to .org and leaves it in the same
directory in which it originally resided.
• The SL Filter creates a new .trn file containing only those
transaction records that were selected by the filtering
process.
• The SL Filter creates an additional file with the extension
.out containing the transaction records that were not
selected in the filtering process.
The files reside in the directories you specified in the User
Preferences dialog box.
To rename the files back to the original state and reverse the
filtering process, follow these steps:
B.178
Appendix B
Tr a n s a c t i o n F i l e F i l t e r
1.
Delete the filenames created by SL filter, those with extension .trn and extension .out. These files have the format
csmmddyy.trn and csmmddyy.out.
2.
Rename the files with the extension .org to have the extension .trn.
Here is a sample of the output of the log file:
**************************************************
Manual mode start :12/10/97 5:32:07 PM
Example:
**************************************************
cs101297.org ➔ cs101297.trn
Filter: DTC user
This completes the reversal.
File processed: c:\WINDOWS\DESKTOP\Cs101497.trn
Files generated:
Log File
c:\WINDOWS\DESKTOP\Cs101497.org
SL Filter contains a log file for output of information generated
during the filtering process. Data from each filtering process is
continually added to the log file (“SLFilter.log” in the SLFilter
directory under Program Files\ SLFilter). At each month end, the
log file can be deleted or renamed. A new log file is created when
the filtering process is run again.
c:\WINDOWS\DESKTOP\Cs101497.trn
The log file contains information about each SL Filter run,
including:
c:\WINDOWS\DESKTOP\Cs101497.out record count:10
c:\WINDOWS\DESKTOP\Cs101497.out
Statistic:
c:\WINDOWS\DESKTOP\Cs101497.org record count:6760
c:\WINDOWS\DESKTOP\Cs101497.trn record count:6750
**************** End 12/10/97 5:33:45 PM ************
• Start and stop times
• Filter profile used
• Files processed and created
• Statistics
• Any error messages
SchwabLink User Manual
(1000-0781)
B.179
Appendix C
Fund Rebalancer
OVERVIEW
Fund Rebalancer simplifies the time-consuming process of
rebalancing an account portfolio to match a given model. The
program identifies which assets should be bought or sold based
on an assigned model and produces a trade file that can be
imported into the Mutual Fund Trading module.
The program allows you to create multiple models based on your
clients and investment strategies. For example, you could have
one model for customers desiring preservation of capital and
another model for aggressive growth. The program also provides
flexibility by defining exclusions and different rebalancing methods.
The Fund Rebalancer module consists of three integrated
programs: Fund Rebalancer, Model Configuration and Model
Assignment. These programs are a central part of SchwabLink
that provide Investment Managers the tools to:
The Model Configuration program creates and maintains
models. You may access the program within Fund Rebalancer
using the Model menu or Model Configuration toolbar button.
The Model Assignment program is used to assign accounts to
models. Each model contains of a set of mutual funds and cash
in specific allocation percentages. This program also defines
account exclusions such as mutual funds or cash you want withheld from the rebalancing process. You may access the program
within Fund Rebalancer using the Model menu or Model
Assignment toolbar button.
The Fund Rebalancer program is the core program. It shows
actual and projected portfolios and account statuses similar to a
“before” and “after” snapshot. This program creates the orders
necessary for rebalancing.
• Define and assign model portfolios
• Create “what if” analysis
• Perform portfolio rebalancing
• Generate mutual fund trade lists
• Print account and model reports
SchwabLink User Manual
C.180
Appendix C
Fund Rebalancer
Fund Rebalancer Program Structure
Fund Rebalancer Program
• Defines account cash management options
• Defines Minimum Order Thresholds
• Sets rebalancing method
• Generates orders
• Displays portfolios
Sample Data
• Exports trade file
Model Configuration Program
• Creates and maintains models
Model Assignment Program
• Assigns accounts to models
• Defines account exclusions
Fund Rebalancer Program*
Model Configuration Program*
Model Assignment Program*
SchwabLink User Manual
* Note: The securities displayed are fictional and used for
illustration purposes.
C.181
Appendix C
Fund Rebalancer
Although Fund Rebalancer is the core program, it is
automatically disabled whenever the Model Configuration or
Model Assignment program is open or displays on the Windows
taskbar. To access Fund Rebalancer, you must first close the
other program.
Icon
Program
Fund Rebalancer
Model Configuration
Getting Help
If you have any questions, or need assistance, contact Technical
Client Services between 8:00 a.m. and 6:00 p.m., Eastern Time,
Monday through Friday.
• For investment advisors, call 1-800-647-LINK (5465) or
e-mail [email protected].
• For Third Party Administrators, call 1-800-231-2855
(Option 2) or e-mail [email protected]
Using This Appendix
This appendix consists of two main sections. The first section is
an overview of the program. The remaining part of the appendix
provides a tutorial designed to quickly introduce you to Fund
Rebalancer and the work area. Additional help topics are included
in each program’s built-in help function.
In certain topics, one or more program icons may appear next to
the title. These program icons identify which program(s) are
involved in the task. Both the Model Configuration program and
Model Assignment program are accessed from within Fund
Rebalancer. The SchwabLink Mutual Fund Trading program is
accessed from the SchwabLink Desktop.
Model Assignment
SchwabLink Mutual Fund Trading
TUTORIAL
There are 10 basic steps involved between creating a model and
importing the trade file into the Mutual Fund Trading module.
Some of these steps are prerequisites. You may notice that during
certain steps, some menu and toolbar functions are disabled. For
example, you can’t generate any orders (Step 6) without moving
accounts to the Selected Accounts list (Step 4).
The 10 basic steps include:
Step 1: Creating a Model
Step 2: Assigning Accounts to the Model
Step 3: Defining Account Exclusions
Step 4: Moving Accounts to the Selected Accounts List
Step 5: Inputting Cash Management Options
Step 6: Generating the Order List
Step 7: Reviewing Orders
SchwabLink User Manual
C.182
Appendix C
Fund Rebalancer
Step 8: Approving the Orders
Fund Rebalancer first opens with
a blank account list.
Step 9: Exporting the Orders
Step 10: Importing the Order File
Master Account
Accessing SchwabLink Fund Rebalancer
To access Fund Rebalancer,
1.
Double-click the SchwabLink icon on your desktop.
The SchwabLink Desktop window appears.
2.
Click the Trade tab.
Figure C-1 Trade Folder
Figure C-2 Fund Rebalancer Program
3.
Click the Fund Rebalancer button
Rebalancer program opens.
SchwabLink User Manual
. The Fund
4.
On the right side of the toolbar, select the Master Account
you wish to work with.
C.183
Appendix C
Fund Rebalancer
U n d e r s t a n d i n g t h e F u n d R e b a l a n c e r Wo r k A r e a
The Fund Rebalancer work area consists of three connected
parts. Each part may be resized.
1. Account
2. Portfolio pane
Sample Data
Actual Portfolio tab
Account List tab
When you select an account from the Account pane, Fund
Rebalancer displays the corresponding asset information on the
Portfolio pane and Graph area.
2.
Figure C-3 Fund Rebalancer with View Charts option*
Portfolio pane—The Portfolio pane consists of three tabs
that represent the “before” and “after” account picture if all
generated orders executed. These tabs include:
• Actual Portfolio (highlighted in Figure C-3)
• Order List
1.
Account pane—This pane contains two tabs listing accounts
with model assignments.
• Account List—accounts with model assignments
(highlighted in Figure C-3)
• Selected Accounts List—accounts with model assignments
in preparation for order generation
* Note: The securities displayed are fictional and used for
illustration purposes.
SchwabLink User Manual
• Projected Portfolio
These last two tabs are only enabled after you've moved
accounts to the Selected Accounts List and generated orders.
3.
Graph area—This is an optional area located below the
Portfolio pane. This area displays either bar charts or pie
charts from the selected tab in the Portfolio pane. The
feature is available either from the Options menu or View
Chart toolbar button.
C.184
Appendix C
Fund Rebalancer
Step 1: Creating Models
2.
In the Model Maintenance section, click the New button.
3.
Creating a model is the foundational step in the rebalancing
process. You may create multiple models provided each account
has no more than one model assignment.
In the Model Attributes section, type the model’s name in
the Name: text box, and (optionally) add a description in the
description box.
4.
In the Asset Allocation section, click the Add Asset
To create a model,
5.
1.
Click the Model Configuration toolbar button
This opens the Model Configuration program.
.
Allocation drop-down arrow.
Highlight the mutual fund symbol you wish to add to the
model. This mutual fund list represents all the funds presently
linked to the Master Account. Alternatively, you may type a
new fund symbol.
Models can only be saved when the
TOTAL ALLOCATION % equals 100.
Sample Data
Figure C-4 Model Configuration program
Figure C-5 Add Asset list box*
SchwabLink User Manual
* Note: The securities displayed are fictional and used for
illustration purposes.
C.185
Appendix C
Fund Rebalancer
6.
Type the model percent value the fund represents in the
% field.
7.
Click the Add button. The model’s asset table updates and
includes the new fund.
8.
Repeat steps 4-7 until the model’s TOTAL ALLOCATION
% is 100.
9.
In the Model Maintenance section, click Save Model.
10. Click the close box
in the upper-right corner to close
the Model Configuration program.
Model Components
Sample Data
Figure C-6 Model Configuration program*
* Note: The securities displayed are fictional and used for
illustration purposes.
SchwabLink User Manual
C.186
Appendix C
Fund Rebalancer
Step 2: Assigning an Account to a Model
Assigning accounts to a model is the second step in the
rebalancing process. You can only have one model assigned to an
account.
2.
At the bottom of the Account pane are two tabs. Click the
Accounts without Models tab.
3.
On the Model table, click a model name.
4.
On the Account pane, hold down the CTRL key, and then
click each account you want assigned to the model.
To assign accounts to a model,
1.
Click the Model Assignment toolbar button
This opens the Model Assignment program.
.
Sample Data
Until you assign accounts, the
Account with Models tab will be empty
Figure C-7 Model Assignment program
SchwabLink User Manual
C.187
Appendix C
Fund Rebalancer
Sample Data
Figure C-8 Highlighted Accounts (before Linking)
Figure C-9 Accounts with Models (after linking)*
5.
Click the Link Accounts with Model toolbar button
Fund Rebalancer updates these accounts and they now
display on the Accounts with Models tab.
.
6.
Click the close box
in the upper-right corner to close
the Model Assignment program.
* Note: The securities displayed are fictional and used for
illustration purposes.
SchwabLink User Manual
C.188
Appendix C
Fund Rebalancer
Step 3: Defining Account Exclusions
3.
On the Account pane, select the account for which you’d
like to set exclusions.
4.
The Model Assignment program allows you to exclude specific
assets from the rebalancing process. These assets may include
cash, mutual funds or marginable funds.
On the Account Exclusions tab, select an option in the Cash
Exclusions section.
5.
Fund Rebalancer program uses these exclusions to generate the
order list. Any fund position not included in the assigned model
appears in the Asset Exclusions table.
In the Asset Exclusions section, select any fund positions
you would like to retain. All non-mutual fund positions are
automatically excluded.
6.
You may also select the check box to Exclude all fund
positions in the margin account.
7.
Click the Update button. An “X” now displays on the
Account pane.
Note: The Account Exclusion settings remain with the account
even if you assign a different model to the account.
To set Account Exclusions,
1.
Click the Model Assignment toolbar button
opens the Model Assignment program.
. This
2.
Click the Accounts with Models tab. The Account
Exclusions tab appears on the right side.
Account Exclusions
Figure C-10 Setting Account Exclusions*
* Note: The securities displayed are fictional and used for
illustration purposes.
SchwabLink User Manual
C.189
Appendix C
Fund Rebalancer
8.
Repeat steps 3-7 for each account that needs exclusions.
9.
Click the close box
in the upper-right corner to close
the Model Assignment program.
The program updates the account exclusions and refreshes the
information on the Actual Portfolio tab within Fund Rebalancer.
The exclusion items appear with an “X” in the first column.
Sample Data
Step 4: Moving Accounts to the Select List
To rebalance an account with an assigned model, you must first
add it to the Selected Accounts list.
To move accounts to the Selected Accounts list,
1.
Click the Account List tab at the bottom of the Account pane.
2.
On the Account pane, hold down the CTRL key, and then
click each account you want to move.
Figure C-11 Selecting Accounts to Move to Selected Accounts List*
3.
Click the Move Accounts From/To Selected List toolbar
button
. The Selected Accounts tab displays with the
selected accounts.
* Note: The securities displayed are fictional and used for
illustration purposes.
SchwabLink User Manual
C.190
Appendix C
Fund Rebalancer
Step 5: Inputting Cash Management Options
Sample Data
Figure C-12 Selected Accounts List*
* Note: The securities displayed are fictional and used for
illustration purposes.
The Cash Management features allow you to further adjust
portfolio rebalancing for anticipated cash movements. These
transactions represent pending cash deposits or withdrawals.
For example, if an account is expected to receive $5,000 in
interest payments this week, you may include this amount in the
rebalancing process by selecting the Deposit (buy) option. A
separate $5,000 line item posts to the Projected Portfolio tab and
the funds are included in the rebalancing process and used for
purchases. This process allows the account to maintain the
model percentages. Note: Accounts still must have sufficient
funds to cover all fund transactions.
The default settings are for no cash exclusions or cash flow
changes. Unlike account exclusions, these cash management
options are only in effect when the account displays on the
Selected Accounts list. Moving an account from the Selected
Accounts tab back to the Account List tab removes the Cash
Management Options for that account.
An important distinction is that Cash Management amounts
are in addition to any Account Exclusion settings (Step 3). For
example, if you set $1000 cash Account Exclusion and a $3000
Cash Adjustment, a total of $4000 is excluded from rebalancing.
The cash movement settings are reflected on the Projected
Portfolio tab after order generation.
To input cash management options,
SchwabLink User Manual
1.
Click the Selected Accounts tab.
2.
On the Account pane, select the account you’d like to set
cash management options for.
3.
Click the Input Cash Management toolbar button
The Account Cash Management window opens.
.
C.191
Appendix C
Fund Rebalancer
4.
Enter in any dollar values for cash exclusions or cash
movement.
5.
Click the Update button.
6.
Repeat steps 2-5 for each account requiring Cash
Management.
The amount and status entered in step 4 appears in the Cash Op
section on the Selected Accounts List.
Cash Management Status Symbols
On the Selected Accounts tab, various status symbols appear in
the far-right column. These symbols represent various options
entered in the Account Cash Management dialog. These symbols
include:
Figure C-13 Account Cash Management
SchwabLink User Manual
X
Indicates cash exclusion. The value entered in the Amount
column will be excluded from the current balance before
rebalancing the portfolio.
+
Indicates a deposit. The value entered in the Amount
column will be used for buy orders.
–
Indicates a withdrawal. The value entered in the Amount
column will be used for sell orders.
C.192
Appendix C
Fund Rebalancer
Sample Data
Status and Amount
Figure C-14 Account with Cash Management Exclusion*
* Note: The securities displayed are fictional and used for
illustration purposes.
Step 6: Generating the Order List
The Generate Orders function creates the Order List and
Projected Portfolios for all accounts on the Selected Accounts
List. Prior to generating orders, the program evaluates all
account exclusions and cash management options set in Step 3
and Step 5.
Fund Rebalancer lets you set order thresholds based on the dollar
value of the order or the order weight as a percentage. Any order
that doesn’t meet either set minimum is removed from the Order
List. For example, setting an Order Amount ($) threshold of
$1,000 would exclude any buy or sell orders equal to or less
than that amount.
SchwabLink User Manual
Once minimum order thresholds are set, they remain in place
until changed or a new session is opened. These Order
Generation parameters are global and applied against each
account on the Selected Accounts List.
To generate orders,
1.
Click the Selected Accounts tab.
2.
Click the Launch Order Generation toolbar button
The Order Generation dialog opens.
.
C.193
Appendix C
Fund Rebalancer
Note: If this step produces an error message, click the Undo
Orders toolbar button
. When the process of undoing the
orders completes, return to Item 2 above to generate the orders.
It’s also possible your settings from Step 3 or Step 5 could
produce similar problems and may need adjusting.
Step 7: Reviewing Orders
The order review step is one of the most critical steps in the
Fund Rebalancer process. This step allows you to review both
the account Order List and Projected Portfolio. It’s important to
note that the contents of the Order List tab can’t be changed.
Each account’s order list is either accepted as is, or the list is
regenerated using different parameters such as rebalancing
method.
Figure C-15 Order Generation
3.
Select a Rebalancing Method.
Note: Additional information on Rebalancing Methods is
available in the Fund Rebalancer section of this appendix
beginning on page C.215.
4. Select an option from the Fund Standing Instructions
list box.
5.
Enter any values for Minimum Order Thresholds.
6.
Click the Launch button.
SchwabLink User Manual
Actual Portfolio: This panel displays the account’s current
holdings. It also indicates any mutual funds or cash marked for
exclusion. The chart section displays pie charts for the current
portfolio and the assigned model (target) portfolio.
The Difference section represents the difference between the
Target (Model portfolio) and the Projected portfolio. For excluded
assets, the Difference column always displays zero.
C.194
Appendix C
Fund Rebalancer
Buys
Sells
Sample Data
Sample Data
Buy Orders
Figure C-16 Actual Portfolio tab contents for 10018632*
Figure C-17 Order List tab contents for 10018632*
Order List: This section shows orders that must execute to meet
your projected portfolio. The chart section displays a bar for
each order. The charts display sell transactions as negative
numbers and buy transaction as positive numbers. (Note: The
fund color legend may not match the colors from the Actual
Portfolio tab.)
To clear the Order List,
1.
Click the Undo Orders toolbar button
.
The Order List and Projected Portfolio tabs are cleared but any
account exclusions or cash management options remain intact.
Projected Portfolio: This tab’s information is similar to the
Actual Portfolio tab with the addition of exclusion symbols and
two column sections: Orders and Projected. The Orders section
estimates the dollar value of the order. Sell transactions are represented as negative red values and buy transactions as positive
blue values. The Projected section indicates each position’s dollar
value and what percentage of the portfolio it represents.
* Note: The securities displayed are fictional and used for
illustration purposes.
SchwabLink User Manual
C.195
Appendix C
Fund Rebalancer
The Difference section represents the difference between the
Target (Model) portfolio and the Projected portfolio. This section
is extremely useful when using the High/Low rebalancing
method.
When reviewing orders, you should review the information in all
three tabs including the chart option. The Chart feature is available from the Options menu or toolbar.
If, after reviewing the orders, you decide to make any changes,
you must undo the entire order list, modify the parameters for
one or more accounts, and then regenerate the orders.
Figure C-18 Projected Portfolio tab contents for 10018632
* Note: The securities displayed are fictional and used for
illustration purposes.
SchwabLink User Manual
C.196
Appendix C
Fund Rebalancer
Step 8: Approving Accounts for Order Export
This is the final step before exporting a trade file. This process
initially marks every account on the Selected Accounts List for
approval; however, an account may be deselected after approval.
To mark all accounts for approval,
1.
Click the Approve Orders for Export toolbar button
.
All the accounts are marked as approved and a red checkmark
appears in the Orders column on the Selected Accounts list.
Approval checkmarks
Figure C-19 Approved Orders*
To remove an account from approval,
2.
Click the red checkmark
for the account.
Note: If the Exclusions, Cash Management Options, or other
factors resulted in 0 trades being generated for an account; the
account will not be marked for approval.
* Note: The securities displayed are fictional and used for
illustration purposes.
SchwabLink User Manual
C.197
Appendix C
Fund Rebalancer
Step 9: Exporting the Orders
2.
Note the name of the exported file and the directory where
it’s saved.
3. Click the Export button
.
The export file is created and a small email icon appears in the
last column where the approval checkbox was located.
The final step within Fund Rebalancer is the exporting of the
orders. This process creates a single trade file containing all
approved orders. The resulting order file must be imported into
the Mutual Fund Trading module for submission to Schwab.
To continue working with other accounts, you need to establish a
new session. Opening a New Session clears the Order List and
Cash Management options. All accounts are moved back to the
Account List.
Note: Since Fund Rebalancer is designed to clear order data
whenever a session is either closed or initiated, we strongly
recommend that you either print or save your reports prior to
exporting your files.
To create the export order file,
1.
Click the Export Approved Order to MFT toolbar button
.
Reminder: Note the Order
Export File name.
The file name consists of your
Master account number and
a timestamp.
Figure C-20 Order Export dialog
SchwabLink User Manual
C.198
Appendix C
Fund Rebalancer
S t e p 1 0 : I m p o r t i n g t h e Tr a d e F i l e
6.
Select the trade file and click the Open button. The trades
will display in the Mutual Fund template. From here, you
can add, update or delete them as with any other trade file.
To import the Fund Rebalancer trade file,
1.
On the SchwabLink Desktop, click the Trade tab.
2.
Click the Mutual Fund Trading button.
3.
Select the appropriate master account from the Master
Account Number drop-down menu.
4.
From the File menu, select Import External File.
Figure C-22 Trades from Fund Rebalancer*
7.
Figure C-21 Importing External Trade File
5.
To upload the file to Schwab, select Send Trade List from the
File menu. Enter your user ID and password, and click OK.
Note: In cases where proceeds exceed purchases in sets of linked
trades, the import process will generate messages on the Import File
Format Errors page stating “Buys total xx%. Excess proceeds will
go to cash.” This is an informational edit and not a file format error.
If you receive this message, click Close and upload the trade file.
If necessary browse to the folder where the trade file resides.
* Note: The securities displayed are fictional and used for
illustration purposes.
SchwabLink User Manual
C.199
Appendix C
Fund Rebalancer
M O D E L C O N F I G U R AT I O N
OVERVIEW
The Model Configuration program is used to create models for
managing Mutual Fund assets within existing portfolios. The
program seamlessly integrates with the SchwabLink portfolio
database to generate trade files designed to bring each portfolio
into compliance with the assigned model. Each of these model
portfolios might represent a different objective or investment
strategy.
The program provides the ability to:
• Add assets to a model
• Delete assets from a model
• Change asset allocations within a model
• Create new models
• Delete models
Figure C-23 Model Configuration*
• Print model portfolio reports
Any change to either the model list or asset allocations within a
model automatically starts a new session when the Model
Configuration program is closed.
U N D E R S TA N D I N G
WORK AREA
THE
M O D E L C O N F I G U R AT I O N
The Model Configuration work area consists of two linked panels.
1. Model Maintenance panel—models are created
2. Asset Allocation panel—asset allocations are defined.
Each panel is further divided into an upper section that displays
existing model information, and a lower section for configuring
models.
* Note: The securities displayed are fictional and used for
illustration purposes.
Model Maintenance panel (left)—The table in the upper section
displays model names and descriptions. The lower section defines
model names and descriptions. For example, you might add a
description indicating the model’s objective and creation date.
Asset Allocation panel (right)—The table displays the assets
belonging to the highlighted model on the left. The top section
provides the symbol, description and model percentage allocation
of each asset.
The lower section is used to add assets to a model or change the
percentage allocation of an existing asset.
You may adjust the panel or column widths using your mouse.
SchwabLink User Manual
C.200
Appendix C
WORKING
Fund Rebalancer
WITH
MODELS
Deleting a Model with Assignments
Creating a Model
Creating a model is the foundational step in the rebalancing
process. You may create multiple models, but each account may
have only one model assignment.
To create a model,
1.
Click the Model Configuration Screen toolbar button
2.
In the Model Maintenance section, click the New button.
3.
In the Model Attributes section, type the model’s name in
the Name: text box, and (optionally) add a description in the
Description box.
4.
In the Asset Allocation section, click the Add Asset
Allocation drop-down arrow.
5.
Highlight the mutual fund symbol you wish to add to the
model or type in a new fund symbol.
6.
Type the percentage value the fund represents for your
model in the % field.
7.
Click the Add button. The model’s asset table will include
the new fund.
8.
Repeat steps 4-6 until the model’s TOTAL ALLOCATION
% is 100.
9.
In the Model Maintenance section, click Save Model.
10. Click the close box
.
Fund Rebalancer prevents deleting models that have account
assignments. Prior to deleting any model, the assigned accounts
must be de-linked.
To delete a model with account assignments,
1.
Click the Model Assignment Screen toolbar button
.
2.
Click the Model Assignment tab.
3.
On the Accounts with Models tab, click on the Model
column header to sort the accounts by assigned model.
4.
On the Accounts with Models tab, select the first account
assigned to the model being deleted.
5.
Shift-click the last account assigned to the model to be deleted.
This should select all assigned accounts for that model.
Prior to deleting a model, you may wish to
print a “Model by Name” report and a “Model
Assignments by Model” report for reference.
in the upper-right corner to close
the Model Configuration program.
Note: It’s only possible to save a model
when the Total Allocation equals 100.
SchwabLink User Manual
C.201
Appendix C
Fund Rebalancer
Figure C-25 Model Configuration/Assign Confirmation message
8.
Click the OK button on the Fund Rebalancer new session
message.
9.
Click the Model Configuration Screen toolbar button
.
10. Select the model for deletion from the Model table.
11. Click the Delete Model toolbar button
.
12. Click the Yes button on the Delete Model dialog.
13. The model is removed from the Model list.
Figure C-24 Removing Account Assignment
6.
Click the Unlink Accounts from Model toolbar button
7.
Click the close-box
in the upper right corner to return
to Fund Rebalancer. A confirmation dialog appears.
Deleting a Model without Assignments
.
A model portfolio may be deleted within Model Configuration
provided no account is assigned to it.
To delete a model without account assignments,
1.
Click the Model Configuration Screen toolbar button
2.
Select the model for deletion from the Model table
3.
Click the Delete Model toolbar button
4.
Click the Yes button on the Delete Model dialog.
.
.
The model is removed from the Model list.
SchwabLink User Manual
C.202
Appendix C
Fund Rebalancer
Copying a Model
4.
In the New Model section, type the new Model Name.
You may find it useful when creating a model, to use an existing
model as a template.
5.
Edit the description if necessary.
6.
Select a different Master Account if necessary.
To copy an existing model,
7.
Click the Copy button.
1.
Click the Model Configuration Screen toolbar button
2.
Select the model for copying from the Model table.
3.
Click the Copy Model toolbar button
Copy dialog appears.
Copying a model does not
impact model assignments
. The Model
.
The new model is posted to the Model table with the same assets
as the original model. If you copied the model to a different
master account, you will have to select that master to see the
new model in the Model Table.
Note: You must use a different model name if copying to the
same master account but may keep the same name if copying to
a different master account.
CHANGING MODEL CONTENTS
Deleting an Asset from the Model
As your investment objectives change, you may decide to delete
one or more assets from an existing model. Prior to deleting assets,
you may wish to print a Model by Name report for reference.
To delete an asset from a model,
1.
Click the Model Configuration Screen toolbar button
.
2.
Highlight the model name.
3.
Highlight the asset you wish to delete. The asset displays in
the Update Asset Allocation section.
After deleting an asset, you must either add a new asset or
change an asset’s allocation to bring the TOTAL ALLOCATION
value up to 100%.
Figure C-26 Model Copy Dialog
SchwabLink User Manual
C.203
Appendix C
Fund Rebalancer
C h a n g i n g a n A s s e t ’s P e r c e n t a g e
You may change the weighting of any asset within a portfolio so
long as the TOTAL ALLOCATION value remains at 100%. The
allocation value may be any whole number.
Sample Data
To change an asset’s percentage,
1.
Click the Model Configuration Screen toolbar button
.
2.
Highlight the model name.
3.
Highlight the asset you wish to change. The asset displays in
the Update Asset Allocation section.
Figure C-27 Deleting an Asset*
4.
In the Update Asset Allocation section, click the Delete button.
5.
Click the Save Model button.
* Note: The securities displayed are fictional and used for
illustration purposes.
SchwabLink User Manual
C.204
Appendix C
Fund Rebalancer
Sample Data
T h e T O TA L A L L O C AT I O N v a l u e
must equal 100%. The program
does not allow you to save
partial model portfolios.
Figure C-28 Adjusting an Asset's Allocation %*
4.
In the Update Asset Allocation section, enter a new value in
the % field.
5.
Click the Update button.
6.
Click the Save Model button.
Adding Cash to a Model
It’s possible to set a percentage of a model’s allocation as cash.
The procedure is the same as adding an existing mutual fund
except that there is a designated symbol.
To add cash to a model,
* Note: The securities displayed are fictional and used for
illustration purposes.
SchwabLink User Manual
1.
Click the Model Configuration Screen toolbar button
.
2.
Highlight the model name.
3.
In the Add Asset Allocation section, select $$$$$ from the
drop-down menu. This is the very last entry.
C.205
Appendix C
Fund Rebalancer
To add a new fund to a model,
1.
Click the Model Configuration Screen toolbar button
.
2.
Highlight the model name.
3.
In the Update Asset Allocation section, type the 5-character
fund symbol in list box. The description line remains blank.
Sample Data
Sample Data
Figure C-29 Adding Cash $$$$$ to a Model*
4.
In the Asset Allocation section, enter a new value in the
% field.
5.
Click the Update button.
ADDING
A
NEW FUND
TO A
MODEL
The Add Asset Allocation list is dynamically built from the
SchwabLink portfolio database and only contains funds presently
held in accounts.
Figure C-30 Adding a Fund Not Linked to Master Account*
The Asset Description line will not indicate
the name of the new fund until the
position is reflected in a client account
* Note: The securities displayed are fictional and used for
illustration purposes.
SchwabLink User Manual
C.206
Appendix C
Fund Rebalancer
4.
In the Update Asset Allocation section, enter a new value in
the % field.
5.
Click the Update button
MODEL ASSIGNMENT
OVERVIEW
The Model Assignment program has two primary objectives. The
first objective is to pair accounts with model portfolios. This step
is also a prerequisite to the second objective—setting account
exclusions.
It’s important to realize the association between models and
account exclusions. Only accounts with assigned models may
have Account Exclusions. If an account is unlinked from a
model, all the associated account exclusions are removed.
Any change to either an account’s assignment or account
exclusions automatically starts a new session when the Model
Assignment program is closed.
U N D E R S TA N D I N G
THE
WORK AREA
The Model Assignment program consists of two sets of resizable
tabbed panels. The left tab set represents all accounts linked to
your Master account. The right tab set lists all Model
Assignments and Account Exclusions.
Accounts with Models—lists each account and its assigned model
portfolio.
Accounts without Models—lists accounts without assigned
models.
Model Assignment—lists every model portfolio and description.
Account Exclusions—displays cash and fund exclusions for
specific accounts.
There is also a relationship between the left and right sets of
tabs. If you select any account from the left set of tabs (Accounts
with Models, Accounts without Models), the corresponding
Account Exclusions or Model Assignment information will
appear on the right side.
Figure C-31 Example of Model Assignment Session message
SchwabLink User Manual
C.207
Appendix C
Fund Rebalancer
4.
On the Model Assignment tab, click the Model Name you’d
like to assign the account(s) to.
5.
Click the Link Accounts with Models
toolbar button.
The accounts are moved from the Accounts without Models tab
to the Accounts with Models tab.
Removing Accounts from a Model
In order to reassign an account to a different model portfolio,
you need to remove the current assignment.
To remove an account assignment,
1.
Click the Model Assignment Screen toolbar button
2.
Click the Accounts with Models tab.
3.
Click the account you wish to unlink.
4.
Click the Unlink Accounts from Model toolbar button
.
.
Figure C-32 Model Assignment*
Showing All Accounts
* Note: The securities displayed are fictional and used for
illustration purposes.
The Show All Accounts feature displays all accounts represented
on one of the two account list tabs in the Model Assignment
program. It does not represent a list of all accounts assigned to a
Master account.
ASSIGNING ACCOUNTS
To display the full account list,
TO A
MODEL
Assigning accounts to models is a prerequisite to both setting
Account Exclusions and rebalancing portfolios. An account may
not be assigned to more than one model portfolio.
1.
Click the Model Assignment Screen toolbar button
2.
Click either the Accounts with Models tab or the Accounts
without Models tab.
To assign accounts to a model,
3.
From the Accounts menu, select Show All Accounts.
1.
Click the Model Assignment Screen toolbar button
2.
Click the Accounts without Models tab.
3.
CTRL-click on each account you’d like assigned.
SchwabLink User Manual
.
.
C.208
Appendix C
Fund Rebalancer
Sorting Columns
Most tables displayed in Model Assignment may be sorted by the
column heading. These include Account, Description, Model
Name and Model Description. The one exception is data
displayed on the Asset Exclusions table.
To sort column data,
With the exception of split mutual fund positions (the same fund
resides both in the cash and margin account), asset exclusions
apply to the whole fund position. It is not possible to exclude a
specific number of shares.
Setting Cash Exclusions—Entire Cash Position
1.
Click the Model Assignment Screen toolbar button
.
2.
Click on the desired tab.
3.
Click the column heading on the column you’d like to sort.
The column resorts and a small arrow to the right of the column
header indicates the sort order.
It’s possible to exclude an entire cash position from rebalancing.
In effect, this prevents cash funds from being used to purchase
additional mutual funds. Accompanying sell transactions must
fund any purchases. This option should not be used on accounts
that are 100% cash.
To exclude the entire cash position,
ACCOUNT EXCLUSIONS
1.
Click the Model Assignment Screen toolbar button
.
2.
Click the Accounts with Models tab.
Understanding Account Exclusions
3.
Select the account you wish to exclude cash from.
Account exclusions are optional settings that represent any asset
you wish to exclude from the rebalancing process. These assets
may include cash, mutual funds or both. All non-mutual fund
assets are automatically excluded from the rebalancing process.
4.
On the Account Exclusions tab, select the Exclude entire
cash position radio button.
5.
Click the Update button at the bottom of the screen.
These exclusions are linked to the account’s model assignment.
Accounts without model assignments do not have any Account
Exclusions and the tab is dimmed.
The account will display an “X” in the last column on the
Accounts with Models tab.
The Model Assignment program automatically determines which
funds are eligible for exclusion by comparing the account’s current
portfolio to the model portfolio. Any mutual fund presently held,
but not included in the model portfolio, will appear in the Asset
Exclusion table. These funds will be sold unless excluded.
SchwabLink User Manual
In Fund Rebalancer, the Actual Portfolio tab will display an “X”
in the first column for the $$$$$ Cash line.
C.209
Appendix C
Fund Rebalancer
Sample Data
Exclusion indicator and $$$$$ entry
Figure C-33 Exclude Entire Cash Position Example*
Note: If the linked model has a cash allocation, the Exclude
entire cash position option is disabled.
Setting Cash Exclusions—Specific
Dollar Amount
In certain circumstances, you may wish to exclude a specific
dollar amount from rebalancing. This excluded amount is then
deducted from the $$$$$ CASH value displayed in Fund
Rebalancer.
To set a specific dollar cash exclusion,
* Note: The securities displayed are fictional and used for
illustration purposes.
1.
Click the Model Assignment Screen toolbar button
.
2.
Click the Accounts with Models tab.
3.
Click the account you wish to exclude cash from.
4.
On the Account Exclusions tab, select the Exclude Dollar
amount radio button.
5.
Type in the dollar amount to exclude in the text box.
6.
Click the Update button at the bottom of the screen.
The account will display an “X” in the last column on the
Accounts with Models tab.
SchwabLink User Manual
C.210
Appendix C
Fund Rebalancer
In Fund Rebalancer, an additional $$$EX line item is added to the
Actual Portfolio tab representing the dollar amount to exclude.
Sample Data
Exclusion indicator and $$$EX entry
Excluding Specific Funds
Figure C-34 Specific Dollar Exclusion Example*
If the defined cash exclusion is greater than the account’s Total
Cash, Fund Rebalancer will exclude the Total Cash amount. The
order list will not result in a higher cash balance in the account
by selling funds and retaining cash to bring the cash balance up
to the exclusion amount.
* Note: The securities displayed are fictional and used for
illustration purposes.
SchwabLink User Manual
The Model Assignment program automatically determines which
funds are eligible for exclusion by comparing the account’s current
portfolio to the model portfolio. Any mutual fund presently held, but
not allocated in the model portfolio appears in the Asset Exclusion
table. These funds will be sold unless excluded. It is not possible to
exclude specific share quantities or dollar values for a fund.
To exclude specific funds from rebalancing,
1.
Click the Model Assignment Screen toolbar button
.
2.
Click the Accounts with Models tab.
3.
Click the account for which you wish to set exclusions.
4.
On the Account Exclusions tab, click the checkbox in the
“X” column for each fund you’d like to exclude.
C.211
Appendix C
Fund Rebalancer
Fund Exclusions
Figure C-35 Asset Exclusion Examples*
Excluding Mutual Funds in the Margin Account
5.
In some situations, you may want to exclude all mutual funds
held in the margin account.
Click the Update button at the bottom of the screen.
The account will display an “X” in the last column on the
Accounts with Models tab.
To exclude all mutual funds in the margin account from
rebalancing,
In Fund Rebalancer, the fund will display with an “X” to the left
of the symbol. The line also appears in a lighter shade.
1.
Click the Model Assignment Screen toolbar button
2.
Click the Accounts with Models tab.
3.
Click the account for which you wish to set the exclusion.
4.
On the Account Exclusions tab, click the checkbox labeled
Exclude all fund positions in the margin account.
5.
Click the Update button at the bottom of the screen.
* Note: The securities displayed are fictional and used for
illustration purposes.
SchwabLink User Manual
.
C.212
Appendix C
Fund Rebalancer
The account will display an “X” in the last column on the
Accounts with Models tab. Any mutual funds held in the margin
account are removed from the Asset Exclusion table unless the
fund is part of a split position.
In Fund Rebalancer, the excluded fund(s) will not display on the
Actual Portfolio tab. The funds’ value will be reflected in the
Other Assets total.
F I LT E R I N G A C C O U N T S
The Filter Accounts List function provides an easy means to find
accounts meeting specific criteria. For example, you could filter
the account list to display only accounts with Account
Exclusions. The function also allows filtering by multiple selection
criteria such as model portfolio and account exclusions.
The filtering process is similar between the account lists; however,
there are some subtle differences. On the Account without
Models tab, the selection criteria appear to the right of the
Master Account list box. On the Accounts with Models tab, the
selection criteria remain in full display at the bottom of the list.
Click on Filter Account List in the Accounts menu to toggle the
selection criteria on and off.
You may also use the “*” wildcard when filtering on account
numbers or account names.
SchwabLink User Manual
Filtering by Account Number
To filter either account list for account numbers,
1.
Click the Model Assignment Screen toolbar button
.
2.
Click either the Accounts with Models tab or the Accounts
without Models tab.
3.
Click the Filter Account List toolbar button
4.
In the selection criteria area, click the Account Number
checkbox.
5.
Type in either an account number or wildcard pattern in the
Account Number textbox. For example, you could type
12345678 or 12*.
6.
Click the Filter button.
.
Filtering by Account Name
To filter either account list for account names,
1.
Click the Model Assignment Screen toolbar button
.
2.
Click either the Accounts with Models tab or the Accounts
without Models tab.
3.
Click the Filter Account List toolbar button
4.
In the selection criteria area, click the Account Name
checkbox.
5.
Type the exact account name, or a partial name surrounded
by the wildcard character. For example, *smith* would
return Adam Smith, Adam Smith Wesson, and Adam
Smithfield.
6.
Click the Filter button.
.
C.213
Fund Rebalancer
Appendix C
Filtering by Portfolio Model
Showing All Accounts
To filter by Portfolio Model,
The Show All Accounts feature displays all accounts represented
on one of the two account list tabs in the Model Assignment
program. It does not represent a list of all accounts assigned to a
Master account.
1.
Click the Model Assignment Screen toolbar button
.
2.
Click the Accounts with Models tab.
3.
If the Selection Criteria dialog isn’t already displayed on
the lower portion, click the Filter Account List toolbar
To display the full account list,
1.
Click the Model Assignment Screen toolbar button
button
2.
Click either the Accounts with Models tab or the Accounts
without Models tab.
3.
From the Accounts menu, select Show All Accounts.
.
4.
Click the Portfolio Model checkbox.
5.
Select a portfolio model from the drop-down list.
6.
Click the Filter button.
.
Filtering Accounts by Multiple Selection Criteria
Filtering Accounts with Rebalancing Exclusions
The program allows you to filter for account exclusions.
Collectively, these rebalancing exclusions include:
The filtering feature also allows you to combine selection
criteria.
To filter for multiple selection criteria,
• Accounts that excluded the entire cash position
1.
Click the Model Assignment Screen toolbar button
• Accounts with specific dollar exclusion
2.
Click either the Accounts with Models tab or the Accounts
without Models tab.
3.
Click the Filter Account List toolbar button
4.
In the Selection Criteria area, click the checkboxes for your
criteria.
5.
Type in your selection criteria.
6.
Click the Filter button.
• Accounts with specific fund exclusions.
• Accounts with fund positions in the margin account
To filter by Rebalancing Exclusions,
1.
Click the Model Assignment Screen toolbar button
2.
Click the Accounts with Models tab.
3.
If the Selection Criteria dialog isn’t already displayed on
the lower portion, click the Filter Account List toolbar
button
.
.
.
.
4.
Click the Accounts with rebalancing exclusions checkbox.
5.
Click the Filter button.
SchwabLink User Manual
C.214
Appendix C
Fund Rebalancer
FUND REBALANCER
U N D E R S TA N D I N G R E B A L A N C I N G M E T H O D S
Fund Rebalancer uses two distinct rebalancing methods: Strict
and High/Low.
The Strict Rebalancing method generates orders based on the
value differences of all positions, including memo cash positions.
If no Minimum Order Thresholds were triggered, the Model
portfolio and the Target portfolio are identical. This method
generates orders to bring every portfolio position into exact
alignment with the model portfolio. Additionally, the portfolio
variance is reduced to zero if all orders are executed.
The High/Low Rebalancing method generates orders by first
bringing the furthest outlying positions into line with the model.
This method starts with the position having the highest
Difference% on the Actual Portfolio tab regardless of the + or sign. In many scenarios, this method generates fewer orders since
the total value of the buy orders equals the total value of the sell
orders or allocated cash. Typically, this method reflects a gradual
approach to reaching the model portfolio.
Until you’re familiar with the two rebalancing methods, you
might generate orders using one method and observe the Order
List tab and Projected Portfolio tabs. Then, undo the orders and
regenerate the order list using the other rebalancing method.
SchwabLink User Manual
C.215
Appendix C
Fund Rebalancer
Notice there is no difference
between the Projected
p o r t f o l i o a n d Ta r g e t ( M o d e l )
portfolio in either the table
or graph area
Figure C-37 Projected Portfolio using Strict Rebalancing Method*
* Note: The securities displayed are fictional and used for
illustration purposes.
SchwabLink User Manual
C.216
Appendix C
Fund Rebalancer
Using the High/Low
rebalancing method, notice
how the Difference section
is populated
Figure C-38 Projected Portfolio using High/Low Rebalancing Method*
* Note: The securities displayed are fictional and used for
illustration purposes.
SchwabLink User Manual
C.217
Appendix C
Fund Rebalancer
Comparison Example of Rebalancing Methods
Using the Strict Rebalancing method, 8 orders were generated:
Let’s compare the Strict and High/Low rebalancing methods on a
sample account. Both the Current Allocation and the Model
Allocation share two fund positions: FUNDC and FUNDB
Asset
Action
Amount
1. FUNDC
Buy $
24,816
2. FUNDB
Sell shares
20,987
Current Allocation
Asset
$ Value
Asset %
FUNDA
67,355
35.5
FUNDB
39,975
21.1
FUNDC
39,690
20.9
Cash
24,816
13.1
FUNDD
14,480
7.6
FUNDE
3,560
1.9
189,876
100%
$ Value
Asset %
FUNDC
75,950
40
NEWF1
56,963
30
NEWF2
37,975
20
FUNDB
18,988
10
189,876
SchwabLink User Manual
Sell all
3,560
4. FUNDA
Sell all
67,355
5. FUNDD
Sell all
14,480
6. NEWF1
Buy
56,963
7. NEWF2
Buy
37,975
8. FUNDC
Buy
11,444
Since the Strict Rebalancing method forces your current portfolio
to the model portfolio’s assigned asset percentages, the following
orders were generated:
• 3 sell orders (#3,4,5) were generated for funds not in the
model portfolio.
Model Allocation
Asset
3. FUNDE
• 3 buy orders (#6,7,8) were generated for funds not in the
current portfolio.
• 1 Buy$ order (#1) was generated for FUNDC to meet the
higher allocation percentage in the model portfolio.
• 1 Sell shares order (#2) was generated for FUNDB to
reduce the position to the lower model portfolio allocation.
100%
C.218
Appendix C
Fund Rebalancer
Using the High/Low Rebalancing method, just 3 orders were
generated:
Asset
Action
Amount
1. FUNDA
Sell all
67,355
2. NEWF1
Buy
56,963
3. NEWF2
Buy
10,392
To set order thresholds,
1.
Click the Launch Order Generation toolbar button
.
2.
In the Minimum Order Thresholds section, enter a value in
the Order Weight% and/or Order Amount$ fields.
Since the High/Low method starts by identifying the furthest
outlying positions, the following orders were generated:
FUNDA—This fund represented 35.5% of the current portfolio
assets but wasn’t included in the model portfolio. The sale
proceeds of $67,355 are used for the purchases of NEWF1 and
NEWF2.
NEWF1—This fund represented 30% of the assets in the model
portfolio and wasn’t included in the current portfolio.
NEWF2—This fund represented 20% of the assets in the model
portfolio and wasn’t included in the current portfolio. The order
was only for $10,392 since that was the remaining balance from
FUNDA sale and NEWF1 purchase. ($67,355-$56,963)
Setting Minimum Order Thresholds
Fund Rebalancer lets you set order thresholds based on the
dollar value of the order or the order weight as a percentage.
Any order that doesn’t meet either set minimum is removed from
the Order List. This may also result in differences between the
projected portfolio and target portfolio.
Figure C-39 Minimum Order Threshold Example of $5000
3.
Click the Launch button.
Once minimum order thresholds are set, they remain in place
until changed. These parameters are global and applied to all
generated orders.
SchwabLink User Manual
C.219
Appendix C
Fund Rebalancer
Down arrow indicates order was
excluded because of thresholds
Figure C-40 Projected Portfolio with Excluded Orders using Minimum Order Threshold*
E x c l u d i n g A s s e t s f r o m t h e A c t u a l P o r t f o l i o Ta b
* Note: The securities displayed are fictional and used for
illustration purposes.
Assets may also be excluded from the rebalancing process using
the exclusion column on the Actual Portfolio tab prior to Order
Generation. This method produces the same results as if you had
excluded the asset using the Account Exclusion screen in Model
Assignment.
One advantage to excluding assets from the Actual Portfolio tab
is that you can easily change the exclusion status by clicking the
column check box. In contrast, fund exclusions set through the
Account Exclusions screen must be changed using the Model
Assignment program.
SchwabLink User Manual
C.220
Appendix C
Fund Rebalancer
To exclude assets from the Actual Portfolio tab,
1.
Click the Selected Accounts tab.
2.
Highlight the account.
3.
In the Asset pane, click the check box for each asset you
wish to exclude from rebalancing.
The boxed X indicates the exclusion was
done from the Actual portfolio tab.
The X indicates the exclusion was done
using Model Assignment
Figure C-41 Examples of Excluded Assets*
* Note: The securities displayed are fictional and used for
illustration purposes.
SchwabLink User Manual
C.221
Appendix C
Fund Rebalancer
F I LT E R I N G A C C O U N T S
Filtering the Account List in Fund Rebalancer
The Filter Account List feature allows filtering of items on the
Account List by a number of criteria. In addition, you may filter
accounts by combining several criteria at once or by running
multiple queries and appending the results.
For example, you could create a filtered Account List representing
accounts assigned to a specific portfolio model with a portfolio
variance above 60%. You could also create a filtered account list
from two different portfolio models by running a filter on each
portfolio model and appending the results.
The Filter Account list allows you to filter by:
• All Accounts
• Account Number
Figure C-42 Account Selection Filter dialog
• Account Description
• Portfolio Model
3.
Click the Show all accounts check box.
• Portfolio Variance
4.
Click OK.
• Export Date
Selecting Accounts by Account Description
• Accounts with exclusions
To Filter the Account List by Account Description,
Displaying All Assigned Accounts
1.
Click the Account List tab in Fund Rebalancer.
You can remove any set filters from the Account List in order to
view all assigned accounts.
2.
Click the Filter Account List toolbar button
3.
Deselect any previous selections.
4.
Click the Account Description check box.
5.
In the Account Description text box, type a partial account
description. (e.g. *IRA*).
6.
In the List Update Type section, click either the replace or
append option.
7.
Click OK.
To display all accounts on the Account List,
1.
Click the Account List tab in Fund Rebalancer.
2.
Click the Filter Account List toolbar button
the Account Selection Filter dialog.
SchwabLink User Manual
. This opens
.
C.222
Appendix C
Fund Rebalancer
S e l e c t i n g A c c o u n t s b y P o r t f o l i o Va r i a n c e
To Filter the Account List by Portfolio Variance,
Fund Rebalancer allows you to filter by Portfolio Variance.
This variance represents the percentage of the account’s current
portfolio that will change because of rebalancing.
1.
Click the Account List tab in Fund Rebalancer.
2.
Click the Filter Account List toolbar button
3.
Deselect any previous selections.
.
Portfolio Variance % indicator
Figure C-43 Portfolio Variance Indicator*
* Note: The securities displayed are fictional and used for
illustration purposes.
SchwabLink User Manual
C.223
Appendix C
Fund Rebalancer
4.
Click the Portfolio variance above check box.
To restore screen defaults,
5.
In the variance percent field, type a numeric value.
1.
From the Options menu, select Restore Screen Default.
6.
In the List Update Type section, click either the replace or
append option.
2.
Click Yes.
3.
Click OK.
7.
Click OK.
4.
Close and restart Fund Rebalancer.
Note: Restoring screen defaults clears the Selected Accounts List.
Any order that hasn’t been exported is lost.
Selecting Accounts by Export Date
The Export Date column indicates when trades were exported
for each account. The column is displayed on the Account List
pane under the Status section.
To filter the Account List by Export Date,
Starting a New Session
To start a new session,
1.
From the Fund Rebalancer menu, select Session.
2.
Select New.
1.
Click the Account List tab in Fund Rebalancer.
2.
Click the Filter Account List toolbar button
3.
Deselect any previous selections.
4.
Click the Last order export before check box.
5.
Click the drop-down arrow on the date field.
Vi e w i n g P o r t f o l i o C h a r t s
6.
Select the date from the calendar control.
7.
In the List Update Type section, click either the replace or
append option.
8.
Click OK.
Fund Rebalancer provides graphical representations for each
enabled tab on the Portfolio pane: Actual Portfolio, Order List
and Projected Portfolio. These graphs are especially useful in
determining the differences between model allocations particularly
when using the High/Low rebalancing method.
.
Note: Starting a new session clears the Order List and Selected
Accounts list. Any orders that were not exported will be lost.
By default, the graph area is not shown and may be viewed by
OPTIONS
clicking the View Chart toolbar button
resizable.
. The graph pane is
Restoring Screen Defaults
Fund Rebalancer allows you to resize both panes and columns as
well as resort data. These custom settings remain in place until
additional changes are made, or the default settings are restored.
SchwabLink User Manual
Changing Master Accounts
Fund Rebalancer uses the same SchwabLink databases as Account
Viewer. The program allows you to switch between Master
C.224
Appendix C
Fund Rebalancer
Accounts so long as you haven’t generated orders. When you
switch Master Accounts, your Selected Accounts list is cleared.
To change Master Accounts,
1.
Locate the Master Account list box to the right of the toolbar.
Figure C-44 Master Account List box
2.
Click the drop-down arrow on the Master Account list box.
3.
Select the new Master Account.
Master Account List box
Sorting Columns
Most tables displayed in Model Assignment may be sorted by
the column heading. These include Account, Description, Model
Name and Model Description. The one exception is data displayed
on the Asset Exclusions table.
To sort column data,
1.
Click the desired tab.
2.
Click the column heading on the column you’d like to sort.
The column resorts and a small arrow to the right of the column
header shows the sort order.
Figure C-45 Example of Column Sort Indicator (Value $)
SchwabLink User Manual
Sort Indicator
C.225
Appendix C
Fund Rebalancer
Resizing Columns
To resize a column,
1.
Rest the cursor between the two column headers until a
double-headed arrow appears.
Double-headed arrow
Figure C-46 Column Resizing Indicator*
2.
Left-click and drag the column boundary until the column is
the size you want.
3.
Release the mouse.
* Note: The securities displayed are fictional and used for
illustration purposes.
REPORTS
OVERVIEW
Each of the three programs includes a series of built-in reports
that are displayed from the Print toolbar menu. These report
modules allow for additional selections that can be customized
such as account range, asset type etc. The report module allows
you to preview, print or save any report.
Note: Since Fund Rebalancer is designed to clear order data
whenever a session is either closed or initiated, we strongly
recommend that you either print or save your reports prior to
exporting your files.
SchwabLink User Manual
C.226
Fund Rebalancer
Appendix C
Saving Reports
FUND REBALANCER REPORTS
Fund Rebalancer comes with a defined file format—QRP. This
format allows you to view a saved report within each of the
three applications.
Fund Rebalancer comes with a robust reports module that
provides a series of predefined reports with additional selection
options. For example, you may request a report on all accounts
or an account range. Additionally, these reports may be
previewed, printed or saved in various file formats.
To print a report to a file,
1.
Click the Printer toolbar button
.
2.
Choose your report settings.
3.
Click the Preview button.
4.
Click the Save Report toolbar button. The Save report dialog
will open.
5.
In the File Name box, type a name for the report.
6.
Click the Save button.
7.
Click the Close toolbar button.
Vi e w i n g S a v e d R e p o r t s
The report module allows you to view saved reports with a .QRP
file extension.
The four main Fund Rebalancer reports include:
• Trade Orders by Account
• Trade Orders by Asset
• Account Rebalancing Summary
• Account Rebalancing Detail
A l l Tr a d e O r d e r s
You may view a report containing all orders for a Master
Account including exported orders for the current session. This
report includes all orders displayed on the Order List. For each
account with an order, the report displays:
• Trade Type
To view a saved report,
• Symbol
1.
On the Fund Rebalancer toolbar, click the Printer toolbar
• Description
button
• Price
.
2.
Select Saved Report Viewer.
• Operation
3.
On the printer toolbar, click the Load Report toolbar button.
• Quantity
4.
Double-click the document you want to open.
• Cost
• Proceeds
SchwabLink User Manual
C.227
Fund Rebalancer
Appendix C
To print a listing of all orders,
1.
4.
Type in numeric values in both the From Number and To
Number.
5.
In the Order Selection area, select Show all Trade orders.
6.
Click the Print button.
On the Fund Rebalancer toolbar, click the Printer toolbar
button
.
2.
Select Trade Orders By Account.
3.
In the Account Selection area, select All Accounts.
4.
In the Order Selection area, select Show all Trade orders.
5.
Click the Print button.
Note: If you used custom account numbers that are alphanumeric,
they will not show using the account range option. You must use
All Accounts.
Exported Orders for the Current Session
All Orders within an Account Range
You may view a report containing all orders for a Master
Account including exported orders within the current session for
an account range. This report includes all orders displayed on the
Order List. For each account with an order, the report displays:
You may view a report containing all session orders for a Master
Account including exported orders for an account range. For
each account with an order, the report displays:
• Trade Type
• Symbol
• Trade Type
• Description
• Symbol
• Price
• Description
• Operation
• Price
• Quantity
• Operation
• Cost
• Quantity
• Proceeds
• Cost
To print a listing of exported orders,
• Proceeds
1.
To print all orders all orders within an account range,
1.
On the Fund Rebalancer toolbar, click the Printer toolbar
button
.
2.
Select Trade Orders By Account.
3.
In the Account Selection area, select Account Range.
SchwabLink User Manual
On the Fund Rebalancer toolbar, click the Printer toolbar
button
.
2.
Select Trade Orders By Account.
3.
In the Account Selection area, select Account Range.
4.
Type in numeric values in both the From Number and To
Number.
C.228
Fund Rebalancer
Appendix C
5.
In the Order Selection area, select Show only trade orders
exported to Mutual Fund Trading.
6.
Click the Print button.
Tr a d e O r d e r s b y A s s e t
You may view a report containing all generated orders by asset
for a Master Account. For each fund order, the report displays:
• Trade Type
Excluded Orders
• Account
An excluded order is any order that wasn’t generated because of
thresholds or adjustments. Although there is not a specific report
that only displays excluded orders, you can get a report showing
all orders including any excluded orders.
• Symbol
For each account with an order, the report displays:
• Export Time
• Description
• Latest Price
• Trade Type
• Operation
• Symbol
• Quantity
• Description
• Cost
• Price
• Proceeds
• Operation or Exclusion reason
• Total Trade Orders
• Quantity
• Cost
To print a listing of trades by asset,
• Proceeds
1.
button
To print a listing of orders including excluded orders,
1.
On the Fund Rebalancer toolbar, click the Printer toolbar
.
On the Fund Rebalancer toolbar, click the Printer toolbar
2.
Select Trade Orders By Asset.
button
3.
In the Asset Selection area, select All Assets.
.
2.
Select Trade Orders By Account.
4.
In the Order Selection area, select Show all trade orders.
3.
In the Account Selection area, select All Accounts
5.
Click the Print button.
4.
In the Order Selection area, select Show all trade orders plus
orders excluded due to thresholds/adjustments.
Account Rebalancing Summary
5.
Click the Print button.
SchwabLink User Manual
The Account Rebalancing Summary provides a consolidated
report for each account with generated orders. The report contains
the data displayed on the Projected Portfolio tab and the Order
List. Optionally, you may select to print the allocation charts.
C.229
Fund Rebalancer
Appendix C
To print the Account Rebalancing Summary report,
1.
button
Model Portfolios by Name
.
2.
Select Account Rebalancing Summary.
3.
In the Account Selection area, select All Accounts.
4.
In the Account Restrictions area, select No restrictions.
5.
In the Charting Option section, check the Show portfolio
allocation chart (Optional)
6.
M O D E L C O N F I G U R AT I O N R E P O R T S
On the Fund Rebalancer toolbar, click the Printer toolbar
Click the Print button.
The Model Portfolios By Name report displays a list of all assets,
symbols, descriptions and allocations for a saved portfolio.
To print a specific model’s portfolio,
1.
Click the Model Configuration Screen toolbar button
2.
Click the Printer toolbar button
3.
Select Models by Name from the drop-down menu.
.
.
4.
In the Model Selection, select the One Model radio button.
Account Rebalancing Detail
5.
In the model drop down list, select the model.
The Account Rebalancing Detail Report provides a sectional
report for each account with generated orders. These detail
sections include: Current Rebalancing Portfolio, Order
Generation, Final Trade orders and Projected Rebalancing
Portfolio. The detail report does not provide an option for
allocation charts.
6.
Click the Print button.
7.
Set any print options such as page range or number
of copies.
8.
Click the OK button.
To print the Account Rebalancing Detail report,
Assets for All Portfolios
1.
The Model Portfolios By Asset report displays a list of all
models, descriptions and allocations for all assets including.
On the Fund Rebalancer toolbar, click the Printer
toolbar button
.
2.
Select Account Rebalancing Detail.
3.
In the Account Selection area, select All Accounts.
4.
5.
To print all model portfolios,
1.
Click the Model Configuration Screen toolbar button
In the Account Restrictions area, select No restrictions.
2.
Click the Printer toolbar button
Click the Print button.
3.
Select Models by Assets from the drop-down menu.
4.
In the Asset Selection, select the All Assets radio button.
5.
Click the Print button.
SchwabLink User Manual
.
.
C.230
Appendix C
Fund Rebalancer
6.
Set any print options such as page range or number of
copies.
MODEL ASSIGNMENT REPORTS
7.
Click the OK button.
All Model Assignments
The Model Assignment by Model report provides the following
information for each model:
Individual Asset Reports
• Linked accounts
The Model Portfolios By Asset report displays a list of all
models, descriptions and allocations for a specific asset.
• Account Description
To print the models linked to one asset,
• Current Portfolio values and variance
1.
Click the Model Configuration Screen toolbar button
2.
Click the Printer toolbar button
3.
Select Models by Asset from the drop-down menu.
To print all model assignments,
4.
In the Model Selection, select the One Asset radio button.
1.
Click the Model Assignment Screen toolbar button
5.
Select the asset from the drop-down menu.
2.
Click the Printer toolbar button
3.
Select Model Assignments by Model from the drop-down
menu. The Model Assignments Report dialog opens.
4.
In the Model Selection section, select the All Models radio
button.
5.
Click the Print button.
6.
• Last Order Export date
• Account Exclusion information
.
Click the Print button.
7.
Set any print options such as page range or number
of copies.
8.
Click the OK button.
SchwabLink User Manual
.
.
.
C.231
Appendix C
Fund Rebalancer
One Model Assignment
To print accounts without model assignments,
The Model Assignment by Model report provides the following
information for the requested model:
1.
Click the Model Assignment Screen toolbar button
2.
Click the Printer toolbar button
3.
Select Accounts without Models from the drop-down menu.
The Model Assignments Reports dialog opens.
4.
In the Account Selection section, select the All Accounts
radio button.
5.
Click the Print button.
• Linked accounts
• Account Description
• Current Portfolio values and variance
• Last Order Export date
• Account Exclusion information
.
.
To print one model assignment,
1.
Click the Model Assignment Screen toolbar button
.
2.
Click the Printer toolbar button
3.
Select Model Assignments by Model from the drop-down
menu. The Model Assignment Reports dialog opens.
4.
In the Model Selection section, select the One Model radio
button.
5.
Select the model name from the drop-down list box.
• Description
6.
Click the Print button.
• Model name
.
Model Assignments by Account
This report displays all the accounts listed on the Account with
Models tab. It does not include any accounts without model
assignments.
For each assigned account, the report displays:
• Account
• Current portfolio market value and variance
• Account Exclusion instructions
Accounts without Models
This report provides a listing of all the accounts linked to the
master account without a model assignment. For each account,
the report displays:
• Account
• Description
• Custom Account number
To print model assignment by account,
1.
Click the Model Assignment Screen toolbar button
2.
Click the Printer toolbar button
3.
Select Model Assignments by Account from the drop-down
menu. The Model Assignments Reports dialog opens.
4.
In the Account Selection section, select the All Accounts
radio button.
5.
Click the Print button.
• Custom Description
SchwabLink User Manual
(0001-03511)
.
.
C.232