1
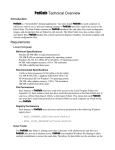
LIGHTech Fiberoptics, Inc.
Communicator User’s Manual
LIGHTech Fiberoptics, Inc.
Communicator
User’s Manual
Version 1.1
Communicator User’s manual - 1 -
LIGHTech Fiberoptics, Inc.
Communicator User’s Manual
Table of Contents:
I. Introduction
3
Figure 1 - The interface of Communicator
II. Computer Requirement
III. Using Communicator
3
3
4
1. Communication Ports Detection
4
Figure 2 - The button on top of the window
Figure 3 - Control Type List Item
4
2. Control Type
4
4
3. Use Control Command
4
4. Clear Records
5
Figure 4 - Commands text box and Responses list
Communicator User’s manual - 2 -
5
LIGHTech Fiberoptics, Inc.
Communicator User’s Manual
I. Introduction
LIGHTech’s Communicator is an easy to use tool that lets you manage and control all
LIGHTech’s products. This software diagnoses all available communication ports
automatically and sends control command to the test instrument directly. On the other
hand, Communicator remembers all of previous commands and the responses that
you have sent between the personal computer and instrument. Figure 1 shows the
interface of Communicator.
Figure 1 - The interface of Communicator
II. Computer Requirement
Personal computer compatible with follows attributes…
1. Intel Pentium or AMD-K2 processor or higher;
2. Minimum of 32MB DRAM;
3. Microsoft Windows 95/98/Me/2000;
4. Either: National Instrument GPIB communication card;
Or: RS-232 COM port with a 9-pin or 25-pin “D” type connector.
Communicator User’s manual - 3 -
LIGHTech Fiberoptics, Inc.
Communicator User’s Manual
III. Using Communicator
This program launches either from the start menu “Start → LIGHTech Communicator”,
or click on the program shortcut on the desktop.
1. Communication Ports Detection
The Communicator can judge the communication ports automatically after you click the
“Auto Detect” button (Figure 2). The user must power-ON the test instrument and to
be ensure the GPIB or RS-232 cord has connected to the instrument first.
Figure 2 - The button on top of the window
Figure 3 - Control Type List Item
2. Control Type
The Control Type lists all available communication ports for choose. For example, the
user selects the “COM 2” or “GPIB 16” (Figure 3) for control type. It means you will
use the RS-232 common port 2 or GPIB to communicate with instrument.
3. Use Control Command
The “Commands” text box (Figure 4) allows user to send commands to instrument after
click the “Enter”. The command will be shown on the response list (Figure 4). It
represent the command has sent to instrument normally. User may move the mouse
and single click on the “Commands” text box (Figure 4) to review the previous
command. User can select one of all previous commands by clicking the scroll bar for
next command. Response list is also available for user to review the previous records.
Please refer to LIGHTech’s “Operating and programming Manual – GPIB/RS-232
Control” – for all available commands.
Communicator User’s manual - 4 -
LIGHTech Fiberoptics, Inc.
Communicator User’s Manual
4. Clear Records
The Commands’ text box and Responses list (Figure 4) are all clear after click on the
“Clear Records” (Figure 2) button.
Figure 4 - Commands text box and Responses list
Communicator User’s manual - 5 -