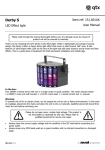
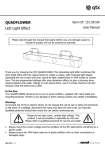
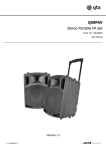
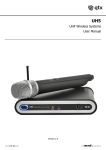
1
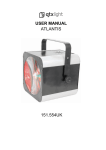
Item ref: 151.558UK PB-7 High Power Foldable PAR Bar User Manual Please read through this manual thoroughly before use, any damage cause by misuse of product will not be covered by warranty. Thank you for choosing this QTX PB-7 PAR bar. A foldable PAR bar kit fantastic for mobile DJs and performers who need their lighting to be quick to set up and easily transportable. This PAR bar boasts 4 high power Cans, each fitted with 7 x 3W RGB LEDs. Smooth colour blending can be achieved by controlling with the included foot controller or via DMX. In the box: Your PB-7 should arrive to you in two separate cartons in good condition. Carton 1: PAR bar with 4 LED PAR Cans Foot controller Foam carry case 2 x IEC mains lead (UK and EU) Carton 2: 35mmØ tripod stand Stand bag Warning: To prevent risk of fire or electric shock, do not expose the unit to rain or damp environments. In the event of a spillage, disconnect the mains and allow the unit to dry out naturally. Qualified personnel should then check the unit before continuing use. Please do not open cover, contain high voltage. This product is not serviceable or repairable by end user. Please refer to qualified personnel for service and repair. Always check the correct voltage and the condition of the IEC lead before connecting to a power outlet. Always ensure any DMX leads used are in good condition with no short connections or damaged plugs. er or professional when unit malfunction. Setup: Release the clasp that holds the top bar in the folded position and unfold to the open position as pictured below. There are two clasps at the back of the unit that need to be locked to keep the top bar in the open position. The opened top bar can now be place on to the supplied tripod stand and adjusted to desired height. Each LED PAR Can pans and tilts to face different directions and angles. Back panel: 1. 2. 3. 4. 5. LCD Display Manual control buttons DMX signal in (DMX male socket) DMX signal out (DMX female plug) Foot controller socket 6. 7. 8. Built in mic IEC socket Earth connection screw DO NOT REMOVE 151.558UK User Manual Manual control menu: Press the “menu” button to enter the setting menu. Press “up” and “down” to navigate through various setting options. Press “enter” to enter the desired setting. Choose set value by “up” and “down” buttons and confirm setting by pressing “enter”. Display Mode DMX address DMX channel mode Slave mode Auto mode Sound activation Microphone sensitivity Blackout mode LED display dimmer LED display inverted Fixture test sequence Fixture hours Press ENTER for setting to , , , 1 or 1 = master, = slave 1,= slave 2 to = sound to light on, = sound to light off (0-100% gain) = on, = blackout = display off after 20s = constant display / (normal or inverted display) Fixture steps through all functions – press MENU to exit Displays how many hours of use for the fixture Operation: The PB-7 can operate in stand-alone, master, slave or DMX modes. Stand-alone/master/slave: For stand-alone mode, first choose whether sound to light is required by selecting or from . Then select one of the eight pre-programmed modes from option to , select for random chase option. Further PB-7 units can be controlled by one master unit allowing synchronization. Ensure the master unit slave mode is set as and the controlled unit slave mode is set as or . Connect DMX out from the master unit to the DMX in of the slave unit. DMX mode: The PB-7 can be control by DMX signal, simply connect the DMX signal source to the DMX in of the unit via a balanced XLR lead. Extra fixtures can be controlled by the same DMX signal by looping through the DMX out on the PB-7. Ensure the correct DMX start address is set from the option on the manual control. 151.558UK User Manual Foot Controller: ON/OFF – Switches the PAR bar on and off MODE – Scroll through all programmed modes UP – Choose setting value to are 8 preset colours to are the 8 pre-programmed chase patterns to are the speed option for the chase , , are the Master/Slave mode FLOOD – press to give maximum light output DMX channel value reference: 1 channel mode: Channel DMX Value 000-007 008-037 038-067 068-097 098-127 Channel 1 sound to light active from 008-255 128-157 158-187 188-217 218-247 248-255 3 channel mode: Channel DMX Value Channel 1 000-255 Channel 2 000-255 Channel 3 000-255 Function Black out Pre-programmed Chase Pre-programmed Chase Pre-programmed Chase Pre-programmed Chase Pre-programmed Chase Pre-programmed Chase Pre-programmed Chase Pre-programmed Chase Random Chase 1-8 1 2 3 4 5 6 7 8 Function Red dimmer 000-0% to 255100% Green dimmer 000-0% to 255-100% Blue dimmer 000-0% to 255100% 151.558UK User Manual 7 channel mode: Channel DMX Value Channel 1 000-255 Channel 2 000-255 Channel 3 000-255 Channel 3 000-255 Channel 5 Channel 6 Channel 7 000-007 008-247 248-255 000-007 008-022 023-037 038-052 053-067 068-082 083-097 098-112 113-127 128-142 143-157 158-172 173-187 188-202 203-217 218-232 233-247 248-255 000-007 008-255 12 channel mode: Channel DMX Value Channel 1 000-255 Channel 2 000-255 Channel 3 000-255 Function Red dimmer 000-0% to 255100% Green dimmer 000-0% to 255-100% Blue dimmer 000-0% to 255100% Master dimmer 000-0% to 255-100% N/A Strobe, speed 0%-100% Sound to light strobe N/A Preset colour change 1 Preset colour change 2 Preset colour change 3 Preset colour change 4 Preset colour change 5 Preset colour change 6 Preset colour change 7 Preset colour change 8 Preset colour change 9 Preset colour change 10 Preset colour change 11 Preset colour change 12 Preset colour change 13 Preset colour change 14 Preset colour change 15 Preset colour change 16 Colour chase to sound N/A Colour change speed 0-100% Function PARcan1 Red dimmer 0-0% to 255-100% PARcan1 Green dimmer 00% to 255-100% PARcan1 Blue dimmer 0-0% to 255-100% 151.558UK User Manual Channel 4 000-255 Channel 5 000-255 Channel 6 000-255 Channel 7 000-255 Channel 8 000-255 Channel 9 000-255 Channel 10 000-255 Channel 11 000-255 Channel 12 000-255 16 channel mode: Channel DMX Value Channel 1 000-255 Channel 2 000-255 Channel 3 000-255 Channel 4 000-255 Channel 5 000-255 Channel 6 000-255 Channel 7 000-255 Channel 8 000-255 Channel 9 000-255 Channel 10 000-255 Channel 11 000-255 PARcan2 Red dimmer 0-0% to 255-100% PARcan2 Green dimmer 00% to 255-100% PARcan2 Blue dimmer 0-0% to 255-100% PARcan3 Red dimmer 0-0% to 255-100% PARcan3 Green dimmer 00% to 255-100% PARcan3 Blue dimmer 0-0% to 255-100% PARcan4 Red dimmer 0-0% to 255-100% PARcan4 Green dimmer 00% to 255-100% PARcan4 Blue dimmer 0-0% to 255-100% Function PARcan1 Red dimmer 0-0% to 255-100% PARcan1 Green dimmer 00% to 255-100% PARcan1 Blue dimmer 0-0% to 255-100% PARcan2 Red dimmer 0-0% to 255-100% PARcan2 Green dimmer 00% to 255-100% PARcan2 Blue dimmer 0-0% to 255-100% PARcan3 Red dimmer 0-0% to 255-100% PARcan3 Green dimmer 00% to 255-100% PARcan3 Blue dimmer 0-0% to 255-100% PARcan4 Red dimmer 0-0% to 255-100% PARcan4 Green dimmer 00% to 255-100% 151.558UK User Manual Channel 12 000-255 Channel 13 000-255 Channel 14 Channel 15 Channel 16 000-007 008-247 248-255 000-007 008-022 023-037 038-052 053-067 068-082 083-097 098-112 113-127 128-142 143-157 158-172 173-187 188-202 203-217 218-232 233-247 248-255 000-007 008-255 PARcan4 Blue dimmer 0-0% to 255-100% Master dimmer 0-0% to 255100% N/A Strobe, speed 0%-100% Sound to light strobe N/A Preset colour change 1 Preset colour change 2 Preset colour change 3 Preset colour change 4 Preset colour change 5 Preset colour change 6 Preset colour change 7 Preset colour change 8 Preset colour change 9 Preset colour change 10 Preset colour change 11 Preset colour change 12 Preset colour change 13 Preset colour change 14 Preset colour change 15 Preset colour change 16 Colour chase to sound N/A Colour change speed 0-100% 151.558UK User Manual Specifications Power 110-240Vac, 50/60Hz (IEC) Power consumption 100W Fuse rating T7A LED type 3W RGB Beam angle 25° DMX channels 1, 3, 7, 12 or 16 Maximum height 1.69m Dimensions : PAR bar 1140 x 290 x 60mm Dimensions : collapsed 570 x 290 x 120mm Dimensions : carry bag 700 x 430 x 280mm Weight : carry bag when full 10.8kg Weight : stand 2.55kg LED safety standard BSEN62471:2008 Troubleshooting No power (mains) No LED display No light output No strobe output Unresponsive to DMX Overheating/ cutting out Check mains voltage is correct and outlet is switched on Check IEC lead and fuse (if fuse continually blows, refer to your dealer) Press any control panel button and check LED setting in menu Check control panel mode settings (standby, slave, sensitivity, DMX) Check DMX settings from controller (dimmer levels, blackout etc.) Check strobe settings on control panel or from DMX controller Check DMX connection and leads Check that DMX mode is enabled (set “Addr” on control panel) Ensure that the unit is not too close to a heat source This product is classed as Electrical or Electronic equipment and should not be disposed with other household or commercial waste at the end of its useful life. The goods must be disposed of according to your local council guidelines. Errors and omissions excepted. Copyright© 2014. AVSL Group Ltd. 151.558UK User Manual