1
Adroit Photo Forensics 2013 User Manual Version: 3.0a The following user manual is for using Adroit Photo Forensics (v3.0a) and is a step-by-step guide on how to create and open cases, perform analysis, and view the results. ©2006 - 2013. All rights reserved. Table of Contents TABLE OF CONTENTS .................................................................................. 2 SETTINGS .................................................................................................. 5 General Settings Tab .............................................................................................................................................5 SmartFilter Settings Tab ........................................................................................................................................7 Report Settings Tab .............................................................................................................................................10 CSV Settings Tab .................................................................................................................................................11 SmartCarve/GuidedCarve Settings Tab ...............................................................................................................12 Hash Database Settings Tab ...............................................................................................................................14 MENU ...................................................................................................... 16 File Menu ............................................................................................................................................................16 View Menu ..........................................................................................................................................................18 Tools Menu..........................................................................................................................................................20 Help Menu ...........................................................................................................................................................21 NEW CASE ............................................................................................... 22 Case Information .................................................................................................................................................22 Examiner Information .........................................................................................................................................22 Evidence Selection ...............................................................................................................................................23 Analysis Profiles ..................................................................................................................................................23 Analyze! ..............................................................................................................................................................23 NEW EXAMINER SCREEN ........................................................................... 24 ANALYSIS OPTIONS................................................................................... 25 Active & Deleted Recovery Tab ...........................................................................................................................25 Embedded Recovery Tab .....................................................................................................................................28 Integrity/Hashing Tab .........................................................................................................................................30 Photo Formats Tab ..............................................................................................................................................32 SmartFilters Tab ..................................................................................................................................................33 Category Profiles Tab ..........................................................................................................................................36 ANALYSIS START ...................................................................................... 37 PHOTO GALLERY ...................................................................................... 39 Group/Sort Options .............................................................................................................................................40 Tab Options .........................................................................................................................................................41 Show Options ......................................................................................................................................................42 Photo Gallery Selection and Navigation..............................................................................................................43 Digital Assembly 2 CUSTOM GALLERY .................................................................................... 45 FORENSIC PHOTO VIEWER ........................................................................ 47 Primary Image .....................................................................................................................................................47 File Details ...........................................................................................................................................................48 Photo Details .......................................................................................................................................................49 Metadata/EXIF Details ........................................................................................................................................50 Stored Thumbnail ................................................................................................................................................51 Summary .............................................................................................................................................................52 Clusters................................................................................................................................................................53 Fragments ...........................................................................................................................................................54 Image Ops ...........................................................................................................................................................55 TIMELINE ................................................................................................. 56 RECOVERY COUNTS ................................................................................. 60 GENERATE REPORTS ................................................................................ 63 VIEW LOG ................................................................................................ 67 SMARTFILTER .......................................................................................... 68 MD5 AND SMARTHASH™ ALERTS, IGNORES AND BOOKMARKS ..................... 71 Bookmarks ..........................................................................................................................................................71 MD5 Hash Alerts .................................................................................................................................................71 SmartHash™ Alerts .............................................................................................................................................72 Ignore ..................................................................................................................................................................72 CATEGORIES ............................................................................................ 73 CATEGORY PROFILES ............................................................................... 74 Automatic Categorization Rules..........................................................................................................................75 OPENING CASES ...................................................................................... 77 BATCH ANALYZE ....................................................................................... 78 VERIFY HASHES ...................................................................................... 82 EXPORT AS FTK KFF .............................................................................. 84 IMPORT HASHES ...................................................................................... 85 MD5 & SmartHash Alerts ....................................................................................................................................85 MD5 Ignored Photos ...........................................................................................................................................86 Digital Assembly 3 GUIDEDCARVE ......................................................................................... 87 GuidedCarve Step 1: Identify Potential Error Block& Deleted recovery ..............................................................88 GuidedCarve Step 2: Choose A GuidedCarve Mode ............................................................................................90 GuidedCarve Operation: Split..............................................................................................................................91 GuidedCarve Operation: Swap ............................................................................................................................93 GuidedCarve Operation: Append ........................................................................................................................98 APPENDIX A: KEYBOARD SHORTCUTS....................................................... 103 Digital Assembly 4 Settings When APF is run for the first time, the Settings dialog (below) appears for a user to set the initial configuration settings. The Settings dialog can also be accessed by selecting from the menu: Tools>Settings. General Settings Tab Default Paths Case Path is where the case folder will be created by default. All case related files such as the log, reports, and case database will be saved here. To change the default path, click on Browse. For example, if the case path is “C:\mysavedcases”, and a new case named "3jpegs" is created then all the case related files will be saved in the folder “C:\mysavedcase\3jpegs” by default. Examiner Path is where examiner details are saved. To change, click on Browse. Multiple examiners can be saved and then subsequently selected when creating a case. APF remembers the examiner information of the most recently created case. Digital Assembly 5 Case Creation Fill case details based on disk image – Default Selected Selected: The case name and case path will be automatically filled out when selecting a disk image or drive. For example if 3jpegs.e01 is selected then the case name and case path will be 3jpegs. Note: the name and path can be manually edited at any point. Not Selected: Case name and ID will have to be manually entered. Starting case ID seed value determines at which number case ID processing should start. This too can be changed at any point. Thumbnails Blur thumbnails to hide photo content – Default Not Selected Selected: Thumbnails of the photos recovered during and after the recovery process will be blurred. May slow down navigation. Not Selected: No blurring will occur on the thumbnails. Show Thumbnails in TimeLine – Default Selected Selected: Allows thumbnails to be displayed when a hotspot in the timeline is clicked. You can read more about this in the timeline section. Not Selected: Thumbnails are not shown in the time line. Screen after Analysis/Recovery This section allows you to choose the default screen set after analysis on a case is complete. The default screens can be either the ‘Photo Gallery’, ‘SmartFiltering’ or ‘Categorization’ screens. This is a convenience option as you can switch between the screens whenever you want to. Default Grouping in Photo Gallery Allows you to set the way the Photo Gallery is initialized when launched. The “Mode” selection determines if you want photos sorted or grouped/stacked. The “Group” drop-down list allows you to select from a range of grouping options including “date”, “camera”, “file name”, etc. The “Tabs” drop-down list allows you to determine if the groups should be separated into different tabs by the carving method. The “Show” drop down allows you to filter out photos by resolution. You can learn more about this in the Photo Gallery section. Note: these are only the defaults and you can change settings in the Photo Gallery at will. Digital Assembly 6 SmartFilter Settings Tab SmartFilter™ Exclusions SmartFiltering™ is a feature that filters specific content in the recovered photos. SmartFiltering™ can either be performed during recovery or after recovery is complete. The SmartFilter™ options in the Settings dialog represent the options for SmartFiltering™ after recovery is complete. For SmartFilter™ options during recovery please look at the Analysis Options section. Do filtering on active photos – Default Selected Selected: SmartFiltering™ will be performed for active photos. Not Selected: SmartFiltering™ will not be performed for active photos. Do filtering on deleted photos – Default Selected Selected: Smart filtering™ will be performed for deleted photos. Not Selected: SmartFiltering™ will not be performed for deleted photos. Do filtering on embedded in active photos – Default Not Selected Selected: SmartFiltering™ will be performed for embedded in active photos. Not Selected: SmartFiltering™ will not be performed for embedded in active photos. Do filtering on embedded in deleted photos – Default Not Selected Selected: SmartFiltering™ will be performed for embedded in deleted photos. Not Selected: SmartFiltering™ will not be performed for embedded in deleted photos. Digital Assembly 7 Do filtering on partial photos – Default Not Selected Selected: SmartFiltering™ is attempted on invalid/corrupted/partial photos. Not Selected: SmartFiltering™ will not be performed for invalid/corrupted/partial photos. SmartFiltering™ can also be configured to filter only photos larger than a certain resolution. The default minimum is 128x128 pixels and it can be changed. Setting it to 0x0 will ensure that the resolution will not be used to determine if the photo should be skipped or not. SmartFilter – Explicit Image Detection (EID) No EID (will not show explicit images) – Default Not Selected Explicit image detection will be disabled. Fast EID (lower accuracy rate, very fast) – Default Not Selected The time taken to perform EID is reduced but the accuracy is lower. Best EID (higher accuracy rate, slow) – Default Selected The most accurate EID mode but also the slowest. Slow EI only if face is detected (Best EID only) – Default Selected Selected: An image will only be considered explicit if a face is detected in the image. This will dramatically lower false positives, and may decrease speed a bit but will also increase false negatives (some images that are explicit may not be detected). Not Selected: Explicit images without having faces in it also will be detected as explicit. Higher chance of false positives. Identify explicit images with children – Default Selected Selected: Will look for explicit photos showing children. Not Selected: Will not look for explicit photos showing children. Skin threshold for EID – Default Value 22% Photos with skin percentage detected less than the value selected will not be detected as explicit. SmartFilter – SmartHashing SmartHashing™ is a proprietary technique to group similar photos together in a case. This allows the user to find duplicate as well as slightly modified or thumbnail versions of photos. Note: SmartHashing does not run on photos that are smaller than 128 x 128 in resolution. Group photos that are similar (resized, edited etc.) – Default Not Selected Selected: It turns on SmartHashing™. SmartHashing™ is a proprietary technique to group similar photos together in a case. This allows the user to find duplicate as well as slightly modified or thumbnail versions of photos. Not Selected: It turns off SmartHashing™. Similar/SmartHash Threshold – Default value 30 This threshold determines how likely two similar files will be grouped together. The higher the threshold the more likely that two similar photos will be grouped together. Alert for Photos with SmartHash in Database – Default Not Selected Digital Assembly 8 Selected: Will compare the SmartHash™ of photos in a case with photos that have SmartHash™ values in the alert database. If the photos are determined to be similar a SmartHash™ Alert will be set on the photo. Not Selected: Will not perform SmartHash™ Alerts. SmartFilter – Other Do face detection (frontal) – Default Selected Selected: Will perform face detection as part of SmartFiltering™ if checked. Not Selected: Will not perform face detection as part of SmartFiltering™. Do photo-thumbnail mismatch detection – Default Selected Selected: Compares an embedded thumbnail against the photo it is supposed to represent. Some photos may contain a thumbnail embedded within the photo itself, these thumbnails are used by the operating system for quick views. There have been instances wherein an explicit image is hidden by an incorrect thumbnail. This option when clicked checks if the thumbnail matches with the primary photo. Not Selected: Will not perform the thumbnail mismatch detection. Alert for Photos with MD5 hash in Database – Default Selected Selected: Tags photos whose MD5 hash value match with the MD5 hash values in a database. Not Selected: Does not compare the MD5 hash values of the current case with the MD5 hash values on the database. Detect duplicate photos using MD5 Hash – Default Selected Selected: Detects duplicate photos in the case by comparing MD5 hashes. If there are 2 or more photos having the same MD5 hash then duplicates are present. Not Selected: Does not compare the MD5 hash values of the photos with each other. Digital Assembly 9 Report Settings Tab Reports can be customized by selecting and removing fields. The list box on the left contains fields not appearing in the report. The list box on the right lists fields appearing in the report. Reports are saved in the "Reports" folder within the case folder. The main report is "index.html" Digital Assembly 10 CSV Settings Tab CSV reports can be customized by selecting and removing fields. The list box on the left contains fields not appearing in the report. The list box on the right lists fields appearing in the report. CSV reports are generated in the case folder and are named "<case name> __Report.csv " After the CSV is generated, a prompt will appear that will ask if the CSV is to be viewed or not. (Generally CSV files are viewable in Excel) Digital Assembly 11 SmartCarve/GuidedCarve Settings Tab Warning this section is for advanced users only. Changes made here can dramatically affect the time and quality of fragmented photo recovery in SmartCarving™ and GuidedCarving™. Fragment Recovery Settings Maximum Fragments – Default value 7 This defines the maximum number of fragments that SmartCarving™ will attempt to build before giving up. The lower the number the faster the SmartCarving™. Maximum forward search – Default value 4,000 This determines the number of blocks to search AFTER the last known block for the photo. The lower the number the quicker, but the higher the number the more likely that the file will be recovered. Maximum backward search – Default value 4,000 This determines the number of blocks to search BEFORE the last known block for the photo. The lower the number the quicker, but the higher the number the more likely that the file will be recovered. Forward match threshold – Default value 0.015 This determines the score threshold below which if a block is being analyzed after the last known block gets automatically selected. This means that forward searching will get terminated and the block that had a score below the threshold value gets selected. Backward match threshold – Default value 0.01 Digital Assembly 12 This determines the score threshold below which if a block is being analyzed before the last known block gets automatically selected. This means that backward searching will get terminated and the block that had a score below the threshold value gets selected. Sequential match threshold – Default value 0.07 This determines the score threshold below which sequential blocks are automatically merged. Fragment ignore threshold – Default value 0.3 This determines the score threshold ABOVE which blocks are removed from consideration. Check threshold for a footer fragment – Default value Not Selected Selected: When a footer is the starting block of a fragment the footer must pass the score threshold before being selected for the recovery of a photo. Not Selected: The footer will be automatically attached to a recovered photo if it decodes successfully. No threshold is checked. Swap/Append Settings Maximum forward search – Default value 50,000 This determines the number of blocks to search AFTER the selected block for swap. The lower the number the quicker, but the higher the number the more likely that the correct block to swap in will be found. Maximum backward search – Default value 50,000 This determines the number of blocks to search BEFORE the selected block for swap. The lower the number the quicker, but the higher the number the more likely that the correct block to swap in will be found. Maximum number of matches – Default value 100 Total possible number of blocks returned as options for swap ordered by the best scores. Digital Assembly 13 Hash Database Settings Tab Hash Database Source No DB No Hash Database is selected. Selecting this option disables MD5 and SmartHash alerts and prevents MD5 Ignore matching as well. Local DB (Default) Selecting this creates and uses a database on the same machine as Adroit Photo Forensics. Network DB Selecting this option allow for connection to a network database. The connection settings can be set in the fields following. Please note that the network DB server must be running in order to connect to a database. Network Settings IP Address This is the IP address of the server running the network database. Port Number - Default value 1527 This is the port number that the network database server is listening for requests on. User – Default value apfuser Enter a user name to access the network database. Password The password associated with the user name to access the network database Digital Assembly 14 Test Connection If a local or network database is selected, you can test the connection to the database by clicking on this button. A message will appear indicating if the connection was made successfully or not. Digital Assembly 15 Menu File Menu New Case - Shows the screen where a new case can be created. The current case (if any) will be closed and a new case screen will show. All entries will be cleared. Open Case - Opens a file open dialog box from where you can open a case file (*.cio). Case files can be opened directly or by choosing their parent folder. Close Case - Closes the current open case. Backup Case - Creates a backup copy of the entire case folder including all case related files. Save Photos - Displays a dialog which will prompt as to which group of photos is to be saved. Save File By Unique ID - Displays a dialog allowing photos and container files for photos to be saved based on their unique ID. This option allows users to export out zips and other container files from evidence. Digital Assembly 16 Import Hashes The import hash feature allows you to import hashes for both the hash alert as well as the hash ignore databases. MD5 & SmartHash Alerts Import hashes for performing hash alerts. There are three ways of importing hashes: From Current Case: Stores the MD5, SmartHash or Category for a group of photos. Dialog will appear that will ask if SmartHash and categories should be saved along with the MD5. From File. From an external source which is in the Hashkeeper, ILook or CSV format hashes. Note: Only MD5 hashes can be saved as part of the alerts using this option. From Old APF Database: Converts the old MD5 hash alert DB to the new format. MD5 Ignored Photos Import hashes for performing hash ignored. There are three ways of importing hashes: From Current Case: Stores the MD5 hashes of a selected group of photos from the current case. From File: From an external source which is in the Hashkeeper, ILook or CSV format hashes. From Windows OS: From a file of known Windows OS photos from Windows XP, Vista and 7. Export as FTK KFF - The Export as FTK KFF feature in APF creates a hash list of the group of photos that were selected. Save this hash list as a Comma Separated Value (.csv) file which can then be imported into FTK. Please see "Importing KFF Hashes" in the FTK user guide. Export as CSV - Allows creating a CSV report of the current case. The various fields selected are columns and their values for each header are listed. List of recently opened cases - This contains the list of the last 5 recently opened cases. Exit - Exits the application. Digital Assembly 17 View Menu Photo Gallery - Displays a photo gallery of thumbnails for the recovered photos. The results screen has features for grouping photos for by day, month, year, camera and even on the basis of size. There is a feature of separating the recovered photos into different tabs depending on the recovery mode of the photo. Also you can filter out the different type of photos recovered. Photo Viewer - Displays the selected group of photos in the photo viewer. Timeline - The timeline is the representation of the evidence usage. It represents the evidence usage along a time graph in the form of balloons. You can select from the group of photos whose timeline you would like to view. Recovery Counts - Shows a summary of all the recovery statistics such as number of photos found, photos without filename (photos that have been deleted fall in this category), active photos (photos that are present in the file system i.e. file not deleted), etc. Depending on the various photo types recovered you will have a list of various photo types and corresponding number of photo of that type. Generate Reports - Creates a more presentable and detailed report of the group of photos generated for. Case information, examiner information, evidence information along with detailed analysis reports is generated. Please be patient while generating reports for cases having large number of recovered photos. Log - Opens up the log created during the analysis of the evidence. The log contains case information right from creation time including case update information. File recovery statistics also get written to the log if the analysis option of 'Write recovered file information to log' is checked. Verify Hashes - If MD5 and SHA1 or SHA256 values are chosen to be calculated in Analysis options, then respective hash values are calculated before and after the recovery. We can verify the hashes at any point once the recovery is completed. Digital Assembly 18 SmartFilters - SmartFilter auto detects explicit content adult and child, faces, photos that have mismatched thumbnails embedded within them, similar looking photos and more. Custom Gallery - Bookmarked – Shows all the bookmarked photos in the Custom Gallery. If the case does not have any bookmarked images, it is disabled. Ignore – Shows all the photos that have been ignored in the Custom Gallery. Hash Alert - If the current case has Hash Alerted Photos; this will open them in the Custom Gallery. Thumbnail Cache - If the current case has Photos recovered from the Thumbnail Cache, this will open them in a Custom Gallery. Recycled - If the current case has Photos recovered from the Recycle Bin, this will open them in a Custom Gallery. Resident Files – Shows photos in the current case that are stored as Resident files. Alternate Data Stream – Shows photos that are stored as Alternate Data Stream files. Sector Carved – Shows photos that were carved out of unallocated space at the sector or byte level in the Custom Gallery. Extension Mismatch – Shows in the Custom Gallery those photos that were determined to have a different photo type from what their extension indicates. Digital Assembly 19 Tools Menu New Examiner - In order to add new examiners click here to add examiner details. Edit Examiner – Used to edit and delete examiner names. Batch Analyze - When there is a need to do case analysis on a number of cases, you should use the batch screen. Blur Thumbnails - This is a short cut for blurring the thumbnails during recovery or while viewing the photo gallery. You can also enable this from Settings -> General Settings Category Profiles - The category profiles allows the user to categorize the photos into 10 categories. Settings - These are the application level options which were set when Adroit Photo Forensics ran for the first time. Options include defaults such as case folder, examiner folder, etc. Digital Assembly 20 Help Menu Help contents - Opens the built-in help guide. Manual - Adroit Photo Forensics PDF manual requires Adobe Reader. Digital Assembly Website - Opens up the system's default browser and takes you to Digital Assembly's website (www.digital-assembly.com) Register Product - Registration will allow you to unleash the full power of Adroit Photo Forensics. All unregistered version restrictions will be removed. Once registered, this option will no longer be visible. Purchase copies of APF will not show this option. Check for Updates - This will cause the update check screen to launch. This screen will allow the user to determine if a new version of APF is available. You can also set how often if ever APF should do automatic update checks. About - Information dialog about Adroit Photo Forensics. Digital Assembly 21 New Case The New Case screen is the screen that will be used most often for creating a case. Cases can also be created in the Batch Analyze Screen. Case Information For a new case, Case ID and Case Name are required; however, if auto-generation of case is on, they will be created based on the evidence selected. Auto-Generation of Case ID and Case Name based on the selected evidence is turned on by default in the Settings screen. Examiner Information By default the last chosen examiner is displayed in the Examiner’s Name drop down list. No examiner details will be present when APF is run for the first time. Click on the "+" button to add a new examiner’s information. You can also use File->New Examiner to add new examiners. Digital Assembly 22 Evidence Selection There are four different types of evidences that can be selected: disk images, physical drives, logical drives and folders. Disk Images: Click on “Click here to choose a disk image” and then browse to and select the disk image that you want analyzed. APF currently supports both Encase and DD/Raw disk images. Disk Images are the preferred method of analyzing evidence. Folder Recovery: Click on the node “Click here to choose a folder” and then browse to and select the Folder you wish to recover from. APF allows you to select a folder and optionally all sub-folders underneath the folder. Cluster Information and deleted file recovery will not be available in this mode. Physical Drives node gives the list of all detected physical drives. Typically, analysis on drives should be done on the physical drive. Logical Drives node gives the list of all detected logical drives. Analysis Profiles Select the Analysis Profile from the drop down list that you want to use on the evidence. Analysis Profiles are set of recovery and analysis settings that are run on a case. Click on Analysis Options to modify, add or delete analysis profiles. Read more about this in the Analysis Options section. Analyze! If no problems are detected, the Analyze button will become enabled. Click on it to start evidence analysis. Digital Assembly 23 New Examiner Screen This screen is fairly self-explanatory. You can use this screen to add as many examiners as you want. They will then be available in the examiner drop-down list in both the New Case and Batch Analyze screens. Fill in examiner details as required and click “Save.” Only the Examiner’s Name field is mandatory. All examiners added can be chosen in the combo box in the case screen. APF will remember the examiner details of the last case created. Digital Assembly 24 Analysis Options The Analysis Options screen allows you to change several carving, hashing, logging and speed settings for the analysis of a new case. This screen can be accessed from the New Case or Batch Analyze screen by clicking on the Analysis Options button. Analysis options are saved as part of profiles. APF comes with a few basic profiles built in, each of which can be edited and deleted. In addition a user can create as many different profiles as necessary. Modification and deletion of analysis profiles can only be done in this screen. The Analysis Options screen has six tabs: Active & Deleted Recovery Tab Active Recovery Use file system to set offset, clusters and active files Selected: When this option is on, if a file system like NTFS or FAT is detected, it will use the file system’s parameters like block size, offset, etc. to do the recovery. In addition, active Digital Assembly 25 files display is possible only if this option is on. Carving for deleted files will only occur in the area of the disk indicated to be unallocated by the file system. Not Selected: If this is turned off the file system is ignored completely, and the whole disk is eligible for carving. Offset and Cluster size Offset: This is the byte offset from the beginning of the disk that you want to start carving. The option is only available when Use file system to set offset, clusters and active files is unchecked. The default value is 0. Block Size: This is the user-specified block size in bytes. The option is only available when Use file system to set offset, clusters and active files is unchecked. The default value is 512. It is highly recommended that these fields be changed only if the user knows the actual disk statistics. Changes to these options can dramatically affect the recovery quality. Recover active photos from file system Selected: Active Photos, i.e. photos not deleted, are to be displayed. For this to work, Use file system to set offset, clusters and active files must be checked. Not Selected: No Active Photos are shown. Only carved photos are to be displayed. Identify active photos by header signature Selected: All active photos are re-verified using the starting header bytes to determine the file type. Slower but much more thorough in retrieving active photos. Photos whose extensions do not match the photo type can be seen in the View->Custom Gallery>Extension Mismatch menu. Not Selected: Active photos are determined by extension only. This option is faster but will miss out on photos that have been renamed to a non-photo extension. Validate active photos found Selected: Photo formats are validated for structural correctness. Not Selected: Active photos will always be shown as valid. Deleted Recovery Carve photos using file system logs (NTFS - LogCarving) Selected: Some file systems log deleted file cluster ranges. Enable this feature to allow APF to use any such information if it exists to carve photos out. Not Selected: APF will ignore any information from the file system that may help to carve out photos. Carve photos that are sequentially stored (Sequential Carving) Selected: This will enable sequential carving from the free space of the evidence. Not Selected: This will disable sequential carving from the free space of the evidence. Carve photos that are fragmented (SmartCarving) Selected: Carves fragmented photos. For this option to be enabled, the Normal Carving option needs to be checked. Not Selected: This will allow you to extract photos faster, but it may result in less successfully carved photos. Limit each SmartCarving Cycle to: Digital Assembly 26 This option can dramatically affect recovery time on extremely fragmented drives. It is highly recommended that the default value of 1200 seconds be left as is. To speed up the recovery process this can be lowered, however, lowering to below 5 minutes may greatly reduce SmartCarving accuracy. Size Carve based on unallocated space (BMP, TIFF, RAW formats): Selected: Once all other carving is done, Size Carve is performed based on the remaining unallocated space. Not Selected: Allows faster recovery but BMPs, TIFFs and RAWs may not be recovered fully. Preview Thumbnails Show thumbnails during recovery Selected: Thumbnails are generated and extracted for every photo recovered. The GUI uses the thumbnail for displaying results. Not Selected: Thumbnails are not shown during the recovery process. This will marginally speed up the recovery process. Note: Thumbnails are still created so that navigation is fast post-recovery. Create preview thumbnail instead of embedded thumbnail Selected: It scales the actual photo to the thumbnail size instead of retrieving the actual embedded thumbnail if available. This will reduce the speed of the recovery process but will ensure that the preview thumbnail matches that of the actual photo. Not Selected: It retrieves the actual embedded thumbnail if available. Upscale preview thumbnails to max viewable size Selected: All the thumbnails will be scaled to the maximum viewable size .It avoids showing stored thumbnails which might be of different sizes. Not Selected: Actual sizes of the thumbnails will show up in the results. Ignore Ignore photos smaller than Selected: Photos of size smaller than the inputted threshold will be set to be ignored. Not Selected: Photos of any size will show up in the results. Ignore photos based on MD5 stored in Ignored DB Selected: Any photo that is found to match a MD5 hash stored in the Ignore DB will be marked as ignored. Ignored photos will not show up in most results in the GUI unless explicitly asked for. Not Selected: Photos will not be checked against the Ignore DB for determining ignore status. Ignore duplicates based on MD5 stored in case Selected: Duplicates will be ignored. When ignoring duplicate files, the file with the earliest modification date will be preserved. Not Selected: Duplicates will not be ignored. Digital Assembly 27 Embedded Recovery Tab File formats like pdf, ppt, zip can contain embedded files within them. This tab deals options that configure embedded file parsing. Embedded in Unallocated Space No sector carve No sector carving of unallocated space is done. Scan for photos only at sector boundaries Carves at sector boundaries for all sectors which have not been assigned to an active or deleted file. Warning: this option can be a little slow on large drives. Scan every byte in a sector for photos Carves every byte in all the remaining sectors which have not been assigned to an active or deleted file. Warning: this option can be very slow on large drives. Embedded in Active/Deleted Recover embedded photos in active Selected: Recover from embedded files which are active on the file system. Not Selected: Active files will not be parsed for embedded photos. Recover embedded photos in carved files Digital Assembly 28 Selected: Recover from embedded files which are deleted. Not Selected: Deleted files will not be parsed for embedded photos Validate embedded photos in active files Selected: Each embedded photo found in an active file is validated for structural correctness. Not Selected: Embedded photos in active files are assumed valid. Validate embedded photos in carved files Selected: Each embedded photo found in a deleted file is validated for structural correctness. Not Selected: Embedded photos in deleted files are assumed valid. File Types Analyzed for Embedded Analyze all file types for embedded photos Selected: Every single file type recovered will be parsed for embedded photos. Warning: this option can be very slow on large drives. Not Selected: File types recovered will be determined by the list selection below. List Selection: Lists the file types which when detected will be parsed for embedded photos. Digital Assembly 29 Integrity/Hashing Tab Photo Integrity Generate MD5 hash of photos Selected: Generates a MD5 hash of each photo recovered. Not Selected: Disables MD5 hash generation. Note: This setting can be over-ridden if user has chosen hash alerts or duplicate detection. Generate SHA hash of photos Selected: Generates SHA hash of each photo recovered. You can select SHA 1 or SHA 256 but not both. Not Selected: Disabled SHA hash generation. Write detailed information of each photo to log Selected: Writes the photo information such as file name, size, dates, etc. to the log during the recovery process. If evidence has a very large number of recovered files the log size could be more than 100MB in size and would require an external application like TextPad to open. Not Selected: Only recovery statistics and usage statistics are written to the log, individual photo details are not logged. Digital Assembly 30 Evidence Integrity Generate MD5 hash of the evidence Selected: Generates MD5 hash of the evidence before and after recovery, to verify that the evidence was not tampered with. This can be very slow on larger drives. Not Selected: No hash is generated for the evidence. Generate SHA hash of the evidence Selected: Generates SHA hash of the evidence before and after recovery, to verify that the evidence was not tampered with. This can be very slow on larger drives. You can select SHA 1 or SHA 256 but not both. Not Selected: No hash is generated for the evidence. Evidence Time Zone Evidence Time Zone - This panel determines which time zone the evidence being analyzed is from. By selecting the correct time zone the date related information extracted from the photos recovered than then by accordingly adjusted to show the correct timeline. Digital Assembly 31 Photo Formats Tab This tab determines which photo formats should be processed. There are two standard options: Recover all photo formats supported This option checks all supported photo formats and ensures that they are recovered if present in the evidence. Recover only camera photo formats This option checks only those formats that can be generated by a digital camera. In addition, each of the formats can be individually checked or unchecked. Digital Assembly 32 SmartFilters Tab SmartFilter™ settings in Analysis Options affect SmartFiltering™ only during recovery. We recommend that SmartFiltering be run in triage mode with Hash Alerts on at least (assuming user has a hash database to compare against). SmartFilter Exclusions SmartFiltering™ is a feature that filters specific content in the recovered photos. SmartFiltering™ can either be performed during recovery or after recovery is complete. This section refers to the options available during recovery. Do filtering during recovery Selected: SmartFiltering™ will be performed during the recovery of the pictures. Not Selected: It does not perform SmartFiltering™ during recovery. By default, it is unchecked. Do filtering on active photos Selected: SmartFiltering™ will be performed for active photos. Not Selected: Does not perform SmartFiltering™ for active photos. Do filtering on deleted photos Selected: SmartFiltering™ will be performed for the deleted photos. Digital Assembly 33 Not Selected: SmartFiltering™ is not performed for deleted photos. Do filtering on embedded in active photos Selected: SmartFiltering™ will be performed for embedded in active photos. Not Selected: SmartFiltering™ is not performed for embedded in active photos. Do filtering on embedded in deleted photos Selected: SmartFiltering™ will be performed for embedded in deleted photos. Not Selected: SmartFiltering™ is not performed for embedded in deleted photos. Don’t filter for width and height less than Only filters photos larger than a certain resolution. The default minimum is 128x128 pixels and it can be changed. Setting it to 0x0 will ensure that the resolution will not be used to determine if the photo should be skipped or not. SmartFilter – Explicit Image Detection (EID) No EID (will not show explicit images) Explicit image detection will be disabled. Fast EID (lower accuracy rate, very fast) The time taken to perform EID is less but its accuracy is lower. Best EID (higher accuracy rate, slow) This mode of explicit image detection is the most accurate. It comes at the cost of time taken in performing explicit image detection. Slow EI only if face is detected (Best EID only) Selected: An image will only be considered explicit if a face is detected in the image. This will dramatically lower false positives, and may decrease speed a bit but will also increase false negatives (some images that are explicit may not be detected). Not Selected: Explicit images without having faces in it also will be detected as explicit. Higher chance of false positives. Identify Explicit images with children Selected: Will look for explicit photos having children present in them. Not Selected: Will not detect explicit photos having children present in them. Skin threshold for EID Photos with skin percentage detected less than the value selected will not be detected as explicit. SmartFilter – SmartHashing SmartHashing™ is a proprietary technique to group similar photos together in a case. This allows the user to find duplicate as well as slightly modified or thumbnail versions of photos. Group photos that are similar (resized, edited etc.) Selected: It turns on SmartHashing™. SmartHashing™ is a proprietary technique to group similar photos together in a case. This allows the user to find duplicate as well as slightly modified or thumbnail versions of photos. Not Selected: It turns off SmartHashing™. Similar/SmartHash Threshold Digital Assembly 34 This threshold determines how likely two similar files will be grouped together. The higher the threshold the more likely that two similar photos will be grouped together. Alert for photos with SmartHash in database Selected: Turns on SmartHash™ Alerts that allow the detection of modified versions of photos in the hash alert database. Not Selected: Does not perform SmartHash™ Alerts. SmartFilter – Other Do face detection (frontal) Selected: Will perform face detection as part of SmartFiltering™ if checked. Not Selected: Will not perform face detection as part of SmartFiltering™. Do photo-thumbnail mismatch detection Selected: Compares an embedded thumbnail against the photo it is supposed to represent. Some photos may contain a thumbnail embedded within the photo itself, these thumbnails are used by the operating system for quick views. There have been instances wherein an explicit image is hidden by an incorrect thumbnail. This option when clicked checks if the thumbnail matches with the primary photo. Not Selected: Will not perform the thumbnail mismatch detection. Alert for photos with hashes in imported set Selected: Tags photos whose MD5 hash value match with the MD5 hash values in a database. Not Selected: Does not compare the MD5 hash values of the current case with the MD5 hash values on the database. Detect duplicate photos using MD5 Hash Selected: Detects duplicate photos in the case by comparing MD5 hashes. If there are 2 or more photos having the same MD5 hash then duplicates are present. Not Selected: Does not compare the MD5 hash values of the photos with each other. Digital Assembly 35 Category Profiles Tab Each case may or may not be assigned a category profile. Category Profiles can be created from Tools -> Category Settings. In the above screen we can set the profile for each case. Rules can be defined and used by the profiles. After setting the category profile for a case all the photos are set to the default category of the profile. Digital Assembly 36 Analysis Start The left part of the screen shows the progress and information about the analysis. You can hide it by clicking on its top right triangle icon. This area contains three tabs: Disk Map: Provides a visualization of the evidence being analyzed. Analysis Status: Provides a very basic text summary of the status of the recovery. SmartFiltering: Shows the SmartFiltering results. The right side of the screen shows photos in 4 possible tabs. SmartFiltered: Shows thumbnails of photos that have some SmartFilter™ identified. For example a hash alerted photo or a photo detected as being potentially explicit. Do filtering during recovery must have been set to true for this feature to work. Active Recovered: Shows thumbnails of photos that are present in the file system. Will also show thumbnails of photos embedded in other active files if present. Successfully Carved: Shows photos that have been successfully carved out of unallocated/deleted region of disk. This will also show photos embedded in other deleted files. Digital Assembly 37 Invalid/Partially Carved: Shows photos that have been identified as not being complete. In analysis options, if we uncheck the Show preview thumbnails during recovery option we get to see only the statistics of recovery. Turning this option off is marginally faster than keeping it on. Digital Assembly 38 Photo Gallery The photo gallery is the default screen seen after recovery/analysis is complete. The photo gallery provides multiple options to select, view, sort and filter photos based on file system, database and photo properties. To filter photos by content please see the SmartFilter Screen section. As analysis of evidence completes, Active, Sequentially Carved, LogCarved, SmartCarved, GuidedCarved, Embedded in Active, Embedded in Carved and Invalid/Partially Carved photos are shown in separate tabs. You can change the type of tabs by clicking on the tabs drop down at the top of the screen. In addition, the Settings screen allows you to set the default tabs for this screen. Each thumbnail in this screen represents a group of photos. If there is more than one photo in the group, the number of photos will be shown with parenthesis. You can move the mouse over a thumbnail group and view a few selected thumbnails within the group (not available for single image groups). Group mode can be turned off by selecting the top left drop down list and selecting Sort. This will cause the photos to no longer be stacked together based on the selected property. Digital Assembly 39 Group/Sort Options Photos can be grouped and sorted on the basis of various parameters including: Day/Month/Year of Date of Last Modification, Day/Month/Year of EXIF date, Camera, Software, Resolution, File Size, File Name, Folder, Block Number, and None. Example: To group by EXIF Month click on the arrow and select Month (EXIF). All the thumbnails of photos recovered will get grouped by EXIF Month date Digital Assembly 40 Tab Options By default photos are separated by the process in which they were recovered. So for example, fragmented photos recovered by SmartCarving™ that were validated will show up in the SmartCarving™ tab. You can change this default grouping to suit your needs. For example if you don’t care about separating the photos by their recoveries, simply select “All Photos Single Tab” and then all photos will be shown in a single tab. Digital Assembly 41 Show Options The first show drop down can be used to only display photos belonging to a specific file type. For example to view only jpeg photos simply select the appropriate option. The second drop down can be used to filter photos based on their resolution. For example to view only photos greater than 32x32 pixels, simply select it from the drop down options. The third drop down determines if Ignored photos are shown or not. By default ignored photos are not shown (Hide Ignored). To show even ignored photos select All Photos. Digital Assembly 42 Photo Gallery Selection and Navigation Each photo group can be double clicked to view the photos in the group. Right Clicking on a group brings up a popup as shown above: View Photos: This launches the photo viewer with the group. It is the same as leftclicking the group. View Timeline: This allows you to view the selected photos on the timeline. View Custom Gallery: This launches the Custom Gallery Screen where the selected photos can be further grouped and sorted. View photos in same folders: Opens a Custom Gallery containing photos from the same folder as the selected photo. Save Photos: This allows you to save all the photos in the group into the disk. Generate Reports: This allows you to generate a report only with the photos in the group. Categorize: This allows you to categorize the selected photos. Add Bookmark: This bookmark’s all the photos in the group for future viewing or reporting. Remove Bookmark: This removes bookmarks from all the photos in the group. Digital Assembly 43 Ignore: Causes the ignore flag to be set for the selected photos. This will cause the photo not to be processed by default. Remove Ignore: Removes the ignore flag from a photo. Navigation in the photo gallery follows normal Windows behavior. You can use the mouse to select a thumbnail group, you can hold the shift and ctrl key to select multiple groups and finally you can use the keyboard arrows to select a photo as well. All the buttons at the bottom of the screen require at least one thumbnail group to be selected. Moving between pages can be done by using the slider, the page buttons on the top right, mouse wheel or PgUp and PgDown keys. Digital Assembly 44 Custom Gallery Grouped /Selected photos can be opened in a Custom Gallery by right clicking on the selected group. In the Custom Gallery photos can be viewed/sorted/grouped in gallery format. Digital Assembly 45 Example: In the Photo Gallery ,Select group by camera filter. Select a particular Camera group for say “Canon Power Shot SD 700 IS” and open this group in a Custom Gallery. In this Custom gallery we can again perform grouping or sorting operations on the basis of day,month, year , software etc. Digital Assembly 46 Forensic Photo Viewer Primary Image With the help of the Forensic Photo Viewer you can view all available forensic, file system and miscellaneous information for recovered photos. This includes the File information, EXIF info, embedded thumbnails, photo header details etc. In the “Primary Image” tab the actual photo contents can be seen. If the photo is larger than the screen it is automatically scaled to fit the screen. You can view the full photo by clicking on the zoom button “100%” in the “Primary Image” tab. Digital Assembly 47 File Details The “File Details” tab provides layout, file system information and hash information for a photo. File System information such as long file name, short file name, file size, dates(creation, modified, accessed) if present, are displayed here. Hash information including MD5, SHA1, SHA256 and SmartHash if calculated are displayed here. The cluster information has the starting cluster information which is the cluster from which the current photo begins from. Cluster count is the number of clusters that belong to the photo and the fragment count is the number of contiguous clusters that belong to the photo. The cluster ranges denote the range of clusters which constitute the photo being viewed. Digital Assembly 48 Photo Details The “Photo Details” tab provides information taken from the header structure of the photo. This information presented may include such details as image type, color width, bits per pixel etc. Digital Assembly 49 Metadata/EXIF Details EXIF information can contain additional information about a photo like the camera settings, color encoding information, sounds recorded when the picture was taken, and Global Positioning System (GPS) information. Exactly what is recorded depends on the model of camera. EXIF/IPTC data if present will be displayed here. Digital Assembly 50 Stored Thumbnail Some photos have an embedded stored thumbnail within them. If present it is displayed in this tab. If a photo contains multiple embedded thumbnails they will each be shown in their own tabs. Digital Assembly 51 Summary Shows a summary of the photo recovered along with EXIF information (if available) such as creation, modified, and accessed dates. You can bookmark single photos in the photo viewer by checking the Bookmark checkbox or hitting the 'B' or 'b' key on the keyboard. The category too can be set for the photo being currently viewed by hitting the number keys on the keyboard to which category you want to assign the photo or selecting from the drop list. Digital Assembly 52 Clusters Every photo is made of a series of disk clusters. This screen lists all the clusters that contain information pertaining to the photo. If a regular jpeg, each of the green buttons can be toggled and its corresponding region gets highlighted in the jpeg. This linking does not work for other photo types currently. Digital Assembly 53 Fragments A fragment is a sequence of clusters which are contiguous. There are 4 cluster ranges in the above example and they are not sequential (contiguous), thus the photo has 4 fragments. If a regular jpeg, each of the green buttons can be toggled and its corresponding region gets highlighted in the jpeg. This linking does not work for other photo types currently. Digital Assembly 54 Image Ops The image ops supported are: resize, rotate, brighten, and contrast. When changing the defaults for the image a new tab will open in the primary display area with the modified image. Once a modification has been carried out, the two buttons "Close" and "Save" will be enabled. The "Save" button will allow the modified image to be saved as a jpeg. The "Close" button will close the opened modified image. Digital Assembly 55 Timeline View timeline of the evidence analyzed to monitor evidence usage in a date range. Each hotspot represents a group of images, created/modified during the time period. The larger the hotspot the more the images available during that time period. To view timeline View->Timeline or click on the Clock icon. To zoom in further use the zoom scroll on the extreme left on the window. To move along the timeline move the mouse over the timeline, while keeping the left mouse button pressed move mouse to left or right, alternatively move the green window at the top of the screen. Digital Assembly 56 DATE FILTER The timeline can also be modified to use file creation date instead of file modification date. Instead you can choose either of the following date types to be used : o File Modification Date (by default) : The date when the photo was last modified. o File Creation Date : The date when the photos was created. o File Access Date : The date when the photo was last accessed. o EXIF Date Time : The embedded date and time within the photo. Digital Assembly 57 If you want to view photos only within a particular date range, then uncheck the Don't apply any date filters option. At times date information might not be present within the photo. Under these circumstances we give them an unknown date identity. If you want to include photos with unknown dates then check this option. It is recommended that you keep this option checked. Select the date by either entering the date in (Mon Day,Year) format for example Jan 01,2010 or clicking the button next it to bring out the calendar. After selecting the start and end dates click Ok. Digital Assembly 58 TIMELINE ZOOMED Left click on the orangehotspots denoting evidence usage to view more details about the photos being represented. Double click on the hotspot to view the photos indicated by the time line. Time line also shows thumbnail previews of photos (if show thumbnails is enabled) which are responsible for evidence activity for the corresponding period. Digital Assembly 59 Recovery Counts View the analysis summary of the evidence. Statistical data such as files found, carved, valid, etc. can be viewed here. For more detailed statistics view the log. Digital Assembly 60 To view analysis summary View->Recovery Counts Counts by File Type- shows the number of photos recovered in terms of photo formats. Digital Assembly 61 Counts by category - Displays the number of photos that belong to a particular category. This is specific to the category profile currently assigned to the case. If the category profile is changed, these numbers will be updated accordingly. Digital Assembly 62 Generate Reports (THE CATEGORY SECTION WILL NOT APPEAR IF A CATEGORY PROFILE IS NOT SET FOR THE CASE) Once analysis is completed reports can be generated on full case, or group of photos. Reports can be generated for a group of photos like active photos, sequentially carved, etc. Full case would include all the photos recovered, and successfully carved photos would include sequentially carved, LogCarved, SmartCarved and GuidedCarved photos. Photos can be bookmarked in the grouping screen or even in the photo viewer. Reports can then be created only on the bookmarked photos. Once the report has been generated, it will open up in your default browser as shown in the following pages. Digital Assembly 63 REPORT EXAMPLE Digital Assembly 64 The partition details show all the information that is embedded into the photo recovered during analysis. The file structure is a representation of the actual file structure detected on the evidence. Clicking on the photos will navigate to the partition details where more information can be seen with respect to the photo clicked on. Digital Assembly 65 Clicking on the thumbnail will navigate to the actual full size photo with respect to the thumbnail clicked on. Digital Assembly 66 View Log The log contains all the details of the analysis. The log also contains the analysis result of each individual photos as specified in the Analysis Options. To view the logs of a case View->Log or click on the Magnifier icon. Scroll down to view the logged information. Click close to close the log. NOTE : If the Log is larger than 1 0 MB then APF would need to use an external text editor such as Notepad or Wordpad. Digital Assembly 67 SmartFilter SmartFiltering helps in auto detection of explicit content in photos, child porn, faces, thumbnail mismatches and duplicates. o Explicit (Fast, Best, Balanced): Explicit photo detection attempts to detect photos that have skin tones in them. The greater the skin tone, the more likely a photo is to be flagged as explicit. Useful for porn detection. Explicit Fast is used to do a quick but not precise analysis of all the photos. Explicit Best is slower but is more likely to correctly identify skin in photos, whereas , Explicit Balanced is somewhere in between Best and Fast in terms of speed and accuracy. o Child: is a feature for detecting child pornography, it looks for photos that are explicit (see above) and that may potentially have children faces in them. o Thumbnail Mismatch: Some photos may contain a thumbnail embedded within the photo itself, these thumbnails are used by the operating system for quick views. There have been instances wherein an explicit image is hidden by a “safe” thumbnail. This SmartFilter shows Digital Assembly 68 those photos that were detected as having thumbnails that are different than the original photo. o SmartHash: Photos identified in this group are either duplicates of each other or are edited versions of the same photo. SmartHashing is basically a form of Fuzzy Hashing. o Hash Filters: Filters photos that are duplicates and hash alerted. o Duplicates: Photos identified in this group are exact MD5 matches of each other. o MD5 Hash Alert: Photos in this group have been matched against the database of known file MD5s. If the categories have been stored in the database, then the photo will be autocategorized. o SmartHash Alert: Photos in this group have been found to be similar to the database of known file SmartHashes. If the categories have been stored in the database, then the photo will be auto-categorized. Navigation in the photo gallery follows normal Windows behavior. You can use the mouse to select a thumbnail group, you can hold the shift and ctrl key to select multiple groups and finally you can use the keyboard arrows to select a photo as well. All the buttons at the bottom of the screen require at least one thumbnail group to be selected. Digital Assembly 69 Moving between pages can be done by using the slider, the page buttons on the top right, mouse wheel or PgUp and PgDown keys. Right click on any of the SmartFilter categories to bring up the above pop up menu. The View photos, timeline, save etc. all correspond to only those photos that belong to that category. The Redo this SmartFilter Only option basically performs the SmartFilter for that category only. This feature comes in handy when minor changes are made to SmartFilter options and rerunning the entire SmartFilter for all the categories can be cumbersome. Thumbnail mismatch will show modified thumbnail in the background outlined with red and the original thumbnail in the foreground. Digital Assembly 70 MD5 and SmartHash™ Alerts, Ignores and Bookmarks Photos may be marked automatically or manually in many ways for easier printing, filtering and viewing. Bookmarks Bookmarks allow for quick identification/viewing and reporting of photos that are of interest to a user. Bookmarking can be done from almost any screen in APF where thumbnails are available. This includes the Photo Gallery, Custom Gallery, Categorization and Photo Viewer screens. Most operations on photos including viewing, reporting, exporting and saving allow a user to select only bookmarked photos. For finer classification of photos please view the next section on Categorization. MD5 Hash Alerts MD5 hash alerts occur when a photo from the hash database has the same exact MD5 hash as a photo from the existing case. Any photos that are MD5 hash alerted will appear with a red triangle in the photo gallery, custom gallery and categorization screens. Hash alerting is turned on from the SmartFilter™ screen. Note: Manual removal of a hash alert is not possible. Digital Assembly 71 SmartHash™ Alerts SmartHash Alerts occur when a photo from the SmartHash database has a SmartHash that is similar to a photo in the existing case. Any photos that are SmartHash Alerted will appear with a simple red symbol in the photo gallery, custom gallery and categorization screens. SmartHash Alerts is turned on from SmartFilter™ screen. Ignore Ignores prevent photos from being processed in SmartFilters and from being shown in the Photo Gallery, Custom Gallery, Photo Viewer etc. Ignores can happen automatically, by comparing against a ignore database (based on MD5 hashes). Duplicates can also be ignored from a case and finally, ignores can be manually set or removed by using the right mouse button and selecting the appropriate option from the subsequent popup. Digital Assembly 72 Categories Category screen shows the various categories assigned to the photos. To quickly assign the photos categories, either in the photo gallery or in the photo viewer hit the number key of the category that you want to assign the photo. o Select the photos that you want to change the category for. o Assign the category by pressing on the number key associated with the category, or right clicking and choosing the category or else hitting the category button and then selecting the category. Note categories can be assigned in any of the following screens: o Photo Viewer o Photo Gallery o SmartFilter o Categorization The photos in the categories can be sorted based on File name, Folder, Resolution, Camera, Start Cluster, Skin tone. Digital Assembly 73 Category Profiles Category Profiles allow you to define a set of up to 10 categories for a case. A photo can belong to one and only one category. APF comes with the North American CP categorization as well as the U.K. CP categorization profiles built in. You can easily add additional categories. To create a new category profile go to Tools -> Category Settings. Create a new category profile by hitting new and enter the category profile name, along with the various categories. Also each category profile has a default category. This is the category to which all photos are assigned to when a category profile is set initially to a case. Edit to category profiles can also be done in this window. Select the profile from the list which needs to be updated. To save the edits hit the <Update> button. At any point click <Use Profile> to assign the selected profile to the currently open case. NOTE : Only one category profile can be assigned per case. Assigning a new profile to a case will remove the old profile from the case. NOTE 2: Changes made to a category profile will not be reflected in older cases, to reflect those changes, you must open the cases, enter the category profile screen, select the profile and click on <Use Profile>. Digital Assembly 74 Automatic Categorization Rules The right most column (“Rule for Automatic Categorization”) shows rules that can be used to automatically categorize photos when doing SmartFiltering. This can be a powerful time saver. The column to the left (“Use Rule”) is required to be checked for the automatic categorization feature to work. To give an example category called “Adult” in the North American CP profile above has the following rule: Explicit + Adult Face + No Child Face. What this means is that if the rule is turned on, then during SmartFiltering any photo that is detected as Explicit and has an adult face and has no child faces will be categorized as Adult. You can of course change the categorization of any photo that you are not happy with. This feature is just meant to be used as a time saver for users who do a lot of categorization. Note: All rules are “ANDed”. There is currently no “OR”. Creating new rules: You can create new rules for existing or new profiles by simply clicking on the last column for a group. This will bring up the screen above. The four rules currently selectable are: 1. 2. 3. 4. Skin Detected: Rule based on the percentage of skin detected in a photo Explicit Detected: Rule for if the SmartFilter process detected an image as explicit or not Adult Detected: Rule for if an adult face is found in the photo or not Child Detected: Rule for if a child face is found in the photo or not If you are creating a new rule and you don’t want to use one or more of the above simply select ignore. Some examples of rules: Digital Assembly 75 Photos with No Faces: Skin (Ignore), Explicit(Ignore) + Adult (False) + Child (False) = No Adult Face + No Child Face 2. Photos with Adults and Skin > 50%: Skin (> 50%) + Explicit (ignore) + Adult (True) + Child (ignore) = Skin > 50 + Adult Face 3. Photos with Adults and no children and Skin > 50%: Skin (> 50%) + Explicit (ignore) + Adult (True) + Child (false) = Skin > 50 + Adult Face + No Child Face 1. Digital Assembly 76 Opening Cases To open a case File->Open Case or click on the File Open icon. Browse to the location of the case file with extension ".cio" and open. When the case opens you can view the results, log, and the timeline of the evidence using the View menu or shortcut buttons. If the case has been successfully analyzed, no part of the case screen will be editable to prevent accidental tampering of the case. Digital Assembly 77 Batch Analyze The batch screen is used for performing analysis for a bunch of cases together as a batch. The various options in the batch analysis panel are: 1. The auto-generate case details helps to faster generate case details, see Preferences. 2. When analyzing a case that already exists then we have an over-write conflict. For this purpose we have 2 choices : o If a case having the same name as the one entered then you can simple overwrite the previous case. o Prompt the user if he would like to overwrite for every case that may exist. 3. Batch case parent path is where all the cases will be created along with other case files. To change click Browse and select the path. 4. Examiner name is required and must be selected. Digital Assembly 78 In batch analysis select a disk image by clicking in the disk image column. If the auto generate case details feature is not on then, fill in the case name, id and path. Enter the case comments if any and select the options button to define the various parameters you would like to use when performing analysis. The total estimated time taken to analyze the selected cases is displayed in the bottom left corner. To begin batch analysis click on Batch Analyze. Digital Assembly 79 While batch analysis is going on a button on the toolbar helps to toggle between the batch screen and the recovery screen. After a case is analyzed it is highlighted, and the recovery screen of the next case appears. Digital Assembly 80 To clear all entries in the batch screen click on New Batch. You can always return to the batch screen by clicking on Tools->Batch Analyze. Digital Assembly 81 VERIFY HASHES When starting the recovery, In the Analysis options if you choose to calculate MD5 and SHA1 or SHA256 then the respective hash values are calculated before and after recovery. We can verify the hashes at any point once the recovery is completed. Once the analysis is complete, click on View -> Verify hashes.., you can always compute the different hashes of the current case. Select the type of hash to be calculated and click on the Compute current hashes button. If the evidence is an Encase disk image then embedded hashes are retrieved and matched against the hash values computed prior and post recovery. If it is not an Encase disk image, embedded hashes do not exist and the post recovery hashes are compared with the hashes calculated prior to recovery. Digital Assembly 82 Computed hash values of current case are compared against all the previously retrieved or calculated hashes. It will be displayed in green if the hashes match. If they don't match they will be displayed in red. If the hash values prior to the recovery are not calculated, then the newly computed hashes appear in black. Digital Assembly 83 EXPORT AS FTK KFF (THE CATEGORY SECTION WILL NOT APPEAR IF CATEGORY PROFILE IS NOT SET FOR THE ACTIVE CASE) In order to export MD5 hashes of the photos recovered go to File -> Export As FTK KFF and the above dialog will appear. Select the group of photos whose MD5 hashes you would like to export. Save this hash list as a Comma Separated Value(.csv) file which can then be imported into FTK. Please see "Importing KFF Hashes" in the FTK user guide. Digital Assembly 84 IMPORT HASHES Adroit Photo Forensics allows users to add to hashes to the MD5, SmartHash and Ignore databases. Hashes can be added from external files as well as from the currently processed case. MD5 & SmartHash Alerts From Current Case: The hashes are imported from a user selected photo group of the current open case. This is currently the only option that allows you to import SmartHash and category information as part of the database. From File: The hashes are imported from an external file. The external file selected must be in the following formats only : FTK Imager Hash List or simple CSV (.csv) ILook (.hsh) Hashkeeper (.hsh) From Old APF Database: Converts the old format (APF version 2.4b and earlier) MD5 hashes to the current format. Digital Assembly 85 MD5 Ignored Photos From Current Case: The hashes are imported from a user selected photo group of the current open case. The photos do NOT have to be ignored in the current case, so any selection will do. From File: The hashes are imported from an external file. The external file selected must be in the following formats only : FTK Imager Hash List or simple CSV (.csv) ILook (.hsh) Hashkeeper (.hsh) From Windows OS: The hashes are imported from a file containing Windows XP, Vista and 7 operating system folder photos. Digital Assembly 86 GuidedCarve GuidedCarve is the process by which partially carved files can be fully recovered after some user manipulation. Currently GuidedCarve is only supported for jpegs. There are three steps to GuidedCarve: Step 1: Identify the first incorrect block. This is the first block that does not belong to the image. Step 2: Choose one of three modes: Split, Swap or Append Step 3: Start the GuidedCarve process. Digital Assembly 87 GuidedCarve Step 1: Identify Potential Error Block& Deleted recovery We have three buttons to help you identify the first error block. To begin, click on the button <Locate First Potential Error>. In photos with the error early in the photo, this will highlight the first block that it thinks will be an error. If it is not an error, you can cycle through the next few potential errors. NOTE: It is critical for GuidedCarve to work that you identify the first error block. If you cannot identify the first error block, you will have zero chance to reconstruct the photo. Start looking for the error block from the top of the photo. NOTE: Unfortunately, the error buttons won’t always work to choose the correct error block. Nothing beats the human eye. If the image is zoomed, set it to 100% and scroll to the top, and then look for the first error block. Once you have found it click on the problem area in the photo and the corresponding block will be selected in the blocks tab. TIP: Frequently though not always, the first error block begins at a fragment start. Click on the fragments tab on the right of the photo viewer and select the second or later fragments and see if the first error block is the start block of the fragment. Digital Assembly 88 Once you have identified and selected (highlighted) the correct error block. We can begin the second step of the reconstruction. Digital Assembly 89 GuidedCarve Step 2: Choose A GuidedCarve Mode So what are splits, swaps, and appends? Split: A split simply instructs the GuidedCarve algorithm that you have identified the first problem block and that you want the algorithm to figure out which is the next best block. (This happens when you click on <Start GuidedCarve>). Swap: A swap is much more powerful. In a swap you identify the first problem block and then indicate what the next correct block should be. You can also indicate what the next set of correct blocks should be. A swap will provide you with a list of most likely replacements based on our algorithms. Append: An append is similar to a swap, except you are indicating that the picture is incomplete, but has no problem blocks. So you are simply indicating to the GuidedCarve algorithm that you are selecting the next correct block(s). Digital Assembly 90 GuidedCarve Operation: Split Once the first erroneous region has been identified click on Split. This indicates that the current block is not in its right place and needs to be broken off. Now click on Start GuidedCarve to initiate the recovery of the photo. The problem with Split is that the next best match as determined by the algorithm could be wrong. After split has been done click on Start GuidedCarve to begin the GuidedCarve process, the new photo will then be displayed to you. Tip: Swapping while initially slower gives better results. Digital Assembly 91 For heavily fragmented photos like the one above you may need to iteratively select the erroneous block/fragment, click on Split, click on Start GuidedCarve until you successfully carve the photo completely. Digital Assembly GuidedCarve was performed correctly and successfully for the given example. The photo has been validated and moved to a separate tab 'Guided Carve'. 92 GuidedCarve Operation: Swap By doing a swap the block/fragment that has been selected will be replaced by another block (which you think is the correct match). Similar to GuidedCarve using Split, the difference being that after selecting the incorrect block/fragment we do not 'Start GuidedCarve' instead we look at the list of available blocks and visually select which block to choose. Digital Assembly 93 Once the first erroneous region has been identified, click on Swap. This will inform the carver that the current block is not in its right place and needs to be swapped with another block. Digital Assembly 94 There will be a brief pause while the algorithm determines the best possible matches and presents them to you in ascending order. Clicking on these matches will show you the change immediately on the picture. The carver will then swap the incorrect block with the block you have just selected from the list of 'Best Matches'. Then visually you will have to check if the block you choose fits in correctly. If not then keep trying the next block in the list of 'Best Matches'. Once you get the correct block, you need to increase the 'Number Of Blocks To Select' initially 1. Keep increasing the 'Number Of Blocks To Select' untill you encounter an incorrect block or photo gets validated or you get tired, which ever is earlier ! Digital Assembly 95 If you look closely in the above example we encountered an incorrect block. So we stop increasing the 'Number Of Blocks To Select'. In the above example 6 blocks gives an incorrect block, so we go back a block and select only 5 blocks to be swapped. Click on 'Accept Swap'. Click on 'Start GuidedCarve'. You may need to repeat the steps until you carve out the photo correctly and completely. Digital Assembly 96 Once the photo is carved out correctly and completely, the thumbnail is outlined with a green border. Digital Assembly 97 GuidedCarve Operation: Append When a photo has been incompletely carved out you need to perform GuidedCarve using Append. In this scenario all the blocks are correctly in place but the photo is not recovered completely. Similar to GuidedCarve using Swap but here no block is getting replaced. Instead a new block is getting added to the end of the recovered photo (which you think is the correct match). Digital Assembly 98 Ooops!! I can't see the photo!!! Use the zoom feature in the swap image tab to see if the photo did get modified by the selected block. Digital Assembly 99 Then select from the list of blocks the block that you think fits in correctly. Keep trying until you get the correct block. Digital Assembly 100 Once you have a correct continuing block to append to the photo, keep increasing the 'Number Of Blocks To Select' until you reach an incorrect block or until you reach end of the file. If you reach an incorrect block reduce the 'Number Of Blocks To Select' such that only correct blocks are present in the photo. Click on 'Accept Swap'. In the next screen click on 'Start GuidedCarve'. Digital Assembly 101 The carver will continue from where you left. If the carver correctly carves the photo, it will display the thumbnail with a green border, which means that the photo has been validated. Digital Assembly 102 Appendix A: Keyboard Shortcuts The following keys are specific to selected groups of photos Hide/unhide thumbnail strip and summary block View in Forensic Photo Viewer Generate reports View Timeline Save photos Bookmark/unbookmark Categorize the photos Selection Select all photos in a tab Select all photos on a page Deselect all photos on a page Selecting photos X V R T S B 0-9 Ctrl + A + or = Ctrl/Shift (correspond to default Windows behavior) Navigation Navigating between photos Page navigation Go back to previous screen All arrow keys Mouse wheel Backspace key Screen New Case Open Case Photo Gallery Photo Viewer Timeline Generate Reports Recovery Counts Show Log View SmartFilter View Categories Batch Analyze Blur Thumbnails Register Product Bookmarked Hash Alerted Thumbnail Cache Recycled Ctrl+N Ctrl+O Alt+G Alt+V Alt+T Alt+R Alt+Y Alt+L Alt+F Alt+C Alt+B Alt+U Ctrl+R Alt+1 Alt+2 Alt+3 Alt+4 Digital Assembly 103


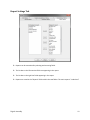
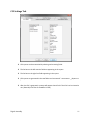
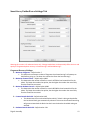


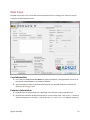


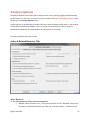
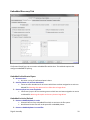


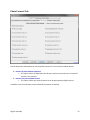

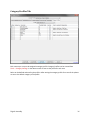
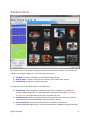

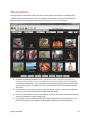
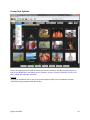

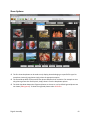
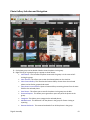

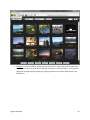
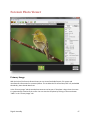


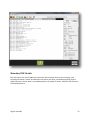


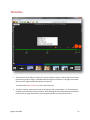
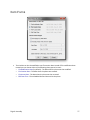


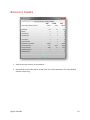
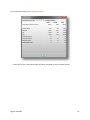

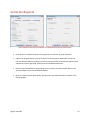
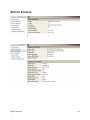
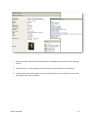
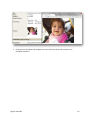


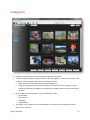
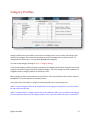
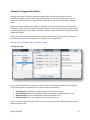

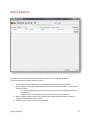
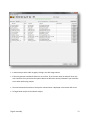
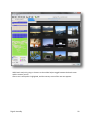
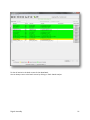
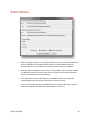
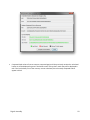
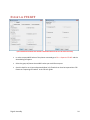
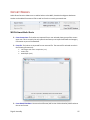
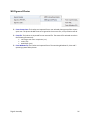
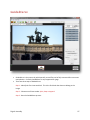
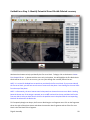

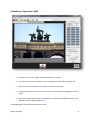

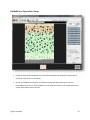
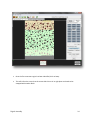
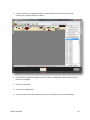

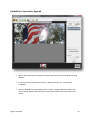


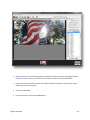


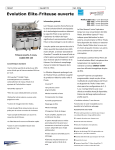


![STATUTORY INSTRUMENTS S.I. No.[ • ] of 20[ • ] SMALL PUBLIC](http://vs1.manualzilla.com/store/data/005664657_1-1d833bc83c9d446d3d2ea05d8407eb41-150x150.png)