1
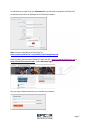
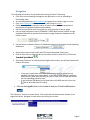
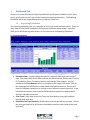
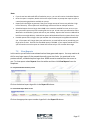
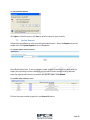
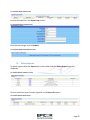
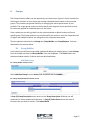
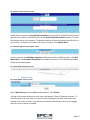
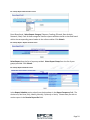
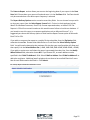
ClientLine®
User Manual
Table of Contents
Introduction .................................................................................................................................... 4
Log-In & password maintenance .................................................................................................... 4
Navigation ....................................................................................................................................... 6
1
2
3
4
5
6
Dashboard Tab ........................................................................................................................ 7
1.1
Reporting Dashboard ....................................................................................................... 7
1.2
Disputes Dashboard ......................................................................................................... 8
1.3
Today’s Data ..................................................................................................................... 9
Sales Tab ............................................................................................................................... 10
2.1
Credit & Debit Transactions ........................................................................................... 11
2.2
Terminal Transactions .................................................................................................... 13
2.3
Rejected Transactions .................................................................................................... 14
2.4
Transaction Summary .................................................................................................... 14
2.5
Monthly Sales History .................................................................................................... 16
Funding ................................................................................................................................. 17
3.1
Bank Deposits ................................................................................................................. 17
3.2
All Activity Summary ...................................................................................................... 18
3.3
Withheld Funds .............................................................................................................. 19
3.4
Monthly Fee and Service Charge History ....................................................................... 20
3.5
Monthly Statement ........................................................................................................ 20
Rate Analysis ......................................................................................................................... 26
4.1
Qualification Analysis ..................................................................................................... 26
4.2
Qualification Expense ..................................................................................................... 27
Disputes ................................................................................................................................ 29
5.1
Chargebacks ................................................................................................................... 29
5.2
Retrievals ........................................................................................................................ 30
5.3
Chargeback Analysis ....................................................................................................... 30
5.4
Retrieval Analysis ........................................................................................................... 32
Research ................................................................................................................................ 33
6.1
Card Search .................................................................................................................... 33
Page 2
Transactions Search .............................................................................................................. 33
Authorizations Search ........................................................................................................... 34
Chargebacks Search .............................................................................................................. 34
Retrievals Search ................................................................................................................... 35
6.2
Authorization Search ...................................................................................................... 36
6.3
Query Builder ................................................................................................................. 36
Account Summary Report ..................................................................................................... 37
Bank Deposits Report............................................................................................................ 38
7
8
6.4
Location Profile Details .................................................................................................. 40
6.5
Card Issuer Identification ............................................................................................... 42
6.6
Fraud Reporting.............................................................................................................. 43
6.7
Refunds with No Sale ..................................................................................................... 43
Reports .................................................................................................................................. 45
7.1
Scheduled Reports ......................................................................................................... 45
7.2
View Reports .................................................................................................................. 47
7.3
Update Reports .............................................................................................................. 48
7.4
Delete Reports................................................................................................................ 49
Groups ................................................................................................................................... 51
8.1
Group Builder ................................................................................................................. 51
Add New Group..................................................................................................................... 51
Update Group ....................................................................................................................... 52
Delete Group ......................................................................................................................... 53
8.2
Group Reports ................................................................................................................ 53
Page 3
Introduction
ClientLine® Reporting is a robust, online tool that gives you 24/7 access to your bankcard
processing information. With ClientLine® you can:
•
•
•
•
•
•
•
•
•
Review daily bankcard activity
View 6 months of credit card transaction details and a year of summary information
Research customer inquiries, card activity and transactions
Analyze processing expenses
View, print, email monthly statements
Reconcile bankcard funding with bank deposits
Monitor and resolve chargebacks and retrieval requests.
Identify refunds with no matching sales.
Create scheduled reports in a variety of formats; print, email, PDF, spreadsheet or MS
Word®
This guide will describe the most common features of ClientLine®.
Log-In & password maintenance
Before using ClientLine® you must first go to https://www.businesstrack.com/ and select
Enroll. You will need your 12 digit Merchant ID (MID). Please follow the instructions on page
10 of your Welcome Kit.
Page 4
As indicated in on page 10 of your Welcome Kit, you will need to complete the ClientLine®
enrollment information as displayed on the illustration below.
Note: View an online demo of ClientLine® at:
https://www.myClientLine®.net/publicS/clrp/training/demo.asp.
Once enrolled, you can access ClientLine® from the URL: https://www.myClientLine®.net or
https://www.businesstrack.com/. Select Merchant Login.
Use your login and password that you received at enrollment.
Page 5
Navigation
The following information may be useful when using ClientLine® Reporting.
• Click most column headings throughout the application to sort in Ascending or
Descending order.
• Any text displayed with a blue underline is a hyperlink to another page or screen.
• Once a blue hyperlink has been accessed it will change to purple.
• Credit amounts will be colored in red on all online screens with the exception of
the disputes (Chargeback and Retrieval) modules.
• Use the horizontal and vertical scroll bars to view the entire screen or pages.
• Use the Page Navigation buttons (FORWARD / PAGE BACK buttons) and Go to Page
dropdown selection on the bottom of screens to page forward or backward on the
online screens.
•
Use the Return to Menu or Return to Dashboard buttons to return back to the Reporting
Dashboard.
•
•
Some online screens have Excel® and CSV (Comma Separated Value) icons.
Click on these icons to view the data on the online screen in either XLS or CSV format.
•
Ιf entering ClientLine® at a hierarchy level higher than location, you will see the below ID
field on all screens.
o If you wish to view data at the MID and hierarchy level for which you are
enrolled, this field must remain blank. If you wish to view data for a different
MID/hierarchy level enter the MID you wish to view in the ID field and choose
the corresponding hierarchy level.
o If you know the DBA Name or the State but not the MID you can click on the
box to do a Merchant ID Lookup
•
Click on the Logoff button on the toolbar to end your ClientLine®® session.
The ClientLine® tool bar is shown below. Each of the tabs will be discussed in detail in the
pages that follow. Navigate to each section by clicking on the tabs.
Page 6
1
Dashboard Tab
ClientLine® has two Dashboards, Reporting Dashboard and Disputes Dashboard, which allow
you to quickly view the last 7 days of your bankcard processing information. The Reporting
Dashboard will be the default display when you log into ClientLine®.
1.1
Reporting Dashboard
The reporting dashboard gives you a snapshot of your most recent bankcard activity. There are
4 key areas of information included on the Reporting Dashboard shown below. Hyperlinks
allow you to drill down to greater detail in 3 of the 4 areas of the Reporting Dashboard.
1.1.1 Reporting Dashboard
•
•
•
Submitted Sales – Displays daily gross sales for credit and debit cards over the last 7
days. Click on the date to drill down and view the Batch Number, Submit date, Terminal
ID, Transaction Count, Transaction Amount and Average Ticket amount. Use the
number in the Trans Amount column to compare to your Eagle’s RDS totals. Click on
the date hyperlink to drill down to batch details displayed by terminal. You can drill
down to individual transactions by clicking on the transaction amount hyperlink. In the
individual transactions, click on the Cardholder Number hyperlink to display details
about an individual transaction.
Sales Trend – Daily sales for the last 7 days are illustrated on a bar graph and help
identify peak sales days.
Submitted Card Type Summary – Breaks down previous day sales by card type. Click on
the card type hyperlink to drill down to individual transactions that make up that card
type total.
Page 7
•
Bank Deposits – Provide the transfers to your bank account over the last 7 days. Drill
down on the date to view checking account information. The Deposit column indicates
the amount deposited to your checking account by funding category (Credit. Click on
the date hyperlink to display details on each day’s deposits. Click the Bank Account
hyperlink to display each deposit by Funding Category.
1.2
Disputes Dashboard
Chargebacks and Retrievals are displayed on the Disputes Dashboard.
1.2.1 Disputes Dashboard
The Disputes Dashboard is divided into several sections;
•
•
•
•
Retrievals (6 months) – Displays the number of Open, Expired, and Fulfilled items. Click
the Open column hyperlink and you can quickly drill down into the detail to research
items that are still pending a response
Chargebacks (6 months) – Provides the number of Open, Expired, and Fulfilled
chargeback items. Click the Open column hyperlink and you can quickly drill down into
the detail to research items that are still pending a response.
Chargebacks Debited – Gives you the number and dollar amount of chargebacks that
were debited over the last 7 days. Click on the Status Date hyperlink to view a detailed
listing.
Chargebacks Reversed -- Displays the number and dollar amount of chargebacks that
were reversed over the last 7 days. Click on the Status Date hyperlink to view a detailed
listing.
Page 8
•
Chargeback History (6 months) – Is a statistical report the gives you the total counts,
dollar amounts and percentages of chargebacks over the last 6 months. Chargebacks
are categorized as;
o Received from Issuer – Incoming Chargebacks received from issuer.
o Reversed to Issuer – Chargebacks that were resolved and sent back to the issuer.
o Resubmitted/Reversal to Issuer by Merchant – Cases that were sent back to the
issuer based on information received from the merchant.
o Debited to Merchant -- Received from issuer-Reversed to Issuer by Merchant
Services- Resubmitted/Reversed to Issuer by Merchant.
1.2.2 Chargebacks Debited & Chargebacks Reversed
1.2.3 Chargeback History
1.3
Today’s Data
Selecting Today’s Data from the Dashboard tab dropdown provides you with a look at the
settled transactions for the current day. You cannot view transactions that have been posted
but not settled. You can view a Card Type Summary or a Bank Deposit Summary. Both views
give you the ability to drilldown to detail information.
Page 9
2
Sales Tab
Transaction activity can be monitored for a number of different transaction types. When you
select Submitted Sales from the toolbar submenus will display based on your account setup.
Those submenus may include;
•
•
•
•
•
•
Credit Transactions
Debit Transactions
Terminal Transactions
Rejected Transactions
Transaction Summary
Monthly Sales History
Field definitions and descriptions are provided below for all submenu screens.
Address Verification Service - Code provided to merchant when the
cardholder’s billing address was validated as being correct before
completion of a mail/telephone transaction
Authorization Amount - Amount of the authorization request
Authorization Code - Code provided during the authorization process if an
authorization approval was received
Authorization Date - Date the transaction was submitted for authorization
approval.
Authorization Response - The issuer’s reply to an authorization request
Batch Number - Number of the batch in which the transaction was
submitted
Billback Reason - Identifies the reason a reclassification
Cardholder Number - The number identifying the cardholder, issuer and
card brand
Card Type - The brand associated with the card number
Currency Code - 3 digit code identifying the currency the transaction was
processed in
Currency Conversion Rate – Exchange rate used when a transaction is
submitted and processed in two different currencies.
CVV2/CVC2 Result - Indicator determining the card validation (through the
magnetic swipe) was captured at the time of sale
Entry Description - Description identifying how the cardholder information
was entered at the point of sale
Entry Mode - Code identifying how the cardholder account information was
entered or captured at the point of sale
Expiration Date - Date the cardholder’s card expires
External Merchant ID - Additional merchant number associated with the
location
Invoice/ Trace ID - Unique number assigned to the transaction by the
merchant
Location ID - Location where the transaction was processed
Merchant Name – DBA Name
Page 10
Net Processed Amount = Net Submitted Amount-Rejected Amount
Net Processed Count = Net Submitted Count-Rejected Count
Net Submitted Count = Sales Count-Refund Count
Net Submitted Amount = Sales Amount-Refund Amount
Partial Auth Indicator – Indicates if a partial auth was received. Ex. a
cardholder has a credit line of 500.00 and a balance of 450.00, a sale of
100.00 is attempted. A partial auth may be obtained for 50.00 rather than
declining the entire sale.
Payment Amount – Amount of transaction that was processed
Plan Code - Identifies the interchange level at which the transaction cleared
Processed Currency Code - 3 digit code and description identifying the
currency the transaction was processed in.
Reclass Code - Code that identifies why a transaction was reclassified
Reference Number - 23 digit Outgoing Acquirer reference number
Refund Amount - The total dollar amount of the refunds/credit for the
submitted date
Refund Count - The total number of refunds/credits for the submitted date
Reject Description - Description of reject reason
Status - Indicates whether transaction was Processed, Cancelled or
Rejected
Sales Count - Total number of sales for submitted date
Sales Amount - The total dollar amount of the transactions for the
submitted date
Submit Date - Date the batch was submitted to Merchant Services
Submitted Currency Amount – Amount of Transaction in the currency
which it was submitted
Submitted Currency Code - 3 digit code and description identifying the
currency the transaction was submitted in
Terminal ID - ID number of the terminal on which the transaction was
processed
Transaction Amount - The amount of the sale or refund
Transaction Date - Date the transaction occurred
Transaction ID - Unique 15-digit number assigned to all original purchase
transactions
Transaction Status - Indicates whether transaction was Processed,
Cancelled, or Rejected
Transaction Time - Time at which the transaction occurred
Trans Type - Numeric code that identifies the transaction as a sale, credit or
cash advance
2.1
Credit & Debit Transactions
Select Credit Transactions or Debit Transaction from the submenu and a search window
displays. Complete the required Date Range fields and other optional fields and click the
Submit button.
Page 11
2.1.1 Search window is the same for Credit/Debit Transactions
ID – Enter the ID and level for a specific location.
Date Range – (Required Field) Enter the dates within the last 6 months that you wish to include
in the search.
Date Type – Choose either Submit Date or Transaction Date.
Amount Range – Enter the transaction dollar amount you wish to include in the search.
Cardholder # / Invoice # / Reference # -- Enter any of the 3 numbers and choose the
corresponding option from the drop down box. When searching by Cardholder Number, you
may enter either the last 4 digits or the complete card number.
Card Type – Select ALL, Visa, MasterCard, Discover, American Express or Other.
Sort By – Select from the dropdown; Date/Time, Cardholder Number, Amount.
After entering the search criteria, click Submit and the Credit Transaction List (or Debit
Transaction List) displays. Click on any of the column headings to sort the report differently.
2.1.2 Credit Transaction List
Click on the Cardholder Number ant the Credit Transaction Detail window will display.
Page 12
2.1.3 Credit Transaction Detail
2.2
Terminal Transactions
Select Terminal Transactions from the submenu and a search menu displays allowing you to
search on credit card transactions within the last 6 months for a specific terminal. You can use
this report to research potential internal fraud by reviewing a specific terminal for suspicious
activity.
Complete the required Date Range fields and other optional fields and click the Submit button.
2.2.1 Terminal Transaction Selection Window
ID – Enter the ID and level for a specific location.
Submit Date Range – (Required Field) Enter the dates within the last 6 months that you wish to
include in the search.
Terminal ID – (Required Field) Enter the terminal that you wish to include in the search.
After entering the search criteria, click Submit and the Terminal Transaction List displays. Click
on any of the column headings to sort the report differently.
2.2.2 Terminal Transaction List
Page 13
Click on the Cardholder Number hyperlink to display additional detail on the transaction.
2.3
Rejected Transactions
Select Rejected Transactions from the submenu and a search menu displays allowing you to
search on rejected transactions for a date range within the last 6 months. You may use this
report to identify training opportunities at point of sale.
Complete the required Date Range fields and other optional fields and click the Submit button.
2.3.1 Rejected Transaction Search screen
ID – Enter the ID and level for a specific location.
Submit Date Range – (Required Field) Enter the dates within the last 6 months that you wish to
include in the search.
Batch Number – Enter a specific batch number if you wish to exclude transactions from other
batches within a date range.
After entering the search criteria, click Submit and the Rejected Transaction List displays. Click
on any of the column headings to sort the report differently.
2.3.2 Rejected Transaction List
2.4
Transaction Summary
Select Transaction Summary from the submenu and a search menu displays allowing you to
view either of two reconciliation reports. You may select Card Type Summary or Batch
Summary by choosing from the drop down in the last field on the Transaction Summary Search
window.
Page 14
2.4.1 Transaction Summary Search window
The Card Type Summary provides you with a summary for all card types for the past 13 months.
You can drill down by clicking on the card type hyperlink to view a breakdown by location and
then click on the cardholder number hyperlink to view transaction details for the past 6
months.
2.4.2 Card Type Summary
The Batch Summary displays closed batches for a given day or date range, and like the Card
Type Summary, it is available for 13 months with detail available for the past 6 months. You
can use this report to view your transaction counts and amounts by batch. Click on the
Location ID hyperlink to see detailed information.
2.4.3 Batch Summary
Page 15
2.5
Monthly Sales History
You can view bankcard activity by card type for 13 months from the Monthly Sales History
selection on the Sales tab. Just select the Card Type from the dropdown and click Submit.
2.5.1 Monthly Sales Summary selection window
Click on the Month hyperlink to view location totals. You can use this report to analyze location
performance.
2.5.2 Monthly Sales Summary selection window
Page 16
3
Funding
The Funding tab is used to reconcile your bank account and contains 5 submenu selections;
•
•
•
•
•
Bank Deposits
All Activity Summary
Withheld Funds
Monthly Fee and Service Charge History
Monthly Statement
3.1
Bank Deposits
There are 2 reports available to assist with reconciliation of your bank statement, the Deposit
Summary Totals and the Deposit Expanded Detail. Make your selection from the drop down
on the last field of the Bank Deposits search window. You can limit your search by entering the
Funding Date Range, Checking Account Number and select either Date or Checking Account
from the Grouping field to determine how the totals are displayed on your report.
3.1.1 Bank Deposits search window
Shown below is the Deposit Summary Totals report grouped by Date. This report may be used
in addition to the Bank Deposit information on the Reporting Dashboard if you need to view
more than 7 days of deposit information. You can click the Date hyperlink to view funding
categories by checking account number.
3.1.2 Bank Deposits search window
Field Definitions are listed below for both the Deposit Summary Totals and the Deposit
Expanded Detail report;
Currency Code - 3 digit code identifying the funded currency
Date - The date of the checking account deposit
Net Sales = Sales - Refund Amount
Page 17
3rd Party Adjustments - Transactions that are passed directly to a third party
service provider for processing and/or funding
Adjustments - Amounts credited to or deducted from your account to
resolve processing or billing discrepancies
Interchange Charges - Variable amounts established by the Card
Associations for processing transactions
Service Charges - Amounts charged to authorize, process and settle card transactions
Fees - A range of transaction-based and/or fixed amounts for specific card processing
services
Chargebacks/Reversals - Transactions that are challenged or disputed by a cardholder or
card-issuing bank. A Chargeback is the amount that is disputed by the cardholder or cardissuing bank. A Reversal is the amount that was previously resolved against the merchant
but now is resolved in favor of the merchant.
Deposit - Amount deposited to your checking account
The Deposit Expanded Detail report displays bank deposit information broken down by
checking account number. You can click on the Checking Account Number hyperlink to view
Batch Summary Totals. Click on the Location ID hyperlink to view Credit Transaction List and
click on the Cardholder Number to view the Credit Transaction Detail.
3.1.3 Bank Deposits search window
3.2
All Activity Summary
The All Activity Summary report displays your processing expense along with a summary of
your bank deposits for a period of up to 13 months.
3.2.1 All Activity search window
The Funded Date Range field is the only required field enter From/To dates within the last 13
months. If the Checking Account Number is not known you may use the search button to the
right of that field to search for a specific account number.
Page 18
3.2.2 All Activity Summary
Field Definitions for the All Activity Summary report are the same as those for Bank Deposits in
section 5.1. Click the Date hyperlink in the Bank Deposit Summary section or click the
Description hyperlink in the Processing Expense Summary section to see detailed items for the
funding categories.
3.3
Withheld Funds
If your account is set up for Withheld Funds this report can be used to track the funds withheld
from the deposit to your account. Select Funding from the toolbar, then click Withheld Funds
from the dropdown.
3.3.1 Withheld Funds search window
Enter the location ID and select the level you would like to search. The Process Date Range
From/To fields must contain dates within the last 13 months. Click Submit to run the report.
3.3.2 Withheld Funds report
Withheld Funds report field definitions:
Location ID - Location where the transaction was processed
Currency Code - 3 digit code identifying the funded currency
Date - Date of the account balance
Category - Type of funds being held
Account Balance - The balance being withheld from the merchant‟s business checking
account
Page 19
3.4
Monthly Fee and Service Charge History
The Monthly Fee and Service Charge History displays information by month and contains
information for up to 13 months. Select the Funding tab from the toolbar and then click
Monthly Fee and Service Charge History from the dropdown.
3.4.1 Monthly Fee and Service Charge History search window
Enter the ID and the level you wish to search and click Submit.
3.4.2 Withheld Funds report
The Amount field displays the monthly fee and service charges that were billed for the month.
3.5
Monthly Statement
The Monthly Statement allows you to view a copy of your monthly processing statement. You
can save a copy to your hard drive or print it.
Note: The size limit for Monthly statements is 2MB. Statements larger than that will not be
available through ClientLine®.
3.5.1 Monthly Statement search window
Enter the ID and the level you wish to search. You may enter dates within the past 13 months
in the Statement Date Range From/To fields. If you wish to view your account activity at a
corporate level choose Recap from the Statement Type field. Choose Location to view a
specific location’s processing activity. Click Submit.
Page 20
3.5.2 Monthly Statement List
From the Monthly Statement List window, select the month you wish to view and then click
Get Statement. The size limit for Monthly statements is 2mb. ClientLine® reporting will not
display any statements larger than that.
3.5.3 Monthly Statement Summary Page
Page 21
3.5.4 Monthly Statement
Page 22
3.5.5 Monthly Statement
Page 23
3.5.6 Monthly Statement
Page 24
3.5.7 Monthly Statement
Page 25
4
Rate Analysis
The Rate Analysis tab on the toolbar gives you access to reports needed to manage and analyze
your interchange expenses. There are 3 selections on the submenu;
•
•
•
Qualification Analysis
Qualification Expense
Billbacks – (Not used with Epicor Payment Exchange)
Each of these selections will be described in the sections below.
4.1
Qualification Analysis
Depending on your pricing plan all transactions may not be processed at the same rate.
ClientLine® Reporting provides you with 13 months of summary and 6 months of detail history
for each clear plan. Typically, merchants use the information to quantify and evaluate the
amount and the percentage of sales that were processed at the higher rates. This can help you
identify potential opportunities at the point of sale to reduce processing expenses.
After selecting Rate Analysis from the toolbar, click Qualification Analysis from the dropdown.
4.1.1 Qualification Analysis search window
Enter the ID and choose the hierarchy level. The Date Range From/To are required fields. You
may select a date range within the past 13 months. Sort By has a drop down allowing you to
choose Plan Description or Dollar Amount. Click Submit.
Page 26
4.1.2 Qualification Analysis report
Click on Description hyperlink to view by location, from there you can click on the Location ID
hyperlink to view the Credit Transaction List. On the Credit Transaction list you can click the
Cardholder Number hyperlink to view Credit Transaction Detail. Identify which locations are
not qualifying for the lowest interchange rates.
4.2
Qualification Expense
This selection provides you with interchange expense information by plan code by
location which enables you to see which locations may be contributing to higher
interchange costs.
After selecting Rate Analysis from the toolbar, click Qualification Analysis from the dropdown.
4.2.1 Qualification Expense report search window
Enter the required Date Range From/To within the past 13months. Select the Transaction
Type (All, Sales, Refunds, Chargebacks, Reversals) and Sort By (Plan Description, Dollar
Amount). On the Report Type field you may select Report or Pie Chart –available only at the
location level. Click Submit. Depending on your choice in the Report Type field either the
Report or the Pie Chart will display; both are illustrated below.
Page 27
4.2.2 Qualification Expense report
Click on the Description hyperlink to drill down by location and then on the Location ID
hyperlink to view the Credit Transaction list. From there you may click on the Cardholder
Number hyperlink to drill down to the Credit Transaction Detail view.
4.2.3 Qualification Expense Pie Chart
The Pie Chart graphically illustrates the card types that make up the interchange expense for
your business.
Page 28
5
Disputes
The Disputes tab contains 4 selections to help you manage the resolution of chargebacks and
retrieval requests.
5.1
Chargebacks
You can query and view chargebacks within the last 13 months by selecting the Disputes tab
and then choosing Chargebacks from the dropdown.
5.1.1 Chargebacks search screen
Enter the desired date within the past 13 months into required Date Range From/To fields.
You may also specify and filter by Amount Range. The Chargeback Status field lets you select;
All Open, All Closed, All Reversed or All Statuses. In the Category field you can choose; All,
Debited, Pre-Arbitration, Pre-Compliance, Pre-Note, Request for Doc, Reversed, Sent to
Collection or Auto-Represent. Filter by card type or by Reason Code in the Sub Category field.
On the last row of the search window you can select from the drop down to filter by Cardholder
Number, Reference Number or Case Number and enter the appropriate value in the Card#
Ref#/ Case# field.
5.1.2 Chargeback List
From the Chargeback List you can click on the Cardholder Number hyperlink to drill down to
the chargeback detail.
Page 29
5.2
Retrievals
When an issuing bank sends a retrieval request it is important to respond quickly. Unanswered
retrieval requests can result in chargebacks. From the Disputes tab on the toolbar select
Retrievals.
5.2.1 Retrievals search window
Enter the desired date within the past 13 months into required Date Range From/To fields.
You may also specify and filter by Amount Range. The Retrieval Type field lets you select; All,
Open, Expired or Fulfilled. In the Retrieval Status field you can choose; All, Open, Expired, or
Fulfilled. You can select from the drop down to filter by Cardholder Number, Reference
Number or Case Number and enter the appropriate value in the Card# Ref#/ Case# field. Filter
by card type or by Reason Code in the Sub Category field. Click Submit.
5.2.2 Retrieval List
Click on the Cardholder Number hyperlink to view details.
5.3
Chargeback Analysis
Chargeback Analysis provides total counts, dollar amounts and percentages of Chargeback
disputes; Received from the Issuer, Reversed to the Issuer by Merchant Services,
Resubmitted/Reversed to the Issuer by Merchant, and Debited to Merchant.
Select the Disputes tab from the toolbar and then click Chargeback Analysis from the
dropdown.
Page 30
5.3.1 Chargeback Analysis search window
Enter ID, and select level. Enter the desired date within the past 13 months into required Date
Range From/To fields.
5.3.2 Chargeback Analysis report
The Chargeback Analysis is broken down by card type, reason code and provides a grand total
and dollar amount. This report is the same as that displayed in the Chargeback History section
of the Chargeback Dashboard, but on this report a date range within the last 13 months may
be used instead of the last 7 days. The following section defines some of the fields found on
this report.
Currency Code - the 3 digit code identifying the currency the chargebacks were initiated in
Card Type - The brand associated with the card number
Reason Code - Numeric chargeback reason code
Description - Description of the chargeback reason code
Received from Issuer - Incoming Chargebacks received from the issuer
Reversed to Issuer by Merchant Services - Chargeback cases that were autorepresented (automatically resolved) back to the issuer
Resubmitted/Reversed to Issuer by Merchant - Chargeback cases that were sent back
to the issuer based on information received from the merchant.
Debited to Merchant = Received from Issuer-Reversed to Issuer by Merchant ServicesResubmitted/Reversed to Issuer by Merchant
Page 31
5.4
Retrieval Analysis
The Retrieval Analysis displays total counts, dollar amounts and percentages of all Retrievals
(Media and Chargeback) received from Issuer, Fulfilled, Unfulfilled and Expired. Select the
Disputes tab from the toolbar and then click Retrieval Analysis from the dropdown.
5.4.1 Retrieval Analysis search window
Enter ID, and select level. Enter the desired date within the past 13 months into required Date
Range From/To fields.
5.4.2 Retrieval Analysis report
The Retrieval Analysis report is broken down by card type, reason code and provides a grand
total and dollar amount. Items in the Retrievals column contain both Media and Chargeback
retrievals. Analyze the reason codes to determine which are adding to your workload. The
following section defines some of the fields found on this report.
Currency Code - the 3 digit code identifying the currency the retrievals were initiated in
Card Type - The brand associated with the card number
Reason Code - Numeric retrieval reason code
Description - Description of the retrieval reason code
Retrievals - Incoming retrievals received from the issuer. This is the total of the
Fulfilled, Unfulfilled, and Expired columns.
Fulfilled - Retrieval requests responded to by the merchant and sent to the issuer
Unfulfilled - Retrieval requests that were not fulfilled by the merchant
Expired - Retrieval requests that were not fulfilled within the requested timeframe
Page 32
6
Research
The Research tab provides seven submenu selections that will be valuable for researching
cardholder activity.
6.1
Card Search
The Card Search utility has 4 reports; Transactions, Authorizations, Chargebacks, and
Retrievals. Each of the reports begin with the same search screen, shown below. The Activity
Type field determines the report that is produced.
Note: Fields displayed on the search window may vary based upon the report selection.
Select the Research tab from the toolbar, and then click Card Search from the drop down.
6.1.1 Retrieval Analysis report (Authorizations search screen shown)
Enter ID, and select level. The Enter Card Number/Invoice Number field is a required field.
Select from the drop down and enter the appropriate value. You may search a card number by
using either the complete number or the last 4 digits of the card number. In the Activity Type
field you will need to select one of the 4 report types; Transactions, Authorizations,
Chargebacks, and Retrievals. Choose between Submit Date and Transaction Date in the Date
Type field. You may also specify a dollar range in the Amount Range field. In the example
shown above, the Authorization Code field is displayed when Authorizations is selected as the
Activity Type. Enter the authorization code for which you wish to search in this field. In the
Card Type field you may choose; Both, Credit or Debit. Click Submit.
Transactions Search
6.1.2 Transaction Detail Report
Page 33
The Transaction Search gives you a list of transactions associated with a specific account
number for up to 6 months. Remember that when searching you can use the full card number
or the last 4 digits. This report is commonly used to verify double charges, check for a credit on
a disputed transaction or determine how frequently a customer makes a purchase. The
following section defines many of the fields on the report;
Location ID - Location where the transaction was processed
External Merchant ID - Additional merchant number associated with the location
Currency Code - 3 digit code identifying the currency the transaction was processed in
Terminal ID - ID number of the terminal on which the transactions was processed
Batch Number - Number of the batch in which the transaction was submitted
Submit Date - Date the batch was submitted to Merchant Services
Card Type - The brand associated with the card number
Cardholder Number - The number identifying the cardholder, issuer and card brand
Trans Amount - The amount of the sale or refund
Trans Type - Numeric code that identifies the transactions as a sale, credit or
cash advance
Trans Date - Date the transaction occurred
Status - Indicates whether transaction is Active or Cancelled or Rejected
Entry Mode - Code identifying how the cardholder account information was
entered or captured at the point of sale
Auth Code - Code provided during the authorization process if an authorization
approval was received.
Authorizations Search
6.1.3 Authorization Data Report
The Authorizations Search gives you a list of authorizations associated with a specific account
number, authorization code or amount range for up to 6 months. Click on the Cardholder
Number hyperlink to view the Authorized Transaction detail.
Chargebacks Search
6.1.4 Chargeback List
Page 34
This report allows you to view chargeback information for a specific account number. Enter the
account number, date range, amount, and transaction date or status date. You can use this
report to determine the number of chargebacks on a specific cardholder number. Click on the
Cardholder Number hyperlink to view the Chargeback Detail Report. The following sections
define many of the fields on this report;
Chargeback Description - Description of the chargeback reason code
Case Number - Number assigned by Merchant Services for the chargeback
Reference Number - 23 digit Outgoing Acquirer reference number
Cardholder Number - The number identifying the cardholder, issuer and card brand
Trans Date - Date the transaction occurred
Chargeback Amount - Amount of the dispute
Due Date - The particular day on or before which merchant response must be
received to comply with Association regulations.
Status Date - Date of the last action taken by the dispute back office
Status –
• Open - Chargebacks that have not been responded to and the due date
has not expired.
• Closed - Chargebacks where the due date has expired
• Reversed - Chargebacks that have been reversed back to the issuing bank
Retrievals Search
6.1.5 Retrieval List
The Retrievals List displays retrieval information for a specific card number. Enter the 3
required fields on the search screen; Account Number/Invoice Number, Activity Type and Date
Range. You may also filter by amount, and Date Type (Transaction Date or Status Date). Use
this report to verify the number of retrievals on a specific cardholder number. Field definitions
are quite similar to those described in the Chargebacks Search section. The 2 listed below are
those that are unique to the Retrievals List;
Request Reason - Code sent by issuing bank identifying reason for request
Status • Open - retrieval requests that have not been fulfilled and the due date has not expired
• Expired - retrieval requests that were not fulfilled within the requested timeframe
• Fulfilled - retrieval requests responded to by the merchant and sent to the issuer
Page 35
6.2
Authorization Search
You can use this option to search on authorization codes and amount ranges. Authorization
data is available for the past 6 months. Select the Research tab on the toolbar and then click
Authorization Search from the dropdown.
6.2.1 Authorization Search
Enter ID, and select level. The Date Range, Amount Range, and Authorization Code are
required fields. Card Number and Card Type (Both, Debit, Credit) are optional fields to help
filter the view. Click Submit.
6.2.2 Authorization Data List
Field Definitions can be found in the sections above. Listed below are a few of the fields more
specific to the Authorization Data List;
Amount - Amount of authorization
Auth Date - Date the transaction was authorized
Auth Code - Code provided during the authorization process if an authorization approval was
received
Response Code - 2 digit code identifying the authorization response
6.3
Query Builder
Create your own reports with the Query Builder option. You can determine which fields are on
the report as well as the date range, card types the locations included in the report, and how
the data is grouped and sorted. Choose either Account Summary or Bank Deposits both are
described below. Select the Research tab from the tool bar and click Query Builder from the
dropdown.
Page 36
6.3.1 Authorization Data Report
Enter ID and select level. Enter the desired dates into the required Date Range From/To field.
You must choose either Account Summary or Bank Deposits from the dropdown in the Report
On field. Both of these selections are described in the sections below. The checking account
may be entered in the Checking Account Number field or search for it by clicking the search
button to the right of the field. Click Submit.
Account Summary Report
This report is generated from your submitted sales information.
6.3.2 Account Summary Report criteria screen
Click the check boxes to select the fields that you wish to show on your report from the
following list. The first 6 fields are required. All other fields are optional.
Location ID (Required Field)
External Merchant ID (Required Field)
Currency Code (Required Field)
Submit Date (Required Field)
Card Type (Required Field)
Batch Number (Required Field)
Sales Count
Sales Amount
Page 37
Refund Count
Refund Amount
Reject Count
Reject Amount
Total Amount
Choose up to 3 fields to group the report results. You may select; Location ID, External
Merchant ID, Currency Code, Submit Date, Card Type, or Batch Number.
In the Select Card Type window choose All Card Types, or select a specific card type (MC, Visa
etc...) to be included in your report. Select the Sort By field from the dropdown and click the
radio button to choose whether to sort in Ascending or Descending order.
From the windows at the bottom of the criteria window select the state and locations that you
wish to include in the report from the Select State and Select Locations windows. The Report
Locations Selected window will display the locations chosen.
To run the report click Submit Query. If you wish to revise the selections click Clear Screen. An
example of the Account Summary Report is shown below.
6.3.3 Account Summary Report screen
Bank Deposits Report
This report is based off your bank deposit information.
Page 38
6.3.4 Bank Deposit Report criteria screen
Of the selections listed in the Fields to Show window 8 are required as indicated in the list
below;
Location ID (Required Field)
External Merchant ID (Required Field)
Currency Code (Required Field)
Checking Account Number (Required Field)
Funded Date (Required Field)
Batch Number (Required Field)
Funding Category (Required Field)
Minor Funding Category (Required Field)
Item Count
Credit Amount
Debit Amount
Total Amount
Choose up to 3 fields to group the report results. In the Group By fields choose from the
following;
Location ID
External Merchant ID
Currency Code
Checking Account Number
Funded Date
Batch Number
Funding Category
Page 39
Minor Funding Category
Select the Sort By field from the dropdown and click the radio button to choose whether to sort
in Ascending or Descending order.
From the windows at the bottom of the criteria window select the state and locations that you
wish to include in the report from the Select State and Select Locations windows. The Report
Locations Selected window will display the locations chosen.
To run the report click Submit Query. If you wish to revise the selections click Clear Screen. An
example of the Bank Deposit Report is shown below.
6.3.5 Bank Deposit Report criteria screen
6.4
Location Profile Details
The Location Profile Details displays account information such as; Statement Setup, IRS
Information, Account Fees and Terminal List Details. Use this option to list your corporate
locations and review the Detail Status Report to ensure that the information on file is accurate.
Select the Research tab from the toolbar and then click Location Profile Details from the
dropdown. If you have a single location the Location Profile Details Status report will appear. If
you have multiple locations the following selection screen will display.
6.4.1 Bank Deposit Report criteria screen
Page 40
The dropdown on Select Lookup Field allows you to choose from; Location Name, Merchant
Name, Location Address, Location City, Location State, Location Zip, or Merchant ID. The Select
a Pattern field has a dropdown with choices that include; Starts With, Equals and Includes.
Enter the search string you wish to use in the Enter Value field. Click Submit.
6.4.2 Location Profile Details screen
Click on the Location ID hyperlink to display the Location Profile Details Status, Statement
Information, IRS Information, Account fees, and Terminal List Details (all shown below).
6.4.3 Location Profile Details Status screen
6.4.4 Statement Information screen
6.4.5 IRS Information screen
Page 41
6.4.6 Account Fees screen
6.4.7 Terminal List Details screen
Field Definitions??
6.5
Card Issuer Identification
You can access issuing bank information for Visa and MasterCard numbers through this option.
This information is also available when you click on View Card Issuer Info from any Credit
Transaction Detail or Debit Transaction Detail screen. Select Research from the toolbar and
then click Card Issuer Identification from the dropdown.
6.5.1 Card Issuer Identification screen
Enter only the first 6 digits of the cardholder number and click Submit.
6.5.2 Card Issuer Information screen
Page 42
6.6
Fraud Reporting
The Fraud Reporting option allows you to monitor refunds by location that have taken place
within the last 6 months. Select Research tab from the toolbar and click Fraud Reporting from
the dropdown.
6.6.1 Fraud Reporting selection screen
The Date Range From/To field is a required field and you must enter a date within the last 6
months. Enter desired amounts in the Amount Range fields. Click Submit.
6.6.2 Fraud Refund Summary By Location screen
6.7
Refunds with No Sale
This option allows you to view a detailed list of refunds without matching sales for the date
range within the last 6 months. Select Research tab from the toolbar and click Refunds with No
Sales from the dropdown.
6.7.1 Refund With No Sales Activity selection screen
Enter ID and select level. The required Date Range From/To field must contain dates within the
last 6 months. You may enter the full card number or just the last 4 digits in the Card # field.
Click Submit.
Page 43
6.7.2 Refund With No Sales Activity report screen
Page 44
7
Reports
The Report selection contains 4 submenu or dropdown choices; Scheduled Report, View
Reports, Update Reports and Delete Reports. Scheduled Reports allows you to generate reports
showing summary and detail information. Reports can be sent to individual or multiple users
via email, or downloaded in multiple formats (PDF, MSWord, Excel or CSV). You can also
schedule reports to run daily, weekly, monthly, yearly or quarterly.
7.1
Scheduled Reports
The scheduler template allows you to schedule report delivery on a recurring basis. Select the
report format, delivery frequency, level of hierarchy, start and end date, and delivery method.
Select the Reports tab from the toolbar then click Scheduled Report from the dropdown.
7.1.1 Report Builder category selection screen
Enter ID and level. Choose from the dropdown in the Select Report Category field. Click
Submit.
7.1.2 Report selection screen
In the Select Report dropdown, choose from the list of reports and click Submit.
Page 45
7.1.3 Report Scheduler screen
In the Report Schedule section select Report Frequency (Run Now, Daily, Weekly, Monthly,
Quarterly, Yearly). Selecting anything other than “Run Now” in Report Frequency will generate
a recurring report of that frequency. Select Receive Report On to choose date you wish to
receive the report.
The Dates to Report section sets the beginning and end dates that are to be included on your
report. Enter a date in the End Date field only when a Run Now report is chosen.
The Report Delivery Options section contains several key fields. You can choose how you wish
to view your report from the Select Report Format field. Choices in the dropdown include;
Word® for Windows Document, Excel® 8.0, Comma-separated values, or Adobe® PDF File.
Reports in CSV will not contain headers as this would cause a failure to load into a database. If
you intend to save this report to a separate application such as Microsoft Access™, it is
suggested you choose the Delivery option of email and the Report Format option of Microsoft
Excel® 8.0 or CSV.
If you wish to compress the report to a smaller file size select Yes, from the Zip Option field,
otherwise choose No. Choose either Web Online or E-mail from the Select Delivery Option
field. You will need to determine the maximum file size that your email provider will allow and
then specify it in the Select Mailbox Size ( <1MB, 1MB-5MB, 5MB-10MB, 10MB-15MB, >15MB).
If you wish to receive an e-mail when the report is generated then select Yes, from the Notify
When Finished field, otherwise choose NO. If you choose YES, an email address must be
specified in the E-Mail To Address 1 field. Select E-Mail to Address 2 and E-Mail to Address 3 to
add other recipients. Additional email recipients do not have to be enrolled ClientLine® users.
Not all email fields need to be filled in. Click Submit.
7.1.4 Report Confirmation screen
Page 46
Note:
•
•
•
•
•
If you do not have Microsoft Office® loaded to your pc, you can still receive a Scheduled Report.
Once the report is complete, double click on the report number to prompt the report to open in
a word processing application available on your pc.
Reports will take longer to generate if they span a large amount of time or are pulled at a high
level of hierarchy. These reports will include large amounts of data or multiple locations.
Scheduled reports that are larger than 16MB in size cannot be emailed from our server to you.
Also your email system may limit incoming file sizes to you. In both cases you will need to select
Web Online as the delivery option and save to your desktop. Reports that are over 10MB will be
held for an overnight delivery. Web Online reports will be deleted from the system after 2 days.
Emailed reports that are larger than your mailbox size will attempt to be zipped and emailed to
you. If the report still is larger than your mail box size, an email will be sent to you advising you
to go online to view. Size limit for scheduled reports is 250 MB. If your report exceeds this size
you will need to rerun the report at a lower level of hierarchy or for a smaller date range.
7.2
View Reports
In this section you will learn how to download and view generated reports. You may need to do
this for very large reports if they exceed the email system size limits. As mentioned in the
previous section, scheduled reports larger than 16MD cannot be emailed from the server to
you. To view reports select Reports from the toolbar and then click View Reports from the
dropdown.
7.2.1 Report Download Summary screen
Click on the desired report hyperlink in the Report ID column.
7.2.2 Download Report Detail screen
Click on the appropriate report number hyperlink in the Report ID column.
Page 47
7.2.3 File Download window
Click Open to view the report, click Save to save the report to your local file.
7.3
Update Reports
Follow these procedures to revise an existing scheduled report. Select the Reports tab on the
toolbar then click Update Reports from the dropdown.
7.3.1 Update Reports selection window
Enter ID and select level. If you are logged in under a higher level of hierarchy than what the
report you are looking for was scheduled you will need to enter the MID in the ID box and
select the appropriate hierarchy to update that specific report. Click Submit.
7.3.2 Update Report Summary screen
Click on the report number hyperlink in the Report ID column.
Page 48
7.3.3 Update Report Detail screen
Click on the hyperlink in the Report Link column.
7.3.4 Report Delivery Criteria screen
Enter desired changes and click Submit.
7.3.5 Report Update Confirmation screen
7.4
Delete Reports
To delete reports select the Reports tab on the toolbar and click Delete Reports from the
dropdown.
7.4.1 Delete Report Summary screen
Click on the desired report number hyperlink in the Report ID column.
7.4.2 Delete Report Detail screen
Page 49
In the Click To Delete column click on the YES hyperlink for the desired report.
7.4.3 Delete Report Confirmation screen
Click Confirm to complete the report deletion process.
7.4.4 Delete Report Verification Message screen
Page 50
8
Groups
The Groups selection offers you the opportunity to create unique “groups” of your locations by
selecting the locations of your choice and running scheduled reports based on those unique
groups. This provides you greater flexibility in managing the overall performance of your
portfolio. The unique group names can easily identify each segment of your portfolio and can
be continually applied to scheduled reports in the future.
Once created you can easily go back into the system and add or delete locations to/from a
specific group. The Groups selection can only be used if your access is set at the corporate level
or higher and multiple locations are rolling up to your corporate level access.
The two submenu selections from Groups are; Group Builder and Group Reports. Each are
described in the sections below.
8.1
Group Builder
In this section you will learn how to add, update and delete your unique groups. Select Groups
from the toolbar and then click Group Builder from the dropdown. The Action field in the
selection window contains 3 choices each are described below.
Add New Group
8.1.1 Group Builder selection screen
Select Add New Group from the Action field dropdown and click Submit.
8.1.2 Group Description/State selection screen
In Step (1) Group Description enter name into the Group Description field that you will
remember for future updates and reference. In Step (2) Select State choose the state of
locations that you wish to include. Click Submit Build.
Page 51
8.1.3 Group Locations selection screen
Double click on locations in Step (3) Select Locations that you wish to include OR click once and
then click the > button to add the location to the Step (4) Selected Locations section. To select
all locations click on the >> button. To deselect locations click on the location and then click on
the < button. To deselect all location click on the << button. Click Submit Build.
8.1.4 Add New Report Group Complete screen
At this screen you may Add More Locations or add locations from a different state – click Add
More States. Click Complete Group Build to complete the process. The confirmation window
shown below should appear.
8.1.5 Group Build Confirmation screen
Update Group
8.1.6 Group Builder selection screen
Select Update Group from the Action field dropdown. Click Submit.
A listing of the current locations for your report will appear in Step (4) Selected Locations. To
delete locations from your report use your mouse to highlight the location that needs to be
deleted. Click on the < button. If more than one location needs deleted, continue to highlight
and click on the < button as needed.
Page 52
If no other changes are needed click Submit Update.
To add locations to your report use your mouse to highlight the state in Step (2). The locations
for that state will appear in Step (3). Using your mouse, highlight the location you would like to
add to the group. Click on the > button. If more than one location needs to be added, continue
to highlight and click on the > button as needed. Once you have finished adding all the locations
needed- Click Submit Update.
The Group Activity Confirmation should appear.
Delete Group
8.1.7 Group Builder selection screen
Select Delete Group from the Action field dropdown. From the Select Report Group dropdown
choose the group to be deleted. Click Submit.
8.1.8 Update Reports selection screen
A listing of all the current locations for the group will appear. Click Delete Group to delete the
group. Delete Confirmation window displays.
8.2
Group Reports
This section describes how to select the scheduled reports that you wish to run. Select Groups
from the toolbar then click Group Reports from the dropdown.
Page 53
8.2.1 Group Report Build selection screen
Enter ID and level. Select Report Category (Disputes, Funding, Giftcards, Rate Analysis,
Research, Sales). Each of these categories contains reports with data similar to the data found
within the corresponding menu header in the online modules. Click Submit
8.2.2 Group Report- Report selection screen
Select Report from the list of reports provided. Select Report Group from the list of your
groups provided. Click Submit.
8.2.3 Group Report Scheduler screen
In the Report Schedule section select from the dropdown in the Report Frequency field. The
choices are; Run Now, Daily, Weekly, Monthly, Quarterly or Yearly. Choose date you wish to
receive report in the Receive Report On field.
Page 54
The Dates to Report section allows you to enter the beginning date of your report in the Start
Date field. Choose date your report will end and enter it in the End Date field. End Date should
only be entered when a Run Now report frequency is selected.
The Report Delivery Options section contains several key fields. You can choose how you wish
to view your report from the Select Report Format field. Choices in the dropdown include;
Word® for Windows Document, Excel® 8.0, Comma-separated values, or Adobe® PDF File.
Reports in CSV will not contain headers as this would cause a failure to load into a database. If
you intend to save this report to a separate application such as Microsoft Access™, it is
suggested you choose the Delivery option of email and the Report Format option of Microsoft
Excel® 8.0 or CSV.
If you wish to compress the report to a smaller file size select Yes, from the Zip Option field,
otherwise choose No. Choose either Web Online or E-mail from the Select Delivery Option
field. You will need to determine the maximum file size that your email provider will allow and
then specify it in the Select Mailbox Size ( <1MB, 1MB-5MB, 5MB-10MB, 10MB-15MB, >15MB).
If you wish to receive an e-mail when the report is generated then select Yes, from the Notify
When Finished field, otherwise choose NO. If you choose YES, an email address must be
specified in the E-Mail To Address 1 field. Select E-Mail to Address 2 and E-Mail to Address 3 to
add other recipients. Additional email recipients do not have to be enrolled ClientLine® users.
Not all email fields need to be filled in. Click Submit.
8.2.4 Group Report Schedule Confirmation screen
Page 55