1
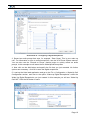
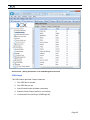
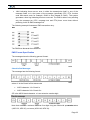
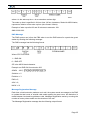
3CX Phone System for Windows System for Windows www.3cx.com User Manual 3CX Hotel Module For 3CX Phone System 11 Page 1 3CX Phone System for Windows System for Windows www.3cx.com Copyright 2012, 3CX ltd. http://www.3cx.com http://www.3cx.com/blog http://www.facebook.com/3CXPhoneSystem E-mail: [email protected] Information in this document is subject to change without notice. Companies‟ names and data used in examples herein are fictitious unless otherwise noted. No part of this document may be reproduced or transmitted in any form or by any means, electronic or mechanical, for any purpose, without the express written permission of 3CX Ltd. 3CX Phone System for Windows is copyright of 3CX Ltd. 3CX is a registered trademark, and 3CX Phone System for Windows and the 3CX logo are trademarks of 3CX Ltd in Europe, the United States and other countries. Last updated September 2012 Page 2 3CX Phone System for Windows System for Windows www.3cx.com Table of Contents Table of Contents ...................................................................................................................... 3 What is the 3CX Hotel Module? ............................................................................................ 5 Components.......................................................................................................................... 5 Operations and Functions Performed by the 3CX Hotel Module............................................ 6 Operations On Check In ................................................................................................... 6 Check Out Operations ...................................................................................................... 6 Do Not Disturb (DND) ....................................................................................................... 6 Wake-up Calls .................................................................................................................. 6 Billing ............................................................................................................................... 6 How It Works......................................................................................................................... 7 Installing 3CX Hotel Module ....................................................................................................... 8 Deployment Considerations .................................................................................................. 8 System Requirements ........................................................................................................... 8 Installing the Software ........................................................................................................... 8 Activating the 3CX Hotel Module ........................................................................................... 9 Creating a Wake Up Call DR ................................................................................................. 9 Automatic Wake Up Service Extension ............................................................................... 11 Configuring the Mini Bar Feature......................................................................................... 11 Using the Hotel Module Web Interface..................................................................................... 14 Introduction ......................................................................................................................... 14 Functions Available ............................................................................................................. 14 Checking In Guests ........................................................................................................ 14 Checking Out Guests ..................................................................................................... 15 Set to Do Not Disturb...................................................................................................... 15 Scheduling a Wake Up Call ............................................................................................ 16 Block External Calls........................................................................................................ 17 Viewing the Calls Made by a Guest ................................................................................ 17 Set Room Status by Phone ............................................................................................ 17 Entering Minibar Usage .................................................................................................. 18 Page 3 3CX Phone System for Windows System for Windows www.3cx.com Hotel Software / PMS Integration ............................................................................................. 20 Introduction ......................................................................................................................... 20 Integration Options .............................................................................................................. 20 Configuring 3CX PMS Protocol Integration ......................................................................... 21 Configuring Fidelio Protocol Integration............................................................................... 21 Configuring the Billing Interface ............................................................................................... 23 Introduction ......................................................................................................................... 23 Adjusting Billing costs ......................................................................................................... 23 CDR Output ........................................................................................................................ 25 Changing CDR Output Location .......................................................................................... 26 Editing CDR Output Format ................................................................................................ 26 Complete CDR Template................................................................................................ 27 SMDR Output...................................................................................................................... 28 Enabling SMDR .............................................................................................................. 28 Customizing SMDR Output............................................................................................. 29 3CX PMS Protocol Specification .............................................................................................. 32 Introduction ......................................................................................................................... 32 General Protocol Information .............................................................................................. 32 PMS to System Transmission ......................................................................................... 32 PMS Format Specification ................................................................................................... 33 Check In/Out Messages ................................................................................................. 33 Name Message .............................................................................................................. 34 Wake Up Messages ....................................................................................................... 34 DND Message ................................................................................................................ 35 Message Registration Message...................................................................................... 35 Message Waiting Message............................................................................................. 36 Station Restriction Message ........................................................................................... 36 Maid Status Message ..................................................................................................... 37 Mini Bar Message ........................................................................................................... 37 Page 4 3CX Phone System for Windows System for Windows www.3cx.com Introduction What is the 3CX Hotel Module? Screenshot 1 - 3CX Hotel Module The 3CX Hotel Module adds additional functions to 3CX Phone System, which allows it to be used in hotels or other hospitality environments. The 3CX Hotel Module performs the following functions: Allows for Check in and Check out of guests Allows setting of guest extensions to Do not Disturb Allows blocking of external calls Allows wake up calls to be scheduled. Allows billing of calls to rooms Allows housekeeping to set room status via the phone Allows minibar usage to be reported via the phone The 3CX Hotel Module can integrate with a host of Hotel software systems / Property Management Systems (PMS) such as Micros Fidelio, Roommaster, Hilton and more. Alternatively the receptionist can use the system directly through the provided web interface. Components The 3CX Hotel Module consists of a front end application and a Windows Service. The Windows Service operates in the background and allows for integration with the Property Management System. With the integration, many of the functions can be triggered from within the PMS software. The Front Desk Phone Control Application is a simple to use Windows or web based application that allows the front desk clerk to perform the above operations with a few mouse clicks. This application can be used separately from, or in tandem with the PMS Page 5 3CX Phone System for Windows System for Windows www.3cx.com system, and thus requires no integration at all. For many smaller hotels, this can be good enough. Operations and Functions Performed by the 3CX Hotel Module The 3CX Hotel Module performs the following functions: Operations On Check In Sets Extension Name Unblocks the extension to allow outbound calls Deletes all voice mail messages Clears any Do Not Disturb (DND) functions Check Out Operations Sets name to blank to show that there is no one in the room Deletes all voice mail messages Disables outbound calls on extension Clears any Do Not Disturb set Do Not Disturb (DND) Sets user status to „Away‟ (same as in interface) All calls will be sent to voice-mail Wake-up Calls The system allows for wake up calls to be scheduled. There are 2 types of Wake-Up Calls in the 3CX Hotel Module. The first is a schedule set by the receptionist from the 3CX Hotel Module web interface. This will call the guest at the scheduled time and play a predefined message so as to wake up the guest. The second is set by the guest from the room without the receptionist‟s intervention. A call will be made from the guest‟s room to a pre-configured Wake-Up Call service IVR, follow the prompts and configure his/her own wake-up call accordingly. This extension number can be printed in the hotel‟s telephone directory brochures. Billing The system will log calls from each room and show costs based on the cost configured in the 3CX Phone System management console. The system can output a configurable CDR report for each call. The CDR report can be sent to a separate text file (one call per text file) to a text file for all calls (all calls will be listed in the same text file, or to a TCP port. For each case, the exact format can be customized Page 6 3CX Phone System for Windows System for Windows www.3cx.com How It Works The 3CX Hotel Module is an additional module that is installed on the 3CX Phone System machine. The module adds an additional service to the 3CX Phone System machine as well as a web application. The 3CX Hotel Module Service starts only if the Hotel is licensed. The web server selection for the 3CX Hotel Module is automatic – this means that if 3CX Phone System was installed using the IIS option, then the Hotel Module web interface will automatically be on IIS. Alternatively, if 3CX Phone System was installed using the Abyss option, the 3CX Hotel Module will use Abyss. In both scenarios, the 3CX Hotel Management Web page will be accessed on http://IP:5000. Page 7 3CX Phone System for Windows System for Windows www.3cx.com Installing 3CX Hotel Module Deployment Considerations Prior to deploying the 3CX Hotel Module, you must install 3CX Phone System and configure it as per the documentation. Keep the following points in mind: Have the extension numbers match your hotel room numbers. This makes it intuitive for guests to dial other room numbers, as well as for hotel staff to identify room phones. 3CX Phone System can be deployed with 2,3,4 or 5 digit length extensions so it should be possible to match almost any hotel room number If you are replacing an old phone system and want to keep certain numbers such as room service or reception using the same shortcuts, keep this in mind when assigning extension numbers. It might be advisable to block access to the 3CX MyPhone User portal. In this case, disable access to the 3CX MyPhone User Portal from the 3CX Phone System Management console > Edit Extension > Other > “Turn Off MyPhone”. System Requirements The 3CX Hotel module requires the following: Windows XP Pro SP3, Vista SP2, Windows 7, Server 2003 SP2, Server 2008 .NET Framework version 3.5 or higher 1 Gigabyte Memory or higher, Pentium 4 processor or up 3CX Phone System 10 must be installed and running Installing the Software To install the 3CX Hotel module: 1. Download the latest 3CX Hotel Module from: http://www.3cx.com/downloads/3CXHotelmodule2.msi 2. Run the 3CX Hotel Module setup on the 3CX Phone System computer. The 3CX Hotel Module must be installed on the same machine as 3CX Phone System. 3. Now follow the instructions of the setup Wizard. 4. You will be prompted to enter a user name and password for the 3CX Hotel Module web interface. This web interface will be used by the receptionists of the hotel. It‟s a shared logon, and does not provide administrative access to the system. 5. Click Finish to complete installation. Page 8 3CX Phone System for Windows System for Windows www.3cx.com 6. The 3CX Hotel web interface will be automatically launched: http://<ip-of-3cx-phonesystem-machine>:5000/Hotel. Login with the credentials specified during the setup. 7. You will see a notification dialog to activate the license and configure a Wake Up Digital Receptionist. Note: If you installed the 3CX Hotel Module on an existing 3CX Phone System installation, you need to „Check-OUT‟ and „Check-IN‟ the existing extensions in order to reset any cost counters, voicemails and settings associated with the extensions. All Call Details will be removed for those extensions. Activating the 3CX Hotel Module The next step is to activate your license. 1. Start-up the 3CX Hotel Module from the start menu program group that has been created. 2. Activate your license by going to the File > Activate License page menu option. 3. Enter your License Key, Company, Contact Name, E-mail, Telephone and Country and click on “Activate” to activate your license. This information will be sent to our license key server and your license key and installation will be activated. 4. Depending on your license key, the product will activate with or without PMS integration. 3CXH stands for the hotel module without PMS integration and 3CHPMS indicates that the license has PMS integration. Creating a Wake Up Call DR The first time you login to the 3CX Hotel Module, you will be prompted that you need to configure a Digital Receptionist (DR) for the Wake Up call functionality. This DR is used to perform the actual wake up calls. To configure a DR: 1. Access the 3CX Phone System Management Console, click on the Digital Receptionist node and click on Add Digital Receptionist. 2. Configure a name for this Digital Receptionist. Example: Wake-Up Call IVR. Page 9 3CX Phone System for Windows System for Windows www.3cx.com Screenshot 14 - Configuring a Digital Receptionist 3. Record an audio prompt that says, for example, “Dear Guest, This is your wake up call”. For information on how to record sound files, see the 3CX Phone System manual. You can also use the “Record on Phone” feature button to quickly record an audio prompt. In this example we will name the file WakeUpCallPrompt.wav 4. Now click on the Add button and specify the file that you just recorded. No further options are necessary - click OK to save the digital receptionist. 5. Load up the Hotel web application and go to the File > Configuration > Wake-Up Call Configuration section, and next to the option “Wake-up Digital Receptionist” select the Wake Up Digital Receptionist you just created. In this example you will see “Wake-Up Call IVR”. Click the OK button to save. Page 10 3CX Phone System for Windows System for Windows www.3cx.com Automatic Wake Up Service Extension A wake up call can also be created by the guest from the room without the intervention of the receptionist. For this we need to create a special Wake Up Digital Receptionist using a small tool provided in the 3CX Hotel Module installation. Access the 3CX Hotel Module computer locally and go to Start > All programs > 3CX Hotel Module Click on “Wake-Up Digital Receptionist Configuration Tool” A dialog will appear which will ask you to enter the extension number you want to assign to the wake up Call service. Enter a free extension number. In this case we will use extension number 500. Note: It is important that if your 3CX Phone System is a 3-digit PBX, then the wake up call extension should also be 3 digits long. Click the Install button. A Digital Receptionist named “Wake-Up Phone Configuration” will be created in the 3CX Phone System Management console > Digital Receptionist. Dial this number from any phone and you will be greeted with the “Wake-Up Call Configuration Menu” which will allow you to set up a wake-up call any day and time you wish. The digital receptionist extension number should be printed in the Hotel‟s telephone directory so that guests are aware of it. At any time, the guest can dial this number, follow the prompts and set up his/her own wake up call. Configuring the Mini Bar Feature 3CX Hotel Module provides a mini bar feature that allows mini bar personnel to communicate the mini bar usage to the PMS system via the use of a phone call. To configure this: Page 11 3CX Phone System for Windows System for Windows www.3cx.com 1. In the 3CX Management console, create a Digital receptionist. Call it Dial Code IVR. This dummy DR will be used for both the Maid status and the Mini bar features. You do not need to upload a Prompt file. 2. In the 3CX Hotel Module interface, go to the configuration dialog and enable the „Maid Status Code‟ and the „Mini bar Codes‟ check-boxes. 3. Select as Digital receptionist: Dial Code IVR (the DR you previously created) 4. Specify a local port number - Choose a high port here, for example 60000. This port is used internally by the hotel module to pass dial code information. 5. Configure Dial Code – put, for example, *68 here. It must not start with any of the dial codes in the 3CX Phone System Dial Codes Page. Example: *44 will not work because it will try and match the dial code *4 which will take you to Voicemail and not to the Mini Bar. *9 will not work either because the PBX will think it is a call to Page an extension. 6. Specify a Success Media File and a Failed Media file. Example content could be “Input confirmed” and “Input failed”. When the dial code is accepted the successful prompt file will be played back to the caller. When a dial code is not understood by the 3CX Hotel Service, the failed media file will be played to inform the user that the dial code was not accepted. 7. Now under the “Enable Mini Bar Codes” section, add the valid Product codes and Product names. This way, the system will know that the user has entered a valid product code and can give mini bar personnel the appropriate feedback. If your Hotel offers Sparkling Water in the Mini bars type “Sparkling Water” in the “Product Page 12 3CX Phone System for Windows System for Windows www.3cx.com Name” field and in the “Product Code” field enter a unique numeric code, for example 10. 8. Dial Mini bar Stock orders in the following order. In this option you specify whether the Mini bar personnel dials the number of units consumed first followed by the product code or whether the product code is entered first followed by the number of units. a. “No of Items * Code” means the user has to type the number of items first, followed by the * and then the product code example 2*10 means 2 bottles of Sparkling Water b. “Code * No of Items” means the user has to dial the product code first, followed by a * and then the number of items, example 10*2. The * character for mini bar codes will be used as multiplication character and as a delimiter character. For example: In Room 101 we need to fill the mini bar with two bottles of sparkling water (code 10) and 3 cokes (code 30). Given the configured dial code is *68, the dialled number from the extension in Room 101 should look like this: *68*2*10*3*30 – if No of Items * Code (a) *68*10*2*30*3 – if Code * No of Items (b) In both cases, the above syntax means that a Mini bar order of 2 water and 3 cokes are needed to fill up the Mini Bar of room 101. Hence this implies that the Guest in Room 101 consumed 2 bottles of water and 3 bottles of coke which of course need to be charged. Page 13 3CX Phone System for Windows System for Windows www.3cx.com Using the Hotel Module Web Interface Introduction This chapter explains how to use the 3CX Hotel Module web interface. Screenshot 2 - The Web Interface The 3CX Hotel Module web interface is located machine>:5000/Hotel. After you login, you will see 4 nodes: at: http://<phone-system- All Rooms – All extensions created in 3CX Phone System Occupied Rooms – These are all the extensions that are checked in Empty Rooms – All extensions that represent checked out status. Wake-Up Calls – All scheduled wake up calls. These show in RED Functions Available Checking In Guests Screenshot 3 - Checking in a Guest To check in a guest: Page 14 3CX Phone System for Windows System for Windows www.3cx.com 1. Select the room number from the „All Rooms‟ or „Empty Rooms‟ node and click on the Check IN icon found on the top toolbar. 2. You will be prompted to enter the guest‟s name, email address and caller ID. The email can be used for voice mail notification if the guest wishes to receive their voice mail via email. 3. Click OK. This will: Set the Extension Name to the Guest‟s name Unblock the extension to allow outbound calls Checking Out Guests To check out a guest: 1. Select the room number and click on the Check OUT icon. Screenshot 4 - Call Costs Dialog 2. The 3CX Hotel Module will bring up the cost of any calls made in a separate dialog. If no calls with costs were made, a dialog confirming this will pop-up. 3. You can choose to print this dialog for inclusion with the hotel bill. 4. Now close the call cost dialog. The extension will now be checked out. This will: Delete the guest name and move the room to „Empty rooms‟ Delete all voice mail messages of the room Disable outbound calls on the extension Clear any Do Not Disturbs set Set to Do Not Disturb The Do not Disturb function will send all calls to the room to the guest voice mail. The DND status will be shown in the DND On/Off column: Available – Guest will take calls Page 15 3CX Phone System for Windows System for Windows www.3cx.com Do Not Disturb – Calls will be sent to voice mail Note: Wake up calls override Do Not Disturb. Therefore, if an extension is set to Do Not Disturb but there is a scheduled wake up Call, the wake up call will still be made whilst a normal call will go to voicemail. Scheduling a Wake Up Call Screenshot 5 - Wake Up Calls The wake up call feature allows you to schedule an automatic call to be placed to a room at a particular date and time. To schedule a wake up call: 1. Select the room number and click on „Set Wake up‟. Screenshot 6 - Set Wake Up Call 2. You will be prompted for the date and time of the wake up call. Click OK to set the wake up – In this example we have configured a wake up call to be made on the 22nd September at 3:00 AM. 3. When the time of the wake up call is reached, the extension in the guest‟s room will be called automatically by the digital receptionist created and transferred to the recorded wake up message. Please note that the guest will be called only once. Page 16 3CX Phone System for Windows System for Windows www.3cx.com Screenshot 7 - List of Wake Up Calls 4. You can view a list of scheduled wake up calls at any time by clicking on the „Wake up calls‟ node. Note: Currently only one wake up call per extension is allowed. Block External Calls You can block external calls in rooms by selecting the room and click the „Block‟ button in the toolbar. Viewing the Calls Made by a Guest Screenshot 8 - Displaying Calls Made by a Guest Click on the room number and „View calls‟ to view all the calls made by a particular room and the associated cost. You can print this data by clicking print. Set Room Status by Phone This function allows cleaners to set the status of the room via the phone. The maid status message is triggered by a call from the room in question and by entering the special feature code (the dial code set in the configuration section of the 3CX Hotel interface which is also used for the Mini bar codes), followed by the appropriate code to specify the status of the room. Note: The codes are different depending on the PMS system used. 3CX PMS supports 9 Maid code states whilst Fidelio supports 6. Page 17 3CX Phone System for Windows System for Windows www.3cx.com For example: Dialling “*682” from room 101 will trigger a maid status message to the PMS that will set the status of room 101 to clean. In this example *68 is the special feature code (configurable) and 2 is the status code „clean‟. The following values can be entered when the selected PMS is 3CX PMS 1 maid present 2 clean 3 not clean 4 out of service 5 to be inspected 6 Occupied/Clean 7 Occupied/Not Clean 8 Vacant/Clean 9 Vacant/Not Clean The following values can be entered when the selected PMS is Fidelio 1 Dirty/Vacant 2 Dirty/Occupied 3 Clean/Vacant 4 Clean/Occupied 5 Inspected/Vacant 6 Inspected/Occupied If the code is correct, the success media file message will be played. If the code is incorrect the failed media file message will be played which will give an indication to the maid that the input was not understood by the 3CX Hotel Module. The audio prompt files can be configured from the 3CX Hotel Module interface, File > Configuration > Maid Status Code Section. These are the same files that are used for the Minibar codes. Entering Minibar Usage The minibar function allows minibar personnel to forward minibar usage to the PMS system via the phone in the guest‟s room. Personnel pick up the phone from the room in question example Room 100 (which will have extension 100) and dial the special dial code, followed by the appropriate item code and the amount. For example: *68*2*10 will notify the PMS that the minibar in room 100 needs 2 units of item code 10. Page 18 3CX Phone System for Windows System for Windows www.3cx.com If the code is correct, the success media file message will be played. If the code is incorrect the failed media file message will be played. These messages can be configured from the 3CX Hotel Module interface, File > Configuration section. Page 19 3CX Phone System for Windows System for Windows www.3cx.com Hotel Software / PMS Integration Introduction Although all hotel related functions can be performed via the web interface, it is often preferable to perform these functions automatically at check in or check out of the guest via the Property Management System software. 3CX Phone System supports a wide range of hotel software systems. Integration Options The 3CX Hotel Module can integrate with PMS systems in the following ways: 1. Via the 3CX PMS protocol. This protocol is very similar to the Mitel protocol. Most hotel software have a Mitel PBX interface so it is possible to select this integration option in the Hotel Software and it will work with the 3CX PMS protocol. If multiple Mitel options are offered, the Mitel SX 2000 option must be selected. 2. Via the Fidelio protocol 3. Exchange of data can also be done on a custom basis. In this scenario, documentation must be provided by the reseller as to how the integration must be performed. Additional charges may apply. Page 20 3CX Phone System for Windows System for Windows www.3cx.com Configuring 3CX PMS Protocol Integration When using the 3CX PMS protocol, the 3CX Hotel Module acts as a server. In other words, the PMS software sends messages to the 3CX Hotel Module. Use this for Mitel compatible hotel software such as Innquest Roommaster 2000 and Brilliant HotelConcepts. In the PMS software you must specify: 1. The IP address of 3CX Phone System. 2. Specify port 15374 for the Hotel Software connection 3. If multiple Mitel options are offered, choose Mitel SX 2000 Naturally, if you change the default ports, you must change them in the PMS system as well. Then access the 3CX Hotel Module and go to File > Configuration. In the PMS Configuration section you must specify: 4. The IP address of the PMS System 5. The port must match that configured in the PMS system example 15374 6. The selected PMS integration type should be 3CX PMS Configuring Fidelio Protocol Integration The Fidelio Protocol integration can be used for Micros Fidelio and Protel hotel software. In this case, no billing interface needs to be configured. Note: FIAS (Fidelio Interface Application Specification) is supported by the following PMS systems from MICROS-Fidelio: Fidelio Suite 6, Fidelio Suite 7, Fidelio Suite 8 & OPERA. It is NOT supported by 'Fidelio Xpress'. Page 21 3CX Phone System for Windows System for Windows www.3cx.com The 3CX Fidelio protocol integration acts as a client. This means that in this case, messages will be sent from the 3CX Hotel Module to the Fidelio Management System. Specify the IP and the Port of the Fidelio PMS server in the 3CX Hotel Module web interface, by going to File > Configuration > PMS Configuration. Select „Fidelio‟ from the PMS integration type dropdown list. Press OK to save this configuration. The 3CX Hotel Service will restart and load the necessary parameters to communicate with the Fidelio PMS. Page 22 3CX Phone System for Windows System for Windows www.3cx.com Configuring the Billing Interface Introduction THE BILLING INTERFACE ONLY NEEDS TO BE CONFIGURED IF USING THE 3CX PMS INTEGRATION (WHICH EMULATES MITEL) WITH MITEL-COMPATIBLE PROPERTY MANAGEMENT SYSTEMS SUCH AS INNQUEST ROOMMASTER AND BRILLIANT / HOTELCONCEPTS. IT IS NOT REQUIRED IF USING THE FIDELIO PROTOCOL (FIAS) WITH MICROS-FIDELIO AND PROTEL. 3CX Phone System provides billing information so that you can charge your guests accordingly for each phone call. This information is displayed per room in the web interface, or alternatively you can output it to a text file or to a TCP port so that you can integrate it with your PMS software. Call costs are calculated and inserted into a CDR (Call Data Record) which is outputted to disk as a text file or sent to a particular host at a particular port. In this manner it is easy to integrate with a hotel software system or call accounting software. Adjusting Billing costs 3CX Phone System calculates call costs based on destination number and call duration. You will need to enter the cost for each country, for national calls and for mobile calls. The default billing rate is 1.0. This is the rate for one minute call time. To change these rates 1. In the 3CX Management Console, go to Settings > Advanced > Billing Information („View > Billing Information‟ in older versions) 2. Edit the rates as appropriate and click „Apply‟. 3. When calls are made to external numbers, they are checked against this Prefix in the Billing Information table. If a match is found then the cost is calculated as follows: Total Cost = (Talk Time in Seconds / 60) * Rate Example: We configured the Billing Information for Cyprus, whose country code starts with 00357. The rate configured is 2.5. A call is made to a number that starts with 00357, and the duration of the call is 3 minutes, 24 seconds. The cost of this call is calculated as follows: (((3 x 60) + 24) / 60) x 2.5 = 8.5 Notes: If you use a prefix to get an outside line, and the outbound rule is configured to remove the prefix, you should not include this prefix in the Billing Information table. Page 23 3CX Phone System for Windows System for Windows www.3cx.com The rate can be in any currency that you choose. If you are in the US, the rate can be US$. If you are in Europe, the rate can be Euros, and if you are in the UK, the rate can be in Sterling. When adding new billing codes, use only alphanumeric characters. Avoid using other type of characters. Note that you can have different rates for different providers in the same country. For example, if you want to add the rate for Vodafone mobile in Cyprus, where the number starts with 0035799 and 0035796, and the rate you want to charge is 2 Euros per minute, you would do the following: 1. From the Billing Information, scroll to the bottom of the page. 2. In the last row that starts with *, enter: Country Name = Cyprus Mobile - Vodafone 99 Prefix = 0035799 Rate = 2.0 3. Add another entry with for the second prefix as follows: Country Name = Cyprus Mobile - Vodafone 96 Prefix = 0035796 Rate = 2.0 4. Hit the Apply button at the top when done. Page 24 3CX Phone System for Windows System for Windows www.3cx.com Screenshot 9 – Billing Information in the 3CX Management Console CDR Output The CDR feature provides 5 output channels. 1. One CDR file for all calls 2. One CDR file per call 3. Active Socket output (initiates connection) 4. Passive Socket Output (waits for connection) 5. Customized Feed via Plugin (CDRPlugin.dll) Page 25 3CX Phone System for Windows System for Windows www.3cx.com Each channel can be enabled separately. To Enable the CDR feature, from the management console go to the „Settings > Advanced > CDR Output tab‟, and select the „CDR Output‟ tab. Changing CDR Output Location The file output default location can be changed by editing each template file. The template files are located in %allusersprofile%\3CX\Data\CDRTemplates. In this folder you will find 4 xml templates which you can modify in C#. In the case of the templates CDRTemplate-Socket and CDRTemplate-SocketListen, the host name and port must be specified in the tags “Host="127.0.0.1" and Port="33555" when you open the XML file. All output is text based and can be formatted by modifying the template for each channel. Each change made in the template files requires a restart of the 3CX Call History Service. Editing CDR Output Format If you need to alter the format with which the CDRs are outputted, you can do by editing the XML template files. Each template file contains XML tags that describe which database fields should be included in the CDR, in which order and how each field should be formatted. Each node outputs the text quoted in the text after “{0}” and is replaced by the value of the actual field. For example, the xml node <CallerID fmt="XX caller ID={0}," /> would output: XX caller ID=00357999999, The formatting can be customised using C# formatting strings. Therefore it is possible to insert text before and after a field value and to format numbers with decimals and format dates. Here are some examples: Formatting the TotalCost and start time fields: <TotalCost fmt="CallCost ={0:000.00}," /> would output CallCost =003.40 <starttime fmt="{0:ddMMyyHHmmss}," /> would output 210911160729, Page 26 3CX Phone System for Windows System for Windows www.3cx.com <starttime fmt="{0:dd/MM/yyyy HH.mm.ss}," /> would output 21.09.2011 16.07.29 Adding new line characters in XML <NumDetails fmt="Call details = {0}
" /> would output: Call details = 2<CR><LF> where CR = 
 LF = 
 (CR – carriage return LF – line feed) Each call has one main Callhistory3 entry and 1 or more CallDetails entries. Each Call Detail is for one destination of the call, so if a call is transferred 2 times, there will be 3 call details records for it: one for the initial destination and one for each transfer. Complete CDR Template Below is a snapshot of the complete contents of one of the CDR templates included in 3CX Phone System – CDRTemplate-Single.xml. It includes all the possible fields. Fields that are not required, can be removed by removing or commenting the corresponding xml node. The contents in the template can be modified but the template file name and location on disk should not be changed. The Call History service must load the templates from the \3CX\Data\CDRTemplates folder. Page 27 3CX Phone System for Windows System for Windows www.3cx.com SMDR Output The SMDR feature is separate from the other CDR features. Enabling SMDR To enable SMDR you must enter the host and port to listen on for incoming connections. In the 3CX Management console, navigate to Settings > Advanced > Custom Parameters Tab. In the search filter type in SMDR. You will see that a parameter will be displayed called SMDRHOSTPORT. SMDRHOSTPORT=“0.0.0.0:1752” should work for most cases where only 1 network connection exists. To disable it you must set an empty host, e.g. SMDRHOSTPORT=“” Page 28 3CX Phone System for Windows System for Windows www.3cx.com SMDR will open a socket and listen on the port specified above. It will output each call in SMDR format to all established connections. The default format is compatible with Mitel SX 2000, and has been tested with “Call Accounting Mate” software. The 3rd party software has the responsibility to connect and to maintain the socket connection to the SMDR service. To connect you will need to go to the SMDR section of your 3rd party software and enter the IP Address of 3CX Phone System and the port which in this case will be 1752. You can test this easily by opening a command prompt window and telnet to the 3CX SMDR connection - simply type in telnet ip-of-3cx-phonesystem 1752 example: telnet 10.172.0.180 1752. After this make a simple call and you should see SMDR outputted on your command prompt screen. SMDR output is sent in specific intervals. You can configure the frequency from the CDR Output tab in the 3CX Management Console Customizing SMDR Output It is also possible to customize the output by editing the C# script that produces this. The template can be found in the following location: %allusersprofile%\3CX\Data\CDRTemplates\SMDR.cs Changing the script requires knowledge of C# or at least programming skills. The script has access to 2 objects, „callinfo‟ and „details‟. callinfo: contains information regarding the entire call. It has access to the following fields: Page 29 3CX Phone System for Windows System for Windows www.3cx.com nHistoryID - the unique ID used for identifying the call. This is used internally to write the call in callhistory3, the primary key. tmDuration - the duration of the call if answered, or 0 if not answered. tmCallStart – Date and Time when the call started. tmCallAnswered – Date and Time when the call was answered. tmCallEnded – Date and Time when the call was dropped. sCallFrom - the initial caller. sCallTo - the initial callee. sGroupNum - the group number, if the call comes from a group(Queue, Ring Group, ivr). Eg: if the call will come from queue 800, sGroupNum will be 800. sLineNum - the external port number through which the call passes. If an extension is calling an external number through a VoIP Provider, the sLineNum will be the Virtual line number of that VoIP Provider Ex: 10000. sRecCallID - the internal unique identifier of the call used by the PBX to uniquely identify calls. sCallerID - the initial caller id. Eg. if the call is from extension 100 to 101, the caller id will be outbound caller id of extension 100 which usually is 100. sDialedNumber - the exact dialled number. Eg: if for instance extension 100 is calling *9102(*9 intercom) the dialled number will be *9102. sLastCallerID - last caller ID of the current call. A call can go through many transfers and this will be the last caller ID of the call. Eg: if extension 100 calls 101, 101 transfers to 102, the last caller ID will be 101. sLastDialedNumber - last dialled number. From the above example, last dial number is 102 which is last dialled number of this call. sBillPrefix - the billing prefix used to make the billing. This is configured from 3CX Management Console > View > Billing Information. sBillRateName - the billing country name. bIsAnswered - true if the call is answered, false otherwise bIsFailed - true if the call has failed, false otherwise bIsCompleted - true if the call is completed, false otherwise bCallFromOutside - true if the call was from an external line, false otherwise. fRate - the rate used to bill this call. fTotalCost - total cost for the call eGroupType – This is a group type for calls coming from a group. Possible values are RingGroup = 3, Queue = 4, DR = 5 iMediaType - media type used for recording. iGrpAnswer - used internally. details: Represents the details and destinations of a call. In the case of transfers a call may have multiple details (DetailData3 object for each transfer) Page 30 3CX Phone System for Windows System for Windows www.3cx.com ParentIdx - internally used to make the link with the parent call. Eg: extension 100 call 101, 101 transfers to 102. For this call we will have 2 "DetailData3" objects, one for 100 to 101, and another for 101 to 102. In this case ParentIdx of the second call(101 - 102) will be the iNDetail of the first "DetailData3" object (100 - 101). DestDN - the destination of the call. Eg: in case we have a call from 100 - 101, destination dn will be 101, if for instance the call is from 100 - "external number" using the line 10000, DestDN will be 10000 (Virtual extension number of the line) DestNum - the destination number as dialled by the caller. Eg: 100 - "external number", destination number will be the "External number" StartTime - the start time of the call AnswerTime – the answer time of the call EndTime – the end time of the call Dur – the duration of the call. Ex: 100 calls 101, 101 transfers to 102. "DetailData3" object of call 101 - 102, Dur will be the duration of this call. If Dur belongs to Status - the status of the call. Possible statuses are the following: Connecting = 0 Answered = 1 DestBusy = 2 DestNoAnswer = 3 DestNotAvailable = 4 NotAnswered = 5 Completed = 6 DstUnknown = 7 IsCompl - true is this call is completed bCallToOutside - true if it is from/to external line SpecType iIdCallHist, iNDetail, ExtType – used for internal use only For a more extensive example please look into SMDR.cs located in the CDRTemplates folder. Page 31 3CX Phone System for Windows System for Windows www.3cx.com 3CX PMS Protocol Specification Introduction This chapter details the 3CX PMS protocol, which integrates with PMS hotel software. The 3CX PMS protocol closely resembles the Mitel PMS protocol, and therefore it‟s possible to specify the Mitel PMS protocol in the PMS system. The protocol is further detailed in this chapter. General Protocol Information The PMS/System bi-directional (through half-duplex) link uses the ENQ /ACK/STX-textETX/ACK protocol. The PMS to system transmission sequence is: The transmission of the message is complete. There are timing restrictions imposed on the transmission sequences: The maximum time to wait for the ACK after a STX + msg + ETX transmission is 3 seconds. PMS to System Transmission After receiving an ENQ character from the PMS, the system responds within three seconds with either an ACK or an NAK. The ACK indicates the transmission was successful. The NAK indicates there was a transmission error, or that the system is busy. The system generates a hotel log indicating such an error occurred. After sending the ACK, the system is immediately ready to receive the STX, message text, and ETX. Within three seconds of receiving the ETX, it responds with either: .ACK indicating the transmission was successful, and all of the message fields are valid. Page 32 3CX Phone System for Windows System for Windows www.3cx.com .NAK indicating there was an error in either the transmission itself, in one of the message fields, or in the syntax of the message (specifically STX, ETX, function code and status code; for example, CHK3 is sent instead of CHK1). The system generates a hotel log indicating this error occurred. The PMS is able to retry sending only the message txn (STX, message text and ETX) three more times without prefacing it with an ENQ message first. The following example illustrates a PMS transaction retry: The PMS then discards the transaction. PMS Format Specification The messages have the following general format: Check In/Out Messages The message has the following format: where: X is the Check In/Out status code ASCII character 1 for Check In ASCII character 0 for Check Out SP is the ASCII blank character. n is an extension number digit. Note that extension numbers less than five digits long are filled with space characters (ASCII 32, HEX 20), not zeros (ASCII 48, HEX 30). Page 33 3CX Phone System for Windows System for Windows www.3cx.com If the message received from the PMS is invalid, the system returns an NAK (an ASCII character for Negative Acknowledge). Example: Check In: (check in for extension 100) STXCHK1 1003 100ETX (where STX = 2, ETX = 3) resulting the following message 2CHK1 Name Message This message is sent from the PMS and is used to display the Guest name on the phone. The Name message has the following input format: where : NAM is the name function code. NAME is a character of the name (maximum 21 characters). n is an extension number digit. The length of the name (up to 21 characters) is left-justified, with blanks used for padding. The characters can be upper or lower case, and may also include numeric characters. First and last names may be given (separated by a comma placed anywhere but in the 1st and 21st location), but if only one name appears it is recorded as the surname by default. The first name in the string must be the last name or surname, followed by the first name. If only one name is given, the 21st character is a blank (the maximum size of a name is 20). Use of the string operation code allows for addition and deletion of a specific name against an extension. The system allows more than one name to be added against a station. Most situations usually have just one name associated with a station number. The String Operation code is the first byte of the status code, and may be one of these options: 1. (addition) - The name is ADDED to the current list of names against this station. If there is no name against this number, a new telephone directory entry is created. 2. (replacement) - The name is used to REPLACE the first alphabetical name against this number. All other names against this number are not altered If an invalid message is received from the PMS, the system returns an NAK. Wake Up Messages The PMS system can inform the system when to set a wake up call for a particular guest station. The wake up message has the following output format: Page 34 3CX Phone System for Windows System for Windows www.3cx.com where: t is the wake-up time. n is an extension number digit. The wake up time is specified in 24 hour time. All four characters, filled with ASCII blanks, represent a deletion of the wake up time (time format: HHmm). Example of wake up call at 23 and 30 minutes to extension 100: 2MW 2330 1003 DND Message The PMS system can inform the PBX when to set the DND status for a particular guest station by sending the following message. The DND message has the following format. Where STATUS CODE: 1 – DND ON 0 – DND OFF SP is the ASCII blank character. Example: set DND ON for extension 302 2DND1 3023 StxValue = 2 EtxValue = 3 ENQ = 5; ACK = 6; NACK = 21 Message Registration Message Each time a hotel extension makes a trunk call, the system sends a message to the PMS to update the total count of outside calls made against the guest room. No distinction is made between local and long-distance calls. Message Registration works by counting the number of meter pulses made over the duration of the call. The Message Registration message has the following output format: Page 35 3CX Phone System for Windows System for Windows www.3cx.com where: SP is the ASCII blank character. n is an extension number digit. The status code in this case is a fee or peg count. This is the one exception to the length of the status code, being 4 bytes instead of 2. Message Waiting Message The format of this message is the same for both directions. The format of the message is similar to the check in/out message where the use of binary status code provides the new state of the message waiting lamp. The Message Waiting message has the following format: where : SP is the ASCII blank character. X is the Message Waiting Lamp status code • ASCII character 1 for Lamp On • ASCII character 0 for Lamp Off n is an extension number digit. Station Restriction Message A Station Restriction message can be used to establish call restrictions. When this message is sent from the PMS to the system, it brings previously programmed Call Restrictions into effect. Note: Emergency Services (911/999) and internal calls are never restricted. The Station Restriction message has the following format: where : RST is the Station Restriction function code X is an extension or suite number digit S is one of the following status codes: . • 0 - Internal . • 1 - Local . • 2 - Long Distance StxValue = 2 EtxValue = 3 Page 36 3CX Phone System for Windows System for Windows www.3cx.com ENQ = 5; ACK = 6; NACK = 21 Maid Status Message The maid status message is used to allow cleaners to set the status of the room via the phone. The maid status message is triggered by a call from the room in question and by entering the special feature code, followed by the appropriate code to specify the status of the room. For example, dialing “*682” from the room will trigger a maid status message to the PMS that will set the status of the room to clean. The Maid Status Message has the following format: STX S T S X SP n N n n n ETX X is the maid status code SP is the ASCII blank character n is the station number digit (up to 5 digits) When a Feature code is dialled, the system sends both a Function and Status code to the PMS, and the PMS interprets the codes in the following way: Message Occupancy Condition STS1 maid present STS2 clean STS3 not clean STS4 out of service STS5 to be inspected STS6 Occupied/Clean STS7 Occupied/Not Clean STS8 Vacant/Clean STS9 Vacant/Not Clean Mini Bar Message The mini bar message allows mini bar personnel to forward mini bar usage to the PMS system via the phone. The mini bar message is triggered by a call from the room in question and by entering the special feature code, followed by the appropriate item code and the amount. For example *68 (special dial code set in the management interface) 10*2. Will send to the PMS that the room had 2 units of item code 10 Page 37 3CX Phone System for Windows System for Windows www.3cx.com If the code is correct, a success message will be played. If it‟s incorrect, an error message will be played. These messages can be configured from the interface. The correct minibar item codes can be configured from the hotel management interface. The minibar message has the following format: STX M N B SP c c c c c(30) nnnnn ETX nnnnn - the extension number cccccc - data length 30 digit, can be filled with 0-9,* '*' character has two roles: delimiter and multiplication Example: A minibar request from extension 100: [STX]MNB[SP]1*20*3*50[SP..SP][SPSP100][ETX] This means posting code item 20 (Coke) with a total of 1 pcs and item code 50 (Chocolate) with a total of 3 pieces. Page 38