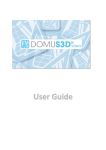
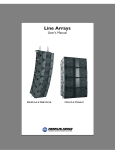
1
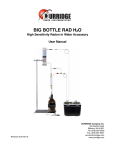
User Manual for ahEnvironmentLight - Version 2.0
© 2007-2008 by Arthur Heinz – All Rights Reserved
(Revision Version 1)
Page 1 of 37
ahEnvironmentLight for DAZ Studio
Version 2.0
and
ahRenderPlugin for DAZ Studio
Version 1.0
Above image rendered in DAZ Studio with the IBL Light as the only light source – no special shaders or
painted specular highlights where used.
User Manual for ahEnvironmentLight - Version 2.0
© 2007-2008 by Arthur Heinz – All Rights Reserved
(Revision Version 1)
Page 2 of 37
Table of Contents
ahEnvironmentLight Version 2.0.......................................................................................................................4
Featured Highlights of Version 2.0 ...................................................................................................................4
Quick Start...................................................................................................................................................5
Location of the various parts in the content tab hierarchy of DAZ Studio:..............................................5
First Steps for setting up a scene with HDR IBL lighting..............................................................................6
Short Introduction to IBL, AO and ILT.........................................................................................................7
IBL..........................................................................................................................................................7
AO..........................................................................................................................................................9
ILT...........................................................................................................................................................9
Preparing an IBL HDRI Light Probe...........................................................................................................11
Introduction...........................................................................................................................................11
Using HDR Shop 1.0 for converting IBL Images...................................................................................12
ahIBL Light - Fine Tuning the Settings.......................................................................................................14
Section: General Transforms................................................................................................................14
X, Y, Z Rotation................................................................................................................................14
Section: Light........................................................................................................................................15
Intensity and Specular Intensity.......................................................................................................15
Illumination......................................................................................................................................15
Ambient Occlusion (Diffuse Shadows).............................................................................................16
Specular Occlusion (Specular Shadows).........................................................................................16
Section: SHADER CONTROLS............................................................................................................17
Irradiance Shadingrate and Irradiance Maximum Error...................................................................17
Section: IBL SETTINGS........................................................................................................................17
IBL Color Map..................................................................................................................................17
IBL Brightness Scale.......................................................................................................................18
IBL Map Saturation..........................................................................................................................18
Section: AO SETTINGS........................................................................................................................19
AO Strength.....................................................................................................................................19
AO Minimum and Maximum Distance..............................................................................................19
AO Distribution................................................................................................................................20
AO Samples and AO Samples for Transparent Materials................................................................20
IBL Light – Presets Overview.....................................................................................................................22
Indoor - Office_001..........................................................................................................................22
Indoor - Office_002..........................................................................................................................22
Indoor - Office_003 .........................................................................................................................23
Outdoor_001....................................................................................................................................23
Outdoor_002....................................................................................................................................24
Outdoor_003 ...................................................................................................................................24
Outdoor_004....................................................................................................................................25
Outdoor_005....................................................................................................................................25
ahILT Light – Fine Tuning the Settings.......................................................................................................26
Section: Light........................................................................................................................................26
Intensity...........................................................................................................................................26
ILT Illumination.................................................................................................................................27
Section: SHADER CONTROLS............................................................................................................27
Section: ILT Settings.............................................................................................................................27
ILT Diffuse Samples and ILT Specular Samples..............................................................................27
Example Renders......................................................................................................................................28
ahRenderControl Plugin for DAZ Studio Version 1.0......................................................................................30
Introduction................................................................................................................................................30
Highlights...................................................................................................................................................30
Where to find the Plugin after Install..........................................................................................................31
Section Camera Control............................................................................................................................32
Camera.................................................................................................................................................32
Depth of Field: f-Stop and Focus(cm)...................................................................................................32
Focus on Selected Object.....................................................................................................................33
User Manual for ahEnvironmentLight - Version 2.0
© 2007-2008 by Arthur Heinz – All Rights Reserved
(Revision Version 1)
Page 3 of 37
Section Output Settings.............................................................................................................................33
Exposure (Gain) Gain and Gamma......................................................................................................34
Image Type...........................................................................................................................................35
Output Path..........................................................................................................................................35
Section Render and Message Area...........................................................................................................35
Image size............................................................................................................................................35
Image Scale..........................................................................................................................................36
Message Area.......................................................................................................................................36
FAQ................................................................................................................................................................37
Can I use the IBL or ILT Light with other lights e.g spot lights?.......................................................37
Can I use the IBL or ILT Light with other surface shaders?...........................................................37
How can I achieve that reflecting sphere that can be seen in the promo images?..........................37
Can I use other images than the provided for IBL?.........................................................................37
Will there be more HDR IBL Image presets?...................................................................................37
Why is the render control plugin not available for MAC user?.........................................................37
Contacting the author...........................................................................................................................37
User Manual for ahEnvironmentLight - Version 2.0
© 2007-2008 by Arthur Heinz – All Rights Reserved
(Revision Version 1)
Page 4 of 37
ahEnvironmentLight Version 2.0
Featured Highlights of Version 2.0
(new features since Version 1.0 are in italic lettering)
●
A comprehensive Manual with attention to details.
●
8 Ready made IBL scene presets including HDR Image light probes for immediate rendering
●
Light Intensity setting ranging from 0 to 100% for compatibility with DAZ Studio lights
●
Full rotation in X,Y,Z axis for compatibility with DAZ Studio lights
●
Full Ambient Lighting support
●
Image Based Lighting (IBL) with HDR Image support and controls for Brightness and
Saturation.
●
Ambient Occlusion with separate sample settings for transparent (e.g. Hair) and non
transparent materials for better performance control and support for three different
distribution methods
●
Specular Highlights calculation with full HDR Image support based on the settings for
Specular Strength and Glossiness of the surface materials.
●
Specular Occlusion calculation based on the settings of Specular Strength and
Glossiness of the surface materials.
●
Controls for Irradiance Shadingrate and Irradiance Maximum Error for optimizing quality versus
render time
●
Indirect Light Transport (ILT) Light for adding diffuse and specular surface to surface
light reflections
●
Bonus 1: Free scripts for advanced features of the DAZ Point and DAZSpotLight with settings for
●
Decay, Intensity Scale and Beam Distribution.
Bonus 2: Free DAZ - Studio 2.0 plugin ahRenderControl with built in support for Camera
focusing, Exposure and Gamma controls plus automated image saving (currently available for
PC only).
User Manual for ahEnvironmentLight - Version 2.0
© 2007-2008 by Arthur Heinz – All Rights Reserved
(Revision Version 1)
Page 5 of 37
Quick Start
Location of the various parts in the content tab hierarchy of DAZ Studio:
●
Studio
● Lights
● ahShaderPackage_V2
● Lights
● ahIBL Light
● ahILT Light
● ahDAZDistantLight
●
●
ahDAZPointLight
●
ahDAZSpotLight
for adding a ahIBL Light to the scene
for adding a ahILT Light to the scene
for adding an advanced DAZ Distant Light to the
scene
for adding an advanced DAZ Point Light to the
scene
for adding an advanced DAZ Spot Light to the scene
Presets for IBL Light
●
HDR IBL Pack Basic
●
Indoor
●
●
●
●
Office_001 - Office
Daylight - Indirect light from window on left.
Office_002 - Office
Daylight - Indirect light from window on left, less contrast
(sun behind some clouds).
Office_003 - Office
Daylight - Indirect light from window on left, but different
view point.
Outdoor
●
●
●
●
●
Outdoor_001
On the Roof – Winter, hazy, 1 hour before sunset – Direct
sunlight from the right.
Outdoor_002
On the Roof – Winter, hazy, 1 hour before sunset - Direct
sunlight from the left.
Outdoor_003
On the Roof Winter, hazy, 1 hour before sunset - Direct
sunlight from the back.
Outdoor_004
In the Garden Winter, clear day, afternoon - Direct sunlight
from the left and slightly from behind.
Outdoor_005
In the Garden Winter, clear day, afternoon - Direct frontal
sunlight
User Manual for ahEnvironmentLight - Version 2.0
© 2007-2008 by Arthur Heinz – All Rights Reserved
(Revision Version 1)
Page 6 of 37
First Steps for setting up a scene with HDR IBL lighting
Overview
For ease of use, the shader package includes presets which will successfully set up a HDR IBL lighted scene
without knowledge of the details. Still, it is highly recommended to read through this manual and perhaps
some background material – see section Recommended Reading for further details.
The steps are:
○
Load or create your scene and pose your models
○
Load one of the ahIBL Light Presets
○
Check your render settings
○
Select Your favorite camera and render away!
1. Load or create your scene and pose your models – and don't add any lights yet!
2. Load an IBL Light Preset
Load one of the provided presets by e.g. double clicking on the script icon Office_001 in the folder:
●
Studio/Lights/ahShaderPackage_V2/ Presets for IBL Light/HDR IBL Pack Basic:
Double Click
User Manual for ahEnvironmentLight - Version 2.0
© 2007-2008 by Arthur Heinz – All Rights Reserved
(Revision Version 1)
Page 7 of 37
3. Check your render settings
There are multiple settings that effect the render quality and the
render time greatly. Check and set the following in the Advanced
Render Tab to the values shown on the right.
Especially important are the settings for Max Ray Trace Depth and
the values Pixel Samples(X) and Pixel Samples(Y).
It is recommended to set them to the values shown on the right.
4. Select Your favorite camera and render away!
Short Introduction to IBL, AO and ILT
IBL
In the CGI world abbreviations are very much common place – almost everything is shortened to two or three
letter acronyms. CGI itself is an acronym and stands for Computer Generated Image or sometimes Imaging.
The techniques used in this shader pack are a subset of so called GI or Global Illumination techniques which
began to evolve some twenty years ago mostly for the purpose of the film industry and their special effects
departments.
A very common problem there is to integrate an CG object into real life footage. While creating and
animating such an object is one problem, the other is how to blend it in so that the audience would not be
able to tell. Unfortunately the human eye and brain are very good in detecting if something looks off in an
image. Especially if there is something to compare the CG object to the image itself like the background or
other objects nearby. Even very small variations in color or tone, inconsistent shadows or reflections or a
dozens of other details can give a CG object away easily .
One of the most fundamental steps to get it right is to light the CG object exactly the same way as it would
actually have been in the scene. There is a very elegant way to do just that. It is called IBL – yet another
acronym for Image Based Lighting.
How does it work? Well, as the name suggests one would take an image of light from the original filming
location to illuminate the CG object later on. Such an image is often called a light probe, because it is
essentially an image of all light that would fall onto a object that would be put in exact the same spot as the
camera that took that image.
Another common way to take such images is to photograph a mirrored sphere put in exactly the location
where the CG objects should be placed in the scene.
Here is such an image:
User Manual for ahEnvironmentLight - Version 2.0
© 2007-2008 by Arthur Heinz – All Rights Reserved
(Revision Version 1)
Page 8 of 37
If we wrap that image onto a cylinder we have a so called panoramic map with Latitude/Longitude layout,
which looks like this:
Now we can see that with a mirrored ball we can take an image of the complete surroundings in one single
shot.
As the image contains light information for any given angle it can be used to determine the exact amount and
color of light that a surface of the CG object would have received from that specific direction if it would
actually have been in the same spot as the mirrored ball. And that is the “magic” of IBL.
User Manual for ahEnvironmentLight - Version 2.0
© 2007-2008 by Arthur Heinz – All Rights Reserved
(Revision Version 1)
Page 9 of 37
Only one more thing. We said that we need only a single image of the mirrored ball. Well that is not exactly
true. As a single image can only hold a rather small number of intensity values we have to take about 12 to
16 images ranging from very dark to very bright and combine them together to get an accurate light probe.
This technique is called HDRI or High Dynamic Range Imaging.
Combining both methods we get what is called HDR IBL. And that is what we use in the IBL light shader
included in this package.
AO
Illuminating every surface of the CG object with the light determined from the light probe places a problem in
our hands: What to do with surfaces that do not face the outside world imaged by the light probe? Or in
other words would be shadowed by blocking objects in the scene?
Well, the IBL light probe can only provide us with the necessary lighting information for surfaces that are
directly exposed to the surrounding – so we have to have another way to determine which surfaces are
shadowed by other objects in our scene.
And that is what AO or Ambient Occlusion does. It looks for light blocking objects in our scene and uses the
gathered information to exclude surfaces from receiving light from the IBL light probe.
It is like sitting on the shaded surface and literally poking around for objects with a long stick and bandaged
eyes. Every time You hit something you know that from that direction the surface is not able to receive light.
This is exactly how AO works. It literally shoots rays in every direction to probe the environment for light
blocking objects. The more rays it shoots the more accurate the probing is.
ILT
ILT stands for Indirect Light Transport. It is another GI technique to illuminate surfaces. ILT determines how
much light a particular surface is receiving from other surfaces in the scene. It simulates light that bounces
from surface to surface in the scene – hence the indirect part in the name.
The technique behind it is somewhat similar to AO. The render engine probes the currently shaded surface
surroundings for objects and determines how much light bounces back from them onto the shaded surface.
Take this sample scene for example:
The left image was rendered without ILT. The only light that illuminates the scene is a point light simulating
User Manual for ahEnvironmentLight - Version 2.0
© 2007-2008 by Arthur Heinz – All Rights Reserved
(Revision Version 1)
Page 10 of 37
the flame of the oil lamp. So all light emanates from that one point only. Every surface that does not directly
“see” the oil lamp receives no light from it at all – hence they are rendered very, very dark or pitch black
depending on their surface materials.
Well, that is not what would happen in a real room setup. Light would bounce from the walls, the ceiling or
any other surface back into the room and then back on other surfaces and so forth.
Now look at the right image. Here we used ILT with one bounce only to simulate the indirect light from the
surfaces. Now every surface has received light – some directly from the oil lamp, others only from
surrounding surfaces. Look closely under the table or at the oil lamp itself – the lower part which is black on
the left image now is illuminated from light that bounces back from the table.
User Manual for ahEnvironmentLight - Version 2.0
© 2007-2008 by Arthur Heinz – All Rights Reserved
(Revision Version 1)
Page 11 of 37
Preparing an IBL HDRI Light Probe
Introduction
If we want to use images as IBL light probes we have to prepare them first.
There are two important things:
●
The map layout of the IBL image
●
The format of the image itself (like TIFF, JPG, PNG etc.)
There are various map layouts for IBL images, the most commonly used ones are the Mirrored Ball and the
Latitude/Longitude layout. In DAZ Studio we use the later one for environment mapping purposes which
includes IBL, AO and reflection mapping.
A properly environment map in Latitude/Longitude layout would look like this:
This image indicates which sections of the light probe will illuminate objects in the scene as seen from the
point of view of the camera. Imagine this wrapped on a giant sphere around the scene.
The image format of the image itself, the way its pixel values are written into the image file, are another
matter. As we strive to use the best images available for IBL, we use formats which can handle HDR pixel
values.
There are two very common formats: *.HDR (Radiance File Format) and *.TIF (or *.TIFF on non Windows(r)
machines).
While HDR can always handle HDR pixel values with TIFF we must be more careful. There are quite a few
sub formats and only one of them fits the bill the so called Floating Point TIFF format.
So whenever converting a *.HDR image to *.TIF we have to make absolutely sure to use Floating Point
TIFF as export format – using anything else and we would lose the High Dynamic Range.
Note:
We are using TIFF in DAZ Studio, because it is the only HDR format that the DAZ Studio GUI permits us to
browse and load via its interface. But as we use Floating Point TIFF only we don't have to compromise on
the quality of the HDR images.
User Manual for ahEnvironmentLight - Version 2.0
© 2007-2008 by Arthur Heinz – All Rights Reserved
(Revision Version 1)
Page 12 of 37
Currently there are two software packages freely available on the net for generating and/or converting HDR
images:
●
HDR Shop 1.0
(available from : http://www.debevec.com) and
●
Picturenaut
(available from : http://www.hdrlabs.com/picturenaut)
While HDR Shop 1.0 is free for non commercial usage, Picturenaut is without usage restriction at all.
Picturenaut and its plugins, is the more complex (and also more powerful) program of the two. But we will
use HDR Shop 1.0 to demonstrate the steps for converting IBL images for DAZ Studio because it still is the
easier program to use.
Using HDR Shop 1.0 for converting IBL Images
Steps for converting panoramic Radiance HDR (or most other image formats):
●
Start HDR Shop 1.0
●
Load the original image file
●
Save the image in Floating Point TIF format for DAZ Studio
Open the File Menu and choose “Open” from the list.
Se
l
ec
tR
ad
ia
nc
e
H
D
R
Fi
le
File M enu
Open
In above dialog choose the original image and click on the button Open.
User Manual for ahEnvironmentLight - Version 2.0
© 2007-2008 by Arthur Heinz – All Rights Reserved
(Revision Version 1)
Page 13 of 37
Select Floating Point TIFF
Open the File Menu and choose “Save” from the list. In the above dialog choose Floating Point TIFF – the
save dialog opens.
SAVE
Save the image under a new file name with the ending .tif. (Option: HDR TIFF (*.tif, *.tiff)).
And that's it. Now we have saved the Radiance HDR image file to a Floating Point TIFF we can use in DAZ
Studio.
User Manual for ahEnvironmentLight - Version 2.0
© 2007-2008 by Arthur Heinz – All Rights Reserved
(Revision Version 1)
Page 14 of 37
ahIBL Light - Fine Tuning the Settings
Section: General Transforms
X, Y, Z Rotation
The settings X, Y, Z Rotation behave exactly the same as the settings of the same name in the standard
lights of DAZ Studio.
Note:
In the preview window one cannot tell from which direction the light is really coming because that
information can only be obtained from the IBL light probe during rendering. So we have to do a (low)
resolution render to actually see the effects of the IBL Light
In the image series above, we can see the effect of rotating the IBL Light.
From left to right: Preview (OGL View in DAZ Studio), rendered with original orientation and rendered with
IBL light rotated 150 degrees in Y-Direction - which means to rotate the IBL light horizontally.
We can see that in the original orientation most of the light comes from the left and slightly behind the figure.
After rotating 150 degrees, the light comes from the front right direction. Note the change in brightness and
specular reflections because the figure now gets much more direct light from the sun.
User Manual for ahEnvironmentLight - Version 2.0
© 2007-2008 by Arthur Heinz – All Rights Reserved
(Revision Version 1)
Page 15 of 37
Section: Light
Intensity and Specular Intensity
The Intensity setting behaves exactly as the setting of the same name in the standard lights of DAZ
Studio. It controls the amount of light which the light should add to the scene.
Reasonable values ranges from 0% - which is the equivalent of switching the light off and 100% which sets it
to full intensity.
If you have additional lights in the scene the scene may get too bright. You should adjust the intensity for
any of the lights to correct for this.
The Specular Intensity setting controls the strength of the calculated specular highlights.
Because most surface shaders are set up to cope well with the standard Studio lights, this might cause
specular highlights under IBL lighting to be either calculated to weak or to strong compared to the original
DAZ Studio lights.
This is mainly caused by the fact that HDR IBL Lighting has a much more “real“ light intensity distribution and
is generally much more accurate with the actual geometry of the original light sources.
For instance, while the origin of a traditional DAZ Studio spot light is mathematically just a point in space the
same spot light in a IBL image has a real dimension thus will create a broader and more natural highlight.
To compensate for this, you can go either of two ways: Alter the surface shader settings to more “real world”
values or compensate in the light shader – exactly what the Specular Intensity setting is for.
Note:
The method to compensate in the IBL light shader is inferior to changing the settings of the surface shader.
So if the IBL light is the primary light source in your scene it is recommended to alter the surface shaders
settings for Glossiness and/or Specular Strength – it will get closer to a natural look (if that is to be desired
for the image in the first place).
Illumination
This setting behaves exactly as the same the standard lights of DAZ Studio. Possible settings are:
●
●
●
●
On
Diffuse Only
Specular Only
Off
Adds diffuse IBL and specular IBL to the scene.
Adds diffuse IBL to your scene.
Adds specular IBL to your scene.
Switches the light completely off.
Note:
The necessary information for computing specular highlights and reflections (glossiness near or at 100%) is
automatically read from the surface shader. So no special preparation must be taken.
User Manual for ahEnvironmentLight - Version 2.0
© 2007-2008 by Arthur Heinz – All Rights Reserved
(Revision Version 1)
Page 16 of 37
The image series above shows from left to right: Diffuse Only, Specular Only and On (both).
Ambient Occlusion (Diffuse Shadows)
Similarly to the standard lights from DAZ Studio, the ahIBL Light has a shadow control setting.
However as the internal mechanics are different, compared to the standard DAZ Studio lights, there is only
an "On" and "Off" value. See section “AO Settings” for further details.
Specular Occlusion (Specular Shadows)
Similar to the above, but calculates the shadows for the specular portion of the light.
Possible Settings are:
●
●
Off
use AO
●
Advanced
No Specular Occlusion is calculated.
Uses the same shadow solution as for Ambient Occlusion, which is very crude but
sometimes a good enough approximation. The main advantage is that it does
not cost additional render time. Note: Ambient Occlusion must be switched on.
Calculates its own shadow solution depending on the specular settings of the
shaded surface material. This settings results in a much more accurate shadowing
at the cost of some additional render time.
Note:
In very rare cases Advanced Specular Occlusion can almost double the render time compared to the
simpler “use AO” option.
User Manual for ahEnvironmentLight - Version 2.0
© 2007-2008 by Arthur Heinz – All Rights Reserved
(Revision Version 1)
Page 17 of 37
In the image series above, we can see small but distinctive differences in the three options. From left to right:
Specular Occlusion Off, use AO and Advanced.
Most noticeable is the difference on the sphere. In the first two images the reflection from the figure is mixed
with the reflection calculated from the IBL image. The color from the table is shining through. In the image on
the right the reflection is calculated correct – the areas from the figures reflection are now excluded from the
reflections calculated from the IBL image.
Section: SHADER CONTROLS
Irradiance Shadingrate and Irradiance Maximum Error
Both settings control the accuracy in which AO and ILT is calculated.
Irradiance Shadingrate controls how often AO is calculated on a specific surface.
Setting it to a value of 1 instructs the render engine that AO should be determined at every shading point in
the scene. This is most often overkill and slows down rendering to a crawl.
“Sane” values for most DAZ Studio scenes ranges from 1024 to 256 which will determine the values only
every 1024th and 256th shading point respectively.
For very close shots or high image sizes, settings may have to be be lowered if the image starts to look
blotchy – but it is recommended to try higher values and have a look on the outcome first.
Because the right setting is highly dependent on the scene, the resolution of the figures, and image size, it is
very hard to give recommendations. But rough estimates for a V4 figure and an image size of 750x750
pixels are:
●
●
●
For wide area shots:
For medium area shots:
For close up shots:
1024
512
256
to 512 (a complete room for instance)
to 256 (a human figure from the waist up for instance)
to 64 (a human single face for instance)
Note:
It is strongly recommended to try higher sampling rates for AO and ILT first before lowering the value for
irradiance shadingrate. It is much cheaper in terms of render time. So try sampling rates of 128 samples or
more first ,and then, as a last option consider lowering the irradiance shadingrate!
Irradiance Maximum Error controls the amount of interpolation between shading points on the shaded
surface. Higher settings instructs the render engine to calculate interpolation more exactly – at the expense
of some render time.
Setting it to values of 0.5 or 0.75 is recommended. A value of zero turns interpolation completely off which
may lead to blotchy images.
Section: IBL SETTINGS
IBL Color Map
This is the actual IBL light probe image.
If the color setting is set to any other color than pure white (RGB 255,255,255) then this color is multiplied
with image color before it is used as IBL image. I.e. it can push an existing IBL image towards a certain hue.
User Manual for ahEnvironmentLight - Version 2.0
© 2007-2008 by Arthur Heinz – All Rights Reserved
(Revision Version 1)
Page 18 of 37
Note that the intensity is also changed, so you might have to compensate with the IBL Brightness Scale
setting – see below.
Note 1:
It is not recommended to use blurred images with the ahIBL light.
While other implementations are dependent on such external blurring for correct lighting calculation the
ahILT light takes care of such things by itself. In doing so it is able to calculate a much better lighting
solution.
Note2:
If no IBL image is given, the ahIBL Light simulates the IBL image by calculating a sphere around the scene
of uniform color and intensity. In this way the ahIBL Light can be used without any image at all as a uniform
fill light in combination with other lights.
Note3:
If You use Your own IBL HDR images, or download some from the Net, then they may have to be properly
prepared before they can be used as light probe. First they have to be in what is called Latitude/Longitude
layout. Secondly, for the sake of Studio they also have to be in TIFF format. For HDR Images it should be a
Floating Point TIFF image to preserve the full range of intensity values. See section “Preparing a Light
Probe” for more information on that matter.
IBL Brightness Scale
Every IBL image contains its own amount of light intensity values. So some of them would appear very dark
or very bright in comparison with the other light sources in DAZ Studio.
In fact it depends heavily on the real light situation at the location they were taken and on the technique
used to combine the single shots into an actual HDR image.
To counterbalance for that, every IBL image will be multiplied with the IBL Brightness Scale value before
calculating the actual brightness of the light.
The exact values can range widely. Some images need values as low as 0.05 others a value of 250 or more.
Unfortunately if the value is unknown the only way to get it is to experiment with a simple scene and trying
various values.
Note:
The light presets included in this package will set the correct Brightness Scale values for their IBL images
automatically.
IBL Map Saturation
IBL images, especially HDR images taken at real locations, tend to have very saturated lights and shadows.
While this is scientifically correct it may not look that good in your rendered image.
For instance:
An HDR image taken on steel blue sunny afternoon on a green meadow will produce very bluish shadows on
surfaces pointing away from the sun and also very greenish shadows on the surfaces pointing towards the
ground.
While the same effect can be seen in many real life photographs it is seldom desired. In fact professional
photographers, if they choose to take a photograph on such a location, use white or even sometimes
colored reflectors to compensate.
Fortunately in CGI we have much easier controls for such matters. The IBL Map Saturation setting will
desaturate the image if needed and therefore colored shadows can be corrected.
User Manual for ahEnvironmentLight - Version 2.0
© 2007-2008 by Arthur Heinz – All Rights Reserved
(Revision Version 1)
Page 19 of 37
Settings:
If IBL Map Saturation is set to 1.0 it has no effect on the image while a setting of 0.0 the image will be
converted to black and white before being used as light probe.
In the image series below the effect of the saturation setting is shown. From left to right: 100%, 25% and 0%
Saturation – For better comparison: The floor plane's surface color is set to a uniform light gray.
Section: AO SETTINGS
AO Strength
If the shadows calculated by AO seem too strong, this setting can be set to lower values to lighten them up
or vice versa to higher values for darkening them.
Note:
A common reason shadows do not appear natural e.g. too dark, is a wrong gamma correction setting.
AO Minimum and Maximum Distance
These settings control at what distance the cast rays are starting and ending while probing the scene
blocking objects.
In other words the rays will start at a point exactly the minimum distance above the surface being shaded
and will end at exactly the distance given in the maximum distance setting. In DAZ Studio the unit for
distances is set to centimeters.
A common way to use the Maximum Distance setting is to exclude bounding objects like walls or other
structures that should not shadow the surface.
Note:
If minimum distance is set too low the surface being shaded will cast its own shadow on itself. This is the so
called self shadowing effect and may occur if the surface shader involves some kind of displacement or
bump mapping.
In this case gradually increase the value of the minimum distance setting in very low steps until no more self
shadowing occurs or set the bump or displacement strength to a lower value.
User Manual for ahEnvironmentLight - Version 2.0
© 2007-2008 by Arthur Heinz – All Rights Reserved
(Revision Version 1)
Page 20 of 37
AO Distribution
This setting controls how the probing rays are cast while probing the environment for blocking objects.
●
●
●
The standard setting is “Standard(Cosine)“ which will cast more of the probing rays in the direction in
which the surface normal is oriented. This setting is also the one that needs the least number of rays
cast (AO Samples) to produce even looking shadows.
The “Uniform” setting will cast probing rays equally distributed in every direction resulting in a more
accurate probing. But as more rays are cast to the edge of the probed area the overall density of the
cast rays gets lower. So this settings sometimes needs a higher number of AO Samples to produce
even shadows compared to the “Cosine” setting.
The “IBL Map” setting tries to determine the most likely direction from which an occlusion occurs
from the given IBL image and cast probing rays primarily in that direction. This results in stronger,
more natural shadows – especially with IBL images that are taken in broad sunlight.
In the image series below the differences are very hard to detect – but they are there – most noticeable at
the chest area. (From left to right: Cosine, Uniform, IBL Map)
Note:
The differences between the distribution settings are most likely only visible by direct comparison of the
resulting images and are often hard to detect. General rule is, the higher the IBL image's dynamic range, the
bigger the difference in the resulting shadows.
Also not all HDR IBL images are equally suitable for IBL Map distribution and some may even result in very
strange shadows.
AO Samples and AO Samples for Transparent Materials
These settings control how many probing rays are cast to detect light blocking objects.
For test rendering the recommended settings are 8 or 4 samples. This will give You good enough shadows
to determine the outcome of the final render.
For final rendering, settings up to 512 samples for non transparent materials are considered normal.
Because probing for transparent surfaces takes very long to render you may want to set the number of
samples for transparent material to considerably lower values like 4 or 8.
User Manual for ahEnvironmentLight - Version 2.0
© 2007-2008 by Arthur Heinz – All Rights Reserved
(Revision Version 1)
Page 21 of 37
Note:
The ahIBL Light recognizes transparent materials automatically while rendering. No special marking or
tagging is required.
The image series below shows the effect of increasing the number of AO samples. From left to right: 8, 16,
64 AO Samples:
User Manual for ahEnvironmentLight - Version 2.0
© 2007-2008 by Arthur Heinz – All Rights Reserved
(Revision Version 1)
Page 22 of 37
IBL Light – Presets Overview
Note: The images below are low dynamic range images recalculated from the original HDR images.
The contrast is set purposely low to show the darker areas better.
Indoor - Office_001
Daylight - Indirect light from the window on left.
Indoor - Office_002
Daylight - Indirect light from the window on left, less contrast (sun behind some clouds).
User Manual for ahEnvironmentLight - Version 2.0
© 2007-2008 by Arthur Heinz – All Rights Reserved
(Revision Version 1)
Indoor - Office_003
Daylight - Indirect light from the window on left, but different view point.
Outdoor_001
On the Roof – Winter, hazy, 1 hour before sunset – Direct sunlight from the right.
Page 23 of 37
User Manual for ahEnvironmentLight - Version 2.0
© 2007-2008 by Arthur Heinz – All Rights Reserved
(Revision Version 1)
Outdoor_002
On the Roof – Winter, hazy, 1 hour before sunset - Direct sunlight from the left.
Outdoor_003
On the Roof Winter, hazy, 1 hour before sunset - Direct sunlight from the back.
Page 24 of 37
User Manual for ahEnvironmentLight - Version 2.0
© 2007-2008 by Arthur Heinz – All Rights Reserved
(Revision Version 1)
Page 25 of 37
Outdoor_004
In the Garden. Winter, clear day, afternoon - Direct sunlight from the left and slightly from behind.
Outdoor_005
In the Garden. Winter, clear day, afternoon - Direct frontal sunlight
User Manual for ahEnvironmentLight - Version 2.0
© 2007-2008 by Arthur Heinz – All Rights Reserved
(Revision Version 1)
Page 26 of 37
ahILT Light – Fine Tuning the Settings
Note1:
An ILT Light can never be used alone. As it calculates light that bounces off surfaces, those surfaces have
to be lit by something else first! Either use one or more DAZ-Studio standard lights or an ahIBL Light as
primary light source and then add an ahILT Light.
Note2:
ILT is by far the most render time consuming feature yet – BUT it is currently the only way in DAZ-Studio to
calculate indirect light that bounces between surfaces.
On a personal side note: I rather would fake it with additional fill lights than try to calculate it. But on the
other hand it adds remarkable realism to the final image.
Note3:
Don't forget to check your render settings!
Especially important are the settings for Max Ray Trace Depth and
the values Pixel Samples(X) and Pixel Samples(Y).
It is recommended to set them to the values shown on the right.
In terms of ILT the Max Ray Trace Depth is the number of light
bounces which are calculated by the ILT Light. So be very careful
here. Render time is increasing quadratically with every bounce of
light!
Section: Light
Intensity
The Intensity setting behaves exactly the same as the setting of the same name in the standard lights of
DAZ Studio. It controls the amount of light which ILT should add to the scene.
Reasonable values range from 0% - which is equivalent to switching ILT off and 100% which sets it to full
intensity.
Note:
To properly light a scene with ILT it is important to lower the intensity of the other lights in the scene
accordingly. Say ILT Intensity is set to 25% the other lights should be set to 75% intensity to compensate for
the additional light from ILT.
User Manual for ahEnvironmentLight - Version 2.0
© 2007-2008 by Arthur Heinz – All Rights Reserved
(Revision Version 1)
Page 27 of 37
ILT Illumination
This setting behaves exactly as the illumination setting in the standard lights of DAZ Studio. Possible settings
are :
●
●
●
●
On
Diffuse Only
Specular Only
Off
Adds diffuse ILT and specular ILT to the scene.
Adds diffuse ILT to your scene.
Adds specular ILT to your scene.
Switches ILT off completely.
Section: SHADER CONTROLS
See same section under ahIBL Light – the settings and their behavior are identical.
Section: ILT Settings
ILT Diffuse Samples and ILT Specular Samples
This setting controls how many probing rays are cast to detect light from other surfaces in the scene.
For test rendering the recommended setting is 4 or 8 samples. This will give a good enough approximation
to determine the outcome of the final render.
For final rendering settings up to 1024 samples are considered normal.
Note:
For most purposes setting the samples for specular ILT to about half (or lower) the value as for diffuse ILT
sufficient.
User Manual for ahEnvironmentLight - Version 2.0
© 2007-2008 by Arthur Heinz – All Rights Reserved
(Revision Version 1)
Page 28 of 37
Example Renders
Note:
Unless stated otherwise, all lights were used with their default settings from the presets.
In the image series above the IBL light was used for outdoor lighting. Left image shows the IBL Light alone.
On the other images it was combined with a single standard distant light to achieve stronger shadows from
the sun.
The only trick used here was to match the distant lights direction to the suns location in the IBL image. The
IBL light used was the “ahOutdoor_005” light preset which was easier to match because the sun stood
directly behind the photographer when the light probe image was taken. So the light direction from the IBL
light matches the suns horizontal angle position. The height was about 25-30 degrees above the horizon so
the assisting distant light must have the same Y-Direction as the IBL light and must also have a elevation of
about 30 degrees on the X-Direction.
In both images the IBL light was used with the default settings, using diffuse and specular lighting, and AO
samples set to 64. The distant light was set to calculate raytraced shadows with 10% softness.
By the way, I salute Stonemason for his superb craftsmanship he showed again in his latest work I used in
the renders above. It is called “Streets Of The Mediterranean” and is available in the DAZ store - and no, I
don't get anything from mention it here.
User Manual for ahEnvironmentLight - Version 2.0
© 2007-2008 by Arthur Heinz – All Rights Reserved
(Revision Version 1)
Page 29 of 37
The left image was made with the IBL light as primary light source and the ILT light to calculate diffuse
reflections from the walls and other objects in the scene. Note the color bleeding from the wooden cabinet
onto the neighboring walls. The settings used were, 128 samples for AO and 256 samples for ILT diffuse.
The preset used in this render was “ahOutdoor_005”.
The two images on the right are portrait renders with the IBL light alone. Used preset where “ahOffice_002”.
Settings were 64 samples for AO and 16 samples for AO on transparent materials.
In the image on the left the IBL light
preset “ahOutdoor_4” was used for
diffuse and specular lighting. AO
Samples were set to 128 samples.
User Manual for ahEnvironmentLight - Version 2.0
© 2007-2008 by Arthur Heinz – All Rights Reserved
(Revision Version 1)
Page 30 of 37
ahRenderControl Plugin for DAZ Studio Version 1.0
Introduction
The idea for this plugin is as old as my use of DAZ Studio. You see, I do a lot of testing and the two things I
went furious over and over again, was when I forgot to save images or forgot to change the camera back to
my main camera after adjusting a pose and hitting the render button again to soon.
It also happens to be the first plugin I ever coded for DAZ Studio. So please don't expect miracles. But as it
proofed invaluable to me in the last few month while developing new lights and shaders for DAZ Studio I
decided to give it to You as a addon freebie to my ahEnvironmentLight Version 2.0.
Have fun rendering!
Arthur.
Highlights
●
Camera Control which automatically switches to your render camera and back.
●
Depth of Field and f-Stop control with Autofocus Button to focus on the currently selected object.
●
Controls for Gamma and Exposure
●
Autosave for rendered images
●
Controls for easy rendering of different image sizes e.g. 25% size for test renders
User Manual for ahEnvironmentLight - Version 2.0
© 2007-2008 by Arthur Heinz – All Rights Reserved
(Revision Version 1)
Page 31 of 37
Where to find the Plugin after Install
You can open the render plugin by selecting View->Tabs->ahRenderControl 1.0.8 from the main menu.
After the plugin window has opened You can drag an drop it into any sidebar as You would with other
windows.
User Manual for ahEnvironmentLight - Version 2.0
© 2007-2008 by Arthur Heinz – All Rights Reserved
(Revision Version 1)
Page 32 of 37
Section Camera Control
Camera
Just select which camera You want to use for rendering.
The point of doing this is that even after you have changed the viewport to another camera or view, this
options switches back to your render camera while rendering and back to the view You had before after
finishing.
Depth of Field: f-Stop and Focus(cm)
These controls behave more or less like as the the controls on real camera lens. Focus sets the distance at
which the camera lens is focused. Any object that is not exactly in that distance will be more or less blurred
depending on the f-Stop setting which controls the depth of field.
Setting f-Stop to OFF results in every object rendered sharp, ignoring their distance to the camera which is
the default in DAZ Studio.
Note:
Contrary to a real diaphragm the f-Stop control does not effect the brightness of the image, only the amount
of depth of field. This is done for convenience, as You wold have to adjust exposure every time You alter
the f-stop setting.
In the image series above You can see how the focus point effect the outcome of the image - from left to
right: Depth of field switched off, f-Stop 4 and focused on the face, f-Stop 4 and focused on the hand.
Note:
As it is with real world lenses the focal length and distance to the object is also very important. Longer
lenses for example need higher f-Stop values to produce the same amount of depth of field as wider
User Manual for ahEnvironmentLight - Version 2.0
© 2007-2008 by Arthur Heinz – All Rights Reserved
(Revision Version 1)
Page 33 of 37
lenses.
Note:
It the blurred parts of the image appear grainy, go to
your advanced render tab and set a higher value for
Pixel samples (X) and Pixel samples (Y).
Focus on Selected Object
As it is not easy to measure exact distances in DAZ Studio the button “Focus on Selected Object” calculates
the distance between the camera and the currently selected object in the scene. For example for the right
image above the hand was selected and then the focus was calculated and set by clicking on the “Focus on
Selected Object” button.
Note:
The focus distance calculation can only focus on the midpoint of the selected object and NOT on the
surface. So sometimes small manual adjustments are necessary.
Also keep in mind, that the depth of field effect is only visible after rendering the image.
Section Output Settings
User Manual for ahEnvironmentLight - Version 2.0
© 2007-2008 by Arthur Heinz – All Rights Reserved
(Revision Version 1)
Page 34 of 37
In this section You'll find the two most important settings You ever have encountered in DAZ Studio – no
kidding! Namely Exposure (Gain) and Gamma. Both settings can change the appearance of your image
dramatically.
Possibilities range from “High Key” to “Low Key” and from underexposed to overexposed and anything
between.
Exposure (Gain) Gain and Gamma
Exposure controls the brightness of the rendered image. The standard setting 1.0 is Studios default setting.
Possible Settings (examples):
●
1.0
Studios standard setting
●
0.5
Sets exposure one stop down, which means half the exposure time and a darker image.
●
2.0
Sets exposure one stop up, which means doubling the exposure time and a brighter image.
The images series below was rendered with the 0.5, 1.0 and 2.0 setting:
Gamma controls the “lightness” of the image, which is technically incorrect. You can also say contrast of the
image which is not correct either. But in layman's terms it is fair enough.
If you really want to now whats behind it I recommend the following link:
Possible Settings (examples):
●
1.0
Studios standard setting
●
0.8
Very “hard” image, darker shadows – towards “Low Key Lighting”
●
1.2
“Lighter” image, less dark shadows - towards “High Key Lighting”
The images series below was rendered with the 0.6, 0.8, 1.0,1.2,1.4 gamma setting and exposure set to 1.0:
User Manual for ahEnvironmentLight - Version 2.0
© 2007-2008 by Arthur Heinz – All Rights Reserved
(Revision Version 1)
Page 35 of 37
Image Type
Only PNG images are supported at this time to preserve the alpha channel in your rendered images.
Possible Settings are:
●
*.png (PNG)
Uses the Portable Network Graphics format to save the images after
the render is finished.
●
OFF
No images saving is done - You are on your own!
Output Path
This is the folder to witch the rendered images are saved. An image name is automatically chosen from your
date and time setting from your computer. So it is easy to sort them chronologically.
To change the folder just click on the button “Output Path”. The standard file dialog will open and let You
choose a new folder.
Section Render and Message Area
Image size
The width and height of the image to be rendered in pixel.
User Manual for ahEnvironmentLight - Version 2.0
© 2007-2008 by Arthur Heinz – All Rights Reserved
(Revision Version 1)
Page 36 of 37
Note:
The aspect frame of the camera window is not changed by this parameter and it does only set the
dimension of the image which is rendered by the plugin when clicking on the button “Start Render”. To set
the aspect frame change the setting of under “Dimensions” in the General Render Tab.
Image Scale
If you want to render your image smaller or bigger You can set here a new size in percentage of the width
and height set above. Very convenient for quick test renders.
Message Area
Here the render plugin prints out statistics information and error messages.
User Manual for ahEnvironmentLight - Version 2.0
© 2007-2008 by Arthur Heinz – All Rights Reserved
(Revision Version 1)
Page 37 of 37
FAQ
Can I use the IBL or ILT Light with other lights e.g spot lights?
Yes, absolutely. Any combination with the DAZ Studio lights will work.
Can I use the IBL or ILT Light with other surface shaders?
Yes, absolutely. Any combination with the standard DAZ Studio shaders will work. And of course it works with
the shaders from the ahEnvironment-ShaderPack either Version 1.0 or 2.0.
How can I achieve that reflecting sphere that can be seen in the promo images?
There is a little trick involved to get the standard Studio surfaces to reflect both
the IBL image and the reflection.
As the IBL shader only sees the specular part of the shader do this
Set diffuse and specular color to white, diffuse strength to 1%, glossiness to 100%, specular strength to
10000%(!) and reflection strength to somewhere between 50-100%.
For optimal results choose Advanced Specular Occlusion in the IBL light.
Can I use other images than the provided for IBL?
Yes, any image can be used provided it is in one of the following image formats: JPEG (8bit), PNG(8bit),
TIFF(8bit) and HDR-TIFF (Floating Point).
For optimal results the image should be HDR and in Floating Point TIFF mapped to latitude/longitude
layout. See section: Preparing a IBL HDRI Light Probe and Short Introduction to IBL,AO and ILT for
more information.
There are plenty of sources on the net or You can create Your own. As starting point I recommend the
following links:
●
http://www.debevec.com
●
http://www.debevec.org
●
http://www.debevec.org/IBL2003/Vitz-HDRIBL-SIGGRAPH2003.pdf
Will there be more HDR IBL Image presets?
Yes, more sets with matching backgrounds in various location are planned.
Why is the render control plugin not available for MAC user?
Unfortunately I have no experience in programming for the MAC-OS nor do I have access to MAC hardware.
I am still waiting for a volunteer to come forward.
Contacting the author
You can reach me any time via eMail: [email protected] or at the DAZ community forums (
www.daz3d.com) under my nickname pendragon. If I do not reply promptly, please take into account the time
difference. My timezone is GMT +1.