1
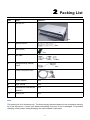
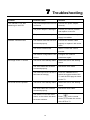
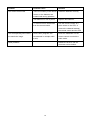
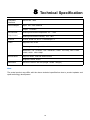
ZXV10 B700
IP Set-Top Box
User Manual
Version 2A
ZTE CORPORATION
ZTE Plaza, Keji Road South,
Hi-Tech Industrial Park, Nanshan District, Shenzhen,
P. R. China
518057
Tel: (86) 755 26771900
Fax: (86) 755 26770801
URL: http://ensupport.zte.com.cn
E-mail: [email protected]
LEGAL INFORMATION
Copyright © 2008 ZTE CORPORATION.
The contents of this document are protected by copyright laws and international treaties.
Any reproduction or distribution of this document or any portion of this document, in any
form by any means, without the prior written consent of ZTE CORPORATION is prohibited.
Additionally, the contents of this document are protected by contractual confidentiality obligations.
All company, brand and product names are trade or service marks, or registered trade or
service marks, of ZTE CORPORATION or of their respective owners.
This document is provided “as is”, and all express, implied, or statutory warranties, representations or conditions are disclaimed, including without limitation any implied warranty of
merchantability, fitness for a particular purpose, title or non-infringement. ZTE CORPORATION and its licensors shall not be liable for damages resulting from the use of or reliance
on the information contained herein.
ZTE CORPORATION or its licensors may have current or pending intellectual property rights
or applications covering the subject matter of this document. Except as expressly provided
in any written license between ZTE CORPORATION and its licensee, the user of this document
shall not acquire any license to the subject matter herein.
ZTE CORPORATION reserves the right to upgrade or make technical change to this product
without further notice.
Users may visit ZTE technical support website http://ensupport.zte.com.cn to inquire related
information.
The ultimate right to interpret this product resides in ZTE CORPORATION.
Revision History
Revision No.
Revision Date
Revision Reason
R1.0
20090819
First Edition
R1.1
20100415
Parameters Revised
Serial No. sjzl20094963
Publishing Date: 20100415
Contents
1 Safety Instruction.................................................................................. 2
2 Packing List .......................................................................................... 3
3 Panels ................................................................................................... 4
Front Panel .............................................................................................. 4
Rear Panel ............................................................................................... 5
4 Connecting Up ...................................................................................... 6
Connecting Network .................................................................................... 6
Video and Audio Connections ......................................................................... 6
Power ON ................................................................................................ 8
Upgrading Automatically ............................................................................... 8
5 Remote Control..................................................................................... 9
STB Remote Control.................................................................................... 9
TV Learning Buttons .................................................................................... 10
6 Operation Guide.................................................................................... 11
Standby/Working Status................................................................................ 11
EPG Operations......................................................................................... 11
Common Operations During Watching Programs ................................................... 12
Controlling Program Playing ........................................................................... 12
Watching TSTV Program............................................................................... 13
7 Troubleshooting.................................................................................... 14
8 Technical Specification ......................................................................... 16
9 Text Input .............................................................................................. 17
Input via remote control ................................................................................ 17
Input via soft keyboard ................................................................................. 18
10 Wireless Network Card Usage Guidelines........................................... 20
Notice..................................................................................................... 20
Operation Steps ......................................................................................... 20
Checking Signals........................................................................................ 21
Troubleshooting ......................................................................................... 22
1
1
Safety Instruction
Special Note
�
If there is a plastic covering wrapping the device, remove the covering before using the device
for normal ventilation.
�
Please use the power adapter provided along with the device.
�
Make sure the position of the power switch on the rear panel of the device before usage.
�
Make sure that the batteries are installed correctly in the remote control.
�
Do not change the structure design and safety design of the device.
Precaution
�
Make sure that the electric voltage meets the device requirements. Make sure that the electric load of power outlet or power cable meets the requirements. Check the cables periodically.
Please replace the damaged cable immediately.
�
Make sure there is enough room for heat exhaustion from the device.
�
Place the device on a flat surface. Do not place any heavy object on the device.
�
Keep the device away from heat and water sources. Do not expose the device to water, rain,
and sunshine.
�
Power off and pull out the power plug if the device will not be used for a long time.
�
After power off, wait at least 15 seconds between power off and next power-on.
Service
Do not disassemble the device. Contact your service provider when the following problems occur:
�
The power cable or power socket is damaged.
�
If there is any liquid leaking into the device.
�
Fail to run normally even after following the instructions.
�
The device is damaged.
2
2
NO.
Item
1
Set-top box
Packing List
Remarks
One
2
Remote control
One
3
AAA battery
Two
4
AV cable
One
5
Straight-through network
cable
One
6
YPbPr component cable
7
Power adapter
One
8
User manual
One
9
Qualification certificate/WA
One
RRANTY
10
Packing list
One
Note:
This packing list is for reference only. The items actually delivered depend on the companion packing
list of the set-top box. Contact your dealer immediately if the part is lost or damaged. For possible
changing of the product, keep packaging box and available components.
3
3
Panels
Front Panel
Figure 1 Front Panel
NO.
Description
1
Standby button
2
Running status indicator
3
�
Red: Standby state
�
Green: running normally
�
Yellow: Fault
�
OFF: Not powered ON
Connection status indicator
�
Green: Normal network connection
�
OFF: Disconnected or network failure
4
Infrared indicator (Green). It flashes when the STB receives signals from the remote control
5
MENU button. Its function is the same as that of remote control
6
Direction buttons. Their functions are the same as those of remote control
7
OK button. Its function is the same as that of remote control
4
Rear Panel
Figure 2 Rear Panel
NO.
Description
1
Ethernet interface, used to connect to the external network
2
USB ports
3
HDMI output interface
4
Component video output interfaces
5
Composite video output interface
6
Audio output interfaces (left channel and right channel)
7
Digital audio output interface
8
personnel before using other types of power adapter
9
Power switch: Make sure the power switch is turned on after the STB is powered on
Power socket: Make sure to use the delivered +12V power adapter. Consult technical
5
4
Connecting Up
Connecting Network
This section introduces the network connection methods for STB. Select one method to connect according to the on-site condition.
Note:
The wireless network card is designated to W200C USB wireless network card provided by ZTE. It is
recommended to use ZXV10 W300 residential gateway device of ZTE to get the best performance.
Video and Audio Connections
Connecting Standard Definition Interface
1. Connect the R and L interfaces on STB to the corresponding interfaces on TV with AV cables
(red and white).
2. Connect the CVBS interface on STB to video input interface on TV with AV cable (yellow), as
shown in Figure 3.
6
Figure 3 Standard Definition Interface
Connecting High Definition Interface
ZXV10 B700 provides two high definition output interface types. Select one of the following methods
to connect with video/audio devices (such as TV, stereo).
1. Connect the R and L interfaces on STB to the corresponding interfaces on TV with AV cables (red
and white). Connect the Y-Pb-Pr component video output interfaces on STB to the corresponding
interfaces on TV with YPbPr component cable, as shown in Figure 4.
2. Connect the HDMI interface on STB to the corresponding interface on TV with HDMI cable, as
shown in Figure 4.
Figure 4 High Definition Interface
Note:
HDMI output interface simultaneously generates uncompressed high-definition video and multichannel audio data. One HDMI data cable is capable of conveying both video and audio data.
7
Connecting Digital Audio
Figure 5 Digital Audio Output
Power ON
1. Make sure that all cables are connected correctly.
2. Make sure that all devices are powered by mains.
3. Turn on the power switch on the TV.
4. Turn on the power switch on the ZXV10 B700.
5. Press TV/AV button to switch the system mode of TV until the EPG page is shown on TV.
Upgrading Automatically
The ZXV10 B700 can automatically connect to the server on each power-on. The ZXV10 B700 can
automatically check whether an upgrade is necessary. The upgrade will start automatically if necessary. The upgrade takes three to five minutes. Do not perform any operation during this period.
8
5
STB Remote Control
Figure 6 shows the STB remote control.
Figure 6 STB Remote Control
9
Remote Control
Note:
The remote control is powered by two AAA batteries. Insert two AAA batteries into the remote control
according to the polarity instruction displayed on it. During the operation, point the front part of the
remote control to the infrared receiving area on the STB.
TV Learning Buttons
The remote control has four buttons (Power, TV/AV, VOL +, VOL-) having TV learning functions.
These four corresponding functions on TV remote control can be operated on the STB remote control
through learning. Users can perform some operations for both TV and STB by only using the remote
control of STB.
Learning Receiver
Operation Steps
Window
1. Press SET for about 3 seconds until the learning status indicator turns
into solid green, which signals the starting of the learning process.
2. Point the remote control of the target learning TV to the learning receiver
window. Press the target learning button on the TV remote control (e.g.,
the Power button for TV), then the learning status indicator changes from
solid green to solid red.
3. Press the target button on the STB remote control (e.g., Power button),
then the learning status indicator changes from solid red to solid green,
which signals that the learning process is successful.
4. Repeat step 2 and step 3 to learn other buttons.
5. After completing the learning process, do not perform any operations until
the learning status indicator is off, which signals that the learning inform
ation is saved successfully.
Note:
If the remote control of STB fails to control TV after learning, please learn again according to the
above steps.
10
6
Operation Guide
Standby/Working Status
Switch the STB between the standby and working status.
Switch the TV between the standby and working status.
Switch the system mode of the TV.
EPG Operations
Press this button on the remote control to enter the EPG home page.
Press direction buttons (up, down, left, and right) on the remote control to
select an EPG item (such as button, text box, column). Press OK on the
remote control to confirm the selection.
When EPG contents are organized in multiple levels or pages, you can perform page flipping operation
via the following buttons.
Go to the upper level if the current level is not the top-most level.
Go to the previous page if there are multiple pages in the same level.
Go to the next page if there are multiple pages in the same level.
Use the following buttons to switch program mode and open the required page directly.
Enter live TV program.
11
Enter TVOD program.
Enter VOD program.
Enter information surfing program.
Enter application program.
Common Operations During Watching Programs
Use the following buttons to control the volume.
Switch between different audio channels (left channel, right channel, stereo).
Turn on/off the volume of the STB.
Increase/decrease the output volume of the STB.
Increase/decrease the output volume of the TV.
Use the following buttons to switch channels when watching programs.
Display the channel number on the screen. Then you can enter the channel number
to switch to that channel.
Switch the channel in order.
Controlling Program Playing
When a program is playing (such as live TV, VOD, TSTV), you can use the following buttons to control
the progress of the program.
Press this button to pause the program; or press it again to resume the program.
Press this button to open a dialog box. Stop playing the program according to the
prompt information in the dialog box.
12
Press this button to operate fast forward when playing VOD or TSTV program.
Press this button to operate fast backward when playing VOD or TSTV program.
While watching the program organized in chapters, press this button to go to the next
chapter.
While watching the program organized in chapters, press this button to back to the
previous chapter.
Press this button to pop up the program progress bar. You can use the left and right
direction buttons to adjust the progress of the program until the interested starting
point is reached. Then press OK on the remote control to play the program from the
interested point.
Press this button to display the information of current channel or program when the
program is playing.
Watching TSTV Program
When watching the live program, you can utilize the time-shifted function of the STB to watch the
program content before the current time slot. Users can watch some missed programs through timeshifted function.
Enter TSTV program
Press
to enter TSTV program. Then press
to play TSTV
program.
Press
Press
to go back to the starting point of the TSTV program.
to pop up the program progress bar. You can use the left
direction button to adjust the progress of the program until the interested
starting point is reached. Then press OK on the remote control to play the
TSTV program from the interested point
Exit TSTV program
Press
to exit TSTV mode and go back to Live program mode.
13
7
Problem
Troubleshooting
Possible Cause
Solution
The indicator is off after
The power adapter has not been
Connect the power adapter
switching on the STB.
connected.
correctly.
The power adapter is damaged.
Consult your service provider
and replace a new one.
The power outlet has no power.
Check and make sure the power
supply is available.
Network connection fails.
The network cable has not been
Connect the network cable
connected properly.
properly or replace it with a new
cable.
The service network fails.
Wait or consult the service
provider.
No image on the TV screen.
The network configuration is not
Configure the network
correct.
parameters again.
The STB is in the standby status.
Switch the STB to the working
status.
The video cable has not been
Reconnect video cable.
connected properly.
The video input source of the TV
Press the TV/AV button to
has been set wrongly.
switch the system mode of the
TV until the EPG page is shown
on the TV.
No sound from the speaker.
The STB is in the standby status.
Switch the STB to the working
status.
The audio cable has not been
Reconnect audio cable.
connected properly.
The STB or TV is in the mute
status, or the volume has been
Press
set to the minimum.
control, or increase the volume
on the remote
of the STB or TV.
14
Problem
The remote control fails.
Possible Cause
Solution
There is no battery in the remote
Install the batteries correctly.
control, or the batteries are
installed with wrong polarities.
The batteries run out of power.
Replace the batteries.
TV cannot receive instructions
Use the remote control at a
from the remote control.
place closer to the STB, or
remove the obstacle between
the remote control and the STB.
The corresponding sound does
Some video programs are
Press the L/R button on the
not match the image.
broadcasted in multiple audio
remote control to switch the
tracks.
audio mode.
Other problems
Restart the STB or call the
customer service hotline.
15
8
Compliant
Technical Specification
Q/SZX 186 - 2005
Standard
Power Adapter
Input: 100 - 240V 50/60Hz
Output: +12.0VDC
Environment
Requirement
Working environment temperature: 0℃ - +40℃
Working environment humidity: 10% - 90%
Protocol
TCP/IP, HTML 4.0, HTTP 1.1/JavaScript 1.5
Video
Supports PAL, NTSC
Receiving bit rate range: 200K - 10M
Resolution: 720 × 576/PAL, 720 × 480/NTSC, 1280 × 720 /720p, 1920 × 1080
/1080i, 1920 × 1080 /1080p
Access Mode
Supports ADSL, LAN and WLAN access
Supports PPPoE, DHCP
Dimension
230 mm ×150 mm ×40 mm (Length × Width × Height )
Note:
The actual product may differ with the above technical specifications due to product updates and
rapid technology development.
16
9
Text Input
Input via remote control
Operations
To input numerals, letters and symbols via the remote control, perform the following steps:
1. Select the text box.
2. Press TXT to switch to the interested input mode. The current input mode is shown on the TV
screen.
Icon
Name
Description
_
Numeral input mode
No icon is shown.
English input mode
Used to input letters, numerals
and English words.
Symbol input mode
Used to input symbols.
3. When the interested input mode is displayed on the screen, you need to stop pressing TXT to
keep the current input mode.
4. Press numeral buttons on the remote control to input letters, numerals, or symbols.
During inputting, press the up/down buttons to turn page. Press Del button to delete the character
before the cursor. Press Back to exit the input mode.
Numeral Input
There are two methods for numeral input. To input the numeral 8, the user has the following two
options:
Method 1
Method 2
When none of the input mode is chosen, directly press 8 to input the numeral 8.
When the English input mode is chosen, press 8 and then press up direction
button to input the numeral 8.
Letter Input
To input the letter Z, perform the following steps:
1. Press TXT to switch to the English input mode.
17
2. Press 9 and then press OK to display the input interface.
3. Press 8 to input the upper-case letter Z.
8 is the number corresponding to letter Z.
Symbol Input
There are three methods for symbol input. To input the symbol “.”, the user has the following three
options:
Method 1
1. Press TXT to switch to the symbol input mode.
2. If the interested symbol is not in the current interface, use up and down direction
buttons to turn the page until the interested one is found.
3. Press 2 to input the symbol “.”. 2 corresponds to symbol “.”. Or use the direction
buttons to select “.” and then press OK.
Method 2
1. In English input mode, press 1 to switch to the text input mode.
2. Then follow the method 1 to input the symbol.
Method 3
1. In English input mode, press 0 to display the input interface.
2. Press 4 to input the symbol “.”. 4 corresponds to symbol “.”. Or use the direction
buttons to select “.” and then press OK.
Input via soft keyboard
Activate/Close Soft Keyboard
1. Select the text box.
2. Press LOC/KB on the remote control to activate the soft keyboard. Then the soft keyboard appears on the TV screen.
3. Press LOC/KB on the remote control to close the soft keyboard. Then the soft keyboard disappears from the TV screen.
Switching Between Interfaces
If the capital letter or symbol you want to input cannot be found in the lower-case interface, you need
to switch to the upper-case interface.
1. Use direction buttons on the remote control to select Caps on the soft keyboard. Then press OK
on the remote control to switch to the letter interface.
2. Use direction buttons on the remote control to select Shift on the soft keyboard. Then press OK
on the remote control to switch to the symbol interface.
18
Letter/Numeral/Symbol Input
1. Press LOC/KB on the remote control to activate the soft keyboard.
2. Switch to the another interface of soft keyboard if the required character is not in current interface.
3. Use direction buttons on the remote control to select the required character.
4. Press OK to input the selected character.
19
10
Wireless Network Card Usage
Guidelines
Notice
Restrictions
�
The wireless network card is designated to the W200C USB wireless network card provided by
ZTE.
�
It is recommended to use the ZXV10 W300 residential gateway device of ZTE to get the best
performance.
Installation Prerequisites
It is recommended to conform to the following prerequisites for good performance of the device:
�
There is no obstacle between AP and wireless network card of STB.
�
The signals of AP and STB wireless network card are in strong status.
�
The wireless network card is equipped with extension line, which is convenient for position and
angle adjustment.
Operation Steps
1. Make sure that the STB is powered off. Insert the wireless network card into the USB interface.
Note:
It is forbidden to insert/pull out the wireless network card during usage.
2. Switch on the STB, and then the prompt information Now connecting, please wait... is displayed
on the TV screen. Input the password when the dialog box Input Password pops up.
3. Press SET on the remote control to enter the EPG page. Input the password when the dialog
box Input Password pops up. And open the Configuration page of STB.
4. Select Basic Settings to open the Network Connection page. Select WLAN mode.
5. Select Next to open the Services Settings page.
Note:
Make sure that the wireless network card is well connected.
20
6. Select Search in the Services Settings page to find nearby AP. After that, select an AP.
7. Set the following parameters: authentication mode, encryption mode, encryption key, encryption
key ID. After settings, select Next.
Note:
Different AP needs to set different parameters. Set the parameters according to the on-site demands of AP.
8. Set network parameters.
Select an access mode according to the network situation.
Access Mode
Parameter Description
PPPoE
�
User: ADSL username
�
Password: ADSL password
DHCP
It is not necessary to set any parameters. The STB gets the parameters (such
as IP address, gateway) automatically.
LAN
�
IP Address: IP address of STB
�
Mask: Subnet mask of STB
�
Gateway: Gateway of STB
�
DNS Server: DNS address of STB
9. After settings, select OK to return to the Configuration page and reset the STB.
10. After resetting, the STB connects to EPG server if the parameters are correctly set.
Note:
Make sure that the AP runs normally before reset.
Checking Signals
After wireless configuration, you need to check wireless signals according to the following procedure:
1. Press SET to enter Configuration page.
2. Use direction buttons to select Network Information. Enter the Network Information page.
Observe the wireless signal status according to WLAN Status, WLAN Intensity.
Signal Intensity
Signal Status
0 - 34
Poor
35 - 54
Medium
21
Signal Intensity
Signal Status
55 - 79
Good
80 - 100
Very good
Note:
When the signal intensity is lower than 50, the connection will not be smooth.
Troubleshooting
1. Symptom: The alert information on the loading failure of wireless network card pops up.
Possible cause: The wireless network card is not inserted, or it is not well connected.
Solution: Check the interface. Pull out the wireless network card and re-insert it. Select Try
Again to retry, or press the SET on remote control to modify the settings.
2. Symptom: The alert information of the connection failure of wireless network pops up.
Possible cause: The wireless network card fails to access AP.
Solution: Press the SET on remote control to modify the settings. Make sure that the settings of
AP and WLAN of STB are well matched, and then reset the STB. If the symptom still exists, you
need to call the customer hotline.
3. Symptom: The WLAN is associated, but there is still no service.
Possible cause: The settings of AP and STB are not matched.
Solution: Press the SET on remote control to modify the settings. Make sure that the settings of
AP and WLAN of STB are well matched, and then reset the STB. If the symptom still exists, you
need to call the customer hotline.
4. Symptom: The program connection is not smooth. The wireless signal intensity is less than 50.
Possible cause: The wireless network card or the associated AP is not in proper position. Meanwhile, other factors also influence the data transmission rate and distance.
Solution: Adjust the position of associated AP and wireless network card to meet the following
requirements:
�
The distance between AP and wireless network card should be limited in the maximum distance.
�
Outdoor environment: There is no obstacle between AP and wireless network card.
�
Indoor environment: In office or at home, if AP and wireless network card also cannot get
good wireless connection, it is recommended to use cable connection mode.
22