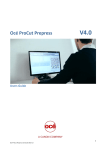
1
SOFTWARE
ENGLISH
User Manual
PROfirst – 1 Click CAM
Programming system for
CNC cutting machines with Nesting
PROfirst – 1 Click CAM
.
Contents 1 Click CAM
INSTALLATION............................................................................................................................ 3
WE RECOMMEND WINDOWS 2000 OR XP ........................................................................................ 3
ALWAYS INSTALL IN FOLDER SUGGESTED BY THE INSTALLATION PROGRAM ...................................... 3
LOCAL ADMINISTRATOR RIGHTS ARE NECESSARY WITH WIN 2000 / XP ........................................... 3
ADJUST SCREEN RESOLUTION TO AT LEAST 800X600 ....................................................................... 3
PROGRAM RUNS IN TEST MODE UNTIL SPECIAL PASSWORD HAS BEEN ENTERED.................................. 3
SETTINGS IN PROFIRST ............................................................................................................. 5
PROFIRST MATERIAL AND MACHINE DATABASE ............................................................................. 5
Add/change materials................................................................................................................. 5
Add/change material prices ........................................................................................................ 6
Add/change machines................................................................................................................. 6
SIMPLE STEPS TO MAKE A PROGRAM.................................................................................. 7
EASY TO FOLLOW STEPS ................................................................................................................. 7
START 1 CLICK CAM ..................................................................................................................... 7
SELECT PARTS TO NEST ................................................................................................................... 7
Explanation of the screen............................................................................................................ 8
Sheets......................................................................................................................................... 9
NESTING ...................................................................................................................................... 10
AUTO NESTING ............................................................................................................................. 10
Function of the icons ................................................................................................................ 10
Manual nesting......................................................................................................................... 11
Using the different functions ..................................................................................................... 11
Define lead-in and lead-out ...................................................................................................... 13
Set cutting path......................................................................................................................... 14
Remnant cutting........................................................................................................................ 15
CREATE CNC PROGRAM ............................................................................................................... 16
PRINT LABELS .............................................................................................................................. 17
Function of the icons ................................................................................................................ 17
PRINT SHEET PLAN ........................................................................................................................ 18
Function of the icons ................................................................................................................ 18
HOW DO I ?................................................................................................................................. 19
SET A MACHINE FOR MULTI HEAD NESTING? .................................................................................. 19
BACKUP THE PRO FIRST DATABASE EVERY DAY ............................................................................. 19
TECHNICAL SUPPORT............................................................................................................. 20
ii
Installation
We recommend Windows 2000 or XP
This program is a modern 32-bit application.
We recommend using Windows 2000 or XP.
It may run on Win 98/ME/NT4.0 but we give no guarantee and do not test
these old operating systems.
Always install in folder suggested by the installation
program
Local administrator rights are necessary with WIN
2000 / XP
All USERS need local administrator rights to avoid problem when
using the program.
- You need at least complete write/read/delete rights on the
follow: installation folder and all sub-folder, not only at
installation but also as user.
- Registry key
HKEY_LOCAL_MACHINE/SOFTWARE/VB_and_VBA_Program_
settings and all sub-keys
Adjust screen resolution to at least 800x600
You can change the screen size this way:
Click with the right mouse button on a free place of your desktop and go to
"properties", "settings". Here it is possible to change the screen size like
wanted.
Program runs in test mode until special password
has been entered
After the first installation of the software runs in test mode. It is possible to
test the software completely in this mode.
3
To activate the software:
- click on "Password to activate software". A serial number, unique
to this PC, will be shown. Send this number via email to
[email protected].
- You will receive a password for this PC by return email.
- Enter this password in the field password.
- Now the software is activated for a limited time or activated
permanently.
We remind you that PROfirst is like all commercial software a single
user licence.
4
Settings in the PROfirst
Database
PROfirst material and machine Database
Choose "Extras", "Database" in the menu and the following window
opens:
Here it is possible to manage your material database.
Add/change materials
Click in "Extras", "Database" on "Materials" and the following windows
opens:
"Add a material" and enter a new material.
Click on "Translate" to edit the names of material
Then add edit values like density, description, and thickness as before.
“Delete a material”, first choose material you want to delete and then
confirm button with “yes”.
5
Add/change material prices
Click in "Extras", "Database" on "Price/Material" and the following
window opens:
Enter the prices for your different materials and confirm with "OK".
Add/change machines
Click in "Extras", "Database" on "Machines" and the following window
opens:
Here are the standard paths for post processor and CNC programs.
If possible use these suggested paths.
IMPORTANT: If you make changes always confirm with the button
"Apply"!
With the button "Import" it is possible to import your machine data. You
get this data from us as a separate file.
Click on “Import”, choose the file in the corresponding path and click on
“Open”, now your machine data will be imported.
6
Simple steps to make a
program
Easy to follow steps
PROfirst 1 Click CAM is very simple and easy to use with following simple
steps:
?
?
?
?
?
?
Select the DXF or DWG files you want to cut
Set the number of parts.
Define the size of the sheet and spacing
Start the automatic nesting and cutting path
Create CNC Program(s)
Print sheet plan or labels
Start 1 Click CAM
To start 1 Click CAM just do the following steps:
Open PROfirst as usually and click down left in the icon menu on the
button "CAM". The program changes from CAD mode to CAM mode.
Then click on the icon "1 Click CAM" to open a new nesting.
IMPORTANT: 1 Click CAM is only displayed if the CAM option is
activated!
Select parts to nest
The start screen of 1 Click CAM is shown in the picture below:
7
Here you can select the parts to nest.
Explanation of the screen
Path window: Choose wanted DXF files.
Sort them by clicking on "Name" or "Changed".
Choose one part: Click on DXF file and it gets blue. To pick it up to your
selection make a double click on it or click on the button "Add parts".
Choose several parts: Hold the <Ctrl> key and click on several parts or
click on one part, hold the left mouse button and move the mouse.
Preview: Bottom right you see a preview of the chosen part to support the
search.
Part window: All parts of the current selection are shown in this window.
Here it is also possible to sort the parts or to change values, for example
click in the field quantity and enter the number of parts to nest, allow
rotation of the parts by clicking on the icon, etc.
Delete parts by clicking on the position number and press the key <del>.
"Add parts": Adds a chosen DXF file to the current selection. Same
function as a double click on the file.
"Load LogiTRACE parts":
Procedure:
- Click in LogiTRACE (Version 12 or higher) in the menu on "File", "Start
new production list". A new production list is automatically started.
- Create developments in LogiTRACE. A list of the saved developments is
created in C:\LogiTRACE_V12\Order_Logitrace.dat.
8
- Click in 1 Click CAM on "Load LogiTRACE parts" to import all parts
created in LogiTRACE to 1 Click CAM.
"Simple parts": Simple Parts as flanges, rings and rectangles can be
created here very easy. Just choose part, enter dimensions and confirm
with “OK” to add it to your current selection.
"Delete list": Deletes the created selection and the path window is empty.
"Colour setup":
Definition of the colours in the DXF file:
Closed contours: 93
7 (7 is black or white, 93=light green)
Marking:
1
(1= red, set to zero if no marker on machine)
Open contours:
4
(light blue)
"Auto colour setting": A check mark activates this function. The parts are
automatically shown in cutting colour if you read it in.
"Auto nest": If the wanted selection is finished click on "Auto nest" to
calculate the nesting.
“Manual nesting”: If you want to nest the created selection manually, just
click on the button “manual nesting”.
Sheets
Click on the button "Sheets" and you will see the window below to change
the sheet and the materials.
Button to change to the window "sheets".
"Part distance + edge distance": Enter values on the screen
"Size of sheet": Enter values in the fields "L" and "H".
9
"Material + Machine": Select desired values.
Nesting
Auto nesting
If you have done all settings in the sheet window and created a selection
of parts, click on "Auto nest" to calculate the nesting.
After a couple of seconds the nesting window opens:
The parts are nested in an optimum on the chosen sheet and the cutting
path is set automatically.
Function of the icons
"Index of current sheet" shows the number of sheets and the
current sheet. Browse between the sheets with the arrow buttons.
„Delete current sheet“ deletes the current sheet after confirmation.
„Insert sheet“ inserts a selected sheet to the current nesting.
"View info on current nesting" shows statistically the nested parts on the
sheets or the complete nesting.
Current sheet format, waste of the displayed sheet
and quantity of identical sheets to be cut.
10
Manual nesting
If you have done all settings on the sheet format and have created a
selection click on „manual nesting“ to start a nesting manually.
After a few seconds the following nesting window opens:
Using the different functions
Sort parts: The parts are listed at the bottom of the screen. It is possible
to sort the parts in the following screen:
A click on “Sort by name” sorts the parts with the part name.
A click on “Sort by size” sorts the parts with their size, beginning with the
biggest.
“Display – remains to be done” only shows the parts which have to be
nested. Already nested parts disappear from the list.
“Single scaling” shows the parts sorted by the dimension of their real
sizes.
“Part spacing” shows the actually defined part spacing and it is possible
to change it whenever you want.
11
Position parts:
A click on „Position part“ or a direct click on the part chooses the
wanted part to position it on the sheet.
Choose part: Just click on the wanted part, it will be chosen and caught
by the mouse cursor (colour pink). It is possible to position this part with
the mouse on the sheet.
Position part on the sheet: Click with the left mouse button (colour blue).
Move part with the cursor keys on your keyboard at the wanted position.
Confirm with <Enter> and the part is fixed on the sheet and show
coloured.
Rotate parts:
If you have chosen a part it is possible to rotate it with the menu bar above
or just use your keyboard.
<Home>: rotates part by 90°.
<Page up/down>: rotates part by entered rotation step (standard 10°)
clockwise or anti-clockwise.
Define a group of parts:
Parts to define a group have to be positioned on the sheet, then click
on “Define a group of parts”, choose wanted parts with a zoom window
or by clicking directly on the elements and confirm with <Enter>. Now this
group is created automatically and the parts can be nested even quicker.
Position row/column of parts:
At least one part for a row or column has to be positioned on the
sheet. Then click on „Position row/column of parts“, choose wanted
element with a zoom window or by clicking directly on the elements and
confirm with <Enter>. Now draw a column by moving the mouse and
confirm with the left mouse button.
Delete a part:
Click on “Delete a part”, choose elements to be deleted with a zoom
window or by directly clicking on them and confirm with <Enter>. Or it is
possible to select all parts with <Ctrl> + A.
Move a part:
Click on “Move a part”, choose parts you want to move with a zoom
window or by directly clicking on the parts and confirm with <Enter>. Now
it is possible to move the parts with the mouse or with the cursor keys of
the keyboard.
12
Special functions:
Turn „Test for collisions“ with other parts on or off.
„Restart nesting on the current sheet“ nests an already manually
started sheet with the remaining parts automatically, but only on this
current sheet.
„Autonest on current sheet“ nests the current selection on all sheets
which are needed for this nesting.
„Nest the selected part“ nests only the current selected part on the
sheet.
“Nest the selected part from a defined position” nests only the
current selected part from a defined position on the sheet.
„Nest the selected part using the advanced form recognition“
nests the selected part with a special algorithm for form recognition and so
even more better results can be achieved (Power Nesting).
In this field you define the distance with which parts are
moved. With pressed <Ctrl> button 1/10 of this value, here 10mm and with
pressed <Shift> button 1/100 of this value, here 1 mm.
Define lead-in and lead-out
It is also possible to define the type and length of the lead-in between the
nesting. To do this, use the following icons:
„Define lead-in / lead-out“ leads to the following window to define the
lead-ins:
Attention: You define here the type and length of the lead-in in
millimetres. Be careful with lead-ins which are longer than the part spacing
to avoid part collisions.
IMPORTANT: always delete the cutting path before you define new leadins! After that add the cutting path again.
13
„Position lead-in / lead out“ positions the lead-in manually to the
chosen contour. To do this, just zoom to the wanted position and click with
the left mouse button on it.
„Delete lead-in / lead-out“ deletes the clicked lead-in from the
existing cutting path.
„Insert lead-in / lead-out in cutting path“ inserts a lead-in to the
existing cutting path. To do that click on the cutting path you want to
replace so that it turns to cyan colour and then choose the wanted point
for he lead-in by clicking on it with the left mouse button. This function can
be repeated as often as you want.
Set cutting path
Beside the automatic cutting path it is also possible to define the cutting
path during the nesting manually or to change it if wanted.
„Auto tool path“ sets the cutting path automatically with the defined
lead-ins on the nested sheet.
„Delete tool path“ deletes the existing cutting path completely from
the sheet. Use this function always if you want to edit or change the leadins.
„Change cutting direction“ changes the cutting direction of a
selected part by clicking on it with the left mouse button. It is necessary
that a cutting path is defined before using this function.
„Repeat a cutting path“ repeats the same cutting path for a part a
soften as you want. To do that place a part on the sheet, set cutting path
as wanted and click on this function. Now choose contour with a zoom
window, confirm with <Enter>, enter number of repeats, confirm again with
<Enter>. PROfirst CAM now repeats this cutting path with the entered
number.
„Cutting path auto for a part“ sets automatically the cutting path on a
selected part. To do that click on the element with the left mouse button.
14
Remnant cutting
Profirst CAM offers different possibilities to do remnant cuttings after a
nesting.
„Auto remnant cutting“ cuts the sheet with the entered settings in the
following window automatically with a remnant cut.
Enter here the type of remnant cutting, distance between the part and the
cut, etc. and click on “OK”.
With „Manual remnant cutting“ it is possible to define the remnant
cutting manually. To do that click outside of the sheet on the wanted
position, define your remnant cut as wanted, click again outside the sheet
on the other end and confirm with the right mouse button.
„Delete remnant cutting on the sheet“ deletes the defined remnant
cut from the sheet if you click on this function.
„Cut skeleton“ sets after you have chosen the spacing for vertical and
horizontal cuts automatically a skeleton cut on the nested sheet. The
sheet is cut in small, defined skeletons.
15
Create CNC program
After the nesting simply click on the icon "Accept nest and make
CNC programs" and create the program code for your machine.
The following window opens where you can check once more your
settings:
Control the machine, the technology and if wanted change the name of the
program by clicking in the concerning column and enter the name of the
file.
The sheet plan will also be printed automatically.
16
Confirm with "OK" and your CNC program is created and saved in the path
"C:\Program Files\PROfirst_V2\CNC".
Print labels
With 1 Click CAM it is possible to print labels for the cut parts.
Click on the icon "Print labels" and the following window opens:
You can choose if you want to print one label per type of part or for each
part. Further there are different settings to change (Size, margin, thickness
(thickness of the drawing lines in pixel), etc.).
Function of the icons
Browse between the different pages
Different page views and sizes
Zoom: Enlarge or reduce view
Print all or current page(s)
17
Print sheet plan
Click on the icon "Print sheet plan" and the following window opens:
Layout of the printout of the sheets with all necessary information,
structured in sheet, statistic and cutting parts.
Function of the icons
For the function of the icons view chapter "Print labels".
Further it is possible to save the sheet as PDF, change between colour
and black/white printout and number the parts.
18
How do I ?
Set a machine for multi head nesting?
To add the functionality of multi torch nesting to a machine:
“Extras”, “Database”, “Machine”
Use the button “New” to add the following parameters to the machine.
Parameter
HEADS
MAIN_HEAD
MAX_PITCH
MIN_PITCH
Value
Description
Integer
Maximum number of cutting heads
UP/DOWN I the leading head with the motor at
the top or bottom of the screen
UP means max. Y-value TOP
Integer
Max. head spacing
Integer
IMPORTANT VALUE
Minimum possible spacing between
heads – simply measure it on the
machine.
Backup the PROfirst database every day
You must backup the PROfirst database on a regular basis: At least every
week, best daily, also before installing a new version.
To backup the complete PROfirst database use the following menu point:
“Extras”, “Database maintenance”, “Make a backup copy”
Select a network drive or another PC. Add the date to the file name, e.g.
PFDB211103.bak. This file is saved to the entered folder if you click on
“SAVE”.
Using an backup database
Always close PROfirst first.
Copy the file, e.g. PFDB211103 to the folder „C:\Program
files\Profirst_V2\DB“.
Rename here the file PFDB.mdb to PFDB-old.mdb, then rename
PFDB211103.bak to PFDB.mdb.
19
Technical support
If you install the software a unique serial number is been created. For this
serial number you need a unique password. Until you activate the software
with this password the program runs in test mode.
Buying and activating the software:
1. Check your serial number
The serial number is shown in the menu under "Password to activate
software".
Write down this serial number and send it to your supplier via fax or
email.
2. Activation of the software
You will get a password from your supplier that you have to enter under
"Password to activate software". This password is only valid for this
serial number and having entered it the software gets activated.
If you have any problems with the activation or the software please call
our technical hotline!
This manual is the property of TOL Computersysteme GmbH and cannot
be reproduced in any form whatsoever without explicit permission from
TOL Computeresysteme GmbH.
© TOL Computersysteme GmbH
Toerringweg 4 • 83355 Grabenstätt
Tel. +49 8661 98 396-0 • Fax -99
www.profirst-group.com
[email protected]
20