1
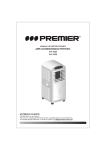
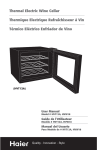
PORTABLE AIR CONDITIONER
CLIMATISEUR PORTATIF
ACONDICIONADOR DE AIRE PORTATIL
User Manual
Model # HPE07XC6
Guide de l’Utilisateur
Modéle # HPE07XC6
Manual del Usuario
Para Modelo de # HPE07XC6
Before operating this Air Conditioner, please read these instructions completely.
Quality Innovation Style
■
■
English
A Word From Haier
Thank You for buying a dependable, energy saving and easy to operate HAIER air conditioner. This
manual contains useful information for you to maintain, operate, install and safely use your air conditioner. Your air conditioner cleans, cools and dehumidifies the air in your room to provide you with
the ultimate level of comfort.
Please read instructions carefully before using the product. Also, do not forget to fill out and mail the
Product Registration Card.
Product Registration
Record Your Model and Serial Number.
Attach the sales receipt to this guide and keep for future reference. Model and serial number can be
obtained from the serial label, which is on your air conditioner. For all your service calls during the
warranty period the following information will be needed:
Model Number:....................................................................................................................
Serial Number: ....................................................................................................................
Date of Purchase: ................................................................................................................
Dealer’s Name:....................................................................................................................
Dealer’s Address: ................................................................................................................
Dealer’s Phone Number: ......................................................................................................
TABLE
RATED VOLTS
AMPS
RECEPTACLE
AND
125/60
15
20
FUSE
TYPES
15
250/60
20
20*15
20*
30
Plug
Plug
WALL OUTLET
FUSE SIZE
TIME DELAY FUSE
(or circuit braker)
1
15
Plug
30
English
SAFETY PRECAUTIONS
WARNING: Following these basic precautions will reduce the risk of fire, electrical shock, injury or
death when using your air conditioner.
1)
Air conditioner must be connected to proper electrical outlet with the correct electrical
supply. (see table previous page)
2)
Proper grounding must be ensured to reduce the risk of shock and fire. DO NOT CUT
OR REMOVE THE GROUNDING PRONG. If you do not have a three-prong electric
receptacle outlet in the wall, have a certified electrician install the proper receptacle.
The wall receptacle MUST be properly grounded.
3)
Do not operate air conditioner if power cord is frayed or otherwise damaged. Also
avoid using it if there are cracks or abrasion damage along the length, plug connector
or if the unit malfunctions or is damaged in any manner. Contact an authorized service
for examination, repairs or
adjustments.
4)
DO NOT USE AN ADAPTER OR AN EXTENSION CORD.
5)
Do not block airflow around the air conditioner. Also the exhaust hose should be free of
any obstructions.
6)
Always unplug the air conditioner before servicing it or moving it.
7)
Do not install or use the air conditioner in any area where the atmosphere contains
combustible gases or where the atmosphere is oily or sulphurous. Avoid any chemicals
coming in contact with your air conditioner.
8)
Do not place any object on the top of the unit.
9)
Never operate the air conditioner without the filters in place.
10)
Do not use the air conditioners near a bathtub, shower or wash basin.
SAVE THESE INSTRUCTIONS
2
English
Table Of Contents
PAGE
A Word From Haier ....................................................................................................................1
Product Registration ....................................................................................................................1
Safety Precautions ......................................................................................................................2
Advantages ................................................................................................................................4
Parts and Features ......................................................................................................................5
Assembly and Installation............................................................................................................6
Operation ..................................................................................................................................7
Product Specification ..................................................................................................................9
Care and Cleaning ....................................................................................................................9
Storage ......................................................................................................................................9
Trouble Shooting ......................................................................................................................10
Warranty Information................................................................................................................11
3
Advantages of this Model
1. This model is easy to operate. The electronic control panel has a timer, thermostat, three cooling
speeds, three fan speeds and one speed dehumidification function (dry).
2. The unit has a unique design which evaporates the water. Therefore no condensation tank is
necessary, thus avoiding you to have to wake up in the middle of the night to empty the bucket and
turn on the unit.
3. Easy to install window kit is included, which consists of the exhaust hose, 2 hose adapters, the
window panel kit and window panel adapter.
4. Full directional casters are included to help the unit to be moved in almost any area.
5. The filter screen is designed for easy accessibility of the filter.
6. Portable air conditioners are easy to store when not in use.
4
English
Parts and Features
1. Control Panel
Front
2. Air Deflector (Left-Right)
3. Front Panel
4. Handle Hole
5. Castor
6. Screen Filter
7. Air Intake (Evaporator)
8. Air Outlet (Heat Exchange)
9. Air Intake (Condenser)
10. Power Supply Cord
11. Water Drain
Rear
5
English
Assembly and Installation
Accessories Include
1
2
3
1. Plastic panel - 2 pieces
2. Window Panel adapter - 1 piece
3. Screws - 4 pieces
4. Heat Exhaust hose connector-2
pieces
5. Heat Exhaust hose-1 piece
1. Push the round Window Panel Adapter through the rear of the Plastic Panel.
Line up the holes and tighten the Adapter with 4 screws that are included in
the kit. (Tighten screws from the front).
2. Adjust the Plastic Panel to the width or height of your window and tighten
the 2 screws that are attached to the panel.
3. Install the Window Plastic Panel into the window. If necessary use duct tape
to better secure the panel.
4. Connect exhaust hose to the unit by inserting the hose connector that is
attached to the hose into the exhaust. (See Illustration A)
5. Move the unit to the window, extend the hose and attach the other end of
the hose to the window. Align the tabs on the hose and window panel
adapters and fasten them together.
6. Plug into wall outlet to get ready for operation.
A
B
* NOTE: Use on Single Outlet Circuit Only.
Hose Connector
Exhaust Hose
Hose Connector
6
English
Operation
Control Panel
Power Control
The power control turns the unit on and off.
Warning Light
Condensed water may accumulate in the unit. If
the internal tank becomes full, the Warring Light
will shine and the unit will not operate until the
unit has been drained.
Mode Control
The Mode Control has three settings:
Cool
Dehumidify
Note: unit does not need to de vented in Fan
mode.
Fan Speed Control
The Fan Speed Control has 3 settings:
Fan
The settings are adjusted with Mode Control button. A light will indicate which setting is currently
being used.
Cool Mode
When cool mode is selected, the indicator light
will shine green. During the cooling mode the air
is cooled and hod air is exhausted to the outside air
through the exhaust tube. Adjust fan speed air
through the temperature to suit your desired comfort level.
Note: The air exchange hoses must vent outside
the room when using cool Mode.
Dehumidify Mode
When Dehumidify mode is selected, the indicator
light will shine orange. Air is dehumidified as it
passes through the unit, without being in full
cooling mode . The fan will operate in Medium
speed. Fan speed is not adjustable in Dehumidify
mode.
7
Fan Mode
When Fan mode is selected the indicator light will
shine yellow. Air is circulated throughout the
room with no cooling.
High
Medium
Low
Timer Control
Auto turn off : With machine in fan mode,
press timer button to select number of hours you
would like the unit to run in air conditioning
mode until it automatically shuts off.
Auto turn on : With machine powered off ,
press timer button to select number of hours until
you would like the unit to automatically start
running in air conditioning mode
Timer / Timer set Controls
Used for adjusting the timer and thermostat. The
default display is room temperature. In cooling
mode, When " " or " " button is pressed, the set
temperature is displayed and may be adjusted.
After 15 seconds the display will revert back to
room temperature. Temperature is only
adjustable in Cool and Heat mode. The time is
adjustable between 1 and 12 hours.
Note: By pressing both Temp/Timer Set buttons
at the same time, the display will toggle
between Celsius and Fahrenheit.
1.
2.
3.
4.
5.
6.
7.
8.
NOTE: Wait for 24 hours to turn on air conditioner if the unit has been tilted for any
reason. This is for the oils and the coolants to settle and level off.
After a normal shut down wait for 3 minutes before restarting the unit so as to complete the
compressor cycle.
Use an 115v /15 amp outlet for the air conditioner. Do not use any other electrical appliances
on this line or you may trip the fuse. Use a dedicated line for this air conditioner.
Do not place the air conditioner in direct sunlight or close to any heating appliances
(eg. baseboard heaters, stoves, etc).
Operate on a flat surface only.
Keep the unit free of any obstructions such as drapes, curtains, blinds, etc.
Keep unit at least 1 foot away from the wall.
Check and clean the filter once every week for highest efficiency.
NOTE: Do not use unit without filter.
If the unit is not being used for a long period of time, remove the plug from the water drain
pipe and drain out any condensed water.
When turning on the unit for the first time after plugging it into an electrical outlet, the unit will
start in a low fan cool mode. The temperature reading out on the LED will be the current room
temperature. When turning on the unit during regular usage, it will remember the last shut off setting. If you want to operate the air conditioner as a dehumidifier, then adjust to dry mode.
Setting The Temperature
To set the temperature, press the + or the - key to raise or lower the temperature. The temperature can be raised or lowered in the cool or dry mode. The temperature cannot be adjusted in the
fan mode.
Fan Speeds
There are 3 adjustable speeds in the cool and fan mode: Low, Medium & High. In the dry or
dehumidification mode the fan will only operate at low speed.
On/Off Time Set
The air conditioner has a 1-12 hour on/off built-in timer. To delay the start time for 1-12 hours at
1 hour intervals, simply press the time/set key and then press the + or - key to adjust the start
time. Note that the unit has to be plugged in to an electrical outlet for the timer to operate.
To automatically shut-off the unit, press the time/set key while the unit is running and then press
the + or - key to adjust the shut-off time. The auto shut-off switch operates in all 3 modes: Cool,
Dry & Fan.
NOTE: The temperature can be set between 60˚F to 89˚F.
8
English
Product Specification
Voltage and Frequency
115V / 60Hz
Input Power
850 W
Cooling Capacity
7000 BTU
Moisture Removal (pints/day)
60
Coolant
R-22
Timer
12 Hours
Operating Temperature Range
64˚F - 100˚F
Unit Dimensions (WxDxH) (inches)
17
3/32
x 15
3/4
x 30
5/16
435 mm x 400 mm x 770 mm
Net Weight lbs. approximate
66 lbs.
Exhaust Hose
5 Feet
Care and Cleaning Guide
• Always unplug your air conditioner before cleaning.
• Air filter needs to be cleaned at least once a week for your unit to operate at optimum
efficiency. Slide out the filter from the back by pulling on the tab. The filter may be washed
or vacuumed. Remove the excess water from the filter by gently shaking the filter. This will
remove dust and particles trapped in the filter. After cleaning, reinstall the filter. DO NOT
use your air conditioner without the air filter in place.
• To clean the cabinet, DO NOT use harsh chemicals, abrasives, ammonia, chlorine, bleach,
concentrated detergents, solvents or metal scouring pads. Some of these chemicals may
dissolve, damage and/or discolor your air conditioner.
• Always use a soft cloth dampened with water or a mild soap and water solution to wipe the
front of the cabinet. Wipe dry with a soft cloth.
Storage
• To store your air conditioner when not being used for a long period of time, drain condensed water using the drain pipe. Remove exhaust hose, clean the filters, cover with plastic
bag and store away.
9
English
Trouble-Shooting
If air conditioner does not operate:
• Check if unit is plugged in. The plug may have come loose.
• Check if the electrical wall receptacle is of proper voltage.
• Check if the circuit breaker needs to be reset or if the fuse needs to be replaced.
• Check if the unit is in “Off” mode.
• If the warning light is on, drain the water drain pipe by removing the plug.
Air conditioner working but room not cooling:
• Room may have appliances that produce heat. Use an exhaust fan to remove excess heat.
• Check exhaust hose for proper installation.
• Redirect the airflow. Remove any obstacles.
• All doors and windows need to be closed so that cool air does not escape the room.
• Air filter may be blocked or may need cleaning.
• Unit BTU may be too low for the required cooling area.
• On extremely hot & humid days, air conditioners may take a little longer to cool.
• Drain the water drain pipe by removing the plug.
• Unit may be in fan or dry mode. Put air conditioner in cool mode.
10
English
Limited Warranty
This warranty covers all defects in
workmanship or materials for:
1. The mechanical and electrical parts (including
labor costs) contained in this Haier product,
for a period of 12 months, from the date of
purchase, (commercial or rental application,
the warranty is 90 days).
2. The sealed system and compressor contained
in this Haier product is for a period of 5 years,
from the date of purchase (excluding labor
costs after the initial 12 month period). In
commercial or rental use, the additional limited compressor warranty is for 1 year and 9
months, (excluding labor costs after the initial
90 days period).
You must keep and be able to provide
your original sales receipt as proof of the
date of purchase.
Who is covered?
The original retail purchaser of this Haier product.
What will be done?
Haier will repair or replace, in your home, any
mechanical, electrical part or the compressor,
which proves defective in normal household, use
for a period of 12 months. Haier will repair or
replace (excluding labor costs) the sealed system
and compressor (parts only) for an additional 4
year period.
How can you get service?
1. Contact your nearest Haier
authorized Service Depot. For the name of the
Service Depot nearest you, contact Haier at
(877) 337-3639.
2. All service must be performed, by an
authorized Haier Service Depot.
11
THIS WARRANTY COVERS UNITS WITHIN
THE CONTINENTAL
UNITED STATES, CANADA
AND PUERTO RICO AND
DOES NOT COVER:
• Damages from improper installation.
• Damages in shipping.
• Damages from misuse, abuse, accident, alteration, lack of proper care and maintenance.
• Damages from service, by other than an
authorized dealer or service center.
• Labor, service, transportation and shipping
charges for the removal of defective parts and
installation of a replacement part, beyond the
initial 12 month period.
THIS LIMITED WARRANTY IS GIVEN
IN LIEU OF ALL OTHER WARRANTIES, EXPRESS
OR IMPLIED, INCLUDING THE WARRANTIES OF
MERCHANTABILITY AND FITNESS FOR A
PARTICULAR PURPOSE.
The remedy provided in this warranty is exclusive
and is granted in lieu of all other remedies. This
warranty does not cover incidental or consequential damages. Some states do not allow the exclusion of incidental or consequential damages, so
this limitation may not apply to you. Some states
do not allow limitations on how long an implied
warranty lasts, so this limitation may not apply to
you. This warranty gives you specific legal rights,
and you may also have other rights, which vary
from state to state.
IMPORTANT
Do Not Return This Product To The Store
If you have a problem with this product, please contact the "Haier Customer Satisfaction Center"
at 1-877-337-3639.
DATED PROOF OF PURCHASE, MODEL # AND SERIAL # REQUIRED FOR WARRANTY SERVICE
IMPORTANT
Ne pas retourner cet article au magasin
En cas de problème avec cet article, veuillez contacter le « Centre satisfaction client » de Haier
au 1-877-337-3639.
UNE PREUVE D’ACHAT DATÉE, LE NUMÉRO DU MODÈLE ET LE NUMÉRO DE SÉRIE SONT
OBLIGATOIRES POUR BÉNÉFICIER DE LA COUVERTURE OFFERTE PAR LA GARANTIE.
IMPORTANTE
No Devuelva Este Producto al Establecimiento Compra.
Si tiene problemas con este producto, por favor póngase en contacto con el "Centro Haier de
Atención al Cliente" en el 1-877-337-3639.
PARA EL SERVICIO DE GARANTÍA SE REQUIERE PRUEBA DE COMPRA, FECHADA, No. DE
MODELO Y No. DE SERIE
Made in China
Haier America
New York, NY 10018
Printed in China
Issue: December 2005
Part: AC-9999-47