1
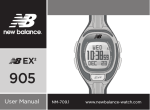
1.0 Introduzione
General Guide
•
Thank you for your purchase of this Watch.
•
With this Watch, you can get your diving
information easily! In addition to the diving
function, this Watch can record your diving
information for your future review. Simply put on
the Watch with the Chest strap and dive with it,
the diving information like diving depth, diving
duration, water temperature, your heart rate and
etc. will be exhibited on the display and stored in
the watch! You can also use the USB connector
and the Diver Master to transfer all the Dive
records in the watch to your personal computer for
further storage and review.
•
This Watch includes 6 functional modes; they are
Clock mode, Dive mode, Chronograph Mode,
Countdown Timer Mode, History Mode and Setup
Mode.
•
Your watch is carefully designed and produced.
In order to utilize the features of your watch, it is
advisable to use the watch in conformity with the
notes mentioned below:
•
Read this user manual carefully before you use the
Watch and keep this manual in a safe place for
future reference.
– Avoid exposing the Watch to extreme
conditions for an unreasonable time.
– Avoid rough usage or severe impacts on the
Watch.
– It is recommended to replace the battery by
a certified service agency because this watch
contains delicate electronic sensors and
components, and the water proof function and
standard can be maintained on your watch.
– Keep the Watch away from magnets
or appliances which contain magnetic
components such as mobile phones, speakers
or motors as these items may ruin the sensors.
– Clean the Watch occasionally with a soft cloth.
– DO NOT expose the Watch to strong
chemicals such as gasoline and alcohol as
they will damage the watch.
1.0 Introduction
WARNING!
•
Diving is one of the highest risk sports. Committing
a careless mistake may lead to serious injury or
fatal accident, hence safety is the first priority and
always remember that you are responsible for your
own safety.
•
The Watch and the Chest Strap are a set of
supplementary devices for proper trained and
qualified divers in diving. They are NOT substitutes
for any professional diving or training gear.
•
Always get proper training, instruction and
qualification before starting diving. Make sure that
you fully understand the functions and limitations
of the Watch and you may have back-up devices
other than this watch in diving.
•
DO NOT use the Watch for commercial or
professional purpose.
2.0 Buttons and Its Functions
Light
[ EL ]
Start/Stop
[ S/S ]
Sensors
Mode
[M]
Lap/Reset
[ L/R ]
2.1 Buttons and Its Functions
Mode [M]
•
To select among the Clock, Dive, Chronograph, Timer, History and Setup modes, just press the [M] button until the
desired mode/icon appears on the screen and wait for 2 seconds, it will go to the main screen of the corresponding
mode automatically.
•
To exit from the current status and return to the previous menu.
Start/Stop Button [S/S]
•
To activate the ‘start’ or ‘stop’ chronograph function in the chronograph mode.
•
To activate the ‘start’ or ‘stop’ timer function in the timer mode.
•
To increase the value on the setting display or move up the cursor to the next item.
Lap / Reset [L/R]
•
To activate the ‘lap’ or ‘reset’ chronograph function in the chronograph mode. To reset the Timer in the Timer mode.
•
To decrease the value on the setting display or move down the cursor to the next item.
EL Button [EL]
•
To turn on the EL back light for about 3 seconds. (Expect History mode & Setup mode)
•
In History mode / Setup mode, hold [EL] for one second to turn on backlight.
•
To select among the setting items on the setting display.
•
To confirm the selected items on the setting display.
Sensors
•
Sensors for the diving mode.
Note
NOTE: When you want to switch off the watch to the power down mode (the screen will be switched off – in this mode,
the clock is still running on the background), you simply press the [M] and [S/S] buttons simultaneously for 5 seconds in
Clock mode. To switch on the screen again, just press any key for 5 seconds, the screen will resume in normal status.
3.0 Major Function Modes
[M]
Clock Mode
[M]
Dive Mode
Chronograph Mode
[M]
[M]
[M]
Set Up Mode
[M]
History Mode
Countdown Timer Mode
4.0 Clock Mode
How to select the Current Time
Clock Mode
Auto entry
after 2 seconds
[ S/S]
Home Time Display
Dual Time Display
•
Select this mode by pressing the [M] button until
the CLOCK icon appears on the screen and wait
for 2 seconds, it will go to the Home time or Dual
time mode automatically.
•
This watch has the Home time and Dual time
modes. You can select between these 2 modes by
pressing the [S/S] button in the Clock mode. When
you press the [S/S] button, the alternate display
will appear for 5 seconds and then return to the
original display. When the [S/S] button is pressed
and held for 2 seconds, the alternate display will
be kept as the current display.
4.1 Clock Mode - Dual Time Display
Dual Time Display
1st row
2nd row
3rd row
Dual Time Display
•
The first row shows the name of this mode – DUAL
TIME mode.
•
The second row shows the hour and minute of the
desired time zone.
•
The third row shows the hour and minute of the
Home time with the “ ” icon.
5.0 Dive Mode
How to select the Dive Function
•
Dive Mode
Auto entry
after 2 seconds
[ S/S]
Depth Display
Heart Rate Display
Select this mode by pressing the [M] button until
the DIVE icon appears on the screen and wait for 2
seconds, it will go to the Dive mode automatically.
When the watch is in another mode, it will go to
the Dive mode automatically when the watch is
submerged in the water deeper than 1.0 meter
provided that the Dive mode setting has been
switched on (please check the chapter 9.1 setting
for details).
5.1 Dive Mode - Depth Display
Depth Display
•
The first row shows either icon ‘ ’(Sea water) or
icon ‘ ’(Lake – fresh water) on the left and the
duration of an individual diving activity on the right;
•
The second row shows the depth of the dive
reached with metric/imperial unit ( ‘ ’ – meter or
‘ ’- feet). When it reaches the maximum depth
pre-set by the user, the ‘ ’ icon above the unit
will flash and an audible alert alarm will beep for
30 seconds.
•
The third rows shows the water temperature on the
left and your heart rate on the right with the ‘ ’
while you are wearing the Chest Strap. When the
heart rate field is flashing, the watch is searching
for the Heart Beat signal from the Chest Strap. If
no Heart Rate signal is picked for 60 seconds, it
will turn off automatically.
1st row
2nd row
3rd row
Depth Display
5.2 Dive Mode - Heart Rate Display
Heart Rate Display
•
The first row shows either icon ‘ ’ (Sea water) or
icon ‘ ’ (Lake – fresh water) on the left, the ‘ ’
icon in the middle will appear and flash and an
audible alert alarm will beep for 30 seconds when
it reaches the maximum depth pre-set by the user
and the maximum depth of the dive reached on
the right.
•
The second row shows the heart rate on the
left with the ‘ ’ icon and the %EMHR on the
right; when these 2 fields are flashing, the watch
is searching for the Heart Beat signal from the
Chest Strap. If no Heart Rate signal is picked for 5
minutes, it will turn off automatically.
•
The Chest Strap comes with this watch is the
sensor for the heart rate, which transmits the heart
beat signal to the watch. The Heart Rate display
is functional provided that you put on the Chest
Strap. When you enter the Dive mode, the Heart
Rate (HR) reception will be turned on automatically
after 5 seconds. If no Heart Rate signal is picked
for 5 minutes, it will turn off automatically.
•
The third row shows the duration of an individual
dive.
1st row
2nd row
3rd row
Heart Rate Display
5.3 Dive Mode - Precaution / Tips for Heart Rate Measurement
Heart Rate Features
•
TPU Black
Elastic Nylon
Band Black
PC+Glass
Fibre Black
Silicon Rubber
Black
This Watch includes a chest strap, thus the Watch
can provide a continuous supply of heart rate data
to user for guiding them to achieve their fitness
goal.
Precautions / Tips
•
There is two contacts located on the back of
the Chest Strap. These two contacts must be
firmly contacted with the user’s skin during
measurement.
•
Clean the contacts occasionally by applying a few
drops of water, and wipe it dry with a paper towel
to remove any residual grease.
•
DO NOT use hand cream; it will insulate the signal
between the skin and the contacts.
•
Clean your skin with soap and water for better
signal transmission.
•
For those with extremely dry skin, apply some
conductive gel or water may help.
•
Adjust the Chest Strap with the supplied elastic
band until it is hold on your chest firmly to avoid
loosen it when doing exercise.
•
Avoid doing any awkward motion during
measurement, otherwise error may be resulted.
Front View
Conductive
silicon rubber
ABS black
Back View
Silicon
Rubber Black
5.3.1 Dive Mode - Wearing the chest strap
How to Wear the Chest Strap
1
2
Refer to the below steps to wear the chest strap on
one’s chest:
1. Extend the elastic band for allowing a loose
fitting the chest strap on your chest.
2. Connect one connector with the chest strap.
Ensure that the connector is completely lodged
into the chest strap.
3. Fit the chest strap on your chest with one hand.
3
4. Connect the opposite connector to the chest
strap with the another hand.
5. Fasten the elastic band until it is fitted on your
chest comfortably.
4
5
6
6. Adjust the chest strap until the two contacts are
firmly contacted with your skin.
IMPORTANT: DO NOT wearing the chest strap over
your cloth, otherwise the chest strap CANNOT get
the heart rate signal.
NOTE: In dry seasons, wetting the contacts with
some water can make the signal transmission better.
5.4 Dive Mode - Heart Rate Alert
Heart rate
(beats per minute)
‘
The upper
limit
Visual
Indication
’ indicator shown
Audio
Indication
Heart Rate Alert
•
When your heart rate is higher than the pre-set
heart rate, the icon ‘ ’ above the ‘ ’ appears
and the alert alarm will beep twice every 10
seconds. When your heart rate is lower than the
pre-set heart rate, the icon ‘ ’ underneath the
‘ ’ appears and the alert alarm will beep once
every 10 seconds. When the heart rate is within the
normal range, only the ‘ ’ appears on the screen.
Please check chapter 9.2.1 Setup menu for the
setting of the Heart Rate limits.
•
The Chest Strap comes with this watch is the
sensor for the heart rate, which transmits the heart
beat signal to the watch. The Heart Rate Alert
can be functional provided that you put on the
Chest Strap and the Heart Rate Zone Alarms are
switched on. Please check the chapter 9.2 for the
H.R.Zone setup.
beep twice
every 10 seconds
The Above Heart Rate Zone
‘
The lower
limit
’ indicator shown
no sound
The Desirable Heart Rate Zone
‘
’ indicator shown
beep twice
every 10 seconds
The Below Heart Rate Zone
The Different Heart Rate Zones and
the Corresponding Indications
5.4.1 Dive Mode - Estimated Maximum Heart Rate (EMHR) and %EMHR
Estimated Maximum Heart Rate (EMHR) and
%EMHR
•
Percentage
of estimated
maximum
heart rate
Heart rate
in bpm
Heart Rate Display
Estimated Maximum Heart Rate (EMHR):
• EMHR = 220 - user’s age.
• Example: What is Tom’s EMHR at the age of 27?
• EMHR = 220-30 = 193.
NOTE: This Watch can calculate the EMHR for the user
at his age up to 99. In order for the watch to calculate
the accurate EMHR and %EMHR, you have to input
your year of birth in the setup menu.
Percentage of Estimated Maximum Heart Rate
(%EMHR):
• %EMHR = Acquired heart rate / EMHR X 100%
• Example: What is Tom’s %EMHR when his heart
rate is 78 bpm?
• %EMHR= 78/193 X 100% = 40%
In doing exercise or sports, your heart naturally
speeds up in pumping blood to the body in
accordance with your increased energy level. This
watch can calculate that increase expressed in
terms of the number of beats per minute (bpm) to
determine a safe target heart rate for an individual.
5.4.2 Dive Mode - What is Heart Rate Zone
What is Heart Rate Zone
•
Some particular training/exercise objectives may require trainee/exerciser maintaining his/her heart rate (exercise
pace) within one particular heart rate zone (upper and lower limits) during the exercise. You may set your upper and
lower heart rate limits in the H.R. Zone Setup menu in Chapter 9.2.
•
WARNING: Consult a doctor or trainer prior to setting the heart rate alert zone for a serious Cardio-fitness training.
How to Select upper and lower limits of your heart rate
•
In general, user may get the cardio-fitness training advice from those prestigious organizations’ website, for
example:
http://www.heart.org/HEARTORG/Conditions/CongenitalHeartDefects/CareTreatmentforCongenitalHeartDefects/Congenital-Heart-Defects-and-Physical-Activity_UCM_307738_Article.jsp
by American Heart Association, and
http://en.wikipedia.org/wiki/Heart_rate#Training_zones
by Wikipedia.
5.5 Dive Mode - Countdown Diving duration
Countdown Diving Duration
Depth Display
Auto return
after 2
seconds
Hold [S/S]
Start Countdown
Diving
Duration Display
Depth Display
Auto return
after 2
seconds
Hold [S/S]
Stop Countdown
Diving
Duration Display
•
You may set your diving duration by using this
function. Pre-set the Countdown interval in the
Setup menu before using this function (please
check chapter 9.1.4 for the setting).
•
Press and hold the [S/S] button for 2 seconds to
start the countdown in the Dive mode, “Countdown
Start!” will be shown on the screen for 2 seconds
and then return to the original dive mode display.
When it reaches zero, it will beep-beep-beep for 30
seconds. Press any key to stop the alarm. You may
stop the countdown by pressing and holding the
[S/S] button for 2 seconds. “Countdown Stop!” will
be shown on the screen for 2 seconds and then
return to the original dive mode display. When you
want to start the countdown again, it will reset and
start from the pre-set value.
5.6 Dive Mode - Interval Alarm
Interval Alarm
•
This function can alert you the depth of your dive
in a multiply of the pre-set value. The value can be
set to 10m, 20m, 30m, 40m and 50m. It will beep
for 2 seconds when it reaches a multiply of the
pre-set value. When you set the value to 20m, it
will beep for 2 seconds when you reach 20m, 40m,
60m, 80m and 100m deep. This function can be
switched on/off. Please check the Setup menu in
Chapter 9.1.2 for more details.
5.7 Dive Mode - Surface Time Counter
Surface Time Counter
•
When you emerge to the water surface from the
last dive and the depth is less than 1 meter, the
display of the watch will change to the surface
mode. The surface mode has 2 displays and will
switch alternatively in every 3 seconds and it
counts from zero and records the duration of your
stay in the water surface.
•
The first row shows the ‘ ’ or ‘ ’ icon on the left
and the duration of the last dive OR the maximum
depth of the last dive on the right with the
maximum depth alert ‘ ’ in the middle when the
last dive reaches the pre-set depth.
•
The second row shows the ‘ ’ icon Surface
mode on the left and the counter - the duration in
the water surface.
•
The third row shows the water temperature and
the heart rate with ‘ ’ Icon. When the heart rate
field is flashing, the watch is searching for the
Heart Rate signal from the Chest Strap. If no Heart
Rate signal is picked for 5 minutes, it will turn off
automatically.
Surface Time
Counter Display
5.8 Dive Mode - Surface Time Counter
•
When the surface time counter reaches the pre-set value (the pre-set value is set in the Setup menu, please check
the chapter 9.1.3 for more details), it will beep for 2 seconds. This alert function can be switched on/off in the Setup
menu.
•
Note 1: The Dive mode is functional only if it is switched on in the Setup menu (Check Chapter 9.1 for the setting).
When you dive deeper than 1.0 meter, the Dive function will be activated and start recording your diving activity.
When you emerge in the water less than 1.0 meter deep and diving activity is more than 10 seconds, one diving
record is completed and saved.
•
Note 2: The Dive mode is not functional at all when it is not switched on in the Setup menu (Check Chapter 9.1 for
the setting). After the Dive mode has been switched on, when you submerge the watch in the water less than 1.0
meter, this function will not be activated. This is to avoid the wrong trigger of this function.
•
Note 3: The maximum number of diving records is 250 depending on the log rate. When the memory is full,
“Memory Full” will appear on the screen when you enter the Dive mode. In order to save the latest diving activities,
you may delete some old records to reserve space for the new records. Before deleting the dive records, you may
transfer the Dive records to the personal computer regularly in order to reserve space for the new diving activities.
(For data transfer, please check the chapter 10.0 for details.)
•
Limitation of the Dive Mode:
– Diving Record: Maximum 250 diving records
– Maximum Logging Data Item: ~16,000
– Maximum Diving duration: 99 minutes 59 seconds
– Maximum Depth: 100 Meters or 328 Feet
– Resolution: 0.1 Meter/Feet
– Temperature Range: -20 to +70°C
– Heart Rate Range: 30 to 240 bpm
6.0 Chronograph Mode
Chronograph Display
Chronograph Mode
Auto entry
after 2 seconds
Chronograph Display
•
Select this mode by pressing the [M] button until
the CHRONO icon appears on the screen and wait
for 2 seconds, it will go to the Chronograph mode
automatically.
•
In this mode, your heart rate can be shown on the
display when you put on the Chest Strap.
6.1 Chronograph Mode - Using the Chronograph
Using the Chronograph
•
The first row of the display shows the heart rate on
the left with the “Heart icon” in the middle when
you put on the Chest Strap and the lap number
with a maximum of 10 laps on the right. The heart
rate display icon will be turned on after you enter
the Chronograph mode 5 seconds. The heart rate
field is flashing when it searches for the Heart Rate
signal from the Chest Strap. When no heart rate is
detected for 5 minutes, the heart rate display icon
will be turned off.
•
For Heart Rate Alert, please refer to Chapter 5.3
for details.
•
The second row of the display shows the lap time.
•
The third row of the display shows the elapsed
time.
•
It shows the minute, second and 1/100 second
when the time is running less than one hour. When
the time is running over one hour, it shows the
hour, minute and second.
1st row
2nd row
3rd row
Chronograph
Display
6.1 Chronograph Mode - Using the Chronograph
Using the Chronograph
•
Chronograph Display
[ S/S ]
[ S/S ]
Start Counting
Auto entry
Auto
Return
Lap Memory
[ S/S ]
[ L/R ]
Counting
Stop Counting
Press the [S/S] button to start or stop counting.
After you press the [S/S] button, the ‘
’
appears and the chronograph starts counting.
During this time, when you press the [L/R] button,
the lap time will be recorded. You can record up to
10 lap records. When you press the [S/S] button
again, the ‘
’ appears and the chronograph
stops counting.
6.2 Chronograph Mode - Recalling the Lap records
Recalling the Lap records
•
When the chronograph is stopped, press the [L/R]
button to show the time of corresponding lap
record and the accumulated elapsed time.
•
The first row shows the Lap number and it is
flashing.
•
The second row shows the current lap time.
•
The third row shows the accumulated elapsed time
up to the current lap.
•
Press [S/S] once to return chronograph display.
1st row
2nd row
3rd row
Chronograph
Display
[ S/S ]
[ L/R ]
Lap Records
6.3 Chronograph Mode - How to reset the Chronograph
How to reset the Chronograph
1st row
2nd row
3rd row
Chronograph
Display
hold
[ L/R ]
Lap record ‘zero’ display
•
When the stopwatch is stopped, press and hold
the [L/R] buttons until the stopwatch resets.
•
When you review your lap records, press the [S/S]
button once (the lap number is not flashing) and
then press and hold the [L/R] button until the
stopwatch resets.
Note: The maximum elapsed time is 23 Hours 59
minutes 59 seconds.
7.0 Countdown Timer Mode
Countdown Timer Display
Timer Mode
Auto entry
after 2 seconds
1st row
2nd row
3rd row
Chronograph Display
•
Select this mode by pressing the [M] button until
the Timer icon appears on the screen and wait for
2 seconds, it will go to the Countdown Timer mode
automatically.
•
The first row shows Timer icon.
•
The second row shows the pre-set value of the
timer.
•
The third row shows the current time clock. The
pre-set value is set in the Setup Menu (please
check the chapter 9.4 for details).
7.0 Countdown Timer Mode
Countdown Timer Display
•
The Timer starts counting from the pre-set value
to zero and stops at zero. The timer will beep once
per minute at the last 10 minutes; beep once per
10 seconds at the last minute; beep once per
second at the last 5 seconds. When it reaches
zero, it will beep-beep-beep for 30 seconds. Press
any key to stop the alarm.
•
Press the [S/S] button to start or stop the timer.
When the timer is stopped, press the [L/R] button
to reset the timer to the pre-set value.
•
Note: The maximum pre-set value for the timer is
23 Hours 59 minutes 59 seconds.
Timer Display
[ S/S ]
[ L/R ]
Reset
Start Counting
[ S/S ]
[ S/S ]
Stop Counting
8.0 History Mode
History Display
History Mode
Auto entry
after 2
seconds
History Display
with no record
•
Select this mode by pressing the [M] button
until the History icon appears on the screen and
wait for 2 seconds, it will go to the History mode
automatically.
•
In this mode, Daily Total, Odometer and Erase
are shown on the screen in the main menu when
there is no record in the memory. When you have
activated the Dive mode and recorded some diving
activities, the individual records are shown in a
sequential order and the latest record is at the top
while the Daily Total, Odometer and Erase menu
are underneath these records.
•
Press the [S/S] or [L/R] button to select the desired
item and press [EL] button to confirm the selection.
Press the [M] button to exit and return to the
previous display.
History Mode
Auto entry
after 2
seconds
History Display
with record
8.1 History Mode - Individual record
Individual record
1st row
•
Please note that this individual record appears
after you have done diving activity. Otherwise, no
record is shown.
•
Press the [S/S] or [L/R] button to change the
screen forward or backward respectively. The
sequence of the screen is in a cycle: Dive Time
> Max Depth > Min Temp > Avg HR > Max HR >
Calories > Dive Time. Press the [M] button to exit
this display and return to the previous display.
•
The first row shows the date of the Dive activity
on the left and the sequence number of the Dive
on the right.
•
The second row shows the information of Dive
mentioned in the third row.
•
The third row shows the nature of the display.
2nd row
3rd row
History Display
[ EL ]
[M]
[ L/R ]
Dive Time
Calories
[ S/S ]
[ S/S ]
[ L/R ]
[ L/R ]
Maximum
Heart Rate
Maximum Depth
[ S/S ]
[ L/R ]
[ L/R ]
Minimum
Temperature
[ S/S ]
[ L/R ]
[ S/S ]
[ S/S ]
Average
Heart Rate
8.2 History Mode - Daily Total
Daily Total
•
The summary with daily total of the last day diving
activity is recorded and shown in this mode. Press
the [S/S] button to change the screen forward or
backward respectively. The sequence of the screen
is in a cycle: Total number of Dives > Dive Time
> Max Depth > Minimum Temperature >Average
Heart Rate > Maximum Heart Rate > Calories >
Total number of Dives.
•
Press the [M] button to exit this display and return
to the previous display.
History Display
[ EL ]
[M]
Total number
of Dives
[ S/S ]
[ L/R ]
[ L/R ]
Dive Time
[ S/S ]
Calories
[ L/R ]
[ L/R ]
[ L/R ]
Minimum
Temperature
[ S/S ]
Maximum
Heart Rate
Max Depth
[ S/S ]
[ S/S ]
[ L/R ]
[ L/R ]
[ S/S ]
[ S/S ]
Average
Heart Rate
8.3 History Mode - Odometer
Odometer mode
•
History Display
[ EL ]
[M]
Total number
of Dives
[ S/S ]
[ L/R ]
[ L/R ]
Calories
[ S/S ]
Dive Time
[ L/R ]
[ L/R ]
Maximum
Heart Rate
[ S/S ]
[ S/S ]
Maximum
Depth
[ L/R ]
Minimum
Heart Rate
[ S/S ]
[ L/R ]
[ L/R ]
[ S/S ]
[ S/S ]
Minimum
Temperature
In this mode, this is the same as the Daily Total
except that this is the summary and accumulation
of all records and diving activities recorded upto-date. The display is the same as the Daily Total
except the legend is Odometer instead.
8.4 History Mode - Erase mode
Erase mode
•
You may erase either All Record, Daily Total or
Odometer data by selecting the desired one to
erase. Press the [S/S] or [L/R] button to select the
desired deletion. Press [EL] to confirm the deletion
and the ‘YES’ and ‘NO’ screen appears. Press
the [M] button to abort the deletion and return
to the Erase selection display OR you have to
select either ‘YES’ to confirm or ‘NO’ to cancel the
deletion. After your confirmation, it will return to
the Erase selection display. Press [M] button to exit
and return to the previous display.
•
When you perform “Erase All Record”, the
individual records will be deleted but the Daily Total
and Odometer data will not be deleted. These two
sets of data have to be deleted individually.
History Display
[ EL ]
[M]
All Record
[ L/R ]
[ S/S ]
[ S/S ]
[ L/R ]
[ L/R ]
Daily Total
Odometer
[ S/S ]
[ EL ]
Yes / No Display
9.0 Setup Mode
Setup Display
•
Setup Mode
Auto entry
after 2
seconds
Setup Display
Select this mode by pressing the [M] button
until the Setup icon appears on the screen and
wait for 2 seconds, it will go to the Setup mode
automatically.
9.0 Setup Mode
Setup Display
•
Setup Display
[ S/S ]
Dive
[ S/S ]
[ L/R ]
[ L/R ]
H.R. Zone
[ S/S ]
System
[ L/R ]
[ L/R ]
[ S/S ]
User
Daily Alarm
[ S/S ]
[ S/S ]
[ L/R ]
[ L/R ]
[ L/R ]
Timer
[ S/S ]
Clock
[ S/S ]
Press [EL] to
confirm the selection
In this mode, press [S/S] or [L/R] button to select
among Dive, H.R.Zone, Daily Alarm, Timer,
Clock, User and System. After you choose your
desired item, press the [EL] button to confirm your
selection.
9.1 Setup Mode - Dive
Dive
•
Setup Display
[ S/S ]
Depth Alert
[ S/S ]
[ L/R ]
[ L/R ]
Interval Alarm
[ S/S ]
Log Rate
[ L/R ]
[ L/R ]
[ S/S ]
Sea/Lake
Surface Alarm
[ S/S ]
[ S/S ]
[ L/R ]
[ L/R ]
[ L/R ]
Countdown
[ S/S ]
Dive On/Off
[ S/S ]
Press [EL] to
confirm the selection
In this menu, you can choose among Depth Alert,
Interval Alarm, Surface Alarm, Countdown, Dive
On/Off, Sea/Lake and Log Rate. Press the [S/S]
or [L/R] button to select the desired item and
press the [EL] button to confirm and go to the
corresponding menu.
9.1.1 Setup Mode - Dive - Depth Alert
Depth Alert Display
•
On this display, the Depth Alert can be set from 2
to 100m. Press the [EL] button to select between
the depth value and the ON/OFF switch.
•
Press the [S/S] or [L/R] button to select/confirm the
‘ON’ or ‘OFF’ of this function.
•
Press the [S/S] or [L/R] button to increase or
decrease the value of the desired depth value
respectively. Holding these buttons will increase
the pace of the change of the value. Press the [M]
button to exit from this display and return to the
previous display.
•
After this function has been switched on, when you
dive and reach the pre-set depth, the maximum
Depth Alert icon ‘ ’ will be flashing on the dive
mode display and it beeps for 30 seconds for alert.
Press any key to stop the alarm.
Depth Alert Display
ON / OFF
[ EL ]
the depth value
Press [S/S] or [L/R] to confirm the selection
or
Increase / Decrease the number
9.1.2 Setup Mode - Dive - Interval Alarm
Interval Alarm Display
Interval Alarm Display
ON / OFF
[ EL ]
•
On this display, the Interval Alarm can be set to 10,
20, 30, 40 or 50m. Press the [EL] button to select
between the interval value and the ON/OFF switch.
•
Press the [S/S] or [L/R] button to select/confirm the
‘ON’ or ‘OFF’ of this function.
•
Press the [S/S] or [L/R] button to increase or
decrease the value of the desired interval value
respectively. Holding these buttons will increase
the pace of the change of the value. Press the [M]
button to exit from this display and return to the
previous display.
•
This function can alert you the depth of your dive in
a multiply of the pre-set value. When this function
is switched on, it will beep for 2 seconds when it
reaches a multiply of the pre-set value. When you
set the value to 20m, it will beep for 2 seconds
when you reach 20m, 40m, 60m, 80m and 100m.
the interval value
Press [S/S] or [L/R] to confirm the selection
or
Increase / Decrease the number
9.1.3 Setup Mode - Dive - Surface Alarm
Surface Alarm Display
•
Surface Alarm Display
[M]
ON / OFF
[ EL ]
[ S/S ] or [ L/R ]
Setting
On this display, press the [S/S] or [L/R] button to
select between the ON/OFF or Setting. Press the
[EL] button to confirm your selection.
9.1.3.1 Setup Mode - Dive - Surface Alarm
Surface Alarm Display
•
Surface Alarm
On / Off Display
[ S/S ] or [ L/R ]
ON
OFF
Press the [EL] to
confirm the selection
On the ON/OFF display, press the [S/S] or [L/R]
button to select the ON or OFF. Press the [EL]
button to confirm the selection. Press the [M]
button to exit this display and return to the
previous display.
9.1.3.2 Setup Mode - Dive - Surface Alarm Setting
Dive Time Screen
•
Surface Alarm Display
[ EL ]
Present Times screen
[ S/S ]
or
[ L/R ]
[ EL ]
When the “Preset” is highlighted/selected, press
the [S/S] or [R] button to change it to the Dive
Times screen. Press the [EL] button to select the
value of times in the Dive Times menu. Press the
[S/S] or [R] button to increase or decrease the
value from 1 to 6. This is the multiply factor for the
preset surface time.
•
[ EL ]
[ EL ]
[ EL ]
Press the [S/S] or [R]
to Increase or
Decrease the number
When the “Dive Times” is highlighted/selected,
press the [S/S] or [R] button to change it to the
Preset time screen. Press the [EL] button to move
the cursor to the second digit or minute digit. Press
the [S/S] or [R] button to increase or decrease the
value of these digits respectively.
9.1.4 Setup Mode - Dive - Countdown Timer
Setup Display
•
Press the [EL] button to move the cursor to the
second, minute and hour fields.
•
Press the [S/S] or [R] button to increase or
decrease the value of these fields.
•
Pressing and holding the [S/S] or [L/R] button
will increase the pace of change of the value.
Maximum value for this function is 23 hours 59
minutes and 59 seconds.
•
Press the [M] button to confirm and exit to the
previous menu.
Countdown Timer Display
Second
[ EL ]
Minute
[ EL ]
[ EL ]
Press [S/S] or [L/R] to
Increase / Decrease the number
Hour
9.1.5 Setup Mode - Dive - Dive On / Off
Dive ON / OFF
[ S/S ] or [ L/R ]
OFF
Press the [EL] to
confirm the selection
Press the [S/S] or [L/R] button to select between
the “ON” or “YES” option, press the [EL] button to
confirm the selection.
•
Press the [M] button to exit to the previous menu.
Note: This option must be switched on in order for
the Dive mode to function.
Dive On / Off Display
ON
•
9.1.6 Setup Mode - Sea/Lake
Sea/Lake
•
Press the [S/S] or [L/R] button to select between
the “Sea” or “Lake” option, press the [EL] button to
confirm the selection. Press the [M] button to exit
to the previous menu.
Note: Since the densities of the sea water and lake
fresh water are different, in order to let the watch
function in an accurate manner, it is better to state
the correct corresponding environment in this setting.
Sea / Lake Display
[ S/S ] or [ L/R ]
Sea
Lake
Press the [EL] to
confirm the selection
9.1.7 Setup Mode - Dive - Log Rate
Log Rate
Long Rate Display
•
Press the [S/S] or [L/R] button to change the time
interval for the log. The values for this function are
1, 2, 5 and 10 seconds. Press the [M] button to
confirm the setting and exit to the previous menu.
•
The log rate is used for recording the diving activity
in the set interval. When you set the log rate in 5
seconds, the watch records the diving activity in
every 5 seconds while you are diving. The more
frequent of the recording interval (lower value of
this setting), the less of the records can be stored
due to the limitation of the memory.
9.2 Setup Mode - Heart Rate Zone
Heart Rate Zone
•
Setup Display
[ S/S ]
Limits
[ L/R ]
[ S/S ]
[ S/S ]
[ L/R ]
[ L/R ]
High Alert
Low Alert
[ S/S ]
Press [EL] to
confirm the selection
Press the [S/S] or [L/R] button to select among
the Limits, High Alert and Low Alert and press the
[EL] button to confirm the selection. Press the [M]
button to exit this menu and return to the previous
menu.
9.2.1 Setup Mode - Heart Rate Zone - Limits
Limits
•
Limits Display
High Value
[ EL ]
Low Value
Press [S/S] or [L/R] to
Increase / Decrease the number
On the screen, you can choose either the HI value
or LO value by pressing the [EL] button. Press
the [S/S] or [R] button to increase or decrease
the value respectively. Holding these buttons will
increase the pace of change of the values. The
corresponding %EMHR next to the value changes
according to the value input. Press the [M] button
to confirm the change and exit this menu and
return to the previous menu.
9.2.2 Setup Mode - Heart Rate Zone - High Alert
High Alert
High Alert Display
[ S/S ] or [ L/R ]
ON
OFF
Press [EL] to
confirm the selection
•
On this screen, you can switch on or off the High
heart rate alert.
•
Press the [S/S] or [L/R] button to select the “ON”
or “OFF”, then press the [EL] button to confirm the
selection. Press the [M] button to exit this menu
and return to the previous menu.
9.2.3 Setup Mode - Heart Rate Zone - Low Alert
Low Alert
Low Alert Display
[ S/S ] or [ L/R ]
ON
OFF
Press [EL] to
confirm the selection
•
On this screen, you can switch on or off the Low
heart rate alert.
•
Press the [S/S] or [R] button to select the “ON” or
“OFF”, then press the [EL] button to confirm the
selection. Press the [M] button to exit this menu
and return to the previous menu.
9.3 Setup Mode - Daily Alarm
Daily Alarm Setup Display
Daily Alarm Display
ON/OFF
[ EL ]
Minute
[ EL ]
[ EL ]
Press [S/S] or [L/R] to confirm the selection
or
Increase / Decrease the number
Hour
•
Press the [EL] button to select among the Hour,
Minute and ON/OFF fields.
•
Press the [S/S] or [L/R] button to select the “ON”
or “OFF” while the cursor is in this field. When this
function is set to “ON”, the watch will beep for 30
seconds at the pre-set alarm time daily. Press any
key to stop the alarm.
•
Press the [S/S] or [L/R] button to increase or
decrease the value of the Hour or Minute field while
the cursor is in these fields. Holding these buttons
will increase the pace of change of the value. Press
the [M] button to exit this menu and return to the
previous menu.
9.4 Setup Mode - Timer
Timer Setup Display
•
Timer Display
Second
[ EL ]
Minute
[ EL ]
[ EL ]
Press [S/S] or [L/R] to
Increase / Decrease the number
Hour
Press the [EL] button to select among the Hour,
Minute and second fields. Press the [S/S] or [L/R]
button to increase or decrease the value of these
fields. Holding these buttons will increase the pace
of change of the value. Press the [M] button to exit
this menu and return to the previous menu.
9.5 Setup Mode - Clock
Clock Setup Display
•
Setup Display
[ S/S ]
[ S/S ]
Time
Format
[ L/R ]
[ S/S ]
[ L/R ]
[ L/R ]
[ S/S ]
[ L/R ]
Date
Dual Time
[ S/S ]
Press [EL] to
confirm the selection
Press the [S/S] or [L/R] button to select among the
Time, Date, Dual Time and Format. Press the [EL]
button to confirm the selection.
9.5.1 Setup Mode - Clock - Time
Time Display
•
Time Display
Second
[ EL ]
Minute
[ EL ]
[ EL ]
Press [S/S] or [L/R] to
Increase / Decrease
the number
Hour
This is for setting the current time. Press the [EL] to
select among the Hour, Minute and Second fields.
Press [S/S] or [L/R] button to increase or decrease
the value of these fields. Holding these buttons will
increase the pace of change of the value. Press
the [M] button to exit this menu and return to the
previous menu.
9.5.2 Setup Mode - Clock - Date
Date Display
•
Date Display
Year
[ EL ]
Month
[ EL ]
[ EL ]
Press [S/S] or [L/R] to
Increase / Decrease the number
Day
This is for setting the current date. Press the [EL]
to select among the Year, Month and Day fields.
Press [S/S] or [L/R] button to increase or decrease
the value of these fields. Holding these buttons will
increase the pace of change of the value. Press
the [M] button to exit this menu and return to the
previous menu.
9.5.3 Setup Mode - Clock - Dual Time
Dual Time Display
•
Dual Time Display
Hour
[ EL ]
Minute
Press [S/S] or [L/R] to
Increase / Decrease the number
This is for setting the time for another time zone.
Press the [EL] to select among the Hour and
Minute fields. Press [S/S] or [L/R] button to
increase or decrease the value of these fields.
Holding these buttons will increase the pace of
change of the value. Press the [M] button to exit
this menu and return to the previous menu.
9.5.4 Setup Mode - Clock - Format
Format Display
•
Setup Display
[ S/S ]
Time
[ S/S ]
[ L/R ]
Date
Press [EL] to
confirm the selection
Press the [S/S] or [L/R] button to select between
Time or Date format. Press the [EL] button to
confirm the selection
9.5.4.1 Setup Mode - Clock - Format - Time Format
Time Format Display
•
Time Format Display
[ S/S ] or [ L/R ]
24 hour
12 hour
Press [EL] to
confirm the selection
Press the [S/S] or [L/R] button to select between
the 24 Hour or 12 Hour format. Press the [EL]
button to confirm the selection. Press the [M]
button to exit this menu and return to the previous
menu.
9.5.4.2 Setup Mode - Clock - Format - Date Format
Time Format Display
Date Format Display
[ S/S ] or [ L/R ]
MM / DD
DD / MM
Press [EL] to
confirm the selection
•
Press the [S/S] or [L/R] button to select between
the MM/DD or DD/MM format. Press the [EL]
button to confirm the selection. Press the [M]
button to exit this menu and return to the previous
menu.
•
Press the [M] button to exit this menu and return to
the previous menu.
9.6 Setup Mode - User
User Display
•
Setup Display
[ S/S ]
Gender
[ L/R ]
[ S/S ]
[ S/S ]
[ L/R ]
[ L/R ]
Birthday
Weight
[ S/S ]
Press [EL] to
confirm the selection
Press the [S/S] or [L/R] button to select among the
Gender, Birthday and Weight.
9.6.1 Setup Mode - User - Gender
Gender Display
•
Time Format Display
[ S/S ] or [ L/R ]
Male
Female
Press [EL] to
confirm the selection
Input your gender in this setting. Press the [S/S] or
[L/R] button to select between “Male” or “Female”.
Press the [EL] button to confirm the selection.
Press the [M] button to exit this menu and return to
the previous menu.
9.6.2 Setup Mode - User - Birth year
Birth year Display
•
Birth Year Display
Press [S/S] or [L/R] to
Increase / Decrease the number
Input your birthyear in this setting. Press the [S/S]
or [L/R] button to increase or decrease the value.
Holding these buttons will increase the pace of
change of the values. Press the [M] button to exit
this menu and return to the previous menu.
Note: Your year of birth is used to calculate the
EMHR and %EMHR.
9.6.3 Setup Mode - User - Weight
Weight Display
Weight Display
Press [S/S] or [L/R] to
Increase / Decrease the number
•
Input your body weight in this setting. Press the
[S/S] or [L/R] button to increase or decrease the
value. Holding these buttons will increase the pace
of change of the values.
•
Press the [M] button to exit this menu and return to
the previous menu.
9.7 Setup Mode - System
System Display
•
Setup Display
[ S/S ]
[ S/S ]
Sound
About
[ L/R ]
[ S/S ]
[ L/R ]
[ L/R ]
[ S/S ]
[ S/S ]
Sleep
Contrast
[ L/R ]
[ L/R ]
[ L/R ]
Units
[ S/S ]
Power Save
[ S/S ]
Press [EL] to
confirm the selection
Press the [S/S] or [L/R] button to select among
the Sound, Contrast, Units, Power Save, Sleep
and About. Press the [EL] button to confirm the
selection.
9.7.1 Setup Mode - System - Sound
System Display
•
System Display
[ EL ]
Key Tone
[ S/S ]
[ L/R ]
Chime
Press [EL] to
confirm the selection
Press the [S/S] or [L/R] button select between “Key
Tone” or “Chime” settings. Press the [M] button to
exit this menu and return to the previous menu.
9.7.1.1 Setup Mode - System - Sound - Key Tone
Key tone Setup Display
Key Tone Display
[ EL ]
ON
[ S/S ]
[ L/R ]
OFF
Press [EL] to
confirm the selection
•
Press the [S/S] or [L/R] button to select between
“ON” or “OFF”. Press the [EL] button to confirm
the selection. Press the [M] button to exit this
menu and return to the previous menu.
•
When this function is switched on, whenever a
button is pressed, a beep will be heard.
9.7.1.2 Setup Mode - System - Sound - Chime
Chime Setup Display
Chime Display
[ EL ]
ON
[ S/S ]
[ L/R ]
OFF
Press [EL] to
confirm the selection
•
Press the [S/S] or [L/R] button to select between
“ON” or “OFF”. Press the [EL] button to confirm
the selection. Press the [M] button to exit this
menu and return to the previous menu.
•
When this function is switched on, it beeps once
at the hour.
9.7.2 Setup Mode - System - Contrast
Contrast Display
Contrast Display
Press [S/S] or [L/R] to
Increase / Decrease the number
•
The contrast values are from 1 to 10. 1 represents
the lightest display and 10 represents the brightest
display.
•
Press the [S/S] or [L/R] button to increase or
decrease the value. Holding these buttons will
increase or decrease the pace of change of the
values. Press the [M] button to exit this menu and
return to the previous menu.
9.7.3 Setup Mode - System - Units
Unit Display
•
System Display
[ EL ]
General
[ S/S ]
[ L/R ]
Temperature
Press [EL] to
confirm the selection
Press the [S/S] or [L/R] button to select between
General or Temperature. Press the [EL] button to
confirm the selection. Press the [M] button to exit
this menu and return to the previous menu.
9.7.3.1 Setup Mode - System - Units - General
General Display
•
General Display
[ EL ]
Metric
[ S/S ]
[ L/R ]
Imperial
Press [EL] to
confirm the selection
Press the [S/S] or [L/R] button to select between
Metric or Imperial. Press the [EL] button to confirm
your selection. Press the [M] button to exit this
menu and return to the previous menu.
9.7.3.2 Setup Mode - System - Units - Temperature
Temperature Display
General Display
[ EL ]
°C
[ S/S ]
[ L/R ]
°F
Press [EL] to
confirm the selection
•
Press the [S/S] or [L/R] button to select between
“ °C” or “ °F ”. Press the [EL] button to confirm
your selection.
•
Press the [M] button to exit this menu and return to
the previous menu.
9.7.4 Setup Mode - System - Power Saving
Power save Display
Power Saving Display
[ EL ]
ON
[ S/S ]
[ L/R ]
OFF
Press [EL] to
confirm the selection
•
Press the [S/S] or [L/R] button to select between
ON or OFF. Press the [EL] button to confirm your
selection. Press the [M] button to exit this menu
and return to the previous menu.
•
When this function is switched on, the watch will
enter the Standby mode for Power Saving when
no key is pressed for one hour. In this mode, only
the running Hour and Minute digits appear on the
screen.
•
Note: When the watch is in Standby mode,
pressing any key will resume the watch to the
current Clock screen.
Standby Mode
9.7.5 Setup Mode - System - Sleep
Sleep Display
•
System Display
[ EL ]
ON / OFF
[ S/S ]
[ L/R ]
Time Set
Press [EL] to
confirm the selection
Press the [S/S] or [R] button to select between
“ON/OFF” or Time Set. Press the [EL] button to
confirm your selection. Press the [M] button to exit
this menu and return to the previous menu.
9.7.5.1 Setup Mode - System - Sleep - ON / OFF
ON/OFF Display
•
Key Tone Display
[ EL ]
ON
[ S/S ]
[ L/R ]
OFF
Press [EL] to
confirm the selection
Press the [S/S] or [R] button to select between
ON or OFF. Press the [EL] button to confirm your
selection. Press the [M] button to exit this menu
and return to the previous menu. In the function,
you can set the watch to sleep mode in a period
of time and it will wake up automatically at the
pre-set time.
9.7.5.2 Setup Mode - System - Sleep - Time Set
Time Set Display
•
Key Tone Display
[ EL ]
LCD On Time
[ EL ]
LCD Off Time
Press [S/S] or [L/R] to
Increase / Decrease the number
Press the [S/S] or [L/R] button to increase or
decrease the value of the time you prefer for the
Sleep function. Press the [EL] button to select the
wake up status LCD ON or sleep status LCD OFF.
Press the [M] button to exit this menu and return to
the previous menu.
9.7.6 Setup Mode - System - About
About Display
•
About Display
This shows the latest software version in this watch
for future update reference. Press the [M] button to
exit this menu and return to the previous menu.
10.0 PC Link Mode
PC Link Mode
•
This watch comes with a PC USB link cable and
software for you to keep track of your diving
activities.
•
This software can help you store all the Diving
activities and show the summary of the individual
records with Daily Total.
10.1 PC Link Mode - Connect the watch to the computer
How to connect the watch to the computer using
the USB cable with a Clip
1. Run the software Diver Master in your computer.
2. Align the clip guide and pins with the notch and
contacts at the bottom of the watch.
3. Make sure the clip is secured.
4. Plug the other end of the USB cable into any of
the PC’s USB connectors.
Front
5. When all these are done, the PC Link Icon will
appear on the screen of the watch and the
Watch is connected to the computer.
USB Cable
Contact
points
Back
PC Connect Mode
Personal Computer
10.2 PC Link Mode - Software to review
How to use the software to review your Dive
activities
1. You may transfer the Dive information in your
watch to the computer to review all the activities.
Click the pull down menu “Data Transfer” and
click the “receive Watch Data”, the Dive records
will be transferred from your watch to the
software and stored for your review. Please note
that the Dive records in the watch are still kept
until you erase them manually.
Review Display
2. You may review the activities in the logbook. Just
click on the month folder and then click on the
date you want to review. The graph on the top
shows the summary of the day activity selected.
Below the logbook, you can select the individual
dive activity. The graph at the bottom shows the
individual Dive corresponding to the selected
item on the left.
10.3 PC Link Mode - Other usage of this software
Other usage of this software
1) File
Login Display
•
You may import or export the Dive data files in
DIVE format.
•
You may print the current graphs as shown on the
screen.
•
Exit the program.
2) View
•
Refresh the graphs.
3) User
•
You may use this software to store different Dive
records for different individual users. Just use
this pull down menu to create new users. After
transferring the relative Dive records, you may
review the Dive activities of the corresponding User
by using the “switch user” menu.
4) Setting
Watch configuration
•
Watch Configuration Display
3 settings are displayed on this screen. They are
Time Format, Depth and Temperature unit. You can
read these settings from the watch by clicking on
the “Read setting from watch” or edit the settings
on the screen and write them back to the watch by
clicking on the “Write setting to watch” icon.
10.3 PC Link Mode - Other usage of this software
•
You may synchronize the computer’s time with
your watch by clicking on the “Sync PC time to
watch” icon.
Watch firmware update
•
Watch Firmware Update Display
You may check the latest version of the software
in the watch by clicking on this icon. It will check
it for you.
Option
5) Help
Software Update Display
About Display
•
Software Update – click on this one for checking
software update.
•
About – click on this one for display of the version
of this software.
11.0 Power Saving Mode
Power Saving Mode
•
This Watch has a Power Saving Function which
can turn off the LCD display so that the battery can
last longer.
•
In the Power Saving Mode, the watch function is
working normally. (i.e. The timekeeping function is
running normally in the Power Saving Mode.)
How to enter/exit the Power Saving Mode
Home Time Display
[EL] / [M] /
[S/S] / [L/R]
Hold
[L/R]
Power Saving Mode
(LCD display turned off)
•
Hold the [L/R] button in the Home Time Mode
for about 5 seconds and the LCD display will be
turned off.
•
Press any key to turn on the LCD display. A “Bi”
sound will be heard when the display is on.
12.0 Specification
Time
• Show hour, minute, second, date and day of week
• Calendar Range : 2000 ~ 2099
• 12/24 hour format
• MM/DD or DD/MM date format
• Daily Alarm
• Dual Time
Dive
• Max Depth 100 meter or 328 feet
• Resolution: 0.1 meter / feet
• Memory: Max up to 250 dive records & ~16,000
logging items
• Max dive time / surface time: 99 minute 59 second
• Sea or Lake site selectable
• Log rate: 1/2/5/10 seconds selectable
• Depth alert, interval alarm & surface time alarm
Heart Rate
• Coded 5.3K transmission
• Heart Rate range: 30 to 240 BPM
• Heart Rate Alert
Temperature
• Range: -20 to +70 Celsius (-4 to 158 Fahrenheit)
• Resolution: 0.1 Celsius/Fahrenheit
Chronograph
• Max 99H59M59S
• Resolution: 0.01s when less than an hour; 1s when
over an hour
• 10 lap memories
• Split time and lap time display
Count Down Timer
• Max 23:59:59
• 1 second resolution
• Bi once per minute at last 10 minute; bi once
per 10 seconds at last minute; bi once per
second at last 5 seconds; bi-bi-bi for 30
second when reaches zero
Recall
Daily Total, Odometer and Dive Record recall
Contains dive time, max. depth, min
temperature, average/max. heart rate and
calories
• Erase function
•
•
Other
EL backlight
Keytone & Hourly chime
LCD contrast selectable
Personal data entry – gender, birth year &
weight
• Imperial/metric unit selection
• Power saving & Sleep mode
• PC data communication
•
•
•
•