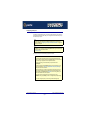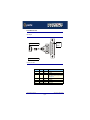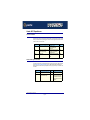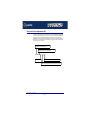
1
I/O8+ Serial Adaptors
User Guide
Part number: 5500031-17
Date: 10 September 2008
Navigating around this manual
Using this on-line manual. See page 5.
Fast contents. See page 7.
Contents. See page 8.
Quick reference. See page 111.
Index. See page 155.
Page 1
Copyright statement
This document must not be reproduced in any way whatsoever, either printed or
electronically, without the consent of:
Perle Systems Limited,
60 Renfrew Drive
Markham, ON
Canada
L3R 0E1
Perle reserves the right to make changes without further notice, to any products to improve
reliability, function or design.
Specialix, the Specialix logo, JETSTREAM, JETSTREAM4000, JETSTREAM8500 and
LANSTREAM2000 are trademarks of Perle Systems Limited.
Microsoft, Windows 95, Windows 98, Windows NT, Windows 2000, Window XP,
Windows Server 2003, Windows Vista, Windows Server 2008, and Internet Explorer are
trademarks of Microsoft Corporation.
Netscape is a trademark of Netscape Communications Corporation.
Solaris is a registered trademark of Sun Microsystems, Inc. in the USA and other countries.
Perle Systems Limited, 10 September 2008.
Page 2
FCC Note
The products described in this manual have been found to comply with the limits for a Class
A digital device, pursuant to Part 15 of the FCC rules. These limits are designed to provide
reasonable protection against harmful interference when the equipment is operated in a
commercial environment. This equipment generates, uses and can radiate radio frequency
energy and, if not installed and used in accordance with the instructions in this Guide, may
cause harmful interference to radio communications. Operation of this equipment in a
residential area is likely to cause harmful interference, in which case the user will be required
to correct the interference at his/her own expense.
EN 55022: 1998, Class A Note
Warning: This is a Class A product. In a domestic environment this product may cause radio
interference in which case the user may be required to take adequate measures.
Caution: The products described in this manual are approved for commercial use only.
Page 3
I/O8+ Serial Adaptors
User Guide
About this manual
Purpose of this manual
This manual tells you how to install, configure and use the Perle I/O8+ ISA and PCI serial
adaptor cards, associated drivers and utilities.
Who this manual is for
This manual is aimed at users who want to add extra serial ports to their system using I/O8+
ISA and PCI serial adaptor cards. This manual requires a working knowledge of using
personal computers and associated operating systems, as well as experience in installing
host cards.
Warning
Dangerous voltages exist inside computer systems. Before
installing host cards in your system, turn off the power supply
and disconnect the mains lead.
I/O8+ Serial Adaptors User Guide
Purpose of this manual
Page 4
Using this on-line manual
The following is a brief guide to using this manual on-line.
Document navigation
This manual features document navigation hypertext buttons in the header area as shown in
the next picture;
Jump to Using this on-line manual
Jump to Index
Jump to Quick Reference
Jump to previous location
Jump to front of current chapter
Jump to Contents
Jump to Fast contents
Hypertext jumps
You can also navigate around this manual by clicking on any cross reference or text in blue
for example, Hypertext jumps.
Note
The Fast Contents, Contents and Index entries are all hypertext
jumps into this manual.
I/O8+ Serial Adaptors User Guide
Using this on-line manual
Page 5
Revision history
Date
Part number
Description
June 1999
5500031-10
First issue of new I/O8+ user manual replacing Installation guide 42-700001.
Includes details of drivers, utilities and installation under the SCO OpenServer 5
operating system.
August 1999
5500031-11
Update of manual to include drivers, utilities and installation under the SCO
UnixWare operating system.
March 2000
5500031-12
Update of manual to include drivers, utilities and installation under the Windows
95 and 98 operating systems.
September 2000
5500031-13
Update of manual to include drivers, utilities and installation under the Windows
NT and Windows 2000 operating systems.
November 2001
5500031-14
Update of manual to include new contact details and some re-branding.
October 2002
5500031-15
Removal of part numbers from Cabling chapter.
January 2006
5500031-16
Added information for OpenServer 6 support.
September 2008
5500031-17
Added information for Windows XP/Server 2003/Vista/Server 2008.
Page 6
Fast contents
ABOUT THIS MANUAL ...........................................................................................................4
REVISION HISTORY ..............................................................................................................6
FAST CONTENTS ..................................................................................................................7
CONTENTS ..........................................................................................................................8
CHAPTER 1 INTRODUCTION ..................................................................................................15
CHAPTER 2 INSTALLING DRIVERS AND HOST CARDS .............................................................17
CHAPTER 3 I/O8+ CABLING INFORMATION ...........................................................................105
CHAPTER 4 QUICK REFERENCE ...........................................................................................111
APPENDIX A SERIAL PORT DEVICE NAMES ............................................................................119
APPENDIX B TRANSPARENT PRINTING ..................................................................................122
APPENDIX C ISA HOST CARD ADDRESS SETTINGS ................................................................126
APPENDIX D TROUBLESHOOTING .........................................................................................131
APPENDIX E CONTACTING PERLE ........................................................................................149
INDEX ..................................................................................................................................155
Page 7
Contents
ABOUT THIS MANUAL ............................................................ 4
Purpose of this manual ..................................................................................4
Who this manual is for ...................................................................................4
Using this on-line manual ..............................................................................5
Document navigation ................................................................................5
Hypertext jumps ........................................................................................5
REVISION HISTORY ................................................................ 6
FAST CONTENTS ................................................................... 7
CONTENTS ............................................................................ 8
Page 8
CHAPTER 1 INTRODUCTION
15
About the I/O8+ serial adaptor card .............................................................16
Page 9
CHAPTER 2 INSTALLING DRIVERS AND HOST CARDS
17
Before you start ...............................................................................................18
Downloading I/O8+ drivers from the Perle web site .................................18
Installing I/O8+ under Windows 95 and 98 .................................................19
General installation procedure for Windows 95 and 98 ............................19
Installing device drivers and utilities..........................................................20
Adding ISA host cards to the system ........................................................22
Configuring I/O8+ serial ports ...................................................................28
Removing I/O8+ hardware from your system ...........................................31
Installing under Windows NT .......................................................................33
Installing I/O8+ under SCO OpenServer .....................................................34
General installation procedure for SCO OpenServer................................34
Upgrading from existing device drivers.....................................................36
Upgrading from Specialix combined driver 2.0.2 for SCO Unix 3.2.4
(SCO OpenServer 5 Only) ............................................................................ 36
Upgrading your current I/O8+ device driver (SCO OpenServer 5 Only) ....... 36
Installing device drivers and utilities..........................................................37
Assigning ISA host card addresses and IRQ levels
(SCO OpenServer 5 Only) ........................................................................43
Starting the Host Card Configuration utility ................................................... 44
Adding a new host card address ................................................................... 45
Editing a host card address ........................................................................... 47
Removing a host card address ...................................................................... 49
Exiting the Host Card Configuration utility ..................................................... 50
Configuring I/O8+ serial ports ...................................................................51
Removing I/O8+ drivers and utilities from your system.............................55
Installing I/O8+ under SCO UnixWare .........................................................57
General installation procedure for SCO UnixWare ...................................58
Upgrading from existing device drivers.....................................................60
Upgrading from Specialix I/O8+ Svr4 driver v1.0.2 ....................................... 60
Installing drivers and utilities onto your system.........................................61
Assigning ISA host card addresses and IRQ levels..................................64
Starting the Unixware Device Configuration Utility ........................................ 65
Adding a new host card address ................................................................... 67
Editing a host card address ........................................................................... 69
De-activating a host card ............................................................................... 70
Displaying software device driver details ....................................................... 71
Exiting the Device Configuration Utility ......................................................... 72
Configuring serial ports .............................................................................73
Configuring serial ports under SCO UnixWare 2 ......................................78
Removing I/O8+ drivers and utilities from your system.............................79
Page 10
Installing an I/O8+ PCI host card under Windows 2000/XP/Server 2003/
Vista/Server 2008 .............................................................................................80
General PCI host card installation procedure for Windows 2000/XP/Server
2003/Vista/Server 2008.............................................................................80
Installing PCI host card device drivers and utilities onto your system ......81
Updating I/O8+ PCI host card device drivers with update.exe..................83
Configuring PCI host card serial ports ......................................................85
Installing an I/O8+ ISA host card under Windows 2000 ..........................88
General ISA host card installation procedure for Windows 2000..............88
Adding ISA host cards to the system ........................................................89
Viewing and changing the ISA host card resources for a device ..............93
Updating I/O8+ ISA host card device drivers with update.exe..................97
Configuring ISA host card serial ports ......................................................98
Installing a PCI host card ...............................................................................100
Installing an ISA host card ............................................................................101
Removing host cards .....................................................................................103
Page 11
CHAPTER 3 I/O8+ CABLING INFORMATION
105
RJ12 socket pinouts on I/O8+ host cards ..................................................106
I/O8+ cables available from Perle .................................................................107
RJ12 to DB9 male cable ...........................................................................108
Cable diagram ............................................................................................... 108
Connector pinout table .................................................................................. 108
RJ12 to DB25 male cable .........................................................................109
Cable diagram ............................................................................................... 109
Connector pinout table .................................................................................. 109
RJ12 to DB25 female cable ......................................................................110
Cable diagram ............................................................................................... 110
Connector pinout table .................................................................................. 110
Page 12
CHAPTER 4 QUICK REFERENCE
111
SCO OpenServer utilities ...............................................................................112
Host Card Configuration utility (SCO OpenServer 5 Only) .......................113
Port Configuration utility............................................................................114
SCO UnixWare utilities ...................................................................................116
Device configuration utility ........................................................................116
Serial Manager..........................................................................................117
APPENDIX A SERIAL PORT DEVICE NAMES
119
Under SCO OpenServer .................................................................................120
Device node details...................................................................................120
DTR and RTS signal information ..............................................................120
Under SCO UnixWare .....................................................................................121
Device node details...................................................................................121
APPENDIX B TRANSPARENT PRINTING
122
What is transparent printing? .......................................................................123
Problems with printer output ........................................................................124
The printcap.io8 configuration file ...............................................................124
The print.io8 configuration file .....................................................................125
APPENDIX C ISA HOST CARD ADDRESS SETTINGS
126
DIL switch location .........................................................................................127
Hexidecimal to binary conversion table .....................................................128
APPENDIX D TROUBLESHOOTING
131
Windows 95 and 98 .........................................................................................132
Resource conflicts.....................................................................................132
Re-allocating system resources................................................................136
Re-allocating resources from the BIOS ......................................................... 136
Re-allocating resources using Device Manager ............................................ 137
Windows NT .....................................................................................................140
Windows NT general troubleshooting .......................................................140
Page 13
SCO OpenServer 5 ..........................................................................................141
Example of normal boot up messages for host cards...............................141
Error messages.........................................................................................142
SCO UnixWare/SCO OpenServer 6 .............................................................143
Example of normal boot up messages for host cards...............................143
Error messages.........................................................................................144
I/O8+ host card error messages ................................................................... 144
I/O8+ software error messages ..................................................................... 145
Windows 2000/XP/Server 2003/Vista/Server 2008 ....................................146
General troubleshooting under Windows 2000/XP/Server 2003/Vista/Server
2008 ..........................................................................................................147
Windows 2000/XP/Server 2003/Vista/Server 2008 error messages.........148
APPENDIX E CONTACTING PERLE
149
Making a technical Support Query ..............................................................150
Who to contact ..........................................................................................150
Information needed when making a query................................................151
Making a support query via the Perle web page .......................................152
Repair procedure ............................................................................................153
Feedback about this manual ........................................................................153
Contacting Perle technical support .............................................................154
INDEX ................................................................................... 155
Page 14
I/O8+ Serial Adaptors
User Guide
Chapter 1 Introduction
You need to read
this chapter if you
want to...
You need to read this chapter if you want an introduction to the Perle I/O8+ serial adaptor
cards, driver software and utilities.
This chapter provides introductory information about the Perle I/O8+ ISA and PCI serial
adaptor cards, driver software and configuration utilities.
This chapter includes the following sections;
•
About the I/O8+ serial adaptor card on page 16
I/O8+ Serial Adaptors User Guide
Chapter 1 Introduction
Page 15
About the I/O8+ serial adaptor card
The I/O8+ is a serial adaptor card which allows you to connect up to eight serial devices. This
type of adaptor card is available in both ISA and PCI formats.
Each serial port has three device nodes associated with it. Each node takes the form of a
special file which you can access in the normal manner from operating system utilities and
user applications. See also Appendix A Serial port device names and your operating
system manual for details of special files.
You use the I/O8+ when you want a robust entry level solution for the small office or point of
sale applications. Typically you use I/O8+ because you want to add extra serial ports to an
existing computer system rather than replacing it with the considerable cost that entails.
To use the I/O8+ serial adaptor cards you must first install the drivers supplied with the card
for your operating system. You then configure each card as required prior to mechanical
installation.
Note
The procedure for installing and configuring I/O8+ serial adaptor cards varies for different
operating systems.
Please read Before you start on page 18 in Chapter 2 Installing drivers and host cards
before commencing installation.
Thin Clients
Up to 4 I/O8+
cards per host
Dumb Terminals
Electronic
point of sale
8 serial ports per card.
Up to 32 ports per host
Printers
Data Capture
I/O8+ Serial Adaptors User Guide
About the I/O8+ serial adaptor card
Chapter 1 Introduction
Page 16
I/O8+ Serial Adaptors
User Guide
Chapter 2 Installing drivers and host cards
You need to read
this chapter if you
want to...
You need to read this chapter if you want to install I/O8+ serial adaptor cards and associated
software.
This chapter provides information about installing and configuring I/O8+ serial adaptor cards
in both ISA and PCI formats.
Note
The procedure for installing and configuring I/O8+ serial adaptor cards
varies for different operating systems. Please read Before you
start on page 18 before commencing installation.
This chapter includes the following sections;
•
Before you start on page 18
•
Downloading I/O8+ drivers from the Perle web site on page 18
•
Installing I/O8+ under Windows 95 and 98 on page 19
•
Installing under Windows NT on page 33
•
Installing I/O8+ under SCO OpenServer on page 34
•
Installing I/O8+ under SCO UnixWare on page 57
•
Installing an I/O8+ PCI host card under Windows 2000/XP/Server 2003/Vista/Server
2008 on page 80
•
Installing an I/O8+ ISA host card under Windows 2000 on page 88
•
Installing a PCI host card on page 100
•
Installing an ISA host card on page 101
•
Removing host cards on page 103.
I/O8+ Serial Adaptors User Guide
Chapter 2 Installing drivers and host cards
Page 17
Before you start
Before you install your I/O8+ host cards and software, note that the procedure for installing
and configuring I/O8+ serial adaptor cards varies for different operating systems.
To install under a particular operating system, please refer to one of the operating system
specific installation procedures listed below;
•
Installing I/O8+ under Windows 95 and 98 on page 19
•
Installing under Windows NT on page 33
•
Installing I/O8+ under SCO OpenServer on page 34
•
Installing I/O8+ under SCO UnixWare on page 57
•
Installing an I/O8+ PCI host card under Windows 2000/XP/Server 2003/Vista/Server
2008 on page 80
Downloading I/O8+ drivers from the Perle web site
You can install the I/O8+ driver and utility software from the Perle web site. To do this
proceed as follows;
1. On your PC, start the Internet browser you want to use (for example, Netscape).
2. Within your Internet browser window, select the software directory using the following
URL;
http://www.perle.com/downloads
Note
In the event of any problems contact your System Administrator or
Internet Service provider for assistance.
3. Change to the software directory.
The software directory is now displayed.
4. Download the zip files in this directory to a suitable location on your PC for example, /
tmp.
5. Uncompress the files using a suitable utility.
6. You can now install the driver software using the correct procedure for your operating
system. See Before you start on page 18.
I/O8+ Serial Adaptors User Guide
Before you start
Chapter 2 Installing drivers and host cards
Page 18
Installing I/O8+ under Windows 95 and 98
This section tells you how to install I/O8+ host cards, software drivers and utilities under the
Windows 95 and Windows 98 operating systems and includes the following;
•
General installation procedure for Windows 95 and 98 on page 19
•
Installing device drivers and utilities on page 20
•
Adding ISA host cards to the system on page 22
•
Configuring I/O8+ serial ports on page 28
•
Removing I/O8+ hardware from your system on page 31
General installation procedure for Windows 95 and 98
The general procedure for installing and configuring host cards, drivers software and
associated utilities for the Windows 95 and 98 operating systems is as follows:
1. Download the I/O8+ driver files into your PC from the CDROM or the Perle website. See
Downloading I/O8+ drivers from the Perle web site on page 18.
2. Install the I/O8+ Windows 95 and 98 drivers and utilities onto your system using the
procedures described in Installing device drivers and utilities on page 20.
3. Select and assign addresses for any additional ISA host cards you want to install from the
free addresses available. See Adding ISA host cards to the system on page 22.
4. Repeat step 3. until you have assigned addresses to all the ISA host cards you want to
install.
5. Install any PCI host cards you require into your system. See Installing a PCI host
card on page 100.
6. If required, remove any host cards you want from your system. See Removing host
cards on page 103.
7. Re-start your system
Your system now detects any ports automatically, no configuration is required by the user.
Your system can now use the serial adaptor cards you have installed. If required, you can
reconfigure serial ports following initial installation. See Configuring I/O8+ serial ports on
page 28.
Note
To remove the I/O8+ hardware from your system configuration, see Removing I/O8+
hardware from your system on page 31.
I/O8+ Serial Adaptors User Guide
Installing I/O8+ under Windows 95 and 98
Chapter 2 Installing drivers and host cards
Page 19
Installing device drivers and utilities
To install the I/O8+ device drivers and utilities for the Windows 95 or 98 operating systems
proceed as follows;
1. Load the CDROM into your PC.
The web browser window is now displayed automatically showing a virtual website (the
browser application depends on your system).
2. From the \drivers\io8plus\win9x directory, run the setup.exe file.
A welcome window is now displayed
3. In the Welcome window, click on the Next > button.
A progress message is displayed while installed devices are upgraded to use the new
drivers, followed by the Setup Complete window as shown in the next pictures.
I/O8+ Serial Adaptors User Guide
Installing I/O8+ under Windows 95 and 98
Chapter 2 Installing drivers and host cards
Page 20
4. In the Setup Complete window click select the Yes, I want to restart my computer now
option then click on Finish button to confirm your selection.
Hint
After the machine restarts, if windows cannot find a file whilst trying to install a Perle device
a pop-up window is displayed asking you for the location of missing file. To remedy this;
•
In the popup window, select the windows system directory for example,
c:\windows\system.
Device installation should then be able to continue.
Installation of device drivers and utilities is now complete.
I/O8+ Serial Adaptors User Guide
Installing I/O8+ under Windows 95 and 98
Chapter 2 Installing drivers and host cards
Page 21
Adding ISA host cards to the system
To add an I/O8+ ISA host card to the system configuration, proceed as follows;
1. In the Windows desktop, click on the Start button and select Settings > Control Panel to
display the Control panel window.
2. In the Control panel window, double click on the Add New Hardware icon.
The Add New Hardware Wizard is now displayed.
I/O8+ Serial Adaptors User Guide
Installing I/O8+ under Windows 95 and 98
Chapter 2 Installing drivers and host cards
Page 22
3. In the Add New Hardware Wizard click on the Next > button.
The page shown in the next picture is now displayed.
4. In the Add New Hardware Wizard, click on the Next > button.
The prompt page shown in the next picture is now displayed.
I/O8+ Serial Adaptors User Guide
Installing I/O8+ under Windows 95 and 98
Chapter 2 Installing drivers and host cards
Page 23
5. In the prompt page, select the No, I want the hardware from a list option and then click
on the Next > button to confirm your selection.
The hardware selection page is now displayed as shown in the next picture.
6. In the hardware selection page, scroll down the Hardware types list and single click on
the Multi-function adapters option to select it. Now click on the Next > button
The select manufacturer and model page is now displayed.
7. In the select manufacturer and model page, scroll down the Manufacturers list and select
Specialix International Ltd. Now scroll down the Models list and select the
Specialix I/O8+ ISA Adapter option.
I/O8+ Serial Adaptors User Guide
Installing I/O8+ under Windows 95 and 98
Chapter 2 Installing drivers and host cards
Page 24
8. In the select manufacturer and model page, click on the Next > button.
The system now tries to add the ISA card at its default address and IRQ level. If the
system can use the factory default address and IRQ settings the following screen is
now displayed.
Click on the Details
button to display the
factory defaults in use.
I/O8+ Serial Adaptors User Guide
Installing I/O8+ under Windows 95 and 98
Chapter 2 Installing drivers and host cards
Page 25
If the system has resources free but cannot use the factory defaults, the screen
shown in the next picture is now displayed which shows values suggested by the system.
Note
If the system cannot use the factory default or allocate free resources
you now need to try and resolve the resource conflict using the procedures given in
Resource conflicts on page 132 in Appendix D Troubleshooting.
9. In the Add New Hardware Wizard, click on the Next > button.
The final page of the wizard is now displayed as shown in the next picture.
I/O8+ Serial Adaptors User Guide
Installing I/O8+ under Windows 95 and 98
Chapter 2 Installing drivers and host cards
Page 26
10.In the Add New Hardware Wizard, click on the Finish button to complete the setup.
The System Settings Change window is now displayed asking you if you are ready to shut
down your computer and install the hardware.
11.In the System Settings Change window, click on the Yes button to complete the
installation.
You can now install your ISA host card. See Installing an ISA host card on page 101.
I/O8+ Serial Adaptors User Guide
Installing I/O8+ under Windows 95 and 98
Chapter 2 Installing drivers and host cards
Page 27
Configuring I/O8+ serial ports
Note
I/O8+ ports are normally configured as part of the installation process described in
Installing device drivers and utilities on page 20. The procedures described in
this section are provided for information only.
To configure I/O8+ serial ports proceed as follows;
1. In the Windows desktop, click on the Start button and select Settings > Control panel.
The control panel window is now displayed.
I/O8+ Serial Adaptors User Guide
Installing I/O8+ under Windows 95 and 98
Chapter 2 Installing drivers and host cards
Page 28
2. In the control panel window, double click on the System icon.
The System Properties tabbed window is now displayed as shown in the next picture.
Hint
You can also display the System Properties tabbed window by right
clicking on the My Computer icon on your desktop and selecting the
Properties menu option.
3. In the System Properties tabbed window, click on the Device Manager tab.
The Device Manager page is now displayed.
4. In the Device Manager page, double click on the device whose properties you wish to
view.
The properties tabbed window for the selected device is now displayed.
I/O8+ Serial Adaptors User Guide
Installing I/O8+ under Windows 95 and 98
Chapter 2 Installing drivers and host cards
Page 29
5. In the properties window, click on the Port Settings tab.
The Settings page is now displayed.
6. In the Settings page, select the configuration values you want and either click on the OK
button.
Re-configuration of ports is now complete.
I/O8+ Serial Adaptors User Guide
Installing I/O8+ under Windows 95 and 98
Chapter 2 Installing drivers and host cards
Page 30
Removing I/O8+ hardware from your system
To remove I/O8+ hardware from your system configuration proceed as follows;
Note
This process does not remove the I/O8+ device drivers and utilities from your system.
1. In the windows desktop, click on the Start button and select Settings > Control panel.
The control panel window is now displayed.
2. In the control panel window, double click on the System icon.
The System Properties tabbed window is now displayed as shown in the next picture.
I/O8+ Serial Adaptors User Guide
Installing I/O8+ under Windows 95 and 98
Chapter 2 Installing drivers and host cards
Page 31
3. In the System Properties tabbed window, click on the Device Manager tab
The Device Manager page is now displayed as shown in the next picture.
4. In the Device Manager page, click on the View devices by type button.
The display is now updated to show installed devices by type.
5. In the Device Manager page, click on the device you wish to remove, highlighting it then
press the Remove button.
The selected device is now removed from the system.
Warning
If you remove the devices but do not remove the hardware, the
devices will be re-installed when you next re-boot the machine or
run the Hardware Wizard.
I/O8+ Serial Adaptors User Guide
Installing I/O8+ under Windows 95 and 98
Chapter 2 Installing drivers and host cards
Page 32
Installing under Windows NT
The procedure for installing and configuring host cards, drivers software and associated
utilities for the Windows NT operating system is as follows:
Note
The Perle PortDirector software contains drivers for the I/O8+ host cards.
You will need to install the PortDirector for WIndows NT on your system in order to use
the I/O8+ host cards.
See Chapter 5 Adding and deleting host cards in the PortDirector User guide
part number 5500028 for further details.
1. Install any PCI host cards you require into your system. See Installing a PCI host
card on page 100
2. Install any ISA host cards you require into your system. See Installing an ISA host
card on page 101
3. If required, remove any host cards you want from your system. See Removing host
cards on page 103.
4. Use the PortDirector software to update your system with the revised number and type of
host cards. See The PortDirector user guide part number 5500028 for further details.
Your system can now use the serial adaptor cards you have installed.
I/O8+ Serial Adaptors User Guide
Installing under Windows NT
Chapter 2 Installing drivers and host cards
Page 33
Installing I/O8+ under SCO OpenServer
This section tells you how to install host cards, software drivers and utilities under the SCO
OpenServer operating system (SCO OpenServer 5 and SCO OpenServer 6) and includes
the following;
•
General installation procedure for SCO OpenServer on page 34
•
Upgrading from existing device drivers on page 36
•
Installing device drivers and utilities on page 37
•
Assigning ISA host card addresses and IRQ levels (SCO OpenServer 5 Only) on
page 43
•
Configuring I/O8+ serial ports on page 51
•
Removing I/O8+ drivers and utilities from your system on page 55.
General installation procedure for SCO OpenServer
The general procedure for installing and configuring host cards, drivers software and
associated utilities for the SCO OpenServer operating system is as follows:
1. If required, install any PCI host cards you require into your system. See Installing a PCI
host card on page 100
Note
SCO OpenServer 5 device drivers are displayed as Specialix I/O8+. SCO
OpenServer 6 device drivers are displayed as Perle I/O8+.
Note
SCO OpenServer 6 supports only the PCI version of the I/08+ card.
Note (SCO OpenServer 5 only)
If you are installing a PCI card after having installed your driver, you will need to run the
io8hcfg utility to create the relevant device nodes. See Assigning ISA host card
addresses and IRQ levels (SCO OpenServer 5 Only) on page 43 and
Appendix A Serial port device names.
Note
If your system has an EISA bus, you need to run the EISA configuration utility now. See
your System Administrator or product user documentation for further details.
I/O8+ Serial Adaptors User Guide
Installing I/O8+ under SCO OpenServer
Chapter 2 Installing drivers and host cards
Page 34
Note
If your system already has Specialix combined driver version 2.02 for SCO Unix 3.2.4
installed, you need to remove them before you can install new device drivers. See
Upgrading from existing device drivers on page 36.
2. If required, install the I/O8+ SCO OpenServer drivers and utilities onto your system using
the procedures described in Installing device drivers and utilities on page 37.
3. (SCO OpenServer 5 only) If required, using the Host Card Configuration tool, select
and assign addresses for any additional ISA host cards you want to install from the free
addresses available. See Assigning ISA host card addresses and IRQ levels (SCO
OpenServer 5 Only) on page 43.
4. (SCO OpenServer 5 only) Repeat step 3. until you have assigned addresses to all the ISA
host cards you want to install.
5. (SCO OpenServer 5 only) If required, install any ISA host cards you require into your
system. See Installing an ISA host card on page 101.
6. If required, remove any host cards you want from your system. See Removing host
cards on page 103.
7. Using the Port Configuration tool, configure the serial ports you have added to the
system. See Configuring I/O8+ serial ports on page 51.
Your system can now use the serial adaptor cards you have installed. If required, you can
reconfigure serial ports following initial installation. See Assigning ISA host card
addresses and IRQ levels (SCO OpenServer 5 Only) on page 43 and Configuring I/O8+
serial ports on page 51 for details.
I/O8+ Serial Adaptors User Guide
Installing I/O8+ under SCO OpenServer
Chapter 2 Installing drivers and host cards
Page 35
Upgrading from existing device drivers
If your system already has an existing Perle device driver installed, you cannot install a new
device driver unless you follow the correct upgrade procedure. The procedure required
depends on the device driver type currently installed as follows;
•
Upgrading from Specialix combined driver 2.0.2 for SCO Unix 3.2.4 (SCO
OpenServer 5 Only) on page 36
Note
SCO OpenServer 6 does not support the upgrade feature. If you are using SCO
OpenServer 6, remove the existing driver using the procedure described in
Removing I/O8+ drivers and utilities from your system on page 55. After the old
device driver is removed, install the new device driver using the procedures described in
Installing device drivers and utilities on page 37.
Upgrading from Specialix combined driver 2.0.2 for SCO Unix 3.2.4 (SCO OpenServer 5 Only)
You cannot upgrade the Specialix combined driver 2.0.2 for SCO Unix 3.2.4. You need to
remove the old driver, then install its replacement as follows;
1. Remove the existing device driver using the procedure described in Removing I/O8+
drivers and utilities from your system on page 55.
2. Install the new device driver using the procedures described in Installing device drivers
and utilities on page 37.
3. Continue with your installation as required using the steps listed under General
installation procedure for SCO OpenServer on page 34.
Upgrading your current I/O8+ device driver (SCO OpenServer 5 Only)
To upgrade your current I/O8+ device driver, proceed as follows;
•
Follow the procedure for installing device drivers detailed in Installing device drivers
and utilities on page 37 using the upgrade options when prompted by the software.
I/O8+ Serial Adaptors User Guide
Installing I/O8+ under SCO OpenServer
Chapter 2 Installing drivers and host cards
Page 36
Installing device drivers and utilities
To install the I/O8+ device drivers and utilities for the SCO OpenServer operating system
proceed as follows;
1. Login to your system as super user.
2. Load the CDROM into your system CD drive.
3. At the command prompt, make a directory for your installation by typing:
mkdir /cdrom
4. Mount the CDROM file system using the following commands:
mount -f ISO9660 -r /dev/cd0 /cdrom
Note
The example above shows the directory name as /cdrom, You can either use this
name or use another directory name to suit your requirements. For example, /mnt.
5. In the SCO OpenServer desktop, double click on the System Administration folder.
The System Administration window is now displayed.
6. In the System Administration window, double click on the software manager icon.
The Software Manager window is now displayed.
I/O8+ Serial Adaptors User Guide
Installing I/O8+ under SCO OpenServer
Chapter 2 Installing drivers and host cards
Page 37
7. In the Software Manager menu, click on Software > Install New.
The Begin Installation window is now displayed as shown in the next picture.
Click here to
select the local
host as the host
machine.
8. In the Begin Installation window, select the local host as the machine to install from by
clicking on the From localhostname button and then click on Continue.
The Select Media window is now displayed.
9. In the Select Media window, using the Media Device selector choose the Media Images
option then click on Continue.
The Enter Image Directory window is now displayed.
I/O8+ Serial Adaptors User Guide
Installing I/O8+ under SCO OpenServer
Chapter 2 Installing drivers and host cards
Page 38
10.In the Enter Image Directory window, enter the following in the Image directory field;
SCO OpenServer 5: /cdrom/drivers/io8plus/ose5
SCO OpenServer 6: /cdrom/drivers/io8plus/ose6
Note
The example and picture above show a directory name including /cdrom, You can
either include this name in the path or use another directory name to suit your
requirements. For example, /mnt.
11.In the Enter Image Directory window, click on OK.
The Install Selection window is now displayed.
I/O8+ Serial Adaptors User Guide
Installing I/O8+ under SCO OpenServer
Chapter 2 Installing drivers and host cards
Page 39
12.In the Install Selection window, click on the Install button.
If you are upgrading your current Perle I/O8+ SCO OpenServer 5 device driver, the
following pop-up window is now displayed.
13.In the pop-up window, click on the Continue button to continue the installation process.
The following progress message is now displayed.
The Specialix I/O8+ Installation Options window is now displayed.
Only available if you
are performing an
upgrade
I/O8+ Serial Adaptors User Guide
Installing I/O8+ under SCO OpenServer
Chapter 2 Installing drivers and host cards
Page 40
14.If required, in the Specialix I/O8+ Installation Options window, select the Re-Link kernel
option. (SCO OpenServer 6 users skip to step 18.)
Hint
If you are installing more then one driver, you can de-select this option until you
have installed all the drivers and utilities you require to save time.
15.If you wish to retain the existing configuration from a previous device driver installation, in
the Specialix I/O8+ Installation Options window, select Retain Configuration Data.
16.In the Specialix I/O8+ Window Installation menu, click on Options > Exit to close the
window and continue the installation process.
The host card configuration window is now displayed.
17.Using the Host Card Configuration utility, add any cards you want to the system then exit
the utility using the Card > Save and exit menu option. See Assigning ISA host card
addresses and IRQ levels (SCO OpenServer 5 Only) on page 43.
If you have re-linked the kernel earlier in this procedure, a message window is now
displayed prompting you to re-boot the system.
I/O8+ Serial Adaptors User Guide
Installing I/O8+ under SCO OpenServer
Chapter 2 Installing drivers and host cards
Page 41
18.In the message window click on OK to continue the installation process.
The following message is now displayed upon completion of the installation process.
19.In the message window, click on OK to close the window.
The software manager window is now updated to show the driver you have installed as
shown in the next picture.
20.In the Software Manager window, click on the Host > Exit menu option to close the
window.
21.Shut down your system and turn the power off. You can now continue with the rest of the
installation process see General installation procedure for SCO OpenServer on
page 34.
I/O8+ Serial Adaptors User Guide
Installing I/O8+ under SCO OpenServer
Chapter 2 Installing drivers and host cards
Page 42
Assigning ISA host card addresses and IRQ levels (SCO OpenServer 5 Only)
The Host Card Configuration Utility allows you to define and edit addresses and IRQ levels
for I/O8+ host cards you add to the system. In addition this utility automatically creates and
removes serial port device nodes.
This section includes the following;
•
Starting the Host Card Configuration utility on page 44
•
Adding a new host card address on page 45
•
Editing a host card address on page 47
•
Removing a host card address on page 49
•
Exiting the Host Card Configuration utility on page 50
Note
If you make any changes to the host card addresses on the system,
you will need to restart the software kernel. See Re-building the
kernel on page 50 for details.
I/O8+ Serial Adaptors User Guide
Installing I/O8+ under SCO OpenServer
Chapter 2 Installing drivers and host cards
Page 43
Starting the Host Card Configuration utility
You can start the Host Card Configuration utility in one of two ways;
Using the
command line
•
Using the command line. See page 44.
•
Using the SCO OpenServer 5 desktop. See page 44.
To start the Host Card Configuration Utility from the command line proceed as follows;
1. At the command prompt, type io8hcfg and press the Enter key.
The Host Card Configuration window is now displayed.
You can now use the utility to add, remove or edit host card parameters.
Using the SCO
OpenServer 5
desktop
To start the Host Card Configuration Utility from the SCO OpenServer 5 desktop proceed as
follows;
1. In the SCO OpenServer 5 desktop, open the System Administration folder.
The System Administration window is now displayed.
2. In the System Administration window, click on the Specialix I/O8+ folder to open it.
The Specialix I/O8+ window is now displayed
I/O8+ Serial Adaptors User Guide
Installing I/O8+ under SCO OpenServer
Chapter 2 Installing drivers and host cards
Page 44
3. In the Specialix I/O8+ window, click on the I/O8+ Host Configuration Icon.
The Host Card Configuration window is now displayed.
You can now use the utility to add, remove or edit host card parameters.
Adding a new host card address
In order to function, each ISA host card must be allocated an available I/O address and IRQ
level. The Host Card Configuration utility allows you to determine the available addresses
and IRQ levels, then allocate them to a particular host card. To do this, proceed as follows;
1. In the Host Card Configuration menu, click on Card > Add.
The Set Address and IRQ window is now displayed which shows the next available host
card address and IRQ level by default.
Selecting nondefault address
and IRQ level
2. If you want to allocate an address and IRQ level other than the default proceed as follows;
a. In the Set Address and IRQ window, click in the Address (hex) field and enter the
address you want in hexidecimal.
b. In the Set Address and IRQ window, click on the IRQ (Interrupt level ReQuest
level) selector and select a free IRQ level.
I/O8+ Serial Adaptors User Guide
Installing I/O8+ under SCO OpenServer
Chapter 2 Installing drivers and host cards
Page 45
Testing your
selection
3. In the Set Address and IRQ window, click on the Check button to verify the values you
have entered.
The Resource Check Result pop-up is now displayed telling you whether or not the
selected address and IRQ level are valid. An example is shown in the next picture.
4. In the pop-up, click on OK to close the window.
5. In the Host Card Configuration window click on OK to confirm your selection and close
the window.
If your selection is invalid, the Resource Check Result pop-up message is now displayed.
Otherwise, the address is now set and the host card configuration window updated to show
the new card and address.
I/O8+ Serial Adaptors User Guide
Installing I/O8+ under SCO OpenServer
Chapter 2 Installing drivers and host cards
Page 46
Editing a host card address
To edit an existing host card address on the system proceed as follows;
1. In the host card Configuration window, select the host card whose address you want to
edit.
2. In the Host Card Configuration menu, click on Card > Edit.
The Set Address and IRQ window is now displayed showing the current address and IRQ
level for the selected host card.
3. In the Set Address and IRQ window click in the Address (hex) field and enter the
address you want in hexidecimal.
4. In the Set Address and IRQ window, click on the IRQ (Interrupt level ReQuest level)
selector and choose the IRQ level you want.
I/O8+ Serial Adaptors User Guide
Installing I/O8+ under SCO OpenServer
Chapter 2 Installing drivers and host cards
Page 47
Testing your
selection
5. If required, in the Set Address and IRQ window, click on the Check button.
The Resource Check result pop-up is now displayed telling you if the selected address
and IRQ level are valid. An example is shown in the next picture.
6. In the pop-up, click on OK to close the window
7. In the Host Card Configuration window, click on OK to confirm any changes and close the
window.
If your selection is invalid, the Resource Check Result pop-up message is now displayed.
Otherwise, the new address is now set and the host card configuration window updated to
show the changes.
I/O8+ Serial Adaptors User Guide
Installing I/O8+ under SCO OpenServer
Chapter 2 Installing drivers and host cards
Page 48
Removing a host card address
To remove a host card address from the system, proceed as follows;
1. In the host card configuration window, click on one or more of the host cards listed in the
Current Host Card Configuration field highlighting them.
2. In the Host Card Configuration menu, click on Card > Remove.
The Host Card Configuration window is now updated to show the remaining host cards
only.
I/O8+ Serial Adaptors User Guide
Installing I/O8+ under SCO OpenServer
Chapter 2 Installing drivers and host cards
Page 49
Exiting the Host Card Configuration utility
Quitting and saving To exit the Host Card Configuration utility and save any changes you have made, proceed as
follows;
1. In the Host Card Configuration menu, click on Card > Save and exit.
Re-building the
kernel
If you have made any changes a pop-up now appears prompting you to re-build the
operating system kernel, otherwise the utility closes.
2. In the pop-up, click on the Yes button to re-link the operating system kernel.
The Kernel now re-links and a busy message is displayed during this process, followed by
a confirmation pop-up.
3. In the confirmation pop-up, click on OK to close the window.
The Host Card Configuration utility now closes and saves any changes you have made.
Note
To quit the Host Card Configuration utility without saving any changes:
•
In the In the Host Card Configuration menu, click on Card > Quit.
I/O8+ Serial Adaptors User Guide
Installing I/O8+ under SCO OpenServer
Chapter 2 Installing drivers and host cards
Page 50
Configuring I/O8+ serial ports
The Port Configuration utility allows you to configure the extra I/O8+ serial ports you have
added to your system. To do this proceed as follows;
Note
If you want to perform transparent printing from any of the terminals attached to your
system, you need to check the contents of the printcap.io8 file to see if the terminal
type you are using is supported. To do this proceed as follows;
1. Using a text editor, go to the /etc directory and open the file called
printcap.io8
2. Check the contents of the printcap.io8 file to see if the terminal type you are
using is supported. See page 124 in Appendix B Transparent printing for
the syntax of the entries in this file.
3. If the terminal type you are using is not supported, add an entry for the new
terminal type (including the type, transparent print ON and transparent print
OFF strings) to the printcap.io8 file (page 124). See the user guide for your
terminal for details of the entries required.
You can now configure the ports you want using the Port Configuration utility.
Starting the Port
1. In the command prompt, type io8pcfg and press the Enter key.
Configuration utility
Or use the SCO OpenServer 5 desktop as follows;
a. In the SCO OpenServer 5 desktop, open the System Administration folder.
The System Administration window is now displayed.
b. In the System Administration window, click on the Specialix I/O8+ folder to open it.
The Specialix I/O8+ window is now displayed
c. In the Specialix I/O8+ window, click on the I/O8+ Port Configuration Icon.
Or use the SCO OpenServer 6 desktop as follows;
a. In the SCO OpenServer 6 desktop, open the System Administration folder.
The System Administration window is now displayed.
b. In the System Administration window, click on the Perle-Serial folder to open it.
The Perle-Serial window is now displayed
c. In the Perle-Serial window, click on the I/O8+ Port Configuration Icon.
The Port Configuration window for SCO OpenServer 5 is shown in the next picture (SCO
OpenServer 6 would have the Perle I/O8+ Port Configuration window title).
I/O8+ Serial Adaptors User Guide
Installing I/O8+ under SCO OpenServer
Chapter 2 Installing drivers and host cards
Page 51
Menus see
page 115.
Select one or
more ports
from this list.
Select a
terminal type
here.
See page 53
Select a getty
definition
here.
See page 53.
Enables or
disables flow
control.
See page 53
Enables or
disables login.
See page 54
Selecting ports
2. In the Port Configuration window, select the ports you want you want to configure by
clicking on one or more items in the list of ports (example in next picture).
Hint
To select multiple items which follow each other in the list, hold down the Shift key and
click on all the items you want.
To select multiple items from anywhere in the list, hold down the Ctrl key and click on all
the items you want.
I/O8+ Serial Adaptors User Guide
Installing I/O8+ under SCO OpenServer
Chapter 2 Installing drivers and host cards
Page 52
Selecting a getty
definition
3. In the Port Configuration window, select the getty definition you want by double clicking
on an item in the Available gettydefs list. Alternatively, click on the Set button.
The list of currently selected ports is now updated to show the new getty definition.
New definition
displayed here
Selecting terminal
type
4. In the Terminal type list, double click on the terminal type you want for the currently
selected ports. Alternatively, single click on the item you want in the Terminal type list and
press the Set button.
The list of ports is now updated to show the new terminal type
New terminal type
displayed here
Enabling and
disabling flow
control
5. If required, in the Port Configuration window, click on the ixon button to enable flow
control for Transparent printing.
Note
For information about transparent printing, see Appendix B Transparent printing.
6. If required, in the Port Configuration window, click on the ixany button to enable sending
of data on receipt of the next character (when flow control is enabled on the transparent
print port).
I/O8+ Serial Adaptors User Guide
Installing I/O8+ under SCO OpenServer
Chapter 2 Installing drivers and host cards
Page 53
Setting up a port
login
7. In the Port Configuration window, click on one of the menu options shown in the next
table to display the ports with the login status you want to change. For example, ports
without logins enabled.
These options allow you to filter on the type of ports you are looking for. This facility is
helpful when you have a large number of ports installed.
To Display
Click menu option
All ports with logins enabled
Ports > Logins
All ports without logins enabled
Ports > Unconfigured
Display all ports
Ports > All
8. If required, in the Port Configuration window, select the ports whose logins status you
want to change, then click on one of the following to change the login status;
Tc
Click on ..
Enable logins for a port
Enable button
Disable logins for a port
Disable button
The selected ports in the list now are updated show their new login status. For example if
you enable the login for a port, a tick is displayed along side the port as shown in the next
picture.
9. Repeat steps 2. to 8. until you have configured all the ports you want.
Exiting the Port
Configuration tool
10.In the Port Configuration menu, click on Ports > Save & Exit.
Note
To quit the Port Configuration tool without saving changes,
•
In the Port Configuration menu, click on Ports > Quit.
The Port Configuration tool now closes and saves any changes you have made.
I/O8+ Serial Adaptors User Guide
Installing I/O8+ under SCO OpenServer
Chapter 2 Installing drivers and host cards
Page 54
Removing I/O8+ drivers and utilities from your system
To remove the I/O8+ device drivers and utilities for the SCO OpenServer operating system
proceed as follows;
1. In the SCO OpenServer desktop, double click on the System Administration folder.
The System Administration window is now displayed.
2. In the System Administration window, double click on the software manager icon.
The Software Manager window is now displayed.
Note
SCO OpenServer 5 device drivers are displayed as Specialix I/O8+. SCO
OpenServer 6 device drivers are displayed as Perle I/O8+.
3. In the Software Manager window select the driver you want to remove.
4. In the Software Manager menu, click on Software > Remove software.
A confirmation window is now displayed prompting you to confirm removal
I/O8+ Serial Adaptors User Guide
Installing I/O8+ under SCO OpenServer
Chapter 2 Installing drivers and host cards
Page 55
5. In the confirmation window, click on the Remove button.
The software is now removed and the following Kernel re-link message is now displayed
as shown in the next picture.
The Kernel re-link message window now closes and the removal continues. A message is
displayed upon completion.
6. In the message window, click on OK to close the window.
The software manager window is now updated to show the remaining software.
I/O8+ Serial Adaptors User Guide
Installing I/O8+ under SCO OpenServer
Chapter 2 Installing drivers and host cards
Page 56
Installing I/O8+ under SCO UnixWare
This section tells you how to install host cards, software drivers and utilities under the SCO
UnixWare operating system and includes the following;
•
General installation procedure for SCO UnixWare on page 58
•
Upgrading from existing device drivers on page 60
•
Installing drivers and utilities onto your system on page 61
•
Assigning ISA host card addresses and IRQ levels on page 64
•
Configuring serial ports on page 73
•
Configuring serial ports under SCO UnixWare 2 on page 78
•
Removing I/O8+ drivers and utilities from your system on page 79.
I/O8+ Serial Adaptors User Guide
Installing I/O8+ under SCO UnixWare
Chapter 2 Installing drivers and host cards
Page 57
General installation procedure for SCO UnixWare
The general procedure for installing and configuring host cards, drivers software and
associated utilities for the SCO UnixWare operating system is as follows:
1. Install any PCI host cards you require into your system. See Installing a PCI host
card on page 100
Note
Once you have installed the I/O8+ drivers, if you add or remove any host cards the
operating system will update the kernel accordingly using the spxnodescpt script.
The spxnodescpt script is run automatically during boot up and checks to see if any
host cards have been added or removed since the last time the system was powered up.
If anything has changed the spxnodescpt script recreates the files which identify the
ports, terminals and transparent printing and applies the changes.
Note
If your system already has Specialix IO8 Svr4 driver v1.0.2 for SVR4 operating systems, you
need to remove them before you can install new device drivers. See Upgrading from existing
device drivers on page 60.
2. If required, install the I/O8+ SCO UnixWare drivers and utilities onto your system using
the procedures described in Installing drivers and utilities onto your system on
page 61.
3. if required, using the UnixWare Device Configuration Utility, select and assign
addresses for any additional ISA host cards you want to install from the free addresses
available. See Assigning ISA host card addresses and IRQ levels on page 64.
4. Repeat step 3. until you have assigned addresses to all the ISA host cards you want to
install.
5. If required, install any ISA host cards you require into your system. See Installing an ISA
host card on page 101
6. If required, remove any host cards you want from your system. See Removing host
cards on page 103.
7. Using the Serial Manager utility, configure the serial ports you have added to the system.
See Configuring serial ports on page 73.
Note
If you are running version 2 of the SCO UnixWare operating system you need to use the
procedures described in Configuring serial ports under SCO UnixWare 2 on page 78 to
configure your serial ports.
Your system can now use the serial adaptor cards you have installed. If required, you can
reconfigure serial ports following initial installation. See Assigning ISA host card
I/O8+ Serial Adaptors User Guide
Installing I/O8+ under SCO UnixWare
Chapter 2 Installing drivers and host cards
Page 58
addresses and IRQ levels on page 64 and Configuring serial ports on page 73 for
details.
I/O8+ Serial Adaptors User Guide
Installing I/O8+ under SCO UnixWare
Chapter 2 Installing drivers and host cards
Page 59
Upgrading from existing device drivers
If your system already has an existing Perle device driver installed, you cannot install a new
device driver unless you follow the correct upgrade procedure. The procedure required
depends on the device driver type currently installed as follows;
•
Upgrading from Specialix I/O8+ Svr4 driver v1.0.2 on page 60
Upgrading from Specialix I/O8+ Svr4 driver v1.0.2
You cannot upgrade the Specialix I/O8+ Svr4 driver v1.0.2. You need to remove the old
driver, then install its replacement as follows;
1. Remove the existing device driver using the procedure described in Removing I/O8+
drivers and utilities from your system on page 79.
2. Install the new device driver using the procedures described in Installing drivers and
utilities onto your system on page 61.
3. Continue with your installation as required using the steps listed under General
installation procedure for SCO UnixWare on page 58.
I/O8+ Serial Adaptors User Guide
Installing I/O8+ under SCO UnixWare
Chapter 2 Installing drivers and host cards
Page 60
Installing drivers and utilities onto your system
To install the I/O8+ device drivers and utilities for the SCO UnixWare operating system
proceed as follows;
1. Login to your system as super user.
2. Load the CDROM into your system CD drive.
3. At the command prompt, type scoadmin.
The System Administration window is now displayed.
4. In the System Administration window, double click on the Filesystem Manager folder.
The Filesystem Manager window is now displayed.
I/O8+ Serial Adaptors User Guide
Installing I/O8+ under SCO UnixWare
Chapter 2 Installing drivers and host cards
Page 61
5. In the Filesystem Manager menu, click on Mount > Add Mount Configuration >Local.
The Add Local Mount Configuration window is now displayed.
6. In the Add Local Mount Configuration window, set only the options detailed in the next
table:
Option
Set to or enter....
Device File
Select cdrom or string
containing cdrom
Mount Point
/cdrom
Access Mode
Select Read-only
When to Mount
Enable Now
Disable At System Startup
I/O8+ Serial Adaptors User Guide
Installing I/O8+ under SCO UnixWare
Chapter 2 Installing drivers and host cards
Page 62
7. In the Add Local Mount Configuration window, click on OK to accept the settings and
close the window.
The Filesystem Manager window is now updated to show the new mount as shown in the
next picture.
8. Filesystem Manager menu, click on Host > Exit to close the window.
9. At the command prompt, type:
pkgadd -d /cdrom/drivers/io8plus/unixware/io8.pkg.dd io8
10.Press the Enter key.
The system now installs the driver and displays a series of messages ending with the
prompt shown in the next picture.
11.At the prompt type q and press the Enter key.
12.At the command prompt, type shutdown -y -i6 and press the Enter key to shutdown and
re-boot your system.
Upon completion of the system re-boot the I/O8+ drivers you have installed are ready to use.
I/O8+ Serial Adaptors User Guide
Installing I/O8+ under SCO UnixWare
Chapter 2 Installing drivers and host cards
Page 63
Assigning ISA host card addresses and IRQ levels
The Unixware Device Configuration Utility allows you to define and edit addresses and IRQ
levels for I/O8+ host cards you add to the system.
This section includes the following;
•
Starting the Unixware Device Configuration Utility on page 65
•
Adding a new host card address on page 67
•
Editing a host card address on page 47
•
De-activating a host card on page 70
•
Exiting the Device Configuration Utility on page 72
Note
If you make any changes to the host card addresses on the system,
you will need to rebuild the UNIX kernel. See Re-building the
kernel on page 50 for details.
I/O8+ Serial Adaptors User Guide
Installing I/O8+ under SCO UnixWare
Chapter 2 Installing drivers and host cards
Page 64
Starting the Unixware Device Configuration Utility
UnixWare provides a mechanism for adding and removing device hardware with the Device
Configuration Utility. You will need to use this utility in order to add any ISA cards to your
configuration.
Note
I/O8+ PCI cards are automatically detected by the operating system.
You do not need to add them manually.
You can start the Device Configuration Utility using either the command prompt or the SCO
UnixWare System Administration tool. See the following;
Command prompt
method
•
Command prompt method on page 65
•
System Administration tool method on page 66.
To start the Device Configuration Utility from the command prompt, proceed as follows;
•
At the command prompt, type dcu and press the Enter key.
The Unixware Device Configuration Utility window is now displayed.
You can now use the Device Configuration Utility to configure or display host card
addresses and IRQ levels. See Adding a new host card address on page 67.
I/O8+ Serial Adaptors User Guide
Installing I/O8+ under SCO UnixWare
Chapter 2 Installing drivers and host cards
Page 65
System
To start the Device Configuration Utility from the SCO UnixWare System Administration tool,
Administration tool proceed as follows;
method
1. At the command prompt, type scoadmin
The System Administration window is now displayed
2. In the System Administration tool window, click on the Hardware folder and then select
Device Configuration Utility (DCU)
The Unixware Device Configuration Utility window is now displayed.
You can now use the Device Configuration Utility to configure or display host card
addresses and IRQ levels. See Adding a new host card address on page 67.
I/O8+ Serial Adaptors User Guide
Installing I/O8+ under SCO UnixWare
Chapter 2 Installing drivers and host cards
Page 66
Adding a new host card address
In order to function, each ISA host card must be allocated an available I/O address and IRQ
level. The Device Configuration Utility allows you to determine the available addresses and
IRQ levels, then allocate them to a particular host card. To do this proceed as follows;
1. Start the Unixware Device Configuration Utility. See Starting the Unixware Device
Configuration Utility on page 65.
2. In the Device Configuration Utility Main Menu, click on Software Device Drivers.
The Software Device Driver Selections window is now displayed.
3. In the Software Device Driver Selections window, select Communications cards using
the up and down arrow keys and press the Enter key to confirm your selection.
The Software Device Drivers window is now displayed as shown in the next picture.
I/O8+ Serial Adaptors User Guide
Installing I/O8+ under SCO UnixWare
Chapter 2 Installing drivers and host cards
Page 67
4. In the Software Device Drivers window, select the host card you want using the up and
down arrow keys and then press the space bar to activate the card (denoted by a star
symbol).
5. Press the F5 key.
The New Hardware Configuration window is now displayed.
6. In the New Hardware Configuration window, select IRQ using the up and down arrow
keys and type in the new IRQ value you want to assign for the selected host card.
7. Repeat step 6. to set the upper and lower address values IOStart and IOEnd. Use the
same procedure to set MemStart and MemEnd to 0 so they are not used.
Note
The Host card address values you enter must be in hexidecimal and match the
corresponding settings on the host cards. To obtain the correct hexidecimal address from
the binary value set on ISA host cards, see Appendix C ISA host card address
settings.
8. Repeat steps 4. to 7. until you have set all the IRQ levels and addresses for all the host
cards you require.
9. Press the F10 key to accept the new values and close the window.
I/O8+ Serial Adaptors User Guide
Installing I/O8+ under SCO UnixWare
Chapter 2 Installing drivers and host cards
Page 68
Editing a host card address
Note
You can only edit ISA card properties. PCI card properties are set by the
operating system and cannot be changed by the user.
The Device Configuration Utility allows you to edit existing host card addresses and IRQ
levels. To do this proceed as follows;
1. Start the Unixware Device Configuration Utility. See Starting the Unixware Device
Configuration Utility on page 65.
2. In the Device Configuration Utility Main Menu, click on Hardware Device Configuration.
The Hardware Device Configuration window is now displayed.
Activate (Y) or deactivates (N) a host card.
Enter IRQ (Interrupt
request level) here
Not used for I/O8+
Enter address of ISA
host cards here
3. In the Hardware Device Configuration window, use the tab key move the cursor to the
host card IRQ or address you wish to change.
4. At the selected location, type in the new IRQ or address value you want to assign for the
selected host card.
Note
The Host card address values you enter must be in hexidecimal. To
obtain the correct hexidecimal address from the binary value set on
ISA host cards, see Appendix C ISA host card address
settings.
5. Repeat steps 3. to 4. until you have set all the IRQ levels and addresses you require.
I/O8+ Serial Adaptors User Guide
Installing I/O8+ under SCO UnixWare
Chapter 2 Installing drivers and host cards
Page 69
6. Press the F10 key to confirm your changes and close the window.
De-activating a host card
To deactivate an installed host card proceed as follows;
1. Start the Unixware Device Configuration Utility. See Starting the Unixware Device
Configuration Utility on page 65.
2. In the Device Configuration Utility Main Menu, click on Hardware Device Configuration
The Hardware Device Configuration window is now displayed.
Activate (Y) or deactivates (N) a host card.
Enter IRQ (Interrupt
request level) here
Not used for I/O8+
Enter address of ISA
host cards here
3. In the Hardware Device Configuration window, use the tab key to move the cursor to the
activate/deactivate field for the host card you want as shown in the next picture.
Type N here to deactivate a host card.
4. At the selected field type N to de-activate the host card (to re-activate type Y).
5. Repeat steps 3. to 4. until you have set all the IRQ levels and addresses you require.
6. Press the F10 key to accept the new values and close the window.
I/O8+ Serial Adaptors User Guide
Installing I/O8+ under SCO UnixWare
Chapter 2 Installing drivers and host cards
Page 70
Displaying software device driver details
To display details of the software device drivers present on your system proceed as follows;
1. Start the Unixware Device Configuration Utility. See Starting the Unixware Device
Configuration Utility on page 65.
2. In the Device Configuration Utility Main Menu, click on Hardware Device Configuration.
The Hardware Device Configuration window is now displayed showing details of the
software device drivers present on your system.
3. Press the F10 key to confirm your changes and close the window.
I/O8+ Serial Adaptors User Guide
Installing I/O8+ under SCO UnixWare
Chapter 2 Installing drivers and host cards
Page 71
Exiting the Device Configuration Utility
Quitting and saving To exit the Device Configuration Utility and save any changes you have made, proceed as
follows;
1. In the Device Configuration Utility Main Menu, click on Apply Changes & Exit DCU.
The Device Configuration Utility now closes and saves any changes you have made.
Note
To quit the Host Card Configuration utility without saving any changes:
•
In the In the Host Card Configuration menu, click on Exit DCU and Cancel
Changes.
Note
In most cases the kernel will need to be rebuilt in order for the changes to take
effect to do this proceed as follows;
1. Login to your system as super user.
2. At the command prompt, type /etc/conf/bin/idbuild and press the Enter
key.
You are now prompted to re-boot the system.
3. At the command prompt, type Shutdown -i6 -y to re-boot the system.
The system now re-boots displaying messages as it does so.
I/O8+ Serial Adaptors User Guide
Installing I/O8+ under SCO UnixWare
Chapter 2 Installing drivers and host cards
Page 72
Configuring serial ports
The software provided with the I/O8+ for the SCO UnixWare operating system includes a
utility called Serial Manager which allows you to configure the extra I/O8+ serial ports you
have added to your system.
Note
If you are running version 2 of the SCO UnixWare operating system you need to use the
procedures described in Configuring serial ports under SCO UnixWare 2 on page 78 to
configure your serial ports.
Note
On UnixWare 7.0, you must apply a patch file called ptf7053 before using the Serial Manager.
You can find the patch on the SCO web site at;
http://www.sco.com
To configure serial ports with Serial Manager proceed as follows;
Note
If you want to perform transparent printing from any of the terminals attached to your
system, you need to check the contents of the printcap.io8 file to see if the terminal
type you are using is supported. To do this proceed as follows;
1. Using a text editor, go to the /etc directory and open the file called
printcap.io8
2. Check the contents of the printcap.io8 file to see if the terminal type you are
using is supported. See page 124 in Appendix B Transparent printing for
the syntax of the entries in this file.
3. If the terminal type you are using is not supported, add an entry for the new
terminal type (including the type, transparent print ON and transparent print
OFF strings) to the printcap.io8 file (page 124). See the user guide for your
terminal for details of the entries required.
4. If you have made any changes then either re-boot using by typing
Shutdown -i6 -y or type io8cfg in order to re-configure the print port settings.
You can now configure the ports you want using the Serial Manager utility.
I/O8+ Serial Adaptors User Guide
Installing I/O8+ under SCO UnixWare
Chapter 2 Installing drivers and host cards
Page 73
1. At the command prompt, type scoadmin
The System Administration window is now displayed as shown in the next picture.
2. In the System Administration tool window, click on the Hardware folder and then select
Serial Manager
The Serial Manager window is now displayed showing the host cards (including I/O8+)
currently present on the system.
I/O8+ Serial Adaptors User Guide
Installing I/O8+ under SCO UnixWare
Chapter 2 Installing drivers and host cards
Page 74
3. In the Serial Manager window, select the host card you want. Then in the Serial Manager
menu, click on View > Ports .
The Serial Manager window now displays the ports available for the selected host card as
shown in the next picture.
I/O8+ Serial Adaptors User Guide
Installing I/O8+ under SCO UnixWare
Chapter 2 Installing drivers and host cards
Page 75
4. In the Serial Manager menu, click on Port > Modify .
The Modify Serial Port window is now displayed.
5. In the Modify Serial Port window, set the parameters shown in the next table
Parameter
Set to
Port Type
No change, should already be
set to software flow control
Configure port
incoming only
Speed
the speed value you require
I/O8+ Serial Adaptors User Guide
Installing I/O8+ under SCO UnixWare
Chapter 2 Installing drivers and host cards
Page 76
6. In the Modify Serial Port window, click on the Port settings button.
The Port settings window is now displayed.
7. In the Port settings window, select the Data bits and Parity values you require and click
on OK.
8. In the Modify Serial Port window, click on OK to accept the changes you have made and
close the window.
9. Repeat steps 3. to 8. until you have configured the serial ports for all the host cards you
require.
10.In the Serial Manager menu click on Host > Quit to quit Serial Manager and close the
window.
I/O8+ Serial Adaptors User Guide
Installing I/O8+ under SCO UnixWare
Chapter 2 Installing drivers and host cards
Page 77
Configuring serial ports under SCO UnixWare 2
spxadmport
Syntax
SCO UnixWare 2 does not include the graphical user interface based Serial Manager utility.
If you are running SCO UnixWare 2 on your computer, you need to run the spxadmport
script from the command line to configure I/O8+ serial ports. You use this by typing a single
line command which contains the information required for a given configuration task using
the following syntax;
/etc/spxadmport command svctag [label] [owner]
where;
Procedure
Item
Description
Example
command
add, enable, disable, remove or list.
remove
svctag
device number from /dev/term.
i01
label
/etc/ttydefs entry (optional).
9600
owner
user ID assigned to the port (optional).
root
To use the spxadmport script to configure your I/O8+ serial ports proceed as follows;
1. At the command prompt, type one of the commands detailed in the next table using the
following syntax;
/etc/spxadmport [command] [svctag] [label] [owner]
Command
Description
Example command
Add
Adds a serial port to the
service monitor (io8mon) and
enables the port for monitoring
logins.
/etc/spxadmport add i01 9600 root
Enable
Enables a previously disabled
port for monitoring.
/etc/spxadmport enable
Disable
Disables a port. Has the effect
of disabling all further logins on
this port.
/etc/spxadmport disable i01
Remove
Removes the selected serial
port from the service monitor
(io8mon).
/etc/spxadmport remove i01
List
Lists the currently defined
services and/or port monitors.
/etc/spxadmport list
List p
Lists all logins configured.
/etc/spxadmport list p
List s
Lists all port services
configured.
/etc/spxadmport list s
I/O8+ Serial Adaptors User Guide
Installing I/O8+ under SCO UnixWare
Chapter 2 Installing drivers and host cards
Page 78
2. Press the Enter key.
The revised I/O8+ port configuration is now adopted by the system.
Removing I/O8+ drivers and utilities from your system
To remove the software drivers from your system under the SCO UnixWare operating
system proceed as follows;
Note
Before removing a software driver you should first de-activate all I/O8+ host cards
present on the system. See De-activating a host card on page 70.
1. At the command prompt, type pkgrm io8 and press Enter
The I/O8+ driver and associated utilities are now removed from your system.
I/O8+ Serial Adaptors User Guide
Installing I/O8+ under SCO UnixWare
Chapter 2 Installing drivers and host cards
Page 79
Installing an I/O8+ PCI host card under Windows 2000/XP/
Server 2003/Vista/Server 2008
This section describes how to install the PCI host card I/O8+ device driver software under
Microsoft Windows 2000/XP/Server 2003/Vista/Server 2008.
This section includes the following:
•
General PCI host card installation procedure for Windows 2000/XP/Server 2003/
Vista/Server 2008 on page 80
•
Installing PCI host card device drivers and utilities onto your system on page 81
•
Updating I/O8+ PCI host card device drivers with update.exe on page 83
•
Configuring PCI host card serial ports on page 85.
General PCI host card installation procedure for Windows 2000/XP/Server 2003/Vista/
Server 2008
The general procedure for installing an I/O8+ PCI host card under the Windows 2000/XP/
Server 2003/Vista/Server 2008 operating systems is as follows:
1. Install or remove any PCI host cards you require on your system. See Installing a PCI
host card on page 100 and Removing host cards on page 103.
2. Using the I/O8+ installation wizard, install the I/O8+ device driver software. See Installing
PCI host card device drivers and utilities onto your system on page 81.
3. Using the Windows Device Manager, configure the serial ports you have added to the
system. See Configuring PCI host card serial ports on page 85.
I/O8+ Serial Adaptors User Guide
Installing an I/O8+ PCI host card under Windows 2000/XP/Server 2003/Vista/Server 2008
Page 80
Chapter 2 Installing drivers and host cards
Installing PCI host card device drivers and utilities onto your system
To install or enable the I/O8+ device drivers on your system proceed as follows:
1. Turn on your PC and if required, log in.
If you have installed any new host cards a Found New Hardware message is briefly
shown followed by the Found New Hardware wizard as shown in the pictures.
2. In the Found New Hardware wizard click on the Cancel button.
3. Download the lastest I/O8+ driver zip file from the Perle website for your operating
system:
io8-x86.zip for 32-bit Windows operating systems.
io8-amd64.zip for 64-bit Windows operating systems.
io8-ia64.zip for 64-bit Windows Itanium operating systems.
4. Unzip the driver zip file to a local directory. We recommend that you use the
io8-setup-<arch>.exe file when installing the drivers for a I/O8+ PCI card, which will
launch the installation wizard, to install the I/O8+ driver.
I/O8+ Serial Adaptors User Guide
Installing an I/O8+ PCI host card under Windows 2000/XP/Server 2003/Vista/Server 2008
Page 81
Chapter 2 Installing drivers and host cards
5. Double-click the io8-setup-<arch>.exe installation executable and follow the installation
wizard steps:
6. During the installation, you may get a Windows Logo message. Click Continue Anyway
when these appear.
Note
If you are installing an unsigned driver, you may have to click through the Found New
Hardware wizard for every IO8+ card on your system.
7. Your I/O8+ driver installation is now finished.
I/O8+ Serial Adaptors User Guide
Installing an I/O8+ PCI host card under Windows 2000/XP/Server 2003/Vista/Server 2008
Page 82
Chapter 2 Installing drivers and host cards
Updating I/O8+ PCI host card device drivers with update.exe
Whenever you add any SX, I/O8+ or SI/XIO hardware to your system, by default Windows will use its
latest digitally signed driver in its driver database. To ensure you install the latest driver you must now
run the update.exe program. This ensures that every device currently installed in the system is
updated to use the driver on the CDROM.
To run update.exe, proceed as follows:
1. In the Windows desktop, click on the Start button and select the Run option.
The Run window is now displayed.
2. In the run window enter the path and program name (update.exe), then click on the OK
button.
The Device Driver Updater Wizard is now displayed as shown in the next picture.
I/O8+ Serial Adaptors User Guide
Installing an I/O8+ PCI host card under Windows 2000/XP/Server 2003/Vista/Server 2008
Page 83
Chapter 2 Installing drivers and host cards
3. In the Perle Device Driver Updater Wizard, click on the Next > button.
A progress message is now displayed while the drivers are updated. This is then followed
by the closing message window.
4. In the closing page, click on the FINISH button to complete driver installation.
I/O8+ Serial Adaptors User Guide
Installing an I/O8+ PCI host card under Windows 2000/XP/Server 2003/Vista/Server 2008
Page 84
Chapter 2 Installing drivers and host cards
Configuring PCI host card serial ports
To configure I/O8+ serial ports under Windows 2000/XP/Server 2003/Vista/Server 2008,
proceed as follows:
1. In the Windows 2000 desktop, click on the Start button and select
Settings > Control Panel.
The control panel window is now displayed.
2. In the Control Panel window, click on the System icon.
The System Properties tabbed window is now displayed.
3. In the System Properties window, click on the Hardware tab.
The hardware page is now displayed.
I/O8+ Serial Adaptors User Guide
Installing an I/O8+ PCI host card under Windows 2000/XP/Server 2003/Vista/Server 2008
Page 85
Chapter 2 Installing drivers and host cards
4. In the Hardware page, click on the Device Manager Button.
The Device Manager window is now displayed.
5. In the Device Manager window, click on the Multiport serial adapters icon to display the
currently installed devices.
6. In the Device Manager window, double click on the device whose properties you want to
view or change
The device Properties tabbed window is now displayed.
I/O8+ Serial Adaptors User Guide
Installing an I/O8+ PCI host card under Windows 2000/XP/Server 2003/Vista/Server 2008
Page 86
Chapter 2 Installing drivers and host cards
7. In the device Properties window, click on the Port Settings tab to display the Port
Settings page.
8. In the Port Settings page, set the Port Number, Baud Rate and other configuration
parameters you require and then click on the OK button to save changes and close the
window.
The configuration process is now complete.
I/O8+ Serial Adaptors User Guide
Installing an I/O8+ PCI host card under Windows 2000/XP/Server 2003/Vista/Server 2008
Page 87
Chapter 2 Installing drivers and host cards
Installing an I/O8+ ISA host card under Windows 2000
This section describes how to install the I/O8+ device driver software for the ISA host card
under Microsoft Windows 2000.
This section includes the following:
•
General ISA host card installation procedure for Windows 2000 on page 88
•
Adding ISA host cards to the system on page 22
•
Viewing and changing the ISA host card resources for a device on page 93
•
Updating I/O8+ ISA host card device drivers with update.exe on page 97
•
Configuring ISA host card serial ports on page 98.
General ISA host card installation procedure for Windows 2000
The general procedure for installing I/O8+ under the Windows 2000 operating system is as
follows:
1. If required, install any ISA host cards you require into your system. See Installing an ISA
host card on page 101.
2. If required, using the Windows 2000 Add/Remove Hardware wizard, add any additional
ISA host cards to the list of installed devices on the system using the free addresses
available. See Adding ISA host cards to the system on page 89.
3. Repeat step 2. until you have added all the ISA host cards you want to install.
Note
The drivers for I/O8+ are included on your Windows 2000 CDROM.
Whenever you add any SX, I/O8+, or SI/XIO hardware to your system, by default Windows
2000 will use its latest digitally signed driver in its driver database. To ensure you install the
latest driver you must now run the update.exe program. This ensures that every device
currently installed in the system is updated to use the driver on the CDROM (version 8 or
later).
See Updating I/O8+ ISA host card device drivers with update.exe on page 97.
4. Using the Windows 2000 Device Manager, configure the serial ports you have added to
the system. See Configuring PCI host card serial ports on page 85.
5. If required, remove any host cards you want from your system. See Removing host
cards on page 103.
I/O8+ Serial Adaptors User Guide
Installing an I/O8+ ISA host card under Windows 2000
Chapter 2 Installing drivers and host cards
Page 88
Adding ISA host cards to the system
When you physically install an ISA host card in your system you also need to add the card to
the list of installed devices in the system.
To add ISA host cards to your system, proceed as follows:
1. In the Windows desktop, click on the Start button and select Settings > Control Panel.
The control panel window is now displayed.
2. In the control panel window, double click on the System icon.
The Add/Remove Hardware Wizard is now displayed.
3. Using the instructions given in the next table, use the Add/Remove Hardware Wizard to
assign the host card addresses and IRQ levels you require.
I/O8+ Serial Adaptors User Guide
Installing an I/O8+ ISA host card under Windows 2000
Chapter 2 Installing drivers and host cards
Page 89
In this Wizard page
Do the following...
4. In the Add/Remove Hardware Wizard, select
Add/Troubleshoot a device and press the
Next > button.
The Choose a Hardware Device page is now
displayed.
5. In the Choose a Hardware Device page,
scroll up the list of devices and click on
Add a new device, then click on the Next >
button.
The Find New Hardware page is now
displayed.
6. In the Find New Hardware page, select No, I
want to select the hardware from a list
and click on the Next > button.
The Hardware Type page is now displayed.
7. In the Hardware Type page, select Mutliport serial adaptors and click on the Next >
button.
I/O8+ Serial Adaptors User Guide
Installing an I/O8+ ISA host card under Windows 2000
Chapter 2 Installing drivers and host cards
Page 90
In this Wizard page
Do the following...
The Select a Device Driver page is now
displayed.
8. If your host card type isn’t shown, in the
Select a Device Driver page click on the
Have Disk button.
A message window is now displayed which
prompts you for the driver and location you
want to use.
9. In the message window, enter or select the
driver you want and click on the OK button to
accept settings and close the window.
The Select a Device Driver page is now
updated to show the new driver you have
selected.
10.In the Select a Device Driver page, select
the Specialix or Perle I/O8+ ISA Adapter
option, then click on the Next > button.
The Start Hardware Installation page is now
displayed.
11. In the Start Hardware Installation page, click
on the Next > button to accept your choice.
A completion message page is now
displayed as shown in the next picture.
Note
Windows 2000 will try to load the I/O8+ drivers using the default resources. If the card you
are loading is not configured to use the defaults or the resources are not freely available in
the system, the driver will fail to start.
If resources are not free you will have to change the resource configuration using the
procedures described on page 97.
I/O8+ Serial Adaptors User Guide
Installing an I/O8+ ISA host card under Windows 2000
Chapter 2 Installing drivers and host cards
Page 91
12.In the completion message page click on the Finish button to complete the new
configuration.
After the you have finished adding cards to the system all connected port devices will now be
detected. Windows 2000 will try to install the latest driver for the ports from its database or
will prompt you for one if one cannot be found.
I/O8+ Serial Adaptors User Guide
Installing an I/O8+ ISA host card under Windows 2000
Chapter 2 Installing drivers and host cards
Page 92
Viewing and changing the ISA host card resources for a device
To view or change the resources for a device proceed as follows:
1. In the Add/Remove Hardware Wizard go to the last page and click on the Resources
button.
The Add New Hardware Wizard properties window is now displayed.
I/O8+ Serial Adaptors User Guide
Installing an I/O8+ ISA host card under Windows 2000
Chapter 2 Installing drivers and host cards
Page 93
2. In the Add New Hardware Wizard properties window, select the Resources page and
click on the Set Configuration Manually button.
The resources page is now updated to show the settings for the current installed I/O8+
device.
I/O8+ Serial Adaptors User Guide
Installing an I/O8+ ISA host card under Windows 2000
Chapter 2 Installing drivers and host cards
Page 94
3. In the Add New Hardware Wizard properties window, select the Input/Output Range you
require and click on the Change Setting button.
The Edit Input/Output Range window is now displayed.
4. In the Edit Input/Output Range window, enter the memory range you want and click on
the OK button.
If values you have selected are not acceptable to the system, then the Device Manager
will display a problem icon as shown in the next picture.
5. If the I/O address you have selected are not acceptable to the system, check your
configuration settings and adjust memory address as required. Otherwise ring Technical
support.
I/O8+ Serial Adaptors User Guide
Installing an I/O8+ ISA host card under Windows 2000
Chapter 2 Installing drivers and host cards
Page 95
6. In the Add New Hardware Wizard properties window, select Interrupt Request you
require and click on the Change Setting button.
The Edit Interrupt Request window is now displayed.
7. In the Edit Interrupt Request window, select the IRQ level you want using the Value field
and click on the OK button.
If value you have selected is not acceptable to the system, then the Device Manager will
display a problem icon as shown in the next picture.
8. If the IRQ level you have selected are not acceptable to the system, check your
configuration settings and adjust the IRQ value as required. Otherwise ring Technical
support. See Contacting Perle on page 108 in Appendix D Contacting Perle.
I/O8+ Serial Adaptors User Guide
Installing an I/O8+ ISA host card under Windows 2000
Chapter 2 Installing drivers and host cards
Page 96
Updating I/O8+ ISA host card device drivers with update.exe
Whenever you add any SX, I/O8+ or SI/XIO hardware to your system, by default Windows 2000 will
use its latest digitally signed driver in its driver database. To ensure you install the latest driver you
must now run the update.exe program. This ensures that every device currently installed in the
system is updated to use the driver on the CDROM.
To run update.exe, proceed as follows:
1. In the Windows desktop, click on the Start button and select the Run option.
The Run window is now displayed.
2. In the run window enter the path and program name (update.exe), then click on the OK
button.
The Device Driver Updater Wizard is now displayed as shown in the next picture.
3. In the Perle Device Driver Updater Wizard, click on the Next > button.
A progress message is now displayed while the drivers are updated. This is then followed
by the closing message window.
4. In the closing page, click on the FINISH button to complete driver installation.
I/O8+ Serial Adaptors User Guide
Installing an I/O8+ ISA host card under Windows 2000
Chapter 2 Installing drivers and host cards
Page 97
Configuring ISA host card serial ports
To configure I/O8+ serial ports under Windows 2000, proceed as follows:
1. In the Windows 2000 desktop, click on the Start button and select
Settings > Control Panel.
The control panel window is now displayed.
2. In the Control Panel window, click on the System icon.
The System Properties tabbed window is now displayed.
3. In the System Properties window, click on the Hardware tab.
The hardware page is now displayed.
4. In the Hardware page, click on the Device Manager Button.
The Device Manager window is now displayed.
I/O8+ Serial Adaptors User Guide
Installing an I/O8+ ISA host card under Windows 2000
Chapter 2 Installing drivers and host cards
Page 98
5. In the Device Manager window, click on the Multiport serial adapters icon to display the
currently installed devices.
6. In the Device Manager window, double click on the device whose properties you want to
view or change.
The device Properties tabbed window is now displayed.
7. In the device Properties window, click on the Port Settings tab to display the Port
Settings page.
8. In the Port Settings page, set the Port Number, Baud Rate and other configuration
parameters you require and then click on the OK button to save changes and close the
window.
The configuration process is now complete.
I/O8+ Serial Adaptors User Guide
Installing an I/O8+ ISA host card under Windows 2000
Chapter 2 Installing drivers and host cards
Page 99
Installing a PCI host card
To install a PCI host card proceed as follows;
Note
The exact location of host card slots varies for different systems, for exact mechanical
details of your system, refer to your system documentation.
Warning
Dangerous voltages exist inside computer systems. Before
installing host cards in your system, turn off the power supply
and disconnect the mains lead.
1. Turn off the power to your system and disconnect the mains supply.
2. Remove the system cover to expose the inside of the connector panel for host cards.
3. Insert the PCI card you want to install into a vacant host card slot and secure in place as
shown in the next picture.
Caution
Full anti-static precautions should be taken when handling host
cards.
4. Repeat step 3. until you have installed all the PCI cards you want.
5. Replace and secure the system cover.
Installation of PCI host cards is now complete. For further details about installing host cards
including other types, see Before you start on page 18.
I/O8+ Serial Adaptors User Guide
Installing a PCI host card
Chapter 2 Installing drivers and host cards
Page 100
Installing an ISA host card
Setting the
Before you install an ISA card in your system you need to physically set the address for the
address on an ISA card using the DIL switch provided (shown in the next picture).
host card
To set the address for an ISA host card proceed as follows;
Caution
Full anti-static precautions should be taken when handling host
cards.
1. Convert the address you want to use into a binary value. See Appendix C ISA host card
address settings.
2. On the host card set the DIL switch on the host card to the selected binary address you
want. The next picture shows an example DIL switch set to an address of 100 hex which
corresponds to 01000000.
I/O8+ Serial Adaptors User Guide
Installing an ISA host card
Chapter 2 Installing drivers and host cards
Page 101
Mechanical
installation
You can now install the ISA host card in your system. To do this proceed as follows;
Note
The exact location of host card slots varies for different systems, for exact mechanical
details of your system, refer to your system documentation.
Warning
Dangerous voltages exist inside computer systems. Before
installing host cards in your system, turn off the power supply
and disconnect the mains lead.
3. Turn off the power to your system and disconnect the mains supply.
4. Remove the system cover to expose the inside of the connector panel for host cards.
5. Insert the ISA card you want to install into a vacant host card slot and secure in place as
shown in the next picture.
Caution
Full anti-static precautions should be taken when handling host
cards.
6. Repeat step 3. until you have installed all the ISA cards you want.
7. Replace and secure the system cover.
8. Plug in the mains lead and turn on the power.
Installation of ISA host cards is now complete. For further details about installing host cards
including other types, see Before you start on page 18.
I/O8+ Serial Adaptors User Guide
Installing an ISA host card
Chapter 2 Installing drivers and host cards
Page 102
Removing host cards
To remove a host card from your system proceed as follows;
Note
The exact location of host card slots varies for different systems, for exact mechanical
details of your system, refer to your system documentation.
Warning
Dangerous voltages exist inside computer systems. Before
removing host cards from your system, turn off the power supply
and disconnect the mains lead.
1. Turn off the power to your system and disconnect the mains supply.
2. Remove the system cover to expose the inside of the connector panel for host cards.
3. Remove all cables plugged into the host card.
4. Undo the securing screw for the host card you want to remove then lift the card out of its
slot as shown in the next picture (ISA card shown).
Caution
Full anti-static precautions should be taken when handling host
cards.
5. Repeat step 4. until you have removed all the host cards you want.
6. Replace and secure the system cover.
7. Plug in the mains lead and turn on the power.
Removal of host cards is now complete. For further details about installation of host cards
including other types, see Before you start on page 18.
I/O8+ Serial Adaptors User Guide
Removing host cards
Chapter 2 Installing drivers and host cards
Page 103
I/O8+ Serial Adaptors User Guide
Removing host cards
Chapter 2 Installing drivers and host cards
Page 104
I/O8+ Serial Adaptors
User Guide
Chapter 3 I/O8+ Cabling information
You need to read
this chapter if you
want to...
You need to read this chapter if you want cabling information for the Perle I/O8+ serial
adaptor cards.
This chapter provides cabling and connector pinout information for the Perle I/O8+ serial
adaptor cards. Included are details of standard cables for use with I/O8+ products available
from Perle.
This chapter includes the following sections;
•
RJ12 socket pinouts on I/O8+ host cards on page 106
•
I/O8+ cables available from Perle on page 107
I/O8+ Serial Adaptors User Guide
Chapter 3 I/O8+ Cabling information
Page 105
RJ12 socket pinouts on I/O8+ host cards
The connector pinout for each RS232 RJ12 socket fitted to either I/O8+ ISA or PCI host
cards is as follows;
PCI host card
ISA host card
Port 1
Port 1
Pin 1
Pin 1
RJ12 pin
Direction
Signal
Description
1
Input
DCD
Data Carrier Detect.
2
Input
RXD
Receive Data.
3
Output
DTR/RTS
Data Terminal Ready/Request To Send.
Function depends on the way you open the serial
port see page 120.
4
-
GND
Ground.
5
Output
TXD
Transmit Data.
6
Input
CTS
Clear to send.
I/O8+ Serial Adaptors User Guide
RJ12 socket pinouts on I/O8+ host cards
Chapter 3 I/O8+ Cabling information
Page 106
I/O8+ cables available from Perle
This section provides connector pinout information for the following standard cables available
from Perle:
•
RJ12 to DB9 male cable on page 108
•
RJ12 to DB25 male cable on page 109
•
RJ12 to DB25 female cable on page 110.
I/O8+ Serial Adaptors User Guide
I/O8+ cables available from Perle
Chapter 3 I/O8+ Cabling information
Page 107
RJ12 to DB9 male cable
Cable diagram
Pin 1(looking into socket)
Pin 6
Pin 1
Pin 5
Pin 9
Pin numbers looking into connector
Perle part number CIO8+DB9
Connector pinout table
RJ12 pin
DB9 Pin
Signal
Description
1
1
DCD
Data Carrier Detect.
2
2
RXD
Receive Data.
3
4 and 7
DTR/RTS
Data Terminal Ready/Request To Send.
Function depends on the way you open the serial
port see page 120.
4
5
GND
Ground.
5
3
TXD
Transmit Data.
6
8
CTS
Clear to send.
Shell
Shield
Chassis
Chassis ground.
I/O8+ Serial Adaptors User Guide
I/O8+ cables available from Perle
Chapter 3 I/O8+ Cabling information
Page 108
RJ12 to DB25 male cable
Cable diagram
Pin 1
(looking into
connector)
Pin 1(looking into socket)
Perle part number CIO8+M
Connector pinout table
RJ12
DB25
Signal
Description
1
8
DCD
Data Carrier Detect.
2
3
RXD
Receive Data.
3
4 and 20
DTR/RTS
Data Terminal Ready/Request To Send.
Function depends on the way you open the serial
port see page 120.
4
7
GND
Ground.
5
2
TXD
Transmit Data.
6
5
CTS
Clear to send.
Shield
1 and Shell
Chassis
Chassis ground.
I/O8+ Serial Adaptors User Guide
I/O8+ cables available from Perle
Chapter 3 I/O8+ Cabling information
Page 109
RJ12 to DB25 female cable
Cable diagram
Pin 1 (looking into socket)
Pin 1
(looking into
connector)
Perle part number CIO8+F
Connector pinout table
RJ12
DB25
Signal
Description
1
8
DCD
Data Carrier Detect.
2
2
RXD
Receive Data.
3
5 and 6
DTR/RTS
Data Terminal Ready/Request To Send.
Function depends on the way you open the serial
port see page 120.
4
7
GND
Ground.
5
3
TXD
Transmit Data.
6
4
CTS
Clear to send.
Shield
1 and shell
Chassis
Chassis ground.
I/O8+ Serial Adaptors User Guide
I/O8+ cables available from Perle
Chapter 3 I/O8+ Cabling information
Page 110
I/O8+ Serial Adaptors
User Guide
Chapter 4 Quick reference
You need to read
this chapter if you
want to...
You need to read this chapter if you want information in quick reference form about the
utilities provided with the I/O8+ Serial adaptor cards.
This chapter provides a quick reference guide to the software utilities provided with the I/O8+
Serial adaptor cards. The utilities are grouped under operating system and include main
windows and menus. In addition, cross references are provided for further information about
each area.
This chapter includes the following sections;
•
SCO OpenServer utilities on page 112
•
SCO UnixWare utilities on page 116
I/O8+ Serial Adaptors User Guide
Chapter 4 Quick reference
Page 111
SCO OpenServer utilities
A number of utilities are provided for use with the SCO OpenServer operating system. See
the following sections for information about main windows and menus;
•
Host Card Configuration utility (SCO OpenServer 5 Only) on page 113
•
Port Configuration utility on page 114
I/O8+ Serial Adaptors User Guide
SCO OpenServer utilities
Chapter 4 Quick reference
Page 112
Host Card Configuration utility (SCO OpenServer 5 Only)
The main window for the Host Card Configuration tool is shown in the next picture. See
Menu map on page 113 for details of menus.
For menu,
see page
Menu map
The Host Card Configuration tool menu is as follows;
Menu option
Card
>
Description
Quit the Host Card Configuration tool
without saving.
Quit
See page 50.
Add a new host card address.
Add
See page 45.
Remove a host card address.
Remove
See page 49.
Edit an existing host card address.
Edit
See page 47.
Save and exit
Exit the Host Card Configuration tool and
save any changes.
See page 50.
I/O8+ Serial Adaptors User Guide
SCO OpenServer utilities
Chapter 4 Quick reference
Page 113
Port Configuration utility
The main window for the Port Configuration table is shown in the next picture. See Menu
map on page 115 for details of menus.
Menus see
page 115.
Select one or
more ports
from this list
Select a
terminal type
here.
See page 53
Select a getty
definition
here.
See page 53.
Enables or
disables flow
control.
See page 53
Enables or
disables login.
See page 54
I/O8+ Serial Adaptors User Guide
SCO OpenServer utilities
Chapter 4 Quick reference
Page 114
Menu map
The Port Configuration tool menu is as follows;
Menu option
Ports
>
Description
Quit Port Configuration tool without saving
changes.
Quit
See page 54
Display all ports with logins enabled.
Logins
See page 54
Unconfigured
Display all ports without logins enabled.
See page 54
Display all ports.
All
See page 54
Save & Exit
Exit the Port Configuration tool and save
changes.
See page 54
I/O8+ Serial Adaptors User Guide
SCO OpenServer utilities
Chapter 4 Quick reference
Page 115
SCO UnixWare utilities
Device configuration utility
The main window for the Device Configuration Utility is shown in the next picture.
Menu map
The menu is as follows;
Menu option
Description
Hardware Device Configuration >
Displays the Hardware Device Configuration
window which allows you to set host card
addresses and IRQ levels.
See page 64.
Software Device Drivers
>
Displays the Software Driver Device selections
window which allows you to select a software
device driver type to display.
See page 71.
Apply Changes & Exit DCU
>
Apply configuration changes and exit the
Hardware Device Configuration Utility.
See page 72.
Exit DCU and Cancel Changes
>
Exit the Hardware Device Configuration Utility
and cancel any changes.
See page 72.
I/O8+ Serial Adaptors User Guide
SCO UnixWare utilities
Chapter 4 Quick reference
Page 116
Serial Manager
Main window
The main window for the Serial Manager is shown in the next picture.You can display this
window in one of two views, Board view and Ports view. See page 118 for menu maps.
Boards view
Displays the host cards present on
the system. To obtain this view, click
on the View > Boards menu
option.
Ports view
Displays the serial ports present on
the system. To obtain this view, click
on the View > Ports menu option.
I/O8+ Serial Adaptors User Guide
SCO UnixWare utilities
Chapter 4 Quick reference
Page 117
Menu map
The Serial Manager menu is as follows;
Menu option
Host
>
Description
Open Host
Selects a host machine.
See your SCO UnixWare documentation for
further details.
Port
>
Exit
Exit Serial Manager.
Modify
Modifies serial port settings.
See page 73.
View
>
Ports
Show serial ports available for the currently
selected host card.
See page 73.
Boards
Show host cards present on the system.
See page 73.
I/O8+ Serial Adaptors User Guide
SCO UnixWare utilities
Chapter 4 Quick reference
Page 118
I/O8+ Serial Adaptors
User Guide
Appendix A Serial port device names
You need to read You need to read this appendix if you want information about device names for the
this appendix if you Perle I/O8+ serial adaptor cards.
want to...
This appendix provides information about the device nodes associated with each serial port
for the Perle I/O8+ serial adaptor cards. Included are naming conventions, functions, file
locations and some additional information about the Data terminal ready and Ready to send
signals.
This chapter includes the following sections;
•
Under SCO OpenServer on page 120
•
Under SCO UnixWare on page 121
I/O8+ Serial Adaptors User Guide
Page 119
Under SCO OpenServer
Device node details
Each serial port has three device nodes associated with it. Each node takes the form of a file
which you can access from operating system utilities and user applications. Details of these
nodes are shown in the next table.
Device name
Function
Description
Location
ttyi1
Normal communications port
Indicates normal
communications port
behaviour.
/dev
ttyI1
Normal communications port
wait for DCD on open
Indicates a port open will not
complete unless the DCD
signal is present.
/dev
ttyi1p
Print device
Indicates that device should
only be used for transparent
print.
/dev
DTR and RTS signal information
The serial ports on I/O8+ serial adaptor cards use the same pin (pin3 on the RJ12 connector
see Chapter 3 I/O8+ Cabling information) for the Data Terminal Ready and Ready To
Send signals. The function of the pin depends on the way you open the port as shown in the
next table.
Device name
Function
Signal
Description
ttyi1
Normal communications port.
RTS
Ready To Send. Used for
hardware flow control.
ttyI1
Normal communications port
wait for DCD on open.
DTR
Data Terminal Ready.
This pin cannot be used
for hardware flow control
when this type of device is
opened.
I/O8+ Serial Adaptors User Guide
Under SCO OpenServer
Page 120
Under SCO UnixWare
Device node details
Each serial port has three device nodes associated with it. Each node takes the form of a file
which you can access from operating system utilities and user applications. Details of these
nodes are shown in the next table.
Device name
Function
Description
Location
ix
Normal communications port
Indicates normal
communications port
behaviour.
/dev/term
Ix
Modem port
Indicates a port open will not
complete unless the DCD
signal is present.
/dev/term
ixp
Transparent print ports
Indicates that device should
only be used for transparent
print.
/dev/term
Note
x denotes a physical port on a host card.
When x is between 1 and 9, it is written as 0x.
You can only open the transparent print port can when the corresponding normal
port is open.
I/O8+ Serial Adaptors User Guide
Under SCO UnixWare
Page 121
I/O8+ Serial Adaptors
User Guide
Appendix B Transparent printing
You need to read You need to read this appendix if you want background information on transparent printing.
this appendix if you
want to...
This appendix gives an overview of the transparent printing feature offered for the SCO
OpenServer and SCO UnixWare operating systems and includes details of configuration files
associated with transparent printing.
This appendix includes the following sections;
•
What is transparent printing? on page 123
•
Problems with printer output on page 124
•
The printcap.io8 configuration file on page 124
•
The print.io8 configuration file on page 125
I/O8+ Serial Adaptors User Guide
Page 122
What is transparent printing?
Most terminals have an auxiliary (AUX) port which can be connected to a serial printer. Data
can then be output to the terminal or the printer via the same serial line. This is called
transparent print (or xprint) and is designed for printing simple ascii text. A separate xprint
device node (ttyinp where n is device number) is created for each port. This device is
enabled automatically if either the local or modem device is enabled for the port.
SCO OpenServer
operating system
I/O8+ Port
Configuration utility
print.io8 file
I/O8+Device driver
I/O8+ host
card
Computer system
Terminal
Auxiliary port
on terminal
Serial communications
port on terminal
Printer
When a host card receives data addressed to the transparent print device it prefixes it with
the transparent print mode ON string and appends it with the transparent mode OFF string.
The ON and OFF strings for each terminal type available are defined by the printcap.io8 file.
See The printcap.io8 configuration file on page 124 for more details.
When the host card receives data addressed to the transparent print device, it prefixes it with
the Transparent Print Mode ON string and appends it with the Transparent Print Mode OFF
string. Terminal I/O has absolute priority over printer output. Transparent print data will only
be sent when there is a break in output to the terminal (for more than a tenth of a second)
For each port, the transparent printing parameters are controlled by an entry in the print.io8
file found in the /etc/ directory on your system. The entry for each port includes definitions of
the terminal type, transparent print throughput rate and device name. See The print.io8
configuration file on page 125 for further details.
I/O8+ Serial Adaptors User Guide
What is transparent printing?
Page 123
Problems with printer output
When you use transparent printing you may obtain incorrect printer output due to the
following reasons;
Graphics printers may misinterpret some characters output through transparent print. This
problem is more likely if the terminal is in 7-bit mode, because 8-bit characters will not be
printed.
Some terminals suppress the output of certain characters to their printer or AUX ports. Such
terminals can prevent essential control characters from reaching the printer thus generating
incorrect printer output. This occurrence is extremely unpredictable because of the large
number of potential hardware configurations.
The printcap.io8 configuration file
The printcap.io8 file defines the transparent print ON and OFF strings for each terminal type
available. When a host card receives data addressed to the transparent print device it
prefixes it with the transparent print mode ON string and appends it with the transparent
mode OFF string.
ansi ^X ^T
Transparent print OFF
Terminal type.
Transparent print ON string.
If you don’t configure a specific terminal type printcap.io8 will use the default type which is
“unknown”
I/O8+ Serial Adaptors User Guide
Problems with printer output
Page 124
The print.io8 configuration file
For each port, transparent printing is controlled by an entry in the print.io8 file. The print.io8
file is found in the /etc/ directory on your system. The entry for each port includes definitions
of the terminal type, transparent print throughput rate, device name. The content of the
print.io8 file is normally controlled automatically by either the Port Configuration utility (SCO
OpenServer) or the Serial Manager (SCO UnixWare). A sample entry from a typical print.io8
file is shown in the next example.
Maximum number of characters per second
throughput for transparent printing
Terminal type of terminal to which your printer is
attached defined in the printcap.io8 file.
100 unknown ttyi1 -ixany -ixon
Device name
Enables flow control for Transparent printing.
Enables sending of data on receipt of the next character
(when flow control is enabled on the transparent print port).
I/O8+ Serial Adaptors User Guide
The print.io8 configuration file
Page 125
I/O8+ Serial Adaptors
User Guide
Appendix C ISA host card address settings
You need to read You need to read this appendix if you want information on converting hexidecimal addresses
this appendix if you into binary for I/O8+ ISA serial adaptor cards.
want to...
This appendix provides a table for converting hexidecimal addresses into binary for I/O8+
ISA serial adaptor cards. See also Installing an ISA host card on page 101 in Chapter 2
Installing drivers and host cards.
This appendix includes the following sections;
•
DIL switch location on page 127
•
Hexidecimal to binary conversion table on page 128.
I/O8+ Serial Adaptors User Guide
Page 126
DIL switch location
You assign host card addresses for an ISA host card using the on board configuration DIL
switch on an I/O8+ ISA host card (shown in the next picture). To convert I/O8+ hexidecimal
address into binary see Hexidecimal to binary conversion table on page 128.
See also Installing an ISA host card on page 101 in Chapter 2 Installing drivers and
host cards.
I/O8+ Serial Adaptors User Guide
DIL switch location
Page 127
Hexidecimal to binary conversion table
This table tells you how to convert hexidecimal addresses into binary for I/O8+ ISA host
cards. You use the resulting values to assign host card addresses using the on board
configuration DIL switch on an I/O8+ ISA host card (see DIL switch location on page 127).
Host card
address
Switch setting
on host card
Host card
address
Switch setting
on host card
Host card
address
Switch setting
on host card
100
01000000
170
01011100
1e0
01111000
104
01000001
174
01011101
1e4
01111001
108
01000010
178
01011110
1e8
01111010
10c
01000011
17c
01011111
1ec
01111011
110
01000100
180
01100000
1f0
01111100
114
01000101
184
01100001
1f4
01111101
118
01000110
188
01100010
1f8
01111110
11c
01000111
18c
01100011
1fc
01111111
120
01001000
190
01100100
200
10000000
124
01001001
194
01100101
204
10000001
128
01001010
198
01100110
208
10000010
12c
01001011
19c
01100111
20c
10000011
130
01001100
1a0
01101000
210
10000100
134
01001101
1a4
01101001
214
10000101
138
01001110
1a8
01101010
218
10000110
13c
01001111
1ac
01101011
21c
10000111
140
01010000
1b0
01101100
220
10001000
144
01010001
1b4
01101101
224
10001001
148
01010010
1b8
01101110
228
10001010
14c
01010011
1bc
01101111
22c
10001011
150
01010100
1c0
01110000
230
10001100
154
01010101
1c4
01110001
234
10001101
158
01010110
1c8
01110010
238
10001110
15c
01010111
1cc
01110011
23c
10001111
160
01011000
1d0
01110100
240
10010000
164
01011001
1d4
01110101
244
10010001
168
01011010
1d8
01110110
248
10010010
16c
01011011
1dc
01110111
24c
10010011
I/O8+ Serial Adaptors User Guide
Hexidecimal to binary conversion table
Page 128
Host card
address
Switch setting
on host card
Host card
address
Switch setting
on host card
Host card
address
Switch setting
on host card
250
10010100
2d0
10110100
350
11010100
254
10010101
2d4
10110101
354
11010101
258
10010110
2d8
10110110
358
11010110
25c
10010111
2dc
10110111
35c
11010111
260
10011000
2e0
10111000
360
11011000
264
10011001
2e4
10111001
364
11011001
268
10011010
2e8
10111010
368
11011010
26c
10011011
2ec
10111011
36c
11011011
270
10011100
2f0
10111100
370
11011100
274
10011101
2f4
10111101
374
11011101
278
10011110
2f8
10111110
378
11011110
27c
10011111
2fc
10111111
37c
11011111
280
10100000
300
11000000
380
11100000
284
10100001
304
11000001
384
11100001
288
10100010
308
11000010
388
11100010
28c
10100011
30c
11000011
38c
11100011
290
10100100
310
11000100
390
11100100
294
10100101
314
11000101
394
11100101
298
10100110
318
11000110
398
11100110
29c
10100111
31c
11000111
39c
11100111
2a0
10101000
320
11001000
3a0
11101000
2a4
10101001
324
11001001
3a4
11101001
2a8
10101010
328
11001010
3a8
11101010
2ac
10101011
32c
11001011
3ac
11101011
2b0
10101100
330
11001100
3b0
11101100
2b4
10101101
334
11001101
3b4
11101101
2b8
10101110
338
11001110
3b8
11101110
2bc
10101111
33c
11001111
3bc
11101111
2c0
10110000
340
11010000
3c0
11110000
2c4
10110001
344
11010001
3c4
11110001
2c8
10110010
348
11010010
3c8
11110010
2cc
10110011
34c
11010011
3cc
11110011
I/O8+ Serial Adaptors User Guide
Hexidecimal to binary conversion table
Page 129
Host card
address
Switch setting
on host card
Host card
address
Switch setting
on host card
Host card
address
Switch
setting on
host card
3d0
11110100
3e0
11111000
3f0
11111100
3d4
11110101
3e4
11111001
3f4
11111101
3d8
11110110
3e8
11111010
3f8
11111110
3dc
11110111
3ec
11111011
3fc
11111111
I/O8+ Serial Adaptors User Guide
Hexidecimal to binary conversion table
Page 130
I/O8+ Serial Adaptors
User Guide
Appendix D Troubleshooting
You need to read You need to read this appendix if you want information on troubleshooting error messages
this appendix if you experienced with I/O8+ serial adaptor cards.
want to...
This appendix provides examples of normal boot up messages and a table of error
messages, their meaning and corrective action required for the all the currently supported
operating systems.
This appendix includes the following sections;
•
Windows 95 and 98 on page 132
•
Windows NT on page 140
•
SCO OpenServer 5 on page 141
•
SCO UnixWare/SCO OpenServer 6 on page 143.
•
Windows 2000/XP/Server 2003/Vista/Server 2008 on page 146
I/O8+ Serial Adaptors User Guide
Page 131
Windows 95 and 98
Resource conflicts
If the system cannot use the factory default or allocate free resources when the system
tries to add the ISA card at its default address and IRQ level the following message screen is
displayed.
If this occurs proceed as follows;
1. In the Add New Hardware Wizard, click on the Next > button to display the following
screen.
I/O8+ Serial Adaptors User Guide
Windows 95 and 98
Page 132
2. In the Add New Hardware Wizard, click on the Finish button.
The Properties tabbed window is now displayed.
3. In the properties tabbed window, click on the Resources tab.
The Resources page is now displayed.
I/O8+ Serial Adaptors User Guide
Windows 95 and 98
Page 133
4. In the Resources page, click on the Set Configuration Manually button
The lower half of the Resources page is now updated to show the resources currently in
use as shown in the next picture.
I/O8+ Serial Adaptors User Guide
Windows 95 and 98
Page 134
5. Note the details of the resource conflict down, then in the Resources page, click on
Change Setting button,
The Edit Interrupt Request window is now displayed.
6. In the Edit Interrupt Request window, Scroll through the different Interrupt Request levels
using the Value field selector to establish if there are any Request Levels you can
reallocate.
7. Once you have established a device whose resources can be reallocated, try re-allocating
system resources using the methods suggested in Re-allocating system resources on
page 136.
I/O8+ Serial Adaptors User Guide
Windows 95 and 98
Page 135
Re-allocating system resources
Having found another IRQ level you can allocate (typically from another ISA card) you can
re-allocate resources in one of the following ways;
•
Re-allocating resources from the BIOS on page 136
•
Re-allocating resources using Device Manager on page 137
Re-allocating resources from the BIOS
To re-allocate resources from with the BIOS proceed as follows;
•
Go into the system BIOS and reserve the Interrupt Request Level you want to use.
Any PCI devices present on the system should now use a different IRQ level automatically.
The resource you have reserved should now be free on re-starting your system.
Note
If you want to use the IRQ level from another ISA device, you can’t do this from within the
BIOS. In this case you will need to use the Device Manager Facility. See Re-allocating
resources using Device Manager on page 137 for details.
I/O8+ Serial Adaptors User Guide
Windows 95 and 98
Page 136
Re-allocating resources using Device Manager
If you are unable to re-allocate resources from with the system BIOS, you can try using the
Device Manager instead using the following procedure;
1. In the Windows desktop, click on the Start button and select Settings > Control Panel to
display the Control panel window.
2. In the Control panel window, double click on the System icon shown in the next picture.
3. In the System Properties tabbed window now displayed, click on the Device Manager tab
to display the Device manager page.
4. In the device manager page, double click on the device which is currently using the IRQ
level you want.
I/O8+ Serial Adaptors User Guide
Windows 95 and 98
Page 137
5. In the properties tabbed window now displayed, click on the Resources tab.
The Resources page is now displayed as shown in the next picture.
I/O8+ Serial Adaptors User Guide
Windows 95 and 98
Page 138
6. In the Resources page, click on the Set Configuration Manually button
The lower half of the Resources page is now updated to show the resources currently in
use as shown in the next picture.
7. In the Resources page, change the resource property of the device to free up the
resource you want. Refer to your Windows documentation for further details.
I/O8+ Serial Adaptors User Guide
Windows 95 and 98
Page 139
Windows NT
Windows NT general troubleshooting
In the event of any problems, open the Devices window to view the status of any installed
hardware. For further details of troubleshooting under Windows NT, see your Windows NT
user documentation or help system.
I/O8+ Serial Adaptors User Guide
Windows NT
Page 140
SCO OpenServer 5
Example of normal boot up messages for host cards
The normal messages for satisfactory host card detection and initialisation form part of the
normal SCO OpenServer 5 boot up messages and are shown in the next example. This
example shows one ISA host card and one PCI host card.
ISA host card message (one per card installed)
Address range used by host
card in hexidecimal
Host card ID number
Host card type
IRQ level
IO8
0x100-0x103
IO8
0xFC80-0xFC83 9 - host:1, Type:PCI, Driver:v1.0.0
IO8
-
- -
11 - host:0, Type:ISA, Driver:v1.0.0
Total Ports: 16
Driver software version
Total number of ports
PCI host card message (one per card installed)
I/O8+ Serial Adaptors User Guide
SCO OpenServer 5
Page 141
Error messages
Error message
Reason
Action required
ERROR: a PCI host is
not initialised
PCI host card faulty.
1. Ensure that you have followed the installation
procedure correctly. See page 17
2. If the problem persists try another host card.
See page 17.
ERROR: an ISA host
is not initialised
Driver software has been
unable to detect an ISA host
card at the specified
address.
1. Check that DIL switch settings on host cards
match those set in Host Card Configuration
tool. See page 47.
2. Ensure that you have followed the installation
procedure correctly. See page 17.
3. If the problem persists try another host card.
See page 17.
ERROR: a PCI host
has bad resource(s)
PCI host card faulty.
1. Ensure that you have followed the installation
procedure correctly. See page 17
2. If the problem persists try another host card.
See page 17.
ERROR: an ISA host
has bad resource(s)
Duplication of addresses
and/or IRQ level for two or
more host cards.
1. Check that DIL switch settings on host cards
match those set in Host Card Configuration
tool. See page 47.
2. Ensure that you have followed the installation
procedure correctly. See page 17.
3. If the problem persists try another host card.
See page 17.
WARNING: a PCI host
is not configured
System error.
1. Remove the I/O8+ host card and uninstall the
drivers from your system. See page 17 and
page 55.
WARNING: an ISA
host is not configured
Serial port device node
related messages
2. Re-install the drivers and host cards onto your
system taking care to follow the correct
procedure. See page 17.
Serial port device nodes not
present.
1. Invoke the io8hcfg utility. See page 43.
2. Ensure all installed host cards are listed.
3. Save and exit the utility to create the device
nodes.
I/O8+ Serial Adaptors User Guide
SCO OpenServer 5
Page 142
SCO UnixWare/SCO OpenServer 6
Example of normal boot up messages for host cards
The normal messages for satisfactory host card detection and initialisation form part of the
normal SCO UnixWare boot up messages and are shown in the next example. This example
shows one ISA host card and one PCI host card.
SCO UnixWare
IO8 UnixWare Driver v1.0.0
I/O8+ Host Card Type ISA Interrupt 11
I/O8+ Host Card Type PCI Interrupt 9
Host card type
host card message
(one per card installed)
IRQ level
SCO OpenServer 6
Perle IO8+ OpenServer 6 Driver v1.0.0
Copyright (c) Perle Systems Limited, Jan 25, 2006, 17:57:59
I/O8+: PCI Card at Interrupt 9
Host card type
IRQ level
I/O8+ Serial Adaptors User Guide
SCO UnixWare/SCO OpenServer 6
Page 143
host card message
(one per card installed)
Error messages
I/O8+ host card error messages
Error message
Reason
Action required
No I/O 8+ hosts located within system
I/O8+ driver was unable to
find any I/O8+ Host Cards.
Ensure that you have inserted
each I/O8+ host card into its slot
properly. See page 100 and page
100.
io8_: No Card slot found
I/O8+ driver was unable to
determine in which slot the
host card is located.
Try installing the host card in a
different position. See page 100
and page 100.
io8_: Address not found
I/O8+ driver failed to Read
the address.
For ISA host cards, ensure you
have assigned the addresses
correctly. See page 64.
For PCI host cards, ensure that
the Device Configuration Utility
displays a valid address for the
card. See page 71.
io8_: Card not ready. GSVR x, wait y
The I/O8+ host card is not
responding to commands
and may be faulty.
Try installing another host card.
See page 57.
io8_: Wrong IDENT
I/O8+ driver does not
recognise a card as an as
an I/O8+ host card. Host
card may be faulty.
Try installing another host card.
See page 57.
io8_ : No Interrupt number found
The I/O8+ driver was
unable to read the
interrupt number from the
operating system.
For ISA cards, ensure the correct
interrupt has been set on the card
and that the correct value has
been set with the Device
Configuration Utility. See page 64
and page 71.
For PCI host cards, ensure that
the Device Configuration Utility
has selected a valid interrupt. See
page 71.
io8_: Fail attach Interrupt
The I/O8+ driver failed to
attach an interrupt.
I/O8+ Serial Adaptors User Guide
SCO UnixWare/SCO OpenServer 6
Page 144
Check that the interrupt set by the
Device Configuration Utility is
valid for the I/O8+ card and not
used by another application. See
See page 71.
I/O8+ software error messages
The following messages are caused by applications which use the I/O8+ serial ports such as
terminals.
Error message
Reason
Action required
io8_ : real port not open
An application has attempted
to open a Transparent port
without the real port being
open.
Ensure your application opens a
real port before opening the
transparent port.
io8_ : open fails - modem + local at
same time
An application cannot open a
particular port as Local and
Modem simultaneously.
Ensure your application only uses
each port as either a local or a
modem but not both.
io8_ :open fails - exclusive use set
An application cannot
open a particular port
while it is already open.
Ensure your application closes
any ports already in use before
starting.
io8_ : Cannot close : X Print still open
An application cannot
close the local port while
the transparent print port
remains open.
Ensure your application closes
the transparent port when
appropriate.
I/O8+ Serial Adaptors User Guide
SCO UnixWare/SCO OpenServer 6
Page 145
Windows 2000/XP/Server 2003/Vista/Server 2008
This section describes troubleshooting I/O8+ products under the Windows 2000/XP/
Server 2003/Vista/Server 2008 operating systems and includes the following sections:
Note
To contact Perle for technical support. see Appendix E Contacting Perle.
•
General troubleshooting under Windows 2000/XP/Server 2003/Vista/Server 2008 on
page 147
•
Windows 2000/XP/Server 2003/Vista/Server 2008 error messages on page 148.
I/O8+ Serial Adaptors User Guide
Windows 2000/XP/Server 2003/Vista/Server 2008
Page 146
General troubleshooting under Windows 2000/XP/Server 2003/Vista/Server 2008
Problem
Action required
Machine fails to boot.
1. Turn off your machine, remove I/O8+ card(s) and
reboot. See page 103.
2. In the BIOS setup, make sure memory and
interrupts levels are reserved for any ISA cards
fitted.
3. Check the memory address switch settings on
any ISA cards fitted. See page 101.
4. Try installing a different host card in case the one
currently installed is faulty. See page 101.
Windows operating system fails while loading
and the system hangs.
1. Reboot machine and then switch to the last
known good configuration.
2. Check for resource conflicts or faulty hardware.
3. Turn off machine, remove any I/O8+ cards fitted
(page 103) and then reboot your system.
4. Once the machine boots properly, change the
configuration settings of the I/O8+ card to match those
in the BIOS setup. See page 101.
Windows operating system fails while loading
and displays a blue screen.
1. Note the five hexadecimal numbers at the top line
of the screen
2. Reboot your machine and then switch to the last
known good configuration.
3. Check for resource conflicts or faulty hardware.
4. Turn off machine, remove any I/O8+ cards fitted
(page 103) and then reboot your system.
5. Once the machine boots properly, change the
configuration settings of the I/O8+ card to match those
in the BIOS setup. See page 101.
Operating system loads OK, but I/O8+ driver or
another driver fails to boot.
1. Run Windows Device Manager to find available
IRQ and memory addresses.
I/O8+ ports do not work after installation.
1. Check the Windows Event Log and follow the
suggested actions.
I/O8+ Serial Adaptors User Guide
Windows 2000/XP/Server 2003/Vista/Server 2008
Page 147
Problem
Action required
Windows driver fails during normal operation,
symptom: blue screen.
1. Note the five hexadecimal numbers displayed at
the top line of the screen.
2. Reboot your machine and then switch to the last
known good configuration.
3. Check for resource conflicts or faulty hardware.
4. Turn off machine, remove any I/O8+ cards fitted
(page 103) and then reboot your system.
5. Once the machine boots properly, change the
configuration settings of the I/O8+ card to match those
in the BIOS setup. See page 101.
Windows driver fails during normal operation,
symptoms either:
1. Contact Technical Support. See Appendix E
Contacting Perle.
black screen, machine reboots or system hangs.
Windows 2000/XP/Server 2003/Vista/Server 2008 error messages
In the event of any error messages, check the Windows Event Log. Also open the Windows
Device Manager and check for warming icons on the installed hardware. See your Windows
user documentation or help system for details.
For general problems, see General troubleshooting under Windows 2000/XP/Server
2003/Vista/Server 2008 on page 147.
I/O8+ Serial Adaptors User Guide
Windows 2000/XP/Server 2003/Vista/Server 2008
Page 148
Appendix D Contacting Perle
You need to read You need to read this appendix if you want to contact Perle for technical support or any other
this appendix if you queries about this product.
want to...
This appendix includes the following sections;
•
Making a technical Support Query on page 109
•
Repair procedure on page 112
•
Feedback about this manual on page 112
•
Contacting Perle technical support on page 113
Internet access
Click here to access the our website at
the following URL:
http://www.perle.com
Email
Click here to email Perle at the following address;
Email: [email protected]
Page 108
Making a technical Support Query
This section contains the following information about making a query;
•
Who to contact on page 109
•
Information needed when making a query on page 110
•
Making a support query via the Perle web page on page 111
Who to contact
If you bought your product from a registered Perle supplier, you must contact their Technical
Support department; they are qualified to deal with your problem.
If you are a registered Perle supplier, and bought your product from Perle, contact Perle
Technical Support using the details given in Contacting Perle technical support on
page 113.
Making a technical Support Query
Page 109
Information needed when making a query
When you make a technical support enquiry please have the following information ready;
Hint
Print out this page and fill in the table provided with the basic
information you need.
Item
Write details here
Product name and version
Problem description
Operating system version
Driver version
Details of any other cards
installed in your system
Your name
Company Name
Country
Phone number
Fax number
Email address (if available)
Making a technical Support Query
Page 110
Making a support query via the Perle web page
If you have an internet connection, please send details of your problem to Technical Support
using the email links provided on the Perle web site in the ‘Support’ area.
See also Contacting Perle technical support on page 113 for email links and other contact
details for the Perle technical support centres.
Click here to access our website at the following URL:
http://www.perle.com
Making a technical Support Query
Page 111
Repair procedure
Before sending a unit for repair, you must contact your Perle supplier. If, however, you bought
your product directly from Perle you can contact directly. See Contacting Perle technical
support on page 113 for contact information.
Customers who are in Europe, Africa or Middle East can submit repair details via a website
form shown in the next picture. This form is on the Perle website, www.perle.com, in the
Support area.
Click here to access our web site at the following URL:
http://www.perle.com/support_services/rma_form.asp
In the USA and Asia contact the office shown in the Technical Support section.
Feedback about this manual
If you have any comments or suggestions for improving this manual please email Perle using
the following address;
Email: [email protected]
Please include the title, part number and date of the manual (you can find these on the title
page at the front of this manual).
Repair procedure
Page 112
Contacting Perle technical support
Note
Perle offers free technical support to Perle Authorised Distributors and Registered Perle
Resellers.
To access technical support please visit the Perle website at
www.perle.com/support_services/index.shtml.
If you are unable to find the information you require, please feel free to contact our
technical support teams by email using the addresses shown in the next table.
Region
Address
Email
North America
Perle Systems Ltd.
60 Renfrew Drive
Markham
Ontario
Canada
L3R OE1
Email: [email protected]
Europe
Perle Systems Europe Ltd.
3 Wintersells Road
Byfleet Surrey
KT14 7LF
UK
Email: [email protected]
Asia
Perle Asia Pacific (Pte) Ltd.
190 Middle Road
#19-05 Fortune Centre
Singapore 188979
Email: [email protected]
Worldwide
Perle Systems Ltd.
60 Renfrew Drive
Markham
Ontario
Canada
L3R OE1
Email: [email protected]
Contacting Perle technical support
Page 113
#A B C D E F G H I J K L M N O P Q R S T U V W X Y Z
Index
drivers and host cards 17
DTR 120
A
About this manual 4
address
adding using Host Card Configuration
utility 45
editing 47
removing 49
E
editing
host card address 47
email 149
error messages
SCO OpenServer 5 142, 144
exiting
Host Card Configuration utility 50
C
cable
RJ12 to DB25 female 110
RJ12 to DB25 male 109
RJ12 to DB9 male 108
cabling information 105
contacting Perle Systems 149
email 149
for technical support 150
internet 149
H
hardware, removing
Windows 95 and 98 31
host card address
assigning 43
editing 47
removing 49
Host Card Configuration utility 43
adding a new host card address 45
exiting 50
menu map 113
starting 44
host cards
removing 103
D
Data Terminal Ready 120
device drivers and utilities
installing
SCO OpenServer 5 37
SCO UnixWare 61
Windows 2000 81
Windows 95 and 98 20
Windows NT 33
removing
SCO OpenServer 5 55
SCO UnixWare 79
device names 119
device node 120, 121
device nodes 119
downloading drivers from web site 18
Page 155
#A B C D E F G H I J K L M N O P Q R S T U V W X Y Z
I
P
I/O8+ drivers
downloading from web site 18
I/O8+ serial adaptors
introduction to 16
installation 17, 18
device drivers and utilities
SCO OpenServer 5 37
SCO UnixWare 61
Windows 2000 81
Windows 95 and 98 20
Windows NT 33
general procedure
SCO OpenServer 5 34
SCO UnixWare 58
Windows 95 and 98 19
ISA host cards 101
PCI host cards 100
under SCO OpenServer 5 34
under Windows 95 and 98 19
under Windows NT 33
ISA host card addresses and IRQ levels
SCO UnixWare 64
ISA host cards
address settings 126
address, conversion to binary 126
addresses, assigning 43
installation 101
removing 103
PCI host cards
installation 100
removing 103
pinouts
RJ12 to DB25 female cable 110
RJ12 to DB25 male cable 109
RJ12 to DB9 male cable 108
Port Configuration utility
exiting 54
menu map 114
port login, setting up 54
starting 51
port login
setting up under SCO OpenServer 5 54
print.io8 configuration file 125
printcap.io8 configuration file 124
printing, transparent 122
problems 124
Q
quick reference 111
R
Ready to Send 120
removing
device drivers and utilities
SCO OpenServer 5 55
SCO UnixWare 79
hardware
Windows 95 and 98 31
host card address 49
host cards 103
repair procedure 153
resources
viewing and changing, under windows
2000 93
RJ12 socket
card edge views 106
pinouts 106
RJ12 to DB25 female cable
diagram 110
pinouts 110
M
menu map
Host Card Configuration utility 113
Port Configuration utility 114
menu maps of utilities 112
O
on-line manual
guide to using 5
hypertext jumps 5
navigation 5
OpenServer 5, see SCO OpenServer 5
Page 156
#A B C D E F G H I J K L M N O P Q R S T U V W X Y Z
RJ12 to DB25 male cable
diagram 109
pinouts 109
RJ12 to DB9 male cable
diagram 108
pinouts 108
RTS 120
transparent printing 122, 124
definition of 123
print.io8 configuration file 125
printcap.io8 configuration file 124
troubleshooting
SCO OpenServer 5 141
Windows 95 and 98 132
Windows NT 140
S
SCO OpenServer 5 112
device drivers and utilities
installing 37
removing 55
upgrading 36
error messages 142, 144
general installation procedure 34
Host Card Configuration utility 43
installation under 34
installing device drivers and utilities 37
Port Configuration utility 51
troubleshooting 141
SCO UnixWare
device drivers and utilities
installing 61
removing 79
upgrading 60
ISA host card addresses and IRQ levels 64
serial ports, configuring 73
SCO UnixWare 2
serial ports, configuring 78
serial ports
configuring
SCO OpenServer 5 51
SCO UnixWare 73
SCO UnixWare 2 78
under Windows 2000 85, 98
starting Host Card Configuration utility 44
U
Unixware Device Configuration Utility 64
UnixWare, see SCO UnixWare
upgrading device drivers and utilities
SCO OpenServer 5 36
SCO UnixWare 60
utilities, menu maps 112
W
T
technical support 150
centres worldwide 154
queries, information needed for 151
via the internet 152
who to contact 150
Page 157
Windows 2000
configuring serial ports 85, 98
device drivers and utilities
installing 81
installing device drivers and utilities 81
viewing and changing the resources for a
device 93
Windows 95 and 98
adding ISA host cards to the system 22
configuring serial ports 28
general installation procedure 19
hardware, removing from system 31
installation under 19
installing device drivers and utilities 20
troubleshooting 132
Windows NT
device drivers and utilities
installing 33
installation under 33
installing device drivers and utilities 33
troubleshooting 140