1
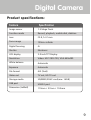
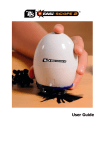
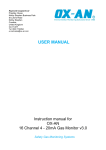
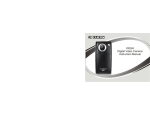
Warranty & Support
This product is provided with a one year warranty for problems found
during normal usage. Mistreating the Digital Camera or opening the unit will
invalidate this warranty. Any data stored on the unit and any consequential
loss is not covered by this warranty. The battery is not user replaceable.
Technical Support
Please visit www.tts-group.co.uk for the latest product information.
Email [email protected] for technical support.
TTS Group Ltd.
Park Lane Business Park
Kirkby-in-Ashfield
Nottinghamshire,
NG17 9GU, UK.
Freephone: 0800 318686 Freefax: 0800 137525
Digital Camera
WARNING: Do not dispose of this product in
household waste. Hand it over to a collection
point for recycling electronic appliances.
WARNING! Not suitable for children under 36
months due to small parts – choking hazard.
Made in China, on behalf of the TTS Group Ltd.
Nxxxxx
N448
TTS Product Code:
IT00617
Digital Camera
Video and Stills
USER GUIDE
www.tts-shopping.com
Contents
2
1. Appearance and buttons
4
Function description:
2
2. Basic operation
5
Important Information:
2
Installing driver and software
8
System requirements:
2
Standard accessories:
8
Start to use:
3
Product specifications:
9
Function Description
Before use, please read this user manual carefully.
This digital video camera allows you can take 1.3MP (HD format) and 640
x 480 (VGA format) stills and video clips. The camera also has a playback
function, so you can preview your captured videos and images.
Important Information
General:
1.Never open the housing of the digital video camera; due to risk of
electric shock.
2.Damp, pressure, collision and extreme heat may damage this digital
video camera.
System Requirements
2
Operation System
Microsoft Windows 2000,XP, Vista, Win7
CPU
Above Intel PIII667 or CPU of equal performance
Memory
Above 128 MB
Sound card and display card
DirectX8 or above.
CD-ROM
4× speed or above
Hard Disk
1 GB space above useable
Other
One standard USB 1.1 or USB 2.0 port
Digital Camera
Memory and storage:
1.SD/MMC/SDHC are compatible (not included) the memory slot is
expandable up to 16GB.
2.When buying a SD/MMC/SDHC card, be sure to take the digital video
camera with you so as to ensure compatibility.
3.When SD/MMC/SDHC card is inserted, the memory of the digital video
camera will not function.
4.These memory cards cannot be used for permanent storage of data.
Copy the documents on the digital video camera to a PC’s HDD or
equivalent device to create a backup.
5.When storing documents onto the memory or a memory card, make
sure that the size of the documents does not exceed the capacity of the
memory.
Maintenance and care:
1.In use always wear the wrist band to help prevent damage.
2.Use the protection sheath to avoid scratching the lens and screen.
3.To clean the lens, firstly blow away the dust on its surface, and then use
a cloth suitable for optical devices to clean the lens. If necessary, use lens
cleanser. Never use organic cleanser to clean the digital video camera.
4.Never touch the lens with your fingers.
5.When placed into storage, remove the battery from the digital video
camera.
Other notices:
1.When switching video output between the LCD display and video
devices, be sure to exit from the play or record mode.
2.This digital video camera is suited to an ambient temperature of
between 0°C and 40°C (32°F-104°F).
3.Do not leave the digital video camera exposed to extremes of
temperature.
4.TV programs, movies, music, images and other resources may be
protected by copyright law.
3
1. Appearance and Buttons
LCD
Up key
Shutter key
Mode/Play key
Delete key
Left key
Right key
USB Connector
TV Out
Port
Down key
Lens
Status LED
Microphone
USB
Switch
Power Key
Speaker
HDMI Out
Port
Battery Cover
4
Strap Holder
Tripod fixing
SD/MMC
Card Slot
Digital Camera
2. Basic operation
2.1 Install battery
Press / slide down the Battery Cover and insert the lithium battery. Align
with correct polarity of battery terminals. Replace the Battery Cover.
2.2 Charge Battery
1.Turn off the camera.
2.Connect the camera, via the built in USB port, to the computer’s USB
port or a power adapter
3.During charging, Status LED is on and turns off when charging is
complete.
2.3 Use SD/MMC/SDHC card
Turn your camcorder OFF before inserting / removing the SD Card.
Insert a Memory card into the SD/MCC Card Slot. Push it down until the
card stays latched.
Push and release the inserted card if you wish to remove or replace the
card.
2.4 Power on/off
When off, press and hold the power key to power
on the camera. When on, press the power key
to turn off the camera.
When on, allow the camera to idle for 1 minute
to power off the camera automatically
When battery level is very low, the camera will
turn off after several seconds. You must
recharge the batteries.
5
2.5 Setup menu
To access the Setup menu, press and hold the shutter button during start
up. The Setup menu allows changes to be made to the Auto power off,
Buzzer, LCD brightness, TV output, Date/Time, Light frequency and Language
options.
2.6 Change between Video/Still mode
Press the Mode key to change the mode between video and stills mode.
2.7 Change resolution
You can press the mode/play key to change video resolution in video model.
Press and hold the mode/play key. LCD screen will display
“HD”and“VGA”indicating selected resolution.
2.8 Recording a Video
In video mode, press the shutter to begin recording video, press the shutter
key again to stop recording. Press the up key or the down key to zoom in or
zoom out.
2.9 Playback videos
In playback mode, press the left or right key to select another file.
Press mode/play key to begin video playback, during playback, press mode/
2.10 TV output
Turn on the camera, and then insert the
TV cable into the colour coded ports on
the TV. The output can be viewed using
the AV channel on your TV.
6
Digital Camera
2.11 HDMI output (optional)
Insert an HDMI cable into the HDMI
port of the video camera; connect the
other terminal of the HDMI cable to an
HD TV. Note: During HDMI output, the
video camera cannot show a live feed,
only captured images and videos can be
shown.
play key to pause the video, press the shutter key to stop playback.
2.12 Delete files
During playback, press the Delete key to access the Delete menu. The delete
menu has three options: No, Yes and All. Use
the Shutter button to confirm your selected option. Selecting No will cancel
the delete option, selecting Yes will delete the selected image or video, and
selecting All will delete all images and video stored on the camera’s memory.
Connect to PC
1.Slide the USB Switch up to extend the USB connector. And turn the
camera ON.
Open USB port
Connect camera to PC
7
2.Insert the camera’s USB connector into the computer’s USB port, or use
the supplied USB extension cable to make the connection.
2.13 Download files from camera to PC
1.After connecting to a computer, go to “My Computer” and open the
“Removable Disk.” The videos will be saved in the \DCIM\100MEDIA
folder in the removable disk drive. Choose the desired image/video in
the 100MEDIA folder and copy (drag with mouse) it into the target
folder in the HD of the computer.
2.You can use ArcSoft VideoImpression to edit videos.
3. ArcSoft VideoImpression can be installed from CD included.
Installing driver and software
The accessory CD contains the camera driver and provided software
MAGIX Video easy SE / MAGIX Photo Manager 9 (for photo and video
processing).
Installation interface
Please insert the CD into the CD-ROM, the system will automatically run the
installer in the CD, and the screen shows the installation wizard window as
below.
Run the software MAGIX Video easy SE / MAGIX Photo Manager 9, click the
button in the wizard window and follow the prompt to install step by step.
For usage, please click the “Software operation explanation” button in the
installation wizard window.
Standard accessories:
8
TV cable
Installation CD
USB extension cable
Digital Camera
Product specifications:
Feature
Specification
Image sensor
1.3 Mega Pixels
Function mode
Record, playback, mobile disk, deletion
Lens
F2.8, f=3.1mm
Focus range
120cm~infinite
Digital focusing
4×
Shutter
Electronic
LCD display
2.0 inch TFT Display
Resolution
Video: HD 1280×720, VGA 640x480
White balance
Automatic
Exposure
Automatic
File format
AVI (Xvid)
Video out
TV out, HD TV out
Storage media
SD/MMC/SDHC card(max. 16GB)
USB port
USB2.0 port
Dimension (LxWxH)
110mm × 57mm × 19.5mm
9