1
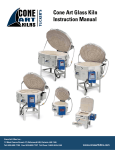
Studio 8/Hot Box
Installation and Operating Manual
North American Models
SAFETY PRECAUTIONS
¾
Read All Instructions and safety precautions before
using kiln.
¾ Do not touch hot sides.
¾ Keep unsupervised children away from kiln.
¾ Place Kiln on noncombustible surface.
¾ Do not install closer than 12” from any wall or
combustible surface.
¾ Do not use near any flammable material.
¾ Fire in only well ventilated area. No small closet
type areas.
¾ Never use with an extension cord.
¾ UV protective eye wear is suggested for looking in
kiln.
¾
Dangerous voltage: Do not touch elements with
anything.
¾ Do not leave kiln unattended during firing.
¾ Wear protective glasses when lifting top to look into
the kiln during firing. Keep your face at least 15”
away from kiln when looking into the hot firing
chamber.
¾ Never fire organic materials inside you kiln.
¾ When firing is completed, always unplug kiln.
¾ Do not use the window lid for a base, heat loss may
damage supporting surface.
TEST FIRE
A test fire should be done in your kiln to burn off any
residue from the kiln or shelves. To do a test fire, kiln
should be placed on a level noncombustible surface
away from any combustible materials.
Place kiln
washed shelves in kiln. Put lid on kiln and turn infinite
switch to 5.
Watch pyrometer until kiln reaches
1200 ® then turn kiln off and unplug it. Do not touch
until kiln is cool.
INSTRUCTIONS
¾
¾
¾
¾
¾
¾
¾
¾
¾
Place kiln on a level noncombustible surface. Keep
away from curtains and other combustible materials.
Vacuum dust from the kiln every few firings. Dust
particles falling will contaminate glass or glazed
ware.
Place kiln washed shelf on base of kiln. (Glass
separator could be used instead of kiln wash.)
Never put glazes and glass directly on base to
prevent kiln bottom from wearing out.
Never use kiln wash on sides of kiln or on the
elements.
¾
¾
¾
Place glass or ware onto kilns shelf being careful not
to get anything on elements.
With infinite switch in the off position, plug in kiln.
The Hot Box & Studio 8 uses an infinite switch to
control temperatures. Using this type of switch
allows the user to have a heating range from 0100% power output. The control knob positions are
“2” for LOW , position “4 ½” for MEDIUM, and “HI”
for HIGH. (This gives the kiln operator the option of
how slow or how fast they want their piece to fire.)
Watch the kiln pyrometer until the kiln has achieved
the temp desired.
Once the kiln has reached temperature, turn kiln off.
Do not touch kiln until kiln is cool.
When firing glass in this kiln you may find the need
to cool the kiln down fast. To do so – use HOT
MITTS and (flash vent) lift lid off and on frequently
while kiln is cooling. Always wear protective glasses
and keep face at least 15” away from kiln.
These instructions are not a substitute instructional
manual for glass fusing of ceramic and porcelain
MODEL
DIMENSION
W”x H”x L”
MAX.
F°
VOLTS
AMPS
WATTS
RECPT
CONF.
FUSE
SIZE
MIN.
WIRE
SHIPPING
WEIGHT
HB-120
6” x 4.5” x 6”
1800°
120V
12
1440
5-15R
15
12
20 Lbs.
HB-230
6” x 4.5” x 6”
1800°
230V
9.6
2208
6-20R*
20
12
20 Lbs.
Studio 8
8” x 4.5” x 8”
1800°
120V
12
1440
5-15R
15
12
30 Lbs.
Studio 8
8” x 4.5” x 8”
1800°
230V
9.6
2208
6-20R*
20
12
30 Lbs.
* Plug configuration may differ based on country of use.
Basic Firing Instructions:
1. Prepare the shelf with Shelf Primer and dry thoroughly.
2. Position the glass on the mold for slumping or on the shelf for fusing.
3. Place shelf or mold with the glass in the kiln.
4. Turn the kiln on “medium” temperature until it reaches 1000ºF.
5. Turn the kiln to “High” and fire until the glass reaches the desired bend or fuse.
6. Turn the kiln off when the glass is to your liking.
7. Flash vent to 1000ºF.
8. Anneal in the kiln for 10 minutes and transfer to a fiber blanket or leave in the kiln until room
temperature.
Firing in warm pre-fired kiln
1. Cool the kiln to approximately 500 degrees.
2. Allow the glass or mold with glass to absorb heat in the kiln for 3 minutes.
3. Continue to fire as above.
NOTE: Firing schedules vary dependant on the size and thickness of glass. Larger pieces must have
a slower firing schedule to avoid cracking. You will find that items fired in the Hot Box & Studio 8 may
not follow the same firing schedules as those used for the larger sized glass kilns. Due to the quicker
rise in temperature you may need to reach a higher end temperature and hold it there till desired
results are achieved, or hold it longer at the lower temperature till desired results are achieved. This
Hot Box/Studio 8 has been calibrated to 1700° F.
There are books on the market with detailed instructions on firing the small (mini) kilns. We have used
“Sculptural Effects and Garden Delights” by Debra and Steven Vantol as our reference. These books
are available from your glass supplier.