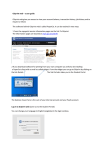
1
PaperCut - PaperCut Payment Gateway Module - PayEx Quick Start Guide PaperCut Payment Gateway Module PayEx Quick Start Guide This guide is designed to supplement the Payment Gateway Module documentation and provides a guide to installing, setting up, and testing the Payment Gateway Module for use with the PayEx system. The main Payment Gateway Module documentation may be downloaded from: http://www.papercut.com/anonftp/pub/pcng/ext/paymentgateway/PaymentGatewayModule.pdf This document is written assuming the reader has good server administration skills and is experienced with general PaperCut administration. PaperCut should be configured, installed and tested before installing the Payment Gateway Module with PayEx support. Contents 1 Introduction ..................................................................................... 2 2 Architecture ...................................................................................... 2 3 End-User Overview ........................................................................... 3 4 Prerequisites ..................................................................................... 7 4.1 PayEx settings and configuration ................................................................... 7 4.2 Mapping network users to PayEx Client References ...................................... 7 4.2.1 Use the PaperCut Card/ID number field (default) ................................................................ 7 4.2.2 Use the PaperCut email field ............................................................................................... 7 4.2.3 Lookup in external database ............................................................................................... 7 4.2.4 Payex AutoPay .................................................................................................................... 8 4.3 5 6 Choose transfer modes ..................................................................................... 8 Installation ...................................................................................... 8 5.1 Installing the Payment Gateway Module ....................................................... 9 5.2 Testing .............................................................................................................. 9 5.2.1 Testing the Manual transfer mode .......................................................................................10 5.2.2 Testing the on-demand/auto transfer ..................................................................................10 Troubleshooting ............................................................................. 12 v2013 PaperCut - PaperCut Payment Gateway Module - PayEx Quick Start Guide 1 Introduction PayEx (www.payex.com) is a popular one-card payment system used in many college campuses throughout Europe. PayEx allow people to pay for services using various types of credit and debit accounts. The PaperCut PayEx payment gateway allows PaperCut to integrate with PayEx to allow students to pay for printing from their PayEx account. Note: Payment from credit cards or other accounts is not supported via this interface. Key Feature Summary Automatic integration with PayEx – no hardware dependence No need for the user to leave their computers to conduct a deposit/transfer Different operation modes: o End-user instigated transfer o Automatic transfer on-demand (Live) o Automatic transfer on-demand (Batched amount) Combination thereof as set by administrator Administrator control configuration options Full transaction auditing for both end-user and administrators Live integration with Active Directory (if secure) and/or an external database to facilitate associated of network login identities with PayEx accounts/cards Implementation does not compromise/replace standard PaperCut features such as free quotas, overdraft rules, or the ability to add alternate payment types in the future (e.g. PayPal, Credit Card, Loan Systems, etc.). 2 Architecture The solution is designed with security as the number one objective. All communication with PayEx (and external credit source) is done via the PaperCut Server. No client software is used. Communication with end-users is encrypted using SSL/TLS Browser encryption. Setup and testing time should take around 30 minutes. No system level restart is required; however the PaperCut application server will be restarted during the install process. If other administrators are using the PaperCut administration interface at this time, it may be advisable to warn them of the pending restart. v2013 PaperCut - PaperCut Payment Gateway Module - PayEx Quick Start Guide This document is written assuming the reader has good server administration skills and is experienced with general PaperCut administration. 3 End-User Overview The system may be configured in one of three operating modes. The operating mode is configured by the administrator. Mode 1: Manual Transfer Mode In this mode users instigate a payment/transfer manually direct from their desktop using the PaperCut End-User Web interface. The interface and workflow will be based on the proven interface used for other payment gateway interfaces including the popular PayPal and CyberSource systems used by many organizations. 1. The user logs into the standard PaperCut. 2. A new “Add Credit” link existing on the left (The link will appear after the module is installed. The name of the link can be changed). 3. The user clicks “Add Credit” and select the amount to transfer (the range of amounts can be defined by the administrators). 4. After clicking the form Submit button, the selected amount, if available, is transferred from PayEx and placed in the user’s PaperCut account in real time. 5. The end-user can view and report on all details of their historic transactions via the web interface. These screen-shots show the equivalent end-user screens. Attributes such as visual design, link names, and instruction/help text can all be customized. v2013 PaperCut - PaperCut Payment Gateway Module - PayEx Quick Start Guide Figure 1: Interface accessed via standard end-user PaperCut login (can be skinned to organization design) Illustration shows extra option(s) above normal options after gateway is installed. v2013 PaperCut - PaperCut Payment Gateway Module - PayEx Quick Start Guide Figure 2: Conducting a transfer: What the end-user sees (Currency symbol is set by your System locale). Interface wording can be configured by administrator. Mode 2 & 3: On-Demand Mode (Live or Batched Transfer) In this mode, the system will automatically transfer funds from PayEx to the user’s PaperCut account on an as-need basis based on rules defined by the Administrator. For example, if a user performs printing when they have no PaperCut printing credit, the PaperCut PayEx integration will automatically transfer a defined amount, or the cost of the job, into the user’s PaperCut account to pay for the print job. By default only the amount required for the current print job is transferred. This leaves the user with a zero PaperCut balance after the cost of the print job is deducted. This is known as “Live Mode” where there is a one-to-one link between a print job requiring funds and a transaction in the PayEx system. The other on-demand transfer mode is batched mode where a fixed pre-determined amount is transfer into the user’s account as required (i.e. the user runs out of funds). The default transfer amount is defined by the administrator. Each on-demand mode offers different advantages and compromises. Live mode ensures funds never remain in the PaperCut account and hence could potentially be used elsewhere by the user. Batch mode on the other hand partly decouples PaperCut from the PayEx system offering advantages around reliability and scalability: 1. Batch mode reduces the number of transactions sent to the PayEx system. v2013 PaperCut - PaperCut Payment Gateway Module - PayEx Quick Start Guide 2. If the PayEx system or the network link is down, printing for most users can continue and downtime would only affect users who require PayEx credit at this time. These modes are best illustrated by examples: Example of live mode: 1. User Betty only has SEK0.00 in her PaperCut printing account. 2. Betty prints a job that costs SEK3.50. 3. The PaperCut PayEx gateway transfers the required SEK3.50 into Betty’s PaperCut account. Example of batch mode with a SEK5.00 default transfer amount: 1. User Betty only has SEK0.50 in her PaperCut printing account. 2. Betty prints a job that costs SEK3.50. 3. Because the print job costs more than the value currently in her account, the PaperCut PayEx gateway transfers the default transfer amount of SEK5.00. 4. The job cost is deducted from the PaperCut account leaving Betty with SEK1.50 in her PaperCut account, which may be used for future printing. The on-demand transfer mode is enabled and configured by the administrator. No end-user intervention is required. End users however have a full list of all transfers available from their End-User web interface. If using batch mode, sites should explain to users how the system works (e.g. default transfer amounts). Notes: On-demand mode can be configured to only apply to a group of users (e.g. Students and not staff) Any free quota allocated to users is used first before the PayEx system is contacted for value. May be used to implement a predictable system where a fixed amount is transferred each time (e.g. SEK5 blocks). Or may be configured to simply transfer the value of each job on demand. If the user is out of PayEx funds the “inadequate credit” message will propagate to the user as it normally does in PaperCut (options include popup message or email notification). Both Mode 1, or 2 and 3 (on-demand) can be enabled together offering a flexible hybrid system, or the group-level restrictions may be used to enable one mode for one group of users and another mode for another group. v2013 PaperCut - PaperCut Payment Gateway Module - PayEx Quick Start Guide 4 Prerequisites This section describes the prerequisites before the payment gateway module can be installed. 4.1 PayEx settings and configuration PayEx must be configured to allow PaperCut to perform transactions. This requires that a PayEx merchant account be available. Please contact PayEx for this information. The payment gateway module requires the following information about your PayEx setup: Merchant Account Number. Merchant Encryption Key Client Account Type (email or account number) The settings are configured in the payment gateway configuration file. 4.2 Mapping network users to PayEx Client References The payment gateway requires a user’s PayEx Client Reference to perform a transaction from their PayEx account. This requires a mapping between PaperCut users (e.g. a network domain username) and Client References. In PaperCut, users are identified by their network username. This differs from PayEx where a PayEx client reference is required. The two must be linked together via a mapping method. The PaperCut PayEx payment gateway allows for a number of mapping options (described below). The settings for the Account lookup are found in the payment gateway configuration file in the section “Account Lookup Settings”. e.g. “payex.accountlookup.mode”. If you have questions about the account mapping, please contact PaperCut support. 4.2.1 Use the PaperCut Card/ID number field (default) In this lookup mode the number stored in the “Card/ID field” for the user in PaperCut is used for PayEx transaction. This is number may be automatically imported from Active Directory or LDAP, or alternatively imported from a text file. Information about importing the Account numbers into PaperCut can be found in the PaperCut Manual in the section titled “Importing Card/Identity numbers from Active Directory or LDAP”. This approach is generally suitable for sites that store users’ PayEx Account numbers in fields in their existing Active Directory or LDAP server. 4.2.2 Use the PaperCut email field Some PayEx accounts use an email address as the client reference. If this email address matches the email address associated with a user’s PaperCut account, you may identify the PayEx account by email address. Set the “payex.account-lookup.mode” setting to “EMAIL”. The “payex.server.PayEx-client-type” field should also be set to EMAIL. 4.2.3 Lookup in external database Many PayEx sites maintain a database mapping PayEx client references to network usernames. The PaperCut PayEx gateway can be configured to lookup a user’s PayEx Account in an external database. To do this you will require: v2013 PaperCut - PaperCut Payment Gateway Module - PayEx Quick Start Guide The lookup data in an external database server (for example Microsoft SQL Server, Oracle or PostgreSQL). Connection details for the database (e.g. network address, database name, and username/password). NOTE: Only read-only access to the database is required. An SQL query that will return the user’s PayEx Client Reference given a username (or other user details). This lookup mode can be enabled by changing the “payex.account-lookup.mode” setting to “EXTERNAL_DATABASE” in the PayEx gateway configuration file. For detailed configuration instructions, see the config file. 4.2.4 Payex AutoPay By default, the PaperCut Payex integration uses the PxPurchase API to perform debit transactions. Some sites prefer to use the Payex AutoPay system to perform transactions. The AutoPay system requires that each user first creates an agreement with the Payex system permitting debit transactions to be performed. This agreement is identified by an Agreement Reference, which is required to perform the transaction using the AutoPay API. Creation and validation of AutoPay agreements is the responsibility of the customer and is outside the scope of the PaperCut Payex gateway. To use Autopay, an external database lookup must return two values for each user, the Client Reference and the Agreement Reference. PaperCut will then use the Agreement Reference to perform the Autopay transaction. For detailed configuration instructions, see the config file. 4.3 Choose transfer modes The payment gateway offers two transfer modes as described in section 3 “End-User Overview” above, including: Manual transfer – the user initiates the transfer and selects the amount. This mode is the simplest for users to understand and give the user full control over the funds they transfer from PayEx into PaperCut. This setting is controlled by “payex.manual-transfer.enabled” in the config file. On-demand (Live or Batched transfer) – the gateway will automatically transfer funds when required for printing with no end-user interaction. This setting is controlled by “payex.on-demand-transfer.enabled” in the config file. 5 Installation This document is written assuming the reader has good server administration skills and is experienced with general PaperCut administration. Setup and testing time should take around 30 minutes. No system level restart is required; however the PaperCut application server will be restarted during the install process. If other administrators are using the PaperCut administration interface at this time, it may be advisable to warn them of the pending restart. v2013 PaperCut - PaperCut Payment Gateway Module - PayEx Quick Start Guide 5.1 Installing the Payment Gateway Module 1. The Payment Gateway Module will function during the PaperCut NG 40 day trial period. After this, the module must be licensed. If you have been supplied with a new license take the time to install this now. The license install procedure is documented in the PaperCut user manual chapter ‘Licensing and Support’. 2. Download the Payment Gateway Module from the PaperCut website at http://www.papercut.com/anonftp/pub/pcng/ext/payment-gateway/pcng-paymentgateway-module.exe 3. Install the module into the same directory as PaperCut NG. This is normally: C:\Program Files\PaperCut NG 4. Open the file: [app-path]\server\lib-ext\payment-gateway-payex.properties in a text editor such as Notepad. 5. Locate the line payex.enabled=N and change the N to Y. This will enable the PayEx module. 6. Locate the line payex.server. merchant-account-number and enter the account number assigned payex. 7. Locate the line payex.server. merchant-encryption-key and enter the value number supplied by payex. 8. Select and configure your chosen PayEx Account lookup mode (configuration item: payex.account-lookup.mode). This is discussed in more detail in Section 4.2 “Mapping network users to PayEx ” above. 9. Take some time to review the configurable options available in the paymentgateway-payex.properties file. Options include limits on the amount to transfer, access groups and custom display messages. You may like to enable a group restriction to limit access to administrators until configuration is complete. 10. Save the file and exit the text editor. 11. Restart the PaperCut Application Server service via Control Panel Administrative Tools Services and wait 30 seconds. 5.2 Testing The Payment Gateway Module for PayEx is now ready for testing. This test will involve performing a live transaction with the PayEx system, testing real-world end-to-end functionality. v2013 PaperCut - PaperCut Payment Gateway Module - PayEx Quick Start Guide To begin testing you will require a login for a user that has an associated account in PayEx. The simplest way to achieve this is to enter a test PayEx Account in the “Card/ID number” field of your test user in the PaperCut administration interface. 5.2.1 Testing the Manual transfer mode (Only if manual transfer is enabled) 1. Log into the PaperCut user web interface at http://papercut:9191/user 2. A new link called Add Credit should appear on the left. Click this link. 3. Select and amount to add and press Continue. 4. The requested amount will be transferred from the user’s PayEx account into PaperCut. The transaction can be viewed in the “Transaction History”. 5.2.2 Testing the on-demand/auto transfer (Only if on-demand/auto transfer is enabled) 1. Login to the PaperCut admin interface (http://papercut:9191/admin) and select your test user from the Users tab. 2. Change the user’s account balance to SEK0.0. 3. Login to a workstation as this test user and perform a test print job. 4. The print job should trigger a transfer of credit from PayEx and the print job should be allowed. 5. Login to the PaperCut admin interface and select the test user from the Users tab. 6. Select the user’s Transaction History tab, where you should see the funds transferred from PayEx into PaperCut (and then the deducted from PaperCut for the cost of the v2013 PaperCut - PaperCut Payment Gateway Module - PayEx Quick Start Guide print job). v2013 PaperCut - PaperCut Payment Gateway Module - PayEx Quick Start Guide 6 Troubleshooting Administrators may find information in the following log files useful when trying to troubleshoot setup/configuration problems or issues reported by end-users. Payment Gateway Event Log: [app-path]\server\logs\payment-gateway\event.log This log contains gateway specific error messages and events. Application Log: [app-path]\server\logs\server.log This log contains general application specific error messages and events. Transaction Log: [app-path]\server\logs\payment-gateway\transaction.log This log contains a list of successful transactions in a tab-delimited form. Please feel free to contact the PaperCut Software support team at [email protected] if you require assistance. v2013