1
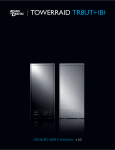
Mini-EPICa SATA II-to-SATA II Internal RAID Subsystem User Manual Revision 1.3 SATA II-to-SATA II Internal RAID Subsystem Contents Preface ................................................................................................................................3 Before You Begin .............................................................................................................4 Chapter 1 Introduction.................................................................................................6 1.1 Technical Specification..........................................................................................................................................7 1.2 Identifying Parts of the RAID Subsystem......................................................................................................8 1.2.1 1.2.1.1 Disk Drive Carrier ..................................................................................................................................9 1.2.1.2 LED Indicators .........................................................................................................................................9 1.2.2 1.3 Front View .........................................................................................................................................................8 Rear View........................................................................................................................................................ 10 RAID Concepts ...................................................................................................................................................... 11 1.3.1 Definition of RAID Levels ......................................................................................................................... 11 1.3.2 RAID Levels Summary ............................................................................................................................... 14 Chapter 2 Getting Started .........................................................................................15 2.1 Installing Hard Drives ......................................................................................................................................... 15 2.2 Preparing the RAID Subsystem ...................................................................................................................... 17 Chapter 3 3.1 Configuration Utility................................................................................18 Installing the AP in Microsoft Windows..................................................................................................... 20 3.2 Starting the AP in Linux..................................................................................................................................... 22 3.3 Starting the AP in Mac OS ................................................................................................................................. 23 3.4 Mini-EPICa Management GUI ......................................................................................................................... 24 3.4.1 Other Buttons of the mini-EPICa Management GUI .................................................................... 25 Chapter 4 4.1 RAID Management .................................................................................28 Basic Mode ............................................................................................................................................................. 28 4.1.1 RAID and Disk Information ..................................................................................................................... 28 4.1.2 Event Log Viewer......................................................................................................................................... 31 4.1.3 Basic Raid Configuration.......................................................................................................................... 32 4.2 Advanced Mode ................................................................................................................................................... 36 4.2.1 Email Notification and Event Settings ................................................................................................ 36 4.2.2 Advanced Raid Configuration ................................................................................................................ 37 4.2.3 Firmware Information ................................................................................................................................ 41 4.2.4 RAID Settings ................................................................................................................................................ 43 Chapter 5 5.1 Additional Information ..........................................................................44 Support for Over 2TeraBytes........................................................................................................................... 44 2 User Manual SATA II-to-SATA II Internal RAID Subsystem Preface About this manual his manual provides information regarding the quick installation and hardware features of the SATA II-to-SATA II Internal RAID subsystem. This document also describes how to use the storage management software. Information contained in the manual has been reviewed for accuracy, but not for product warranty because of the various environment/OS/settings. Information and specifications will be changed without further notice. This manual uses section numbering for every topics being discussed for easy and convenient way of finding information in accordance with the user’s needs. The following icons are being used for some details and information to be considered in going through with this manual: NOTES: These are notes that contain useful information and tips that the user must give attention to in going through with the subsystem operation. IMPORTANT! These are the important information that the user must remember. WARNING! These are the warnings that the user must follow to avoid unnecessary errors and bodily injury during hardware and software operation of the subsystem. CAUTION: These are the cautions that user must be aware to prevent damage to the equipment and its components. Copyright No part of this publication may be reproduced, stored in a retrieval system, or transmitted in any form or by any means, electronic, mechanical, photocopying, recording or otherwise, without the prior written consent. Trademarks All products and trade names used in this document are trademarks or registered trademarks of their respective holders. Changes The material in this document is for information only and is subject to change without notice. User Manual 3 SATA II-to-SATA II Internal RAID Subsystem Before You Begin efore going through with this manual, you should read and focus on the following safety guidelines. Notes about the subsystem’s controller configuration and the product packaging and delivery are also included. To provide reasonable protection against any harm on the part of the user and to obtain maximum performance, user is advised to be aware of the following safety guidelines particularly in handling hardware components: Upon receiving of the product: Place the product in its proper location. It should be handled with care to avoid dropping that may cause damage to the product. Always use the correct lifting procedures. Upon installing of the product: Ambient temperature is very important for the installation site. It must not exceed 30◦C. Due to seasonal climate changes; regulate the installation site temperature making it not to exceed the allowed ambient temperature. Before plugging-in any power cords, cables and connectors, make sure that the power switches are turned off. Disconnect first any power connection if the power supply module is being removed from the enclosure. Outlets must be accessible to the equipment. All external connections should be made using shielded cables and as much as possible should not be performed by bare hand. Using anti-static hand gloves is recommended. In installing each component, secure all the mounting screws and locks. Make sure that all screws are fully tightened. Follow correctly all the listed procedures in this manual for reliable performance. Controller Configurations This RAID subsystem supports single controller configuration. Packaging, Shipment and Delivery Before removing the subsystem from the shipping carton, you should visually inspect the physical condition of the shipping carton. Unpack and verify that the contents of the shipping carton are complete and in good condition. Exterior damage to the shipping carton may indicate that the contents of the carton are damaged. If any damage is found, do not remove the components; contact the dealer where you purchased the subsystem for further instructions. 4 User Manual SATA II-to-SATA II Internal RAID Subsystem Unpacking the Subsystem The package contains the following items: Internal RAID subsystem unit One SATA cable Installation Reference Guide /CD Spare screws, etc. User Manual 5 SATA II-to-SATA II Internal RAID Subsystem Chapter 1 Introduction The Internal RAID Subsystem Unsurpassed Value - Most cost-effective SATA II RAID subsystem. - Compact Desktop size with stylish design. Application Flexibility - Extends useful life by adapting to future IT/SOHO requirements. Easy Installation & Maintenance - Provide a fast and easy way to install and manage the storage. Low Power Consumption - Cable-less backplane with integrated RAID processor. No more unnecessary components inside. Features - SATA II (3GBps) host interface - Over 2TB support - Supports hot spare and automatic hot rebuild - Local event notification - Easy management via In-Band data bus - Transparent data protection for all popular operating systems RAID Management - Real time drive activity and status indicators - Graphical User Interface (GUI) management utility 6 User Manual SATA II-to-SATA II Internal RAID Subsystem 1.1 Technical Specification Model iS05AAMi Form Factor Internal RAID Box RAID Processor Integrated Micro-processor RAID Levels 0, 1, 3, 5, 10, LARGE, CLONE Host Interface SATA II No. of Host Channels 1 Data Transfer Rate Up to 3.0Gbps Disk Interface SATA II (3Gbps) Number of Hot-swap Disk Trays Five (5) 2.5-inch SFF Disk trays Cooling Fans 1 Failed Drive Indicators Yes Failed Drive Auto Rebuild Yes Environment Monitor Yes Auto Spare Support Yes Over 2TB Support Yes Environmental Relative Humidity: Operating Temperature: 10% ~ 85% Non-condensing 10°C ~ 40°C (50°F ~ 104°F) Dimension 84(H) x 146(W) x 190(D)mm Weight 1.43Kg (without disk) Specification is subject to change without notice. User Manual 7 SATA II-to-SATA II Internal RAID Subsystem 1.2 Identifying Parts of the RAID Subsystem The illustrations below identify the various parts of the subsystem. 1.2.1 Front View 8 User Manual SATA II-to-SATA II Internal RAID Subsystem 1.2.1.1 Disk Drive Carrier HDD Status Indicator Function Part HDD Access LED This LED will blink blue when the hard drive is busy or being accessed. HDD Fault LED Green LED means HDD is good. Red LED indicates hard drive has failed. No LED light means no hard drive in the slot. 1.2.1.2 LED Indicators Part Function Fan Fail LED LED is off means Fan is good. Red LED means Fan has failed. Over Temp LED LED is off means Temperature is normal. Red LED means Temperature exceeded normal range. Power On LED White LED means RAID subsystem is powered on. User Manual 9 SATA II-to-SATA II Internal RAID Subsystem 1.2.2 Rear View SATA Port The RAID subsystem has one 3Gbps SATA port for connecting to host system/server. Fan The fan provides proper ventilation for the RAID subsystem. Power Socket The RAID subsystem has two power sockets to plug in power connectors. 10 User Manual SATA II-to-SATA II Internal RAID Subsystem 1.3 RAID Concepts The basic idea of RAID (Redundant Array of Independent Disks) is to combine multiple inexpensive disk drives into an array of disk drives to obtain performance, capacity and reliability that exceeds that of a single large drive. The array of drives appears to the host computer as a single logical drive. The RAID subsystem provides data striping, mirroring, XOR calculation and data verification. It supports RAID levels 0, 1, 3, 5, 10, LARGE and CLONE. All RAID levels’ capacity can exceed 2 Terabytes. The RAID subsystem behaves as a full 48-bit addressing RAID drive and is 100% ATA compliance. From (PC) host controller, each logical device (RAID volume) controlled by the RAID system acts just the same as single regular hard disk although a RAID system generally consists of more than one hard disk drives. Therefore, no extra BIOS, driver or software is needed. 1.3.1 Definition of RAID Levels Striping (RAID 0) for High Performance Striping or RAID 0 is the segmentation of logically sequential data, such as a single file, so that segment can be assigned to multiple hard disks in a round-robin fashion and thus written concurrently. Advantage of RAID 0 is to achieve high performance by accumulating each individual hard disk performance. However, if any one hard disk gets defective, information stored in this RAID 0 will become invalid. The RAID subsystem will just make use of the same disk space for each hard disk under RAID 0 condition. For example, if a RAID 0 consists of 5 different size hard disks, the total usable space of this RAID 0 will be [capacity of smallest size hard disk] * [the number of hard disks in this RAID 0]. Mirror (RAID 1) for High Security Mirror or RAID1 is the replication of data onto separate hard disk in real time to ensure continuous availability. In a RAID 1 system with two hard disks, the data in one hard disk will be exactly the same as the data in the other hard disk. The RAID subsystem will also make use of same size disk space in each hard disk in RAID 1. That is, the RAID controller will write data to the same disk space in each hard disk. When reading data, the RAID controller will read data from a specified hard disk. User Manual 11 SATA II-to-SATA II Internal RAID Subsystem Failure in a hard disk will cause the RAID controller to enter into degraded mode. The host controller can still read/write data to the RAID without knowing any hard disk defect. Users have to replace the hard disk then the RAID controller will enter in on-line rebuild mode automatically. Besides, if there is only partial defect in a hard disk, the RAID controller will read data from the other healthy hard drive. Stripe + Mirror (RAID 10) for High Performance and High Security RAID subsystem could be configured to support Stripe and Mirror at the same time, i.e. RAID 10. Take four hard drives in RAID 10 as an example. Hard drive 0 and hard drive 1 could act as Mirror 1. Hard drive 2 and hard drive 3 act as Mirror 1 too. The RAID controller then configures these two Mirrors as Stripe. At least two drives (either one in each Mirror) can be allowed to fail without any impact to RAID data access. If two drives from the same Mirror are failed, the RAID data is not accessible and becomes invalid. CLONE Clone’s action is similar to RAID 1. However, all of the hard disks will be the mirrors. For example, in a four hard drives Clone environment, data in each hard drive will be the same. This mode is useful especially when users would like to copy data from a hard drive to several hard drives at the same time. The number of allowed failed drives is the total number of drives in the RAID minus one. 12 User Manual SATA II-to-SATA II Internal RAID Subsystem Concatenating (Large) This mode is also named “Large”. In this mode, the RAID controller will concatenate all of the hard drives into a single hard drive with larger capacity. For example, if three 500GB hard disks are connected to the RAID subsystem in Large Mode, user will get a single hard disk with capacity of 1,500GB. If any one hard disk gets defective, information stored in this LARGE RAID will become invalid. Parity Protection (RAID 3 and RAID 5) The XOR engine in the RAID controller generates parity block. In RAID 3 mode, parity block will be stored in the same hard disk drive. In RAID 5 mode, parity block will be spread over all of the different hard drives. The RAID controller will also make use of the same size disk space in each hard disk under RAID 3 / RAID 5 condition. Failure in a hard disk will cause the RAID controller to enter into degraded mode. Host controller still could rear/write data thru the RAID normally without knowing any defects. Users have to replace the defective hard disk. The RAID controller will then enter into online-auto-rebuild mode automatically. User Manual 13 SATA II-to-SATA II Internal RAID Subsystem 1.3.2 RAID Levels Summary RAID Level No. of Allowed Failed Drives 0 None Block striping is provided and yields higher performance than with individual drives. There is no redundancy. 2 1 (2) Drives are paired and mirrored. All data is 100% duplicated on an equivalent drive. Fully redundant. RAID 1 if use 2 drives; RAID 10 if use 4 drives. 2 LARGE None Large is similar to RAID 0 in that it concatenates the capacity of all member drives. The data is written linearly starting with the first disk drive. When first disk drive becomes full, the next disk drive is used. Large can have 2 or more disk drives. There is no data redundancy. 1 CLONE No. of drives minus 1 3 1 Data is striped across several physical drives. Parity protection is used for data redundancy. 3 5 1 Data is striped across several physical drives. Parity protection is used for data redundancy. 3 1 (10) 14 User Manual Description Clone provides multiple copies of data in a disk drive. Clone can have 2 or more disk drives. Min. # of Drives 2 SATA II-to-SATA II Internal RAID Subsystem Chapter 2 Getting Started This section describes the physical locations of the hard drives supported by the subsystem and give instructions on installing a hard drive. The subsystem supports hot-swapping allowing you to install or replace a hard drive while the subsystem is running. This also discusses on how to power-on the subsystem in preparation for operation. 2.1 Installing Hard Drives a. Push the tray latch to release a disk tray. b. Then pull out an empty disk tray. c. Place the hard drive in the disk tray. Make sure the holes of the disk tray align with the holes of the hard drive. User Manual 15 SATA II-to-SATA II Internal RAID Subsystem d. Install the mounting screws on the bottom part to secure the drive in the disk tray. e. Slide the tray into a slot until it reaches a full stop. f. 16 Press the lever in until you hear the latch click into place. User Manual SATA II-to-SATA II Internal RAID Subsystem 2.2 Preparing the RAID Subsystem Here are the steps to prepare the RAID subsystem for use. 1. Shutdown the host system. 2. Install the Internal RAID Box into the host system and secure it by using screws on the sides. 3. Connect the SATA cable from RAID subsystem to the SATA port on the host system. 4. Connect two 4-pin power connectors to the two power sockets. 5. Power on the host system. User Manual 17 SATA II-to-SATA II Internal RAID Subsystem Chapter 3 Configuration Utility The subsystem has a setup configuration utility containing important information about the configuration as well as settings for various optional functions in the subsystem. This chapter explains how to use and make changes to the setup utility. Configuration Method The RAID subsystem can be configured using the Application Program provided with the subsystem. There are three versions: Microsoft Windows version, Linux version, and Mac OS version. IMPORTANT: The RAID subsystem must be connected to the Host system in order to configure the RAID subsystem. If the RAID subsystem is not connected to the Host system, the Application Program will show “No disks or RAID!” NOTE: At least disk drive must be inserted in the RAID subsystem. If there is no disk drive in the RAID subsystem, the Application Program will show “No disks or RAID!” 18 User Manual SATA II-to-SATA II Internal RAID Subsystem IMPORTANT: When hard disks are inserted in the disk slots, the first hard disk is assigned “Port 0”. Port 0 is the (in-band) channel that will be used by mini-EPICa AP to manage the RAID controller. Other hard disks will be assigned Port1, Port 2, etc. If the first hard disk assigned as Port 0 is removed, the AP cannot access and manage the RAID controller. When a RAID Set is already created, the first hard disk that was inserted and assigned Port 0 (whether or not it is part of the RAID Set) can then be removed and the AP can still manage the RAID controller. User Manual 19 SATA II-to-SATA II Internal RAID Subsystem 3.1 Installing the AP in Microsoft Windows 1. To install mini-EPICa AP for Windows OS, copy the installation files to a local directory and open the setup.exe program. 2. Click Install to begin the installation. The setup wizard will start installing. 20 User Manual SATA II-to-SATA II Internal RAID Subsystem 3. Click Finish to exit the wizard. The application will be launched immediately. The mini-EPICa Application Program main screen will be displayed. User Manual 21 SATA II-to-SATA II Internal RAID Subsystem 3.2 Starting the AP in Linux To configure the RAID subsystem when connected to Linux system, go to the directory where the Application Program is saved and open the Application Program. This example is from Fedora Core 9. Another way is to open terminal window, then at the command prompt type “./miniEPICaRaidSetup”. After running the Application Program, the mini-EPICa main screen will be displayed. 22 User Manual SATA II-to-SATA II Internal RAID Subsystem 3.3 Starting the AP in Mac OS To configure the RAID subsystem when connected to Mac OS X Server, go to the directory where the Application Program is saved and open the Application Program. This example is from Mac OS X Server version 10.5.4. After running the Application Program, the mini-EPICa main screen will be displayed. User Manual 23 SATA II-to-SATA II Internal RAID Subsystem 3.4 Mini-EPICa Management GUI The mini-EPICa management GUI contains the following menu options: Basic Mode: RAID and Disk Information Provides information about RAID and disk drives. This also have Advanced information which shows System Information such as temperature, fan speed and voltage levels. This can also display SMART information of disk drives after RAID is created. Event Log Viewer Shows the RAID controller event log. Basic Raid Configuration Provides function for creating basic RAID configuration. This function will use all available disk drives. Email Notification and Event Settings This function provides option to configure email for sending event notifications when events happen. Advanced Raid Configuration This function provides option to customize RAID configuration and select disk drive members. Firmware Information Shows information about current firmware and provides function to upgrade the firmware version. RAID Settings Provides settings such as RAID Stand-by Timer and RAID Rebuild Priority. Advanced Mode: 24 User Manual SATA II-to-SATA II Internal RAID Subsystem 3.4.1 Other Buttons of the mini-EPICa Management GUI Minimize Window button – Used to minimize the mini-EPICa GUI into taskbar. Close Windows button – Used to close the mini-EPICa GUI. Note that the AP is still running in the background. To exit the AP, right-click the mini-EPICa icon in the task bar then select Quit from the pop-up menu. User Manual 25 SATA II-to-SATA II Internal RAID Subsystem About button – Used to display the current mini-EPICa AP version. 26 User Manual SATA II-to-SATA II Internal RAID Subsystem Turn Off the Buzzer – Use this to silence the alarm buzzer. User Manual 27 SATA II-to-SATA II Internal RAID Subsystem Chapter 4 RAID Management This chapter provides details about configurations and options available in the RAID subsystem. There are two modes of operation: Basic Mode and Advanced Mode. 4.1 Basic Mode Under Basic Mode, there are three menu options that can be selected: RAID and Disk Information, Event Log, and Basic Raid Configuration. 4.1.1 RAID and Disk Information RAID and Disk Information provides information about RAID and disk drives. RAID and Disk Information: No existing RAID configuration Disk Information: Disk drive is “Unreleased” or not a RAID member. 28 User Manual SATA II-to-SATA II Internal RAID Subsystem RAID Information: Disk Drives are RAID 5 member. RAID Information: RAID Level – Shows the RAID Level of the RAID Status – Shows the current status of the RAID. Status can be: Normal – No failed disk drive. Degrade – One or more disk drives failed in a RAID Level with data redundancy. The data is still accessible. Broken – One or more disk drives failed in a RAID Level. The number of allowable failed disk drives in the RAID Level has been exceeded and data is not accessible. Rebuilding (%) – The RAID is in rebuilding state. The completed rebuilding percentage is shown. Capacity – Shows the capacity of the RAID Plugged Member(s) – Shows the disk drive slots which are member of the RAID Disk Information: Disk drive is a RAID member. User Manual 29 SATA II-to-SATA II Internal RAID Subsystem NOTE: In the left panel of the RAID and Disk Information, the status of a hot spare disk will be shown as “S0” for first host spare, “S1” for second hot spare, and so on. Disk Information: Model Name – Shows the disk drive model Serial Number – Shows the disk drive serial number Firmware Version – Shows the disk drive’s firmware version Capacity – Shows the capacity of the disk drive Unreleased Capacity – Shows the amount of unused or unreleased capacity in the disk drive Disk Information This will show SMART information of the selected disk drive if SMART function is supported by the disk drive. NOTE: The SMART information will be shown only if a RAID is already created. Controller 1: Controller Information This will show the System Information screen contains hardware information about the RAID subsystem such as temperature, fan speed and voltage levels. 30 User Manual SATA II-to-SATA II Internal RAID Subsystem 4.1.2 Event Log Viewer The RAID controller event log can be viewed from this menu. It will show the Number of Events, the Issued Module, Date, Type, and Message. Event Log Buttons: Save To File – This option allows the event logs to be saved as a log text file (.log). Enter the filename you want for the log file and click “Save”. Clear – Selecting this option will clear the event log. When the dialog box shown below is displayed, select “Yes” to delete all event logs. User Manual 31 SATA II-to-SATA II Internal RAID Subsystem 4.1.3 Basic Raid Configuration This menu provides function for creating basic RAID configuration. This function will use all available disk drives in the RAID subsystem. NOTE: If you want to create a hot spare disk, use the Advanced Raid Configuration function. Basic Raid Configuration Options: Configure RAID – Select the RAID Level from the list of options. The RAID Levels that can be selected for the number of available disk drives are enabled. When there is an existing RAID, the “DELETE ALL RAID(s)” option is enabled. Support Password – This option provides RAID security. When this option is enabled and a password is entered in the corresponding box, deleting the RAID will require the password to be entered. Using a wrong password will not allow the RAID to be deleted. The password can be up to 8 characters. Basic Raid Configuration Buttons: Apply – Save the configuration and create the RAID. Cancel – Undo the current operation. NOTE: The RAID subsystem supports up to two RAIDs. 32 User Manual SATA II-to-SATA II Internal RAID Subsystem To create a RAID using Basic Raid Configuration: 1. In the Configure RAID option, select the RAID Level you want for the RAID. Click “Apply” to save the RAID configuration. 2. When a dialog box is displayed, select “Yes” to confirm creating RAID. 3. A progress bar will be shown. User Manual 33 SATA II-to-SATA II Internal RAID Subsystem 4. An information message will be displayed. Click “OK”. 5. The RAID is created successfully. The RAID will be available to the Host/Server immediately and a new disk device will be detected. 6. Check the new disk drive in your Host/Server. 34 User Manual SATA II-to-SATA II Internal RAID Subsystem NOTE: If your RAID subsystem’s host interface is SATA, you can create up to two RAIDs. If the SATA controller in your host system supports SATA port multiplier, the two RAIDs will be detected. For example, Silicon Image SiI3132 chip supports port multiplier. Over 2TB RAID via SATA host interface is supported only in latest OS. Please refer to 2TeraByte Limitation in the next chapter. User Manual 35 SATA II-to-SATA II Internal RAID Subsystem 4.2 Advanced Mode 4.2.1 Email Notification and Event Settings This function provides option to configure email for sending event notifications when events happen. Email Notification Options: SMTP Server Name – Enter the SMTP Server name or IP address SMTP Server Port – Enter the SMTP Server port number; normally it is ‘25’. Sender E-mail – Enter the sender’s email address Sender Username – Enter the sender’s username Sender Password – Enter the sender’s password which is authenticated by the specified mail server. Recipient E-mail(s) – Enter one or more recipient email addresses. Multiple email addresses are separated by ‘;’. Select event(s) for notification – Tick the events which you want to be included in the list of events for email notification. When selected events happen, the email recipient(s) will receive the event notification. Email Notification Buttons: Send Mail Test – Use this send a mail to the specified recipient(s) for testing. Load From Profile – Use this button to load mail settings from a profile. Save To Profile – Use this button to save the mail settings to a profile. Apply – Use this button to apply changes to the configuration. Cancel – Undo any changes made. 9 Check Mark – Select all events 8 Cross Mark – Clear all events 36 User Manual SATA II-to-SATA II Internal RAID Subsystem 4.2.2 Advanced Raid Configuration This function provides option to customize RAID configuration and select disk drive members. NOTE: Advanced Raid Configuration will automatically set any unreleased disk(s) as hot spare disk(s). Any unreleased disk(s) can still be used to create another RAID. The RAID subsystem supports up to 2 RAIDs. Advanced Raid Configuration Options: Configure RAID – Select option whether to Create RAID or to Delete RAID. When Create RAID is selected, the RAID Level options are displayed. When Delete RAID is selected, the list of available RAIDs that can be deleted is displayed. Create RAID - Select the RAID Level from the list of options, and select the disk drives in the right pane. When the minimum number of disk drives for the RAID Level has been selected, the Apply and Cancel buttons will become active and can be used. Delete RAID - Select the RAID from the list of RAIDs displayed, and click Apply to delete the selected RAID. Support Password – This option provides RAID security. When this option is enabled and a password is entered in the corresponding box, deleting the RAID will require the password to be entered. Using a wrong password will not allow the RAID to be deleted. The password can be up to 8 characters. Advanced Raid Configuration Buttons: Apply – Save the configuration and create the RAID. Cancel – Undo the current operation. User Manual 37 SATA II-to-SATA II Internal RAID Subsystem To create a RAID using Advanced Raid Configuration: 1. In the Configure RAID option, select Create RAID. 2. Select the RAID Level you want for the RAID. 3. Select the disk drives you want to become member of the RAID. 4. If you want security for the RAID, enable Support Password and enter a password. 5. Click “Apply” to save the RAID configuration. A dialog box will be displayed. Select “Yes” to proceed. 6. A progress box will be displayed. 38 User Manual SATA II-to-SATA II Internal RAID Subsystem 7. An information message will be displayed. Click “OK”. 8. The RAID is created successfully. The RAID will be available to the Host/Server immediately and a new disk device will be detected. NOTE: Any unreleased disk(s) will automatically become hot spare disk(s). The status of a hot spare disk will be shown as “S0” for first host spare, “S1” for second hot spare, and so on. Hot spare disk status can be viewed using RAID and Disk Information. User Manual 39 SATA II-to-SATA II Internal RAID Subsystem 9. Check the new disk drive in your Host/Server. NOTE: If your RAID subsystem’s host interface is SATA, you can create up to two RAIDs. If the SATA controller in your host system supports SATA port multiplier, the two RAIDs will be detected. For example, Silicon Image SiI3132 chip supports port multiplier. Over 2TB RAID via SATA host interface is supported only in latest OS. Please refer to 2TeraByte Limitation in the next chapter. 40 User Manual SATA II-to-SATA II Internal RAID Subsystem 4.2.3 Firmware Information Shows information about current firmware and provides function to upgrade the firmware version. Firmware Information – shows the Product Name, Firmware version, Manufacturer, and Flash Number. Firmware Upgrade Buttons: Browse – Use this button to browse and select the firmware file. After selecting the firmware file, the Select Firmware box will show the selected firmware file. Update – Use this button to upgrade the selected firmware file. User Manual 41 SATA II-to-SATA II Internal RAID Subsystem To upgrade firmware: 1. Select “Browse” and locate the firmware file. 2. Select “Update” to proceed with firmware upgrade. 3. The firmware will be upgraded. Click “OK”. 4. To reboot the RAID subsystem, uninstall the disk drive from the host system then power cycle the RAID subsystem. The new firmware will be loaded in the RAID controller. 42 User Manual SATA II-to-SATA II Internal RAID Subsystem 4.2.4 RAID Settings The RAID Settings provides options such as RAID Stand-by Timer and RAID Rebuild Priority. RAID Stand-by Timer Settings – Use this option to select time option, in minutes, before the RAID comes into stand-by mode. When there is no host access to the RAID, after the preset time (minutes), the RAID will be in standby mode. RAID Rebuild Priority Settings – Use this option to set the RAID Rebuild Priority, which is the amount of system resource allotted to rebuilding process. Low priority means rebuilding process will take less system resource and more time to complete; and High priority means rebuilding process will be completed faster but access to RAID will be slower. Apply – Save the settings made. Cancel – Undo the changes made. User Manual 43 SATA II-to-SATA II Internal RAID Subsystem Chapter 5 Additional Information 5.1 Support for Over 2TeraBytes Please take note of the following 2TB Limitations of the RAID controller when using different SATA controllers. Note that most OS does not support installing the OS on disk/volume over 2TB. For OS installation, the RAID Set must not be over 2TB. For data use, the RAID Set can be over 2TB. OS SATA controller Intel Silicon Image JMicron ICH5R ICH7R ESB2 SIL3512 (PCI) SIL3132 (PCI-E) SIL3124 (PCI-X) JMB363 (PCI-E) Windows XP Professional SP2 32bit FAIL FAIL FAIL FAIL FAIL FAIL FAIL Windows XP Professional SP1 64bit FAIL FAIL FAIL OK OK OK OK Windows Server 2003 R2 Enterprise SP2 32bit FAIL FAIL FAIL OK OK OK OK Windows Storage Server 2003 R2 SP2 FAIL FAIL FAIL OK OK OK OK Windows Vista Ultimate 32bit NA OK OK OK OK OK OK Windows Vista Ultimate 64bit NA OK OK OK OK OK OK Windows 2008 Enterprise 32bit NA OK OK OK OK OK OK Windows 2008 Enterprise 64bit NA OK OK OK OK OK OK MS Windows 44 User Manual SATA II-to-SATA II Internal RAID Subsystem Mac OS Mac X Server 10.5.4 X X X NA OK NA NA Fedora 8 (Linux 2.6.23.1-42) 32bit NA OK OK NA OK NA NA SUSE 10.3 (Linux 2.6.22.5-31) 64bit NA NA OK NA OK NA NA Ubuntu 8.10 (Linux 2.6.27-7) 64bit NA OK OK NA OK NA NA Linux Legend: OK - Support Over 2TB FAIL - Does not support over 2TB NA - No Testing Done X – Intel controller is not available User Manual 45